1
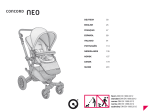
_ENGLISH
OVERVIEW
THANK YOU!
PLEASE NOTE
ATTACHING AND REMOVING THE BACK WHEELS
UNFOLDING AND FOLDING
ATTACHING AND REMOVING THE SEAT FRAME (PROFIX SYSTEM)
SETTING THE SEAT ANGLE
USING THE SAFETY BAR
USING THE SUN SHADE
ADJUSTING THE HANDLEBAR
ADJUSTING THE FOOTREST
USING THE HARNESSING SYSTEM
USING THE PARKING BRAKE
LOCKING THE FRONT WHEELS
USING THE WIND PROTECTOR
USING THE RAIN COVER
PUTTING ON, REMOVING AND LAUNDERING THE COVER
CONCORD ORIGINAL SPARE PARTS/ACCESSORIES
GUARANTEE
26
28
28
30
32
33
35
36
37
38
39
40
42
42
43
44
45
45
46
25
_OVERVIEW
01 Sun shade
11 Handlebar
02 Handlebar
unlocking button
03 Seat frame
06 ProFix unlocking lever
04 Wind protector
05 Safety bar
unlocking button
07 Footrest
26
13
Unlocking lever
with safety button
14 Safety bar
15 ProFix adapter
16 Footrest unlocking button
17 Rain cover pocket
18 Transport lock
08 Luggage net
09 Front wheel
lock
12
Adjustment handle
10
Parking brake
19 Pushbutton
27
_THANK YOU!
You have made a good choice with this Concord quality product. You will
be impressed by the versatility and safety of this product. We hope you
will have lots of fun with your new CONCORD NEO.
_PLEASE NOTE
IMPORTANT!
• Please read the instructions carefully before using the CONCORD
NEO for the first time and retain them for future reference. Failure to comply with the guidelines set out below can put the child’s safety at risk!
WARNING!
• The CONCORD NEO is suitable for children up to about 3 years of
age and weighing not more than 15 kg.
• The CONCORD NEO is only suitable for children under 6 months in
conjunction with approved Concord accessories.
• Only allow one child to sit or lie in the CONCORD NEO at a time.
• The CONCORD NEO is not a child car seat! Only transport your
children in tested, approved child seats.
• Some Concord accessory products are fitted with adaptors suitable
for the CONCORD NEO, making it easy to attach them to the
CONCORD NEO. Make sure that the Concord accessory has
engaged properly with the CONCORD NEO prior to use.
• Never leave your child unsupervised.
• Never let children play with the CONCORD NEO.
• Always use the safety belts when the child is sitting or lying in the
CONCORD NEO.
• Any load that is attached to the handle of the CONCORD NEO
(such as bags), limits the stability of the CONCORD NEO.
28
• You should take the child out of the CONCORD NEO whenever you have to manoeuvre stairs or steep slopes.
• The CONCORD NEO is not suitable for jogging or skating.
• Never allow a child to stand on the connecting rods between the
wheels of the CONCORD NEO. This can damage the CONCORD
NEO and impair its safety.
• Before using the CONCORD NEO, make sure that all fastening and
locking devices are properly engaged and securely locked.
• Check all the parts of the CONCORD NEO, and the accessories
used, at regular intervals.
• Make sure the child is not in the baby buggy before putting on or
removing the cover or the approved Concord accessory.
• Only use Concord original spare parts / accessories.
• The guarantee does not apply if the CONCORD NEO is damaged
through excess strain, incorrect usage or the use of other spare parts /
accessories.
• Sunlight may cause a slight discoloration of parts of the CONCORD
NEO.
• Please avoid exposing the CONCORD NEO to extreme
temperatures.
• Throw away all plastic packaging immediately. It can put your child’s
life at risk.
29
_ATTACHING AND REMOVING THE BACK WHEELS
You must attach the rear wheels before using the CONCORD NEO for
the first time. First, remove the wheel cover. To do so, guide the axle
through the hub from the inside of the wheel and push the cover off. Now
press the two rings at the end of the axle together and pull the axle out of
the hub.
To attach the back wheel, press and hold the pushbutton as you push
the wheel onto the CONCORD NEO axle, and let it click audibly into
place.
Guide the axle through the hub from the front of the wheel. Press on the
cover until it snaps into position.
To remove a back wheel, press and hold the pushbutton (19) and pull the
wheel off the axle.
30
31
_UNFOLDING AND FOLDING
To set up the CONCORD NEO,
first release the transport lock
(18) by pressing it downwards or
backwards. Then pull the handlebar
(11) upwards until you hear it
engage with a clear click.
_ATTACHING AND REMOVING THE SEAT FRAME (PROFIX SYSTEM)
The CONCORD NEO is equipped with ProFix adapters (15). These
adapters are used to attach the CONCORD NEO seat frame to the
chassis. You can secure the seat frame to the chassis so that it is either
front or rear facing. To do this, insert the seat frame from above into the
receivers on the chassis and let it click audibly into place.
To fold down the CONCORD NEO,
first adjust the seat angle on the
seat frame (03) to position P (see
ADJUSTING THE SEAT ANGLE).
The unlocking levers are located on
the left and right of the handle. To unlock, press and hold the safety
button on the inside of the right
unlocking lever (13) and pull both
unlocking levers upwards. Now
push the handlebar forwards/down
until the transport locking device
engages.
32
WARNING
• Never seat your child in the seat frame until after you have secured the frame to the chassis.
• Before using the CONCORD NEO, ensure that all fixing mechanisms and fastenings are properly locked in position and closed.
• Never remove the seat frame from the chassis while a child is sitting in it.
33
_SETTING THE SEAT ANGLE
To remove the seat frame from the chassis, pull simultaneously on the
right and left ProFix unlocking levers (06) on the seat frame and pull the
frame upwards and away from the chassis.
Tip: Various elements can be
attached to the CONCORD
NEO by means of the ProFix
adapter. Some Concord
accessories, available from
specialist retailers, are
equipped with adapters
suitable for the CONCORD
NEO, making it easy to attach
them to the CONCORD
NEO. Check before use
that the Concord accessory
has engaged properly in the
CONCORD NEO. Please also
refer to the instructions for
use enclosed with the relevant
Concord accessory.
34
You can set the seat frame’s angle of inclination to several positions. To
do this, pull the adjustment handle (12) on the top edge of the seat frame
and adjust the seat angle until it engages in the required position.
WARNING
• An additional position (P) allows the CONCORD NEO to be folded down extra compactly, but it must be used solely for this purpose and never for transporting a child.
35
_USING THE SAFETY BAR
_USING THE SUN SHADE
The safety bar (14) on the CONCORD NEO engages in the receivers
provided for this purpose in the seat frame. You can open the safety bar
on both sides or just on one. To do this, press the relevant unlocking
buttons (05) on the left and right of the seat frame.
To secure the CONCORD NEO sun shade (01) onto the seat frame, push
it from above onto the relevant plastic receivers on the seat frame. Then
join the zip on the inside of the sun shade to the seat cover.
To remove the sun shade, undo the zip and pull the sun shade upwards
and away from the seat frame.
36
37
_ADJUSTING THE HANDLEBAR
_ADJUSTING THE FOOTREST
The handlebar can be adjusted to seven different positions. To do this,
release the positioning mechanism by pressing both the unlocking
buttons (02) on the left and right of the handlebar and move the bar until
it engages in the next position.
You can adjust the footrest (07) to five different positions. To do this,
simultaneously press the left and right unlocking buttons (16). Then
adjust the footrest until it engages in the required position.
38
39
_USING THE HARNESSING SYSTEM
Take care that your child is always strapped in, with the buckle fastened,
whenever you go out with the pushchair.
Adjust the straps so that they are taut and lie close against the child.
To adjust the strap length, slide the strap clasps up or down. Check that
the straps are not twisted.
Shoulder strap
Waist strap
Centre strap
Feed the centre strap with the buckle between
the child’s legs. Then insert the buckle
adaptors on the shoulder and waist straps
from above into the top of the buckle. They
should click audibly into position.
To open the harness system, press the button
in the middle of the buckle until the buckle
adaptors are released..
The childproof lock is on the back of
the buckle. This can be activated and
deactivated by turning. Activating the childproof lock locks the buckle opening mechanism.
WARNING!
• Always use the shoulder and waist straps together with the centre
strap.
40
41
_USING THE PARKING BRAKE
_USING THE WIND PROTECTOR
To activate the CONCORD NEO’s
parking brake (10), push up the foot
pedal on the left back wheel.
The CONCORD NEO is equipped with an integrated wind protector (04).
To use it, undo the zip on the safety bar and stretch the wind protector
across the footrest.
To release the parking brake, push
down the pedal on the left back
wheel.
_LOCKING THE FRONT WHEELS
To locate the front wheels of the
CONCORD NEO, align the front
wheels towards the back and slide
the locking button (09) from the
outside inwards.
To release the wheels, slide the
locking button from the inside to the
outside.
42
43
_USING THE RAIN COVER
The rain cover for the CONCORD NEO is located in the pocket (17)
underneath the seat frame. It is secured to the sun shade by means of
the zip.
_PUTTING ON, REMOVING AND LAUNDERING THE COVER
The different parts of the cover of the CONCORD NEO are joined to
each other by means of press-studs, Velcro and zip fasteners, and are
attached to the rods. If you wish to remove the cover, first loosen all
these fastenings.
Make sure all the fasteners and connections are done up safety when
you put the cover on.
You can wipe all parts of the cover as well as the rods and the plastic
parts of the CONCORD NEO with a damp cloth.
_CONCORD ORIGINAL SPARE PARTS/ACCESSORIES
Information on Concord original spare parts/accessories is available at
your retailer’s or directly from Concord.
Concord GmbH
Industriestraße 25
95346 Stadtsteinach
Germany
Phone +49 (0)9225.9550-0
Fax +49 (0)9225.9550-55
[email protected]
www.concord.de
44
45
_GUARANTEE
The guarantee begins on the day of purchase. The guarantee period
corresponds to the statutory warranty period in the end-user’s country
concerned. At the manufacturer’s discretion, the guarantee shall cover
rectification, replacement or a price reduction.
The guarantee is valid for the original purchaser only. In the event of
any defect, claims can not be considered unless the specialist dealer is
notified of the fault as soon as it occurs for the first time. If the specialist
dealer is unable to remedy the problem himself, he must return the
product to the manufacturers together with details of the complaint,
official proof of purchase and the purchase date. The manufacturers
assume no liability for faulty goods that they did not supply.
The guarantee does not apply where:
• the product has been modified;
• the product is not brought back to the specialist dealer complete with
proof of purchase within 14 days of the defect occurring;
• the defect was caused by improper usage or maintenance or due to
anything else deemed to be the fault of the user, in particular failure to
comply with the instructions for use;
• repairs have been carried out on the product by third parties;
• the defect was caused as the result of an accident.
The guarantee makes no provision for any alteration or deterioration to
the product that is incurred through normal usage (wear and tear). The
period of guarantee shall not be extended by any remedial measures
carried out by the manufacturers in the event of a claim.
46
Concord GmbH
Industriestraße 25
95346 Stadtsteinach
Germany
Phone +49 (0)9225.9550-0
Fax +49 (0)9225.9550-55
[email protected]
www.concord.de
Einbau- und Bedienungsanleitung
Instructions for attachment and use
Directives d‘installation et mode d‘emploi
Instrucciones de montaje y de uso
Istruzioni per l‘uso e il montaggio
Manual de montagem e de utilização
Inbouw- en bedieningshandleiding
Beszerelési és kezelési útmutató
Návod k montáži a obsluze
Bruksanvisning og monteringsveiledning
Monterings- og betjeningsvejledning
Navodila za vgradnjo in uporabo
Instrukcja montażu i obsługi
Montaj ve Kullanma Kılavuzu
Návod na montáž a obsluhu
Naputak za montažu i uporabu
NE 04/1207
_DEUTSCH
_ENGLISH
_FRANÇAIS
_ESPAÑOL
_ITALIANO
_PORTUGUÊS
_NEDERLANDS
_MAGYAR
_ČESKY
_NORSK
_DANSK
_SLOVENSKO
_POLSKI
_TÜRKÇE
_SLOVENSKY
_HRVATSKI