Download PROCASTER AMTX100 AM Transmitter Installation and Operation
Transcript
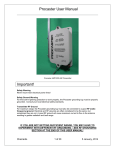
PROCASTER AMTX100 AM Transmitter
Installation and Operation
(PRELIMINARY)
Installation
PROCASTER™ contents
•
•
•
•
•
•
PROCASTER™ transmitter module
Studio interface module
Antenna tubes (3 pieces)
Hardware
AC wall adapter
Assembly/installation instructions
Changes or modifications not expressly approved by ChezRadio could void user's
authority to operate the equipment.
SAFETY WARNING
TO PREVENT ELECTROCUTION ALWAYS BE AWARE OF NEARBY ELECTRICAL POWER
WIRING AND MOUNT THE ANTENNA FAR ENOUGH AWAY SUCH THAT IF THE ANTENNA
FELL DOWN, THERE WOULD BE NO CHANCE OF CONTACT.
Before starting your installation, consider the following carefully:
•
•
•
•
•
Is the chosen frequency clear?
Are there nearby obstructions such as buildings, trees and power lines etc?
Where are you going to mount the transmitter?
Where are you going to ground it?
What range are you expecting to get?
For a successful installation, follow these steps...
Page 1 of 9
PROCASTER AMTX100 AM Transmitter
Installation and Operation
Step 1. Choose a Quiet Channel
Drive around your chosen broadcast area and listen for clear channels. Note: car radios are
usually more sensitive than portables, so that should be considered too. If you want to broadcast
at night, you would have to check if the channel is clear then. It's more difficult to broadcast at
night because changes in the ionosphere cause signals from higher-powered radio stations
to reach your broadcast area; so bear that in mind. Try to choose one of the highest 42 channels
available for the PROCASTER™ by setting the option switches accordingly. The higher the
frequency, the better the range because of the restrictive short antenna length.
Step 2. Install Location
Higher mounted antennas usually result in better range. The PROCASTER™ mounting bracket is
intended for mounting on a flat vertical surface. Optional kit # XXXXX allows pole mounting. Make
sure you can access the transmitter for tuning once it is in its final position. A good height above
earth ground is about 25 feet. The roof of a 2-storey building is a good choice.
Step 3. Assemble Antenna
Three aluminum tubes (large 5/8", medium 1/2" and small 3/8") are assembled together to form a
103 inch antenna. These sections are held together using 2 stainless steel pipe clamps.
•
•
•
•
Join the large tube to the medium tube
o slide a pipe clamp over the mid-point of the slotted end of the large tube
o insert the medium tube into the large tube lining up the black dot
o tighten pipe clamp snugly using a 1/4" nut driver
Join the small tube to the medium tube
o slide a pipe clamp over the mid-point of the slotted end of the medium tube
o insert the small tube into the medium tube lining up the black dot
o tighten pipe clamp snugly using a 1/4" nut driver
Fasten the assembled mast to the transmitter using (2) #10 lock-washers and (2)
locknuts - refer to E
o Use a screwdriver to prevent the bolt from turning while tightening the nuts - refer
to F
o Tighten snugly (don't over-tighten)
Antenna assembly is now complete
(antenna assembly pics)
Step 4. Mount External Transmitter
In all mounting cases, ensure you can reach the unit for tuning once installed!
Direct wall mounting
Mount the PROCASTER™ directly to a flat vertical surface using the 4 holes in the case
mounting plate. Make sure that there is sufficient space between the antenna mast and the rear
wall such that snow/ice does not cause a short.
(direct on wall)
Page 2 of 9
PROCASTER AMTX100 AM Transmitter
Installation and Operation
Direct wall mounting with standoff brackets
Use Radio Shack 4 inch Antenna Mast Wall Mount kit catalog # 15-883 to hold the
PROCASTER™ further away from the wall.
(direct on wall with brackets)
Pole mounting
For pole mounting use a pair of 2 inch spacing U-bolts with formed curved backing plates – like
the ones in the following picture. The backing plate prevents the case mounting areas from
bending when tightening onto the pole and makes for a more secure installation.
(pole mounting)
Step 5. Install Ground
Connect the copper grounding lug shown below to a suitable ground.
(grounding lug)
Good grounding is extremely important for optimum antenna performance and is required for safe
operation of the lightning protection circuitry. Typical grounds include:
•
•
•
•
Copper clad steel grounding rod at least 8 ft into earth ground
Water pipe ground
Radial ground system
Metal roof
Warning: FCC rules (47 part 15.219) state:” the total length of the transmission line, antenna and
ground lead (if used) shall not exceed 3 meters.” [3 meters = 118 inches]
The PROCASTER™ has an attached 103 inch antenna measured from its tip to the lower
mounting bolt which is the connection of the transmitter output. It has no transmission line. A 15
inch maximum ground lead is allowed from the grounding lug to a massive ground.
Step 6. Connect Power and Audio Wiring
The PROCASTER™ connects to the studio interface with 4 conductor CAT3 wire. Because the
audio is balanced and the power consumption is low, several hundred feet of wire can be used
without issue. Proceed as follows:
•
•
•
Open the PROCASTER™ cover by loosening the 3 cover clamps
Insert 4 conductor CAT3 wire through liquid-tight grommet on the underside
Connect:
o RED: +12V
o GREEN: 0V
o YELLOW: AUD +
Page 3 of 9
PROCASTER AMTX100 AM Transmitter
Installation and Operation
•
o BLACK: AUD Tighten nut on liquid-tight grommet
(wiring pic)
Step 7. Connect to indoor Studio Interface Module
Bring the 4 conductor CAT3 cable into the studio area. Proceed as follows:
•
•
•
•
Remove the 4 rubber feet from the studio interface enclosure
Slide off the cover
Pass the 4 conductor CAT3 cable through the rear bushing
Connect:
o RED: +12V
o GREEN: 0V
o YELLOW: AUD +
o BLACK: AUD -
(rear of studio interface)
Step 8. Connect an audio source
The PROCASTER™ is fitted with a universal 3.5mm stereo input jack similar to I-pod™ and
modern car audio equipment. It has been designed to accept stereo left and right audio channels
and mixes them into a mono signal.
(front of studio interface)
The built-in audio processor has a fairly wide accommodation range and will automatically adjust
audio level for optimum sound quality. In addition there is an input audio level adjustment control
(normally set at mid-point) accessible through the front panel using a small jewellers screwdriver.
The audio level can be set from approximately 200mV to 3V which will accommodate most audio
devices.
Page 4 of 9
PROCASTER AMTX100 AM Transmitter
Installation and Operation
Step 9. Power Up the Procaster ™
Connect the AC wall adapter.
Step 10. Choose Channel Frequency
To choose the desired broadcast channel, refer to the Option Switch section. Note: the option
switch also allows additional settings to be made.
Step 11. Tune Antenna
Once the broadcast channel is set, turn the antenna tuning capacitor using a small bladed
screwdriver until a maximum reading is seen on the tuning meter. Make sure to stand clear of the
antenna as body capacitance will affect tuning. If the reading is not "sharp" and strong, re-check
your ground connection.
(tuning)
Antenna tuning is now complete. (Now that was easy!)
Step 12. Final Checkout & Adjustments
Check your sound level and range by listening on a radio. The broadcast signal should be clear
and strong when closer to the transmitter, with more noise heard the further you move away.
The built-in audio processor is what makes the PROCASTER™ sound like a big station. If you
want to use your own external audio processing equipment, the PROCASTER™ audio processor
can be disabled by changing the option switches.
The PROCASTER™ audio processor can be adjusted to suit personal preferences as follows:
Compression: Turning the compression control CW boosts quieter parts of the audio to be
more equal to the louder parts. This makes the overall audio louder resulting in a stronger signal
and greater range. The tradeoff is the subjective audio quality depending on the level of
compression.
Modulation Depth: Turning the modulation depth control CW increases the audio
modulation level of the AM signal.
Limiting: Limiting is automatic to prevent sideband 'splatter' and both the above adjustments
have no affect on the 'hard limiter' built into the audio processor.
Congratulations! You have set up your broadcast station.
Page 5 of 9
PROCASTER AMTX100 AM Transmitter
Installation and Operation
Specifications
Outdoor Transmitter Module
Modulation scheme
AM
Harmonic suppression
>30dB
100mW input power control
Automatic self-regulating
Frequency selection
42 channel PLL
Frequency range
1290kHz to 1700kHz
Antenna tuning
manual adjust with meter
Treble boost option
yes
Built-in audio processor
(may be disabled)
Compression control
Modulation depth control
Fast/slow release (selectable)
Audio input
Balanced transformerless
Frequency response
20Hz to 20kHz +/- 3dB
Input voltage
12VDC 60mA
Enclosure
NEMA 4X
Mounting
4 holes (2 in x 6.31 in)
Antenna
103 in, 3-section, aluminum
Approvals
FCC Part 15.219
Industry Canada RSS-210
Weight
6lb
Lightning protection
350V 1ns
ESD protection
Audio and power
Connection to Studio Control
4 conductor CAT3
Indoor Studio Module
Audio input
3.5mm stereo jack
Input mixer
Mixes left and right audio
Audio level adjust
200mV to 3V
Power input (switch selectable)
12VAC or 12VDC
Audio output
Balanced transformerless
Weight
0.5 lb
ESD protection
Audio and power
Connection to External Transmitter
4 conductor CAT3
Page 6 of 9
PROCASTER AMTX100 AM Transmitter
Installation and Operation
Option Switches
The function of the 10 position switch located in the PROCASTER™ is as follows:
•
•
•
•
Switches S1 - S6 allow selection of 1 of 42 broadcast channels
Switch S7 selects 1 of 2 audio processor response rates (music or voice)
Switches 8 and 9 turns the audio processor on or off (when external processing is used)
Switch 10 turns on the treble boost
(switch)
Miscellaneous Functions
S7 ON
fast response
suited to music sources
S7 OFF
slow response
suited to voice sources
S8 OFF
S9 ON
audio processor on
S8 ON
S9 OFF
audio processor off
S10 ON
treble boost on
S10 OFF
treble boost off
Channel Settings
Freq kHz
S1
S2
S3
S4
S5
S6
1290
ON
ON
ON
ON
ON
ON
1300
OFF
ON
ON
ON
ON
ON
1310
ON
OFF
ON
ON
ON
ON
1320
OFF
OFF
ON
ON
ON
ON
1330
ON
ON
OFF
ON
ON
ON
1340
OFF
ON
OFF
ON
ON
ON
1350
ON
OFF
OFF
ON
ON
ON
1360
OFF
OFF
OFF
ON
ON
ON
1370
ON
ON
ON
OFF
ON
ON
1380
OFF
ON
ON
OFF
ON
ON
1390
ON
OFF
ON
OFF
ON
ON
1400
OFF
OFF
ON
OFF
ON
ON
1410
ON
ON
OFF
OFF
ON
ON
1420
OFF
ON
OFF
OFF
ON
ON
1430
ON
OFF
OFF
OFF
ON
ON
1440
OFF
OFF
OFF
OFF
ON
ON
Page 7 of 9
PROCASTER AMTX100 AM Transmitter
Installation and Operation
1450
ON
ON
ON
ON
OFF
ON
1460
1470
OFF
ON
ON
ON
OFF
ON
ON
OFF
ON
ON
OFF
ON
1480
OFF
OFF
ON
ON
OFF
ON
1490
ON
ON
OFF
ON
OFF
ON
1500
OFF
ON
OFF
ON
OFF
ON
1510
ON
OFF
OFF
ON
OFF
ON
1520
OFF
OFF
OFF
ON
OFF
ON
1530
ON
ON
ON
OFF
OFF
ON
1540
OFF
ON
ON
OFF
OFF
ON
1550
ON
OFF
ON
OFF
OFF
ON
1560
OFF
OFF
ON
OFF
OFF
ON
1570
ON
ON
OFF
OFF
OFF
ON
1580
OFF
ON
OFF
OFF
OFF
ON
1590
ON
OFF
OFF
OFF
OFF
ON
1600
OFF
OFF
OFF
OFF
OFF
ON
1610
ON
ON
ON
ON
ON
OFF
1620
OFF
ON
ON
ON
ON
OFF
1630
ON
OFF
ON
ON
ON
OFF
1640
OFF
OFF
ON
ON
ON
OFF
1650
ON
ON
OFF
ON
ON
OFF
1660
OFF
ON
OFF
ON
ON
OFF
1670
ON
OFF
OFF
ON
ON
OFF
1680
OFF
OFF
OFF
ON
ON
OFF
1690
ON
ON
ON
OFF
ON
OFF
1700
OFF
ON
ON
OFF
ON
OFF
Page 8 of 9
PROCASTER AMTX100 AM Transmitter
Installation and Operation
Compliance Statement
AM Transmitter
Model: AMTX100
Manufacturer: ChezRadio
FCC ID: VCJ-AMTX100
IC: 7378A-AMTX100
This device complies with Part 15 of the FCC Rules. Operation is subject to the following two
conditions: (1) this device may not cause harmful interference, and (2) this device must accept
any interference received, including interference that may cause undesired operation.
Warning:
Changes or modifications not expressly approved by ChezRadio could void the user’s authority to
operate the equipment.
Page 9 of 9


