Download Operator`s Manual
Transcript
Operator's
Manual
M
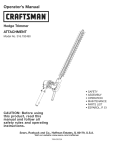
Pole Saw
ATTACHMENT
Model No. 316.792460
•
•
•
•
•
•
SAFETY
ASSEMBLY
OPERATION
MAINTENANCE
PARTS LIST
ESPANOL, P. E1
TION:
Before
using
this
product,all read
manual
follow
safetythisrules
and and
operating
Sears, Roebuck
and Co., Hoffman
Visit our website"
769-03569A
instructions.
Estates, IL 60179, U.S.A.
www.sears.com/craftsman
3/08
TABLE
OFCONTENTS
Rules
forSafeOperation
.................................
2
Warranty.............................................
4
KnowYourUnit........................................
5
Assembly
Instructions
...................................
5
Operating
Instructions
...................................
6
Maintenance
&Repair
Instructions
.........................
7
Replacing
SawChain...................................
7
ChainLubrication
......................................
8
Cleaning
andStorage...................................
8
Specifications
.........................................
8
PartsList...........................................
E11
Service
Numbers..............................
BackCover
Before
beginning,
locatetheunit'smodelplate.It liststhemodeland
serialnumbers
ofyourunit.Refer
tothesample
platebelowandcopy
theinformation
forfuturereference.
SYMBOL
I
I
I
I
J
MEANING
Attention is required
SAFETY
ALERT:in order
Indicates
to avoid
danger,
serious
warning
personal
or caution.
injury.
May be used in conjunction with other symbols or pictographs.
NOTE:
Advises you of information or instructions vital to the
operation or maintenance of the equipment.
DANGER:
Failureto
obeyAlways
a safetyfollow
warning
result
in serious
injury to yourself
or to others.
the will
safety
precautions
to reduce the risk of fire, electric shock and personal injury.
Model Number
Serial Number
-_
_S/N
1
The purpose of safety symbols is to attract your attention to possible
dangers. The safety symbols, and their explanations, deserve your
careful attention and understanding. The safety warnings do not by
themselves eliminate any danger. The instructions or warnings they
give are not substitutes for proper accident prevention measures.
:
Parent Part Number
\MODEL:
ITEM :
WARNING:
in injuw to yourself
Failure
and
to others.
obey aAlways
safety warning
follow the
cansafety
result
precautions to reduce the risk of fire, electric shock and
personal injuw.
/
/
CAUTION:
Failure
to obey ainjuw
safetyto warning
property damage
or personal
yourself may
or to result
others.in
Always follow the safety precautions to reduce the risk of
fire, electric shock and personal injury.
Copy the model and parent part number here:
All information, illustrations, and specifications in this manual are based
on the latest product information available at the time of printing. We
reserve the right to make changes at any time without notice.
Copy the serial number here:
Read the Operator's Manual andfollow allwarnings and safety instructions.Failureto do so can resultin serious injuryto the operatorand/or bystanders.
FOR QUESTIONS,
• IMPORTANT
READ ALL INSTRUCTIONS
CALL 1-800-659-5917
SAFETY INSTRUCTIONS
BEFORE OPERATING
•
KICKBACK SAFETY PRECAUTIONS
WARNING:
I_lk
safety rules. Please read these instructions before operating
the unit in order to ensure the safety of the operator and any
WARNING:
Whenkeep
using
the instructions
unit, you must
the
bystanders. Please
these
for follow
later use.
• Carefully read and understand the operator's manual of the unit
that powers this attachment.
• Read this operating instruction manual carefully. Be thoroughly
familiar with the controls and the proper use of the equipment.
Know how to stop the unit and disengage the controls quickly.
• Do not operate this unit when tired, ill, or under the influence of
alcohol, drugs, or medication.
• Never allow children to operate the equipment. Never allow adults
unfamiliar with the instructions to use the unit. Never allow adults
to operate the equipment without proper instruction.
• All guards and safety attachments must be installed properly
before operating the unit.
POLE SAW OPERATING PROCEDURES
• Keep bystanders, especially children and pets, at least 50 ft (15 m) away.
• Wear safety glasses or goggles that are marked as meeting ANSI
Z87.1-1989 standards, and ear/hearing protection when operating
this unit. Wear a face or dust mask if the operation is dusty.
• Wear heavy, long pants, boots, gloves and a long sleeve shirt. Do
not wear loose clothing, jewelw, short pants, sandals or go
barefoot. Secure hair above shoulder level.
• Use the unit only in daylight or good artificial light.
• Use the right tool. Only use this tool for the purpose intended.
• Always stop the engine when operation is delayed or when
walking from one location to another.
• Use only OEM replacement parts and accessories for this unit.
These are available from your authorized service dealer. Use of any
unauthorized parts or accessories could lead to serious injury to the
user or damage to the unit, and void your warranty.
Kickback may occur when the nose or tip of the
guide bar touches an object, or when the wood closes in and
pinches the saw chain in the cut. Tip contact in some cases may
cause a lightning-fast reverseaction, kicking the guide bar rapidly
back towards the operator. Pinching the saw chain along the top of
the guide bar may push the guide bar rapidly back towards the
operator. Either of these reactions may cause you to lose control of
the saw, which could result in serious injury to the user.
Do not rely exclusively upon the safety devices built into your
saw. As a pole saw user, you should take several steps to
keep your cutting jobs free from accident or injury.
With a basic understanding of kickback, you can reduce or eliminate
the element of surprise. Sudden surprise contributes to accidents.
• Grip trimmer firmly. Hold the pole saw/trimmer unit firmly with
both hands when the motor is running. Keep one hand on the grip
and the other hand on the handle.
• Do not let the nose of the guide bar contact a log, branch, ground
or other obstruction.
• Always cut with the engine running at full speed. Fully squeeze
the throttle trigger and maintain a steady cutting speed.
• Do not over reach.
• Follow the manufacturer's sharpening and maintenance
instructions for the saw chain.
• Use only replacement bars and chains specified by the
manufacturer or the equivalent.
SAFETY WARNINGS FOR ELECTRIC POWERNEADS
WARNING:
To reduce the risk of electrical shock, use
only extension cords approved for outdoor use, such as an
extension cord of cord type SW-A, SOW-A, STW-A, STOWA, SJW-A, SJOW-A, SJTW-W or SJTOW-A. Extension
cords are available from your local retailer. Use only roundjacketed extension cords approved for outdoor use.
• CORD SETS: Make sure your cord set is in good condition. When
using a cord set, be sure to use a cord that is heavy enough to
carry the current that your unit will draw. An undersized cord set
will cause a drop in line voltage resulting in loss of power and
overheating. See the operator's manual for the unit that will power
this attachment for the recommended cord size.
• Inspect all extension cords and the unit power connection
periodically. Look closely for deterioration, cuts or cracks in the
insulation. Also inspect the connections for damage. Replace the
cords if any defects or damage appear.
• Prevent disconnection of the electric powerhead from extension
cord during operation by using a plug-receptacle retaining strap,
connector, or by making a knot as shown below:
Extension
Powerhead
Extension
Powerhead
Cord
Cord
Cord
Cord
DANGER: RISK OF CUT OR SHOCK -- Keep hands
away from blades. Keep one hand on assist handle on the
powerhead and on the loop handle of attachment when
power is on. Do not attempt to remove cut material or hold
material to be cut when blades are moving. Make sure the
switch on the power unit is off when clearing jammed
material from blades. Do not grasp the exposed cutting
blades or cutting edges of the pole saw. Wear gloves when
handling the blade. Do not operate unit with one hand.
Avoid dangerous environments. Never operate your unit in damp
or wet conditions. Moisture is a shock hazard.
• Do not use the unit in the rain. Do not use in or around water. Do
not use on wet hedges or shrubbery.
• Do not handle the plug or unit with wet hands or standing on any
wet surfaces.
• Do not leave the unit plugged in when not in use, changing
attachments or add-ons, or while being serviced.
OTHER SAFETY PRECAUTIONS
• DO NOT operate a pole saw with one hand! Serious injury to the
operator, helpers, or bystanders may result from one-handed
operation. A pole saw is intended for two-handed use.
• Do not operate a pole saw if you are fatigued.
• Do not wear loose clothing or jewelry, as they can get caught in
moving parts. Non-skid footwear is recommended when working
outdoors. Wear protective hair covering to contain long hair.
• Use safety glasses, safety footwear, snug fitting clothing,
protective gloves, and protective hearing and head gear.
• Keep the work area clean. Cluttered areas invite injuries. Do not
start cutting until you have a clear work area, secure footing, and
a planned retreat path from the falling branches.
• Stay Alert. Watch what you are doing. Use common sense. Do not
operate the pole saw when you are tired. Keep all parts of your body
away from the saw chain when the motor is operating. Before you
start the saw, make sure the saw chain is not contacting anything.
• Disconnect the pole saw when not in use, before servicing, and when
changing accessories and attachments such as saw chain and guard.
• Check damaged parts. Before further use of the pole saw, a guard or
other part that is damaged should be carefully checked to determine
that it will operate properly and perform its intended function. Check
for alignment of moving parts, binding of moving parts, breakage of
parts, mounting, and any other conditions that may affect its
operation. A guard or other part that is damaged should be properly
repaired or replaced by an authorized service center, unless otherwise
indicated in this instruction manual.
• Use extreme caution when cutting small sized brush and sapling,
as slender material may catch the saw chain and be whipped
toward you or pull you off balance.
• Do not operate a pole saw in a tree unless you are specifically
trained to do so. When cutting a limb that is under tension, be
alert for spring back so that you will not be struck when the
tension in the wood fibers is released.
• Do not expose the pole saw to rain. Do not use the pole saw in
damp or wet locations.
• Do not use the pole saw in the presence of flammable liquids or gases.
• All pole saw service, other than the items listed in the operator's
manual safety and maintenance instructions, should be
performed by competent pole saw personnel. Do not attempt to
repair it yourself; there are no user serviceable parts inside.
• The pole saw will do a better and safer job when used at the rate
for which it was intended.
• Use the right tool. Cut wood only. Do not use the pole saw for
purposes for which it was not intended. For example, do not use the
pole saw for cutting plastic, masonry, or non-building materials.
• Use devices, such as low-kickback chain, guide bar nose guards, chain
brakes and special guide bars, which reduce the risks associated with
kickback.
• There are no other replacement components for achieving
kickback protection in accordance with CSA Z62.3.
• Do not operate a pole saw that is damaged, improperly adjusted,
or not completely and securely assembled. Be sure that the saw
chain stops moving when the trigger is released.
• Do not attempt operations beyond your capacity or experience.
• Never remove, modify or make inoperative any safety device
furnished with your unit.
• This saw is intended for infrequent use by homeowner's, cottagers
and campers, and for such general applications such as clearing and
pruning. It is not intended for prolonged use. If the intended use
involves prolonged periods of operation, this may cause circulatory
problems in the user's hands due to vibration. It may be appropriate
to use a saw having an anti-vibration feature.
• Safety clothing required by your safety organizations, government
regulations, or your employer should be used; otherwise, snug fitting
clothing, safety footwear, and hand and ear protection should be worn.
• Low-kickback saw chain is chain that has met the kickback
performance requirements of ANSI B175.1-1991 and is in
accordance with CSA Z62.3. Do not use other replacement chain
unless it has met these requirements for your specific model.
• Do not use any other cutting attachment or accessories. Use only
original equipment manufacturer replacement parts and accessories,
which are designed specifically to enhance the performance and
maximize the safe operation of our products. Failure to do so may
cause poor performance and possible injury. Use only the chain and
bar supplied with this product. Do not use any other cutting
attachment. Use of such attachments will void your factory warranty
and could result in serious bodily injury.
• Never touch the chain or attempt to service the saw while the
engine is running. Make sure all moving parts have stopped.
Allow the chain to cool, as the chain can be hot.
• Check the bar and chain at frequent intervals for proper
adjustment. Make sure the bar and chain are properly tightened
and sharpened. Visually inspect for damage. Repair any damage
before restarting or operating the pole saw.
• Do not cut near electrical cables or power lines.
• Do not use the pole saw to fell a tree. Use a standard chain saw
for this application.
MAINTENANCE AND STORAGE
• Allow the unit to cool before storing or transporting. Be sure to
secure the unit while transporting.
• Always use the transport guard on the bar and chain during
transportation and storage.
• Store the unit in a locked up and dry or high and dry place to
prevent unauthorized use or damage, out of the reach of children.
• Never douse or squirt the unit with water or any other liquid. Keep
handles dry, clean and free from debris. Clean after each use.
• Keep these instructions. Refer to them often and use them to
instruct other users. If you loan someone this unit, also loan them
these instructions.
• Only qualified personnel should perform any repairs or
maintenance procedures that are not described in this manual.
SAVE THESE INSTRUCTIONS
This operatorIs manualdescribes safety and internationalsymbols and pictographs that may appear on this product. Read the operatorIs manualfor complete
safety,assembly,operating and maintenance and repairinformation.
SYMBOL
MEANING
SYMBOL
MEANING
• SAFETY ALERT SYMBOL
danger, warning or caution. May be use d in
J. conjunction with other symbols or pictographs.
AA,
I Indicates
• READ OPERATOR'S MANUAL
_]1 I I_ I WARNING: Read the operat0r!s manUal(s)and
I
"
I• GUIDE
_-_
^_
Contact of the guide bar tip with any object
I should be avoided. Tip contact may cause the guide bar to
I moye
suddenly upward and backward, which
_.._t_:_:,@
Always use both hands while operating the chain saw.
• WEAR HEAD, EYE AND HEARING PROTECTION
Never use on y one hand to operate the saw.
Thrown objects and loud noise can cause
severe
injury
and hearing
loss. Wear
meeting eye
ANSI
Z87.1,1989
standards
andeye
earprotection
protection
when operating this unit. Falling objects can cause
severe head injury. Wear head protection when
• operating this unit.Use a full face shield when needed.
may cause
senous inju_.
I"USE
BOTH
HANDS
follow
all warnings
safety
instructions.
Failure to
d° s° can
result in and
seri0us
injury
t° the 0perat0r
/ and/or bystanders.
WARNING:
BAR
I WARNING:
I"HOT
SURFACE
I
,,_;_1_,
WARNING: Do not touch a hot surface. You may
I get burned. These parts get extremely hot from
operation. They remain hot for a short time after the
unit is turned off.
, KEEP BYSTANDERS AWAY
WARNING:
Keep all bystandersl eSpeCially children
and pets, at least 50 feet (15 m) from the operating area.
. POWER LINES CAN CAUSE SEVERE INJURY
WARNING= Do net operate
ii_II_II_II
unit near POwer linesl
Contact with a power line may cause serious injury or
damage to the unit. Maintain a clearance of at least
50 ft (15 m) between the pole saw (including any
branches it is contacting) and any electrical line.
@
%2
' CHAIN OIL ADJUSTMENT INDICATOR
The chain must be continously coated with oil to
function oroperly. Make sure to set the Oil Adjustment
Screw to allow a sufficient amount of oil to flow
continuously onto the chain
Use a 3!32-inch Allen wrench to adjust the Oil
Adjustment Screw.
CRAFTSMAN FULL WARRANTY
If this Craftsman product fails due to a defect in material or workmanship within one year from the date of purchase, return it to any Sears
store or other Craftsman outlet in the United States for free replacement.
This warranty applies for only 90 days if this product is ever used for commercial or rental purposes.
This warranty covers ONLY defects in materal and workmanship.
Sears will NOT pay for:
•
The chain saw bar and chain, wich are expendable items that can wear out from normal use within the warranty period.
•
Repairs necessary because of accident or failure to operate or maintain the product according to all supplied instructions.
This warranty gives you specific legal rights, and you may also have other rights which vary from state to state.
Sears, Roebuck and Co., Hoffman Estates, IL 60179
I
I
Removing the Attachment
Chain Transport Guard
Guide Bar
Nose
_Saw
q: Rook
Oil Tank Cap
Guard
Craftsman
Convertible
Coupler
_lb
Oil Adjustment
Screw
A e%n
Oil Reservoir
FILLING THE OIL RESERVOIR
to the Failure
unit. Make
sureoil
the
oil reservoir
is always
filled. I
i damage
DANGER:
to fill the
reservoir
will cause
irreparable
Follow the following steps to fill the oil reservoir:
1. Place the unit on a flat surface.
2. Remove the Oil Tank Cap.
3. Open the bar & chain oil bottle provided with your unit.
4. Pour oil into the reservoir until filled.
NOTE: The oil reservoir may be filled to the lip of the fill opening
without damaging the unit.
_hb
the chain. Check the oil level constantly so that the oil level does
i WARNING:
Oil constantly
flows from the oil reservoir to oil
I
not drop below half
full.
INSTALLING/REMOVING
_lk
Release Button
TM
Coupler _
,
_
/
_€"=r
Guide Recess
Fig. 1
to the unit, NEVER install more than one extension boom to a
To avoid serious personal injury and damage
I WARNING:
power tool.
TM
Extension Boom
_hb
counterclockwise to
loosen (Fig. 3).
Press and hold the release
button (Fig. 1).
3. While firmly holding the
upper shaft housing, pull
the attachment or
extension boom out of the
coupler (Fig. 2).
Installing the Attachment or
Extension Boom
Convertible
2.
Chain
Screw
Boom
damage to the unit, shut the unit off before removing or
WARNING:
To avoid serious personal injury and
installing
add-ons.
1. Turn the knob
Bar Retaining
Hanger_
or Extension
ATTACHMENT
i WARNING:
operator's manual
Priorforto unit
operation,
to be used
readwith
and this
understand
attachment.
the I
The attachment may be mounted to different power tools. The
instruction manuals for the basic power tool and the attachment
contain the information necessary for operation of the power tool
combination. Therefore, aways read BOTH instruction manuals
before using the power tool for the first time. Keep the manuals in
a safe place for future reference.
NOTE: To make installing or removing the attachment easier, place
the unit on the ground or on a work bench.
1. Remove the hanger or
Primary Hole
of the shaft housing.
2. Turn knob
counterclockwise to
loosen (Fig.
,,
shipping
cap3).from the top __
3. While firmly holding the
attachment, push it
Upper Shaft
Lower Shaft
straight into the
Housing
Housing
Convertible TM coupler
Fig. 2
until the release button
snaps firmly into the
primary hole (Fig. 6).
NOTE: Aligning the release
button with the guide
recess will help
installation (Fig. 1).
4. Turn the knob clockwise to
tighten (Fig. 3).
Knob
5. Repeat steps 1-4 for the
attachment or extension
Fig. 3
boom.
The attachment should be installed with the release button in the
primary hole.
_l
and
securely tighten
therelease
knob before
this unit.
AUTION:
Lock the
button operating
in the primary
hole
_l
only. Using the wrong hole could lead to personal injury or
CAUTION:
are to be used in the primary hole
damage to theAdd-ons
unit.
Check Flex Shaft Engagement Prior to Using
1. Start the unit.
2. Briefly engage and release the trigger.
3. Check that attachment is operating.
4. If the attachment is not operating, remove attachment
repeat steps for installing the attachment.
5. Recheck operation of the attachment.
and
OPERATING
PRECAUTIONS
I,_
when operating this unit. Do not wear loose clothing or
jewelry. Wear eye and ear/hearing protection. Wear heavy
long
pants, boots
andproperly
gloves. to
Wear
a hard
a full
ARNING:
Dress
reduce
the hat.
risk Use
of injury
face shield when needed.
1. Place the pole saw on firm ground or other solid surface in an
open area.
2. Maintain good balance and secure footing.
OPERATING TIPS
WARNING:
Alt
1. Keep bystanders 50 feet (15 meters) away when operating the saw.
2. Do not use the pole saw
chain saw without a pole
attachment.
3. Make sure the oil tank is
full and oil is lubricating
the chain prior to starting.
cutpole
down
trees. Use a
_,_
'
_
)
4. to
Grip
saw/trimmer
securely--one hand on the
grip, the other on the
handle.
Fig. 4
5. Keep finger off the trigger
until ready to make cut.
6. Before starting the pole
saw, make sure the chain
is not touching anything.
7. Keep all parts of your
body away from the chain
when the saw is running.
8. Do not force the chain saw
while cutting. Apply light
pressure. It will do the job
Fig. 5
better and safer at the rate
for which it was intended.
9. When cutting limbs or
branches that are under
tension, use extreme
caution. Be alert for wood
springing back. When wood
tension is released, the limb
could spring back and
strike operator causing
severe injury or death.
Fig. 6
10. When carrying pole saw
from one place to another:
• hold pole at balance point
• keep guide bar and chain to the rear
11. Do not cut small brush and saplings with the pole saw. Slender
matter may catch in the chain and be whipped toward you. This
could also pull you off balance.
12. Never stand directly under the limb you are trimming. Always
position yourself out of the path of falling debris (Fig. 4).
13. Never stand on a ladder or other type of unstable support while
using the pole saw.
14. Always use both hands to operate pole saw. Keep a firm, steady
pressure on the pole saw while cutting, but do not try to force
the saw through the wood.
I_lb
than
4" (10 cm)Do
in diameter.
ARNING:
not use the pole saw to cut limbs larger
15. Keep other persons away from cutting end of pole saw and at a
safe distance from work area. (Fig. 5).
16. Do not use the pole saw near cable, electric power or telephone
lines. Maintain a minimum clearance of 50 feet (15 m) from all
power lines (Fig. 6).
STARTING INSTRUCTIONS
I_
start the engine at least 30 ft. (9.1 m) from the fueling spot,
ARNING:
outdoors
only. To reduce the risk of fire and burn injuries,
Start and operate your pole saw without assistance. For specific
starting instructions, see the appropriate section of your powerhead
manual. Proper starting methods reduce the risk of injury.
Kickback may occur when the nose or tip of
the guide bar touches an object, or when the wood closes
in and pinches the saw chain in the cut. Tip contact in
some cases may cause a lightning-fast reverse action,
kicking the guide bar rapidly back towards the operator.
Pinching the saw chain along the top of the guide bar may
3ush the guide bar rapidly back towards the operator.
Either of these reactions may cause you to lose control of
the saw, which could result in serious injury to the user.
Do riot rely exclusively upon the safety devices built into
your saw. As a chain saw user, you should take several
steps to keep your cutting jobs free from accident or injury.
Avoid kickback. Kickback can result in severe injury or death.
• Do not operate the pole saw while in a tree, on a ladder or any
other unstable work surface, or in any awkward position. You may
lose control of the pole saw causing severe injury.
• Do not extend your arms above shoulders when using the pole
saw.
• Seek professional help if you are facing conditions beyond your
ability.
• Trimming a tree is the process of cutting limbs from a living tree.
Make sure your footing is firm. Keep your feet apart. Divide your
weight evenly on both feet.
• Before starting unit, always check the chain lubrication and oil
tank level.
NOTE: The chain must be continously coated with oil to function
properly. Make sure that the oil adjustment screw is set
appropriately.
To trim a limb (pruning):
WARNING:
If the oil tank runs out, the oil ajustment screw
hole becomes clogged, or the chain fails to get proper
lubrication in any fashion, the chain will overheat and cause
irreversible damage to the unit and may result in severe injury.
Excessive heat from friction can lead the chain to
catastrophically fail and come off the bar while operating.
Make the first cut six inches from tree trunk on the underside of
the limb. Use the top of the guide bar to make this cut. Cut a
third of the way through
Cut 4
6in
Cut 2
the diameter of the limb
F I \_ (15.2cm)_
(Fig. 7).
i) __
2.
Move two to four inches
it _1[__
Make the second cut from
5.1-10.2 cm}
farther out on the limb.
_1_
/ ,2:4in(
above the limb. Continue
t^ _ cut 1
the cut until you cut the
cut 3
3.
limb
Makeoff.
the third cut as close "\ _1
to the tree trunk as
Fig.7
possible on underside of limb stub. Use the top of the guide bar
to make this cut. Cut a third through the diameter of stub.
Make the fourth cut directly above the third cut. Cut down to
meet the third cut. This will remove the limb stub.
4.
SAWCHAINREPLACEMENT/INSTALLATION
_,
4.
wear work gloves
for protection
against
sharp
cutting
edges. I
I WARNING:
Whenever
handling
the saw
chain,
always
The pole saw chain and bar are expendable items, not covered by
the product warranty. Replacement chain or bar is available for
purchase through Sears parts and repair.
1. Remove the bar retaining
Chain Guard
nuts and screw. Then take off []
[_
/
the chain guard (Fig. 8, B).
2. Using a flat-head
screwdriver turn tension
adjustment screw
counterclockwise
(Fig. 8,
A) 4 turns.
3. Take off the chain and bar.
4. Prepare new chain and/or
bar, and fit the chain into
the groove in the bar.
5. Loop the saw chain over
the drive sprocket with the
cutting edges of the chain
pointing in the direction of
rotation (Fig. 9).
6. Adjust the tension
adjustment screw (Fig. 8,
A) to allow insertion of the
bar (Fig. 10). Make sure
the chain follows the slot
in the guide bar and adjust
the tension adjustment
screw to make the chain
fit snugly on the underside
of the bar.
7. Install the chain guard and
tighten bar retaining nuts
and screw (Fig. 8, B).
SAW CHAIN TENSION
ADJUSTM ENT
_l_l
Tension
Adjustment Screw Bar Retaining Nuts
Fig. 8
_
_ __
)___
/f
I/_
_ -_
/d.../_
"_____jI"
_ \ y-'__--__,_'r
_ ...v
_
_
Fig. 9
Holding the nose in upper position, securely tighten the bar
retaining nuts.
CHAIN LUBRICATION
The pole saw chain is self-lubricating. Oil is dispersed onto the
chain as the unit is used. Keep an adequate amount of oil in the oil
tank. Use the bar-chain oil provided in the hardware pack. Always
use bar-chain and sprocket oil
or similar chain saw oil.
Oil Adjustment Screw
Setting the Oil Adjustment
Screw
The Oil Adjustment Screw is
located on top of the gearbox
assembly (Fig. 12).
1. Insert a 3/32-inch Allen
wrench into the oil
Assembly
adjustment screw.
Fig. 12
2. Turn the screw
counterclockwise to increase oil flow to the chain.
Turn the screw clockwise to restrict the oil flow to the chain.
WARNING:
If the oil tank runs out, the oil ajustment screw
hole becomes clogged, or the chain fails to get proper lubrication
in any fashion, the chain will overheat and cause irreversible
damage to the unit and may result in severe injury. Excessive
heat from friction can lead the chain to catastrophically fail and
come off the bar while operating.
.__
_
J J'_ _L..\
_...__
)
'_
I t=_1
_
\
GUIDE BAR MAINTENANCE
is disconnected
(gas powerheads)
before performing any
_IIL IWARNING:
that the unit is off and the spark plug
maintenance onEnsure
your saw.
•
o
_._.
_
' _
"
_
_ _
_
o
•
_-__"
_z_X.
-Slot
Fig. 10
and saw bearings will wear more rapidly. Refer to Figure 11 for
information concerning
cold tension
(A), correct
CAUTION:
If a chaincorrect
is too loose
or too tight,
the barwarm
chain
tension (B), and a chain in need of adjustment (C).
Proper tension of the saw chain is extremely important and must be
checked before starting, as well as during, any cutting operation.
Taking the time to make needed adjustments to the saw chain will
result in improved cutting performance and prolonged chain life.
NOTE: A new chain and bar
will need readjustment after as
few as 5 cuts. This is
normal during the
break-in period, and
the interval between
future adjustments
will lengthen quickly
(Fig. 11).
To adjust the saw chain tension:
Fig. 11
1. Loosen the bar retaining nuts so they are hand tight (Fig. 8, B).
2. Holding the nose of the bar up, use the screwdriver to turn the
guide bar adjustment screw clockwise to tighten the chain (Fig. 8,
A). Turning the screw counterclockwise loosens the chain on the
guide bar.
3. While wearing heavy duty work gloves (after you've made the
adjustment), move the saw chain back and forth on the guide
bar to be sure the chain moves freely and is in proper mesh with
the sprocket. Never move the chain with your bare hands.
NOTE: If the chain is difficult to rotate or if it binds on the guide bar,
there is too much tension applied and it must be adjusted. To
decrease tension, turn the adjustment screw counterclockwise,
slowly. Move the chain back and forth until it moves freely.
NOTE:
Proper maintenance of the guide bar is essential to the
performance of your pole saw. Proper guide bar
maintenance will keep your saw in good working order.
Most guide bar problems can be prevented merely by keeping the
chain saw well maintained. Incorrect filing and non-uniform cutter
and depth gauge settings cause most guide bar problems, primarily
resulting in uneven bar wear. As the bar wears unevenly, the rails
widen, which may cause chain clatter and difficulty in making
straight cuts. Insufficient guide bar lubrication and operating the
saw with a chain that is too tight will contribute to rapid bar wear.
Refer to Saw Chain Tension Adjustment and Oiling the Chain. To
help minimize bar wear, the following guide bar maintenance is
recommended:
Bar Wear
Turn guide bar frequently at regular intervals (for example, after 5
hours of use), to ensure even
wear on top and bottom of
bar.
Bar Grooves
Bar grooves (or rails which
support and carry the chain)
should be cleaned if the saw
has been heavily used or if the
saw chain appears dirty. Rails
should always be cleaned
every time the saw chain is
removed.
Fig. 13
To clean guide bar rails:
1. Remove chain guard, bar, and chain. Refer to Saw Chain
Replacement / Installation.
2,
Using a screwdriver, putty knife, wire brush or other similar
instrument, clear residue from the rails on the guide bar (Fig. 13).
This will keep the oil passages open to provide proper
lubrication to the bar and chain.
Ensure the sprocket in the bar turns freely during cleaning.
NOTE: Oil passages at the bar pad should be cleaned to ensure
proper lubrication of the bar and chain during operation.
This should be done while the bar is removed for cleaning.
3,
4. Onthebarpaduseasoft
wiresmallenough
to
insertintotheoil
discharge
hole,scrape
anysawdustordebri
away.
(Fig.14)
5. Reinstall
thebar,chain,
chainguard,
screw,
and
barretaining
nuts.Refer
toSawChain
Replacement
/
Fig. 14
Installation.
CHAIN MAINTENANCE
WARN ING: Unless you have experience and specialized
training for dealing with kickback (see Important Safety
Instructions), always use a low-kickback saw chain, which
significantly reduces the danger of kickback. Low-kickback saw
chain does not completely eliminate kickback. A low-kickback or
"safety chain," should never be regarded as total protection
against injury.
Always use a replacement saw chain designed as "low-kickback" or a
saw chain which meets the low-kickback performance. A standard saw
chain (a chain which does not have the kickback reducing guard links)
should only be used by an experienced professional chain saw operator.
Low-Kickback Saw Chain
WARNING:
Never remove,
modify
or make
inoperative
any
safety
device furnished
with your
unit. The
low-kickback
saw
chain is a major safety feature provided for your protection.
Breaking in a New Saw Chain
A new chain and bar will need readjustment after as few as 5 cuts. This
is normal during the break-in period, and the interval between future
adjustments will begin to lengthen quickly. Over a period of time,
however, the moving parts of the saw chain will become worn, resulting
in what is called chain stretch. This is normal. When it is no longer
possible to obtain correct chain tension adjustment, it is recommended
to purchase a replacement chain at Sears or other qualified service
dealer have this repair performed.
CLEANING
_l_J
3 links
removed Never
from it.
This
couldof damage
thehas
sprocket.
ARNING:
use
a loop
chain that
more than
• Slacken the chain if you have retensioned it at operating
temperature during cutting work.
• The chain contracts as it cools down. If it is not slackened, it may
damage the gearbox and bearings.
STORAGE
Wait for the engine to cool down. Drain the oil tank and store the
machine in a dry place well away from sources of ignition until you
need it again.
• Attach the transport guard to the bar/chain before storing the unit.
• Store the unit in a dry, high and/or locked location, out of the
reach of children and other unauthorized persons.
LONG-TERM STORAGE
• Remove the saw chain and guide bar, clean them, and spray them
with corrosion inhibiting oil.
• Attach the transport guard to the bar/chain before storing.
WARNING:
thatpowerheads)
the unit is off
and working
the sparkonplug
is disconnected Ensure
(for gas
when
the
saw chain. Wear heavy duty gloves too.
A low-kickback saw chain is a chain which has met the kickback
performance requirements of ANSI B175.1. Do not use other replacement
chain unless it has met these requirements for your specific model. By
keeping the saw chain in good working condition and correctly serviced
as recommended in this manual, you will be able to maintain the safety
system of your pole saw over the life of the product.
Chain Tension
Check the chain tension frequently and adjust as often as necessary
to keep the chain snug on the bar, but loose enough to be pulled
around by hand. Refer to Saw Chain Tension Adjustment.
NEED MORE HELP"
I".,,re]
nil= E.%WI:_n q:To]• I_V,I
_ _| d
Approximate Operating Weight of Attachment .....
3.3 Ibs. (1.5 kg)
Drive Shaft Length ........................
26 inches (66 cm)
Cutting Length ...........................
8 inches (20.3 cm)
All specifications are based on the latest product information
available at the time of printing. We reserve the right to make
changes at any time without notice.
II
Manual del Operador
M
Accesorio de
CORTADORA
DE POSTE
Modelo No. 316.792460
• SEGURIDAD
• MONTAJE
• FUNCIONAMIENTO
• MANTENIMIENTO
• LISTADODEPIEZAS
/
/
/
/
/
/
JJ
/ f
PRECAUCION:
Lea el manual del
advertencias
e instrucciones
operador
y siga
todas las
seguridad.
Sears, Roebuck
and Co., Hoffman
de
Estates, IL 60179, U.S.A.
Visite nuestro sitio web" www.sears.com/craftsman
769-03569A
3/08
TINDICE
DE
CONTENIDOS
Normas para una operaci6n segura .......................
Garantfa .............................................
Conozca su unidad ....................................
Instrucciones de montaje. ...............................
Instrucciones de operaclon ..............................
Instrucciones de mantenimiento ..........................
Cadena instalaci6n de remplazo ..........................
Lubricaci6n de la cadena ...............................
Limpieza y almacenamiento
.............................
Especificaciones
......................................
Lista de piezas ......................................
Servicio Numera ............................
Los simbolos de seguridad se utilizan para Ilamar su atencion sobre
posibles peligros. Los simbolos de seguridad y sus explicaciones merecen
toda su atencion y comprensi6n. Los simbolos de seguridad no eliminan
ningQnpeligro por si mismos. Las instrucciones o advertencias que ofrecen
no substituyen las medidas adecuadas de prevencion de accidentes.
E2
E4
E5
E5
E6
E7
E7
E8
E8
E8
E11
Contraportada
SIMBOLO
N.
.
precaucion. Debe prestar atencion para evitar sufrir graves lesiones
ALERTA
DE SEGURIDAD:
Indicapeligro,
advertencia
personales. Puede
ser utilizadojunto con
otros simbolos
o figuras.o
_
NOTA:
Antes de que empiece a ensamblar su nuevo ec{uipo, por favor
ubique la placa que contiene el modelo de la unldad y escriba esa
informaci6n en el espacio en blanco aquf deba o. Aqui debajo se
explica la muestra de una placa del modelo.
SIGNIFICADO
_,
Le ofrece informaci6n o instrucciones que son esenciales
para la operaci6n o mantenimiento del equipo.
puede
conducirEl
a que
usted u otras
personas sufrangraves
PELIGRO:
no obedecer
una advertencia
de seguridad
lesiones. Siga siempre lasprecauciones de seguridadpara reducir
el riesgo de incendio, descarga electrica y lesiones personales.
. Nurnero del modelo N_mero de la
urneroae sene
S/N :
-._
_L
.......
plezaael_0ncan_e
\MODEL:
ITEM :
puede
conducir a que usted
otrasuna
personas
sufrande
lesiones.
ADVERTENCIA:
El no u
seguir
advertencia
seguridad
Siga siempre las precauciones de seguridad para reducir el
riesgo de incendio, descarga electrica y lesiones personales.
/
puede conducir a dafioElpatrimonial
o a advertencia
que usted ude
otras
PRECAUCION:
no seguir una
seguridad
personas sufran lesiones personales. Siga siempre las
precauciones de seguridad para reducir el riesgo de incendio,
descarga electrica y lesiones personales.
Copiez le numero de modble / pibce mere ici :
Todala informacion, las ilustracionesy las especificaciones contenidas en este
manualse basan en la informaci6n mas reciente disponible en el momento de
impresion del manual. Nos reservamos el derecho de hacer cambios en
cualquier momento sin aviso previo.
Copiez le numero de s_rie ici :
Lea el manual del operador y siga todas las advertencias e instrucciones de seguridad. De no hacerlo, el operador y/o los espectadores
pueden sufrir graves lesiones.
SI TIENE
LEA TODAS LAS INSTRUCCIONES
I_I_
PREGUNTAS,
LLAME
AL
1-800-659-5917
• IMPORTANTE
INFORMACION
DE SEGURIDAD
•
ANTES DE LA OPERACION
PROTEJASE CONTRA EL CONTRAGOLPE
ADVERTENCIA"
El contragolpe puede ocurrir cuando la
nariz o lapunta de la barra guia toca un objeto, o cuando la madera
se clerra y pellizca lasierra de cadena cuando esta cortando. Si la
3untade labarra hace contacto, puede causar un a reaccbn
reversivarela.mpago,pateando la barra guia hacia arribay atr_.sen
direccion del operado. Pellizcando lasierra de cadena a Io largo de
la barra guia pude empujar la barra rapidamente hacia atr_.sen
direccion el operador.Cualquiera de estas reacciones puede causar
que usted pierda el control de la sierra,Io cual puede resultaren
serias lesionespersonales. No dependa exclusivamente de los
dispositivos de seguridad integrados en su sierra.Como usuariode
sierra de cadena, usted debe dar varios pasos para que en sus
trabajos de corte no ocurran accidentes ni lesiones.
seguridad cuando use la unidad. Per favor lea estas instrucciones
para su propia seguridad y las de los espectadores, antes de hacer
funcionar la unidad. Per Se
favor
mantenga
estas
instrucciones
en un
ADVERTENCIA:
debe
seguir las
siguientes
reglas de
lugar seguro para use futuro.
• Lea cuidadosamente y entienda el manual del operador de la
unidad que impulsa a este acople.
• Lea este manual de instrucciones de funcionamientodetenidamente.
Familiaricesecompletamente con loscontroles y el use apropiado del
equipo. Sepa come apagar launidad y desactivar los controles con rapidez.
• No opere esta unidad siesta cansado, enfermo, o bajo los
efectos del alcohol, drogas o medicamentos.
• Nunca permita que los ni_os mane en el equipo. Nunca permita que
los adultos usen la unidad cuando no esten familiarizados con las
instrucciones. Nunca permita que las personas adultas manejen el
equipo si no cuentan con las instrucciones apropiadas.
• Se debe instalar adecuadamente todos los protectores y
dispositivos de seguridad antes de hacer funcionar la unidad.
PROCEDIMIENTOS PARA LA OPERACION DE SIERRAS DE CADENA
• Mantenga retirados a los espectadores, especialmente a los ni_os y
animales domesticos por Io menos a 15 m (50 ft) de distancia.
• Use lentes o gafas de protecci6n que cumplan con las normas
ANSI Z87.1-1989, y protecci6n para sus ol'dos/audici6n mientras
opere esta unidad. Use siempre una mascara facial o para
protegerse contra el polvo si la operaci6n levanta polvo.
• Use pantalones largos ygruesos, botas, guantes y camisa de manga
larga. No use ropaholgada, alhajas, pantalones cortos, sandalias nl
este descalzo. Sostenga el cabello sobre el nivel de los hombros.
• Use la unidad s61o con luz diurna o con buena luz artificial.
• Use la herramienta correcta. Use esta herramienta s61o para el
trabajo para el que fue diser_ada.
• Pare siempre la unidad cuando posponga el traba o o mientras
camine entre diferentes zonas de corte.
• Uses61o piezasyaccesoriosderepuestogenuinosdefabricaparaesta
unidad. Puede obtenerlos en su proveedor de servicio autorizado. El
uso de piezas o accesorios no autorizados puede causar lesiones
graves al usuario o daflo a la unidad, y la cancelaci6n de su garantia.
• Con una comprensi6n basica del contragolpe, usted puede
reducir o elimmar el elemento de sorpresa, la sorpresa repentina
contribuye a los accidentes.
• Agarre el recortador firmemente. Sujete firmemente con ambas
manos la sierra de pertiga/recortador cuando el motor este
funcionando. Mantenga una mano en el agarre y la otra en la manija.
• No permita que la nariz de la barra guia tenga contacto con un
tronco, rama, el suelo u otra obstrucci6n.
• Corte a altas velocidades del motor.
• No sobrepase su aloanoe.
• Utilice solamente barras y cadenas espcificadas por su fabricante
o el equivalente.
ADVERTENCIAS DE SEGURIDAD ESPECIALES PARA LAS
UNIDADES MOTRICES Y TURBOSOPLADORES
ELECTRICOS
electrica, use s61ocables de extension aprobados para ser
usados en exteriores, como los cables de extension tipo SW-A,
SOW-A, STW-A, STOW-A, SJW-A, SJOW-A, SJTW-W o
SJTOW-A. Puede adquirir cables de extension en su
_li_ I ADVERTENCIA:
Para reducirdeelextension
riesgo de de
descarga
distribuidor local. Use s61ocables
camisa
cilindrica aprobados para ser usados en exteriores.
• CABLES DE EXTENSION: Verifique que su cable de extensi6n este en
buenas condiciones. Cuando utilice un cable de extensiSn, verifique
que el mismo sea Io suficientemente grueso para conducir la corriente
E2
que consuma su unidad. Si utiliza un cable demasiado delgado, esto
ocasionara una caida de volta e de la linea, yen consecuencia, una
perd da de potenc a y reca entam ento. Lea e manua de operador de
la unidad que accionara a este accesorio para informarse acerca del
tamafio recomendado del cable de extensi6n.
• Inspeccione con frecuenciatodos loscables de extensiony laconexi6n de
la unidad a lacorriente. Revisecon cuidado para ver si hay deterioros,cortes
o grietas en el aislamiento.Inspeccione tambien lasconexiones para ver si
han sufrido dafios. Cambie los cables si observa algL_ndefecto o dafio.
• Evite la desconexi6n del cabezal motorizado de la energia
electrica cabeza del cable de extensi6n durante el
funcionamiento, utilizando un retenedor de enchufe-receptaculo,
conector o haciendo un nudo como se muestra aquf debajo:
Cable de
Accione Cuerda
Cable de
Accione Cuerda
extensibn
de Cabeza>
• No use la unidad bajo la Iluvia. No la use dentro del agua ni
alrededor de ella.
• No exponga la sierra de cadena en presencia de liquidos o gases
flamables.
• Todo el servicio de la sierra de cadena, otro que los articulos listados
en las instrucciones de seguridad y mantenimiento en el manual del
usuario, deberan ser ejecutadas por un personal de servicio de
sierras de cadena competente. No intente repafla usted mismo; no se
encuentran piezas de servicio para el usuario adentro de la sierra.
• Cuando no se encuentre en uso, la sierra de cadena debera ser
almacenada fuera del alcance de los nifios, en un lugar seco,
elevado, y asegurado.
• No force la sierra de cadena. La sierra de cadena realizaraun trabajo mejor
ymas seguro cuando se utilice a elpromedio para el cual fue diseSada.
• Utilice la herramienta adecuada. Corte solamente madera. No utilice
la sierra de cadena para propositos para los cuales no fue disefiada.
Pro ejemplo, no utilice la sierra de cadena para cortar plasticos,
mamposteria, o materiales que no sean para la construcci6n.
• Utilice mecanismos tales como cadenas de contragolpe bajo, protectores
para la nariz de la barra guia, chain brakes y barras guias especiales, los
cuales reducen los peligros relacionados con el contragolpe.
• No existen otros components de repuesto para Iograr protecci6n
del contragolpe de acuerdo con CSA Z62.3.
• NO opere la sierra de cadena cuando este da_ada,
impropiamente ajustada, o no segura y completamente
ensamblada. AsegOrese de ue la cadena de la sierra deje de
moverse cuando el gatillo de estrangulaci6n sea liberado.
• NO intente hacer operaciones m4s alia de su capacidad o experiencia.
• Esta sierra de cadena con motor fue clasificada por la CSA como una
sierra de clase 2C. Y fue destinada para el uso infrecuente por duefios
caseros, excursionistas, jounaleros. Para aplicaciones generales tales
como el limpiado, podado, cortado de lefia para chimenea, etc. No fue
diseSada para un uso prolongado. Si el uso destinado envuelve el uso
prolongado de los periodos de operacion, esto puede causer problemas
circulatorios en las manos del usuario debido a la vibraci6n. Puede ser
apropiado el utilizar la sierra teniendo un mecanismo de anti-vibrado.
• NUNCA REMUEVA, modifique o haga inoperativo cualquiera de
los mecanismos de seguridad construidos en su unidad.
• Ropas de seguridad son requeridas por sus organizaciones de
seguridad, regulaciones guber-namentales, o su empleador
deberan set utilizadas; de otra manera, ropa entallada, calzado de
seguridad y protecci6n para manos y oidos debera ser utilizada.
• Una cadena para sierra de contragolpe ba o es una cadena que ha
cumplido con los requerimientos de rendimiento del contragolpe de la
ANSI B175.1-1991 y esta de acuerdo con CSA Z62.3. No utilice una
cadena de repuesto diferente a menos que Ilene estos requisitos para
su modelo particular.
• No use ningt]n otro aditamento o accesorio de corte. Use s61orepuestos
y accesorios fabricante del equipo original, los cuales estan disefiados
especialmente para mejorar el desempefio y maximizar la operaci6n
segura de nuestros productos. No hacerlo asi, puede producir un pobre
desempefio y posiblemente alguna lesi6n. Use s61ola cadena y la barra
_ue se suministran con este producto. No use ningQn otro aditamento
e corte. El uso de tales aditamentos anulara su garantia de feabrica y
puede producir alguna lesi6n seria a su cuerpo.
• Nunca toque la cadena ni trate de dar servicio a la sierra con el motor
encendido. Cerci6rese de que todas las partes m6viles se hayan
detenido. Deje enfriar la sierra, ya que la cadena pudiera estar caliente.
• Inspeccione la barra y la cadena a intervalos frecuentes para el
_eUStedebido. Cerci6rese de que la barra y la cadena esten
bidamente apretadas y afiladas. Verifique visualmente que no
esten averiadas. Repare cualquier averia antes de arrancar o de
operar de nuevo la sierra de cadena.
• No corte cables electricos ni el tendido electrico.
• No use la sierra de postes para tumbar un arbol. Use una sierra
de cadena estandar para esta tarea.
MANTENIMIENTO Y ALMACENAMIENTO
• Espere que el motor se enfrie antes de guardar o transportar la
unldad.AsegQrese de que la unidad este segura al transportarla.
• Use siempre el protector para transporte en la barra y la cadena
durante e/transporte y el almacenamiento.
• Guarde la unidad ba o Ilave en un lugar adecuado y seco para evitar el
uso por personas no autorizadas y da_os, ejos dela cance de os n 5os.
• Nunca mo e ni rocie la unidad con agua ni con ningQn otro liquido.
Mantenga as man as secas, mp as y s n res duos. Ump e a un dad
luego de cada uso, lea las instrucciones de Umpieza y Almacenamiento.
• Guarde estas instrucciones. ConsQltelas con frecuencia y
utilicelas para enser_ar a otros usuarios. Si le presta esta unidad a
alguien, prestele tambien estas instrucciones.
• Cualquier reparaci6n o procedimientos de mantenimiento que no
esten descritos en este manual deben ser hechos Qnicamente por
personal calificado.
GUARDE ESTAS INSTRUCClONES
_'_>
PELIGRO"
RIESGO DE CHOQUE O CUT - Mantenga las
manos fuera de las hojas. Mantenga una mano en ayudar a
manipular en la powerhead y en el bucle de manejar embargo,
cuando esta en el poder. No intente quitar o cortar materialcelebrar
materialque seva a cortar cuando lashojas se mueven. Aseg(_rese
de que el interruptor en la unidad de energiaesta apagado cuando
atascado material procedente de la limpiezade lashojas. No
comprender laexposici6n o de las cuchillas cortantes de la
cobertura recortador. Utilice guantes almanipular la pala. No porter
en marcha la unidad con una mano.
Evite los ambientes peligrosos. No opere nunca su unidad en
ambientes hQmedos ni mo ados. La humedad representa un
pe gro de descarga e ectr ca.
• No use la unidad bajo la Iluvia. No Io use dentro del agua ni
alrededor de ella.
• No toque el enchufe ni la unidad con las manos mojadas ni
cuando este parado sobre una superficie mojada.
• No deje la unidad enchufada mientras no la use, mientras cambie
los accesorios o aditamentos, ni mientras realiza el servicio.
OTRAS PRECAUCIONES DE SEGURIDAD
• iNO opere la sierra de cadena con una mano! Serias lesiones al
operador, ayudantes, espectadores, o cualquier combinaci6n de
estas personas puede resultar por la operaci6n con una mano. La
sierra esta destinada para el uso con dos manos.
• No opere la sierra de cadena cuando este cansado.
• No se vista con ropa suelta o oyeria ya que pueden ser atrapadas
por las partes en movimiento. LJgas o calzado contra el resbalo son
recomendados cuando trabaje al aire libre. Utilice cubiertas
protectivas para cabello para sostener el cabello largo.
• Utilice lentes de precauci6n, ropa entallada, calzado de precauci6n,
guantes de protecci6n, y equipo de protecci6n para ofdos y cabeza.
• Areas de trabajo sucias inducen lesiones. No empiece a cortar hasta
que no tenga un area de trabajo limpia, se encuentre seguramente
£arado y haya planeado el sendero de retirada del arbol que caera.
• Este alerta. Fijese Io que este haciendo. Utilice el sentido comQn. No
opere la sierra cuando se encuentre fatigado. Mantenga todas las
partes de su cuerpo alejadas de la sierra de cadena cuando el motor
se encuentra en operacJ6n. Antes de arrancar la sierra, asegurese de
que la cadena de la sierra no este haciendo contacto con nada.
• Uesconecte la sierra de cadena cuando no se encuentre en uso,
antes de cada servicio, y cuando cambie accesorios y
aditamentos tales como la cadena de la sierra y el resguardo.
• Antes de cualquier uso de la sierra de cadena, el resguardo u otra
parte que se encuentre da_ada debera ser cuidadosamente revisado
para determinar si operara propiamente y realizara la funcion para la
cual fue disefiada. Revise et alineamiento de las partes movibles, y
cualquier otra condici6n que pueda afectar la operaci6n correcta de
la unidad. Un resguardo o cualquier otra parte daSada debera ser
propiamente reparada o reemplazada por un centro de servicio
autorizado, a menos de que el manual indique otra cosa.
• Considere elemedio ambiente del area de trabajo. Utilice extrema
precauci6n cuando corte arbustos pequeSos, aboles jovenes,
dado a que material delgado puede set atrapado por la sierra y
azotado en direcci6n de usted, o sacarlo de balance.
• No opere la sierra en un arbol a menos de que usted se encuentre
especificamente entrenado para hacerlo. Cuando corte ramas que
contengan tensi6n, este alerta del resorteopara que usted no sea
golpeado cuando la tensi6n de la fibras de la madera sea liberada.
E3
= SIMBOLOS
DE SEGURIDAD
E INTERNACIONALES
=
Este manual del operador describe los simbolos y figuras de seguridad e internacionales que pueden aparecer en este producto. Lea el
manual del operador para obtener informaci6n completa acerca de la seguridad, ensamble, operaci6n y mantenimiento y reparaci6n.
SIMBOLO
SIGNIFICADO
SIMBOLO
I" SIMBOLO DE ALERTA DE SEGURIDAD
Indica peligro, advertencia o precauci6n. Pued e ser
A _
I utilizado
SIGNIFICADO
' AVISO SOBRE LA BARRA DE GUIA
ADVERTENC
junto con otros simbolos o figuras.
_4_' _
I, LEA EL MANUAL DEL OPERADOR
I ADVERTENClA:
Lea el manual del operador y siga
I todas las advertencias e instrucciones de seguridad. De
no hacerlo, el operad0r y/o 10sespectad0res puede n
I sufrir graves lesiones.
...............
&-_
1
II
IA: Debe evitarse el C0ntacto de la punta
de la barra de guia con cualquier objeto. El contacto Con la
punta pudiera hacer que la barra de guia se mueva
repentinamente hacia arriba y hacia atr_s, !0 cua Ipudiera
I
I
provocar lesionesgraves,
l
I*USEAMBA s MANO S
I Use siempre ambas manos al operar la sierra de
I
cadena. Nunc a opeEe !a sieEra con una sola
CABEZA
ADVERTENCIA:
Los objetos arrojadoSpot ia unidad y
USE PROTECCION OCULAR, AUDITIVA Y EN SU
el ruido fuerte pueden causar graves lesiones 0culares y
p@dida auditiva. Utilice protecci6n ocular que cumpla con as
normas ANSI Z87:1-1989 y protecci6n auditiva cuando
opere esta unidad. Los objetos que Caen pueden causar
graves lesiones en su cabeza. Use protecci6n en su cabeza
mientras opere esta unidad. Use una careta completa
cuando la necesite.
,_
...........
ii ¸ O
:
/%2/¸
, INDICADOR DE AJUSTE DEL ACEITE DE LA CADENA
La cadena debe estar cubierta continuamente con aceite
para que funcione correctamente. Asegt_resede ajustar el
tornillo de ajuste de aceite para permitir que fluya
continuamente una cantidad de aceite suficiente hacia la
cadena.
, SUPERFICIE CALIENTE
I
caliente.
Puede
quemarse.
Estas
partes
se
calientan
mucho
I
ADVERTENCIA:
No toque una superficie que est6
con el use. Luego de apagarse permanecen calientes
durante un corto tempo.
J
• MANTENGA ALEJADOS A LOS ESPECTADORES
ADVERTENCIA:
Mantenga retirades a los
espectadores, especialmente a los niSos y animales
dom6sticos pot Io menos a 15 m (50 ft) de distancia.
_-_Oft(1_m)_
• LAS LINEAS DE CORRIENTE
ELI_CTRICA PUEDEN
ADVERTENCIA:
No opere la unidad Cercade lineas de
corriente el6ctrica. El contacto con una linea de corriente
el6ctrica puede ocasionar lesionesgraves o da_ar la unidad.
Mantenga una separaci6n de al menos 50 pies (15 metros)
entre la sierra de p6rtiga (incluyendo cualquier rama con la
que este en contacto) y cualquier linea de corriente el_trica.
Utilice una IlaveAllen de 3132de pulgada Para ajustar el
tornillo de ajuste de aceite.
GARANTIA TOTAL DE CRAFTSMAN
Si este producto Craftsman falla debido a un defecto en el material o en la mano de obra dentro de un periodo de uno argo a partir de la
fecha de compra, devuelvalo a cualquier tienda Sears u otro establecimiento de Craftsman en Estados Unidos para que sea reemplazado
costo alguno.
Esta garantfa se aplica solamente durante 90 dias si este producto en algQn momento se utiliza para fines comerciales o de alquiler.
Esta garantia abarca SOLAMENTE los defectos en el material o en la mano de obra. Sears NO pagara:
•
Los articulos consumibles que se desgasten debido al uso normal dentro del periodo de garantfa,
•
Las reparaciones necesarias debidas a accidente asi como por no operar o no mantener el equipo de acuerdo con todas las
instrucciones provistas,
Esta garantfa le concede a usted derechos legales especfficos, y usted pudiera tener otros derechos que varfan de un estado a otro,
Sears, Roebuck and Co,, Hoffman Estates, IL 60179
E4
sin
Quitar el Accesorio o la Extensi6n
Protector de transporte
del cadena _
Puntade guia
Guia de
de barra
barra
1.
_Cadena
_
)Y
E
Tuercasujetadoradel
_,.J
._
Tapon de _Z_/,/_
tanque
_
aceite
Ens.amblede
3,
Hueco de Guia
Fig. 1
I/_
/ /
eje,n,
pulsor\
//
Para aflojarlo, gire el bot6n
en el sentido opuesto al de Convertible
Bot6n de desconexi6n
las manecillas del reloj
Acoplador_.
__=
(Fig. 3).
Oprima y sostenga
oprimido el bot6n de
liberaci6n (Fig. 1).
Mientras sostiene con
firmeza el bastidor del eje
superior, tire del accesorio
de jardin hacia afuera del
acoplador (Fig. 2).
2,
Protector
X_pu//'_,_=_/
de
7%/
cadena
/ /
DVERTENCIA"
lesiones
personales, I
apague
la unidad antesPara
de evitar
sacar graves
o instalar
accesorios.
TM
para
contar
/
i_;_ede
I
A
y da_os a la unidad, NUNCA instale mas de un brazo de |
ADVERTENCIA:
Para evitarmotorizada.
lesiones personales gravesJ
extensi6n en una herramienta
|
Instalar el Accesorio o la
Extensibn
Oriflcio primario
_1
_
/ / Acopide
dor
\
//
/_
/
/
Tapa para
transporte
"_/_Asa
_(_
//
/ /
/
//
/ /_
/
/
,
_
para ___r/(_
colgar _/
(_
1.
CcCr
aftrStTb_nT
M
Srazo de extension
/
/
//
/_
Tornillo o_
orni o par_
ajuste de /
tension
2.
Tornillo de
ajuste de aceite
A la vez que sostiene
firmemente el accesorio,
empOjelo derecho hacia
el interior del acoplador
Convertible TM hasta que
el bot6n de desconexi6n
encaje s61idamente en el
orificio principal (Fig. 2).
NOTA: La alineaci6n del
bot6n de
desconexi6n con la
gu[a ayuda en la
instalaci6n (Fig. 1).
......
- \ _
..
lanque ael aceite
4.
irreparables a la unidad. AsegQrese de que el tanque de aceite
I este
PELIGRO:
No Ilenar el tanque de aceite ocasionara dahoe
siempre Ileno
5.
2. Quite la tapa del tanque de aceite.
3. Abra la botella de aceite que se proporciona con la unidad.
4. Vierta aceite en el tanque hasta que este Ileno
NOTA: El tanque de aceite se puede Ilenar hasta el borde de la
abertura de Ilenado sin da_ar la unidad.
A
El aceite fluye constantemente del tanque
delcOnstantementetanque,
para que no desc enda por debajo de a m tad
EL ACCESORIO
J ADVERTENCIA:
operador de los accesorios
Lea Y oomprenda
antes de sueloperaci6n.
manual eel
N
Cubierta inferior
del eje
Fig. 2
Bot6n
Fig. 3
Repita los pasos 1-4 para los siguientes accesorios o de la
extensi6n.
con el sistema EZ-Link TM deben ser usados en el orificio
primario a menos que se indique Io contrario en el manual
operador del accesorio.
El usar
orificio
I del
PRECAUCI(3N"
El accesorio
de el
corte
y losincorrecto
accesorios
puede conducir a lesiones personales o daSo de la unidad.
El accesorio debera instalarse con el bot6n de desconexi6n en el
orificio primario.
Inspeccione el acoplamiento
del eje acodado antes de usar la
unidad
I ADVERTENCIA"
INSTALAR/QUlTAR
_'_
I primario
PRECAUCION:
y ajuste bien laTrabe
perilla
elantes
bet6nde
deoperar
descenexbn
esta unidad.
en el erificio I
_ll_
de aceite para lubricar la cadena. Revise el nivel de aceite
A
_.j_-..
_------------_
Cubierta superior
del eje
Apriete el bot6n girandolo
hacia la derecha (Fig. 3).
A
Siga los pasos siguientes para Ilenar el tanque de aceite:
1. Coloque la unidad en una superficie plana.
\
\
Apriete el bot6n girandolo _ __
haoia la dereoha (Fig. 3). __=::i_--_
3.
COMO LLENAR EL TANQUE DE ACEITE
_i_
Quite el colgador o el tapa
para transporte de encima _
de la oubierta del eje.
_L._i_3
I
El accesorio se puede montar en diferentes herramientas motorizadas.
Los manuales de instrucci6n para la herramienta motorizada basica y los
accesorios contienen la informaci6n necesaria para la operaci6n de la
combinaci6n de herramientas motorizadas. Per Io tanto, lea siempre
AMBOS manuales de instrucci6n antes de usar la herramienta
motorizada per primera vez. Guarde los manuales en un lugar seguro
para consultas futuras.
NOTA: Para facilitar la instalaci6n o remoci6n de los accesorios,
ponga la unidad sobre el suelo o sobre un banco de trabajo.
1.
2.
3.
Arranque la unidad.
Enganche y suelte el gatillo brevemente.
Verifique que el accesorio este funcionando.
4.
Si el accesorio no esta funcionando, retire el accesorio y repita
los pasos para su instalaci6n.
Vuelva a verificar el funcionamiento del accesorio.
5.
E5
PRECAUCIONES
DECORTE
I_
1.
de 3 metros (10 pies) de cualquier cable electrico (Fig. 6).
INSTRUCClONES
DE ARRANQUE
el riesgo de lesiones cuando opere esta unidad. No use
ropa holgada ni alhajas. Use protecci6n ocular y auditiva.
Use
pantalones largosVista
y gruesos,
y guantes.
use
DVERTENCIA:
en formabotas
adecuada
para No
reducir
pantalones cortos, sandalias ni trabaje descalzo.
_1
Mantenga a espectadores 15 metros (50 pies) lejos cuando
este operando la herramienta.
Arranque y opere su sierra de pertiga sin ayuda. Para conocer instrucciones
precisas para el arranque, yea la seccion adecuada de su manual del motor.
Los metodos de arranque adecuados reducen el riesgo de lesiones.
1. Coloque la sierra de pertiga en tierra firme u otra superficie
s61ida en un Area abierta.
telescopica para
derrumbar arboles. Use
para esto la motosierra
sin el aditamento
telescopico.
2.
3.
5.
4.
6.
2. Mantenga buen equilibrio y los pies firmes en el suelo.
SUGERENCIAS DE OPERACION
No use la motosierra
AsegQrese
de que el
tanque de aceite este
Ileno y de que el aceite
este lubricando la cadena
antes de arrancar.
_
de pertiga / recortador -una mano en el agarre, la
otra en la manija.
Mantenga su dedo lejos
del gatillo interruptor
Agarre
hasta estar
firmemente
listo para
la sierra
hacer el corte.
Antes de encender su
motosierra telescopica,
aseg-urese que la cadena
de corte no esta tocando
nada.
,_
ADVERTENClA"
El contragolpe puede ocurrir cuando la
nariz o la punta de la barra guia toca un objeto, o cuando la
madera se cierra y pellizca la sierra de cadena cuando esta
cortando. Si la punta de la barra hace contacto, puede causar un
a reaccion reversiva relampago, pateando la barra gufa hacia
arriba y atras en direccion del operado. Pellizcando la sierra de
cadena a Io largo de la barra guia pude empujar la barra
rapidamente hacia arrasen direcci6n el operador. Cualquiera de
estas reacciones puede causar que usted pierda el control de la
sierra, Io cual puede resultar en serias lesiones personales.
No dependa exclusivamente de los dispositivos de seguridad
integrados en su sierra. Como usuario de sierra de cadena, usted
debe dar varios pasos para queen sus trabajos de corte no
ocurran accidentes ni lesiones.
)
Fig.
!_# ._._..._._
"
_
)
Evite el efecto de reculado. Este efecto de reculado pudiera
causar graves lesiones o la muerte.
• No opere la unidad mientras este sobre un arbol, en una escalera
o cualquier otra superficie inestable, o en una posicion incomoda.
Pudiera perder el control de la unidad causando graves lesiones.
• No extienda sus brazos mas alia de sus hombros cuando use la unidad.
• Solicite ayuda profesional si ve que el trabajo que necesita hacer
esta fuera de sus posibilidades.
• Podar un arbol es el proceso de cortar las ramas de un arbol vivo.
Asegurese que esta bien parado. Mantenga sus pies separados,
Divida su peso en los dos pies.
• Antes de arrancar la unidad, revise siempre la lubricaci6n de la
cadena y el nivel del tanque de aceite.
NOTA: La cadena debe estar cubierta continuamente con aceite
para que funcione correctamente. AsegQrese de que el
tornillo de ajuste de aceite este ajustado correctamente.
Para cortar una rama (podar):
Fig.
7.
Mantenga todas las
partes del cuerpo
alejadas de la cadena de
corte cuando su
motosierra este en
funcionamiento.
8. No force la motosierra
cuando este cortando.
Fig. 6
Aplique una presion lijera. Hara el trabajo mejor y mas seguro.
9. Cuando este cortando ramas que se encuentren bajo tension, use
extrema precaucion. Este alerta a el resorteo de las ramas. Cuando
la rama se libere, esta pudiera regresarse intempestivamente y
golpear al operador causandole severas lesiones o hasta la muerte.
10. Cuando transporte la motosierra telescopica de un lugar aotro:
• mantenga el tubo en posicion balanceada cerca de la unidad de poder
• mantenga la barra guia y la cadena hacia atras
ADVERTENCIA"
Si se acaba el aceite en el tanque, elorificio
del tornillo de ajuste de aceite queda obstruido, o lacadena no
recibe lubricacion adecuada por algOnmotivo, la cadena se
recalentaray ocasionara daSos irreversibles a la unidad y pudiera
ocasionar lesiones graves. El calor excesivo debido a la friccion
puede ocasionar una falla catastrofica de la cadenay hacer que se
salga de la barra mientras estA funcionando.
11. No corte maleza o arbustos con la motosierra telescopic& Las
ramas delgadas de la maleza o arbustos pudieran enrredarse en la
unidad de corte y pudieran regresarse intempestivamente hacia
usted causandole lesiones o la posibilidad de que pierda el balance.
12. Nunca se pare directamente por debajo de la rama que esta
podando. Siempre posicionese fuera de la trayectoria de caida
de dichas ramas (Fig. 4).
13. Nunca se pare en una escalera o otro tipo de soporte inestable
cuando utilice la motosierra telescopica.
1.
2.
14. Siempre use ambas manos al operar su motosierra telescopica.
Mantenga una presion firme y constante en la motosierra
telescopica mientras este cortando pero no trate de forzar la
sierra a traves de la madera.
I,_
lesiones por quemaduras, arranque al motor al menos a 30
pies (9.1 metros) del sitio de aprovisionamiento de
ADVERTENCIA"
Para disminuir
el riesgo de incendio y
combustible, en exteriores
solamente.
3.
ramas
de mas de 10 cm
(4 pulg.)
de diametro.
DVERTENCIA"
NO use
la sierra
de poste para cortar
15. Mantenga alas otras personas alejadas de la zona de corte y
de la motosierra telescopica (Fig. 5).
16. No utilice su motosierra telescopica cerca de cables, cables
electricos, o lineas telefonicas. Mantenga una minima distancia
4.
E6
Hacer el primer corte a unas 6 pulgadas de el tronco por
debajo de la rama. Use la parte superior de la barra para hacer
este corte. Corte 1/3 de diametro de la rama (Fig 7).
Mueva dos o cuatro pulgadas fuera de la rama. Hacer un
segundo corte desde ariiba de la rama. Continue el corte hasta
terminar de cortar la rama. Corte 15.2cm
Corte 2
Hacer el tercer corte Io
mas cercano a, tronco, y,
lateralmente a a la
4\
(6 in)_r______
,_4_
_[_€.__
superior para
rama.Use
la parte
hacer este
I' J_
\5_.1-1:. 2 cm (2-4 in)
corte. Corte t/3 dentro
¢_/J
torte 1
del diametro dela rama.
Corte
Hacer el cuarto corte
3
directament sobretercer
\ I
corte. Corte hacia abajo
Fig. 7
para Ilegar al tercer corte. Esto removera la rama.
CADENA
INSTALACION
I_
DE REMPLAZO
para protegerse contra los eslabones de cortado filosos
DVERTENCIA"
Utilice
guantes de trabajo pesado
cuando
maneje la sierra
de cadena.
I
Asta vie cadena y barra son articulos gastables, no cubrieron por la
garantia del producto. Cadena del reemplazo o la barra estan disponibles
para la compra per pares de Quemaduras y reparan.
1. Valiendose de un destornillador de ranura recta, gire el tornillo de
ajuste de tension en sentido
Cubierta del
antihorario (Fig. 8, B) tan
[]
_engrane
lejos como Ilegue o hasta el
final de su recorrido,
despues saque la cadena y
retire la barra.
2,
Usando un destornillador
de cabeza plan& gire el
tornillo de ajuste de
de barra
tensi6n 4 vueltas hacia la ajuste de tension
Fig. 8
izquierda (Fig. 8, A).
3,
Quite la cadena y la barra.
4.
Prepare la cadena y/o barra
nueva, e instale la cadena
en la ranura de la barra.
5.
4,
Manteniendo la nariz en posicion hacia arriba, apriete bienl a
tuerca de la barra.
LUBRICACION DE LA CADENA
La cadena de la sierra de poste se lubrica automaticamente. El
aceite se riega per la cadena a medida que se usa la unidad.
Mantenga una cantidad adecuada de aceite en el tanque de aceite.
Use el aceite de cadena-barra que se proporciona en el paquete de
ferreterfa. Use siempre el aceite de cadena-barra y pi_6n o un
aceite similar de sierra de cadena.
O6mo ajustar el tornillo de ajuste de aceite
El tornillo de ajuste de aceite
._
Tornillode ajuste
esta ubicado en la parte
_de
aceite
superior del conjunto de la
caja de engranajes (Fig. 12),
1, Inserte una Ilave Allen de
3/32 de pulgada en el
tornillo de ajuste de
aceite,
Enlacela cadena dela
sierra sobre el pi_6n de
mando con los berries
cortantes de la cadena
apuntando en la direcci6n
de rotaci6n (Fig. 9).
Fig. 9
Ajuste el tornillo de ajuste
de tensi6n (Fig. 8, A) para
permitir la inserci6n de la
barra (Fig. 10). Cerci6rese
de que la cadena sigue la
ranura en la barra de gufa
y ajuste el tornillo de
ajuste de tensi6n para
apretar la cadena.
7.
Instale la cubierta del
pi_6n y apriete las
Fig. 10
tuercas y el tornillo para fijar la barra (Fig. 8, B).
AJUSTE DE LA TENSION DE LA OADENA DE LA SIERRA
6.
2,
Gire el tornillo hacia la
engranajes
izquierda (en sentido
Fig. 12
antihorario) para
aumentar el flujo de aceite hacia la cadena.
Gire el tornillo hacia la derecha (en sentido horario) para
restringir el flujo de aceite hacia la cadena.
ADVERTENCIA:
Si se acaba el aceite en el tanque, el orificio
del tornillo de ajuste de aceite queda obstruido, o la cadena no
recibe lubricacion adecuada por algOnmotivo, lacadena se
recalentara y ocasionara da_os irreversibles a la unidad y pudiera
ocasionar lesionesgraves. El calor excesivo debido a la fricci6n
puede ocasionar una falla catastr6fica de la cadena y hacer que se
salga de la barra mientras esta funcionando.
Una tensi6n propia de la cadena de la sierra es extremadamente
importante y debe de set revisada antes de arrancar la sierra, al igual
que durante cualquier operaci6n de cortado. El tomar tiempo para
hacer los ajustes necesarios para la sierra de cadena resultara en un
mejor rendimiento y una vida prolongada para su sierra de cadena.
NOTA: Una cadena y barra nueva requeriran un reajuste despues de por
Io menos 5 cortes. Esto es normal dentro del periodo de
acondicionamiento, y el intervalo dentro de los proximos ajustes
se alagara pronto (Fig. 11).
'_l
Girando el tornillo en contra de las manecillas del reloj afloja la cadena
de la barra guia.
3, Despues del ajuste y usando guantes gruesos, mueva la cadena de
corte hacia atras y hacia adelante para asegurarse que lacadena se
mueve libremente y esta colocada correctamente en el engrane. No
mueva cadena con manos descubiertas.
NOTA: Si la cadena muestra dificultad de movimiento, significa
que demasiada tension se le ha dado a la cadena y debera
de ser reajustada. Para reducir tension, gire el tornillo de
ajuste contra las manecillas el reloj lentamente. Mueva la
cadena hacia atras y hacia adelante hasta que se mueva
libremente.
MANTENIMIENTO
DE LA BARRA GUIA
apagada y que la bujfa este desconectada (de gasolina)
ADVERTENCIA:
Cerci6rese alguno
de que de
la unidad
este
antes
de realizar mantenimiento
su sierra.
NOTA:
Un propio mantenimiento de la barra guia, como se explica
en esta secci6n, es esencial para mantener su sierra en
buenas condiciones de servicio.
La mayoria de los problemas de la barra gufa puede set prevenidos
simplemente conservando la sierra de cadena bien mantenida. Un
Ilenado incorrecto y unos eslabones de cortado y ajuste en la
medida de profundidad no uniformes son la causa de la mayoria de
los problemas de la barra guia, resultando primeramente en un
desgaste desproporcionado de la barra. AI tiempo que le barra se
desgasta desproporcionalmente,
los rieles se agrandan, Io cual
puede causar estruendo en la cadena y difficultad al hacer cortes
derechos. Una insuficiente lubricaci6n de la barra guia y operaci6n
de la sierra con la cadena demasiado apretada contribuira a un
desgaste rapido de la barra. Vea la secci6n Ajuste de la Tension de
la Cadena de la Sierra. Para ayudar a minimizar el desgaste de la
barra, los siguientes procedimientos de mantenimiento para la barra
guia son recomendados.
Desgaste de la Barra
De vuelta a la barra gufa frecuentemente a intervalos regulares (per
ejemplo, despues de cada 5 horas de uso), para aseguararse de un
desgaste parejo en la parte superior e inferior de la barra.
muy APRETADA,la barra, cadena y los rodamientos del cigue_al
se desgastaran mas rapidamente. Estudie la Figura 11 para
informacion respecto a la tension ffia correcta (A),tensi6n caliente
correcta
(B), y como una
gufa
para cuando
la cadena
la sierra
PRECAUCION"
Si la
cadena
se encuentra
muy de
SUELTA
o
requiera algOnajL_ste(C).
Para ajustar tension de la cadena de corte:
1. Aflojelastuercas
retenedoras de la barra de
tal forma que esten
apretadas a mane (Fig. 8, B).
2.
Manteniendola narizdela
brra hacia arriba, utilice el
desarmador para girar el
tornillo de ajuste de la barra
guia a favor de las
manecillas del reloj para
Fig. 11
apretar la cadena (Fig. 8, A).
E7
Ranuras
delaBarra
Lasranuras de la barra
(o
rieles que soportan y
conducen la cadena) deberan
ser limpiados si la sierra ha
sido utilizado para servicio
pesado o si la sierra
manifiesta suciedad. Los
rieles deben de ser limpiados
cada vez que la cadena de la
sierra es removida.
TENSION
DE LA SIERRA
Revise la tensi6n frecuentemente y ajustela tan pronto como se
necesite para mantener la cadena ajustada a la barra, pero Io
suficientemente suelta para ser jalada con la mano. Vea la secci6n
Ajuste de la Tension de la Cadena de la Sierra
Acondicionamiento
en una Cadena para Sierra Nueva
Una barra y cadena nueva requeriran un reajuste despues de tan
pocos como 5 cortes. Esto es normal dentro del periodo de
acondicionamiento,
y los intervalos dentro de los pr6ximos ajustes
se alagaran rapidamente. Sobre un periodo de tiempo, de cualquier
manera, las partes movibles de la sierra se gastaran, dando como
resultado Io que es Ilamado alargmiento de la cadena. Esto es
normal. Cuando es ya no posible obtener el ajuste correcto de la
tensi6n de cadena, es recomendado para comprar una cadena del
reemplazo en Sears u otro comerciante calificado del servicio tiene
esta reparaci6n realizada.
LIMPIEZA Y ALMACENAMIENTO
Fig. 13
Para limpiar los rieles de la barra:
1. Remueva la cubierta del pi_6n, la barra y cadena. Vea la
Secci6n Ajuste de la Tension de la Cadena de la Sierra.
Utilizando un desarmador, navaja, cepillo de alambre o
cualquier otro instrumento similar, limpie residous de los rieles
de la barra guia. Esto mantendra los pasajes abiertos para
proveer una lubricaci6n adecuada a la barra y cadena (Fig. 13).
3,
AsegQrese de que la rueda dentada en la barra gire libremente
durante la limpieza.
NOTA: Se deben limpiar los conductos de aceite en la almohadilla
de la barra para
garantizar que la
barra y la cadena se
lubriquen de manera
adecuada durante el
funcionamiento.
Esto
debe hacerse
mientras se saca la
barra para limpiarse.
En la almohadilla de la
Fig. 14
barra, utilice un alambre
blando Io suficientemente pequeho para insertarlo en el orificio de
descarga de aceite y limpiar el aserrfn y la suciedad. (Fig. 14)
5.
Reinstale la barra, cadena y las tuercas retenedoras de la barra.
Vea la secci6n Ajuste de la Tension de la Cadena de la Sierra.
MANTENIMIENTO
DE LA CADENA
I ADVERTENCIA:
Nunca tenga mas de 3 eslabones
removidos del hare de la sierra. Esto puede causar daSo al pi_6n.
I
• Afloje la cadena si la ha tensionado a la temperatura de operaci6n
durante el trabajo de corte.
• La cadena se contrae a medida que se enfrfa. Si no se afloja,
pudiera daSar la caja de engranajes y los cojinetes.
Cbmo almacenar la maquina durante un periodo corto
Espere que el motor se enfrie. Drene el tanque de combustible y
almacene la maquina en un lugar seco alejada de fuentes de
ignici6n hasta que la necesite de nuevo.
• Coloque el protector para transporte en la barra/cadena antes de
almacenar la unidad.
• Almacene la unidad en un lugar seco, alto y/o cerrado, lejos del
alcance de niSos y otras personas no autorizadas.
Almacenamiento a largo plazo
• Quite la cadena y la barra de guia de la sierra, limpielas y rocfelas
con aceite para evitar la corrosi6n.
• Coloque el protector para transporte en la barra/cadena antes de
almacenar la unidad.
ADVERTENCIA"
,_
A menos de que usted tenga experiencia
y entrenamiento especializado para tratar con el contragolpe
(vea las Precaucions de Seguridad), siempre utlice una cadena
para sierra de contragolpe bajo, la cual reduce
significativamente el peligro de un contragolpe. Una cadena de
contragolpe bajo o "cadena de precaucion" nunca debera ser
referida come protecci6n total contra una lesi6n.
Peso de la unidad ($61o el accesorio) ...........
Longitud del Eje Conductor ..................
Anchura de Corte .........................
Utilice siempre una cadena de sierra de repuesto dise_ada con la
caracteristica de "bajo contragolpe" o una cadena de sierra que
cumpla con los requisitos de rendimiento de bajo conttragolpe Una
cadena de sierra estandar (una cadena que no tenga los eslabones
del protector contragolpes) solamente debera ser usada por un
operador profesional experimentado en sierras de cadenas.
Oadena de Oontragolpe Bajo
Una cadena de contragolpe bajo es una cadena la cual ha cumplido
los requerimientos de rendimiento del contragolpe de la ANSI
B175.1. No utilice una cadena de repuesto diferente a menos que
Ilene estos requisites para su modelo particular. Mediante el
mantenimiento della cadena de la sierra en buenas condicions de
trabajo y dandole servicio correctamente come se recomienda en
este manual, usted podra mantener el sistema de precauci6n de su
sierra mas alia de la vida del producto.
1,5 kg (3,3 Ibs.)
66 cm (26 pulg)
20.3 cm (8 pulg)
* Toda las especificaciones contenidas en este manual se basan en
la informaci6n mas reciente disponible en el momento de impresi6n
del manual. Nos reservamos el derecho de hacer cambios en
cualquier momento sin aviso previo.
ADVERTENCIA:
Nunca desmonte, modifique ni desactive
ningOndispositivo de seguridad que se incluya junto con su
unidad. La sierra de cadena de "bajo contragolpe" es un
indispensable dispositivo de seguridad destinado a su protecci6n.
ADVERTENCIA:
Cerci6rese de que la unidad este
apagada y que la bujia este desconectada (de gasolina)
antes de realizar mantenimiento alguno de su sierra. Use
tambien guantes de trabajo.
E8
.NECESITA MAS AYUDA?
......
Er_cont_ara
_
°
:_"
',
......
,
Is. r@_pue$t_a _/..mucho
"
'_e
_
'
_
ma., e_ ma_agemyhOmeoCOm
°
_ grat_s_
° Obtenga respuestas de nuestros expertos en productos para el hogar.
° Redba un plan de mantenimiento
personalizado
para su hogar.
° Encuentre la ]nformad6n y [as herramientas que [e ayudar_n en sus proyectos para su hogar.
°
":"
.o.o.
Se...
',,.
J
Eg
EIO
REPLACEMENT
POLE
PARTS
- MODEL
316.792460
SAW ATTACHMENT
Item
1
Part No.
753-04352
Description
Extension Boom
2
3
4
753-1190
791-182057
791-181617
Split Boom Coupler (includes 3-6)
Screw
Bolt
5
6
7
8
9
791-181981
753-04386
753-05724
791-181166
791-180288
Adjustment Knob
Knob Retaining Nut
Drive Shaft Housing (includes 8)
Flexible Drive Shaft
Screw
10
11
12
13
14
15
16
17
18
753-05586
753-05587
753-05274
753-05588
753-05589
753-05591
753-05765
753-05592
753-05594
Oil Tank Assembly
Oil Cap Assembly
Screw
Oil Line
Screw
Nut
Chain Guard
Chain
Bar
19
20
753-05595
753-05596
Sprocket Assembly
Bolt
21
22
753-05597
753-05598
Chain Tension Hardware Assembly
Chain Cover
23
753-05599
Gearbox Assembly (includes 14 & 19)
Not Shown
791-612605 Hanger
Ell
Your Home
For expert troubleshooting
and home solutions
anage
o
advice:
e
www.managemyhome.com
For repair - in your home - of all major brand appliances,
lawn and garden equipment, or heating and cooling systems,
no matter who made it, no matter who sold it!
For the replacement parts, accesspries and
owner's manuals that you need to do-it-yourself.
For Sears professional installation of home appliances
and items like garage door openers and water heaters.
1-800-4- MY-HOM E®
Call anytime,
(1-800-469-4663)
day or night (U.S.A. and Canada)
www.sears.com
www.sears.ca
Our Home
For repair of carry-in items like vacuums, lawn equipment,
and electronics, call anytime for the location of your nearest
Sears Parts & Repair Service
1-800-488-1222
(U.S.A.)
www.sears.com
To purchase
a protection
1-800-827-6655
Para pedir servicio
a domicilio,
1-800-SU-
1-800-469-4663
on a product
(U.S.A.)
1-800-361-6665
piezas:
Au Canada
serviced by Sears:
(Canada)
pour service en fran(_ais:
1-800-LE-FOYER
HOGAR ®
(1-888-784-6427)
(Canada)
www.sears.ca
agreement
de reparacion
y para ordenar
Center
Sealrs
® Registered Trademark / TMTrademark / SMService Mark of Sears Brands, LLC
® Marca Registrada / TMMarca de F_.brica / SMMarca de Servicio de Sears Brands, LLC
McMarque de commerce / MDMarque d6pos_e de Sears Brands, LLC
Mc
(1-800-533-6937)
www.sears.ca
© Sears Brands, LLC
This document in other languages
- español: MTD 41AJPS-C799


