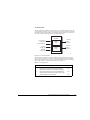
1
DAC700
Digital Audio Codec/Multiplexer
Subsystem
Installation and Operation Guide
Notice
This publication and its contents are proprietary to ComStream Corporation (ComStream) and are
intended solely for the contractual use of its customers for no other purpose than to install and operate the
equipment described herein. This publication and its contents shall not be used or distributed for any
other purpose and/or otherwise communicated, disclosed, or reproduced in any way whatsoever, without
the prior written consent of ComStream.
For the proper installation and operation of this equipment and/or all parts thereof, the instructions in this
guide must be strictly and explicitly followed by experienced personnel. All of the contents of this guide
must be fully read and understood prior to installing or operating any of the equipment or parts thereof.
FAILURE TO COMPLETELY READ AND FULLY UNDERSTAND AND FOLLOW ALL OF
THE CONTENTS OF THIS GUIDE PRIOR TO INSTALLING AND/OR OPERATING THIS
EQUIPMENT, OR PARTS THEREOF, MAY RESULT IN DAMAGE TO THE EQUIPMENT, OR
PARTS THEREOF, AND TO ANY PERSONS INSTALLING AND/OR OPERATING THE
SAME.
ComStream does not assume any liability arising out of the application or use of any products, component
parts, circuits, software, or firmware described herein. ComStream further does not convey any license
under its patent, trademark, copyright, or common-law rights nor the similar rights of others. ComStream
further reserves the right to make any changes in any products, or parts thereof, described herein without
notice.
© Copyright 1998 ComStream Corporation
This digital audio receiver is manufactured by ComStream Corporation. It incorporates Musicam
compression technology under license from Corporate Computer Systems, Inc. as outlined in the
copyright notice below.
This Musicam digital audio product is manufactured under license from Corporate Computer Systems,
Inc. This product contains one or more programs protected under International and U.S. copyright laws as
unpublished works. They are confidential and proprietary to Corporate Computer Systems, Inc. They may
not be, in whole or in part, reproduced, decompiled, reverse engineered, analyzed, copied, translated, or
used to create derivative works. Copyright 1992, 1993, 1994, 1995 by Corporate Computer Systems, Inc.
All rights reserved. Musicam is a registered trademark of Corporate Computer Systems, Inc.
This equipment has been tested and found to comply with the limits for a Class A digital device, pursuant
to Part 15 of the FCC Rules. These limits are designed to provide reasonable protection against harmful
interference when the equipment is operated in a commercial environment. This equipment generates,
uses, and radiates radio frequency energy and, if not installed and used in accordance with the instruction
guide, may cause harmful interference to radio communications. Operation of this equipment in a
residential area is likely to cause harmful interference, in which case the user will be required to correct
the interference at his or her own expense.
Warning! Shock Hazard!
Do Not Open The Equipment! Service Only By ComStream!
Gefährliche Spannung!
Öffnen des Gerätes und Service nur durch ComStream!
The DAC700 Codec/Multiplexer contains no user-serviceable parts. Do not attempt to service this
product yourself. Any attempt to do so will negate any and all warranties.
This symbol is intended to alert the user to the presence of important operating and maintenance
(servicing) instructions in the literature accompanying the appliance.
ii
Notice
Contents
Preface
Using this Guide ix
Conventions Used in this Guide ix
Warranty Statement xi
Return Procedure xii
Revision History xiii
Customer Support xiii
Safety Precautions xiv
Chapter 1
Overview
Introduction 1-1
Satellite Digital Audio Distribution Network Overview 1-2
DAC700 Features 1-4
Chapter 2
Functional Description and Theory of Operation
Overview 2-1
DAC700 Chassis 2-2
Front Panel Indicators 2-3
Transmission Channel Signal Format 2-4
Proper Signal Discrimination of Narrow Band RF Signals 2-5
DAC700 Major Functional Modules 2-7
Audio Input Interfaces 2-9
Audio Output Interfaces 2-10
Broadcast Data Interface 2-10
Data Interfaces 2-11
Monitor and Control Interface 2-14
Relay/Control Interface 2-14
Audio/Data Encoder 2-15
Data Multiplexer 2-16
Audio/Data Decoder 2-16
Unit Controller 2-16
Clock Generator 2-17
Power Module 2-20
Sources for Decoder Input 2-20
LB 0 – External Baseband Input Operation 2-20
LB 1 – PCM Loopback Operation 2-21
LB 2 – Normal Operation 2-22
Contents
iii
Chapter 2.1
iv
ISO/MPEG Layer II/IIA Functional Description
Overview 2.1-1
Compression Concepts 2.1-1
Performance Considerations 2.1-3
Chapter 3
Installation and Initial Startup
Overview 3-1
Site Planning and Preparation 3-1
Location Requirements 3-2
Mounting the DAC700 3-2
External Connections 3-2
Analog Output 3-3
Analog Input 3-3
AUX/AES 3-3
Broadcast Data 3-4
User Data 3-4
M&C 3-4
Relay/Control 3-5
Initial Power-Up 3-5
Installation Check 3-5
Firmware Version 3-7
Initial Configuration 3-7
Audio Bandwidth Configuration 3-7
User Data Configuration 3-8
Passthrough Mode Configuration 3-9
Encoder/Decoder Ancillary Data Rate Configuration 3-9
User Relay Configuration 3-10
Network and Channel Definitions 3-11
Timing Source Configuration 3-11
Chapter 4
Remote Monitor and Control Operation
Overview 4-1
Command Syntax 4-1
Command Error Codes 4-2
Command Summary 4-2
Detailed Command Descriptions 4-4
Contents
Chapter 5
ComStream Packet Protocol
Overview 5-1
Packet Protocol Interface 5-1
Packet Protocol Messaging 5-1
Packet Format and Content 5-2
ComStream Packet Protocol Address Selection 5-3
Extended Addressing 5-4
Packet Protocol Command Structure 5-4
Status Query Commands 5-5
Controller Packet Command Example 5-5
ComStream Packet Protocol Communications Modes 5-6
Special Packet Control Commands 5-7
ComStream Packet Protocol Specifications 5-7
Chapter 6
Maintenance and Troubleshooting
Overview 6-1
Maintenance 6-1
Cleaning the DAC700 6-1
Performance Monitoring and Maintenance Commands 6-2
Fault Condition Descriptions 6-4
Status/Fault Indicator Lights 6-4
Overload Indicator 6-4
Fault Indicator 6-5
Power Indicator 6-5
Connectors and Cables 6-5
General Troubleshooting 6-6
Unit Troubleshooting 6-7
Appendix A
Technical Specifications and Port Information
Audio Performance A-1
Available Audio Rates and Bandwidths A-2
Diagnostics A-3
Rear Panel Ports A-3
Rear Panel Port Mapping A-3
Analog Input Port A-3
Analog Output Port A-3
AUX/AES Port A-3
Broadcast Data Port A-4
User Data Port A-4
Passthrough Port A-4
Contents
v
Relay/Control Port A-4
M&C Port A-4
Front Panel LED Status A-5
Mechanical (IDU) A-5
Power A-5
Environmental A-5
Appendix B
Glossary
Index
vi
Contents
Interface Pinouts
Analog Output Port J1 B-1
Analog Input Port J2 B-2
AUX/AES Port J3 B-3
Broadcast Data Port J4 B-4
User Data Port J5 B-5
M&C Port J6 B-6
Relay/Control Port J7 B-7
Figures
Figure 1-1
Figure 1-2
Figure 1-3
Figure 2-1
Figure 2-2
Figure 2-3
Figure 2-4
Figure 2-5
Figure 2-6
Figure 2-7
Figure 2-8
Figure 2-9
Figure 2-10
Figure 2-11
Figure 2-12
Figure 2-13
Figure 2-14
Figure 2-15
Figure 2-16
Figure 2-17
Figure 2-18
Figure 2-19
Figure 2-20
Figure 3-1
Figure 5-1
Figure B-1
Figure B-2
Figure B-3
Figure B-4
Figure B-5
Figure B-6
Figure B-7
Single-Channel-to-Multipoint Audio/Data Satellite Network 1-2
Multichannel-to-Multipoint Audio/Data Satellite Network 1-3
DAC700 Audio Codec/Mux Unit 1-4
DAC700 Front Panel 2-2
DAC700 Rear Panel 2-2
DAC700 Front Panel Indicators 2-3
Multichannel Single Transponder System 2-4
DAC700 Channel Format 2-5
DAC700 Functional Block Diagram 2-8
Audio Input Interfaces 2-9
Audio Output Interfaces 2-10
User Data Processing 2-12
Data Passthrough Processing 2-13
Monitor and Control Processing 2-14
Contact Mapping Diagram 2-15
Clock Generator 2-17
TxCLK Internal Timing (PLL) 2-18
Send Timing 2-18
Receive Timing 2-19
AES/EBU Timing Input 2-19
ISO/MPEG Layer II/IIA Codec DAC700 Block Diagram
for LB 0 2-20
ISO/MPEG Layer II/IIA Codec DAC700 Block Diagram
for LB 1 2-21
ISO/MPEG Layer II/IIA Codec DAC700 Block Diagram
for LB 2 2-22
DAC700 Rear Panel Connectors 3-3
Packet Format 5-2
DB-9 Male Connector B-1
DB-9 Female Connector B-2
DB-15 Female Connector B-3
DB-15 Female RS-422 Connector B-4
DB-9 Female RS-232 Connector B-5
DB-9 Female RS-232 or RS-485 Connector B-6
DB-37 Female Connector B-7
Contents
vii
Tables
Table 2-1
Table 2-2
Table 2.1-1
Table 2.1-2
Table 3-1
Table 4-1
Table 4-2
Table 4-3
Table 5-1
Table 5-2
Table 6-1
Table 6-2
Table 6-3
Table A-1
Table A-2
Table A-3
Table B-1
Table B-2
Table B-3
Table B-4
Table B-5
Table B-6
Table B-7
viii
Contents
Channel Identifier and Frequency Allocation Combinations 2-6
Timing Source 2-17
Quality Grades and Bit Rates 2.1-4
Bit Rate and Encode-Decode Cycles 2.1-6
Installation Sequence 3-1
Error Codes and Descriptions 4-2
DAC700 Command Summary 4-2
Factory Default Settings 4-28
Packet Protocol EM Query Command 5-6
RS-485 Device Pinout Specifications 5-7
Key Performance Montoring and Maintenance Commands 6-2
Fault Conditions 6-4
DAC700 Unit Troubleshooting 6-7
Available Audio Rates and Bandwidths A-2
Rear Panel Port Mapping A-3
LED Descriptions A-5
DB-9 Male Connector Pinouts B-1
DB-9 Female Connector Pinouts B-2
DB-15 Female Connector Pinouts B-3
DB-15 Female RS-422 Connector Pinouts B-4
DB-9 Female RS-232 Connector Pinouts B-5
DB-9 Female RS-232 or RS-485 Connector Pinouts B-6
DB-37 Female Connector Pinouts B-7
Preface
Using this Guide
Welcome to the ComStream world of satellite-based communication systems and
networks. This guide is your sourcebook for using the ComStream DAC700
Codec/Multiplexer. It describes the installation, operation, and performance
specifications of this product.
The chapters in this guide provide step-by-step instructions for a variety of tasks
and activities, including unpacking, setting up, mounting, and operating the
DAC700 Codec/Multiplexer. The chapters also provide an overview of system
operations, as well as technical specifications and troubleshooting procedures.
Conventions Used
in this Guide
This guide is designed to help you find and use information quickly and easily. To
take full advantage of this design, please take a moment to review the specific
formats.
Locating Information
There are several tools located in this guide to help you quickly locate
information. The table of contents, located at the beginning, provides you with an
outline of the chapters and major topics contained within them. A detailed
description of each chapter is contained in the next section, titled Organization.
The glossary and index are located at the end of this guide. The glossary contains
technical terms and system commands for easy reference. The Index can be used
to help you quickly locate information.
Important Information
Throughout this guide you will find three icons designed to help you identify
important information. These symbols are:
The note icon identifies information for the proper operation of your equipment,
including helpful hints, shortcuts, or important reminders.
The caution icon identifies information that requires careful attention in order to
prevent equipment damage and/or injury to the operator.
The troubleshooting icon identifies information that will assist you in solving
malfunctions in your equipment.
Illustrations
Some illustrations contained in this guide may differ slightly from those shown on
your front panel display or computer console due to variations in your system
setup, configuration, or customization.
Preface
ix
Keyboard Entries
Each activity or task is presented in a series of numbered, step-by-step instructions.
Commands or information that you type into the system appear in a different, bold
type:
Type ST ? and press Enter.
Keys that are pressed in combination appear with a plus sign (+). For example:
Ctrl+Shift+3
You hold down the Control and Shift keys and press the number 3.
Mouse Actions
You may be using a mouse to interact with your system. The conventions used in this
guide are:
x
Preface
Click
Click the left mouse button
Double-click
Click the left mouse button twice in rapid succession
Drag
Click and hold the left mouse button, then move the selected
object with the mouse
Warranty Statement
ComStream warrants that its products are free from defects in material and
workmanship at the time of shipment and that they conform to applicable
specifications. In no event will ComStream be liable for consequential misuse or
damages.
The ComStream DAC700 Codec/Multiplexer is warranted against any abovementioned defects that appear within one year of shipping date.
Should it be necessary to make a claim against this warranty, the buyer shall first
notify ComStream’s Customer Service Department to define the nature of the
problem. When returning products, please be aware of the following:
1. Products returned to ComStream, whether for upgrade, warranted or out-ofwarranty repair work, or maintenance, must comply with the ComStream
Return Procedure.
2. Products shall be forwarded to ComStream, transportation prepaid.
3. Products returned to ComStream freight collect or without a Return Material
Authorization (RMA) number will not be accepted.
4. ComStream shall not accept any responsibility for returned products that are
improperly packaged and/or damaged in shipment. If possible, please use
original shipping and packaging materials.
5. Original product identification markings and labels must not have been
removed, defaced, or altered. Further, to preserve the warranty, the product
should not be subjected to abuse, improper installation or application,
alteration, accident, or negligence in use, storage, transportation, or handling.
6. Any returned product shall be completely evaluated in an attempt to duplicate
the problem so that appropriate corrective action and repair may be
completed. Following repair, the product shall be thoroughly tested for
compliance with appropriate specifications. This process will be handled in an
expedient and prompt manner but may be subject to available labor and
material resources.
The ComStream warranty, as stated herein, is in lieu of all other warranties,
expressed, implied, or statutory.
For further information, please contact ComStream Customer Service at
619-657-5454 or toll free at 888-559-0831.
Preface
xi
Return Procedure
If it is necessary to return a product for out-of-warranty repair, upgrade, or any
modification, the following procedures must be followed:
1. Contact ComStream Customer Service, located in the United States, via phone or
fax:
Phone 619-657-5454, or toll free at 888-559-0831
Fax
619-657-5455
2. Speak to a ComStream customer service representative about any questions,
issues, or problems. Quite often equipment problems can be corrected over the
phone, which keeps your equipment in service and avoids unnecessary and costly
downtime.
3. Should it be necessary to return a product to ComStream for any reason, the
ComStream Customer Service representative will issue you a return material
authorization (RMA) number. To issue an RMA number, the ComStream
representative will need the product’s serial number and model number.
4. You may be returning a product for either repair, upgrade, or modification. If you
are returning the product for:
Repair, please include a complete serial number of the unit, description of the
problem, the operating conditions which caused the problem, and any
circumstances that may have led to the problem. This information is essential
for ComStream repair technicians to reproduce, diagnose, and correct the
problem.
Upgrade or modification, please include a complete description of the current
configuration and the desired change(s). This information will allow a
ComStream Customer Service representative to provide a formal quote for the
upgrade.
5. Include a purchase order (PO) for any upgrade or out-of-warranty repair work
being performed. ComStream will begin repair work after a PO is received.
6. Reference the RMA number on all paperwork that accompanies the equipment
and write the RMA number clearly on the outside of the shipping container.
7. Ship your module in the original shipping carton and packaging (or its
equivalent), prepaid, to the following address:
ComStream
6350 Sequence Drive
San Diego, CA 92121-2724 USA
RMA Number
Do not include product accessories such as I&O guides or rack-mount brackets.
When handling or shipping static-sensitive equipment, observe antistatic procedures
and always use antistatic bags for shipment. Upon request, ComStream will provide
you with ESD bags for your use.
xii
Preface
All equipment upgrade and repair requests will be completely evaluated and the
required work performed in an expedient and prompt manner. The equipment will
then be thoroughly tested for compliance with appropriate specifications.
Revision History
This guide is periodically updated and revised. For documentation updates, call
ComStream Customer Service (located in the United States) at 619-657-5454, toll
free 888-559-0831, or fax your request to 619-657-5455..
Revision1
Date
Rev. A
02/95
Initial release
Rev. B
05/95
All chapters; updated references to ISO/MPEG Layer II/IIA, added
new section
Rev. C
08/95
Updated notice page to include CCS copyright notice
Rev. D
11/95
Command set updates
Rev. E
07/98
Updated ComStream’s address and Customer Service phone
numbers, removed CPN and revision information from body pages
Type of Revision
1Revision A is always the first official release to ComStream customers.
Customer Support
We hope this guide provides all of the information and instructions you need to
operate the DAC700 Codec/Multiplexer.
However, in the event that you need further assistance, or if problems are
encountered, ComStream has set up a Customer Support Line for your use. Please
feel free to contact ComStream Customer Support, located in the United States, by
phone or fax at the following numbers:
Phone: 619-657-5454, toll free 888-559-0831
Monday through Friday, 8:00 a.m. to 5:00 p.m. Pacific time
Fax:
619-657-5455
Preface
xiii
Safety Precautions
Carefully read and follow all safety, use, and operating instructions before operating
the DAC700 Codec/Multiplexer. Heed all warnings and cautions contained in this
guide. Retain these instructions for future reference.
Follow Startup Procedure
Do not plug in the DAC700 Codec/Multiplexer until you have connected the system and read
the chapter on installation and initial startup.
Provide A Safe Location
Place the DAC700 Codec/Multiplexer in a rack or on a stable surface of sufficient size and
strength, where it will not be jarred, hit, or pushed off its surface. Ensure that all cables and
cords are out of the way and will not be tripped over, as this could cause personal injury or
serious damage to the DAC700 Codec/Multiplexer.
Avoid Water and Moisture
Do not expose the DAC700 Codec/Multiplexer to any liquids, which are often found in flower
vases, coffee cups, rain from open windows, etc. If the DAC700 Codec/Multiplexer is exposed
to any liquid, contact ComStream, as serious damage could occur to the DAC700 Codec/
Multiplexer or its components.
Avoid Heat, Humidity, and Dust
To avoid internal damage, the DAC700 Codec/Multiplexer should be placed away from all heat
sources, including radiators, heater ducts, etc., out of direct sunlight, and away from high
humidity, excessive dust, or mechanical vibrations that can cause damage to internal parts.
Provide Adequate Ventilation
Slots and openings on the DAC700 Codec/Multiplexer are provided for ventilation that is
needed to ensure reliable operation. To avoid overheating and ensure that the ventilation slots
are not blocked, place the DAC700 Codec/Multiplexer on a smooth, hard surface that has at
least two inches of clearance around the unit and adequate air circulation. If the DAC700
Codec/Multiplexer is placed in a closed area, such as a bookcase or rack, ensure that proper
ventilation is provided.
Never place the DAC700 Codec/Multiplexer on a soft surface that would obstruct the required
airflow into the DAC700 Codec/Multiplexer ventilation slots.
Use Correct Power Source
The DAC700 Codec/Multiplexer comes equipped with both a North American and
Internationally compatible power cord. The North American power cord has an IECcompatible female plug on one end and a North American-compatible male plug on the other.
This cord is UL and CSA approved up to 125 VAC at 10A. This cord is ready to use with no
user wiring required.
The International power cord has an IEC-compatible female plug on one end and three stripped
and tinned bare wires on the other end. This cord is approved by many international safety
agencies, including VDE, up to 250 VAC at 6A. This cord wire complies with the international
color codes of ground is green/yellow, neutral is blue, and line is brown.
If these color codes do not correspond to the colored markings on the terminals in the plug, use
the following standards:
xiv
Preface
The green/yellow wire must be connected to the plug terminal marked by the letter E or by
the earth symbol or colored-coded green and yellow.
The blue wire must be connected to the plug terminal marked with the letter N or coloredcoded black.
The brown wire must be connected to the plug terminal marked with the letter L or
colored-coded red.
An AC plug must be attached to the international power cord in accordance with
government standards and codes in effect at the DAC700 Codec/Multiplexer installation
site. If an unterminated power cord is supplied with the unit, the appropriate certified
termination plug must be installed. The following is a list of the required certifying
agencies for various countries.
Country
Agency
Australia
Austria
Belgium
Canada
Denmark
Finland
France
Germany
India
Ireland
Italy
Japan
Netherlands
New Zealand
SAA
OVE
CEBEC
CSA
DEMKO
FEI
UTE
VDE
ISI
IIRS
IMQ
MITI
KEMA
SECV
SECQ
SECWA
EANSW
ETSA
HECT
SANZ
NEMKO
SABS
AEE
SEMKO
SEV
ASTA
BSI
Norway
Rep. S. Africa
Spain
Sweden
Switzerland
UK
Route Power Cords Safely
Route power cords so they are not walked on or pinched. Pay particular attention to cords
and connections at the plugs, receptacles (such as power strips), and the point where they
exit from the DAC700 Codec/Multiplexer and attach to other equipment. Do not place any
items on or against power cords.
No Stacking
Do not place or stack any objects on top of the DAC700 Codec/Multiplexer. Other
equipment may be placed in a rack or on a shelf above or below the DAC700 Codec/
Multiplexer, but never stacked directly on top of the modem itself.
Protect Against Lightning and Power Surges
When the satellite communication equipment is installed, have the professional installer
ground the system to protect against voltage surges and built-up static charges.
Protect the DAC700 Codec/Multiplexer from lightning and powerline surges during a
storm by unplugging it from the wall outlet and disconnecting the coaxial cable.
Preface
xv
Turn Modem Off When Changing Circuit Boards
Turn modem off before installing or removing any circuit boards from chassis slots. Possible
damage may occur to modem, boards, or related equipment if power is left on during this
procedure.
Provide Antistatic Protection
Wear a properly grounded antistatic wrist strap to prevent electrostatic damage to components
when handling circuit boards or other electronic modules.
Keep Objects Outside
Touching internal DAC700 Codec/Multiplexer parts is dangerous to both you and the unit.
Never put any object, including your fingers, through DAC700 Codec/Multiplexer slots or
openings, as this could result in touching dangerous voltage points, short-circuiting parts,
electric shock, or fire.
There are no user-serviceable parts inside the DAC700 Codec/Multiplexer. If an object falls
into the DAC700 Codec/Multiplexer, unplug the unit and contact ComStream Customer
Service, as serious damage could occur to the DAC700 Codec/Multiplexer or its components.
Use Approved Attachments Only
Use only ComStream-approved option cards and other satellite communication equipment
with the DAC700 Codec/Multiplexer.
Clean the DAC700 Codec/Multiplexer
Before cleaning the DAC700 Codec/Multiplexer, unplug it from the wall outlet. Do not use
water or any type of abrasive pads, scouring powders, liquid cleaners, aerosol cleaners, or
solvents such as alcohol or benzene.
Use only a clean, soft cloth lightly moistened with a mild detergent solution. Wipe all
equipment with a clean, soft cloth lightly moistened with water to remove the detergent
solution.
Service the DAC700 Codec/Multiplexer
Do not attempt to service the DAC700 Codec/Multiplexer yourself, as there are no userserviceable parts. Opening or removing covers may expose you to dangerous voltages or other
hazards as well as void your warranty. Contact ComStream Customer Service to obtain
qualified service personnel.
The following conditions indicate that the DAC700 Codec/Multiplexer needs servicing:
The power cord or plug has been damaged.
An object has fallen into the receiver.
Liquid has been spilled into the DAC700 Codec/Multiplexer or it has been exposed to rain
or water.
The unit has been dropped or the cover has been damaged.
The DAC700 Codec/Multiplexer does not operate normally or shows a marked change in
performance.
Perform Safety Checks
Upon completion of any service or repairs to the DAC700 Codec/Multiplexer or its option
cards, ask the service technician to perform safety checks to verify that the system is in safe
operating condition.
xvi
Preface
1
Overview
Introduction
The DAC700 audio codec/multiplexer subsystem is a key component of the
ComStream digital audio broadcast system. The following equipment is all that is
needed to provide a complete CD-quality digital audio satellite uplink:
DAC700
ComStream CM701 satellite modem
Radio Frequency (RF) terminal
Antenna
The DAC700 can be set up in an audio broadcast system in many ways. Two of the
most common ways are:
As an unprotected or protected encoder/decoder configuration, in which the
DAC700 transmits compressed International Standards Organization/Motion
Picture Experts Group (ISO/MPEG Layer II/IIA) audio, data, and cue
controls. This data is then broadcast to, and can be received by, the
ComStream family of audio receivers, such as the ABR200/75.
In a full duplex codec configuration, the DAC700 can operate point-to-point
with a DAC700, a CM701 modem, and an RF terminal at each end of the link.
In this configuration, audio, data, and control data can be transmitted in both
directions simultaneously. Asymmetric transmit and receive rates are
supported.
This chapter provides an overview of a typical satellite digital audio distribution
network as well as an overview of the DAC700.
Overview
1-1
Satellite Digital Audio
Distribution Network
Overview
A satellite broadcast network consists of the following three major subsystems
shown in Figure 1-1.
Satellite transmission uplink station
Satellite link
One or more remote satellite receivers
Receive Site #1
Single Uplink
ABR200/75
Analog Audio
AES/EBU
Data
Control
Relays
DAC700
CM701
Earth
Station
Audio Out
Async Data
Receive-Only
Antenna
Telco
Modem
Optional
Relay Contacts
Channel Control/
External Alarms
Receive Site #N
ABR200/75 #1 Audio, Data, Relays
Receive-Only
Antenna
ABR200/75 #2 Audio, Data, Relays
ABR200/75 #3 Audio, Data, Relays
F092
Figure 1-1 Single-Channel-to-Multipoint Audio/Data Satellite Network
The hub or satellite transmission uplink station is the facility where the audio to be
transmitted is collected and uplinked to the satellite. This facility consists of the
following:
Audio encoder/multiplexer, such as the DAC700
Digital modem, such as the CM701
Earth station, such as the DT7000
Antenna, such as those provided by Prodelin
Optional audio network management system (ANMS)
Optional terrestrial link to provide dial-up diagnostics and performance
monitoring
The satellite link consists of a commercial telecommunications satellite in
geosynchronous orbit above the earth. Two RF bands that are primarily used are
C-band and Ku-band.
1-2
Overview
The third major subsystem, the remote satellite receiver, includes:
Satellite antenna subsystem
Interfacility link (IFL) cable
Satellite audio receiver
A number of configurations are possible depending on the size of the network.
Networks are often a single channel uplink to multipoint downlinks. On the uplink
side, a DAC700 unit connects to a ComStream CM701 modem and RF terminal.
On the downlink side, there are a number of ComStream ABR receivers and RF
terminals. This configuration is shown in Figure 1-1.
For larger networks, a multichannel uplink to multipoint downlink architecture is
used, as shown in Figure 1-2. On the uplink side, two or more DAC700 units
connect to CM701 modems and RF terminals. On the downlink side, there are
multiple ABR receivers. In this configuration the audio network
management/control system (ANMS) is recommended. The ANMS
communicates with the entire network of audio satellite receivers via the audio
codec/mux unit and provides the system control from the uplink.
er
Uplink
ri
ar
C
#1
N
r#
Receive Site #1
e
rri
Ca
Transmit
Antenna
Audio Out
ABR200/75
Async Data
Receive-Only
Antenna
Telco
Modem
PSK Digital
Modems
User Data/
Passthrough
Input(s)
Channel Control/
External Alarms
DAC700
L
Audio
Source(s)
Optional
Relay Contacts
Uplink
Equipment
M&C
R
Audio
Relay Control
Signals
Audio Network
Management System
Receive Site #N
Network
Control
Channel
ABR200/75 #1 Audio, Data, Relays
Telco
Modem
Optional
Receive-Only
Antenna
ABR200/75 #2 Audio, Data, Relays
ABR200/75 #3 Audio, Data, Relays
F091
Figure 1-2 Multichannel-to-Multipoint Audio/Data Satellite Network
Overview
1-3
DAC700 Features
The DAC700 is a multirate audio encoder/decoder. The DAC700, shown in Figure
1-3, receives either analog audio or Audio Engineering Society/European
Broadcast Union (AES/EBU) input from a studio sound source and translates it to
digital audio. A user data port can be connected to a personal computer so that
information such as air logs or station traffic can be transmitted with the audio
signal. The unit can also transmit relay/control information to the network of ABR
receivers. When used with ComStream uplink racks, the unit provides a protection
mode that allows it to shadow and swap out channels even if they operate at
different encoding and transmission rates.
Digita
l Aud
io C
od
ec/M
Powe
r
Audio
Sync
ux D
AC
700
Dual
Mono
Joint
Stere
o
Overl
oad
Fault
F096
Figure 1-3 DAC700 Audio Codec/Mux Unit
Several capabilities give the DAC700 unmatched versatility for audio and data
distribution. The DAC700:
1-4
Overview
Is a full duplex, multirate ISO/MPEG Layer II/IIA encoder and decoder that
can transmit and receive mono, dual mono (stereo), or joint stereo analog
audio
Provides full duplex, selectable AES/EBU digital input and output for mono,
dual mono (stereo), or joint stereo audio
Is an integrated, multichannel, asynchronous data multiplexer/demultiplexer
that can transmit and receive composite user data at rates of up to 9600 bps
Allows remote control from a desktop computer, portable terminal, or
terminal emulator using either an RS-232 or optional multidrop RS-485
connection
Has a data passthrough mode for direct user data transfer without the internal
multiplexer overhead
Provides 16 individual TTL opto-isolated inputs that can be mapped to an
audio receiver’s eight output relays for control of external studio units such as
a console control or event sequencer
Provides eight dry contact relay outputs from the onboard decoder to external
units such as a studio console control or event sequencer
Offers users the selection of four different clock sources, one internal and
three external
Has built-in diagnostics that include local and remote loopback of audio/data,
operating status, fault alarms, and output status relay
Provides front panel operating status and fault indicators
The remaining portion of this guide describes in detail the steps necessary to
install, configure, and operate the DAC700 audio codec/mux within a network
environment.
Overview
1-5
COMSTREAM
®
A Spar Company
1-6
Overview
Functional Description and
Theory of Operation
Overview
2
The DAC700 accepts either analog audio or AES/EBU-formatted digital audio
from a studio source. The DAC700 can encode and decode this audio as well as
ancillary data using the ISO/MPEG Layer II/IIA audio compression algorithm.
The DAC700 has three operating modes for system audio:
Mono
Dual mono (stereo)
Joint stereo
The DAC700 has the flexibility to have either 600 ohm balanced or >100 kohm
audio input impedance. The factory internally configures the DAC700 for
>100 kohm input impedance. It can also be configured to 600 ohm balanced
operation by using an optional cable.
The DAC700 encoder multiplexes ancillary data along with the digitized audio.
Ancillary data comprises the following types of data, which provide users with a
number of capabilities:
User data – provides the capability to download pricing information, music
play lists, or E-mail files in a “one-to-all” network distribution
Relay control data – offers precise uplink control of remote receivers and
radio studio equipment such as cart machines
Network control command – provides uplink control of some or all downlink
receiver sites for channel or format changes
For more information on the types of ancillary data, refer to the chapter on
installation and initial startup.
The DAC700 decoder section can be configured to accept data from the onboard
encoder or from an external ISO/MPEG Layer II/IIA encoder (that is, another
DAC700). When set up to receive data from the onboard encoder, the decoder
section of the DAC700 allows the user to monitor the audio and data that is being
transmitted to the remote sites.
The relay/control interface supports both 16 Transistor-Transistor Logic (TTL)
opto-isolated sensor inputs and eight decoder output relay contacts. The 16 TTL
sensor inputs go to the unit controller for formatting into the system relay control
messages. The eight separate form A (SPST) relay contacts are used by the
onboard decoder to control external audio or other station equipment.
Functional Description and Theory of Operation
2-1
The DAC700 unit can connect via the Monitor & Control (M&C) port in either
RS-232 or RS-485 format to an external portable terminal, desktop computer, or
terminal emulator. The computer can be used to issue control, configuration, and
diagnostics commands. By means of the DAC700’s extensive query command
capability, the computer can also be used to monitor unit codec/mux operating
status and fault and alarm information.
The clock module produces all the clocks and event timing necessary for the unit.
Two separate clock generator circuits are available to support independent,
asynchronous transmit and receive operations.
This chapter presents a description of the following:
DAC700 Chassis
DAC700 chassis
DAC700 front panel indicators
ISO/MPEG Layer II/IIA
Transmission channel signal format
DAC700 major functional modules
DAC700 loopback modes
The DAC700 consists of a single Circuit Card Assembly (CCA) enclosed in a
chassis. The chassis consists of a standard 19-inch-wide enclosure, one rack unit
high. The front view of the DAC700 is shown in Figure 2-1.
Digital Audio Codec/Mux DAC700
Power
Audio Sync
Dual Mono
Joint Stereo
Overload
Fault
F093
Figure 2-1 DAC700 Front Panel
For ease of installation, all input and output connections are made on the rear
panel, shown in Figure 2-2.
J1
J2
ANALOG OUTPUT ANALOG INPUT
J3
AUX/AES
J4
BROADCAST DATA
J5
USER DATA
J6
M&C
J7
RELAY/CONTROL
F090
Figure 2-2 DAC700 Rear Panel
2-2
Functional Description and Theory of Operation
Front Panel Indicators
The front panel of the DAC700 has six indicators located on the right side of the
panel, as shown in Figure 2-3. The indicators are backlit to show active operation
status or faults in the DAC700 unit.
Digital Audio Codec/Mux DAC700
Power
Audio Sync
Dual Mono
Joint Stereo
Overload
Fault
F095
Figure 2-3 DAC700 Front Panel Indicators
The green Power LED indicates the unit is powered on and the power supply is
functioning correctly.
The Audio Sync illuminates green to indicate the decoder has ISO/MPEG Layer
II/IIA music frame synchronization.
The Dual Mono is a green LED that indicates the current mode of operation:
On indicates the audio/digital encoder is performing independent stereo
coding in dual mono mode.
Off indicates the unit is operating in mono mode or joint stereo mode. (Refer
to the following description of Joint Stereo mode.)
The Joint Stereo is a green LED:
On indicates the audio/digital encoder is in joint stereo coding mode.
Off indicates the unit is operating in mono mode or in the dual mono
operating mode. (Refer to the previous description of the Dual Mono mode.)
When both the Dual Mono and Joint Stereo indicators are off, the unit is in mono
operation.
The Overload LED illuminates red to indicate that one or both audio input
channels are above +18 dBu. Clipping of the input audio channels occurs at +18
dBu and higher. For more information on overload, refer to the chapter on
maintenance and troubleshooting.
The Fault indicator illuminates red when a decoder or encoder fault condition
exists.
Examples of such conditions are: Receive (Rx) or Transmit (Tx) Phase Lock Loop
(PLL) out of lock and Digital Signal Processor (DSP) hardware errors such as
memory fault, watchdog time-out, or muted audio.
Functional Description and Theory of Operation
2-3
The fault indicator function mimics the alarm relay and is masked using the alarm
mask (AM) command. For more information, see the chapter on remote
maintenance and control operation.
Transmission Channel
Signal Format
The ComStream digital audio satellite broadcast system uses a single RF carrier to
distribute audio, data, relays, and control information from the uplink to all
downlinks. This multiservice data stream uses time division multiplexing (TDM)
to receive, process, and transmit all these types of information.
Multiple audio channels can be transmitted using an RF carrier for each mono,
dual mono (stereo), or joint stereo channel service. This technique is known as
frequency division multiplexing (FDM). Signal parameters between two RF
carriers can be completely different. One carrier may be operating monaural audio
at 64 kbps using Quadrature Phase Shift Keying (QPSK) modulation, and a
second dual mono at 256 kbps using Bi-Phase Shift Keying (BPSK) modulation.
Figure 2-4 illustrates various digital audio carriers that might occur on a single
transponder.
36 MHz Transponder
Central Uplink
Figure 2-4 Multichannel Single Transponder System
2-4
Functional Description and Theory of Operation
Mono #4
Mono #3
Dual Mono (Stereo) #14
Regional Stereo B
Regional Stereo A
Mono #1 & 2
Dual Mono (Stereo) #4
Dual Mono (Stereo) #3
Dual Mono (Stereo) #2
Dual Mono (Stereo) #1
Other SCPC
Users
F071
The TDM frame structure is provided by the ISO/MPEG Layer II/IIA audio
standard, as shown in Figure 2-5. The frame header provides all information
regarding the audio rate, compression mode (mono, dual mono (stereo), joint
stereo), sampling rate (48 kHz), and ancillary data size. For error detection, a
Cyclic Redundancy Check (CRC) checksum is included within the frame header.
24 ms Frames
Frame Header
ISO/MPEG Audio Data
Ancillary Data
A. Audio Frame
Data
Data
Data
Data
Data
Data
Data
B. User Data Frame
F100
Figure 2-5 DAC700 Channel Format
The audio data is the digitally compressed data generated by the ISO/MPEG
Layer II/IIA encoder section of the DAC700. The ancillary data stream comprises
three types of control blocks:
Network control
User data
Relay (cue) signaling
As shown in Figure 2-5, the ancillary data is embedded into the outbound digital
stream that is then sent to the modem for the uplink. At the ABR receiver, the
ancillary data is stripped out by the ISO/MPEG Layer II/IIA decoder and sent to a
control microprocessor for additional processing.
Proper Signal Discrimination of Narrow Band RF Signals
The acquisition range of the ABR200/75 receivers work over a very large
frequency range, approximately 2 MHz. With the possibility of having multiple
carriers over that range, a means to uniquely identify one RF carrier from another
is needed to ensure the correct RF signal is received and processed as desired.
Discrimination is provided by the DAC700 when it embeds a unique identifier
into the relay/control block of the ancillary data of the ISO/MPEG Layer II/IIA
compressed audio output stream. This unique identifier has two components: a
network ID and a channel ID. The programmable values for the IDs are generated
by the DAC700 codec/mux at regular intervals (multiples of 100 ms).
Functional Description and Theory of Operation
2-5
For a given uplink, each codec/mux is programmed with a unique channel
number, with each carrier typically having the same network ID. The network and
channel IDs can be user-programmed during the DAC700’s installation using the
NI and CI commands, respectively. These commands are detailed in the chapter
on remote monitor and control operation.
For single uplinks it is recommended that, as a minimum, the network ID be
reprogrammed from its default value of 1.
Please note that the RF channel configuration at the uplink must match the
downlink receiver’s configuration or the receiver will not acquire and output the
signal.
For example, if a channel ID other than 1 is used, say 16, then ensure that the
downlink ABR receivers have a channel configuration #16 defined for the proper
RF receiver frequency, symbol rate, and demodulation type (that is, CC
16,11700000,128000,1). If CC 0, CC 1, or any other channel configuration
number other than CC 16 is programmed into the receivers, they will not acquire
the channel.
For multiple carriers from a single uplink, a good practice is to keep the network
ID the same for all multiplexes. The channel IDs should be consecutively ordered
1, 2, 3, and so on to correspond to the channel configuration numbers that are
programmed into the downlink ABR units (CC 1, CC 2, CC 3, and so on).
Table 2-1 provides an example of these different configurations and their RF
channel spacing (one carrier is incorrect). Assume QPSK operation and 128 kbps
transmission rate.
Table 2-1 Channel Identifier and Frequency Allocation Combinations
Carrier
No.
Uplink
Site
RF Freq.
MHz
NI
CI
CC/FC Format
ABRs
A
X
11700.0
2
1
CC1,...FD 1,2,1,7
B
Y
11700.2
1
1
CC1,...FD 1,1,1,7
C
Z
11700.8
1
1
CC1,...FD 1,1,1,7
D
Z
11701.0
1
2
CC2,...FD 2,1,2,7
FD 3,1,2,5
E
Z
11701.2
1
3
CC2,...FD 4,1,3,7
With this configuration of carrier frequencies and ID numbers, it is possible that
carriers B and C will be incorrectly received, since they are within 600 kHz of
each other and do not have unique ID numbers. All other carriers will operate
properly.
2-6
Functional Description and Theory of Operation
DAC700 Major
Functional Modules
The major functional modules of the DAC700 consist of:
Audio input interfaces
Audio output interfaces
Broadcast data interface
User data interface
Passthrough interface
M&C interface
Relay/control interface
Audio/data encoder
Audio/data decoder
Data multiplexer
Unit controller
Clock generator
Power module
A brief description of each functional module is provided in the following
paragraphs.
Functional Description and Theory of Operation
2-7
Figure 2-6 is a block diagram of the DAC700.
RS-422
Sync Data
Analog
Audio Out
Channel
A/B
Broadcast
Data
(J4)
Analog
Output
Port
(J1)
Audio
Encoder
Left
(DSP 1)
Data
Mux
(DSP 3)
Audio
Encoder
Right
(DSP 2)
Analog
Audio/
AES/EBU
Mux
Analogto-Digital
Converter
(ADC)
Analog
Input
Port
(J2)
AES/
EBU
Interface
Aux/AES
Port
(J3)
Analog
Audio In
Channel
A/B
Digital
Audio
In/Out
Audio/
Data
Decoder
(DSP 4)
Digital-toAnalog
Converter
(DAC)
Front
Panel
Power
Audio Sync
Dual Mono
Joint Stereo
Overload
Fault
User Data/
Passthrough
Data
Unit
Controller
Encoder/
Decoder
16
Relay
Contacts
Data
Port
(J5)
8
Relay/
Control
Port (J7)
M&C
Port (J6)
16 Sensor
Inputs
8 Closure
Contacts
RS-232/
RS-485
Remote
Control
F094
Figure 2-6 DAC700 Functional Block Diagram
2-8
Functional Description and Theory of Operation
Audio Input Interfaces
Analog audio is input as two channels (A/B) through the analog (audio) input
port, as shown in Figure 2-7. The audio is buffered, amplified, and converted into
16 bit linear PCM data by the Analog-to-Digital Converter (ADC). The ADC is a
dual channel oversampling device operated at a 48 kHz sample rate.
Predigitized AES/EBU audio may also be input through the AUX/AES port from
an external device. Input AES/EBU data rates of 56 K and 112 K are not
supported.
The AES/EBU serial audio data is converted into multiplexed 16 bit linear PCM
data compatible with the ADC output. The audio data is sent to the audio/data
encoder (DSP 1/DSP 2). A 2:1 selector controls which audio data source is input:
either via the ADC from analog (audio) input port or the AES/EBU interface from
the AUX/AES port. Selector operation is controlled by the unit controller.
The audio/data encoder (DSP 1/DSP 2) converts the audio data to ISO/MPEG
Layer II/IIA digital audio. The audio data then goes to the data multiplexer
(DSP 3) where ancillary data is added to form a composite stream that is
transmitted via the broadcast data port to the modem.
Analog
Audio In
Channel
A/B
Analog
Input
Port (J2)
Analog-toDigital
Converter
(ADC)
Audio/
Data
Encoder
(DSP 1/
DSP 2)
Analog
Audio/
AES/EBU
Mux
Analog
AES/EBU
Digital
Audio In
Aux/AES
Port (J3)
AES/EBU
Interface
Audio/
Data
Decoder
(DSP 1/
DSP 2)
Analog
Audio/
AES/EBU
Mux
Data
Mux
(DSP 3)
Broadcast
Data Port
(J4)
RS-422
Sync
ISO/MPEG
Data
Broadcast
Data Port
(J4)
RS-422
Sync
ISO/MPEG
Data
Ancillary
Data
Data
Mux
(DSP 3)
Ancillary
Data
Digital
F072
Figure 2-7 Audio Input Interfaces
Functional Description and Theory of Operation
2-9
Audio Output Interfaces
Transmitted data is received via the broadcast data port, as shown in Figure 2-8.
The audio/data decoder (DSP 4) separates the data into ISO/MPEG Layer II/IIA
digital audio and ancillary data streams. The audio data stream goes to the Digitalto-Analog Converter (DAC).
Digital-toAnalog
Converter
(DAC)
RS-422 Sync
ISO/MPEG
Data
Broadcast
Data Port
(J4)
Audio/Data
Decoder
(DSP 4)
Analog
Output Port
(J1)
Analog
Audio Out
Channel
A/B
Aux/AES
Port (J3)
AES/EBU
Digital
Audio Out
Analog
AES/EBU
Interface
Digital
F073
Figure 2-8 Audio Output Interfaces
The DAC is a dual channel, oversampling device operating at a 48 kHz sample
rate. It converts the digital audio into analog audio that is transferred via the
analog output port to the external sound equipment.
Digitized audio may also be output. The audio/data decoder converts the signal to
16 bit linear PCM data and sends it to the AES/EBU interface. The resulting
AES/EBU audio data (in serial form) is output via the AUX/AES port. Both the
analog audio and the AES/EBU digital format are output at the same time.
The appropriate transmit and receive timing signals for the audio input and output
interfaces are provided by the clock generator module (described later in this
chapter).
Broadcast Data Interface
The broadcast data interface consists of a full duplex, synchronous RS-422 port.
The transmit and receive data channels operate independently at rates from 56 to
384 kbps. The broadcast data port connects directly to the CM701 modem, or
equivalent, for satellite transmission. The transmit and receive data rates are
selectable via the M&C port.
2-10
Functional Description and Theory of Operation
Data Interfaces
The data interface consists of two asynchronous, RS-232 serial channels. Each
serial channel operates independently. The audio data stream goes to the DAC.
Data channel 1
Data channel 1 is for user data. The DAC700 processes, formats, and transfers
user data following the ComStream proprietary protocol.
The maximum user data rate depends on the system’s data transfer specifications.
User data rates are from 300 to 9600 bps. Since user data has the highest priority
in the encoding process at lower transmission rates (64 K, 96 K, and 112 K), the
higher the user data rate, the more bits will be taken away from the audio content.
On the transmit side, user data is input to the unit controller, divided into blocks,
and transferred in packet format to the data multiplexer (DSP 3) along with
relay/control blocks and network control blocks. It multiplexes the ancillary data
packets with the digital audio into a composite stream. This composite data is then
output via the broadcast data port, as shown in Figure 2-9.
The data block length can be user-defined with the BL command. Valid lengths
are from 30 to 255 bytes with a system default of 26 bytes. For more information
on block types, refer to the chapter on installation and initial startup.
The ABR200/75 can only accept block lengths of up to 50 bytes.
Blocks are closed and transmitted based on one of the following:
Maximum block length
When the maximum block length is reached, the current block is transmitted
via the broadcast data port.
Time-out
If the maximum block length has not been reached in a given period of time,
the block is closed and transmitted. The length of time is called the user data
block time and is user-defined.
Termination character
The user may define a special end-of-block terminating character, which may
also be sent with the user data or stripped off.
Data port channel 1 features are programmed with the Data Port 1 Configuration
(UC), User Block (UB), and User Termination (UT) commands. (See the chapter
on installation and initial setup.)
Functional Description and Theory of Operation
2-11
On the receive side, composite data is demultiplexed by the audio/data decoder
(DSP 4) into separate digital audio and ancillary data streams. The ancillary data
is transferred to the unit controller where it is demultiplexed into user data, relay
control messages, and network control commands, and the user data is output via
data channel 1.
Figure 2-9 illustrates user data processing.
User
Data In
Data Port
(J5)
Encoder
Processor
Data
Mux
(DSP 3)
Broadcast
Data Port
(J4)
Unit Controller
RS-422
Sync Data
(Including
User Data)
(Digitized) Audio
Transmit Side
(Digitized) Audio
RS-422
Sync Data
(Including
User Data)
Broadcast
Data Port
(J4)
Audio/Data
Decoder
(DSP 4)
Decoder
Processor
Data Port
(J5)
User
Data
Out
Unit Controller
Receive Side
F074
Figure 2-9 User Data Processing
Data channel 2
Data port channel 2 allows the user to send “passthrough” data. The data rate is
programmable and is embedded into the output ancillary data stream. The
passthrough mode allows the user to transfer preformatted data to minimize the
overhead of the onboard multiplexer. In this mode, an external source such as the
ComStream Smart Node performs the formatting normally done internally by the
DAC700. The passthrough mode can be selected at any time independent of user
data, relay control messages, or control channel information. Passthrough data
rates vary from 300 to 9600 bps.
Passthrough data can be any of the allowable data types for the system, that is,
user data, relay control, and network control commands.
It is not recommended to send a block type via data port channel 1 when sending
the same block type in the passthrough mode via channel 2.
2-12
Functional Description and Theory of Operation
On the transmit side the passthrough data is input to the unit controller (encoder
processor), as shown in Figure 2-10. The controller transfers the formatted data to
the data multiplexer (DSP 3). The passthrough and ancillary data are multiplexed
with the digital audio into a composite stream. The composite data is then output
via the broadcast data port and transmitted over the satellite in remote loopback
mode.
Passthrough
Data
In #2
Data Port
(J5)
Encoder
Processor
Data
Mux
(DSP 3)
Broadcast
Data Port
(J4)
Unit Controller
RS-422
Sync Data
(Including
User Data)
(Digitized) Audio
Transmit Side
(Digitized) Audio
RS-422
Sync Data
(Including
User Data)
Broadcast
Data Port
(J4)
Audio/Data
Decoder
(DSP 4)
Decoder
Processor
Data Port
(J5)
Passthrough
Data
Out #2
Unit Controller
Receive Side
F084
Figure 2-10 Data Passthrough Processing
The DAC700 transmits all blocks successfully received, based on ComStream
proprietary protocol definition. Blocks not successfully received are discarded.
On the receive side, the loopback composite data is demultiplexed by the
audio/data decoder (DSP 4) into separate digital audio and ancillary data streams.
The ancillary data is transferred to the unit controller where it is demultiplexed
and output via channel 2 of the data port.
Only passthrough data will be accepted through channel 2.
Implementation
Two dual channel Universal Asynchronous Receiver/Transmitters (UARTs) are
used to implement the data port. One UART is used for user data and a separate
one is used for passthrough data.
Functional Description and Theory of Operation
2-13
Monitor and Control Interface
The monitor and control interface provides two ports for external monitoring and
control of the DAC700 configuration and operation. This interface supports both
RS-232 and RS-485 asynchronous channels via the M&C port.
The DAC700 connects via the M&C port to an external portable terminal, desktop
computer, or terminal emulator. Control and status information from the remote
computer is input to the unit controller (encoder/decoder processors), as shown in
Figure 2-11.
Encoder
Processor
Control/Status
(From Terminal/
Desktop Computer/
Terminal Emulator)
M&C
Port (J6)
Unit Controller
M&C
Port (J6)
Control/Status/
Alarm (To Terminal/
Desktop Computer/
Terminal Emulator)
Decoder
Processor
F075
Figure 2-11 Monitor and Control Processing
Relay/Control Interface
The relay/control interface supports 16 TTL opto-isolated sensor inputs that are
used to create the relay control messages broadcast to the network in the ancillary
data stream. These 16 relay inputs are mapped to eight output relays at each audio
decoder within the network; this is on both the audio receivers and the DAC700.
The relay contacts can be used to control external audio or other station
equipment.
Because only eight contact closures are available on each audio decoder, a
mapping must be made as to which of the 16 possible control inputs activate the
closures. For the DAC700 decoder, this mapping is performed by using the contact
mapping (CM) command (see the chapter on remote monitor and control
operation). The default for both the DAC700 and the ABR audio receiver decoders
is to have the first eight inputs control the eight closures.
2-14
Functional Description and Theory of Operation
Figure 2-12 illustrates the 16-to-8 mapping function that occurs for the
relay/control of the DAC700 decoder section.
DAC700 MUX
DAC700/ABR200/ABR75
ANMS
Control
Channel
1
1
8
16
•
•
•
Cue
Input
Sampling
Cue
In
Closure 1
1
Cue
Out
DEMUX
MUX
•
•
•
8
TDM
Control
Channel
1
•
•
•
•
•
•
16
Cue
Mapping
1
16
16
8
Closure 8
16
User
Data
In
User
Data
Out
F077
Figure 2-12 Contact Mapping Diagram
The sensor inputs operate at TTL logic levels, internally pulled up to +5 volts. The
inputs become active by providing a dry contact closure to the signal ground on
the relay/control port. Contact polarity can be set as either normally open or
normally closed for each relay.
All inputs are sampled at a user-defined rate set using the RM command (see the
chapter on remote monitor and control operation). Any change in the state of any
input line is sensed within two sample periods and transmitted over the control
channel.
The input levels are transmitted continuously over the control channel at a
specified rate. The relay contact closures at the receiving end directly track the
logic levels at the transmitting end. At the default sampling rates, pulsed signals
are reproduced faithfully to the nearest 50 ms.
Audio/Data Encoder
The audio/data encoder (DSP 1/DSP 2) consists of two DSPs that perform
transmit audio ISO/MPEG Layer II/IIA processing. The first DSP handles the left
channel, and the second DSP handles the right channel of both the analog and
digital audio inputs. These two DSPs convert the audio data into 16 bit linear
PCM data and transfer it to the data multiplexer (DSP 3) for further processing via
a shared memory architecture.
Functional Description and Theory of Operation
2-15
Data Multiplexer
The data multiplexer (DSP 3) inputs and processes 16 bit linear PCM audio data
and asynchronous ancillary data from the encoder processor. Data transfer is via a
simplex interface that operates at a programmable rate set by the unit controller.
The ancillary data is multiplexed along with the 16 bit linear PCM audio data into
a composite data stream. The composite data is then transferred synchronously via
the RS-422 network interface for transmission by the CM701 modem over the
satellite link.
Audio/Data Decoder
DSP 4 performs the onboard ISO/MPEG Layer II/IIA decoding of the received
(loopback or external) digital stream. A single DSP demultiplexes the incoming
composite data stream into 16 bit linear PCM audio data and asynchronous
ancillary data. The ancillary data is output to the unit controller via a simplex
interface that defaults to 38.4 kbps. The decoded ISO/MPEG Layer II/IIA audio
data is then sent to both the DAC and AES/EBU interfaces. The audio is available
at both the analog output port and the AUX/AES port.
ISO/MPEG Layer II/IIA data input to the decoder is selected from two sources:
Broadcast data port during external baseband input operation
Audio/data encoder when operating in PCM loopback or normal operation
mode
Loopback testing operation allows the audio/data decoder to monitor the
functional integrity of the encoder. Should the encoder function abnormally or
fail, the decoder will lose frame synchronization.
Unit Controller
The unit controller provides centralized control of both the encoder and decoder
processes. The controller utilizes a Motorola MC 68010 running at 12 MHz.
Included with the microprocessor is 64 K RAM, 128 K EPROM, and 16 K
battery-backed RAM within the DAC700.
Encoder processor
The encoder processor of the unit controller has parallel read/write registers to
monitor and control the analog and digital AES/EBU encoder. It also sends
numerous event control and status bits throughout the system to select clock rates,
operating modes, and device/circuit configurations.
Decoder processor
The decoder processor of the unit controller receives the ancillary data from the
decoder DSP. This information includes user data and network control messages.
The information is handled in a manner identical to the encoder processor. The
decoder processor also receives relay control data and controls the eight decoder
output relay contacts.
2-16
Functional Description and Theory of Operation
Clock Generator
The clock generator module, shown in Figure 2-13, produces all the clocks and
event timing necessary for the system. Two separate clock generator circuits are
provided to support independent, asynchronous transmit and receive operations.
There are four selectable clock sources available to the user.
Clock
Generator
TxCLK Internal
Timing (PLL)
Transmit
Clock
Transmit
Clock
(TxCLK)
Receive
Clock
Receive
Clock
(RxCLK)
Send Timing (ST)
Receive
Timing (RT)
AES/EBU
Timing Input
F078
Figure 2-13 Clock Generator
The transmit clock generator circuit can derive clocking from one of the four
sources, shown in Table 2-2. The TT (Transmit Timing Selection) command
selects which timing source to use. For more information on the TE command,
refer to the chapter on remote monitor and control operation.
Table 2-2 Timing Source
TT
Timing Source
Figure
0
Internal 12.288 MHz crystal oscillator (PLL)
2-14
1
External from “send timing” (ST), RS-422 input from the
broadcas tdata port (that is, from the modem send timing)
2-15
2
External from “receive timing” (RT), RS-422 input from the
broadcast data port (that is, from the modem receive timing)
2-16
3
AES/EBU (digital) clock input (External)
2-17
Functional Description and Theory of Operation
2-17
For internal timing (TT 0), the DAC700 uses its onboard 12.288 MHz PLL to
generate the terminal timing that is sent to the modem with the transmit data.
Figure 2-14 illustrates the internal timing source.
DAC700
Modem
12.288 MHz
Analog Audio
Terminal Timing
L
PLL
(TT)
Tx Data
R
DAC700 = Int. timing
Modem = Ext. timing
F112-04
Figure 2-14 TxCLK Internal Timing (PLL)
For send timing (TT 1), the DAC700 uses the clock received from the modem to
send back with the transmit data. This clock is derived from the modem’s onboard
PLL, as shown in Figure 2-15.
DAC700
Analog Audio
Modem
Terminal Timing
L
Tx Data
Send Timing
R
DAC700 = Ext. timing
PLL
Modem = Int. timing
F113-04
Figure 2-15 Send Timing
2-18
Functional Description and Theory of Operation
For receive timing (TT 2), the DAC700 uses the clock received from the modem to
send back with the transmit data. This clock is derived from the active
demodulator on the modem, as shown in Figure 2-16.
DAC700
Modem
Terminal Timing
Tx Data
Receive Timing
DAC700 = Ext. timing
Demodulator
Modem = Derived timing
F114-04
Figure 2-16 Receive Timing
For AES/EBU timing (TT 3), the DAC700 derives the clock from the AES/EBU
digital input data stream and sends this to the modem with the transmit data, as
shown in Figure 2-17.
DAC700
AES/EBU
Digital Data
Modem
Terminal Timing
Tx Data
DAC700 = Derived timing
Modem = Ext. timing
F115-04
Figure 2-17 AES/EBU Timing Input
If the AES/EBU stream is not present, the DAC700 indicates a fault and stops
sending a clock to the modem.
Protected mode
While in LB 2, the protected mode of the DAC700 controls the terminal transmit
timing clock (TTCLK). This is based on the frame synchronization status of the
audio/digital decoder within the DAC700. If the decoder is synchronized, then the
TTCLK is output at its prescribed rate. If the audio/digital decoder loses
synchronization, then the TTCLK is held low until it is restored. A delay of up to
several seconds is provided to prevent race conditions with external transmission
equipment. The unit controller enables the TTCLK and determines the delay
value. The TE (Set Protected Mode) command enables or disables this feature.
Functional Description and Theory of Operation
2-19
Power Module
An autoswitching, universal input voltage power supply provides all internal DC
voltages in the unit.
Sources for Decoder
Input
There are two possible sources of input to the onboard ISO/MPEG Layer II/IIA
decoder. The Audio Sync indicator shows when the decoder has ISO/MPEG
Layer II/IIA frame synchronization but does not show the source of the signal.
There are three defined loopback modes, LB 0, LB 1, and LB 2, that are set or
read using the LB command.
Following is a description of each loopback mode. For more information on the
LB command, refer to the chapter on remote monitor and control operation.
LB 0 – External Baseband Input Operation
In LB 0 an 0ISO/MPEG Layer II/IIA stream from an external source is brought in
through the broadcast data port and then decoded, as shown in Figure 2-18. This
mode can be used to monitor the uplink, since you are using the DAC700 as a
decoder only.
An independent ISO/MPEG Layer II/IIA stream can also be sent out the broadcast
data port.
Channel A
Analog
Input
Channel B
AES/
EBU
Digital
Audio
Analog
Output
Port J1
Control
ADC
Encoder
DSPs
Broadcast
Data Port
J4
Digital
Audio
Input
AES/
EBU
Channel A
Decoder
DSP
DAC
RS-422
Channel B
Sensor
Input
16
Closure
Contacts
8
Relay
Input
MicroController
LB 0 Path
Relay
Contacts
RS-232
User Data
Async Data
RS-232/RS-485
Remote Control
F097
Figure 2-18 ISO/MPEG Layer II/IIA Codec DAC700 Block Diagram for LB 0
2-20
Functional Description and Theory of Operation
LB 1 – PCM Loopback Operation
In LB 1 the data is looped from the output ADC through the DAC, as shown in
Figure 2-19, bypassing the DSP encoder/decoder. This mode can be used to verify
the ADC performance while bypassing the algorithm.
LB 1 Path
Analog
Input
Port J2
Channel A
Channel B
AES/
EBU
Digital
Audio
Analog
Output
Port J1
Control
ADC
Encoder
DSPs
AES/
EBU
Broadcast
Data Port
J4
RS-422
Channel A
Decoder
DSP
DAC
Channel B
Sensor
Input
16
Closure
Contacts
8
RS-232
User Data
Relay
Input
MicroController
Relay
Contacts
Async Data
RS-232/RS-485
Remote Control
F098
Figure 2-19 ISO/MPEG Layer II/IIA Codec DAC700 Block Diagram for LB 1
Functional Description and Theory of Operation
2-21
LB 2 – Normal Operation
In LB 2 the data is received from the analog input port, as shown in Figure 2-20,
encoded, and then sent out the broadcast data port. From the encoder, data is also
sent to the decoder. This mode is primarily used for normal system operation.
LB 2 Path
Analog
Input
Port J2
Channel A
Control
ADC
Channel B
Encoder
DSPs
AES/
EBU
Digital
Audio
Broadcast
Data Port
J4
AES/
EBU
RS-422
Channel A
Analog
Output
Port J1
Decoder
DSP
DAC
Channel B
Sensor
Input
16
Closure
Contacts
8
Relay
Input
MicroController
Relay
Contacts
RS-232
User Data
Async Data
RS-232/RS-485
Remote Control
F099
Figure 2-20 ISO/MPEG Layer II/IIA Codec DAC700 Block Diagram for LB 2
2-22
Functional Description and Theory of Operation
ISO/MPEG Layer II/IIA
Functional Description
2.1
This section is reprinted in part with the permission of Corporate Computer
Systems, Inc. (CCS).
Overview
The DAC700 uses the ISO/MPEG Layer II/IIA compression algorithm. As the
most tested, documented, and reviewed audio compression algorithm in the world,
ISO/MPEG Layer II/IIA has been demonstrated to be a superior compression
algorithm.
The importance of the audio compression algorithm is the direct relationship
between the low bit rates associated with compression and the costs associated
with the transmission and storage of compressed audio.
The bit rate for high-quality stereo audio signals (1,411 kbps for a CD) can now be
reduced by the Musicam algorithm to about 200 kbps as a result of major progress
in the development of source coding techniques, which utilize knowledge of the
human ear. This means that the average quantization of the audio signal at a
sampling rate of 48 kHz would be approximately 2 bits per sample in the mono
channel, instead of the 16 bits per sample used in CDs.
Despite this high reduction in the bit rate, no quality differences are discernible to
a trained ear. A slight impairment only becomes audible at higher compression
rates. ISO/MPEG Layer II/IIA also offers the flexibility of independently
adjustable digital bit rates (56 kbps, 64 kbps, 112 kbps, 128 kbps, 192 kbps,
256 kbps, 384 kbps, etc.) as well as embedded data (user data) within the audio bit
stream.
Compression Concepts
The main principle of ISO/MPEG Layer II/IIA is the reduction of redundancy and
irrelevance in the audio signal. Every audio signal contains irrelevant signal
components, such as determination of timbre and localization, which have nothing
to do with the identification of the audio signal.
These irrelevant signals are not significant to the human ear and are not required
by the information processing centers in the brain. The reduction of irrelevance
means that these signal components are not transmitted. This results in a lower bit
rate without any perceived degradation of the audio signal. Furthermore, it is
possible to allow a certain degree of quantizing noise that is inaudible to the
human ear due to the masking effects of the audio itself.
ISO/MPEG Layer II/IIA Functional Description
2.1-1
Every audio signal produces a masking threshold in the ear depending on a timevarying function of the signal. Masking thresholds are based on masking tones.
A masking tone is simply a high amplitude audio signal occurring over a relatively
narrow frequency span and is often called a “masker.” A number of these masking
tones typically occur at several different frequencies in an audio signal. A masking
tone renders smaller amplitude tones close to it inaudible due to its masking
effect. The exact shape of the masking effect is called the masking threshold. The
aggregate of all the maskers defines a global masking threshold.
The parts of an audio signal below the global masking threshold are inaudible to
the ear. They are said to be masked and therefore need not be transmitted. Other
signal components above the masking threshold only require the level of
quantization to keep quantization noise below the masking threshold, and the
quantization-induced noise remains inaudible. Quantization noise can be better
adapted to the masking threshold of the human ear by splitting the frequency
spectrum into subbands.
The quantization of the analog time samples required for each individual subband
is dependent on the minimum masking value in each subband. This minimum
masking level is a measure of the allowed quantization noise, which is just below
the level of perceptibility. Subbands with desired signals well below the masking
threshold—thus irrelevant for the human ear—do not need to be transmitted.
In each 24 ms period, a calculation of the masking threshold is performed for each
subband. This threshold is then used to compute the best psychoacoustical
allocation of the available bits. This process is called dynamic bit allocation.
Audio data is quantized using the dynamic bit allocation, thus the required bit rate
for time-variant audio signals changes continuously due to the changing masking
threshold.
If there are an insufficient number of bits to completely hide the quantizinginduced noise, then the noise is placed in the least objectionable place in the audio
sample. If there is an excess number of bits, then the extra bits are used to reduce
the quantizing-induced noise to as low a level as possible. The allocation of the
extra bits is crucial and allows multiple encode-decode cycles as well as
postproduction of the audio.
The total transmitted bit stream contains quantized audio values as well as
auxiliary information describing bit allocation and scale factors, all of which are
required by the decoder to reproduce the audio information.
The scale factors are determined by searching for the maximum sampling value in
each subband and quantizing the result using 16-bit sampling. The scale factors
have a dynamic range of 120 dB, which is sufficient for future encoding of
quantized Pulse Code Modulation (PCM) signals using up to 20-bit sampling
while still retaining their dynamic range. All necessary information is encoded
into Musicam frames, each of which represents about 24 ms of real-time audio.
2.1-2
ISO/MPEG Layer II/IIA Functional Description
All of the complex calculations of the ISO/MPEG Layer II/IIA algorithm are
performed by the encoder. Decoders are designed to be universal. ISO/MPEG
Layer II/IIA decoders that correctly decode and play back audio information that
has been encoded by a range of ISO/MPEG Layer II/IIA encoders can be
constructed. This aspect to the ISO/MPEG Layer II/IIA algorithm is crucial
because it enables refinements in the encoding process to further improve
performance without impacting decoders that are already installed.
Performance Considerations
Four fields of use are commonly described in discussing performance
considerations:
Contribution
Distribution
Emission
Commentary
Contribution grade is used to describe quality suitable for digital master. Its use
would be in the transmission of a digital master from one archive to another or
from a remote site to a production studio. It is assumed that the original copy is in
a 16-bit linear PCM format and is to be compressed, transmitted, decompressed,
and stored in a 16 bit linear PCM format at the distant end. Because the audio will
endure future compression/decompression cycles, any contribution grade
compression system must be able to withstand many encode-decode cycles and
postproduction without any apparent degradation.
Distribution grade systems are used to transmit audio between two storage devices
or from a central production center to individual stations or transmitters. However,
the number of subsequent encode-decode cycles is limited to only a few.
Distribution grade systems are used when the number of audio compressiondecompression cycles are limited.
Emission grade systems are used when only one compression-expansion cycle,
such as broadcast to the general public, is anticipated. This is the case when audio
is compressed and transmitted from one place to another, decompressed, and
stored on an analog tape, and the only future manipulations done are in the analog
domain.
Commentary grade systems are used for transmitting voice grade audio.
These definitions make no mention of the analog bandwidth or the exact
definition. They are vague terms used to describe ability of the audio to withstand
multiple encode-decode cycles. In all cases, the compressed audio is assumed to
be indistinguishable from the original.
ISO/MPEG Layer II/IIA Functional Description
2.1-3
Quality vs. bit rate
The ISO/MPEG Layer II/IIA design allows the digital bit rate, analog bandwidth,
and quality to be generally related by the following formula:
Digital Bit Rate Quality =
Digital Bit Rate
Analog Bandwidth
According to this formula, the quality increases as the bit rate increases, and the
analog bandwidth is kept constant. Similarly, if the digital bit rate is kept constant
and the analog bandwidth is decreased, then quality improves.
The ISO tests in Stockholm in May 1992 have demonstrated that at a digital bit
rate of 256 kbps per stereo channel, ISO/MPEG Layer II/IIA is statistically
identical to the original signal. This means that the panel of approximately 60
highly trained listeners could not distinguish the original uncompressed source
material from the audio compressed by the ISO/MPEG Layer II/IIA algorithm.
The conclusion of the ISO tests (at 256 kbps per stereo channel) was that
ISO/MPEG Layer II/IIA is transparent. ISO/MPEG Layer II/IIA scored 5 on the
Mean Opinion Score (MOS) scale, where the lowest is 1 and the highest is 5.
The qualities the ISO/MPEG Layer II/IIA algorithm provides at various bit rates is
shown in Table 2.1-1.
Table 2.1-1 Quality Grades and Bit Rates
Quality
Bit Rate
Contribution
384 kbps (stereo, Layer II)
Distribution
256 kbps (stereo, Layer II)
Emission
192 kbps (stereo, Layer IIA)
Commentary
64 kbps (mono, Layer II)
The classification of 192 kbps for the emission grade is based on recent work at
the Institute fur Rundfunk Technique (IRT) and relies on the intensity (joint)
stereo coding technique for additional compression.
Tolerance to transmission errors
The ISO/MPEG Layer II/IIA data block consists of two parts. The first is the
header and consists of framing, bit allocation, scale factors, and other side
information. The second part of the frame is the audio data. In the case of
256 kbps per stereo channel, the length of a 24 ms frame is 6,144 bits, the header
part of the frame is approximately 300 bits, and the remainder of the frame is the
audio data. The bit integrity of the entire header is vital since it defines the layout
of the remainder of the frame. Any bit error in the header causes degradation
because the following parts of the frame would be decoded incorrectly and, thus,
24 ms of audio would be lost.
2.1-4
ISO/MPEG Layer II/IIA Functional Description
An error in the data part of the frame can range from imperceptible to just barely
noticeable. This is due to the fact that a single bit error only affects a single data
sample, thus only a very small time. If the bit error occurs in the least significant
bit of the data sample, the effect of the error is minimal. However, if the error
occurs in the most significant bit (the sign bit), then the effect is more pronounced.
The header of an ISO/MPEG Layer II/IIA frame is protected by an error
protection polynomial and provides the ability to detect errors that occur in the
header. The data portion of the frame is unprotected, and any error occurring in
the data part of the frame remains. The ISO/MPEG Layer II/IIA system has a
defined error strategy. If an error is detected in the header, the last frame (24 ms)
of audio is repeated.
If, in the succeeding frame, an error is detected in the header, the second and all
succeeding frames with errors are muted. This error mitigation technique has been
shown to be effective for bit error rates of approximately 10-5. This error rate
represents error rates easily achievable by transmission systems. Using this
strategy, there is a smooth degradation of the audio quality as the error rate
increases until the error rate becomes excessive. At the point of excessive error
rates, the audio output mutes.
Tolerance to multiple processing
To understand the effect of multiple encode/decode cycles, it is important to
review the predominant effect that allows ISO/MPEG Layer II/IIA audio to
achieve its compression. This is the hiding of quantization noise under a loud
signal. ISO/MPEG Layer II/IIA audio adjusts the degree of quantization-induced
noise in each subband, and thus hides more noise (uses fewer bits) in the subbands
that contain large amounts of audio energy.
The quantizing noise raises with each encode-decode cycle, and, after a sufficient
number of cycles, the noise level becomes perceptible. The degradation process is
gradual and depends on the level of the quantizing noise on the original.
ISO/MPEG Layer II/IIA Functional Description
2.1-5
Table 2.1-2 lists the approximate number of total encode-decode cycles before the
noise becomes significant.
Table 2.1-2 Bit Rate and Encode-Decode Cycles
Mode
Bit Rate
Number of
Cycles
Mono
128 kbps
64 kbps
5
1
Dual Mono
384 kbps
15
(Stereo)
256 kbps
5
Joint Stereo
192 kbps
128 kbps
2
1
These are approximate and the exact number is highly dependent on the source
material.
Postproduction processing effects
Modeling postproduction processing of compressed audio is complicated. For
example, an equalizer changes the level of a range of frequencies, while limiting
and compression are nonlinear processes. Very little test data is available to
ascertain the effects of postprocessing. Private communications with the IRT
suggest that ISO/MPEG Layer II/IIA is robust against the effects of
postprocessing, and the degree of robustness depends on the compression rate. In
particular, 384 kbps audio is unaffected by postprocessing, while 128 kbps audio
is somewhat sensitive to postprocessing.
2.1-6
ISO/MPEG Layer II/IIA Functional Description
Installation and Initial
Startup
Overview
3
This chapter describes the steps to install and initialize the DAC700. It also
describes the initial configuration procedures as part of the installation process.
The overall steps for installing and starting up the DAC700 are shown in
Table 3-1, as well as the recommended installation sequence. You should become
familiar with this sequence before installing the unit. Be aware of any unusual
conditions or contingencies that might affect the installation process.
Table 3-1 Installation Sequence
Sequence
Site planning and preparation
Location requirements
Safety considerations
External connections
Initial power-up
Installation check
Firmware version
Initial configuration
Audio bandwidth configuration
User data or passthrough mode configuration
Encoder/decoder ancillary data configuration
User relay configuration
Network and channel definitions
Timing source configuration
Site Planning and
Preparation
The purpose of site planning is to specify where the components are to be located
and to identify any special installation or operational requirements. Time spent in
site planning prevents unnecessary complications during installation.
Installation and Initial Startup
3-1
Location Requirements
Location requirements for the DAC700 unit are:
Standard 19 inch equipment rack, one unit (1.75 inch) high
Adequate ventilation
Mount the DAC700 in a manner that ensures adequate ventilation at all times.
The minimum airflow clearance space required is three inches at the sides and
six inches in the rear.
Facility AC line power as follows:
90 VAC to 264 VAC
47 to 63 Hz
40 W service with circuit breaker and integral ground protection
One or more lightning and surge protector
Cable run to AC power connector on rear of unit with 3 ft (1 m) relief
length
ComStream recommends an uninterruptible power supply (UPS), a line
conditioner, or both where power is subject to surges, unstable or noisy
conditions, or outages.
Mounting the DAC700
Adequate distance between the DAC700 unit and electromagnetic
interference (EMI) sources such as AC power-generating equipment
Proximity of 25 ft (7.62 m) or less to equipment providing specified signal I/O
levels for RS-422, RS-232, or optional RS-485 interfaces
The DAC700 works in concert with the CM701 modem. The DAC700 has been
thermally designed to be placed in a 19 inch rack in a pattern of alternating
DAC700s and CM701s (CM701/DAC700/CM701/DAC700, etc.).
If the DAC700 is not used with the CM701, it is recommended that one unit of
rack space be left open above each DAC700 unit to ensure adequate airflow. The
rack must be ventilated so that the internal ambient temperature does not exceed
the DAC700’s maximum ambient temperature of 50°C.
External Connections
This section describes the physical and electrical connections to the DAC700.
Ensure that all cables are installed before connecting to an AC power source.
3-2
Installation and Initial Startup
All external connections to the DAC700 are made through the rear panel
connectors. The DAC700 has eight possible connections, including the power
plug, on the rear panel. The location of these connectors is shown in Figure 3-1.
J1
J2
ANALOG OUTPUT ANALOG INPUT
J3
AUX/AES
J4
BROADCAST DATA
J5
USER DATA
J6
M&C
J7
RELAY/CONTROL
F090
Figure 3-1 DAC700 Rear Panel Connectors
The pinouts for these interfaces are detailed in the appendix on interface pinouts.
To ensure compliance with emission standards, all signal cables connected to the
receiver should be shielded. The shield must be electrically attached to the mating
connector.
Analog Output
The analog output port has two balanced output channels from the decoder: one
right channel and one left channel.
Ensure that phase alignment is maintained between studio equipment and the
encoder. If a phasing error occurs when operating in the joint stereo mode,
common mode (background) noise may be accentuated.
Analog Input
This port has two balanced input channels for the encoder: one right and one left
audio channel. The maximum input level before distortion occurs is +18 dBu
(dBm). Above this level, the DAC700 hard-clips the signal.
Audio input impedance is configured internally for >100 kohm audio input
impedance at the factory. An optional cable (ComStream Part No. 05-0548-001)
can be used to configure it for 600 ohm balanced operation.
AUX/AES
This port provides two digitized AES/EBU audio channels: an input channel to
the encoder and an output channel from the decoder. Both the input and output
channels are serial digital with balanced line, transformer-coupled interfaces.
The AUX/AES port also provides three preset inputs that can be programmed to
automatically switch the DAC700 to operate in any of eight predetermined
formats.
In addition, two status closure contacts provide codec alarm relay fault status, and
the remote control reset initializes the M&C port in the default configuration.
Installation and Initial Startup
3-3
Broadcast Data
The broadcast data port provides the composite audio and multiplexed data to and
from the satellite modem. It is a full duplex, synchronous RS-422 interface.
The transmit and receive channels operate independently at data rates from 56 to
384 kbps. Transmit timing for data output may be derived from four sources.
Receive timing for data input may be derived from two sources. For timing
definitions, refer to the chapter on functional description and theory of operation.
User Data
The user data port consists of two separate, asynchronous RS-232 serial ports.
Each serial channel operates independently. Rates can be selected via the M&C
port. Data 1 channel provides transmit direction hardware flow control and
operates at rates from 300 to 9600 bps. Data 2 channel is used as an input/output
path for the data passthrough mode and operates at rates from 300 to 9600 bps.
M&C
The M&C port can be used to connect the DAC700 unit to an external, portable
terminal or desktop computer. The computer is used to issue user control,
configuration, and diagnostic commands to the unit. The computer can also be
used to monitor unit operating status and fault and alarm information.
The M&C port supports a standard RS-232 interface or an optional RS-485
interface:
The standard RS-232 interface provides duplex, asynchronous serial data with
an operating range from 300, 1200, 2400, 4800, 9600 to 19200 bps. The
defaults for an RS-232 interface are 1200 bps, odd parity, 7 data bits, and 1
stop bit.
The RS-485 interface provides duplex, asynchronous, multidrop packet data
configured for party-line operation. This port is used in conjunction with the
remote control computer. The operating rates are 300, 1200, 2400, 4800,
9600, or 19200. The RS-485 interface defaults are 2400 bps, odd parity, 7 data
bits, and 1 stop bit.
A proprietary ComStream packet protocol is used for communicating via this
interface. (See the chapter on ComStream packet protocol.)
The default RS-485 address of the M&C port on the DAC700 is 31, but it can be
configured to any bus address from 1 to 31 using the RA command. (See the
chapter on remote monitor and control operation.)
3-4
Installation and Initial Startup
Relay/Control
The relay/control port is a multifunction interface that supports 16 TTL optoisolated sensor inputs and eight relay contact outputs. The 16 TTL sensor inputs
go to the unit controller for formatting into relay control messages. In turn, these
messages are sent through the system’s ancillary data channel to directly control
an external control console or event sequencer connected to the relay output port
of the receivers.
The sensor inputs operate at TTL logic levels, internally pulled up to +5 V. The
inputs become active by providing a dry contact closure to the signal ground on
the relay/control port.
Initial Power-Up
This section describes the steps to complete the initial AC power-up of the
DAC700 unit.
To power up the DAC700:
1. Make sure the DAC700 is properly installed in the equipment rack and the
system cables are properly connected to the unit.
Ensure that all cables are installed before connecting to an AC power source.
2. Turn on power for the remote control terminal, desktop computer, or terminal
emulator and wait for it to initialize.
Make sure the computer COM port provides RS-232 communication and is
connected to the unit M&C port. Configure the port for 2400 baud, 7 data bits,
1 stop bit, and odd parity.
3. Turn on the unit by connecting the power cord to the AC power jack on the
unit.
When the power-up initialization cycle has been completed, as a minimum the
green power LED will be illuminated. Other LEDs may also be illuminated
depending on your system configuration.
Installation Check
Once the DAC700 has been powered up, verify the unit connections for the audio,
user data, and relay/control ports. This can be accomplished by communicating
with a receiver locked to the uplink RF carrier or using an ASCII terminal to query
the decoder section of the DAC700 to confirm the setup and perform several
diagnostic tasks.
Installation and Initial Startup
3-5
Use the DB-9-to-DB-25 adapter cable (ComStream Part No. 30-0120-093) to
connect the DAC700’s M&C port to the DB-25 connector on your terminal. The
terminal should be configured for 2400 baud, 7 data bits, 1 stop bit, and odd
parity.
When communication is successfully accomplished, a > prompt appears on the
terminal, indicating it is ready to accept commands.
To establish communication with the DAC700:
At the ASCII terminal connected to the DAC700, press the Enter key on the
terminal.
The DAC700 should respond with an ASCII login request string.
For an alphabetical listing of commands with proper command syntax, valid
parameters, and default values, refer to the chapter on remote monitor and control
operation.
Once the communications link with the DAC700 is established, use the following
steps to perform the installation check.
1. Using a terminal emulation program, verify that the default values are correct
by entering the appropriate command for each value. For a list of the
commands and their correct values, see the chapter on remote monitor and
control operation.
2. Test for fault-free operation.
a. Using the terminal emulation program, enter LB 1 to put the unit in PCM
loopback mode. Allow the unit to operate in loopback for 5 to 10 minutes
error free.
There are also two other loopback modes available. Select the appropriate
mode for your testing. (See the chapter on functional description and theory of
operation.)
b. After operating in loopback mode, enter FL and check for any fault codes.
3-6
Installation and Initial Startup
•
If no faults are displayed, enter LB 0 to put the unit into normal
operating mode.
•
If any faults are displayed, refer to the chapter on maintenance and
troubleshooting.
3. Check audio performance.
a. Using the terminal emulation program, enter the AT command with the
appropriate parameter.
The DAC700 provides two internally generated audio test tones for
checking audio performance and the option of checking the left channel,
the right channel, or both. (See the remote monitor and control operation
chapter.)
b. After checking audio performance, enter AT 0 to return to normal
operation.
Firmware Version
Check the firmware version number as part of the initial installation. The number
should be the same as all other stations in the network. Different version numbers
indicate possible software incompatibility and might result in unusual or
intermittent operation.
1. Enter DC.
2. Verify that the firmware version number matches the version number of other
stations in the network.
If the number does not match, notify the network operator or ComStream
Customer Service as soon as possible.
Initial Configuration
Specify the initial configuration parameters for the DAC700 using the procedures
that follow. Use only the procedure or procedures that support your hardware
configuration and the operating mode or modes you intend to use in the network.
The configuration process requires you to use a number of commands. This
section gives the general syntax for commands used during configuration. An
alphabetical listing of all commands with a full description of the command,
command syntax, valid parameters, and default values, is provided in the remote
monitor and control operation chapter.
Read the command description in the remote monitor and control operation
chapter before using the command to configure the DAC700.
Audio Bandwidth Configuration
The audio bandwidth configuration depends on three factors:
Transmission rate
Operating mode (mono, dual mono (stereo), joint stereo)
User-selectable bandwidth
For information on the relationship between these factors, see the appendix on
technical specifications and port information.
Installation and Initial Startup
3-7
From the information in that appendix, select the transmission rate, operating
mode, and bandwidth for the audio configuration of your network.
To configure the unit audio bandwidth to match your selections, perform the
following steps.
1. Set the encoder analog bandwidth.
The command format is:
AB 0 – to select bandwidth A
AB 1 – to select bandwidth B
AB 2 – to select bandwidth C
AB 3 – to select bandwidth D
2. Set the encoder transmit mode.
The command format is:
TM 0 – to select mono
TM 1 – to select dual mono
TM 2 – to select joint stereo
3. Set the encoder transmit rate.
The command format is:
TD transmission_rate
Replace transmission_rate with 56000 to select 56 K, 64000 to select
64 K, and so on.
4. Set the decoder receive channel rate.
The command format is:
RD receive_channel_rate
The value for receive_channel_rate should be the same as for
transmission_rate.
User Data Configuration
Use the following steps to configure the user data feature.
1. Configure data port 1.
The command format is:
UC baud,parity,data_bits,stop_bits
2. Set the user data time or send interval.
The command format is:
UB time_interval
3-8
Installation and Initial Startup
3. Set the user data termination character.
The command format is:
UT termination_character
Replace termination_character with the decimal value of the ASCII
character to be used.
Passthrough Mode Configuration
Use the following steps to configure the passthrough mode.
1. Configure data port 2.
The command format is:
PP baud,parity,data_bits,stop_bits
2. Enable the data passthrough mode, using the PT command as shown:
PT 1 – to enable data port 2
PT 0 – to disable data port 2
Encoder/Decoder Ancillary Data Rate Configuration
Ancillary data is made up of three components: relay blocks, network control
message blocks, and user data blocks. Each of these information types has a
specific packet structure or format.
Relay blocks include the input relay information, the network ID, and channel
ID information. These blocks have the highest priority of the three. Relay
blocks are sent out at user-programmable intervals in multiples of 100 ms.
The length of the interval is programmed in the DAC700 with the RM
command. (See the chapter on remote monitor and control operation.)
Network control message blocks contain commands generated by the ANMS
and sent to the receivers through the satellite transmission. Network control
messages have the second highest priority.
User data blocks are originated by the user and input into the DAC700 for
broadcast transmission to all receivers.
The ancillary data rate is the bandwidth set aside for this information and is
programmed using the AG command. The bandwidth is dynamic and is only as
wide as it needs to be. The default is 38.4 kbps.
The rule of thumb is to minimize the user data rate as much as possible. Because
user data can vary from 300 to 9600 bps at lower transmission rates—112 kbps
down to 56 kbps—audio degradation may occur if user data exceeds roughly 5%
of the bandwidth.
Installation and Initial Startup
3-9
Judging the effect that data bandwidth has on music quality is very subjective. The
guideline given in this guide is a recommendation only.
To configure encoder/decoder ancillary data:
1. Set the ancillary data rate for the encoder/decoder.
The command format is:
AG baud,parity,data_bits,stop_bits
2. Set the mux/demux mode.
The command format is:
DM 0 – for simplex mode
DM 1 – for full duplex mode
For a definition of simplex and duplex modes, refer to the chapter on remote
monitor and control operation.
User Relay Configuration
Configure user relays to provide control of cueing or event operations for a studio
console, event sequencer, or ABR receiver. For example, user relays can turn
specific receivers on at a set time.
Use the following steps to configure these relays.
1. Set the contact sense polarity for the eight relay channels.
The command syntax is:
CS relay_1,relay_2,relay_3,relay_4,relay_5,
relay_6,relay_7,relay_8
For each instance of relay, substitute:
0 – relay normally open
1 – relay normally closed
This is a DAC700 decoder function only.
2. Map transmit relays to receive relays.
The command syntax is:
CM
relay_1,relay_2,relay_3,relay_4,relay_5
relay_6,relay_7,relay_8
This is a DAC700 decoder function only.
3-10
Installation and Initial Startup
3. Define the relay message interval.
The command syntax is:
RM interval
Interval is the time between relay control message updates.
4. Configure the relay input port.
The command syntax is:
XM
active_input_mask,polarity_mask,debounce
Network and Channel Definitions
Define channel and network ID numbers as follows:
1. Define channel ID numbers.
The command syntax is:
CI n
2. Define network ID numbers.
The command syntax is:
NI n
Timing Source Configuration
The DAC700 uses the timing reference to support independent, asynchronous
transmit and receive operations. The correct timing source is essential for accurate
unit internal timing and external interface timing. For more information on timing
sources, see the chapter on functional description and theory of operation.
To select the timing source, use the TT command as shown below:
TT 0 – to select internal, 12.288 MHz crystal oscillator
TT 1 – to select external, from send timing
TT 2 – to select external, from receive timing
TT 3 – to select AES/EBU timing input
Installation and Initial Startup
3-11
COMSTREAM
®
A Spar Company
3-12
Installation and Initial Startup
Remote Monitor and
Control Operation
Overview
4
The DAC700 M&C port provides a means to configure and monitor the status of
the entire ISO/MPEG Layer II/IIA audio codec/multiplexer unit. The unit is
capable of communicating in RS-232 ASCII message format and in a multidrop
RS-485 network packet protocol format. When operating in the RS-485 packet
protocol format, network control messages can also be communicated through this
port.
The command formats are compatible with existing ComStream command
formats. However, for RS-232 operation there is no need for an Escape character
to precede the command. If an Escape character is input by the user, it is ignored
and the command executes as entered.
Command Syntax
For RS-232 ASCII commands, the following generic formats are used:
To write or change a parameter associated with the command designated by a
two-character mnemonic, XX, the formats are:
XX parameter
XX parameter 1,parameter 2,parameter 3
Separate multiple parameters with a comma only; do not add spaces.
To read or query a parameter value for command, the format is:
XX ?
The space before the question mark is optional.
To repeat the previous command, use a carriage return only.
To access help, press ?.
Help provides a summary of available commands with a short explanation of
each.
Commands may be entered in either upper- or lowercase. All commands are
followed by a carriage return.
Remote Monitor and Control Operation
4-1
Command Error Codes
Command errors occur when a command has been mistyped, is inappropriate, or
cannot be immediately executed. The operator normally receives one of the error
messages shown in Table 4-1.
Table 4-1 Error Codes and Descriptions
RS-232 Mode
RS-485 Mode
Description
Invalid Command
ER1
Indicates that an invalid command has
been entered
Invalid Parameter
ER2
Indicates that the associated parameter
is outside the expected range
Not Available
ER3
Indicates that the command is currently
not available (for example, a function is
not operating that would provide the
expected results)
Command Summary
Table 4-2 displays the DAC700 commands in a summary form. Further details are
provided in the next section.
Table 4-2 DAC700 Command Summary
Command
Description
AB
Analog bandwidth
AG
Aggregate encoder-decoder (ancillary data rate)
AM
Alarm mask (for status relay activation)
AS
Algorithm select
AT*
Audio test tone mode
BL
Block length
CF
Clear fault (accumulation)
CI
Channel ID (sets for relay control messages)
CM
Contact map (definition for local relay closures)
CO
Relay contact control (for local relay closures)
CQ
Contact status query (for local relay closures)
CS
Contact sense (for local relay closures)
DC
Display configuration
DD
Decoder ancillary data rate (selects)
DM
Duplex mode
FL
Fault status (accumulated)
IN
Master reset (reinitializes unit to default values)
LB
Loopback mode (selection)
LR*
Left/right channel toggle
* AT, LR, and MU affect only DAC700 decoder audio function
4-2
Remote Monitor and Control Operation
Table 4-2 DAC700 Command Summary (continued)
Command
MU*
Description
Audio mute
NI
Network ID (sets for relay control messages)
PC
RS-232 monitor and control port configuration (sets)
PD
Preset definition (for redundancy protection)
PM
Preset mode (sets)
PP
Data port 2 configuration (passthrough)
PS
Preset selection
PT
Passthrough mode
RA
Remote port address (sets RS-485 control device)
RC
Remote control port configuration (sets RS-485 M&C )
RD
Receive channel rate (data)
RE
Resets the unit
RM
Relay message interval (selects)
ST
Real-time status (fault)
TD
Transmit channel rate (data)
TE
Set protection mode
TM
Encoder transmitter mode (Select ISO/MPEG Layer II/IIA)
TT
Transmit timing selection (clock source)
UA
Relay, data, in-band signaling
UB
User data time or send interval
UC
Data port 1 configuration (user data)
UT
User termination
XM
Relay mapping (input)
* AT, LR, and MU affect only DAC700 decoder audio function
Remote Monitor and Control Operation
4-3
Detailed Command
Descriptions
AB
Following is a list of commands with a detailed description of each used to
configure and operate the DAC700. The items shown in italics are variable
characters to be replaced by the specific parameter information being entered.
Because of space constraints, defaults sometimes appear on more than one line. In
actual use, these defaults would be on one line separated by commas.
Analog Bandwidth
Use this command to set audio bandwidth.
Syntax
AB <bandwidth>
Parameters
<bandwidth> parameters are as follows:
0 – Bandwidth A (default)
1 – Bandwidth B
2 – Bandwidth C
3 – Bandwidth D
Additional Information
The selected bandwidth is dependent on transmission rate (TD) and operating
mode (TM). For the relationship between bandwidth, transmission rate, and
operating mode, see the appendix on technical specifications and port
information.
4-4
Remote Monitor and Control Operation
AG
Aggregate Encoder-Decoder Ancillary Data Rate
Use this command to set or read the encoder-decoder ancillary data rate.
Syntax
AG <baud>,<parity>,<data_bits>,<stop_bits>
AG ?
Parameters
Valid <parameters> and their values are as follows:
<baud>
1200, 2400, 4800, 9600, 38400
<parity>
O, E, N (odd, even, none)
data_bits
8
<stop_bits>
2
Defaults
38400,N,8,2
Additional Information
The AG parameter data and stop bits must be set to 8 and 2, respectively.
AM
Alarm Mask
Use this command to set or read the alarm relay mask.
Syntax
AM <parameter>
AM ?
Parameters
<parameter> is the decimal number that represents the bit map of the faults to
be monitored by the status relay as shown below:
Fault Number
Fault Condition
Decimal Weight
1
Tx PLL not locked
1
2
Rx PLL not locked
2
3
Decoder not framed (out of sync)
4
4
Audio overload, left channel
8
5
Audio overload, right channel
16
6
Network or channel ID fault
32
The default is 255.
Remote Monitor and Control Operation
4-5
AS
Algorithm Select
Use this command to select or read the algorithm to either ISO/MPEG or
Musicam.
Syntax
AS <parameter>
AS ?
Parameters
Valid <parameter> values are as follows:
AT
0 – (default) ISO/MPEG Layer II/IIA, provides connectivity to proprietary
codecs
1 – ISO/MPEG Layer II/IIA connectivity
Audio Test Tone Mode
Use this command to set or read the decoder tone generation mode.
Syntax
AT <parameter>
AT ?
Parameters
<parameter> specifies the channel(s) over which the tone is generated and the
tone frequency.
A <parameter> of 1 to 6 generates a tone continuously until the user stops it by
entering AT 0.
Valid <parameter> values are as follows:
4-6
0 – Normal operation (default)
1 – Left audio channel, 1,000 Hz tone
2 – Right audio channel, 1,000 Hz tone
3 – Both audio channels, 1,000 Hz tone
5 – Left audio channel, 9,600 Hz tone
6 – Right audio channel, 9,600 Hz tone
7 – Both audio channels, 9,600 Hz tone
Remote Monitor and Control Operation
BL
Block Length
Use this command to set or read the maximum block length used for the protocol
of the ancillary data where <parameter> is the length of the block in bytes.
Syntax
BL <parameter>
BL ?
Parameters
Valid <parameter> values are from 30 to 255. The default is 30.
ABR200/75 receivers can only accept block lengths of up to 50 bytes.
CF
Clear Fault
Use this command to clear the fault specified by <parameter> in the fault
history register.
Syntax
CF <parameter>
Parameters
The default is 0.
If <parameter> = 0, all faults are cleared.
CI
Channel ID
Use this command to set or read the channel ID number that is sent out as part of
the relay control message.
Syntax
CI <parameter>
CI ?
Parameters
Valid <parameter> range is 1 through 255. The default is 1.
Additional Information
For a description of the channel ID, refer to the chapter on functional description
and theory of operation.
Remote Monitor and Control Operation
4-7
CM
Contact Map
Use this command to allow the codec to be configured to provide a mapping of
relay contacts at the transmitting codec to relay contacts at all receiving decoders,
both internal and over the satellite network.
Syntax
CM <map values>
CM ?
Parameters
The map is a series of eight parameters separated by commas, which indicates a
correspondence of transmitting relays to receive relays. The mappings are
designated by decimal integer values. The first transmitting relay designator
corresponds to receive relay 1, the second corresponds to receive relay 2, etc.
through receive relay 8.
Additional Information
CM 3,2,1,4,15,6,6,7 performs the relay mapping as follows:
Transmitter
Relay
Receive
Relay
3
1
2
2
1
3
4
4
15
5
6
6
6
7
7
8
The default is 1,2,3,4,5,6,7,8.
4-8
Remote Monitor and Control Operation
CO
Relay Contact Control
Use this command to allow the receive relays to be temporarily
activated/deactivated for test purposes.
Syntax
CO <string>
CO ?
Parameters
The <string> in the command line is an 8-byte character string that controls the
state of each relay contact. The first character controls relay number 1, the second
controls relay number 2, etc. through relay 8.
Valid <string> values are as follows:
0 – Deactivates a relay
1 – Activates a relay
X – Do not care (normal control channel processing)
The default is XXXXXXXX.
Additional Information
This command is implemented before the relay sense command processing,
thereby permitting a logical control of the contacts, not physical contact closure.
CQ
Contact Status Query
Use this command to query the physical state of the relay contact closures.
Syntax
CQ ?
Additional Information
The value returned is an eight-character value, each character representing the
status of an individual relay. The first character corresponds to the first relay, the
last character corresponds to the last relay.
A 0 for a relay indicates that the relay is open, a 1 indicates that the relay is closed.
Remote Monitor and Control Operation
4-9
CS
Contact Sense
Use this command to control the normal (deactivated) position for the DAC700
decoder relay closures.
Syntax
CS <string>
CS ?
Parameters
The <string> is an 8-byte character string with each character position
controlling the normal state of a relay. Each character is separated by a comma.
The first character controls relay number 1, the second character controls relay
number 2, etc. through relay number 8.
A 1 for an individual character indicates that the relay is normally closed and that
the relay is activated by opening it. A 0 for an individual character indicates that
the relay is normally open and that the relay is activated by closing it.
The default is 0,0,0,0,0,0,0,0.
DC
Display Configuration
Use this command to instruct the receiver to display its software version.
Syntax
DC
4-10
Remote Monitor and Control Operation
DD
Decoder Ancillary Data Rate
Use this command to set or read the decoder ancillary (Aux) data (baud) rate.
Syntax
DD <baud>,<parity>,<data_bits>,<stop_bits>
DD ?
Parameters
The valid <parameter> values are as follows:
<baud>
300, 1200, 2400, 3600, 4800, 7200, 9600, 19200, 384000
<parity>
O, E, N (odd, even, none)
<data_bits>
7 or 8
<stop_bits>
1 or 2
Defaults
38400,N,8,1
This value is automatically set when the AG value for the encoder is modified.
Remote Monitor and Control Operation
4-11
DM
Duplex Mode
Use this command to set or read the mux/demux operation to full duplex or
simplex mode.
Syntax
DM <mode>
DM ?
Parameters
Valid <mode> values are:
0 – Simplex mode
1 – Full duplex mode (default)
DM should be set to 0 (simplex) if PP is set to a rate more than 9600 for
Passthrough.
Additional Information
In duplex mode, the DAC700 encodes and sends the digitally compressed data out
and loops it back through its onboard decoder. The signal is then available as
needed in monitoring.
In simplex mode, the DAC700 encodes and sends the digitally compressed data
out without looping this information back through its onboard decoder.
4-12
Remote Monitor and Control Operation
FL
Fault Status
Use this command to display accumulated faults.
Syntax
FL
Additional Information
The faults are bit-mapped registers, with each bit and associated weight assigned
to a particular fault condition. The output value is the sum of all set fault weights.
The table below provides a description of each fault and its weight.
If the Audio Overload, Left Channel and Audio Overload, Right Channel are
active, the FL command returns the value 24.
Fault Condition
IN
Weight
Encoder PLL not locked
1
Decoder PLL not locked
2
Decoder not framed (out of sync)
4
Audio Overload, Left Channel
8
Audio Overload, Right Channel
16
Network or channel ID fault
32
Master Reset
Use this command to reset nonvolatile parameters to their factory default settings.
(See Table 4-3.)
Syntax
IN 9346
Additional Information
A related command, RE, resets the entire unit and reinitializes all volatile
parameters, but it does not reset the nonvolatile parameters.
Remote Monitor and Control Operation
4-13
LB
Loopback Mode
Use this command to set or read the codec loopback mode.
Syntax
LB <loopback mode>
LB ?
Parameters
Valid <loopback mode> values are as follows:
0 – External baseband input operation
1 – PCM loopback
2 – Normal operation (default)
Additional Information
In external baseband input operation, an ISO/MPEG Layer II/IIA stream from an
external digital audio is brought in through the broadcast data port and decoded.
From the decoder, data is sent to the DAC700, converted to analog audio, and sent
out the analog output port. An independent ISO/MPEG Layer II/IIA stream can be
sent out the broadcast data port.
In the PCM loopback operation, analog audio is converted into 16-bit linear PCM
data and transferred directly from the analog-to-digital converter output to the
digital-to-analog converter input. The PCM data is processed through the
DAC700, converted into analog audio, and sent to the analog output port.
In the normal operation, analog audio is converted into 16-bit linear PCM data and
transferred directly from the audio/data encoder output to the decoder input. The
PCM data is processed through the decoder, converted into analog audio, and sent
to the analog output port.
4-14
Remote Monitor and Control Operation
LR
Left/Right Channel Toggle
Use this command to set or read the sense of the left and right audio channel
output on the DAC700 decoder only.
Syntax
LR <parameter>
LR ?
Parameters
Valid <parameters> are:
0 – Normal sense (default)
1 – Reverse sense
2 – Left input on both left and right output
3 – Right input on both left and right output
This will not affect the sense of the audio transmitted to the receiver.
MU
Audio Mute
Use this command to set or read the muting of both the analog and digital audio
outputs of the DAC700 decoder.
Syntax
MU <parameter>
MU ?
Parameters
Valid <parameters> are:
0 – Unmuted, audio outputs enabled (default)
1 – Muted, audio output disabled
2 – Left channel muted, right channel unmuted
3 – Right channel muted, left channel unmuted
This will not affect the audio transmitted to the receiver.
Remote Monitor and Control Operation
4-15
NI
Network ID
Use this command to set or read the network ID number that is sent out as part of
the relay control message.
Syntax
NI <parameter>
NI ?
Parameters
Valid <parameter> range is 1 through 255. The default is 1.
PC
RS-232 Monitor and Control Port Configuration
Use this command to set or read the RS-232 M&C port configuration.
Syntax
PC <baud>,<parity>,<data_bits>,<stop_bits>
PC ?
Parameters
Valid <parameters> are as follows:
4-16
<baud>
1200, 2400, 4800, 9600
<parity>
O, E, N (odd, even, none)
<data_bits>
7 or 8
<stop_bits>
1 or 2
Defaults
1200,O,7,1
Remote Monitor and Control Operation
PD
Preset Definition
Use this command to set or read the preset definition. <preset_number>
identifies each unique definition.
Syntax
PD <preset_number>,<network_id>,<channel_id>,
<encoder_mode>,<timing>,<ag_value>,
<transmit_channel_rate>,<receive_channel_rate>
PD ?
Parameters
The valid <parameter> range of preset numbers is 1 to 8. The default is
1,1,1,1,O,38400,128000,128000.
Additional Information
The preset definition can be used to preset the configuration parameters for each
channel into the DAC700 for that channel. To do this, the user defines the
configuration for each channel using the PD command, then assigns the preset
definition for that configuration to a particular DAC700 using the Preset Select
(PS) command.
The preset definition can also be used in redundancy protection. In redundancy
protection, an extra DAC700 and modem pair serves as a backup to any one
channel of a DAC700 and modem pair. When a user-defined fault is detected, a
channel switchover automatically occurs. This switch initiates the replacement of
the faulty channel’s DAC700 and modem pair with the spare DAC700 and modem
pair.
Switchovers are controlled by the Preset Mode of the DAC700. To use this mode,
three commands need to be configured: Preset Definition (PD), Preset Mode
(PM), and Preset Selection (PS). Using the PD command, the user enters resets for
all the channels in the system into a spare DAC700 for redundancy protection.
To enable the preset mode, the user sets the PM command for each DAC700 to 1.
When a fault is detected and the modem protection switch performs a channel
switchover, the address of the faulty channel is sent to the spare DAC700 and a
signal routing switch. With PM = 1, the spare DAC700 receives the address,
selects the preset for that channel, and uses these parameters to reconfigure itself
to mirror the faulty channel.
Upon receiving the faulty channel’s address, the signal routing switch selects the
faulty channel’s audio input and routes it to the spare DAC700 to complete the
switchover.
Once the switchover is complete, the signal from the spare codec/modem pair
proceeds to the RF terminal to be transmitted to the satellite, via a satellite
antenna, and then to the receiving sites.
Remote Monitor and Control Operation
4-17
PM
Preset Mode
Use this command to set or read the preset mode.
Syntax
PM <parameter>
PM ?
Parameters
Valid <parameters> are as follows:
0 – Mode is disabled (default)
1 – Presets are controlled from the three hardware input lines
2 – Presets are controlled by the PS command
Additional Information
In mode 1, the presets are controlled by the three TTL input lines on the
AUX/AES port P3. The mappings of these pins to the preset definitions are as
follows:
4-18
Preset No.
Pin 3
Pin 4
Pin 5
1
0
0
0
2
0
0
1
3
0
1
0
4
0
1
1
5
1
0
0
6
1
0
1
7
1
1
0
8
1
1
1
Remote Monitor and Control Operation
PP
Data Port 2 Configuration (Passthrough)
Use this command to set or read the data port 2 configuration.
Syntax
PP <baud>,<parity>,<data_bits>,<stop_bits>
Parameters
Valid <parameters> are as follows:
PS
<baud>
300, 1200, 2400, 4800, 9600
<parity>
O, E, N (odd, even, none)
<data_bits>
7 or 8
<stop_bits>
1 or 2
Defaults
2400,O,7,1
Preset Selection
Use this command to set or read the current preset.
Syntax
PS <parameter>
PS ?
Parameters
The valid <parameter> range is 1 through 8. The default is 1.
Additional Information
If preset mode = 1, then this command is read-only and reports back the current
hardware preset selection number.
When a preset is selected, the associated preset definition parameters are loaded
into their respective command values for unit reconfiguration.
Remote Monitor and Control Operation
4-19
PT
Passthrough Mode
Use this command to set or read the passthrough mode.
Syntax
PT <parameter>
PT ?
Parameters
Valid <parameter> values are:
RA
0 – (default) disables mode
1 – enables mode
Remote Port Address
Use this command to set or read the remote port address for the unit.
Syntax
RA <parameter>
RA ?
Parameters
The valid <parameter> address range is 1 through 31. The default is 31.
RC
Remote Control Port Configuration RS-485
Use this command to set or read the RS-485 M&C (remote control) port
configuration.
Syntax
RC <baud>,<parity>,<data_bits>,<stop_bits>
RC ?
Parameters
Valid <parameters> are as follows:
4-20
<baud>
1200, 2400, 4800, 9600
<parity>
O, E, N (odd, even, none)
<data_bits>
7 or 8
<stop_bits>
1 or 2
Defaults
2400,O,7,1
Remote Monitor and Control Operation
RD
Receive Channel Rate
Use this command to set or read the receive channel rate operation for the decoder.
The Receive Channel Rate should be the same as the Transmit Channel Rate (TD).
Syntax
RD <parameter>
RD ?
Parameters
Valid <parameters> are:
RE
56000
64000
96000
112000
128000 (default)
192000
256000
384000
Resets the Unit
Use this command to reset all of the hardware on the DAC700.
Syntax
RE
Parameters
The following volatile parameters are set:
AT 0
CO XXXXXXXX
CF 0
LB 2
Additional Information
Issuing an RE command is the same as power cycling the unit. All volatile
parameters will be reset to the their default state. All nonvolatile parameters
remain unchanged.
Remote Monitor and Control Operation
4-21
RM
Relay Message Interval
Use this command to set or read the time interval in 100-ms increments between
relay control message updates.
Syntax
RM <parameter>
RM ?
Parameters
Valid <parameter> value range is 0 (off) through 100 (10 seconds). The default
is 1 (100 ms).
ST
Real-Time Status
Use this command to read real-time faults.
Syntax
ST <parameter>
Parameters
The faults are bit-mapped registers, with each bit and associated weight assigned
to a particular fault condition. The table below provides a description of each fault
and its weight.
Fault Condition
4-22
Weight
Encoder PLL not locked
1
Decoder PLL not locked
2
Decoder not framed (out of sync)
4
Audio Overload, Left Channel
16
Audio Overload, Right Channel
32
Network or channel ID fault
64
Remote Monitor and Control Operation
TD
Transmit Channel Rate
Use this command to set or read the transmit channel data rate operation for the
decoder.
Syntax
TD <parameter>
TD ?
Parameters
Valid <parameters> are as follows:
TE
56000
64000
96000
112000
128000 (default)
192000
256000
384000
Set Protection Mode
Use this command to set or read the protection mode.
Syntax
TE <parameter>
TE ?
Parameters
Valid <parameters> are as follows:
0 – Disabled
1 – Enabled (default) The decoder input comes from the encoder’s output, and
the transmit terminal timing output is qualified with the decoder’s audio frame
sync status.
Remote Monitor and Control Operation
4-23
TM
Encoder (Transmitter) Mode
Use this command to set or read the encoder mode.
Syntax
TM <parameter>
TM ?
Parameters
Valid <parameters> are as follows:
TT
0 – Mono (default)
1 – Dual mono
2 – Joint stereo
Transmit Timing Selection
Use this command to set or read the transmit timing mode.
Syntax
TT <timing mode>
TT ?
Parameters
Valid <timing mode> values specify the mode as follows:
4-24
0 – Internal (default)
1 – External (from ST input)
2 – External (from RT input)
3 – AES/EBU Interface
Remote Monitor and Control Operation
UA
Relay, Data, In-Band Signaling
Use this command to turn on and off decoder relay, data, and/or IBS.
The command does not effect encoder relay, data or IBS.
Syntax
UA <parameter>
UA ?
Parameters
Valid <parameters> are:
Relay Data
IBS
Off
Off
0 – Off
1 – On
Off
Off
3 – On
On
Off
7 – On
On
On
Additional Information
Seven (7) indicates that all switches, relay, data, and IBS, are ON; it is the default.
UB
User Data Time or Send Interval
Use this command to allow the user to determine the period at which user data is
sent out with the aggregate data.
Syntax
UB <parameter>
UB ?
Parameters
Valid <parameter> values specify the value in milliseconds; the valid range is
0 to 1000.
A value of 0 indicates no time interval and causes the characters to be sent as they
are received with one character per packet. The default is 500.
Example
A <parameter> of 500 sets the send interval to 500 ms, or 0.5 sec.
Remote Monitor and Control Operation
4-25
UC
Data Port 1 Configuration (User Data)
Use this command to set or read the user data port configuration.
Syntax
UC <baud>,<parity>,<data_bits>,<stop_bits>
UC ?
Parameters
Valid <parameters> are as follows:
UT
<baud>
0 (off), 300, 1200, 2400, 4800, 9600
<parity>
O, E, N (odd, even, none)
<data_bits>
7 or 8
<stop_bits>
1 or 2
Defaults
2400,O,7,1
User Termination
The user termination command enables the user to specify an 8-bit character or
value which is checked against incoming characters.
Syntax
UT <parameter>
UT ?
Parameters
<parameter> is the decimal value of the ASCII character to be used as the
termination character. The default is 0.
Additional Information
If the value is less than zero and matches a character, then the character is
discarded from the input user stream, and the current user block is terminated. If
the character is greater than zero, then the termination character is stored in the
current block for transmission, and the block is terminated. A zero value character
disables input termination.
Example
If N = 65, when ASCII A is detected in the input user data stream, the current user
data block is sent out with A as the last character.
If N = -65, when A is detected, the block is sent without A.
4-26
Remote Monitor and Control Operation
XM
Relay Mapping
Use this command to set or read the relay input port configuration.
Syntax
XM <active_input_mask>,<polarity_mask>,<debounce>
XM ?
Parameters
The three <parameters> are defined as follows:
<active input mask>
The active input mask selects which of the 16 inputs will be used in forming
the relay control word.
The mask is specified in a decimal format with 65535 selecting all 16 bits;
zero selects no active inputs. Selection numbers other than zero are:
Sensor Input Number
Selection Number
0
1
1
2
2
4
3
8
4
16
5
32
6
64
7
128
8
256
9
512
10
1024
11
2048
12
4096
13
8192
14
16384
15
32768
<polarity mask>
The polarity mask selects the sense of the input on a bit basis in decimal
format. A 1 selects inverted, and a 0 selects no inversion.
For example, 65535 selects all bits to be inverted before being transmitted.
Zero selects all bits to be noninverted. Given active-low hardware inputs, the
inverted state, 65535, provides true polarity in the relay message packet.
<debounce>
The debounce selects the time interval applied to all inputs before a relay
message is generated.
Valid values are 20 to 1,000 ms. The default is 65535,65535,20.
Remote Monitor and Control Operation
4-27
The IN command resets the nonvolatile parameters to their factory default
settings, as shown in Table 4-3.
Table 4-3
4-28
Factory Default Settings
Command
Default Value
AB
0
AG
38400,N,8,2
AM
255
AS
0
AT
0
BL
30
CF
0
CI
1
CM
1,2,3,4,5,6,7,8
CO
XXXXXXXX
CS
0,0,0,0,0,0,0,0
DD
38400,N,8,1
DM
1
LB
2
LR
0
MU
0
NI
1
PC
1200,O,7,1
PD
1,1,1,1,O,38400,128000,128000
PM
0
PP
2400,O,7,1
PS
1
PT
0
RA
31
RC
2400,O,7,1
RD
128000
RM
1
TD
128000
TE
1
TM
0
TT
0
Remote Monitor and Control Operation
Table 4-3
Factory Default Settings (continued)
Command
Default Value
UA
1
UB
500
UC
2400,O,7,1
UT
0
XM
65535,65535,20
Remote Monitor and Control Operation
4-29
COMSTREAM
®
A Spar Company
4-30
Remote Monitor and Control Operation
ComStream Packet Protocol
Overview
5
This chapter presents an overview of the ComStream Packet Protocol and
includes:
Packet format and contents
Extended addressing
Controller-to-modem command structure and slave responses
Packet communication modes
Special packet control commands
In addition, specifications for the ComStream packet protocol and the physical
interface connectors are described.
Packet Protocol Interface
The ComStream packet protocol uses the RS-485 bus interface to control devices
that reside on the bus. The RS-485 interface allows for a maximum of 31 devices
to be connected to a single bus and is configured as a party line. Each device on
the bus is given an address from 1 to 31 and responds to commands and messages
containing its specific address. The default address for the DAC700 is 31.
Packet Protocol Messaging
Commands and messages are sent between a controller and individually
addressable devices, referred to as slaves, via information packets. Some packets
sent from the controller may request a return acknowledgment packet from the
slave. This acknowledgment packet:
Indicates if the command has been executed
Replies with the appropriate error and/or status messages
Signals that the slave can receive and process another packet
ComStream Packet Protocol
5-1
The rate at which the controller can send messages to:
One specific slave is determined either:
Implicitly by the slave’s message handling rate specification
Explicitly by acknowledgment packets sent from the slave back to the
controller
Different slaves are determined by the baud rate of the communication
channel
Packet Format and Content
ComStream packet protocol runs under the standard asynchronous ASCII format
with 1 start bit, 7 data bits, odd parity, and 1 stop bit.
Each packet must conform to the format shown in Figure 5-1.
Byte
Count
STX
Device
Address
Control
Byte
Data
Checksum
ETX
F205-01
Figure 5-1 Packet Format
Each byte within the packet is defined as follows:
STX – Signifies the beginning of a packet. Its ASCII value is STX=02H.
Byte Count – Represents the total number of bytes in the packet including the
STX and ETX. The minimum count is 6, and the maximum count is 127.
Device Address – Indicates the destination of a packet and is bit mapped as
follows:
Bits 0-4 signify the slave address. Although each slave recognizes only
those packets that are addressed to it, all slaves will also respond to, but
not acknowledge, packets addressed to device address zero.
Bit 5 is always 1
Bit 6 is the address extension bit. This bit allows a packet to be addressed
to a nonprimary device, that is, a device not directly connected to the
primary RS-485 bus. When set, additional address fields will follow.
Address extension bit parameters are:
•
0 – No address extension
•
1 – Address extension
Refer to the “Extended Addressing” section in this chapter for a more
detailed explanation.
5-2
ComStream Packet Protocol
Control Byte – Provides control information to the receiving device. It is bit
mapped differently for controller-to-slave or slave-to-controller
communication. Bit maps are as follows:
For controller-to-slave communications:
•
•
Bit 0 represents the packet acknowledge request as follows:
–
0 – slave should not acknowledge receipt of packet
–
1 – slave is required to acknowledge receipt of packet
Bits 1-6 are always 0
For slave-to-controller communications:
•
Bits 0-5 are always 0
•
Bit 6 is always 1
Data – Used to transfer information from one device to another, such as
commands from the controller to the slave or response information from the
slave to the controller. The format of this data varies depending on message
content.
Checksum – Verifies the integrity of the characters contained within a
message. The checksum is computed as the sum (modulo 128) of packet
bytes, beginning with the device address (byte) and ending with the last byte
of the data field.
ETX – Signifies the end of a packet. Its ASCII value is ETX=03H.
All controller or slave-generated packets have:
Minimum length of six bytes (Minimum packet format omits the data field and
consists of STX, Byte Count, Address, Control, Checksum, ETX)
Maximum length of 127 bytes including delimiters and checksum
All packets with a length exceeding 127 bytes or that do not meet the prescribed
format are discarded.
ComStream Packet Protocol Address Selection
To select the remote address of a DAC700 for ComStream packet protocol mode,
use the M&C port to change the packet address with the RA command. For more
information on the Packet Address command, refer to the chapter on remote
monitor and control operation.
ComStream Packet Protocol
5-3
Extended Addressing
The ComStream packet protocol allows hierarchical addressing. Any device
within the packet network may be addressed by providing a full address path.
The address field of a packet may be extended indefinitely if:
Appropriate address extension bits are set
Maximum packet length is not exceeded
Intermediate ComStream devices in the addressing chain automatically forward
the packet to the next device in the chain. Response packets, originating from the
last device in the chain, are forwarded until they reach the controller.
If an acknowledge packet is required, the controller must adjust its time-out period
to account for the packet forwarding delay encountered within the device
hierarchy.
Packet Protocol
Command Structure
All commands are initiated by a controller that sends addressed packets to the
slave units on the packet party-line interface. A controller command can be:
Configuration
Control
Status query
All commands are issued by the controller as odd parity and 7 data bits. All
responses are returned as odd parity and 7 data bits, with the exception of BD
command responses.
For a listing of specific configuration, control, or query commands, refer to the
chapter on remote monitor and control operation.
Configuration or control commands
The structure of configuration and control commands consists of:
Two- or three-letter mnemonic ASCII string
Single ASCII space character
Optional ASCII parameter string
Configuration and control commands have the following structure:
xxx parameter
5-4
ComStream Packet Protocol
Status Query Commands
The structure of a status query command consists of:
Two- or three-letter mnemonic ASCII string associated
with the parameter to be interrogated
Single ASCII space character
ASCII question mark (?) character
Status query commands have the following structure:
xxx ?
Command execution
Commands are executed when the following conditions are met:
Command is valid
Parameter value, when required, is within the valid range
Parameter value or command is compatible with the present modem
configuration
Command or query can be executed immediately
Commands that do not follow these guidelines are not executed and produce an
error code. For information on error conditions and valid command parameters,
refer to the chapter on remote monitor and control operation.
Controller Packet Command Example
To assist you in creating and sending viable packets, a byte-by-byte packet
construction for the query command EM ? is presented in this section. This EM
query packet is constructed by the controller and issued to a slave modem.
The following assumptions are made for this example:
Slave address is 1
Extended addressing is not required
Acknowledgment packet is required
ASCII codes used in this example include:
E is 45H
M is 4DH
space character is 20H
? is 3FH
ComStream Packet Protocol
5-5
The packet to issue an EM query command is constructed as shown in Table 5-1.
Table 5-1 Packet Protocol EM Query Command
Byte Description
STX
Byte
Count
Device
Address
Control
Byte
E
Before Parity
02H
After Odd Parity
02H
OAH
21H
01H
8AH
A1H
01H
?
Checksu
m
ETX
20H
3FH
13H
03H
20H
BFH
13H
83H
M
space
45H
4DH
45H
CDH
ComStream Packet Protocol Communications Modes
Two communications modes are supported by ComStream packet protocol:
One-way communication consisting of controller-to-slave transmission with
no slave response requested
Two-way communications consisting of controller-to-slave transmission with
a slave-to-controller acknowledgment response
The controller may indicate which communications mode is to be followed on a
packet-by-packet basis by transmitting the appropriate control byte to the slave.
One-way communication mode
In one-way communication, information is sent one way only—from the
controller to the slave. In this mode, the controller receives no information from
the slave and is operating in an open loop mode. In this mode, the slave does not
respond to the controller nor send any type of messages informing the controller
of commands received, nonexecuted commands, or error conditions.
Two-way communication mode
Operating in a two-way communication mode, the controller receives a response
packet from the slave for every packet transmitted. The data portion of the slave
response packet depends on the command issued by the controller.
The slave’s response to a configuration or control command will be either:
Empty packet (no data field) if the command was successfully completed
Error sequence if the slave was not able to execute the requested modification
The slave’s response to a status query will be either:
5-6
Message packet containing status information consisting of the queried
parameter, an ASCII space, and the parameter value or status information
Error sequence if the slave was unable to obtain the queried parameter
information
ComStream Packet Protocol
Special Packet Control
Commands
Most of the standard modem monitor and control commands are supported by
ComStream packet protocol. Commands which result in a response that exceeds
the maximum packet byte count of 127 bytes are not supported. All DAC700
commands are supported.
ComStream Packet
Protocol Specifications
The interface signal levels and electrical characteristics are in accordance with the
IA RS-485, full duplex, tri-state interface bus standards. The bus is configured as a
party line with a maximum of 32 devices connected to a single bus.
The physical interface connector is a 9-pin, D-type connector. Table 5-2 lists the
pinout specifications for an RS-485 device.
Table 5-2 RS-485 Device Pinout Specifications
Pin
Signal
Direction
1
Rcv-
In
5
Gnd
—
7
Rcv-
In
8
Xmit+
Out
9
Xmit-
Out
2,3,4,6
—
No Connection
A positive differential at the RCV outputs [Vrcv+> Vrcv-], also known as a space,
is intended as a TTL 0, which is considered to be a start bit per EIA specifications.
A positive differential at the Xmit inputs [Vxmit+>Vxmit-], also known as a
space, will be interpreted as a TTL 0, which is considered to be a start bit per EIA
specifications.
ComStream Packet Protocol
5-7
COMSTREAM
®
A Spar Company
5-8
ComStream Packet Protocol
Maintenance and
Troubleshooting
Overview
6
This chapter provides information about the maintenance of the DAC700. This
chapter also provides an alphabetical listing of the following:
Key performance monitoring and maintenance commands
Fault conditions
Status/fault indicator lights
These listings provide a description of each command and fault condition. Other
maintenance topics include cables and connectors.
The last section of this chapter presents information that can help troubleshoot
problems that may occur with the DAC700.
Maintenance
The DAC700 does not require scheduled or preventive maintenance. The unit has
no internal or external configuration switches, jumpers, or straps that require
setting by the technician or operator.
Cleaning the DAC700
The DAC700 may be cleaned, if desired. Before cleaning the DAC700, be sure to
unplug it from the wall outlet. Do not use water or any type of abrasive pad,
scouring powders, liquid cleansers, aerosol cleansers, or solvents such as alcohol
or benzene.
Use only a clean, soft cloth lightly moistened with a mild detergent solution. Wipe
all equipment with a clean, soft cloth lightly moistened with water to remove the
detergent solution.
Maintenance and Troubleshooting
6-1
Performance
Monitoring and
Maintenance
Commands
The DAC700 has a number of commands for monitoring key system parameters
and performing maintenance tasks. By interrogating maintenance parameters on a
periodic basis, the overall system performance level can be determined and
changed if necessary.
Table 6-1 describes the key performance monitoring and maintenance commands.
For more detail on these commands, refer to the chapter on remote monitor and
control operation.
These commands are implemented using a remote control terminal or desktop
computer operating in terminal emulation mode. For more detail on connecting
the computer to the DAC700, see the chapter on installation and initial setup.
Table 6-1 Key Performance Montoring and Maintenance Commands
Command
Description
AT
Audio Test Tone
This command sets the tone generation mode.
The DAC700 provides two internally generated audio test tones for checking the audio
performance. By entering the appropriate parameter, the user can select an audio test tone
and specify the channel to be checked—the left channel, the right channel, or both. The test
tone is generated continuously until the operator stops it by entering the appropriate AT
command parameter.
NOTE: The audio test tone is generated internally in the decoder DSP and is, therefore,
only testing the decoder section of the DAC700.
Use the remote control computer or an oscilloscope connected to the analog output port to
track the output level of the test tone. The test tone frequency level should be within ±0.5 dB
of the stable level (active balanced output drives down to 50 ohm loads or unbalanced
output).
If the audio test tone is muted or not present, check to see if the MU (audio mute) command
is active. Also check to see if the right and left channels can be reversed. Check this by
using the LR (left/right channel toggle) command.
CO
Relay Contact Control
The CO command controls the relay contacts logically so they can be temporarily
activated/deactivated without physical contact closure. Use this command to check for
correct contact configuration and operation.
DC
Unit Configuration
This command lists the current unit operating parameters. Make sure the configuration
parameters match the operating requirements. If appropriate, change the parameters to
provide the intended unit performance.
Master Reset
This command resets the nonvolatile parameters to their factory default settings. (For a table
of factory defauls, see the chapter on remote monitor and control operation.) The RE
command resets and reinitializes the unit but does not reset the nonvolatile parameters.
IN 9346
6-2
Function
Maintenance and Troubleshooting
Table 6-1 Key Performance Montoring and Maintenance Commands (continued)
Command
Function
Description
LB
Loopback
This command can be used to isolate system faults to a failure of the DAC700 unit or of
another unit in the system, such as the modem or ABR receiver. Three loopback modes are
available:
External Baseband Input Loopback Operation (LB 0)
In external baseband input operation, an ISO/MPEG Layer II/IIA stream from an external
source, is brought in through the broadcast data port, decoded, and sent out the audio
output ports. An independent ISO/MPEG Layer II/IIA stream can also be sent out the
broadcast data port. This mode can be used to monitor the uplink, since you are using
the DAC700 as a decoder only.
External baseband input audio means that the onboard decoder and the DAC are
operating correctly. Abnormal, muted, or absent loopback audio means that either the
decoder or DAC is not operating correctly or is improperly configured.
PCM Loopback Operation (LB 1)
In PCM loopback operation, analog audio is converted into 16 bit linear PCM data and
transferred directly from the ADC output to the DAC input bypassing the DSP
encoder/decoder. This mode can be used to verify the ADC performance while
bypassing the algorithm.
Normal PCM loopback audio means that the audio transmit and receive converters are
operating correctly. Abnormal, muted, or absent loopback audio means the ADC, the
DAC, or both have either failed or are not properly configured.
Normal Loopback Operation (LB 2)
In normal operation the data is received from the analog input port, encoded, then sent
out the broadcast data port. From the encoder, data is also sent to the decoder.
Normal audio means that the audio transmit and receive sides are operating correctly.
Abnormal, muted, or absent loopback audio means that either or both sides are not
properlyconfiguredorhavefailed(thatis,audio/dataencoderordecoder,ADC,orDACcircuits).
RE
Reset Unit
This command resets the entire unit and reinitializes all parameters. It is identical to a
hardware reset. Unlike the IN 9346 command, the RE command does not reset the
nonvolatile parameters.
This command should be used only if the technician suspects that one or more user-defined
parameters are incompatible with the unit’s physical configuration, functional configuration,
or both.
Refer to the RE command description in the chapter on remote
monitor and control operation for the parameters affected and their default values.
XM
Relay Configuration
This command sets or reads the current or existing relay parameters.
Check the relay input port configuration to determine the current mapping parameters. If
change is appropriate, each contact can be configured independently or in combination with
other contacts by the relay control messages from the unit controller.
Maintenance and Troubleshooting
6-3
Fault Condition
Descriptions
Table 6-2 provides a description of fault conditions. Periodically check the current
and accumulated fault codes using the FL or ST commands at the remote control
computer.
Table 6-2 Fault Conditions
Fault
Status/Fault Indicator
Lights
Condition
Tx PLL Unlock
The TxPLL unlock fault occurs when the PLL reference is out of
phase, exceeds the 25 Hz limit, or is not present.
Rx PLL Unlock
This fault occurs when the PLL reference is out of phase,
exceeds the 25 Hz limit, or is not present.
Decoder Not Framed
This fault occurs when the encoder output is abnormal,
intermittent, or fails, causing the decoder to lose frame
synchronization.
Audio Overload—Left
Channel
This fault occurs when the input level exceeds +18 dBu
maximum, causing input clipping, distortion, and noise.
Audio Overload—Right
Channel
This fault occurs when the input level exceeds +18 dBu
maximum, causing compression, distortion, and noise.
Network/Channel ID Fault
This fault is generated when the decoder has not received a
network/channel ID for a period of 10 seconds. This fault
indicates that either the decoder is not functioning properly, or
the encoder is not transmitting network/channel IDs.
NOTE: Check the RM value to make sure the relay interval is
not zero.
Two front panel indicators provide fault alarm information—Overload and Fault
lights (LEDs). Check the indicator lights periodically, along with the accumulated
or real-time fault codes on the remote control computer.
Overload Indicator
The red overload warning indicator illuminates when the analog audio input level
exceeds the +14 dBu limit. The right channel analog audio is provided via the
analog input port.
6-4
Maintenance and Troubleshooting
Fault Indicator
A red indicator light appears when a summary fault occurs. This indicates one or
more of the following failures:
Audio muted or not present
Transmit or receive PLL out of lock
Encoder or decoder DSP errors
Unit controller watchdog time-out exceeded
Processor memory failure
Power Indicator
The indicator light is green as long as AC line power is applied to the unit power
supply and the internal DC voltages are normal. The light goes off if one of the
following fails:
AC line power
Internal DC voltages
Power supply module
Unreliable operating power can affect operation of the DAC700 unit and can
sometimes damage electronic equipment or components. Power disturbances can
be caused by a variety of sources, including lightning, switching high power
electrical equipment on and off, and utility company activities such as power
factor correction.
Power problems may cause slow or erratic unit operation, audio distortion,
intermittent alarms, or loss of configuration. In some cases, even unit or
component failure can occur.
Connectors and Cables
Check the connectors on the rear panel of the DAC700 unit for any of the
following defects:
Loose, bent, or broken pins or recessed or missing pins in a connector,
resulting in misalignment, improper mating, overheating, intermittent
electrical contact, or shorting
Cracked or broken connector shells, resulting in intermittent electrical contact
or shorting
Bare wire contact with a metal casing, resulting in overheating, intermittent
electrical contact, or shorting
Defective threads, missing guide pins, or key misalignment, resulting in
improper mating, electrical contact, or shorting
Maintenance and Troubleshooting
6-5
Check the interconnection cables on the unit and associated equipment for any of
the following defects:
General
Troubleshooting
Loose, cracked, or missing insulation and connectors on cables, resulting in
intermittent or no electrical contact or shorting
Discolored, melted, or burnt insulation, resulting from overloads, exceeding
voltage/current ratings, or shorting
Cable routed too close to electromagnetic interference (EMI) sources,
resulting in intermittent data losses, excessive signal noise, crosstalk,
feedback, or poor quality audio or data transmissions
The general troubleshooting procedure requires using a remote control computer
or laptop terminal. Also, the status and fault indicators on the front panel should
be used to determine the cause of unit failures. Associated system equipment or
facilities fault indications should be used, since they can assist in troubleshooting
the DAC700 unit. For general troubleshooting, perform the following steps:
1. Check the status and fault indicator lights on the unit front panel for any
alarms.
2. Using the remote control computer, check the fault display for any unit fault
codes.
3. Check for any fault indications in associated system equipment, such as the
modem, ABR receiver(s), RT terminal, control console, event sequencer, etc.
4. Check for any facility services faults, such as AC line power surge, drop,
brownout, or loss; excessive temperature or humidity conditions in equipment
room or enclosure; air conditioning, cooling fans, or blowers not operating;
dirty or blocked air filters; etc.
6-6
Maintenance and Troubleshooting
Unit Troubleshooting
Table 6-3 provides a list of faults with the probable cause and corrective action
that applies to the DAC700 unit. The remote control computer, laptop terminal, or
terminal emulator is required to make full use of the troubleshooting information
in the table. The status and fault indicators on the front panel should be used in
conjunction with the remote control computer.
Table 6-3 DAC700 Unit Troubleshooting
Fault Indication
Action
Power indicator light
(green) is off
Overload indicator light
(red) is on
This indicates that the analog audio input level exceeds +18 dBu. Restore input audio to normal peak
level.
Fault indicator light (red) is
on
Tx PLL unlock fault code
Ensure the transmit PLL reference is present, in phase, and within the 25 Hz limit.
Rx PLL unlock fault code
Decoder not framed fault
code
This indicates the audio/digital decoder has lost frame synchronization because the encoder output is
abnormal, intermittent, or has failed.
Audio overload left channel
fault code
This indicates analog audio input to the left channel exceeds the +18 dBu maximum level. Restore input
audio to normal peak level.
Audio overload right
channel fault code
This indicates analog audio input to the right channel exceeds the +18 dBu maximum level. Restore input
audio to normal peak level.
Encoder DSP alarm code
This code indicates that audio/digital encoder DSP 1/DSP 2 is not working correctly or has failed.
Anomalous or failed ADC operation affects downstream DSPs.
Check analog audio input.
If it is overloaded, too low, or absent, restore it to normal peak level.
Decoder DSP alarm code
Ensure the unit is plugged into an active AC outlet.
Verify that the line cord is firmly plugged into the rear panel receptacle.
Ensure the line cord is not at fault by using a known working cord.
This is a summary alarm that means one or more faults have occurred.
Use the FL command (FL ?) to determine what faults are occurring. For each fault identified, refer to
the fault description and suggested actions presented in this table.
Ensure the audio is normal.
Ensure the unit controller has not exceeded the watchdog time-out and that the processor memory is
functioning normally.
Ensure that the receive PLL reference is present, in phase, and within the 25 Hz limit.
Check the timing source.
If the internal source 12.288 MHz crystal-controlled oscillator (master clock) is being used,
switch to an external timing source.
If an external source is being used for send timing (ST) or receive timing (RT), switch to an
internal timing source.
Ensure audio/digital decoder DSP 4 operation is normal.
Ensure DAC operation is normal.
Maintenance and Troubleshooting
6-7
COMSTREAM
®
A Spar Company
6-8
Maintenance and Troubleshooting
Technical Specifications
and Port Information
Audio Performance
A
Operation
Full duplex, encoder operates independently of
decoder
Compression Technique
ISO/MPEG Layer II/IIA
Operating Rates (Analog)
56, 64, 96, 112, 128, 192, 256, and 384 kbps
Operating Rates (AES/EBU)
64, 96, 128, 192, 256, and 384 kbps
Operating Modes
Mono, dual mono (stereo), and joint stereo
Frequency Response
15 Hz to 20.0 kHz
Analog Sampling Rate
48 kHz
Analog Input Levels
+0 dBu average program level (APL) recommended,
+18 dBu max
Input Impedance
>100 kohm
Output Levels
+18 dBu max; active balanced or unbalanced output
drives down to 50 ohm loads; no adjustments
Digital I/O
AES/EBU transformer coupled, balanced I/O
Total Harmonic Distortion
<0.2% at 1 kHz at +8 dBm
Dynamic Range
>90 dB
Signal to Noise
>90 dB at 1 kHz (referenced to +18 dBu)
Idle Channel Noise
< -67 dBm (unweighted)
Crosstalk (two channel)
>85 dB (referenced to +18 dBu)
Stereo Phase Deviation
<1.0°, all frequencies
End-End Gain
±0.5 dB at 1 kHz, no adjustments
End-End Stability
±0.5 dB, 15 to 20 kHz, referenced to gain at 1 kHz, no
adjustments
Channel Mute
>98 dB (referenced to +18 dBu)
Technical Specifications and Port Information
A-1
Available Audio Rates
and Bandwidths
Table A-1 lists the available audio rates and bandwidths.
Table A-1 Available Audio Rates and Bandwidths
Rate (kbps)
56
64
96
112
128
192
256
384
A-2
Analog BW A (kHz)
AB 0
Analog BW B (kHz)
AB 1
Analog BW C (kHz)
AB 2
Analog BW D (kHz)
AB 3
Mono
8
5
6
7
Dual Mono (Stereo)
5
2
3
4
Joint Stereo
5
2
4
5
Mono
8
5
6
7
Dual Mono (Stereo)
4
2
3
4
Joint Stereo
5
3
4
5
Mono
20
10
12
14
Dual Mono (Stereo)
10
6
7
8
Joint Stereo
11
7
8
8
Mono
20
10
12
14
Dual Mono (Stereo)
10
6
7
8
Joint Stereo
20
10
12
14
Mono
20
10
12
14
Dual Mono (Stereo)
10
6
7
8
Joint Stereo
20
10
12
14
Mono
20
10
12
14
Dual Mono (Stereo)
20
10
12
14
Joint Stereo
20
10
12
14
Mono
20
10
12
14
Dual Mono (Stereo)
20
10
12
14
Joint Stereo
20
10
12
14
Mono
20
10
12
14
Dual Mono (Stereo)
20
10
12
14
Joint Stereo
20
10
12
14
Audio Mode
Technical Specifications and Port Information
Diagnostics
Rear Panel Ports
The following diagnostics are all selectable from the M&C port.
PCM Loopback
PCM output of A/D is fed directly into D/A
Normal Operation
Decoder input comes from encoder output instead of
the broadcast data port
Test Tone Output
1,000 Hz and 9,600 Hz; left only, right only, or both
channels
Rear Panel Port Mapping
Rear panel port mapping is shown in Table A-2.
Table A-2 Rear Panel Port Mapping
Port Number
Port Name
J1
Analog Output
J2
Analog Input
J3
AUX/AES
J4
Broadcast Data
J5
User Data
J6
M&C
J7
Relay/Control
Analog Input Port
Connector
DB-9, female
Analog Output Port
Connector
DB-9, male
Interface Type
Transformer coupled, balanced I/O
Connector
DB-15, female
AUX/AES Port
Technical Specifications and Port Information
A-3
Broadcast Data Port
User Data Port
Passthrough Port
Relay/Control Port
M&C Port
A-4
Interface Type
Asynchronous RS-422
Data Rates
56, 64, 96, 112, 128, 192, 256, and 384 kbps
Connector
DB-15, female
Clocking
Internal, external, or derived from AES/EBU
Operating Modes
1 – Normal
2 – Protected (decoder sync status controls clock
presence)
Interface Type
Asynchronous RS-232
Data Rates
300, 1200, 2400, 4800, and 9600 baud
Connector
DB-9, female
Interface Type
Asynchronous RS-232
Data Rates
300, 1200, 2400, 4800, and 9600 baud
Connector
DB-9, female
Recoder Output Contact Closures
8, form A, individually controlled
Encoder Inputs
16 TTL opto-isolated inputs
Connector
DB-37, female
Interface Type
RS-232 asynchronous or RS-485 multidrop packet;
address is configurable from control port, default is
address 31; default interface is RS-232; no
handshaking signals
Connector
DB-9, female
Functions
Unit configuration, status, and diagnostics; connects to
terminal emulator (RS-232) or ComStream packet
protocol (RS-485)
Technical Specifications and Port Information
Front Panel LED Status
The front panel LED descriptions are shown in Table A-3.
Table A-3 LED Descriptions
Label
Mechanical (IDU)
Power
Environmental
Function
LED Color
Power
Power on
Green
Audio Sync
Decoder framing OK
Green
Dual Mono
Audio mode
Green
Joint Stereo
Audio mode
Green
Overload
Left/right audio overload
Red
Blank
Fault status
Red
Size
4.5 cm x 42.5 cm x 38 cm (48 cm rack-mount);
1.75" x 17 x 15" (19" rack-mount)
Weight
<6 kg (12 lbs)
Shipping Weight
<11 kg (24 lbs)
Input Voltage (AC)
90 to 264 VAC (auto ranging)
Frequency
47 to 63 Hz
Consumption
<40 watt (typical)
Temperature
0° to 50°C (operating)
Humidity
0 to 95% noncondensing
Safety
UL 1950, CSA 950, and TUVPS EN 60950
Emission
FCC Part 15B Class A
CISPIR 22 Class B
Technical Specifications and Port Information
A-5
COMSTREAM
®
A Spar Company
A-6
Technical Specifications and Port Information
B
Interface Pinouts
Analog Output Port J1
The pin positions for the analog output port connector are given in Figure B-1.
1
2
6
3
7
4
8
5
9
F116-04
Figure B-1 DB-9 Male Connector
The pinout specifications for the analog output port connector are given in
Table B-1.
Table B-1 DB-9 Male Connector Pinouts
Pin #
I/O
Name
Description
1
O
LO+
Left Audio Output (+)
2
O
LO-
Left Audio Output (-)
3
—
—
Not Used
4
O
RO+
Right Audio Output (+)
5
O
RO-
Right Audio Output (-)
6
O
AGND
7
—
—
Not Used
8
—
—
Not Used
9
O
AGND
Analog Ground
Analog Ground
Interface Pinouts
B-1
Analog Input Port J2
The pin positions for the analog input port connector are given in Figure B-2.
5
4
9
3
8
1
2
7
6
F087
Figure B-2 DB-9 Female Connector
The pinout specifications for the analog input port connector are given in
Table B-2.
Table B-2 DB-9 Female Connector Pinouts
B-2
Interface Pinouts
Pin #
I/O
Name
Description
1
O
LI+
Left Audio Input (+)
2
O
LI-
Left Audio Input (-)
3
—
—
Not Used
4
O
RI+
Right Audio Input (+)
5
O
RI-
Right Audio Input (-)
6
O
AGND
7
—
—
Not Used
8
—
—
Not Used
9
O
AGND
Analog Ground
Analog Ground
AUX/AES Port J3
The pin positions for the AUX/AES port connector are given in Figure B-3.
8
7
6
5
4
3
15 14 13 12 11 10
2
1
9
F088
Figure B-3 DB-15 Female Connector
The pinout specifications for the AUX/AES port connector are given in Table B-3.
Table B-3 DB-15 Female Connector Pinouts
Pin #
I/O
Names
Description
1
O
SG
2
O
Status+
3
I
PS0
Preset Select Bit 0
4
I
PS1
Preset Select Bit 1
5
I
PS2
Preset Select Bit 2
6
I
DIGIN-
7
O
SG
8
O
DIGOUT-
9
I
RST-
10
O
Status-
11
—
—
12
I
Reset
13
O
DIGIN+
14
O
SG
15
O
DIGOUT+
Signal Ground
Status Closure Contact 1
AES/EBU Digital Audio In (-)
Signal Ground
AES/EBU Digital Audio Out (-)
Remote Control Reset (short to pin 1, SG)
Status Closure Contact 2
Reserved
External Reset
AES/EBU Digital Audio In (+)
Signal Ground
AES/EBU Digital Audio Out (+)
Interface Pinouts
B-3
Broadcast Data Port J4
The pin positions for the broadcast data port connector are given in Figure B-4.
8
7
6
5
4
3
15 14 13 12 11 10
2
1
9
F088
Figure B-4 DB-15 Female RS-422 Connector
The pinout specifications for the broadcast data port connector are given in
Table B-4.
Table B-4 DB-15 Female RS-422 Connector Pinouts
B-4
Interface Pinouts
Pin #
I/O
Name
Description
1
O
FG
Frame Ground
2
O
TD+
Transmit Data (+)
3
O
TT+
Terminal Timing (+)
4
I
RD+
Receive Data (+)
5
—
—
6
I
RT+
Receive Timing (+)
7
I
ST+
Send Timing (+)
8
I
SG
Signal Ground
9
O
TD-
Transmit Data (-)
10
O
TT-
Terminal Timing (-)
11
I
RD-
Receive Data (-)
12
—
—
Not used
13
I
RT-
Receive Timing (-)
14
I
ST-
Send Timing (-)
15
—
—
Not used
Not used
User Data Port J5
The pin positions for the user data port connector are given in Figure B-5.
5
4
9
3
8
1
2
7
6
F087
Figure B-5 DB-9 Female RS-232 Connector
The pinout specifications for the user data port connector are given in Table B-5.
Table B-5 DB-9 Female RS-232 Connector Pinouts
Pin #
I/O
Name
Description
1
I
AUXRTS
Aux Request to Send
2
O
RD
Receive Data
3
I
TD
Transmit Data
4
O
CTS
Clear to Send
5
O
SG
Signal Ground
6
I
RTS
Request to Send
7
O
AUXRD
Aux Receive Data
8
I
AUXTD
Aux Transmit Data
9
O
AUXCTS
Aux Clear to Send
Interface Pinouts
B-5
M&C Port J6
The pin positions for the M&C port connector are given in Figure B-6.
5
4
9
3
8
1
2
7
6
F087
Figure B-6 DB-9 Female RS-232 or RS-485 Connector
The pinout specifications for the M&C port connector are given in Table B-6.
Table B-6 DB-9 Female RS-232 or RS-485 Connector Pinouts
B-6
Interface Pinouts
Pin #
I/O
Name
Description
1
I
TD+
Transmit Data, RS-485 (+)
2
O
RD
Receive Data, RS-232
3
I
TD
Transmit Data, RS-232
4
O
CTS
Clear to Send, RS-232
5
O
SG
Signal Ground
6
I
RTS
Request to Sent, RS-232
7
I
TD-
Transmit Data, RS-485 (-)
8
O
RD+
Receive Data, RS-485 (+)
9
O
RD-
Receive Data, RS-485 (-)
Relay/Control Port J7
The pin positions for the relay/control port connector are given in Figure B-7.
19
18
37
17
36
16
35
15
34
14
33
13
32
12
31
30
9
10
11
29
28
8
27
7
26
5
6
25
24
4
23
3
22
2
21
1
20
F089
Figure B-7 DB-37 Female Connector
The pinout specifications for the relay/control port connector are given in
Table B-7.
Table B-7 DB-37 Female Connector Pinouts
Pin #
I/O
Name
Description
1
I
S1
Sensor Input 1, opto (cathode)
2
I
S2
Sensor Input 2, opto (cathode)
3
I
S3
Sensor Input 3, opto (cathode)
4
I
S4
Sensor Input 4, opto (cathode)
5
I
S5
Sensor Input 5, opto (cathode)
6
I
S6
Sensor Input 6, opt (cathode)
7
I
S7
Sensor Input 7, opto (cathode)
8
I
S8
Sensor Input 8, opto (cathode)
9
I
S9
Sensor Input 9 opto (cathode)
10
I
S10
Sensor Input 10 opto (cathode)
11
I
S11
Sensor Input 11, opto (cathode)
12
I
S12
Sensor Input 12, opto (cathode)
13
I
S13
Sensor Input 13, opto (cathode)
14
I
S14
Sensor Input 14, opto (cathode)
15
I
S15
Sensor Input 15, opto (cathode)
16
I
S16
Sensor Input 16, opto (cathode)
17
O
OPTOCOM
18
O
+12 V
19
O
SG
20
O
RC1A
Relay Closure Contact 1A
21
O
RC1B
Relay Closure Contact 1B
22
O
RC2A
Relay Closure Contact 2A
23
O
RC2B
Relay Closure Contact 2B
Opto Common (anode)
+12 V thru 220 ohm resistor
Signal Ground
Interface Pinouts
B-7
Table B-7 DB-37 Female Connector Pinouts (continued)
B-8
Interface Pinouts
Pin #
I/O
Name
Description
24
O
RC3A
Relay Closure Contact 3A
25
O
RC3B
Relay Closure Contact 3B
26
O
RC4A
Relay Closure Contact 4A
27
O
RC4B
Relay Closure Contact 4B
28
O
RC5A
Relay Closure Contact 5A
29
O
RC5B
Relay Closure Contact 5B
30
O
RC6A
Relay Closure Contact 6A
31
O
RC6B
Relay Closure Contact 6B
32
O
RC7A
Relay Closure Contact 7A
33
O
RC7B
Relay Closure Contact 7B
34
O
RC8A
Relay Closure Contact 8A
35
O
RC8B
Relay Closure Contact 8B
36
O
SG
Signal Ground
37
O
SG
Signal Ground
Glossary
16-Bit Linear PCM
A
ABR
AC
ADC
AES/EBU
Amplify
Analog-to-Digital
Ancillary Data
ANMS
APL
ASCII
Asymmetric
An audio encoding format in which 16 bits of data for each sample are used with
Pulse Code Modulation (PCM).
Amps
Audio Broadcast Receiver
Alternating Current
Analog-to-Digital Converter
Acronym for Audio Engineering Society/European Broadcast Union and their
standard for digital audio interfaces.
To strengthen audio signals that have become weaker during processing.
A device that converts an analog signal to a digital signal.
Ancillary data is nonaudio data that is processed by the DAC700. Ancillary data
has three components: relay blocks, network control message blocks, and user
data blocks. For more detail, see the definitions for each of the components.
Audio Network Management System (ComStream proprietary)
Average Program Level
American Standard Code for Information Interchange
A compression technique that requires intensive processing on the compression
end, but little processing on the decompression end.
AUX
Auxiliary
bps
Bits per second
BPSK
Buffered
Bi-Phase Shift Keying
Placed in a temporary storage location before being sent or received.
Glossary
1
CCA
CD
Codec/Multiplexer
A piece of equipment that combines the functions of both a codec and a
multiplexer. A codec consists of a series of integrated circuits that perform a
specific analog-to-digital conversion. The DAC700 codec converts analog sound
signals to a digital bit stream. A multiplexer simultaneously transmits two or more
messages on a single transmission path. The multiplexer also receives messages
and controls the communication lines.
Cyclic Redundancy Check
CSA
Canadian Standards Association
DAC
Digital-to-Analog Converter
Decibels
dBm
Decibels referenced to 1 milliwatt
dBr
Decibels above reference number
dBu
Decibels relative to a reference of 0.775 volts RMS
DSP
Digital Signal Processor – A specialized digital microprocessor that performs
calculations on the digitized signals that have been converted from analog and
sends the results on.
Duplex Mode
An optional configuration for operating the DAC700. In duplex mode, the
DAC700 encodes and sends the digitally compressed data out and loops it back
through its onboard decoder. The signal is then available as needed for monitoring
performance.
EIA
Electronic Industries Association
EMI
Electromagnetic Interference
EPROM
External Baseband
Input Operation (LB 0)
FCC
Glossary
Compact Disc
CRC
dB
2
Circuit Card Assembly
Erasable Programmable Read-Only Memory
In external baseband input operation, an ISO/MPEG Layer II/IIA stream from an
external source is brought in through the broadcast data port, decoded, and then
sent out the audio output ports. An independent ISO/MPEG Layer II/IIA stream
can also be sent out the broadcast data port.
Federal Communications Commission
FDM
Frequency Division Multiplexing
Hz
Hertz
ID
Identification
IEC
International Electrotechnical Commission
ISO
International Standards Organization
IXC
Interexchange Carrier
kbps
Thousand bits per second
kHz
Thousand Hertz
LED
Light Emitting Diode
LNA
Low Noise Amplifier
LNB
Low Noise Block downconverter
Loopback
A type of diagnostic test in which the transmitted signal is returned to the sending
device after passing through the DAC700. This enables a technician to compare
the output signal with the input signal to get some sense of what is wrong.
The DAC700 has two diagnostic loopback modes: PCM loopback and network
loopback. (For more detail, see the definitions of the specific loopback modes.)
M&C
Monitor and Control
MHz
Megahertz (million Hertz)
MPEG
MR
Motion Picture Experts Group
Master Reset
Network Control
Message Blocks
Network control message blocks are one of three types of ancillary data processed
by the DAC700. Network control messages consist of commands generated by the
ANMS computer and sent to the receivers in the transmission. Of the three types
of data, network message blocks have the second highest priority.
Normal Operation
(LB 2)
In normal operation, the data is received from the analog input port, encoded, and
then sent out the broadcast data port. From the encoder, data is also sent to the
decoder.
Glossary
3
Passthrough Mode
PC
PCM
PCM Loopback
Operation (LB1)
PLL
Point-to-Point
PPL
PROM
Protected
QPSK
RAM
The DAC700 passthrough mode is a selectable configuration for transferring user
data. Passthrough mode allows the user to transfer preformatted data.
Preformatting the data minimizes the overhead of the onboard multiplexer. The
passthrough mode can be selected at any time independent of user data, relay
control messages, or control channel information.
Personal Computer
Pulse Code Modulation
In PCM loopback operation, the data is looped from the output ADC through the
DAC, bypassing the DSP encoder/decoder. This mode can be used to verify the
ADC performance while bypassing the algorithm.
Phase Lock Loop
Communication between two points only.
Peak Program Level
Programmable Read-Only Memory
A protected system has the built-in capability to detect when a fault has occurred
in the uplink transmission of one of the channels. When a fault is detected, the
system swaps out the faulty DAC700/CM701 with the channel in the rack referred
to as the “spare.” The spare channel also consists of a DAC700/CM701. Using
this technique ensures that the rack is always “protected,” unless a fault has
previously occurred and the faulty channel has not yet been fixed.
Quadrature Phase Shift Keying
Random Access Memory
Redundancy Protection
An optional configuration in which an extra DAC700 serves as a backup to one or
more other DAC700s. Users can preset definitions to match the configuration of
the redundant DAC to one or more primary units. Users can also configure the
system to automatically swap DAC700s if a primary unit goes out of operation.
Relay Blocks
One of three types of ancillary data that can be processed by the DAC700. Relay
blocks include the input relay information and the network ID and channel ID
information. Relay blocks are sent out at user-programmable intervals in multiples
of 100 ms. The length of the interval is programmed in the DAC700 with the RM
command. Of the three types of data, relay blocks have the highest priority.
RF
4
Glossary
Radio Frequency
RF Terminal
RMA
Rx
Sampling
A radio frequency terminal is composed of a modem, an earth station, a radio, and
an uplink dish.
Return Material Authorization
Receive
The process of converting continuous signals (analog), such as voice or music,
into discrete (binary) values.
Sampling Rate
The number of times per second that an analog signal is measured and converted
to a binary number.
Shadow
To act as a backup unit; for example, to provide an extra DAC700 to back up one
or more other DAC700s. (See redundancy protection.)
Simplex
In simplex mode, the DAC700 encodes and sends the digitally compressed data
out without looping this information back through its onboard decoder.
SR
Subsystem
Swap
TDM
TTCLK
TTL Logic Levels
Tx
TxCLK
UART
UL
Unprotected
UPS
Status Relay
The major components that make up a system. For example, the DAC700 and
CM701 are the uplink modulator subsystem. The ABR200 with an LNB and dish
with IFL cable are the receive site downlink subsystem.
To switch from one operating unit to another unit with the same configuration.
Time Division Multiplexing
Transmit Timing Clock
TTL stands for Transistor-Transistor Logic and references on and off levels. A one
equals a high (+5 volts).
Transmit
Transmit Clock
Universal Asynchronous Receiver/Transmitter
Underwriters Laboratories
An unprotected system does not have the built-in capability to switch to a spare
piece of equipment when a fault occurs.
Uninterruptible Power Supply
Glossary
5
User Data Blocks
V
VDE
W
XCO
6
Glossary
User data blocks are one of three types of ancillary data that can be processed by
the DAC700. User data blocks are originated by the user and input into the
DAC700 for broadcast transmission to all receivers. Of the three types of data,
user data blocks have the lowest priority.
volts
Verband Deutscher Elektrotechniker
watts
Crystal-Controlled Oscillator
Index
A
ABR200/75 receiver
data block length 2-11
transmission channel signal
format 2-5
Acquisition range 2-5
AES/EBU
definition 3-3
Analog input port
audio input interfaces 2-9
description 3-3
interface pinout B-2
maximum input 3-3
port number A-3
Analog output
phase alignment 3-3
Analog output port 2-10
decoder interface 2-16
description 3-3
interface pinout B-1
port number A-3
Ancillary data
audio input interfaces 2-9
data channel 1 2-11
receive side 2-12
decoder processing 2-16
Ancillary data configuration
bandwidth definition 3-9
bandwidth guidelines 3-9
network control messages 3-9
relay blocks 3-9
setting the data rate 3-10
setting the mux/demux mode 3-10
user data blocks 3-9
Audio bandwidth configuration
setting the bandwidth 3-8
setting the receive rate 3-8
setting the transmit mode 3-8
setting the transmit rate 3-8
Audio input
analog audio 2-9
digitized audio 2-9
interfaces 2-9
transmit and receive timing signals
2-10
Audio output interfaces 2-10
Audio performance
analog input levels A-1
analog sampling rate A-1
channel mute A-1
compression technique A-1
crosstalk A-1
digital I/O A-1
dynamic range A-1
end-end gain stability A-1
frequency response A-1
idle channel noise A-1
input impedance A-1
operating modes A-1
operation A-1
output levels A-1
signal to noise A-1
stereo phase deviation A-1
total harmonic distortion A-1
Audio/data decoder
audio output interfaces 2-10
description 2-16
Audio/data encoder
audio input interfaces 2-9
description 2-15
AUX/AES
port number A-3
AUX/AES port A-3
audio input interfaces 2-9
description 3-3
interface pinout B-3
Available audio rates and bandwidths
A-2
B
Broadcast data port A-4
audio input interfaces 2-9
audio output interfaces 2-10
data channel 1 2-11
data rates 3-4
description 3-4
interface pinout B-4
network data interface 2-10
port number A-3
timing sources 2-13, 2-17
C
Cables
checking for damage 6-6
Channel ID
defining channel ID numbers 3-11
proper signal discrimination 2-5
Cleaning 6-1
Clock generator
audio input and output interfaces
2-10
description 2-17
CM701 modem 2-10, 2-16
ComStream packet protocol
address selection 5-3
command execution 5-5
command structure 5-4
communication modes 5-6
one-way 5-6
extended addressing 5-4
format 5-2
byte count 5-2
checksum 5-3
data 5-3
device address 5-2
ETX 5-3
minimum length 5-3
packets that do not meet
prescribed format
5-3
STX 5-2
interface 5-1
messaging 5-1
pinout specifications 5-7
specifications 5-7
Connectors
checking for damage 6-5
D
DAC700 1-1, 1-4
Data multiplexer 2-9, 2-13, 2-15, 2-16
Data port A-4
channel 1 2-11, 3-4
channel 2 2-12, 3-4, A-4
data rates 3-4
description 3-4
implementation 2-13
Index
1
interface 2-11
interface pinout B-5
port number A-3
Decoder processor 2-16
Diagnostics A-3
Duplex mode 4-12
Dynamic bit allocation 2.1-2
E
Electromagnetic interference (EMI) 3-2
Emission standards
compliance 3-3
Encoder processor 2-16
Environmental specifications A-5
F
Fault conditions
audio overload 6-4, 6-7
decoder DSP alarm 6-7
decoder not framed 6-4, 6-7
encoder DSP alarm 6-7
network/channel ID fault 6-4
Rx PLL unlock 6-4, 6-7
Tx PLL unlock 6-4, 6-7
Fields of use 2.1-3
commentary grade 2.1-3
contribution grade 2.1-3
distribution grade 2.1-3
emission grade 2.1-3
quality vs bit rates 2.1-4
Firmware version
checking as part of installation 3-7
G
Global masking threshold 2.1-2
I
Indicators
fault 6-5, 6-7
overload 6-4, 6-7
power 6-5, 6-7
Initial power-up 3-5
Installation check
establishing communication with
DAC700 3-6
performing the check 3-6
testing for faults 3-6
ISO/MPEG (Musicam)
data block 2.1-4
testing 2.1-4
ISO/MPEG Layer II/IIA 2.1-1
2
Index
J
J1 A-3
J2 A-3
J3 A-3
J4 A-3
J5 A-3
J6 A-3
J7 A-3
L
Location requirements 3-2
Loopback modes 2-20
LB 0 2-20
LB 1 2-21
LB 2 2-22
LB Command 4-14
use in troubleshooting 6-3
M
M&C interface 2-14
M&C port A-4
description 3-4
interface pinout B-6
M&C interfaces 2-14
Network data interfaces 2-10
port number A-3
Masking threshold 2.1-2
calculation 2.1-2
Masking tone 2.1-2
Mechanical specifications A-5
N
Network ID
defining network ID numbers 3-11
proper signal discrimination 2-5
P
Passthrough data 2-12, 2-13
Passthrough mode 2-12
configuration
configure data port 2 3-9
enable mode 3-9
Performance monitoring
checking audio performance 6-2
checking relay contacts 6-2
isolating system faults 6-3
listing current parameters 6-2
reset and reinitialize unit 6-3
set or read current relay parameters
6-3
Power
specifications A-5
Power module 2-20
R
Rear panel
mapping A-3
ports A-3
Relay control interface 2-1, 2-14
Relay control port
description 3-5
function 2-15
Relay/control port A-4
interface pinout B-7
port number A-3
Remote monitor and control commands
4-4
descriptions 4-4
error codes 4-2
escape character 4-1
summary 4-2
syntax 4-1
Remote operations
activate/deactivate relays
temporarily 4-9
ancillary data rate (set or read) 4-5
audio bandwidth (set or read) 4-4
audio muting (set or read) 4-15
audio test tone (set or read) 4-6
channel ID number (set or read)
4-7
clear fault 4-7
compression algorithm (set or
read) 4-6
control port configuration (set or
read) 4-16
current preset (set or read) 4-19
data block length (set or read) 4-7
data port 2 configuration (set or
read) 4-19
decoder ancillary data rate (set or
read) 4-11
display accumulated faults 4-13
display real-time faults 4-22
encoder mode (set or read) 4-24
mux/demux operating mode (set or
read) 4-12
network ID number (set or read)
4-16
passthrough mode (set or read)
4-20
preset definition (set or read) 4-17
preset mode (set or read) 4-18
protection mode (set or read) 4-23
query physical state of relay
contacts 4-9
receive channel rate (set or read)
4-21
relay input port configuration (set
or read) 4-27
remote port address (set or read)
4-20
remote port configuration (set or
read) 4-20
reset volatile parameters 4-21
sense of audio channel output (set
or read) 4-15
set position of relay closures 4-10
transmit timing mode (set or read)
4-24
user data interval (set or read) 4-25
user data port configuration (set or
read) 4-26
RS-232
data interface 2-11
M&C interface 2-14
RS-485
M&C interface 2-14
S
Satellite broadcast network
configurations 1-3
satellite link 1-2
satellite receiver 1-3
satellite transmission uplink
station 1-2
subsystems 1-2
Simplex mode 4-12
Site planning 3-1
data channel 2
receive side 2-13
data interface 2-11
Passthrough data
data channel 2
receive side 2-13
passthrough data 2-12
passthrough mode 2-12
priority 2-11
processing 2-12
rate 2-11
User data configuration
configure channel 1 3-8
set termination character 3-9
set time or send interval 3-8
User relay configuration
configure relay input port 3-11
defining message interval 3-11
mapping relays 3-10
setting contact sense polarity 3-10
T
Terminal
configuration 3-6
installation check 3-5
Timing sources 2-17
selecting a timing source 3-11
Transmission channel signal format 2-4
U
Uninterruptible power supply (UPS)
3-2
Unit controller
ancillary data 2-12
audio input 2-9
data 2-11, 2-13
data multiplexer 2-16
description 2-16
M&C 2-14
relay control messages 2-1
timing and timing source selection
2-19
user data 2-16
User data
ancillary data multiplexer 2-16
data channel 1
transmit side 2-11
Index
3
COMSTREAM
A Spar Company
4
Index