Download USER MANUAL
Transcript
USER MANUAL
USER MANUAL
1. Safety and usage information
The Clone+™ devices have been designed according to the safety standards. Before using
this unit, make sure to read the safety and usage information as well as the User Manual.
1.1 Small children and animals
The Clone+™ devices contain small parts which may cause choking or serious injuries if
swallowed. Keep this unit out of the reach of small children or animals.
1.2 Precautions
• Keep the Clone+™ device away from rain, moisture and humidity.
• Keep the Clone+™ device away from direct sunlight, heat-generating equipment or
strong magnetic field or its emitters or generators.
• It is advised not to use the Clone+™ device during the storm. It is recommended
to unplug the device from the mains to eliminate the risk of the electrical shock or
short-circuit.
• Do not clean the Clone+™ device with water, liquids or aerosols.
• The voltage of the designated power adapter that comes with this unit is 230V AC/5060Hz.
• Do not overload wall power outlets or extension cords, as this may result in the risk of
fire or electrical shock.
4
1.3 Requirements
The following are required to install and use the Clone+™ devices:
• digital satellite, cable or terrestrial receivers of Conax, Cryptoworks, MediaGuard,
Viaccess-coded pay-tv.
• a working installation* connected to each of the digital satellite, cable or terrestrial
receivers,
• valid subscriber card.
1.4 Other electronic equipment
Devices which emit radio transmission in their wireless communication may
disrupt the performance of the Clone+™ devices.
1.5 Important notes
Use only the designated power adapter and accessories approved by PYCH International
Electronics Sp. z o.o.. Using any other unsuitable power adapters and accessories which are
not approved by PYCH International Electronics Sp. z o.o. may result in damaging the unit
or severe injury.
* a working installation is herewith defined as an installation in which all the devices have been
installed properly.
5
2. About Clone+™
2.1 How it works :
The Clone+™ SRF150 Access Server is a main unit which multiplies the privileges of the
subscriber card and sends them to the authorised wireless Clone+™ CRF150 Client Cards.
The Clone+™ CRF150 Client Cards are subordinate units which co-ordinate the
information exchange between the SmartCard reader module in the digital satellite, cable
or terrestrial receiver (or CI module) and the Clone+™ SRF150 Access Server.
Note:
The Clone+™ devices only send the subscriber card privileges and do not affect the
quality of the sound and vision whatsoever.
2.2 Benefits to the user:
• viewing the digital pay-tv simultaneously on 8 TV receivers (independent channels)
with paying only for one subscriber’s plan,
• cost saving solution for the user (one subscriber’s plan serves up to 8 TV receivers).
• fast and reliable performance,
• software update via USB,
• easy and fast installation.
2.4 Product specification:
•
•
•
•
transmission: RF 868 - 915MHz, BW 150kHz, GFSK, NRZ 38.4 Kbps,
variable transmitter power from -20 to 5 dBm,
range up to 150 meters (outdoors),
DC 12V-powered.
3. Contents
Wireless Access Server SRF150
Wireless Client Card CRF150
12V power adapter
User Manual
Mini CD
USB cable
1
2
1
1
1
1
2.3 Key features:
• Dedicated for the digital tv platforms using the content encryption systems such as
Conax, CryptoWorks, MediaGuard, Viaccess,
• 8 active users,
• unauthorised access protection,
• works with all digital satellite, cable, terrestrial receivers and CI modules which are
Conax, CryptoWorks, MediaGuard, Viaccess compatible,
• an extended system of LED indicators,
• advanced Plug&Play technology,
6
•
7
4. First steps
4.1 Installation of the SRF150 Access Server and authorisation of the CRF150 Client
Cards.
Step-by-step procedure:
1. Insert the valid subscriber card of the service provider into the server’s SmartCard slot.
2.
3. Connect the power tip to the Server SRF150 and then plug the power adapter into the
230V AC/50-60Hz mains socket.
1. Wait until the Ready LED is ON.
1. Remove the subscriber card from the server’s SmartCard slot.
1. Insert the CRF150 Client Card into the server’s SmartCard slot.
1. Wait until the Upgrade LED is OFF on the CRF150 Client Card.
1. Remove the CRF150 Client Card from the server’s SmartCard slot - the Client Card is
now ready to use with digital receivers or CI modules.
Note:
To authorise another CRF150 Client Card, repeat steps 5 to 7.
2.
3. Insert the valid subscriber card of the service provider into the server’s SmartCard slot.
4.
5. Insert the CRF150 Client Card into the digital receiver or CI module.
8
9
SUBSCRIBER CARD
10
Connect the power tip to the SRF150 Server and then plug the power adapter
into the 230V AC/50-60Hz mains socket.
SUBSCRIBER CARD
Insert the valid subscriber card of the service provider into the server’s
SmartCard slot.
11
SUBSCRIBER CARD
Wait until the Ready LED is ON.
12
Remove the subscriber card from the server’s SmartCard slot.
SUBSCRIBER CARD
13
Insert the CRF150 Client Card into the server’s SmartCard slot.
14
Wait until the Upgrade LED is OFF on the CRF150 Client Card.
15
Insert the valid subscriber card of the service provider into the server’s
SmartCard slot.
SUBSCRIBER CARD
Remove the CRF150 Client Card from the server’s SmartCard slot.
16
17
4.2 Installation of the SRF150 Access Server working with Twin Slot Interface
and authorisation of the CRF150 Client Cards.
Insert valid subscriber cards of the service providers into the Twin Slot Interface’s
SmartCard slots.
Twin Slot Interface enables simultaneous work of subscriber cards of two
different service providers.
Step-by-step procedure:
Authorise the CRF150 Client Cards according to 4.1, steps 1 to 7 for first
valid subscriber card of the service provider.
Card with
the chip this side
Authorise the CRF150 Client Cards according to 4.1, steps 1 to 7 for another
valid subscriber card of the service provider.
Insert valid subscriber cards of the service providers into the Twin Slot Interface’s
SmartCard slots.
Insert the Twin Slot Interface into the server’s SmartCard slot.
Insert the Twin Slot Interface into the server’s SmartCard slot.
Insert the CRF150 Client Cards into the digital receivers or CI modules.
Insert the Twin Slot Interface as indicated
18
19
The LED indicators messages about the
SRF150 Server status
The LED indicators messages about the
SRF150 Server status
Status
LED
Description
No card in the slot.
0.3 second interval.
Invalid subscriber card or
subscriber card’s malfunction.
The Ready LED is ON for 2 seconds then it
turns OFF for 0.1 second. The cycle repeats.
Ready to use.
The unit is reading the subscriber
card.
Connection established with the
CRF150 Client Card.
The Link LED is ON when connecting with the
CRF150 Client Card and it goes OFF when the
communication was successful. The Signal
Level LED indicates the full, 3-stage level of
the CRF150 Client Card signal.
The signal level.
The Signal Level LED indicates the full, 3stage level of the CRF150 Client Card signal
when connected.
Authorising the CRF150 Client Card.
Software update.
The SRF150 Server is connected to a PC via
USB cable.
Status
LED
Description
Authorising the
access to the
SRF150 Server.
The Upgrade LED blinks for about 4 seconds, stays ON for
0.5 second and goes OFF.
Calibration.
The process takes up to 20 seconds.
Connecting to the
SRF150 Server.
The Link LED is ON when the CRF150 Client Card is ready
to connect to the SRF150 Server and goes OFF when the
connection was successful.
Connection with
the SRF150 Server
within 3 minutes
failed.
The signal level.
The Signal Level LED indicates the full, 3-stage level of the
SRF150 Server signal when connected.
System update.
The Signal Level LED indicates the full, 3-stage level of the
SRF150 Server signal when connected.
No access to the
SRF150 Server.
the LED
is OFF
20
the LED is
blinking
the LED
is ON
21
5. Software Update
Connect the SRF150 Server to a PC via the USB cable.
Step-by-step procedure:
1.
Connect the SRF150 Server to a PC via the USB cable.
1.
Connect the power tip to the SRF150 Server.
1.
Plug the server’s power adapter into the 230V AC/50-60Hz mains socket.
1.
Install the Clone+ Update application from the CD-ROM.
1.
2.
Start the Clone+ Update application and then press „Software Update”.
The software update will take about 3 seconds. The prompts will be displayed.
1.
Unplug the power adapter from the 230V AC/50-60Hz mains socket.
1.
Disconnect the USB cable from the SRF150 Server.
Note:
After the software has been successfully updated, follow the instructions in 4.1
- Installation of the SRF150 Access Server and authorisation of the CRF150 Client
Cards. In case of using Twin Slot Interface, follow the instructions in 4.2.
22
23
Connect the power tip to the SRF150 Server.
24
Plug the server’s power adapter into the 230V AC/50-60Hz mains socket.
25
Install the Clone+ Update application from the CD-ROM.
Start the Clone+ Update application and then press „Software Update”.
The software update will take about 3 seconds. The prompts will be displayed.
To install the Clone+ Update application, double-click on the file setup.exe.
When you are using Microsoft Windows 2000 or Microsoft Windows XP, double-clicking
on the file setup.exe may result in displaying a webpage in the Internet Explorer browser.
If this happens, start the installation wizard by double-clicking on the file Clone+ Update.
manifest.
When you are using Microsoft Windows NT, Microsoft Windows Server 2008, Microsoft
Windows Vista or Microsoft Windows7, you have to be logged in as „administrator” to be
able to run setup.exe.
After starting the installation wizard, it will advise the user to download and install the
latest version of the application. Next, the installation wizard will inform the user about
the installation of the drivers. Follow the instructions of the installation wizard. After the
installation has been successful, the Clone+ Update will run. To run the Clone+ Update
application again, go to:
Clone+ Update v1.0.0.0
Button
Menu Start => Programs => PYCH International Electronics => Clone+ Update
Note:
If the installation wizard detects that the .NET Framework 2.0 component is not
installed, the wizard will automatically download and install the missing component.
26
27
Unplug the power adapter from the 230V AC/50-60Hz mains socket.
28
Disconnect the USB cable from the SRF150 Server.
29
6. Restoring the factory settings
7. Usage and maintenance
Step-by-step procedure:
Correct disposal of this product:
1. Connect the power tip to the server.
(Waste Electrical & Electronic Equipment)
1. Plug the server’s power adapter into the 230V AC/50-60Hz mains socket.
(Applicable in the European Union and other European countries
with separate collection systems)
1. Wait until all the LED indicators are ON (after about 15 minutes).
Note:
After restoring the factory settings of the unit, follow the instructions in 4.1 - Installation
of the SRF150 Access Server and authorisation of the CRF150 Client Cards. In case of
using Twin Slot Interface, follow the instructions in 4.2.
This marking shown on the product or its literature, indicates that it should
not be disposed with other household wastes at the end of its working life. To prevent
possible harm to the environment or human health from uncontrolled waste disposal,
please separate this from other types of wastes and recycle it responsibly to promote the
sustainable reuse of material resources.
Household users should contact either the retailer where they purchased this product,
or their local government office, for details of where and how they can take this item for
environmentally safe recycling.
Business users should contact their supplier and check the terms and conditions of the
purchase contract. This product should not be mixed with other commercial wastes for
disposal.
30
31
D E C L A R AT I O N O F C O N F O R M I T Y R & T T E
Manufacturer
PYCH International Electronics Sp. z o.o.
ul. Lipkowska 21
04-801 Warszawa
herewith declare that:
Wireless SmartCard Splitter of Digital PayTV Subscription
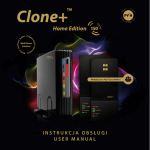
Clone+™ Home Edition 150: SRF150, CRF150
conforms to the following product specifications:
•
•
•
Safety: EN 60950,
EMC: EN 301489,
Radio: EN 300220.
We herewith declare that the above mentioned product
complies with the requirements of the following directives:
•
•
•
R&TTE 99/05/EC,
73/023/ECC,
89/336/ECC.
Grzegorz Pych
President of the Board
Warszawa 1.09.2009
32


