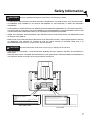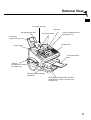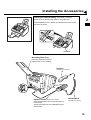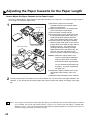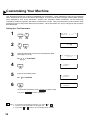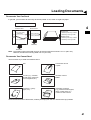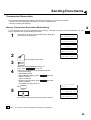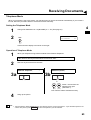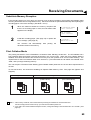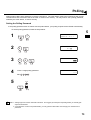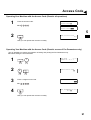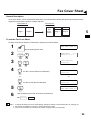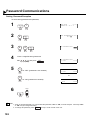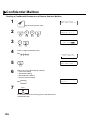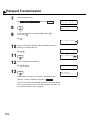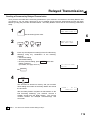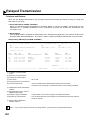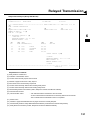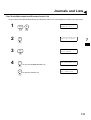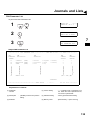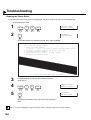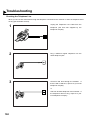
1
Facsimile
UF-585/595
User’s Guide
IMPORTANT INFORMATION
When requesting information, supplies or service always refer to the model and serial number of your
machine. The model and serial number plate (Main Name Plate) is located on the machine as shown below.
For your convenience, space is provided below to record information you may need in the future.
Model No.
Serial No.
Date of Purchase
Dealer
Address
Telephone Number
(
)
–
Supplies Telephone Number
(
)
–
Service Telephone Number
(
)
–
Model and Serial Number
Copyright © 1999 by Matsushita Graphic Communication Systems, Inc.
All rights reserved. Unauthorized copying and distribution is a violation of law. Printed in Japan.
The contents of this User’s Guide are subject to change without notice.
Table of Contents
1
GETTING TO KNOW YOUR MACHINE
Safety Information ............................................................................................... 7
Introduction.......................................................................................................... 9
Function Key...................................................................................................... 10
External View ..................................................................................................... 11
Control Panel ..................................................................................................... 12
2
INSTALLING YOUR MACHINE
Main Unit and Accessories............................................................................... 14
Installing the Accessories ................................................................................ 15
Installing the Toner Cartridge .......................................................................... 16
Loading the Recording Paper .......................................................................... 18
Paper Specifications
How to Load the Recording Paper
18
18
Adjusting the Paper Cassette for the Paper Length ...................................... 20
How to Adjust the Paper Cassette for the Paper Length
20
Adjusting the Paper Cassette for the Paper Width ........................................ 21
How to Adjust the Paper Cassette for the Paper Width
21
Connecting the Telephone Line Cable and Power Cord................................ 22
Setting the Dialing Method (Tone or Pulse) .................................................... 24
Adjusting the Volume........................................................................................ 25
Setting the Monitor Volume
Setting the Ringer Volume
25
25
User Parameters ................................................................................................ 26
Setting the Date and Time
Setting Your LOGO
Setting Your Character ID
Setting Your ID Number (Fax Telephone Number)
3
26
27
28
29
PROGRAMMING YOUR MACHINE
One-Touch/Abbreviated Dialing Numbers ...................................................... 31
Entering One-Touch/Abbreviated Dialing Numbers
Changing or Erasing One-Touch/Abbreviated Dialing Numbers
Printing Out a Directory Sheet
31
33
35
Customizing Your Machine .............................................................................. 36
Setting the Fax Parameters
Fax Parameter Table
4
36
37
BASIC OPERATIONS
Loading Documents .......................................................................................... 41
Documents You Can Send
Documents You Cannot Send
How to Load Documents
41
41
42
Basic Transmission Settings ........................................................................... 43
Contrast
Resolution
Halftone
Verification Stamp
Communication Journal (COMM. JOURNAL)
43
43
44
44
45
1
Sending Documents ..........................................................................................46
Memory Transmission .............................................................................................. 46
Manual Number Dialing
48
One-Touch Dialing
49
Abbreviated Dialing
50
Directory Search Dialing
51
Multi-Station Transmission (Broadcasting) ............................................................ 52
Direct Transmission .................................................................................................. 53
Manual Number Dialing (Direct Transmission)
53
One-Touch Dialing (Direct Transmission)
54
Abbreviated Dialing (Direct Transmission)
55
Directory Search Dialing (Direct Transmission)
56
Voice Mode Transmission ........................................................................................ 57
Off-Hook Dialing
57
On-Hook Dialing
58
Transmission Reservation........................................................................................ 59
Memory Transmission Reservation (Multi-tasking)
59
Direct Transmission Reservation (Priority Transmission Reservation)
60
Redialing .................................................................................................................... 61
Automatic Redialing
61
Manual Redialing
61
Receiving Documents........................................................................................62
Reception Modes ....................................................................................................... 62
Telephone Mode ........................................................................................................ 63
Setting the Telephone Mode
63
Operation of Telephone Mode
63
Fax / Tel Auto Switching Mode................................................................................. 64
Setting the Fax / Tel Auto Switching Mode
64
Operation of Fax / Tel Auto Switching Mode
64
Fax Mode .................................................................................................................... 65
Setting the Fax Mode
65
Operation of Fax Mode
65
TAM (Telephone Answering Machine) Interface Mode .......................................... 65
Installing your TAM
65
Setting the TAM Interface Mode
66
Operation of TAM Interface Mode
66
Print Reduction .......................................................................................................... 67
Selecting the Print Reduction Mode
67
Receiving Oversize Documents
68
Substitute Memory Reception .................................................................................. 69
Print Collation Mode.................................................................................................. 69
Making Copies....................................................................................................70
5
ADVANCED FEATURES
Timer Controlled Communications ..................................................................71
Deferred Transmission
Deferred Polling
71
72
Polling .................................................................................................................73
Setting the Polling Password
Preparing to be Polled
To Poll Documents from Another Station
2
73
74
75
Program Keys .................................................................................................... 76
Setting for Group Dialing
Setting for Deferred Transmission
Setting for Deferred Polling
Setting for Normal Polling
Setting for One-Touch Key
Changing or Erasing the Program Key Settings
76
77
78
79
80
81
Edit File Mode .................................................................................................... 82
Printing a File List
Viewing the Contents of a File List
Changing the Start Time or the Station of a File
Deleting a File
Printing Out a File
Adding Documents into a File
Retry an Incomplete File
82
83
84
86
87
88
89
Access Code ...................................................................................................... 90
Setting the Access Code
Operating Your Machine with the Access Code (Restrict all operations)
Operating Your Machine with the Access Code
(Restrict access of Fax Parameters only)
90
91
91
Receive To Memory........................................................................................... 92
Setting the RCV To Memory Password
Setting RCV To Memory
Printing Out Documents
92
92
93
Distinctive Ring Detector (DRD)....................................................................... 94
Fax Cover Sheet ................................................................................................ 95
General Description
To use the Fax Cover Sheet
95
95
Fax Forward ....................................................................................................... 97
Setting Fax Forward
6
97
NETWORK FEATURE
Selective Reception........................................................................................... 99
Setting the Selective Reception.
99
Password Communications ........................................................................... 100
General Description ................................................................................................ 100
Compatibility with Other Machines
100
Setting Password Transmission
101
Setting Password Reception
102
Using Password Transmission
103
Using Password Reception
104
Confidential Mailbox ....................................................................................... 105
Confidential Mailbox ............................................................................................... 105
Compatibility with Other Machines
105
Sending a Confidential Document to a Remote Station's Mailbox
106
Polling a Confidential Document from a Remote Station's Mailbox
107
Receiving a Confidential Document to Your Machine's Mailbox
108
Storing a Confidential Document in Your Machine's Mailbox
109
Printing Out a Confidential Document from Your Machine's Mailbox
110
Deleting a Confidential Document Stored in Your Machine's Mailbox
111
3
Relayed Transmission .....................................................................................112
General Description ................................................................................................ 112
Compatibility with Other Machines
112
Relay Network
113
Setting Up Your Machine for Relayed Transmission
115
Sending a Document by Relayed Transmission
119
Printouts and Reports
120
Sub-addressing ................................................................................................122
General Description ................................................................................................ 122
To set the Sub-address into a One-Touch/ABBR Dialing Numbers
123
To send a Document with Sub-address
124
7
PRINTOUT JOURNALS AND LISTS
Journals and Lists ...........................................................................................125
Transaction Journal
Individual Transmission Journal (IND. XMT JOURNAL)
Communication Journal (COMM. JOURNAL)
One-Touch/Abbreviated and Directory Search List
Program List
FAX Parameter List
8
125
126
128
131
134
135
PROBLEM SOLVING
Troubleshooting ...............................................................................................137
If You Have Any of These Problems
Information Codes
Clearing a Recording Paper Jam
Clearing a Document Jam
Cleaning the Document Scanning Area
Cleaning the Printer Roller
Adjusting the Automatic Document Feeder (ADF)
Verification Stamp
Replacing the Lithium Battery
Checking the Telephone Line
4
137
140
143
144
145
146
147
148
149
150
9
APPENDIX
Specifications .................................................................................................. 151
Recording Paper Specifications .................................................................... 154
Options and Supplies...................................................................................... 155
Installing the Flash Memory Card
157
FCC Notice for User in USA............................................................................ 158
Notice to User in Canada ................................................................................ 160
Glossary ........................................................................................................... 162
ITU-T Image No. 1 ............................................................................................ 167
INDEX................................................................................................................ 169
5
This page is intentionally left blank.
6
GETTING TO KNOW YOUR MACHINE
Safety Information
!
WARNING
1
denotes a potential hazard that could result in serious injury or death.
• TO PREVENT FIRE OR SHOCK, DO NOT EXPOSE THIS PRODUCT TO RAIN OR ANY TYPE OF MOISTURE.
• TO MINIMIZE THE POSSIBILITY OF SHOCK OR DAMAGE TO THE MACHINE, IT MUST BE PROPERLY
GROUNDED.
• THIS PRODUCT COMPLIES WITH FDA RADIATION PERFORMANCE STANDARDS, 21 CFR SUB-CHAPTER J.
CAUTION-USE OF CONTROLS OR ADJUSTMENTS OR PERFORMANCE OF PROCEDURES OTHER THAN
THOSE SPECIFIED HEREIN MAY RESULT IN HAZARDOUS RADIATION EXPOSURE.
• WHEN YOU OPERATE THIS EQUIPMENT, THE SOCKET-OUTLET SHOULD BE NEAR THE EQUIPMENT AND
BE EASILY ACCESSIBLE.
• MAKE SURE THAT THE MACHINE IS INSTALLED IN A SPACIOUS OR WELL VENTILATED ROOM SO AS NOT
TO INCREASE THE AMOUNT OF OZONE IN THE AIR. SINCE OZONE IS HEAVIER THAN AIR, IT IS
RECOMMENDED THAT AIR AT FLOOR LEVEL BE VENTILATED.
!
CAUTION
denotes hazards that could result in minor injury or damage to the machine.
• THIS PRODUCT CONTAINS A LITHIUM BATTERY. DANGER OF EXPLOSION IF BATTERY IS INCORRECTLY
REPLACED.
REPLACE ONLY WITH THE SAME OR EQUIVALENT TYPE. DISPOSE OF USED BATTERIES ACCORDING TO
THE INSTRUCTIONS OF YOUR LOCAL SOLID WASTE OFFICIALS.
Panasonic
Complies with FDA radiation performance standards,
Model No. UF- 585/595
21 CFR Sub-chapter J.
120VAC
60 Hz
4.0 A
Manufactured: (Month, Year)
MATSUSHITA GRAPHIC COMMUNICATION SYSTEMS, INC.
2-3-8 Shimomeguro, Meguro-ku, Tokyo, Japan
Serial No. 01990300001
Matsushita Graphic Communication Systems. Inc.
Tokyo Japan
Made in Japan
Main Name Plate
(Manufacturing
Location Code)
HHS Label
7
Safety Information
!
CAUTION
denotes hazards that could result in minor injury or damage to the machine.
Do not install the machine near heating or an air conditioning unit.
Avoid exposure to direct sunlight.
Install the machine on a flat surface, leave at least 4 inches (10 cm) of
space between the machine and other objects.
Do not block the ventilation openings.
Do not place heavy objects or spill liquids on the machine.
8
Introduction
1
Thank you very much for purchasing the Panafax UF-585/595.
The UF-585/595 is one of the most advanced models in the Panafax family of G3 compatible, desktop facsimile
machines.
Some of its many features are
1. Plain Paper Printing
Plain paper printing means you can easily write on received documents
with a pen or pencil. Documents do not curl, making filing easier. In
addition, plain paper does not fade, making it ideal for long term storage
of important documents.
2. Quick Scanning
The UF-585/595 Quick Scan speeds up the fax process by scanning the
documents into memory in about 6* seconds per page.
(* Standard Resolution, based on ITU-T Image No.1 Test Chart. The scanning speed
applies to the feeding process from the leading to the lagging edge of a single page test
chart. The time for the storing process is not applied for this definition.)
This means that you no longer have to wait around until a transmission is
completed before retrieving your originals.
3. Easy Maintenance
Maintenance requires only changing a toner cartridge, making it quicker
and easier than with other types of plain paper fax machines.
4. Memory Function
A standard image memory feature allows you to store up to 60 standard
pages into the document memory. After the UF-585/595 stores your
documents, it can send them to selected station(s) automatically.
You do not have to wait until the transmission ends before retrieving your
originals.
5. Multi- Access
Operation
The UF-585/595 allows you to reserve the next transmission even during
reception or memory transmission. It can also receive during document
storage.
6. Fax / Telephone Auto
Switch
The UF-585/595 differentiates between an incoming fax or voice call and
automatically switches the circuit to either receive a document or to ring
until you pick up the telephone connected to it. With the UF-585/595 you
do not require a separate telephone line for your fax.
7. TAM Interface
A Telephone Answering Machine (TAM) can be connected to the UF585/595. The UF-585/595 determines whether the signal from the
calling side is a fax or voice call. If it is a fax, the UF-585/595 will switch
the telephone line and start the fax communication. If a fax signal is not
detected, the UF-585/595 will stay in the TAM mode and the caller can
leave a message.
With a little practice, anyone can learn how to use the most popular
features of the UF-585/595.
This User's Guide will help you to use your UF-585/595 quickly and
easily. The Table of Contents shows where to find information on each
feature. Although we recommend that you review each section briefly, it
will only be necessary to read the sections that contain the feature(s)
you will be using.
9
Function Key
Any function can be started by first pressing FUNCTION and then enter the function number, or by pressing
or
scroll key repeatedly until the desired function appears on the display.
1
Deferred Communication
1 = XMT
2 = Polling
2
Advanced Communication
1 = Relayed Transmission
(See Note 1)
2 = Confidential Communication
FUNCTION
7
Set Mode
1 = User Parameters
• Date & Time
• Logo
• Character ID
• ID Number (Fax Telephone Number)
2 = One-Touch/Abbreviated Numbers
3 = Program Keys
4 = Fax Parameters
5 = Relayed XMT & Conf. Comm. Parameters
(See Note 1)
6 = Cleaning Printer Roller
8
Select Mode
1 = Communication Journal = OFF/ON/INC
2 = Not Used
3 = Cover Sheet = OFF/ON
4 = Password-XMT = OFF/ON (See Note 1)
5 = RCV to Memory = OFF/ON/PRINT
9
Edit File Mode
1 = File List (Print/View)
2 = Change Time/Station
3 = Delete File
4 = Print File
5 = Add Document
6 = Retry Incomplete File
FUNCTION
3
Polling
1 = Polling
2 = Polled
6
Printout
1 = Journal (Print/View)
2 = One-Touch/Abbreviated/
Directory Search List
3 = Program List
4 = Fax Parameter List
5 = Not used
6 = Individual XMT Journal
7 = Directory Sheet
(see Note 1)
Note: 1. If Fax Parameter is not preset to a Valid position, which enables you to use the function, the display will not show
the function.
10
External View
1
Document Sub Tray
ADF Door
Recording Paper Tray
Document Guides
Pressure Adjusting Lever
(See page 147)
Recording
Paper Sub Tray
Control Panel
Printer Cover
Document Return
Tray
Handset
(Available as an option,
See page 155)
Recording Paper Cassette
(Standard)
250 sheets Recording Paper Cassette
(Available as an option, see page 155)
(UF-595 only)
11
Control Panel
Used to erase the previously entered input.
Used to enter a pause when recording or
dialing a telephone number, or to redial the
last dialed number. (See page 61)
PAUSE
REDIAL
CLEAR
Used to start Abbreviated Dialing. (See page
50 and 55)
ABBR
Used to separate the Sub-address from the
telephone number when dialing, or to access
some features of your PBX.
SUB-ADDR
FLASH
Used to set operations.
SET
Used to start On-Hook Dialing. (See page 58)
MONITOR
Used to start or select the function and
sub-functions.
These functions are explained in detail on
page 10.
FUNCTION
LCD Display
Indicates date and time,
or the current operation.
FUNCTION
PAUSE
REDIAL
CLEAR
ABBR
SUB-ADDR
FLASH
SET
01
02
03
MONITOR
04
05
06
07
08
09
10
11
12
13
14
15
16
17
18
19
20
21
22
23
24
P1
P2
P3
AU
ABC
DEF
1
2
3
GHI
JKL
MNO
4
5
6
DIRECTORY
SEARCH
VOL.
OUT
ON LINE
TONER
ALARM
DARKER
S-FINE
FAST
LIGHTER
CONTRAST
PRS
TUV
WXY
7
8
9
AU
TONE
FINE
RESOLUTION
QUALITY
HALFTONE
START
COPY
ABC
3
GHI
JKL
MNO
4
5
6
PRS
TUV
WXY
7
8
9
TONE
OPER
0
12
DEF
2
Used for Manual Number Dialing,
recording phone numbers, and selecting
functions.
SPACE
P4 UPPER
OPER
0
1
STOP
LOWER
TONE
MEMORY
STAMP
Used to temporarily change the Dialing
Mode to Tone when Pulse mode is set.
Control Panel
1
CONTRAST
Used to set Normal, Lighter, or Darker.
(See page 43)
Also serves as an arrow key (<) to move the
cursor over recorded numbers and characters.
RESOLUTION
Used to set Standard, Fine or Super-Fine.
(See page 43)
Also serves as an arrow key (>) to move the
cursor over recorded numbers and characters.
HALFTONE
Provides OFF, QUALITY or FAST settings for
halftone documents. (See page 44)
COPY
START
DIRECTORY
SEARCH
OUT
Used to make copies.
(See page 70)
Used for the following:
• Adjust the monitor and ringer volume.
(See page 25)
• Search the station name for Directory
Search Dialing.
• Confirm the entered station for multi-station
communication.
• Select functions.
• Confirm the current communication modes
(e.g. Page number, ID, Dialed Telephone
number, File number) when the unit is ON
LINE.
VOL.
STOP
Used to cancel operations. When it is
pressed, the machine will return to standby.
Used to start operations.
Used to search for a station name.
(See page 51 and 56)
Used to select either IN mode or OUT mode.
(See page 62)
ON LINE
Blinks when the machine is transmitting
a document or receiving.
TONER
Blinks when the remaining toner is
getting low and lights when the toner
has run out. (See page 16)
ALARM
Lights when trouble occurs.
(See page 137)
One-Touch Keys (01-24)
Used for One-Touch Dialing.
(See page 49 and 54)
Program Keys (P1-P4)
Used to record long dialing procedures or
Group Dialing Number keys.
(See page 76 to 81)
Character Keys
The One-Touch Keys and Program Keys
also serve as character and symbol input
keys which are used to record your LOGO,
character ID and station name. The
character key template is printed on the
panel under the directory sheet cover.
Note : Whenever One-Touch keys are
changed to the character key mode
(to record your LOGO, station name,
etc...), use the UPPER/LOWER key
to switch between upper and lower
character set.
01
02
03
04
05
06
07
08
09
10
11
12
13
14
15
16
17
18
19
20
21
22
23
24
P1
P2
P3
SPACE
P4 UPPER
LOWER
SPACE
MEMORY
STAMP
MEMORY
STAMP
Used to insert a space while entering
LOGO, character ID and station name.
Used to select either memory or direct
communication. (See page 46 to 56)
Used to turn the verification stamp ON or
OFF. (See page 44)
13
INSTALLING YOUR MACHINE
Main Unit and Accessories
Unpack the carton and check that you have all the accessories illustrated.
Machine
Toner Cartridge
Recording Paper Tray
Telephone Line Cable
Power Cord
User's Guide / Quick Guide
Lithium Battery and Holder
14
Installing the Accessories
Installing the Lithium Battery (This battery is used to
2
backup the clock during power failures, see page 149)
Install the Battery into the Holder and slide it into the slot on the
ADF Door as shown.
Final Installed View
ADF Door
Recording Paper Tray
Hook the projections into the
square holes on the machine.
Handset
[Available as an Option]
Handset Cradle [Available as an Option]
Hook the projections into the square holes on
the machine.
Connect the cable into the HANDSET jack on
the machine.
Handset Cord
[Available as an Option]
15
Installing the Toner Cartridge
1
Unpack the Toner Cartridge and rock it back
and forth as shown for 5 or 6 times to even the
Toner Cartridge
toner inside.
2
3
Continued on the next page.
16
Remove the protective seal.
Note: Pull on the seal slowly and straight out.
Open the Printer Cover.
Printer Cover
Installing the Toner Cartridge
4
Align the projections on both sides of the
2
Toner Cartridge with the grooves in the
machine as shown and insert the Toner
Cartridge into the machine.
Note : Lock the Toner Cartridge into place by
pressing the handle down and then
pushing towards the rear of the
machine.
5
6
Close the Printer Cover.
Printer Cover
If you are replacing the Toner Cartridge, it is recommended to clean the Printer Roller to maintain good
printing quality. To clean the Printer Roller, follow the procedure on page 146.
17
Loading the Recording Paper
Paper Specifications
In general, most bond papers will produce excellent results. Most photocopy papers will also work very well.
There are many "name" and "generic" brands of paper available. We recommend that you test various papers
until you obtain the results you are looking for. For detailed recommended paper specifications, see page 154.
How to Load the Recording Paper
1
Lift up the Paper Cassette slightly
and slide it out from the machine.
Paper Cassette
2
Remove the Paper Cassette Cover.
Cassette Cover
3
(1) Remove the Shipping Screw securing the
Pressure Plate.
(2) Store the screw by attaching it to the post
provided under the Paper Cassette Cover
Shipping Screw
for future use.
Cassette Cover
18
Loading the Recording Paper
4
(1) Load the paper into the Paper Cassette.
2
Slide the paper width guide to the left until
Max. Paper
Capacity Mark
it lightly touches the stack of paper without
bending the paper. The paper must fit
squarely and firmly between the Paper
Width Guide and the right side of tray. If it
Paper
Width Guide
does not, the paper may feed into the
printer incorrectly resulting in a paper jam.
Caution: Make sure that the paper is set
under the metal Paper Separation
Clips and that it does not exceed
the Maximum Paper Capacity Mark.
You can load about 250 sheets (20
lb weight). For paper specification,
see page 154.
(2) Re-install the Paper Cassette Cover.
(3) Slide the Paper Cassette into the machine.
19
Adjusting the Paper Cassette for the Paper Length
How to Adjust the Paper Cassette for the Paper Length
The factory default Paper Length setting for the Paper Cassette is on Letter size. To change the paper length to
A4 or Legal size, follow the steps below. (see Note 1)
1
Release Latch
Paper Length Guide
Paper Width Guide
Max. Paper
Capacity Mark
(1) Remove the paper from the Paper
Cassette and place the cassette upside
down on a flat surface.
(2) While pushing down on the release latch,
pull out the Paper Length Guide.
(3) Turn the Paper Cassette upright.
(4) Insert the Paper Length Guide hooks into
the appropriate paper length slots (A4 or
Legal) and slide the guide towards the
back of the cassette until it locks in place.
(5) Load the paper into the Paper Cassette.
Slide the paper width guide to the left until
it lightly touches the stack of paper without
bending the paper. The paper must fit
squarely and firmly between the Paper
Width Guide and the right side of tray. If it
does not, the paper may feed into the
printer incorrectly resulting in a paper jam.
Caution: Make sure that the paper is set
under the metal Paper Separation
Clips and that it does not exceed
the Maximum Paper Capacity Mark.
You can load about 250 sheets (20
lb weight). For paper specification,
LTR
A4
LGL
2
see page 154.
(6) Replace the Paper Cassette Cover to the
appropriate paper position (LTR, A4 or
LGL).
(7) Slide the Paper Cassette into the machine.
The Recording Paper Size setting of the Fax Parameter No. 23 must match the paper loaded in the
cassette. If you change the Recording Paper Size, please change the setting accordingly. (See page
38)
Note: 1. If you forget to change the Recording Paper Size setting in Fax Parameter No. 23 when different paper is installed
in the cassette, the unit will Stop printing after the 1st page of an Incoming Fax and display a "PAPER SIZE
MISMATCH" error. Then, the Recording Paper Size setting automatically adjusts to the proper size and the unit
resumes printing the Incoming Fax from the 1st page.
20
Adjusting the Paper Cassette for the Paper Width
How to Adjust the Paper Cassette for the Paper Width
The factory default Paper Width setting for the Paper Cassette is on Letter/Legal size. To change the paper width
to A4 size, follow the steps below. (see Note 1)
1
(1) Release the left Paper Separation Clip
latch.
(2) Pull up the Paper Separation Clip to
remove it.
(3) Reposition the Paper Separation Clip into
the A(A4) slot.
(4) Swing the Paper Separation Clip
downward to latch it in place.
Paper Separation Clip
2
(1) Load the paper into the Paper Cassette.
Slide the paper width guide to the left until
it lightly touches the stack of paper without
bending the paper. The paper must fit
squarely and firmly between the Paper
Width Guide and the right side of tray. If it
does not, the paper may feed into the
printer incorrectly resulting in a paper jam.
Paper
Width Guide
Max. Paper
Capacity Mark
Caution: Make sure that the paper is set
under the metal Paper Separation
LTR
A4
LGL
Clips and that it does not exceed
the Maximum Paper Capacity Mark.
You can load about 250 sheets (20
lb weight). For paper specification,
see page 152.
(2) Replace the Paper Cassette Cover to the
appropriate paper position (LTR, A4 or
LGL).
(3) Slide the Paper Cassette into the machine.
3
The Recording Paper Size setting of the Fax Parameter No. 23 must match the paper loaded in the
cassette. If you change the Recording Paper Size, please change the setting accordingly.
(See page 38)
Note: 1. If you forget to change the Recording Paper Size setting in Fax Parameter No. 23 when different paper is installed
in the cassette, the unit will Stop printing after the 1st page of an Incoming Fax and display a "PAPER SIZE
MISMATCH" error. Then, the Recording Paper Size setting automatically adjusts to the proper size and the unit
resumes printing the Incoming Fax from the 1st page.
21
2
Connecting the Telephone Line Cable and Power Cord
Power Cord
Plug one end of the power cord into an ordinary 3 prong AC outlet and the other end into the receptacle on the
rear of the machine.
Warning : This apparatus must be properly grounded through an ordinary 3 prong AC outlet.
Do not break off the earth (ground) prong to fit a 2 prong outlet.
(see Note 1).
Power Cord (Included)
Telephone Line Cable
Plug one end of the telephone line cable into the "RJ-11C" telephone jack supplied by the telephone company
and the other end into the LINE jack on the Rear of the machine
RJ-11C Telephone Jack
Telephone Line Cable (Included)
Note: 1. Your machine uses little power and you should keep it ON at all times. If the power is turned OFF for too long, the
clock contents may be lost.
22
Connecting the Telephone Line Cable and Power Cord
power
S
2
TEL
External Telephone (Optional)
You can connect an additional standard
single line telephone to the machine. To
connect the telephone, break off the
protective tab on the TEL jack.
23
Setting the Dialing Method (Tone or Pulse)
Your machine can operate with either of two dialing methods (Tone or Pulse), depending on the type of telephone
line you are connected to. If you need to change the dialing method to Tone or Pulse, follow the procedure below.
1
SET MODE
(1-6)
ENTER NO. OR ∨ ∧
7
FUNCTION
2
4
SET
3
0
6
4
1
FAX PARAMETER(01-99)
NO.=❚
SET
06 DIALING METHOD
2:TONE
06 DIALING METHOD
1:PULSE
for “PULSE”.
or
or
2
for “TONE”.
5
06 DIALING METHOD
2:TONE
STOP
SET
-
(see Note 1)
Note: 1. For some countries, this feature is not available depending on the country’s regulation. The display may not show
this feature.
24
Adjusting the Volume
You can adjust the monitor and ringer volume on your machine. The built-in speaker enables you to hear the dial
tone, dialing signals, and busy tone. The ringer sounds when your machine receives a call.
Setting the Monitor Volume
1
* MONITOR *
❚
MONITOR
You will hear the dial tone through the speaker.
2
VOL.
MONITOR VOLUME
LOW [❚❚❚❚❚❚❚❚] HIGH
repeatedly to raise the volume.
or
VOL.
repeatedly to lower the volume.
MONITOR VOLUME
LOW [
] HIGH
-
3
MONITOR
Setting the Ringer Volume
1
2
Standby
MAR-12-1999 15:00
00%
VOL.
RINGER VOLUME
))))
((((
repeatedly to raise the volume.
☎
or
VOL.
RINGER VOLUME
repeatedly to lower the volume.
☎
-
3
STOP
-
(see Note 1)
Note: 1. You can also adjust the volume of the key touch tone and the volume of the buzzer in the Fax Parameter No. 10
(KEY/BUZZER VOLUME). (See page 37)
25
2
User Parameters
Your facsimile machine has several basic settings (User Parameters) to help you keep records of the documents you
send or receive. For example, the built-in clock keeps the current date and time, and your LOGO and ID Number
help to identify you when you send or receive documents.
Setting the Date and Time
At standby the display will show the date and time. Once the standby display is set, it will automatically be
updated.
1
FUNCTION
SET MODE
(1-6)
ENTER NO. OR ∨ ∧
7
2
1
1:USER PARAMETERS?
PRESS SET TO SELECT
3
SET
DATE & TIME
❚1-01-1999 00:00
4
Enter the new date and time.
Ex: 0 3
Month
: March
1 2
Date
: 12th
1 9 9 9
Year
: 1999
1 5 0 0
Time
: 3:00 PM
DATE & TIME
03-12-1999 15:00
If you make a mistake, use
or
to move the cursor
over the incorrect number, then overwrite it with a correct
one.
5
STOP
SET
-
(see Note 1)
(see Note 2)
Note: 1. The clock of your machine is equipped with D.S.T.(Daylight Saving Time) system. So, your clock will automatically
set the time forward from 2:00 AM to 3:00 AM on the first Sunday of April and set the time back from 2:00 AM to
1:00 AM on the last Sunday of October.
If your state does not use the D.S.T. system, change the Fax Parameter No. 35 (DAYLIGHT TIME) to "Invalid" . (See
page 39)
2. The current Date & Time must be set because it is required by the Telephone Consumer Act of 1991. (For details,
see FCC NOTICE at the end of this User's Guide)
26
User Parameters
Setting Your LOGO
2
When you send a document, your LOGO appears on the top of the copy printed out at the other station.
The LOGO helps to identify you to someone who receives your document.
1
FUNCTION
7
SET MODE
(1-6)
ENTER NO. OR ∨ ∧
2
1
1:USER PARAMETERS?
PRESS SET TO SELECT
3
SET
LOGO
❚
4
repeatedly until display shows;
Enter your LOGO (max. 25 characters and digits) by using
the Character keys (See page 13).
Ex: P A N A S O N I C
LOGO
PANASONIC❚
If you make a mistake, use
or
to move the cursor
beyond the incorrect character, press CLEAR then reenter the new character.
If more than 19 characters are entered, the left side
characters will scroll off the display.
5
STOP
SET
-
(see Note 1)
Note: 1. Your Company Name or your name must be set as your LOGO because it is required by the Telephone Consumer
Act of 1991. (For details, see FCC NOTICE at the end of this User's Guide)
27
User Parameters
Setting Your Character ID
If the remote machine has a Character ID capabilities, when you are sending or receiving, your Character ID will
appear on the remote machine's display and the remote machine's Character ID will appear on your display.
1
FUNCTION
7
SET MODE
(1-6)
ENTER NO. OR ∨ ∧
2
1
1:USER PARAMETERS?
PRESS SET TO SELECT
3
SET
CHARACTER ID
❚
4
repeatedly until display shows;
Enter your Character ID (max. 16 characters and digits)
by using the Character keys (See page 13).
Ex: H E A D SPACE O F F I C E
CHARACTER ID
HEAD OFFICE❚
If you make a mistake, use
or
to move the cursor
beyond the incorrect character, press CLEAR then reenter the new character.
5
STOP
SET
-
(see Note 1)20
Note: 1. The special characters of Å, Ä, Ö, Ü, Æ, è and é cannot be used for Character ID.
28
User Parameters
Setting Your ID Number (Fax Telephone Number)
If the remote machine does not have a Character ID but it has an ID Number, when sending or receiving, your ID
Number will appear on the remote machine's display and their ID Number will appear on your display.
We suggest you use your facsimile telephone number as your ID number. (max. 20 digits)
1
2
1
3
SET
4
7
FUNCTION
SET MODE
(1-6)
ENTER NO. OR ∨ ∧
1:USER PARAMETERS?
PRESS SET TO SELECT
repeatedly until display shows;
ID NO.
❚
Enter your ID (max. 20 digits) by using the key pad and
SPACE .
Ex: 2 0 1 SPACE 5 5 5
SPACE 1 2 1 2
ID NO.
201 555 1212❚
If you make a mistake, use
or
to move the cursor
beyond the incorrect number, press CLEAR then
re-enter the new number.
5
STOP
SET
-
(see Note 1)
(see Note 2)
Note: 1. You may use
to enter a "+" character at the beginning of the ID number to indicate the following digit(s) for your
country code.
Ex :+1 201 555 1212
+1 for U.S.A. country code.
+81 3 111 2345
+81 for Japan country code.
2. Your Fax Telephone Number must be set as your ID Number because it is required by the Telephone Consumer
Act of 1991. (For details, see FCC NOTICE at the end of this User's Guide)
29
2
This page is intentionally left blank.
30
PROGRAMMING YOUR MACHINE
One-Touch/Abbreviated Dialing Numbers
Entering One-Touch/Abbreviated Dialing Numbers
One-Touch and Abbreviated Dialing are two fast ways of dialing full telephone numbers. To use these dialing
methods, you must first store the telephone number using the following procedure.
3
To enter a One-Touch key, follow the steps below
1
FUNCTION
2
2
3
1
SET MODE
(1-6)
ENTER NO. OR ∨ ∧
7
1:ONE-TOUCH
2:ABBR NO.
SET
ONE-TOUCH< >
PRESS ONE-TCH OR ∨ ∧
4
Ex:
5
Enter the telephone number
(up to 36 digits including pauses and spaces).
01
<01>
ENTER TEL. NO.
<01>
9-555 1234❚
Ex: 9 PAUSE 5 5 5 SPACE 1 2 3 4
6
7
<01> ENTER NAME
9-555 1234
SET
Enter the station name using character keys
(up to 15 characters).
Ex: S A L E S SPACE D E P T
8
<01> SALES DEPT❚
9-555 1234
ONE-TOUCH< >
PRESS ONE-TCH OR ∨ ∧
SET
To record another number, repeat step 4 to 8.
To return to standby, press
STOP .
31
One-Touch/Abbreviated Dialing Numbers
To set an Abbreviated Dialing Number, follow the steps below
1
FUNCTION
2
2
3
2
7
SET
SET MODE
(1-6)
ENTER NO. OR ∨ ∧
1:ONE-TOUCH
2:ABBR NO.
ABBR.[❚ ]
ENTER NO. OR ∨ ∧
4
Ex: 0 2 2 (001 to 072)
[022]
ENTER TEL. NO.
5
Enter the telephone number
(up to 36 digits including pauses and spaces).
[022]
9-555 2345❚
Ex: 9 PAUSE 5 5 5 SPACE 2 3 4 5
6
7
8
SET
Enter the station name using character keys
(up to 15 characters).
[022]ENTER NAME
9-555 2345
[022]ACCOUNTING❚
9-555 2345
Ex: A C C O U N T I N G
SET
ABBR.[❚ ]
ENTER NO. OR ∨ ∧
To record another number, repeat step 4 to 8.
To return to standby, press STOP .
(see Note 1) (see Note 2) (see Note 3) (see Note 4)
Note: 1. If you require a special access number to get an outside line, enter it first and then press PAUSE .
A hyphen "-" is displayed for pause.
2. Use SPACE or MONITOR to enter a space between the numbers to make it easier to read.
3. If you are using Pulse dialing and you wish to change to Tone dialing in the middle of dialing, press
(represented by a"/"). The dialing method will be changed from Pulse to Tone after dialing the digit "/".
Ex : 9 PAUSE TONE 5551234
4. You can search for an unused One-Touch key or ABBR number by pressing
32
or
in step 3 or 4.
TONE
One-Touch/Abbreviated Dialing Numbers
Changing or Erasing One-Touch/Abbreviated Dialing Numbers
If you have to change or erase any of the One-Touch/Abbreviated dialing numbers, follow the steps below.
To change the settings of a One-Touch/ABBR dialing number
1
2
FUNCTION
7
2
3
1:ONE-TOUCH
2:ABBR NO.
SET
Select 1 for One-Touch Dialing number
Select 2 for ABBR Dialing Number
ONE-TOUCH< >
PRESS ONE-TCH OR ∨ ∧
Ex: 1
3
Enter the station you wish to change.
Ex:
4
<01> SALES DEPT
9-555 1234
01
<01> SALES DEPT
ENTER TEL. NO.
CLEAR
then enter a new telephone number. (See Note 1)
Ex: 9 PAUSE 5 5 5 SPACE
5
6
3 4 5 6
<01> SALES DEPT
9-555 3456❚
SET
<01> SALES DEPT
9-555 3456
CLEAR
<01> ENTER NAME
9-555 3456
then enter a new station name. (See Note 1)
<01> PANAFAX❚
9-555 3456
Ex: P A N A F A X
7
ONE-TOUCH< >
PRESS ONE-TCH OR ∨ ∧
SET
To return to standby, press
STOP .
(see Note 1)
(see Note 2)
Note: 1. If you make a mistake, use
or
to move the cursor beyond the incorrect number, press CLEAR then
re-enter the new number.
2. If the One-Touch/Abbreviated dialing number has been used for a communication reservation, the settings cannot
be changed or erased until the communication has finished.
To change or erase the settings, cancel the communication first by Edit File Mode. (See page 82)
33
One-Touch/Abbreviated Dialing Numbers
To erase the settings of One-Touch/ABBR Dialing number
1
2
FUNCTION
7
2
SET
Select 1 for One-Touch Dialing number
Select 2 for ABBR Dialing Number
ONE-TOUCH< >
PRESS ONE-TCH OR ∨ ∧
Ex: 1
3
1:ONE-TOUCH
2:ABBR NO.
Enter the station you wish to erase.
Ex:
<01> SALES DEPT
9-555 1234
01
4
CLEAR
5
SET
To return to standby, press
<01> SALES DEPT
ENTER TEL. NO.
ONE-TOUCH< >
PRESS ONE-TCH OR ∨ ∧
STOP .
(see Note 1)
Note: 1. If the One-Touch/Abbreviated dialing number has been used for a communication reservation, the settings cannot
be changed or erased until the communication has finished.
To change or erase the settings, cancel the communication first by Edit File Mode. (See page 82)
34
One-Touch/Abbreviated Dialing Numbers
Printing Out a Directory Sheet
After programming a one-touch dialing number, you can print out the directory sheet which includes the first 12
characters of each station name. Cut along the dotted line and place it over the One-Touch key under the
Directory Sheet Cover. To print out a directory sheet, follow the steps below.
1
2
FUNCTION
7
PRINT OUT
(1-7)
ENTER NO. OR ∨ ∧
6
* PRINTING *
DIRECTORY SHEET
SET
Your machine prints out the directory sheet.
******************* -DIRECTORY SHEET- ****************** DATE
01
02
03
04
05
06
07
08
09
10
11
12
13
14
15
16
17
18
19
20
21
22
23
24
P1
P2
P3
MAR-12-1999 ***** TIME 15:00 *****
P4
dotted line
-
********************************************* -HEAD OFFICE
PANASONIC
- ****** -
201 555 1212- *******
Directory Sheet Cover
35
3
Customizing Your Machine
Your facsimile machine has a variety of adjustable Fax Parameters. These parameters, listed in the Parameter
Table, are preset for you and do not need to be changed. If you do want to make a change, read the table carefully.
Some parameters, such as the Resolution, Contrast, and Verification Stamp parameters, can be temporarily
changed by simple key operation just before a transmission is made. When the transmission ends, however, these
parameters return to their preset values (Home position). Other parameters can only be changed by the procedure
described below.
Setting the Fax Parameters
1
2
3
FUNCTION
4
SET MODE
(1-6)
ENTER NO. OR ∨ ∧
7
FAX PARAMETER(01-99)
NO.=❚
SET
Enter Fax Parameter number from the Parameter Table.
(See pages 37 to 40)
FAX PARAMETER(01-99)
NO.=01
Ex: 0 1 for CONTRAST
4
5
6
01 CONTRAST
1:NORMAL
SET
Enter the new setting value.
Ex: 2 for LIGHTER
02 RESOLUTION
1:STANDARD
SET
To set another parameter, press CLEAR to return to step
3 or press
STOP
to return to standby.
(see Note 1) (see Note 2) (see Note 3)
Note: 1. To scroll the Fax Parameters in Step 2 or 4, press
or
.
2. To print out a Fax Parameter List, see page 135.
3. If you press
or
in step 5, the new setting will be canceled.
36
01 CONTRAST
2:LIGHTER
Customizing Your Machine
Fax Parameter Table
No.
Parameter
Setting
Number
Setting
01
CONTRAST
*1
Normal
2
Lighter
3
Darker
*1
Standard
2
Fine
3
S-Fine
*1
Off
2
On
Setting the home position of the STAMP key.
To select the stamp function when document is stored in memory,
see Fax Parameter No. 28.
1
Off
Setting the home position of the MEMORY key.
*2
On
1
Pulse
*2
Tone
*1
Inside
2
Outside
3
No print
*1
Logo, ID No.
2
From To
*1
Invalid
2
Valid
1
Off
*2
Soft
3
Loud
1
Off
2
Always
*3
Inc. only
1
Invalid
*2
Valid
*1
Tel
2
Fax/Tel SW
*1
Fax
2
TAM I/F
02
04
05
06
07
08
09
10
12
13
15
16
RESOLUTION
STAMP
MEMORY
DIALING METHOD
HEADER PRINT
HEADER FORMAT
RCV'D TIME PRINT
KEY/BUZZER VOLUME
COMM. JOURNAL
AUTO JOURNAL PRINT
IN MODE
OUT MODE
Comments
3
Setting the home position of the CONTRAST key.
Setting the home position of the RESOLUTION key.
Selecting the Dialing method.
Selecting the printing position of the header.
Inside : Inside TX copy area.
Outside : Outside TX copy area.
No print : Header is not printed.
Selecting the header format.
Selecting whether the machine prints the received date & time,
remote ID, percentage of reduction and page number on the
bottom of each received page.
Selecting the volume of the Key/Buzzer tone.
Selecting the home position of printout mode for COMM. Journal
Off/Always/INC.
Off
: No printout
Always : Always prints out
Inc. only : Printout when communication has failed.
Selecting whether the machine prints the journal automatically
after every 32 transactions.
Selecting IN (attended) mode as either Telephone Mode or
Fax / Tel Auto Switching Mode.
Selecting OUT (unattended) mode as either Fax Mode or TAM
interface Mode.
Continued on the next page.
37
Customizing Your Machine
No.
Parameter
Setting
Number
Setting
Comments
18
OPERATOR CALL TIMER
*1
20 sec.
2
30 sec.
Selecting the length of time that your machine signals (rings) for an
incoming voice call in Fax/Tel Auto Switching mode.
(See page 64)
3
40 sec.
4
50 sec.
1
1 sec.
---
---
60
60 sec.
1
Invalid
*2
Valid
1
Invalid
*2
Valid
1
A4
*2
Letter
3
Legal
1
Fixed
*2
Auto
70
70%
----
----
100
100%
19
20
22
23
24
25
OGM LENGTH (TAM I/F)
SILENT DETECTION
(TAM I/F)
SUBSTITUTE RCV
RECORDING PAPER
SIZE
PRINT REDUCTION
REDUCTION RATIO
26
POLLING PASSWORD
27
POLLED FILE SAVE
28
31
32
STAMP AT MEM. XMT
INCOMPLETE FILE
SAVE
*1
Invalid
2
Valid
1
Invalid
*2
Valid
*1
Invalid
2
Valid
1
Manual
*2
Auto
COPY REDUCTION
Continued on the next page.
38
(----)
Setting for the OGM length of your TAM from 1 to 60 seconds. The
machine will not start to detect SILENCE until the time setting has
lapsed.
(Default = 20 sec.)
Selecting the Silent Detection Mode.
Selecting whether the machine receives to memory when
recording paper runs out, toner runs out or recording paper is
jammed.
Setting the recording paper size installed in your machine.
Selecting print reduction mode.
Fixed : Reduce received document according to setting of
Parameter No. 25.
Auto : Reduce received document according to the length of
received documents.
Selecting fixed print reduction ratio from 70% to 100%. This
parameter functions only when fixed print reduction is selected on
Fax Parameter No. 24.
Setting a 4-digit password for secured polling. (See page 73)
Selecting whether the machine retains the polled document in
memory even after the document is polled once.
Selecting whether the machine stamps the original documents
when storing the documents into memory.
(depending on the Stamp setting on the Control Panel)
Selecting whether the machine retains the document in memory if
the document is not successfully transmitted.
Selecting whether the machine performs the copy reduction ratio
automatically or manually.
Manual :The machine will prompt you for the Zoom ratio (100% to
70%) when making copies.
Auto : The machine will automatically determine the reduction
ratio according to the length of the original document.
Customizing Your Machine
No.
Parameter
34
ENERGY SAVER MODE
Setting
Number
1
2
*3
35
36
DAYLIGHT TIME
RING PATTERN
DETECT (DRD)
(See Note 2)
Invalid
*2
Valid
*1
Invalid
ACCESS CODE
40
RELAY XMT REQUEST
42
43
44
46
47
CONF. POLLED FILE
SAVE
PASSWORD-XMT
PASSWORD-RCV
SELECT RCV
REMOTE RECEPTION
All ring patterns.
Valid
(----)
Enter a 4-digit password used to print out the received document
in memory by using F8-5 (RCV TO MEMORY). When F8-5 is set
to On, this parameter will not be shown on the LCD display. (See
page 92)
(----)
Enter a 4-digit Access Code to secure the machine from
unauthorized use. (See page 90)
*1
Invalid
2
Valid
*1
Invalid
2
Valid
*1
Off
2
On
*1
Off
2
On
*1
Invalid
2
Valid
1
Invalid
*2
Valid
3
Selecting whether the clock adjusts for Daylight Saving Time
automatically. The built-in clock will advance 1 hour at 2:00 am on
the first Sunday in April and fallback 1 hour at 2:00 am on the last
Sunday in October.
Select a ring pattern for automatic answering.
1: A
Standard ring pattern.
2: B
Double ring pattern.
3: C
Triple ring pattern (Short-Short-Long).
4: D
All other triple ring pattern, except the type C
described above.
RCV TO MEMORY
38
Comments
To reduce the power consumption in standby, select either EnergySaver or Sleep mode and specify the Delay Time (1 to 120
Off
minutes) for the machine to enter into the selected mode.
The Delay Timer setting is only available in the Energy-Saver or
Sleep Modes.
Off :
The unit will remain in standby mode and
consume more energy than when in EnergyEnergy-Saver
Saver or Sleep modes.
Energy-Saver Mode :Saves energy by consuming less power than
when in standby mode by turning off the
fuser unit after the specified time.
Sleep Mode :
This is the lowest power state that the
Sleep
machine enters after the specified time
without actually turning off.
1
2
37
Setting
Selecting whether the machine accepts and performs Relay XMT
Request. (See page 115)
Selecting whether the machine saves the confidential polled file
even after the file is polled once.
Setting a 4-digit XMT-Password and selecting whether the
machine performs and checks the XMT-Password of the receiving
station when transmitting. (See page 101)
Setting a 4-digit RCV-Password and selecting whether the
machine performs and checks the RCV-Password of the
transmitting station when receiving. (See page 102)
Selecting whether the machine performs selective reception. (See
page 99)
Selecting whether or not the machine accepts remote reception
command. (See page 63)
52
DIAGNOSTIC
PASSWORD
(----)
Setting the password for Remote Diagnostic Mode. Please ask
your Panasonic Authorized Dealer for details.
53
SUB-ADDRESS
PASSWORD
(----)
Setting a 20-digit password for secured sub-address
communication.
Continued on the next page.
39
Customizing Your Machine
No.
Parameter
Setting
Number
Setting
54
FAX FORWARD
*1
Invalid
2
Valid
*1
Off
2
On
*1
A-English
2
C-French
3
Spanish
1
Invalid
*2
Valid
-
-
56
COVER SHEET
58
65
LANGUAGE
PRINT COLLATION
99
MEMORY SIZE
(Flash Memory)
Comments
Selecting whether the machine performs Fax Forwarding to the
specified destination . (See page 97)
Setting the home position of the Cover Sheet parameter in the
Select Mode. (See page 95)
Selecting the language to be shown on the display and reports.
Selecting whether the machine prints out documents in sequence.
(See page 69)
Displays the amount of base and optional memory installed.
(Base Memory + Optional Memory)
(see Note 1)
(see Note 2)
Note: 1. Setting number marked with an asterisk (*) indicates the factory standard setting.
2. This parameter supports an optional telephone service "Distinctive Ring Service" provided by your local telephone
company. It allows up to 4 different telephone numbers to be assigned on a single telephone line with a distinctive
ring for each telephone number. By selecting the appropriate ring pattern associated with the telephone number
assigned for your fax machine. It can differentiate and answer the incoming call on the fax number. All other calls
on the other telephone numbers will not be answered. This optional service from your local phone company is also
called Custom Ringing, Distinctive Ringing, Ident-a-call, Ident-a-ring, Personalized Ringing, RingMaster, RingMate,
Selective Ringing, Smart Ring or something similar. Check with your local telephone company on the availability of
this service in your area.
40
BASIC OPERATIONS
Loading Documents
Documents You Can Send
In general, your machine will send any document printed on A4, Letter or Legal size paper.
Document Size
Maximum Size
10.1 in (257 mm)
[See Note]
Document Thickness
4
Minimum Size
Single sheet:
0.0024 in (0.06 mm), 12 lbs to
0.0060 in (0.15 mm), 30 lbs
5.8 in (148 mm)
5.0 in (128 mm)
Multiple sheets:
0.0024 in (0.06 mm), 12 lbs to
0.0048 in (0.12 mm), 20 lbs
78.7 in (2000 mm)
Direction
Direction
Note: The maximum document width that can be sent through the machine is 10.1 in (257 mm).
However, the effective scanning width is 8.3 in (212 mm).
Documents You Cannot Send
You must never try to send documents that are:
Wet
Covered with wet ink
or paste
ABC
Too thin (e.g., onionskin,
airmail paper, pages from
some magazines, etc.)
Coated (e.g., glossy
paper, etc.)
Wrinkled, curled or
folded
abcdef
ghijklm
nopqrs
abcdef
tuvwx
ghijklm
yzabcd
abcdef
ef
ghijklm nopqrstuvwx
yzabcd
nopqrs
abcdef
efg
ghijklm
tuvwx
yzabcd
nopqrs
abcdef
efg
tuvwx
ghijklm
yzabcd
nopqrs
abcdef
efg
ghijklm
tuvwx
yza
nopqrs
tuvwxyza bcdefg
bcdefg
abcd
ab
abcdef
abcdef
g
ghijkl
abcdef
mnopq
abcdef
ghi
rstuvw
ghijkl
xyzabc
mnopq
abcdef
rstuvw
def
ghijkl
mnopq
xyzabc
abcdef
rstuvw
def
ghijkl
xyzabc
mnopq
abcdef
defg
rstuvw
ghijkl
xyzabc
mnopq
rstuvw
defg
xyzabc
defg
Chemically processed
(e.g., pressure-sensitive paper,
carbon-coated paper, etc.)
or made of cloth or metal
To transmit these kinds of documents, make a photocopy first and then transmit the copy instead.
41
Loading Documents
How to Load Documents
1. Be sure the document(s) is free of staples, paper clips and is not torn, greasy or covered by foreign objects.
2. Place the document(s) FACE DOWN on the Automatic Document Feeder (ADF) until the leading edge placed
into the machine stops. (see Note 1) (see Note 2) (see Note 3)
If you are sending multiple pages, make sure that the bottom sheet enters first. You can also stack up to 30
PAGES on the ADF at one time. If you have more than 30 pages, wait until transmission or storing in memory
starts as pages feed through, place any remaining pages on top of the last page in the feeder.
3. Adjust the Document Guides to center the document on the ADF.
Document Guides
CORRECT
INCORRECT
When you set a document on the ADF, the display message will change from date and time (standby) to the
following message. You can now change basic transmission settings, or begin the dialing procedure.
ENTER STATION(S)
THEN PRESS START 00%
Note: 1. The document limitation to send multiple pages is as follows.
Document Size
Document Thickness
Up to 20 pages
Up to 10.1” X 14.3” (257mm X 364mm)
0.0024”(12lbs) to 0.0048”(20 lbs)
Up to 30 pages*
A4 or Letter size
0.0024”(12lbs) to 0.0039”(16 lbs)
* Please note that although the size and thickness meets the specifications, you might not be able to set 30 pages
with some types of papers.
2. Transmitting documents longer than 14 in (356 mm) requires user’s assistance.
3. When transmitting documents longer than Letter size (8.5 x 11 in), please extend the Document Sub Tray as shown
below.
Document Sub Tray
42
Basic Transmission Settings
You can temporarily change the transmission settings either before or after you place the document on the ADF.
These settings are as follows;
• Contrast
• Resolution
• Halftone
• Stamp
• Communication Journal
After your document has been sent, your machine will automatically return to the preset settings.
4
Contrast (see Note 1)
Your machine is preset to Normal contrast. If you wish to send a document with lighter contrast, change the
setting to Lighter. If you wish to send a document with darker contrast, change the setting to Darker.
Press CONTRAST to:
DARKER
LIGHTER
CONTRAST
CONTRAST = Normal
DARKER
LIGHTER
CONTRAST
CONTRAST = Lighter
DARKER
LIGHTER
CONTRAST
CONTRAST = Darker
Resolution (see Note 2)
Your machine is preset to Standard resolution, which is suitable for most documents.
Use Fine or Super Fine for detailed documents.
Press RESOLUTION
CONTRAST to:
S-FINE
FINE
RESOLUTION
RESOLUTION = Standard
S-FINE
FINE
RESOLUTION
RESOLUTION = Fine
S-FINE
FINE
RESOLUTION
RESOLUTION = Super Fine
(see Note 3)
Note: 1. To change the preset Contrast position, change the setting of Fax Parameter No. 01. (See page 37)
2. To change the preset Resolution position, change the setting of Fax Parameter No. 02. (See page 37)
3. If you send a photographic document with Halftone set to Fast or Quality and the Resolution set to Super Fine (UF585: 203 pels/inch x 391 lines/inch, UF-595: 406 pels/inch x 391 lines/inch), the reproduction of the received
document will be determined by the capability of the remote station.
43
Basic Transmission Settings
Halftone (see Note 1)
The Halftone setting is useful when sending photographs or illustrations with gray tones. Your machine is preset
to HALFTONE = Off. You can select either Fast or Quality mode.
Press HALFTONE to:
FAST
QUALITY
HALFTONE
HALFTONE = Off
FAST
QUALITY
HALFTONE
FAST
QUALITY
HALFTONE
HALFTONE = Quality
HALFTONE = Fast
Verification Stamp (see Note 2) (see Note 3)
The Verification Stamp helps you to confirm successful transmissions by stamping the bottom of each
successfully transmitted page with a small
mark.
Press STAMP to:
STAMP
STAMP
STAMP = Off
STAMP = On
Note: 1. When you select HALFTONE, FAST or QUALITY, your machine will automatically select Fine Resolution.
2. When you store a document in memory, the Verification Stamp will stamp on the document if it is successfully stored
in memory. In this case the Verification Stamp is not a confirmation that the document was successfully transmitted.
If you wish to disable the use of the Verification Stamp when storing document in memory, change the setting of Fax
Parameter No. 28. (See page 38)
3. To change the preset Verification Stamp position, change the setting of Fax Parameter No. 04. (See page 37)
44
Basic Transmission Settings
Communication Journal (COMM. JOURNAL)
A Communication Journal lets you verify if the transmission was successful. You can select the condition to print
out the Communication Journal as follows.
When you set COMM. JOURNAL = OFF:
a Communication Journal will not be printed out.
When you set COMM. JOURNAL = ON :
a Communication Journal is printed out automatically
after every communication.
When you set COMM. JOURNAL = INC.:
a Communication Journal is printed out automatically
only if the communication has failed.
1
FUNCTION
2
1
3
1
8
SET
SELECT MODE
(1-5)
ENTER NO. OR ∨ ∧
COMM. JOURNAL=INC
1:OFF 2:ON 3:INC
COMM. JOURNAL=OFF
1:OFF 2:ON 3:INC
for “OFF”.
or
or
2
for “ON” (Always print out).
or
COMM. JOURNAL=ON
1:OFF 2:ON 3:INC
or
3
for “INCOMPLETE” only.
4
4
COMM. JOURNAL=INC
1:OFF 2:ON 3:INC
SET
(see Note 1)
Note: 1. To change the preset Comm. Journal condition, change the setting of Fax Parameter No. 12. (See page 37)
45
Sending Documents
You can choose either Memory or Direct Transmission.
Use Memory Transmission if:
• You want to send the document to multiple stations.
• You have to retrieve the document immediately.
• You want to take advantage of Dual Operation design.
Use Direct Transmission if:
• The memory is full.
• You want to send the document immediately.
Use Voice Mode Transmit if:
• You want to send the document after talking with the other party.
• You want to send the document after listening to a voice prompting.
Memory Transmission
Your machine quickly stores the document into the machine's memory.
Then, starts to dial the telephone number.
If the transmission fails, your machine will re-transmit the remaining unsuccessful page(s) automatically.
2
1
Store document
in memory
Transmit
3
Destination A
Receive
A
A
Destination B
A
46
Sending Documents
(see Note 1)Å@Å@ (see Note 2)Å@Å@ (see Note 3)Å@Å@ (see Note 4) (see Note 5) (see Note 6)
Note: 1. The File Number of the document being stored is shown at the upper right
corner of the display while storing the document. It is also printed on the
Communication Journal (COMM. JOURNAL), Transaction Journal and File
List. The percentage of memory used is shown on the lower right corner of
the display after each page is stored.
* STORE *
NO.003
PAGES=002 10%
* STORE * COMPLETED
TOTAL PAGES=005 30%
2. If memory overflow occurs while storing documents, the remaining
documents on the ADF will be ejected. The machine prompts you whether to
transmit the successfully stored documents or to cancel the transmission.
Press 1 to cancel or press 2 to transmit.
See the Specifications on page 152 for the image memory capacity.
If no action is taken within 10 seconds, the machine will start transmitting the
stored documents.
MEMORY OVERFLOW
INFO. CODE=870
3. An Information Code will be displayed if the transmission has failed or no
answer at the receiving side after the last automatic redial.
The document stored for this transmission will be erased from the memory
automatically and the information code is printed for the transmission on the
Communication Journal (COMM. JOURNAL).
If you need to retain the incomplete documents even after the last redial,
change Fax Parameter No. 31 (INC. FILE SAVE) to "Valid" in advance. (See
page 38) To retry the incomplete documents, refer to page 89.
INCOMPLETE
INFO. CODE=XXX
4. To stop the transmission, press
The display shows:
4
15 PAGES COMPLETED
DELETE? 1:YES 2:NO
STOP .
COMMUNICATION STOP ?
1:YES 2:NO
Press 1 to stop the transmission. The document you stored will be erased automatically.
If you do not want to erase the documents, change the setting of Fax Parameter No. 31 (INC. FILE SAVE) to "Valid"
in advance. (See page 38)
Then the following display will appear and you can select whether to save the file as an incomplete file
for editing and retry, or delete the file manually.
SAVE AS INCOMP.FILE?
1:YES 2:NO
5. If you would like to print a Communication Journal (COMM. JOURNAL) after stopping a transmission, press 1
when the display shows:
PRINT COMM. JOURNAL?
1:YES 2:NO
6. If the file memory capacity reaches 10 files and you try to store another file, the following display appears and the
machine will not accept additional files until a file is completed and becomes available.
FILE STORAGE IS FULL
PLEASE WAIT!
47
Sending Documents
Manual Number Dialing
To dial the telephone number manually, follow the steps below. (see Note 1)
1
ENTER STATION(S)
THEN PRESS START 00%
Set document(s) face down.
2
MEMORY
Make sure that the MEMORY lamp is on.
If not, press MEMORY to set “On”.
3
4
Enter a telephone number from the keypad.
Ex: 5 5
TEL. NO.
5551234❚
5 1 2 3 4
START
The document is stored into memory with a file number.
Then starts to dial the telephone number.
* STORE *
NO.002
PAGES=001 05%
* DIALING *
5551234
NO.002
(see Note 2)
Note: 1. If you need a special access number to get an outside line, dial it first then press PAUSE to enter a pause
(represented by a "-") before dialing the full number.
Ex: 9 PAUSE 5551234
2. If you are using Pulse dialing and you wish to change to Tone dialing in the middle of dialing, press TONE
(represented by a "/").
The dilaing mode will be changed from Pulse to Tone after dilaing the digit "/".
Ex: 9 PAUSE TONE 5551234
48
Sending Documents
One-Touch Dialing
One-Touch Dialing allows you to dial a full telephone number by pressing a single key. To set up the One-Touch
keys, see page 31.
1
ENTER STATION(S)
THEN PRESS START 00%
4
Set document(s) face down.
2
MEMORY
Make sure that the MEMORY lamp is on.
If not, press MEMORY to set “On”.
3
Press a One-Touch key.
Ex:
4
<01>(Station name)
5551234
01
START
The document is stored into memory with a file number.
Then starts to dial the telephone number.
* STORE *
NO.002
PAGES=001 05%
* DIALING *
NO.002
(Station name)
49
Sending Documents
Abbreviated Dialing
Abbreviated dialing is a speedy way to dial a frequently dialed telephone number by preprogramming the
telephone number into the built-in auto-dialer with a 3-digit abbreviated code. To program an abbreviated dialing
number, see page 32.
1
ENTER STATION(S)
THEN PRESS START 00%
Set document(s) face down.
2
MEMORY
Make sure that the MEMORY lamp is on.
If not, press MEMORY to set “On”.
3
Press
Ex:
4
ABBR
ABBR
then enter a 3-digit code.
0
1
0
START
The document is stored into memory with a file number.
Then starts to dial the telephone number.
50
[010](Station name)
5553456
* STORE *
NO.002
PAGES=001 05%
* DIALING *
NO.002
(Station name)
Sending Documents
Directory Search Dialing
Directory Search dialing allows you to dial a full telephone number by searching the station name entered in
One-Touch keys or Abbreviated dialing numbers.
1
ENTER STATION(S)
THEN PRESS START 00%
4
Set document(s) face down.
2
MEMORY
Make sure that the MEMORY lamp is on.
If not, press MEMORY to set “On”.
3
4
DIRECTORY
SEARCH
ENTER LETTER(S)
❚
Enter the full station name or part of a station name by using
the Character keys. (See page 13)
ENTER LETTER(S)
PANA❚
Ex: P A N A for searching PANASONIC
5
[010] PANASONIC
5553456
or
-
repeatedly until the display shows the station name you want
to send to.
6
START
The document is stored into memory with a file number.
Then starts to dial the telephone number.
* STORE *
NO.002
PAGES=001 05%
* DIALING *
PANASONIC
NO.002
51
Sending Documents
Multi-Station Transmission (Broadcasting)
If you have to send the same document(s) to multiple stations, you can save time in feeding the document(s) by
using memory transmission. That is, you can store the document(s) into memory and then send it to the
station(s) automatically.
1
ENTER STATION(S)
THEN PRESS START 00%
Set document(s) face down.
2
MEMORY
Make sure that the MEMORY lamp is on.
If not, press MEMORY to set “On”.
3
Dial by any combination of the following methods:
• One-Touch Dialing
• Abbreviated Dialing
• Manual Number Dialing, press SET after each
station is entered
(Up to 12 stations)
• Directory Search Dialing, press SET after each
station is entered
(For details, see page 48 to 51.)
Ex:
<01>(Station name)
5551234
01
ABBR
0
0
1
[010](Station name)
5553456
If you want to confirm the number of stations you have
entered, press
4
SET
.
START
2 STN(S) ARE SET
ADD MORE OR START
* STORE *
NO.001
PAGES=001 01%
* STORE * COMPLETED
TOTAL PAGE=005
25%
The document is stored into memory with a file number.
Then starts dialing the telephone numbers in sequence.
* DIALING *
NO.001
(Station name)
(see Note 1)
Note: 1. You can review the stations you entered in step 3 before storing your document into memory by pressing
or
52
. Press CLEAR to clear an entered station or group shown on the display if needed.
Sending Documents
Direct Transmission
If your machine's memory is full or you wish to send the document immediately, use Direct Transmission.
Manual Number Dialing (Direct Transmission)
To dial the telephone number manually, follow the steps below.
1
4
ENTER STATION(S)
THEN PRESS START 00%
Set document(s) face down.
2
3
4
ENTER STATION
MEMORY
00%
Make sure that the lamp goes off.
Enter a telephone number from the keypad.
PRESS START TO DIAL
5551234❚
Ex: 5 5 5 1 2 3 4
* DIALING *
5551234
START
Your machine starts to dial the telephone number.
(see Note 1) (see Note 2) (see Note 3)
Note: 1. If you need a special access number to get an outside line, dial it first then press PAUSE to enter a pause
(represented by a "-") before dialing the full number.
Ex: 9 PAUSE 5551234
2. If you are using Pulse dialing and you wish to change to Tone dialing in the middle of dialing, press
(represented by a "/").
The dilaing mode will be changed from Pulse to Tone after dilaing the digit "/".
Ex: 9 PAUSE TONE 5551234
3. To stop the transmission, press
The display shows:
TONE
STOP .
COMMUNICATION STOP ?
1:YES 2:NO
Press 1 to stop the transmission. The Communication Journal will not print out regardless of the printout mode
setting of the Communication Journal.
53
Sending Documents
One-Touch Dialing (Direct Transmission)
One-Touch Dialing allows you to dial a full telephone number by pressing a single key. To set up the One-Touch
keys, see page 31.
1
ENTER STATION(S)
THEN PRESS START 00%
Set document(s) face down.
2
3
ENTER STATION
MEMORY
00%
Make sure that the lamp goes off.
Press a One-Touch key.
Ex:
01
The display will show the One-Touch number and station
name. The full number (e.g. 5551234) will then be dialed.
54
<01>(Station name)
5551234
* DIALING *
(Station name)
Sending Documents
Abbreviated Dialing (Direct Transmission)
Abbreviated dialing is a speedy way to dial a frequently dialed telephone number by preprogramming the
telephone number into the built-in auto-dialer with a 3-digit abbreviated code. To program an abbreviated dialing
number, see page 32.
1
4
ENTER STATION(S)
THEN PRESS START 00%
Set document(s) face down.
2
3
ENTER STATION
MEMORY
00%
Make sure that the lamp goes off.
Press
Ex:
ABBR
ABBR
and a 3-digit code.
0
1
0
The display will show the ABBR number and station name.
The full number (e.g. 5553456) will then be dialed.
[010](Station name)
5553456
* DIALING *
(Station name)
55
Sending Documents
Directory Search Dialing (Direct Transmission)
Directory Search dialing allows you to dial a full telephone number by searching the station name entered in
One-Touch keys or Abbreviated dialing numbers.
1
ENTER STATION(S)
THEN PRESS START 00%
Set document(s) face down.
2
3
4
ENTER STATION
MEMORY
00%
Make sure that the lamp goes off.
DIRECTORY
SEARCH
ENTER LETTER(S)
❚
Enter the full station name or part of a station name by
using the Character keys. (See page 13)
ENTER LETTER(S)
PANA❚
Ex: P A N A for searching PANASONIC
5
[010] PANASONIC
5553456
or
-
repeatedly until display shows the station name you want
to send to.
6
START
The full number (e.g. 5553456) will be dialed.
56
* DIALING *
PANASONIC
Sending Documents
Voice Mode Transmission
If you wish to send the document after talking with other party, use Voice Mode Transmission. Your machine requires
an optional fax handset or an external telephone.
Off-Hook Dialing
4
For Off-Hook Dialing, follow the steps below.
1
ENTER STATION(S)
THEN PRESS START 00%
Set document(s) face down.
2
3
Lift the fax handset or the external telephone and dial the
telephone number from the keypad.
* PHONE OFF HOOK *
Ex: 5 5 5 1 2 3 4
* DIALING *
5551234❚
When you hear the voice of the other party, tell the other
party to prepare to receive a document.
ON LINE * XMT *
Then, when you hear a beep,
START
and hang up the handset.
(see Note 1)
Note: 1. To stop the transmission, press
The display shows:
STOP .
COMMUNICATION STOP ?
1:YES 2:NO
Press 1 to stop the transmission. The Communication Journal will not print out regardless of the printout mode
setting of the Communication Journal.
57
Sending Documents
On-Hook Dialing
For On-Hook Dialing, follow the steps below.
1
ENTER STATION(S)
THEN PRESS START 00%
Set document(s) face down.
2
* MONITOR *
❚
MONITOR
You will hear dial tone through the monitor speaker.
3
Dial the telephone number from the keypad.
Ex: 5 5 5 1 2
4
* DIALING *
5551234❚
3 4
When you hear a beep,
ON LINE * XMT *
START
(see Note 1) (see Note 2)
Note: 1. If you need a special access number to get an outside line, dial it first then press PAUSE to enter a pause
(represented by a "-") before dialing the full number.
Ex: 9 PAUSE 5551234
2. If you are using Pulse dialing and you wish to change to Tone dialing in the middle of dialing, press TONE
(represented by a "/").
The dilaing mode will be changed from Pulse to Tone after dilaing the digit "/".
Ex: 9 PAUSE TONE 5551234
58
Sending Documents
Transmission Reservation
You can do the following while sending a document from memory or receiving a document.
• Reserve the next transmission into memory for up to 10 different files.
• Reserve a priority transmission.
Memory Transmission Reservation (Multi-tasking)
If your machine is on-line busy transmitting from memory, receiving or printing received documents, you can
reserve a transmission by the following procedure.
1
Your machine is on-line, the ON LINE lamp is blinking or
printing received documents.
ON LINE * MEM.XMT *
ID:(Identification)
ON LINE * RCV *
ID:(Identification)
ON LINE
PC MODE
* PRINTING *
MEMORY RCV’D DOC
2
ENTER STATION(S)
THEN PRESS START 00%
Set document(s) face down.
3
4
MEMORY
Make sure that the MEMORY lamp is on.
If not, press MEMORY to set “On”.
Dial by any combination of the following methods:
• One-Touch Dialing
• Abbreviated Dialing
• Manual Number Dialing, press SET after each
station is entered
(Up to 12 stations)
• Directory Search Dialing, press SET after each
station is entered
(For details, see page 48 to 51.)
Ex:
5
01
START
<01>(Station name)
5551234
* STORE *
NO.005
PAGES=001 01%
* STORE * COMPLETED
TOTAL PAGES=005 25%
Your machine will store the document(s) into memory.
(see Note 1)
Note: 1. To cancel the memory transmission reservation, see page 86.
59
4
Sending Documents
Direct Transmission Reservation (Priority Transmission Reservation)
If you are in a rush to send an urgent document, however there are many files in the memory, use Direct
Transmission Reservation to send the urgent document. The urgent document will be sent immediately after the
current communication is finished.
Note that you cannot send documents to multiple stations.
To reserve your machine for sending the urgent documents
1
Your machine is on-line, the ON LINE lamp is blinking or
printing received documents.
ON LINE * MEM.XMT *
ID:(Identification)
ON LINE * RCV *
ID:(Identification)
ON LINE
PC MODE
* PRINTING *
MEMORY RCV’D DOC
2
ENTER STATION(S)
THEN PRESS START 00%
Set document(s) face down.
3
4
ENTER STATION
MEMORY
00%
Make sure that the lamp goes off.
Dial by using any one of the following methods:
• One-Touch Dialing
• Abbreviated Dialing
• Manual Number Dialing and press START
• Directory Search Dialing and press START
(For details, see pages 53 to 56.)
Ex:
<01>(Station name)
5551234
01
You can reserve sending an urgent document to a single
station only.
A message “DIRECT XMT RESERVED” will be shown on
the display.
DIRECT XMT RESERVED
<01>(Station name)
To cancel the direct transmission reservation
1
2
Make sure the document is on the ADF.
STOP
CANCEL XMT RESERVE ?
1:YES 2:NO
-
3
60
DIRECT XMT RESERVED
<01>(Station name)
1
and then remove the document from ADF.
Sending Documents
Redialing
Automatic Redialing
If a busy line is detected, the machine will redial the number up
to 5 times at 3 minutes interval. However, if a busy line is not
detected, the machine will redial only one time. During that time,
a message will appear as shown to the right.
A file number is shown in the upper right hand corner of the
display if it is a memory transmission file.
WAIT TO DIAL NO.001
<01>(Station name)
4
Manual Redialing
You can also redial the last dialed number manually by pressing REDIAL key.
To redial the last dialed number through memory
1
ENTER STATION(S)
THEN PRESS START 00%
Set document(s) face down.
Make sure that the MEMORY lamp is on.
2
3
TEL. NO.
5551234
PAUSE
REDIAL
* STORE *
NO.002
PAGES=001 01%
START
* DIALING *
5551234
NO.002
The document is stored into memory with a file number.
Then dials the last dialed number.
To redial the last dialed number through ADF
1
ENTER STATION(S)
THEN PRESS START 00%
Set document(s) face down.
2
3
ENTER STATION
MEMORY
00%
Make sure that the lamp goes off.
START
PAUSE
PRESS START TO DIAL
5551234
REDIAL
* DIALING *
5551234
Your machine starts to dial the last dialed number.
(see Note 1)
Note: 1. While the unit is displaying "WAIT TO DIAL", you can press REDIAL to start redialing immediately.
61
Receiving Documents
Reception Modes
You can select one of the four modes as shown below.
(see Note 1)
Conditions
Suggested Reception Mode
Settings
1. Fax Parameter No. 15
set to 1 : Tel
2. Press the OUT button, the
You normally receive
following LCD appears:
You can answer the incoming call via an External
only voice calls.
Telephone (Optional). If you receive a fax calling
MAR-12-1999 15:00
signal, simply press START to receive manually. (See
RCV MODE=TEL
00%
page 63)
Telephone Mode
(IN Mode)
Fax / Tel Auto Switching Mode
(IN Mode)
1. Fax Parameter No. 15
set to 2 : Fax / Tel SW.
2. Press the OUT button, the
You receive both voice Unit will answer the incoming call then distinguishes
following LCD appears:
and fax calls.
whether it is voice or fax call. If it is a fax call, the unit
MAR-12-1999 15:00
will receive automatically. if it is a voice call, the unit
RCV MODE=FAX/TEL 00%
will signal (ring) through the speaker for your
attention. (See page 64)
Fax Mode
(OUT Mode)
1. Fax Parameter No. 16
set to 1 : Fax
2. Press the OUT button, the
You normally receive
following LCD appears:
Unit will receive the document automatically. All
fax calls only.
incoming calls (including a voice call) are answered
MAR-12-1999 15:00
by the fax machine. (See page 65)
00%
TAM Interface Mode
(OUT Mode)
1. Fax Parameter No. 16
set to 2 : TAM I/F.
You receive both voice
2. Press the OUT button, the
and fax calls. And a
following LCD appears:
The TAM answers the incoming call. During that time,
Telephone Answering
the unit also monitors whether it is a voice call, the
MAR-12-1999 15:00
Machine (TAM) is
TAM continues to operate. If it is a fax call, the unit
RCV MODE=FAX/TAM 00%
connected.
will automatically switch the line to the Fax and begin
receiving document. (See page 66)
(see Note 2)
Note: 1. Depending on the model of the Telephone Answering Machine (TAM) that is connected, some of the features may
not be compatible with your fax machine operating in the TAM Interface mode.
2. If you are using the "Distinctive Ring Service" provided by your local telephone company, please note that the ring
pattern for your fax number must match with the setting of Fax Parameter No. 36 (RING PATTERN DETECT). (See
page 39)
If the setting does not match with the ring pattern, your machine will not receive a document automatically and the
telephone will continue to ring.
Furthermore, if your TAM does not support the "Distinctive Ring Detector" service, it may not function properly in
TAM Interface.
62
Receiving Documents
Telephone Mode
When your machine is set to this mode, your machine will not receive documents automatically. If you receive a
fax call, follow the procedure below to receive documents manually.
Setting the Telephone Mode
1
2
4
Change Fax Parameter No. 15 (IN MODE) to 1 : Tel. (See page 37)
MAR-12-1999 15:00
RCV MODE=TEL
00%
OUT
Confirm that the display is as shown to the right.
Operation of Telephone Mode
1
When your telephone rings, lift the handset of the External Telephone.
2
Remove any document from the ADF.
If you hear a beep from the phone, it means someone wants to send a fax. Or, if the
caller answers and says he/she wants to send a fax, then...
If you answered the call using the
External Telephone,
3a
START
If you answered the call on an
Extension phone,
3b
START
or
within 1 second from the
telephone key pad.
(See Note 1)
Your machine will be activated remotely.
4
Hang up the phone.
(see Note 1)
Note: 1. This procedure is called "REMOTE RCV" and will only work on a touch tone phone. If your extension phone is not
a touch tone phone, press START on the control panel of your fax machine.
63
Receiving Documents
Fax / Tel Auto Switching Mode
When your machine is set to this mode, your machine will switch to document reception or voice communication
automatically.
Setting the Fax / Tel Auto Switching Mode
1
2
Change Fax Parameter No. 15 (IN MODE) to 2 : Fax / Tel SW. (See page 37)
MAR-12-1999 15:00
RCV MODE=FAX/TEL 00%
OUT
Confirm that the display is as shown to the right.
Operation of Fax / Tel Auto Switching Mode
1
Your machine will answer the call when a call is received, then distinguish whether it is
a voice or fax call.
If it is a Fax call,
2a
Your machine begins to receive the
documents.
If it is a Voice call,
2b
Your machine begins to signal (ringing)
through the machine's speaker for your
attention. (See Note 1)
3b
Lift the handset of the External Telephone
4b
Begin the conversation.
and press
STOP .
(see Note 1) (see Note 2)
Note: 1. The length of time the machine signals can be changed by Fax Parameter No.18 (OP CALL TIMER) (see page 38).
2. To adjust the Ringer Volume refer to page 25.
64
Receiving Documents
Fax Mode
When your machine is set to this mode, it will immediately begin to receive documents automatically when a call
is received.
Setting the Fax Mode
1
2
4
Change Fax Parameter No. 16 (OUT MODE) to 1 : Fax. (See page 37)
MAR-12-1999 15:00
00%
OUT
Confirm that the display is as shown to the right.
Operation of Fax Mode
Your machine will begin receiving automatically when a fax call is received.
TAM (Telephone Answering Machine) Interface Mode
Your machine is equipped with a unique feature called TAM Interface which enables it to automatically switch a
single telephone line either to Fax or TAM. You can connect most TAMs in the market to your machine and use
your existing telephone line very efficiently. However, some TAMs may not be compatible with this machine.
Answering Services (Voice Mail) provided by your Local Phone company are not compatible with this feature. For
the operation of your TAM, please refer to the User's Guide of the TAM.
Installing your TAM
TEL
(1) Remove the telephone line cable of your
TAM from the wall jack.
(2) Plug the telephone line cable of your TAM
into the TEL jack on the rear of the fax
machine as shown.
65
Receiving Documents
Setting the TAM Interface Mode
1
2
Change Fax Parameter No. 16 (OUT MODE) to 2 : TAM I/F. (See page 37)
MAR-12-1999 15:00
RCV MODE=FAX/TAM 00%
OUT
Confirm that the display is as shown to the right.
Operation of TAM Interface Mode
1
When your TAM and Fax receives an incoming call, the TAM always answers the call
first and then the TAM plays the OGM (Outgoing Message) recorded in your TAM to
the calling station. During the time the TAM is answering the call, your fax machine will
be monitoring the line to distinguish whether it is a voice or fax call.
If it is a Fax call,
2a
Your machine will switch the line to the
fax and then begin to receive the
documents immediately from the
calling station.
If it is a Voice call,
2b
Your TAM continues to record a message
(ICM) after playing the OGM.
Sample of OGM
Hello, this is Smith. Sorry I am unable to take your call. Please leave your message after the beep or if
you are calling to send a fax, press the asterisk button twice on your touch tone phone now and start
your machine. Thank you for calling.
Silent Detection Mode
Enables your Fax machine to switch to the Fax Mode when receiving from units that do not send fax
signal (short beep) and prevents your TAM from recording blank (long silence) incoming message.
To activate this feature,
1. Change Fax Parameter No. 20 (SILENT DET.) to 2 : Valid. (See page 38)
2. Set the time length of the OGM recorded in your TAM with the Fax Parameter No. 19 (OGM
LENGTH). (See page 38.)
[We recommend to set the time length 5 or 6 seconds longer than the actual time length of the OGM.]
66
Receiving Documents
Print Reduction
This machine can use Letter, Legal or A4 size plain paper for recording. Sometimes, oversized documents sent
to you by the other parties cannot be printed within a single page. When this occurs, the document will be
divided into separate pages.
This machine is equipped with a Print Reduction function to solve this problem. You may select the most
appropriate setting from the selections described below.
1. Automatic Reduction
Each page of a received document is first stored in memory. Based on the document length, your machine will
automatically calculate the suitable reduction ratio (70% to 100%) to print the entire document on a single page.
If the received document is extremely long (over 39% longer than the recording paper), the document will be
divided into separate pages and print without reduction.
2. Fixed Reduction
You can pre-determine the reduction ratio from 70% to 100% in 1% steps. The document(s) you receive will be
reduced to the fixed ratio regardless of size.
Selecting the Print Reduction Mode
Set Fax Parameters as shown below. (See page 38)
1. To set Automatic Reduction mode.
(1) No. 24 Print Reduction set to “Auto”.
2. To set Fixed Reduction mode.
(1) No. 24 Print Reduction set to “Fixed”.
(2) No. 25 Reduction Ratio set to any number between 70% through 100%. (See Note 1)
EX: A4 to A4 - 96%
A4 to Letter - 90%
Letter to Letter - 96%
Legal to Letter - 75%
(see Note 1)
Note: 1. If the sending side is set to print the header on the outside of the copy area, more reduction ratio will be required.
67
4
Receiving Documents
Receiving Oversize Documents
If the received document is extremely long (over 39% longer than the recording paper), the document will be
divided into separate pages. When printing on separate pages, the bottom 0.4 in (10 mm) of first page will be
overlapped on top of the next page.
(see Note 1)
Transmitted Document
Received Document
Overlap print.
0.4 in (10 mm)
The receiving document is divided
into two sheets with overlap printing.
Note: 1. If the reduction method is set to the Automatic Reduction mode, the document is printed out with no reduction when
printing out separate pages. If the reduction method is set to Fixed Reduction mode, the document is printed out by
the ratio you set in Fax Parameter No. 25.
68
Receiving Documents
Substitute Memory Reception (see Note 1) (see Note 2)
If the recording paper runs out or jams or if the toner runs out during reception, the machine automatically starts
receiving documents into its image data memory. Stored documents are printed automatically after replacing the
recording paper or the toner cartridge. (See Note 1 and 2)
1
When the machine finishes the memory reception and
there is no recording paper or toner, an Information Code
appears on the display.
4
NO RECORDING PAPER
INFO. CODE=010
OUT OF TONER
INFO. CODE=041
2
Install the recording paper (See page 18) or replace the
toner cartridge (See page 16).
The machine will automatically
document stored in the memory.
start
printing
* PRINTING *
MEMORY RCV’D DOC
the
Print Collation Mode
The printing mechanism of the UF-585/595 is a Reverse Order Stacking construction. The UF-585/595 has a
Print Collation Mode that stacks received documents in the correct order. When the Print Collation Mode is
enabled, all received documents are stored into memory first, then printed out in Correct Order Stacking. The
requirements for the Print Collation Mode to be active are; 1) Fax Parameter No. 65 PRINT COLLATION set to
“Valid”, and 2) enough remaining memory.
The unit will print in Reverse Order Stacking (Non-Collation Mode) whenever one of the above requirements is
not met.
To use this function, we recommend installing an Optional Flash Memory Card. See page 155 (Options and
Supplies).
Sending Document Order
Stacking Document Order
Correct Order Stacking
(Collation Mode)
1
1
2
3
2
3
Reverse Order Stacking
(Non-Collation Mode)
2
3
1
Note: 1. If the memory overflows, the machine will stop receiving and release the communication line.
The document(s) stored in the memory up to that moment will be printed out.
2. If you wish to turn off the substitute reception function, change the setting of Fax Parameter No. 22 to "Invalid". (See
page 38)
69
Making Copies
Your machine has a copy function which can make single or multiple copies. When copying, your machine will
automatically select Fine resolution.
1
ENTER STATION(S)
THEN PRESS START 00%
Set document(s) face down.
2
3
4
COPY
COPY
NO. OF COPY=1
Enter the number of copies.
COPY
NO. OF COPY=10
Ex: 1 0
START
* STORE *
NO.005
PAGES=001 01%
The machine stores the document, then prints the copies.
* COPY *
NO. OF COPY=01/10
(see Note 1) (see Note 2) (see Note 3)
Note: 1. The copy will be reduced automatically depending on the length of the original document. If you wish to be prompted
for the reduction ratio when making copies, change the setting of Fax Parameter No. 32 (COPY REDUCTION) to
"Manual". (See page 38)
2. If you make a copy with Super Fine resolution, it will be reduced slightly even if the reduction ratio is set to 100% in
order to fit the data on one page.
3. Standard Resolution is not available in Copy Mode.
70
ADVANCED FEATURES
Timer Controlled Communications
You can send a document to one or multiple stations at any preset time within the next 24 hours. Up to 10 built-in
timers can be set for deferred transmission and deferred polling.
Deferred Transmission (see Note 1) (see Note 2) (see Note 3)
1
ENTER STATION(S)
THEN PRESS START 00%
Set document(s) face down.
2
3
4
5
5
DEFERRED XMT
START TIME
SET
❚ :
Enter the start time from the keypad.
(Use a 4-digit, 24-hour clock)
Ex: 2
3 3 0 (11:30 p.m.) and
SET
ENTER STATION(S)
THEN PRESS START
Dial by any combination of the following methods:
• One-Touch Dialing
• Abbreviated Dialing
• Manual Number Dialing, press SET after each
station is entered
(Up to 12 stations)
• Directory Search Dialing, press SET after each
station is entered
(For details, see page 48 to 51.)
Ex:
6
1
FUNCTION
1
DEFERRED COMM. (1-2)
ENTER NO. OR ∨ ∧
<01>(Station name)
5551234
01
* STORE *
NO.002
PAGES=001 05%
START
to store documents into the memory.
* STORE * COMPLETED
TOTAL PAGES=005 30%
Note: 1. If you enter a wrong number in Step 4, press CLEAR then re-enter the right number.
2. To change or cancel the Deferred Communication settings, see page 84 and 86.
3. When you reserve a deferred transmission without storing document into memory, the following message will be
shown on the display after pressing START in the last step.
DEF DIRECT XMT RSV’D
<01>(Station name)
71
Timer Controlled Communications
Deferred Polling
1
2
3
2
DEFERRED COMM. (1-2)
ENTER NO. OR ∨ ∧
1
FUNCTION
DEFERRED POLLING
❚ :
START TIME
SET
Enter the start time from the keypad.
(Use a 4-digit, 24-hour clock)
Ex: 0 3 3 0 (3:30 a.m.) and
4
5
DEFERRED POLLING
PASSWORD=❚❚❚❚
Enter a 4-digit polling password.
Ex: 9 8 7 6 and
SET
ENTER STATION(S)
THEN PRESS START
Dial by any combination of the following methods:
• One-Touch Dialing
• Abbreviated Dialing
• Manual Number Dialing, press SET after each
station is entered
(Up to 12 stations)
• Directory Search Dialing, press SET after each
station is entered
(For details, see page 48 to 51.)
Ex:
6
SET
01
START
<01>(Station name)
5551234
* STORE *
(see Note 1)
(see Note 2)
Note: 1. If you enter a wrong number in Step 3, press CLEAR , then re-enter the right number.
2. To change or cancel the Deferred Communication settings, see page 84 and 86.
72
NO.001
Polling
Polling means calling other station(s) to retrieve a document. The other station must know in advance that you will
call and must have a document set on the ADF or stored in the memory. You may need to set a polling password,
shared by the other station, to ensure security.
Setting the Polling Password
If the polling password does not match with the polled station, your polling request will be refused automatically.
To set the polling password, follow the steps below.
1
5
7
FUNCTION
2
4
SET
3
2
6
4
SET MODE
(1-6)
ENTER NO. OR ∨ ∧
FAX PARAMETER(01-99)
NO.=❚
SET
Enter a 4-digit polling password.
26 POLLING PASSWORD
❚❚❚❚
26 POLLING PASSWORD
1234
Ex: 1 2 3 4
5
STOP
SET
-
(see Note 1) (see Note 2)
Note: 1. Polling might not function with all fax machines. We suggest you attempt a trial polling before you actually poll
important documents.
2. If a password is not set in the polled station, you may poll the other station even though your machine has a
password.
73
Polling
Preparing to be Polled
In order to let other stations poll your machine, you must prepare your machine with a document stored in
memory. Be sure to set the polling password before storing the document into memory. After being polled, the
documents stored in the memory will be erased automatically. To retain the documents in memory so that they
can be polled repeatedly change Fax Parameter No. 27 (POLLED FILE SAVE) to "Valid".
1
ENTER STATION(S)
THEN PRESS START 00%
Set document(s) face down.
2
3
4
5
FUNCTION
3
POLLING
NO.=❚
1:POLLING 2:POLLED
POLLED
PASSWORD=1234
2
Enter a 4-digit polling password. (See Note 3)
Ex: 4 3 2 1
START
The document(s) will be stored into memory.
POLLED
PASSWORD=4321
* STORE *
NO.015
PAGES=001 01%
* STORE * COMPLETED
TOTAL PAGES=005 24%
(see Note 1)
(see Note 2)
(see Note 3)
Note: 1. You can still send or receive documents even when set to be polled.
2. Only 1 polled file can be stored in memory. If you need to add document(s) into the same polled file, see page 88.
3. If you have set the polling password in Fax Parameter No. 26, the password will appear on the display.
You can still change the password temporarily by overwriting it with a new one.
74
Polling
To Poll Documents from Another Station
The following procedure lets you poll a document from one or multiple stations. Be sure to set the polling
password before polling. (See page 73)
1
2
3
4
5
FUNCTION
POLLING
NO.=❚
1:POLLING 2:POLLED
5
POLLING
PASSWORD=1234
1
Enter a 4-digit polling password. (See Note 2)
POLLING
PASSWORD=1111
Ex: 1 1 1 1
SET
ENTER STATION(S)
THEN PRESS START
Dial by any combination of the following methods:
• One-Touch Dialing
• Abbreviated Dialing
• Manual Number Dialing, press SET after each
station is entered
(Up to 12 stations)
• Directory Search Dialing, press SET after each
station is entered
(For details, see page 48 to 51.)
Ex:
6
3
01
START
<01>(Station name)
5551234
* STORE *
NO.001
(see Note 1)
(see Note 2)
Note: 1. You can review the entered stations in step 5 by pressing
or
key, press CLEAR to erase the displayed
station or group as needed.
2. If you have set the polling password in Fax Parameter No. 26, the password will appear on the display.
You can still change the password temporarily by overwriting it with a new one.
75
Program Keys
Your fax machine has special Program Keys. These keys are useful if you frequently need to send or poll the same
group of stations. You can use these keys to store a One-Touch group key, a sequence of stations to be polled, a
deferred transmission or polling sequence or an additional One-Touch key.
Setting for Group Dialing
To set a Program Key for Group Dialing
1
2
7
FUNCTION
1
3
PROGRAM
(1-4)
ENTER NO. OR ∨ ∧
SET
PROGRAM[P ]
PRESS PROGRAM KEY
SET
3
Ex:
4
Enter the station name (up to 15 characters) by using the
Character keys. (See page 13)
PROGRAM[P1]
ENTER NAME
P1
Ex: PROG.A and
5
ENTER STATION(S)
THEN PRESS START
SET
Enter the station numbers by using One-Touch Key or
ABBR and 3-digit code.
Ex:
01
and
ABBR
0
1
0
You may use the
or
keys to review the entered
station(s) before going to next step. If you find an error,
press CLEAR to erase the displayed station.
6
START
You can now set other Program Keys by repeating the
procedures from Step 3, or return to standby by pressing
STOP .
76
NAME
<01>(Station name)
5551234
[010](Station name)
5553456
PROGRAM[P ]
PRESS PROGRAM KEY
Program Keys
Setting for Deferred Transmission
To set a Program Key for deferred transmission
1
2
3
4
7
FUNCTION
2
Ex:
6
7
PROGRAM[P ]
PRESS PROGRAM KEY
PROGRAM[P1]
ENTER NAME
P1
5
NAME
Enter the station name (up to 15 characters) by using the
Character keys. (See page 13)
FUNCTION
1
PROGRAM[P1]
PRESS FUNCTION KEY
SET
1
DEFERRED XMT
START TIME
SET
❚ :
Enter the starting time using 4 digits.
Ex: 2 3 3 0 (11:30 p.m.) and
SET
ENTER STATION(S)
THEN PRESS START
Enter the station by any combination of the following
methods:
• One-Touch Dialing
• Abbreviated Dialing
• Directory Search Dialing, press SET after each
station is entered
(For details, see page 49 to 51.)
Ex:
8
PROGRAM
(1-4)
ENTER NO. OR ∨ ∧
SET
SET
Ex: PROG.A and
5
3
01
START
<01>(Station name)
5551234
PROGRAM[P ]
PRESS PROGRAM KEY
You can now set other Program Keys by repeating the
procedures from Step 3, or return to standby by pressing
STOP .
77
Program Keys
Setting for Deferred Polling
To set a Program Key for deferred polling
1
2
3
4
5
6
7
8
2
Ex:
3
PROGRAM
(1-4)
ENTER NO. OR ∨ ∧
SET
PROGRAM[P ]
PRESS PROGRAM KEY
SET
PROGRAM[P1]
ENTER NAME
P1
Ex: PROG.A and
FUNCTION
1
PROGRAM[P1]
PRESS FUNCTION KEY
SET
2
DEFERRED POLLING
❚ :
START TIME
SET
Enter the starting time.
Ex: 2 2 0 0 (10:00 p.m.) and
SET
DEFERRED POLLING
PASSWORD=❚❚❚❚
Enter a 4-digit polling password.
Ex: 1 1 1 1 and SET
The polling password appears if it has been previously set.
Enter the station by any combination of the following
methods:
• One-Touch Dialing
• Abbreviated Dialing
• Directory Search Dialing, press
after each
SET
station is entered
(For details, see page 49 to 51.)
01
START
You can now set other Program Keys by repeating the
procedures from Step 3, or return to standby by pressing
STOP .
78
NAME
Enter the station name (up to 15 characters) by using the
Character keys. (See page 13)
Ex:
9
7
FUNCTION
ENTER STATION(S)
THEN PRESS START
<01>(Station name)
5551234
PROGRAM[P ]
PRESS PROGRAM KEY
Program Keys
Setting for Normal Polling
To set a Program Key for normal polling
1
2
3
4
7
FUNCTION
2
Ex:
6
SET
PROGRAM
(1-4)
ENTER NO. OR ∨ ∧
PROGRAM[P ]
PRESS PROGRAM KEY
SET
PROGRAM[P1]
ENTER NAME
P1
5
NAME
Enter the station name (up to 15 characters) by using the
Character keys. (See page 13)
Ex: PROG.A and
5
3
FUNCTION
SET
PROGRAM[P1]
PRESS FUNCTION KEY
POLLING
PASSWORD=❚❚❚❚
3
Enter a 4-digit polling password.
Ex: 1 1 1 1 and
SET
ENTER STATION(S)
THEN PRESS START
The polling password appears if it has been previously set.
7
Enter the station by any combination of the following
methods:
• One-Touch Dialing
• Abbreviated Dialing
• Directory Search Dialing, press SET after each
station is entered
(For details, see page 49 to 51.)
Ex:
8
<01>(Station name)
5551234
01
START
PROGRAM[P ]
PRESS PROGRAM KEY
You can now set other Program Keys by repeating the
procedures from Step 3, or return to standby by pressing
STOP .
79
Program Keys
Setting for One-Touch Key
To set a Program Key for One-Touch Key
1
2
7
FUNCTION
3
3
SET
PROGRAM[P ]
PRESS PROGRAM KEY
SET
3
Ex:
4
Enter the station name (up to 15 characters) by using the
Character keys. (See page 13)
5
SET
5 5 SPACE 1 2 3 4
START
You can now set other Program Keys by repeating the
procedures from Step 3, or return to standby by pressing
STOP .
80
NAME
[P1] PROG.A
ENTER TEL. NO.
Enter a telephone number (up to 36 digits including
pauses and spaces).
Ex: 9 PAUSE 5
6
PROGRAM[P1]
ENTER NAME
P1
Ex: PROG.A and
PROGRAM
(1-4)
ENTER NO. OR ∨ ∧
[P1] PROG.A
9-555 1234❚
PROGRAM[P ]
PRESS PROGRAM KEY
Program Keys
Changing or Erasing the Program Key Settings
To change the settings in a Program Key, follow the procedure on setting a Program Key on pages 76 to 80.
• Start time or station(s) for deferred transmission
• Station(s) for normal polling
• Start time or station(s) for deferred polling
• Station(s) for group dialing
• Telephone number and station name for One-Touch key
To erase the settings in a Program Key
1
2
3
FUNCTION
4
5
3
SET
SET
PROGRAM
(1-4)
ENTER NO. OR ∨ ∧
PROGRAM[P ]
PRESS PROGRAM KEY
Press the Program key you want to erase.
Ex:
4
7
5
P1
1
You can now erase other Program Keys by repeating the
procedures from Step 3, or return to standby by pressing
PROGRAM[P1]
DELETE? 1:YES 2:NO
* DELETING *
PROGRAM[P1]
PROGRAM[P ]
PRESS PROGRAM KEY
STOP .
81
Edit File Mode
Your machine has a document image memory which enables you to reserve memory transmission, memory
deferred transmission, memory polling and so on.
After reserving the communications in memory, you may need to change the settings of the communication(s) while
it is still in memory. This section describes how to use the file editing features.
Printing a File List
The contents of the communication settings may have to be modified or deleted. To verify the contents, follow the
steps below to print out a file list.
1
EDIT FILE MODE (1-6)
ENTER NO. OR ∨ ∧
9
FUNCTION
2
1
1:FILE LIST?
PRESS SET TO SELECT
3
SET
FILE LIST
1:PRINT 2:VIEW
4
1
* PRINTING *
FILE LIST
Sample File List
*************** -FILE LIST- *********************** DATE MAR-12-1999 ***** TIME 15:00 ********
(1)
FILE
No.
(2)
COMM. TYPE
(3)
CREATED TIME
(4)
START TIME
001
DEFERRED XMT
MAR-12 13:20
20:30
002
MEM. DEF. XMT
MAR-12 13:20
22:30
(5)
(6)
PAGES DESTINATION(S)
[001]
003
[011] [012] [013] [016] [017]
-PANASONIC
************************************ -HEAD OFFICE
- ***** -
201 555 1212- *********
Explanation of Contents
(1) File number
: If the file is now being executed, a "*" is indicated on the left of the file number.
(2) Communication type
(3) Stored date/time
: Date/time that these files were stored.
(4) Executing time
: If the file is a Timer Controlled Communication, the start time is printed in this
column.
If the file is an incomplete file, "INCOMP" is printed in this column.
(5) Number of stored page(s)
(6) Destination
82
: ABBR No./One-Touch No./Manual Dialing No.
Edit File Mode
Viewing the Contents of a File List
To view the contents of a file list on the display without printing it, follow the steps below.
1
FUNCTION
EDIT FILE MODE (1-6)
ENTER NO. OR ∨ ∧
9
2
1
1:FILE LIST?
PRESS SET TO SELECT
3
SET
FILE LIST
1:PRINT 2:VIEW
4
2
5
USE THE ∨ ∧ KEYS TO
SCROLL EACH FILE
5
or
repeatedly until the display shows a file you want to edit.
-
Sample display
Type of File
XMT:
POLL:
POLLED:
RCV TO MEM:
PC JOB:
JOURNAL:
Status
Transmission
Polling
Polled
Receive to Memory
PC Interface Job (Option)
Journal / Report
nn:nn:
IN PRG:
REDIAL:
INCOMP:
Start time
In progress
Waiting to redial
Incomplete file
001 XMT 10:00 P010
<01>(Station name)
File Number
6
Entered station
Number of pages
STOP
-
83
Edit File Mode
Changing the Start Time or the Station of a File
To change the start time and/or stations in a communication file, follow the steps below.
1
2
3
FUNCTION
2
EDIT FILE MODE (1-6)
ENTER NO. OR ∨ ∧
9
ENTER FILE NO.OR ∨ ∧
FILE NO.=❚❚❚
SET
Enter the file number or use
that you want to change.
or
to select the file
ENTER FILE NO.OR ∨ ∧
FILE NO.=001
Ex: 0 0 1
4
5
6
84
SET
DEFERRED XMT
START TIME
22:30
DEFERRED XMT
START TIME
06:00
(See Note 2)
Enter a new start time.
Ex: 0 6 0 0 (6:00 a.m.)
(If you do not have to change the time, skip to step 6.)
SET
<01>(Station name)
5551234
Edit File Mode
7
To delete the station(s), press
or
key until the
station you want to delete appears. Then press CLEAR .
ENTER STATION(S)
THEN PRESS START
or
Enter the station(s) you want to add.
Ex:
8
01
SET
START
5
1 STN(S) ARE SET
ADD MORE OR START
* STORE *
005
(see Note 1) (see Note 2) (see Note 3)
Note: 1. Your machine cannot change the start time and/or stations in the file while it is being sent or waiting to redial.
2. If the file is not a Deferred Communication File, the following message is shown on the display.
SET DEFERRED COMM.?
1:YES 2:NO
Press 1 to change the type of the file for deferred communication file.
3. If you edit the file that is saved as an incomplete file, after pressing START in step 8, your machine will prompt
you whether to execute the file immediately.
The display shows:
RETRY INCOMP FILE?
1:YES 2:NO
Press 1 to execute the file immediately.
85
Edit File Mode
Deleting a File
To delete the file in memory, follow the steps below.
1
FUNCTION
2
3
3
EDIT FILE MODE (1-6)
ENTER NO. OR ∨ ∧
9
ENTER FILE NO.OR ∨ ∧
FILE NO.=❚❚❚
SET
Enter the file number or use
you want to delete.
or
to select the file that
ENTER FILE NO.OR ∨ ∧
FILE NO.=001
Ex: 0 0 1 (See Note 2)
4
SET
DELETE FILE
1:YES 2:NO
5
1
* DELETING *
FILE NO.=001
Enter the next file number you want to delete or press
NO.001?
ENTER FILE NO.OR ∨ ∧
FILE NO.=❚❚❚
STOP to return to standby.
(see Note 1)
(see Note 2)
Note: 1. Your machine cannot delete the file while it is being sent.
2. Enter
as the file number and press
The following message is shown on the display.
DELETE ALL FILES?
1:YES 2:NO
Press 1 to delete all files.
86
SET
to delete all files (except the file in progress).
Edit File Mode
Printing Out a File
To print the contents of the communication file, follow the steps bellow.
1
FUNCTION
EDIT FILE MODE (1-6)
ENTER NO. OR ∨ ∧
9
5
2
3
4
ENTER FILE NO.OR ∨ ∧
FILE NO.=❚❚❚
SET
Enter the file number or use
that you want to print.
or
to select the file
ENTER FILE NO.OR ∨ ∧
FILE NO.=001
Ex: 0 0 1
4
SET
Your machine will print the file. The document(s) will
remain in memory even after printing the file.
* PRINTING *
PAGE=001/003
(see Note 1)
Note: 1. Your machine cannot print the file while it is being sent.
87
Edit File Mode
Adding Documents into a File
To add documents into the file, follow the steps bellow.
1
ENTER STATION(S)
THEN PRESS START 0.5%
Set document(s) face down.
2
3
FUNCTION
5
EDIT FILE MODE (1-6)
ENTER NO. OR ∨ ∧
9
ENTER FILE NO.OR ∨ ∧
FILE NO.=❚❚❚
SET
Enter the file number or use
you want to add.
or
to select the file that
Ex: 0 0 1
4
ENTER FILE NO.OR ∨ ∧
FILE NO.=001
SET
Your machine will start storing the document(s) into a file.
* STORE *
NO.001
PAGES=002 10%
(see Note 1)
Note: 1. Your machine cannot add the document into the file while it is being sent or waiting to redial.
88
Edit File Mode
Retry an Incomplete File
If a memory communication has been unsuccessful due to a busy line or no answer, the document you stored is
automatically erased from memory after the last redial.
If you need to retain the document even if the communication failed, change the setting of Fax Parameter No. 31
(INC. FILE SAVE) to Valid in advance. (See page 38)
To retry the incomplete file, print a File List first to verify the file number. (See page 82)
Then, follow the steps below.
1
2
3
FUNCTION
6
EDIT FILE MODE (1-6)
ENTER NO. OR ∨ ∧
9
ENTER FILE NO.OR ∨ ∧
FILE NO.=❚❚❚
SET
Enter the file number or use
you want to retry.
or
to select the file that
Ex: 0 0 1
4
5
SET
Your machine will retry the file and start dialing immediately.
ENTER FILE NO.OR ∨ ∧
FILE NO.=001
* STORE *
NO.001
<01>(Station name)
* DIALING *
NO.001
<01>(Station name)
(see Note 1) (see Note 2)
Note: 1. To confirm or change the entered telephone number for the file, see page 82 and 84.
2. If you set Fax Parameter No. 31 to Valid, all incomplete files will remain in the memory. To avoid memory overflow,
please check the memory content frequently. We recommend that optional flash memory card is installed when this
function is used. (See page 155)
89
Access Code
The Access Code prevents an unauthorized user from operating the machine. Once a 4-digit Access Code is
registered, no one can operate the machine without entering the correct access code.
Automatic Receiving, however, is always available. After you complete any operation, such as mode setting or
transmission, and the display returns to standby, you have to re-enter the access code in order to use the machine
again. Registering the Access Code does not affect the use of the machine in any other way.
Setting the Access Code
1
FUNCTION
2
4
SET
3
3
8
4
5
6
SET MODE
(1-6)
ENTER NO. OR ∨ ∧
7
FAX PARAMETER(01-99)
NO.=❚
38 ACCESS CODE
❚❚❚❚
SET
Enter a 4-digit Access Code.
38 ACCESS CODE
1234
Ex: 1 2 3 4
SET
38 ACCESS CODE
1:ALL
1234
38 ACCESS CODE
2:FAX PARA.
1234
Select Restriction Level.
11
for All operations
or
22
for Setting and Printing the Fax Parameters only.
Ex: 2
7
STOP
SET
-
(see Note 1)
Note: 1. To erase the Access Code, enter the Access Code and press
then press CLEAR , SET
and STOP .
90
SET
and follow the procedure above to step 3,
Access Code
Operating Your Machine with the Access Code (Restrict all operations)
1
Enter the Access Code.
MAR-12-1999 15:00
ACCESS CODE=❚
Ex: 1 2 3 4
MAR-12-1999 15:00
ACCESS CODE=❚❚❚❚
5
2
MAR-12-1999 15:00
00%
SET
Now you can operate the machine normally.
Operating Your Machine with the Access Code (Restrict access of Fax Parameters only)
The UF-585/595 can restrict the operation of setting and printing the Fax Parameters only.
Ex: When setting the Fax Parameter.
1
2
3
4
FUNCTION
4
7
SET
Enter a 4-digit Access Code.
SET MODE
(1-6)
ENTER NO. OR ∨ ∧
INPUT ACCESS CODE
❚
INPUT ACCESS CODE
❚❚❚❚
Ex: 1 2 3 4
SET
FAX PARAMETER(01-99)
NO.=❚
Now you can operate the machine normally.
91
Receive To Memory
This feature is used to secure all received documents by storing them into the memory. To print out the document
from memory, the authorized operator must enter the correct password.
Setting the RCV To Memory Password
1
FUNCTION
2
4
SET
3
3
7
4
SET MODE
(1-6)
ENTER NO. OR ∨ ∧
7
FAX PARAMETER(01-99)
NO.=❚
SET
37 RCV TO MEMORY
❚❚❚❚
Enter a 4-digit RCV to Memory Password.
Ex: 1 2 3 4
5
37 RCV TO MEMORY
1234
STOP
SET
-
Setting RCV To Memory
1
FUNCTION
8
SELECT MODE
(1-5)
ENTER NO. OR ∨ ∧
2
5
3
2
RCV TO MEMORY=ON
1:OFF 2:ON 3:PRINT
4
SET
MAR-12-1999 15:00
< RCV TO MEMORY >
SET
RCV TO MEMORY=OFF
1:OFF 2:ON 3:PRINT
(see Note 1) (see Note 2)
Note: 1. When the memory overflows, the machine will stop receiving and release the line. The machine will not answer the
next incoming call until there is space available in the memory.
2. We recommend that optional flash memory card is installed when this function is used. See page 152 on Image
Memory Capacity.
92
Receive To Memory
Printing Out Documents
After receiving a document with the Receive To Memory feature, the following message will appear on the display.
MESSAGE IN MEMORY
< RCV TO MEMORY >
To print the document, follow the steps below.
1
FUNCTION
2
5
3
3
4
SET
5
8
SET
Enter the password to print the documents.
(See Note 1)
SELECT MODE
(1-5)
ENTER NO. OR ∨ ∧
5
RCV TO MEMORY=ON
1:OFF 2:ON 3:PRINT
RCV TO MEMORY=PRINT
1:OFF 2:ON 3:PRINT
INPUT PASSWORD
❚❚❚❚
INPUT PASSWORD
1234
Ex: 1 2 3 4
6
SET
* PRINTING *
MEMORY RCV’D DOC
Machine will start to print the documents.
(see Note 1) (see Note 2)
Note: 1. If the password has not been set, your machine will not prompt you to enter the password.
The documents will be printed immediately after pressing
SET in step 4.
2. Once the RCV TO MEMORY feature is set to "On", the password cannot be changed (Fax Parameter No. 37 will
not be shown on the LCD display). If you wish to change the password, set RCV TO MEMORY feature to “Off” first.
Then change the password. (See page 92)
93
Distinctive Ring Detector (DRD)
Your machine has a special feature in conjunction with an optional service provided by many local telephone
companies. It can distinguish up to 4 telephone numbers with a corresponding ring pattern identifying each number.
"DRD" lets you provide multiple phone numbers, one for your fax, business or personal use with only one single
phone line.
Please check with your local telephone company on the availability of this service in your area.
Your machine can be programmed to respond to only 1 of the 4 distinctive ring patterns. To select the corresponding
ring pattern for your fax number, refer to the Fax Parameter Table on page 37.
The following table shows a typical example with 4 telephone numbers on a single phone line.
Telephone No.
Usage
Distinctive Ring Sound
Ring Pattern
555-1111
Business
Riiing...............................Riiing................................
Type A, Standard Ring
555-2222
Fax
Ring...Ring.......................Ring...Ring........................
Type B, Double Ring
555-3333
Personal
Ring...Ring...Riiing............Ring...Ring...Riiing.............
Type C,Triple Ring
555-4444
Teenager
Ring...Riiing...Ring............Ring...Riiing...Ring.............
Type D,Triple Ring
(Short-Short-Long)
(All other than type C)
(see Note 1)
The following illustration shows a typical set up, with your machine set to detect Type B (double ring) ring pattern.
At Your Location with
Distinctive Ring Service
Ring..Ring.............Ring..Ring
A person recognizes the call
is for the fax machine by the
double ring pattern sound.
Ring..Ring.............Ring..Ring
The fax machine distinguishes
the call is for the fax by the
double ring pattern and answers
automatically.
Dialing "555-2222"
Ring..Ring.............Ring..Ring
A person recognizes the call
is for the fax machine by the
double ring pattern sound.
Note: 1."Riiing" means a long ringing sound and "Ring" means a short ringing sound.
94
Fax No. "555-2222"
Fax Cover Sheet
General Description
A Fax Cover Sheet can be automatically attached to your transmit document(s) that shows the recipient's name,
originator's name and the number of pages attached.
Transmitted as:
Page 1
Received as:
Page 2
Fax
Cover
Sheet
Header P.01
Header P.02
Page 1
Page 2
5
Total P.02
To use the Fax Cover Sheet
To attach a Fax Cover Sheet to a transmission, follow the procedure below.
1
ENTER STATION(S)
THEN PRESS START 00%
Set document(s) face down.
2
3
3
4
1
SELECT MODE
(1-5)
ENTER NO. OR ∨ ∧
8
FUNCTION
COVER SHEET=OFF
1:OFF 2:ON
SET
for “OFF” (Cover Sheet is not attached)
or
or
2
for “ON” (Cover Sheet is attached)
5
6
COVER SHEET=OFF
1:OFF 2:ON
COVER SHEET=ON
1:OFF 2:ON
ENTER STATION(S)
THEN PRESS START 00%
SET
Dial the station(s) you wish to send the documents to.
Ex:
01
START
(see Note 1) (see Note 2)
(see Note 3)
Note: 1. To change the preset Fax Cover Sheet Setting, change the setting of Fax Parameter No. 56, see page 40.
2. This function is available for memory or direct transmission modes.
3. The Fax Cover Sheet is not counted in the number of pages column of the journals.
95
Fax Cover Sheet
Fax Cover Sheet Sample
***** FACSIMILE COVER SHEET *****
(1)
MAR-12-1999 15:00
(2)
Message To:
SALES DEPT.
(3)
Message From:
PANASONIC
201 555 1212
(4)
02
Page(s)
Following This Cover Page
Explanation of contents
(1) Starting time of communication.
(2) Recorded name in the One-Touch, ABBR No. or dialed telephone number.
(3) Your LOGO (up to 25 characters) and ID Number. (Up to 20 digits)
(4) The number of pages to follow. This information is not shown when transmitting by Direct Transmission Mode.
96
Fax Forward
Setting Fax Forward
This feature allows all incoming faxes to be forwarded to the station registered in the one-touch or abbreviated
dialing number. Once the faxes are received in the memory, the machine will forward the received document(s) to
the telephone number registered in the one-touch or abbreviated dialing number.
This function is convenient when you would like to receive faxes in another place (i. e. your home) at night or
during a holiday.
1
FUNCTION
SET MODE
(1-6)
ENTER NO. OR ∨ ∧
7
2
4
SET
3
5
4
4
2
54 FAX FORWARD
2:VALID
5
SET
54 FAX FORWARD
ENTER STATION
6
5
FAX PARAMETER(01-99)
NO.=❚
SET
54 FAX FORWARD
1:INVALID
Enter the station to forward the received faxes to, by
assigning a one-touch key or an abbreviated dialing
number.
Ex:
<01> (STATION NAME)
5551234
01
7
STOP
SET
-
(see Note 1) (see Note 2):
(see Note 3)
Note: 1. When the Fax Forward feature is set, the one-touch or the abbreviated dialing number is restricted from editing.
Please change this function to “Invalid” when you would like to edit the telephone number.
2. If the communication to transfer a received document(s) fails, the received document will print out and then is erased
from memory even if the Fax Parameter No. 31 (INC. FILE SAVE) is set to “Valid”.
If you wish to save the document into memory in case of communication failure, set your machine to Receive To
Memory. (See page 92)
3. It is not possible to receive a document if the memory of your machine overflows or is about 95% used.
97
This page is intentionally left blank.
98
NETWORK FEATURE
Selective Reception
Your machine has a special feature, Selective Reception, which can prevent the receiving of unnecessary
documents (i.e. junk fax, direct mail, etc.).
Before receiving the document, the last 4 digits of the ID Number received from the sending machine will be
compared with the last 4 digits of the telephone number programmed in each One-Touch or Abbreviated station.
When a match is found, your machine will start receiving the document. If a match is not found, your machine will
cancel the reception and an Information Code 406 will be recorded on the Journal.
Setting the Selective Reception.
1
FUNCTION
2
4
SET
3
4
6
4
2
5
6
SET MODE
(1-6)
ENTER NO. OR ∨ ∧
7
FAX PARAMETER(01-99)
NO.=❚
SET
46 SELECT RCV
1:INVALID
46 SELECT RCV
2:VALID
STOP
SET
-
(see Note 1)
(see Note 2)
Note: 1. When the Selective Reception is set, your machine can receive only from those stations which are programmed in
the built-in auto-dialer.
2. If your ID number has not been set, your machine might not be able to receive from some models.
To set your ID number, see page 29.
99
Password Communications
General Description
Password Communications, including Password Transmission and Password Reception will prevent your machine
from sending a fax to a wrong station or receiving a fax from an unauthorized stations. You can set Password
Transmission and Password Reception independently, or both together.
To use Password Transmission, you must set a 4-digit transmission password in advance. The password must be
shared with other compatible Panafax machine(s). If the transmission password in your machine does not match
the transmission password in the other compatible Panafax machine(s), the transmission will fail. You can select
password transmission by setting Function 8-4 (PASSWORD-XMT) to "ON" when you send a document.
To use Password Reception, you must set a 4-digit receiving password in advance. The password must be
shared with the other compatible Panafax machine(s). If the password in your machine does not match the
receiving password in the other compatible Panafax machine(s), the reception will fail. Once you set password
reception and set the parameter to “ON”, it stays until you change the setting to “OFF”.
Compatibility with Other Machines
You can only use password transmission and reception with another Panafax compatible machine(s) listed below.
Model
DF-1100
UF-160
UF-160M
UF-170
UF-260
UF-270
UF-270M
UF-280M
UF-300
UF-312
UF-322
UF-550
UF-560
UF-585
UF-595
UF-650
UF-733
UF-744
UF-745
UF-750
UF-750D
UF-755
UF-755e
UF-766
UF-770
UF-788
UF-880
UF-885
UF-895
UF-M500
100
Special Settings
Required.
Please refer to the individual User's Guide of each model.
Password Communications
Setting Password Transmission
To set transmission password and parameter,
1
2
4
SET
3
4
3
4
5
SET MODE
(1-6)
ENTER NO. OR ∨ ∧
7
FUNCTION
FAX PARAMETER(01-99)
NO.=❚
6
43 PASSWORD-XMT
❚❚❚❚
SET
Enter a 4-digit Transmission Password.
Ex: 1 2 3 4 and press
SET
1
for “OFF” (password is not checked)
43 PASSWORD-XMT
1:OFF
1234
43 PASSWORD-XMT
1:OFF
1234
or
or
2
for “ON” (password is checked)
6
43 PASSWORD-XMT
2:ON
1234
STOP
SET
-
(see Note 1) (see Note 2):
Note: 1. You can change the setting temporarily by using FUNCTION 8-4 (PASSWORD-XMT) for each transmission. See
page 103 for details.
2. To change the password, press CLEAR in step 4. Then re-enter a new one.
101
Password Communications
Setting Password Reception
To set receiving password and parameter,
1
2
4
SET
3
4
4
4
5
SET MODE
(1-6)
ENTER NO. OR ∨ ∧
7
FUNCTION
FAX PARAMETER(01-99)
NO.=❚
44 PASSWORD-RCV
❚❚❚❚
SET
Enter a 4-digit Receiving Password.
Ex: 1 2 3 4 and press
SET
1
for “OFF” (password is not checked)
44 PASSWORD-RCV
1:OFF
1234
44 PASSWORD-RCV
1:OFF
1234
or
or
2
for “ON” (password is checked)
6
44 PASSWORD-RCV
2:ON
1234
STOP
SET
-
(see Note 1)
(see Note 2)
Note: 1. Once you set the parameter, you cannot select the parameter, “OFF” or “ON”, for each reception. It is always “OFF”
or “ON” until you change the setting.
2. To change the password, press CLEAR in step 4. Then re-enter a new one.
102
Password Communications
Using Password Transmission
To use Password Transmission, you can select PASSWORD-XMT “OFF” or “ON” for each Transmission by
following the procedure below.
1
ENTER STATION(S)
THEN PRESS START 00%
Set document(s) face down.
2
FUNCTION
3
4
4
1
8
SET
PASSWD-XMT=OFF
1:OFF 2:ON
for “OFF” (password is not checked)
or
2
for “ON” (password is checked)
6
6
PASSWD-XMT=OFF
1:OFF 2:ON
or
5
SELECT MODE
(1-5)
ENTER NO. OR ∨ ∧
SET
PASSWD-XMT=ON
1:OFF 2:ON
ENTER STATION(S)
THEN PRESS START
Dial by any combination of the following methods:
• One-Touch Dialing
• Abbreviated Dialing
• Manual Number Dialing, press SET after each
station is entered
(Up to12 stations)
• Directory Search Dialing, press SET after each
station is entered
(For details, see page 48 to 51.)
Ex:
01
<01>(Station name)
5551234
103
Password Communications
7
START
If your machine's Transmission Password coincides with
the other station's Transmission Password, your machine
starts sending the document.
When transmission is completed, PASSWORD-XMT
returns to standard setting (“OFF” or “ON”).
Using Password Reception
There is no additional operation required once you set the parameter by following the procedure on page 102.
The parameter, “OFF” or “ON”, cannot be selected for each reception. It is always “OFF” or “ON” until you
change the setting.
104
Confidential Mailbox
Your machine is equipped with two Confidential Communication features which ensure that the Confidential
information you send is received only by the person with the correct confidential code.
Confidential Mailbox
The confidential mailbox feature can be used as a mailbox to communicate with other compatible models using a
4-digit confidential code. The Confidential Mailbox feature receives document(s) with a confidential code into
memory. These documents can only be printed by the person who has the correct confidential code.
Panafax
Compatible
Model
Panafax
Compatible
Model
Send A
with
Conf.Code
1000
6
Send B
with
Conf.Code
2000
Panafax Compatible Model (Note 5)
MAILBOX
Document "A" and "B"
are stored into memory.
Panafax
Compatible
Model
B
(Note 5)
Polling A
with
Conf.Code
1000
Print out
with
Conf.Code
2000
Figure 1 : Confidential Mailbox
Compatibility with Other Machines
Table 1 shows a list of compatible Panafax models which have the Confidential Mailbox feature. It also shows
whether or not special settings are required. (see Note 1) (see Note 2) (see Note 3) (see Note 4) (see Note 5)
Table 1 : Confidential Mailbox Requirement
Compatible Model
DF-1100
UF-344
UF-744
UF-788
UF-280M
UF-550
UF-745
UF-880
UF-312
UF-560
UF-755
UF-885
UF-322
UF-585
UF-755e
UF-895
Special Settings
UF-332
UF-595
UF-766
UF-342
UF-733
UF-770
Not Required.
Note: 1. If your machine receives two confidential faxes with same confidential code, both documents are stored together in
the same confidential mailbox.
2. Up to 10 Mailbox files can be stored in memory. So, you can receive the confidential fax using 10 different
confidential codes.
3. If the memory overflows, the machine will stop receiving and release the line.
4. We recommend that optional flash memory card be installed when this function is used. See page 152 on Image
Memory Capacity.
5. If confidential faxes were received in the mailbox of UF-733, you cannot poll those documents. The UF-733 is
designed to print out the received confidential document locally only.
105
Confidential Mailbox
Sending a Confidential Document to a Remote Station's Mailbox
1
ENTER STATION(S)
THEN PRESS START 00%
Set document(s) face down.
2
3
4
5
6
1
2
SET
SET
Ex: 2 2 3 3
SET
CONFIDENTIAL XMT
CONF. CODE=❚❚❚❚
CONFIDENTIAL XMT
CONF. CODE=2233
ENTER STATION
THEN PRESS START
Dial by any one of the following methods:
• One-Touch Dialing
• Abbreviated Dialing
• Manual Number Dialing
• Directory Search Dialing
01
START
If necessary, inform the receiving person and tell them the
Confidential Code.
106
CONF. COMM.
(1-5)
ENTER NO. OR ∨ ∧
Enter a 4-digit Confidential Code.
Ex:
7
2
FUNCTION
<01>(Station name)
5551234
Confidential Mailbox
Polling a Confidential Document from a Remote Station's Mailbox
After you have been informed that someone has transmitted a confidential document to a remote station's
mailbox, you can poll the confidential document from the remote station by following the procedure below.
1
2
3
4
5
2
2
SET
SET
CONF. COMM.
(1-5)
ENTER NO. OR ∨ ∧
CONFIDENTIAL POLL
CONF. CODE=❚❚❚❚
6
Enter a 4-digit Confidential Code.
Ex: 2 2 3 3
SET
CONFIDENTIAL POLL
CONF. CODE=2233
ENTER STATION
THEN PRESS START
Dial by any one of the following methods:
• One-Touch Dialing
• Abbreviated Dialing
• Manual Number Dialing
• Directory Search Dialing
Ex:
6
2
FUNCTION
01
<01>(Station name)
5551234
START
(see Note 1)
Note: 1. The confidential file will be erased automatically at the center station after being polled.
107
Confidential Mailbox
Receiving a Confidential Document to Your Machine's Mailbox
No special setting is required, your machine comes with this feature ready to use. Your machine receives a
confidential fax the same way it receives a normal fax message. When receiving the confidential fax, the display
shows the following message (CONF. RCV REPORT) and prints out the Confidential Receive Report.
MESSAGE IN MAIL BOX
Sample CONF. RCV Report
*************** -CONF. RCV REPORT- **************** DATE MAR-12-1999 ***** TIME 15:00 ********
** NOTICE OF CONFIDENTIAL DOCUMENT HELD **
(1)
FILE NO.
040
(2)
RECEIVED FROM
(3)
PAGES
PANAFAX
(4)
TIME RECEIVED
001
MAR-12 15:00
-PANASONIC
************************************ -HEAD OFFICE
- ***** -
201 555 1212- *********
Explanation of contents
(1) File number
: 001 to 999
(2) Received remote station's ID
: Character ID or Numeric ID
(3) Number of pages received
(4) Received date and time
(see Note 1) (see Note 2)
(see Note 3) (see Note 4)
Note: 1. If your machine receives two confidential faxes with same confidential code, both documents are stored together in
the same confidential mailbox.
2. Up to 10 Mailbox files can be stored in memory. So, you can receive the confidential fax using 10 different
confidential codes.
3. If the memory overflows, the machine will stop receiving and release the line.
4. You can verify whether the unit has received a confidential fax by printing out the File List. (See page 82)
108
Confidential Mailbox
Storing a Confidential Document in Your Machine's Mailbox
Use the following procedure to store a document in a confidential mailbox in your machine. Once the confidential
document is stored in your machine, it can be polled by another machine.
1
ENTER STATION(S)
THEN PRESS START 00%
Set document(s) face down.
2
3
4
5
FUNCTION
3
2
2
SET
SET
6
CONF. COMM.
(1-5)
ENTER NO. OR ∨ ∧
CONFIDENTIAL POLLED
CONF. CODE=❚❚❚❚
Enter a 4-digit Confidential Code.
Ex: 2 2 3 3
SET
CONFIDENTIAL POLLED
CONF. CODE=2233
* STORE *
NO.002
PAGES=001 01%
The document(s) will be stored into memory.
If necessary, inform the receiving party of the confidential
document and tell them the confidential code needed to
poll the document.
(see Note 1)
Note: 1. The confidential file will be erased automatically after being polled.
If you wish to retain the confidential file even after being polled, change the setting of Fax Parameter
No. 42 (CONF. POLLED FILE SAVE) to "Valid".
109
Confidential Mailbox
Printing Out a Confidential Document from Your Machine's Mailbox
After you have been notified that someone has transmitted a confidential document to your machine's mailbox,
use the following procedure to print out the confidential document.
1
2
3
FUNCTION
4
2
2
SET
SET
Enter the Confidential Code of the document you want to
print out.
CONF. COMM.
(1-5)
ENTER NO. OR ∨ ∧
PRINT CONF. FILE
CONF. CODE=❚❚❚❚
PRINT CONF. FILE
CONF. CODE=2233
Ex: 2 2 3 3
4
SET
* PRINTING *
PAGE=001/001
The machine will print out the confidential documents.
(see Note 1)
Note: 1. The confidential file will be erased automatically after being printed out even if the setting of Fax Parameter No. 42
(CONF. POLLED FILE SAVE) is changed to "Valid".
110
Confidential Mailbox
Deleting a Confidential Document Stored in Your Machine's Mailbox
If your memory becomes full, or you just want to clean out your confidential documents, you may delete one or
more confidential faxes stored in your machine by using the following procedure.
There are two types of confidential file deletions, one is to delete the file individually by its Confidential Code, and
the other is to delete all confidential files in memory.
To delete a file using Confidential Code
1
2
3
4
FUNCTION
2
2
SET
CONF. COMM.
(1-5)
ENTER NO. OR ∨ ∧
6
5
DELETE CONF. FILE
CONF. CODE=❚❚❚❚
SET
Enter a 4-digit Confidential Code.
DELETE CONF. FILE
CONF. CODE=2233
Ex: 2 2 3 3
* DELETING *
CONF. CODE=2233
SET
To delete all confidential files in memory
1
FUNCTION
2
2
SET
CONF. COMM.
(1-5)
ENTER NO. OR ∨ ∧
2
5
3
SET
DELETE ALL CONF.
FILES? 1:YES 2:NO
4
1
* DELETING *
ALL CONF. FILES
SET
DELETE CONF. FILE
CONF. CODE=❚❚❚❚
111
Relayed Transmission
General Description
The Relayed Transmission feature can save you time and transmission costs if you need to send the same
documents to multiple G3 fax machines. This is especially true if the transmissions are long distance.
To use Relayed Transmission, you must be part of a "Relay Network" built around a "Relay Station". That is,
when you send a document by Relayed Transmission, you actually send it to a Relay Station together with
instructions to relay it to one or multiple end receiving station(s).
The Relay Station first receives the document in its memory and then relays it to the end receiving station(s).
Example:
RESULT REPORT
End
Receiving
Station
Relay
Station
Initial Sending Station
Stockholm
New York
London
End
Receiving
Station
Berlin
Local Call
End
Receiving
Station
Rome
Compatibility with Other Machines
Table 1 shows the kind of facsimile machines which can make up a Relay Network used for Relayed
Transmission. Note that your machine can serve as an Initial Sending Station or End Receiving Station.
Table 1 : Relay Network Compatibility Requirements
Station
112
Compatible Model
Special Settings
UF-312
UF-322
UF-342
UF-344
UF-550
UF-560
UF-585
UF-595
UF-620
UF-640
UF-650
UF-733
UF-744
UF-745
UF-750
UF-750D
UF-755
UF-755e
UF-766
UF-770
UF-788
UF-880
UF-885
UF-895
Initial Sending Station
DF-1100
UF-150
UF-160
UF-160M
UF-170
UF-250
UF-260
UF-270
UF-270M
UF-280M
UF-300
Relay Station
UF-620
UF-650
UF-640
UF-M500
End Receiving Station
ITU-T G3 Compatible machines
Required. Please refer to the
individual User's Guides of each
machine.
Not required.
Relayed Transmission
Relay Network
A Relay Network is basically a group of facsimiles programmed to communicate with each other via a Relay
Station. In this case, the word programmed means that certain numbers have been stored in the memory of each
machine. These numbers, also called parameters, are needed to identify the machines in the network.
Since your machine can only serve as an Initial Sending Station or End Receiving Station in a Relay Network, it
is assumed that you will not have to establish the network yourself. All you have to do is follow the set up
procedure described here, and certain instructions provided by the network organizer (usually the person
controlling the Relay Station). You should know, however, what kind of network you are going to connect to, and
how it works. A sample network is shown in figure 1.
Figure 1 shows a sample network as seen from New York. London and Singapore are Relay Stations connected
to New York. Viewed from New York, Stockholm, Berlin, Rome, Tokyo, Hong Kong, Wellington and Sydney are
End Receiving Stations.
With this simple network using two Relay Stations, you can send a document with one operation to any
combination of stations in the network via the London Relay Station and/or Singapore Relay Station. If New York
only transmits to one station, for example, then the document will go directly to the station or indirectly via the
Relay Station depending on the One Station XMT Parameter you preset.
London
Tel. No.:
44 71 111 1234
Network Address: 2000
Relay Address: 20
Relay Station:
Yes
Tokyo
Tel. No.:
81 33 111 1234
Network Address: 3001
Relay Address: 30
Stockholm
Tel. No.:
46 8 111 1234
Network Address: 2001
Relay Address: 20
Hong Kong
Tel. No.:
852 4 111 1234
Network Address: 3002
Relay Address: 30
Stockholm
London
New York
Berlin
Tokyo
Rome
Singapore
Hong Kong
New York
Tel. No.:
212 111 1234
Network Address: 1000
Relay Address: 10
Sydney
Rome
Tel. No.:
39 6 111 1234
Network Address: 2003
Relay Address: 20
Berlin
Tel. No.:
49 611 111 1234
Network Address: 2002
Relay Address: 20
Singapore
Tel. No.:
65 111 1234
Network Address: 3000
Relay Address: 30
Relay Station:
Yes
Wellington
Sydney
Tel. No.:
61 2 111 1234
Network Address: 3003
Relay Address: 30
Wellington
Tel. No.:
64 4 111 1234
Network Address: 3004
Relay Address: 30
Figure 1 : Sample Network
113
6
Relayed Transmission
Table 2, 3 and 4 are sample settings for a Sample Network.
Table 2 : Sample Parameter and Abbreviated Dialing Number Table for New York
Telephone Number
Network Address
Relay Address
One-Touch/
ABBR No.
01
02
03
04
05
06
07
08
09
: 212 111 1234
: 1000
: 10
Station Name
London
Stockholm
Berlin
Rome
Singapore
Tokyo
Hong Kong
Sydney
Wellington
Telephone
Number
44 71 111 1234
46 8 111 1234
49 611 111 1234
39 6 111 1234
65 111 1234
81 33 111 1234
852 4 111 1234
61 2 111 1234
64 4 111 1234
Relay
Address
20
20
20
20
30
30
30
30
30
Relay Station
Yes/No
Yes
No
No
No
Yes
No
No
No
No
Network
Address
2000
2001
2002
2003
3000
3001
3002
3003
3004
Table 3 : Sample Parameter and Abbreviated Dialing Number Table for London
Telephone Number
Network Address
Relay Address
One-Touch/
ABBR No.
01
02
03
04
05
06
07
08
09
: 71 111 1234
: 2000
: 20
Station Name
Stockholm
Berlin
Rome
New York
Singapore
Tokyo
Hong Kong
Sydney
Wellington
Telephone
Number
46 8 111 1234
49 611 111 1234
39 6 111 1234
1 212 111 1234
65 111 1234
81 33 111 1234
852 4 111 1234
61 2 111 1234
64 4 111 1234
Relay
Address
20
20
20
10
30
30
30
30
30
Relay Station
Yes/No
No
No
No
No
Yes
No
No
No
No
Network
Address
2001
2002
2003
1000
3000
3001
3002
3003
3004
Table 4 : Sample Parameter and Abbreviated Dialing Number Table for Singapore
Telephone Number
Network Address
Relay Address
One-Touch/
ABBR No.
01
02
03
04
05
06
07
08
09
114
: 65 111 1234
: 3000
: 30
Station Name
New York
London
Stockholm
Berlin
Rome
Tokyo
Hong Kong
Sydney
Wellington
Telephone
Number
1 212 111 1234
44 71 111 1234
46 8 111 1234
49 611 111 1234
39 6 111 1234
81 33 111 1234
852 4 111 1234
61 2 111 1234
64 4 111 1234
Relay
Address
10
20
20
20
20
30
30
30
30
Relay Station
Yes/No
No
Yes
No
No
No
No
No
No
No
Network
Address
1000
2000
2001
2002
2003
3001
3002
3003
3004
Relayed Transmission
Setting Up Your Machine for Relayed Transmission
To set up your machine for Relayed Transmission, use the procedures on the following pages to set the
parameters listed below. Some parameters (e.g., Fax Parameter No. 40 (RELAY XMT REQUEST)) are only set
once, but others must be set separately for each station in the Relay Network.
1. Relay XMT Request (Fax Parameter No. 40)
Selecting whether the machine will accept and perform G3 relayed transmission. (See page 39)
2. Own Telephone Number ( FUNCTION 7 5
SET )
Enter the full telephone number of your machine in order for the Relay Station to send you a Result Report.
3. Network Password ( FUNCTION 7 5
SET )
Enter a 4-digit Network Password to be used for protection against unauthorized (outside) stations from
accessing your machine to relay messages to G3 fax machines via PSTN. This password should be given out
to authorized people only. Every Relay requesting stations and Relay stations in the network should have the
same Network Password.
4. Own Network Address ( FUNCTION 7 5
SET )
Enter a 4-digit Own Network Address in order for the Relay Station to send you a Result Report.
5. One-Touch/ABBR Numbers (Auto Dialer)
Enter the One-Touch or ABBR Number that represents the end receiving station’s fax telephone number in the
network as seen from your station.
1) Relay Station (Yes/No) Parameter (Auto Dialer)
Set this parameter to "Yes" if the particular station you are recording is a Relay Station.
connected to more than one Relay Stations in series, set "Yes" only for the first Relay Station.
If you are
2) Relay Address (Auto Dialer)
Enter a 2-digit number which identifies the Relay Station your machine will use. Your machine may be
connected to more than one Relay Station in parallel, but when you use Relay XMT Request your machine
will only send documents to the Relay Station identified by the Relay Address.
3) Network Address (Auto Dialer)
End Receiving Station telephone numbers set in the Initial Sending Station may be different from the
numbers set in a Relay Station. To send a fax to an End Receiving Station via a Relay Station each station
in the network must be identified with a certain code which does not vary depending on where you call from.
The code is the Network Address, which consists of a 4-digit number and is assigned to a One-Touch/ABBR
number.
115
6
Relayed Transmission
To set the Relayed XMT FAX Parameters;
1
SET MODE
(1-6)
ENTER NO. OR ∨ ∧
7
FUNCTION
2
4
SET
3
4
0
4
2
FAX PARAMETER(01-99)
NO.=❚
SET
40 RELAY XMT REQUEST
1:INVALID
40 RELAY XMT REQUEST
2:VALID
5
STOP
SET
-
To set your Own Telephone Number, Network Password and Own Network Address;
1
2
3
FUNCTION
5
7
SET
Ex: 1 SPACE 2 1 2 SPACE
SET
Continued on the next page.
116
OWN TELEPHONE NO.
❚
Enter your machine’s full telephone number (max. 36 digits).
1 1 1 SPACE 1 2 3 4
4
SET MODE
(1-6)
ENTER NO. OR ∨ ∧
OWN TELEPHONE NO.
1 212 111 1234❚
NETWORK PASSWORD
❚❚❚❚
Relayed Transmission
5
6
7
Enter a 4-digit Network Password.
Ex: 9 9 9 9
NETWORK PASSWORD
9999
OWN NETWORK ADDRESS
❚❚❚❚
SET
Enter your own 4-digit Network Address.
Ex: 1 0 0 0
8
6
OWN NETWORK ADDRESS
1000
STOP
SET
-
To set a One-Touch/ABBR Dialing Number, Relay Station (Yes/No) Parameter, Relay Address,
Network Address and One Station XMT (Relay/Direct Parameter);
1
FUNCTION
2
2
3
1
4
5
Ex:
7
SET
SET MODE
(1-6)
ENTER NO. OR ∨ ∧
1:ONE-TOUCH
2:ABBR NO.
ONE-TOUCH< >
PRESS ONE-TCH OR ∨ ∧
01
<01>
ENTER TEL. NO.
Enter the fax telephone number of the end receiving station
(up to 36 digits including pauses and spaces).
Ex: 4 6 SPACE 8 SPACE 1 1 1 SPACE
<01>
46 8 111 1234❚
1 2 3 4
6
SET
<01> ENTER NAME
46 8 111 1234
Continued on the next page.
117
Relayed Transmission
7
Enter the station name.
Ex: S T O C K H O L M and press
8
9
SET
<01> STOCKHOLM❚
46 8 111 1234
<01> RELAY STN?
1:YES 2:NO
SET
2
If the recorded station is a Relay Station, press 1 .
If not, press 2 .
Ex: 2
<01> RELAY ADDRESS
❚❚
10
Enter a 2-digit Relay Address which identifies the Relay
Station your machine will use.
<01> RELAY ADDRESS
20
Ex: 2 0
11
12
13
<01> NETWORK ADDRESS
❚❚❚❚
SET
Enter a 4-digit Network Address
<01> NETWORK ADDRESS
2001
Ex: 2 0 0 1
SET
ONE-TOUCH< >
PRESS ONE-TCH OR ∨ ∧
Repeat step 4 through 13 to enter the numbers for other
stations, or return to standby by pressing
STOP .
Print out a list of One-Touch/ABBR numbers or Directory Search
List to confirm that you have recorded everything correctly. For
the printout operation, refer to page 131.
118
Relayed Transmission
Sending a Document by Relayed Transmission
Once you have recorded all the necessary parameters in your machine in accordance to the Relay Network that
you belong to, you can send a document to one or multiple G3 fax machines automatically through the Relay
Station by using the procedure described below. The Relay Network must have all the necessary parameters
setup.
1
ENTER STATION(S)
THEN PRESS START 00%
Set document(s) face down.
2
3
FUNCTION
1
SET
Enter only the telephone number(s) of the End Receiving
Station(s) using any combination of the following
methods:
• One-Touch Dialing
• Abbreviated Dialing
• Directory Search Dialing, press SET after each
station is entered
(For details, see page 49 to 51)
Ex:
4
2
6
ENTER STATION(S)
THEN PRESS START
<01>(Station name)
5551234
01
START
The document is stored into memory and your machine
starts dialing the number of the Relay Station and sends
the document.
* STORE *
NO. 001
PAGES=001 01%
After the Relay Station completes its transmission to the
End Receiving Station(s), your machine receives a
COMM. Journal from the Relay Station. This Journal
confirms whether the Relayed Transmission(s) was
successful.
(see Note 1)
Note: 1. You cannot use manual number dialing in step 3.
119
Relayed Transmission
Printouts and Reports
When you use Relayed Transmission, your machine will print the following two reports to help you check and
keep track of your faxes.
1. Relay XMT Report (COMM. JOURNAL)
When your machine finishes transmitting to the Relay Station, it will print a COMM. Journal when the Fax
Parameter No. 12 (COMM. JOURNAL) is set to "2:ALWAYS", this tells you whether the transmission was
successful or not.
2. Result Report
After the Relay Station completes its transmission to the End Receiving Station(s), your machine receives and
prints the Relay XMT Result Report. This report confirms whether the Relayed Transmission was successful.
Sample Relay XMT Report (COMM. JOURNAL)
************** -COMM. JOURNAL - ***************** DATE MAR-12-1999 **** TIME 15:00 **********
(1)
MODE = MEMORY RELAYED TRANSMISSION
(2)
START= MAR-12 14:50
(3)
END= MAR-12 15:00
FILE NO.= 050 (4)
(5)
(6)
(7)
STN NO. COMM. ABBR NO.
(8)
STATION NAME/TEL NO.
(9)
PAGES
001
002
003
004
LONDON
STOCKHOLM
BERLIN
ROME
001/001
001/001
001/001
001/001
R-OK
R-OK
R-OK
R-OK
<01>/2000
<02>/2001
<03>/2002
<04>/2003
(10)
DURATION
00:01:30
RELAY
RELAY
RELAY
(11)
RLY STN
<01>/2000
<01>/2000
<01>/2000
<01>/2000
- PANASONIC *************************************** - HEAD OFFICE
- ****** - 201 555 1212 - *******
(1) Indication of communication
mode
(2) Start time of communication
(3) End time of communication
(4) File number
: 001 to 999
(5) Sequential number of the stations
(6) Communication result
: "R-OK" indicates that the Relayed XMT Request was successful.
3-digit Info Code (See page 140) indicates that the communication has failed.
(7) Abbreviated number and Network
Address
(8) Recorded name in One-Touch or
ABBR Number dialing
(9) Number of pages transmitted
: 3-digit number is the number of pages successfully transmitted.
(10)Duration of communication
: The communication that was requested to be transferred via the relay station is
shown as "RELAY".
(11)Relay station's ABBR NO. /
Network Address
(see Note 1)
Note: 1. If you transmit through more than one Relay Station, you will receive a separate Result Report.
120
Relayed Transmission
Sample Result Report (Relay XMT Result)
(1)
12-MAR-1999 12:10
FROM LONDON
TO NEW YORK
P.001/001
******-RESULT REPORT- ************************** DATE 12-MAR-1999 ***** TIME 12:10 ***** P.1
(2)
MODE = RELAYED TRANSMISSION
(3)
(6)
(7)
REQUEST REC'V TIME=12-MAR 11:40
START=12-MAR 12:00
END=12-MAR 12:10
NUMBER OF PAGE(S) = 01 (4)
FILE NO. = 045 (5)
6
**** REQUESTING STATION ** (8)
- NEW YORK TELEPHONE NUMBER = 212 111 1234
NETWORK ADDRESS = 1000
(9)
NO.
01
02
03
04
(10) (11)
COMM. DESTINATION(S)
OK
OK
OK
INC
2000
2001
2002
2003
LONDON
STOCKHOLM
BERLIN
ROME
(12)
PAGE(S)
(13)
RLY STN
001/001
001/001
001/001
000/001
**RELAY STATION **(14)
- LONDONTELEPHONE NUMBER = 44 71 111 1234
RELAY ADDRESS= 20
NETWORK ADDRESS= 2000
- LONDON
****************************************************************- 44 71 111 1234 - *************
TOTAL P.01
Explanation of contents
(1) Relay Station's Header Print
(2) Indication of transmission mode
(3) The time when the relay request was received
(4) Number of pages received for a relay request
(5) File number of the received relay request file
(6) The time when the Relay Station starts sending Relay Faxes
(7) The time when the Relay Station ends sending Relay Faxes
(8) Initial Sending Station's information (LOGO, Telephone number and Network Address)
(9) Communication number
(10) Communication result
: "OK" indicates that the transmission was successful.
"R-OK" indicates that the transmission to the Relay Station was successful.
"INC" indicates that the transmission was not completed.
(11) Station name
(12) Number of pages transmitted/number of pages received for a Relay Request
(13) Another Relay Station's Relay Address/Network Address (If transferred to another Relay Station)
(14) Relay Station's information (LOGO, Telephone number and Network Address)
121
Sub-addressing
General Description
The Sub-addressing function allows you further routing, forwarding or relaying of document(s) to the desired
recipient(s) when used in combination with the Networking version of HydraFax/LaserFAX software. This function
conforms to the ITU-T recommendation for T. Routing-Facsimile Routing utilizing the Sub-address.
Example of a Network
Document with SUB
e.g.
Dial 2013331234
SUB=004
aaa
Extension Network
PSTN
Network
RJ11C
PBX
Tel No.
201-333-1234
Ext. No.
1000
1001
1002
aaa
bbb
Document with SUB
e.g.
Dial 2013331234
SUB=003
Hydra Fax/
Laser Fax
G3 fax
G3 fax
LAN Network
Automatic Routing Table of HydraFax/Laser Fax
SUB
001
002
003
004
005
006
Destination
John
Dave
Bob
1000
1001
9-2126667777
Bob
Dave
John
bbb
Compatibility with Other Machines
• Sub-addressing Transmission: DF-1100/UF-332/342/344/550/560/585/595/770/788/880/885/895 (See Note 2)
• Sub-addressing Reception:
DF-1100/UF-342/344/550/560/585/595/770/788/880 with PC Interface using the
Networking version of HydraFax/LaserFAX software.
Sub-addressing Transmission Methods
You can send a document with Sub-address information to the desired recipient by the following methods.
• By registering the Sub-address information into One-Touch/ABBR Dialing Numbers.
• By specifying the Sub-address information in the Manual Number Dialing Mode.
Setting of Routing, Forwarding or Relaying
You can customize the Automatic Routing to any combination of LAN (Local Area Network), PSTN
(Public Switched Telephone Network) or PBX Extension with HydraFax/LaserFAX Routing Table (please refer to
the HydraFax/LaserFAX User Manual).
(see Note 1) (see Note 2)
Note: 1. HydraFax and LaserFAX are trademarks of Wordcraft International Ltd.
2. UF-788 with PC Interface Option or the Option ROM installed.
122
Sub-addressing
To set the Sub-address into a One-Touch/ABBR Dialing Numbers
1
2
FUNCTION
7
2
SET
1:ONE-TOUCH
2:ABBR NO.
1
to select “One-Touch”.
6
or
2
to select “ABBR NO.”.
ONE-TOUCH< >
PRESS ONE-TCH OR ∨ ∧
Ex: 1
3
4
Ex:
01
<01>
ENTER TEL. NO.
Enter the telephone number, press FLASH then enter
the Sub-address. (Up to 20 digits)
(Up to 36 digits including telephone number, pauses,
spaces, FLASH and Sub-address)
<01>
5551234s2762❚
Ex: Telephone number = 5551234, Sub-address =2762
Enter as: 5 5 5 1 2 3 4
FLASH
5
2 7 6 2
<01> SALES DEPT❚
5551234s2762
SET
Enter the station name. (See page 31)
6
STOP
SET
-
(see Note 1)
Note: 1.
FLASH separates the Sub-address from the Telephone number and is indicated by an "s" in the display.
123
Sub-addressing
To send a Document with Sub-address
Using One-Touch/ABBR Number Dialing
The operation is the same as for normal dialing
1
ENTER STATION(S)
THEN PRESS START 00%
Set document(s) face down.
2
3
Ex:
01
<01> (Station name)
5551234s2762
* STORE *
NO. 001
PAGES=001 01%
START
The document is stored into memory and your machine
starts to dial the number of the station and sends the
document(s) with Sub-addressing information.
Using Manual Number Dialing
Use
FLASH to separate the Telephone number and the Sub-address.
1
ENTER STATION(S)
THEN PRESS START 00%
Set document(s) face down.
2
Enter the telephone number, press FLASH then enter
the Sub-address (up to 20 digits).
(Up to 36 digits including telephone number, pauses,
spaces, FLASH and Sub-address)
TEL. NO.
5551234s2762❚
Ex: Telephone number = 5551234, Sub-address=2762
Enter as: 5 5 5 1 2 3 4
FLASH
3
2 7 6 2
START
* STORE *
NO. 001
PAGES=001 01%
The document is stored into memory and your machine
starts to dial the number of the station and sends the
document(s) with Sub-addressing information.
(see Note 1) (see Note 2) (see Note 3)
Note: 1. FLASH separates the Sub-address from the Telephone number and is indicated by an "s" in the display.
2. Manual Off-Hook or On-Hook Dialing cannot be used with the Sub-addressing Transmission.
3. The Sub-address is not transmitted during Manual Redial Mode.
124
PRINTOUT JOURNALS AND LISTS
Journals and Lists
To help you maintain records of the documents you sent and received, as well as lists of the numbers you record,
your facsimile machine is equipped to print the following journals and lists: Transaction Journal, Individual
Transmission Journal, Communication Journal, One-Touch/Abbreviated/Directory Search No. List, Program List, Fax
Parameter List, Directory Sheet and File List.
Transaction Journal
The "Journal" is a record of the last 32 transactions (a transaction is recorded each time you send or receive a
document). It is printed out automatically after every 32 transactions (See Note 1) or you can print or view it
manually by using the following procedure:
1
2
1
3a
1
PRINT OUT
(1-7)
ENTER NO. OR ∨ ∧
6
FUNCTION
7
JOURNAL
1:PRINT 2:VIEW
SET
* PRINTING *
JOURNAL
for printing a Journal
3b
JOURNAL VIEW
1:XMT ONLY 2:ALL
2
for viewing a Journal
4
Select the viewing mode.
1 to view transmission transactions only
USE THE ∨ ∧ KEYS TO
SCROLL EACH RECORD
2 to view all transactions
Ex: 2
You can view the transactions in the journal by pressing
or
. Press
STOP to return to standby.
Date & Time
12/12 10:00
OK P01
XMT ☎ 5551234
Type of Communication
XMT :
RCV :
POL :
PLD :
FWD :
Transmission
Reception
Polling
Polled
Fax Foward
Received ID,
Recorded name or
the dialed
telephone number
Communication Result
OK
: Communication was successful.
P-OK
: Reserved transmission was successful
under memory full condition.
R-OK
: Relayed transmission was successful.
BUSY
: Line busy
STOP
: STOP was pressed.
3-digit Info Code : Communication has failed
(Refer to page 136 for details.)
Number of pages successfully transmitted or received.
Scroll Marker
: Latest transaction
: Oldest transaction
: Only 1 transaction
(see Note 1)
Note: 1. If you wish to disable the automatic print out of the Transaction Journal, change the setting of Fax Parameter No.
13 to "Invalid". (See page 37)
125
Journals and Lists
Individual Transmission Journal (IND. XMT JOURNAL)
An Individual Transmission Journal contains the information on the latest transmission.
1
126
FUNCTION
2
6
3
SET
6
PRINT OUT
(1-7)
ENTER NO. OR ∨ ∧
6:IND. XMT JOURNAL?
PRESS SET TO PRINT
* PRINTING *
IND. XMT JOURNAL
Journals and Lists
Sample Transaction Journal
(1)
(2)
***************** -JOURNAL- ************************* DATE MAR-12-1999 ***** TIME 15:00 *********
(3)
NO.
01
02
03
04
05
06
07
(4)
(5)
COMM. PAGES
OK
OK
OK
630
STOP
OK
408
(6)
FILE
(7)
DURATION
(8)
X/R
(9)
IDENTIFICATION
DATE
001
002
003
004
005
006
007
00:00:22
00:01:17
00:00:31
00:00:00
00:00:34
00:00:20
00:02:14
XMT
RCV
XMT
XMT
XMT
XMT
XMT
SERVICE DEPT.
111 222 333
ACCOUNTING DEPT.
☎ 342345676
☎ 12324567
☎ 44567345
☎ 2345678
MAR-11
MAR-11
MAR-11
MAR-11
MAR-11
MAR-11
MAR-11
005/005
003
001
000/005
000
001/001
*003
(10)
TIME
(11)
17:35
17:41
17:50
17:57
18:35
18:44
18:55
(12)
DIAGNOSTIC
C0044903C0000
C0044903C0000
C0044903C0000
0800420000000
0210260200000
C8044B03C0000
0040440A30080
7
31
32
OK
OK
002/002
003/003
050
051
00:00:31
00:01:32
XMT
XMT
☎ 0245674533
☎ 0353678980
MAR-12
MAR-12
08:35
08:57
C8044B03C1000
C8044B03C1000
(13)
-PANASONIC
************************************ -HEAD OFFICE
(15)
- ***** -
201 555 1212- *********
(14)
Sample Individual Transmission Journal (IND. XMT JOURNAL)
************** -IND. XMT JOURNAL-
(10)(11)
(1)
(2)
**************** DATE MAR-12-1999 ***** TIME 15:00 *********
DATE/TIME
= MAR-12-1999 09:00
(3)
JOURNAL No.
= 21
(4)
COMM. RESULT = OK
(5)
PAGE(S)
= 001
(7)
DURATION
= 00:00:16
(6)
FILE No.
= 010
(16)
MODE
= TRANSMISSION
(17)
DESTINATION
= [001] / 555 1234 /ABCDEFG
(18)
RECEIVED ID
=
(19)
RESOLUTION
= STD
(13)
-PANASONIC
******************************-HEAD OFFICE
(15)
-*******-
201 555 1212- *****************
(14)
127
Journals and Lists
Explanation of contents
(1) Printout date
(2) Printout time
(3) Journal number
(4) Communication result
: "OK" indicates that the communication was successful.
"BUSY" indicates that the communication has failed because of busy line.
"STOP" indicates that STOP was pressed during communication.
"M-OK" indicates that the substitute reception message in memory was not
printed out.
"P-OK" indicates that memory overflow or document misfeeding occurred while
storing the documents into memory for transmission but successfully stored
document(s) was sent.
"R-OK" indicates that the Relayed XMT or Confidential Communication was
successful.
"3-digit Info Code" (See page 140) indicates that the communication has failed.
(5) Number of pages transmitted or
received
: The 3-digit number is the number of pages successfully transmitted or received.
When the documents are stored into memory, two 3-digit numbers will appear.
The first 3-digit number represents the number of pages successfully
transmitted. The second 3-digit number represents the total number of pages
that were attempted to be transmitted.
Asterisk "*" indicates that the quality of some received copies was poor.
(6) File number
: 001 to 999 (If the communication is stored into memory, a file number is
assigned for each communication.)
(7) Duration of communication
(8) Type of communication
: "XMT" means Transmission
"RCV" means Reception
"POL" means Polling
"PLD" means Polled
"FWD" means Fax Forward
(9) Remote station identification
: Name : Recorded name in One-Touch or ABBR Numbers or remote station's
Character ID.
☎ number : Dialed telephone number.
Number : Remote station's ID number.
(10) Communication date
(11) Communication Start time
(12) Diagnostic
: For service personnel only
(13) Own LOGO
: Up to 25 characters
(14) Own ID number
: Up to 20 digits
(15) Own Character ID
: Up to 16 characters
(16) Type of communication
: Transmission or memory transmission
(17) Destination
: If a One-Touch or ABBR was used for the transmission:
One-Touch or ABBR No./Telephone Number/Recorded Name
If not : Telephone number
(18) Received remote station's ID
: Character ID or ID number
(19) Resolution
: "STD" means standard resolution
"FINE" means fine resolution
"S-FINE" means super fine resolution
128
Journals and Lists
Communication Journal (COMM. JOURNAL)
The Communication Journal (COMM. JOURNAL) lets you verify whether the transmission or polling was
successful. You may select the printout condition (Off/Always/Inc. only) in Function 8-1 or Fax Parameter No. 12.
Sample COMM. JOURNAL
************** - COMM. JOURNAL - ***************** DATE MAR-12-1999 **** TIME 15:00 ********
(1)
MODE = MEMORY TRANSMISSION
(2)
START=MAR-12 14:50
(3)
END=MAR-12 15:00
FILE NO.= 050 (4)
(5)
STN NO.
001
002
003
004
(6)
COMM.
(7)
ABBR NO.
(8)
STATION NAME/TEL NO.
(9)
PAGES
(10)
DURATION
OK
OK
407
BUSY
<01>
<02>
<03>
SERVICE DEPT.
SALES DEPT.
ACCOUNTING DEPT.
021 111 1234
001/001
001/001
000/001
000/001
00:01:30
00:01:25
00:01:45
00:00:00
☎
7
- PANASONIC ************************************* - HEAD OFFICE
- ****** - 201 555 1212 - *******
129
Journals and Lists
Explanation of contents
(1) Indication of communication
mode
(2) Start time of communication
(3) End time of communication
(4) File number
(5) Station number
(6) Communication result
(7) Abbreviated number or ☎ mark
(8) Recorded name in One-Touch,
ABBR or direct dialing number
(9) Number of pages transmitted or
received
(10) Duration of Communication
130
: 001 to 999 (When the communication is stored into memory, a file number is
assigned for each communication.)
: Sequential number of the Stations.
: "OK" indicates that the communication was successful.
"BUSY" indicates that the communication has failed because of busy line.
"STOP" indicates that STOP was pressed during communication.
"M-OK" indicates that the substitute reception message in memory was not
printed out.
"P-OK" indicates that memory overflow or document misfeeding occurred while
storing the documents into memory for transmission but successfully stored
document(s) was sent.
"R-OK" indicates that the Relayed XMT or Confidential Communication was
successful.
"3-digit Info Code" (See page 140) indicates that the communication has failed.
In this case, the machine will print out the attached report with first page of your
document as shown on the previous page.
: ☎ mark indicates dialed by direct number dial.
: The 3-digit number is the number of pages successfully transmitted or received.
When the documents are stored into memory, two 3-digit numbers will appear.
The first 3-digit number represents the number of pages successfully
transmitted. The second 3-digit number represents the total number of pages
that were attempted to be transmitted.
Journals and Lists
One-Touch/Abbreviated and Directory Search List
To print a One-Touch/Abbreviated Number and Directory Search List of the telephone numbers you have stored.
1
FUNCTION
6
PRINT OUT
(1-7)
ENTER NO. OR ∨ ∧
2
2
2:ONE-TCH/ABBR LIST?
PRESS SET TO PRINT
3
SET
1:ONE-TOUCH/ABBR NO.
2:DIR. SEARCH
4
1
* PRINTING *
ONE-TOUCH/ABBR LIST
7
for One-Touch/ABBR Number List
* PRINTING *
DIR. SEARCH LIST
2
for Directory Search List
131
Journals and Lists
Sample One-Touch List
*************** -ONE-TOUCH LIST- ****************** DATE MAR-12-1999 ***** TIME 15:00 *******
(1)
(2)
ONE- STATION NAME
TOUCH
(3)
TELEPHONE NO.
<01>
<02>
<03>
121 555 1234
222 666 2345
313 333 3456
SERVICE DEPT.
SALES DEPT.
ACCOUNTING DEPT
(5)
NETWORK
ADRS
2000
2001
2002
(6)
RELAY
STN.
YES
NO
NO
NO. OF STATIONS = 03 (4)
(7)
RELAY
ADRS
20
20
20
(8)
ONE STN
XMT
DIRECT
DIRECT
DIRECT
(see Note 1)
OWN TELEPHONE NO.=12345678 (9)
OWN NETWORK ADDRESS=1000 (10)
NETWORK PASSWORD=9999 (11)
(see Note 1)
-PANASONIC
************************************** -HEAD OFFICE
- ***** -
201 555 1212- *********
Sample ABBR Number List
*************** -ABBR NO. LIST- ****************** DATE MAR-12-1999 ***** TIME 15:00 *******
(1)
ABBR
NO.
(2)
STATION NAME
[001]
[002]
[003]
ENG. DEPT.
PURCHASE DEPT.
REGULATION DEPT
(3)
TELEPHONE NO.
888 555 1234
999 666 2345
777 333 3456
NO. OF STATIONS = 003
(5)
NETWORK
ADRS
3000
3001
3002
(6)
RELAY
STN.
YES
NO
NO
(4)
(7)
RELAY
ADRS
(8)
ONE STN
XMT
30
30
30
DIRECT
DIRECT
DIRECT
(see Note 1)
OWN TELEPHONE NO.=12345678 (9)
OWN NETWORK ADDRESS=1000 (10)
NETWORK PASSWORD=9999 (11)
(see Note 1)
-PANASONIC
*************************************** -HEAD OFFICE
- ***** -
201 555 1212- *********
(see Note 1)
Note: 1. This information will be printed if the setting of Fax Parameter No.40 (RELAY XMT REQUEST) is set to "Valid".
132
Journals and Lists
Sample Directory Search List
*************** -DIR. SEARCH LIST- ***************** DATE MAR-12-1999 ***** TIME 15:00 *******
(12)
(2)
STATION NAME
[A]
(1)
ABBR
NO.
ACCOUNTING DEPT <03>
[E]
ENG. DEPT.
[001] 888 555 1234
3000
YES
30
DIRECT
[P]
PURCHASE DEPT
[002] 555 666 2345
3001
NO
30
DIRECT
[R]
REGULATION DEPT [003] 777 333 3456
3002
NO
30
DIRECT
[S]
SALES DEPT.
SERVICE DEPT
2000
2001
YES
NO
20
20
DIRECT
DIRECT
<01>
<02>
(3)
TELEPHONE NO.
(5)
NETWORK
ADRS
2002
313 333 3456
121 555 1234
222 666 2345
(6)
RELAY
STN.
NO
(7)
RELAY
ADRS
20
(8)
ONE STN
XMT
DIRECT
7
(see Note 1)
NO. OF STATIONS = 006
(4)
OWN TELEPHONE NO. = 12345678(9)
OWN NETWORK ADDRESS = 1000
(10)
NETWORK PASSWORD = 9999
(11)
(see Note 1)
-PANASONIC
************************************ -HEAD OFFICE
- ***** -
201 555 1212 - *********
(see Note 1)
Explanation of contents
(1) One-Touch number or Abbreviated number
: <nn>= One-Touch number, [nnn] = Abbreviated number
(2) Station name recorded in the machine
: Up to 15 characters
(3) Telephone number recorded in the machine
: Up to 36 digits
(4) Number of recorded One-Touch and ABBR numbers
(5) Network Address
: 4-digit
(6) Relay Station
: Yes/No
(7) Relay Address
: 2-digit
(8) One Station XMT
: Relay/Direct
(9) Own telephone number
: Up to 36 digits
(10) Own Network Address
: 4-digit
(11) Network Password
: 4-digit
(12) The first letter of station name recorded in your machine
Note: 1. This information will be printed if the setting of Fax Parameter No. 40 (RELAY XMT REQUEST) is set to "Valid".
133
Journals and Lists
Program List
To print a Program List of the Dialing Patterns that you have previously entered into the Program Keys.
1
FUNCTION
PRINT OUT
(1-7)
ENTER NO. OR ∨ ∧
6
2
3
3:PROGRAM LIST?
PRESS SET TO PRINT
3
SET
* PRINTING *
PROGRAM LIST
Sample Program List
*************** -PROGRAM
(1)
PROGRAM
[P1]
[P2]
[P3]
LIST- ******************** DATE MAR-12-1999 ***** TIME 15:00 *******
(2)
PROGRAM NAME
(3)
TYPE
(4)
TIMER
(5)
ABBR NOS.
TIMER XMT
TIMER POLL
PROG. A
XMT
POLL
POLL
12:00
19:00
-----
[001]
[002]
[001] [002]
-PANASONIC
************************************ -HEAD OFFICE
- ***** -
201 555 1212- *********
Explanation of contents
(1) Program key
(2) Program name
: Up to 15 characters
(3) Type of communication
: "XMT" indicates transmission.
"POLL" indicates polling.
"ABBR/GRP" indicates that the Program key is programmed as a group key.
"ONE-TOUCH" indicates that the Program key is programmed as a One-Touch
key.
(4) Timer
: Indicates the starting time.
"---- " indicates that the Program key contains "non-deferred" program.
(5) Numbers recorded in the program
: One-Touch/ABBR numbers
134
Journals and Lists
FAX Parameter List
To print out a FAX Parameter List:
1
FUNCTION
PRINT OUT
(1-7)
ENTER NO. OR ∨ ∧
6
2
4
4:FAX PARA. LIST?
PRESS SET TO PRINT
3
SET
* PRINTING *
FAX PARAMETER LIST
7
Sample FAX Parameter List
*************** -FAX PARAMETER LIST- ************** DATE MAR-12-1999 ***** TIME 15:00 ********
(1)
PARAMETER
NUMBER
(2)
DESCRIPTION
01
02
04
CONTRAST
(HOME)
RESOLUTION (HOME)
STAMP
(HOME)
99
MEMORY SIZE
(3)
SELECTION
(1:Normal
(1:Standard
(1:Off
(4)
CURRENT
SETTING
2:Lighter
2:Fine
2:On)
3:Darker)
3:S-Fine)
(5)
STANDARD
SETTING
1
2
1
1
1
1
(1MB + 2MB) (6)
-PANASONIC
************************************ -HEAD OFFICE
- ***** -
201 555 1212- *********
Explanation of contents
(1) Parameter
number
(2) Description
(3) Selection
: "(HOME)" means home position
setting.
(4) Current setting
: "----" indicates code or password is not
set. When the code or password is set,
it is shown in parenthesis.
(5) Standard setting
: Factory preset standard setting
(6) Memory sizes
: (Base memory + option memory)
135
This page is intentionally left blank.
136
PROBLEM SOLVING
Troubleshooting
If You Have Any of These Problems
Mode
During Standby
Symptom
The display is blinking
The battery is not installed or the battery is completely
discharged. Install a New battery and reset the clock.
Document doesn't feed/
multiple feed
1. Check that your document is free of staples and paper
clips, and that it is not greasy or torn.
2. Check that your document is the right type to send through
a fax machine by consulting the list on "Documents You
Cannot Send". If your document has the characteristics
listed, make a photocopy of your document and send the
copy instead.
3. Check that the document is loaded properly.
4. Adjust the ADF Pressure.
During Transmission
Transmission Copy
Quality
During Reception
Cause / Action
page
26
149
41
42
147
Document jam
The information code 031 will appear on the display if the
document becomes jammed.
144
Does not stamp
1. Check if Stamp LED is lit.
2. Check Fax parameter No. 04 and No. 28 settings.
Stamp too light
Replace stamp or refill ink.
148
Vertical lines on the
transmitted document
Check own copy quality. If copy is OK, your machine has no
problem, report to the receiving party that they have a
problem. If copy is NG, clean the Document Scanning Area.
145
Transmitted document is
blank
1. Make sure the document is set face down.
2. Check own copy quality. If copy is OK, your machine has
no problem, report to the receiving party that they have a
problem. If copy is NG, clean the Document Scanning
Area.
145
No recording paper
The information code 010 will appear on the display if the
paper runs out.
18
Recording paper jam
The information code 001 or 002 will appear on the display if
the paper gets jammed.
143
Recording paper doesn't
advance into machine
Make sure that there is paper in the Paper Cassette. Follow
the instructions for loading paper.
18
Recording paper doesn't
eject after printing
Check to see if the recording paper is jammed inside of the
machine.
143
44
37,38
Recording papers are not 1. Check if Fax Parameter No. 65 is set to valid.
stacked in sequence.
2. If memory becomes full during reception, the machine will
Machine does not print
start to print from the 1st page received. We recommend
from the last page
that optional flash memory card is installed if this symptom
received.
occurs frequently.
40
155
Document auto reduction
doesn't work
Check Print Reduction settings.
67
Out of toner
The information code 041 will appear on the display if the
Toner Cartridge runs out of toner.
16
137
8
Troubleshooting
Mode
Symptom
Cause / Action
page
Print out a Journal report (e.g. FUNCTION, 6, 1, SET and 1)
and check quality to make sure whether your machine has
trouble.
If Journal report quality is OK, your machine has no problem,
report to the sending party that they have a problem.
If copy is NG, replace the Toner Cartridge.
125
Fuzzy print
1. Make sure you are using the correct paper for the best
possible print quality.
2. Try reversing the recording paper to the other side.
154
Missing dots or lines/
inconsistent darkness
within print
1. Make sure you are using the correct paper for the best
possible print quality.
2. Replace the Toner Cartridge.
154
Fading print
Your Toner Cartridge may be running out of toner. Replace
the Toner Cartridge.
16
Faint print
You may need to choose a different paper for the best possible
print quality.
154
No dial tone
1. Check the connection of the telephone line.
2. Check the telephone line.
150
No auto answer
1. Check the connection of the telephone line.
2. Check the Reception mode setting.
3. If the Fax Parameter No. 13 (AUTO JOURNAL PRINT) is
set to "Valid" (default setting) and the machine is printing
the received document from memory, which also happens
to be the 32th transaction, the machine will not auto answer
until the Transaction Journal completes printing.
150
62
Cannot transmit or
receive
An information code will be shown on the display. Refer to the
information code table to find out the trouble.
140
No unit operation
To reset the machine, unplug the Power Cord for a few
seconds then plug it in again.
22
Vertical lines printing on
the received document
Print Copy Quality
Communication
No Unit Operation
138
16
16
Troubleshooting
Mode
TAM Interface
Trouble in
Unattended TAM I/F
Mode (OUT Mode)
TAM Interface
Trouble In
Unattended Fax
Mode (OUT Mode)
Symptom
Cause / Action
page
Cannot utilize the remote
turn-on feature of the
telephone answering
machine (TAM). The fax
machine always answers
after the 8th ring.
This feature is not compatible. The fax machine is designed to
answer after 8 rings if the TAM does not answer.
--
Fax machine will not start TAM that gives outgoing announcement only is not
up when the telephone
compatible. The fax machine will work with a TAM that will
answering machine is set record Incoming message (ICM).
to give only an outgoing
message (OGM).
--
A beep...beep sound is
recorded on the
telephone answering
machine.
--
Speak a little slower between each word while recording an
outgoing message (OGM).
8
Fax machine starts up in Make sure the outgoing message (OGM) does not have a
the middle of the outgoing silent pause longer than 5 seconds.
message even though the
caller wants to leave a
voice message.
--
Cannot record any
Set Fax Parameter No. 20 (Silent Detection) to "Invalid".And,
incoming message (ICM). instruct the calling party to press
twice on their touch-tone
The fax machine always
phone during the OGM to start up your fax machine remotely.
starts up at the end of the
OGM and before the tape
advances to the end of
last ICM. (Your TAM only
uses a single cassette
tape to give OGM and
record ICM.)
38
Cannot receive from a
machine that does not
send CNG signal (a short
beep tone every 3
seconds) after dialing.
38
Set Fax Parameter No. 20 (Silent Detection) to "Valid".Or,
Instruct the calling party to press
twice on their touchtone phone during the OGM to start up your fax machine
remotely.
Cannot retrieve message Set Fax Parameter No. 20 (Silent Detection) to "Invalid".
from the answering
machine remotely, the fax
machine always starts up
after the command code
is entered.
38
Cannot receive a fax
message, but can record
voice message.
--
Check your outgoing message, if it is too long, the calling fax
machine may have timed out. Try to shorten your outgoing
message to less than 15 seconds, or ask the calling party to
program your telephone number in their fax machine with 3
pauses and a "#" at the end. (ex. 5551212 PAUSE PAUSE
PAUSE #)
Fax machine will not start Increase the ring count for detection on the telephone
to receive with the
answering machine.
telephone answering
machine in the
auto-answer mode.
--
139
Troubleshooting
Information Codes
When something unusual occurs, the display may show one of the Information Codes listed below. These will
help you to identify and correct the problem.
Info.
Code
Meaning
Action
Page
001
Recording paper jammed when feeding from the 1st
cassette.
Remove jammed paper.
143
002
Recording paper jammed when feeding from the 2nd
cassette.
Remove jammed paper.
143
007
Recording paper did not completely exit out of
machine.
Remove the Toner Cartridge and remove the
jammed paper.
143
008
Paper cassette is removed while paper is feeding.
Remove the jammed paper and close the
cassette.
143
010
No recording paper.
Load the recording paper.
18
011
Recording Paper Cassette is not installed properly.
Install the Recording Paper Cassette.
--
017
Incorrect paper size loaded in the Paper Cassette.
Load the Paper Cassette with proper paper
size (A4, LTR or LGL).
20
21
026
The backup battery is getting weak.
Replace the battery, otherwise, the clock
contents may be lost.
149
030
Document is misfeeding.
1. Reload the document properly.
2. Remove the document jam.
3. Adjust ADF.
42
144
147
031
Document paper is too long or jammed.
Document length exceeds 78.8 inches (2 meters).
1. Reload the document properly.
2. Remove document jam.
42
144
041
Out of toner.
Replace the Toner Cartridge.
16
043
Toner is getting low.
045
Toner Cartridge is not installed.
Install the Toner Cartridge.
16
060
Printer Cover is open.
Close the Printer Cover.
--
061
ADF Door is open.
Close the ADF Door.
--
400
During initial handshake, receiving station did not
respond or communication error occurred.
1. Check with the other party.
2. Reload the document and send again.
--
401
Remote station required a Receiving Password to
Check the remote station.
receive the document.
Program your ID Number (Fax Telephone
Remote station does not have Confidential Mailbox.
Number). (See page 29)
Remote station requires the sending unit’s ID Number.
(Fax Telephone Number)
--
402
During initial handshake, communication error
occurred.
Reload the document and send again.
--
403
No polling capability at the remote side.
Ask remote side to set "POLLED=ON".
--
Reload the document and send again.
--
404/405 During initial handshake, communication error
occurred.
140
Troubleshooting
Info.
Code
Meaning
Action
Page
99
101
102
406
Transmission Password does not match.
Receiving Password does not match.
Received from an unauthorized station in Selective
Reception mode.
Check the password or the telephone number
in One-Touch or Abbreviated station.
407
No confirmation from the receiving station for the
previous page sent.
Wait a few minutes and send again.
--
408/409 Remote side confirmation of previous page is illegible. Wait a few minutes and send again.
--
410
Communication aborted by the transmitting side.
Check with the other party.
--
411
Polling password does not match.
Check the polling password.
73
412
No data from the transmitting side.
Check with the other party.
--
414
Polling password does not match.
Check the polling password.
73
415
Polling transmission error.
Check the polling password.
73
416/417 Received data has too many errors.
418/419
Check with the other party.
--
420/421 Machine goes to receiving mode, but receives no
command from the transmitting side.
1. Remote side misdial.
2. Check with the other party.
--
422/427 Interface is incompatible.
Check with the other party.
--
430/434 Communication error occurred while receiving.
Check with the other party.
--
436/490 Received data has too many errors.
Check with the other party.
--
1. Print a File List and check the contents.
2. Wait until unit finishes printing.
82
Check with the other party.
--
Check with the other party.
--
Check with the other party.
--
456
• Unit received a confidential document or was
requested to be polled of a confidential document
under any of the following conditions.
1) Not enough space in memory to receive the
confidential document.
2) Confidential Mailbox is full.
3) While printing received document.
8
• Unit was requested to relay a document.
492/493 Communication error occurred while receiving.
494
495
Telephone line disconnected.
501/502 Communication error occurred using the internal V.34
Modem.
141
Troubleshooting
Info.
Code
Meaning
540/541 Communication error occurred while transmitting.
542
543/544
550
Telephone line disconnected.
552/553 Communication error occurred while receiving.
554/555
Action
Page
1. Reload the document and send again.
2. Check with the other party.
--
Check with the other party.
--
Check with the other party.
--
580
Sub-address transmission to a unit that has no Subaddress function.
Check the remote station.
122
581
Sub-address Password transmission to a unit that has Check the remote station.
no Password Sub-address function.
122
601
ADF Door was opened during ADF transmission.
Close the ADF Door and send again.
144
623
No document loaded on the ADF.
Reload the document and send again.
--
630
Redial was not successful due to a busy line.
Reload the document and send again.
--
631
During dialing, STOP was pressed.
Reload the document and send again.
--
634
Redial was not successful due to no response from the Check the telephone number and send again.
called station, wrong number dialed or busy tone was
not detected.
Note: If busy tone is not detected, the machine will
only redial once.
--
638
Power failure occurred during the communication.
Check the power cord and plug.
22
Verify your Confidential Network and Relay
communication parameter settings.
112
800 - 816 Parameter setting for Confidential Network or Relay
825
communication is not properly set.
870
Memory overflow occurred while storing documents
into memory for transmission.
1. Transmit documents without storing into
memory.
2. Install Optional Memory Card.
53
155
(see Note 1)
Note: 1. After identifying the problem and verifying the recommended action, if the information Codes keep reoccuring or for
help on Information Codes that appear on your machine but are not listed above, please contact your local
Panasonic Authorized Dealer.
142
Troubleshooting
Clearing a Recording Paper Jam
If the recording paper becomes jammed in the machine, the display will show an Information Code 001 or 007.
To clear the jam, Info. Code 001
(1) Slide out the Paper Cassette and remove
the Paper Cassette Cover.
(2) Remove the jammed or wrinkled paper and
reload the recording paper into the paper
cassette.
8
To clear the jam, Info. Code 007
(1) Open the Printer Cover.
(2) Remove the Toner Cartridge.
(3) Remove the jammed paper.
Note : 1. If at all possible, try removing the
jammed paper from inside of the unit
first (as shown in the upper figure) to
prevent toner that has not been
fused on the paper from rubbing off
and soiling the Fuser Roller.
2. To remove the jammed paper from
the rear of the unit (as shown in the
lower figure), remove the Recording
Paper Tray Assembly first and gently
pull the jammed paper straight out;
taking care not to tear it.
(see Note 1)
Note: 1. The Recording Paper Jam message display is reset only by opening and closing of the Printer Cover.
143
Troubleshooting
Clearing a Document Jam
If a document becomes jammed in the machine, the display will show the Information Code 030 or 031.
To clear the jam
1
(1) Open the ADF Door.
(2) Remove the jammed document.
144
Troubleshooting
Cleaning the Document Scanning Area
If the receiving party reports that the received documents were black, or contained black lines, try making a copy
on your unit to verify. If the copy is black or has black lines, the document Scanning Area is probably dirty and
must be cleaned.
To clean the Scanning Area
1
Open the ADF Door.
ADF Door
8
2
Wipe the Scanning Area gently with a soft
cloth gauze wet with ethyl alcohol. Be sure to
use a clean cloth, the scanning area can be
easily scratched.
Scanning Area
145
Troubleshooting
Cleaning the Printer Roller
If you find toner on the back of the recording paper, the printer roller in the fuser unit is probably dirty.
To clean the printer roller
1
2
FUNCTION
7
6
SET
CLEANING CHARTS
1:PRINT 2:CLEAN
* PRINTING *
CLEANING CHARTS
1
The machine will print out 3 Cleaning Charts. Then, return to standby.
<PRINTER ROLLER CLEANING CHART>
HOW TO LOAD THE CLEANING CHARTS
1. REMOVE THE PAPER CASSETTE
(If multiple cassette configuration, REMOVE THE UPPER PAPER CASSETTE)
2. SET THESE 3 CLEANING CHARTS IN THE CASSETTE FACE DOWN
3. RE-INSTALL THE PAPER CASSETTE
4. PRESS [FUNCTION][7][6][SET][2] TO START CLEANING
5. DISPOSE OF THE CLEANING CHARTS
*** SET THIS END TOWARDS THE FRONT, FACE DOWN ***
3
4
5
Load the Cleaning Charts into the cassette face down.
(See Note 1)
FUNCTION
7
6
SET
2
CLEANING CHARTS
1:PRINT 2:CLEAN
* CLEANING *
PRINTER ROLLER
The Machine will feed out the charts and clean the printer
roller.
(see Note 1)
Note: 1. If you have installed the optional cassette, load the Cleaning Charts into the upper cassette.
146
Troubleshooting
Adjusting the Automatic Document Feeder (ADF)
If document misfeeding occurs frequently, we suggest you adjust the ADF.
To adjust the ADF,
Slide the Pressure Adjusting Lever to the desired
position depending on the condition.
Position
Condition
To prevent no feed trouble
Standard position
To prevent multiple feed trouble
8
147
Troubleshooting
Verification Stamp
The Verification Stamp contains ink. When the stamp mark appears faded or hard to see, the stamp should be
replaced or refilled with ink.
To remove the stamp
1
Open the ADF Door.
ADF Door
2
(1) Remove by pulling the Stamp Assembly
upward.
2
(2) Remove the Stamp. Replace the stamp
with a new one.
(see Note 1)
Note: 1. Please contact your local Panasonic dealer to purchase a new stamp. See page 156 for order number.
148
Troubleshooting
Replacing the Lithium Battery
During the initial self test, when the power is turned “On”, the machine will evaluate the condition of the back up
battery. If the battery is weak or fully discharged, the following message will be shown on the display.
REPLACE BATTERY
INFO. CODE=026
To replace the battery, follow the procedure below:
1
(1) Remove the Battery Holder.
(If the Battery Holder does not come out
easily, open the Printer Cover and try
again.)
!
CAUTION
Dispose of the Lithium Battery properly
and keep it away from small children.
2
(1) Remove the Battery from the Battery
Holder.
(2) Install the new Battery into the Battery
Holder with the ⊕ side facing upwards.
(Order No.: CR2032)
!
CAUTION
When replacing the battery make sure to
observe the polarity to avoid damage to
the machine.
3
4
(1) Re-install the Battery Holder.
If the clock is flashing on the LCD Display, follow the procedure on page 26 to reset the clock.
(see Note 1)
Note: 1. The service life of the battery is approximately 1 year when the machine is turned “Off”.
149
8
Troubleshooting
Checking the Telephone Line
When you do not hear a dial tone through the telephone connected to the machine or when the telephone does
not ring (No automatic receive).
1
Unplug the Telephone Line Cable from the
telephone jack that was supplied by the
telephone company.
2
Plug a different regular telephone into the
3
Check for dial tone through the handset. If
same telephone jack.
there is still no dial tone, report it to your local
telephone company.
or
Call from another telephone to this number. If
the telephone does not ring, report it to your
local telephone company.
150
APPENDIX
Specifications
Compatibility
ITU-T Group 3
Coding Scheme
MH, MR, MMR (Conforms to ITU-T Recommendations)
Modem Type
ITU-T V.34, V.17, V.29, V.27 ter and V.21
(ITU-T V.34 available only on UF-595)
Modem Speed
UF-595 : 33600 - 2400 bps
UF-585 : 14400 - 2400 bps
Document Size
Max.
: 10.1 x 78.7 in (257 x 2000 mm)
(with operator's assistance)
Min.
: 5.8 x 5.0 in (148 x 128 mm)
Document Thickness
Single page
: 0.0024 in (12 lbs) to 0.0060 in (30 lbs)
Multiple pages : 0.0024 in (12 lbs) to 0.0048 in (20 lbs)
ADF Capacity
(Automatic Document
Feeder)
Built-in, up to 30 Sheets
Note : The document limitation to send multiple pages is as follows.
Document Size
Document Thickness
Up to 20 pages
Up to 10.1” × 14.3”
(257mm × 364mm)
0.0024”(12lbs) to
0.0048”(20 lbs)
Up to 30 pages*
A4 or Letter size
0.0024”(12lbs) to
0.0039”(16 lbs)
9
* Please note that although the size and thickness meets the specifications, you
might not be able to set 30 pages with some types of papers.
Scanning Method
Sheet Feeding with CCD type image sensor
Effective Scanning Width
8.3 in (212 mm)
Scanner Resolution
Standard
Fine
Super Fine
[UF-585]
[UF-595]
Horizontal
203 pels/inch
(8 pels/mm)
203 pels/inch
(8 pels/mm)
×
×
×
×
Vertical
98 lines/inch
(3.85 lines/mm)
196 lines/inch
(7.7 lines/mm)
203 pels/inch
(8 pels/mm)
×
×
391 lines/inch
(15.4 lines/mm)
406 pels/inch
(16 pels/mm)
(Interpolated)
×
×
391 lines/inch
(15.4 lines/mm)
Recording Method
Laser printer
Recording Paper
Plain Paper
Recording Paper Size
Letter, A4 or Legal
Printer Resolution
(Fax/Copy)
203 × 391 dpi (UF-585)
406 × 391 dpi (UF-595)
(Printer)
300 × 300 dpi
600 × 600 dpi (UF-595 only)
151
Specifications
Effective Recording Size
Letter
A4
Legal
: 8.2 x 10.7 in (208 x 271 mm)
: 8.0 x 11.4 in (202 x 289 mm)
: 8.2 x 13.7 in (208 x 348 mm)
Print Margin
(See Note 1)
0.16 in
(4 mm)
0.16 in
(4 mm)
0.16 in
(4 mm)
0.16 in
(4 mm)
Recording Paper Capacity
Approx. 250 sheets (using 20 lbs paper)
One-Touch/Abbreviated
Dialing Memory Capacity
112 stations
(including 24 One-Touch keys and 4 Program keys)
Each station can register up to 36 digits for each telephone number (including
pauses and spaces) and up to 15 characters for each station name
Image Memory Capacity
UF-585/595
Base Memory
60 pages
with 1 MB Flash Memory Card
140 pages
with 2 MB Flash Memory Card
220 pages
with 4 MB Flash Memory Card
380 pages
(Based on ITU-T Image No.1 using Standard Resolution)
(see Note 1)
Note: 1. The left and right print margin is 0.22 in (5.5mm) when printing a Letter or Legal size document with 600 dpi from a
PC using the Parallel Port Interface Kit.
152
Specifications
Power Supply
99-138 VAC, 47-63 Hz, Single Phase
Power Consumption
UF-585
UF-595
Standby (Sleep Mode : On)
Less than 0.7 Wh Less than 0.7Wh
Standby (Energy-Saver : On)
Approx. 6.0 Wh
Approx. 7.0 Wh
Standby (Energy-Saver : Off)
Approx. 21 Wh
Approx. 23 Wh
[Room temperature : 77°F (25°C)]
Transmission
Reception
Copy
Max
Dimensions
Approx. 16 W
Approx. 450 W
Approx. 450 W
Approx. 470 W
Approx. 17 W
Approx. 450 W
Approx. 450 W
Approx. 470 W
14.6 (W) x 16.2 (D) x 9.8 (H) in
(370 x 413 x 250 mm)
(excluding Projections and optional Paper Cassette)
Weight
Approx. 19 lbs (Approx. 8.5 kg)
(excluding consumable supplies and options)
Operating Environment
Temperature
Relative Humidity
FCC Registration Number
BTLJPN-33443-FA-E
Ringer Equivalence
2.2B
9
: 50 to 95°F (10 to 35°C)
: 15 to 70%
153
Recording Paper Specifications
In general, most bond papers will produce excellent results. Most photocopy papers will also work very well. There
are many "name" and "generic" brands of paper available. We recommend that you test various papers until you
obtain the results you are looking for.
The following table summarizes the major specifications to consider when selecting white or colored paper.
Basic Weight
16 to 24 lb (60 to 90 g/m2)
Cut Edge Conditions
Cut with sharp blades, no visible frayed edges
Grain
Long grain
Moisture Content
3.7% to 5.3% by weight
Opacity
88% minimum
Packing
Polylaminated moisture-proof ream wrap
Sizes
Letter
A4
Legal
Type
Cut sheet
: 8.5 x 11 in (216 mm x 279 mm)
: 8.3 x 11.7 in (210 mm x 297 mm)
: 8.5 x 14 in (216 mm x 356 mm)
(see Note 1)
Note: 1. It is possible that the paper could meet all of the specifications listed above and still not print well because of the
variations in paper manufacturing. Therefore, we recommend that you test the paper thoroughly before purchasing
large quantities.
154
Options and Supplies
Please contact your local Panasonic dealer for availability.
A. Options:
Order No.
Picture
Description
Available
Models
UE-403117
Handset Kit
UF-585
UF-595
UE-409070
250 sheets Letter / Legal / A4 Size Paper
Cassette with the Feeder Unit
UF-595
UE-410045
Expansion Flash Memory Card, 1 MB
UE-410046
Expansion Flash Memory Card, 2 MB
UE-410047
Expansion Flash Memory Card, 4 MB
UE-404071
Parallel Port Interface Kit
(Used for Printer, Scanner or PC Interface)
9
UF-585
UF-595
UF-585
UF-595
155
Options and Supplies
B. Supplies:
Order No.
DZHT000027
UG-3350
156
Picture
Description
Available
Models
Verification Stamp
UF-585
UF-595
Toner Cartridge
UF-585
UF-595
Options and Supplies
Installing the Flash Memory Card
Before installing, make sure that there is no document file(s) stored in the memory. You may confirm by printing
out a File List (See page 82). When the memory card is installed, the machine will initialize the document
memory, all contents stored in the document memory at that time will be lost.
1
(1) Unplug the Power Cord.
(2) Remove the Memory Card Cover.
Memory Card Cover
2
9
(1) Insert the Flash Memory Card gently into
the card slot with the Panasonic logo facing
to the outside of the machine.
Caution: Installing the Flash Memory Card in
the wrong direction may damage
the connecting pins inside the
machine.
(2) Re-install the Memory Card Cover.
3
Plug in the Power Cord. Print out the Fax Parameter List (See page 135) and confirm that the
memory size on Fax Parameter No. 99. (See page 40)
(see Note 1)
Note: 1. The document(s) stored in memory will be lost if the memory card is removed.
157
FCC Notice for User in USA
!
WARNING
This equipment generates radio frequency energy and if not installed and used properly, that is, in strict accordance with the
manufacturer's instructions, may cause interference to radio and television reception. It has been type tested and found to comply
with the limits for a Class B digital device in accordance with the specifications of Part 15 of FCC Rules, which are designed to
provide reasonable protection against such interference in a residential installation. However, there is no guarantee that
interference will not occur in a particular installation. If this equipment does cause interference to radio or television reception,
which can be determined by turning the equipment off and on, you are encouraged to try to correct the interference by one or
more of the following measures: (see Note 1)
(1) Reorient the receiving antenna.
(2) Relocate your fax machine with respect to the receiver.
(3) Move your fax machine away from the receiver.
(4) Plug your fax machine into a different outlet so that your fax machine and receiver are on different branch circuits.
If necessary, you should consult the dealer or an experienced radio / television technician for additional suggestions. To assure
continued FCC emission limit compliance, the user must operate this device in accordance with these instructions and do not
make any unauthorized changes or modifications.
Ask your telephone company or installer to install the jack suitable for your device if such is not available.
The REN is useful to determine the quantity of devices you may connect to your telephone line and still have all of those devices
ring when your telephone number is called. In most, but not all areas, the sum of the REN 's of all devices connected to one line
should not exceed five (5.0). To be certain of the number of devices you may connect to your line, as determined by the REN, you
should contact your local telephone company to determine the maximum REN for your calling area.
If your telephone equipment causes harm to the telephone network, the Telephone Company may discontinue your service
temporarily. If possible, they will notify you in advance. But if advance notice isn't practical, you will be notified as soon as possible.
You will be informed of your right to file a complaint with FCC.
Your telephone company may make changes in it's facilities, equipment, operations or procedures that could affect the proper
functioning of your equipment. If they do, you will be notified in advance to give you an opportunity to maintain uninterrupted
telephone service.
If you experience trouble with this telephone equipment, please contact the manufacturer's authorized service agency for
information on obtaining service or repairs. The telephone company may ask that you disconnect this equipment from the network
until the problem has been corrected or until you are sure that the equipment is not malfunctioning.
!
WARNING
For protection against the risk of electric shock, always disconnect all cables from the wall outlet before servicing, modifying or
installing the equipment.
This equipment may not be used on coin service provided by the telephone company nor connected to party lines.
!
WARNING
To assure continued compliance, use only shielded interface cables when connecting the facsimile machine parallel interface port
to host computer.
Note: 1. This equipment complies with Part 68 of the FCC Rules. On the rear panel of this equipment is a label that contains,
among other information, the FCC Registration Number and Ringer Equivalence Number (REN) for this equipment.
You must, upon request, provide this information to your telephone company.
158
FCC Notice for User in USA
The telephone Consumer Protection Act of 1991 makes it unlawful for any person to use a computer or other
electronic device to send any message via telephone facsimile machine unless such message clearly contains in a
margin at the top or bottom of each transmitted page or on the first page of transmission the following information:
1)Date and Time of transmission; and,
2)Identification of either business, business entity or individual sending the message: and,
3)Telephone number of either the sending machine, business, business entity or individual.
In order to program this information into your facsimile machine, you should refer to page number 26 to 29 in this
User's Guide to complete the steps.
Example of Header Format (LOGO, ID Number setting)
MAR-12-1999 09:00
1) Date and Time
PANASONIC COMM. & SYS. CO
2) LOGO
201 348 7000
P.01/05
3) ID Number
9
As an ENERGY STAR Partner, Panasonic has determined that this product meets the
ENERGY STAR guidelines for energy efficiency.
159
Notice to User in Canada
NOTICE
The Industry Canada Label identifies certified equipment. This certification means that the equipment meets certain
telecommunications network protective, operational and safety requirements. The Department does not guarantee the
equipment will operate to the user's satisfaction.
Before installing this equipment, users should ensure that it is permissible to be connected to the facilities of the local
telecommunications company. The equipment must also be installed using an acceptable method of connection. The customer
should be aware that compliance with the above conditions may not prevent degradation of service in some situations.
Repairs to certified equipment should be made by an authorized Canadian maintenance facility designated by supplier. Any
repairs or alterations made by the user to this equipment, or equipment malfunctions, may give the telecommunications company
cause to request the user to disconnect the equipment.
Users should ensure for their own protection that the electrical ground connections of the power utility, telephone lines and
internal metallic water pipe system, if present, are connected together. This precaution may be particularly important in rural
areas.
CAUTION
!
Users should not attempt to make such connections themselves, but should contact the appropriate electric inspection authority,
or electrician, as appropriate.
NOTICE
The ringer equivalence number (REN) assigned to each terminal device provides an indication of the maximum number of
terminals allowed to be connected to a telephone interface. The termination on an interface may consist of any combination of
devices subject only to the requirement that the sum of the ringer equivalence numbers of all the devices does not exceed 5.
160
Notice to User in Canada
Avis
L'étiquette de Industrie Canada identifie le matériel homologué. Cette étiquette certifie que le matériel est conforme à certaines
normes de protection, d'exploitation et de sécurité des réseaux de télécommunications. Le Ministère n'assure toutefois pas que
le matériel fonctionnera à la satisfaction de l'utilisateur. Avant d'installer ce matériel, l'utilisateur doit s'assurer qu'il est permis de
le raccorder aux installations de l'entreprise locale de télécommunication. Le matériel doit également être installé en suivant une
méthode acceptée de raccordement.
L'abonné ne doit pas oublier qu'il est possible que la conformité aux conditions énoncées ci-dessus n'empêche pas la
dégradation du service dans certaines situations. Les réparations de matériel homologué doivent être effectuées par un centre
d'entretien canadien autorisé désigné par le fournisseur. La compagnie de télécommunications peut demander à l'utilisateur de
débrancher un appareil à la suite de réparations ou de modifications effectuées par l'utilisateur ou à cause de mauvais
fonctionnement. Pour sa propre protection, l'utilisateur doit s'assurer que tous les fils de mise à la terre de la source d'énergie
électrique, des lignes téléphoniques et des canalisations d'eau métalliques, s'il y en a, sont raccordé ensemble. Cette précaution
est particulièrement importante dans les régions rurales.
!
Avertissement
L'utilisateur ne doit pas tenter de faire ces raccordements lui-même; il doit avoir recours à un service d'inspection des installations
électriques, ou à un électricien, selon le cas.
Avis
L'indice d'équivalence de la sonnerie (IES) assigné à chaque dispositif terminal indique le nombre maximal de terminaux qui
peuvent être raccordés à une interface. La terminaison d'une interface téléphonique peut consister en une combinaison de
quelques dispositifs, à la seule condition que la somme d'indices d'équivalence de la sonnerie de tous les dispositifs n'excède
pas 5.
161
9
Glossary
ABBR No.
(Abbreviated Number)
The ability to store full phone numbers into the dialer and then utilizing a
short series of keystrokes to speed dial that number in the future.
Access code
A 4-digit programmable access code that prevents unauthorized operation
of your Fax.
ADF
(Automatic Document
Feeder)
The mechanism that delivers a stack of document pages to the scanner
one page at a time.
Automatic reception
The mode that allows you to receive fax documents without user
intervention.
Auto print reduction
The method of automatically reducing a received document so that it can
be printed onto a standard size piece of plain paper. For example, your
machine will reduce an incoming legal size page to 75% of its original size
so it could fit on a letter size page.
BPS
(Bits Per Second)
The amount of data that is transmitted over the phone line. Your machine
can start at each Max. Modem speed and automatically steps down to
suitable speed depending on the phone line condition and the receiving
machines capabilities.
(Max. Modem Speed UF-585: 14400BPS / UF-595: 33600BPS)
C.C.I.T.T.
Consultative Committee on International Telegraph and Telephone. This
organization has presently developed four groups of industry standards
that insure facsimile compatibility.
Character ID
A programmed proprietary code name that allows up to 16 alphanumeric
characters identifying your facsimile machine.
Character keys
The keys that are used to enter letters and symbols for various
programming functions.
Coding scheme
The data compression method used by facsimile machines. Your machine
utilizes Modified Huffman (MH), Modified Read (MR) and Modified
Modified Read (MMR) coding schemes.
COMM. JOURNAL
Refers to either the Communication Journal, Relay Transmission Report,
or the Confidential XMT Report.
Confidential communication In a network of facsimile machines, a code can be entered to retrieve a
document that is stored in memory of a designated relay station.
Confidential RCV Report
The report that gives you information about a confidential document(s) that
is held in your machine's memory.
CONTRAST
Signifies the scanning sensitivity in terms of lightness and darkness of your
original transmitting pages.
Cover Sheet
A Fax Cover Sheet can be attached to your transmit document(s) that
shows the recipient's name, originator's name and number of pages
attached.
DDD
(Direct Distance Dialing)
A telephone service that allows unassisted dialing, no operator assistance
is required.
Deferred polling
The ability to retrieve documents from other stations at a later time.
162
Glossary
Deferred transmission
The ability to send documents to other stations at a later time.
Direct Dialing
The method of dialing where you enter the entire telephone number
through the keypad.
Directory Search Dialing
Allows you to dial a full telephone number by searching the station's name
entered in the One-Touch keys or Abbreviated dialing numbers.
Directory Sheet
The list that contains the station names that are programmed into your unit.
DTMF (Dual Tone MultiFrequency)
Dialing method that sends a different set of frequencies for each digit of the
telephone keypad. Commonly refers to touch tone dialing.
ECM (Error Correction Mode) The ability to correct transmission errors as detected during the
transmitting phone call.
Energy-Saver Mode
Saves energy by consuming less power than when in standby mode by
turning off the fuser unit after the specified time.
End receiving station
In a relay network, the final station designated to receive the document.
FAX Forward
The ability to forward all incoming faxes to the registered station in the
specified ABBR No.
FAX Parameter List
The list that contains the home FAX parameters settings that you have
programmed into your machine.
FAX/TEL Auto Switching
The ability to share a single telephone line for both fax and voice usage.
F.C.C.
Federal Communications Commission. The U.S. Government organization
that regulates communications originating or terminating in the United
States.
File
A task that has been stored into the memory of your unit. Examples are
deferred transactions.
Fixed print reduction
The method that allows you to determine one reduction rate, such as 75%,
for all incoming documents.
FUNCTION
The control panel key that will be utilized to begin an operation or
configuration of a feature.
G3 mode (Group 3)
Refers to the standards and transmission capabilities of the current
generation of facsimile machines.
Group dialing
The ability to program many telephone numbers into a single station so
that many locations can be dialed in sequence utilizing a single keystroke.
HALFTONE
A scanning technique to distinguish levels of gray from black and white.
Your machine can detect up to 64 levels of gray in halftone mode.
Handshaking
The exchange of a group of control signals that communicate between the
transmitter and receiver. These signals determine the condition at which
communication can occur.
Header
A row of information that is transmitted by the sending machine and printed
on the top of each page by the receiving unit. This identifies the
transmitting unit and information about the transmission, such as time and
date.
9
163
Glossary
IN/OUT Mode
IN (Attended reception) and OUT (Unattended reception) mode can be
easily changed by just pressing the OUT button. When IN or OUT mode is
selected, the reception mode will be set according to the setting in the Fax
Parameter 15 and 16.
IN Mode
: TEL (Fax manual reception)
: FAX/TEL Auto Switch
OUT Mode : FAX (Fax automatic reception)
: TAM I/F
ITU-T
International Telecommunication Union - Telecommunication, formerly
known as C.C.I.T.T.
ITU-T Image No.1
An industry standard document that allows comparisons of the
transmission speeds and capabilities of facsimile machines.
ID
A programmable address of up to 20 digits identifying your machine.
Image memory capacity
This signifies the amount of memory available in your unit capable of
storing pages of documents. All page units of measure are based on the
ITU-T Image No.1.
Individual Transmission
Journal
A report that is printed by the transmitting unit stating information regarding
the last document transaction.
Industry Canada (D.O.C)
Department of Communications. The Canadian Government organization
that regulates communications originating or terminating in Canada.
Information code
A code that is internally generated by your Fax stating a specific
operational error or machine failure.
Initial sending station
In a relay network, the station that is originating the document
transmission.
Journal
A report that is printed by your unit listing the last 32 transactions.
Keypad
A group of numeric keys located on your control panel.
LCD
Liquid Crystal Display. The display area of your machine.
LOGO
Your programmed company name or identification up to 25 alphanumeric
characters.
Manual reception
A mode that requires operator intervention to receive an incoming
document.
Memory transmission
The documents are scanned into memory before actual connection to the
phone line for transmission.
Modem
A device that converts signals from your fax machine into signals that can
be transmitted over telephone lines.
Multi-station transmission
The ability to broadcast the same set of documents to a programmed
number of locations.
Network address
An individual 4-digit addressing number assigned to a One-Touch/
Abbreviated number that identifies a particular station in a relay network.
Network password
A 4-digit password assigned to a network address to prevent unauthorized
stations from accessing a relay station.
164
Glossary
Off-hook dialing
The direct dialing of a telephone number with the handset out of the cradle
or "off the hook."
On-hook dialing
The direct dialing of a telephone number with the handset in the cradle or
"on the hook."
One-Touch dialing
The ability to dial an entire telephone number by pressing one key.
Overlap Printing
Documents too long to be reduced are automatically printed on two pages
with approximately 10 mm overlap.
Panasonic Super Smoothing An electronic image enhancement (Panasonic Super Smoothing) that will
create a particular pattern for the improvement of copy quality.
Polling
The ability to retrieve a document from another facsimile machine.
Polling password
A 4-digit programmed code that enables the security of a document being
polled.
Power Saver Mode
To reduce the power consumption of the machine in standby, select the
time period to turn OFF the high temperature fuser unit when the printer is
idle.
Print Collation
The ability to stack received documents in the correct order.
Print reduction modes
The methods used to determine how an incoming document will be
reduced to print onto the paper loaded in your machine.
Program keys
Keys that are defined for storing a sequence of stations to be dialed or
polled.
Protocol
A protocol is the special set of rules for communicating that the end points
in a telecommunication connection use when they send signals back and
forth. Both end points must recognize and observe the protocol.
PSTN
Public Switched Telephone Network. Network of interconnected switching
equipment and transmission facilities.
Receiving password
A 4-digit password that is checked before a document is received.
Relay address
A 2-digit code that identifies your machine is programmed in a relay
network.
Relay network
A group of facsimile machines that communicate via a relay station.
Relay station
A certain type of facsimile machine that can store and forward documents
to an end receiving station and/or a relay station in another relay network.
Your machine can not be used as a relay station.
Relay Transmission
Sending a document to a relay station, which in turn, sends the document
to the end receiving station.
Relay Transmission Report
A report that contains information regarding the last document
transmission to a relay station.
RESOLUTION
Relates to the number of dots scanned or printed per certain square. The
quality of the image increases as the number of dots per certain square
increases.
9
165
Glossary
Selective reception
A function that can be set so that your unit will receive from only those
machines programmed into your dialer.
Sleep Mode
The lowest power state that the machine enters after the specified time
without actually turning off.
Station name
Alphanumeric ID which can be programmed for each One-Touch dialing
and Abbreviated dialing number.
Stored documents
Documents that have been scanned and now are stored in your machine's
memory.
Sub-address
ITU-T recommendation for further routing, forwarding or relaying of
incoming faxes.
Sub-address Password
ITU-T recommendation for additional security that corresponds to the Subaddress.
Substitute memory reception Your machine's ability to store an incoming document into its memory,
when it runs out of recording paper or toner.
Transmission reservation
The ability to preset a telephone number so that you may reserve a
transmission while your unit is performing another function.
TAM Interface
A capability of your unit to be connected and operate with a Telephone
Answering Machine(TAM).
Transmission password
A 4-digit password that is checked when a document is transmitted.
User parameter
Programmed parameters that provide information to other stations.
Examples are logo, character ID, date and time.
Verification stamp
A user selectable transmission verification stamp can be placed on
scanned documents that are successfully transmitted or stored in memory.
View Mode - File List
Allows you to view the brief contents of the memory files through the LCD
display without having to print the Memory File List.
View Mode - Journal
Allows you to view the brief contents of the journal through the LCD display
without having to print the journal.
166
ITU-T Image No. 1
All specifications are based on the ITU-T Image No. 1 (The sample shown below is not to scale).
9
167
This page is intentionally left blank.
168
INDEX
A
Header Print ........................................................ 37
ABBR Number List .....................................131, 132
Abbreviated Dialing Numbers ..............................31
Access Code........................................................90
ADF Capacity .....................................................151
Automatic Document Feeder ...............................42
Automatic Reduction............................................67
I
C
Character ID.........................................................28
Character Key ......................................................13
Communication Journal (COMM. JOURNAL)
.....................................................................45, 128
Confidential Mailbox...........................................105
Contrast ...............................................................43
Copy.....................................................................70
Cover Sheet .........................................................95
D
Date and Time .....................................................26
Deferred Polling ...................................................72
Deferred Transmission.........................................71
Diagnostic Password ...........................................39
Dialing Method (Tone or Pulse) .....................24, 37
Dimensions ........................................................153
Direct Transmission .............................................53
Direct Transmission Reservation .........................60
Directory Search Dialing ................................51, 56
Directory Sheet ....................................................35
Distinctive Ring Detector (DRD) ..........................94
Document Jam ...................................................144
Document Misfeeding ........................................147
Document Size...................................................151
Document Thickness .........................................151
E
Edit File Mode ......................................................82
F
Fax Forward.........................................................97
FAX Parameter List............................................135
Fax Parameter Table ...........................................37
Fax/Tel Auto Switching Mode ..............................64
FCC Registration Number..................................153
File List.................................................................82
Fixed Reduction ...................................................67
Function Key List .................................................10
G
Group Dialing .......................................................76
H
Halftone................................................................44
Header Format .....................................................37
ID Number ........................................................... 29
Image Memory Capacity ................................... 152
Incomplete File .................................................... 38
IND. XMT JOURNAL......................................... 126
Information Codes ............................................. 140
Initial Sending Station ....................................... 112
ITU-T Image No. 1 ............................................ 167
J
Journal .............................................................. 125
K
Key/Buzzer Volume............................................. 37
L
Loading Document .............................................. 41
LOGO .................................................................. 27
M
Memory Card .............................................155, 157
Memory Transmission ......................................... 46
Monitor Volume ................................................... 25
Multi-Station Transmission .................................. 52
N
Network Address ............................................... 115
Network Password ............................................ 115
O
Off-Hook Dialing .................................................. 57
One-Touch Dialing Numbers............................... 31
One-Touch Keys ................................................. 31
One-Touch List...........................................131, 132
On-Hook Dialing .................................................. 58
Operating Environment ..................................... 153
Overlap Printing .................................................. 68
Own Network Address ...................................... 115
Own Telephone Number ................................... 115
P
Paper Specifications ......................................... 154
Password Reception ......................................... 100
Password Transmission .................................... 100
Pause .................................................................. 12
Polling ................................................................. 73
Polling Password................................................. 73
Power Consumption .......................................... 153
Pressure Adjusting Lever .................................. 147
Print Collation ...................................................... 69
Print Margin ....................................................... 152
Print Reduction Ratio .......................................... 67
169
Priority Transmission Reservation ...................... 60
Program Keys ..................................................... 76
Program List...................................................... 134
R
Receive To Memory ............................................ 92
Received Time Print............................................ 37
Receiving Password.......................................... 102
Recording Paper Jam ....................................... 143
Redial .................................................................. 61
Reduction Ratio................................................... 38
Relay Address................................................... 115
Relay Network................................................... 112
Relay Station..................................................... 112
Relay Station Parameter ................................... 115
Relay XMT Report (COMM. JOURNAL) ........... 120
Resolution ........................................................... 43
Result Report .................................................... 120
Retry an Incomplete File ..................................... 89
Ringer Equivalence ........................................... 153
Ringer Volume .................................................... 25
S
Scanner Resolution........................................... 151
Selective Reception ............................................ 99
Sub-address Password ....................................... 39
Sub-addressing ................................................. 122
Substitute Memory Reception ............................. 69
T
TAM Interface Mode............................................ 65
Toner Cartridge ................................................... 16
Transmission Password .................................... 101
Transmission Reservation................................... 59
U
User Parameter................................................... 26
V
Verification Stamp ........................................44, 148
View Mode - File List........................................... 83
W
Weight ............................................................... 153
170
Facsimile Number Directory
Name
Number
Facsimile
UF-585
UF-595
Matsushita Graphic Communication Systems, Inc.
CORPORATE OVERSEAS SALES AND
OPERATION MANAGEMENT DEPARTMENT
2-3-8 Shimomeguro, Meguro-ku, Tokyo, Japan 153-8687
Printed in Japan
DZSD000868-0
QUICK
GUIDE UF-585/595
How to Set Documents.
Set the documents face down
and adjust the document guides.
You can set the documents on the ADF(Automatic
Document Feeder) up to 30 pages* at one time.
*:[Based on Letter size document, thickness 0.0024”(12 lbs)
to 0.0039”(16 lbs)]
The display message is as shown below when the
documents are set properly.
ENTER STATION(S)
THEN PRESS START 00%
How to Send Using Manual Dialing.
1
2
3
4
5
6
7
8
START
9
0
Set the documents
face down.
The document is
stored in memory.
Then, your machine
starts dialing .
Enter the telephone number.
How to Send Using One-Touch/Abbreviated Key.
01
START
or
Set the documents
face down.
ABBR
+
1
2
3
4
5
6
7
8
9
0
Enter a 3-digit
code (001 to 072).
The document is
stored in memory.
Then, your machine
starts dialing .
How to Send without storing into memory.
1
2
3
4
5
6
7
8
9
START
+
0
MEMORY
or
Your machine
starts dialing
the number.
01
Set the documents
face down.
The lamp goes off.
or
ABBR
+
1
2
3
4
5
6
7
8
9
0
Enter a 3-digit
code (001 to 072).
How to Print Journals and Reports.
Transaction Journal
FUNCTION
6
1
SET
1
* PRINTING *
JOURNAL
One-Touch/ABBR List
FUNCTION
6
2
SET
1
* PRINTING *
ONE-TOUCH/ABBR LIST
Directory Search List
FUNCTION
6
2
SET
2
* PRINTING *
DIR. SEARCH LIST
Program List
FUNCTION
6
3
SET
* PRINTING *
PROGRAM LIST
Fax Parameter List
FUNCTION
6
4
SET
* PRINTING *
FAX PARAMETER LIST
Individual XMT Journal
FUNCTION
6
6
SET
* PRINTING *
IND. XMT JOURNAL
Directory Sheet
FUNCTION
6
7
SET
* PRINTING *
DIRECTORY SHEET
QUICK
GUIDEUF-585/595
DZSD000869-0