1
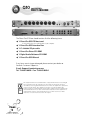
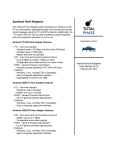
Aardvark USA
202 East Washington Suite 306
Ann Arbor, Michigan 48104
Web: http://www.aardvark-pro.com
E-mail: [email protected]
Voice: 734-665-8899
Fax: 734-665-0694
Q10
OWNERS MANUAL
TABLE OF CONTENTS
INTRODUCTION . . . . . . . . . . . . . . . . . . . . . . . . . . . . . . . . . . . . . . . . . . . . . . . . . . . . . . . . . . . . . . . . . .1
WHAT’S INCLUDED . . . . . . . . . . . . . . . . . . . . . . . . . . . . . . . . . . . . . . . . . . . . . . . . . . . . . . . . . . . . . . .2
INSTALLING THE DIRECT PRO Q10 INTERFACE . . . . . . . . . . . . . . . . . . . . . . . . . . . . . . . . . . . . . .3
DRIVER INSTALLATION
WINDOWS 95 HARDWARE INSTALLATION . . . . . . . . . . . . . . . . . . . . . . . . . . . . . . . . . . . . . . . . . . . . . . . . .4
WINDOWS 95 SOFTWARE INSTALLATION . . . . . . . . . . . . . . . . . . . . . . . . . . . . . . . . . . . . . . . . . . . . . . . . .5
WINDOWS 98 HARDWARE INSTALLATION . . . . . . . . . . . . . . . . . . . . . . . . . . . . . . . . . . . . . . . . . . . . . . . . .6
WINDOWS 98 SOFTWARE INSTALLATION . . . . . . . . . . . . . . . . . . . . . . . . . . . . . . . . . . . . . . . . . . . . . . . . .7
INTERFACE OVERVIEW
FRONT PANEL
ANALOG COMBO INPUTS . . . . . . . . . . . . . . . . . . . . . . . . . . . . . . . . . . . . . . . . . . . . . . . . . . . . . . . . . .8
ADDITIONAL FEATURES OF SPECIFIC INPUTS . . . . . . . . . . . . . . . . . . . . . . . . . . . . . . . . . . . . . . . . . . .9
PHANTOM POWER BUTTON . . . . . . . . . . . . . . . . . . . . . . . . . . . . . . . . . . . . . . . . . . . . . . . . . . . . . . .10
E.F.R.™ HI-Z GUITAR BUTTONS . . . . . . . . . . . . . . . . . . . . . . . . . . . . . . . . . . . . . . . . . . . . . . . . . . . .10
MONITOR VOLUME KNOB . . . . . . . . . . . . . . . . . . . . . . . . . . . . . . . . . . . . . . . . . . . . . . . . . . . . . . . . .11
HEADPHONE VOLUME KNOB . . . . . . . . . . . . . . . . . . . . . . . . . . . . . . . . . . . . . . . . . . . . . . . . . . . . . .11
HEADPHONE JACK . . . . . . . . . . . . . . . . . . . . . . . . . . . . . . . . . . . . . . . . . . . . . . . . . . . . . . . . . . . . . .11
REAR PANEL
ANALOG OUTPUTS . . . . . . . . . . . . . . . . . . . . . . . . . . . . . . . . . . . . . . . . . . . . . . . . . . . . . . . . . . . . . .12
MONITOR OUTPUTS . . . . . . . . . . . . . . . . . . . . . . . . . . . . . . . . . . . . . . . . . . . . . . . . . . . . . . . . . . . . .12
S/PDIF DIGITAL INPUTS/OUTPUTS . . . . . . . . . . . . . . . . . . . . . . . . . . . . . . . . . . . . . . . . . . . . . . . . . .13
MIDI INPUTS/OUTPUTS . . . . . . . . . . . . . . . . . . . . . . . . . . . . . . . . . . . . . . . . . . . . . . . . . . . . . . . . . .14
HOST ATTACHMENT AND PCI HOST CARD . . . . . . . . . . . . . . . . . . . . . . . . . . . . . . . . . . . . . . . . . . . . .15
INSERTS . . . . . . . . . . . . . . . . . . . . . . . . . . . . . . . . . . . . . . . . . . . . . . . . . . . . . . . . . . . . . . . . . . . . .16
Q10 SOFTWARE CONTROL
CONTROL PANEL . . . . . . . . . . . . . . . . . . . . . . . . . . . . . . . . . . . . . . . . . . . . . . . . . . . . . . . . . . . . . . . .17
INPUT CONTROLS . . . . . . . . . . . . . . . . . . . . . . . . . . . . . . . . . . . . . . . . . . . . . . . . . . . . . . . . . . . . . . .18
PLAYBACK CONTROLS . . . . . . . . . . . . . . . . . . . . . . . . . . . . . . . . . . . . . . . . . . . . . . . . . . . . . . . . . . . .21
ROUTING . . . . . . . . . . . . . . . . . . . . . . . . . . . . . . . . . . . . . . . . . . . . . . . . . . . . . . . . . . . . . . . . . . . . .23
PRESETS . . . . . . . . . . . . . . . . . . . . . . . . . . . . . . . . . . . . . . . . . . . . . . . . . . . . . . . . . . . . . . . . . . . . .24
ADVANCED . . . . . . . . . . . . . . . . . . . . . . . . . . . . . . . . . . . . . . . . . . . . . . . . . . . . . . . . . . . . . . . . . . .25
RECORDING SOFTWARE QUICKSTART
CAKEWALK PRO AUDIO 9™ . . . . . . . . . . . . . . . . . . . . . . . . . . . . . . . . . . . . . . . . . . . . . . . . . . . . . .28
CAKEWALK SONAR™ . . . . . . . . . . . . . . . . . . . . . . . . . . . . . . . . . . . . . . . . . . . . . . . . . . . . . . . . . . .32
EMAGIC LOGIC AUDIO™ . . . . . . . . . . . . . . . . . . . . . . . . . . . . . . . . . . . . . . . . . . . . . . . . . . . . . . . . .33
STEINBERG CUBASE VST™, NUENDO™ . . . . . . . . . . . . . . . . . . . . . . . . . . . . . . . . . . . . . . . . . . . .33
NEMESYS GIGASTUDIO™ . . . . . . . . . . . . . . . . . . . . . . . . . . . . . . . . . . . . . . . . . . . . . . . . . . . . . . . .34
NATIVE INSTRUMENTS . . . . . . . . . . . . . . . . . . . . . . . . . . . . . . . . . . . . . . . . . . . . . . . . . . . . . . . . . .34
PROPELLERHEAD REASON™ . . . . . . . . . . . . . . . . . . . . . . . . . . . . . . . . . . . . . . . . . . . . . . . . . . . . .34
FREQUENTLY ASKED QUESTIONS . . . . . . . . . . . . . . . . . . . . . . . . . . . . . . . . . . . . . . . . . . . . . . . .35
TROUBLESHOOTING . . . . . . . . . . . . . . . . . . . . . . . . . . . . . . . . . . . . . . . . . . . . . . . . . . . . . . . . . . . . .37
Q10
INTRODUCTION
WELCOME TO THE WONDERFUL
WORLD OF COMPUTER RECORDING
THE AARDVARK STORY
Aardvark has over a decade’s worth of experience in designing digital
audio master clocks that make the world’s best recording studios sound
even better. We’ve incorporated that expertise into the new Direct Pro
Series to give you all the quality of a professional studio, at a fraction of
the cost. Our premium sound quality and user–friendly features will
change the way you make music and will give you the easy-to-use
professional studio you’ve always wanted. We know you'll enjoy being a
part of the Direct Pro Series revolution.
THE Q10 REVOLUTION
The powerful Q10 is the pinnacle of the Direct Pro Series and brings a
fresh new approach to computer recording. Its unique 8 XLR mic inputs
and mixer-like monitoring features allow you to professionally record 10
channels direct-to-disk, without needing a mixer. Even if you don't need
all 8 mic preamps at once, the flexible XLR / 1/4” connectors can be
cleverly used as 1/4” line inputs. This allows studios with analog mixers
to easily take advantage of Aardvark's legendary low-jitter clocks and
premium A/D converters for enhanced stereo imaging and sonic clarity.
As an added bonus for guitarists, we added 2 warm sounding,
proprietary E.F.R.™ guitar preamps. With the Q10, Aardvark continues to
break down the barriers of traditional audio interfaces. It will elegantly
integrate your audio software with your studio and dramatically expand
the capabilities of your workstation.
PAGE
1
DIRECT PRO Q10
O W N E R S M A N U A L
Q10
BOX CONTENTS
WHAT’S INCLUDED
The Direct Pro Q10 box should contain all of the following items:
◆ 1- Direct Pro Q10 PCI host card
Connects directly to the motherboard of your computer
◆ 1- Direct Pro Q10 Interface Box
◆ 1- 6’ shielded 25-pin cable
◆ 1- Direct Pro Driver CD--ROM
◆ 1- Digital Audio Software CD--ROM
◆ 1- Direct Pro Q10 Manual
If any items are missing or damaged, please contact your dealer or
Aardvark Customer Support at:
E-mail: [email protected]
Tel: 734-665-8899 - Fax: 734-665-0694
This product
complies with
European CE
requirements.
PAGE
2
DIRECT PRO Q10
O W N E R S M A N U A L
This equipment has been tested and found to comply with the limits for a class A digital
device, pursuant to part 15 of the FCC rules. These limits are designed to provide a
reasonable protection against harmful interference when the equipment is operated in a
commercial environment. This equipment generates, uses, and can radiate radio
frequency and, if not installed and used in accordance with the instruction manual, may
cause harmful interference to radio communications. Operation of this equipment in a
residential area is likely to cause harmful interference in which case the user will be
required to correct the interference at his own expense.
Q10
PCI HOST INTERFACE CARD
INSTALLING THE DIRECT PRO
Q10 INTERFACE
1. Please unplug you PC before connecting or disconnecting the Direct Pro Q10 interface box
and PCI host card. Connecting or disconnecting the hardware with electricity present will
cause physical damage to the Direct Pro Q10 or your computer. It is best to disconnect the
power cable completely before proceeding. If you are unfamiliar with installation of
computer peripherals, please seek assistance from a qualified computer technician.
Aardvark will not be held responsible nor liable for damages resulting from improper
installation.
2. Remove the cover from your computer. Most computers have a series of screws on the back
of the case that keeps the cover in place.
3. Choose an empty PCI slot. It will look like the
PCI slots shown to the right.
4. Remove the small outer cover from the
chosen PCI slot .This cover will likely be held
in place by a screw. Ground yourself by
touching an empty slot on the computer ’s
metal chassis.
5. Gently align the Direct Pro Q10 PCI Host
Card with the chosen PCI slot and press it
slowly but firmly into place. It should be
seated tightly, with the metal connection
bracket matching up perfectly through the
hole in the back of the computer.
6. Use the screw from the small outer cover to
lock the Direct Pro Q10 Host Card in place
while providing maximum grounding.
7. Replace the computer ’s cover.
8. Connect one end of the 6-ft shielded cable to the 25 pin connector on the Direct Pro Q10
Host Card, and the other end on the back of the Direct Pro Q10 interface box labeled To
Aark Host. Tighten the screws to assure a firm connection and maximum grounding for the
Direct Pro Q10 system.
9 .Avoid putting the Direct Pro Q10 interface box near your computer or TV screen. This may
cause interference and degrade the quality of the audio.
10. Keep analog cables connected to the Direct Pro Q10 away from power cords and monitors.
11. Reconnect the computer ’s power supply, then turn on the computer. The Direct Pro Q10
system is completely powered by your computer. Because of this, you must never
detach the shielded interface cable without first turning off the computer,
otherwise, damage will occur.
PAGE
3
DIRECT PRO Q10
O W N E R S M A N U A L
Q10
DRIVER INSTALLATION
WINDOWS 95
HARDWARE SETUP
1. When Windows restarts, it will
automatically detect the card you installed.
Since it is a PCI card, it will identify itself as a
“Plug and Play” device.
Windows will indicate detecting the
hardware with these dialogs:
2. Insert the Driver CD-ROM packaged with
the Direct Pro Q10 , and click Next. The
Following dialog should appear:
3. Click Next. Windows may now ask for the
location of the drivers. If this is the case,
specify the CD-ROM drive (usually D:).
Otherwise, simply click Next again.
Windows will copy the files from the Direct
Pro Q10 CD-ROM.
4. When the files have been copied,
Windows will ask to restart the computer.
This is because the files just installed will not
take effect until the next time Windows is
loaded. Click NO, since you will restart the
computer after completing the Direct Pro
Q10 software installation in the next section.
PAGE
4
DIRECT PRO Q10
O W N E R S M A N U A L
Q10
DRIVER INSTALLATION
WINDOWS 95
SOFTWARE SETUP
5. Once Windows has finished loading, the Direct Pro
Q10 Control Panel installation program may appear
automatically. If not, go to My Computer, find your
CD-ROM drive, and click the setup.exe icon.
6. Click Next when you see the welcome screen:
7. Setup will allow you to select the Destination
Directory. Otherwise, it will put the Direct Pro Q10
software and drivers in the “C:\Program Files\Aark
manager” directory. If you would like the files
elsewhere, simply type the new destination or select
Browse to put the files in another directory.
8. Click the Next button to continue. The Ready to
Install!! Dialog should now appear. Click Next again
to begin installation.
9. When the installation is complete, a new folder for
the Direct Pro Q10 Control Panel application will
reside in the destination directory, and a shortcut will
automatically appear on the desktop for easy access.
10. You must now turn your computer off for the
changes to take place. Instead of restarting, select
Shut Down from the Start Menu/Shut down menu.
If you choose restart the installation will not be
compete, and you will have to repeat this process!
☛
NOTE: Always turn off your monitors or speakers when rebooting! Often, the
speakers will pop during startup, causing potential damage!
PAGE
5
DIRECT PRO Q10
O W N E R S M A N U A L
Q10
DRIVER INSTALLATION
WINDOWS 98
HARDWARE SETUP
1. When Windows restarts, it should
automatically detect the card you installed.
Since it is a PCI card, it will identify itself as a
“Plug and Play” device.
Windows will indicate detecting the new
hardware with these dialogs:
2. Click Next then select the option Search
for the best driver for your device, then click
Next again.
3. Insert the driver CD-ROM that came with
the Direct Pro Q10. Place a check mark
beside CD-ROM drive by clicking on it. All
other boxes must be cleared. Click Next.
4. Windows will now locate the Direct Pro
Q10 driver software. Click Next to begin
installation. Windows will copy the files
from the Direct Pro Q10 driver CD-ROM.
5. When the installation is complete, you
must press Finish to exit the setup.
Windows will ask to restart the computer.
This is because the files you just installed will
not take effect until the next time Windows
is loaded. Click NO, since you will restart the
computer after installing the Direct Pro Q10
Control Panel software in the next section.
PAGE
6
DIRECT PRO Q10
O W N E R S M A N U A L
Q10
DRIVER INSTALLATION
WINDOWS 98
SOFTWARE SETUP
6. IF the welcome screen does not automatically
appear, run Setup.exe from your CD-ROM. This can
be done from Windows by opening your CD-ROM
drive (usually D: ) in My Computer and double
clicking the Setup.exe icon.
7. Click Next when you see the Welcome Screen.
8. Setup will allow you to select the Destination
Directory. Otherwise, it will put the Direct Pro Q10
software and drivers in the C:\Program Files\Aark
Manager Control Panel directory. If you would like
the files elsewhere, simply type the new destination
or select Browse to put the files in another directory.
9. Click the Next button to continue. The Ready to
Install!! Dialog should now appear. Click Next again
to begin installation.
10. When the installation is complete, a new folder
for the Direct Pro Q10 Control Panel application will
reside in the destination directory, and a shortcut will
automatically appear on the desktop for easy access.
11. You must now turn your computer off for the
change to take place. Instead of restarting, select
Shut Down from the Start Menu/Shut down menu.
If you choose restart the installation will not be
compete, and you will have to repeat this process!
☛
NOTE: Always turn off your monitors or speakers when rebooting! Often, the
speakers will pop during startup, causing potential damage!
PAGE
7
DIRECT PRO Q10
O W N E R S M A N U A L
Q10
FRONT PANEL
ANALOG COMBO INPUTS
The Q10 has eight analog inputs located on the front of the interface
box. (An additional S/PDIF digital input is located on the back, we’ll get
to that later)
The inputs are designed to accept either 1/4” line level signals, such as
the output of mixers, synthesizer, and drum machine, or direct
connection of XLR Microphones.
!
IMPORTANT: Do not connect XLR line level or 1/4” microphones.
• The 1/4 " inputs accept both balanced (+4dBu) and unbalanced (10dBv) signals. The Q10 control panel allows you to configure each
input to accomodate balanced or unbalanced, allowing use of
balanced and unbalanced gear at the same time.
• The XLR inputs are designed specifically for use with microphones.
Some line level devices such as mixers or synthesizers have XLR
outputs. The Q10 XLR inputs are not intended for use with these
devices, and potential damage can occur. The XLR inputs will work
with any microphone.
☛
NOTE: You may use any combination of 1/4” line level or XLR mic for
any of the 8 inputs.
Each DIRECT PRO Q10 input is mono. If you want to connect a stereo
device such as a synthesizer or CD player, you must use two inputs.
PAGE
8
DIRECT PRO Q10
O W N E R S M A N U A L
Q10
FRONT PANEL
ADDITIONAL FEATURES
OF SPECIFIC INPUTS
• Analog inputs 1 - 4 are equipped to provide 48v phantom power.
Phantom power is activated by pressing the Phantom button on the
front panel. Phantom power is used with condensers and other
powered microphones. If you are not sure your microphone needs
phantom power, simply try the microphone with and without the
phantom enabled. A powered microphone will become more
responsive, while a non-powered mic will not be affected. There is no
risk of damage if a non-powered mic is plugged into an XLR jack with
phantom power.
• Inputs 1 - 4 also have independent effects inserts. Effects inserts
allow outboard effects to be applied to signals that have already gone
through our preamp. This is especially useful for applying compression,
limiting, or EQ to a pre-amplified mic, prior to it being recorded. More
on using these inserts later in the manual.
• Inputs 7 and 8 can be used for direct guitar recording By pressing
in either one of the Hi-Z guitar buttons, you enable input 7 and/or 8 as
a direct guitar input. This allows you to connect a guitar, bass or other
Hi-Z sound source without the need for a DI (direct) box or preamp.
Armed with Aardvarks exclusive E.F.R.™ technology these inputs yield
a vibrant, natural sound quality.
☛
NOTE: Although inputs 1-4 provide phantom power and effects inserts,
and inputs 7-8 provide direct guitar inputs, they do not have to be
used this way. They can also be used for standard XLR microphone and
1/4" line operation.
PAGE
9
DIRECT PRO Q10
O W N E R S M A N U A L
Q10
FRONT PANEL
PHANTOM POWER BUTTON
Pressing this button will light its corresponding LED, and send phantom
power to mics connected to XLR inputs 1-4. Phantom power is needed for
powered microphones like condenser mics. As long as XLR mics or 1/4" line
level devices are connected to inputs 1-4, it is fine to use the Phantom power.
!
IMPORTANT: The phantom power does not affect any of the 1/4”
line inputs.
Q10
FRONT PANEL
E.F.R™ HI-Z GUITAR BUTTONS
These enable E.F.R.™ for inputs 7 and/or 8, which allows you to plug a guitar
directly into these inputs!
Inputs 7 and 8 can be used for direct guitar recording by pressing the guitar
buttons (the two buttons on the right with the little guitar drawings next to
them). There are separate buttons for inputs 7 and 8. No preamps, DI boxes or
pedals needed. Just plug the guitar right into the Q10! This is done using
Aardvark’s exclusive E.F.R.™ (Enhanced Frequency Response). technology.
E.F.R.™ optimizes for direct guitar recording by altering the impedance and
frequency response of the input. The end result is a warm, rich tone that will
sound great in your mix, accompanied by the convenience of direct recording.
PAGE
10
DIRECT PRO Q10
O W N E R S M A N U A L
Q10
FRONT PANEL
MONITOR VOLUME KNOB
HEADPHONE VOLUME KNOB
HEADPHONE JACK
• The monitor Volume Knob: This controls the volume of the Monitor L
and Monitor R outputs on the back of the Q10. Allowing you to adjust
the monitor levels from the front of the Q10
• Headphone Volume Knob: This controls the volume of the
headphone jack.
• Headphone Jack: This is where to plug in your headphones. We
recommend using headphones with an impedance of 160 Ohms or
less. The headphone jack also comes in handy if the only speakers you
have are PC speakers with one 1/8" connection. Simply connect a
stereo 1/8" to 1/4" adapter, and plug the speakers into the
headphone jack!
PAGE
11
DIRECT PRO Q10
O W N E R S M A N U A L
Q10
REAR PANEL
ANALOG OUTPUTS
The Q10 has eight stereo output pairs on the back of the interface box.
Although these outputs can be used in many ways by tweaking the Q10
software, Outputs 1-8 are typically used if you want to send tracks to
separate outputs, allowing you to use a hardware mixer, or add external
effects.
Q10
REAR PANEL
MONITOR OUTPUTS
The Q10 also has a monitor output pair on the back of the interface box.
Although the monitor outputs can be used in many ways, Monitor L and
Monitor R are commonly used to listen to the full mix of your project. In
the control panel, these should be set to Monitor L and Monitor R. This
way you can use these as the main outputs that allow you to monitor
incoming signals, as well as previously recorded tracks. The volume of
these outputs can be adjusted with the Monitor Volume Knob on the
front of the Q10 (discussed earlier).
PAGE
12
DIRECT PRO Q10
O W N E R S M A N U A L
Q10
REAR PANEL
S/PDIF DIGITAL INPUTS/OUTPUTS.
For those of you unfamiliar with S/PDIF, S/PDIF inputs and outputs look
like RCA jacks, but they process very different information. They allow
you to transmit and receive audio digitally, so it is not subject to the
signal degradation and interference that is present in analog transfers.
S/PDIF transfers a stereo audio signal through one cable. Standard RCA
cable can be used, but it is best to work with cable designed specifically
for S/PDIF. Our S/PDIF can accept digital information with a bit depth of
16, 24 or any in between. Our S/PDIF inputs and outputs only work
with other S/PDIF devices.
To activate the S/PDIF input for recording, go to the Q10 control panel
and select ADVANCED, then select the General tab. In the lower left, you
will have the option to select the Channels 9/10 recording source.
Select S/PDIF. Once this is selected, you can record S/PDIF by choosing
Q10 input 9,10 in your audio recording software.
If you are recording with the S/PDIF input, you must have the "Source
Select" in the Q10 control panel set to S/PDIF, otherwise, unwanted
digital noise will occur.
You can designate what comes from this output in the Q10 Routing
menu. However, S/PDIF is not listed as a choice in Routing. Instead, the
S/PDIF output will carry the same signal as Analog outputs 7 & 8.
☛
NOTE: The S/PDIF output is changeable in the Control Panel Patchbay.
It is always the same as Analog Outputs 7, 8.
PAGE
13
DIRECT PRO Q10
O W N E R S M A N U A L
Q10
REAR PANEL
MIDI INPUTS AND OUTPUTS
The MIDI inputs and outputs are provided for interfacing with other MIDI products
and producing MIDI time code (MTC). These are standard MIDI ports that will be
recognized by any MIDI software. Don’t look for any MIDI controls in the Q10’s
software, these MIDI ports our controlled by whatever audio software you choose to
use.
☛
NOTE: The Q10 does not have a built in synthesizer. These ports can be used to
trigger MIDI sounds in a separate sound module, but the ports themselves do not
create sound in any way.
Q10
REAR PANEL
WORD CLOCK I/O
This allows the Q10 to send or receive clock from other word clock enabled devices.
Word clock is used to synchronize the clocks of multiple digital devices, so they all
share the same sample rate. Because word clock deals with synchronization, a
common misconception is that word clock is used to synchronize the transports of
devices, so when one plays or rewinds, the other device/s follow. Work clock is not
used to sync the transports of devices, nor is it used to send or receive audio. It is
used to synchronize the sample rates of multiple devices, to prevent jitter and other
potential digital audio flaws. If you are not using multiple Q10s o other digital
devices, Word Clock is not necessary.
☛
PAGE
14
DIRECT PRO Q10
O W N E R S M A N U A L
NOTE: You can run up to 4 Q10 units in the same computer. To keep them
synchronized, connect the WC output of the first unit to the WC input of the second
unit and so on. In the first units control panel, you will need to set the synchronization
to INT. On all the slave units, you need to set synchronizzation to WC (Word Clock).
Q10
REAR PANEL
HOST ATTACHMENT &
PCI HOST CARD
This is where you connect the Q10 interface box to the Q10 host card
(pictured below) with the included 25 pin cable.
!
☛
IMPORTANT: Use only the included cable to connect the host card
to the Q10 unit or you may damage your Q10 interface, host card or
computer.
NOTE: The extra shielding on the PCI card is to protect the card and
keep out harmful computer interference.
PAGE
15
DIRECT PRO Q10
O W N E R S M A N U A L
Q10
REAR PANEL
INSERTS
As mentioned earlier, inputs 1-4 (either XLR mic or 1/4” line level) on
the front of the Q10 can be used with these effects inserts.
Those of you unfamiliar with effects inserts may find the concept a bit
odd at first, but we assure you, they’re very nice to have around! The
effects inserts allow you to use our preamps on incoming signals, then
run them though external hardware effects before they go through the
A/D converter and are recorded to your computer. These effects inserts
allow you to use the Q10s high quality mic preamps with outboard
effects processors.
The insert number directly corresponds to the input on the front panel.
Insert 1 is connected to input 1, insert 2 is connected in input 2, etc.
Two things are required to use the Q10 inserts. First, you need to have
an external effects device that you want to apply to an incoming signal.
Also, you’ll need to use a "Y" cable, with a 1/4" TRS (Tip-Ring-Sleeve)
connection on one end, that splits into two 1/4" mono connections.
☛
NOTE, If you are having trouble telling the difference between a TRS
jack and a mono jack, a 1/4" TRS plug has two black lines, and a 1/4"
mono plug has only one black line.
The 1/4” TRS (2 black lines) end of the "Y" cable plugs into one of the
Q10 inserts.
The end of the "Y" cable that corresponds to the "tip" of the 1/4” TRS
plug should be plugged into the hardware processor’s input.
The end of the "Y" cable that corresponds to the "ring" of the 1/4" TRS
plug should be plugged into the hardware processor’s output.
☛
PAGE
16
DIRECT PRO Q10
O W N E R S M A N U A L
NOTE: Each 1/4” insert is both the “send” and the “receive”. So only one
cable is needed per channel.
Q10
SOFTWARE
Q10 CONTROL PANEL
The Q10 control panel is very powerful and easy to use and While it may
initially seem a bit complex. You’ll find that it becomes user friendly
rather quickly. This control panel is the cornerstone of the Q10 and
allows unparalleled flexibility and power!
All of the knobs and faders on the Q10 control panel are adjusted with
the mouse. If you want to fine tune a control with more precision than
the mouse allows, first click it with the mouse, then use the arrow keys
on your keyboard to fine tune it.
You will find this control panel works just like any analog mixer used for
mixing and monitoring, but it also has many cool features that make it
easier to use and more powerful.
PAGE
17
DIRECT PRO Q10
O W N E R S M A N U A L
Q10
SOFTWARE
Q10 CONTROL PANEL
INPUT CONTROLS
INPUT GAIN
At the top of each channel, there are 3 buttons that allow you to provide
different levels of gain to the corresponding inputs. Just beneath these
buttons is a trim knob, which allows you to fine tune the volume of the
incoming signal.
☛
NOTE: Although M1 and M2 are typically used with the XLR inputs, and
L is typically used with the 1/4" inputs, these buttons provide gain to
both the 1/4" and XLR inputs
From Right to left:
The M2 button provides the highest amount of gain,
anywhere from 52 dB to 75 dB. This is a substantial amount
of gain, and should not be necessary for most applications.
Unless you are recording a very quiet signal, or the
microphone is not very responsive, M2 should rarely be
necessary.
The M1 button provides the second highest level of gain, 32
to 55 dB. This is used for most microphone applications, or for
quieter line level devices that require a bit more gain.
The L button provides the lowest amount of gain, and can
reduce the volume of the incoming signal as well. It provides
up to 15 dB of gain, to –8 dB volume reduction.
The Trim Knob, located beneath these buttons allows you to
fine tune the applied gain. Directly to the left of each trim
know is a numeric display of how much gain is applied to the
signal, measured in dB.
☛
PAGE
18
DIRECT PRO Q10
O W N E R S M A N U A L
NOTE: All the gain applied with MC2, MC1, L, and the trim knob is done
in the analog stage before the A/D converter. This lets you monitor your
audio levels and ultimately get better sound.
Q10
SOFTWARE
Q10 CONTROL PANEL
INPUT CONTROLS
INPUT METERS
These meters operate two different ways: If you click Advanced, go to
the Meters section, and choose Pre-Fader, the meters will respond to the
exact dB level of the incoming signal. If you choose Post-Fader in the
Meters section, the meter will measure the level of the incoming signal,
as well as the gain or attenuation applied to the signal with the channel
faders. Because of this, Post-Fader does not accurately measure your
recording volume.
Just above each meter is a numeric display that measures the incoming
signal in dB.
☛
NOTE: To get the best recording quality, record your incoming signals as
loud as you can with out letting them go into the upper red portion of
the meters.
Link
The Link button is used to link the controls of channel 1 to
channel 2, channel 3 to channel 4, channel 5 to channel 6,
and channel 7 to channel 8. This button is used for recording
devices with individual left/right outputs, such as a
synthesizer or drum machine, and is ideal for stereo mics or
mic pairs recording the same source.
You’ll notice that if Link is pressed on channel 1, and you
adjust the channel 1 volume, channel 2 will change as well.
PAGE
19
DIRECT PRO Q10
O W N E R S M A N U A L
Q10
SOFTWARE
Q10 CONTROL PANEL
INPUT CONTROLS
Mute
The Mute button allows you to remove an incoming signal
from the monitor mix. You should be aware that Mute does
not actually mute the input, and the signal can still be
recorded. Mute simply removes the incoming signals from the
monitor. This is helpful if you want to record Microphones or
other instruments that could potentially feed back.
Solo
Solo will make the selected channel the only audible channel
in the monitor mix, all other inputs, and playback from audio
software, will be muted.
Pan
At the bottom of each input is a Pan control. Pan does not
affect how an incoming signal is recorded, it only affects the
way it is heard in your monitor mix. An example of why Pan is
helpful: if you are monitoring with headphones, and recording
a guitar with channel 1, it is easiest to hear the guitar in both
sides of the headphones, even though you are recording a
mono track.
S/PDIF input controls
This channel strip allows you to adjust the signals entering the
S/PDIF input on the back of the Q10.
On the top of the strip is a LOCK light. This will light if our
S/PDIF input is receiving valid S/PDIF.
Directly beneath are the S/PDIF input meters, which measure
the dB level of the incoming S/PDIF signal.
PAGE
20
DIRECT PRO Q10
O W N E R S M A N U A L
Q10
SOFTWARE
Q10 CONTROL PANEL
PLAYBACK CONTROLS
PLAYBACK CONTROLS
Just to the right of the input controls are five groups of faders to control
the output channels. Although it may seem like it, these faders are not
hard wired to the hardware outputs on the back of the Q10
These faders are used to boost and cut playback in the monitor mix. You
will hear the adjustments of these faders in your headphones, the
Monitor L/R outputs, as well as any other output that has been assigned
the monitor bus in the Routing section.
Mute (M) & Solo (S)
Mute silences a channel in the monitor mix, while solo will
solo an output channel, and will mute all other channels, both
input and output.
PAGE
21
DIRECT PRO Q10
O W N E R S M A N U A L
Q10
SOFTWARE
Q10 CONTROL PANEL
PLAYBACK CONTROLS
Monitor
On the far right there are faders labeled MONITOR. This allows
you to boost and cut the main monitor mix. These faders
typically affect the headphone output and the Monitor L/R
outputs. The Monitor fader can affect the other 1/4" outputs
if MONITOR L/R is connected to them the Routing menu.
The Peak button, if activated, will take note of the highest
volume that has gone through the monitor, measured in dB.
The Reset button will reset the peak volume to zero.
Phantom
If this light is on, it means you have activated Phantom Power,
by pressing the Phantom button on the front of the Q10
Brightness
This knob allows you to control the brightness of the
appealing Aardvark logo on the front of the Q10. Turn it up
high to show off your Q10, or dim it down, to make the Q10
less noticeable in darker studios.
Source Select
This lets you select what sample rate you want to use the
Q10 at. You can select 32 kHz, 44.1 kHz, 48 kHz, or slave to
S/PDIF. This automatically sets the source of the Q10’s clock
as well as the word clock output.
☛
PAGE
22
DIRECT PRO Q10
O W N E R S M A N U A L
NOTE: If you are recording S/PDIF, you must have Source Select set to
S/PDIF.
Q10
SOFTWARE
Q10 CONTROL PANEL
ROUTING
ROUTING
The routing section allows
you to control what signal is
sent to which output on the
back of the Q10. A picture
of the Q10 outputs is
provided, with a dropdown
menu beneath each output.
Use the dropdown menu to
choose what signal is
routed to that output.
☛
NOTE: Whatever is routed to outputs 7 & 8 will be routed to the S/PDIF
output as well
If Analog Input 1-8 is selected, the output will only monitor the
incoming signal of the input assigned to it.
If Playback 1-8 is selected, the output will only monitor playback tracks
from audio software routed to that playback channel.
If Monitor L or Monitor R is selected, the output will monitor all
playback tracks, and all inputs.
If Tone is selected, the output will generate a 1khz test tone, allowing
you to verify your hardware is working.
!
IMPORTANT: This tone is rather loud. To avoid a nasty surprise, Turn
down your speaker volume before assigning tone to an output.
If Silence is selected, nothing but digital silence will come out of the
output. This is useful for system calibration and other diagnostics.
☛
NOTE: Most users will have output L, R set to monitor L, R. This is the
output of the Control Panel Mixer, and will always be monitoring the 10
physical inputs and the 10 playback channels.
Additionally, it is common to have Outputs 1-8 assigned to playback 18 respectively. This directly links these tracks in the recording software
to the physical outputs of the Q10 allowing you to send the signals
from these outputs to any outboard analog gear for processing
or mixing.
PAGE
23
DIRECT PRO Q10
O W N E R S M A N U A L
Q10
SOFTWARE
Q10 CONTROL PANEL
PRESETS
PRESETS
The Q10 is very flexible, allowing you to have multiple
configurations for different situations. You can load and
save these various configurations by using the Presets
menu. The Presets menu saves and loads the entire Q10
software configuration, including fader levels, volume,
sample rate, -10/+4, and routing settings. It’s like taking
a “screenshot” of all your settings so you can save and
recall them at a later time.
When you open a Presets menu, either for the entire
control panel, or for a specific effect, you have the
option to load a saved configuration, or save your
current settings.
• To save a preset, type a new name in the text box in the upper right,
click add, then close the window.
• To recall a preset, double click a name from the box on the left, and it
should appear on the upper right, click recall, then close the window.
PAGE
24
DIRECT PRO Q10
O W N E R S M A N U A L
Q10
SOFTWARE
Q10 CONTROL PANEL
ADVANCED
ADVANCED
Clicking the Advanced button on the Q10 control panel
brings up a menu that provides access to additional
features.
GENERAL TAB:
Registration: You may be asked for this number if you contact tech
support. Other than that, you do not need to be concerned with it.
Issue Warnings On Sample Rate Errors: If activated, the Q10 will
provide a warning if you are trying to play an unsupported sample rate,
or if your multitrack software is set to a different sample rate than what is
set in the SOURCE SELECT of the Q10 Control Panel, or if you are trying
to record S/PDIF with out changing SOURCE SELECT to S/PDIF.
Channels 9,10 Recording Source: In your multitrack software, inputs
9,10 are among the available Q10 recording devices. Here, you can
choose what inputs 9,10 actually record.
• If S/PDIF is selected, software inputs 9,10 will record the S/PDIF
input on the back of the Q10
• If Monitor is selected, software inputs 9,10 will record the full Q10
monitor mix, which consists of all inputs and playback.
PAGE
25
DIRECT PRO Q10
O W N E R S M A N U A L
Q10
SOFTWARE
Q10 CONTROL PANEL
ADVANCED
S/PDIF output channel status: This allows you to pick between
consumer and professional S/PDIF output. This does not change the
quality of the S/PDIF signal. Rather, it allows the Q10 to be compatible
with devices that have different S/PDIF formats. If the S/PDIF output
does not seem to communicate with other devices properly, try
changing this setting.
PCI Bus Efficiency: This reading is a tool used by tech support to help
determine the cause of various problems. Due to the variety of computer
components currently available, a low PCI BUS EFFICIENCY percentage
reading does not necessarily mean that the Q10 is operating poorly.
Disregard this reading unless you are running into other problems.
METERS:
• If you select Post-Fader, the Q10 input meters to measure the
incoming signal and any changes applied to that signal by the channel
faders.
• If you select Pre-Fader , the meters will measure the unaltered input
signal, which is also the level that your multitrack software records.
SOFTWARE TAB
This tab lets you know which Q10 input and output channels are
currently in use by a software application. Some low-latency programs,
especially software synthesizers, will report a device "In use" simply by
having the program open, even if it is not playing audio. If a device says
IDLE, it simply means that a program is not using that device. It does not
mean that inputs or playback are having problems.
OUTPUT LEVELS TAB
This lets you select between -10dBV (unbalanced) or +4dBu (balanced)
for the eight 1/4" channel outputs on the back of the Q10. This is not
required for the inputs, because the adjustments can be made by using
the trim knob.
PAGE
26
DIRECT PRO Q10
O W N E R S M A N U A L
Q10
SOFTWARE
Q10 CONTROL PANEL
ADVANCED
ASIO AND DIRECTX TAB
Direct Sound Buffer
Size: This lets you choose
a buffer size for fine tuning
performance in
DirectSound applications.
This does not apply to
multitrack software. Direct
Sound is most commonly
used by software
synthesizers, such as
Rebirth, Fruityloops, Retro,
Reality, and others.
ASIO Configuration: This
is for using the Direct Pro with ASIO compatible programs, such as Steinberg
Cubase VST, Emagic Logic Audio, and Native Instruments Reaktor. You can
choose between 16 bit and 24 bit ASIO operation, as well as the ASIO buffer
size. Lowering your ASIO buffer size will reduce the latency in your ASIO
software. However, if your ASIO buffers are too low, you may get unwanted
clicks and pops in your audio. The ideal ASIO buffer size varies from computer
to computer.
ASIO Turbo Mode; works on almost all computers and software, but
occasionally it will not. Simply give it a try, if it works, great! If not, don’t use it.
☛
NOTE: If ASIO Turbo Mode is enabled, the second to lowest ASIO buffer
size is the fastest.
ASIO configuration: Provides the option for selecting a master Aardvark Aark
card. This is for when multiple Aardvark cards are on the same computer.
It is also possible in this menu to limit the number of ASIO inputs and outputs a
program can see. Some programs, like Logic Audio, use all ASIO inputs and
outputs, even if they are not currently in use. Limiting the number of inputs and
outputs the program sees allows you to conserve the computer’s resources.
Ignore this menu unless you are using an ASIO compatible program. Programs
such as Cakewalk, Cool Edit Pro, Vegas, Samplitude, Sound Forge are among
the programs that are not ASIO compatible.
PAGE
27
DIRECT PRO Q10
O W N E R S M A N U A L
Q10
SOFTWARE
CAKEWALK PRO AUDIO 9™
QUICKSTART
Before setting up Cakewalk, keep in mind that many of the demo songs
on the Cakewalk CD are MIDI tracks, the Q10 is an audio card. Playing a
Cakewalk Demo song is not a good way to verify that hardware and
software are working properly.
When you open Cakewalk for the first time, it’s best to optimize your
audio settings for use with the Q10. Once these are set, you will not
have to do it again.
Go to OPTIONS | AUDIO
Here, I have 24 bit and a sampling rate of
44100 chosen. You may choose different
sample rates and bit depths if desired.
Also, you can attempt to lower your
mixing latency by reducing the buffer size
and the number of buffers in the playback
queue. If the mixing latency is too low, you
may get glitches in your audio.
On the DRIVERS tab, just be sure that you
have all of your desired Aardvark devices
activated.
PAGE
28
DIRECT PRO Q10
O W N E R S M A N U A L
Q10
SOFTWARE
CAKEWALK PRO AUDIO 9™
QUICKSTART
Next, go to the ADVANCED tab
Here’s how to set it up.
On the DEVICE PROFILES tab, be sure that
"Use wave out position for timing" is not
enabled for any of your Aardvark devices.
Click OK to exit your audio options. You
may need to restart Cakewalk for your
changes to register.
PAGE
29
DIRECT PRO Q10
O W N E R S M A N U A L
Q10
SOFTWARE
CAKEWALK PRO AUDIO 9™
QUICKSTART
Right click track one in Cakewalk and
select "Track Properties"
This will bring up a track properties menu
that allows you to choose the recording
and playback device for the track.
"Source" refers to the recording device. If
you want to record only one input onto a
track, be sure of have the "Left" or "Right"
side of the device, as opposed to "Stereo",
which records two inputs simultaneously.
"Port" Refers to your output device.
In both the "source" and "port" menus,
your devices may have a wave icon, or a
note icon assigned to it.
The Wave icon refers to an audio device,
and the note icon refers to a wave device.
The options beneath Source and Port are
for MIDI only.
Click OK once you have chosen your
recording and playback device.
PAGE
30
DIRECT PRO Q10
O W N E R S M A N U A L
Q10
SOFTWARE
CAKEWALK PRO AUDIO 9™
QUICKSTART
Click the R on your track to arm it for recording.
To verify that Cakewalk is getting a signal, go to VIEW | CONSOLE,
and the Cakewalk mixing console will appear.
If Cakewalk is receiving signal from your Aardvark card, the meters
should respond on your armed track.
If you’re getting signal, great! Hit Record, located in the upper right,
and lay down a track!
If you want to overdub, disarm your first track, and repeat the steps
above for another track.
And that’s how to get started recording in Cakewalk!
PAGE
31
DIRECT PRO Q10
O W N E R S M A N U A L
Q10
SOFTWARE
CAKEWALK SONAR™
QUICKSTART
SETUP INFORMATION FOR ADDITIONAL AUDIO SOFTWARE
Here are guides to configuring some of the more common software programs
used with the Q10. Don’t worry if you’re favorite program is not listed here, it
probably works fine! There are a couple of reasons that a program might not
be included: First, there are countless audio software packages available, it’s
tough to cover them all. Also, many programs integrate with our hardware
immediately, without requiring any additional setup.
CAKEWALK SONAR™
☛
NOTE: The optimal SONAR™ settings will change considerably when
Aardvark’s WDM drivers become available. Check our websaite for updates.
Go to OPTIONS | AUDIO
On the GENERAL tab:
• Playback and Record Timing Master should be 5,6 Direct Pro Q10
• Aux Bus, Virtual Mains, Sampling rate, Audio Driver and File bit Depth can be
whatever you prefer.
• Under Mixing latency, the default settings should be fine. Slowly increase them if
Sonar is unstable. Lower them if you want to reduce latency.
• The wave profiler is not necessary for Aardvark Hardware
On the ADVANCED tab:
• The Data Directory and Picture Directory must be different directories, regardless of
where they are.
• No Checkmarks in Enable Read Caching or Enable write Caching
• A checkmark should be in "Copy and Manage Imported Files"
• A checkmark should be in "Always use MME interface"
• No checkmark in "Apply Dither"
• No checkmark in "Share Drivers with other programs"
• "Play effect tails after stopping" can be whatever you prefer.
On the INPUT MONITORING tab:
• No Aardvark device should be highlighted, since we already have zero latency
hardware monitoring of inputs.
On the DRIVERS tab:
• Make sure all your Aardvark Devices are highlighted
On the DRIVER PROFILES tab:
• Use the dropdown menu to show the Profile for the Direct Pro
• There should be no checkmark in "Access Driver in Mono"
• There should be a checkmark in "Wave Pipe Acceleration"
• Stream >16 bit data should be set to 32 bit PCM, left-justified
• No need to adjust the DMA buffer sizes.
PAGE
32
DIRECT PRO Q10
O W N E R S M A N U A L
Q10
SOFTWARE
EMAGIC LOGIC AUDIO™ & STEINBERG
CUBASE VST™, NUENDO™ QUICKSTART
EMAGIC LOGIC AUDIO™:
Due to the fact that Logic Audio has different ASIO engines in some
versions of the program
Open Logic, go to AUDIO | AUDIO HARDWARE AND DRIVERS
Next, select the AUDIO DRIVER tab.
Make sure none of the drivers on this tab are activated
Next, go to the AUDIO DRIVER 2 tab.
ASIO should be the only driver selected, and MONITORING should NOT
be enabled.
On the lower right, you’ll notice an ASIO buffer delay option. It may not
be necessary to adjust this, but you may need to if audio tracks do not
synchronize properly.
You can adjust the Aardvark ASIO drivers to provide optimal latency in
Logic Audio. Go to START | PROGRAM FILES | AARDVARK | ASIO
CONFIGURATION. Here, you can adjust the ASIO buffer size. Lower
buffer means lower latency, but if the buffer is too low, the system can
become unstable. There is also an option in ASIO configuration for Logic
audio users, be sure to put a checkmark in there to enable it.
STEINBERG CUBASE VST™ & NUENDO™:
The defaults of these programs are fairly Aardvark-friendly, so there is not
a huge amount of setup required. In both programs, be sure that the
Aardvark ASIO drivers are selected, and that monitoring is disabled. We
do support ASIO direct monitoring, but our hardware can perform the
same task without using the computer’s resources.
You can use Aardvark’s control panel to adjust the latency in these
programs. Go to START | PROGRAM FILES | AARDVARK | ASIO
CONFIGURATION. Here, you can adjust the ASIO buffer size. Lower
buffer means lower latency, but if the buffer is too low, the system can
become unstable.
PAGE
33
DIRECT PRO Q10
O W N E R S M A N U A L
Q10
SOFTWARE
NEMESYS GIGASTUDIO™, NATIVE INSTRUMENTS &
PROPELLERHEAD REASON™ QUICKSTART
NEMESYS GIGASTUDIO™:
Go to the SETTINGS menu
On the Hardware Routing Tab the hardware choice is Aardvark Pro Q10
Multichannel
Sample rate 44.1 (or whatever sample rate you prefer), and bit depth 24
You can enable as many outputs as you wish. Keep in mind, though, that
if you plan on using other software at the same time as Gigastudio, they
will not be able to use these outputs.
On the Sampler Tab the buffer is set to 1 meg. The optimal buffer size
depends a great deal on the computer you are using, though.
NATIVE INSTRUMENTS REAKTOR™, B4™, PRO52™, ETC.
For best performance, be sure that these programs are configured to
use ASIO.
For ultra low latency performance,
you should also try the “ASIO Turbo
Mode” found in the Advanced Tab of
the Q10 Control Panel
PROPELLERHEAD REASON™:
Be sure you use ASIO, and that you’re on the latest version. Previous
versions of Reason had some ASIO problems, but they’re fixed, and the
program runs great!
PAGE
34
DIRECT PRO Q10
O W N E R S M A N U A L
Q10
SUPPORT
FREQUENTLY ASKED QUESTIONS
Presented below are answers to some common questions about the Q10
and soundcards in general that may come up. We’ll try to cover as many as
possible here.
QUESTION: How many tracks can I record with the Q10?
ANSWER: The amount of tracks you can record with the Q10 depends on the
audio software you use, and how powerful your computer is. The only limitation
of the Q10 is that 10 (8 analog and 2 digital) tracks can be recorded
simultaneously.
The total number of tracks available depends on a number of factors. Bit depth,
sample rate, (higher ones mean less tracks), installed RAM, hard drive speed
and processor speed, are among the most significant.
QUESTION: Can I put multiple Q10 units in the same computer, or can I use
the Q10 with another Aardvark card?
ANSWER: Up to four (4) Aardvark products, Q10 or otherwise, can be used in
the same computer. In order for them to be synchronized, you must choose one
of the cards as the master, and the other cards as slaves. Use the WC I/O on
the Q10 to lock multiple units together.
QUESTION: When I have multiple cards on the same system, how does the
Aardvark control panel recognize them?
ANSWER: Each card has its own control panel. When multiple Q10s, or other
Aardvark cards are on the same system, a "card select" menu will be available
in your control panel software to select which control panel you want to
configure.
QUESTION: Can I potentially damage non-powered microphones by using the
phantom power?
ANSWER: Your microphones will not be damaged. Phantom power is
designed to go to only microphones that need it.
QUESTION: Is the Direct Pro Q10 full duplex (can it record audio while playing
previously recorded tracks back)?
ANSWER: Yes, the Direct Pro Q10 is a full duplex device.
PAGE
35
DIRECT PRO Q10
O W N E R S M A N U A L
Q10
SUPPORT
FREQUENTLY ASKED QUESTIONS
QUESTION: What is the Latency of the Direct Pro Q10?
ANSWER: This is not as simple a question as it seems. There are different types
of latency that can occur on a system, and latency itself can vary a great deal
depending on what audio software is used, and how powerful the computer is.
Here is a simple breakdown of the different latencies you need to be concerned
with.
◆ Monitoring Latency: This is the ability to listen to the incoming signal
through the outputs of the Q10, and overdub tracks so they are in sync with
one another. The Q10 provides zero Monitoring latency.
◆ Mixing Latency: Mixing latency refers to how long it takes for audio
software to respond to commands such as volume changes, and transport
controls. In ASIO programs such as Cubase, it can get as low as 4ms. NonASIO programs may experience anywhere from 50 to 300ms latency.
◆ SoftSynth Latency: This refers to the time it takes for a software synthesizer
to respond to an incoming MIDI command, such as pressing the key on a
controller keyboard. Most Software Synthesizers are ASIO compatible, so
you’re likely to encounter 4ms to 12ms latency on a decent machine. Some
programs use DirectSound instead of ASIO, which creates slightly higher
latency, but is still tolerable.
QUESTION: I have a SoundBlaster (or similar) sound card. Can I keep this on
my computer if I install the Q10?
ANSWER: Yes, the Q10 will co-exist with SoundBlaster and other consumer
sound cards.
PAGE
36
DIRECT PRO Q10
O W N E R S M A N U A L
Q10
SUPPORT
TROUBLESHOOTING
PROBLEM: My inputs/outputs don’t seem to be working.
SOLUTION: With all of the variables involved with audio software and
instruments, its tough to figure out what is at fault if something is not working
correctly.
Here’s a way to test your inputs and outputs simultaneously:
First, go to ROUTING and assign Tone to all the Q10 outputs.
Next, with 1/4" cables, plug the Q10 output 1 into input 1, output 2 into input
2, output 3 into input 3, etc.
Doing this generates a tone from the Q10 1/4" outputs, that will be picked up
by the Q10 inputs.
You can find out if the inputs see the tone by checking the input meters at the
bottom of each input channel.
If you are short on cables, you do not need to test all eight inputs at the same
time.
PROBLEM: I can’t hear an audio CD through the Q10 outputs.
SOLUTION: Here’s why, the Q10 does not have a dedicated connection to
your CD-ROM. You can play .wav or other audio files off of a CD, but one of two
things need to be done.
If you download and use the latest Windows Media Player to play Audio CDs, it
will automatically convert CD-audio into a format that can be played by the
Q10.
Or, you can install an alternate CDFS.vxd file in windows. This file is available on
several websites, simply search for "alternate cdfs.vxd" to find a site that
provides it. It converts CD audio in to .wav files in real time, allowing the Q10 to
play audio CDs in any program that platys .wav files. It will not work with
programs that ONLY play audio CDs.
PAGE
37
DIRECT PRO Q10
O W N E R S M A N U A L
Q10
SUPPORT
TROUBLESHOOTING
PROBLEM: I can’t see the pan controls on the bottom of the Q10 control panel.
SOLUTION: You need to increase the screen size your monitor accepts. Go to
the Windows control panel and select DISPLAY. Then, select the SETTINGS tab.
Your SCREEN AREA should be set to 800 x 600 pixels or larger. Otherwise,
you will not be able to see the entire Direct Pro control panel.
PROBLEM: I can’t load a PRESET.
SOLUTION: Once you have selected the preset you want to load, be sure you
click RECALL before returning to the Q10 control panel.
PROBLEM: My input meters are responding, but I don’t hear anything from the
outputs
SOLUTION: Be sure the volume knob on the front is up, and you have
MONITOR L,R assigned to the output you are listening through.
PROBLEM: The Q10 display does not look right
SOLUTION: You may need to increase the screen size your monitor accepts,
and the color scheme it uses. Go to the Windows control panel and select
DISPLAY. Then, select the SETTINGS tab. Your SCREEN AREA should be set to
800 x 600 pixels or larger. Colors should be set to "High Color (16bit)" or more.
PROBLEM: The Audio software I am using says that the Q10 does not support
24 bit
SOLUTION: There are several ways for a program to interpret 24 bit audio
data. The Q10 does this by left justifying 24 bit data in a 32 bit word. In some
audio programs, you will have to specify this particular 24 bit format in order for
it to work. Depending on the program, it may also be referred to as "24 bit
unpacked", "24 bit left-justified" or "24 bit alternate".
PAGE
38
DIRECT PRO Q10
O W N E R S M A N U A L
Q10
SUPPORT
TROUBLESHOOTING
PROBLEM: I am recording an instrument/microphone, and it’s only coming
out of one side when it plays back
SOLUTION: Keep in mind that each input of the Q10 is mono. In order to
record a stereo signal, you must record two inputs at the same time. It is also
possible to record a mono track, then send it to the left and right channels in
equal amounts.
PROBLEM: I can’t record S/PDIF.
SOLUTION: In order to record S/PDIF, be sure that you have instructed your
recording software to use inputs 9,10. In addition, you must go to the
ADVANCED menu of the Q10 control panel, and verify that the Channels 9,10
recording source is set to S/PDIF. Finally, you should make sure that the Q10
Source Select is set to S/PDIF.
PROBLEM: The Q10 sync selection keeps switching to 32kHz.
SOLUTION: This is usually due to Windows attempting to play a 32 kHz
system sound through the Q10. It’s best to simply disable system sounds. You
can do this by going to START | SETTINGS | CONTROL PANEL, select
SOUNDS
PAGE
39
DIRECT PRO Q10
O W N E R S M A N U A L