1
JGS8750,
JGS8850
BLE OF CONTENTS
SafetyInstructions...................................................................
I-3
SurfaceCooking.......................................................................
4-5
OvenCooking........................................................................
6-13
Care& Cleaning..................................................................
14-16
Maintenance
.........................................................................
16-17
:
BeforeYou Callfor Service...................................................
18
Warranty....................................................................................
I9
4
GuidedeI'utilisateur................................................................
20
Guiadel Usuario.......................................................................
40
mBBLIENN-AIR
Form No. AJl0/00
part No. 8113P279-60 74005525 Litho U.S.A.
JMPORTANT
SAFETY INSTRUCTIONS
Read and follow all instructions heInstaller: Pleaseleavethis manual
with thisappliance,
Consumer: Pleaseread and keep
thismanualforfuturereference.Keep
salesreceiptand/orcancelledcheck
asproof of purchase.
ModelNumber
SerialNumber
Dateof Purchase
If you havequestions,call:
Jenn-AirCustomerAssistance
1-800-688-II00
1-800-688-2080
( U.S.TTYfor hearingor speechimpaired)
(Mon.-Fri.,8 am-8pm EasternTime)
Internet: http://www.jennair.com
For serviceinformation,seepage
19.
In our continuingeffort to
improvethequalityandperformance of our cooking
products,it maybe necessaryto makechanges
to the
appliancewithout revising
thisguide,
fore using this appliance to prevent the
potentialriskof fire, e(ectricshock,personalinjuryor damageto the applianceas
aresultofimproperusage
of theappliance.
Useappliance
onlyfor itsintendedpurpose
asdescribedin thisguide.
To ensureproperandsafeoperation:
Appliancemustbe properlyinstalledand
groundedbyaqualifiedtechnician.
Do not
GENERAL
INSTRUCTIONS
_
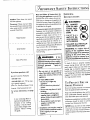
WARNING:
• ALL RANGES
CAN TIP AND
CAUSE INJURIES TO PERSONS
attemptto adiust,repair,service,or replaceanypartof your applianceunlessit is
specifically
recommendedinthisguide.All
other servicingshouldbe referredto a
qualifiedservicer.Havethe installershow
youthelocationofthegasshutoffvalveand
how to shutit off in anemergency.
• I N ST A L L
ANTI-TIP DEVICE PACKED
WITH RANGE
Alwaysdisconnectpowerto appliancebefore servicing,
WARNING: To reduce risk of
tipping of the appliance from
abnormal usage or by excessive
WARNING"
If the
I_
information in this manual isnot
followed exactly, a fire or explosion may result causingproperty
damage, personal
injury or
death,
- Do not store or use gasoline or
other flammable vapors and liquids in the vicinity of this or any
appliance,
- IF YOU SMELL GAS:
I
__
• FOLLOW ALL INSTALLATION INSTRUCTIONS
appliance
be secure
loading of must
the oven
door, by
thea
properly installed anti-tip device.
To checkif deviceis properly installed,
removestoragedrawer and look underneathrangeto makesureone of the rear
levelinglegs is properly engagedin the
bracketslot.Theanti-tipdevicesecuresth_
rearlevelinglegto the floor whenproper1)
engaged.
You shouldcheckthis anytime
the rangehasbeenmoved.
• appliance.
Do not try to light any
• Do not touch any electrical
switch.
• Do not useany phone in your
building.
• Immediately callyour gas
supplierfrom a neighbor's
phone.Followthegassupplier's
Besureallpackingmaterialsare remove,
from the appliancebeforeoperatingit.
instructions.
• If you cannot reach your gas
supplier, call the fire
department.
Ifapplianceisinstallednearawindow,
prope
precautionsshouldbe taken to preven
curtainsfrom blowingover burners.
- Installation and service must be
performed byaqualifiedinstaller,
serviceagencyor the gas
supplier,
I
To PREVENT FIRE OR
SMOKE DAMAGE
Keepareaaroundappliance
clearandfre
from combustiblematerials,gasoline,an,
other flammable
vaporsandmaterials.
NEVER leaveanyitemson the cookto
The hot air from the vent mayignitefian
mableitemsandmayincreasepressure
closedcontainerswhichmaycausethemt
burst.
COOKING
SAFETY
Manyaerosol-type
spraycansareEXPLOSIVEwhen exposedto heatand may be
highlyflammable.Avoidtheiruseor storagenearanappliance,
children.Childrenshouldbetaughtthatan
applianceisnot atoy.Childrenshouldnot
beallowedto playwith controlsor other
partsof the unit.
Manyplasticsarevulnerableto heat.Keep
plasticsawayfrom partsof the appliance
that maybecomewarm or hot. Do not
leaveplasticitemson the cooktopasthey
maymeltor softenif lefttoo closeto the
ventor a lightedsurfaceburner.
CAUTION: NEVER store itemsof interest to childrenin cabinetsabovean
appliance
or onbackguard
of a range.Children climbingon the appliancedoor to
reachitemscouldbeseriouslyinjured,
Makesurethe correct burneristurnedon
andthattheburnerhasignited.Whencooking is completed,turn burner off before
removingpantopreventexposuretoburner
flame.
Alwaysadjustsurfaceburnerflamesothat
To eliminatethe hazardof reachingover
hotsurfaceburners,cabinetstorageshould
not be provideddirectlyabovea unit. If
storageisprovided,it shouldbelimitedto
itemswhichareusedinfrequentlyand
which
are safelystored in anareasubjectedto
heatfromanappliance.
Temperatures
may
beunsafefor someitems,suchasvolatile
liquids,cleanersor aerosolsprays,
ABOUT
APPLIANCE
NEVERuseapplianceasaspaceheaterto
heator warma room to preventpotential
hazardto the user and damageto the
appliance.
Also,donot usethe cooktopor
ovenasastorageareafor food or cooking
utensils,
Do not obstructthe flow of combustion
it doesnot extendbeyondthe bottomedge
of thepan.Anexcessive
flameishazardous,
wastesenergyand maydamagethe appliance,panor cabinetsabovethe appliance.
NEVER leavea surfacecookingoperation
unattendedespeciallywhen usinga high
heatsettingorwhendeepfatfrying.Boilovers
causesmokingand greasyspilloversmay
ignite.Cleanup greasyspills as soon as
possible.Do not usehighheatfor extended
andventilationairbyblockingtheovenvent
or airintakes.Restrictionofairflowtothe
burnerpreventsproper performanceand
increasescarbon monoxideemissionto
unsafelevels,
Avoidtouchingovenvent areawhileoven
ison andfor severalminutesafterovenis
turned off. Someparts of the vent and
surroundingareabecomehot enoughto
cookingoperations.
NEVER heat an unopenedcontaineron
the surfaceburneror in the oven.Pressure
build-upmaycausecontainerto burst resuitinginseriouspersonalinjuryor damage
to the appliance.
Use dry, sturdy potholders.Damp potholders may cause burns from steam.
Dishtowelsorothersubstitutesshould
never
causeburns.Afterovenisturnedoff,donot
touchthe ovenvent or surroundingareas
untilthey havehadsufficienttime to cool.
beusedaspotholdersbecause
theycantrail
acrosshot surfaceburnersandigniteor get
caughton appliance
parts.
Other potentially hot surfacesinclude
cooktop, areasfacingthe cooktop, oven
vent,surfacesnearthe vent opening,oven
door,areasaroundtheovendoorandoven
Alwaysletquantitiesofhotfatusedfordeep
fatfryingcoolbeforeattemptingto moveor
handle.
window.
WARNING:NEVERuseappliancedoor,
or drawer,if equipped,asa stepstool or
seatasthismayresultinpossibletippingof
the appliance,
damage
to the appliance,
and
seriousinjuries.
mablematerials
Do
not let cookinggreaseor
accumulate
in or
other
nearthe
flamappliance,hood or vent fan. Cleanhood
frequentlyto preventgreasefromaccumulatingonhoodor filter.Whenflamingfoods
underthe hoodturn the fanon.
IN
CASE
OF
FIRE
Turn off applianceandventilatinghoodto
avoidspreading
the flame.Extinguish
flame
thenturn on hoodto removesmokeand
odor.
• Cooktop:Smotherfireor flameinapan
with a lidor cookiesheet,
NEVER pickupor moveaflamingpan.
• Oven: Smotherfire or flameby closing
the ovendoor.
Do not usewater on greasefires. Use
bakingsoda,a dry chemicalor foam-type
extinguisherto smotherfire or flame,
CHILD SAFETY
NEVER leavechildrenaloneor unsupervisednearthe appliance
whenit isin useor
isstill hot.
NEVER allowchildrento sit or standon
anypartof the applianceasthey couldbe
injuredor burned.
YOUR
Do not toucha hot ovenlightbulbwith a
dampclothasthe bulbcouldbreak.Should
Childrenmustbetaughtthatthe appliance the bulb break,disconnectpowerto the
andutensilsinit canbehot.Lethot utensils appliancebeforeremovingbulb to avoid
cool in a safeplace,out of reachof small electricalshock.
2
Always placea pan on a surfaceburner
beforeturning it on. Be sure you know
whichknobcontrolswhichsurfaceburner.
NEVERweargarmentsmadeofflammable
materialor loose fitting or long-sleeved
apparelwhilecooking.Clothingmayignite
or catchutensilhandles.
Always place oven racks in the desired
positionswhileoveniscool.Slideovenrack
outto addor removefood,usingdry,sturdy
JMPORTANT
SAFETY INSTRUCTIONS,
CONT.
potholders.Alwaysavoid reachinginto the
oventoaddor removefood.Irarackmustbe
movedwhilehot,useadrypotholder.Always
turn the ovenoff atthe endof cooking,
Only certaintypesof glass,glass/ceramic, Slide-inrangesfeatureacoolingfan which
ceramicor glazedutensilsaresuitablefor operatesautomatically
duringacleancycle.
cooktopor oven usagewithout breaking Ifthe fandoesnot turnon,cancelthe clean
dueto the suddenchangein temperature, operation and contact an authorized
Usecarewhen openingthe ovendoor. Let
hot air or steamescapebeforemovingor
replacingfood.
PREPAREDFOOD WARNING: Follow
food manufacturer's
instructions.If a plastic
frozenfood containerand/orits coverdistorts,warps,or isotherwisedamaged
during
cooking,immediatelydiscardthefood
andits
container.Thefoodcouldbecontaminated,
Follow manufacturer'sinstructionswhen
usingglass.
This appliancehasbeen testedfor safe
performance
usingconventional
cookware,
Do not useanydevicesor accessories
that
are not specificallyrecommendedin this
guide.Do not useeyelidcoversfor the
surfaceunits, stovetop grills, or add-on
ovenconvectionsystems.The useof de-
I_IEVEI_usealuminumfoil to cover oven
racksor ovenbottom.This could resultin
risk of electricshock,fire, or damage
to the
appliance.Usefoil only as directedin this
guide,
vicesor
accessories
thatmanual
arenotcexpressly
recommended
in this
ancreate WARNING
serioussafetyhazards,result in perfor- The CaliforniaSafeDrinkingWater and
manceproblems,andreducethe lifeofthe Toxic EnforcementAct of 1986(Proposicomponentsof the appliance,
tion 65)requiresthe Governorof Californiato publisha listof substances
knownto
the Stateof Californiato causecanceror
CLEANING
SAFETY
reproductive
harm,andrequiresbusinesses
Turnoffallcontrolsandwait for appliance to warncustomersof potentialexposures
partsto cool beforetouchingor cleaning to suchsubstances.
them.Do not touchthe burnergratesor Usersof thisapplianceareherebywarned
surroundingareas
untiltheyhavehadsuffi- that the burningof gascanresultin lowcienttime to cool.
levelexposureto someof the listedsub-
UTENSIL
SAFETY
Usepanswith flatbottomsandhandlesthat
areeasilygraspedandstaycool.Avoidusing
unstable,warped,easilytipped or loosehandledpans.Also avoid usingpans,especiallysmallpans,with heavyhandlesasthey
couldbeunstableandeasilytip.Pansthatare
heav'/tomovewhenfilledwith foodmayalso
behazardous,
Besureutensilis largeenoughto properly
containfood andavoidboilovers.Pansizeis
particularlyimportantin deepfat frying.Be
surepanwill accommodatethe volumeof
Cleanappliancewith caution.Usecareto
avoidsteamburnsif awet spongeor cloth
isusedto wipespillsonahot surface.Some
cleanerscanproducenoxiousfumesif appliedto a hot surface,
SELF-CLEAN
OVEN
servicer.
Itisnormalforthecooktopoftherangeto
becomehotduringaself-cleancycle.Therefore, touchingthe cooktopduringa clean
cycleshouldbeavoided.
IMPORTANT
SAFETY
NOTICE
AND
stances,includingbenzene,formaldehyde
andsoot,dueprimarilyto the incomplete
combustionof naturalgasor liquidpetroleum(LP)fuels.Properlyadjustedburners
will minimizeincompletecombustion.Exposureto thesesubstancescanalso be
minimizedbyproperlyventingthe burners
to the outdoors.
foodthat isto beaddedaswellasthe bubble
actionof fat.
To minimizeburns, ignition of flammable
materialsandspillagedueto unintentional
contactwiththeutensil,
donotextendhandles
over adjacentsurfaceburners.Alwaysturn
Cleanonlypartslistedinthisguide.Do not IMPORTANT NOTICI=RI:GARDII_IG
cleandoorgasket.Thedoor gasketis es- PI=TBIRDS:Neverkeeppet birdsinthe
sentialforagoodseaI.Careshouldbetakenkitchenor in roomswherethefumesfrom
notto rub,damage,
ormovethegasket.Do the kitchencouldreach.Birdshavea very
not useoven cleanersof anykind in or sensitiverespiratorysystem.Fumesrearoundanypartof the self-cleanoven.
leasedduring an oven self-cleaning
cycle
panhandlestowardthe sideor backof the
appliance,
not out intothe room wherethey
areeasilyhit or reachedbysmallchildren,
Neverleta panboildry asthiscoulddamage
the utensilandthe appliance.
Followthe manufacturer'sdirectionswhen
usingovencookingbags.
Before self-cleaningthe oven, remove
broiler pan,ovenracksandother utensils
andwipeupexcessive
spilloversto prevent
excessive
smoke,flare-ups
orflaming.CAUTION: Do not leavefood or cooking
utensils,etc. in the oven duringthe selfcleancycle.
may be harmfulor fatalto birds. Fumes
releaseddueto overheated
cookingoil,fat,
margarineandoverheatednon-stickcookwaremaybeequallyharmful.
SAVE THESE INSTRUCTIONS FOR FUTURE REFERENCE
3
URFACE
COOKING]
ISuRrACE
CONTROLS]
SETTING
CONTROLS
THE
OPERATINGFAILURE
DURING
POWER
A
CAUTION$I
Your cooktophassealedgasburnerswith
automaticre-ignition.If the burner flame
• If flameshouldgoout duringa cookingoperation,turnthe burneroff. Ifa
stronggasodor is detected,opena
windowandwait fiveminutesbefore
relightingthe burner,
shouldgoout,the systemwill automatically 2. Pushinandturnthe controlknobslowly
sparkto re-ignitethe burner,
to desiredsetting.
I. Placea pan on the burner grate. (To
preservethegratefinish,donot operate
CAUTIONS:
the burnerswithoutapanonthegrateto
• Besureallsurfacecontrolsaresetin
the OFFpositionprior to supplying
gasto the range,
• NEVER touch cooktopuntil it has
absorbthe heatfrom the burnerflame.)
2. Pushin knobandturn immediately
counterclockwiseto the desiredsetting,
• A clicking(spark)soundwill beheard
cooled. Expectsome parts of the
cooktop,especially
aroundthe burn-
andthe burnerwill light. (All four
ignitorswill sparkwhenanysurface
ers,to becomewarm or hot during
cooking.Usepotholdersto protect
hands.
burnerknobisturnedon. However,
onlythe selectedburnerwill light.)
Yourrangeisequipped
with pilotlessigniPILOTLESS IGNITION
tion.With thistypeof ignitionsystem,the
gasautomaticallyshutsoff and the oven
will notoperateduringa powerfailure,
ISUGGESTED
A lighted match will not light the oven
burner.No attempt shouldbe madeto
operate theovenduringapowerfailure,
Settings
SURFACE
HEAT
I. Hold a lightedmatchto the desired
surfaceburner head.
.When
lightingthe
surfaceburners,
be
sureallof
the controlsarein
the OFF
position. Strikethe matchfirst and
hold it in positionbeforeturningthe
knob.
oDonot leavethecooktopunattended
whencookingduringa powerfailure.
Theautomaticre-ignitionfeaturewill
not operateduringa powerfailure.
SETTINGS]
Thesizeandtype of cookwarewill affectthe heatsetting.Forinformationon cookware
andother factorsaffectingheatsettings,refer to "Cooking Made Simple" booklet.
Uses
hi
I
Usehi to bringliquidto aboil, or reachpressurein a
pressurecooker.Alwaysreducesettingto alowerheatwhen
liquidsbeginto boil or foodsbeginto cook.
CONTROL
KNOBS
_
An intermediateflamesizeisusedto continuecooking.Food
surfaceburners.
An
Use to turn on the
infinitechoiceof heat
settings is available
from Io to hi. At the
hi settinga detentor
notchmaybefelt.Theknobscanbeseton
or betweenanyof the settings.
_
thanneeded
to maintainagentleboil.Water boilsattheused
same
will not cookanyfasterwhenahigherflamesettingis
temperaturewhetherboilinggentlyor vigorously.
Graphicsnext to the knobidentifywhich
_
covered.It ispossibleto reducethe heatby rotatingthe knob
burnertheknobcontrols.
orexample,
the
graphic
at rightshowstheFright
/-"-'N
front burnerlocation.
_, ah_
_w
_
toward OFF. Besureflameisstable.
Io
I
UseIo to simmerfoods,keepfoodswarmandmelt
chocolateor butter.
Somecookingmaytakeplaceonthe Io settingifthe panis
4
ICURFACE
COOKTOP
COOKING,
]
CONT.I
SIMMER
This burner isBURNER
located in the left front
To preventthe cooktopfrom discoloringorstaining:
position.
Thesimmerburneroffersalower
BTU flamefor delicatesaucesor melting
chocolate,
• Cleancooktopaftereachuse.
* BTUratingswill varywhenusingLPgas.
• Wipeacidicor sugaryspillsassoon
asthecooktophascooledasthese
spillsmaydiscolorthe porcelain.
_
BURNER
GRATES
The grates must be properlypositioned
Unlikearangewithstan- beforecooking. Improperinstallationof
dardgasburners,this the gratesmay result in chippingof the
cooktopdoesnot liftcooktop.
upnor isit removable.
Donotattemptto lift
the cooktop for any
Donotoperatetheburnerswithouta
panon the grate. The grate'sportelain finishmay chip without a pan to
absorb the heat from the burner
flame.
Althoughthe burner gratesare durable,
they will graduallylosetheir shineand/or
discolor,dueto the hightemperaturesof
the gasflame.
.
:_...
reasofl.
NOTES:
SEALED BURNERS
Thesealedburnersof your rangeare securedto thecooktopandarenot designed
to be removed. Sincethe burners are
sealedintothe cooktop,boiloversor spills
will not seepunderneaththe cooktop.
' A properlyadjustedburnerwith cleanportswill lightwithin afewseconds.If using
naturalgas,the flamewillbebluewitha deeperblueinnercone.
Iftheburnerflameis ellowor isnoisy,theair/gasmixturemaybeincorrect.Contact
aservicetechnician
to adjust.(Adjustmentsare notcoveredb the warranty.)
With LPgas,someyellow tipson the flamesare acce_table.Thisis normaland
However, the burner headsshould be
cleanedaftereachuse.Theheadportionof
the burneris easilyremovedfor cleaning,
ac ustmentisnot necessary.
, With sometypesofgas,youmayheara "popping"soundwhenthesurfaceburner
isturnedoff. Thisis a normaloperatingsoundof the burner.
(Seepage15for cleaningdirections.)
• If the control knob is turnedvery quicklyfrom hi to Io, the flamemaygo out,
particularlyifthe burneriscold. Ifthisoccurs,turn the knobto the OFFposition,
HIGH PERFORMANCE
BURNER (i 2,000 BTU*)
There is one highspeedburner on your
range,locatedin the right front position.
Thisburner offershigherspeedcooking
thatcanbeusedto quicklybringwaterto a
boil andfor large-quantity
cooking.
wait several seconds and relightthe burner.
. Theflameshouldbeadiustedso it doesnot extendbeyondthe edgeof the pan.
_
f_=_
_
_.........
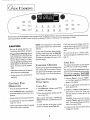
OVEN
COOKING
Drying
W_rn_
Oven
\
Light
Warm
Timer 1
_o_._B°_
_,,p,_v
o_
Bread
Timer 2
Proofing
..............
Cook
1
c0_,,_o_
6
C_ _ _ _,_
2
_2.o_,o_
7
3
SO_L_,
8
Fe#_C/F
Languaue
4
5
,_,_'.o,,c_,,__,o,Sp_._
9
_ l_u_t
0
s_'_z#c_t_s
Bake
Time
Stop
T me
Time
Conveet
Bake
Probe
r-,_
Clean
|
L, an
2/
/
J
Theelectroniccontrolisdesigned
for easein programming.
Thedisplaywindowonthecontrolshowstimeofday,timerandovenfunctions.
Controlpanel shown includesConvect and other model specificfeatures. (Stylingmay vary dependingon model.)
NOTE; Thetemperatureor time will be
automaticallyenteredfour secondsafter
selection,
Clocktime cannotbe changedwhenthe
ovenhasbeenprogrammedfor clockcontrolled cooking,self-cleanor delayedself-
movedfrom ovenbeforeturningon,
• Prepared FoodWarning: Follow
foodmanufacturer's
instructions.Ifa
plasticfrozenfood containerand/or
itscoverdistorts,warps,or isotherwisedamaged
duringcooking,immediatelydiscard the food and its container.Thefood could be contaminated.
If more than 30 secondselapsebetween
pressingafunctionpadandthe Auto Set
pador numberpads,the functionwill be
canceledandthe displaywill returnto the
previousdisplay.
clean.
The clockmaybesetto a 24-hourclock.
SeeControl Options(I 2/24Hour Clock),
page12.
Severalcontroloptionsareindicatedunder
TIMER PADS
Thetimer(s)maybesetforanytimeperiod
upto 99 hoursand59minutes(99:59).
• Followthe manufacturer's
directions
whenusingovencookingbags.
the numberpadson the control. Factorysetoptionscanbechanged
to yourprefer-
Thetimer(s)operatesindependently
ofany
otherfunctionandcanbesetwhileanother
• Do not useovenfor storingfood or
cookware.
ences.Seepage12for more information,
ovenfunctionis operating.THE TIMER
DOES NOT CONTROL THE OVEN.
SETTING
I. Press the Timer I or 2 pad. TIMERI
or 2 willflashrespectively.0HR:00will
appear in the display.
CAUTION:
. Be sure all packingmaterialis re-
CONTROL
PAD
CONTROL
OPTIONS
CONTROL
FUNCTIONS
OPERATION
CLOCK PAD
• Pressthe desiredfunctionpad.
• PresstheAuto Setpador theappropriatenumberpad(s)to entertimeor ternperature,
I. PressClock pad. Indicatorword TIME
will flashin the display.
2. Pressthe appropriatenumberpadsfor
the currenttime.
• Abeepwillsoundwhenanypadispressed.After a power interruption,POWERIN• A doublebeepwill soundif a program- TERRUPTIONwill scrollfollowedby SET
mingerror occurs.
CLOCK.
• Furtherinstructionswill scrollin display
afterfunctionpadsarepressed,
To recallthe time of daywhen another
functionis showing,pressClock pad.
2. Press the appropriate number pads to
enter desired time.
3. TIMERI orTIMER2will bedisplayed.If
bothtimersare
active,the
the
leastamountof
time Timerwith
left will be
displayed.
EXAMPLE:
To setatimerfor 5 minutes,
press
Timer I padandthe
number
pad5.the
Thecontrolwillbegin
countdown
afterafour seconddelay.
4. Thelastminuteofthecountdownwill be
displayedin seconds.
OVEN
COOKING,
5. Attheendofthesettime,"END"willbe
displayed and two chimes will sound
followedbyone chimeevery30seconds
for upto fiveminutes.Press the corre-
CONT.
BAKE PAD
Use for bakingand roasting.
CONVECT BAKE PAD ISELECT
MODELS)
I. Press Bake pad.
I. Press Convect Bake pad.
spendingTimer pad to cancelthe
2.Pressagainfor 350°For presstheAuto
chimes.
Set pad. Eachadditionalpressof Auto
NOTE: TheTimerreminderchimesat
Setwill raisethetemperature250F. Or,
the endof a settime maybechanged,
pressthe appropriatenumberpadsfor
See Control Options (End-of-Timer
thedesiredtemperaturebetween100°F
Signal),page12.
and5500F.
To Cancela Set Time:
Pressandhold the corresponding
Timer
padfor severalseconds.Afteraslightdelay
the time of daywill appear.
OR
3.Whenthe oventurnson,a redpreheat
indicatorwill lightandthe bakeiconwill
bedisplayed,
PREHEAT
INDICATOR
BAKE
ICON
indicatorwilllightandtheconvect
iconwill bedisplayed.
4. A singlechimewill indicatethe oven is
5. Whencookingiscomplete,pressCancel pad.Removefood from oven.
4.A singlechimewill indicatethe oven is
EVEN HEAT ASSIS'_
preheatedto the settemperature.The
preheatindicatorwill turn off.
5.Whencookingiscomplete,pressCancel pad. Removefoodfrom oven.
Therangeisequippedwith
a I IOVelectrictop element to insure even
browning during baking
androasting.
AUTO SET PAD
Usewithfunctionpadsto automatically
set:
3. Whenthe oventurnson, a red preheat
preheatedto the set temperature.The
preheatindicatorwill turn off.
Pressthe Timer padandthe "0" number
pad.After a slightdelaythe timer will be
canceled,
CANCEL PAD
Useto cancelallprogrammingexceptthe
ClockandTimerfunctions.
2. Pressagainfor 325OFor presstheAuto
Set pad. Eachadditionalpressof Auto
Setwill raisethe temperature25° F.Or,
pressthe appropriatenumberpadsfor
the desiredtemperaturebetween100° F
and550° F.
NOTEs,
_-/_1
.............................................
• 3500Fbaketemperature
BAKING
• 325°Fconvectbaketemperature(select
• To recallthe settemperatureduring
models)
• hi or Io broil
preheat press the Bake pad.
• As a general rule, when convection
, To changeoventemperatureduring
baking, set the oven temperature
• three hoursof cleaningtime
• 140°Fdryingtemperature(selectroodels)
• 160° Fprobetemperature(selectroodels)
• 170° F keepwarmtemperature(select
models)
• quickor standardbreadproofing(select
models)
• to changecontrol options
cooking,pressthe Bake padandthe
appropriatenumberpads.
• Allow 10-12minutesfor the ovento
preheat,
• Do not usetemperaturesbelow140°F
to keepfoodwarmor below200°Ffor
cooking.Forfoodsafetyreasons,
lower
temperaturesare not recommended,
with the convectionfanat a low speed.
25° F lower than the conventional
recipe or prepared mix directions.
Baking time will be the same to a
few minutes less than directions.
• When roasting meat using the convection setting, roasting times may
be up to 30%less. (Maintainconventionalroastingtemperatures.)
• Foradditionalbakingandroastingtips, • Seechartin "Cooking MadeSimple"
referto the"Cooking MadeSimple"
bookletfor recommended
roastingternbooklet,
peratureandtimes,andadditionalbaking
andconvectioncookingtips.
CONVECT BAKING
(select models)
• The convectionfan will stopwhen, Convect Bake functioncyclesboth
ever the ovendoor isopened.
thebakeburnerandbroilelementalong
7
BROIL PAD
4. At the end of cooktime,the ovenwill
4. PressStop Time pad again.STOP
Usefor top browningor broiling.Forbest
results,usethe broiler panprovidedwith
your range,
I. Pressthe Broil pad.
shutoffautomatically,
ENDandCOOK
TIMEwill bedisplayed
andthree chimes
will sound.
5.PressCancel pad. Removefoodfrom
oven. If the programis not canceled,
TIME must be flashingto set the
delay start time.
5. Pressthe appropriatenumberpadsto
enter the time you want the ovento
stop.
2. Pressthe Auto Set padfor hi broil,
pressagainfor Io broil, or pressthe
appropriatenumberpadsto setdesired
broil temperaturebetween300° and
550° F.
therewillbetworeminderchimesevery
minutefor upto 30minutes.
3. Foroptimalbroiling,preheatthree to
four minutes.
4. Placefood in oven. Close the oven
door.
5. Follow broiling recommendationsin
"Cooking Made Simple" booklet.
6. Whenbroilingiscomplete,pressCantel pad. Removefoodandbroiler pan
fromoven.
COOK TIME/SToP
TIME
PADS (CLOCK CONTROLLED
OVEN COOKING)
Useto programthe ovento startandstop
automatically.
Cooktimemaybesetfor up
to II hoursand59minutes(I h59). The
clockmustbefunctioningandcorrectlyset
for thisfeatureto work.
TO START IMMEDIATELY AND
TURN OFFAUTOMATICALLY:
I. PressCook Time pad. COOK TIME
will flash.Presstheappropriatenumber
padsto entercookingtimein hoursand
minutes,
2. Pressthe Bakeor ConvectBake(selectmodels)padandselectthetemperature. COOK TIMEwill be displayed
alongwith the temperature,
3. One minutebeforethe endofthe programmedcooktime,the ovenlightwill
turn on.Thelightwillturn offautomatitally when Cancel pad is pressedor
afterovendoor isopenedandclosed.
6. DELAYwill bedisplayed.
7. At theendofthedelayperiod,BAKEand
NOTE: TheCookTime/StopTimereCOOK TIME will be displayedalong
minder chimesmay be changed.See
with the temperature.
Control Options (End-of-Cook-Time
Signal),page12.
8. Followsteps3-5in precedingsection.
TO DELAY THE START OF COOKING AND TURN OFF AUTOMATICALLY:
KEEP WARM PAD (SELECT
MODELS)
I. PressCook Time pad. COOK TIME
Forsafelykeepingfoodswarmor for warmingbreadsandplates.
will flash.Presstheappropriatenumber
padsto entercookingtime in hoursand
minutes.
2. Pressthe Bakeor Convect Bake(solectmodels)padandselectthetempera-
I. PressKeep Warm pad.
2. PressAuto Set padfor 1700For press
the appropriatenumberpadsfor ternperaturesbetween145° and 190° F.
ture.
COOK
TIME will be displayed 3. KEEP
andthe temperaturesoalongwith
the temperature,
lettedWARM
will bedisplayed
whenthe func3. Press Stop Time pad. Displayshows
when the ovenwill stop basedon an
immediatestart,
tion is active,
4. Whenwarmingiscomplete,pressCantel pad.Removefoodfrom the oven.
SeeadditionalKeepWarm notes,page9.
NOTES:
BROILING
CLOCK CONTROLLED
• Hi broil is usedfor mostbroiling.
Use Io broil when broilinglonger
cookingfoods to allow them to
cook to well donestagewithout
OVEN COOKING
• Highlyperishablefoodssuchasdairy
products,pork, poultry or seafood
are not recommendedfor delayed
excessivebrowning,
• Nevercoverbroilerpaninsertwith
aluminum
foil.Thispreventsfatfrom
cooking.
• Clockcontrolledbakingisnotrecommendedfor bakeditemsthat require
drainingto the panbelow,
apreheated
oven,suchascakes,cookiesandbreads.
................................................................................
IOVEN
COOKING,
CONT.
MEAT PROBE PAD
160oFor pressthe appropriate number
BREAD PROOFING PAD
(SELECT MODELS}
To roast and bake items to the desired
padsfortemperaturebetween 100°and
185° F.
(SELECT MODELS)
Forproofingor allowingyeastbreadproductsto risepriorto baking.Therearetwo
proofingmethodsavailable
- STANDARD
andQUICK.
temperaturewithoutoveror undercooking. 5. Pressthe Bake or Convect Bake
I. Insertthe probeintothe food item.(For
(selectmodels)pad.Presstheapproprimeats,the probetip shouldbelocatedin
ate numberpadsfor the desiredternthecenterofthethickestpartofthe meat
peraturebetween100° and550° F.
andnot into the fator touchinga bone.) 6. Whenthe probe hasreachedthe set
2. Insertthe probeplugintothe receptacle temperature,the oven will shut off,
locatedon the top rightof the oven.Be
"END"willbedisplayedandfourchimes
certainto insertp)ugintothe receptacle will soundfollowedbyonechimeevery
allthe way.The controlwill readPRESS minutefor one houror untilthe CanPROBEPAD.
tel padis pressed,
StandardProofingtemperatureis slightly
higherthanroom temperature,protecting
doughfromtemperaturechangesanddrafts
that canaffectproofingresults.
3. PressProbe Pad.
I. PressBread Proofing pad.
4. Setthe desiredinternaltemperatureof
the food by pressingAuto Set padfor
2. Pressthe Auto Set padfor Standard
Proof,pressagainfor QuickProof.
QuickProofingprovidesfasterresultsthan
countertopor
standardproofing,without
harmingthe yeast.
3. When proofingis complete,pressthe
Cancel pad.
NOTES:
KEEPWARM
- pressKeepWarm andAuto Set
• Usethehandleoftheprobeforinsert-
• Foroptimalfoodquality,ovencooked
foodsshouldbe kept warm for no
longerthan I to 2 hours,
pads.
- warmfor fiveminutes,turn off the
ovenandleaveplatesin the oven
ingandremoving.
Do not pullon the
cable.Usea potholderto remove
since probe becomes hot.
• For optimalfood qualityand color,
foodscookedonthe rangetop should
bekeptwarmfor anhouror less.
for 15minutesmore.
- useonlyoven-safeplates,check
with the manufacturer.
• To keep foods from drying,cover
looselywith foil or a lid.
• TO WARM DINNER ROLLS:
- donot setwarmdisheson a cold
surfaceasrapidtemperature
changes
couldcausecrazing.
- coverrollslooselywith foil and
place
in oven.
MEAT PROBE
- press
KeepWarm andAutoSet
pads.
• Theprobemustberemovedfromthe
ovenwhenitisnotbeing
used.
- warmfor12-15
minutes.
• Forfrozen meats,insertprobeafter
I-2 hoursof roasting.
• To cleancooledprobe,wipewith a
soapydishcloth.Do not submerge
probein
washer. water or washin the dishBREAD PROOFING
• Foranydoughthat
requires
onerise,
eitherStandardorQuickProofingcan
beused.
, BecauseoftheexceIIentinsulationofthe
, Fordoughrequiring
tworises,
Stanoven,theretained
heatcontinues
to
dardProofing
mustbeusedforthe
• TO WARM PLATES:
cookthefoodafterthesignalhassounded
first
rising
period.
Either
Standard
or
- place
2stacks
ofuptofourplates
andtheovenhascycled
off.
Forthis
QuickProofing
canbeusedforthe
eachintheoven.
reasonitisimportant
to removethe
secondrise.
foodfromtheovenassoonasthesignal
sounds.
DRYING PAD
{SELECT MODELS)
Fordryingfruits,vegetables,
herbs,etc.Use
NOTES:
DRYING
adryingrackforbestresults,ltallowsairto
circulateevenlyaroundthe foods.
I. Pressthe Drying pad.
• To purchasea drying rack,contact
your Jenn-Air dealer for the
"DRYINGRACK"AccessoryKit or
2. Pressthe Auto Set padfor 140° For
pressthe appropriatenumberpadsfor
thedesireddryingtemperature
between
I00° and200° F.
call1-800-688-8408.
. Most fruits andvegetablesdry well
andretaintheir color whendriedat
140° F.Foroptimalflavor,dry herbs
3. The oven door needsto be opened
slightlyto allowmoistureto escape
from
the ovenduringthe dryingprocess,
at I00° F, however,at this lower
temperatureexpectextendeddrying
timesof upto 8 hours.
. Openthe
_--_
_.j
slightly,
• Rotatethe
metalspacer
atthe upper
ovendoor
rightcornerof __o
the ovenframeupwardto hold the
door in position,
• Whileholdingthe spacerup,gently
closethe ovendoor until it rests
againstthe spacer.Follow the
drying guideon page I I for
drying times. Coolfoodsto room
temperaturebeforetestingfor
doneness.
• Thelengthofdryingtimesvarydueto
tent of food, size of food pieces,
amountoffood
beingdried,humidity
in the air.
• Fruitsthat turn brownwhen exposed
toairshouldbetreatedwithanantioxidant.Tryoneofthefollowingmethods:
I.
Dipfruit ina mixtureof two parts
bottledlemonjuiceto one part
cool water.
2. Soakfruit in a solutionof I tsp.
ascorbicacidor commercialantioxidantto I quart of coldwater.
• Foodsmaydrip duringthe dryingprocess.After dryinghighacidor sugary
and water. The porcelainoven finish
maydiscolorifacidor sugaryfoodsoils
are not wipedupprior to highheator
. Checkfoodsat the minimumdrying
aself-cleaning
cycle.
the following:
Water
andsugarcon- . foods,clean
theovenbottomwith
soap
time.
Dry longerif
necessary.
Referto other
resourcesat your local
• More thanone rack of food maybe
libraryor callyour localCountyExtendried at the sametime. However,
sionservicefor additionalinformation.
additionaldryingtime is needed.
' ..... .............................................................................
• Whenthe doorisopened,thespacer
will rotate downwardandrestflush
againstthe rangesidepanel.Resetthe
spacerif youneedto continuethe
dryingprocess.
4. Whendryingiscomplete,turn theoven
off bypressingthe Cancel pad.
I0
19RYING
GUIDE
t
Apples*
FirmVarieties:
Graven
Stein,GrannySmith,
Jonathan,
Winesap,
RomeBeauty,Newton.
Apricots*
Wash,peelif desired,
coreandslice
into I/8'*slices,
4-8hours
Pliable
to crisp.Dried
apples
storebestwhen
theyareslightlycrisp.
Blenheim/Royal
most
Wash,halve,
andremovepits.
common.Tiltonalsogood.
18-24hours
Soft,pliable.
Bananas*
FirmVarieties
Peelandcutinto I/4" slices.
17-24hours.
Pliable
to crisp.
Cherries
Lambert,RoyalAnn,
Napoleon,
Vanor Bing.
Washandremovestems.Halveand
removepits.
18-24hours.
Pliable
andleathery.
Nectarines
andPeaches*
Freestone
Varieties.
Halveandremovepits.Peeling
is
optionalbut resultsinbetter-looking
driedfruit.
24-36hours
Pliableandleathery.
Pears*
Bartlett
Peel,halveandcore.
24-36hours
Softandpliable.
Pineapple
Freshor canned.
Wash,peelandremovethornyeyes.
Slicelengthwiseandremovethesmall
core.Cutcrosswise
into I/2" slices.
Canned:
14-18hours
Fresh:
12-16hours
Softandpliable.
Orange and
Lemon Peel
Selectrough-skinned
fruit. ZWashwell.Thinlypeeltheouter 1/16
Do not drythe peeloffruit • to 1/8"ofthe peel.Do not usethe
marked"coloradded".
_whitebitterpithunderthe peel.
I-2 hours
Tomatoes
Plum,Roma
Halve,removeseeds.Placetomatoes
skinsideuponrack.Prickskins.
12-18hours
Toughto crisp.
Carrots
DanversHalfLong,
Imperator,RedCored
Chantenay
Do not usecarrotswith woodyfiberor
pithycore.Wash,trimtopsandpeelif
desired.Slicecrosswise
or diagonally
in I/4" slices.Steamblanch
for 3 rain.
4-8hours
Toughto brittle.
Not Peppers
Ancho,Anaheim
_Wash,halveandseed.Prick
• skinseveraltimes.
4-6hours
_ Toughto brittle.
. Podsshouldappearshriv• eled,clarkredandcrisp.
Parsley,Mint,
Cilantro,Sage,
Oregano
Rinsein coldwater.Leavestemson
untilleavesaredry,thendiscard.
I-3 hours
Brittleandcrumbly.
Basil
Cutleaves3 to 4"from top of plant
justasbudsappear.Rinseleavesin
coldwater.
2-5hours
Brittleandcrumbly.
*Fruits requiring an antioxidantto prevent discolorationand lossof nutrients. Referto the noteson page I 0 for
specificmethods.
** 12Hour Off will not occurduring dryingfunctions.
II
I OVEN
[ CONTROL
COOKING,
OPTIONS
CONT.
I
TO CHANGE FACTORY SET
DEFAULT OPTIONS:
I. Pressthe Setup Options (8) padand
thedesired
pad.(See Options
below.) option
2. Currentoption will appearin the display.
3. Pressthe Auto Set padto changethe
option.
4. Pressanyfunctionpadother thanthe
Cancel padto setthedisplayed
option
andexitthe program.
SOUNDLEVEE
The sound of the(3)chimes
may be
changed with 11111111(8)
being the highest volume and I(I) beingthe lowest,
Thedefaultisset at level6.
HOUR CLOCK (4)
TO ADJUST:
The clockmay be setfora 12-hour
or
24-hourclock. Thedefaultissetfor a 12- I. Pressthe Bakepadandenter 5500F.
hourclock.
2. Pressandholdthe Bakepadfor several
SCROLL SPEED (5)
The scrollspeedof the messagesinthe
displaymay be changedfrom FASTto
MEDIUMto SLOW. Thedefaultissetfor
the mediumspeed.
END-OF-COOK
END-OF-TIMER
SIGNAL (6)
There are three choices for the end of
"clock controlled cooking" reminder
signals.
(TIMER 1 & TIMER 2)
Therearethreechoicesfortheendof
"timer" reminder signals.
• Two chimes(Timer I) or four chimes
(Timer2) followedbyone chimeevery
30seconds
for upto fiveminutes(default
setting).
• Two chimes(Timer I) or four chimes
(Timer2) followedbyone chimeevery
minutefor upto 30minutes.
• Two chimes(Timer I) or four chimes
(Timer2) followedby noother chimes,
NOTE: Theremindersignalchosenwill
applyto bothtimers,
CONTROL LOCK (1)
The function pads on the control can
be locked to prevent unwanted use
for safety and cleaning benefits.
ControlLockwillnot lockoutthe Timer,
Clockor OvenLight.
TIME
MODE (2)
The oven may be set to turn off after
12hours or stay on indefinitely. The
defaultis setto turn offafter 12hours.
secondsuntilTEMPADJ isdisplayed.
3. Press the Auto Set pad - each press
changesthe temperatureby 5° F. The
controlwill acceptchanges
from-35°to
+35° F.
4. Ifthe ovenwaspreviouslyadjusted,the
changewill bedisplayed.Forexample,if
the oven temperature was reduced by
15° F,the displaywillshow -15° F.
5. When you have made the adjustment,
press any function pad, OPTION
CHANGEDwill scroll andthe time of
daywill reappearin the display. The
• Three chimesfollowed by two chimes
ovenwill nowbakeatthe adjustedtemeveryminuteforupto30minutes(default
perature.
setting).
• Threechimesfollowedbynootherchimes.
• Three chimesfollowed by two chimes
every3Osecondsfor upto fiveminutes.
OVEN
LIGHT
Theovenlightautomatically
comesonwhen
TEMP C/F {7)
the door is opened. When the door is
Thetemperaturescalemaybechanged closed,pressthe Oven Light padon the
to Centigrade or Fahrenheit. The de- controlpanelto turn the lighton or off.
faultis setfor Fahrenheit.
The ovenlightwill comeon automatically
one minutebeforethe endof a clockconLANGUAGE (8)
trolled cookingoperation.
The words whichscrollinthe displaymaybe
changedfrom Englishto Frenchor Spanish.
I OVEN
I
DEFAULT (9)
The contro] canbe reset to restorethe
factorysettingfor eachoption,
12 HOUR OFF/SABBATH
Ifyouthinkthe oven isoperatingtoo coldor
hot, you canadjustit. Bakeseveraltest
itemsandthenadjustthetemperaturesetLingnot morethan l0° Fat a time,
12/24
OPTIONS AVAILABLE:
SIGNAL
OVENTEMPERATURE
ADJUSTMENT
BOTTOM
Protectovenbottomagainst
spillovers,
especiallyacidor sugaryspills,asthey may
discolorthe porcelainenamel.Use the coy-
DISPLAY ON/OFF (CLOCK)
rectpansizetoavoidspilloversandboilovers.
Thetime-of-daydisplaymay
beshutoffwhen Do not placeutensilsor aluminumfoil
the oven is not in a cookingor cleaning directly on the oven bottom.
function.
12
0VEN
COOKING,
[OVEN RACKS
CONT.
[
The oven hastwo racks(threeracksif
convection). All racks are designed with a
lock-stop edge.
TO REMOVE OVEN RACKS:
Pullrack straight out until it stops at the
lock-stop position; lift up on the front of the
rackand pull out.
pies,
or frozenconvenience
foods,
and
for broiling.
RACK 2:
I(SELECT
Use for roasting small cuts of meat,
casseroles,bakingloavesof bread,bundt
cakesorcustardpies,andtwo-rackbakins.
RACK I :
MULTIPLE RACK COOKING:
Two rack: Use rack positions2 and 4,
or I and 4. Stagger food to ensure
Placerack on the rack support in the oven;
tilt the front end up slightly;slide rack back
proper air flow.
Support
_-_
TO INSTALL
d<_.-_._
IN OVEN:
I. Always install
half rack when
_
Front
2. Grasptop center of the halfrack.Align
the side arm support between the top
fourth and fifth oven rack guides. Insert
the two tabs on the back frame of the
half rack into the slots on the upper left
rear of the oven wall.
3. Pushfirmly on the top surfaceof the half
rack until the tabs slide into the slots
andthe half rack sidearm support rests
on the fourth oven rack guide.
until it clearsthe lock-stop position; lower
front and slide back into the oven.
Do not cover an entire rack with alumihum foil or place foil on the oven bottom. Baking results will be affected and
damage may occur to the oven bottom.
Tabs
N_ODELSI1
oven is cool.
Usefor roastinglargecuts of meat and
poultry, frozen pies,dessert souffles or
angelfood cake,and two-rack baking.
TO REPLACE OVEN RACKS:
HALF RACK
4. Checkfor proper installationby placing
your handon the top surfaceof the half
rack and pressingdown firmly.
_
LayerCakePlacement(Conventional
Oven)
Bakeon racks2 and4
TO REMOVE FROM THE OVEN:
When the oven is
cool,graspthe top II_:_
center of the half
RACK POSITIONS
_
rackandpullupward
until the back tabs
s
of the oven back
slots.
LayerCakePlacement
(Convection
Oven)
ConvectBakeon racks2 and4
on the rack slideout
[_zl
Three-rackConvection
Baking(Racks1,3
and5)
RACK 5:
Three rack: (convectionfunctionsonly,
select models) Use rack positions I, 3
and 5. See illustration at left.
Use for toasting bread or broiling very
thin foods.
RACK 4:
Usefor two-rack bakingand for broiling.
RACK 3:
Use for most bakedgoods on a cookie
sheet or jelly roll pan, layer cakes,fruit
13
---
_
ICA E&CLEAMNG]
CLEAN PAD
NOTES:
• Do not usecookwarethat extends
beyondedgeof rack.
• For best results,allow two inches
betweenthe panplacedonthe rack
• Whenopeningtheovendoor,allow
andthe ovensidewall.
steamandhot
air to escapebefore
reachinginto the ovento remove
food.
• Use cautionwhen removingitems
from the halfrackto avoidburns.
• Carefullyremove items from the
lower rack to avoiddisturbingthe
halfrack.
• If not includedwith your range,contact your Jenn-Airdealer for the
HALERACKAccessoryKit or call
1-800-688-8408.
...........
OVEN
-VENT
Useto setaself-cleancydeor adelayedself- 4. When the clean cycle is complete,
cleancycle.Onepressofthe Clean padsets
CLEANEDwill be displayed.LOC will
upanimmediatecleancycle.A secondpress
remain on until the oven has cooled
of the Clean pad setsup a delayedclean
(approx.I hour).
cycle.
5. Whentheoveniscool,LOCwillnolonger
door frame(area
' " .,,
• outsideof
Cleanovenframe,
gasket)
....""
.1
_/_
and around the
opening in the l
"_-_(/_
door gasketwith
a nonabrasive
cleanersuchasBon Ami*.
Theseareasarenot exposedto cleaning
temperatures.
• Remove oven racks. If racksareleft in
6. Wipe out the oveninterior with a damp
bedisplayed
andthe doormaybeopened.
cloth. If soilremainsit indicatesthe cycle
wasnot longenough.
TO CANCEL SELF-CLEAN:
I. PressCancel pad.
2. If LOCisNOTdisplayed,
openovendoor.
If LOCis displayed,
allowovento cool.
duringacleancycle,it mayimpairfunction TO SET FOR DELAY START:
andthey will discolor.Turn off the oven
lightandclosedoor.
I. PressClean padtwice.
* Brand namesfor cleaningproductsare 2. Pressthe Auto Set padto programa 2registeredtrademarksoftherespectivemanu-hourdelay.Eachadditionalpressof Auto
facturers.
Setwill add2 hours,upto atotal delayof
eighthoursfrom the currenttime.
]/
TO
I. Press
SETClean
FOR padonce.
IMMEDIATE START:
2. Pressthe Auto Set padfor 3 hoursof
Whenthe ovenisin use,the areanear"the
cleaning
time,pressagainfor 4 hoursand
vent may becomehot enoughto cause
againif 2 hoursof cleantime isdesired,
burns.NEVERblockthe ventopening.
3. CLEANINGandLOCplusthe cleantime
OVENVENTLOCATION
will appearin the display.
3. displayed
Thestarttime
duringthe
andthe
delayperiod.
timeof daywill be
4. At the endof the delayperiod,CLEANING,LOC andthe cleantime will appear
in the display.
5. Followsteps4-6 in precedingsection.
NOTES:
COOLINGFAN
• To preventdamageto ovendoor, do
not attemptto openovendoor when
touchingcooktop,
door,windowor oven
ventareaduringa deancycle.
the LOC indicatorword isdisplayed. •
• Duringthecleaningprocess,
thekitchen
shouldbewellventilatedto helpeliminatenormalodorsassociatedwithdean.•
A coolingfanwill automatically
turn on
duringcleaning.If it doesnot operate,
contactanauthorizedservicer.
Wipe up sugaryand acidic spillovers
The coolingfanwill automatically
turn on
duringcleaningand some bakingoperations.It isusedto keepinternalpartsonthe
controlpanelcool.Thefanwill automaticallyturn offwhenpartshavecooled.The
withsuse.
such
assweetpotatoes,
tomatoorcycle.
mill<. ins.
It is Odorswill
normalfor lessen
flare-ups,
mokingor
based
saucespriorto aself-clean
flamingto occur duringcleaningif the
Porcelainenamelis acid resistant,not
oven is heavilysoiled. It is better to
acidproof andmaydiscolorif spillsare
cleanthe ovenregularlyratherthanto
not wipedupbeforea self-cleancycle.
wait untilthereisaheavybuildupof soiL • A whitediscolorationmayappearafter
• Wipe upexcessgreaseor spiJlovers
to
cleaningif acidor sugaryfoodsarenot
preventsmokeandflare-ups,
wipedup beforethe cleancycle. This
fanmaycontinueto operateafterthe oven
hasbeenturnedoff. Thisisnormal,
. It is normalfor partsof the rangeto
becomehot duringacleancycle.Avoid
14
discolorationis normaland will NOT
affectperformance.
CARE
CLEANING, CONT.
CLEANING PROCEDURES
CAUTIONS:
• Be sure appliance is off and all
parts are coolbeforehandlingor
cleaning.This is to avoid damageand possibleburns,
• To preventstainingor discoloration,
cleanappliance
aftereachuse.
• If a part is removed,be sure it is
correctlyreplaced,
BURNERGRATES
COOKTOP-PORCELAIN
• Wash with warm, soapywater and a
ENAMEL
nonabrasive,
plastic,scrubbingpador in
thedishwasher.
Forstubbornsoils,clean
with a soap-filled,nonabrasive,
plastic
pador CooktopCleaningCreme*(Part
# 2000000I)** anda sponge,
Porcelain
enamelisglassfusedonmetaland
maycrack or chipwith misuse.It is acid
resistant,not acid proof. All spillovers,
especiallyacidor sugarspillovers,should
bewipedupimmediately
with a dry cloth.
, Thegratesaremadeofporcelainoncast
ironandareverydurable,however,they
will graduallylose their shine and/or
discolor.Thisisdueto exposureto high
temperaturesfrom the gasflame,
• WhencooK,
washwithsoapywater,rinse
anddry.
BROILER PAN AND ]_NSERT
• Never wipeoff a warm or hot surface
witha dampcloth.Thismaycausecrackingor chipping.
• Placesoapyclothoverinsertandpan;let CLOCK AND CONTROL
, Never useoven cleaners,abrasiveor
soak to loosen soil.
PAD AREA
• Washin warmsoapywater.Usescouringpadto removestubbornsoil.
• Toactivate"ControlLock"for cleaning,
seepage12.
• Broilerpanandinsertcanbecleanedin
dishwasher.
• Wipe with a dampclothanddry.
BURNER HEADS
• The surfaceburner headsare removable. The cap portion of the headis
porcelainandthe
port area
isaluminum.
Washthe
burnerheads
in the
sinkwith
milddetergentanda plasticscrubber.
• Checkto besureallportsareopen.To
opendoggedports,insertastraightpin
directlyintoeachport. Do not enlarge
or distortthe port.
• Whenreplacingthe burnerheads,carefullyalignthe tab onthe burner basewith
the indentationin the head. The two
pinswill fit in the slotswhenthe tab is
alignedwith the indentation.
• Glasscleanersmaybeusedifsprayedon
a clothfirst. DO NOT spray directly
on control pad and display area.
FINISHES
• Whencool,cleanwith soapandwater,
rinse and dry.
• Usea glasscleaneranda softcloth.
NOTE: Neveruseovencleaners,
abrasive
or causticliquidor powderedcleanserson
plasticfinishes.Thesecleaningagentswill
• For stubbornsoil, usemildly abrasive scratchor marfinish.
cleaning
agents
suchasBon
Ami*.
Do
NOT use
abrasive
cleanerssuch
assteel
NOTE: To preventstainingor discolorawoolpadsorovencleaners.Theseprod- tion, wipe upfat, greaseor acid(tomato,
uctswill permanentlydamagethe surlemon,vinegar,milk,fruit juice,marinade)
face.
immediately
with a dry papertowel.
CONTROL KNOBS
OVEN WINDOW _
• Removeknobsin the OFFpositionby
pullingforward.
GLASS
Indentation
DOOR --
• Avoidusingexcessive
amountsof water
whichmayseepunderor behindglass
causingstaining.
• Washwith soapandwater.Rinsewit_
dearwateranddry. Glasscleanercar
beusedif sprayedon a clothfirst.
e
Do not useabrasivematerialssucha:
cleaners
asthey
will scratch
scouringpads,
steelwool
or glass.
powderec
I_n_or
Sl/RNER 13ASE
DOOR HANDLE -- PLASTIC
CONTROL PANEL
• Wipe with dampcloth,
• Wash,rinseanddry. Do not useabraNOTE."
Whenburnerheads
areremovedfor
sirecleaning
agentsastheymayscratch
cleaning,
do not spillliquidsthroughthe
the finish.
holesintheburnerbase.
.,,.,.,o
• Turn on each burner to be surethe
oo0
polo
knobshavebeencorrectlyreplaced,
.......
causticcleaningagents on exterior finish
of range.
I$
OVEN INTERIORS
• Followinstructionson page14to seta
self-cleancycle,
restoreeaseofmovement,
thenwipeoff
excessoil. Likewise,placeone dropof
vegetableoil on rackguides,
OVEN RACKS
NOTE: Remove
ovenracksduringa clean
cycle,
lf racksareleftintheoven,itmayimpair
• Cleanwith soapywater,
functionandtheywilldiscolor,
• Removestubbornsoil with cleansing STORAGE DRAWER -powderor soap-filled
scouringpad.Rinse
and dry.
PAINTED ENAMEL
• Ifovertime,racksdonotslideouteasily,
wipethe rack edgeand rack support
with a smallamountof vegetableoil to
• When cool, wash with warm soapy
water, rinse and dry. Never wipe a
warmor hot surfacewith adampcloth
asthismaydamagethe surfaceandmay
causea steamburn.
• For stubborn soil, usemildlyabrasive
cleaningagentssuch as baking soda
pasteor Bon Ami.* Do not useabrasive,causticor harshcleaningagents
suchassteelwool padsor ovencleaners. These products will scratch or
permanentlydamagethe surface.
NOTE: Use dry towel or cloth to
wipe up spills, especially acid or
sugary
discolor
or dull spills.
if soilSurface
is not may
immediately
removed. This is especially imporrant/or white surfaces.
* Brandnamesfor cleaningproductsareregisteredtrademarksof the respectivemanufacturers.
** To orderdirect,call1-800-688-8408.
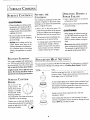
JAINTENANCE
OVEN
DOOR
CAUTION:
2. Graspdoorateachside.
Donotusethe
door handleto lift door.
NOTE:Theovendooronanewrangemay
feel "spongy"when it is closed.This is
normalandwill decreasewith use.
3, Lift up evenlyuntil door clearshinge
arms.
• NEVERplaceexcessive
weighton or
stand on an open oven door. This
could causethe rangeto tip over,
breakthe door, or injurethe user.
TO PROTECT THE OVEN DOOR
• NEVER attempt to open or close
door or operateovenuntil door is
properlyreplaced.
TO REPLACE:
WINDOW:
I. Do not hit the glasswith pots, pans,
furniture,toys,or otherobjects.
• NEVER placefingersbetweenhinge
I. Graspdoorat eachside.
2 Do not closethe ovendoor untilthe
2, Alignslotsinthe door with the hinge
armsonthe range.
ovenracksarein place.
Scratching,
hitting,jarringor stressing
the
glassmayweakenitsstructurecausing
an
increased
riskof breakage
at a laterdate.
andfrontovenframe.Hingearmsare
springmounted.Ifaccidentally
hit,the
hingewillslamshutagainst
ovenframe
andcouldinjureyourfingers.
TO REMOVE:
I. Whencool,openthe ovendoorto the
first stopposition(openedaboutfour
inches).
OVEN
3, Slidethe door down onto the hinge
armsuntilthedooriscompletely
seated
on the hinges.Pushdownon the top
cornersof thedoorto completely
seat
door on hinges.Door shouldnot appearcrooked.
16
WINDOW
IJ INTENANC,
co T.
LEVELING LEGS
ELECTRICAL
• Besure the anti-tip bracket secures one
CONNECTION
ofthe rear levelinglegsto thefloor.This
OVEN BOTTOM
I_---_
tallytipping,
require electrical
power areequipped
The rangeshouldbe levwith a three-prong
bracketpreventstherangefromacciden- Appliances
which__
eledwheninstalled.If the
grounding
plug
rangeisnot level,turnthe
whichmustbepluggeddirectlyintoapropplasticlevelinglegs,Ioerlygroundedthree-hole120volt electricotedateachcarcoloutlet,
her of the
range, until
Alwaysdisconnect
powerto appliance
before
rangeislevel,
servicing,
Thethree-pronggroundingplugoffersprotection againstshockhazards.DO NOT
OVEN LIGHT
CUT OR REMOVE THE THIRD
GROUNDING PRONG FROM THE
Toassurethe proper replacementbulb
POWER CORD PLUG.
is used,order bulb from Maytag Customer Service. Call 1-800-688-8408, If anungrounded,
two-holeor other type
askforpartnumber74OO4458-halogen electricaloutlet is encountered,it is the
bulb.
personal responsibility of the appliante owner to have the outlet reCAUTION:
placed with a properly grounded
three.hole electrical outlet.
• Disconnectpower to rangebefore
replacinglightbulb.
• Allowoven to cool before replacing
lightbulb.
• Makesurebulbcoverandbulbarecool
before touching,
TO REPLACE OVEN LIGHT BULB:
I. When oven is cool, use fingertips to
graspedgeof bulbcover.Pullout and
remove,
2. Carefullyremoveold bulb by pulling
straight out of ceramicbase.
STORAGE
DRAWER
The storage drawer at the bottom of the
range is safe and convenient for storing
metalandglasscookware. DO NOT store
plastic,paperware,food or flammablematerial in this drawer. Remove drawer to
cleanunder range.
TO REMOVE: Emptydrawer thenpull
out to thefirststopposition.Liftupfrontof
drawer andpull to the secondstop position. Graspsidesand lift up andout to
removedrawer,
3. Toavoiddamagingordecreasingthelife TOREPLACE:Fittheendsofthedrawer
of the newbulb,do not touchthe bulb glidesonto the rails.Lift up drawerfront
with barehandsor fingers.Holdwith a andgentlypushinto firststopposition.Lift
cloth or paper towel. Pushnew bulb up and continueto slidedrawer to the
prongsstraight into smallholes of closedposition,
ceramicbase.
4. Replacebulb cover by snappinginto
place,
5. Reconnectpower to the range.Reset
clock.
17
Theovenbottom on a conventionalbake
NOTE: The oven bottom on convection models is not removable.
TO
rangemayberemovedfor
REMOVE:Whencool,re-_
easiercleaning.
movethe ovenracks.Slide
t_
two catches, Iocotedat eachrear
cornerof the oven
bottom,towardthe
t3.,.
front of the oven.
Lift the rear edgeof the oven bottom
slightly,then slideit backuntil the front
edgeof the ovenbottom clearsthe oven
front frame.Removeoven bottom from
oven,
TO REPLACE:Fitthe front edgeof the
oven bottom into the ovenfront frame.
Lower
the rear
of the
ovenlocktheoven
bottom and
slidethetwo
catches
backto
bottom inplace.
TO REMOVE RANGE
FOR CLEANING AND
SERVICING
I. Shut off gas supplyto appliance.
2. Disconnect electrical supply to appliance, ifequipped.
3. Disconnect gas supply tubing to applionce.
4. Sliderangeforwardto disengage
from
anti-tipbracket.(Seelnstallationlnstructionsfor locationof bracket.)
5. Reverseprocedureto reinstall.If gas
line hasbeendisconnected,checkfor
gasleaksafterreconnection.
NOTE: A
qualifiedservicershoulddisconnect
andreconnectgassupply.
6, To preventaccidental
tipping,rangemust
be securedto the floor by slidingrear
levelingleginto anti-tipbracket.
EFORE
FOR
MOST
You
CALL FOR SERVICE
CONCERNS I TRY
THESE FIRST:
• Checkif ovencontrolshavebeenproperlyset.
I
• Aluminumfoilwasincorrectlyused.NeverTHE FLAMEIS UNEVEN•
linethe broiler insertwith foil.
• Burnerportsmaybeclogged.
• Trimexcessfatfrommeatbeforebroiling.
, A soiledbroiler panwasused.
SURFACE BURNER FLAME IS
• Checkto be sure plugissecurelyinserted
YELLOWIN COLOR.
into receptacle.
OVEN WILL NOT SELF-CLEAN.
• Contact an authorizedJenn-Airservicer.
• Checkor re-setcircuitbreaker. Check • Checktomakesurethecycleisnotsetfor • Someyellowtipsontheflameareacceptor replacefuse.
a delayedstart.Seepg. 14.
ablewhenusingLPgas.
• Checkpowersupply.
• Checkif door is closed.
THERE IS A STRONG ODOR OR
PARTORALLOFAPPLIANCEDOES
OVENDIDNOTCLEAN
PROPERLY. LIGHT SMOKE WHEN OVEN IS
NOT WORK.
• Longercleaningtime maybe needed.
• Checkif surfaceand/or oven controls
havebeenproperlyset.Seepgs.4 & 7.
• Checkifovendoorisunlockedafterself-
, Excessivespillovers,
especiallysugaryand/• This is normalfor a newrangeandwill
or acidicfoods,were not removedprior
disappearafter a few uses. Initiatinga
to the self-cleancycle,
cleancyclewill "burnoff' theodorsmore
TURNED ON•
cleancycle. See pg. 14.
OVEN DOOR WILL NOT UNLOCK
quickly.
• Checkifovenissetfor adelayedcookor"
• Turning on a ventilationfan will help
clean program.See pgs.8 & 14.
AFTER SELF-CLEAN CYCLE.
remove the smoke and/or odor.
• CheckifControlLockisactivated.Seepg., Oveninterior isstillhot. AIIowaboutone , Excessive
foodsoilsontheovenbottom.
12.
hourfortheoventocoolafterthecompleUsea self-cleancycle.
tionof a self-clean
cycle.Thedoorcanbe
BAKING RESULTS ARE NOT AS
opened when the LOC indicatorword is A FAN SOUND CAN BE HEARD
EXPECTED OR DIFFER FROM
not displayed.
PREVIOUS OVEN.
MOISTURE COLLECTS ON OVEN
• Makesurethe ovenvent hasnot been
WINDOW OR STEAMCOMES FROM
blocked.Seepg. 13for location.
OVEN VENT.
• Checkto makesurerangeis level.
• Thisisnormalwhencookingfoodshighin
• Temperatures
oftenvarybetweenanew
moisture.
oven and an old one. As ovens age, the
oventemperatureoften"drifts" andmay • Excessive
moisturewasusedwhencleanbecomehotteror cooler.Seep&12for
ingthewindow.
instructionson adjustingthe oventern- SURFACE BURNER FAILS TO
perature.NOTE:It isnot recommended LIGHT.
to adjustthe temperatureif onlyoneor
two recipesarein question.
• Checkto besureburnerportsor ignition
• Checkthatoventemperaturetsdecreased portsare not clogged.Seepage15.
by25° Fwhenconvertbaking.
• Checktobesureignitorisdryandclicking,
• See"Cooking MadeSimple" booklet
for more informationon bakewareand
baking,
• Thisisthe coolingfanandisnormaI.The
fanwillcontinuetorunafteruseuntilthe
ovencoots.
"F" PLUS A NUMBER AND THE
MESSAGE: "CALL AN AUTHORIZED SERVICER OR 800-6881100."
• This iscalledafaultcode. Ifafaultcode
appearsin the displayand beepssound,
pressthe Cancel pad. If the faultcode
andbeepscontinue,disconnectpowerto
the appliance.
Wait afew minutes,then
reconnectpower.Iffaultcodeandbeeps
still continue,disconnectpowerto the
Burnerwill not lightifignitorisdamaged, applianceandcallanauthorizedservicer.
soiledor wet. Ifignitordoesn'tclick,turn • If the oven is heavilysoiled,excessive
controlknobOFF.
flare-upsmayresultinafaultcodeduring
acleancycle.PressCancelpadandallow
• Makesureovenispreheated
whenrecipe SURFACE BURNER FLAME LIFTS
or directionsrecommendpreheat,
theovento coolfor onehour,thenreset
OFF PORTS.
thecleancycle.Ifthefaultcodeandbeeps
• Checkrackpositions.Seepage13.
• Checkto besurea panis sittingon the
still continue,disconnectpowerto the
FOOD IS NOT BROILING PROgrate above,
applianceand callanauthorized servicer.
PERLYOR SMOKES EXCESSIVELY. . Contact an authorized Jenn-Airservicer.
• Check oven rack positions.Food maybe
too closeto flame.
18
ENN-AIR
RANGE
WARRANTY
WHAT IS NOT COVEREDBv THESE
WARRANTIES:
Full One Year Warranty - PaRs and Labor
Forone (I) year fromthe originalretailpurchase
date,anypartwhichfailsinnormalhomeusewill be
repairedor replacedfreeof charge.
LimitedWarranties - Parts Only
I. Conditionsanddamages
resultingfrom anyof the following:
a.lmproper installation,delivery,or maintenance.
b.Anyrepair,modification,
alteration,or adjustmentnot authorizedbythe
manufactureror anauthorizedservicer.
c. Misuse,abuse,accidents,or unreasonable
use.
d.lncorrect electriccurrent,voltage,or supply.
e.lmpropersettingof anycontrol.
Second Year - After the first year from the
originalpurchasedate,partswhichfail in normal
homeusewill berepairedor replacedfreeof charge
for the part itself,withthe ownerpayingallother
costs,includinglabor,mileageandtransportation.
2 Warrantiesarevoid if the originalserialnumbershavebeenremoved,
altered,or cannotbereadilydetermined.
Third Through Fifth Year - Fromthe original
purchasedate, parts listed below which fail in
normalhomeusewill berepairedor replacedfree
of chargefor the partitself,withthe ownerpaying
5. Thecostof serviceor servicecallto:
a. Correct installationerrors.
b. Instructthe useronthe proper useof the product.
c. Transportthe applianceto the servicer.
allother costs,includinglabor,mileageandtransportation,
• Electronic Controls
6. Consequential
or incidentaldamages
sustainedbyanypersonasa result
ofanybreachof thesewarranties.Somestatesdonot allowthe exclusion
orlimitationofconsequentialorincidentaldamages,
sotheaboveexclusion
• ElectricHeating Elements:Surface,
broiland
bakeelementsongasandelectriccookingappliances.
• Sealed Gas Burners
CanadianResidents
The abovewarrantiesonly cover an appliance
installedin Canadathathasbeencertifiedor listed
by appropriatetest agencies
for complianceto a
NationalStandardof Canadaunlessthe appliance
wasbroughtinto Canadadueto transferof residencefromthe UnitedStatesto Canada.
LimitedWarranty OutsidetheUnitedStates
and Canada- Parts Only
Fortwo (2)yearsfromthe dateof originalretail
purchase,anypartwhichfailsin normalhomeuse
will berepairedor replacedfreeof chargefor the
part itself,with the ownerpayingall other costs,
includinglabor,mileage
andtransportation,
Thespecific
warranties
expressed
abovearetheONLY
warranties
providedbythemanufacturer.
Thesewarrantiesgiveyouspecificlegalrights,andyoumayalso
haveotherrightswhichvaryfromstateto state.
3. Lightbulbs.
4. Productspurchasedfor commercialor industrialuse.
maynot apply.
IF
You
NEED
SERVICE
• Callthe dealerfrom whomyourappliancewaspurchased
or callMaytag
Appliances
SalesCompany,Jenn-AirCustomerAssistance
at 1-800-688II00 to locateanauthorizedservicer.
Besureto retainproof of purchaseto verifywarrantystatus.Referto
WARRANTYfor further informationon owner'sresponsibilitiesfor
warrantyservice.
If the dealeror servicecompanycannotresolvethe problem,write to
MaytagAppliances
SalesCompany,Attn: CAIR®Center,P.O.Box2370,
Cleveland,
TN 37320-2370,
or catl1-800-688-I 100.
U.S.customersusingTTYfor deaf,hearingimpairedor speechimpaired,
ca111-800-688-2080.
NOTE: Whenwriting or callingabouta serviceproblem,pleaseinclude
the followinginformation:
a. Your name,addressandtelephonenumber;
b. Modelnumberandserialnumber;
c. Nameandaddressof your dealeror servicer;
d. A cleardescriptionof the problemyouarehaving;
e. Proofof purchase(salesreceipt).
• User'sguides,servicemanualsandpartsinformationare availablefrom
MaytagAppliances
SalesCompany,Jenn-AirCustomerAssistance.
19