1
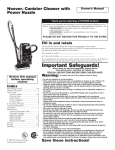
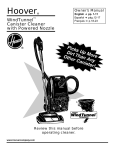
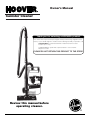
Owner’s Manual
Canister Cleaner
Thank you for selecting a HOOVER® product
This cleaner was inspected and packaged carefully before being shipped from the
factory. If you should happen to need assistance during assembly or operation, call
1-800-944-9200 for automated referral of authorized service outlet
locations (U.S. only)
1-330-499-9499 to speak with a representative in our Consumer
Response Center.
PLEASE DO NOT RETURN THIS PRODUCT TO THE STORE.
Review this manual before
operating cleaner.
®
Fill in and retain
The model and serial number are located on the bottom of the cleaner.
For your personal records, please enter the COMPLETE model and serial number in the spaces provided and retain this information.
Your cleaner is model___________________________________
and has serial number___________________________________
It is suggested that you attach your sales receipt to this owner’s manual.
Verification of date of purchase may be required for warranty service of your
Hoover product.
Important Safeguards!
Index
Assembling Cleaner .............................3
Cleaner Descriptions ............................4
How To Use
Cleaning Tools ..................................4
Rug and Floor Nozzle.......................4
To Clean Stairs..................................4
If You Have a Problem ..........................6
Important Safeguards...........................2
Lubrication ............................................6
Maintenance
Cleaning Secondary Filter ...............6
Obstructions .....................................6
Replacing Bag...................................5
Service ...................................................6
© 1991 The Hoover Company
www.hoovercompany.com
When using an electrical appliance, always follow
basic precautions, including the following:
READ ALL INSTRUCTIONS BEFORE USING THIS APPLIANCE
Warning:
To reduce the risk of fire, electric shock or injury:
• Do not use outdoors or on wet surfaces.
• Close supervision is necessary when any appliance is used by or near children.
Do not allow vacuum cleaner to be used as a toy or to run unattended at any time.
• Keep hair, loose clothing, fingers, and all parts of body away from openings, and
moving parts.
• Do not pick up anything that is burning or smoking, such as cigarettes, matches,
or hot ashes.
• Do not use to pick up flammable or combustible liquids such as gasoline or use in
areas where they may be present.
• Avoid picking up hard, sharp objects with the cleaner. They may damage the cleaner and the bag.
• Do not use without dust bag or filters in place. Change bag frequently when
picking up very fine materials such as powder.
• Use extra care when cleaning on stairs.
• Do not put any object into openings. Do not use with any opening blocked; keep
free of dust, lint, hair, or anything that may reduce air flow.
• Do not pull or carry by cord, use cord as a handle, close door on cord or pull cord
around sharp edges or corners. Do not run appliance over cord. Keep cord away
from heated surfaces.
• Always disconnect cord from electrical outlet before servicing the cleaner.
• Unplug cleaner when not in use. Turn off all controls before unplugging.
• Do not unplug by pulling on cord. To unplug, grasp the plug, not the cord. Never
handle plug or appliance with wet hands.
• The use of an extension cord is not recommended.
• Do not use with damaged cord or plug. If appliance is not working as it should, has
been dropped, damaged, left outdoors, or dropped into water, take it to a Hoover
Factory Service Center or Authorized Hoover Warranty Service Dealer (Depot).
• Use vacuum cleaner only for its intended use as described in the instructions. Use
only attachments recommended by The Hoover Company; others may cause
hazards.
Save these instructions!
2
1. Assembling cleaner
Questions or Concerns?
The Hoover Company wants to quickly resolve any concerns about your cleaner or questions regarding its use. Look on the list provided with the product for
your local Hoover Factory Service Center or in the Yellow Pages under
“Vacuum Cleaners - Household” for the nearest Authorized Hoover Warranty
Service Dealer (Depot) or call:
1-800-944-9200 for an automated referral of authorized service outlet
locations (U.S. only)
OR
1-330-499-9499 to speak with a representative in the Hoover Consumer
Response Center.
PLEASE DO NOT RETURN THIS PRODUCT TO THE STORE OR SEND IT
TO NORTH CANTON FOR SERVICE.
Carton contents
1-1
Unpack cleaner from carton and
identify the parts shown. Remove
and dispose of the packing.
A
A. Canister cleaner
B. Rug and floor nozzle
B
C
C. Filter bag
D. Extension wands, hose, and
cleaning tools
D
Attaching parts
1-2
1-3
1-4
A
Connect hose
Insert hose end with latch (A) into
opening of cleaner, lining up largest
projection on hose with largest notch of
opening. Turn hose to the right to tighten.
To disconnect, depress latch, and turn
hose to the left.
Attach wands, tools and
nozzle
To attach hose to extension wand or tool,
turn plastic latch ring on hand grip until
outer slot lines up with inner slot.
Push hand grip down onto wand or tool
so that button projection fits into slot.
Turn latch ring to lock into place.
Attach second wand and nozzle or tools
in the same manner.
Reverse procedure to remove wand, tool
or nozzle.
3
2. How to use
Cleaner description
The assembled cleaner will look like
the drawing.
2-1
12
1. Furniture nozzle
2. Crevice tool
3. Cover: remove by lifting up top
section of carrying handle and pulling
forward.
4. Carrying handle
5. Rug and floor nozzle
6. Large wheels: provide easy towing,
when cleaner is pulled over carpet,
area rugs and door sills.
11
9
1
2
4
12. Hand grip
Operate cleaner only at voltage
specified on data plate on
bottom of cleaner.
This cleaner is intended for
household use.
7. Tool rack: provides storage for
crevice tool, dusting brush, and
furniture nozzle.
10
3
11. Extension wands: used
with rug and floor nozzle. If
added length is desired when
using cleaning tools, add one or
both wands to hose.
8
7
6
8. ON-OFF switch: located on top of
cleaner.
9. Dusting brush
10. Plastic latch ring: rotate to lock
hand grip to extension wands or
cleaning tools.
5
ON-OFF switch
2-2
2-3
Rug and floor nozzle
Cleaning stairs
Depress switch to turn cleaner ON
or OFF.
To reduce the risk of electric shock, this
appliance has a polarized plug (one
blade is wider than the other). This plug
will fit in a polarized outlet only one way.
If the plug does not fit fully in the outlet,
reverse the plug. If it still does not fit,
contact a qualified electrician to install
the proper outlet. Do not change the
plug in any way.
The combination rug and floor nozzle
has been designed to do an efficient
cleaning job on both carpet and hard
surface floors.
The nozzle also has constant edge
cleaning for cleaning along baseboards
and solid furniture.
Hard surface floor
Lock brushes to clean bare floors by
sliding indicator to BARE FLOOR.
Rugs
Release brushes to clean rugs or carpet
by sliding indicator to RUG.
4
Clean stairs by placing cleaner on end
as shown. Clean stairs from bottom
to top.
Cleaning tools
A variety of useful cleaning tools, made
for your cleaner is shown.
The hard floor tool is available at
additional cost from your Authorized
Hoover Dealer, a Hoover Factory Service
Center, by writing to The Hoover
Company, North Canton, Ohio 44720,
or through The Hoover Company online
at www.hoovercompany.com
Continued
➜
Selecting tools
2-4
2-5
1. Crevice tool may be used in tight
spaces, corners and along edges in
such places as dresser drawers, upholstered furniture, stairs and baseboards.
1
3
2
4
3. Maintenance
Familiarize yourself with these home
maintenance tasks as proper use
and care of your cleaner will ensure
continued cleaning effectiveness.
Filter bag
When to replace
Check the bag occasionally. When bag
is filled with dirt, the cleaner will not
operate efficiently. Discard used bag.
CAUTION: Very fine materials, such
as face powder, cornstarch, fireplace
ashes or fireplace soot may seal the
paper bag and may cause it to burst
even though it is only partially filled
with dirt. When the cleaner is used to
remove material of this nature, the
bag should be changed frequently.
2. Furniture nozzle may be used for
upholstered furniture, draperies, tapestry, mattresses, clothing, automobile
interiors and carpeted stairs.
3. Dusting brush may be used for
carved furniture, table tops, books,
lamps, lighting fixtures, venetian blinds,
baseboards, shutters and registers.
Attaching tools
*4. Hard floor tool may be used for
walls and very irregular hard surface
floors such as brick and slate.
Attach tools to hand grip and plastic
wands by rotating latch ring until slots
align; insert tool and rotate ring to lock.
*Available at additional cost
To remove tool, reverse above procedure.
Centers, or through The Hoover Company
online at www.hoovercompany.com. When
purchasing bags, be sure to give the
model number of your cleaner.
3-1
What to buy
For improved cleaning effectiveness, use
Genuine HOOVER® Allergen Filtration
Type K disposable filter bags with your
cleaner.
Regular HOOVER® Type K disposable filter bags will also fit your cleaner.
To assure that your HOOVER cleaner
operates at peak performance, it is
imperative that you use only genuine
HOOVER paper bags distributed by
The Hoover Company. HOOVER bags
can be identified by the trademarks —
Where to buy
®
Replacing the filter bag
Disconnect cleaner from electrical
outlet.
Remove cover by lifting top section of
carrying handle and pulling forward.
®
Bags may be purchased from your local
Authorized Hoover Dealers (Depots),
Leading Retailers, Hoover Factory Service
3-2
3-3
Depress latch and lift out used bag.
To install new bag, place notches on bag
collar (at bag edge) into groove inside
lower front edge of cleaner.
3-4
Pull collar forward until latch snaps into
collar. Open folds of bag. Replace cover.
5
3-5
Rug and floor nozzle
Clearing obstructions
To maintain cleaning effectiveness of
your rug and floor nozzle, the brushes
may need to be replaced occasionally.
See your nearest Hoover Factory Service
Center or Authorized Warranty Service
Dealer for new brushes.
Remove larger objects from carpet and
floor surfaces before vacuuming to help
prevent obstructions in hose, wands or
nozzle connector, and to maintain
cleaning effectiveness of your cleaner.
Lubrication
Secondary filter
The motor is equipped with sealed ball
bearings. The addition of lubricant could
cause damage. Therefore, do not add
lubricant to the motor bearings.
To check for blockages, proceed with
each of the following steps until the
blockage is found.
1. Turn cleaner OFF and disconnect
wands from hand grip.
4-1
Cleaning filter
Disconnect cleaner from electrical
outlet.
The secondary filter is located inside the
cleaner behind the filter bag. To remove
filter, first remove cover of cleaner, then lift
out filter. Clean filter by rinsing it in water.
When dry, slide filter back into position.
Do not operate cleaner without the
secondary filter in place.
Service
To obtain approved HOOVER service and
genuine HOOVER parts, locate the nearest
Hoover Factory Service Center or
Authorized Hoover Warranty Service
Dealer (Depot) by:
• checking the Yellow Pages under
“Vacuum Cleaners - Household”
OR • checking the list of Factory Service
Centers provided with this cleaner
OR • calling 1-800-944-9200 for an
automated referral of authorized
service outlet locations (U.S. only)
OR • checking the Service section of The
Hoover Company online at
www.hoovercompany.com
Please do not send your cleaner to
The Hoover Company in North Canton
for service, this will only result in delay.
If further assistance is needed, contact
The Hoover Company Consumer
Response Center, North Canton, Ohio
44720 Phone: 330-499-9499.
In Canada, contact Hoover Canada,
Burlington, Ontario L7R 4A8,
Phone: 1-800-263-6376.
Always identify your cleaner by the
complete model number when requesting
information or ordering parts. (The model
number appears on the bottom of the
cleaner.)
6
4. If you have
a problem
If a minor problem occurs, it usually can
be solved quite easily when the cause is
found by using the check list below.
Problem: Cleaner won’t run
Possible cause
Possible solution
• Not firmly plugged in
• Plug in firmly
• No voltage in wall plug
• Check fuse or breaker
• Blown fuse/tripped breaker
• Replace fuse/reset breaker
2. Turn cleaner ON and check hose end
for suction. Turn cleaner OFF and
remove any blockages.
3. Remove nozzle from wands and
attach wands to hose. Turn cleaner ON
and check for suction.
Turn cleaner OFF and remove any
blockages.
4-2
A
Problem: Cleaner suction low
Possible cause
Possible solution
• Bag full
• Replace paper filter bag
• Bag not opening
• Open bag by pulling folds
• Blockage in wands, hose or
nozzle connector
• Remove blockage (see “Clearing
obstructions” section)
• Secondary filter dirty
• Clean filter
Problem: Nozzle won’t pick up
Possible cause
Possible solution
• Nozzle brush worn
• Replace brush
4. Before attaching nozzle to wands,
check nozzle connector (A).
Look into nozzle connector and remove
any blockages.
HOOVER y
son marcas registradas
THE HOOVER COMPANY, NORTH CANTON, OHIO 44720
HOOVER and
®
HOOVER et
sont des marques déposées
THE HOOVER COMPANY, NORTH CANTON, OHIO 44720
are registered trademarks
THE HOOVER COMPANY, NORTH CANTON, OHIO 44720
4-98 S3410, S3531
Litho USA
56513-346
7