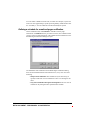
1
Telecommunication Systems Division
Release 4.0
Administrator Manual
June 2001
BETA DOCUMENT - PRELIMINARY & CONFIDENTIAL
Publication Information
Toshiba America Information Systems, Inc.,
Telecommunication Systems Division, reserves the right,
without prior notice, to revise this information publication for
any reason, including, but not limited to, utilization of new
advances in the state of technical arts or to simply change the
design of this document.
Further, Toshiba America Information Systems, Inc.,
Telecommunication Systems Division, also reserves the right,
without prior notice, to make such changes in equipment
design or components as engineering or manufacturing
methods may warrant.
SCS-AG-ADMR4-VC
4016190
Version C, June 2001
© Copyright 2001
Toshiba America Information Systems, Inc.
Telecommunication Systems Division
All rights reserved. No part of this manual, covered by the
copyrights hereon, may be reproduced in any form or by any
means—graphic, electronic, or mechanical, including
recording, taping, photocopying, or information retrieval
systems—without express written permission of the publisher
of this material.
Strata is a registered trademark of Toshiba Corporation.
Microsoft, Windows, and Windows NT are registered
trademarks of Microsoft Corporation. SQL Server is a
trademark of Microsoft Corporation. Adobe and Acrobat are
registered trademarks of Adobe Systems Incorporated.
Dialogic is a registered trademark of Dialogic Corporation.
Trademarks, registered trademarks, and service marks are the
property of their respective owners.
CONTENTS
Chapter 1. Overview of Upgrading and Configuring Strata CS
Welcome to Strata CS...........................................................................1-2
Significant Strata CS features........................................................... 1-2
What’s New in Strata CS 4.0.................................................................1-3
Miscellaneous new features.............................................................. 1-6
What’s automatically upgraded......................................................... 1-6
Before you begin ...................................................................................1-7
Changes in Strata CS from version 2.1 to 3.0 or later ..........................1-7
Changes in Strata CS 3.0 or later .........................................................1-8
Configuring Strata CS for the first time .................................................1-9
Where to get help................................................................................1-10
Strata CS documentation ................................................................ 1-10
Your Strata CS provider .................................................................. 1-11
Chapter 2. The Strata CS Administrator
About the Strata CS Administrator ........................................................2-2
Linking computers and phones ......................................................... 2-2
Logging on to the Administrator ........................................................ 2-3
The Administrator interface ...................................................................2-3
Working in views ............................................................................... 2-5
Performing basic actions in the Administrator.......................................2-8
Creating items ................................................................................... 2-8
Deleting items.................................................................................... 2-9
Renaming items ................................................................................ 2-9
Copying and pasting items................................................................ 2-9
Customizing columns ........................................................................ 2-9
Working with voice files................................................................... 2-10
Chapter 3. Strata CS Licenses
About Strata CS licenses ......................................................................3-2
Entering licenses...................................................................................3-2
Removing licenses ................................................................................3-4
Chapter 4. Defining System Settings
About system settings ...........................................................................4-2
Customizable settings ....................................................................... 4-2
The General tab ....................................................................................4-3
Defining business hours and holidays .............................................. 4-5
The Call Log tab....................................................................................4-8
BETA DOCUMENT - PRELIMINARY & CONFIDENTIAL
Logging internal calls......................................................................... 4-8
Archiving the Call Log ....................................................................... 4-8
The Storage tab .................................................................................. 4-10
Allocating disk space....................................................................... 4-11
Moving voice files ............................................................................ 4-11
The Dialing tab.................................................................................... 4-12
Defining special access codes ........................................................ 4-12
Setting dialing timeouts ................................................................... 4-13
The Emergency tab ............................................................................ 4-14
Using standard 911 service with Strata CS .................................... 4-14
Using extended 911 service with Strata CS.................................... 4-14
How emergency numbers are handled........................................... 4-15
The Other tab...................................................................................... 4-17
Setting dial-by-name directory options............................................ 4-17
Presenting a confirmation menu before voice mail......................... 4-18
Setting up Microsoft Exchange synchronization ............................. 4-18
Setting the minimum password length ............................................ 4-20
Chapter 5. Managing Trunks and Spans
About trunks.......................................................................................... 5-2
Trunk types........................................................................................ 5-2
Adding trunks..................................................................................... 5-3
Naming trunks ................................................................................... 5-3
Monitoring trunks ............................................................................... 5-3
Deleting trunks................................................................................... 5-3
Configuring trunks................................................................................. 5-4
Inbound and outbound calls and hunt groups................................... 5-4
Matching trunk settings with your phone company........................... 5-4
Routing inbound calls on a trunk....................................................... 5-5
Placing outbound calls on a specific trunk ........................................ 5-5
ANI/DID digit collection ......................................................................... 5-5
Collecting ANI/DID digits ................................................................... 5-6
Using DID with Robbed Bit T1 lines.................................................. 5-7
Using DID with analog lines .............................................................. 5-7
Setting up fax routing............................................................................ 5-7
Customizing fax routing..................................................................... 5-8
The Trunks view ................................................................................... 5-8
About digital and Internet spans........................................................ 5-9
Adding an analog trunk....................................................................... 5-10
Setting up digit collection on an analog trunk ................................. 5-11
Adding a digital Robbed Bit T1 span .................................................. 5-13
Configuring signaling using the Robbed Bit T1 Experimenter........ 5-13
STRATA CS ADMINISTRATOR MANUAL
BETA DOCUMENT - PRELIMINARY & CONFIDENTIAL
Adding the Robbed Bit T1 span in the Trunks view........................ 5-13
Using a signaling template .............................................................. 5-15
Entering trunk defaults for a span ................................................... 5-16
Adding a digital ISDN or CAS span.....................................................5-17
Adding a digital ISDN BRI span ..........................................................5-18
Optimizing your ISDN settings ............................................................5-19
Enabling ISDN Megacom support.......................................................5-20
Adding an Internet span ......................................................................5-21
Modifying Strata CS IP codecs ....................................................... 5-22
Fine-tuning your IP connection ...................................................... 5-24
Chapter 6. Managing Users and Stations
The Users view .....................................................................................6-2
About users and roles ...........................................................................6-4
Users ................................................................................................. 6-4
Roles ................................................................................................. 6-6
Setting user options ..............................................................................6-6
Where to set user options ................................................................. 6-6
About adding a user ..............................................................................6-7
Adding a user at the telephone ......................................................... 6-7
Adding a user in the User dialog box ................................................ 6-8
Adding a user by using a template.................................................... 6-9
The General tab ....................................................................................6-9
The Recordings tab.............................................................................6-15
Allocating space for voice messages.............................................. 6-15
Allocating space for recorded greetings and voice titles ................ 6-15
Enabling Microsoft Exchange Server synchronization ................... 6-16
Setting up call recording.................................................................. 6-16
The Notifications tab ...........................................................................6-17
Setting e-mail notification ................................................................ 6-18
Setting pager notification................................................................. 6-18
Scheduling notifications .................................................................. 6-19
Defining a schedule for e-mail and pager notification..................... 6-20
Setting up custom time rules........................................................... 6-22
The Call Handling tab..........................................................................6-24
Setting up call forwarding................................................................ 6-25
Mobile phone issues with forwarded calls ...................................... 6-27
Call forwarding and voice mail ........................................................ 6-27
Forwarding calls over Centrex/PBX trunks ..................................... 6-27
Listing a user in the dial-by-name directory .................................... 6-27
The Phone tab.....................................................................................6-28
Activating features on Toshiba digital phone ................................6-30
CONTENTS
BETA DOCUMENT - PRELIMINARY & CONFIDENTIAL
The Dialing tab.................................................................................... 6-33
Setting account code modes........................................................... 6-35
The Permissions tab ........................................................................... 6-37
New Role ............................................................................................ 6-39
The Other tab...................................................................................... 6-40
Managing users .................................................................................. 6-41
Recording the new user’s voice title and greeting .......................... 6-41
Updating users’ mail, greeting, and disk usage totals .................... 6-42
Moving a user .................................................................................. 6-42
Deleting a user ................................................................................ 6-42
Managing stations............................................................................... 6-43
Adding a station............................................................................... 6-43
Supported phones ........................................................................... 6-43
Supporting different types of CLASS phones ................................. 6-43
Viewing station activity .................................................................... 6-44
Chapter 7. Managing Workgroups
About Workgroups ................................................................................ 7-2
Workgroups view............................................................................... 7-3
Creating a Workgroup........................................................................... 7-3
Using the General tab ....................................................................... 7-3
Using the Dialing tab ......................................................................... 7-4
Chapter 8. Managing Outbound Calls
About dialing services........................................................................... 8-2
Dialing service types ......................................................................... 8-2
The Dialing Services view..................................................................... 8-4
How you can use dialing services......................................................... 8-5
Access codes........................................................................................ 8-7
Tips on access codes and names for services ................................. 8-7
How Strata CS uses access codes................................................... 8-8
Setting default access codes for ringbacks....................................... 8-9
Adding a Phone Number dialing service............................................. 8-10
Adding a Centrex/PBX Extension service........................................... 8-12
Adding an Internet Address service.................................................... 8-14
Adding an Internet-to-Phone Number service .................................... 8-15
Adding an Internet-to-Centrex/PBX Extension service ....................... 8-17
Trunks tab........................................................................................ 8-18
Location Settings tab .......................................................................... 8-20
Codecs tab ...................................................................................... 8-21
Dialing Exceptions tab..................................................................... 8-22
Permissions tab ............................................................................... 8-26
STRATA CS ADMINISTRATOR MANUAL
BETA DOCUMENT - PRELIMINARY & CONFIDENTIAL
Routing services..................................................................................8-29
How you can use routing services .................................................. 8-30
An example of routing rules ............................................................ 8-31
Adding a routing service.................................................................. 8-33
Routing Rules tab............................................................................ 8-35
Add a new routing rule .................................................................... 8-36
Defining patterns to match the dialed digits.................................... 8-38
Adding new routing variables.......................................................... 8-38
Defining a new number for a routing rule........................................ 8-40
Chapter 9. Handling Inbound Calls
About call routing ..................................................................................9-2
Using auto attendants ..........................................................................9-4
About auto attendants ....................................................................... 9-4
The Auto Attendants view ................................................................. 9-6
Setting up an auto attendant .................................................................9-7
Creating a new auto attendant.......................................................... 9-7
Defining menu choices...................................................................... 9-8
Scheduling transfers and greetings ................................................ 9-14
Setting up hold music...................................................................... 9-17
Deleting auto attendants ................................................................. 9-17
Routing calls directly to a user ............................................................9-18
Routing calls to workgroups ................................................................9-19
Chapter 10. Using Account Codes
About account codes...........................................................................10-2
Setting up account codes....................................................................10-3
Setting general account code options............................................. 10-3
Setting a user’s account code modes............................................. 10-4
Creating a text file of valid account codes ...................................... 10-5
Using a verbal account code prompt .............................................. 10-7
How users enter account codes..........................................................10-7
Indicating the end of an account code ............................................ 10-8
Viewing account codes in the Call Log ...............................................10-8
Generating account code reports........................................................10-8
Chapter 11. Monitoring & Backing Up
About monitoring and backing up your Strata CS system...................11-2
Using the Device Monitor ....................................................................11-3
Monitoring station activity................................................................ 11-3
Monitoring trunk activity................................................................... 11-4
Enabling and disabling trunks ......................................................... 11-5
CONTENTS
BETA DOCUMENT - PRELIMINARY & CONFIDENTIAL
Restarting stations or trunks............................................................ 11-6
Starting a new Server log ................................................................ 11-7
Using the Call Log .............................................................................. 11-7
Displaying a specific number of Call Log entries .......................... 11-10
Exporting the Call Log ................................................................... 11-11
Monitoring database and disk usage ................................................ 11-11
Backing up Strata CS ....................................................................... 11-11
Restoring Strata CS data .............................................................. 11-12
Shutting down the Strata CS Server ............................................. 11-14
Moving a Strata CS Server to another machine ........................... 11-14
Viewing the Windows Event Log ...................................................... 11-14
Strata CS-related Windows Event Log messages........................ 11-15
T1 alarms....................................................................................... 11-19
Using the Maintenance Log view...................................................... 11-20
Reporting problems .......................................................................... 11-20
The problem report package ......................................................... 11-21
Using the Problem Report Wizard................................................. 11-22
Reporting Strata CS Server problems .......................................... 11-23
Reporting workstation application problems ................................. 11-24
Reporting distributed problems ..................................................... 11-24
Chapter 12. System Prompts
About system prompts ........................................................................ 12-2
The System Prompts view .................................................................. 12-2
Controlling the prompt display......................................................... 12-3
Managing system prompts.................................................................. 12-3
Recording system prompts ................................................................. 12-5
Recording system prompts professionally ...................................... 12-6
Recording over system prompts yourself........................................ 12-8
Testing system prompts ................................................................ 12-10
Localizing the telephone commands ................................................ 12-12
Chapter 13. Configuring Internet Telephony Support
About IP telephony and Strata CS...................................................... 13-2
Internet telephony requirements ..................................................... 13-2
Placing calls to H.323 terminals such as NetMeeting......................... 13-2
Placing calls to Net Meeting from the Strata CS Client .................. 13-3
Placing calls to Net Meeting from a Strata CS phone..................... 13-3
Calling Strata CS from H.323 terminals such as Net Meeting........ 13-4
Using Windows 2000 Phone Dialer as an H.323 terminal.............. 13-6
Enhancing a Web page with a “Call Us!” button ................................. 13-6
Connecting two Servers using IP Gateways....................................... 13-7
STRATA CS ADMINISTRATOR MANUAL
BETA DOCUMENT - PRELIMINARY & CONFIDENTIAL
Overview of creating an IP Gateway connection............................ 13-8
Illustration of an IP Gateway ........................................................... 13-9
Creating an IP Gateway .................................................................. 13-9
Creating IP Gateway dialing services ........................................... 13-13
Calling Strata CS extensions on the remote Server ..................... 13-13
Placing phone calls through the remote Server............................ 13-15
Placing Centrex/PBX calls through the remote Server................. 13-16
Creating Gateway users to unify two Strata CS Servers.............. 13-17
Fine-tuning your IP connection .........................................................13-20
Chapter 14. Extending Strata CS
About extending Strata CS..................................................................14-2
Extending Strata CS with off-the-shelf applications ............................14-3
In-band signaling applications......................................................... 14-3
TAPI applications ............................................................................ 14-3
Extending Strata CS with third-party devices......................................14-4
The Strata CS SDK .............................................................................14-8
Installing the Strata CS SDK ........................................................... 14-9
The Strata CS SDK Application Programming Interfaces .............. 14-9
The IVR Plug-in API ........................................................................ 14-9
The Device Status API .................................................................. 14-11
The Client API ............................................................................... 14-12
Appendix A. Strata CS Configuration Settings
About Strata CS configuration settings ................................................ A-2
Strata CS Server registry settings........................................................ A-2
Strata CS Workstation applications registry settings ........................... A-7
Current User Settings........................................................................A-8
Local Machine Settings .....................................................................A-9
Strata CS Server language locale settings ........................................ A-11
Locale definitions.............................................................................A-11
Defining custom tones........................................................................ A-12
Disabling Dialogic devices ................................................................. A-13
Dialogic device names ....................................................................A-15
Toshiba device names................................................................. A-17
Dialogic voice board settings ............................................................. A-18
VoiceBoard settings ........................................................................A-18
VoiceBoard channel settings ..........................................................A-20
E1 and T1 board settings ................................................................A-23
ISDN Megacom service settings.....................................................A-24
MSI station board settings...............................................................A-25
Using the Strata CS Settings program ............................................... A-26
CONTENTS
BETA DOCUMENT - PRELIMINARY & CONFIDENTIAL
Logging in ........................................................................................A-26
Viewing current values ....................................................................A-27
Changing key values .......................................................................A-28
Modifying other supported Strata CS settings ................................A-28
Appendix B. Command Line Options
Appendix C. IP Gateway Configuration Worksheet
Appendix D. Using Quicknet and E-Tel with Strata CS
Using Quicknet hardware with Strata CS ............................................ D-2
Using Quicknet with Internet Switchboard 3.5 ................................. D-2
Using Quicknet with Internet Switchboard 4.0 ................................. D-6
Calling a Quicknet card from Strata CS ......................................... D-10
Forwarding your calls to a Quicknet phone.................................... D-10
Using the Strata CS Client with a Quicknet card ........................... D-11
For More Information...................................................................... D-11
Contacting Quicknet ....................................................................... D-11
Using an E-tel FreeRide IP phone with Strata CS ............................. D-12
Setting up a FreeRide phone to connect to Strata CS................... D-12
Transferring and handling calls with a FreeRide phone ................ D-16
E-tel contact information................................................................. D-17
Appendix E. Using Performance Counters
The Strata CS performance counters ...................................................E-2
Viewing performance counters in Windows NT/2000 ...........................E-2
Glossary .................................................................................... Gloss-1
Index .......................................................................................... Index-1
STRATA CS ADMINISTRATOR MANUAL
BETA DOCUMENT - PRELIMINARY & CONFIDENTIAL
CHAPTER 1
CHAPTER 1
OVERVIEW OF UPGRADING AND
CONFIGURING STRATA CS
CHAPTER CONTENTS
Welcome to Strata CS . . . . . . . . . . . . . . . . . . . . . . . . . . . . . . . . . . 1-2
What’s New in Strata CS 4.0 . . . . . . . . . . . . . . . . . . . . . . . . . . . . . 1-3
Before you begin . . . . . . . . . . . . . . . . . . . . . . . . . . . . . . . . . . . . . . 1-7
Changes in Strata CS from version 2.1 to 3.0 or later . . . . . . . . . . 1-7
Changes in Strata CS 3.0 or later. . . . . . . . . . . . . . . . . . . . . . . . . . 1-8
Configuring Strata CS for the first time . . . . . . . . . . . . . . . . . . . . . . 1-9
Where to get help . . . . . . . . . . . . . . . . . . . . . . . . . . . . . . . . . . . . . 1-10
BETA DOCUMENT - PRELIMINARY & CONFIDENTIAL
Welcome to Strata CS __________________________________
Toshiba’s Strata CS is dramatically improving the way business professionals
communicate. An intelligent phone system designed specifically for small- to
medium-sized businesses and branch offices, Strata CS combines the power of
the desktop computer with the most advanced communications technology
available. With Strata CS you have unprecedented call management that lets you
maximize your productivity while controlling costs. Strata CS offers you more
functionality than a stand-alone PBX, and at a lower price.
Significant Strata CS features
The following is a partial list of significant Strata CS features.
n
n
Fault Tolerant architecture is designed to keep your phone system up
and running. If the network or your desktop PC goes down, your phone
lines are unaffected. Even in the case of a Strata CS server malfunction or
power outage, your critical phone lines will stay open.
Multi-line call control gives you an easy graphical way to place calls,
transfer, put on hold, send to voice mail, set up conference calls and more.
n
n
n
Verbal menus guide you through all call handling and user management
tasks, so you can use Strata CS even without a PC.
Full-featured voice mail lets you create caller-specific greetings, log in
remotely, and manage your voice messages graphically. You can also
easily call back the person who left you a message.
E-mail and pager notification of incoming voice mail, with or without
voice mail attachments.
n
n
n
n
n
Advanced caller identification via PIN or caller ID lets you easily screen
every call and message, either visually or by announcing the caller's name
when you answer the phone.
Call recording lets you record conversations of calls or conferences.
Personal Status lets you create vacation, out-of-the-office, and other
status settings for ringer, greeting, and routing list behavior when you are
not able to answer calls.
The Strata CS Web Client enables users with a browser to access voice
mail or manage personal settings from anywhere in the world over the
Internet or from non-Windows platforms in the office.
“Follow-me” call forwarding features routing lists that try several
locations to find you. You can set different routing lists for the callers you
choose.
n
Call logging lets each user see a record of his or her own calls, while
giving administrators access to the company’s complete log.
1-2
STRATA CS ADMINISTRATOR MANUAL
BETA DOCUMENT - PRELIMINARY & CONFIDENTIAL
n
n
n
n
n
n
n
Automatic call distribution (ACD) lets you create call center
workgroups, keep a call log of workgroup activity, and use the Call Center
Reporter to analyze workgroups, agents, hold time and more.
Scheduled auto attendants allow greetings to change and calls to be
routed to different extensions at different times of the day and days of the
week.
Built in Internet H.323 gateway saves money by routing calls over the
Internet or your intranet. It supports tie-lines between branch offices, and
even allows your customers to call you from a Web page.
TAPI Service Provider and Contact Manager Assistant let you use
Act!, Outlook, GoldMine, or other TAPI-compliant applications,
including Front Office 2000, with Strata CS. You can place calls and
receive screen-pop identifications when you receive calls.
The Strata CS SDK lets you extend Strata CS functionality. The IVR
Plug-in API lets you integrate IVR and call control applications that pass
caller input or database information to Strata CS users, place outbound
calls; process initial command line arguments defined in the
Administrator; and, for security purposes, determine if the caller is a
Strata CS “logged in” user. Use the Client API for applications that
require a subset of the functions available in the Client (for example,
monitoring the status of stations and trunks).
Multi-lingual system prompts let both users and callers select the
language of their choice for Strata CS's verbal commands.
Support for CLASS feature phones with caller ID displays, caller ID on
Call Waiting and message waiting lights.
What’s New in Strata CS 4.0 _____________________________
New features in Toshiba Strata CS 4.0 include the following:
n
Completely Rewritten Client Application. The Strata CS Client has
been rewritten using a collection of COM objects that make it more
modular, internationalized, and flexible. Third-party developers can use
these COM objects to build custom applications that can harness all of the
Client’s data and call information. Third-party applications will be able to
do anything the Client does.
n
Monitor Calls from Multiple Users and Queues. You can click the
appropriate tab in the Call Monitor and see any calls that ring your phone,
calls in ACD workgroups, or call center queues. You can also share your
Call Monitor with other users, so that they can cover your calls as needed.
You no longer need to run multiple Clients to see and manage these calls.
CHAPTER 1. OVERVIEW OF UPGRADING AND CONFIGURING STRATA CS
BETA DOCUMENT - PRELIMINARY & CONFIDENTIAL
1-3
n
n
Call Center Queues. Call center queues can be configured to distribute
calls to agents using a variety of distribution algorithms. Agents can sign
in/out of one or more queues, see calls in queues and take them before
being offered them, if they so choose. Queues can prompt callers for
Customer ID numbers or other data. On-hold messages can be highly
customized or can change based on caller data.
Calling workgroups. You can call a public workgroup’s extension to ring
all of the users’ phones in the workgroup at the same time.
n
n
More drag and drop. Drag a message or Call Log entry onto the Call
Monitor to call it back.
Ringback numbers. Your callers can enter a ringback number by
pressing a specific key while they listen to the voice-mail greeting. This
feature is useful when caller ID is inaccurate or is not available at all.
n
Dialing toolbar. You can quickly enter a number to dial using the optional
dial toolbar without opening
n
n
Drag and drop to make calls, transfers, conferences, and more. You
can drag a call onto an extension to transfer the call to that extension. To
call an extension, drag the extension from the extension pane onto the Call
Monitor. To create a conference, hold down the shift key drag and a call
onto another call and drop.
Integrated Call Monitor and Extensions panes . The optional
Extensions pane shows the system’s extensions (users, and so forth) along
with the Call Monitor’s calls. The optional Calls pane lets you manage
your calls in any Strata CS view, such as the Voice Messages view. See
the View menu to turn the optional panes on or off.
n
Personal Status. You can indicate to your co-workers what you are
doing by setting your personal status to Available, In a Meeting, Out of
the Office, Do Not Disturb, and more. You can see everyone’s personal
status in the extensions pane, just like they can see your personal status.
You can create personal status settings that can change your forwarding
number, your active greeting, your routing list, or prevent your phone
from ringing. You can also create custom personal statuses such as On
Sales Call, or At Client Presentation. Personal statuses can be selected
from the Client or from the phone while you are on the road. Personal
statuses replace Do Not Disturb in previous versions.
n
Workgroups. Workgroups are collections of extensions, such as all the
users in Sales and Marketing. Workgroups appear as tabs in the extensions
pane so that you can quickly find people in different departments. To pick
up a ringing phone within workgroups you are a member of, pick up the
phone and press *99. Users can create personal workgroups that help them
quickly find people they work with. Workgroups can group related items
1-4
STRATA CS ADMINISTRATOR MANUAL
BETA DOCUMENT - PRELIMINARY & CONFIDENTIAL
together such as auto attendants, queues, IVR plug-ins, and contacts.
Workgroups replace Contact Groups used in previous versions.
n
Call Rules. You can change the way calls are handled based on who calls
or a particular date or time. For example, you can automatically send
specific calls to voice mail during lunch, change your personal greeting
after hours, or forward calls from your mother or special co-workers to
your cell phone. Call rules replace people rules and Smart Do Not Disturb
used in previous versions.
n
n
Hands-free Answering. You can leave your phone off-hook while
waiting for calls and will not hear dial tone. When a new call arrives, you
hear a zip-tone and then you are connected to the call. Connect an
overhead speak to a station using hands-free answering to set up a paging
system.
Permissions. User groups provide administrators a way to assign
permissions to a group of people, similar to Class of Service. Users can
now inherit permissions from one or more groups, such as Administrators
or Users.
n
Account Codes. You can use account codes to help track calls back to
one or more “accounts” such as clients or customers you may need to bill.
Account codes can be used for any call, are saved in the Call Log, and can
be reported on using the Call Center Reporter. Administrators can
optionally force that users enter account codes for every call on a per user
basis. Account codes can be optionally verified against a list configured
by the Administrator.
n
New Call Center Reporter. The new Call Center Reporter does not
require any roll-ups or separate roll-up database. All reports are run
directly from the Strata CS server and get the latest data. Several new
reports allow better analysis of call center, trunk, and agent performance
and behavior.
n
Custom greetings in Routing Lists. You can define special greetings
between routing list actions, such as “Attempting to call my cell phone,
please stay on the line.” You can also define special greetings for final
actions.
n
n
Streamlined Place Call To Dialog Box. The Place Call To dialog box
has been optimized so that in one place you can easily make calls to any
contact, extension or number, including your own home, mobile, and
other personal numbers.
Easily forward your calls to your remote phone. If caller ID is
available, you can press *51 from the account menu to forward your calls
to a remote phone, such as your cell phone.
CHAPTER 1. OVERVIEW OF UPGRADING AND CONFIGURING STRATA CS
BETA DOCUMENT - PRELIMINARY & CONFIDENTIAL
1-5
n
n
n
Voice Mail Bookmarks. Drag the green bookmarks to save the beginning
and end of an important segment of a voice message. After you set the
bookmarks, the message is only played between the bookmarks.
Windows Performance Counters. Strata CS now includes several
standard Windows performance counters that can show you the number
of calls in use, total calls handled, and more.
Custom folders and folder list. You can organize your contacts,
messages and greetings in different folders. Display the folder list to
quickly jump between any folder or view.
n
Share Contacts. Share any contacts folder to other users, just like you
can share any messages folder or your Call Monitor.
n
Custom data easier to use. Custom data items are now centrally defined
in the Administrator so that it is easy to see a list of all custom variables
that can be associated with calls.
Miscellaneous new features
n
n
n
n
Voice messages include a list of all recipients, allowing you to reply to all
of them at once
5-Digit extensions are now supported
Extensions and station IDs are automatically suggested when you create
new users
All Call Log entries are displayed at once in the Client, instead of a page
at a time
What’s automatically upgraded
The following items are upgraded automatically when you upgrade to Strata CS
4.0:
n
Contact groups become workgroups
n
Permissions
n
Routing lists and greetings
n
People rules become call rules
n
Personal status
n
Phone settings
n
Folders
n
Custom data
1-6
STRATA CS ADMINISTRATOR MANUAL
BETA DOCUMENT - PRELIMINARY & CONFIDENTIAL
Before you begin ______________________________________
Before you begin to upgrade Strata CS or configure it for the first time, first
complete the following tasks as described in Strata CS Installation &
Maintenance Manual:
n
Install the Dialogic hardware and drivers in the Strata CS server computer.
n
Physically connect your trunks and stations.
n
Install the Strata CS server and Strata CS Administrator.
This chapter outlines the tasks you must perform after installation. Detailed
instructions for each step are in subsequent chapters.
Changes in Strata CS from version 2.1 to 3.0 or later _________
The following administrative tasks have changed in this version of Strata CS:
n
Licensing has changed. See “About Strata CS licenses” on page 3-2.
n
Outbound calls are now made via dialing services that you create and
configure in the Administrator. See “About dialing services” on page 8-2.
n
n
n
Dialing services provide a way to restrict the numbers that can be dialed by
all users. You can also define exceptions to further restrict or permit user
dialing. See “Permissions tab” on page 8-26.
Location settings and dialing rules are now part of dialing services, and must
be defined separately for each service. See “Location Settings tab” on
page 8-20.
Business hours and holidays are now defined centrally. This lets both users
and administrators set up features that change automatically according to
schedules. If you previously had auto attendants that included business
and holiday hours, those hours must be redefined in system settings. See
“Business Hours” on page 4-5.
n
Based on the business hours you defined, auto attendants can now include
scheduled greetings or transfers (to other auto attendants or IVR
Plug-ins). See “Scheduling transfers and greetings” on page 9-14.
n
Robbed Bit T1 signalling is now defined using the Robbed Bit T1
Experimenter instead of the Administrator. See Installing Strata CS for
more information.
n
Fax routing is now set up at the trunk level. Several other trunk properties
have moved to dialing services. See “Setting up fax routing” on page 5-7.
n
An ACD workgroup user can be configured so that only supervisors can put
an ACD workgroup in Do Not Disturb. See the Strata CS Call Center
Administrator Guide for details.
CHAPTER 1. OVERVIEW OF UPGRADING AND CONFIGURING STRATA CS
BETA DOCUMENT - PRELIMINARY & CONFIDENTIAL
1-7
n
n
You can no longer enter # at the beginning of a phone number to bypass least
cost routing for the call. Instead, create another dialing service that does
not use least cost routing.
*8900 to hear a station ID has been replaced with *0.
Wherever possible, Strata CS 2.1 settings are upgraded seamlessly to work with
new Strata CS features.
For example, dialing permissions—set for dialing services and users—have
replaced the old dialing exceptions, previously set only at the user level. When
you upgrade to this version of Strata CS, all Strata CS 2.1 users are assigned the
permissions setting Use dialing service permissions except the following, and
their preexisting dialing exceptions are carried forward.
Changes in Strata CS 3.0 or later _________________________
The following administrative tasks have changed in this version of Strata CS:
n
n
Workgroups. You can arrange users into specific workgroups (such as
Sales, Marketing, Gold Box Team, and so forth) to better manage calls, or
share specific information. Workgroups can also include auto attendants,
queues, IVR plug-ins, and contacts. Workgroups replace Contact Groups.
See Chapter 7, “Managing Workgroups.”
Account codes. Account codes can be entered on any call to help track
calls back to one or more “accounts” such as clients or customers you may
need to bill for. Account codes are saved in the call log and can be
reported on using the Call Center Reporter. Administrators can optionally
force account codes be entered for every call on a per user basis. Account
codes can be set up to be verified against a list of valid account codes.See
Chapter 10, “Using Account Codes.”
n
User permissions. You can now assign permissions to groups of users.
User groups provide administrators a way to assign permissions to a group
of people, similar to Class of Service. Users can now inherit permissions
from one or more groups such as Administrators or Users. See “The
Permissions tab” on page 6-37.
n
New Call Center Reporter. Accessible from the Client’s Tools menu, the
new reporter does not require any roll ups or separate roll-up database. All
reports are run directly from the Strata CS server and get the latest data.
Several new reports allow better analysis of call center, trunk, and agent
performance and behavior.
n
Windows Performance Counters. Strata CS now includes several
standard Windows performance counters that can show you the number
of calls in use, total calls handled, and more.
1-8
STRATA CS ADMINISTRATOR MANUAL
BETA DOCUMENT - PRELIMINARY & CONFIDENTIAL
n
Custom data easier to use. Custom data items are now centrally defined
in the Administrator so that it’s easy to see a list of all custom variables
that can be associated with calls.
n
Miscellaneous new features and changes.
n
n
Five-digit extensions are now supported
Extensions and station IDs are automatically suggested when
creating new users
n
Personal Status has replaced Do Not Disturb (DND)
n
Call Rules replace People Rules and Smart DND
n
In the Client, Extensions view replaces User view
Wherever possible, Strata CS 3.x settings are upgraded seamlessly to work with
new Strata CS features.
Configuring Strata CS for the first time ____________________
When you are configuring your Strata CS system for the first time, you must
complete the following tasks, which are explained in detail in the remainder of
this manual:
1.
Add licenses.
To configure Strata CS, you must first enter the license codes that your
system requires. See “About Strata CS licenses” on page 3-2.
2.
Configure system settings.
For more information, see “About system settings” on page 4-2.
3.
Configure your trunks.
In addition to physically connecting your trunks, you must define them
in the Trunks view in the Administrator in order to use them, and
configure the trunk behavior. This is true for every kind of
trunk—analog, T1, E1 or Internet. See “Adding trunks” on page 5-3.
4.
Create users.
Define your Strata CS users, assign them stations, extensions and
passwords, record their voice titles, set up their voice mailboxes and
define their permissions. See “About adding a user” on page 6-7.
5.
Set up outbound call handling.
See Chapter 8, “Managing Outbound Calls.”
6.
Set up call routing for inbound calls.
You can have calls sent to an operator or directly to users via direct
inward dial (DID) without going through the main auto attendant. See
CHAPTER 1. OVERVIEW OF UPGRADING AND CONFIGURING STRATA CS
BETA DOCUMENT - PRELIMINARY & CONFIDENTIAL
1-9
“About call routing” on page 9-2.
Optionally, you can route calls to an auto attendant that answers
incoming calls automatically and lets callers enter extensions to connect
with users. If you want to use auto attendants, record a greeting and
prompts for each one, and set up any options that your menu should
offer the caller. Apply scheduling to your auto attendants to have them
change with your business hours. See “About auto attendants” on page
9-4.
Where to get help______________________________________
You can get help from Strata CS documentation and from your Strata CS
provider.
Strata CS documentation
Strata CS includes the following documentation:
n
n
n
n
n
n
n
Strata CS Administrator Manual—This manual contains instructions for
configuring and managing your Strata CS system, including Strata CS
Administrator system settings, licenses, trunks and stations, users, dialing
services, auto attendants, inbound and outbound call routing, and system
prompts.
Strata CS Client User Guide—This manual describes how to use Strata
CS’s Client Web Client, Contact Manager Assistant, TAPI Service
Provider features, and the telephone commands.
Strata CS Call Center Administrator Guide—This manual contains
complete instructions for setting up and maintaining a call center in which
multiple agents answer calls to a single number, such as a sales or
customer support department.
Strata CS Quick Reference Card—This wallet-sized card is a convenient
reference for the Strata CS telephone commands.
Strata CS Quick Reference Guide—This quick-start guide for new users
describes basic Strata CS commands for the Client and telephone.
Strata CS SDK and API Programming Guide—This manual describes
how to extend Strata CS's built-in features using the Client API, the IVR
Plug-in API, and Device Status API.
Online Help—Context-sensitive Help is available in all Strata CS
applications. To access Help in the current dialog box, click the Help
button or press F1.
1-10
STRATA CS ADMINISTRATOR MANUAL
BETA DOCUMENT - PRELIMINARY & CONFIDENTIAL
This table list the available components in the Strata CS documentation set and
the presentation format:
Document
Printed
Online
Book
Acrobat (PDF)
Strata CS Installation &
Maintenance Manual
Yes
Yes
Yes
Strata CS Administrator
Manual
Yes
Yes
Yes
Strata CS Client User Guide
Yes
Yes
Yes
Strata CS Call Center
Administrator Guide
Yes
Yes
Yes
SDK and API Programming
Guide
Yes
No
Yes
Strata CS Quick Reference
Card
Yes
Yes
Yes
Notes:
n
n
The online books are available in HTML-based format. To access an
online book, click Help > Online Books from any Strata CS application.
The PDF-formatted books are available on the Strata CS CD, in the
Manuals directory. Use Adobe Acrobat Reader—also available on the
Strata CS CD—to view and print these files.
Your Strata CS provider
Contact your Strata CS provider for technical support. To view your provider's
contact information, choose Help > About from the Strata CS Client or
Administrator.
CHAPTER 1. OVERVIEW OF UPGRADING AND CONFIGURING STRATA CS
BETA DOCUMENT - PRELIMINARY & CONFIDENTIAL
1-11
CHAPTER 2
CHAPTER 2
THE STRATA CS ADMINISTRATOR
CHAPTER CONTENTS
About the Strata CS Administrator . . . . . . . . . . . . . . . . . . . . . . . . . 2-2
The Administrator interface . . . . . . . . . . . . . . . . . . . . . . . . . . . . . . 2-3
Performing basic actions in the Administrator . . . . . . . . . . . . . . . . 2-8
BETA DOCUMENT - PRELIMINARY & CONFIDENTIAL
About the Strata CS Administrator________________________
The Strata CS Administrator is a Microsoft Windows program that lets you
configure, monitor, and manage your Strata CS system. Through the
Administrator you can control the following items:
n
System settings (see Chapter 4)
n
Trunk configuration (see Chapter 5)
n
User configuration and permissions (see Chapter 6)
n
Workgroups (see Chapter 7)
n
Dialing services (see Chapter 8)
n
Auto attendants (see Chapter 9)
n
System prompts (see Chapter 12)
n
IVR Plug-ins (see Chapter 14)
n
Queues (see Strata CS Call Center Administrator Guide)
This chapter describes logging on to the Administrator, using the interface of the
Administrator, and performing basic actions in the Administrator.
Linking computers and phones
Strata CS runs simultaneously on two communication systems:
n
Your internal telephone wiring. Connects the Strata CS Server to users’
telephones around the office.
n
A Microsoft TCP/IP Local Area Network. Connects the Strata CS Server
to users’ Windows PC workstations. This network is required if users will
be running the Client or the Administrator on a computer other than the
Server. This is the typical setup in most installations.
For information about the network and phone wiring in your office, consult the
appropriate vendor. For details on configuring the network for Strata CS, see
Strata CS Installation & Maintenance Manual.
2-2
STRATA CS ADMINISTRATOR MANUAL
BETA DOCUMENT - PRELIMINARY & CONFIDENTIAL
Logging on to the Administrator
1.
Choose Start > Strata CS Administrator. The Log on dialog box opens.
2.
If you want to change your default Server or station ID, click Options
to view the expanded dialog box. You also can log on as a different user
to access this dialog box.
3.
Type your User name.
A user called “Admin” exists by default. To create other administrators,
you must add users to whom you give Administrator permissions (see
“The Permissions tab” on page 6-37).
4.
Type your Password. The Administrator password is set to 100 at
installation. Change the password for the Administrator user after you
log on for the first time (see “Creating a password” on page 6-14).
5.
If you want to log on to a different Server than the one already selected
under Server, choose a Server name on the drop-down list.
6.
If you want to change your station ID, enter a valid station ID in the
Station ID field.
7.
Click OK.
For information about logging on to the Administrator using command line
options, see Appendix B.
The Administrator interface _____________________________
The Strata CS Administrator interface is composed of views (see “Working in
views” on page 2-5). Views are used in Strata CS to configure, manage, and
monitor the components of the Strata CS system.
CHAPTER 2. THE STRATA CS ADMINISTRATOR
BETA DOCUMENT - PRELIMINARY & CONFIDENTIAL
2-3
This section introduces the Strata CS Administrator’s views, explains how to
work in views, and shows you how to perform basic tasks in them. It also explains
how to work with voice files.
View
Users
Description
See
Add, edit, and delete Strata CS users.
Includes changing passwords and
Chapter 6,
allotting users disk space for voice
“Managing Users and Stations”
mail messages and greetings.
Create and manage workgroups
Workgroups (groups of related extensions or
contacts).
Chapter 7
“Managing Workgroups”
Trunks
Manage the phone lines that connect
Chapter 5,
your Strata CS system to the public
“Managing Trunks and Spans”
phone network.
Dialing
Services
Create and manage dialing services,
which define outbound trunk
Chapter 8,
allocation and dialing behavior for
“Managing Outbound Calls”
groups of trunks.
Device
Monitor
View and manage Strata CS stations Chapter 11,
and trunks.
“Monitoring & Backing Up”
Auto
Attendants
Create, modify, and delete auto
attendants.
Queues
Create and manage groups of agents Strata CS Call Center
in Strata CS call center queues.
Administrator Guide
System
Prompts
Listen to and change recordings used
Chapter 12,
for standard system prompts and
“System Prompts”
auto attendants.
Call Log
View a record of the calls made on
the system.
Chapter 9,
“Handling Inbound Calls”
Chapter 11,
“Monitoring & Backing Up”
2-4
STRATA CS ADMINISTRATOR MANUAL
BETA DOCUMENT - PRELIMINARY & CONFIDENTIAL
View
Description
Manage Strata CS IVR Plug-ins, the
interactive voice response
IVR Plug-Ins applications that share the Dialogic
hardware with the Strata CS Server.
See
Chapter 14,
“Extending Strata CS”
Create, modify, and delete IP
Gateways, by which you can
Chapter 13
exchange
calls
with
remote
Strata
CS
“Configuring Internet
IP Gateways
Servers over the Internet or an IP
Telephony Support”
network.
Maintenance Tracks specific actions and presents
details about each action
Log
Chapter 11
“Monitoring & Backing Up”
Working in views
To open a view, click its button in the vertical view bar on the left side of the
Administrator window. To change the location of a button on the view bar, drag
and drop it.
You can also open a view by clicking one of the choices under View on the main
menu bar.
The main part of a view contains rows of the items that pertain to that view. For
example, in the Users view, each Strata CS user appears as an item on a row. In
some views, such as the Users or the Trunks view, you can double-click an item
to open the related dialog box for the item. For example, in the Users view,
CHAPTER 2. THE STRATA CS ADMINISTRATOR
BETA DOCUMENT - PRELIMINARY & CONFIDENTIAL
2-5
double-clicking an item opens the User dialog box for that user. This dialog box
contains Strata CS settings for that user. Some views, such as the Call Log and
Device Monitor, display read-only information that cannot be expanded or
changed.
Using commands in a view
A command always affects the item or items that are selected. You can access
commands in a view by the following methods:
n
n
n
Selecting an item or items and choosing a command from the view’s
menu. For example, in the Trunks view, click the Trunks menu and
choose a command.
Selecting an item or items and clicking a toolbar button (see the next
table).
Right-clicking an item in a view and choosing a command from the
shortcut menu. Right-clicking an item selects it and opens the shortcut
menu, so it is often the fastest way to perform an action.
Using the Administrator toolbar
The Administrator toolbar is located on the main menu bar in each view. It gives
you quick access to Administrator commands that are also available through the
Administrator menus.
Some toolbar buttons change depending on the view. For example, the buttons in
the next table for new items in Strata CS each appear as the first button in their
respective views.
New User
Create a new user.
New Workgroup
Create a new workgroup.
New Trunk
Create a new trunk or digital span.
2-6
STRATA CS ADMINISTRATOR MANUAL
BETA DOCUMENT - PRELIMINARY & CONFIDENTIAL
New Auto Attendant
Create a new auto attendant.
New Queue
Create a new queue.
New Dialing Service
Create a new dialing service.
New IVR Plug-in
Create a new IVR Plug-in.
Print
Print the contents of the current view.
Delete
Delete the selected item.
Refresh
Refresh and update the current view.
Help
Open the Strata CS Administrator Help.
CHAPTER 2. THE STRATA CS ADMINISTRATOR
BETA DOCUMENT - PRELIMINARY & CONFIDENTIAL
2-7
Performing basic actions in the Administrator
This section shows you how to perform the following basic actions in most views:
n
Creating items
n
Deleting items
n
Renaming items
n
Copying and pasting items
n
Customizing columns
Creating items
In any view, clicking the first toolbar button opens a dialog box for a new item
associated with that view. For example, in the Users view, clicking the first
toolbar button opens a User dialog box with the title Untitled - User.
You can also click the small arrow to the right of the first toolbar button and use
the menu that opens to create any new Administrator item. The arrow is available
in every view.
You also can create all items from any available view. To create a new item,
choose File > New.
To create a new item that is based on an existing item
1.
Select the item on which you want to base a new item, such as a user in
the Users view.
2.
Choose Edit > Copy.
3.
Choose Edit > Paste. A User dialog box opens. Copy of <item that you
copied> appears in the title bar of the dialog box. It contains a duplicate
of the selected item’s information. You can use the this information as
a basis for creating a new item.
4.
Enter the information about the new item in the dialog box.
5.
Click OK to save the changes as a new copy.
2-8
STRATA CS ADMINISTRATOR MANUAL
BETA DOCUMENT - PRELIMINARY & CONFIDENTIAL
Deleting items
1.
Right-click the item. To select more than one item, use SHIFT-click or
CTRL-click.
2.
Choose Edit > Delete. In the confirmation dialog box that opens, click
Yes or No.
Renaming items
Items in some views cannot be renamed, for example, Call Log items cannot be
renamed.
To rename an item
1.
Double-click the item to open its dialog box.
2.
In the Name field, type a new name for the item.
3.
Click OK.
Copying and pasting items
Copying a row in any view places the information about the item in that row on
the clipboard as text, for easy pasting into other applications. Use this method to
paste Call Log entries and voice message information into the Problem Report
Wizard (See “Using the Problem Report Wizard” on page 11-22.).
Customizing columns
Click a column header to sort by that column. Click again to sort in the reverse
order. The triangle in the column header shows by which column and in what
direction the display is currently sorted.
You can resize column widths by dragging the sides of the column headers.
For each view in the Administrator, you can choose the columns that you want to
see and the columns that you want to hide. Some views do not show all the
available columns by default.
To show or hide columns in a view
1.
Choose Tools > Columns, or right-click a column header.The Columns
dialog box opens.
2.
From the View drop-down list, choose the view you want to change.
3.
Check a column to show it. Uncheck a column to hide it. For an
explanation of the various columns, click Help.
4.
Click OK.
CHAPTER 2. THE STRATA CS ADMINISTRATOR
BETA DOCUMENT - PRELIMINARY & CONFIDENTIAL
2-9
Working with voice files
A voice file is an audio recording that is stored as a file. Strata CS stores system
prompts, greetings, voice messages, and recorded conversations in voice files that
you can play over your computer speakers or on the telephone. You can record
voice files using the telephone.
Strata CS supports the following file formats for voice files:
n
.WAV
n
.VOX (a-law and µ-law formats)
The Strata CS Server natively uses 8-bit PCM .VOX format.
Changing the voice file format
You can change the format of your Strata CS .VOX voice files from a-law to
µ-law, or from µ-law to a-law by using the TVConvert utility. To do so:
1.
Run the file TVConvert.exe in the Strata CS Server directory on the
Strata CS Server computer. The default path is:
C:\Program Files\Strata CS Server\CSConvert.exe.
2.
Click OK to convert all your Strata CS voice files to the other format. If
the voice files are a-law, they become µ-law. If they are µ-law, they
become a-law.
In most cases you will not need to use this procedure, because your voice file
format will have been correctly set by your Strata CS provider.
Using the audio controls
Strata CS makes it easy to create and listen to recordings. The following controls
appear in Strata CS wherever you can make a recording.
To create recordings, use the buttons on the recording control as shown in the
following table and speak into your phone.
Record
When you are ready to record, pick up your phone, and
then click this button. A beep signals that recording has
begun.
Stop
When you are done recording, you can either hang up or
click this button.
2-10
STRATA CS ADMINISTRATOR MANUAL
BETA DOCUMENT - PRELIMINARY & CONFIDENTIAL
Play
To hear the recording, click this button.
To move forward and backward within the recording, drag the slider bar.
Importing and exporting voice files
To import or export a voice file, use the import or export buttons on the recording
control, as shown in the next table.
Import
You can import a voice file in .WAV or .VOX format to
use for any Client recording (greetings, voice titles, and so
on).
Strata CS can import .WAV files with a frequency of
8Khz, 11.025 Khz, 22.05 Khz, or 44.1 Khz. You can also
import an 8 kHz PCM .VOX file (µ-law format for North
America and Japan, a-law format for other countries).
Export
You can export any of your Client recordings, including
voice messages and recorded conversations, to a .WAV
file.
Changing audio output
Strata CS can play audio files over your telephone. You can also play them on
your computer if it has a sound card and speakers.
To hear audio output over the phone, click the telephone button on the
status bar, or choose Tools > Audio Output > Phone.
To hear audio output over your computer speakers, click the speaker
button on the status bar, or choose Tools > Audio Output > Speakers.
CHAPTER 2. THE STRATA CS ADMINISTRATOR
BETA DOCUMENT - PRELIMINARY & CONFIDENTIAL
2-11
CHAPTER 3
CHAPTER 3
STRATA CS LICENSES
CHAPTER CONTENTS
About Strata CS licenses . . . . . . . . . . . . . . . . . . . . . . . . . . . . . . . . 3-2
Entering licenses . . . . . . . . . . . . . . . . . . . . . . . . . . . . . . . . . . . . . . 3-2
Removing licenses . . . . . . . . . . . . . . . . . . . . . . . . . . . . . . . . . . . . . 3-4
BETA DOCUMENT - PRELIMINARY & CONFIDENTIAL
About Strata CS licenses________________________________
The following types of licenses are required for your Strata CS system:
n
n
Server license. One license for each Strata CS Server. A Server license
is provided when you purchase Strata CS. The Server license authorizes
you to run one copy of the Strata CS Server. Only one Server license is
required per Strata CS Server regardless of the number of trunks or users.
Trunk licenses. One license for each analog, T1, E1, or BRI trunk that is
connected to the Strata CS Server.
n
IP Port licenses. One license for each Internet trunk that is connected to
the Strata CS Server.
n
n
n
Station licenses. One license for each internal telephone that is
connected to the Strata CS Server. A station license is also required for
each running instance of an IVR Plug-in. For more information about how
to enter licenses for IVP Plug-ins, see Chapter 14, “Extending Strata CS.”
Client licenses. One license for each computer that is using Strata CS.
One Client license allows a user to log on to multiple Clients or to have
multiple Client API sessions using a single user name and password. An
additional Client license is required each time a user logs on using a
different user name and password.
Call Center Agent licenses. Each agent in a call center queue must have
a license. A single licensed agent can participate in multiple call center
queues. Call Center Agent licenses are also used by the Strata CS Call
Center Reporter. If you want to use the Reporter, even for non-queue
reports such as call activity on trunks, you need a minimum of four Call
Center Agent licenses.
To see a license summary that shows the total number of each type of license
currently installed on the Server, in the Administrator choose Tools > System
Settings, and then click the Licenses tab.
The Stations field under License summary displays the total number of licenses.
You must supply the appropriate license serial numbers and verification keys to
the Server before you can use the corresponding trunks, stations, and Strata CS
Clients. For this reason, you may want to purchase additional licenses for
expected system growth so that you do not have to wait for a license the next time
you expand your system.
Entering licenses ______________________________________
You must enter your Strata CS Server license, as follows, before you enter any
other licenses and before you configure the Server.
3-2
STRATA CS ADMINISTRATOR MANUAL
BETA DOCUMENT - PRELIMINARY & CONFIDENTIAL
To enter your Strata CS Server license
1.
Select Tools > System Settings, and then click the Licenses tab.
2.
Select Server from the Show License Category drop-down list.
3.
Enter the Serial number and Verification key in the corresponding
fields.
4.
Click OK.
CHAPTER 3. STRATA CS LICENSES
BETA DOCUMENT - PRELIMINARY & CONFIDENTIAL
3-3
To enter all other license types
1.
On the Licenses tab, select the license type from the Show License
Category drop-down list.
2.
Click Add. The Modify License dialog box opens.
3.
Enter the license serial number and verification key and click OK.
4.
If you are entering more than one license, repeat the procedure until you
have finished entering all licenses.
5.
Click OK on the Licenses tab of the System Settings dialog box.
Removing licenses ____________________________________
You can remove installed licenses and use them on another Strata CS Server as
long as you do so according to the following rules:
n
n
Before you remove a Trunk, IP Port, or Client license, you must delete the
trunk or user that had used the license from the system configuration (see
“Deleting trunks” on page 5-3 and “Deleting a user” on page 6-42).
Before you remove the Server license, make sure that you have removed
all Trunk, IP Port, Station, Client, and Call Center Agent licenses.
3-4
STRATA CS ADMINISTRATOR MANUAL
BETA DOCUMENT - PRELIMINARY & CONFIDENTIAL
To remove all licenses
1.
Choose Tools > System Settings. The System Settings dialog box
opens.
2.
On the Licenses tab, select the license type from the Show License
Category drop-down list.
3.
Select the license that you want to remove.
4.
Click Delete and then click OK to close the System Settings dialog box.
To remove the Server license
1.
Verify that you have removed all other licenses.
2.
On the Licenses tab of the System Settings dialog box, select Server
from the Show License Category drop-down list.
3.
Delete the serial number and verification key that are displayed in the
fields.
4.
Click OK and then click Yes or No when the system prompts you for
confirmation.
CHAPTER 3. STRATA CS LICENSES
BETA DOCUMENT - PRELIMINARY & CONFIDENTIAL
3-5
CHAPTER 4
CHAPTER 4
DEFINING SYSTEM SETTINGS
CHAPTER CONTENTS
About system settings . . . . . . . . . . . . . . . . . . . . . . . . . . . . . . . . . . 4-2
The General tab . . . . . . . . . . . . . . . . . . . . . . . . . . . . . . . . . . . . . . . 4-3
The Call Log tab . . . . . . . . . . . . . . . . . . . . . . . . . . . . . . . . . . . . . . . 4-8
The Storage tab . . . . . . . . . . . . . . . . . . . . . . . . . . . . . . . . . . . . . . 4-10
The Dialing tab . . . . . . . . . . . . . . . . . . . . . . . . . . . . . . . . . . . . . . . 4-12
The Emergency tab . . . . . . . . . . . . . . . . . . . . . . . . . . . . . . . . . . . 4-14
The Other tab . . . . . . . . . . . . . . . . . . . . . . . . . . . . . . . . . . . . . . . . 4-17
BETA DOCUMENT - PRELIMINARY & CONFIDENTIAL
About system settings _________________________________
System settings control overall system behavior. Before you can add Strata CS
trunks or users, you must define your system settings using the tabs in the System
Settings dialog box. You can use system settings to customize Strata CS as your
system develops.
To open the System Settings dialog box, choose Tools > System Settings.
This chapter assume you have already entered the required licenses (see
Chapter 3) and describes how to create system settings by using the following
tabs in the System Settings dialog box:
n
n
n
n
n
n
General. Use to set number of rings before answering, set hold audio,
generate tones using software, select default language for system prompts,
set up Windows NT Event Log notifications, and define business hours.
Call Log. Use to set configuration and archiving options for the Call Log
(see “Using the Call Log” on page 11-7).
Storage. Use to view current disk usage and set locations for backups of
voice files and the database (see “Monitoring database and disk usage” on
page 11-11).
Dialing. Use to set up access codes for the dial-by-name directory and
trunk access. Also use to set default access codes and dialing timeouts.
Emergency. Use to configure emergency dialing options.
Other. Use to configure the dial-by-name directory, present a
confirmation menu before sending callers to voice mail, set up Microsoft
Exchange synchronization, and set the minimum password length.
Customizable settings
Here are some frequently referenced settings that you can customize:
n
Set minimum password length (see page 4-20).
n
Use hold audio (see page 4-4).
n
Specify the number of rings before Strata CS answers a call (see
page 4-3).
n
Select the default language for system prompts (see page 4-4).
n
Set special access codes (see page 4-12).
n
Configure Microsoft Exchange synchronization (see page 4-19).
n
Set up business hours and holidays (see page 4-5).
n
Set up 911 and E-911 dialing (see page 4-14).
n
Set dial-by-name directory options (see page 4-17)
4-2
STRATA CS ADMINISTRATOR MANUAL
BETA DOCUMENT - PRELIMINARY & CONFIDENTIAL
Changing Windows NT/2000 registry settings
Some Strata CS settings are maintained in the Windows NT/2000 registry. These
are low-level settings that are rarely changed, or settings that cannot be changed
from the Administrator. For a complete description of these settings, see
Appendix A, “Strata CS Configuration Settings.”
Rerecording voice prompts
For information about how to rerecord the Strata CS system prompts or translate
them into another language, see Chapter 12, “System Prompts.”
The General tab _______________________________________
Choose Tools > System Settings and then click the General tab to set general
Server options.
Server Configuration
n
Number of rings before answering a call. For analog trunks only, this
field sets the number of times Strata CS allows the phone to ring before it
answers the call.
The default of 2 rings allows for the capture of caller ID on analog trunks.
In the U.S. this information appears between the first and second ring. In
other areas, such as the U.K., or when using digital trunks, where caller
CHAPTER 4. DEFINING SYSTEM SETTINGS
BETA DOCUMENT - PRELIMINARY & CONFIDENTIAL
4-3
ID appears before the first ring, this setting can be changed to 1 so that
calls on an inbound trunk are answered after the first ring.
n
Use hold audio from station number. Check this box to play music for
callers on hold. The music can be played on a CD player or other
music-on-hold device that is attached to the specified station. It is highly
recommended that you use music on hold for systems with ACD
workgroups or follow-me call forwarding.
Strata CS plays whatever is on the specified channel. It does not monitor
the channel. If the music device stops, callers on hold hear nothing.
n
Generate tones using software. Check this box to generate dial,
reorder, ringback, and stutter dial tones using Strata CS software. This
feature supports Dialogic boards that do not generate these tones in
hardware.
U.S. customers should leave this box unchecked, because U.S. Dialogic
hardware generates the tones. International customers who use the
D/41ESC board must check this box.
n
Default system prompts. Use this drop-down list to select the language
version of system prompts presented to callers and users on the Strata CS
system.
U.S. English is installed by default. You must reinstall Strata CS to access
additional languages, such as U.K. English or Latin American Spanish.
For more information, see Strata CS Installation & Maintenance Manual.
n
Allow voice-first answering. Check this box to enable voice-first
answering for users who have Toshiba Strata (digital) phones (see Strata
CS Client User Guide for details about voice-first answering).
Windows Event Log notifications
When a Strata CS-related event is logged in the Windows NT/2000 Event Log, a
notification is sent based on the settings described in this section.
n
E-mail Strata CS events for
Select one of the following from the drop-down list:
n
n
All events.
n
Errors and warnings.
n
Errors only.
n
No events. This is the default. No notifications are sent.
E-mail to
Identify to whom the notifications are sent. The users you identify here
must also have e-mail notification set to receive Windows Event Log
notifications (see “Setting e-mail notification” on page 6-18).
4-4
STRATA CS ADMINISTRATOR MANUAL
BETA DOCUMENT - PRELIMINARY & CONFIDENTIAL
n
n
All Strata CS Administrators. Notifications go to all Strata CS
users with Administrator permissions who have e-mail notification
turned on. This is the default setting.
E-mail address(es). Type the e-mail addresses of users whom you
want to receive notifications, separated by semicolons.
Business Hours
Click Business Hours to schedule specific Strata CS behavior for particular
hours and on specific dates.
Your settings are used by Strata CS to schedule the following:
n
Transfers and greetings. See “Scheduling transfers and greetings” on
page 9-14.
n
E-mail and pager notifications. See “Scheduling notifications” on
page 6-19.
n
Business hours and holidays for call rules. See “Defining business
hours and holidays” on page 4-5.
Strata CS uses the following categories to define business hours and holidays:
n
Work days and work hours for each work day
n
Full or partial holidays
n
Custom work days, hours, and dates
Strata CS includes a default set of business hours that you can customize. You can
create as many sets of business hours as you need. For example, you can create a
set of business hours for the company as a whole, and then create additional sets
of business hours for individual departments, shifts, and so forth.
Note: When you define business hours and holidays, you can type dates and
times in most formats. Your entries are converted to a standard format that is
based on your Windows regional settings.
Defining business hours and holidays
Business hours and holidays are used by Strata CS to schedule transfers and
greetings, notifications, and call rules.
CHAPTER 4. DEFINING SYSTEM SETTINGS
BETA DOCUMENT - PRELIMINARY & CONFIDENTIAL
4-5
To define business hours and holidays
1.
On the General tab, click Business Hours. The Business Hours dialog
box opens.
2.
If you have more than one set of business hours defined, select the
Name of the set to edit from the drop-down list.
3.
On the Work Hours tab, check each day that is a Work day.
4.
Set Work hours for each work day by entering the starting and ending
times for that day in your organization.
4-6
STRATA CS ADMINISTRATOR MANUAL
BETA DOCUMENT - PRELIMINARY & CONFIDENTIAL
5.
To define holidays, click the Holidays tab.
6.
Click Add to add a new holiday. Click Edit to edit an existing one.
7.
Type the Holiday date.
8.
Choose if this is an All day holiday or Partial day holiday. For a partial
day holiday, enter:
9.
n
Work hours begin at. Starting time for work on the holiday.
n
Work hours end at. Ending time for work on the holiday.
When you finish creating holidays, click OK.
CHAPTER 4. DEFINING SYSTEM SETTINGS
BETA DOCUMENT - PRELIMINARY & CONFIDENTIAL
4-7
The Call Log tab _______________________________________
The Call Log tab contains settings for logging internal calls and for archiving the
Call Log.
Logging internal calls
By default, Strata CS logs only external calls. If Call Log information is important
to you, and you can afford the additional disk space, you can log internal calls as
well.
To log internal calls as well as external calls
1.
Choose Tools > System Settings and then click the Call Log tab.
2.
Under Configuration, check Log internal calls.
Archiving the Call Log
Over time, Call Log information will begin to fill up your Strata CS database (see
“Monitoring database and disk usage” on page 11-11). To recover database space,
you can archive old Call Log information that is no longer needed to a location
outside the database.
4-8
STRATA CS ADMINISTRATOR MANUAL
BETA DOCUMENT - PRELIMINARY & CONFIDENTIAL
Archived information is permanently removed from the Strata CS database. Use
the Export command (see “Exporting the Call Log” on page 11-11) to create a file
containing Call Log information without removing the information from the
database.
Call Log information is written to a comma separated value (.CSV) text file that
can be read by most spreadsheet and database programs. The default path for this
file is
C:\Program Files\Strata CS Server\Archive\Calllog.csv
You can archive Call Log data in the following ways:
n
n
n
Set up automatic archiving, which takes place at 1:00 a.m. every day.
Automatically overwrite the Call Log after a number of days that you
specify.
Perform a manual archive on an as-needed basis, in addition to daily
automatic archiving. You can do a manual archive whether or not
automatic archiving is turned on.
You do not need to stop the Strata CS Server or any other Strata CS components
to perform an archive. However, because archiving is database-intensive you may
want to perform it during off-peak hours so as not to affect normal system
operation.
To archive Call Log information
1.
Choose Tools > System Settings. The System Settings dialog box
opens.
2.
Click the Call Log tab and specify how you want to perform archiving:
n
n
Archive Call Log daily. If checked, the Call Log is archived
automatically at 1:00 a.m. every day. Calls are archived according to
the settings you make in the following fields. If unchecked, the Call
Log will continue to grow unless you manually archive it.
Archive calls older than ___ days. Number of days a call remains
in the Call Log until it is archived.
n
n
Archive filename. Location of the Call Log archive file on the Strata
CS Server. This file is in .CSV format and can be viewed with most
spreadsheet or database programs.
Overwrite archive every ___ days. Number of days' worth of
automatically archived information that will be appended to the Call
Log archive file. At the end of that time, information in the file will
be deleted and the file will be reused.
CHAPTER 4. DEFINING SYSTEM SETTINGS
BETA DOCUMENT - PRELIMINARY & CONFIDENTIAL
4-9
n
Archive will be overwritten on. Date and time when the Call Log
archive file will next be overwritten and the data in it deleted. To
preserve the archived data, back up the file just before it will be
overwritten.
3.
Click Archive Now to manually archive the Call Log according to the
settings specified above. The archive begins immediately and may take
several minutes to complete. You cannot perform any other
Administrator functions until the archive completes. You can perform a
manual archive at any time whether or not automatic archiving is turned
on.
4.
Click OK to save your archiving settings.
The Storage tab _______________________________________
The Storage tab controls how Strata CS’s database stores your system
configuration settings and voice files.
Disk usage
n
Database. Percentage of disk space allocated for the Strata CS database
that is currently used, also shown in kilobytes used out of the total number
of kilobytes allocated. The size of the Strata CS database is set and the
required disk space allocated when the Strata CS Server is installed. The
4-10
STRATA CS ADMINISTRATOR MANUAL
BETA DOCUMENT - PRELIMINARY & CONFIDENTIAL
default database size is 100 MB. This space is allocated automatically if
necessary.
When you start the Administrator, Strata CS displays a warning message
if the Strata CS database is 80% or more full. You must check the database
usage periodically to make sure you are not running out of space.
n
Messages. Percentage of disk space allocated for all users’ voice mail
messages, as well as any call recordings users have made, that is currently
used.
n
Greetings. Percentage of disk space allocated for all users’ greetings and
voice titles that is currently used.
n
Call Log. Amount of space currently used in the Strata CS database for
Call Log records, in kilobytes. Some or all of this space can be recovered
by archiving Call Log information if total database usage is high (see
page 4-8).
Allocating disk space
When you set up new users, you specify the maximum size of each user’s voice
mailbox and the maximum space permitted for each user's greetings and voice
titles.
If there is not enough free disk space for all mailbox and greeting allotments to be
full at the same time, the Administrator displays a warning, but allows you to
continue. When you see a disk space warning message, you must take steps to
reduce disk space usage, such as reducing the space allocated to users or having
users delete their stored messages.
See page 6-15 for more information about allocating disk space for new users.
Note: When users log into the Client or use the telephone commands, they may
get a warning if their voice mailboxes are more than 80% full. You can check
available message and greeting space on a per-user basis using the Users view.
If the free disk space on the Server drops below 50 MB, a verbal message alerts
you when you pick up a Strata CS phone.
Moving voice files
If you are running out of disk space on the drive where you installed Strata CS but
have space available on another local drive, you can move your voice message
and prompt files to the other drive. To move voice files, the user name with which
you logged into the Administrator must have write access to both the source and
destination directory.
CHAPTER 4. DEFINING SYSTEM SETTINGS
BETA DOCUMENT - PRELIMINARY & CONFIDENTIAL
4-11
To move voice message files
1.
Shut down the Strata CS Server. You cannot move voice files while the
Server is running.
2.
Start the Strata CS Administrator.
3.
Choose Tools > Systems Settings and then click the Storage tab.
4.
Click Move.
5.
Choose a new location for your voice files. The drive you select must be
a local drive on the Strata CS Server, not a network drive.
6.
Click OK.
The Dialing tab ________________________________________
System-wide settings for special access codes and dialing timeouts are made on
the Dialing tab.
Choose Tools > System Settings and then click the Dialing tab (see the next
illustration).
Defining special access codes
Enter the access codes that users must dial to reach the following:
n
n
Dial-by-name directory. Number to access the Strata CS dial-by-name
directory. The default is 411.
Select a trunk. Number to dial to place a call on a particular trunk. The
default is 88.
To place a call on a specific trunk, dial the access code and the trunk
number. Only users with Administrator permissions can select a trunk
before placing a call. If you must allow users to select a trunk, create
dialing services for the appropriate trunks. See “About dialing services”
on page 8-2 for more information.
You also enter default access codes on this tab. Default access codes are used for
ringbacks from the Client. For more information, see “Setting default access
codes for ringbacks” on page 8-9
4-12
STRATA CS ADMINISTRATOR MANUAL
BETA DOCUMENT - PRELIMINARY & CONFIDENTIAL
.
Setting dialing timeouts
Strata CS uses timeouts that you specify to determine the end of a number that
was entered by a user. If users press # after entering the final digit of a number,
Strata CS dials the number immediately and does not wait for the timeout period
to elapse.
n
Internal dialing incomplete timeout. Number of milliseconds before
Strata CS times out on an internal call if not enough digits were entered.
The default is 8000 milliseconds (8 seconds).
n
n
Internal dialing ambiguous timeout. Number of milliseconds before
Strata CS times out on an internal call if the digits entered cannot be
resolved into a recognized number. The default is 3000 milliseconds (3
seconds).
Dialing service incomplete timeout. Number of milliseconds before
Strata CS times out on an external call if not enough digits were entered.
The default is 8000 milliseconds.
n
Dialing service ambiguous timeout. Number of milliseconds before
Strata CS times out on an external call if the digits entered cannot be
resolved into a recognized number. The default is 3000 milliseconds.
Note: The default dialing timeouts work in most installations, and they should be
modified carefully.
CHAPTER 4. DEFINING SYSTEM SETTINGS
BETA DOCUMENT - PRELIMINARY & CONFIDENTIAL
4-13
You may want to consider increasing the dialing service ambiguous timeout by
half-second intervals if users report intermittent problems hearing “Number not
available” when they dial out on analog or Robbed Bit T1 trunks (this is not a
problem for ISDN or IP lines).
If you increase this timeout by too much, you can introduce other problems, such
as users missing the beginning of the audio signal at the target, for example, the
beginning of an auto attendant that answers calls immediately. If this problem
occurs, you can do any of the following:
n
Reduce the dialing service ambiguous timeout.
n
Instruct users to enter # after dialing a number.
n
Collect all digits before dialing (see page 8-10).
The Emergency tab ____________________________________
Strata CS supports two kinds of emergency dialing services—standard 911 and
Enhanced 911 (E-911).
Using standard 911 service with Strata CS
A standard 911 call does not require any additional hardware. All standard 911
calls use a Strata CS trunk and go through the local phone company to the
emergency dispatching center.
To support 911 calls in Strata CS, you must provide an emergency access code
for users to dial.
Using extended 911 service with Strata CS
An extended 911 (E-911) call includes the calling station’s ANI information (the
Strata CS station ID). This information helps the phone company’s E-911 center
identify the location of the person who made the emergency call, for example, the
specific floor and office in a large building.
An E-911 call does not use a Strata CS trunk. Typically, a dedicated trunk
connects the E-911 device directly to the emergency dispatching center.
All E-911 calls go through an E-911 device. For information about obtaining,
installing, and configuring an E-911 device, see Strata CS Installation &
Maintenance Manual.
After the E-911 device is installed and configured, you must enable E-911 and
assign E-911 stations. You assign one or more Strata CS stations for the exclusive
purpose of handling E-911 calls. An E-911 station is physically connected to a
port on the E-911 device, and can be any station that is not already assigned and
that has a valid station license.
4-14
STRATA CS ADMINISTRATOR MANUAL
BETA DOCUMENT - PRELIMINARY & CONFIDENTIAL
Note: When you select stations to connect to the E-911 device, do not use the
first 4 stations on the BCP connection panels. The Strata CS Watchdog mode uses
these stations to maintain phone service during a power or Windows Server failure.
For more information about Watchdog mode, see Strata CS Installation &
Maintenance Manual.
How emergency numbers are handled
Users can make an emergency call from any station, including a station that has
not yet been assigned to a user. Users can make an emergency call even if they
are blocked from making external calls.
If E-911 is enabled and the E-911 device has been installed and configured
correctly, the emergency call is routed to one of the stations connected to the
E-911 device. As soon as the E-911 station takes the call, the station ID of the
caller’s station is passed to the device. The E-911 device then calls the emergency
center directly over a dedicated trunk.
If for any reason the emergency call cannot be placed using E-911 service, Strata
CS automatically places a standard 911 call to the emergency center using the
local carrier. Reasons why an E-911 call cannot be placed include:
n
All the E-911 stations are busy.
n
The E-911 device fails.
n
The dedicated trunk from the E-911 device to the emergency center is
down.
n
The trunk does not respond within a certain time period.
n
E-911 is not enabled in Strata CS.
To set emergency dialing options
1.
Choose Tools > System Settings and then click the Emergency tab (see
the next illustration).
2.
Check Emergency number can be dialed at internal dial tone if you
want users to be able to dial the emergency number without dialing an
access code first. If unchecked, users must dial the access code and then
the emergency number. This setting only affects emergency calls.
3.
If you have configured an E-911 device and service (as described in
Strata CS Installation & Maintenance Manual), check Enable support
for E-911 service, and then go to the next step.
If you leave this option unchecked, calls to the emergency number are
made using standard 911 service.
CHAPTER 4. DEFINING SYSTEM SETTINGS
BETA DOCUMENT - PRELIMINARY & CONFIDENTIAL
4-15
4.
Click Add to add each station that is connected to the E-911 device.
5.
In the Add E-911 Station dialog box, choose a station from the list of
available stations, and then click OK.
If the list in this dialog box is empty, make more stations available by
unassigning users that are no longer used, or purchase additional station
licenses (see “About Strata CS licenses” on page 3-2).
6.
Repeat steps 4-5 until all E-911 stations have been added. Click OK
when you are done.
4-16
STRATA CS ADMINISTRATOR MANUAL
BETA DOCUMENT - PRELIMINARY & CONFIDENTIAL
The Other tab _________________________________________
Choose Tools > System Settings and then click the Other tab to set the options
that appear in the next figure.
Setting dial-by-name directory options
Specify the method by which callers can search the dial-by-name directory:
n
Last name. Caller enters “Smith”. This is the default.
n
First name. Caller enters “John”.
n
Last name or First name. Caller enters “Smith” or “John”.
In Present names using, select one of the following methods for presenting
users’ names to callers:
n
Extension number. Callers hear an extension number after each name,
as in “For John Smith, press 175”. This is the default.
n
Numbered list. Callers hear a sequence number after each name, as in
“For John Smith, press 1”.
By default Strata CS connects a caller immediately to the user that was chosen in
a menu of multiple names. Similarly, when the system finds one match only, the
call is immediately transferred to the user.
CHAPTER 4. DEFINING SYSTEM SETTINGS
BETA DOCUMENT - PRELIMINARY & CONFIDENTIAL
4-17
Select Present a confirmation menu before transferring if you want callers to
confirm their choices before they are transferred to the extension that matched the
names they entered. For example, a caller would hear, “For Cecilia St. John, press
1. To try again, press *.”
Presenting a confirmation menu before voice mail
Check Present a confirmation menu before voice mail so that callers hear the
message “To leave a message press 1, or press * to return to the menu” after they
hear a user's voice mail greeting. If unchecked (the default), callers go directly to
voice mail.
Setting up Microsoft Exchange synchronization
If your organization is using Microsoft Exchange Server for e-mail, you can
choose this option to synchronize Strata CS voice mail messages with the
corresponding e-mail notifications in Exchange on a per-user basis.
Synchronization behavior depends on whether e-mail notifications have voice
attachments or not, as follows:
n
If a voice message is attached to an e-mail notification, the following
occurs:
n
n
n
n
Moving a voice message from the Inbox folder to the Deleted folder
(or the reverse) in either system moves the voice message on the
other system as well. For example, messages deleted from the Strata
CS Inbox are deleted from the Exchange Inbox as well.
A voice message in Strata CS is deleted permanently when the
associated e-mail notification in Exchange is deleted or is moved to
any folder other than the Inbox or Deleted folder in Exchange.
An e-mail notification in Exchange is deleted permanently when the
associated voice message is deleted permanently in Strata CS.
If the voice message is not attached to an e-mail notification, the
following occurs:
n
n
An e-mail notification in Exchange is deleted permanently when the
associated Strata CS voice message is deleted, either via the Client or
telephone commands.
Deleting an e-mail notification in Exchange has no effect on the
voice message in Strata CS. Voice messages therefore cannot be
deleted in Strata CS before a user has the opportunity to listen to
them.
4-18
STRATA CS ADMINISTRATOR MANUAL
BETA DOCUMENT - PRELIMINARY & CONFIDENTIAL
Exchange Server Mailbox Permissions
In order to synchronize with Microsoft Exchange, the Strata CS account must be
a domain account that has User role permissions to all Exchange mailboxes that
are to be synchronized.
One way you can do this is by assigning the Strata CS User role permissions to
each individual mailbox. This method is secure but time-consuming.
Alternatively, you can assign the Strata CS User role permissions to all mailboxes
at the site level. This method is less secure, but it requires less intervention by
system administrators. For more information about assigning User role
permissions, see your Exchange Server documentation.
With Exchange Server version 5.5 or later, note that depending on how Exchange
Server is configured, it may take up to two hours for mailbox permission changes
to take effect, because changes are cached before they are applied. For more
information and details on how to change the cache interval for Exchange Server
5.5, see:
http://support.microsoft.com/support/kb/articles/q179/0/65.asp
To set up Microsoft Exchange synchronization for a user
1.
In the System Settings dialog box Other tab, check Synchronize
messages with Microsoft Exchange to synchronize message deletions
between Strata CS and Microsoft Exchange. Then enter:
n
Exchange Server name. Name of the Exchange Server on your
LAN.
n
Synchronization interval. How often the synchronization takes
place, in minutes. The default is one minute.
2.
Set up e-mail notification for the user (see “Setting e-mail notification”
on page 6-18).
3.
Enable Exchange synchronization for the user (see “Enabling Microsoft
Exchange Server synchronization” on page 6-16).
Note: The user’s Microsoft Outlook client must be configured to deliver messages
to a mailbox on the Exchange Server. Exchange Server synchronization does not
work if the user’s Outlook client is configured to deliver messages to a PST file on
the local computer.
CHAPTER 4. DEFINING SYSTEM SETTINGS
BETA DOCUMENT - PRELIMINARY & CONFIDENTIAL
4-19
Setting the minimum password length
Enter the Minimum password length, the shortest permissible password to log in
to Strata CS (the maximum password length is 12 numeric digits). Set this field
to 0 if you want to allow users to log in without using a password. The default is 0.
When you change the minimum password length, existing passwords shorter than
the new minimum length continue to work until they are changed.
4-20
STRATA CS ADMINISTRATOR MANUAL
BETA DOCUMENT - PRELIMINARY & CONFIDENTIAL
CHAPTER 5
CHAPTER 5
MANAGING TRUNKS AND SPANS
CHAPTER CONTENTS
About trunks . . . . . . . . . . . . . . . . . . . . . . . . . . . . . . . . . . . . . . . . . . 5-2
Configuring trunks . . . . . . . . . . . . . . . . . . . . . . . . . . . . . . . . . . . . . 5-4
ANI/DID digit collection . . . . . . . . . . . . . . . . . . . . . . . . . . . . . . . . . . 5-5
Setting up fax routing . . . . . . . . . . . . . . . . . . . . . . . . . . . . . . . . . . . 5-7
The Trunks view . . . . . . . . . . . . . . . . . . . . . . . . . . . . . . . . . . . . . . . 5-8
Adding an analog trunk. . . . . . . . . . . . . . . . . . . . . . . . . . . . . . . . . 5-10
Adding a digital Robbed Bit T1 span . . . . . . . . . . . . . . . . . . . . . . 5-13
Adding a digital ISDN or CAS span . . . . . . . . . . . . . . . . . . . . . . . 5-17
Adding a digital ISDN BRI span . . . . . . . . . . . . . . . . . . . . . . . . . . 5-18
Optimizing your ISDN settings . . . . . . . . . . . . . . . . . . . . . . . . . . . 5-19
Enabling ISDN Megacom support . . . . . . . . . . . . . . . . . . . . . . . . 5-20
Adding an Internet span . . . . . . . . . . . . . . . . . . . . . . . . . . . . . . . . 5-21
BETA DOCUMENT - PRELIMINARY & CONFIDENTIAL
About trunks__________________________________________
Trunks are the outside phone lines that connect your business to the telephone
company and other providers.
Adding a trunk to your Strata CS system is a three-step process:
1.
Connecting the physical trunk line to the Dialogic voice board in the
Strata CS Server computer. You can find instructions for this step in
Strata CS Installation & Maintenance Manual.
2.
Defining the trunk in the Strata CS Administrator’s Trunks view. See
“Adding trunks” on page 5-3.
3.
Including the trunk in a dialing service, so that users can place outbound
calls on it. See “About dialing services” on page 8-2.
For information about required hardware and how to order services from your
phone company, see Strata CS Installation & Maintenance Manual.
Trunk types
Strata CS supports analog and digital trunks.
The analog trunks supported are the following:
n
n
Standard analog trunks. Analog Direct Inward Dial (DID) trunks. For
Strata CS to support analog DID trunks, they must be properly configured
following the instructions in Strata CS Installation & Maintenance
Manual.
Centrex trunks or analog extensions from another PBX. In Strata CS,
these are referred to collectively as Centrex/PBX extensions.
The digital trunks supported are the following:
n
Robbed Bit T1 trunks
n
ISDN PRI over T1 trunks
n
ISDN PRI over E1 trunks
n
ISDN BRI over BRI trunks
n
E1 CAS trunks
Note: Strata CS supports Internet telephony and does not require any additional
telephone company trunks. A Dialogic Internet telephony board connects directly
to your network and accesses the Internet over your company’s normal Internet
connection.
5-2
STRATA CS ADMINISTRATOR MANUAL
BETA DOCUMENT - PRELIMINARY & CONFIDENTIAL
Adding trunks
This chapter contains instructions for adding new trunks of each type, as follows:
n
“Adding an analog trunk” on page 5-10
n
“Adding a digital Robbed Bit T1 span” on page 5-13
n
“Adding a digital ISDN or CAS span” on page 5-17
n
“Adding an Internet span” on page 5-21
Before you perform the steps in each section of this chapter, make sure you have
installed and configured the Dialogic boards and drivers that are necessary to
support your trunks. See Strata CS Installation & Maintenance Manual for
instructions.
As long as the Dialogic boards and drivers have been properly installed and
configured, you can start using a trunk as soon as you add it according to the
instructions in this chapter. Note that if you add a trunk in the Administrator
before it is physically installed or configured, the trunk has a status of “Not
Installed” in the Device Monitor.
Naming trunks
Give your trunks names that convey important information about them, so that
you can identify trunks quickly and easily. Information to use in a trunk name
includes:
n
The telephone number of an analog trunk
n
The IP address of an Internet trunk
n
The name of the digital or Internet span to which the trunk belongs
Monitoring trunks
For instructions on how to monitor the activity on a trunk, enable or disable a
digital trunk, or restart a trunk that is experiencing problems, see “Using the
Device Monitor” on page 11-3.
Deleting trunks
Deleting a trunk removes it from your Strata CS system configuration, but does
not affect the telephone line or hardware, or the trunk license.
Although you can delete a single analog trunk, you cannot delete a T1, E1, or
Internet trunk from the span it belongs to. If you must permanently remove a
digital line, you must delete the entire span. To disable an individual trunk in a
span temporarily, edit the trunk and uncheck the options for receiving inbound
and placing outbound calls.
CHAPTER 5. MANAGING TRUNKS AND SPANS
BETA DOCUMENT - PRELIMINARY & CONFIDENTIAL
5-3
A deleted trunk appears in the Device Monitor as “NA” if a telephone line is still
connected to the BCP Connection Panel.
For information about deleting items in Strata CS, see “Deleting items” on
page 2-9.
Configuring trunks_____________________________________
You can configure trunks as inbound-only, outbound-only, or both inbound and
outbound. In most Strata CS systems, trunks are configured for both inbound and
outbound use.
If it is critical that a phone line is always available for inbound calls (for example,
if you have an emergency hotline), you can set up an inbound-only trunk.
Similarly, if it is critical that there is always a trunk available for outbound calls,
you can set up an outbound-only trunk.
For instructions on configuring a trunk for inbound and outbound calls, see
“Adding trunks” on page 5-3.
Inbound and outbound calls and hunt groups
The best arrangement for Strata CS is to ask the telephone company for a
terminated hunt group. In this arrangement, inbound calls try the lowest phone
number first and then the next lowest until a free line is found. When you are
adding trunks to your configuration in the Administrator, assign the lowest phone
numbers to the lowest Strata CS trunk numbers.
On outgoing calls, by default Strata CS starts searching for a free line with the
highest Strata CS trunk number. This behavior results in the fewest conflicts for
lines, since inbound calls are coming in on the lower-numbered trunks, and
outbound calls are going out on the higher-numbered trunks. This behavior is
defined by the dialing service used to place the call, and can be changed to
accommodate other configurations and needs. See “About dialing services” on
page 8-2 for more information.
Matching trunk settings with your phone company
Strata CS inbound and outbound settings control only how Strata CS treats the
line, and they do not affect how the telephone company treats the line.
For example, if you configure a trunk for inbound calls only, Strata CS does not
use the line for outbound calls. You do not receive any calls on the line, however,
unless you have distributed the number to callers and instructed your telephone
company to include the trunk in your inbound hunt group.
5-4
STRATA CS ADMINISTRATOR MANUAL
BETA DOCUMENT - PRELIMINARY & CONFIDENTIAL
Similarly, specifying a trunk as exclusively outbound does not prevent inbound
calls if you have given the line’s telephone number to outside parties or included
the trunk in your inbound hunt group. If calls arrive on a trunk designated for
exclusive outbound use, Strata CS plays a message indicating that the caller
dialed a wrong number and then hangs up.
Note: The message played under these circumstances is the system prompt
“Wrong Number.” You can rerecord it to have the message give the caller the
correct number to reach your company. See Chapter 12 for more information about
recording system prompts.
Routing inbound calls on a trunk
If you set a trunk to accept inbound calls, you can route the calls to the following
places in Strata CS:
n
An auto attendant
n
A user
n
An automatic call distribution (ACD) workgroup
n
A group of internal users simultaneously
n
An IVR Plug-in application
Placing outbound calls on a specific trunk
Administrators can place a call on a specific trunk for testing purposes by dialing
88, the trunk number, and then the phone number. For example, to place a call on
trunk #1, dial 8801 (you must use 4 digits). To place a call on trunk #12, dial 8812.
When you are using specific-trunk dialing, you do not need to dial the access code
to make an external call.
You can change the 88 code to other digits. See “Defining special access codes”
on page 4-12.
Note: If you want to allow specific trunk access for users, create a dialing service
that allocates that trunk. See “About dialing services” on page 8-2.
ANI/DID digit collection _________________________________
The following services from your phone company enable Strata CS to work with
maximum efficiency:
n
n
n
Caller ID.
ANI (Automatic Number Identification). Provides Caller ID
information about analog DID and digital trunks
DID (Direct Inward Dial). Enables direct routing of incoming calls to
the individual stations
CHAPTER 5. MANAGING TRUNKS AND SPANS
BETA DOCUMENT - PRELIMINARY & CONFIDENTIAL
5-5
n
DNIS (Dialed Number Identification Service). Provides DID data
on toll-free lines such as 800, 877, and 888 numbers. Throughout Strata
CS, “DID” refers to DNIS as well.
DID information appears in the following Administrator and Client views:
n
n
n
n
n
The Users view in the Administrator shows the DID number assigned to
a user in the DID Number column.
The Auto Attendants view in the Administrator shows the DID number
assigned to an auto attendant in the DID Number column.
The Trunks view in the Administrator identifies analog trunks configured
to handle DID calls. Digital trunks will retrieve DID depending on the
configuration.
The Call Log in the Administrator shows the DID number associated with
a call in the DID Number column.
The Call Monitor in the Client shows the DID number associated with a
call in the DID Number column.
Collecting ANI/DID digits
Some caller or number identification services that you can order with your analog
or Robbed Bit T1 phone lines require that Strata CS collect information that
arrives with an inbound call.
Note: Strata CS automatically collects caller ID digits on analog trunks, and
ANI/DNIS digits on ISDN or CAS trunks if available. If your system is configured to
collect digits automatically, you can skip this section.
For Strata CS to collect DID/DNIS information when a call arrives on an analog
or Robbed Bit T1 trunk, or to collect ANI digits on a Robbed Bit T1 trunk, the
Server needs to know exactly how the data is signaled. Use the information
supplied by your telephone company or T1 carrier to define these signals to Strata
CS. For detailed instructions, see:
n
n
“Setting up digit collection on an analog trunk” on page 5-11
“Configuring signaling using the Robbed Bit T1 Experimenter” on
page 5-13
See Strata CS Installation & Maintenance Manual for information about ordering
and installing DID/DNIS for analog or digital lines.
5-6
STRATA CS ADMINISTRATOR MANUAL
BETA DOCUMENT - PRELIMINARY & CONFIDENTIAL
Using DID with Robbed Bit T1 lines
1.
Make sure that your Robbed Bit T1 lines have been installed correctly.
2.
Configure digit collection signaling for the trunks (see “Configuring
signaling using the Robbed Bit T1 Experimenter” on page 5-13 for step
by step instructions and examples).
3.
Verify that each trunk in the digital span is configured to accept inbound
calls, and that calls are sent to a user or auto attendant (see “Entering
trunk defaults for a span” on page 5-16).
4.
Assign DID numbers to users or auto attendants (see “The General tab”
on page 6-9).
Using DID with analog lines
1.
Make sure your analog DID lines and digital interface units have been
correctly installed and configured. See Strata CS Installation &
Maintenance Manual.
2.
Configure analog digit collection signaling for the trunks (see “Setting
up digit collection on an analog trunk” on page 5-11).
3.
Enable DID for each inbound analog DID trunk (see “Adding an analog
trunk” on page 5-10).
4.
Assign DID numbers to users or auto attendants (see “Assigning a DID
number” on page 6-13).
Setting up fax routing __________________________________
You set up fax routing on a per-trunk basis for the following trunk types:
n
Analog
n
Robbed Bit T1
n
ISDN/CAS T1/E1
Fax calls can be routed to an auto attendant, user, or IVR Plug-in. Usually you
route faxes to a user whose station is connected to a fax Server or fax machine.
Whenever Strata CS detects a fax signal on the trunk, the call is automatically
routed to this station.
Note: If a DID match occurs on an inbound call, the fax is not routed to the auto
attendant, user, or IVR Plug-in as described in the trunk. The fax instead is routed
directly to the DID target.
For instructions on how to configure specific trunk types to support fax routing,
see the sections on adding these trunk types later in this chapter.
CHAPTER 5. MANAGING TRUNKS AND SPANS
BETA DOCUMENT - PRELIMINARY & CONFIDENTIAL
5-7
Customizing fax routing
To route incoming faxes to a pool of fax machines, set up a routing list for the user
that points to a series of users whose stations are attached to fax machines. To
handle faxes differently based on time or date, route fax calls to an auto attendant,
and then schedule transfers to the appropriate users.
The Trunks view_______________________________________
Click the trunks button in the view bar to open the Trunks view.
Each trunk you add appears as a row in the view. The following table show the
information that appears for each trunk.
Column
Description
Number
Port number on the Dialogic board associated
with this trunk.
Type
Type of trunk: Analog, Robbed Bit T1, Internet, or
ISDN/CAS E1/T1.
Inbound
If checked, this trunk is used for inbound calls.
Outbound
If checked, this trunk is used for outbound calls.
Retrieve DID
If checked, Strata CS retrieves Direct Inward Dial
digits from calls coming in on this trunk.
Centrex
If checked, indicates a Centrex trunk.
5-8
STRATA CS ADMINISTRATOR MANUAL
BETA DOCUMENT - PRELIMINARY & CONFIDENTIAL
Column
Description
Span
For digital spans, the number of the span to which
the trunk belongs.
Name
Descriptive name assigned to the trunk.
Send calls to
Auto attendant, operator, user, or IVR Plug-in that
receives inbound calls on this trunk.
Send faxes to
User to whom inbound faxes on this trunk are
routed.
IP Address
IP address of the trunk.
Span Description
Optional information provided when the span was
added.
Because you can add trunks to the configuration before the physical lines are
added to your system, the number of trunks shown in the trunks view may not
reflect the actual number of trunks available for Strata CS’s use.
About digital and Internet spans
Strata CS represents digital and Internet trunks as a span of individual trunks,
corresponding to the number of available channels. For example, a Robbed Bit T1
trunk offers 24 channels, so when you add a Robbed Bit T1 trunk, 24 individual
trunks appear in the Trunks view. You can set some properties for an individual
trunk in a span, and other properties for the span as a whole.
n
n
To set properties for an individual trunk, right-click the trunk, and then
choose Open Trunk.
To set properties for a span as a whole, right-click a trunk in the span, and
then choose Open Span.
When Strata CS dials out over a board, it reads the board configuration
information that was entered when the board was installed using the Dialogic
Configuration Manager (DCM). However, the Administrator does not read this
information when you add or configure a digital span that uses the board. When
you add a digital span, make sure that the span type matches the protocol type
specified using DCM.
You cannot change a span’s type after you add it. If you create a span of the wrong
type, delete the span and add a new one of the correct type.
Note: After adding Internet trunks to a span, you must restart the computer. If the
trunks fail to appear, delete the span and add the span again.Then restart the
computer.
CHAPTER 5. MANAGING TRUNKS AND SPANS
BETA DOCUMENT - PRELIMINARY & CONFIDENTIAL
5-9
Adding an analog trunk_________________________________
Use the following procedure to add a new analog, analog DID, or analog Centrex
trunk.
1.
Choose Trunks > New Trunk > Analog Trunk. A new Trunk dialog box
opens.
2.
Enter the number and name of the trunk:
n
Number. Identifies the hardware resource on the Server used for this
line. The number must correspond to the port on the Dialogic BCP
Connection Panel to which the trunk is connected.
If you have a mix of analog and digital trunks, be sure that you assign
trunk numbers that reflect how trunks will be installed in your
system. Analog trunks always use the lower-numbered trunks, so
either add the analog trunks first, or bump up the starting trunk
number for the digital span to reflect the actual line number. See
“About digital and Internet spans” on page 5-9 for information about
adding a digital span.
n
Name. Descriptive name for the trunk. See “Naming trunks” on
page 5-3.
3.
Choose whether the trunk is used for inbound calls, outbound calls, or
both, using the following fields:
n
Accept inbound calls. Check this box if the trunk is used for
inbound calls.
5-10
STRATA CS ADMINISTRATOR MANUAL
BETA DOCUMENT - PRELIMINARY & CONFIDENTIAL
n
Calls are sent to. Select the auto attendant, user or IVR Plug-in
that answers all inbound voice calls on this trunk. If you change
the target by time of day, send the calls to an auto attendant and
define the appropriate scheduled transfer action.
n
Faxes are sent to. Select the auto attendant, user or IVR Plug-in
that answers all inbound fax calls on this trunk. See “Setting up
fax routing” on page 5-7 for more information.
n
Retrieve DID digits from this analog line. Check this box to
collect DID digits on the line. When checked, Strata CS routes
inbound calls directly to the user, auto attendant, or IVR Plug-in
associated with the DID number. See “Setting up digit collection
on an analog trunk” on page 5-11 for more information.
n
Allow outbound calls. Check this box if the trunk is used for
outbound calls.
n
Registered for least cost routing. This feature is not available
in this version.
n
Centrex/PBX transfers supported. If this is a Centrex trunk or a
trunk connected to an external PBX, check the box to enable users to
transfer or forward calls using only Centrex or PBX extensions.
When this option is selected (and if supported by your Centrex/PBX),
Strata CS can transfer or forward a call without using any Strata CS
trunks.
n
Pre-transfer sequence. Type the keys required before
transferring a call to a Centrex or PBX extension. The valid keys
are 0-9, *, #, and & (Flash). The default is &.
n
4.
Post-transfer sequence. Type the keys required after Strata CS
dials the pre-transfer sequence and the extension, to transfer a call
to a Centrex or PBX extension. The valid keys are 0-9, *, #, and
& (Flash). After the post-transfer sequence is dialed, Strata CS
hangs up.
Click OK to add the trunk to your configuration.
Before Strata CS can use the new trunk, you must start it from the Device Monitor
(see “Restarting stations or trunks” on page 11-6).
Setting up digit collection on an analog trunk
The format used to transmit ANI and DID/DNIS information on analog trunk
varies with the carrier, as follows:
n
Fixed format. Each piece of information is always the same length. For
example, DID information is typically the last four digits that the caller
dialed.
CHAPTER 5. MANAGING TRUNKS AND SPANS
BETA DOCUMENT - PRELIMINARY & CONFIDENTIAL
5-11
n
Variable format. Each piece of information can vary in length, with filler
digits used as separators, for example, 4 DID digits and 5 ANI digits in the
format #DDDD#AAAAA#.
To collect the variable-format digits in this example, you must specify 3 separate
actions to Strata CS, using the procedure that follows:
n
n
n
The first action collects the filler digit # that indicates the start of the DID
information. The digit type is Filler, and the number of digits to collect is
1.
The second action collects the DID digits sent by the carrier. The digit
type is DID. You collect a variable number of digits up to the separator
digit, #.
The third action collects the ANI digits sent by the carrier. The digit type
is ANI. You collect a variable number of digits up to the separator digit, #.
To collect digits on an analog trunk
1.
In the Trunks view, select the trunk.
2.
Choose Trunks > Analog Digit Collection. The Analog Digit
Collection dialog box lists the digit collection actions that have been
defined already for this trunk.
3.
Type the number of milliseconds that you want Strata CS to wait for the
analog DID interface device to send digits.
4.
Click Add to add an action to collect the digits that you expect, or Edit
to modify the highlighted action.
5-12
STRATA CS ADMINISTRATOR MANUAL
BETA DOCUMENT - PRELIMINARY & CONFIDENTIAL
5.
In the Modify Action dialog box, select the Digit type to retrieve. You
can retrieve DID, ANI, or filler digits.
n
n
To retrieve fixed-format data, click Exactly __ digits, and then type
the number of digits to collect.
To retrieve variable-format data in which each piece of information
may vary in length, and filler digits are used as separators, click
Variable up to the first ___ digit, and then type the separator
character.
6.
Click OK.
7.
Repeat steps 4-6 to add all the actions required to collect digits coming
in on the trunk.
8.
Click OK.
After analog digit collection has been configured correctly, make sure that the
trunk is configured to accept inbound calls and retrieve DID digits. Both these
settings appear in the Trunks view and can be configured in the Trunks dialog
box.
Adding a digital Robbed Bit T1 span ______________________
This section explains how to add a digital Robbed Bit T1 span by configuring
signalling and adding the span to Strata CS in the Trunks view.
Configuring signaling using the Robbed Bit T1 Experimenter
Before you add a Robbed Bit T1 span in the Administrator, you must run the
Strata CS Robbed Bit T1 Experimenter on the Strata CS Server computer to
configure signaling on the T1 trunk. For information about installing and using
the Experimenter, see Strata CS Installation & Maintenance Manual.
Adding the Robbed Bit T1 span in the Trunks view
After you configure signaling on the span correctly using the Robbed Bit T1
Experimenter, you can add the span in the Administrator.
CHAPTER 5. MANAGING TRUNKS AND SPANS
BETA DOCUMENT - PRELIMINARY & CONFIDENTIAL
5-13
1.
Choose Trunks > New Trunk > Robbed Bit T1 Span. A new Robbed
Bit T1 Span dialog box opens.
2.
On the General tab, specify the following information for the span:
n
n
Span number. The sequence number of this Dialogic T1 board as
installed in your Strata CS Server computer (the sequence number of
the first T1 board is 1, not 0).
Starting trunk number. The starting trunk number of the span. The
numbers of the 24 trunks belonging to this span are displayed. If your
system also has analog trunks, the analog trunks must have the lower
trunk numbers, so if you have not added them yet, leave room for
them in your numbering of the span.
n
Wink duration. The length in milliseconds of the signal Strata CS
sends to your T1 carrier to indicate that it is ready to receive digits.
You can also set the wink duration using the Robbed Bit T1
Experimenter.
n
Send and receive. For T1 lines with ANI or DID/DNIS service only,
the signaling type—DTMF or MF—used for inbound digit
collection. You can also set this in the Robbed Bit T1 Experimenter.
n
Description. A description of the span, typically including the main
phone number of the span.
3.
On the Signaling tab, review the event definitions for your T1 trunk that
you specified using the Robbed Bit T1 Experimenter. The definitions
must match your carrier’s definitions for the trunk to work. To change
a definition, use the Robbed Bit T1 Experimenter (see “Configuring
signaling using the Robbed Bit T1 Experimenter” on page 5-13).
5-14
STRATA CS ADMINISTRATOR MANUAL
BETA DOCUMENT - PRELIMINARY & CONFIDENTIAL
Note: If you are running the Administrator on the Server, click Edit to
start the Experimenter. Otherwise, you must run the Experimenter on the
Strata CS Server.
4.
On the Trunks tab, set the default values for the 24 trunks that will be
created in this span. You can then change these values for each trunk
individually. See “Entering trunk defaults for a span” below.
5.
Click OK to add the span to your configuration.
Using a signaling template
The Robbed Bit T1 Experimenter includes templates that contain Robbed Bit T1
signaling definitions that will be valid in many cases:
n
E&MSignaling. Use if your Robbed Bit T1 line supports E&M
signaling.
n
Local1. Use for a local Robbed Bit T1 line.
n
Longdistance. Use for a long-distance Robbed Bit T1 line.
To apply a template to a span, click Apply Template on the Signaling tab. Select
the template to apply, click Open, and then click OK.
Note: If you have installed the Robbed Bit T1 Experimenter to a directory other
than the Strata CS Administrator’s directory, you must look for the template there.
CHAPTER 5. MANAGING TRUNKS AND SPANS
BETA DOCUMENT - PRELIMINARY & CONFIDENTIAL
5-15
To edit signaling definitions applied from a template, use the Robbed Bit T1
Experimenter.
Entering trunk defaults for a span
When you create a new digital span, you can set the defaults for all the trunks in
the span on the Trunks tab.
To enter trunk defaults for a span
1.
Check Accept inbound calls if the trunk is used for inbound calls.
2.
In Calls are sent to, select the auto attendant, user or IVR Plug-in that
answers all inbound voice calls on this trunk.
In Faxes are sent to. Select the auto attendant, user or IVR Plug-in that
answers all inbound fax calls on this trunk. See “Setting up fax routing”
on page 5-7 for more information.
3.
Check Allow outbound calls if the trunk is used for outbound calls.
Registered for least cost routing is not available in this version.
After you add the span, the Trunks tab is disabled. To modify the settings for an
individual trunk after the span has been added, edit the trunk in the Trunks view.
5-16
STRATA CS ADMINISTRATOR MANUAL
BETA DOCUMENT - PRELIMINARY & CONFIDENTIAL
Adding a digital ISDN or CAS span _______________________
Use the following procedure to add an ISDN T1, ISDN E1, or CAS E1 trunk. To
add ISDN Basic Rate Interface (BRI) trunks, see “Adding a digital ISDN BRI
span” on page 5-18.
1.
Choose Trunks > New Trunk > ISDN/CAS T1/E1 Span. A new
ISDN/CAS T1/E1 Span dialog box opens.
2.
On the General tab, specify the following information for the span:
n
Board number. The sequence number of the span.
n
Description. A description of the span, typically including the main
phone number of the span.
n
Protocol type. Select whether the trunk is an ISDN T1 or an E1 type.
The actual protocol used is determined when the Dialogic drivers are
installed, as described in Strata CS Installation & Maintenance
Manual.
Note: If you are using an E1 board with the CAS protocol, and your
country’s E1 CAS protocols are different from the standard format, see
“Manually entering E1 CAS protocols” in Strata CS Installation &
Maintenance Manual.
n
Starting trunk number. The starting trunk number of the span. The
numbers of the trunks that belong to this span are displayed. If your
system also has analog trunks, the analog trunks must have the lower
CHAPTER 5. MANAGING TRUNKS AND SPANS
BETA DOCUMENT - PRELIMINARY & CONFIDENTIAL
5-17
trunk numbers, so if you have not added them yet, leave room for
them in your numbering of the span.
3.
On the Tuning tab, optimize your ISDN settings as needed. See
“Optimizing your ISDN settings” on page 5-19.
4.
On the Trunks tab, set the default values for the 24 trunks that will be
created in this span. You can then change these values for each trunk
individually. See “Entering trunk defaults for a span” on page 5-16.
5.
Click OK to add the span to your configuration.
Note: ANI/DNIS is automatically retrieved by Strata CS for these types of digital
trunks.
Adding a digital ISDN BRI span __________________________
Use the following procedure to add a new ISDN Basic Rate Interface (BRI) span.
To add Primary Rate Interface (PRI) spans, see “Adding a digital ISDN or CAS
span” on page 5-17.
1.
Choose Trunks > New Trunk > ISDN BRI Span. A new ISDN BRI Span
dialog box opens
2.
On the General tab, specify the following information for the span:
n
BRI board number. The sequence number of the span.
5-18
STRATA CS ADMINISTRATOR MANUAL
BETA DOCUMENT - PRELIMINARY & CONFIDENTIAL
n
Description. A description of the span, typically including the main
phone number of the span.
n
Number of channels. The number of trunks supplied by your
Dialogic BRI board. If you are using a BRI/80-SC board, select 8. If
you are using a BRI/160-SC board, select 16.
n
n
Protocol. The protocol of your BRI span, as given to you by your
BRI supplier.
Starting trunk number. The starting trunk number of the span. The
numbers of the trunks belonging to this span are displayed. If your
system also has analog trunks, the analog trunks must have the lower
trunk numbers, so if you have not added them yet, leave room for
them in your numbering of the span.
n
Server Protocol Identifier Number (SPID). A unique number
assigned to each trunk in the BRI span. Enter the SPID numbers
supplied to you by your BRI supplier. SPID numbers are required for
North American BRI installations only. If your BRI board is the
Dialogic BRI/2VFD, you do not need to enter SPID numbers.
3.
On the Tuning tab, optimize your ISDN settings as needed. See the next
section, “Optimizing your ISDN settings.”
4.
On the Trunks tab, set the default values for the 24 trunks that will be
created in this span. You can then change these values for each trunk
individually. See “Entering trunk defaults for a span” on page 5-16.
5.
Click OK to add the span to your configuration.
Optimizing your ISDN settings ___________________________
When you are adding an ISDN trunk, you can use the Tuning tab to change ISDN
board parameters. Changes you make while a call is in progress on the board are
not reflected until the current call ends and a new call begins.
To set your ISDN parameters
1.
Run the Dialogic Makecall Utility (DMU), supplied on the Strata CS
CD. For instructions, see Strata CS Installation & Maintenance
Manual. The DMU wizard steps you through the process of testing your
ISDN board, and generates a file in the Output subdirectory called
Outbound_MCB.txt.
CHAPTER 5. MANAGING TRUNKS AND SPANS
BETA DOCUMENT - PRELIMINARY & CONFIDENTIAL
5-19
2.
On the Tuning tab, click Import and select the Outbound_MCB.txt file.
This method updates all ISDN parameters based on their optimum value as
determined by the DMU. To undo the update, click Restore Defaults to reset the
Tuning tab to its initial values.
You can also change each parameter individually. Click Help for a description of
each parameter and its possible values.
Enabling ISDN Megacom support ________________________
If you are using ISDN Megacom service, you must change the Strata CS Server
computer’s registry in order to make outbound international calls. Without this
change, international calls will fail, because Strata CS does not provide the
parameter indicating national or international calls that ISDN Megacom service
requires.
For instructions on changing the registry for ISDN Megacom calls, see “ISDN
Megacom service settings” on page A-24.
5-20
STRATA CS ADMINISTRATOR MANUAL
BETA DOCUMENT - PRELIMINARY & CONFIDENTIAL
Adding an Internet span ________________________________
1.
Choose Trunks > New Trunk > Internet Span. A new Internet Span
dialog box opens.
2.
On the General tab, specify the following information for the span:
n
IP Board number. The sequence number of this Dialogic DM3
IPLink board as installed in your Strata CS Server computer (the
sequence number of the first DM3 board is 1, not 0).
n
IP Address. The IP address of the IP Link board if it has its own
built-in Network Interface Card (NIC), otherwise the IP address of
the Strata CS Server computer’s NIC.
n
Description. A description of the span. Include the address of the
span in the description for easy reference.
n
Number of trunks. The number of trunks contained in the span.
Enter the number of channels available on the Dialogic DM3 IPLink
board. To find the number of channels available on your board, refer
to the model number of the board and Strata CS Installation &
Maintenance Manual.
n
Starting trunk number. The starting trunk number of the span. The
numbers of the trunks belonging to this span are displayed. If your
system also has analog trunks, the analog trunks must have the lower
trunk numbers, so if you have not added them yet, leave room for
them in your numbering of the span.
CHAPTER 5. MANAGING TRUNKS AND SPANS
BETA DOCUMENT - PRELIMINARY & CONFIDENTIAL
5-21
n
Send inbound calls to. Select the auto attendant, user or IVR
Plug-in that answers all inbound voice calls on the trunks in this span.
3.
Click the Trunks tab to specify how trunks in this span are used:
n
Accept inbound calls. If checked, the trunks are used for inbound
calls.
n
Allow outbound calls. If checked, the trunks are used for outbound
calls.
4.
Click the Codecs tab to view the default codecs used by this span for all
inbound calls and as dialing service defaults for outbound calls. If you
must change Strata CS’s default codec list, see the next section,
“Modifying Strata CS IP codecs.”
Note: You can override the default span codecs when you set up a
dialing service that allocates trunks in this span (see “Codecs tab” on
page 8-21).
5.
Click OK to add the span to your configuration.
Modifying Strata CS IP codecs
A codec is a protocol used to compress and decompress voice signals for
transmission over an IP network. When an IP call is established between two
devices, the devices automatically choose which codec to use. This choice is
based on whether the codec is available to both devices and how highly the codec
is preferred by both. This tab lets you make codecs available to your device, and
arrange them in order of preference, with the topmost codec being the most
preferred. For example, you may prefer one codec over another for bandwidth
reasons.
Important: When you are connecting two Strata CS Servers over an IP Gateway
connection, the Servers must use the same codec lists, otherwise audio failure can
occur during calls. See “Connecting two Servers using IP Gateways” on page 13-7
for more information about IP Gateway connections.
The codecs you can make available are listed below. See the Known Issues in the
Administrator online Help for up-to-date information about the availability of
codecs.
n
G.729a. Best for Strata CS-to-Strata CS connections. Offers a good
balance between sound quality and bandwidth. (8.8 kbs.)
n
G.711 a-law, G.711 µ-law. Supported by all H.323 gateways and
terminals, but high bandwidth. (64 kbs.)
n
G.723.1. Best for NetMeeting and other H.323 terminals. (5.3 kbs. or 6.3
kbs.)
n
MSGSM. (13.0 kbs.)
5-22
STRATA CS ADMINISTRATOR MANUAL
BETA DOCUMENT - PRELIMINARY & CONFIDENTIAL
n
GSM. (13.0 kbs.)
To modify Strata CS IP codecs
1.
In the Trunks view, double-click the Internet span to open its dialog box,
and then click the Codecs tab.
2.
If necessary, click Add to add another codec, or select a codec and click
Edit to change any of the parameters used with the codec.
3.
In the Add Codec dialog box, select a Codec name from the list of
codecs supported by the Dialogic IPLink boards in the drop-down list.
4.
If you want to modify any of the parameters used with the codec, enter
the new values. The fields you can change may vary depending on the
codec you select. If enabled for a particular parameter, select Any to
accept whatever parameter value the other device sends.
n
Frame size. Frame buffer size, in milliseconds. A larger frame size
means more latency (time delay).
n
Frames per packet. Number of frames in a packet.
n
Bit rate. Rate at which data is transmitted over the network.
n
Transmit audio only when voice is detected. If checked, only
actual voice audio signal is digitized for transmission, not silence.
5.
Click OK to add the codec.
6.
Click the up or down arrows to promote or demote a specific codec
within the list. The topmost codec is the most preferred. Continue to add
codecs to the service.
7.
Click OK to return to the Codecs tab.
CHAPTER 5. MANAGING TRUNKS AND SPANS
BETA DOCUMENT - PRELIMINARY & CONFIDENTIAL
5-23
Fine-tuning your IP connection
Strata CS’s IP Span dialog box includes a Tuning tab that you use to change any
of the IPLink board parameters between IP calls. Changes you make while a call
is in progress on the board are not reflected until the call completes and a new call
is initiated.
Parameters are listed in the following groups:
n
General
n
Debug print levels
n
DTMF parameters
n
Echo canceler
n
Level controls
n
Miscellaneous
n
Packet loss recovery
n
Redundancy
Parameters that may be useful to change include echo cancellation and volume
(located under Level Controls).
To change an IPLink board parameter
1.
In the Trunks view, double-click the Internet span to open its dialog box,
and then click the Tunings tab.
2.
Click a Parameter to expand it.
5-24
STRATA CS ADMINISTRATOR MANUAL
BETA DOCUMENT - PRELIMINARY & CONFIDENTIAL
3.
Enter the new Value. Some fields are text boxes or drop-down lists.
Other fields enable the slider bar at the bottom of the dialog box.
4.
Click OK to save your changes. Click Restore defaults to restore the
IPLink board defaults.
Note: If you dial out on an IP-to-Phone Number service and you cannot send
digits to external phone systems, increase DTMF Gain and DTMF On-time, under
DTMF Parameters on this tab.
CHAPTER 5. MANAGING TRUNKS AND SPANS
BETA DOCUMENT - PRELIMINARY & CONFIDENTIAL
5-25
CHAPTER 6
CHAPTER 6
MANAGING USERS AND STATIONS
CHAPTER CONTENTS
The Users view . . . . . . . . . . . . . . . . . . . . . . . . . . . . . . . . . . . . . . . . 6-2
About users and roles. . . . . . . . . . . . . . . . . . . . . . . . . . . . . . . . . . . 6-4
Setting user options . . . . . . . . . . . . . . . . . . . . . . . . . . . . . . . . . . . . 6-6
About adding a user . . . . . . . . . . . . . . . . . . . . . . . . . . . . . . . . . . . . 6-7
The General tab . . . . . . . . . . . . . . . . . . . . . . . . . . . . . . . . . . . . . . . 6-9
The Recordings tab . . . . . . . . . . . . . . . . . . . . . . . . . . . . . . . . . . . 6-15
The Notifications tab . . . . . . . . . . . . . . . . . . . . . . . . . . . . . . . . . . . 6-17
The Call Handling tab . . . . . . . . . . . . . . . . . . . . . . . . . . . . . . . . . . 6-24
The Phone tab . . . . . . . . . . . . . . . . . . . . . . . . . . . . . . . . . . . . . . . 6-28
The Dialing tab . . . . . . . . . . . . . . . . . . . . . . . . . . . . . . . . . . . . . . . 6-33
The Permissions tab . . . . . . . . . . . . . . . . . . . . . . . . . . . . . . . . . . . 6-37
The Other tab . . . . . . . . . . . . . . . . . . . . . . . . . . . . . . . . . . . . . . . . 6-40
Managing users . . . . . . . . . . . . . . . . . . . . . . . . . . . . . . . . . . . . . . 6-41
Managing stations . . . . . . . . . . . . . . . . . . . . . . . . . . . . . . . . . . . . 6-43
BETA DOCUMENT - PRELIMINARY & CONFIDENTIAL
The Users view________________________________________
The Users view presents information about individual users and roles in your
organization. Roles appear in bold in the Users view. Roles are collections of
specific permissions that are used to grant permissions to users. You can grant
additional permissions to users by changing that user’s permissions (see “The
Permissions tab” on page 6-37).
To add, edit, or delete Strata CS users, click the Users button in the view bar The
Users view opens. Double-click a user in the view to open the User dialog box for
that user.
Each user that you add appears as a row in the Users view. The following table
shows the information that is displayed for each user.
Column
Description
Name
Logged-on user’s name.
Extension
Extension number dialed to reach the user.
DID
Direct inward dial number used to dial the
user directly.
Station
Default station (phone device) assigned to
the user.
6-2
STRATA CS ADMINISTRATOR MANUAL
BETA DOCUMENT - PRELIMINARY & CONFIDENTIAL
Column
Description
Type
The type of user:
User. An individual with an extension on this
Server. Can also be a conference room.
ACD workgroup. An automatic call
distribution workgroup user.
IP Gateway. A user created to enable IP calls
to a user on a remote Server.
Title
The job title entered for this user. You can
enter titles for users when you create them.
Mail Usage
Percentage of allocated voice mail space
currently used. For details on how the
information in this and the following two
columns is calculated, see “Updating users’
mail, greeting, and disk usage totals” on
page 6-42.
Greeting Usage
Percentage of allocated greeting and voice
title space currently consumed by the user.
Disk Usage
Amount of disk space in megabytes
consumed by the user's voice message,
greeting, and voice title files.
Mailbox Size
Total space allocated to the user for voice
messages, in minutes.
Greeting Size
Total space allocated to the user for greetings
and voice titles, in minutes.
Forwarding To
Number to which the user is currently
forwarding calls.
Listed
If checked, the user is listed in the
dial-by-name directory.
Voice Title
If checked, the user has a recorded voice
title. You can record titles for users or they
can record their own.
Announce Callers
If checked, the caller's name is announced
on incoming calls.
Exchange Sync
If checked, Strata CS and Microsoft
Exchange inboxes are synchronized.
Comments
Comments added about the user.
CHAPTER 6. MANAGING USERS AND STATIONS
BETA DOCUMENT - PRELIMINARY & CONFIDENTIAL
6-3
About users and roles__________________________________
Unlike a traditional PBX, Strata CS manages phone traffic by user rather than by
device. Adding a user allows that person to make and receive calls through the
Strata CS system. Roles are collections of permissions that you assign to users.
You can add a user to an existing role and grant them the same permissions as
every member who also has that role, and you can create new roles.
Users
Users in Strata CS are of the following types:
n
n
n
User. A person using a telephone in your office.
ACD workgroup. This special type of user sends callers to one or more
automatic call distribution groups. To create an ACD workgroup, select
ACD workgroup under Type. For more about setting up ACD
workgroups, see the Strata CS Call Center Administrator Guide.
IP Gateway. This special type of user represents a user on a remote
Strata CS Server that is linked to your Server by an IP Gateway
connection over the Internet or other IP network. With IP Gateway users,
the users on both Servers appear to be local, effectively creating a single
large Strata CS site. To create an IP Gateway user, select IP Gateway
under Type. For more information, see “Connecting two Servers using IP
Gateways” on page 13-7.
The Admin and Operator users
Strata CS comes with two default Users already defined, Admin and Operator.
n
n
Admin user. Allowed to run the Administrator and Device Monitor
program and to perform all administrative functions. You cannot delete or
rename the Admin user, nor can you remove the Admin user’s
administrative permissions.
Operator. The user to whom all calls go to by default if they cannot be
handled in any other way. For example, if a caller presses 0, or a user’s
mailbox cannot be found, the call is sent to the extension assigned to the
Operator. You cannot delete or rename the Operator, but you can remove
the Operator user’s Operator permissions.
You can assign Administrator and Operator permissions to other users (see “The
Permissions tab” on page 6-37).
Configuring a system without an Operator
If you choose not to have a person act as an Operator in your system, the Operator
extension still receives calls whenever callers press 0 from within the system.
6-4
STRATA CS ADMINISTRATOR MANUAL
BETA DOCUMENT - PRELIMINARY & CONFIDENTIAL
Even if the Operator extension has no station associated with it, voice messages
left by callers are saved in the Operator user’s mailbox.
If you do not want this to happen, edit the Operator user’s Standard routing list so
that its only action transfers calls to another extension. For instructions on editing
routing lists, see Strata CS Client User Guide.
Understanding personal Operators
The Strata CS system has one Operator user, but each user can specify a personal
Operator. A user’s personal Operator is the extension to which callers are
transferred if the caller presses 0 from within the user’s voice mailbox or routing
list. By default, a user’s personal Operator is the Operator user, but users can
specify any extension as their personal Operators. See “Creating a password” on
page 6-14.
How callers are transferred to Operators
The following table shows to which Operator callers are transferred, depending
on their location when they press 0.
Caller presses 0 within
Caller is transferred to
Auto attendant
Operator user
Dial by name directory
Operator user
User’s voice mailbox
Personal Operator
User’s routing list
Personal Operator
On hold
Personal Operator
Note: If a user does not set up a personal operator, callers are transferred to the
Operator user in all cases.
Changing the Operator’s extension from 0
You can change the Operator’s extension to a number other than the default of 0
(for example, in order to use 0 as a dialing service access code). However, even
when the Operator’s extension is something other than 0, callers must press 0
from within the system to transfer to the Operator. For example, if a caller reaches
a user’s voice mail, and wants to transfer to the Operator instead of leaving a voice
message, the caller dials 0, even if the Operator’s extension is 111.
Setting up workgroups for the Operator
To make the Operator’s job easier, you can set up a separate workgroup for each
department in your system. The Operator’s Call Monitor will then display a tab
for each department, and the Operator will be able to see a list of people in a
CHAPTER 6. MANAGING USERS AND STATIONS
BETA DOCUMENT - PRELIMINARY & CONFIDENTIAL
6-5
specific department by clicking on the appropriate tab. See Chapter 7, “Managing
Workgroups,” for details about setting up workgroups.
Roles
Roles are collections of specific permissions that are granted to users according
to the roles they perform in the organization. By default Strata CS contains two
roles—Administrators and Users. You can edit these roles as needed and you can
also create new roles (see “To create a new role” on page 6-39).
Setting user options ___________________________________
You can set user options in Strata CS in the following ways:
n
n
n
Set options for all users. To set up all users with the same options,
create a template user, and then base all users on the template (see
“Adding a user by using a template” on page 6-9).
Set options for a group of users. Create a template user for each group
of users with common characteristics, and then base each user in the group
on the template.
Set options for individual users. Follow the steps described in “Adding
a user in the User dialog box” on page 6-8.
Also, users can customize many options themselves using the Client. You
control the options that they can customize by allowing or restricting
access to specific Options dialog box tabs in the Client.
Where to set user options
User options are set in both the Strata CS Administrator and Client.
n
Some options can only be set in the Administrator. These options are
described in detail in this chapter.
n
n
Some options are set in the Client. To edit these options from the
Administrator, click the Edit All Client Settings button in the User dialog
box. Client options are described in detail in Strata CS Client User Guide.
Some options can be set in both places. This allows you to set up
users using standard defaults for your organization. Individual users can
then customize the settings further, or you can restrict the options that
users can customize. These options are described in this chapter and in
Strata CS Client User Guide.
6-6
STRATA CS ADMINISTRATOR MANUAL
BETA DOCUMENT - PRELIMINARY & CONFIDENTIAL
About adding a user ___________________________________
Adding a user to the system allows that person to make and receive calls using
Strata CS. Unlike other telephone systems, Strata CS assigns access permissions
to specific people rather than to devices. Users access the system using their own
identities regardless of the identity of the telephone device they use.
Generally, you must have a station license available for each user you create. It is
possible, however, to add a user who does not have a station (an actual telephone).
Such a user is commonly created for ACD workgroups, voice mail-only users, or
remote users who always have their calls forwarded outside the office. Users
without stations do not require station licenses. For more information about
license requirements, see “Entering licenses” on page 3-2.
You can add a new user in the following ways:
n
n
n
At the telephone. This is a convenient way to quickly activate phones
when you are setting up a new Strata CS system. However, you must
physically go to each user’s telephone to activate it, and must still use the
Administrator to finish adding each user.
In the User dialog box. This method allows you to set up all user options
at one time from one location.
Using a template. You can save time and reduce typing when adding
new users in the Administrator by creating a template user with
characteristics common to all users. This template user can then be copied
and customized for each new user. You can create different template users
for various types of users who share specific properties, for example,
ACD agents, remote users, and so on.
Adding a user at the telephone
From the new user’s telephone, press *0 and follow the prompts to create the user
and assign an extension. The user is created with default information.
For example, assigning the extension 123 creates a user with a default first name
of “New”, a default last name of “User123”, and a default password of “123”.
You are also prompted to record a voice title for the user or change user
preferences. You must run the Administrator at a later time to modify the default
properties to reflect the new user’s real name and password and to set additional
user properties.
Note: This method does not work if the phone is already assigned to another
user. For a phone that has already been assigned an extension, dialing *0 plays
the extension and station ID.
CHAPTER 6. MANAGING USERS AND STATIONS
BETA DOCUMENT - PRELIMINARY & CONFIDENTIAL
6-7
If for any reason Strata CS is unable to create the user at the telephone extension
(for example, a user with that name already exists, or there are no more Client
licenses available), you must run the Strata CS Administrator, resolve the issue,
and add the user there.
Adding a user in the User dialog box
To create a user, choose Users > New User. The tabs in the User dialog box allow
you to add and modify user properties. These properties are described later in this
chapter.
n
General tab (see page 6-9). Enter basic information that defines the user
to Strata CS. Assign an extension, station ID, and DID number. Create a
password, specify a personal operator, and select a language for telephone
prompts.
You also use this tab to create a user for handling ACD agents (see Strata
CS Call Center Administrator Guide) or an IP Gateway user that allows
users to directly dial the extension of a user on a remote Strata CS Server
(see “Creating Gateway users to unify two Strata CS Servers” on
page 13-17).
n
n
Recordings tab (see page 6-15). Allocate space for the user’s voice
messages, greetings, and voice title. Indicate where call recordings made
by this user are sent. Record a voice title. Set up Microsoft Exchange
synchronization.
Notifications tab (see page 6-17). Set up and schedule e-mail and pager
notifications.
n
n
Call Handling tab (see page 6-24). Set up call screening. Specify how
the user is listed in the dial-by-name directory. Set up call forwarding for
the user.
Phone tab (see page 6-28). Enable features on the user’s telephone, such
as caller ID and message waiting indicator. Specify how long the phone
rings before continuing to voice-mail.
n
n
n
Dialing tab (see page 6-33). Allow the user to make external calls, and
specify phone numbers the user is permitted or restricted from dialing.
Permissions tab (see page 6-37). Control user permissions to determine
the options or features that the user can access. Set the permission roles
that the user belongs to.
Other tab (see page 6-40). Set hands-free options.
6-8
STRATA CS ADMINISTRATOR MANUAL
BETA DOCUMENT - PRELIMINARY & CONFIDENTIAL
Adding a user by using a template
Create a user, named, for example, “User Template” that has the settings you want
all users to share, such as mailbox size and dialing permissions. You can also set
up e-mail and pager notification options in the template, and you can enable
phone features that are applied to all users that are created using the template.
To add a new user based on the template, select the template user in the Users
view, and then choose Edit > Copy. Choose Edit > Paste to open the User dialog
box, in which you can customize the new user’s properties, such as first and last
name, extension and station ID, e-mail address for notifications, and so on.
The General tab _______________________________________
Choose File > New > User in the Administrator, and then click the General tab.
Identifying the user
In Type, choose User. Then enter the user’s First name and Last name. At least
one of the name fields is required. You can enter the user’s Title and any
Comments (such as the user's department) that you want to be displayed along
with the user name in the User view.
It can be helpful to use the Title field for the user’s department, for example,
“Sales.” When a caller requests to be transferred to someone in Sales, the
Operator can see all the users in the Sales department grouped together in the
Client’s Transfer Call dialog box.
CHAPTER 6. MANAGING USERS AND STATIONS
BETA DOCUMENT - PRELIMINARY & CONFIDENTIAL
6-9
Assigning an extension
A user’s extension is the number callers dial to reach the user. Extensions must
comply with the following restrictions:
n
No longer than 5 digits
n
Numeric characters only
n
Must be unique
In addition, follow these recommendations when assigning extensions:
n
n
Avoid extensions that begin with another extension or access code. For
example, if one user is given extension 17 and another extension 177,
users who dial extension 17 will experience a brief delay while Strata CS
waits to see if another “7” is dialed. See “Avoiding dialing ambiguities”
on page 8-8 for more information.
Avoid extensions that begin with frequently dialed area codes—if users
forget to dial an access code, they may unexpectedly dial the extension
instead. For example, if 1-617 is a commonly dialed prefix for your
location, do not assign extension 161.
When you create a new user, you can accept the extension suggested
automatically by Strata CS or you can assign a different one. Strata CS suggests
the next-highest extension number that has not yet been assigned, and it reuses
extensions that have been unassigned.
By default, new extensions are assigned starting with extension 100. If you want
all your extensions to start in a different range, choose Tools > Options, and then
enter the Starting extension number under User auto suggestion.
Note: You can give the Operator user an extension other than the default of 0.
See “Changing the Operator’s extension from 0” on page 6-5.
6-10
STRATA CS ADMINISTRATOR MANUAL
BETA DOCUMENT - PRELIMINARY & CONFIDENTIAL
Assigning a station ID
The station assigned to a user of the type User is the numeric identifier of the
telephone at the user’s default location. A station ID is not used for users of the
type ACD workgroup or IP Gateway.
Strata CS assumes that a user is located at the phone specified by the user’s station
ID unless someone specifies otherwise.
n
n
Inbound calls. Calls to the user’s extension ring that station, unless the
user routes calls elsewhere by using call forwarding or a routing list.
Outbound calls. Calls from that station appear in the Call Log as from the
user and are subject to the user’s dialing restrictions and permissions,
unless another user logs in to that station.
Outbound calls from a station are identified by Strata CS as belonging to
one of the following:
n
n
n
The user logged in using the telephone commands.
If no one is logged in using the telephone commands, the user who
last logged in using the Client.
If no one else is logged in, the default user for that station.
When you create a new user of the type User, you can accept the station ID
suggested automatically by Strata CS, or you can assign a different one. Strata CS
suggests the next-highest station ID that has not yet been assigned, and it reuses
station IDs that have been unassigned. By default, new station IDs are assigned
starting with station ID 1. If you want to start with a different station ID, choose
Tools > Options, and then enter the Starting station number under User auto
suggestion.
Station ID corresponds to the interface on the MSI board to which the station is
connected. On systems with analog trunks, this number is often the same number
as that displayed on the BCP connection jack to which the phone is attached.
n
n
If you are using analog trunks and the BCP panel, assign station ID 1 to
your operator and station IDs 2-4 to people who are assigned to answer
phones in the event of a system failure. With analog phone service, Strata
CS's Watchdog mode provides limited telephone support if power fails or
the Windows NT/2000 server goes down. In Watchdog mode, the
Dialogic hardware routes the first 4 incoming analog trunks to the first 4
stations (station IDs 1-4).
For a user without a physical telephone (for example, a voice mail-only
user, an ACD workgroup, or a user who works permanently off-site),
assign station ID 0.
CHAPTER 6. MANAGING USERS AND STATIONS
BETA DOCUMENT - PRELIMINARY & CONFIDENTIAL
6-11
All stations must be assigned to a user, even phones that are not associated with
an individual in the workplace, such as a conference room phone. To represent
such phones, create dummy users called “Conference Room 1,” “Mail room,” and
so forth, and assign the stations to them.
Linking users and phones
In Strata CS, the computer—not the user—is linked to the telephone. Each Client
workstation has an assigned phone, which is usually be the phone closest to it. The
station ID of the phone is specified during the Client installation and is stored in
the computer’s Windows Registry.
It is important to understand the distinction between a user’s extension and station
ID:
n
Extension. The number that callers dial to reach the user, not the number
they dial to reach the telephone on the user’s desk. Because users can set
up call forwarding or routing lists to route their calls elsewhere, a call to
a user’s extension might actually ring another phone in the office, their
home phone, a cell phone, and so on.
n
Station ID. The station ID represents the physical telephone jack assigned
to the user. A station ID is never dialed. The number corresponds to the
MSI board interface that the phone is plugged into. To identify a phone’s
station ID, pick up the phone and dial *0.
6-12
STRATA CS ADMINISTRATOR MANUAL
BETA DOCUMENT - PRELIMINARY & CONFIDENTIAL
Assigning multiple users to the same station. You can give multiple users
the same station ID, which means they share the same phone. Outgoing calls from
the phone are attributed in the Call Log to the user who logged on most recently.
For example, Steve and Dorothy work different shifts, but they share the same
computer and phone. At the beginning of his shift, Steve logs on to the Client. In
the Call Log, the From column for calls he makes contains “Steve”. At the end of
his shift he logs off and exits the Client. Dorothy then starts work, and makes a
call using the telephone. Because she forgot to log in, this call is also identified in
the Call Log as having been placed by Steve. After Dorothy logs in, either via the
Client or the telephone commands, the station is in her name and the calls she
makes are attributed to her in the Call Log.
Logging in at a station other than the assigned one. A user can temporarily
log in to someone else’s default station, either through the telephone commands
or the Client. While logged in, Strata CS treats outgoing calls as coming from the
user, and applies the user’s own dialing permissions and permissions. Calls to the
user appear in the Call Monitor. However, calls do not ring at this phone unless
the user forwarded calls to the new location or selected “Take Call” from the Call
Monitor. Calls for the default user at the location still ring there, but are not
displayed in the Call Monitor.
When the user logs off, the station reverts to its default extension. To find out the
default extension for a phone, dial *0.
n
To log off using the telephone commands, hang up the phone.
n
To log off using the Client, exit the Client or log in as a different user.
Reconfiguring a station for a different phone. Each Strata CS Client is
configured to work with a specific station. For example, if you move a user’s
Client workstation to a different office with a different phone, you must change
the station ID, as described in “Assigning a station ID” on page 6-11.
Assigning a DID number
You can assign a DID number to a user from the block of numbers provided by
your telephone company or T1 provider. When Strata CS recognizes this number
as the final digits on an inbound call, the caller is automatically connected to this
user, bypassing the main auto attendant.
To assign multiple DID numbers to a user, separate each number with a comma
(,). For more information about DID, see “ANI/DID digit collection” on page 5-5.
CHAPTER 6. MANAGING USERS AND STATIONS
BETA DOCUMENT - PRELIMINARY & CONFIDENTIAL
6-13
Creating a password
Enter a numeric Password used to access the user’s voice mail, options, and to
start the Strata CS Client. The minimum password length for your system is
specified in the General tab of the System Settings dialog box. The password can
be changed either on this tab or in the Client.
Retype the new password in the Confirmation field.
Setting up a personal operator
By default, Strata CS dials the Operator user’s extension whenever a caller
presses 0 while listening to a user's greeting or leaving a message. To transfer
calls to another user instead (for example, a departmental operator, personal
assistant, or other auto attendant), select the user from the Operator drop-down
list on the General tab. For more information about operators, see “The Admin
and Operator users” on page 6-4. A personal operator can be also be set in the
Strata CS Client.
Choosing a language for telephone prompts
On the General tab, in the Telephone prompts drop-down list, select the
language that you want to be used. When the user logs in or is identified on the
telephone, Strata CS automatically switches to this language for all subsequent
system prompts for that user. The language can be also be set in the Strata CS
Client. This setting does not affect the prompts that callers hear.
Editing a user’s Client settings
A user’s Contacts, Greetings, Routing list settings, and Call rules can only be
viewed or changed in the Strata CS Client.
To edit these settings from the Administrator, click Edit All Client Settings from
any tab. The Client starts, automatically logged in to the user’s account without
your having to enter the user’s password. For privacy reasons, the Call Monitor
and Voice Messages views are hidden. Using the Client you can view and edit any
of the user’s custom settings.
The Client must be installed on the same computer as the Administrator for you
to use this feature.
6-14
STRATA CS ADMINISTRATOR MANUAL
BETA DOCUMENT - PRELIMINARY & CONFIDENTIAL
The Recordings tab ____________________________________
You allocate space for a user’s voice files on the Recordings tab of the User dialog
box. For existing users, this dialog box displays the amount of allocated space (in
minutes) that is currently used for the user’s mailbox, recorded greetings, and
voice titles. This information is also shown in MB and as a percentage of the total
space allocated.
Allocating space for voice messages
In Mailbox with __ minute max size, enter the number of minutes' worth of voice
messages the user can save.
Choose the default setting of 20 minutes (9.2MB of storage) for typical users. You
may need to increase the default for users who record calls, because call
recordings (including those that were e-mailed to the user) are stored in the user's
mailbox.
To create an extension at which no messages are left, for example, a conference
room or an IP Gateway user, check No mailbox.
Allocating space for recorded greetings and voice titles
In Maximum storage, enter the number of minutes of recorded greetings and
voice titles the user can save. The Maximum storage size can be also be set in the
Strata CS Client.
CHAPTER 6. MANAGING USERS AND STATIONS
BETA DOCUMENT - PRELIMINARY & CONFIDENTIAL
6-15
The default setting of 10 minutes requires 4.6MB of storage. The Administrator
posts a warning message if the total allotment of voice message and greeting
space for all users exceeds the available disk space on the Strata CS Server.
Voice titles can be recorded either from this tab or in the Strata CS Client.
Enabling Microsoft Exchange Server synchronization
You can enable synchronization of a user’s Strata CS voice mail messages with
the corresponding e-mail notifications in Exchange.
To enable synchronization
1.
Check Synchronize with Exchange Server mailbox. If this control is
disabled, first set up Exchange Server notification on the Other tab of
the System Settings dialog box. For more information, see “Setting up
Microsoft Exchange synchronization” on page 4-18.
2.
Enter the user’s Exchange Server mailbox. This can be obtained from
Microsoft Exchange.
Note: Exchange Server mailboxes must not be confused with the
e-mail address supplied when setting up e-mail notification for the user
(see “Setting e-mail notification” on page 6-18). One of the e-mail
addresses specified for the user for e-mail notification must route e-mail
to the Exchange Server mailbox that you specify here.
Setting up call recording
By default, call recordings are sent to the mailbox of the user who made them.
Select a name from the Send call recordings to drop-down list on the Recordings
tab to send recordings made by the user to another user’s mailbox.
Note: This option is disabled if the user has been prevented from making call
recordings.
6-16
STRATA CS ADMINISTRATOR MANUAL
BETA DOCUMENT - PRELIMINARY & CONFIDENTIAL
The Notifications tab ___________________________________
You can set Strata CS to send an e-mail message or call a pager whenever a user
receives a new voice message. This feature is convenient for users who work at
remote locations and do not use the Client program.You can receive notifications
for all voice messages or for urgent messages only.
E-mail notifications can contain:
n
Caller’s name
n
Phone number at which call originated
n
Strata CS extension at which message was left
n
Voice message length
n
Notes associated with the message
n
Voice message as an attachment
Pager notifications can contain:
n
Caller ID for message
n
Strata CS extension that was dialed
n
Voice message length
CHAPTER 6. MANAGING USERS AND STATIONS
BETA DOCUMENT - PRELIMINARY & CONFIDENTIAL
6-17
Setting e-mail notification
Make sure e-mail notification is configured properly as described in Strata CS
Installation & Maintenance Manual. See “Configuring e-mail notification
support” in Chapter 10 of that manual for more information.
On the Notifications tab, under After receiving a message, notify this user via
e-mail, select one of the following options from the drop-down list:
n
n
Do not send e-mail notifications. The user does not receive e-mail
notification of new voice messages.
Send e-mail for all messages. The user receives an e-mail notification
whenever they receive a new voice message.
n
Send e-mail for urgent messages only. The user receives an e-mail
notification whenever they receive a voice message marked urgent.
In the E-mail address(es) field, enter the e-mail address to which notifications
are sent. Separate multiple addresses by semicolons (;).
Note: Valid e-mail addresses must be in the format [email protected] or be
resolvable via the address book of the e-mail client configured on the Strata CS
Server. For example, the e-mail address “Bob Smith” will work if the address book
is configured to look up or resolve on that name.
In the next drop-down list, set whether the voice message is attached to the e-mail
as a .WAV file, by selecting one of the following:
n
Do not attach voice message. The voice message is not attached to the
e-mail.
n
n
n
Attach voice message. Messages are attached to the e-mail and also
appear in the user’s Strata CS Inbox marked as unheard.
Attach voice message and mark as heard. Messages are attached to
the e-mail and appear in the user’s Inbox marked as already heard.
Attach voice message and delete from Inbox. Messages are attached
to the e-mail only, and do not appear in the user’s Inbox. You cannot
select this option if Exchange synchronization is enabled for a user (see
“Enabling Microsoft Exchange Server synchronization” on page 6-16).
Setting pager notification
On the Notifications tab, under After receiving a message, notify this user via
pager, select one of the following options from the drop-down list:
n
n
Do not send pager notifications. The user does not receive pager
notification of new voice messages.
Send a page for all messages. The user receives a page whenever a new
voice message arrives.
6-18
STRATA CS ADMINISTRATOR MANUAL
BETA DOCUMENT - PRELIMINARY & CONFIDENTIAL
n
Send a page for urgent messages only. The user receives a page
whenever a voice message marked urgent arrives.
In the Page using field, select the dialing service that you want Strata CS to use
to dial the user’s pager.
In the Dial Sequence field, enter the dial string for the pager, including the phone
number of the paging service and the pager's PIN if required. The dial string can
contain any touch tone digit (0-9, *, #). You can enter commas to indicate
1-second pauses in the dial sequence.
You can also use the following special characters to add information to the page:
n
I or i sends the caller ID number (for an external call) or Strata CS
extension (for an internal call).
n
E or e sends the Strata CS extension that the caller dialed.
n
L or l sends the length of the voice message in seconds.
For example, the dial sequence 18007771000,,,1245983#E causes Strata CS to
dial the paging service, pause for 3 seconds, enter the pager’s PIN (1245983)
followed by # to indicate end-of-PIN, enter your extension (where the voice
message was left), and then hang up. In this example, your pager displays only the
extension number.
If users receive only the last portion of the pager data specified, there are not
enough pauses between the pager number and the information. If this problem
occurs, add more commas.
Note: Do not enter multiple stars (*) in a row in the pager string. Use only one star
to send a dash. Multiple consecutive stars can terminate the page message.
Scheduling notifications
You can schedule notifications to occur at specific times, for example, during
business hours, after business hours on work days, and so on. You can also set up
custom hours. Notifications can also be scheduled in the Strata CS Client.
For information about how to set up business hours to use when scheduling
notifications, see “Business Hours” on page 4-5.
Note: When you turn e-mail or pager notification on for a user, by default Strata
CS sends notifications 24 hours a day, 7 days a week. If this is what you want to
do, you do not need to schedule notifications.
A schedule contains individual time rules that are added together. For example, if
you want a user to be notified of new voice messages during business hours and
all day on holidays, you would add a time rule for “during business hours” and
another time rule for “on holidays.” You (or users) can define custom time rules
for even greater precision.
CHAPTER 6. MANAGING USERS AND STATIONS
BETA DOCUMENT - PRELIMINARY & CONFIDENTIAL
6-19
You can enable or disable each time rule, as needed. For example, if you do not
want a user to be paged during a specific upcoming holiday, disable the time rule
for “on holidays.” You can enable the rule after the holiday has passed.
Defining a schedule for e-mail and pager notification
On the Notifications tab, click Schedule to schedule e-mail or pager
notifications. A Schedule button is provided in each area, but is disabled unless
you have chosen to send notifications. The Schedule E-mail Notifications or the
Schedule Pager Notifications dialog box opens.
The Schedule E-mail Notifications and Schedule Pager Notifications dialog
boxes list the schedules that have been defined so far, if any. Click one of the
following:
n
Always send a notification. The schedule (if any has been set up) is
ignored, and the user receives notification of new voice messages at all
times.
n
Only send a notification during the following times. The user receives
notification only during the times specified in the schedule.
6-20
STRATA CS ADMINISTRATOR MANUAL
BETA DOCUMENT - PRELIMINARY & CONFIDENTIAL
To add a schedule entry
1.
To add a schedule entry, click Add. The Schedule Notification dialog
box opens.
2.
To view or change the business and holiday hours used for scheduling,
or to create other sets of business hours, click Business Hours. See “To
define business hours and holidays” on page 4-6.
3.
Under This schedule entry occurs, choose one of the following time
periods during which you want to notify the user of new voice messages.
The examples below assume that business hours are Monday through
Friday, 9:00 a.m. to 5:00 p.m. and that the setting shown in the previous
illustration has been made:
n
During business hours. In this example, notifications are not sent
during business hours.
n
During nonbusiness hours. Notifications are sent at all times other
than business hours, including early mornings, evenings, weekends
and holidays. In this example, notifications are sent Monday through
Friday, 5:01 pm to 8:59 am, and on Saturdays, Sundays, and
holidays.
n
After business hours on work days. In this example, notifications
are not sent Monday through Friday, 5:01 pm to 8:59 am.
n
On nonwork days. In this example, notifications are not sent on
Saturdays and Sundays.
n
On holidays. In this example, notifications are not sent on holidays.
n
During custom hours. Notifications are sent during specific days
and hours independent of the business and holiday hours already
defined. See “Setting up custom time rules” below.
4.
Be sure to check Enable this schedule action, and then click OK. Now
the schedule includes the time rule you just created and you are returned
to the Schedule E-mail Notifications or Schedule Pager Notifications
CHAPTER 6. MANAGING USERS AND STATIONS
BETA DOCUMENT - PRELIMINARY & CONFIDENTIAL
6-21
dialog box. Add more time rules as needed, and then click OK when you
are finished.
Setting up custom time rules
You can define a custom time rule that is not related to your office’s business
hours and holidays and use it to schedule notifications, auto attendant actions
(described in Chapter 9), and routing rules (described in Chapter 8). Custom time
rules use custom hours, which are specific to the user, auto attendant, or routing
rule for which you create them. That is, the custom hours you set up for a user do
not apply automatically to other users. Custom hours for a user can also be set up
in the Strata CS Client.
When setting a custom time rule, you can enter dates and times in most
formats—they are converted to a standard format based on your Windows
regional settings.
To set up a custom time rule
1.
Click Custom Hours in either the Schedule Notification dialog box (for
users) or the Schedule Action dialog box (for auto attendants). The
Custom Hours dialog box opens.
2.
On the Days tab, check each day of the week when you want the custom
schedule to be active. If you leave the Hours field blank for a selected
day, the entire day is included in the custom schedule. To include only
part of a day, enter starting and ending hours for the included period.
6-22
STRATA CS ADMINISTRATOR MANUAL
BETA DOCUMENT - PRELIMINARY & CONFIDENTIAL
3.
On the Dates tab, click Add if you want to apply the custom schedule to
a specific date.
4.
In the Custom Date dialog box, type the Custom Date, and then click
All day or Partial day. For a partial day, enter starting and ending times
to indicate the hours that are included in the custom schedule.
5.
Click OK to add the custom date.
CHAPTER 6. MANAGING USERS AND STATIONS
BETA DOCUMENT - PRELIMINARY & CONFIDENTIAL
6-23
The Call Handling tab __________________________________
You set up call screening and call announcing for a user on the Call Handling tab.
These options can also be set in the Strata CS Client.
Check Announce who the call is for to have Strata CS announce who the call is
for when the user answers the phone. This feature is useful if the user shares a
phone. It is also convenient to have call announcing turned on if the user receives
phone both personal and ACD workgroup calls. If call announcing is not turned
on, calls are connected directly without being announced.
Under Screen and announce the caller’s name for these types of calls, if you
want Strata CS to screen calls and announce the caller’s name. Choose any of the
following types of calls:
n
n
Internal. Calls from another Strata CS user.
External. External calls routed to the user by an auto attendant or
operator.
n
External direct. Calls dialed directly using the user’s DID number, or
calls that come in on a trunk configured to send calls to this user.
Check Ask callers without a voice title for their name for Strata CS to prompt
callers to say their names if no voice titles have been recorded for them. If the user
has a phone with caller ID, check If caller ID is present, do not ask for their
name to avoid prompting callers to identify themselves unnecessarily.
Check Announce who is transferring for Strata CS to play the voice title of the
user who is transferring a call.
6-24
STRATA CS ADMINISTRATOR MANUAL
BETA DOCUMENT - PRELIMINARY & CONFIDENTIAL
Setting up call forwarding
Call forwarding directs the user’s incoming calls to ring at another phone, either
another extension or an external number.
A change to call forwarding automatically updates the Where I Am location in all
the user’s routing lists. The Where I Am location is normally the first entry in a
routing list. When call forwarding is turned on, a routing list rings the forwarding
phone number instead of the user’s default station. Call forwarding options can
also be set in the Strata CS Client. For more information about routing lists, see
Strata CS Client User Guide.
Note: The call forwarding settings in this dialog box may be overridden if a user
changes the active settings directly or applies a personal status with different call
forwarding preferences. However, neither of these actions changes the settings in
this dialog box. For more information about personal status and the active settings,
see Strata CS Client User Guide.
To turn on call forwarding
1.
From the Call Handling tab of the User dialog box, click Call
Forwarding. The Call Forwarding dialog box opens.
2.
Check Forward Calls (change “where I am”) and select one of the
following from the list of locations:
n
n
To forward calls to another extension, select to another extension
in the list of locations and then select the extension from the
drop-down list.
To forward calls to an external phone number, Internet address or
other destination, select the appropriate category in the left pane, and
then enter the dialing service in the Call using field and number in
the Number field.
CHAPTER 6. MANAGING USERS AND STATIONS
BETA DOCUMENT - PRELIMINARY & CONFIDENTIAL
6-25
n
See “Forwarding calls over Centrex/PBX trunks” on page 6-27 for an
explanation of the Attempt Centrex/PBX Transfer field.
Note: When you forward calls to a mobile phone, make sure that you
check Prompt recipient to accept or decline call. See “Mobile phone
issues with forwarded calls” on page 6-27.
3.
Under When forwarding calls to an external number, choose any of
the following:
n
n
Call number for __ seconds. Determines for how long a call rings
at the forwarded phone before proceeding to the next step on the
user’s routing list (usually voice mail). If the option Prompt
recipient for password or Prompt recipient to accept or decline
call is checked (described below), you must allow at least 30
seconds. Otherwise the call might be sent to voice mail before the
user finishes listening and responding to the prompts.
Prompt recipient for password. If checked, the person who picks up
the phone hears, “Call for <the user’s voice title>. Please connect
me.” To be connected to the caller, the user must enter a valid Strata
CS password. Choosing this option ensures that only users can
receive their forwarded calls.
This option is used only when calls are forwarded to an external
number and the user has a voice title recorded. See “Recording the
new user’s voice title and greeting” on page 6-41.
n
Prompt recipient to accept or decline call. If checked, when the
user picks up the phone, Strata CS announces the caller (“Call from”)
and intended recipient (“Call for”) and offers the option to accept or
decline the call. Declined calls proceed to the next step in the user’s
routing list, usually voice mail.
This option is used only when forwarding calls to an external
number. When forwarding to an internal extension, the user’s call
screening settings are used. See “The Call Handling tab” on
page 6-24.
4.
Select Ignore call rules and use Standard routing list if you want to
sends all of the user’s incoming calls to the forwarded phone. This
setting disables the user’s call rules and uses the Standard routing list for
all calls. See Strata CS Client User Guide for an explanation of routing
lists and call rules.
Leaving this field unchecked keeps the user’s active routing list and call
rules in effect, which means that some calls might ring elsewhere than
the forwarded phone.
5.
Click OK.
6-26
STRATA CS ADMINISTRATOR MANUAL
BETA DOCUMENT - PRELIMINARY & CONFIDENTIAL
To turn the user’s call forwarding off, uncheck Forward Calls in the Call
Forwarding dialog box.
Mobile phone issues with forwarded calls
Calls to a mobile phone are picked up by the mobile phone company first, and
then passed to the individual phone. When Strata CS detects the first pickup, it
stops proceeding down the routing list, whether or not anyone has actually
answered the mobile phone. For this reason, when forwarding calls to a mobile
phone, always check Prompt recipient to accept or decline call. Strata CS then
relies on user input to signal a connection, and proceeds down the routing list
unless someone explicitly accepts the forwarded call.
Call forwarding and voice mail
If a forwarded call is not answered, it is sent to the user’s voice mail.
To completely transfer a user’s calls to another user's phone, so that the other user
receives voice mail as well as the calls themselves, do not use call forwarding.
Instead, use the Client to create a routing list whose final action is Transfer to
Extension, and make it the user’s active routing list. See Strata CS Client User
Guide.
Forwarding calls over Centrex/PBX trunks
If your Server uses Centrex trunks or if it is connected to an external PBX, you
can forward calls using the option Attempt Centrex/PBX transfer, which
economizes Strata CS’s trunk usage.
If this option is checked, Strata CS attempts to route the user’s incoming calls out
to the forwarding number on the same trunk line using a Centrex or external PBX
transfer, thus saving two Strata CS trunks. Strata CS makes the attempt only when
the incoming call is on an analog Centrex/PBX line; it routes incoming calls on
other trunk types to the forwarding number in the usual way, using a second trunk.
Note: Forwarding calls with this method avoids tying up extra trunks. However,
when a call is routed out using a Centrex/PBX transfer, Strata CS loses control of
it and cannot send it to subsequent steps on the user’s routing list. For example,
after a call is transferred using Centrex/PBX, it does not go to voice mail.
This option is also available when specifying external phone numbers in a user’s
routing list. See Strata CS Client User Guide.
Listing a user in the dial-by-name directory
To include a user's name in the dial-by-name directory that callers can search,
check List in dial-by-name directory on the Call handling tab. This option can
also be set in the Strata CS Client.
CHAPTER 6. MANAGING USERS AND STATIONS
BETA DOCUMENT - PRELIMINARY & CONFIDENTIAL
6-27
To play a user’s extension along with the user’s name when callers choose the user
from the dial-by-name directory, check Play extension to the caller. This option
can also be set in the Strata CS Client.
Note: This checkbox is enabled only if Present names using numbered list is
selected in the System Settings.
The Phone tab ________________________________________
Certain analog telephones support special features, known as CLASS features.
Not all phones support all features. For a list of phones that have these features,
see Strata CS Installation & Maintenance Manual. If a user has a phone that
supports one or more of these features, you activate them on the Phone tab.
Activating features for CLASS phones
Under Use the following features on this user’s phone, check each of the
following features that is supported on the user’s phone. These options can also
be set in the Strata CS Client.
n
Caller ID. Strata CS sends caller ID name and phone number to the user's
phone on an incoming call, along with the date and time of the call. Caller
ID is sent for Strata CS users and external callers, as well as for contacts
who can be identified by Strata CS. Strata CS may also send:
n
n
“P”, indicating that the calling party blocked transmission of
caller ID
“O”, indicating that caller ID information was not available.
6-28
STRATA CS ADMINISTRATOR MANUAL
BETA DOCUMENT - PRELIMINARY & CONFIDENTIAL
n
Caller ID on call waiting. Strata CS delivers caller ID information while
the user is on another call, so the user can decide whether or not to accept
the incoming call.
When this option is used, the first call waiting beep is a different tone than
the second beep, that because the first beep is a special ADSI Alert Tone.
You can change the volume of the first beep by modifying the registry key
DXCH_ADSIALERT_AMPL. See “VoiceBoard channel settings” on
page A-20.
n
n
Message waiting indicator. Strata CS notifies the user when a new voice
message is received by activating the message waiting indicator on the
user’s phone.
Stutter tone. Strata CS alerts the user to the existence of unheard
messages via a stutter dial tone when the user picks up the phone.
Padding extensions sent as caller ID on internal calls
For internal calls, Strata CS passes the user's extension as caller ID. Some caller
ID displays cannot handle caller ID strings of less than 10 digits. On the Phone
tab, check Pad extensions when sent as Caller ID to pad the short string so the
phones display extensions correctly. Choose a Padding position:
n
n
Before extension. Pads before the extension with the padding character
you select, for example, *******186.
After extension. Pads after the extension, for example, 186*******.
Setting the number of seconds to ring the phone
On the Phone tab, in Ring phone __ seconds, enter the number of seconds Strata
CS rings a user’s extension before continuing with the user’s routing list or
transferring to voice mail. This option can also be set in the Strata CS Client.
Note: In North America, caller ID is transmitted after the second ring. You must
increase this setting for caller ID phones in North America so that there is enough
time for caller ID to be displayed and read. See “Number of rings before answering
a call” on page 4-3.
Sending DTMF digits to stations
Use this feature if you are integrating a third-party device with Strata CS, such as
a fax server or voice mail system. For more information, see “Extending Strata
CS with third-party devices” on page 14-4.
CHAPTER 6. MANAGING USERS AND STATIONS
BETA DOCUMENT - PRELIMINARY & CONFIDENTIAL
6-29
Activating features on Toshiba digital phone
If the user’s phone is a Toshiba Strata (digital), the Phone tab displays a set of
options customized for the Strata’s special features.
Ring Patterns
In these fields, enter the number of seconds that you want Strata CS to ring a
user’s extension before continuing with the user’s routing list or transferring to
voice mail. You must allow enough time for caller ID to be displayed and read,
because caller ID information is transmitted after the first ring.
n
n
Internal calls. Number of seconds to ring if the call is from another user.
External calls. Number of seconds to ring if the call is from an external
number.
Phone settings
n
Button settings list box. You can set each of the Strata’s programmable
buttons in the list box under Phone settings. To set a button, click on the
6-30
STRATA CS ADMINISTRATOR MANUAL
BETA DOCUMENT - PRELIMINARY & CONFIDENTIAL
button number in the Button column, and then select a feature from the
drop-down list in the Feature column.
Two of the selections in the feature column have parameters that must be
defined (See “Secondary Directory Number parameters” on page 6-32
and “Speed Dial parameters” on page 6-31 for details).
There are two other fields in the Phone settings section:
n
n
LCD idle message. Enter the message that you want to appear on the
LCD display when the phone is not in use. This message usually shows
the user name and extension for the phone.
Ring volume. This slider bar adjusts the default ring volume for the
phone.
Hands free answering
The Hands free answering section contains user options for hands-free mode.
n
Enable Hands-free answering. Check this box to enable hands-free
answering for a user.
n
Dial tone duration before going silent. Enter the time in seconds that
the user must wait between calls (before the dial tone ends). To end a
hands-free call, the user presses the Flash button or hangs up, but has to
wait for the phone to go off-hook again. During this time the user hears a
dial tone. This setting allows you to set the timeout to “0” so that the user
does not hear a dial tone and returns to off-hook status immediately after
disconnecting from a call.
Speed Dial parameters
If you select the Speed Dial feature in the Button settings list box (see page 6-30)
and then click the button in the Parameter column, the Speed Dial window opens.
To speed-dial an extension, click Extension and select an extension from the
CHAPTER 6. MANAGING USERS AND STATIONS
BETA DOCUMENT - PRELIMINARY & CONFIDENTIAL
6-31
drop-down list. To speed-dial an outside number, click Phone number, select the
number used to get an outside line in the Call using field, and then enter the phone
number that you want to dial in the Number field.
Secondary Directory Number parameters
If you select the Secondary Directory Number feature in the Button settings list
box (see page 6-30) and then click the button in the Parameter column, the
Secondary Directory Number dialog box opens. In the Extension field, you can
select a secondary number from the drop-down list. If you check Ring this phone
when the extension is called, you can set your phone to either ring immediately,
or specify the number of seconds to wait before ringing.
6-32
STRATA CS ADMINISTRATOR MANUAL
BETA DOCUMENT - PRELIMINARY & CONFIDENTIAL
The Dialing tab ________________________________________
You can set up dialing permissions that allow a user to dial certain numbers and
that prevent the user from dialing certain other numbers on the Dialing tab.
Under Dialing permissions, specify the default behavior when a user dials a
number:
n
n
Use dialing service permissions. Applies the dialing permissions set up
for the dialing service used to place the outbound call.
Allow all numbers except the following (ignore service permissions).
Allows the user to dial all numbers except those allowed or disallowed in
the list.
n
Disallow all numbers except the following (ignore service
permissions). Prevents the user from dialing any numbers except those
allowed or disallowed in the list.
n
Use dialing service permissions except for the following. Applies the
dialing permissions set up for the dialing service used to place the
outbound call, except those allowed or disallowed in the list.
Numbers beginning with lists the beginning digits of phone numbers that this
user is allowed or not allowed to call. Click Add to open the Dialing Permission
dialog box and add a dialing permission. Click Edit to modify an existing dialing
permission.
CHAPTER 6. MANAGING USERS AND STATIONS
BETA DOCUMENT - PRELIMINARY & CONFIDENTIAL
6-33
To set dialing permissions
1.
In the Dialing Permission dialog box, choose to Allow or Disallow calls,
and then enter the digits. The permission is applied whenever the user
dials a number beginning with the digits using the Phone Number
service.
2.
In Phone numbers starting with, type a phone number or beginning
portion of a phone number. Include 1 before the number if it would
normally be dialed as part of the number, for example, 1800.
3.
Click OK to save the dialing permission and return to the Dialing tab.
Global dialing permissions
Dialing permissions can be set on a per-user basis, or globally for all numbers
dialed using a Phone Number dialing service. It is recommended that you first set
up dialing permissions at the dialing service level (see “Permissions tab” on
page 8-26). Then set user permissions only for those exceptions to the service
defaults when you need to allow or disallow additional numbers.
A user who attempts to dial a restricted number hears the message, “Sorry, you
do not have permission to dial this number.” A user cannot include a restricted
number in a routing list, or forward calls to a restricted number. Commonly
blocked numbers include those listed in the following table.
Prefix
Blocks
1
Long distance calls. Be aware that in some areas this may
block local calls as well.
011
International calls.
1550
Group conversation lines.
1554
Adult information services.
1900
Long distance programs.
1976
General information programs.
To block the same numbers for all users, add a Phone Number dialing service that
blocks the numbers (see “Adding a Phone Number dialing service” on page 8-10).
6-34
STRATA CS ADMINISTRATOR MANUAL
BETA DOCUMENT - PRELIMINARY & CONFIDENTIAL
See “Permissions tab” on page 8-26 for more information about setting dialing
permissions, including a detailed example and an explanation of the order in
which dialing permissions are applied.
Setting account code modes
Account code modes determine when a user is to be prompted to enter an account
code. For more information, see “Setting a user’s account code modes” on page
10-4.
If you select the Secondary Directory Number feature, the Secondary Directory
Number dialog box opens. In the Extension field, you can select a secondary
number from the drop-down list. If you check Ring this phone when the
extension is called, you can set your phone to either ring immediately, or specify
the number of seconds to wait before ringing.
If you select the Speed Dial feature, the Speed Dial window opens. To speed-dial
an extension, click Extension and select an extension from the drop-down list. To
speed-dial an outside number, click Phone number, select the number used to get
an outside line in the Call using field, and then enter the phone number that you
want to dial in the Number field.
CHAPTER 6. MANAGING USERS AND STATIONS
BETA DOCUMENT - PRELIMINARY & CONFIDENTIAL
6-35
The last feature in the list under Button settings is Cnf/Trn
(Conference/Transfer). You can use this feature to set the Strata phone’s Cnf/Trn
button for either a direct transfer or a menu assisted transfer.
Other settings
Three other settings are grouped at the bottom of the tab.
In Ring phone for __ seconds, enter the number of seconds that you want Strata
CS to ring a user’s extension before continuing with the user’s routing list or
transferring to voice mail. You must allow enough time for caller ID to be
displayed and read, because caller ID information is transmitted after the first
ring.
In LCD idle message, enter the message that you want to appear on the LCD
display when the phone is not in use. This message usually shows the user name
and extension for the phone.
The Ring volume slider bar adjusts the default ring volume for the phone.
6-36
STRATA CS ADMINISTRATOR MANUAL
BETA DOCUMENT - PRELIMINARY & CONFIDENTIAL
The Permissions tab ___________________________________
The Permissions tab controls user access to Strata CS features. Users inherit
permissions from the roles to which they belong. To adjust individual
permissions, make changes in the Permissions pane. Changes take effect when
you click OK.
Permissions are granted to users in the following categories:
n
Standard
n
Folder Visibility
n
Administration
n
Folder Access
When you add a user in Strata CS, the user inherits the permissions of the roles to
which that user is assigned. For example, in the previous figure, the user has
inherited permissions from the Users role.
You can change a user’s individual permissions, however, in the Permissions
pane, as follows:
n
n
n
Use roles (value). Permission for this item is determined by the user’s
role memberships (described in the following section). The actual value
of the permission is displayed in parentheses.
Allow. The listed feature (for example, exporting Contacts) is available to
the user.
Disallow. The function is not available to the user.
CHAPTER 6. MANAGING USERS AND STATIONS
BETA DOCUMENT - PRELIMINARY & CONFIDENTIAL
6-37
n
View and Edit. The specified tab or folder (such as the Phone settings tab
or the Call Log folder) can be viewed and edited by the user.
n
View only. The user can view the folder or tab, but cannot change it.
n
No access. The folder or tab cannot be used or viewed by the user.
Individual permissions and roles
There are two types of permissions: individual permissions and roles. All users
have their permissions set to “use roles” by default. This means that all users
inherit their permissions from the roles to which they have been assigned. If a user
belongs to more than one role, the highest level of permission is used.
By default, Strata CS creates the following two roles:
n
Administrators. This role has full permissions, and cannot be modified or
deleted. The Admin user is a member of the Administrators role group by
default and cannot be removed. The Admin user's permissions are set to
“use roles” and cannot be changed. Each Administrator can use the
permissions as defined for the role, or can define other permissions that
override the current role permissions.
n
Users. All new users automatically have this role.
You can change a permission for a role by editing the Permissions tab in the Role
dialog box of the role.
If a few people need different permissions, you can adjust their permissions
individually on the Permissions tab of the User dialog box of the user. Individual
permissions always override role permissions.
Adding a user to a role grants the same permissions to that user as any other user
with a similar function. Removing a user from the role takes away the role's
permissions from that user. You can move users between roles and each time that
user inherits the permissions of the new role.
To change a user’s role membership, on the Permissions tab of the User dialog
box, click Change. The Roles dialog box opens and in the left pane shows a list
of all roles. The user is a member of the roles listed in Selected roles in the right
pane.
6-38
STRATA CS ADMINISTRATOR MANUAL
BETA DOCUMENT - PRELIMINARY & CONFIDENTIAL
Whenever a user’s list of roles is changed, the “use roles” values on the
Permissions tab are updated to reflect the new role configuration.
New Role
With Strata CS you can create a new role. A new role such as a Admin Assistant
is one or more users that have the same permissions (for example, call or dialing
permissions). All users assigned to this role are automatically granted the same
permissions. There are two types of permissions: explicit and implicit. Explicit
permissions are those permissions granted directly to a user. No other users are
affected. Implicit permissions are those permissions granted to all the users in that
role.
When a user attempts to use the phone, that user's set of permissions are based on
the intersection of that user's explicit and implicit permissions. A user's
permissions are always the least restrictive of that user's explicit permissions and
the permissions of any role to which that user belongs. For this reason, the least
complicated way to administer users is to create a new role and assign
permissions to those users rather than to individual users. Then you can change
individual users' permissions by adding or removing them from the role. Also, if
you need to grant new permissions, you can grant them to all members in that role
in a single operation.
To create a new role
1.
In the Users view, choose User > New Role. A new Role dialog box
opens.
2.
Enter the name of the role and any comments about its function.
3.
Select the Users tab to manage (add or remove) users in the role.
CHAPTER 6. MANAGING USERS AND STATIONS
BETA DOCUMENT - PRELIMINARY & CONFIDENTIAL
6-39
4.
Click the Permissions tab to change the default permissions.
5.
Click the Dialing Permissions tab to specify the types of numbers that
can be dialed based on the prefix. For example, 1-800 may be allowed,
while 1-900 may not allowed.
The Other tab _________________________________________
The Other tab contains user options for hands-free mode.
1.
To enable hands-free answering for a user, check Enable Hands-free
answering.
2.
To allow dialing while in hands-free answering, check Allow dialing
while hands free (requires dedicated voice resource). If this option
is not checked, a user must press Flash to get a dial tone while in
hands-free answering. When it is checked, the user can dial out directly
without having to press Flash.
3.
In Number of seconds to play dial tone before going silent, enter the
time in seconds that the user must wait between calls (before the dial
tone ends.)To end a hands-free call, the user presses the Flash button or
hangs up, but has to wait for the phone to go off-hook again. During this
time the user hears a dial tone. This setting allows you to set the timeout
to “0” so that the user does not hear a dial tone and returns to off-hook
status immediately after disconnecting from a call.
6-40
STRATA CS ADMINISTRATOR MANUAL
BETA DOCUMENT - PRELIMINARY & CONFIDENTIAL
Managing users _______________________________________
For an overview of user properties, see “Adding a user in the User dialog box” on
page 6-8. Detailed procedures for setting these properties are described in the
sections starting on page 6-9. This section describes other user management tasks.
Recording the new user’s voice title and greeting
After you create a new user, do the following:
n
n
Record the user’s voice title. The voice title is used in many
call-screening features, for example, when an auto attendant transfers a
call. The voice title is a recording of the user’s name that Strata CS fits
into its own prompts. It must not be a long recording or greeting.
You can record the user’s voice title when you create the user at a
telephone extension or using the Administrator (on the Recording tab of
the User dialog box). A user can rerecord a voice title later using the
Client. For more information, see “Using the audio controls” on
page 2-10.
n
Record the user’s voice mail greeting. This greeting is the message
callers hear when they reach the user’s voice mail. You or the user must use the
Client to record the user’s voice mail greeting.
Helping new users get started
To get new users up and running quickly on the system, give them copies of the
Strata CS Quick Reference Guide and the Strata CS Quick Reference Guide.
When you add a new user, a “Welcome to Strata CS” voice message is copied
automatically to the user’s voice mailbox. This message helps the new user get
started by explaining how to record a voice title and create a custom voice mail
greeting using the telephone commands.
The information that new users must know includes:
n
Their extensions and passwords.
n
Their Direct Inward Dial numbers, if any.
n
n
n
A list of your office's dialing services and access codes, along with
instructions about when to use each one.
A list of special access codes, such as the codes for the Strata CS
dial-by-name directory and emergency services.
The path they must use to install Strata CS client applications, such as the
Strata CS Client and the TAPI Service Provider. The default path is
<Servername>\NetSetup\Setup.exe.
CHAPTER 6. MANAGING USERS AND STATIONS
BETA DOCUMENT - PRELIMINARY & CONFIDENTIAL
6-41
n
n
n
For users who are automatic call distribution (ACD) agents, the
workgroup name to use when logging on and the password.
The telephone key they must use at an auto attendant to log in from a
remote phone, if you have changed it from #.
Whether they have permission to make external calls:
n
From stations
n
When logged in from an outside phone
n
In call forwarding or routing list situations
n
A list of any views or Options tabs in the Client that they cannot access.
n
Whether they can record calls in the Call Monitor.
Updating users’ mail, greeting, and disk usage totals
The Users view displays the following for each user:
n
n
n
Percentage of space allocated for mail storage that has been used
Percentage of space allocated for greetings and voice titles that has been
used
Total amount of allocated disk space (in MB) that has been used
To avoid slowing the opening and scrolling of the Users view, Strata CS does not
dynamically recalculate the totals at any other time. Instead, this information is
recalculated once a day at 1:00 a.m. You can recalculate the totals at any time by
choosing Tools > Recalculate Disk Usage.
Moving a user
Each Strata CS Client is configured to work with a specific station ID. If you
move a user’s Client workstation to a different office, you must change the station
ID (see “Assigning a station ID” on page 6-11).
Deleting a user
Deleting a user prevents that user from using Strata CS and removes all of the
user’s voice mail files from the system (unless the voice mailbox is being shared
with another user). A deleted user’s Call Log entries are left in place to maintain
an accurate and complete call history on the system.
For information about deleting items in Strata CS, see “Deleting items” on
page 2-9.
Note: You cannot delete the Administrator or Operator user.
6-42
STRATA CS ADMINISTRATOR MANUAL
BETA DOCUMENT - PRELIMINARY & CONFIDENTIAL
Managing stations _____________________________________
This section presents information about adding a station and about phones that are
supported in Strata CS
Adding a station
To add a station to your Strata CS system
1.
Using phone cable, connect the phone to the Dialogic MSI board or BCP
Control Panel at the Strata CS Server computer. See Strata CS Installation &
Maintenance Manual for instructions.
2.
In the User’s view of the Strata CS Administrator, assign the station to a user
(see “Assigning a station ID” on page 6-11).
Supported phones
Strata CS supports standard analog touchtone telephones—called 2500 sets in
U.S. telephone terminology—for internal stations. Multi-line analog phones can
be used, but line use indicator lights may not perform correctly on some models.
Strata CS also supports phones with caller ID displays and some phones with
message waiting lights. See Chapter 5 of Strata CS Installation & Maintenance
Manual for a list of supported phones.
Supporting different types of CLASS phones
Two Strata CS registry settings specify the format used to send caller ID or visual
message waiting indicator information to CLASS phones. See “MSI station board
settings” on page A-25 for more information.
Important: These two registry settings change the message format sent to all
phones connected to the specified MSI board.
Caller ID information
Caller ID information is sent to a display phone in one of the following formats:
n
n
n
Single Data Message Format (SDMF), which sends the date, time, and
10-digit caller ID number.
Multiple Data Message Format (MDMF), which sends the date, time,
10-digit caller ID number, and 15-digit caller name.
United Kingdom message format (UK), which sends the date, time,
18-digit caller ID number, and 20-digit caller name. This information is
only delivered as caller ID on call waiting, that is, when the user is on
another call.
CHAPTER 6. MANAGING USERS AND STATIONS
BETA DOCUMENT - PRELIMINARY & CONFIDENTIAL
6-43
The default format, MDMF, works for most display phones, as does SDMF.
Note: These formats specify only how Strata CS sends caller ID information to
CLASS phones. They do not affect how caller ID information is passed along with
a call by the phone company.
Visual message waiting indicator information
Visual message waiting indicator information is sent to a display phone in either
SDMF or MDMF.
The Strata CS default is the SDMF format. If the message waiting light on your
CLASS phone does not work, try changing the VMWI_FSK_FORMAT setting to
MDMF.
Viewing station activity
For information about how to view station activity and restart a station that is
experiencing problems, see “Monitoring station activity” on page 11-3.
6-44
STRATA CS ADMINISTRATOR MANUAL
BETA DOCUMENT - PRELIMINARY & CONFIDENTIAL
CHAPTER 7
CHAPTER 7
MANAGING WORKGROUPS
CHAPTER CONTENTS
About Workgroups . . . . . . . . . . . . . . . . . . . . . . . . . . . . . . . . . . . . . 7-2
Creating a Workgroup . . . . . . . . . . . . . . . . . . . . . . . . . . . . . . . . . . 7-2
BETA DOCUMENT - PRELIMINARY & CONFIDENTIAL
About Workgroups ____________________________________
A workgroup is a group of related extensions or contacts. With Strata CS
workgroups you can manage how calls are directed to groups of users, IVR
Plug-ins, auto attendants, or queues. Workgroups appear in the Workgroups view.
Note: Workgroups replace Contact Groups, which were supported in prior
versions of Strata CS.
Strata CS provides two types of workgroups: public and personal.
Public workgroups are workgroups that callers from outside your company can
reach by dialing a number. Administrators and users with the appropriate
permissions can create public workgroups.
Personal workgroups are workgroups that users can create in the Client for their
personal use.
Strata CS workgroups offer the following benefits:
n
n
n
n
n
n
The process of finding an individual to take calls or to join a conference
is easier, because the Extensions view in the Client can be filtered by
workgroup.
Any public workgroup member can pick up a ringing call within the
workgroup if an extension has been assigned.
Calls to a public workgroup simultaneously ring the phones of all the
extensions that are members of that workgroup (users, IVR plug-ins, auto
attendants, queues, or contacts).
When workgroup members set their personal statuses to “Do Not Disturb”
(see Strata CS Client User Guide) their phones do not ring when the
workgroup is called.
When workgroup members set their personal statuses to Where I Am (see
Strata CS Client User Guide) on their phones, calls to a workgroup that
they are in ring at the phone that has accepted the Where I Am from the
member.
When members set their personal statuses to Where I Am (see Strata CS
Client User Guide) on their phone to an external number, calls to a
workgroup that they are in do not ring the external number.
7-2
STRATA CS ADMINISTRATOR MANUAL
BETA DOCUMENT - PRELIMINARY & CONFIDENTIAL
Workgroups view
To add, edit, and delete public workgroups, click the Workgroups button in the
View bar to open the Workgroups view:
Creating a Workgroup __________________________________
To create a public workgroup, choose File > New > Workgroup and enter
information on the tabs in the Workgroup dialog box.
Using the General tab
On the General tab, you must enter the Name of the workgroup and at least one
member. You can optionally add a note about the workgroup in the Description
field.
CHAPTER 7. MANAGING WORKGROUPS
BETA DOCUMENT - PRELIMINARY & CONFIDENTIAL
7-3
To add members to the workgroup, select names from the list of Available
extensions and click Add. Press CTRL to select multiple names from the list.
Use the up and down arrows next to the list of Members to arrange the order of
the members. The order in which the names appear can be used in conjunction
with a Routing List and the sequence can be either “top down” or “round robin”
for calling within the workgroup. You can also use the Remove button to delete
members from the list.
Using the Dialing tab
Use the Dialing tab to enter the workgroup’s Extension number and its DID
number (for external calls). All of the information on the Dialing tab is optional.
Assigning an extension
Assign an Extension number that callers can dial to reach the workgroup. For
more information about extension requirements and restrictions, see “Assigning
an extension” on page 6-10.
When no extension number is entered, the workgroup cannot be called by the auto
attendant or telephone commands, and users cannot use the Workgroup pickup
option (*99) to retrieve ringing calls within their workgroup. For more
information about extensions, see Strata CS Client User Guide.
7-4
STRATA CS ADMINISTRATOR MANUAL
BETA DOCUMENT - PRELIMINARY & CONFIDENTIAL
Assigning a DID number to a workgroup
You can assign a DID number to a workgroup from the block of numbers
provided by your telephone. When Strata CS recognizes this number as the final
digits on an inbound call, the caller is automatically connected to this workgroup,
bypassing the main auto attendant.
To assign multiple DID numbers to a workgroup, separate each number with a
comma (,). For more information about DID, see “ANI/DID digit collection” on
page 5-5.
Adding a voice title
After you create a workgroup, you can add a voice title so the workgroup can be
listed in the dial-by-name directory. For more information, see “Using the audio
controls” on page 2-10.
Transferring unanswered calls
You can specify the number of seconds before a call is transferred to the operator.
By default, Strata CS transfers the call to the workgroup’s operator (a person
designated to answer calls for the workgroup) whenever the time-out parameter
is exceeded. To transfer calls to another user, for example, a departmental
operator or other auto attendant, select the user from the if no answer, transfer
drop-down list on the Dialing tab.
Listing workgroups in the dial-by-name directory
You can choose to have the workgroup displayed in the organization’s
dial-by-name directory or to play the workgroup’s extension when the extension
number is dialed after the time limit has expired for the phone to ring.
CHAPTER 7. MANAGING WORKGROUPS
BETA DOCUMENT - PRELIMINARY & CONFIDENTIAL
7-5
CHAPTER 8
CHAPTER 8
MANAGING OUTBOUND CALLS
CHAPTER CONTENTS
About dialing services. . . . . . . . . . . . . . . . . . . . . . . . . . . . . . . . . . . 8-2
The Dialing Services view . . . . . . . . . . . . . . . . . . . . . . . . . . . . . . . 8-4
How you can use dialing services . . . . . . . . . . . . . . . . . . . . . . . . . 8-5
Access codes . . . . . . . . . . . . . . . . . . . . . . . . . . . . . . . . . . . . . . . . . 8-7
Adding a Phone Number dialing service . . . . . . . . . . . . . . . . . . . 8-10
Adding a Centrex/PBX Extension service . . . . . . . . . . . . . . . . . . 8-12
Adding an Internet Address service . . . . . . . . . . . . . . . . . . . . . . . 8-14
Adding an Internet-to-Phone Number service . . . . . . . . . . . . . . . 8-15
Adding an Internet-to-Centrex/PBX Extension service . . . . . . . . . 8-17
Trunks tab. . . . . . . . . . . . . . . . . . . . . . . . . . . . . . . . . . . . . . . . . . . 8-18
Location Settings tab . . . . . . . . . . . . . . . . . . . . . . . . . . . . . . . . . . 8-20
Codecs tab . . . . . . . . . . . . . . . . . . . . . . . . . . . . . . . . . . . . . . . . . . 8-21
Dialing Exceptions tab . . . . . . . . . . . . . . . . . . . . . . . . . . . . . . . . . 8-22
Permissions tab . . . . . . . . . . . . . . . . . . . . . . . . . . . . . . . . . . . . . . 8-26
Routing services . . . . . . . . . . . . . . . . . . . . . . . . . . . . . . . . . . . . . . 8-29
Adding a routing service . . . . . . . . . . . . . . . . . . . . . . . . . . . . . . . . 8-33
Routing Rules tab . . . . . . . . . . . . . . . . . . . . . . . . . . . . . . . . . . . . . 8-35
BETA DOCUMENT - PRELIMINARY & CONFIDENTIAL
About dialing services__________________________________
Your Strata CS Server can place outbound phone calls over several different types
of trunk. A Strata CS dialing service is used to manage calls over a specific type
of trunk. For example, a Phone Number dialing service is used to manage calls
over a group of PSTN trunks, while an Internet Address dialing service is used to
manage calls over a group of Internet trunks. A dialing service creates a
prioritized list of trunks that can be used to place the call. The call is then allocated
to the highest priority available trunk.
Each dialing service has an access code that users must dial when they begin to
place a call. The access code tells Strata CS which dialing service to use. For
example, users might dial 9 plus a phone number to use a Phone Number dialing
service, or 71 plus an IP address to use an Internet Address dialing service.
Dialing service types
Strata CS supports the following types of dialing services:
n
Phone Number service. Used to dial standard phone numbers over the
public telephone network. You can specify long distance prefix, area
code, and other information to reflect the telephone company’s dialing
plan. For many installations, a Phone Number service is the only type of
dialing service needed.
See “Adding a Phone Number dialing service” on page 8-10.
n
Centrex/PBX Extension service. Used to dial Centrex extensions, PBX
extensions, or other custom numbers over analog and digital trunks that
are connected to external switches such as the phone company’s Centrex
service or an external PBX. You can specify the minimum and maximum
digits your Centrex/PBX service uses.
See “Adding a Centrex/PBX Extension service” on page 8-12.
n
Internet Address service. Used to dial Internet addresses over Internet
trunks. With this service, users can pick up a phone and dial an IP address
(for example, a number such as 123*456*78*90) to connect to H.323
devices such as NetMeeting. Users can also place such calls from the
Client using either IP addresses or domain names (for example, a name
such as voip.mycompany.com).
See “Adding an Internet Address service” on page 8-14.
n
Internet-to-Phone Number service. Gateway service used to dial a
phone number through another Strata CS Server at a remote location. The
call connects to the remote Server using the Internet or a private TCP/IP
network, and then the phone number is dialed from that Server.
See “Adding an Internet-to-Phone Number service” on page 8-15.
8-2
STRATA CS ADMINISTRATOR MANUAL
BETA DOCUMENT - PRELIMINARY & CONFIDENTIAL
n
Internet-to-Centrex/PBX Extension service. Gateway service used to
dial Centrex or PBX extensions or other custom numbers through another
Strata CS Server at a remote location. The call connects to the remote
Server using the Internet or a private TCP/IP network, and the number is
dialed from that Server. With this type of service you can directly dial a
Strata CS extension on the remote Server, or 411, or # to log in to an
account on the remote Server.
See “Adding an Internet-to-Centrex/PBX Extension service” on
page 8-17.
n
Routing service. A dialing service that routes calls through other dialing
services.
See “Routing services” on page 8-29 for detailed information.
The default dialing service
You may not need to create any dialing services. Strata CS automatically creates
a default dialing service named “Phone Number,” with an access code of 9. Phone
Number includes all phone number trunks (analog or digital). With this dialing
service, a user can pick up the phone and dial 9 plus a phone number. Strata CS
then places the call on the first available trunk. This dialing service is often the
only dialing service that a company needs.
Using routing services to manage other dialing services
If you need to create several different dialing services, you may be able to
simplify dialing for your users by creating routing services. A routing service is
a special type of dialing service that routes the number dialed to other dialing
services. A routing service prioritizes the dialing services by following rules
based on the phone number dialed and, optionally, on the time of day or day of
the week. A routing service can do the following:
n
n
n
Allow users to dial a single access code for all their phone calls. Routing
rules can automatically determine the best dialing service for a given call,
and are not limited to a single type of trunk.
Automatically route a call to trunks on an alternate dialing service when
all the trunks of the preferred dialing service are in use.
Perform least cost routing by selecting the least expensive dialing service
for a given phone number and time.
For example, you might have two different carriers for long-distance calls. One
carrier is the least expensive during business hours, and the other during evenings
and weekends. You can set up a dialing service for each of the two carriers. You
can then set up a routing service that can route the call through either dialing
service. The routing service automatically assigns the highest priority to the
CHAPTER 8. MANAGING OUTBOUND CALLS
BETA DOCUMENT - PRELIMINARY & CONFIDENTIAL
8-3
dialing service of the least expensive carrier, based on the call’s time and date.
Users do not have to remember separate access codes for the two carriers because
they always dial the access code for the routing service.
For detailed information on routing services, see “Routing services” on
page 8-29.
The Dialing Services view _______________________________
To add, edit, and delete dialing services, click the Dialing Services button in the
view bar to open the Dialing Services view.
Each dialing service appears as a row in the Dialing Services view. Double-click
a listed dialing service to see its properties in the Dialing Services view.
The following table describes the information displayed for each dialing service.
Column
Description
Type
Dialing service type. The available types are:
Name
n
Phone Number
n
Centrex/PBX Extension
n
Internet Address
n
Internet-to-Phone Number
n
Internet-to-Centrex/PBX Extension
n
Routing
Name that you assign to a dialing service when you
create it.
8-4
STRATA CS ADMINISTRATOR MANUAL
BETA DOCUMENT - PRELIMINARY & CONFIDENTIAL
Column
Description
Access Code
Number that users dial to access this service. For
example, 9 to access a dialing service that routes all
phone number calls. See “Access codes” on page 8-7
for more information.
Note: You can see the access code for a call in the
From code and To code columns of the Call Log view.
Enabled
If checked, Strata CS allows users to dial using this
service. See “Disabling dialing services while creating
them” on page 8-7.
Hidden
If checked, Strata CS does not display this service in
the Client (see “Hiding dialing services in the Client”
on page 8-6).
Default
If checked, this is a default service. See “Setting
default access codes for ringbacks” on page 8-9 for
more information.
Trunk Order
Order in which the dialing service’s list of trunks is
prioritized (see “Trunks tab” on page 8-18 for more
information). This column is blank for routing services,
because they always get their lists of trunks from
other dialing services.
How you can use dialing services ________________________
By creating new dialing services, you can do any of the following:
n
Segregate trunks for different uses. For example, you might want to
use your long-distance T1 trunks for all long-distance calls and restrict
your analog trunks to local calls only. You can create one dialing service
that manages your long-distance T1 trunks and another that manages your
analog trunks. Each dialing service will have its own access code. Users
can dial those local and long-distance access codes manually or you can
set up a Routing dialing service (see “Routing services” on page 8-29) that
can distinguish between local and long-distance numbers and will
automatically route them over the appropriate local and long-distance
trunks.
n
Enable Internet calls. Any use of Internet telephony requires that you
create one of the Internet dialing services. You can set up a dialing service
that will place calls through remote Strata CS Servers over an Internet
connection in a way that is transparent to users.
CHAPTER 8. MANAGING OUTBOUND CALLS
BETA DOCUMENT - PRELIMINARY & CONFIDENTIAL
8-5
n
Use the same trunks in different ways. For example, you can send both
Centrex numbers and regular phone numbers over your Centrex trunks.
You would create a Centrex/PBX dialing service (access code 6) and a
Phone Number dialing service (access code 9) that route calls to the same
group of trunks. You would define the Phone Number dialing service to
automatically prefix another 9 to the number dialed by the user, so that the
user gets an outside line from the Centrex system.
n
Automatically add prefixes and suffixes to the phone number dialed
by the user. For example, you can create a Cost Saving dialing service
that prefixes all numbers with the “10-10-xxx” code belonging to the
carrier of your choice. You can also create a Calling Card dialing service
that automatically dials the prefix of the calling card number, then the
user’s phone number, and then the suffix of a credit card number. In both
of these examples the user dials only the access code and the phone
number. Everything else happens behind the scenes.
Deleting or disabling a dialing service
Deleting a dialing service means that users can no longer use that dialing service
when placing calls. If you delete the last remaining dialing service assigned to a
trunk, you have in effect disabled that trunk for outbound calls. Client contacts
and routing lists that refer to the access code for the deleted service will not work
until you specify an alternate access code (see “Updating phone numbers after
changing an access code” on page 8-8). For information about deleting items in
Strata CS, see “Deleting items” on page 2-9.
To disable a dialing service temporarily, edit the dialing service and uncheck
Enabled on the General tab.
Hiding dialing services in the Client
You can hide a dialing service if you do not want users to access it directly (see
the Hidden column in “The Dialing Services view” on page 8-4) through the
Client. The Hidden setting is useful when you want to hide dialing services that
you use for testing purposes, or services that you only want to make available to
users through a routing service.
For example, you can set up dialing services for each of several long-distance
carriers, and then set up a single routing service that chooses the least expensive
dialing service for each call. You can then hide the dialing services for the
individual carriers so that users can only make long-distance calls through the
routing service.
Although it is not visible in the Client, a hidden dialing service is still available to
phone users who dial the access code for that service.
8-6
STRATA CS ADMINISTRATOR MANUAL
BETA DOCUMENT - PRELIMINARY & CONFIDENTIAL
Using dialing services to install and troubleshoot trunks
You can also use dialing services to install and test new trunk lines without
interfering with live call handling on the Strata CS Server. You add the new
trunks to a service that you use for testing. After the trunks work properly, you
can move them to the default Phone Number service or another dialing service
that users access to place calls.
You can also use dialing services to isolate problem trunks from your system
without interrupting service. Remove them from the dialing service and the
Server will no longer use them to place calls.
Disabling dialing services while creating them
While you are creating a dialing service, it can be helpful to uncheck Enabled on
the General tab. Doing this disables the dialing service, making it unavailable to
users. With the dialing service disabled, you can click OK to save your
information at any time during the creation process, without giving users access
to an incomplete service. When you have finished creating the dialing service,
check Enabled again.
Access codes_________________________________________
Dialing services enable users to select what kind of call to make and to choose a
dialing service before placing a call. Each dialing service has an access code that
users must dial when they begin to place a call. For example, users might dial 9
plus a phone number to use a Phone Number dialing service, or 71 plus an IP
address to use an Internet dialing service.
Tips on access codes and names for services
If your system has multiple dialing services that users will access directly, it is
important to choose their names and access codes carefully, because these are the
points of contact for the users who place outbound calls. Typically, you set up
dialing services with names like “Phone number,” “Centrex extension,” or
“Cambridge IP gateway” and access codes of 9 or 7, making it easy for users to
remember the dialing service to use when they place a call.
For dialing services that you do not want users to access directly and that you may
have hidden (see “Hiding dialing services in the Client” on page 8-6), consider
using 4-digit access codes of the form 80xx. Doing this places the access codes in
the same numbering space as is used for auto attendants, which helps prevent
dialing ambiguities. It is important not to select access codes that begin with the
same digit as extensions.
CHAPTER 8. MANAGING OUTBOUND CALLS
BETA DOCUMENT - PRELIMINARY & CONFIDENTIAL
8-7
Avoiding dialing ambiguities
When setting up access codes and extensions, it is possible to introduce
ambiguities that will delay dialing. For example, if you have a dialing service with
an access code of 9 and a user with the extension 901, a user who dials either one
to make an external call will experience a delay in getting a dial tone while Strata
CS waits to see if the number is complete.
Note: Users can bypass the delay by pressing # after dialing. You can change the
length of the delay by modifying the internal dialing ambiguous time-out system
setting (see “Setting dialing timeouts” on page 4-13).
If you enter an access code for a dialing service, an extension for a user, auto
attendant, IVR Plug-in, or a special access code (411, for example) that starts with
the same digits as one that already exists, Strata CS identifies the ambiguous
number and prompts you to click Cancel to go back and change the ambiguous
access code or extension, or OK to keep it. Choosing OK introduces a brief delay
whenever a user dials one of these numbers.
How Strata CS uses access codes
Strata CS saves the dialing service’s access code with each phone number or
Internet address stored in the Strata CS database. When a user selects a number to
call in the Client, the system uses the dialing service that is currently assigned to
the access code stored with the number.
Because Strata CS associates each number with an access code, instead of with
the service used to dial it, you can change the dialing service used by a number
without changing all the numbers stored in the Strata CS database. You do this by
changing the access code or reassigning the access code to a new service.
Reassigning the access code to a new dialing service can be totally transparent to
users, because users need to know only the access code, which remains the same.
Updating phone numbers after changing an access code
If you need to change the access code used to dial a certain type of call after users
have entered phone numbers in Strata CS for contacts, routing lists, or call
forwarding, choose Tools > Update Phone Numbers.
Choose the Current access code and the New access code from the drop-down
lists, and then click OK. All the phone numbers that users have entered in the
Strata CS database with that current access code are changed.
8-8
STRATA CS ADMINISTRATOR MANUAL
BETA DOCUMENT - PRELIMINARY & CONFIDENTIAL
Creating a dialing service with access code 0
By default, 0 is the Operator user’s extension. To use 0 as a dialing service access
code (for example, to have users dial 0 to get an outside line), you must first
change the Operator user’s extension to a number other than 0.
Even when the Operator user’s extension is a number other than 0, callers must
press 0 from within the system to transfer to the Operator. For example, if a caller
reaches a user’s voice mail and wants to transfer to the user’s personal Operator
instead of leaving a voice message, the caller dials 0, even if the Operator user’s
extension is 111.
Setting default access codes for ringbacks
When users return calls from the Strata CS Client, the system automatically uses
a default access code that you set. You can set one default access code for phone
numbers and one default access code for Internet addresses. The defaults are used
system-wide.
You set the default access codes on the Dialing tab of the System Settings dialog
box as follows:
n
Default phone number access code. Select the access code for the
dialing service that will be used to return a call from a phone number from
the Call Log and Voice Messages views. The default is 9. You can select
a Routing dialing service (see “Routing services” on page 8-29) or any
dialing service that takes phone numbers as inputs. You typically would
use a Routing dialing service or a Phone Number dialing service.
n
Default Internet address access code. Select the access code for the
Internet Address dialing service that will be used to return an IP
call—typically a NetMeeting call—that did not come from a remote Strata
CS Server. When returning a call that came from a remote Strata CS
Server, the system automatically uses the correct access code required to
reach the remote Server.
Where the default access codes appear
In the Administrator, the Default column of the Dialing Services view shows the
current defaults for phone number and Internet ringbacks.
In the Client, the Place Call To dialog box always opens with the current default
dialing service for phone numbers selected (the user can also choose a different
dialing service to place a call). When you import contacts, new phone numbers
and IP addresses automatically receive the default access codes.
CHAPTER 8. MANAGING OUTBOUND CALLS
BETA DOCUMENT - PRELIMINARY & CONFIDENTIAL
8-9
Adding a Phone Number dialing service ___________________
A Phone Number dialing service allows users to dial standard telephone numbers
over analog and digital trunks.
1.
Choose Dialing Services > New Dialing Service > Phone Number
Service.
2.
On the General tab, enter the following basic information about the
dialing service:
n
Name. Access code. Choose a name and access code that will make
it easy for users to select this dialing service when placing a call. See
“Tips on access codes and names for services” on page 8-7.
n
Enabled. To make this dialing service available to users, leave
Enabled checked. Clearing the check box disables the dialing service
so that users cannot select it. Disabling can be useful if you want to
click OK before you are finished defining the dialing service, or later
if you want to change or troubleshoot the dialing service.
n
Hidden. To hide this dialing service in the Client, check Hidden.
This setting is typically enabled to hide dialing services that you use
for testing purposes or only want to make available to users through
a Routing service (see “Routing services” on page 8-29). A hidden
service is still accessible to Telephone users.
n
Collect all digits before dialing on trunk. Check this box to have
Strata CS play a dial tone, collect digits, and then dial those digits
after the user has finished. Uncheck it to have Strata CS send digits
8-10
STRATA CS ADMINISTRATOR MANUAL
BETA DOCUMENT - PRELIMINARY & CONFIDENTIAL
to the phone company as the user dials them and let the phone
company determine when the dial string is complete.
Digits are normally sent as the user dials them. In certain cases,
however, you can collect all digits if you want to do either of the
following:
n
n
Simulate a dial tone for carriers that do not generate a dial tone
after a Primary Interexchange Carrier (PIC) code (in the U.S.,
you can create a dialing service that uses a PIC code prefix to
access a particular carrier).
Improve tone detection when users attempt to place an outbound
call while logged into Strata CS remotely from a digital cell
phone or other low-quality connection.
If you check Collect all digits before dialing on trunk, Strata CS
assumes that all digits have been dialed when the dialing service
ambiguous time-out elapses, and places the call (for more
information, see “Setting dialing timeouts” on page 4-13). Users can
dial # when they are done dialing to skip the time-out and place the
call immediately. Also see “Routing services” on page 8-29 for a
more advanced way to avoid timeouts.
n
Dial prefix and dial suffix. Enter any digits to be dialed
automatically before or after the phone number dialed by the user.
When you create a Phone Number dialing service, you can enter a
dialing prefix and suffix. A dialing prefix consists of digits dialed
automatically by the dialing service before the number that the user
dialed. Similarly, a dialing suffix consists of digits dialed
automatically after the number the user dialed.
You can use a dialing prefix or suffix as follows:
n
n
To create a Phone Number service (“Outside Line”) used to dial
phone numbers over a Centrex trunk. Enter a dialing prefix,
typically 9, to get an outside line from Centrex. You can also
support the dialing of Centrex/PBX extensions over the same
trunks by creating a Centrex/PBX Extension dialing service
without entering a dialing prefix.
To create a Phone Number service (“Calling Card”) that makes it
easy for users to charge calls to a calling card company. Enter a
dial prefix that is the entire number used to access the calling card
company (including the calling card number), and then enter a
dialing suffix that is the number of the credit card used to pay for
these calls.
When users need to charge a call, they dial the access code for the
dialing service, and then dial the number they want to call. The
CHAPTER 8. MANAGING OUTBOUND CALLS
BETA DOCUMENT - PRELIMINARY & CONFIDENTIAL
8-11
dialing service automatically dials the number of the calling card
(the prefix), and then dials the number the user dialed, and then
supplies the credit card number (the suffix).
3.
Trunks tab. Click the Trunks tab (see “Trunks tab” on page 8-18) and
choose the trunks that this dialing service will use to place calls.
4.
Location Settings tab. Click the Location Settings tab (see “Location
Settings tab” on page 8-20) and specify the location of the Strata CS
Server. Location information enables Strata CS to determine whether it
needs to add a long-distance prefix, international prefix, or area code to
the number before dialing.
5.
Dialing Exceptions tab. Click the Dialing Exceptions tab (see “Dialing
Exceptions tab” on page 8-22) and define specific rules used to dial
numbers in a particular city, area code, exchange.
6.
Permissions tab. Click the Permissions tab (see “Permissions tab” on
page 8-26) and specify any restrictions on the numbers that can be
called using this dialing service.
7.
Click OK on any tab to add the dialing service.
Adding a Centrex/PBX Extension service __________________
A Centrex/PBX Extension service allows users to dial Centrex/PBX extensions
or other custom numbers over analog and digital trunks.
1.
Choose Dialing Services > New Dialing Service > Centrex/PBX
Extension Service.
8-12
STRATA CS ADMINISTRATOR MANUAL
BETA DOCUMENT - PRELIMINARY & CONFIDENTIAL
2.
On the General tab, enter the following basic information about the
dialing service:
n
n
Name, access code. Choose a name and access code that will make
it easy for the users to select this dialing service when placing a call.
See “Tips on access codes and names for services” on page 8-7.
Enabled. To make this dialing service available to users, leave
Enabled checked. Clearing the checkbox disables the dialing service
so that users cannot select it. Disabling can be useful if you want to
click OK before you are finished defining the dialing service, or later
if you want to change or troubleshoot the dialing service.
n
Hidden. To hide this dialing service in the Client, check Hidden.
This setting is typically enabled to hide dialing services that you use
for testing purposes or only want to make available to users through
a Routing dialing service (see “Routing services” on page 8-29). A
hidden service is still accessible to Strata CS users.
n
Minimum, Maximum number of digits. When a user dials a
Centrex/PBX extension, Strata CS waits to collect all of the digits up
to the minimum number of digits you specify here, and does not dial
them until one of the following occurs:
n
A time-out occurs (see “Setting dialing timeouts” on page 4-13).
n
The user presses # to signify that all digits have been entered.
n
The maximum number of digits (that you specify below) have
been entered.
If every Centrex/PBX extension that users can dial is the same length,
you can expedite dialing by entering that information here. For
example, if the extensions are 3 digits long, set both values to 3.
n
Collect all digits before dialing on trunk. Check to have Strata CS
wait until the user finishes dialing before sending the complete dial
string to the phone company. Uncheck to have Strata CS send digits
to the phone company as the user dials them, and let the phone
company determine when the dial string is complete.
Normally, digits are sent as the user dials them. In certain cases,
however, you can collect all digits:
n
n
To simulate a dial tone for carriers that do not generate a dial tone
after a Primary Interexchange Carrier (PIC) code (in the U.S.,
you can create a dialing service that uses a PIC code prefix to
access a particular carrier).
To improve tone detection when users attempt to place an
outbound call while logged into Strata CS remotely from a digital
cell phone or other low-quality connection.
CHAPTER 8. MANAGING OUTBOUND CALLS
BETA DOCUMENT - PRELIMINARY & CONFIDENTIAL
8-13
If you check this option, Strata CS assumes that all digits have been
dialed when the dialing service ambiguous time-out elapses, and
places the call (for more information, see “Setting dialing timeouts”
on page 4-13). Users can dial # when they are done dialing to skip the
time-out and place the call immediately.
n
Dial prefix and dial suffix. Enter any digits to be dialed
automatically before or after the phone number dialed by the user.
A dialing prefix consists of digits dialed automatically by the dialing
service before the number that the user dialed. Similarly, a dialing
suffix consists of digits dialed automatically after the number the
user dialed.
For example, you can create a Centrex/PBX Extension service
(“Voice mail”) that accesses a PBX that provides voice mail. Enter a
prefix that takes users into voice mail. Enter a suffix that takes them
directly to their new messages.
3.
Trunks tab. Click the Trunks tab (see “Trunks tab” on page 8-18) and
choose the trunks that this dialing service will use to place calls.
4.
Click OK on any tab to add the dialing service.
Adding an Internet Address service_______________________
An Internet Address dialing service allows users to place calls to IP (Internet
Protocol) addresses over Internet trunks. For example, you can use an Internet
Address service to place a call to a PC running Microsoft NetMeeting.
For complete information on setting up Strata CS for IP telephony, see
Chapter 13, “Configuring Internet Telephony Support.”
1.
Choose Dialing Services > New Dialing Service > Internet Address
Service.
2.
On the General tab, enter the following basic information about the
dialing service:
n
Name, access code. Choose a name and access code that will make
it easy for the users to select this dialing service when placing a call.
See “Tips on access codes and names for services” on page 8-7.
n
Enabled. To make this dialing service available to users, leave
Enabled checked. Clearing the checkbox disables the dialing service
8-14
STRATA CS ADMINISTRATOR MANUAL
BETA DOCUMENT - PRELIMINARY & CONFIDENTIAL
so that users cannot select it. Disabling can be useful if you want to
click OK before you are finished defining the dialing service, or later
if you want to change or troubleshoot the dialing service.
n
Hidden. To hide this dialing service in the Client, check Hidden.
This setting is typically enabled to hide dialing services that you use
for testing purposes or only want to make available to users through
a Routing service (see “Routing services” on page 8-29). A hidden
service is still accessible to Telephone users.
3.
Trunks tab. Click the Trunks tab (see “Trunks tab” on page 8-18) and
choose the trunks that this dialing service will use to place calls.
4.
Codecs tab. Click the Codecs tab (see “Codecs tab” on page 8-21) and
choose whether to default to or override the codecs specified for the
Internet span used by the service.
5.
Click OK on any tab to add the dialing service.
Adding an Internet-to-Phone Number service_______________
You use an Internet-to-Phone Number service to dial telephone numbers from a
remote Strata CS Server. For complete information on setting up Strata CS for IP
telephony, see Chapter 13, “Configuring Internet Telephony Support.”
1.
Choose Dialing Services > New Dialing Service > Internet-to-Phone
Number Service.
2.
On the General tab, enter the following basic information about the
dialing service:
CHAPTER 8. MANAGING OUTBOUND CALLS
BETA DOCUMENT - PRELIMINARY & CONFIDENTIAL
8-15
n
Name, access code. Choose a name and access code that will make
it easy for the users to select this dialing service when placing a call.
See “Tips on access codes and names for services” on page 8-7.
n
Enabled. To make this dialing service available to users, leave
Enabled checked. Clearing the checkbox disables the dialing service
so that users cannot select it. Disabling can be useful if you want to
click OK before you are finished defining the dialing service, or later
if you want to change or troubleshoot the dialing service.
n
Hidden. To hide this dialing service in the Client, check Hidden.
This setting is typically enabled to hide dialing services that you use
for testing purposes or only want to make available to users through
a Routing dialing service. A hidden service is still accessible to phone
users.
n
n
3.
IP Gateway. Select the IP Gateway that will direct calls from this
dialing service to a remote Strata CS Server. To create a new IP
Gateway, click the IP Gateway button. See “Creating an IP Gateway”
on page 13-9.
Remote Server’s Phone Number service access code. Use this
field to specify the dialing service that the remote server will use to
place outbound calls. Enter the access code of a Phone Number
dialing service on the remote Server (typically 9).
Trunks tab. Click the Trunks tab (see “Trunks tab” on page 8-18) and
choose the trunks that this dialing service will use to place calls.
4.
Codecs tab. Click the Codecs tab (see “Codecs tab” on page 8-21) and
choose whether to default to or override the codecs specified for the
Internet span used by the service.
5.
Location Settings tab. Click the Location Settings tab (see “Location
Settings tab” on page 8-20) and specify the location of the Strata CS
Server. Location information enables Strata CS to determine whether it
needs to add a long-distance prefix, international prefix, or area code to
the number before dialing.
6.
Click OK on any tab to add the dialing service.
Note: If you have problems sending digits to external phone systems when
dialing out on an Internet-to-Phone Number service, try increasing the DTMF Gain
and DTMF On-time parameters on the Tuning tab of the remote system’s Internet
span. See “Fine-tuning your IP connection” on page 5-24.
8-16
STRATA CS ADMINISTRATOR MANUAL
BETA DOCUMENT - PRELIMINARY & CONFIDENTIAL
Adding an Internet-to-Centrex/PBX Extension service________
You use an Internet-to-Centrex/PBX Extension service to dial any number such
as an extension or 411, or # to log in to Strata CS from the remote Server’s dial
tone. You can also use an Internet-to-Centrex/PBX Extension service to dial
Centrex or PBX extensions or other custom numbers from a remote Strata CS
Server. For complete information on setting up Strata CS for IP telephony, see
Chapter 13, “Configuring Internet Telephony Support.”
1.
Choose Dialing Services > New Dialing Service >
Internet-to-Centrex/PBX Extension Service.
2.
On the General tab, enter the following basic information about the
dialing service:
n
n
Name, access code. Choose a name and access code that will make
it easy for the users to select this dialing service when placing a call.
See “Tips on access codes and names for services” on page 8-7.
Enabled. To make this dialing service available to users, leave
Enabled checked. Clearing the checkbox disables the dialing service
so that users cannot select it. Disabling can be useful if you want to
click OK before you are finished defining the dialing service, or later
if you want to change or troubleshoot the dialing service.
n
Hidden. To hide this dialing service in the Client, check Hidden.
This setting is typically enabled to hide dialing services that you use
for testing purposes or only want to make available to users through
a Routing service (see “Routing services” on page 8-29). A hidden
service is still accessible to Strata CS users.
CHAPTER 8. MANAGING OUTBOUND CALLS
BETA DOCUMENT - PRELIMINARY & CONFIDENTIAL
8-17
n
Minimum, Maximum number of digits. When a user dials a
Centrex/PBX extension, Strata CS waits to collect all of the digits up
to the minimum number of digits you specify here, and does not dial
them until one of the following occurs:
n
A time-out elapses (see “Setting dialing timeouts” on page 4-13)
n
The user presses # to signify that all digits have been entered
n
The maximum number of digits (that you specify below) have
been entered
If every Centrex/PBX extension that users can dial is the same length,
you can expedite dialing by entering that information here. For
example, if all Centrex/PBX extensions are 3 digits long, set both
values to 3.
n
n
IP Gateway. Select the IP Gateway that will direct calls from this
dialing service to a remote Strata CS Server. To create a new IP
Gateway, click the IP Gateway button. See “Creating an IP Gateway”
on page 13-9.
Place Centrex/PBX calls on remote Server using. Choose how
calls from this dialing service will connect to the remote Server:
n
Remote Server’s Centrex/PBX service access code. The
remote Server places a call using the Centrex/PBX Extension
dialing service whose access code you enter here. This option lets
users dial Centrex/PBX extensions external to the remote Server,
for example, to connect to a legacy PBX on the remote Server, or
dial a Centrex extension.
n
3.
Remote Server’s internal dial tone. The call is connected to the
remote Server’s internal dial tone, as if the user was dialing from
a station on that Server. This option lets users dial internal Strata
CS extensions on the remote Server, or log in to an account on
that Server.
Trunks tab. Click the Trunks tab (see “Trunks tab” on page 8-18) and
choose the trunks that this dialing service will use to place calls.
4.
Codecs tab. Click the Codecs tab (see “Codecs tab” on page 8-21) and
choose whether to default to or override the codecs specified for the
Internet span used by the service.
5.
Click OK from any tab to add the dialing service.
Trunks tab
The Trunks tab is used by all dialing service types except routing services (see
page 8-29). This tab specifies the trunks to which calls will be routed, and the
order in which those trunks will be allocated.
8-18
STRATA CS ADMINISTRATOR MANUAL
BETA DOCUMENT - PRELIMINARY & CONFIDENTIAL
1.
Click the Trunks tab.
2.
Identify the trunks allocated by the service:
n
Use trunks in this order. Choose the algorithm used to allocate
trunks from the dialing service:
n
Bottom to Top. Trunks are allocated starting at the bottom of the
list each time. If a trunk is busy, the next trunk up is allocated.
n
Top to Bottom. Trunks are allocated starting at the top of the list
each time. If a trunk is busy, the next trunk down is allocated.
n
Round Robin. Trunks are allocated in the same sequence as
Bottom to Top, but starting with a different trunk for each call.
3.
Identify the trunks that will be allocated by this service.
Note: The label of the next field, and the trunks available for allocation
will vary depending on the type of service you are creating.
n
Use all phone number trunks. If selected, this dialing service will
allocate all analog and digital trunks in the Strata CS system, using
the algorithm selected above.
n
Use only selected trunks. If selected, only the trunks in the list on
the right will be allocated, using the algorithm selected above.
Click Add to add a trunk to the Selected trunks list. Click Remove
to remove it.
n
Available trunks. Lists all the trunks in the Strata CS system that
can be used by this type of dialing service:
CHAPTER 8. MANAGING OUTBOUND CALLS
BETA DOCUMENT - PRELIMINARY & CONFIDENTIAL
8-19
n
n
Phone Number service: analog and digital trunks
n
Centrex/PBX Extension service: analog and digital trunks
n
Internet Address service: Internet trunks
n
Internet-to-Phone Number service: Internet trunks
n
Internet-to-Centrex/PBX Extension service: Internet trunks
Selected trunks. Lists the trunks that will be allocated from this
dialing service. Use the up and down arrows to move a trunk higher
or lower in the list.
Location Settings tab___________________________________
The Location Settings tab is used by Phone Number dialing services (see
page 8-10) and Internet-to-Phone dialing services (see page 8-15). Strata CS uses
location information to format and dial telephone numbers entered in the Client
or collected from caller ID information.
1.
Click the Location Settings tab.
2.
Identify the local and long-distance phone number formats used to dial
using this service.
Note: When using this tab to create an Internet-to-Phone Number
dialing service, these values must match those on the remote Strata CS
Server.
n
Country/Region. Location of the Strata CS Server.
8-20
STRATA CS ADMINISTRATOR MANUAL
BETA DOCUMENT - PRELIMINARY & CONFIDENTIAL
n
Long-distance prefix. Prefix required to dial a long-distance number
from the Server location.
In the U.S., enter 1. Outside of the U.S. and Canada, the
long-distance prefix is typically 0.
n
International prefix. Prefix required to dial an international number
from the Server location. In the U.S., enter 011. Outside of the U.S.,
the international prefix is typically 00.
n
n
n
Area code. City or area code for local phone numbers.
Dial local numbers without area code. If checked, Strata CS strips
the area code from local numbers before dialing. In most areas, this
field should be checked, unless the service allocates trunks that only
support long-distance numbers, or always expect numbers to include
area codes.
Include long-distance prefix in area code. If checked, Strata CS
assumes that the long-distance prefix is always included with the area
code, as in the U.K. for example, 0181. This field is only available
for a Phone Number service, and is disabled in the U.S.
Codecs tab
When you add a dialing service of the type Internet Address (see page 8-14),
Internet-to-Phone Number (see page 8-15), or Internet-to-Centrex/PBX
Extension(see page 8-17), you can default to the codecs specified for the Internet
span or override the default and specify one or more codecs for this service. For
a complete discussion of codecs, including which ones to choose, see “Modifying
Strata CS IP codecs” on page 5-22.
You can create different IP services optimized for specific uses, for example, one
IP service with codecs optimized for Net Meeting, and another with codecs
optimized for Strata CS-to-Strata CS communication over IP.
Note: The default is to use the codecs set up at the span level. If you want to use
the default codecs, you do not need to make any changes on the Codecs tab. The
Codecs tab does not display the default codecs assigned at the Internet span level.
To view the default codecs, you must display the span properties in the Trunks
view.
If you decide to override the default codecs for the span, arrange the codecs in the
order in which you prefer to use them. For example, you may prefer one codec
over another to get greater bandwidth or better voice quality.
CHAPTER 8. MANAGING OUTBOUND CALLS
BETA DOCUMENT - PRELIMINARY & CONFIDENTIAL
8-21
To change the codecs used by a dialing service
1.
Click the Codecs tab.
This dialog box lists codecs assigned to the service so far. It does not
display the default codecs assigned at the Internet span level. To view
the default codecs, you must display span properties in the Trunks view.
2.
To override the codecs set up at the Internet span level, click Use the
following codecs.
3.
Click Add to add another codec, or select a codec and click Edit to
change any of the parameters used with the codec. For more information
on how to use the Add Codec dialog box, see “Adding an Internet span”
on page 5-21.
4.
Click the up or down arrows to promote or demote a specific codec
within the list.
5.
Click OK on any tab to save the dialing service.
Dialing Exceptions tab
The Dialing Exceptions tab is used only for Phone Number dialing services (see
“Adding a Phone Number dialing service” on page 8-10). If Dial local numbers
without area code on the Location Settings tab is checked (see “Location
Settings tab” on page 8-20), Strata CS dials all calls as long-distance calls except
calls in your area code. Within your area code, all calls are dialed as local calls.
You can change this default behavior, or add other dialing rules to cover
exceptions for certain exchanges.
8-22
STRATA CS ADMINISTRATOR MANUAL
BETA DOCUMENT - PRELIMINARY & CONFIDENTIAL
Note: If you did not check Dial local numbers without area code, you usually
do not need to specify dialing exceptions.
1.
Click the Dialing Exceptions tab. This tab displays dialing exceptions
created so far. If these settings are incorrect, calls dialed automatically
to local exchanges will be dialed as long-distance calls.
2.
Click Add to create a new dialing exception, or Edit to modify an
existing one. The Dialing Exception dialog box opens.
For information about importing and exporting dialing exceptions, see
“Exporting and importing dialing exceptions” on page 8-25.
3.
In the Dialing Exception dialog box, add a default dialing rule for each
city or area code for which you want to define exceptions.
n
n
City/Area code. Enter the city or area code.
Dial as. Select a dial string from the drop-down list. This string will
be used to dial all calls to this city or area code that do not match any
of the exceptions that you define below. In this example, the default
CHAPTER 8. MANAGING OUTBOUND CALLS
BETA DOCUMENT - PRELIMINARY & CONFIDENTIAL
8-23
dialing rule for the 617 area code has been defined. Click Apply to
save the default dialing rule.
4.
In Number, enter the exchange within the selected City/Area code that
requires a dialing exception. Select the Dial string to be used for calls to
this exchange from the drop-down list. In the following figure, the
dialing exception for the 235 exchange has been defined.
5.
Click Apply to save the dialing exception.
You can define several dialing exceptions for a city or area code to cover
different exchanges. Continue to enter exchanges for which dialing
exceptions are needed. When you are done, click OK.
The Dialing Exceptions tab displays the default dialing rule and the
dialing exceptions you defined.
You can continue to add default dialing rules for other city or area
codes, or add additional dialing exceptions. Enter only those city or area
codes for which local calling applies. If a city or area code is not in the
list, all calls to it are dialed as long-distance calls.
8-24
STRATA CS ADMINISTRATOR MANUAL
BETA DOCUMENT - PRELIMINARY & CONFIDENTIAL
Exporting and importing dialing exceptions
You use these functions to copy dialing exceptions from one Strata CS Server to
another, or from one Phone Number service to another on the same Strata CS
Server, so you do not have to retype them on each system. Dialing exceptions are
exported into a comma separated value (.CSV) file.
To export dialing exceptions
1.
In the Phone Number Service dialog box, click the Dialing Exceptions
tab.
2.
Click Export. The Export Dialing Exceptions dialog box opens.
3.
Enter a filename for the exported file. Click Browse to specify a
destination.
4.
Click Finish to export the file.
To import dialing exceptions
1.
In the Phone Number Service dialog box, click the Dialing Exceptions
tab.
CHAPTER 8. MANAGING OUTBOUND CALLS
BETA DOCUMENT - PRELIMINARY & CONFIDENTIAL
8-25
2.
Click Import. The Import Dialing Exceptions dialog box opens.
3.
Enter the filename. Click Browse to search for the file.
4.
Click Finish to import the file.
Permissions tab
The Permissions tab is used only for Phone Number dialing services (see “Adding
a Phone Number dialing service” on page 8-10). Dialing service permissions
allow or restrict users from dialing certain numbers when using specified dialing
services. You can set permissions for dialing services or for users. Dialing service
permissions can be inclusive (“allow all numbers except for...”) or exclusive
(“disallow all numbers except for...”). A user’s permissions can override those set
for the dialing service. For more on setting user permissions, see “The Dialing
tab” on page 6-33.
Note: Dialing service permission settings apply to numbers dialed using a Phone
Number dialing service. Numbers dialed using a Centrex/PBX Extension service
are only restricted by your Centrex/PBX provider. Numbers dialed using an Internet
Address service are only restricted by your network.
A user who attempts to dial a restricted number using the service hears the
message, “Sorry, you do not have permission to dial that number.” A user cannot
include a restricted number in a routing list or forward calls to a restricted number.
8-26
STRATA CS ADMINISTRATOR MANUAL
BETA DOCUMENT - PRELIMINARY & CONFIDENTIAL
To set dialing service permissions
1.
In the Phone Number Service dialog box, click the Permissions tab.
2.
Specify the default behavior when users dial a number using this
service, by selecting one of the following options:
n
allow all. Users can dial all numbers over this dialing service except
the disallowed ones listed below.
n
disallow all. Users cannot dial any numbers over this dialing service
except the allowed ones listed below.
3.
Click Add to add a new permission, or Edit to modify an existing one.
4.
Choose to Allow or Disallow calls, and then enter the digits. The
permission is applied whenever a user selects this dialing service and
then dials a number beginning with the prefix.
5.
Click OK to close the dialog box.
6.
Click OK on any tab to save the Phone Number service.
An example of how to set dialing service permissions
The following example illustrates how to set up dialing service permissions:
n
You want to allow users to dial all local numbers in the 216 area code.
These calls are dialed without the area code because they are local calls as
CHAPTER 8. MANAGING OUTBOUND CALLS
BETA DOCUMENT - PRELIMINARY & CONFIDENTIAL
8-27
set up on the Location Settings tab (see “Location Settings tab” on
page 8-20).
n
n
You want to allow calls to some exchanges in the 330 and 440 area codes,
which are dialed with a 1 in front of them because they are long-distance
calls, for example, 1-330-531-1234 and 1-440-674-4321.
In addition, you want to prevent calls to all other long-distance and
international numbers, but allow calls to 1800 and other toll-free numbers.
To do this with the fewest steps, set up the following dialing service
permissions:
n
By default, allow all numbers except those starting with:
n
Disallow 1. This prevents calls to long-distance numbers.
n
Disallow 011. This prevents calls to international numbers.
n
Allow 1330531. This allows calls to numbers in the 531
exchange of the 330 area code.You enter a separate permission
for each valid exchange in the 330 area code.
n
Allow 1440674. This allows calls to numbers in the 674
exchange in the 440 area code.
n
Allow 1800. This allows calls to toll-free numbers.
8-28
STRATA CS ADMINISTRATOR MANUAL
BETA DOCUMENT - PRELIMINARY & CONFIDENTIAL
In this example, the rules are applied in this order, longest to shortest:
1330531—allow
1440674—allow
1800—allow
011—disallow
1—disallow
The following numbers are allowed:
1 330 531 1234
1 800 123 4567
731 4521 (in the local area code)
The following numbers are disallowed:
1 347 555 1212
1 330 532 1212
011 44 181 555 1212
Routing services ______________________________________
A routing service is a special type of dialing service that routes calls through other
dialing services. It uses routing rules to identify the dialing services that are valid
for the number dialed. For example the following table shows a simple routing
rule that identifies local calls. If the dialed number matches the pattern in the
digits dialed column, then the Local calls dialing service can be used to place
the call. Local calls is referred to as the target dialing service for this rule.
Schedule Digits dialed
New digits
Action Service/Reason
Always
Nxxxxxx
Route
Nxxxxxx
Notes
76 - Local calls
This example shows the rule as it would be displayed in the Routing Rules tab
(see “Routing Rules tab” on page 8-35). Columns in the Routing Rules tab
contain the following information:
n
Schedule. Scheduled times at which the rule will be applied. This column
contains Always if no schedule is defined.
n
Digits dialed. Pattern that matches the dialed numbers that you want the
routing rule to process. The pattern Nxxxxxx matches any seven-digit
number starting with digits 2 through 9. See “Defining patterns to match
the dialed digits” on page 8-38 for details.
n
New digits. Pattern of the number to be passed to the target dialing
service. In this example, the number is unchanged.
n
Action. The rule’s action is Route to attempt to route the call through the
target dialing service, or Stop to stop processing of any further routing
rules that use this pattern.
CHAPTER 8. MANAGING OUTBOUND CALLS
BETA DOCUMENT - PRELIMINARY & CONFIDENTIAL
8-29
n
Service/Reason. The example gives the access code and name of the
target dialing service for this rule. If the rule’s action was Stop, this
column would list the reason for stopping.
n
Notes. Comments that you enter when you create the rule.
A routing service can have many different routing rules. The routing service
attempts to match the number dialed to each routing rule until it reaches the end
of the routing rules or finds a rule that tells it to stop processing the number. If one
or more valid dialing services are found, the routing service attempts to route the
call through the first one found. If all trunks on the first dialing service are busy,
the routing service tries other valid dialing services in the order that they were
found until the call is placed or all valid dialing services have been tried.
Before the routing service passes the number to a dialing service, it modifies the
number according to the pattern specified in New digits (the number is
unchanged if New digits matches Digits dialed). The dialing service applies any
prefixes, suffixes, and dialing exceptions (see pages 8-11, 8-14, and 8-22) to the
modified number before the call is placed.
How you can use routing services
By setting up multiple dialing services and using a routing service, you could do
any of the following:
n
Set up dialing services to roll over automatically. Set up multiple
routing rules that match the same type of number on the same schedule,
but route to different dialing services. The routing service identifies all
routing rules that match a phone number until it either encounters a stop
rule for that phone number or reaches the end of the routing rules. If all
trunks on the first rule’s target dialing service are busy, the second rule’s
target dialing service is tried, and so on until the call is placed.
n
Route local calls and long-distance calls to different trunks. Write
routing rules that identify local calls and route them to dialing services
that offer the lowest cost for local calls. Write another routing rule that
identifies long-distance numbers and routes them to the trunks that offer
the lowest price for long distance.
n
Route long-distance calls over an Internet gateway to be made as
local calls from a remote Strata CS Server. You are in the New York
office. Your company also has an office in Boston. Your New York users
make many calls to the Boston area code (617). You would set up an
Internet-to-Phone Number dialing service named Call Through Boston
that routes calls over the Strata CS Server in Boston. You would then
create a routing rule that matches numbers with the 617 area code
(1617Nxxxxxx) and routes the calls to the Call Through Boston dialing
service.
8-30
STRATA CS ADMINISTRATOR MANUAL
BETA DOCUMENT - PRELIMINARY & CONFIDENTIAL
n
Schedule the use of different dialing services for the same number to
implement least cost routing. You have three different carriers for
long-distance calls. One is the least expensive during business hours, one
during the evening hours of business days, and one during nights and
weekends. You would set up three dialing services for the three carriers.
In your routing service, create three routing rules, all of which match
long-distance numbers but are in effect during the three different times.
Have each rule route the calls to the appropriate dialing service.
An example of routing rules
Arrange your routing rules in the order you want them to be evaluated and
applied, top to bottom. There often are multiple rules to match the same phone
number. The first routing rule might be the least expensive long-distance option,
for example, while subsequent rules route to progressively more expensive
options.
The routing service in the following example has four routing rules (rules 5
through 8) that match the same set of numbers.
1
2
3
4
5
6
7
8
9
Schedule
Digits dialed
Always
011~
New digits
Stop
Invalid number
Always
1900~
Stop
Invalid number
Always
411
Always
411
Weekdays
1NxxNxxxxxx
Always
1NxxNxxxxxx
Always
1NxxNxxxxxx
Always
1NxxNxxxxxx
Always
~
411
Action Service/Reason
Route
79 - T1 line
Stop
All lines busy
1010321NxxNxxxxxx
Route
79 - T1 line
+1NxxNxxxxxx
Route
79 - T1 line
+1NxxNxxxxxx
Route
78 - All trunks
Stop
All lines busy
Route
79 - T1 line
~
These rules work as follows:
1.
Users are not permitted to place international calls with this access code.
This could be useful if you only want international calls to be placed by
users who have been given a special access code.
2.
Stops calls to 900 pay-per-minute numbers. (But see “Adding new
routing variables” on page 8-38. You could replace 900 with a new
routing variable that matches all pay-per-minute numbers).
3.
Route 411 calls to the T1 line dialing service.
4.
If all trunks are busy on T1 line, stop processing and play a message
saying all lines are currently busy. This stop rule causes a much quicker
time-out when no lines are available.
CHAPTER 8. MANAGING OUTBOUND CALLS
BETA DOCUMENT - PRELIMINARY & CONFIDENTIAL
8-31
5.
If a call is placed during hours defined by the Weekdays schedule, use
the least expensive carrier. The PIC code 10-10-321 is added to the
dialed digits before the number is passed to the T1 line dialing service.
6.
This rule will be used when the call is not placed during Weekday hours.
The rule uses the same target dialing service as rule 5, but it doesn’t
append the PIC code.
7.
This rule has a different target dialing service than the previous two. If
all of the T1 line dialing service trunks are busy, this rule routes the call
to the All trunks dialing service.
8.
If the dialed digits match this rule, no more routing rules will be
processed. With the stop rule in place, if no trunks are available from the
previous rules, the routing service stops the processing of the call and
plays a system prompt to the user saying that no lines are available.
Without such a stop rule, the routing service would search every routing
rule in the list.
9.
All other numbers are passed to the T1 line dialing service unchanged.
Processing phone numbers received from the Client
The Client automatically reformats most phone numbers using the area code and
country code settings of the service being used. This means, for example, that
even if the user types a number as 3540600 in the Client’s Place Call To dialog
box, the number would reach a routing service as (617)3540600. Phone numbers
dialed from a telephone, on the other hand, reach the routing service exactly as
dialed.
When the Client sends a number to a routing service, it also specifies whether or
not the number must be used exactly as dialed (see Strata CS Client User Guide
for information about entering a phone number by using a dialing service). If this
information indicates that the number can be altered, area code and country code
information is stripped from the number before the routing service processes it.
Putting local numbers from the Client and the telephone into the same seven-digit
form allows you to use the same routing rules for local phone numbers from both
sources.
8-32
STRATA CS ADMINISTRATOR MANUAL
BETA DOCUMENT - PRELIMINARY & CONFIDENTIAL
A routing service does not have location settings of its own, but every routing
service is configured with a default dialing service (see “Adding a routing
service” on page 8-33). The location settings of the default dialing service supply
the information needed to convert a number to the local form.
Applying permissions in routing services
When a routing rule has a Phone Number dialing service as its target, the target
dialing service must check user permissions (see “Permissions tab” on
page 8-26). If a routing rule matches the dialed digits, the target dialing service
checks the rule’s New digits against the permissions defined for the user, the user
role or roles, and the target dialing service itself. If the call is blocked, the target
dialing service is not used.
For information about permissions, see Chapter 6, “Managing Users and
Stations.”
Adding a routing service
1.
In the Dialing Services view, choose Dialing Services > New Dialing
Service > Routing Service. The Routing Service dialog box opens.
2.
On the General tab, enter the following basic information about the
routing service:
n
Name, access code. Choose a name and access code that will make
it easy for the users to select this routing service when placing a call.
See “Tips on access codes and names for services” on page 8-7.
CHAPTER 8. MANAGING OUTBOUND CALLS
BETA DOCUMENT - PRELIMINARY & CONFIDENTIAL
8-33
n
Enabled. To make this routing service available to users, leave
Enabled checked. Clearing the checkbox disables the routing service
so that users cannot select it. Disabling can be useful if you want to
click OK before you are finished defining the routing service, or later
if you want to change or troubleshoot the routing service (see
“Disabling dialing services while creating them” on page 8-7).
When you disable a routing service that is currently being used, you
should assign its access code to a dialing service or another routing
service that can handle all the types of calls that the routing service
normally handles so that users do not experience a service
interruption.
n
Hidden. To hide this dialing service in the Client, check Hidden.
This setting is typically enabled to hide dialing services that you use
for testing purposes or only want to make available to users through
a routing service. A hidden service is still accessible to Strata CS
users (see “Hiding dialing services in the Client” on page 8-6).
n
Default service. Dialing service whose location settings are applied
to numbers dialed from the Client. Select a dialing service from the
drop-down menu, or click
to create a new dialing service.
3.
Click the Routing Rules tab and add routing rules (see “Add a new
routing rule” on page 8-36) until you have provided coverage for all
numbers that you expect users to dial.
4.
Click OK to add the routing service.
8-34
STRATA CS ADMINISTRATOR MANUAL
BETA DOCUMENT - PRELIMINARY & CONFIDENTIAL
Routing Rules tab
The top pane on the Routing Rules tab displays routing rules for this service.
The columns in the top pane contain the following information:
n
Schedule. Scheduled times at which the rule will be applied. Contains
“Always” if no schedule was defined.
n
Digits dialed. Pattern that will match the dialed numbers you want the
routing rule to process.
n
n
n
New digits. Pattern of the digits to be passed to the target dialing service.
Action. The rule’s action is Route to pass a number to the target dialing
service, or Stop to stop processing of any further routing rules that use this
pattern.
Service/Reason. Lists either the access code and name of the target
dialing service or the reason for stopping, depending on the Action.
n
Notes. Comments that you enter when you create the routing rule.
To create a new routing rule, click Add (see “Add a new routing rule” on
page 8-36).
The bottom pane displays the routing variables that are currently available. Click
Variables if you need to create or edit routing variables for use in your routing
rules. See “Adding new routing variables” on page 8-38 for more information.
CHAPTER 8. MANAGING OUTBOUND CALLS
BETA DOCUMENT - PRELIMINARY & CONFIDENTIAL
8-35
Add a new routing rule
When you click Add On the Routing Rules tab, the Add Routing Rules dialog box
opens.
Use this rule under the following conditions
In this section of the dialog box, you can define which numbers the rule will
match and, optionally, set a schedule for when this rule is in effect.
n
n
Digits dialed. Type the pattern that will match the dialed numbers you
want the routing rule to process. For example, Nxxxxxx would match any
seven-digit local number. See “Defining patterns to match the dialed
digits” on page 8-38 for details. The pattern entered here is displayed in
the Dialed digits column of the Routing Rules tab.
Schedule. If you want to apply the rule only at scheduled times, click
to change from the default Always, which indicates that the rule is always
in effect. In the Custom Hours dialog box that opens, define the hours and
days of the week or the specific dates that this rule will be in effect. See
“Setting up custom time rules” on page 6-22 for more information. If you
enter a schedule, it is displayed in the Schedule column of the Routing
Rules tab.
8-36
STRATA CS ADMINISTRATOR MANUAL
BETA DOCUMENT - PRELIMINARY & CONFIDENTIAL
Execute the following action
In this section of the dialog box, you can specify the action to be performed with
the dialed digits. You have a choice of two actions: you can either Route to pass
the number to the target dialing service, or Stop to stop processing of any further
routing rules that use this pattern. The action you choose is displayed in the
Action column of the Routing Rules tab.
n
Route the call to another dialing service. Select to pass the number to
the target dialing service.
n
n
n
Dialing Service. From the drop-down list, select the target dialing
service for this rule. The service you select appears in the
Service/Reason column of the Routing Rules tab.
New Number. Type the pattern that defines the number you want to
pass to the target dialing service. If you do not want to change the
number, use the same pattern that you entered in digits dialed. See
“Defining a new number for a routing rule” on page 8-40 for more
information. If you enter a pattern, it appears in the New digits
column of the Routing Rules tab.
Stop processing rules. Select to prevent the routing service from
looking further for rules that match the dialed number.
If no rules have matched when the stop rule is reached, or if no trunks are
available from the target dialing services of the rules that matched, Strata
CS plays an appropriate system prompt to the user. The available prompts
include “No lines available,” “No lines available for this number,” and
“Invalid number.” The name of the prompt you select is displayed in the
Service/Reason column of the Routing Rules tab.
Most routing services will include stop rules. Stop rules can be used for
the following purposes:
n
Prevent numbers from being dialed over inappropriate trunks.
For example, create routing rules that dial 411 over the trunks that
support 411, and then add a stop rule so that Strata CS does not
attempt to use an inappropriate trunk from a later rule. Restrict 1800
numbers to specific trunks in the same way.
n
Eliminate timeouts when the user is dialing from the telephone.
For example, with 911 calls, you could create one or more routing
rules for the trunks that can handle the call, and then add a stop rule
for 911. The stop rule will cause Strata CS to pass 911 to a trunk
immediately instead of evaluating all of the remaining rules for
matches before routing the call.
n
Block calls to numbers. You can set up stop rules for 1900
numbers, for example, to prevent users from calling them.
CHAPTER 8. MANAGING OUTBOUND CALLS
BETA DOCUMENT - PRELIMINARY & CONFIDENTIAL
8-37
Defining patterns to match the dialed digits
You can include any of the characters listed below in the Digits dialed that the
routing rule uses to match digits received (see “Use this rule under the following
conditions” on page 8-36).
Routing rules can match the exact digits in phone numbers, such as 16173540600,
or use number patterns that include variables to match all dialed digits that fall
into a more general category. For example, using the pattern 1617Nxxxxxx to
match the dialed digits would match all phone numbers in the 617 area code. The
pattern 1NxxNxxxxxx could be used to match any long distance number in the
North American Numbering Plan.
By default, the system defines the following routing variables:
n
n
n
N matches any digit from 2-9. These are the initial digits used in exchanges
and area codes.
x matches any digits (0-9).
~ matches any sequence of digits and asterisks to the end of dialed digits.
This creates an ambiguous timeout (see “Avoiding dialing ambiguities”
on page 8-8).
You also can define your own routing variables to match combinations of digits,
as described in “Adding new routing variables” on page 8-38.
Here are some examples of match patterns and the phone numbers that these
patterns would match:
n
n
n
1617Nxxxxxx matches 16173540600 and any other seven-digit phone
number in the 617 area code.
1617~ matches 1617, 16173540600, 16173540600123456789, or any other
set of digits following “1617”.
Nxxxxxx matches 3540600, 2000000, or any other seven digits in which
the first digit is from 2-9.
Adding new routing variables
Routing rules use a set of variables to define the phone numbers to be matched.
By default, the system defines the routing variables N and x (see “Defining
patterns to match the dialed digits” on page 8-38). You may want to define
additional routing variables that match individual digits or combinations of digits,
such as area codes or exchanges.
For example, if you are in the 617 area code and calls to the 617, 781, and 508
area codes have the same low cost over certain trunks, you could create a new
routing variable AAA that matches the digit sequences 617, 781, and 508. By using
the AAA routing variable, for example, in a 1AAANxxxxxx match pattern, you could
8-38
STRATA CS ADMINISTRATOR MANUAL
BETA DOCUMENT - PRELIMINARY & CONFIDENTIAL
match calls to any seven-digit phone number in these three area codes. Doing this
would enable you to consolidate your handling of 617, 781, and 508 calls in a
single routing rule.
To add a routing variable
1.
Click Variables on the Routing Rules tab (see page 8-35).
Note: This dialog box can also be accessed by choosing Tools >
Routing Variables in the Dialing Services view.
2.
Click Add. The Routing Variable dialog box opens.
3.
Enter a name for the new variable in the Name field and the set of values
it will match in the Data field. The name must be a string of consisting
of a repeating upper case letter (for example, W, RRR or HHHHH).
The number of characters in the Name of the routing variable must be
the same as the number of digits being matched. For example, you could
use a a variable named BBB to match the area codes 617 and 781, but
you could not use a variable named BBBBB.
4.
Click OK to return to the Routing Variables dialog box. Click Add to
add another routing variable or click OK.
CHAPTER 8. MANAGING OUTBOUND CALLS
BETA DOCUMENT - PRELIMINARY & CONFIDENTIAL
8-39
Defining a new number for a routing rule
You can include any of the characters shown in the following table in the New
number defined for a routing rule (see “Add a new routing rule” on page 8-36).
Characters
Digits placed in the new number
N, x
Places the digit that the variable matched into the new
number. The position of the variable within the match
pattern is preserved in the new number. For example, If
the match pattern Nxxxxxx matches the dialed digits
5551212, including xxxx in the new number would yield
the digits matched by the first four x variables: 5512.
+
If + is the first character in the New Number field, the
routing rule’s target dialing service will apply area code
and country code rules to the basic number.
0-9*#
Valid telephone digits.
,&
A comma in the dialing sequence causes a 2-second
pause. An ampersand causes a Flash on analog trunks,
and is ignored on other trunks.
[n]
The nth digit in the dialed digits.
[n-m]
The nth through mth digits in the dialed digits.
[n-]
The nth through the last dialed digit.
~
All digits matched by the ~ in the dialed digits. (Can only
be used when the match pattern uses ~.)
"<string>"
Use quoted strings without modification. For example,
the following new number begins with the MyNetPhone
gateway as a quoted string, incorporates all the dialed
digits, then adds an account name and password as a
suffix: “gateway.mynetphone.net/”[1-]*1234*1234.
The following table illustrates some of the possibilities that exist for defining the
new number used by a routing rule. The first column shows number patterns and
dialed digits that match those patterns. The second column shows New Number
patterns that incorporate some or all of the dialed digits and the number that
results from applying the new number pattern to the dialed digits.
8-40
STRATA CS ADMINISTRATOR MANUAL
BETA DOCUMENT - PRELIMINARY & CONFIDENTIAL
Note: The last example in this table assumes that the U.S. is the country and 617
is the area code the Location Settings of the routing rule’s dialing service.
Match pattern/
Dialed digits
New Number pattern/
Number produced by pattern
1NxxNxxxxxx
16173540600
NxxNxxxxxx
6173540600
1NxxNxxxxxx
16173540600
Nxx[5-11]
6173540600
1NxxNxxxxxx
16173540600
[5-11]
3540600
1NxxNxxxxxx
16173540600
[5][6][7][8][9][10][11]
3540600
1NxxNxxxxxx
18005551111,,1211#E
[1-]
18005551111,,1211#E
1Nxx~
16173540600
18002255288,1Nxx~,4321
18002255288,16173540600,4321
Nxxxxxx
3540600
1010321Nxxxxxx
101032116173540600
Nxxxxxx
3540600
+1617Nxxxxxx
+16173540600
CHAPTER 8. MANAGING OUTBOUND CALLS
BETA DOCUMENT - PRELIMINARY & CONFIDENTIAL
8-41
CHAPTER 9
CHAPTER 9
HANDLING INBOUND CALLS
CHAPTER CONTENTS
About call routing . . . . . . . . . . . . . . . . . . . . . . . . . . . . . . . . . . . . . . 9-2
Using auto attendants. . . . . . . . . . . . . . . . . . . . . . . . . . . . . . . . . . . 9-4
Setting up an auto attendant . . . . . . . . . . . . . . . . . . . . . . . . . . . . . 9-7
Routing calls directly to a user . . . . . . . . . . . . . . . . . . . . . . . . . . . 9-18
Routing calls to workgroups . . . . . . . . . . . . . . . . . . . . . . . . . . . . . 9-19
BETA DOCUMENT - PRELIMINARY & CONFIDENTIAL
About call routing _____________________________________
This chapter provides an overview of call routing options in Strata CS and directs
you to the chapters in this manual that explain in detail how to use them.
With Strata CS, you can route incoming calls in the following ways—you can use
one of these options or several of them in combination:
n
n
n
n
n
n
n
n
Route calls to an auto attendant. Incoming calls go to an auto
attendant, at which callers enter an extension number. Auto attendants can
also provide a dial-by-name directory for callers who do not know a user’s
extension.
Route a trunk directly to a user. All incoming calls on a specific
trunk go to a specified user’s phone. With this option you can send calls
to a live operator who then transfers them to users. You can also give a
user a dedicated private line.
Ring multiple users simultaneously. Incoming calls simultaneously
ring the phones of all users in a specific workgroup. The first user in the
workgroup who answers is connected to the caller. Workgroups can
contain an unlimited number of users.
Route calls to an automatic call distribution (ACD) workgroup.
Incoming calls are automatically put on hold in a workgroup until an agent
becomes available. Calls with the longest wait times are answered first.
See the Strata CS Call Center Administrator Guide for details of routing
within an ACD workgroup.
Give a user a direct inward dial (DID) number. Incoming calls
reach the user without going through an auto attendant. Callers dial a
specific number that directly connects them to the user. If your phone line
supports DID, using this feature is a way to give a user a private number
without dedicating a trunk. You do not have to give DID numbers to all
users. For more information, see “ANI/DID digit collection” on page 5-5.
Give auto attendants DID numbers. Incoming calls on any trunk are
routed to the appropriate auto attendant using the DID number that the
caller dialed. Different departments can have different phone numbers and
auto attendants (the main office, sales, support, and so forth) without
requiring many separate trunks. By assigning DID numbers to auto
attendants, you can have several auto attendants with their own phone
numbers without having to dedicate a trunk to each one.
Route calls to a fax machine or pool of fax machines. For more
information, see “Setting up fax routing” on page 5-7.
Route calls directly to an IVR application. In addition, users can
route calls by setting up call forwarding or using routing lists. For more
information, see Strata CS Client User Guide.
9-2
STRATA CS ADMINISTRATOR MANUAL
BETA DOCUMENT - PRELIMINARY & CONFIDENTIAL
CHAPTER 9. HANDLING INBOUND CALLS
BETA DOCUMENT - PRELIMINARY & CONFIDENTIAL
9-3
Using auto attendants _________________________________
By default Strata CS uses auto attendants to route calls to users. Auto attendants
are powerful tools that offer callers recorded information, verbal menus, and other
features.
An auto attendant automatically answers incoming calls on a trunk line and plays
a recorded message that offers callers options for directing their calls. For
example, a recorded message might say, “Welcome to Barchetta Industries. You
may dial an extension at any time. For sales, press 1.” The caller enters an
extension number or chooses one of the options presented by the verbal prompt.
To route incoming calls on a trunk to an auto attendant, you modify the trunk.
Different trunks can point to different auto attendants.
About auto attendants
Auto attendants automatically answer incoming calls and offer callers various
options for directing their call. For example, your main auto attendant might say:
“Welcome to Barchetta Industries. You may dial an extension at any time. For
Sales, press 1. For Customer Support, press 2. To hear a recorded message about
our special offers, press 3. To speak to the operator, please hold.”
The preceding example message uses the default Strata CS method for routing
calls to users (see “The Default Auto Attendant” on page 9-5). Auto attendants
can be powerful tools, as follows:
n
n
n
n
You can create additional auto attendants and assign them to different
trunks or DID numbers. For example, if you distribute different phone
numbers for your sales department and your accounting department, you
can create a custom auto attendant for each one.
Strata CS lets you nest auto attendants, so that one option can take callers
to a menu of other options. By creating multilevel auto attendants you can
offer callers a nearly unlimited number of choices.
You can further customize an auto attendant by scheduling greetings and
call transfer behavior to change how it behaves during or after business
hours.
You can create auto attendants that are recorded in different languages but
have the same menu choices. A master auto attendant tells callers, “To
continue in English, press 1. To continue in Spanish, press 2.” Pressing the
appropriate choice transfers the caller to the auto attendant recorded in
that language. It also changes the system prompts that Strata CS presents
to the caller to the specified language.
9-4
STRATA CS ADMINISTRATOR MANUAL
BETA DOCUMENT - PRELIMINARY & CONFIDENTIAL
What callers hear
The auto attendant recording that callers hear is a series of short individual
recordings. The individual recordings are the following:
n
A greeting. The greeting is the first thing the auto attendant plays when it
answers a call, for example, “Thank you for calling Barchetta Industries.”
n
Menu prompts. Each menu prompt recording tells callers about a single
option. For example, “For Sales, press 1.” You must record each such
prompt individually, and specify the sequence in which you want the auto
attendant to play them.
By default, the following options are turned on for all auto attendants:
n
n
Callers can always enter an extension. At any time while listening to
an auto attendant’s options, callers can enter an extension and be
transferred to the party at that extension.
Callers can always log in by pressing #. Strata CS users who have an
extension and password can press # at any time to log in to Strata CS.
Even if these options are not mentioned in the recorded prompts played to callers,
they are available to them unless you turn them off.
The Default Auto Attendant
When Strata CS is installed, all incoming trunk lines are assigned the Default
Auto Attendant at extension 8000. The Default Auto Attendant is also assigned to
any new trunk that you add. You can change these assignments at any time.
The Default Auto Attendant plays a greeting and offers the caller the following
options:
n
Enter 9 to access a dial-by-name directory.
n
Enter 0 to transfer to the Operator.
n
Enter # to log in to Strata CS.
If the caller enters something different than the auto attendant options (9, 0, #),
Strata CS will treat what the caller enters as a user extension and attempt to
transfer the call. If three (3) seconds pass after the greeting has played without the
caller pressing a key, the call is transferred to the Operator.
Note: Although you can edit the Default Auto Attendant, it is recommended that
you leave it unmodified and create another auto attendant to customize for your
use. The Default Auto Attendant is used if another auto attendant is missing.
CHAPTER 9. HANDLING INBOUND CALLS
BETA DOCUMENT - PRELIMINARY & CONFIDENTIAL
9-5
The Auto Attendants view
To create and manage auto attendants, click the Auto Attendants button in the
view bar to open the Auto Attendants view.
Each auto attendant that you create appears as a row in the Auto Attendants view.
A nested auto attendant is considered a separate auto attendant and appears on its
own row. The following table shows the information that appears for each auto
attendant.
Column
Description
Name
Descriptive name assigned to the auto attendant.
Extension
Extension number used to connect to the auto
attendant.
DID
Direct inward dial numbers used to dial this auto
attendant directly.
Description
Additional descriptive information about the auto
attendant.
Double-click an auto attendant in the view to open the Auto Attendant dialog box.
Auto attendants that you create are not used until you assign them to a trunk in the
Trunks dialog box, as described for the various trunk types in Chapter 5. In this
way you can create different auto attendants for various situations and then
activate the one you want at the appropriate time.
9-6
STRATA CS ADMINISTRATOR MANUAL
BETA DOCUMENT - PRELIMINARY & CONFIDENTIAL
Setting up an auto attendant_____________________________
To set up an auto attendant, you must perform the following steps:
1.
Define the menu choices that you want to offer to callers.
2.
Set up the menu prompts that explain each menu choice.
3.
Optionally, schedule greetings and call transfer behavior to further
customize the auto attendant.
4.
Assign the auto attendant to a trunk.
Creating a new auto attendant
1.
Select Auto Attendants > New Auto Attendant. The Auto Attendant
dialog box opens.
2.
Enter the following information:
n
Name (required). Descriptive name for the new auto attendant, for
example, “Sales auto attendant.”
n
Extension (required). Extension used to reach the auto attendant.
Strata CS users can transfer callers to the auto attendant at this
extension. See “Assigning an extension” on page 6-10 for
recommendations and restrictions.
To test the auto attendant, dial the auto attendant’s extension. The
default auto attendant is assigned an extension of 8000.
n
DID number. Assign one or more DID numbers to the user from the
block of numbers provided by your telephone company or T1
CHAPTER 9. HANDLING INBOUND CALLS
BETA DOCUMENT - PRELIMINARY & CONFIDENTIAL
9-7
provider. When Strata CS recognizes this number as the final digits
on an inbound call, the caller is automatically connected to this auto
attendant, bypassing the main auto attendant. To assign multiple DID
numbers to an auto attendant, separate each number with a comma
(,).
n
Description. Information that describes the auto attendant.
3.
Record a greeting that plays before any menu choices are offered to the
caller. A typical greeting is, “Thank you for calling Barchetta Industries.
If you know your party’s extension, you can enter it at any time.” For
more information, see “Using the audio controls” on page 2-10.
4.
Click each of the remaining tabs to finish creating the new auto
attendant:
n
n
5.
Menu Choices (described in the next section).
Scheduled Actions (described in “Scheduling transfers and
greetings” on page 9-14).
Click OK from any tab to save the new auto attendant. To activate the
auto attendant to handle incoming calls, assign it to a trunk (see
“Deleting trunks” on page 5-3).
You can save time and reduce typing when you want to create a new auto
attendant by right-clicking an existing auto attendant and clicking Copy on the
shortcut menu. Then right-click anywhere in the view and click Paste on the
shortcut menu. The Auto Attendant dialog box opens with a copy of the existing
auto attendant and you can now customize it.
Defining menu choices
A Strata CS auto attendant contains a series of menu choices offered to the caller.
When a caller reaches an auto attendant, its menu choice prompts are played in
the order you specify.
In its most basic form, each menu choice consists of:
n
Prompt. A recorded message that explains the option to the user
n
Key. The telephone key the user must press to select the option.
n
Action. The action the system takes when the key is detected. If a menu
choice action transfers the call to a user or IVR Plug-in, you also can select
a prompt that announces the transfer to the caller.
n
Language. The language for subsequent system prompts. When the caller
enters the key associated with this menu choice, all subsequent prompts
are in the specified language. The languages that your system supports is
part of the Strata CS Server installation. For more information, see Strata
CS Installation & Maintenance Manual.
9-8
STRATA CS ADMINISTRATOR MANUAL
BETA DOCUMENT - PRELIMINARY & CONFIDENTIAL
An auto attendant must always contain an action to take when the caller does not
press any key at all, so that the caller is not abandoned. This is called the
“nothing” menu choice. You specify how long the auto attendant will wait for a
key press (after the last prompt finishes playing) before performing the “nothing”
action. The prompt associated with the “nothing” action plays only after the
time-out elapses, not with the prompts for other actions.
When you create a new auto attendant, the “nothing” action is defined for you as
a “Transfer to Operator” with a timeout of 3 seconds. Also by default, the auto
attendant processes all keys that a caller enters that do not match any of the auto
attendant options as an extension.
Note: Strata CS automatically disconnects a call if the caller fails to press a key
during three consecutive auto attendants. The caller is presumed to have hung up.
To change the number of auto attendants that can execute without the caller
pressing a key, see Server\MaxAutoAttendantLoops on page A-31.
The following table lists the actions that you can change. You can also create
other actions that occur in response to other keys.
Action
Description
Transfer to user
Transfers the call to a Strata CS user
Send to voice mail
Transfers the call to a user’s voice mailbox
Play message
Plays a message that you record
User login
Offers the caller the Strata CS login prompt
Dial by name
Offers the caller the dial-by-name directory
Jump to auto
attendant
Transfers the call to another auto attendant
Transfer to IVR
Plug-in
Transfers the call to an IVR Plug-in for
processing
CHAPTER 9. HANDLING INBOUND CALLS
BETA DOCUMENT - PRELIMINARY & CONFIDENTIAL
9-9
To add or modify a menu choice:
1.
In the Auto Attendant dialog box, click the Menu Choices tab.
The following table shows the information that appears for each menu
choice that has been defined for this auto attendant.
Column
Description
Key
Key that the caller presses (0-9, *, or #) to
perform the menu choice.
Description
Action Strata CS performs when that key is
pressed.
9-10
STRATA CS ADMINISTRATOR MANUAL
BETA DOCUMENT - PRELIMINARY & CONFIDENTIAL
2.
Click Add to create a new menu choice. Click Edit to modify the
selected menu choice.The Edit Menu Choice dialog box opens.
3.
On the General tab, type the text of the Prompt to offer this menu
choice, for example, “For Sales, press 1.” Use the audio buttons to
record the prompt. For more information, see “Using the audio controls”
on page 2-10.
4.
Type the key that callers must press to select the menu choice. Valid
keys are 0-9, *, or #.
5.
In the Perform action drop-down list, select the action to perform when
callers press the key.
For transfers to a user or IVR Plug-in, select an optional Announce
prompt:
n
Nothing. The call is transferred with no announcement.
n
Name and extension. Announces the name and extension of the user
or IVR Plug-in as the call is transferred.
n
One moment please. Announces “One moment please” as the call is
transferred.
CHAPTER 9. HANDLING INBOUND CALLS
BETA DOCUMENT - PRELIMINARY & CONFIDENTIAL
9-11
6.
Click the Advanced tab.
7.
To Change the caller’s telephone prompts to another language that
was installed with Strata CS, select the language from the drop-down
list. When callers press the key associated with this action, all
subsequent prompts are in the language you specify here.
For example, to give callers the option of accessing a dial-by-name
directory in Spanish, set up a dial-by-name menu choice on the General
tab, and then select Spanish on the Advanced tab.
8.
To display custom data in the Client’s Call Monitor or send custom data
to an IVR Plug-in or to a queue when a caller selects this menu choice,
check Set custom data when this menu choice is pressed. Enter the
Name and Value of the variable to send. The name of the variable must
match the name expected by the Call Monitor or IVR Plug-in or queue
exactly.
For example, your auto attendant might say, “For product ABC, press 1.
For product XYZ, press 3.” For the two menu choices, you could set
9-12
STRATA CS ADMINISTRATOR MANUAL
BETA DOCUMENT - PRELIMINARY & CONFIDENTIAL
these fields as follows:
Menu choice
Variable Name
Variable Value
1
Product
ABC
2
Product
XYZ
The Call Monitor would then indicate whether a call was regarding
product ABC or XYZ. For details on how to configure the Call Monitor
to display custom variables such as these, see Chapter 15 of Strata CS
Client User Guide.
For more information about IVR Plug-ins, see Chapter 14, “Extending
Strata CS.” For more information about queues, see Strata CS Call
Center Administrator Guide.
9.
Click OK to save the menu choice.
10. On the Menu Choices tab, use the up and down arrow buttons to change
the order in which menu choices are presented to callers.
Notice that menu choices that change the language of subsequent
system prompts identify the new language here.
If checked, Process all other digits as user extensions causes
anything that callers press that does not match an auto attendant action
key to be treated as an extension. Strata CS will attempt to transfer the
call to that extension.
CHAPTER 9. HANDLING INBOUND CALLS
BETA DOCUMENT - PRELIMINARY & CONFIDENTIAL
9-13
You can also modify the Number of seconds before performing
‘nothing’ menu choice.
Note: A fax tone can take up to 7 seven seconds to be recognized. A
short auto attendant prompt (one that announces the company name
only, and then transfers the call to a user) combined with a short number
of seconds before performing nothing menu choice setting can result
in inaccurate fax detection results. The combined time for the auto
attendant prompts and the wait for nothing must be a minimum of 10
seconds.
11. Click OK to save the auto attendant, or continue to add menu choices.
You can test an auto attendant without assigning it to a trunk by dialing its
extension.
Scheduling transfers and greetings
You can further customize an auto attendant by scheduling an action that is
performed before any other auto attendant actions. You can schedule the
following:
n
n
A transfer to another auto attendant, IVR Plug-in, or user. Schedule a
transfer to change call flow behavior over time, for example, to send all
calls to the operator during business hours and to an auto attendant after
hours.
A different main greeting, which replaces the one defined for the auto
attendant on the General tab. Schedule a greeting to play different
greetings to your callers during business hours or after hours.
This allows the same auto attendant to react and respond differently during
various time periods that you set. For example, in order to provide extended
coverage in your customer support organization, support calls that arrive after
your California office closes in the evening transfer automatically to the main
auto attendant at your facility in New Zealand.
Note: If you have a scheduled greeting and a scheduled transfer that occur at the
same time, the transfer always takes precedence and the greeting does not play.
For information about how to set up business hours to use when scheduling jumps
to other auto attendants, see “Business Hours” on page 4-5.
9-14
STRATA CS ADMINISTRATOR MANUAL
BETA DOCUMENT - PRELIMINARY & CONFIDENTIAL
To schedule transfers or greetings:
1.
Create a new auto attendant or edit an existing one. Click the Scheduled
Actions tab.
The following table shows the information that appears for each
scheduled action already defined for this auto attendant.
Column
Description
Enabled
If checked, the action will be performed as
scheduled. If unchecked, the action is
temporarily disabled.
Description
Time period during which the action will be
performed.
Action
Action that will be performed.
You can view the actions scheduled for each set of work hours you have
defined using the Business hours drop-down list. Be sure to select the
appropriate set of Business hours before adding or editing a scheduled
action. For more about business hours, see “Business Hours” on page
4-5.
CHAPTER 9. HANDLING INBOUND CALLS
BETA DOCUMENT - PRELIMINARY & CONFIDENTIAL
9-15
2.
Click Add to schedule a new action. Click Edit to modify the selected
action.
3.
Select the time period during which the action will occur, as follows:
n
n
4.
To view or change the work schedule (the hours covered by this time
period), click Business Hours. For more information about setting a
work schedule, see “Defining a schedule for e-mail and pager
notification” on page 6-20.
To set custom hours to handle special situations, click Custom
Hours (see “Setting up custom time rules” on page 6-22 for more
information).
Select the action to perform immediately when the auto attendant takes
a call during the schedule period:
n
Transfers to. Immediately transfers callers to the auto attendant,
operator, user, or IVR Plug-in that handles calls during the scheduled
time period.
n
Plays greeting. Immediately plays a greeting during the scheduled
time period. For more information, see “Using the audio controls” on
page 2-10.
9-16
STRATA CS ADMINISTRATOR MANUAL
BETA DOCUMENT - PRELIMINARY & CONFIDENTIAL
5.
Check Enable this schedule action to activate this action as soon as
you save the auto attendant. If unchecked, the action is temporarily
disabled.
6.
Click OK.
Setting up hold music
You can set up hold music for an auto attendant that is different from the
system-wide hold music. Callers hear an auto attendant’s hold music while the
auto attendant is transferring them to an extension, and they continue to hear it
while on hold until they reach a part of Strata CS that uses different hold audio.
Each auto attendant can have its own hold music.
If you do not specify hold music for the auto attendant, the auto attendant uses the
system-wide hold music. To configure system-wide hold music, see “Server
Configuration” on page 4-3.
Without hold music, callers hear silence while they are being transferred.
To set up hold music for an auto attendant
1.
In the Auto Attendant dialog box, click the Hold tab.
2.
Check Play hold music from station number and enter the station
number of an attached CD player or other music-on-hold device.
3.
Click OK.
Deleting auto attendants
If you delete a custom auto attendant, all trunks using that auto attendant will use
the Default Auto Attendant. You cannot delete the Default Auto Attendant.
CHAPTER 9. HANDLING INBOUND CALLS
BETA DOCUMENT - PRELIMINARY & CONFIDENTIAL
9-17
For more information about deleting items in Strata CS, see “Deleting items” on
page 2-9.
Routing calls directly to a user ___________________________
This method dedicates a trunk to a single user. All incoming calls on the trunk are
sent to that user. If the user is busy or doesn’t answer, the calls follow the user’s
routing list. The only outgoing calls on the trunk are those placed by the user’s
phone.
With this option you can do the following:
n
n
n
n
n
Send incoming calls on the trunk to a live operator, who then transfers the
calls to the appropriate destination. You can do this on all your trunks.
Send incoming calls on the trunk to a user, giving that user a dedicated
private line. If your phone lines do not support direct inward dial (DID),
this is the only way to let callers dial a user directly, without going through
an auto attendant.
If your phone lines support DID, give a user a direct-dial phone number
using that method instead, without sacrificing a trunk. However, there can
be users who require an actual dedicated line, for example, to generate
their own outgoing caller ID information.
Route calls on a trunk to a workgroup and ring the workgroup’s phones
simultaneously. By doing so you can give a department its own phone
number. To make all incoming calls to your company ring everybody’s
phone at once, route your main number to a workgroup that contains all
users.
Give an automatic call distribution (ACD) workgroup its own phone
number by routing calls on a trunk to a workgroup (see Strata CS Call
Center Administrator Guide for details).
To route a trunk to a user (or to a workgroup as described earlier), modify the
trunk.
Trunk type
To modify trunk, open this dialog box
Analog trunk
Trunk dialog box
Robbed Bit T1
span
Robbed Bit T1 Span dialog box, Trunks tab
Internet span
Internet Span dialog box, General tab
ISDN/CAS T1/E1
span
ISDN/CAS T1/E1 Span dialog box, Trunks tab
9-18
STRATA CS ADMINISTRATOR MANUAL
BETA DOCUMENT - PRELIMINARY & CONFIDENTIAL
For more information about routing inbound calls on a trunk, see Chapter 5,
“Managing Trunks and Spans.”
Routing calls to workgroups_____________________________
You can have incoming calls ring the phones of all users in a workgroup at the
same time. The first user to answer the call is connected to the caller. This feature
is handy for departments or small offices in which it does not matter who answers
an incoming call.
Simultaneous ring is one of several distribution algorithms that you can use with
ACD workgroups. An ACD (automatic call distribution) workgroup distributes
calls to one or more ACD workgroups that handle incoming calls. See Strata CS
Call Center Administrator Guide for more information about routing calls to
ACD workgroups.
CHAPTER 9. HANDLING INBOUND CALLS
BETA DOCUMENT - PRELIMINARY & CONFIDENTIAL
9-19
CHAPTER 10
CHAPTER 10
USING ACCOUNT CODES
CHAPTER CONTENTS
About account codes . . . . . . . . . . . . . . . . . . . . . . . . . . . . . . . . . . 10-2
Setting up account codes . . . . . . . . . . . . . . . . . . . . . . . . . . . . . . . 10-3
How users enter account codes . . . . . . . . . . . . . . . . . . . . . . . . . . 10-7
Viewing account codes in the Call Log . . . . . . . . . . . . . . . . . . . . . 10-8
Generating account code reports . . . . . . . . . . . . . . . . . . . . . . . . . 10-8
BETA DOCUMENT - PRELIMINARY & CONFIDENTIAL
About account codes __________________________________
Strata CS allows you to track your phone traffic by having users enter an account
code for each call. Account codes can represent anything to do with your phone
traffic that you want to track. Users enter an account code on their telephone
keypads whenever they place a call or during a call. You can define the available
account codes and tell your users the codes they must enter under specific
circumstances.
Some of the ways you can use account codes are as follows:
n
For billing clients. With account codes you can track the calls to various
customers whom you bill for the phone time you spend with them.
n
For internal accounting. If phone bills are a significant part of your
company’s expenses, you can use account codes to perform detailed
expense analyses. For example, you can track phone use by department.
Account code information appears in the Call Log (see “Using the Call Log” on
page 11-7), and you can generate reports using the Strata CS Reporter that show
calls by account code. For information about the Strata CS Reporter, see Strata
CS Call Center Administrator Guide.
Example: Your office is working on the Gould case and the Avellanos case. You
give the Gould case an account code of 88 and the Avellanos case an account code
of 55. Whenever users place or receive calls relating to the Gould case, they enter
88. Whenever they place or receive calls relating to the Avellanos case, they enter
55. You can then run a report that sorts calls by account code and see the phone
traffic for the Gould and Avellanos cases separately. You can also run a report
that sorts by user, so that you can see how much phone time a specific user spent
on each case.
10-2
STRATA CS ADMINISTRATOR MANUAL
BETA DOCUMENT - PRELIMINARY & CONFIDENTIAL
Setting up account codes _______________________________
This section describes how to set up your Strata CS system to use account codes.
Setting general account code options
To set up the general behavior of account codes in your system, choose Tools >
Account codes. The Account Codes dialog box opens.
1.
Under Default inbound mode and Default outbound mode, choose the
account code modes that you want to be the defaults for new users. The
default is “Stations with no users assigned”. You can always change a
user’s account code modes.
The account code modes are as follows:
n
Optional non-verified. The user is not prompted to enter account
codes. If the user does enter an account code by pressing *11, it is not
checked against the list of valid account codes.
n
Optional verified. The user is not prompted to enter account codes.
If the user does enter an account code, it is checked against the list of
valid account codes. If the account code is invalid, the user is
prompted to enter it again.
n
Forced non-verified. The user is prompted to enter an account code
when placing an outbound call. The account code is not checked
against the list of valid account codes. This option is available for
outbound mode only.
n
2.
Forced verified. The user is prompted to enter an account code when
placing an outbound call, and the account code is checked against the
list of valid account codes. If the account code is invalid, the user is
prompted to enter it again. This option is available for outbound
mode only.
Use the Collect account code before dialing number check box to
specify when the account code prompt occurs during the dialing of an
CHAPTER 10. USING ACCOUNT CODES
BETA DOCUMENT - PRELIMINARY & CONFIDENTIAL
10-3
outbound call. Check this option to prompt for an account code
immediately after the user dials an access code (for example, 9).
Uncheck the box to prompt for account code after the user completes
dialing the phone number.
3.
Check Verify account code according to range to have the system
verify account codes by length. If an account code contains too many
digits or too few digits, the user is prompted to enter it again. Under
Minimum length and Maximum length, specify the acceptable range
for account code length. For example, if account codes in your system
can be two, three, or four digits, enter a Minimum length of 2 and a
Maximum length of 4.
Note: It is more efficient to set Minimum length and Maximum length
to the same number and use account codes that are all the same length.
When set up this way, the system immediately recognizes when a user
finishes entering an account code, so the user does not need to press #
at the end of the account code. When account codes are of variable
length the user must press # to end the account code or there will be a
slight pause while the system waits for more digits.
If Minimum length and Maximum length are both set to 0, account
codes are not verified by length.
4.
Click OK.
Setting a user’s account code modes
Whether or not users are prompted to enter account codes depends on the account
code modes for each individual user.
Note: You can set default account code modes after setting the account code
modes for new users. The default modes appear for each new user you create.
See “Setting general account code options” on page 10-3.
10-4
STRATA CS ADMINISTRATOR MANUAL
BETA DOCUMENT - PRELIMINARY & CONFIDENTIAL
To set a user’s account code modes
1.
Double-click a user in the Users view. The Users dialog box opens. You
can also set account code modes when you create a new user.
2.
Click the Dialing tab.
3.
Under Account codes at the bottom of the dialog box, select the user’s
account code modes for inbound and outbound calls. For an explanation
of the account code modes, see “Setting general account code options”
on page 10-3.
4.
Click OK.
Creating a text file of valid account codes
If you want to use verified account codes for some or all users, you must create a
text file that lists your valid account codes. The text file must be called
Accountcode.txt and must reside in the Accountcode directory on the Strata CS
Server computer. By default, the complete path is:
C:\Program Files\Strata CS Server\Accountcode\Accountcode.txt
When a user whose account code mode is set to “Verified” enters an account
code, Strata CS checks the code against the contents of the text file. If the account
code is not listed in the text file, Strata CS prompts the user to enter it again.
For instructions on setting a user’s account code mode to “Verified,” see the
previous section, “Setting a user’s account code modes.”
CHAPTER 10. USING ACCOUNT CODES
BETA DOCUMENT - PRELIMINARY & CONFIDENTIAL
10-5
Formatting the text file
Type each account code as a separate line in the text file. Blank lines are permitted
and are ignored by the system. If you want to add a comment line that is ignored
by the system, begin the line with a semicolon (;).
Account codes can contain only the numbers 0 through 9 and the two wild card
characters (see the next section).
Note: Account codes in the text file must meet your account code length
requirements. For example, if your account codes must be between 2 and 4 digits,
a 5-digit account code will be rejected even if it appears in the text file. See “Setting
general account code options” on page 10-3 for instructions on setting account
code length requirements.
Using wild card characters
You can use two wild card characters when you enter valid account codes in the
text file:
n
n
Question mark (?). Indicates any single digit. For example, an account
code entry of 12? would make 123, 124, and 129 all valid account codes.
In this case, however, neither 12 nor 1233 would be valid account codes.
Percent sign (%). Indicates any number of digits, including none. For
example, an account code entry of 12% would make 12, 123, 1233, and
12789213120 all valid account codes.
Wild card characters, if they are used, must be the final characters in an account
code. You can use both wild card characters in the same account code, but if you
do so, the % character must be the final character.
Valid
Invalid
12?
1?2
12??
1%2
12%
?12
10-6
STRATA CS ADMINISTRATOR MANUAL
BETA DOCUMENT - PRELIMINARY & CONFIDENTIAL
Valid
Invalid
12?%
%12
12?????%
12%?
Note: Account codes that are identical except for wild card characters conflict
with each other. For example, 1234 conflicts with 1234?, 1234??, or 1234%. In the
case of conflicting entries, only the first entry is used to verify account codes.
Using a verbal account code prompt
By default, the account code prompt is a single beep. You must explain to your
users that they must enter an account code when they hear the beep. Strata CS
provides an alternate account code sound file, with a verbal prompt that says,
“Please enter an account code.”
To use the verbal account code prompt instead of the beep
1.
Find the file AccountCodePrompt.vox in the user directory. This file
contains the beep. By default the path is:
C:\Program Files\StrataCS Server\Vfiles\User\AccountCodePrompt.vox
2.
Rename the file, for example, to AccountCodePrompt.vox.old.
Users now hear the verbal prompt instead of the beep when they are prompted to
enter an account code.
Note: By renaming the beep file, Strata CS automatically uses another
AccountCodePrompt.vox file, which is found in your language directory and which
contains the verbal prompt. The default path for the English language verbal
prompt file is:
C:\Program Files\StrataCS Server\Vfiles\EN00\AccountCodePrompt.vox.
How users enter account codes__________________________
Users can enter an account code for a call in the following ways, depending on
when they enter the code:
n
When prompted by the system while placing an outbound call. Only
users with an account code mode of “Forced” encounter this prompt.
Exactly where the prompt occurs in the dialing sequence depends on
whether you checked Collect account code before dialing number (see
“Setting general account code options” on page 10-3).
CHAPTER 10. USING ACCOUNT CODES
BETA DOCUMENT - PRELIMINARY & CONFIDENTIAL
10-7
n
During a call. A user can press Flash to put a caller on hold, and then
press *11 to enter an account code for the ongoing call. Users can use this
command as many times as they want during a call to change or correct
the account code for the call. The last account code entered is the one
used.
This method is the way account codes are entered for inbound calls.
n
Before dialing a call. A user can press *11 before dialing a call to enter
an account code for that call. The user picks up the phone and dials *11
<account code> <access code> <phone number>. In the following
example, spaces are shown for clarity:
*11 8877 9 212 123 4567
In this example, 8877 is the account code and 9 is the access code.
Indicating the end of an account code
A user indicates the end of an account code by pressing #. If the user does not
press #, the system automatically registers an account code as complete when the
account code reaches the maximum number of digits or a time out expires (see
“Setting general account code options” on page 10-3 for instructions on setting a
maximum number of digits). If you have a high maximum number of digits and
your account codes can be of variable lengths, you should encourage users to
press # when they reach the end of an account code.
A user can cancel an account code entry while entering it by pressing *.
Viewing account codes in the Call Log ____________________
The Call Log contains an Account Code column that shows the account code
associated with each call. If the Account Code column is blank, no account code
was entered for the call.
Click the Account Code column header to sort the Call Log by account code.
Generating account code reports_________________________
For information about generating reports that show account code usage, see the
Strata CS Call Center Administrator Guide.
You can also export the Call Log, with its account code information, to a .CSV
file that you can view in most spreadsheet programs. See “Exporting the Call
Log” on page 11-11.
10-8
STRATA CS ADMINISTRATOR MANUAL
BETA DOCUMENT - PRELIMINARY & CONFIDENTIAL
CHAPTER 11
CHAPTER 11
MONITORING & BACKING UP
CHAPTER CONTENTS
About monitoring and backing up your Strata CS system . . . . . . 11-2
Using the Device Monitor . . . . . . . . . . . . . . . . . . . . . . . . . . . . . . . 11-3
Using the Call Log . . . . . . . . . . . . . . . . . . . . . . . . . . . . . . . . . . . . 11-7
Monitoring database and disk usage . . . . . . . . . . . . . . . . . . . . . 11-11
Backing up Strata CS . . . . . . . . . . . . . . . . . . . . . . . . . . . . . . . . . 11-11
Viewing the Windows Event Log . . . . . . . . . . . . . . . . . . . . . . . . 11-14
Using the Maintenance Log view . . . . . . . . . . . . . . . . . . . . . . . . 11-20
Reporting problems . . . . . . . . . . . . . . . . . . . . . . . . . . . . . . . . . . 11-20
BETA DOCUMENT - PRELIMINARY & CONFIDENTIAL
About monitoring and backing up your Strata CS system_____
You can monitor your Strata CS system by using the following Strata CS features:
n
Device Monitor. View current station and trunk status.
n
Call Log. Review call history.
n
Storage tab in the System Settings dialog box. Monitor available
space in the Strata CS database and keep track of how much space
individual users are using for voice messages and greetings.
n
Windows Event Log. Monitor Server disk usage and system-wide event
logs.
n
Administrative Maintenance Log. View system changes made by
administrators, such as new passwords, by action or entity type. Provides
you with a higher level of security and fault recovery.
You can also use the Strata CS Call Center Reporter to run comprehensive reports
on queue, agent, caller, system, and billing activity. For more information, see the
Strata CS Call Center Administrator Guide.
You must perform the following backups on a regular basis:
n
Online backup
n
Offline backups
See “Backing up Strata CS” on page 11-11 for information about backing up and
restoring your Strata CS system.
11-2
STRATA CS ADMINISTRATOR MANUAL
BETA DOCUMENT - PRELIMINARY & CONFIDENTIAL
Using the Device Monitor _______________________________
The Device Monitor view shows current station and trunk activity on the system.
This information is useful for monitoring current usage and identifying potential
bottlenecks.
Note: You can view the same information and perform the same tasks using the
Device Monitor utility, which runs independently of the Administrator. The Device
Monitor utility (TVDevmon.exe) is installed on the Strata CS Server.
Monitoring station activity
The following table shows the information that is presented in the upper pane for
each Strata CS station (internal telephone).
Column
Description
Station
Number that corresponds to the MSI board
resource to which a phone is attached.
Idle station or trunk. (Also known as on-hook.)
Active station or trunk. (Also known as off-hook.)
CHAPTER 11. MONITORING & BACKING UP
BETA DOCUMENT - PRELIMINARY & CONFIDENTIAL
11-3
Column
Description
Status
Current station activity. Station status codes
include:
n Startup. Strata CS system is starting.
n
Idle. Station is free (on-hook).
n
In Call. Station is in use (off-hook).
n
n
n
n
Playing hold music. Station is used for music
on hold.
Reorder. Station has been left off-hook for too
long, or is in an error condition.
Navigating TUI. User is logged in on the trunk
and listening to the auto attendant menu.
Not responding. Station is not responding to
device status queries.
The Status column can also show custom status
information set by an IVR Plug-in that has been
called by a station.
Assignment
Name and extension of the user permanently
assigned to this station. This column may also
contain:
n Not assigned. Station is not currently used.
n
Logged In
Not installed. Station has been configured for a
user, but the supporting hardware has not yet been
installed.
Name of the user currently logged in at the station.
Monitoring trunk activity
The following table shows the information that is displayed in the lower pane of
the Device Monitor for each trunk configured in Strata CS.
Column
Description
Trunk
Trunk number that corresponds to the resource on
the trunk board to which the line is connected.
11-4
STRATA CS ADMINISTRATOR MANUAL
BETA DOCUMENT - PRELIMINARY & CONFIDENTIAL
Column
Description
Status
Current trunk activity. Some of the trunk status
codes are:
n
Idle. Trunk is free (on-hook).
n
n
n
n
n
n
n
n
In call. Trunk is in use (off-hook).
Dialog Node. Caller is listening to the auto
attendant menu.
Calling. Strata CS is ringing the trunk.
No loop current. Trunk is not connected to the
telephone company.
Reorder. Trunk is in an error condition.
Navigating TUI. User is logged in on the trunk
and listening to the auto attendant menu.
Not configured. Trunk is not currently used.
Not installed. Trunk has been configured, but
the supporting hardware has not yet been
installed.
The Status column can also show custom status
information set by an IVR Plug-in that is connected
to a trunk.
In
If checked, the trunk is used for inbound calls.
Out
If checked, the trunk is used for outbound calls.
Enabled
If checked, the trunk is enabled for use by Strata
CS.
Name
Optional descriptive name for the trunk.
Enabling and disabling trunks
For testing purposes, you can enable or disable a digital span (RBT1 or ISDN)
without shutting down Strata CS. Choose Device Monitor > Toggle Enabled to
change the enabled state of all selected trunks. If a selected trunk is enabled when
you choose the command, it will be disabled, and if is disabled it will be enabled.
The Enabled column in the view will always reflect the current state of a trunk.
When a device is disabled, Strata CS does not process any events for the device.
No calls, either inbound or outbound, can be placed on the disabled device. While
the device is disabled and Strata CS is running, you can perform tasks such as the
following:
CHAPTER 11. MONITORING & BACKING UP
BETA DOCUMENT - PRELIMINARY & CONFIDENTIAL
11-5
n
n
Run the Robbed Bit T1 Experimenter, modify signaling information (for
example, Pickup, Hangup, Digit Collection), and then enable the device
to pick up the changes.
Run ISDIAG to place an outbound call to determine the correct call
parameters. You can then apply these parameters to the Strata CS registry,
enable the device, and try it again.
Disabling a trunk does not allow you to modify Dialogic settings. The following
restrictions on modifying Dialogic settings still apply:
n
n
n
You cannot modify Dialogic .PRM file settings and have them take effect
without restarting the Dialogic drivers.
You cannot modify Dialogic DCM settings while the drivers are running.
You cannot disable a Dialogic board via the DCM without first stopping
all devices.
Restarting stations or trunks
The Strata CS Server periodically test stations and trunks to see if they are
responding. It automatically restarts stations and trunks whenever necessary. The
default testing interval is 5 minutes. For information on modifying that setting or
to turning it off, see Monitor Interval in the section “Strata CS Configuration
Settings” in Appendix .
Some error conditions may make a trunk or station unusable, and you must restart
the device manually. For example, if a single station shows the status “Reorder,”
restart it to re-establish the connection to Strata CS. Generally, if the status of a
device does not seem to reflect its actual status, you must restart the device.
Similarly, you can manually restart a trunk that has become unstable because of
an error condition. You also restart a trunk using the Device Monitor to detect
loop current on a newly added trunk before Strata CS can use it.
Both automatic and manual restarts are logged in the Windows NT Event Log.
Note: Be aware that restarting a device may take up to 30 seconds. During that
time, you cannot perform any other operations in the Device Monitor.
To restart a station or trunk
1.
Do one of the following:
n
To restart a single device, select the device and choose Device
Monitor > Restart Station or Restart Trunk.
n
To restart multiple devices, press CTRL or SHIFT while you select
trunks or stations, and then choose Restart Devices on the shortcut
11-6
STRATA CS ADMINISTRATOR MANUAL
BETA DOCUMENT - PRELIMINARY & CONFIDENTIAL
menu. You cannot restart both trunks and stations in the same
operation.
2.
Click Yes to confirm the restart.
Starting a new Server log
Choosing Device Monitor > Start new Server log creates a new Strata CS Server
log file. Perform this option only under the direction of your Strata CS provider.
Using the Call Log _____________________________________
The Call Log view displays a record of the calls placed and received on the
system. Each call appears as a row in the view. You can use the Call Log view to
analyze system usage patterns, and you can export Call Log records to generate
traffic analysis reports.
To use the Call Log view, click its button in the view bar.
The following table shows the information that is displayed for each call.
Column
Description
Inbound call.
Outbound call.
CHAPTER 11. MONITORING & BACKING UP
BETA DOCUMENT - PRELIMINARY & CONFIDENTIAL
11-7
Column
Description
From
Name of the person who placed the call. On incoming
calls, “Unknown” appears unless the user identified
the caller as a contact. On outgoing calls, this column
contains the user’s name.
To
Name of the party who received the call. On incoming
calls, the user’s name appears. On outgoing calls,
“Unknown” appears unless the user identified the
person as a contact.
Answered By
Name of the user who answered an incoming call.
Useful for analyzing data for ACD workgroups.
Number
On incoming calls, caller ID name and number if
available. On outgoing calls, the number the user
dialed. On a call to or from another Strata CS user,
this field contains <NA>.
From Number
On incoming calls, the caller’s extension or external
phone number. On outgoing calls, the user’s
extension.
To Number
On incoming calls, the user’s extension or, if the user
called into Strata CS externally, the external number.
On outgoing calls, the external number or extension
the user called.
DID
On incoming calls, the user’s Direct Inward Dial
number if the caller used it to call the user. DID is not
applicable for outgoing calls.
Start Time
Date and time that the call started.
Wait Time
On incoming calls, the length of time between dialing
the user’s extension and the call being answered. On
outgoing calls, Wait Time is always 00:00.
Duration
Length of time that the parties are connected.
11-8
STRATA CS ADMINISTRATOR MANUAL
BETA DOCUMENT - PRELIMINARY & CONFIDENTIAL
Column
Description
Result
How the caller’s wait ended. The assigned values for
the possible outcomes are:
n
0 - Abandoned. Caller hung up before call was
answered.
n
n
n
n
n
n
1 - Connected. Caller was connected to a party.
4 - Left message. Caller went to voice mail, but
did not necessarily leave a message.
5 - Blind transfer. A blind transfer sent the caller
to another party.
6 - Supervised transfer. A supervised transfer
sent the caller to another party.
7 - Unknown. Strata CS was unable to identify the
outcome of the call.
8 - Login. Caller logged in to correct Strata CS
account.
Message
If checked, the caller left a voice message.
From Device
On incoming calls, the trunk or extension from which
the call originated. On outgoing calls, the user’s
station number.
To Device
On incoming calls, the user’s station number. On
outgoing calls, the trunk used for the call. If an
incoming call was transferred, this column shows the
last station that took the call.
Parties
Number of people who took part in the call, including
the caller, the called party, anyone to whom the call
was transferred, and any conference call participants.
Dial String
Digits that Strata CS actually dialed over the trunk,
which may be different than the digits Strata CS
displays in a contact's phone number. For example, a
dial string may contain an international or
long-distance access code, least cost routing
information, or dialing prefix or suffix.
From Type
Type of incoming call: Phone, Centrex, or Internet.
From Code
Access code of the dialing service that will be used to
return this call. Only applicable to calls coming in from
remote Strata CS Servers over an Internet trunk.
CHAPTER 11. MONITORING & BACKING UP
BETA DOCUMENT - PRELIMINARY & CONFIDENTIAL
11-9
Column
Description
From Rules
If checked, Strata CS’s dialing rules will be applied
when returning this call.
To Type
Type of outgoing call: Phone, Centrex, or Internet.
To Code
Access code used to dial an outbound call.
To Rules
If checked, dialing rules were used to make an
outbound call.
Custom Data
Custom data, if any, associated with the call. For
most systems this contain only “Notes=”, meaning
there were no call notes on the call.
Displaying a specific number of Call Log entries
The Call Log can become very large over time and its size can cause a delay in its
display. To reduce this delay, you can view fewer entries of the Call Log at one
time and not load the entire database.
To set the number of calls displayed in the Call Log
1.
Choose Tools > Options.
2.
In the Options dialog box, enter the number of entries that you want
displayed at a time, using the following as a guide:
n
n
3.
A high setting will likely cause a delay while the specified number of
entries are copied over the network, but you can navigate within the
information easily using the scrolls bars after the entries have been
retrieved.
A low setting minimizes the delay before information is displayed,
but you must retrieve entries more often to scroll through the entire
Call Log.
Click OK.
Note: This option controls how many entries are transferred in one request, but
does not limit the entries available for view. All Call Log entries are always available
by choosing Call Log > Next __ Calls or Previous __ Calls, or using the buttons
on the toolbar.
By default, only external calls are logged. For information about logging internal
calls, see “Logging internal calls” on page 4-8. For information about archiving
the Call Log, see “Archiving the Call Log” on page 4-8.
11-10
STRATA CS ADMINISTRATOR MANUAL
BETA DOCUMENT - PRELIMINARY & CONFIDENTIAL
Exporting the Call Log
You can export system call records to a comma separated value (.CSV) file that
can be read by most spreadsheet and database programs. Exported Call Log
entries are not deleted from the Strata CS database, and the size of the Strata CS
database does not change after an export.
1.
Choose File > Import and Export. The Import and Export Wizard
opens.
2.
Under Select an import or export action, select Export Call Log and
click Next.
3.
In Save exported file as, enter the filename and path for the exported
file or click Browse to specify a destination.
4.
Under Options, enter the Start date and End date.
5.
Click Finish to export the file. Depending on the size of your Call Log,
an export may take several minutes to complete.
Monitoring database and disk usage ______________________
Strata CS’s database stores your system configuration settings (information about
trunks, users, auto attendants, and so forth), the Call Log, and an index to voice
prompts, greetings, voice titles, and voice message files in a database. The voice
files themselves are stored separately on disk.
Tasks associated with monitoring database and disk space include:
n
Allocating database space
n
Allocating disk space
See “The Storage tab” on page 4-10 for information about how to perform these
tasks.
Backing up Strata CS___________________________________________
You must perform two kinds of backups on the Strata CS database on a regular
basis. Both the information stored in the Strata CS database, and the voice files
stored separately, are vital to the proper operation of Strata CS. It is critically
important to back up both the database and voice files regularly by creating the
following:
n
n
Online backup. Creates a copy of the Strata CS database. This backup
protects against problems caused by database corruption. The Strata CS
Server registry settings are also saved.
Offline backup. Copies the Strata CS database to another location. This
backup protects against disk crashes and other problems.
CHAPTER 11. MONITORING & BACKING UP
BETA DOCUMENT - PRELIMINARY & CONFIDENTIAL
11-11
You must also regularly back up the Strata CS voice prompts and user voice
message files by copying the files to another location.
Important: To successfully restore Strata CS data, you must have created
synchronized backup sets of the database and voice files. The best way to
accomplish this task is to perform an offline backup of both the database and the
voice files, as described in the procedures that follow.
To perform an online backup of the Strata CS database
1.
Choose Tools > Backup Database.
2.
Click OK to confirm the backup. The Strata CS Administrator creates a
backup copy of your Strata CS database and also copies your current
Strata CS registry settings to a TVServer.reg file.
You can also perform an online backup by starting the Administrator with a
command line option (see Appendix B).
To perform an offline backup of the Strata CS database
1.
Perform an online backup of the Strata CS database, as shown in the
previous procedure.
2.
Copy the following files to tape or to another disk. The default location
is:
C:\Mssql\Toshiba\Backup\Tvdb.dmp
C:\Mssql\Toshiba\Backup\TVServer.reg
To perform an offline backup of the Strata CS voice files
Copy the contents of the following directory and all its subdirectories to tape or
to another disk. The default location is:
C:\Program Files\Strata CS Server\Vfiles\
Note: Be sure to include Temprecs and its files.
Restoring Strata CS data
You can restore the database from the online backup maintained on the Server or
from an offline backup you have created previously.
For a successful restoration, the backup used to restore the Strata CS database
must match the backup voice files exactly. For example, you must not use a
backup of the database made on Monday and a backup of the voice files made on
Tuesday. The best way to insure a successful restoration is to use database and
voice file backups made at the same time.
11-12
STRATA CS ADMINISTRATOR MANUAL
BETA DOCUMENT - PRELIMINARY & CONFIDENTIAL
To restore the Strata CS database from an online backup
1.
Make sure that the Strata CS Server has been shut down (see
page 11-14) and that there are no copies of the Strata CS Client or
Administrator running (except the one you are using).
2.
Choose Windows NT/2000 Services in the Control Panel to stop and
restart the MSSQL service (doing this ensures that no one is connected
to the database Server).
3.
From the Strata CS Administrator, choose Tools > Restore Database.
4.
Click Yes to confirm that you want to restore the database.
5.
If a file (TVServer.reg) containing backed-up Strata CS Server registry
settings is present when you restore the database, click Yes when you
are prompted to restore the registry settings as well.
The Strata CS database is restored using the copy stored by the database Server
the last time you backed up your data. The system prompts and voice mail
messages are not affected.
To restore the Strata CS database from an offline backup
1.
Make sure the Strata CS Server has been shut down (see page 11-14)
and that no copies of the Strata CS Client or Administrator are running.
2.
Choose Windows NT/2000 Services in Control Panel to stop and restart
the MSSQL service (doing this ensures that no one is connected to the
database Server).
3.
Copy the most recent version of the Tvdb.dmp file from your backup
device to:
C:\Mssql\Toshiba\Backup\
If the file already exists, overwrite it.
4.
Start the Administrator, and then choose Tools > Restore Database.
5.
Click Yes to confirm that you want to restore the database. This
procedure restores the database, but does not restore the actual system
prompts and voice mail messages (see the next procedure).
To restore voice files from an offline backup
1.
Delete all the files in the \Vfiles directory. The default location for
this directory is:
c:\Program Files\Strata CS Server\Vfiles
CHAPTER 11. MONITORING & BACKING UP
BETA DOCUMENT - PRELIMINARY & CONFIDENTIAL
11-13
2.
Copy the latest version of the files from your backup device to the
\Vfiles directory. Be sure to include the \Vfiles\Temprecs directory
and its files.
Shutting down the Strata CS Server
Choose Tools > Shutdown Server. Select one of the following options, and then
click OK:
n
n
Immediately shut down and terminate all calls. Shuts down the Server
when you click OK, terminating any calls currently in progress.
Prevent new calls in __ minutes, then shutdown when existing calls
are finished. Preserves calls in progress by waiting the number of minutes
you specify before starting to shut the Server down. When you click OK,
all Client users receive a message that states that the Server is shutting
down. After the time is up, Strata CS prevents any new calls from
beginning and waits until all current calls have ended. At that point, the
Server shuts down.
While the Server is in the process of shutting down and blocking new
calls, incoming callers hear ringing. The same is true after the Server has
shut down.
n
Cancel scheduled shutdown. Cancels a shutdown that was scheduled
using the previous option. You can cancel only the shutdown before the
time that you specified expires. After the Server has begun the process of
blocking new calls and shutting down, you can no longer cancel the
shutdown.
Moving a Strata CS Server to another machine
You can restore the Strata CS database from an online backup to another machine.
The backup/restore function copies all Server registry settings and automatically
resolves different source and target path names to simplify the process of moving
a Strata CS Server.
Viewing the Windows Event Log _______________________________
The Windows Event Log contains informational messages from Windows
NT/2000 and from applications running on the Server. Both Strata CS and the
database Server post startup and shutdown messages and error messages to the
Applications Event Log.
You can examine the Windows Event Log on the Strata CS Server locally or
remotely from any machine running Windows NT/2000.
11-14
STRATA CS ADMINISTRATOR MANUAL
BETA DOCUMENT - PRELIMINARY & CONFIDENTIAL
You can set up Strata CS to send e-mail notifications when Strata CS-related
events are logged to the Event Log. For more information, see “The General tab”
on page 4-3.
To view the Windows Event Log
1.
Choose Start > Programs > Windows NT Administrative Tools
(Common) > Event Viewer. If you are not running the Event Viewer on
the Strata CS Server, choose Log > Select Computer.
2.
Choose Log > Application.
3.
Review the log for Strata CS or the database Server messages.
Strata CS-related Windows Event Log messages
Messages are identified in the Event Log by application and message number.
Double-click a message to see its text.
The following messages are posted to the Event Log by Strata CS:
100 - Informational
Strata CS Server Started -- Version ##
An informational message indicating when the Strata CS Server started.
101 - Informational
Strata CS Server Stopped
An informational message indicating when the Strata CS Server was shut down.
This message indicates an orderly shutdown, not a shutdown caused by a
problem.
102 - Informational
Connecting to SQLServer -- Version ##
An informational message indicating when Strata CS is connecting to the SQL
Server.
103 - Informational
Disconnecting from SQLServer -- Version ##
An informational message indicating when Strata CS is disconnecting from the
SQL Server.
CHAPTER 11. MONITORING & BACKING UP
BETA DOCUMENT - PRELIMINARY & CONFIDENTIAL
11-15
104 - Error
DSSQL Error: xxxx
This message contains an error message returned to the Strata CS Server by SQL
Server. These message are often useful to Strata CS providers or Toshiba support
for assessing a Strata CS problem and must not be discarded.
105 - Error
No Voice Resource Available
This message indicates that the trunk boards in your Server were unable to
provide a voice resource for a requested operation. This error should not be
encountered in normal operation and may indicate that you need additional voice
board resources for your current load. Contact your Strata CS provider.
106 - Warning
Device # Restarted
This message indicates a trunk or station was restarted to recover from an error
condition. The restart may have been initiated automatically by the Strata CS
Server or manually by the administrator. If this message appears only
infrequently, it can be ignored. If it is seen often, contact your Strata CS provider.
107 - Warning
Inbound call detected on outbound trunk #
This message indicates a call was received on a trunk allocated for outbound
calling only. The Strata CS Server played a wrong number message and
disconnected the call. If this message is seen frequently, it may indicate that the
number for the line in question has been distributed to potential callers or that the
line is included in an inbound hunt group.
108 - Warning
Inbound gateway call failed to provide correct password -- Trunk ##,
Account ##
This message indicates that an inbound gateway call failed to provide the correct
password.
109 - Warning
Warning: Low Voice Resources Detected
This message indicates that the trunk boards in your system had to use a voice
resource normally reserved for another purpose for a requested operation. This
message is a less severe version of message 105.
11-16
STRATA CS ADMINISTRATOR MANUAL
BETA DOCUMENT - PRELIMINARY & CONFIDENTIAL
If this message occurs only occasionally when the system is under heavy load it
can be ignored. If the error occurs frequently, however, it may indicate you must
purchase additional resources for your current load. Contact your Strata CS
provider.
111 - Warning
Unable to start Strata CS Mail Server. Voice Mail notifications via
Email will be disabled.
On startup, the Strata CS Server was unable to establish a link with your e-mail
post office. Mail notification will be disabled until the problem is resolved.
Contact your Strata CS provider.
112 - Informational
Started Strata CS Mail Server.
This message indicates the Strata CS Mail Server started successfully when the
Server started. This is an informational message.
113 - Warning
No loop current detected on outbound trunk n.
This message indicates the Strata CS Server was unable to use the indicated trunk
line for an outbound call even though it registered loop current the last time the
Server was started. This could indicate the line was unplugged from the Server or
it might indicate a problem on the line.
114 - Error
Thread performing least-cost routing is not responding
If the error recurs, kill TVLCRhst.exe from the Task Manager. It will restart the
next time Strata CS tries to dial a long-distance call.
115 - Error
Strata CS Server Restarted
Strata CS Server had to be restarted by the Strata CS Watchdog process.
116 - Error
Strata CS cannot accept more voice messages: disk space is low.
Strata CS cannot accept voice messages because the disk space on the voice files
disk is low.
CHAPTER 11. MONITORING & BACKING UP
BETA DOCUMENT - PRELIMINARY & CONFIDENTIAL
11-17
117 - Error
Stopped using trunk ##: the trunk may have been disconnected.
Strata CS Server has stopped using a trunk.
118 - Error
Failed to Restart Strata CS Server: Total Restarts Exceeded
Strata CS Server failed to restart after trying several times.
119 - Error
Failed to Stop Device Handle ##
Strata CS Server failed to stop a Dialogic device. You may need to manually
restart this device in the Device Monitor.
120 - Error
Unable to start Strata CS Exchange Server synchronization.
Exchange Server synchronization will be disabled.
Unable to start Strata CS Exchange Server synchronization.
121 - Informational
Started Strata CS Exchange Server synchronization.
Strata CS Server started Microsoft Exchange Server synchronization.
122 - Error
Unable to open device: ##
Strata CS Server was unable to open the Dialogic device.
123 - Error
Unable to delete temporary message file for device ##.
This is recorded when there is a problem deleting a temporary message file for a
device. The temporary message file for station 2 is S2-m.vox. If this file cannot
be deleted, an invalid message will be left for the recipient.
124 - Error
T1 Alarm: ##
A T1 alarm occurred on the trunk.
11-18
STRATA CS ADMINISTRATOR MANUAL
BETA DOCUMENT - PRELIMINARY & CONFIDENTIAL
125 - Error
Unable to start IVR Plugin: License count exceeded.
Unable to start the IVR Plug-in because the number of your station licenses is less
than the total number of stations assigned to users plus the total number of IVR
Plug-ins currently running (every running IVR Plug-in uses 1 station license).
126 - Error
Insufficient licenses: ##
Strata CS Server detects an insufficient number of trunk, IP trunks, user, or Server
licenses, and the Server was unable to start. Make sure that you have Strata CS
licenses for every user, trunk, and IP trunk you have added in the Administrator.
127 - Error
Notification via pager failed; user ’<Username>’, number
’<pagernumber>’
An attempt to send a pager notification of a new voice message failed. The error
message shows the user’s name and the full dial string of the pager number that
was dialed unsuccessfully. Alert the user that the pager number might be incorrect
or that pause characters should be added to the dial string.
129 - Error
Disabling Exchange Server synchronization. Unable to connect to
database.
Strata CS could no longer access the SQL Server database and disabled Exchange
Server synchronization.
T1 alarms
The following two T1 alarms are written to the Windows NT Event Log:
n
n
Red Alarm. Signals that the Robbed Bit T1 line has lost synchronization
with the switch to which it is connected. Strata CS disables all channels
on the affected digital span, so that spurious signals are not processed as
incoming calls.
Red OK. Signals that synchronization has been restored. All channels on
the affected digital span are re-enabled.
All T1 alarms are written to the Strata CS Server logs.
CHAPTER 11. MONITORING & BACKING UP
BETA DOCUMENT - PRELIMINARY & CONFIDENTIAL
11-19
Using the Maintenance Log view
The Maintenance Log view displays tracked actions and presents details about
each action. Information contained in the log is stored in the database. To view
the Maintenance Log, click its button in the view bar.
The Maintenance Log tracks the following actions:
n
Restarting a device
n
Starting the Server
n
Stopping the Server
n
Scheduling a Server shutdown
n
Changing a user’s password
n
Changing a queue’s password
n
Logging on to the Administrator or Device Monitor
n
Logging out of the Administrator or Device Monitor
n
Enabling or disabling a device
The following columns appear in the Maintenance Log view:
n
Action taken
n
Item that was acted upon (if applicable)
n
Date and time of the action
n
Name of the user who was logged on when the change was made
n
Name of the computer from which the change was made
Reporting problems____________________________________
Use the Problem Report Wizard to report any problems you experience with your
Strata CS system to your provider. Your provider has the expertise to debug,
correct, and expand your Strata CS system, as well as access to Toshiba Technical
Support resources for further assistance.
The Problem Report Wizard asks you to describe the frequency, patterns, and
circumstances of the problem you are reporting. Based on the information you
supply, the Problem Report Wizard isolates exactly when and where the problem
occurred and automatically collects the appropriate Strata CS log files and other
information from your computer. By assembling all the relevant information, the
Wizard helps your technical support representative quickly identify the problem
and begin to solve it.
Note: For information about known issues and workarounds for currently
11-20
STRATA CS ADMINISTRATOR MANUAL
BETA DOCUMENT - PRELIMINARY & CONFIDENTIAL
reported problems, see the Known Issues topic in the online Help for the Strata CS
Administrator.
The problem report package
The problem report package is a single .CAB file. It contains all the information
gathered about the problem by the Problem Report Wizard. The Wizard saves the
problem report package to the location you specify. If you save the problem report
package to the default location—your Desktop—it is represented by the
following icon:
The Wizard summarizes the information reported, including the date and time the
report was created, in a ProblemInfo.txt file within the .CAB file. You can open
a .CAB file with any zip utility (for example, WinZip).
To prevent problem report packages from being overwritten, the Wizard gives
each one a unique name based on your company name and a sequence number, as
in the previous example.
The Wizard increments the sequence number in the filename each time it creates
a new problem report package.
CHAPTER 11. MONITORING & BACKING UP
BETA DOCUMENT - PRELIMINARY & CONFIDENTIAL
11-21
Send the problem report package to your technical support representative by
attaching it to an e-mail message or transferring the file. Because a problem report
package can be large, after you send it to your technical support representative,
delete it from your system to regain disk space.
To e-mail a problem report package
1.
Right-click the package icon on your desktop (or the .CAB filename if
you saved the problem report package to a different location.)
2.
Choose Send To > Mail Recipient. Your e-mail program opens.
3.
Address the message and send it.
Using the Problem Report Wizard
Use the Problem Report Wizard according to the following guidelines:
n
For Strata CS Server problems, run the Wizard on the Strata CS Server.
See “Reporting Strata CS Server problems” on page 11-23.
Examples of Server problems include:
n
The Strata CS Server stops unexpectedly.
n
Caller ID is not sent correctly.
n
There is no dial tone.
n
n
A call-handling problem that does not involve the Client or the
Administrator Call Monitor is present. For example, Strata CS does
not answer incoming calls, calls are being disconnected, or calls are
handled improperly (calls cannot be transferred, held, and so forth).
For problems with any of the workstation applications—Client,
Administrator, or TAPI Service Provider—run the Wizard on the
computer that is experiencing the problem. See “Reporting workstation
application problems” on page 11-24.
Examples of workstation application problems include:
n
n
Workstation application behaves unexpectedly.
n
User cannot connect to the network.
n
User cannot connect to the Strata CS database.
n
Workstation application does not start.
n
Workstation application closes unexpectedly.
For distributed problems (problems that occur with both a workstation
application running on a user’s computer and the Strata CS Server) run the
Wizard on the user’s computer. Then run the Wizard on the Server so that
11-22
STRATA CS ADMINISTRATOR MANUAL
BETA DOCUMENT - PRELIMINARY & CONFIDENTIAL
you create a single problem report package. See “Reporting distributed
problems” on page 11-24.
Examples of distributed problems include:
n
n
n
n
Problems with specific calls in the Client or Administrator Call
Monitor.
Problems with specific voice messages in a Client voice messages
folder.
Call-handling problems that involve the Client or Administrator Call
Monitor (calls cannot be conferenced, for example).
User cannot make outbound calls from the Client.
Reporting a problem with a specific call or voice message
When you need to report a problem with a specific call or voice message, locate
the problem call (or the call that left the problem message) in the Call Log and
before you begin to create the problem report package. You will need to paste the
call record into the appropriate Wizard window.
Reporting Strata CS Server problems
If you experience a problem with the Strata CS Server, run the Problem Report
Wizard on the Server. The Wizard automatically collects the required information
from the Server, including the appropriate Server logs.
Server log files are critical to successfully identifying and solving many
problems. Because these files can be large, by default the Wizard collects Strata
CS Server log information only for the period of time during which the problem
occurred.
Important: You can choose to include all the available Server log information
when you run the Problem Report Wizard. Be aware that doing this can result in a
very large problem report package. A large package can make it more difficult for
your technical support representative to identify the problem. Therefore, use this
option (described in the following procedure) on a case-by-case basis and only if
you need to capture as much history information as possible before the log files are
overwritten. Be sure to delete the problem report package from your system as
soon as you send it to your technical support representative to regain disk space.
To report a Strata CS Server problem
1.
On the Strata CS Server, choose Start > Programs > Toshiba Strata CS
Server > Strata CS Problem Report Wizard. The Problem Report
Wizard opens.
2.
Answer the questions presented in each Wizard window.
To include all the available Server log information in the problem report
CHAPTER 11. MONITORING & BACKING UP
BETA DOCUMENT - PRELIMINARY & CONFIDENTIAL
11-23
package, uncheck the Limit logs to the following time frame.
Reporting workstation application problems
For a problem with any of the Strata CS workstation applications—Client,
Administrator, or TAPI Service Provider—run the Problem Report Wizard on the
computer that is experiencing the problem. The Wizard automatically collects the
required information.
To report a workstation application problem
1.
On the computer that is experiencing the problem, choose Start > Run.
Enter the following path and then click OK. The path on your system
may be different.
C:\Program Files\Common Files\Toshiba\Strata CS\
TVPRwizard.exe
The Problem Report Wizard opens.
2.
Answer the questions presented in each Wizard window.
Reporting distributed problems
For a problem that involves both a workstation application running on a user’s
computer and the Strata CS Server (a distributed problem usually involves the
Client Call Monitor), you should gather information from both computers before
contacting your technical support representative. The Problem Report Wizard
assembles all the information so that your technical support representative
receives all the necessary information about the problem in one .CAB file.
To report a distributed problem
1.
Run the Wizard on the user’s computer to collect information about that
computer and create a problem report package (follow the instructions
for reporting a workstation application problem on page 11-24).
2.
Check This problem involved a specific call or message, and then
copy and paste the call record from the Call Log on the user’s computer.
When this box is checked, the Wizard automatically saves the problem
report package in the shared folder called Packages on the Strata CS
Server. If the Packages folder is not found or you want to save the
problem report package to a different location, click Browse to select
the location.
3.
Run the Wizard on the Strata CS Server to gather all the necessary
Server information (follow the instructions for reporting a Server
problem on page 11-23).
To report a problem with a specific call or voice message, check This
11-24
STRATA CS ADMINISTRATOR MANUAL
BETA DOCUMENT - PRELIMINARY & CONFIDENTIAL
problem involved a specific call or message, and then copy and paste
the call record from the Call Log on the Server.
4.
Check This report includes a Problem Report Package from the
Strata CS Client.
The Wizard automatically browses the Packages folder on the Server so
that you can select the .CAB file that was produced on the user’s
computer. The Wizard then includes that file in the problem report
package it creates on the Server.
If the Packages folder is not found, or the file was saved to another
location, click Browse to select the .CAB file that was produced on the
user’s computer.
CHAPTER 11. MONITORING & BACKING UP
BETA DOCUMENT - PRELIMINARY & CONFIDENTIAL
11-25
CHAPTER 12
CHAPTER 12
SYSTEM PROMPTS
CHAPTER CONTENTS
About system prompts . . . . . . . . . . . . . . . . . . . . . . . . . . . . . . . . . 12-2
The System Prompts view . . . . . . . . . . . . . . . . . . . . . . . . . . . . . . 12-2
Managing system prompts . . . . . . . . . . . . . . . . . . . . . . . . . . . . . . 12-3
Recording system prompts . . . . . . . . . . . . . . . . . . . . . . . . . . . . . . 12-5
Localizing the telephone commands . . . . . . . . . . . . . . . . . . . . . 12-12
BETA DOCUMENT - PRELIMINARY & CONFIDENTIAL
About system prompts _________________________________
This chapter explains how to play and rerecord the system prompts used
throughout Strata CS.You can use the standard prompts included with the system
or record over them to create customized prompts.
The System Prompts view ______________________________
The System Prompts view in the Administrator allows you to listen to and change
the recordings used for standard system prompts and auto attendants. For
example, when you are setting up your Strata CS system, you typically go to this
view to change the default Greeting prompt so that it contains your company
name. Click the System Prompts button in the view bar to open the System
Prompts view, shown in the next figure.
Each system prompt appears as a row in the view. The information in the
following table is displayed for each system prompt.
Column
Description
File name
File name of the prompt.
Text
Contents of the file in text form.
The text displayed here is accurate only if it is
updated each time the file is changed. If you are
unsure of the accuracy of the text, play the file to
confirm what it says.
Last modified
Last time that the file was modified.
12-2
STRATA CS ADMINISTRATOR MANUAL
BETA DOCUMENT - PRELIMINARY & CONFIDENTIAL
Column
Description
Comment
How the prompt is used in Strata CS. Applies to
custom prompts and auto attendant prompts only,
blank for all other prompts.
Language
The set of language prompts this system prompt
belongs to.
Controlling the prompt display
By default the System Prompts view displays all system prompts on the Strata CS
Server. Use the control on the toolbar if you want to display only the custom
prompts you have recorded or only the prompts for a single language.
Note: To install additional language prompts, you must run the Strata CS Server
installation again and select the languages you want.
Managing system prompts ______________________________
This section explains the following aspects of managing system prompts:
n
Playing system prompts
n
Exporting system prompt text
n
Importing system prompt text
n
Exporting and importing system prompt audio files
n
Changing the encoding format of system prompts
Playing system prompts
You can play system prompts to confirm that they contain the correct information.
System prompts play over the telephone or through your PC speakers. If you
choose to play a prompt over the telephone, your phone rings and the prompt
plays when you answer. See “Using the audio controls” on page 2-10 for more
information.
CHAPTER 12. SYSTEM PROMPTS
BETA DOCUMENT - PRELIMINARY & CONFIDENTIAL
12-3
To play a system prompt:
1.
Select the name of the prompt that you want to play.
2.
Choose System Prompts > Play.
Exporting system prompt text
Select File > Import and Export to export system prompt text into a .CSV file for
processing by a professional recording studio or for maintenance purposes.
Importing system prompt text
Select File > Import and Export to import system prompt text into a .CSV file that
was processed by a professional recording studio or was modified.
Exporting and importing system prompt audio files
You can export a system prompt from your Server for use on another Strata CS
Server. You also can import an existing sound file and use it as a system prompt.
For more information, see “Importing and exporting voice files” on page 2-11.
Changing the encoding format of system prompts
Strata CS supports two .VOX file formats, µ-law format for use in the United
States and Japan, and a-law format for use in other countries. When Strata CS is
installed, the correct format is used based on the location of the Strata CS Server.
On rare occasions, it may be necessary to convert the voice files on a Strata CS
system from one encoding format to another, for example, if you are staging a
Strata CS system in one location that will be deployed in another.
To change the encoding format of all .VOX files in the system
1.
Choose Tools > Shutdown Server to temporarily stop the Strata CS
Server.
2.
Run the utility TVConvert.exe, which is located in the directory in
which the Strata CS Server was installed.
3.
Choose Tools > Start Server to restart the Server.
TVConvert.exe checks the Windows NT registry for the current .VOX file
format, converts all files to the other format, and updates the registry.
12-4
STRATA CS ADMINISTRATOR MANUAL
BETA DOCUMENT - PRELIMINARY & CONFIDENTIAL
Recording system prompts______________________________
You may want to record over system prompts for some of the following reasons:
n
n
n
n
You want your custom prompts and system prompts to be recorded with
the same voice.
You want to change the message text of a prompt, for example, the
Welcome message.
You have access to voice talent that you prefer over the existing Strata CS
voices.
You have localized the telephone commands for a language not provided
with Strata CS (see “Localizing the telephone commands” on page 12-12)
and want to record all the prompts in that language as well.
Recording options
You can record in the one of the following ways:
n
n
Record the system prompts professionally using a voice vendor
experienced in telephony recordings.
Record over the system prompts yourself using the Strata CS
Administrator, your telephone, and a VAP tool.
About the sentence file
The sentence file is a text file that contains all the voice prompts and the sentences
they form. The American English sentence file is located in:
C:\Program Files\Strata CS Server\TVLEN00.INI
Note: “EN00” identifies American English files. Strata CS includes two other sets
of system prompts. EN10 identifies British English files. ES00 identifies Latin
American Spanish files.
About the .VAP and .VOX files
Strata CS prompts are contained in:
n
n
The .VAP file, an indexed file containing individual .VOX recordings of
variable information. Variable information, for example, numbers and
dates, is used to build more complex prompts.
.VOX files. There is a separate .VOX file for each sentence and phrase in
the Strata CS TUI.
The .VAP and .VOX files are used together to produce the complete prompts that
callers and users hear. For example, in the sentence prompt, “You have three new
messages, and twelve saved messages”, the words “three” and “twelve” come
from the .VAP file.
CHAPTER 12. SYSTEM PROMPTS
BETA DOCUMENT - PRELIMINARY & CONFIDENTIAL
12-5
The American English .VAP and .VOX files are located in:
C:\Program Files\Strata CS Server\Vfiles\EN00
The American English .VAP file is called TVLEN00.VAP.
The recording process
To record a complete set of system prompts, you must do the following:
n
Record the .VAP file.
n
Build the indexed .VAP file.
n
Record the .VOX files.
n
Test the new prompts.
n
Deploy the new prompts.
Recording system prompts professionally
If you choose to obtain professional recordings, you are responsible for:
n
Choosing a voice vendor that is experienced in telephony recording.
n
Evaluating samples of voice talent and selecting a voice
n
Providing the appropriate files to the vendor in formats they can use
n
n
Testing the new prompts for voice quality, usability, file-naming
accuracy, and indexing accuracy.
Deploying the new prompts
Selecting a voice
The vendor will often provide you with 44kHz, full-bandwidth voice samples to
choose from. Ask your vendor to provide voice samples that have been
re-sampled to µ-law PCM Mono 8 kHz, the format used in Strata CS. This will
ensure that your selection is based on how the voice will actually sound when
used in your Strata CS system.
Keep in mind that high-pitched voices and high frequency sounds degrade more
as a result of this type of re-sampling, resulting in considerable change in higher
frequency sounds at telephony bandwidth.
12-6
STRATA CS ADMINISTRATOR MANUAL
BETA DOCUMENT - PRELIMINARY & CONFIDENTIAL
Using the standard Strata CS voices
To add or modify prompts using one of the standard Strata CS voices, contact
these companies that provided the original set of prompts. They can record new
voice files using the standard voices:
Language
Voice
Contact
U.S. English
“Ellen”
Marketing Messages
51 Winchester Street
Newton, MA
U.S. 02461
800-486-4237 (phone)
617-527-3728 (fax)
http://www.marketingmessages.com
Latin American
Spanish
“Claudia”
Marketing Messages
U. K. English
“Helen”
Marketing Messages
51 Winchester Street
Newton, MA
U.S. 02461
800-486-4237 (phone)
617-527-3728 (fax)
http://www.marketingmessages.com
Providing a script for the vendor
After voice selection has been made, you must provide your vendor with the
“script”—the list of prompt files and the text of each prompt. The list of prompt
files is available in the System Prompts and Prompts section of the TVLEN00.INI
file.
You also need to provide the TVLEN00.VAP file, so that your voice vendor can
match the indexing of the new .VAP file to the existing one.
Testing the recorded prompts
It is important that you thoroughly test all voice files that you receive back from
the vendor to ensure:
n
Accuracy of file names
n
Synchronization of written and spoken prompt content
n
Quality of voice recording
n
Accuracy of index order and format of the .VAP file
CHAPTER 12. SYSTEM PROMPTS
BETA DOCUMENT - PRELIMINARY & CONFIDENTIAL
12-7
See “Testing system prompts” on page 12-10 for information about using the
Sentence Tester to assist with some of these tasks.
Deploying the new prompts
After all files are tested, you can replace the existing prompt files with the new
ones. Place all new .VOX files and the .VAP file in the following directory:
C:\Program Files\Strata CS Server\Vfiles\User
The following auto attendant prompts must also be copied to the User directory.
AACLOSED.VOX
AAHI.VOX
AA4SBN.VOX
AAOPORWT.VOX
The default location is:
C:\Program Files\StrataCS Server\Voice Files\EN00
Recording over system prompts yourself
When you record over system prompts yourself, you can record all the .VOX files
as well as the.VAP file, as with professional recording, or record just the .VOX
files, and use the .VAP file included with Strata CS.
If you don’t record over all the files, be aware that since prompts are combined
with other prompts when presented to callers or users, recording some but not all
prompts may result in a mismatch of voices.
Recording over .VOX files
You use the Strata CS Administrator to record over these files.
12-8
STRATA CS ADMINISTRATOR MANUAL
BETA DOCUMENT - PRELIMINARY & CONFIDENTIAL
To record over a prompt
1.
In the System Prompts view, double-click the prompt name.
2.
In the Edit System Prompt dialog box, type the text of the new prompt
in the Contents box. Use this text as a script when recording the prompt.
3.
Record the prompt. See “Using the audio controls” on page 2-10 for
more information.
4.
Click OK to save the new version of the prompt.
Recording over the .VAP file
You can record over the .VAP file using a variety of recording tools and VAP
tools. If you do not already have such a tool, you should consider VFEdit, which
is available on the Internet.
Testing the new prompts
Use the Sentence Tester to test the new prompts. See the next section, “Testing
system prompts.”
Deploying the new prompts
After all files are tested, you can replace the existing prompt files with the new
ones. Place all new .VOX files and the .VAP file in the following directory:
C:\Program Files\Strata CS Server\Vfiles\User
The following auto attendant prompts must also be copied to the User directory.
AACLOSED.VOX
AAHI.VOX
AA4SBN.VOX
AAOPORWT.VOX
CHAPTER 12. SYSTEM PROMPTS
BETA DOCUMENT - PRELIMINARY & CONFIDENTIAL
12-9
The default location is:
Program Files\Strata CS Server\Vfiles\User
Testing system prompts
You can use the Sentence Tester included with Strata CS to listen to system
prompts in context over your telephone. By concatenating individual prompts into
sentences and playing them as they are used in Strata CS, the Sentence Tester lets
you evaluate intonation, emphasis, and consistency.
Note: The Sentence Tester is available only on computers running
Windows NT/2000.
To use the Sentence Tester
1.
Start the Administrator using the /sentence command line option (see
page C-1 for more information).
2.
Choose Tools > Test Sentences.
3.
Select the Language to test.
12-10
STRATA CS ADMINISTRATOR MANUAL
BETA DOCUMENT - PRELIMINARY & CONFIDENTIAL
4.
Select a sentence from the list.
The Current sentence box displays how that sentence is described in
the sentences.ini file. Many sentences consist of a single .VOX file.
Other sentences are made up of several concatenated .VOX files, and
may contain variables as well.
5.
Double click on a sentence to play it, or select it and press Test. When
your phone rings, pick up and listen to the sentence in the language you
selected. You can continue to play messages, and even change
languages without hanging up your telephone.
6.
If the sentence contains variables, they are indicated in the Name
column with an asterisk. You can enter a new Value for a variable, and
optionally select a different variable Data Type.
For example, by default the sentence ToPurgeMsg sentence plays as:
“To permanently delete the 1 message in your Client’s Deleted
folder, press 3, otherwise press 4.”
By changing the Value of Variable 1 to 6, the sentence plays as:
“To permanently delete the 6 messages in your Client’s Deleted
folder, press 3, otherwise press 4.”
Click Clear to return all Values to their original setting.
CHAPTER 12. SYSTEM PROMPTS
BETA DOCUMENT - PRELIMINARY & CONFIDENTIAL
12-11
Localizing the telephone commands______________________
The Strata CS Localization Kit is available if you want to localize and record the
telephone commands in another language. The Localization Kit includes all the
necessary documentation and tools for localization.
Although the process for recording system prompts is the same for localized
system prompts, the localization process requires several more steps, which are
described in the Localization Kit.
For more information about the Strata CS Localization Kit, contact your Strata CS
reseller.
12-12
STRATA CS ADMINISTRATOR MANUAL
BETA DOCUMENT - PRELIMINARY & CONFIDENTIAL
CHAPTER 13
CHAPTER 13
CONFIGURING INTERNET
TELEPHONY SUPPORT
CHAPTER CONTENTS
About IP telephony and Strata CS . . . . . . . . . . . . . . . . . . . . . . . . 13-2
Placing calls to H.323 terminals such as NetMeeting. . . . . . . . . . 13-2
Enhancing a Web page with a “Call Us!” button . . . . . . . . . . . . . . 13-6
Connecting two Servers using IP Gateways . . . . . . . . . . . . . . . . 13-7
Fine-tuning your IP connection . . . . . . . . . . . . . . . . . . . . . . . . . . 13-20
BETA DOCUMENT - PRELIMINARY & CONFIDENTIAL
About IP telephony and Strata CS ________________________
Strata CS seamlessly supports Internet telephony through an integrated Internet
gateway that eliminates the need for external IP Gateway devices. Combined with
dialing services, Strata CS’s Internet telephony support makes it as easy to place
and receive Internet calls as regular telephone calls—whether you are calling
from a station phone, remote phone, or using the Strata CS Client.
Strata CS’s integrated Internet gateway supports the following Internet telephony
features:
n
n
n
Placing and receiving calls from H.323 terminals, for example, Net
Meeting (see page 13-2) or Phone Dialer (see page 13-6).
Enhancing a Web page with a Call Us! button (see page 13-6).
Connecting Strata CS Servers over the Internet or private IP networks
(which can guarantee quality of service). See page 13-7.
Over a properly configured IP Gateway, users can:
n
Call extensions on a remote Strata CS Server.
n
Place calls to phone numbers from a remote Server.
n
Place calls on a remote Centrex/PBX service through a remote Strata
CS Server.
Internet telephony requirements
Before using any of Strata CS’s Internet telephony features, you must first:
n
n
n
Install the hardware and software required to support Internet telephony.
See Strata CS Installation & Maintenance Manual for more information.
In the Strata CS Administrator, add and configure one or more Internet
spans (see “Adding an Internet span” on page 5-21).
Ensure that the IP address of the Internet span on each Server is
completely accessible by the other Server. To do this, you may have to
configure firewalls at each location appropriately.
This chapter explains in detail how to configure and use Strata CS to make various
types of Internet telephony connections.
Placing calls to H.323 terminals such as NetMeeting_________
You can use Strata CS to place and receive IP calls from H.323-based terminals
like Microsoft NetMeeting, a real-time conferencing and collaboration tool. The
diagram on page 13-4 shows how this process works.
Note: Users who calls NetMeeting terminals might hear an echo on the line. To
13-2
STRATA CS ADMINISTRATOR MANUAL
BETA DOCUMENT - PRELIMINARY & CONFIDENTIAL
avoid this effect, the NetMeeting user must use an echo-cancelling microphone.
NetMeeting is included with Windows 2000. To download NetMeeting for other
operating systems:
1.
Go to www.microsoft.com/downloads.
2.
Select NetMeeting from the top list, select your operating system from
the bottom list, and then click Find It!
To allow Strata CS users to place calls to Microsoft Net Meeting or
other H.323 terminals
1.
In the Strata CS Administrator, create an Internet Address dialing
service (see page 8-14).
2.
Assign the service a name and an access code, for example, “Internet”
and “71”.
Placing calls to Net Meeting from the Strata CS Client
Internet calls can be made from within the Strata CS Client anywhere users can
enter phone numbers, for example, from the Place Call To dialog box, when
adding a contact, in a routing list action, when forwarding calls, and so forth.
Users select an Internet Address dialing service and then enter the IP address or
DNS machine name of the PC running Net Meeting.
For example, entering either of the following in the Address field of the Call
Forwarding dialog box forwards all calls to NetMeeting at that location:
DNS machine name:
IP address:
namemycomputer.mycompany.com
123.45.67.89
Placing calls to Net Meeting from a Strata CS phone
After configured, users can place calls to PCs running Net Meeting from any
Strata CS phone by dialing the access code for an Internet Address dialing service,
followed by the IP address of the PC running Net Meeting.
CHAPTER 13. CONFIGURING INTERNET TELEPHONY SUPPORT
BETA DOCUMENT - PRELIMINARY & CONFIDENTIAL
13-3
IP addresses are dialed with each part of the IP number separated by an asterisk
(*). For example, dialing 71 123*45*67*89 calls the PC running NetMeeting at
the IP address 123.45.67.89.
Calling Strata CS from H.323 terminals such as Net Meeting
Depending on how your Strata CS Internet span and company firewall is
configured, Strata CS can receive calls from any H.323 terminal such as Net
Meeting.
1.
Configure your firewall to allow access to the IP address of one or more
Strata CS Internet spans.
2.
In the Strata CS Administrator, edit the Strata CS Internet span to allow
incoming calls.
3.
Optionally, do one of the following:
n
n
Send Internet calls to the desired user, auto attendant, or IVR Plug-in.
Assign DID numbers to any user, auto attendant, or IVR Plug-in that
you want to allow H.323 terminals to call directly.
Note: For the purpose of receiving Internet calls, you can give users DID
numbers in Strata CS only. You do not need to order DID service from your
telephone company.
Internet trunks behave almost identically to regular trunks, including providing
inbound caller ID and direct inward dialing (DID). Internet calls are routed and
processed just like regular calls to ACD workgroups, routing lists, and so forth.
Note that the name of the Strata CS system is displayed when Net Meeting calls
Strata CS. To change the name, edit the following registry key:
HKLM\Software\Toshiba\Strata CS\Company
13-4
STRATA CS ADMINISTRATOR MANUAL
BETA DOCUMENT - PRELIMINARY & CONFIDENTIAL
Calling a Strata CS Server from Net Meeting
To call a Strata CS Server from Net Meeting, enter the IP address or DNS name
of the Strata CS span in Net Meeting’s phone dialer dialog box. Callers with Net
Meeting 3.0 or later can navigate Strata CS using Net Meeting’s built-in
touch-tone keypad.
Calling a Strata CS DID number from Net Meeting
If you configure Net Meeting to use a Strata CS Server as a gateway, Strata CS
interprets numbers dialed by Net Meeting as DID. Therefore, Net Meeting users
can call any Strata CS user, auto attendant, ACD workgroup, or IVR Plug-in with
a DID number.
To configure Net Meeting to use a Strata CS Server as a gateway
1.
Start NetMeeting
2.
Select Tools > Options.
3.
Click Advanced Calling Options to display the Advanced Calling
Options dialog box.
4.
Check Use an IP Gateway to call telephones and video conferencing
systems.
5.
Enter the IP address or DNS name of the Strata CS span, for example,
123.45.67.89 or myiplinkaddress.mycompany.com.
6.
Click OK.
CHAPTER 13. CONFIGURING INTERNET TELEPHONY SUPPORT
BETA DOCUMENT - PRELIMINARY & CONFIDENTIAL
13-5
Now any numbers entered in Net Meeting are sent to the Strata CS Gateway as
DID. For example, placing a call to 1234 in Net Meeting will call the Strata CS
auto attendant, user or IVR Plug-in with a DID of 1234.
Using Windows 2000 Phone Dialer as an H.323 terminal
A standard installation of Windows 2000 includes Phone Dialer, which has H.323
capabilities similar to those in NetMeeting. Phone Dialer allows you to make
voice calls, video calls, and conference video calls from your personal computer.
Calls to and from Phone Dialer are set up as previously described in this section
for NetMeeting (see “Placing calls to H.323 terminals such as NetMeeting” on
page 13-2).
You can use Phone Dialer to test the setup of computer telephony hardware, such
as voice modems or phone switches on your local area network (LAN), by dialing
the number and seeing if a connection can be established. Phone Dialer lets you
make calls over a telephone connected to your computer, through a modem, over
a network, or through a telephone switch connected to your LAN.
To make a voice call, all you need is the recipient's phone number, IP address, or
DNS (Domain Name System) name. The active call window has buttons that let
you place the call on hold and access a keypad to manually dial numbers.
To receive calls, you must have Phone Dialer running. When you make or receive
a call, a dialog box opens. If the person you are talking to has a video camera
installed, the dialog box displays the video image.
Enhancing a Web page with a “Call Us!” button_____________
By using a CallTo: URL on your Web page, any Internet user with Net Meeting
installed can click on a “Call Us” link on your page to place a call to any Strata
CS DID number. If you assign a DID number to a Strata CS ACD workgroup
user, you can send Internet users directly into your ACD workgroup for
processing by an ACD agent.
For example, you insert the following CallTo: tag on your Web page:
<A HREF="callto:600+gateway=123.45.67.89+type=phone”>Call Us!</A>
Note: The CallTo: tag is supported in Internet Explorer, but is not supported in the
current version of Netscape (4.7).
When a user with Intimating installed clicks the Call Us! link, Intimating starts
and calls the Strata CS user who has a DID of “600” using the Strata CS Internet
span with an IP address of 123.45.67.89.
Note: It is a good idea to include a link to the NetMeeting download page for those
users who do not have NetMeeting installed (www.microsoft.com/downloads).
13-6
STRATA CS ADMINISTRATOR MANUAL
BETA DOCUMENT - PRELIMINARY & CONFIDENTIAL
Connecting two Servers using IP Gateways ________________
You can configure Strata CS’s integrated Internet gateway to connect two Strata
CS Servers over the Internet or a private IP network (sometimes called a tie-line
connection). Doing this allows users on one Server to make calls as if they were
on the other Server.
When two Strata CS Servers are properly configured, users can do the following:
n
n
n
n
Place calls to extensions on the remote Server. In addition to
calling extensions, users can dial # to log in and check remote voice
mailboxes, or 411 for the remote Server’s dial-by-name directory.
Place external phone calls through the remote Server. Users can
call remote phone numbers as if they were local phone numbers, such as
calling directory assistance in another city.
Place outbound Centrex/PBX calls through the remote Server.
Users can dial remote Centrex/PBX extensions as if they were local, such
as extensions on a legacy PBX system connected to the remote Server.
Unify two Servers into a single user environment. By creating
users of the type IP Gateway on each Server, you can make all users
appear to be of the user type User. Users on each Server can dial each
other directly or select extensions for call forwarding and routing lists
regardless of whether they are local (of the user type User) or remote.
Local and remote users appear together in the Client’s Users view, Place
Call To dialog box, and other user lists.
Note: Assembling larger networks of more than two Strata CS Servers is
technically possible, but if a call is transferred to a remote Server, and then
transferred back to the original Server, two IP trunks are used on each Server.
Because the call is originating and ending on the same Server, this setup can
waste resources and bandwidth.
Placing calls involving a remote Strata CS Server
To make an IP Gateway call, users must choose the appropriate dialing service
when placing the call, either by dialing the access code over the phone, or by
selecting it in the Client. See “Creating IP Gateway dialing services” on
page 13-13.
By creating users of the type IP Gateway, you can also enable users to dial remote
extensions directly, without dialing an access code, or place calls to them from the
Client. See “Creating Gateway users to unify two Strata CS Servers” on
page 13-17.
CHAPTER 13. CONFIGURING INTERNET TELEPHONY SUPPORT
BETA DOCUMENT - PRELIMINARY & CONFIDENTIAL
13-7
Receiving Internet calls from a remote Strata CS Server
Incoming calls from a remote Strata CS Server appear like a local call. For
example, caller ID name and number are delivered just as for regular internal or
external calls, allowing users to identify and call back remote users easily.
Codec use with IP Gateway connections
When connecting two Strata CS Servers over an IP Gateway connection, the
Servers must use the same codec lists. Otherwise, audio failure can occur during
calls. See “Modifying Strata CS IP codecs” on page 5-22 for more information.
Overview of creating an IP Gateway connection
Setting up an IP Gateway connection involves the following steps. It is important
to do them in the correct order:
1.
On each Server, create an IP Gateway that points to the other Server. See
“Creating an IP Gateway” on page 13-9.
2.
On each Server, create one or more IP gateway dialing services to cover
the types of Internet calling you want to perform. See “Creating IP
Gateway dialing services” on page 13-13.
You can create a new IP Gateway while defining a
gateway dialing service, by clicking the IP Gateway
button (shown at right) in the dialing service dialog box.
3.
To unify two Servers so that all users appear to be local
users, create an IP Gateway user for each remote extension. See
“Creating Gateway users to unify two Strata CS Servers” on
page 13-17.
Using the IP Gateway Configuration Worksheet
Appendix C of this manual provides a worksheet to help you set up multiple Strata
CS Servers for an IP Gateway connection. Use the IP Gateway Configuration
Worksheet to help you plan consistent access codes for dialing services, and avoid
conflicts such as overlapping extensions or passwords.
13-8
STRATA CS ADMINISTRATOR MANUAL
BETA DOCUMENT - PRELIMINARY & CONFIDENTIAL
Illustration of an IP Gateway
The following diagram illustrates Strata CS Servers in London and Boston,
connected using an IP Gateway.
In the top example, the administrator at the Boston Server set up an
Internet-to-Phone Number dialing service with an access code of 71. The London
Server has a Phone Number dialing service. Users in Boston can now dial phone
numbers in London by dialing 71 followed by the phone number.
In the bottom example, the administrator at the London Server set up an
Internet-to-Centrex/PBX Extension dialing service—configured to connect to the
Boston Server’s internal dial tone—with an access code of 74. Users in London
can now dial extensions in Boston by dialing 74 followed by the extension.
Note: You can enable users to dial remote extensions directly, without dialing the
access code. See “Creating Gateway users to unify two Strata CS Servers” on
page 13-17.
To establish the TCP/IP connection, each administrator creates an IP Gateway
that points to the other Server. The administrator can use the IP Gateway on his
local Server to control dialing permissions for incoming calls. For example, the
London administrator can prevent Boston users from making long-distance calls
through his Server, by changing the dialing permissions of the Boston IP
Gateway.
Creating an IP Gateway
To connect two Strata CS Servers over IP Gateways, administrators on each
Server must create an IP Gateway that points to the other Server. For example, on
an IP Gateway connection between Boston and London, the Boston Server has an
IP Gateway called “London,” and the London Server has an IP Gateway called
“Boston.” Each IP Gateway has an extension and password that the other IP
Gateway uses to log in when connecting IP Gateway calls.
CHAPTER 13. CONFIGURING INTERNET TELEPHONY SUPPORT
BETA DOCUMENT - PRELIMINARY & CONFIDENTIAL
13-9
The IP Gateway’s extension is not meant to be dialed directly; it does not appear
in the Client or the dial-by-name list, and calls to that extension will not go
through. The extension is merely used behind the scenes to let remote Servers
connect.
You can use the IP Gateway to control remote users’ dialing permissions when
placing calls through your Server. For example, if you are the administrator of the
London Server, and you want to prevent Boston users from placing long-distance
calls through your Server, you edit the dialing permissions of the IP Gateway
“Boston.”
Each remote Strata CS Server that you connect to over the Internet requires a
separate IP Gateway. For example, if your Server connects to Servers in London
and Chicago, you create two IP Gateways, called “London” and “Chicago.”
The IP Gateways view
To add, edit, and delete IP Gateways, click the IP Gateways button in the View
bar to display the IP Gateways view:
Each of your IP Gateways is shown as a line in the view. The following table
shows the information that is displayed for each IP Gateway.
Column
Description
Name
Name of the local IP Gateway, usually the name
of the remote Server’s location, or the name of
the remote Server computer itself.
13-10
STRATA CS ADMINISTRATOR MANUAL
BETA DOCUMENT - PRELIMINARY & CONFIDENTIAL
Column
Description
Extension
Extension of the IP Gateway on the local Server,
used by IP Gateways on remote Servers to log in
when connecting IP calls.
Password
Password of the IP Gateway on the local Server,
used by IP Gateways on remote Servers to log in
when connecting IP calls.
Remote Address
IP address or hostname of the remote Server.
Remote
Extension
Extension of the IP Gateway on the remote
Server, used by the local Server to log in when
connecting IP calls.
Remote
Password
Password of the IP Gateway on the remote
Server, used by the local Server to log in when
connecting IP calls.
Comments
Any comments pertaining to the remote Server.
Double-click an IP Gateway in the view to see its properties.
Creating an IP Gateway
The following graphic illustrates an IP Gateway created on a Boston Server, for
purposes of connecting to a remote London Server:
CHAPTER 13. CONFIGURING INTERNET TELEPHONY SUPPORT
BETA DOCUMENT - PRELIMINARY & CONFIDENTIAL
13-11
To set up an IP Gateway
1.
Have the following information ready:
n
The Internet address of the remote Server
n
The extension and password of the IP Gateway on the remote Server.
2.
In the IP Gateways view, choose IP Gateways > New IP Gateway.
3.
Enter a Name for the IP Gateway. Typically the name describes the
remote Server’s location, for example, “London.”
4.
Assign the IP Gateway a unique extension. The extension is not meant
to be dialed, and does not appear in the Client or the dial-by-name
directory. Calls to the extension will not be connected. The IP
Gateway’s extension is used behind the scenes to connect to the remote
Server to complete IP Gateway calls.
5.
Enter a Password for the IP Gateway, and enter it again in the
Confirmation field.
6.
Add Comments to further identify the IP Gateway.
7.
Under Operator, select the extension to which callers using this IP
Gateway are transferred when they press 0 from within the local system.
For example, a user on the remote Server might call a user on this Server
using this Gateway, and press 0 while in the local user’s voice mailbox.
8.
Under Telephone prompts, select the language of the Telephone
Commands as heard by users on the remote Server who log in to the
local system using this IP Gateway.
9.
Under Remote, specify the following information about the remote
Server:
n
Remote Server’s IP address. Enter the IP address in the format
nnn.nnn.nnn.nnn. You can also enter the DNS name.
n
Remote IP Gateway’s extension. Enter the extension of the IP
Gateway on the remote Server that points to this Server.
n
Remote IP Gateway’s password. Enter the password of the IP
Gateway on the remote Server that points to this Server.
10. On the Permissions tab, assign dialing permissions that limit the types
of calls that can be made by remote users who make calls through this
IP Gateway. For example, you might edit the local IP Gateway’s
permissions to prevent London users from making unrestricted
long-distance calls from London. See “The Dialing tab” on page 6-33.
11. Click OK.
13-12
STRATA CS ADMINISTRATOR MANUAL
BETA DOCUMENT - PRELIMINARY & CONFIDENTIAL
Important: The administrator on the remote Server needs to know the extension
and password of your IP Gateway, to be able to correctly configure the IP Gateway
on their Server that points to yours.
Creating IP Gateway dialing services
To use an IP Gateway connection, you must create at least one dialing service of
the Internet-to-Phone Number or Internet-to-Centrex/PBX Extension type. For
complete information about dialing services, see Chapter 8, “Managing
Outbound Calls.” This section covers only the key points necessary to set up IP
Gateway connections.
Note: Before creating an IP Gateway dialing service, make sure you have
created an IP Gateway that points to the remote Server. See “Creating an IP
Gateway” on page 13-9.
The type of dialing service you must create, and how to create it, depends on the
type of IP Gateway calling you want:
n
Calling Strata CS extensions on the remote Server. See page 13-13.
n
Placing phone calls through the remote Server. See page 13-15.
n
Placing Centrex/PBX calls through the remote Server. See
page 13-16.
You must create a separate dialing service for each type of IP Gateway calling you
want to perform with a remote Server.
Calling Strata CS extensions on the remote Server
To call the remote Server’s extensions over IP, you must create an
Internet-to-Centrex/PBX Extension dialing service, selecting the remote Server’s
internal dial tone.
CHAPTER 13. CONFIGURING INTERNET TELEPHONY SUPPORT
BETA DOCUMENT - PRELIMINARY & CONFIDENTIAL
13-13
1.
Choose File > New > Dialing Service > Internet-to-Centrex/PBX
Extension Service.
2.
On the General tab, enter the following information about the remote
Server:
n
n
IP Gateway. Select the IP Gateway that will direct calls from this
dialing service to a remote Strata CS Server. See “Creating an IP
Gateway” on page 13-9. To create a new IP Gateway, click the IP
Gateway button.
Remote Server’s internal dial tone. Selecting this option enables
users to connect to the remote Server itself, rather than having the
remote Server place an outbound Centrex/PBX call.
3.
Enter all other information necessary to create the dialing service. For
instructions, see “Adding an Internet-to-Centrex/PBX Extension
service” on page 8-17.
4.
Click OK on any tab to add the dialing service.
Users can now dial extensions on the remote Server by dialing the access code
plus the extension, for example, 75-123.
To configure Strata CS so that users can dial remote extensions directly—without
dialing the access code—see “Creating Gateway users to unify two Strata CS
Servers” on page 13-17.
13-14
STRATA CS ADMINISTRATOR MANUAL
BETA DOCUMENT - PRELIMINARY & CONFIDENTIAL
Immediately connecting to dial tone on the remote Server
You can configure the dialing service to allow users to actually hear the remote
Server’s dial tone, so they can log in and check remote voice mail boxes, or press
411 to access the dial-by-name directory on the remote Server.
1.
Create a dialing service exactly like the one described above.
2.
Set Minimum and Maximum number of digits to 0.
With these settings, Strata CS connects to the remote dial tone immediately after
the access code is entered (for example, 71), rather than waiting for digits to be
collected by the local Server and then passed to the remote Server.
Note: Another way of accomplishing the same thing—without changing the
minimum and maximum digits—is to instruct users to press # immediately after
dialing the access code, as in 75#.
Placing phone calls through the remote Server
To place outbound calls through a remote Server over IP, you must create an
Internet-to-Phone Number dialing service.
1.
Choose File > New > Dialing Service > Internet-to-Phone Number
Service.
2.
On the General tab, enter the following information about the remote
Strata CS Server:
n
IP Gateway. Select the IP Gateway that will direct calls from this
dialing service to a remote Strata CS Server. See “Creating an IP
CHAPTER 13. CONFIGURING INTERNET TELEPHONY SUPPORT
BETA DOCUMENT - PRELIMINARY & CONFIDENTIAL
13-15
Gateway” on page 13-9. To create a new IP Gateway, click the IP
Gateway button.
n
Remote Server’s Phone Number service access code. Enter the
access code of a Phone Number dialing service on the remote Server
(typically 9). This field specifies the dialing service that the remote
Server uses to place calls originating from your local Server.
3.
Enter all other information necessary to create the dialing service. For
instructions, see “Adding an Internet-to-Phone Number service” on
page 8-15.
4.
Click OK on any tab to add the dialing service.
Users can now place outbound phone calls as if from the remote Server by dialing
the access code plus the phone number, for example, 71-555-1212.
Note: If when dialing out an IP to Phone Number dialing service you have
problems sending digits to external phone systems, try increasing the DTMF Gain
and DTMF On-time parameters in your Internet span’s Tuning tab. See
“Fine-tuning your IP connection” on page 5-24.
Placing Centrex/PBX calls through the remote Server
Use this type of dialing service to connect to a legacy PBX system on the remote
Server, or dial a Centrex extension.
For this type of call, you must create an Internet-to-Centrex/PBX Extension
dialing service, selecting the remote Server’s Centrex/PBX Extension dialing
service.
13-16
STRATA CS ADMINISTRATOR MANUAL
BETA DOCUMENT - PRELIMINARY & CONFIDENTIAL
1.
Choose File > New > Dialing Service > Internet-to-Centrex/PBX
Extension Service.
2.
On the General tab, enter the following information about the remote
Server:
n
n
IP Gateway. Select the IP Gateway that will direct calls from this
dialing service to a remote Strata CS Server. See “Creating an IP
Gateway” on page 13-9. To create a new IP Gateway, click the IP
Gateway button.
Click Remote Server’s Centrex/PBX service access code. The
remote Server completes the call by using the Centrex/PBX
Extension dialing service whose access code you enter here.
3.
Enter all other information necessary to create the dialing service. For
instructions, see “Adding an Internet-to-Centrex/PBX Extension
service” on page 8-17.
4.
Click OK on any tab to add the dialing service.
Users can now place outbound Centrex/PBX calls as if from the remote Server by
dialing the access code plus the Centrex/PBX extension, for example, 74-5252.
Creating Gateway users to unify two Strata CS Servers
IP Gateway users are a way to connect two Strata CS Servers over the Internet or
an IP network, so that users on both Servers appear to be of the type User. From
the users’ perspective, the two Servers become a single Strata CS site.
When you configure two Servers in this way, users can:
CHAPTER 13. CONFIGURING INTERNET TELEPHONY SUPPORT
BETA DOCUMENT - PRELIMINARY & CONFIDENTIAL
13-17
n
n
n
Dial any user’s extension directly, without an access code.
See local users and remote users listed together in the Client’s Users view,
Place Call To dialog box, and all other places where a list of users appears.
Select any user when placing a call, transferring a call or creating a
conference call.
n
Search for any user in the dial-by-name directory.
n
Forward calls to any extension, or include any extension in a routing list.
From the users’ perspective, IP Gateway users appear identical to local users (of
the type User), except that IP Gateway users’ hook states do not appear in the
Client’s Users view.
By connecting two Servers over a private IP network and unifying them with IP
Gateway users, you can effectively double the number of stations your Strata CS
system supports.
Overview of IP Gateway users
An IP Gateway user is a special type of user that you create to mirror a user on
the remote Server. For each user on the remote Server, you create an IP Gateway
user on the local Server. For example, if the remote Server has a user named Pete
Storpin, you would create a user of the type IP Gateway named Pete Storpin on
the local Server that points to the remote user.
The administrator on the remote Server performs the same action, creating an IP
Gateway user on the remote Server to mirror each User on your Server.
When a local user (of the type User) dials an IP Gateway user’s extension, behind
the scenes the IP Gateway user automatically forwards the call over your Server’s
Internet-to-Centrex/PBX Extension dialing service to the matching user on the
remote Server.
Before creating IP Gateway users
To create an IP Gateway user, you must have already done the following on each
Server:
n
n
n
Created an IP Gateway to point to the remote Server. See “Creating an IP
Gateway” on page 13-9.
Created an Internet-to-Centrex/PBX Extension dialing service that
connects to the remote Server’s internal dial tone. See “Calling Strata CS
extensions on the remote Server” on page 13-13.
Made sure that no extensions on one Server conflict with extensions on
the other. To avoid conflicts, you might have all the extensions on one
Server begin with 1, while all the extensions on the other Server begin
with 2.
13-18
STRATA CS ADMINISTRATOR MANUAL
BETA DOCUMENT - PRELIMINARY & CONFIDENTIAL
The IP Gateway Configuration Worksheet in Appendix C can help you plan your
IP Gateway connection so that no conflicts occur.
To create an IP Gateway user
1.
From the Users view, choose Users > New User.
2.
Under Type, select IP Gateway.
3.
Under IP Gateway, select the IP Gateway that points to the remote
Server where this user resides. To create a new IP Gateway, click the
IP Gateway button.
4.
Make sure that the Gateway user’s Extension matches the user’s
extension on the remote Server. This field is the only field that must be
identical to the remote user’s setup. However, you must make Name the
same as well, to reduce confusion.
5.
From the Notifications tab, select the type of e-mail notification the user
will receive. If the IP connection is disrupted, messages will have been
collected and saved. Enter the e-mail address or addresses to which
notifications will be sent. Select an option for attaching a voice message
to the e-mail notification. Click Schedule to always send a notification,
or to only send a notification during specific times. For more
information on e-mail notifications, see “The Notifications tab” on
page 6-17.
CHAPTER 13. CONFIGURING INTERNET TELEPHONY SUPPORT
BETA DOCUMENT - PRELIMINARY & CONFIDENTIAL
13-19
6.
From the Call Handling tab, click Call Forwarding. Click To another
number. Under Call using, select the Internet-to-Centrex dialing
service with which you connect to the remote Server. Under Number,
enter the extension of the user on the remote Server.
7.
Enter the rest of the user information, which governs how the Gateway
user behaves on the local Server. For complete instructions on adding
users, see “The General tab” on page 6-9.
8.
Click OK.
Using Contact PINs with IP Gateway users
When a contact employs a Contact PIN to dial an IP Gateway user, the Contact
PIN is lost when the call is transferred to the actual user on the other Server. The
contact might then appear in the Call Monitor as an unknown caller.
To make sure that Contact PINs are recognized in all cases, users must duplicate
their contacts on the Gateway user account. For example, if Pete Storpin has
defined his wife as a contact with a PIN of 55, he must log in to his Gateway user
account on the remote Server and define his wife again, using the same PIN of 55.
Note: The first time a user receives a Contact PIN call over the IP Gateway
connection, the user must associate the call with the contact. Then the contact will
be recognized on subsequent calls.
An easy way to duplicate contacts is to export them from the local Server’s
account and import them to the remote Server’s Gateway user account. For a full
description of Contact PINs, and instructions on exporting and importing
contacts, see Strata CS Client User Guide.
Fine-tuning your IP connection __________________________
Strata CS’s IP Span dialog box includes a Tuning tab that you use to change any
of the IPLink board parameters between IP calls. Changes you make while a call
is in progress on the board will not be reflected until the call completes and a new
call is initiated. See “Fine-tuning your IP connection” on page 5-24.
13-20
STRATA CS ADMINISTRATOR MANUAL
BETA DOCUMENT - PRELIMINARY & CONFIDENTIAL
CHAPTER 14
CHAPTER 14
EXTENDING STRATA CS
CHAPTER CONTENTS
About extending Strata CS . . . . . . . . . . . . . . . . . . . . . . . . . . . . . . 14-2
Extending Strata CS with off-the-shelf applications . . . . . . . . . . . 14-3
Extending Strata CS with third-party devices . . . . . . . . . . . . . . . . 14-4
The Strata CS SDK . . . . . . . . . . . . . . . . . . . . . . . . . . . . . . . . . . . 14-8
BETA DOCUMENT - PRELIMINARY & CONFIDENTIAL
About extending Strata CS ______________________________
Versatility is what makes Strata CS so powerful, and that versatility is enhanced
even further by the ability to integrate other applications into the Strata CS Server.
You can extend a Strata CS system in the following ways:
n
n
n
In-band signaling applications. Software designed to interact with PBX
or Centrex systems can be configured to work with Strata CS, providing
custom IVR or call-handling functions (fax back, touch tone data
retrieval, and so on).
TAPI applications. TAPI-compatible phone dialers and contact managers
such as Act!, Goldmine, and Outlook can be integrated into Strata CS
through the Strata CS TAPI Service Provider.
Third-party telephony devices. Devices such as fax servers and voice
mail systems can be integrated into the Strata CS Server.
n
Custom software. If you have a requirement that cannot be met by one of
the many off-the-shelf applications available from third-party vendors,
programmers can use the Strata CS Software Development Kit (SDK) to
integrate custom-built software with your Strata CS system.
The next section of this chapter discusses extending Strata CS with off-the-shelf
applications. The rest of the chapter will give you an overview of what
programmers can accomplish using the Strata CS SDK. This chapter includes the
following topics:
n
”Extending Strata CS with off-the-shelf applications” (page 14-3).
Discusses how in-band signaling and TAPI applications can be integrated
into the Strata CS Server.
n
”Extending Strata CS with third-party devices” (page 14-4). Discusses
how to integrate third-party telephony devices.
n
”The Strata CS SDK” (page 14-8). Gives an overview of the SDK, which
contains the following tools:
n
”The IVR Plug-in API” (page 14-9). A powerful way to integrate
virtually any interactive voice response or voice processing
application with your Strata CS system.
n
”The Device Status API” (page 14-11). A software component that
gives custom applications the ability to get detailed information
about trunks and stations from the Strata CS Server.
n
”The Client API” (page 14-12). A set of software components that
gives custom applications the ability to access all functions found in
the Strata CS Client.
14-2
STRATA CS ADMINISTRATOR MANUAL
BETA DOCUMENT - PRELIMINARY & CONFIDENTIAL
Extending Strata CS with off-the-shelf applications __________
Many off-the-shelf applications produced by third-party vendors can be
integrated into the Strata CS Server without any custom programming. These
applications are integrated in one of the following ways:
n
n
In-band signaling applications can be configured to work with most
Centrex and PBX systems, including Strata CS.
TAPI applications can use the Strata CS TAPI Service Provider to
communicate with the Server.
In-band signaling applications
A human caller can send commands to any PBX, including Strata CS, by
generating a flash hook command by quickly pressing and releasing the hang-up
button (or hook) on a telephone handset cradle. The flash hook command signals
the PBX that special instructions will follow, such as placing a call on hold or
transferring a call to another extension. For example, a Strata CS user can
generate a flash and then press 1 to transfer a call.
This method of sending instructions is called in-band signaling. Many telephony
applications use this same method, communicating with PBX or Centrex systems
through flash hook commands.
Most PBXs use their own proprietary sets of flash hook commands. An
application that uses in-band signaling will usually provide you with a way to
configure it for a specific set of flash hook commands, such as those used by
Strata CS. For example, &3 (a flash followed by a 3) is the flash hook command
that Strata CS uses to disconnect from a call, so you can configure the in-band
signaling application to use &3 as its disconnect command. For a complete list of
the Strata CS telephone commands, see the “Telephone Commands Quick
Reference” in Strata CS Client User Guide.
TAPI applications
TAPI applications can communicate with the Server through the Strata CS TAPI
Service Provider (TSP). The TSP can be installed on the Strata CS Server and on
any workstation networked to the Server. When it is installed, users can use
TAPI-enabled phone dialers, contact managers, and similar applications. No
modem is required, and the Strata CS Client does not need to be installed on the
user’s computer.
The TSP runs in the background, establishing a connection between the TAPI
application and the Strata CS Server. Whenever a call is transferred to the station
being monitored by the TSP, any TAPI-compatible application running on the
same PC is notified of the call. The application can then perform functions such
as getting caller ID or DID, transferring the call, putting the call on hold, parking
the call, or hanging up. TAPI applications can also place new calls.
CHAPTER 14. EXTENDING STRATA CS
BETA DOCUMENT - PRELIMINARY & CONFIDENTIAL
14-3
While any TAPI-compatible application should work with Strata CS, the
following contact managers are actively supported:
n
Act! 3.0, 4.0, and 2000
n
GoldMine 4.0 and 5.0, and FrontOffice 2000
n
Microsoft Outlook 98 and Outlook 2000
For detailed instructions on how to install the TSP and use it with the supported
contact managers, see the chapter on “Installing the Strata CS Workstation
Applications” in Strata CS Installation & Maintenance Manual. If you are writing
a TAPI compliant application, see the online Strata CS SDK and API
Programming Guide (TVSDK.PDF) for a discussion of the TAPI features that the
TSP supports. (The developer’s guide is installed with the SDK.)
Extending Strata CS with third-party devices _______________
Many telephony devices produced by third-party vendors, such as fax servers or
voice mail systems, can be integrated into the Strata CS Server. This option is
only available for devices connected to MSI boards.
To use a third-party device with Strata CS, attach the device to a Strata CS station
and configure it using the tabs in the User dialog box.
When you integrate a third-party device, you may need to indicate how to send
DID, or extension numbers, to the station as touchtone digits (DTMF). Consult
the documentation for your third-party device for more information on the kind
of DTMF information that is required.
Note: Some third-party devices require a delay before DTMF digits are sent to the
device. To specify this delay, change the SendDigitsToStationDelay registry
setting (see “Modifying other supported Strata CS settings” on page A-28).
To send DID information to a device as DTMF, on the Phone tab select one of the
following methods from the Send digits to station drop-down list.
n
n
n
Do not send digits. If you are not integrating a third-party device, accept
the default method. No DTMF digits are sent.
Send DID from PSTN. Send the DID number as DTMF digits from the
trunk on which the call arrived.
Send user’s extension number. Send the extension number of the
calling user as DTMF digits.
n
Send call type and extension number. Send the call type and extension
number as DTMF digits. This method is described in detail in the next
section.
14-4
STRATA CS ADMINISTRATOR MANUAL
BETA DOCUMENT - PRELIMINARY & CONFIDENTIAL
Note: If you choose any setting except the default Do not send digits, all call
screening options are disabled for the station.
Sending call type and extension number to a device
The Send call type and extension number method sends DTMF digits that
represent the call type and one or more extension numbers to help the third-party
device determine where the call came from. Using this information, the
third-party device can customize call handling for individual calls.
For example, a third-party voice mail system can use the extension number to
preselect a specific user’s voice mailbox. Using the call type, the system can then
customize how the call is handled. When users dial in from their desks, they are
connected directly to their voice mailboxes and offered a “retrieve voice mail”
menu. For external callers, the voice mail system offers a “leave message” menu
with the user’s voice mailbox already selected.
CHAPTER 14. EXTENDING STRATA CS
BETA DOCUMENT - PRELIMINARY & CONFIDENTIAL
14-5
The possible combinations of DTMF digits that are sent to the device are
described in the following table.
Type of call
DTMF digits sent
Direct call to this extension from an external
caller.
“1”
Direct call to this extension from an internal
caller at another Strata CS source extension.
“2{source extension}#”
Call from an external caller to a different
target extension.
"5{target extension}#"
The call was sent to this extension via a
routing list action because the target
extension was busy or the call was not
answered.
Call from an internal caller at another source
extension to a different target extension.
"6{target extension}#
{source extension}#"
The call was sent to this extension via a
routing list action because the target
extension was busy or the call was not
answered.
The following example illustrates one way that Strata CS can be configured to
send DID digits to stations:
n
n
n
Frank Smith is assigned extension 101. Miri Anatolia is assigned
extension 102.
A third-party voice mail system is attached to several Strata CS stations.
The system administrator creates a user for each device and assigns each
one an extension, as in “Voice Mail Port 1” at extension 301, “Voice Mail
Port 2” at extension 302, and so forth. When setting the Send digits to
station option for each user, the system administrator selected Send call
type and extension number. Finally, each voice mail port is added to a
workgroup called Voice Mail, at extension 300 (for more on setting up
workgroups, see “Creating a Workgroup” on page 7-3).
Both Frank and Miri have a routing list that rings them first at their own
extensions, and then sends calls to the workgroup Voice Mail at extension
300. Any calls for Frank and Miri that they do not pick up go directly to
the first available voice mail port in the workgroup.
14-6
STRATA CS ADMINISTRATOR MANUAL
BETA DOCUMENT - PRELIMINARY & CONFIDENTIAL
Note: It is highly recommended that you use more than one voice mail device in
a scenario such as the previous example. A single device at extension 300, for
example, can only handle one call at a time—either a user checking for voice
messages or an external caller leaving a message. If a second call comes in to the
device while it is busy, the second call goes to the final action of extension 300’s
routing list, which may be Strata CS’s voice mail, or any other final action that you
configured.
Using the previous example again for illustration, the possible DTMF
combinations that may be sent to one of the voice mail systems are described in
the next table. In all cases, the call is handled by the first available voice mail
device in the workgroup Voice Mail.
Type of call
An external caller calls Voice Mail directly at
extension 300 in order to leave a message for a
user.
DTMF digits sent
“1”
For a direct external call, the DTMF digits do not
contain any information about the extension that
was dialed. The caller follows the prompts offered
by the device to identify the user who will receive
the message.
Frank Smith at extension 101 calls Voice Mail
directly at extension 300 in order to retrieve his
voice messages.
“2101#”
For a direct internal call, the DTMF digits identify
Frank’s extension. The voice mail device can send
Frank directly to his own voice mailbox.
An external caller calls Miri Anatolia at extension
102. If there is no answer or a busy signal at
extension 102, the call rings Voice Mail at
extension 300.
"5102#"
For an external call re-routed by a routing list, the
DTMF digits contain Miri’s extension. The voice
mail device can send the caller directly to Miri’s
voice mailbox to leave a message for her.
CHAPTER 14. EXTENDING STRATA CS
BETA DOCUMENT - PRELIMINARY & CONFIDENTIAL
14-7
Type of call
DTMF digits sent
Frank Smith at extension 101 calls Miri Anatolia at
extension 102. If there is no answer or a busy
signal at extension 102, the call rings Voice Mail at
extension 300.
"6102#101#"
For an internal call re-routed by a routing list, the
DTMF digits contain Frank’s and Miri’s extensions.
The voice mail device can send Frank directly to
Miri’s voice mailbox where he can leave her a
message, and he may be identified as the sender.
The Strata CS SDK_____________________________________
The Strata CS SDK is a powerful set of software libraries that programmers can
use to achieve the tightest possible integration between their applications and the
Strata CS Server. A programmer can use the SDK to integrate custom voice and
call processing applications such as:
n
Order processing systems with interactive voice response (IVR)
n
Customer identification and screen pop applications
n
Smart operators that transfer calls based on caller ID or other information
n
Automatic customer support call handling
n
Custom applications that monitor the status of Strata CS devices
Applications that use the Strata CS SDK can be created by programmers who
have experience with a Windows programming platform such as Visual Basic,
Visual C++, or Delphi. Toshiba maintains a list of consultants qualified to
develop applications using the Strata CS SDK.
Most custom applications can use in-band signaling (as described in “In-band
signaling applications” on page 14-3) to perform caller ID and call control and do
not need any other software. However, applications that need to perform
interactive voice-processing tasks (collecting and interpreting touch-tone digits,
playing and recording voice files, generating spoken messages, and so on) require
a telephony toolkit (see “Developing IVR Plug-ins with a telephony toolkit” on
page 14-10 for details).
14-8
STRATA CS ADMINISTRATOR MANUAL
BETA DOCUMENT - PRELIMINARY & CONFIDENTIAL
Installing the Strata CS SDK
The Strata CS SDK consists of sample programs and help files as well as the
software libraries that programmers will use to integrate their applications with
Strata CS. You can print the Strata CS SDK and API Programming Guide
(TVSDK.PDF) and provide it to programmers.
To install the Strata CS SDK
1.
Run the TVSDK.exe program located in \Strata CS on the Strata CS CD.
2.
Follow the instructions in the Strata CS SDK Setup window.
The Strata CS SDK Application Programming Interfaces
The Strata CS SDK consists of three APIs (Application Programming Interfaces)
that can be incorporated into custom applications. Each API is a software library
that the application can use to access specific functions and data within Strata CS.
The following APIs are provided:
n
The IVR Plug-in API. Using the IVR Plug-in API, programmers can
tightly integrate a custom application with the Strata CS Server to perform
complex call-handling or voice-processing tasks (order entry, customer
service, e-mail readers, and so on). The application (called an IVR
Plug-in) is a virtual extension on the Strata CS Server. The IVR Plug-in
can be dialed from a phone or auto attendant, called from an internet
trunk, or have calls forwarded or transferred to it, just like a regular
extension assigned to a user.
n
The Device Status API. Using the Device Status API, an application can
monitor the status of all devices on the Strata CS Server. For example, it
can monitor current users on the system, obtain the name of a user
currently logged on at a station, or identify the trunk to which a station is
connected. The application can generate custom reports concerning the
calls handled by Strata CS.
n
The Client API. Using the Client API, applications can interact with the
Strata CS Server database.
The remainder of this chapter provides an overview of each API. For more
detailed information, see the Strata CS SDK and API Programming Guide.
The IVR Plug-in API
The IVR Plug-in API enables a custom application to function as a virtual
extension on the Strata CS Server. The application (called an IVR Plug-in) can act
just as if it were using a regular extension assigned to a user. IVR Plug-ins run on
the Strata CS Server and are assigned an extension in the Strata CS
Administrator’s IVR Plug-in view. Programmers use the IVR Plug-in API to get
CHAPTER 14. EXTENDING STRATA CS
BETA DOCUMENT - PRELIMINARY & CONFIDENTIAL
14-9
notification of new calls from the Strata CS Server, retrieve caller ID, DID, or
other call data, and then optionally perform any voice processing (get digits, play
or record greetings, perform database lookups, and so forth) using a telephony
toolkit. After an IVR Plug-in finishes processing the call, it can hang up or
transfer the call back to any Strata CS extension, auto attendant, voice mail box,
or even another IVR Plug-in. IVR Plug-ins can also make outbound calls, which
can be useful for predictive dialing applications.
IVR Plug-in sample programs
The following IVR Plug-in sample applications are included with the API:
n
n
n
CustomerID Plug-in. A Visual Basic project that demonstrates how to
transfer customers to different agents automatically, based on the
customer’s area code. Programmers can install and run the compiled
sample program on a Strata CS Server without modification, or they can
use Visual Basic to customize it as desired.
CustomerID database manager. A small program to maintain the
Customer and Agent databases accessed by the CustomerID Plug-in. The
program can be used to customize the customer and agent data for your
Strata CS Server site.
OutBound Calling Plug-in. A Visual Basic project that demonstrates
how a Plug-in can place outbound calls, send data, and then return control
to the Server. The compiled sample program will run on a Strata CS
Server without modification, but you must have Visual Basic and a
telephony toolkit (such as CallSuite) to modify and recompile the sample
program.
Developing IVR Plug-ins with a telephony toolkit
The Strata CS SDK allows a programmer to integrate an application with the
Strata CS Server, but it does not provide tools to perform tasks such as dialing a
phone number, interpreting touch-tone digits, playing or recording voice files, or
generating spoken messages. These tasks require a telephony toolkit such as
CallSuite.
Telephony toolkits can be used to build applications such as:
n
Order entry systems
n
Benefits enrollment hotlines
n
Real estate fax lines
n
Voice mail and paging systems
n
Product literature fax-on-demand systems
n
Movie rating and information lines
n
Talking classifieds
14-10
STRATA CS ADMINISTRATOR MANUAL
BETA DOCUMENT - PRELIMINARY & CONFIDENTIAL
n
Predictive dialers
n
Golf tee reservation systems
n
Ski condition hotlines
IVR Plug-in licensing
IVR Plug-ins are licensed at runtime and count against your station licenses. Your
system may be configured to support an unlimited number of Plug-ins, but each
simultaneous call to an IVR Plug-in will consume one station license for the
duration of the call.
For example, if you have a system with 16 station licenses, and 15 of those
stations are assigned to users, you have one free station license that can be applied
to calling an IVR Plug-in. If one person makes a call to a Plug-in, and during the
call another user makes a call to the same or a different IVR Plug-in, at that point
the caller hears a message that the extension is not available, and an error is
logged to the Strata CS Server’s Windows NT Event Log saying that the license
count has been exceeded.
The Device Status API
The Device Status API provides functions that allow an application to monitor the
status of all devices (stations and trunks) on a Strata CS Server. The application
can obtain the device name, number, hook state, current activity, and extensions
for each device on the system. Each extension can be examined for the extension
number, the user’s name, and whether the extension is in a Do Not Disturb
personal status. Using these functions, the application could:
n
Monitor current users on the system and maintain a call log in a format
customized for your special needs.
n
Obtain a current list of users permanently assigned to a station.
n
Obtain the name of a user currently logged in at a station.
n
Identify the trunk to which a station is connected.
All Device Status information is read-only. The API can be used in combination
with the IVR Plug-in API to provide IVR applications with device information.
The Device Status sample program
The Device Status sample program is a Visual Basic project for a simple device
monitor that displays a constantly updated list of status reports on each device in
the system. Programmers can use this sample program as a starting point for their
own applications, expanding and customizing it as desired. It requires no
hardware or software beyond what is already required for the Strata CS Server
and Visual Basic.
CHAPTER 14. EXTENDING STRATA CS
BETA DOCUMENT - PRELIMINARY & CONFIDENTIAL
14-11
The Client API
The Client API is an extensive collection of the COM objects used to write the
Strata CS Client. It contains objects that are typically used to interact with the
Strata CS Server database and the call-processing engine. Using the objects
available in the Client API, your applications can use any function found in the
Strata CS Client.
14-12
STRATA CS ADMINISTRATOR MANUAL
BETA DOCUMENT - PRELIMINARY & CONFIDENTIAL
APPENDIX A
APPENDIX A
STRATA CS CONFIGURATION
SETTINGS
CHAPTER CONTENTS
About Strata CS configuration settings. . . . . . . . . . . . . . . . . . . . . . A-2
Strata CS Server registry settings . . . . . . . . . . . . . . . . . . . . . . . . . A-2
Strata CS Workstation applications registry settings . . . . . . . . . . . A-7
Strata CS Server language locale settings. . . . . . . . . . . . . . . . . . A-11
Defining custom tones . . . . . . . . . . . . . . . . . . . . . . . . . . . . . . . . . A-12
Disabling Dialogic devices . . . . . . . . . . . . . . . . . . . . . . . . . . . . . . A-13
Dialogic voice board settings . . . . . . . . . . . . . . . . . . . . . . . . . . . . A-18
Using the Strata CS Settings program . . . . . . . . . . . . . . . . . . . . . A-26
BETA DOCUMENT - PRELIMINARY & CONFIDENTIAL
About Strata CS configuration settings ____________________
This appendix lists the Strata CS configuration settings that store low-level
information that is rarely changed, or that cannot be changed using the
Administrator.
Many configuration settings are stored in the Windows registry on the Server
computer and on client computers where one or more Strata CS workstation
applications are installed. Some settings are stored at the machine level and apply
to all users on that machine while others are stored for the current user. The
Windows registry settings can be edited using Regedit.exe or Regedt32.exe.
Other configuration settings are stored in the Strata CS database. These settings
can be edited with the Strata CS Settings program as described in “Using the
Strata CS Settings program” on page A-26.
Note: In this chapter, HKLM is the abbreviation for HKEY_LOCAL_MACHINE
and HKCU is the abbreviation for HKEY_CURRENT_USER.
Strata CS Server registry settings_________________________
Many registry settings are set at installation time. In this appendix, the “default
values” listed for registry settings refer to the values that will be used when there
is no registry entry, not to defaults set by the Strata CS installer.
One Strata CS Server registry setting is found (or can be created) under the
following registry key:
HKLM\Software\Toshiba\Strata CS\
..\Toshiba\Strata CS\
COMPANY
STRING value sent to incoming IP callers who are directed to an auto
attendant or IVR Plug-in. Some terminals such as NetMeeting will be
able to display this name in their user interface. Calls that go directly to
users will use the user’s name instead. Note that this value is written by
the installer. This setting takes effect when SendDisplayOnAnswerCall
(see page A-6) is non-zero. See also Q931DefaultSourceName on
page A-6.
Default is “Strata CS”.
These Strata CS Server registry settings in the following table are found (or can
be created) under the following registry key:
A-2
STRATA CS ADMINISTRATOR MANUAL
BETA DOCUMENT - PRELIMINARY & CONFIDENTIAL
HKLM\Software\Toshiba\Strata CS\Server\Settings
..\Server\Settings\
AnalogMinTrunkOnhookTime
DWORD value specifying the minimum on-hook time in milliseconds
before the trunk will be used for another outbound call.
Default is 3000 milliseconds.
BCPComPort
DWORD value specifying the COM port used to connect to the BCP
panel for Watchdog mode. The watchdog signal is transmitted by Strata
CS over a serial cable that connects the PC COM port to the “RS-232
Watchdog Signal” port on the connection panel.
Default is 1, indicating that the serial cable is connected to the COM1
port. If you are using the COM1 port for another device, such as a mouse,
change this setting to 2 and use the COM2 port.
ConferenceMgr1 and ConferenceMgr2
In an environment that has both Strata and MSI station boards, these
values specify whether Strata CS uses all of the available conference
managers on the Strata boards before using the conference managers on
the MSI boards, or vice versa.
The following case-sensitive codes are used to refer to the MSI and
Strata boards: TvMsi.TerminalMgr and TvStrata.TerminalMgr.
Default settings use the conference managers on the MSI boards first:
ConferenceMgr1 = “TvMsi.TerminalMgr”,
ConferenceMgr2 = “TvStrata.TerminalMgr”
DbCacheInterval
DWORD value specifying the number of minutes between database
cache refreshes.
Default is 5 minutes. Setting to zero to turns off cache refreshes.
DisableDevices
See “Disabling Dialogic devices” on page A-13 for details.
Default is 0.
APPENDIX A. STRATA CS CONFIGURATION SETTINGS
BETA DOCUMENT - PRELIMINARY & CONFIDENTIAL
A-3
..\Server\Settings\
EmptySentItemsFolder
DWORD value specifying whether or not to purge the Sent box in a
Lotus Notes-based e-mail system each time an e-mail notification
includes an attached voice message. If you are not using an e-mail system
based on Lotus Notes, you do not need to define this setting. For more
information, see “Using Lotus Notes for e-mail notification” in Strata CS
Installation & Maintenance Manual.
Default value is 0, specifying that the Sent box should not be purged. A
value of 1 indicates that the Sent box should be purged.
ExternalCallOfferingDelay
DWORD value specifying the wait (in milliseconds) before Strata CS
starts call offering on a trunk for routing lists and call forwarding. This
setting applies to normal PSTN calls (analog, RB T1, and ISDN). For IP
calls where a positive indication of connection is received, use
ExternalCallOfferingDelayConnected.
Default is 8000 milliseconds.
ExternalCallOfferingDelayConnected
DWORD value specifying the wait (in milliseconds) before Strata CS
starts call offering on a trunk for routing lists and call forwarding. This
setting applies to IP calls where a positive indication of connection is
received. For normal PSTN calls (analog, RB T1, and ISDN), use
ExternalCallOfferingDelay.
Default is 100 milliseconds.
LogPath
STRING value specifying the subdirectory in which Strata CS Server log
files (Tvlogxxx.TXT) will be created. If this registry value does not exist,
or points to an invalid directory, Server logging will be disabled.
Default path is: “” (empty string).
LogSize
DWORD value specifying the maximum size of each Strata CS Server
log file (Tvlogxxx.TXT) in megabytes.
Default value is 1MB. A value of 0 will disable logging.
A-4
STRATA CS ADMINISTRATOR MANUAL
BETA DOCUMENT - PRELIMINARY & CONFIDENTIAL
..\Server\Settings\
Mail
DWORD value specifying whether or not Strata CS e-mail functionality
will be available. This includes e-mail notification and Exchange
synchronization.
Default value is 1 (e-mail functionality is available). A value of 0
specifies that e-mail functionality is not available.
MaxNonSilence
DWORD value specifying the maximum length of uninterrupted sound
(in 10 ms units) that will be recorded before the recording is terminated.
Default is 0 (no time-out).
MinDiskFreeSpace
DWORD value specifying the minimum amount of disk space (in
megabytes) that must be available for logging and saving voice
messages. If the minimum amount is not available, no logging will occur
and no voice messages will be saved.
Default value is 50MB.
MonitorInterval
DWORD value specifying the interval in minutes between Strata CS
Device Monitor checks. At each interval the Monitor goes through all
current devices to see if they are responding, and restarts them if they do
not respond within 10 seconds.
Default is 5 minutes.
MonitorTimeout
DWORD value in minutes. This is the length of time that Strata CS waits
before automatically restarting a non responding device. When an
automatic restart is invoked, a message is added to the Windows Event
Log: “Device %1 is not responding, restarting...”
Default is 5 minutes.
MonitorRestart
DWORD value. If this is non-zero, when the system detects a
nonresponding device it will attempt to restart it. A non-zero setting can
cause problems when a device is not responding, because it can result in
slow database access.
Default is 1.
APPENDIX A. STRATA CS CONFIGURATION SETTINGS
BETA DOCUMENT - PRELIMINARY & CONFIDENTIAL
A-5
..\Server\Settings\
NumLogs
DWORD value specifying the number of Strata CS Server log files
(Tvlogxxx.TXT) kept before they are overwritten.
Default is 1.
PartyCustomDataMax
DWORD value specifying the maximum size allowed (in bytes) for
custom data attached to each party. If a Client attempts to set custom data
for a party that exceeds this size, the attempt will be disallowed.
Default is 10000 bytes.
Q931DefaultSourceName
STRING value used when forwarding incoming PSTN calls without
caller ID to an Internet Address or gateway service. The IPLink drivers
will substitute the string “Name” unless another string is provided in the
in source address. This key should have the same value as the Company
setting (see page A-2).
Default is “Strata CS”.
RefreshVMWI
DWORD value specifying the number of milliseconds to wait before
refreshing the CLASS phone message waiting lights.
Default is 5000 milliseconds.
RequireLoginForTUIOnTrunk
DWORD value specifying whether or not Strata CS will require a user
login after pressing ** on a remote phone.
Default value is 1 (login is required). A value of 0 specifies that login is
not required.
SendDisplayOnAnswerCall
DWORD value specifying whether or not to display the company or user
name to inbound Internet callers. You may need to disable this setting to
use certain IP boards that do not support this feature.
Default is 0 (automatic), specifying that all boards except the IP041
boards provide a display string when answering a call. A setting of 1
always provides a display string, which will cause Dialogic Farallon
boards to fail on inbound calls. A setting of 2 never provides a display
string.
A-6
STRATA CS ADMINISTRATOR MANUAL
BETA DOCUMENT - PRELIMINARY & CONFIDENTIAL
..\Server\Settings\
TruncateRecordings
DWORD value specifying whether or not Strata CS should truncate extra
silence at the end of voice message recordings.
Default is 1, specifying that silence is truncated. A value of 0 specifies
that extra silence is not truncated.
UnknownCallerName
STRING value specifying the name to display in the call log when the
actual caller name is unknown.
Default is “Unknown”.
UserVoxPath
STRING value specifying the path for local user voice prompts. Path
string must end in a backslash.
Default is set during installation.
WaitLoopCurrentTimeout
DWORD value specifying the number of milliseconds to wait for loop
current before dialing an outside number. Set this to zero to skip loop
current checks when making outbound calls.
Default is 1400 milliseconds.
WrapupTime
DWORD value specifying the number of milliseconds (for an ACD
workgroup) between when an agent hangs up a call and when the caller
waiting the longest is notified that the agent became available.
Default is 4000 milliseconds.
Strata CS Workstation applications registry settings _________
All supported Strata CS workstation registry settings are found (or can be created)
under the registry keys presented in this section. The workstation application
settings are divided into those that apply to the current user (following section)
and those set for the local machine (beginning on page A-9).
APPENDIX A. STRATA CS CONFIGURATION SETTINGS
BETA DOCUMENT - PRELIMINARY & CONFIDENTIAL
A-7
Current User Settings
The workstation application settings in this section are located in
HKEY_CURRENT_USER.
HKCU\Software\Toshiba\Strata CS\Client\Admin\App
..\Client\Admin\App
LoggedInUserId
STRING value indicating the ID of the user who last logged in.
Default is “” (empty string) on installation.
HKCU\Software\Toshiba\Strata CS\Client\Logon
..\Client\Logon
Extension
STRING value specifying the user’s extension.
Default is “0”.
Server
STRING value specifying the name of the Strata CS Server computer.
May be either a NetBios name (for example, “Strata CS”) or an IP
Address (for example, “123.12.76.102”).
Default is “” (empty string).
PingTimeout
DWORD value specifying the ping timeout duration. If this is not set to
0, users who log on to the Terminal Server remotely will need
administrator permissions to run the Client (see “Installing the Client on
Microsoft Terminal Server” in Strata CS Installation & Maintenance
Manual).
Default is “0”.
Address
STRING value specifying the user’s station ID.
Default is “0”.
Username
STRING value specifying the user’s Strata CS login name.
Default is “” (empty string).
A-8
STRATA CS ADMINISTRATOR MANUAL
BETA DOCUMENT - PRELIMINARY & CONFIDENTIAL
Local Machine Settings
The workstation application settings in this section are located in
HKEY_LOCAL_MACHINE.
HKLM\Software\Toshiba\Strata CS\Client\Client\App
..\Client\Client\App
LoggedInUserId
STRING value indicating the ID of the user who last logged in.
Default is “” (empty string) on installation.
HKLM\SOFTWARE\Toshiba\Strata CS\Client\TSP
..\Client\TSP
HangUpCalls
DWORD value specifying whether or not the current user can hang up
calls in a TAPI client application that is using the Strata CS TAPI Service
Provider (“TSP”). This setting is important for GoldMine users.
Default is 1 (Clients can hang up calls using TAPI functions). A setting
of 0 will prevent Clients from hanging up calls via TAPI.
TraceMaxRevisions
DWORD value specifying the maximum number of backup log files that
will be generated on this machine before the Strata CS TAPI Service
Provider (“TSP”) starts overwriting the oldest files.
Default is 10 log files.
TraceToFile
DWORD value specifying whether or not the TSP will log activity for
this user to a disk file.
Default is 1 (TSP will log).
TraceDirectory
STRING value specifying the path to the TSP log file folder.
Default is the \Logs subdirectory of the Strata CS Client install folder.
TraceLevel
DWORD value specifying a number used to limit logging output from
the TSP. The higher it is, the more events will be logged.
Default is 10 events.
APPENDIX A. STRATA CS CONFIGURATION SETTINGS
BETA DOCUMENT - PRELIMINARY & CONFIDENTIAL
A-9
HKLM\SOFTWARE\Toshiba\Strata CS\Client\TSP\Logon
..\Client\TSP\Logon
Address
STRING value specifying the station ID that the TAPI Service Provider
(“TSP”) will monitor for incoming calls. TAPI client applications are
notified of all calls to this station.
The user can set and change this value using the Strata CS TAPI
Configuration Wizard.
No default. Must be set before the TSP can run.
Server
STRING value specifying the name of the Strata CS Server computer to
which the TSP will call. May be either a NetBios name (for example,
“Strata CS”) or an IP Address (for example, “123.12.76.102”).
The user can set and change this value using the Strata CS TAPI
Configuration Wizard.
No default. Must be set before the TSP can run.
UserName
STRING value showing the name that appears in the Call Log for
incoming and outgoing calls that use the TSP.
The user can set and change this value using the Strata CS TAPI
Configuration Wizard.
No default. Must be set before the TSP can run.
A-10
STRATA CS ADMINISTRATOR MANUAL
BETA DOCUMENT - PRELIMINARY & CONFIDENTIAL
Strata CS Server language locale settings__________________
Strata CS currently uses the following locale codes:
EN00
EN10
ES00
U.S. English
U.K. English
Latin American Spanish
HKLM\SOFTWARE\Toshiba\Strata CS\Server\TUI
..\Server\TUI
DefaultLocaleCode
STRING value specifying the default locale code.
Default value is determined during installation.
Locale definitions
Each installed locale code has its own set of registry entries, as follows:
HKLM\SOFTWARE\Toshiba\Strata CS\Server\TUI\<LocaleCode>
..\Server\TUI
Description
STRING value specifying the language description for this locale code.
Defaults are: EN00 =“US English”, EN10 = “UK English”, ES00 =
“Latin American Spanish”.
LocaleDLL
STRING value specifying the DLL to use for this locale code.
Defaults are: EN00 = “TVLEN00.DLL”, EN10 = “TVLEN10.DLL”,
ES00 = “TVLES00.DLL”.
SentenceFile
STRING value specifying the Sentence file for this locale code.
Defaults are: EN00 = “TVLEN00.INI”, EN10 = “TVLEN10.INI”,
ES00 = “TVLES00.INI”.
VapFile
STRING value specifying the system voice file for this locale code.
Defaults are: EN00 = “TVLEN00.VAP”, EN10 = “TVLEN10.VAP”,
ES00 = “TVLES00.VAP”.
APPENDIX A. STRATA CS CONFIGURATION SETTINGS
BETA DOCUMENT - PRELIMINARY & CONFIDENTIAL
A-11
Defining custom tones _________________________________
Custom tones can be defined for incoming fax detection and disconnect detection.
You can define one incoming fax tone and up to ten different disconnect tones
under the following Windows NT registry keys:
HKLM\SOFTWARE\Toshiba\Strata CS\Server\ToneDefinitions
\IncomingFaxTone
HKLM\SOFTWARE\Toshiba\Strata CS\Server\ToneDefinitions
\DisconnectTone<n>
where <n> is a digit from 1 through 9 (for example, \DisconnectTone1,
\DisconnectTone2, and so forth).
After you enter custom tones, you must restart the Strata CS Server. At startup,
Strata CS will read the definitions for all custom tones and define them to the
Dialogic drivers.
Each custom tone is defined by the DWORD keys shown in the next table.
Custom Tone Keys
Key
Description
freq1
First frequency (in Hz) for the tone
freq1dev
Allowable deviation for the first frequency (in Hz)
freq2
Second frequency (in Hz) for the tone
freq2dev
Allowable deviation for the second frequency (in Hz)
cadence
1 = cadenced tone, 0 = noncadenced tone
minrep
Number of repetitions for the cadence (that is, the number of
times that the on/off signal is repeated)
dualtone
1 = dualtone, 0 = single tone
cadenceon
Length of time for which the cadence is “on” (in 10ms units)
cadenceon_dev
Allowable deviation for “on” time (in 10ms units)
cadenceoff
Length of time for which the cadence is “off” (in 10ms units)
cadenceoff_dev Allowable deviation for “off” time (in 10ms units)
leadingedge
1 = tone detection on leading edge, 0 = on trailing edge
A-12
STRATA CS ADMINISTRATOR MANUAL
BETA DOCUMENT - PRELIMINARY & CONFIDENTIAL
Example: Defining a disconnect detection tone
Custom trunk disconnect detection tones are used in installations where a PBX
sits between the central office and Strata CS, and where the PBX does not provide
a fast busy tone to indicate trunk hangup.
The keys in the next table are DWORD values that define a disconnect tone with
the following characteristics:
n
A Dual Tone Frequency of 400Hz – 450 Hz (that is, 425 +/- 25)
n
On between 460ms – 500ms (that is, 480ms +/- 20ms)
n
Off between 440ms – 480ms (that is, 460ms +/- 20ms)
n
Cadence must repeat 2 times
n
Cadence begins on the leading edge of the tone
Custom Tone Keys
Key
DWORD Description
freq1
425
freq1dev
freq2
25
425
First frequency (in Hz) for the tone
Allowable deviation for first frequency (in Hz)
Second frequency (in Hz) for the tone
Allowable deviation for second frequency (in Hz)
freq2dev
25
cadence
1
1 = cadenced tone, 0 = noncadenced tone
minrep
2
Number of repetitions for the cadence
dualtone
1
1 = dualtone, 0 = single tone
cadenceon
48
cadenceon_dev
cadenceoff
2
46
Time for which cadence is “on” (in 10ms units)
Allowable deviation for “on” time (in 10ms units)
Time for which cadence is “off” (in 10ms units)
cadenceoff_dev
2
Allowable deviation for “off” time (in 10ms units)
leadingedge
1
Tone detection: 1 = leading edge, 0 = trailing edge
Disabling Dialogic devices ______________________________
By default Strata CS allocates and opens all Dialogic devices that are present on
the Server for itself. If you do not want Strata CS to allocate all of the available
devices (for example, if you are connecting fewer lines to a Dialogic board than
the board can support), use the procedure described later in this section to disable
the Dialogic devices.
You might need to disable Dialogic devices for any of the following reasons:
n
To allow non-Strata CS applications to run on the Strata CS
Server
APPENDIX A. STRATA CS CONFIGURATION SETTINGS
BETA DOCUMENT - PRELIMINARY & CONFIDENTIAL
A-13
For example, you may have another CT application installed on the Strata
CS Server that needs to own some Dialogic devices for itself. You would
identify the specific Dialogic devices and channels required by the CT
application, and then disable those devices. When Strata CS opens
Dialogic devices at startup, it will ignore the disabled devices, making
them available to the CT application.
Note: You do not need to reserve devices when developing an IVR
Plug-in, which will automatically share Strata CS’s Dialogic resources as
needed.
n
To connect a fractional T1 or E1 line to Strata CS
For example, you may have a T1 line with 12 channels instead of 24. To
connect this T1 line to Strata CS, you still connect it to a Dialogic card
with 24 channels, but you disable half of the channels. When Strata CS
starts, it will see 12 instead of 24 trunks, which will match the fractional
T1 line. You must be sure to disable the correct half, for example, trunks
1-12 or trunks 13-24, whichever matches the fraction of the T1 line you
have.
n
To ignore several trunks on a voice board and use its voice
processors only
For example, you may want to support a 1T1-by-24-station configuration
in the minimum number of slots. The best way would be to install a
D480SC-2T1 card that supports two T1 lines and 48 voice processors in
one slot, and an MSI240 board to support 24 stations in a second slot. You
would install the 2T1 line card even though you only have one T1 line
because the D480SC-2T1 card has 24 extra voice processors that you can
use to provide dial tone and voice prompts for the 24 stations. Installing a
D240SC-T1 card and a D240SC card for the voice processors would
require more slots. For this configuration, you would disable the network
resources for the second T1 line on the D480SC-2T1 card. Strata CS will
not see them when starting up, but it will see all the voice processors.
To disable Dialogic devices in the Windows NT/2000 registry
1.
Using the conventions described in “Dialogic device names” (in the
next section), determine the device names for the Dialogic devices you
want to disable.
2.
Run Regedit.
3.
Create the following key (if it does not already exist):
HKLM\SOFTWARE\Toshiba\Strata CS\Server\Settings
4.
Create a string value under Settings named DisableDevices.
A-14
STRATA CS ADMINISTRATOR MANUAL
BETA DOCUMENT - PRELIMINARY & CONFIDENTIAL
5.
Set the contents of DisableDevices to a comma-separated list of the
device names you are disabling.
For example, to disable the third and fourth channels on the first voice
board in a system, set the contents of DisableDevices as follows:
DXXXB1C3,DXXXB1C4
To disable all the channels on a board, set DisableDevices to the board
name without any channel, for example:
DXXXB1
6.
Save the changes to the registry.
Note: If you add or remove Dialogic boards, you must update the DisableDevices
list.
Dialogic device names
Dialogic system software creates standard names for devices and channels within
devices. These names are used to open the devices to receive device handles,
which are used in all subsequent Dialogic driver functions.
Dialogic voice board device names
A Dialogic voice board device name has the form DXXXBnCn, where Bn is the
board number and Cn is the channel number. For example, Channel 1 on Board 1
would be named DXXXB1C1. If multiple voice boards have been installed, the
board number 1 is assigned to the Dialogic voice board that was installed in the
Strata CS Server with the lowest board ID. (For information about setting
Dialogic board IDs, see Strata CS Installation & Maintenance Manual.) The
board number is then incremented by 1 for every four voice ports. The channel
number is assigned sequentially starting with 1 each time the board number
changes and incremented by 1 for each voice channel. Whenever all the devices
on one Dialogic voice board have been named, the board-numbering sequence
continues on the Dialogic voice board that was installed with the next lowest
board ID.
APPENDIX A. STRATA CS CONFIGURATION SETTINGS
BETA DOCUMENT - PRELIMINARY & CONFIDENTIAL
A-15
For example, if you installed a Dialogic D/80SC-4LS in the Strata CS Server with
the board ID set to 0 and a D/41ESC with the board ID set to 1, the devices on
these boards would have the names shown in the following table.
Board
D/80SC-4LS
Board ID
0
Channel
DXXXB1C1 - LSI/VOX
DXXXB1C2 - LSI/VOX
DXXXB1C3 - LSI/VOX
DXXXB1C4 - LSI/VOX
DXXXB2C1 - VOX
DXXXB2C2 - VOX
DXXXB2C3 - VOX
DXXXB2C4 - VOX
D/41ESC
1
DXXXB3C1 - LSI/VOX
DXXXB3C2 - LSI/VOX
DXXXB3C3 - LSI/VOX
DXXXB3C4 - LSI/VOX
If you assigned the lower board ID to the D/41ESC board, the devices on the same
boards would have the names shown in the following table.
Board
D/41ESC
Board ID
0
Channel
DXXXB1C1 - LSI/VOX
DXXXB1C2 - LSI/VOX
DXXXB1C3 - LSI/VOX
DXXXB1C4 - LSI/VOX
D/80SC-4LS
1
DXXXB2C1 - LSI/VOX
DXXXB2C2 - LSI/VOX
DXXXB2C3 - LSI/VOX
DXXXB2C4 - LSI/VOX
DXXXB3C1 - VOX
DXXXB3C2 - VOX
DXXXB3C3 - VOX
DXXXB3C4 - VOX
A-16
STRATA CS ADMINISTRATOR MANUAL
BETA DOCUMENT - PRELIMINARY & CONFIDENTIAL
Dialogic modular station interface (MSI) device names
The device name for a Dialogic modular station interface has the form MSIBnCn,
where Bn is the board number and Cn is the channel number. For example,
Channel 1 on Board 1 would be named MSIB1C1. The board number is assigned
sequentially starting with 1 and is incremented by 1 for each board. Board number
1 is assigned to the MSI board installed in the Strata CS Server with the lowest
board ID. Board number 2 is assigned to the MSI station board installed with the
next lowest board ID, and so on. (For information about setting Dialogic board
IDs, see Strata CS Installation & Maintenance Manual.) The channel number is
assigned sequentially starting with 1 on each board, incremented by 1 for each
channel.
For example, if a Strata CS Server had a single MSI/80SC Dialogic MSI board
installed, the MSI devices would have the names shown in the following table.
Board
Channel
MSI/80SC
MSIB1C1
MSIB1C2
MSIB1C3
MSIB1C4
MSIB1C5
MSIB1C6
MSIB1C7
MSIB1C8
For more information, see the Device Name Assignment technical bulletin on the
Dialogic support site at:
http://support.dialogic.com/tnotes/tnbyos/winnt/tn188.htm
Dialogic Internet telephony board device names
You can disable Dialogic Internet telephony boards to make them available for
non-Strata CS use, but you cannot disable individual channels on the boards.
Board names use the form DM3Boardn, where n is the board number. The board
number is assigned sequentially starting with zero and is incremented by 1 for
each board.
Toshiba device names
The mechanism for disabling a Strata board so that it is available for non-Strata
CS use is the same as described for Dialogic boards in the previous sections. You
can disable Strata boards, but you cannot disable individual channels on the
boards.
APPENDIX A. STRATA CS CONFIGURATION SETTINGS
BETA DOCUMENT - PRELIMINARY & CONFIDENTIAL
A-17
A Strata board device name has the form DKTBn, where Bn is the board number.
For example, Board 1would be named DKTB1. The board number is assigned
sequentially starting with 1, incremented by 1 for each Strata board.
Dialogic voice board settings ____________________________
Dialogic voice board settings consist of VoiceBoard keys (applied to all channels
for a specified board number) and VoiceBoard Line keys (applied to individual
channels on the board).
VoiceBoard settings
VoiceBoard keys are located under:
HKLM\SOFTWARE\Toshiba\Strata CS\Server\VoiceBoard<n>
where <n> is the Dialogic board number (see “Dialogic voice board device
names” on page A-15 for an explanation of board numbering conventions).
..\Server\VoiceBoard<n>
Key
DXDB_CHNUM
Default
-
Description
Channel number. Number of channels on the
board.
DXBD_FLASHCHR
&
DXBD_FLASHTM
50
Flash Character. Character that causes a hook
flash when detected.
Flash Time. Length of time onhook during
flash.
DXBD_MAXPDOFF
50
Maximum Pulse Digit Off. Maximum time
loop current may be off before the existing loop
pulse digit is considered invalid and reception
is re-initialized.
DXBD_MAXSLOFF
25
DXBD_MINIPD
25
Maximum Silence Off. Maximum time for
silence being off, during audio pulse detection.
Minimum Loop Interpulse Detection.
Minimum time between loop pulse digits
during loop pulse detection.
DXBD_MINISL
25
Minimum Interdigit Silence. Minimum time
for silence to be on between pulse digits for
audio pulse detection.
DXBD_MINLCOFF
0
Minimum Loop Current Off. Minimum time
DXBD_MINPDOFF
2
Minimum Pulse Detection Off. Minimum
before loop current drop message is sent.
break interval for valid loop pulse detection.
A-18
STRATA CS ADMINISTRATOR MANUAL
BETA DOCUMENT - PRELIMINARY & CONFIDENTIAL
..\Server\VoiceBoard<n>
Key
Default
Description
DXBD_MINPDON
2
Minimum Pulse Detection On. Minimum
make interval for valid loop pulse detection.
DXBD_MINSLOFF
2
Minimum Silence Off. Minimum time for
DXBD_MINSLON
1
Minimum Silence On. Minimum time for
silence to be off for valid audio pulse detection.
silence to be on for valid audio pulse detection.
DXBD_MINTIOF
5
Minimum DTI Off. Minimum time required
DXBD_MINTION
5
Minimum DTI On. Minimum time required for
between ring-received events.
rings received event.
DXBD_OFFHDLY
50
Off-hook Delay. Period after off-hook, during
which no events are generated (no DTMF digits
detected during this time).
DXBD_PAUSETM
200
Pause Time. Delay caused by a comma in the
dialing string.
DXBD_P_BK
6
Pulse Dial Break. Duration of pulse dial
off-hook interval.
DXBD_P_IDD
100
Pulse Interdigit Delay. Time between digits in
pulse dialing.
DXBD_P_MK
4
Pulse Dial Make. Duration of pulse dial
DXBD_R_EDGE
2
Ring Edge. Detection of ring edge:
off-hook interval.
1- Beginning of ring
2 - End of ring
DXBD_R_IRD
80
Inter-ring Delay. Maximum time to wait for the
next ring (100ms units). Distinguishes between
calls. Set to 1 for T-1.
DXBD_R_OFF
5
Ring-off interval. Minimum time for ring not to
be present before qualifying as “not ringing”
(100 ms units).
DXBD_R_ON
3
Ring-on Interval. Minimum time ring must be
present to qualify as a ring (100ms units).
DXBD_S_BNC
4
Silence and Non-silence Debounce. Length
of a changed state before Call Status Transition
message is generated.
DXBD_TTDATA
10
Duration of DTMF digits for dialing.
APPENDIX A. STRATA CS CONFIGURATION SETTINGS
BETA DOCUMENT - PRELIMINARY & CONFIDENTIAL
A-19
..\Server\VoiceBoard<n>
Key
Default
DXBD_MFMINON
0
Description
Minimum MF On. The duration to be added to
the standard MF tone duration before the tone is
detected. The minimum detection duration is
65ms for KP tones and 40ms for all other tones.
This parameters affects all the channels on the
board (10ms units).
DXBD_MFTONE
6
MF Minimum Tone Duration. The duration of a
dialed MF tone. This parameter affects all the
channels on the board. Max value 10 (10ms
units).
DXBD_MFDELAY
DXBD_MFLKPTONE
6
MF Interdigit Delay. The length of silence
period between tones during MF dialing. This
parameter affects all the channels on the board
(10ms units).
10
MF length of LKP Tone. The length of the LKP
tone during MF dialing. This parameter affects
all the channels on the specified board. Max
value 15 (10ms units).
DXBD_T_IDD
5
DTMF Interdigit Delay. Time between digits in
DTMF dialing.
DXBD_MINOFFHKT
M
250
Minimum Off-hook Time. Specified in 10ms
units.
VoiceBoard channel settings
Channel-level settings are controlled by the VoiceBoard Line registry keys,
which are located under:
HKLM\SOFTWARE\Toshiba\Strata CS\Server\VoiceBoard<n1>\Line<n2>
where <n1> is the Dialogic board number and <n2> is the channel number (see
“Dialogic voice board device names” on page A-15 for an explanation of board
and channel numbering conventions).
..\Server\VoiceBoard<n1>\Line<n2>
DXCH_ADSIALERT_AMPL
DWORD value that specifies the volume of the ADSI alert tone, which
is the first caller ID beep when sending caller ID with call waiting. The
Dialogic default is -13, which is louder than the Strata CS setting.
Strata CS default is -23.
A-20
STRATA CS ADMINISTRATOR MANUAL
BETA DOCUMENT - PRELIMINARY & CONFIDENTIAL
..\Server\VoiceBoard<n1>\Line<n2>
DXCH_D_FLAGS
DWORD value for DTMF detection edge select.
Default is 0.
DXCH_DTINITSET
DWORD value that specifies the DTMF digits on which to initiate play
on. You can OR values of different DTMF digits to form the bit mask.
Legal values are as follows:
ValueDigitValueDigit
-DM_1 1 -DM_9 9
-DM_2 2 -DM_0 0
-DM_3 3 -DM_S *
-DM_4 4 -DM_P &
-DM_5 5 -DM_A a
-DM_6 6 -DM_B b
-DM_7 7 -DM_C c
-DM_8 8 -DM_D d
Default is 0.
DXCH_DTMFTLK
DWORD value for DTMF Talk. Sets the minimum time for DTMF to be
present during playback to be considered valid. Increasing the value
provides more immunity to talkoff/playoff. Set to -1 to disable.
Default is 5.
DXCH_DTMFDEB
DWORD value for DTMF debounce time. Maximum length of time in
which DTMF can be absent and then come back on again and still be
considered the same DTMF tone.
Default is 0.
APPENDIX A. STRATA CS CONFIGURATION SETTINGS
BETA DOCUMENT - PRELIMINARY & CONFIDENTIAL
A-21
..\Server\VoiceBoard<n1>\Line<n2>
DXCH_MFMODE
DWORD value for MF Mode. A word-length bit mask that selects the
minimum length of KP tones to be detected. Possible values:
n
0 - detect KP tone > 40ms
n
2 - detect KP tone > 65ms
n
Greater than 2 - KP tone returned to application during MF
detection. Ensures only standard length KP tones (100ms) are
detected. If set to 0 any KP tone greater than 40ms will be detected.
Default is 2.
DXCH_MAXRWINK
DWORD value for Maximum Loop Current for wink. Maximum time
loop current needs to be on before recognizing a wink (10ms units)
Default is 20.
DXCH_MINRWINK
DWORD value for Minimum Loop Current for wink. Minimum time
loop current needs to be on before recognizing a wink (10ms units)
Default is 10.
DXCH_WINKDLY
DWORD value for Wink Delay. The delay after a ring is received before
issuing a wink (10ms units)
Default is 15.
DXCH_RINGCNT
DWORD value for Ring Count. Number of rings to wait before
returning a ring event.
Default is 4.
DXCH_WINKLEN
DWORD value for Wink Length. The duration of a wink in the off-hook
state (10ms units).
Default is 15.
A-22
STRATA CS ADMINISTRATOR MANUAL
BETA DOCUMENT - PRELIMINARY & CONFIDENTIAL
E1 and T1 board settings
In the following tables, Board<n> refers to a Dialogic board number. See
“Dialogic voice board device names” on page A-15 for an explanation of board
numbering conventions.
HKLM\SOFTWARE\Toshiba\Strata CS\Server\DTIBoard<n>\GlobalCall
..\Server\DTIBoard<n>\GlobalCall
DumpCallInfo
DWORD value specifying whether or not to include raw call-event
information elements from E1 and T1 trunks (ISDN PRI, robbed-bit,
CAS) in the Strata CS Server log (Tvlogxxx.txt).
Default is 0, which suppresses the information element logging. Set to 1
to include the information elements in the log.
InProtocol and OutProtocol
These values define the CAS protocol on E1 boards. For details, see
“Manually entering E1 CAS protocols” in Strata CS Installation &
Maintenance Manual.
DNISLength
DWORD value specifying the number of expected DNIS (DDI) digits (in
milliseconds) to be received by the Strata CS Server before attempting to
process the inbound call.
No default, but the Strata CS server attempts to get the DNIS 9 digit
string upon notification of an inbound call.
DNISWaitTime
DWORD value specifying the expected DNIS (DDI) time (in
milliseconds) that the Strata CS Server will wait for digits to be received
before attempting to process the inbound call.
No default, but the Strata CS server expects to wait 2000 milliseconds
after it receives the notification of an inbound call.
APPENDIX A. STRATA CS CONFIGURATION SETTINGS
BETA DOCUMENT - PRELIMINARY & CONFIDENTIAL
A-23
HKLM\SOFTWARE\Toshiba\Strata CS\Server\BRIBoard<n>\ISDN
..\Server\BRIBoard<n>\ISDN
DumpCallInfo
DWORD value specifying whether or not to include raw call-event
information elements from BRI trunks in the Strata CS Server log
(Tvlogxxx.txt).
Default is 0, which suppresses the information element logging. Set to 1
to include the information elements in the log.
ISDN Megacom service settings
These settings enable you to make outbound international calls using ISDN
Megacom service. The first setting is required, and the last two settings are
optional.
For each outbound call, Strata CS checks the dial string to see if it is prefixed with
the number specified in InternationalPrefix.
If it does not contain the international prefix, the call proceeds like a normal
domestic call, and no further steps occur.
If it does contain the international prefix, Strata CS strips the prefix from the dial
string, and then checks whether InternationalType and InternationalPlan are
present. If they are, Strata CS uses them to override the called number and calling
number call parameters.
HKLM\SOFTWARE\Toshiba\Strata CS\Server\DTIBoard<n>\GlobalCall\
MakeCall
..\DTIBoard<n>\GlobalCall\MakeCall
InternationalPrefix
STRING value for your international dialing prefix. For example,
InternationalPrefix=“011”.
Default is “011”.
InternationalType
DWORD value used to override the called number call parameter.
Default is 1, INTL_NUMBER.
InternationalPlan
DWORD value used to override the calling number call parameter.
Default is 1, ISDN_NUMB_PLAN.
A-24
STRATA CS ADMINISTRATOR MANUAL
BETA DOCUMENT - PRELIMINARY & CONFIDENTIAL
MSI station board settings
HKLM\SOFTWARE\Toshiba\Strata CS\Server\MSIBoard<n>
..\Server\MSIBoard<n>
CID_FSK_FORMAT
DWORD value specifying the format used by MSI board <n> to send
Caller ID information to CLASS phones.
Valid settings are:
n
n
n
0 - SDMF (Single Data Message Format) sends the date, time, and
10-digit caller ID number.
1 - MDMF (Multiple Data Message Format) sends the date, time,
10-digit caller ID number, and 15-digit caller name.
2 - UK_MDMF (UK Multiple Data Message Format) sends the
date, time, 18-digit caller ID number, and 20-digit caller name.
Default is 1 (MDMF format).
MSG_DBONTM
DWORD specifying the length of time (in 50 ms. units) or stations on
MSI board <n> to be on-hook before a hangup is registered. This value
should usually be equal to MSG_MAXFLASH + 1.
Default is 21 (1050 milliseconds).
MSG_MAXFLASH
DWORD specifying the maximum length of time (in 50 ms. units) for
stations on MSI board <n> to be on-hook before a hook flash is detected.
Default is 20 (1000 milliseconds).
MSG_MINFLASH
DWORD specifying the minimum length of time (in 50 ms. units) for
stations on MSI board <n> to be on-hook before a hook flash is detected.
Default is 6 (300 milliseconds).
VMWI_FSK_FORMAT
DWORD specifying the format used by MSI board <n> to send visual
message waiting indication to CLASS phones. Valid settings are:
n
0 - SDMF (Single Data Message Format)
n
1 - MDMF (Multiple Data Message Format)
Default is 0 (SDMF format).
APPENDIX A. STRATA CS CONFIGURATION SETTINGS
BETA DOCUMENT - PRELIMINARY & CONFIDENTIAL
A-25
Using the Strata CS Settings program_____________________
The Strata CS Settings program (TVSettings.exe) is a utility that you can use to
view and alter settings for both the Server and individual users. The Strata CS
Server uses a database to store numerous settings. Other Strata CS settings are
stored in the Windows Registry of each machine. The Strata CS Settings program
can be run on either the Server or a client workstation. You must have
Administrator permissions to run it.
Use this utility with extreme caution, preferably under the direction of Toshiba
Strata CS Technical Support engineers.
Logging in
The Strata CS Settings program is located in the Administrator or Client directory
(default locations are \Program Files\Strata CS Administrator and
\Program Files\Strata CS Client), but no shortcut to it is created during
installation.
To use TVSettings
1.
Double-click TVSettings.exe in the Strata CS Administrator or Strata
CS Client directory.
2.
Log in as an Administrator.
A-26
STRATA CS ADMINISTRATOR MANUAL
BETA DOCUMENT - PRELIMINARY & CONFIDENTIAL
Viewing current values
The main window of the program displays a list of all available settings, as shown
in the next illustration.
n
n
n
n
n
n
n
In the User drop-down list, select a Strata CS user. In the Store field,
“User” refers to the user specified here.
Application is a drop-down list that specifies an application. If a key
displays “True” in the Per App field, the key value applies only to the
application specified here.
Key indicates the path and name of the key.
Store indicates where the key value will be stored. “User” and “Server”
keys are stored in a database on the Strata CS Server. “Registry” keys are
stored in the Windows Registry of the machine on which you are running
the Strata CS Settings program.
Per App indicates whether or not the setting applies only to the
application listed in the Application field. For the keys discussed in this
appendix, the Per App field is False unless specified otherwise.
Value indicates the current value of this key. You can change the value
by double-clicking the item and entering a new value in the Setting Value
dialog box (as described in the next section).
Default indicates the Strata CS default value for this key.
APPENDIX A. STRATA CS CONFIGURATION SETTINGS
BETA DOCUMENT - PRELIMINARY & CONFIDENTIAL
A-27
Changing key values
When you double-click on a key listed in the main window, the Setting Value
dialog box opens:
n
n
n
Value name displays the name of the key.
Value data allows you to change the value of the key by typing a new
value and clicking OK.
Description displays the location and description of the key.
Modifying other supported Strata CS settings
Toshiba support is available for the settings described in this section. These
settings are stored either as Registry keys on the current computer or as System
items on the Server database. Support is not available for other settings except
when your Strata CS provider has specifically instructed you to alter them.
Registry keys on the current computer
audio\temp file dir
STRING value that specifies the directory in which to store temporary
files. This setting affects only the application currently displayed in the
Application field (Per App=True).
Default value is “C:\Temp”.
audio\VolumePercentage
DWORD value that specifies the percentage to increase the current wave
volume on playback or recordings or greetings.
Default value is 35 percent.
A-28
STRATA CS ADMINISTRATOR MANUAL
BETA DOCUMENT - PRELIMINARY & CONFIDENTIAL
Registry keys on the current computer
Database\ConnectionTimeout
DWORD value that specifies the amount of time (in seconds) to wait
before timing out when connecting to the database.
Default value is 15 seconds.
Device Monitor\RefreshInterval
DWORD value that specifies the interval (in minutes) between Device
Monitor application refresh cycles.
Default value is 5 minutes.
System items on the Server database
ACD\NoAnswerTime
DWORD value that specifies the how long to wait after an agent in a call
center queue fails to answer a call before offering that agent another call.
Default value is 30 seconds.
CPAConnectDelay
DWORD value that specifies the delay in milliseconds after call progress
analysis returns the connected result before marking an outbound call as
connected. Increasing this value may help discriminate between
abandoned and connected calls.
Default value is 1000 millseconds.
Call Monitor\Hold Conference Parties
DWORD value that specifies whether or not external conference parties
may be put on hold.
Default value is 1 (true). A value of 0 would specify that parties may not
be put on hold.
Server\AllowCallsWithoutUsers
DWORD value that specifies whether or not to allow conference calls
with no users (that is, all parties have left the conference) and external
transfers of external calls.
Default value is 1 (true). A value of 0 would prevent conference calls
with no users and external transfers of external calls.
APPENDIX A. STRATA CS CONFIGURATION SETTINGS
BETA DOCUMENT - PRELIMINARY & CONFIDENTIAL
A-29
System items on the Server database
Server\AllowGatewayUserLogin
DWORD value. If this value is non-zero, the system will allow Gateway
users to log in from an auto attendant or internal dial tone. Gateway users
inherit the permissions of their IP Gateway and usually have the ability
to dial external numbers while logged in on a trunk.
Default value is 1.
Server\AudioControlRingTimeout
DWORD value that specifies the maximum time (in milliseconds) that
the TVAudio Control will spend attempting to connect before returning
with a timeout.
Default value is 30000 milliseconds.
Server\CheckRecipientCallForSetting
DWORD value. Check both callee and recipient “call for” setting. The
callee is the person whom the call is for. The recipient is the person who
answers the phone, or, to be more precise, the person who most recently
logged in at that station. Note that these can be different people.
Default value is 1 (yes). With this setting (or if the setting is not present),
“call for” will be announced if either the callee or the recipient has “call
for” turned on. Can be set to 0 (no.)
Server\DefaultGreetingSize
DWORD value that specifies default size (in minutes) for greeting space.
Default value is 10 minutes.
Server\DefaultMailboxSize
DWORD value that specifies default size for a new mailbox.
Default value is 20.
Server\Dial911AtDialtone
DWORD value that specifies whether the emergency number can be
dialed at the internal dial tone.
Default value is 1 (yes). Can be set to 0 (no).
Server\E911RingDuration
DWORD value that specifies the number of milliseconds to ring E-911
stations before dialing out of trunk.
Default value is 15000 millseconds (15 seconds).
System items on the Server database
Server\InternalDialtoneTrunkFirstTimeout
DWORD value that specifies the dialtone duration (in milliseconds)
before the trunk goes to reorder when a user is logged in remotely.
Default value is 180000 milliseconds.
Server\InternalDialtoneTrunkSecondTimeout
DWORD value that specifies the dialtone duration (in milliseconds) after
a remote party hangs up before the station goes to reorder when a user is
logged in remotely.
Default value is 180000 milliseconds.
Server\InternalDialtoneStationFirstTimeout
DWORD value that specifies the dialtone duration (in milliseconds)
before the station goes to reorder.
Default value is 25000 milliseconds.
Server\InternalDialtoneStationSecondTimeout
DWORD value that specifies the dialtone duration (in milliseconds) after
a remote party hangs up before the station goes to reorder. If there is a
PBX behind Strata CS that uses the reorder tone as a disconnect tone, you
may want to decrease this value.
Default value is 5000 milliseconds.
Server\LongIdleTime
DWORD value that specifies the minimum duration (in seconds) of a
function call or Plug-in before a Windows NT event is generated.
Default value is 21600 seconds.
Server\MaxAutoAttendantLoops
DWORD value that specifies the maximum number of auto attendants to
which a call will be routed without the caller pressing a key.
Default value is 3.
Server\MaxRingDuration
DWORD value that specifies the maximum ring duration (in
milliseconds) for internal and external calls in routing lists.
Default value is 60000 milliseconds.
APPENDIX A. STRATA CS CONFIGURATION SETTINGS
BETA DOCUMENT - PRELIMINARY & CONFIDENTIAL
A-31
System items on the Server database
Server\MinimumMessage
DWORD value that specifies the minimum duration (in milliseconds) for
voice mail messages. Messages shorter than this are discarded.
Default value is 2000 milliseconds.
Server\MinRingDurationForExternalCallOffering
DWORD value that specifies the minimum ring duration (in
milliseconds) for external calls using call offering in routing lists.
Default value is 12000 milliseconds.
Server\MinRingDurationForExternalPadding
DWORD value that specifies the extra time (in millseconds) that the
system adds to ring durations for external calls in routing lists.
Default value is 3000 millseconds.
Server\MinRingDuration
DWORD value that specifies the minimum ring duration (in
milliseconds) for internal and external calls in routing lists.
Default value is 6000 milliseconds.
Server\SendDigitsToStationDelay
DWORD value that specifies the delay (in millseconds) before sending
digits to a station, for example, DID digits.
Default value is 0 milliseconds.
Server\TrunkAllocationInterval
DWORD value that specifies the amount of time (in milliseconds) that
Dialing Services wait before trying to allocate another trunk. This is only
used when a trunk is not responding. If you decrease this value, you also
need to decrease WaitLoopCurrentTimeout (see page A-7).
Default value is 1800 milliseconds.
System\MinAdminBuild
DWORD value that specifies minimum build version number of the
Administrator program that is allowed to log on to the Server.
Default value is 0.
A-32
STRATA CS ADMINISTRATOR MANUAL
BETA DOCUMENT - PRELIMINARY & CONFIDENTIAL
System items on the Server database
System\MinClientBuild
DWORD value that specifies minimum build version number of the
Client that is allowed to log on to the Server.
Default value is 0.
System\MinDevMonBuild
DWORD value that specifies minimum build version number of the
Device Monitor that is allowed to log on to the Server.
Default value is 0.
APPENDIX A. STRATA CS CONFIGURATION SETTINGS
BETA DOCUMENT - PRELIMINARY & CONFIDENTIAL
A-33
APPENDIX B
APPENDIX B
COMMAND LINE OPTIONS
Starting Strata CS from the command line
You can use optional command line arguments to log on to the Strata CS
Administrator or Client using the Run command of the Start menu, from within
an application, or from a Desktop shortcut, for example:
"C:\Program Files\Strata CS\Test Admin\TVAdmin.exe" /Server=TVTest /station=17
Use the command line options shown in this section when logging in.
Command line options
/Server=<Server name>
Name of the Strata CS Server on your network that you want to log in to.
Useful for running a Client or Administrator against a test Server.
If you do not use this option, Strata CS logs you in using the name of the
Strata CS Server stored in the Windows NT /2000 registry, set when you
install Strata CS.
/station=<station number>
Station ID assigned for this session.
If you do not use this option, Strata CS logs you in using the station
number stored in the Windows NT/2000 registry, set when you install
Strata CS, or when you run TVConfig.exe.
/allowmultiple
Allows more than one Administrator or Client to run simultaneously on
a machine. Useful for agents in an ACD workgroup who share a
computer, or who want to log in to one Client to answer queue calls and
another Client to manage personal calls at their extensions.
If you do not use this option, Strata CS allows one instance of the
Administrator or Client to run on a machine.
/user=<user name>
User name under which you want to log on.
If you do not use this option, the Administrator or Client prompts you for
your user name at startup.
BETA DOCUMENT - PRELIMINARY & CONFIDENTIAL
Command line options
/password=<password>
Password for the user account you use to log on.
If you do not use this option, the Administrator or Client prompts you for
your password at startup.
/backup
Administrator only. Performs an immediate online backup of the
Strata CS database using the current System Settings, and then exits the
Administrator when the backup is complete. See “Backing up Strata CS”
on page 11-11.
/sentence
Administrator only. Enables the Tools menu selection Test Sentences,
which allows you to listen to system prompts in context over your
telephone. See “Testing system prompts” on page 12-10.
B-2
STRATA CS ADMINISTRATOR MANUAL
BETA DOCUMENT - PRELIMINARY & CONFIDENTIAL
APPENDIX C
APPENDIX C
IP GATEWAY CONFIGURATION
WORKSHEET
This appendix provides a worksheet to help you create a unified dialing plan
before connecting Strata CS Servers over IP Gateway connections. Using this
worksheet you can avoid conflicts between connected Servers, such as
overlapping extensions or auto attendant numbers. You can also plan consistent
access codes for dialing services.
For complete information about IP Gateways, see Chapter 13, “Configuring
Internet Telephony Support.”
Two worksheets are presented, an illustrated sample, and a blank worksheet that
you can copy for your use.
BETA DOCUMENT - PRELIMINARY & CONFIDENTIAL
IP Gateway Configuration Worksheet
Server 1
Server 2
Name
New York
Chicago
Contact
Tom Rand 123-456-7890
Amy Lum 098-765-4321
Internet Span Address
10.45.67.89
10.65.43.21
Extensions begin with
1
2
Auto attendants begin with
81
82
IP Gateways
To Server 1
To Server 2
On Server 1
Name:
Local Server 1 extension:
Local Server 1 password:
N/A
On Server 2
Name:
New York
Local Server 2 extension: 222
Local Server 2 password: 2121
Chicago
111
1212
N/A
Internet-to-Centrex/PBX Extension Service: Internal Dial Tone
To Server 1
From Server 1
To Server 2
Svr 1 access code: 71
Uses IP Gateway: Chicago
N/A
From Server 2
Svr 2 access code: 71
Uses IP Gateway: New York
N/A
Other Internet Dialing Services
Name
Bell Atlantic
analog
Bell Atlantic
Centrex
Type
X
o IP-to-Phone
o IP-to Centrex
X
o IP-to-Phone
o IP-to Centrex
o IP-to-Phone
o IP-to Centrex
o IP-to-Phone
o IP-to Centrex
From Server
Access
Code
To Server
Access
Code
Chicago
77
New York
9
New York
Chicago
78
New York
8
New York
IP Gateway
IP Gateway Configuration Worksheet
Server 1
Server 2
Name
Contact
Internet Span Address
Extensions begin with
Auto attendants begin with
IP Gateways
To Server 1
To Server 2
On Server 1
Name:
Local Server 1 extension:
Local Server 1 password:
N/A
On Server 2
Name:
Local Server 2 extension:
Local Server 2 password:
N/A
Internet-to-Centrex/PBX Extension Service: Internal Dial Tone
To Server 1
From Server 1
Svr 1 access code:
Uses IP Gateway:
N/A
From Server 2
Name
To Server 2
Svr 2 access code:
Uses IP Gateway:
Type
o IP-to-Phone
o IP-to Centrex
o IP-to-Phone
o IP-to Centrex
o IP-to-Phone
o IP-to Centrex
o IP-to-Phone
o IP-to Centrex
From Server
N/A
Access
Code
To Server
Access
Code
IP Gateway
APPENDIX D
APPENDIX D
USING QUICKNET AND E-TEL WITH
STRATA CS
CHAPTER CONTENTS
Using Quicknet hardware with Strata CS . . . . . . . . . . . . . . . . . . . . D-2
Using an E-tel FreeRide IP phone with Strata CS . . . . . . . . . . . . D-12
BETA DOCUMENT - PRELIMINARY & CONFIDENTIAL
Using Quicknet hardware with Strata CS___________________
Quicknet’s Internet PhoneJACK, Internet LineJACK and Internet PhoneCARD
are standard H.323 terminals that enable you to use a regular analog telephone to
make or receive calls over the Internet or an IP network by using Strata CS’s
Internet Telephony support. You can set up a remote Strata CS extension that is
connected to your Strata CS Server over TCP/IP. If your Strata CS Server has a
Dialogic IPLink board installed, you can use a phone connected to a Quicknet
card to access Strata CS over IP.
This appendix contains two sections, one for Internet Switchboard version 3.5 and
one for version 4.0. Refer to the section for the version you use.
n
For Internet Switchboard 3.5, see the next section.
n
For Internet Switchboard 4.0, see page D-6.
Using Quicknet with Internet Switchboard 3.5
Setting up Quicknet to dial Strata CS
1.
Start Internet Switchboard if it is not already running. Choose Start >
Programs > Internet Switchboard > Internet Switchboard.
2.
Choose Phone > Switchboard Wizard. Click Next to continue.
3.
On the Main Switchboard wizard screen, choose Telephone Gateways
from the Switchboard drop-down list. Click Next to continue.
D-2
STRATA CS ADMINISTRATOR MANUAL
BETA DOCUMENT - PRELIMINARY & CONFIDENTIAL
4.
On the Telephone Gateways wizard screen, right-click in the list of
connection types and choose New > Gateway. The H.323 Gateway
dialog box opens.
5.
Enter the following required information:
n
Top unlabeled field. Enter a name for new H.323 Gateway.
n
Number. Enter one or more digits that you want to press at your
Quicknet phone’s dial tone to reach your Strata CS Server.
n
Gateway. Enter the same name that you entered in the top unlabeled
field.
n
Address. Enter the Strata CS IP address. This address is the IP
address of the Strata CS Server’s Internet span. Ask your Strata CS
system administrator for this number.
n
Tel./Ext. To be connected to a specific party on the Strata CS Server,
enter the DID number of the party. The party can be a user, auto
attendant, or IVR Plug-in. If you leave this field blank, the call will
go to the party specified in the Internet span (by default the auto
attendant).
APPENDIX D. USING QUICKNET AND E-TEL WITH STRATA CS
BETA DOCUMENT - PRELIMINARY & CONFIDENTIAL
D-3
6.
Click OK to return to the Telephone Gateways wizard screen. Your new
Gateway appears in the list.
7.
Click Next to continue.
8.
Click Next on the SpeedDials wizard screen.
9.
Click Finish.
When you pick up the phone attached to your Quicknet card, dial the number for
your Gateway, and press #, you are now connected to the Strata CS Internet span.
Depending on how the span is set up to route the call, or if you specified a DID
number, you can be connected to the auto attendant, a user, or an IVR Plug-in.
Using a Preferred address to dial extensions directly
If the Strata CS Internet span routes calls to an auto attendant, you can make your
Strata CS Gateway preferred. Doing this lets you pick up your Quicknet phone
and dial a Strata CS extension immediately, without having to dial the Gateway
number to Strata CS first.
For example, if your Strata CS Gateway number is 5 and your co-worker Steve’s
extension is 123, you would normally reach Steve by dialing 5#, waiting for the
auto attendant to answer, and then dialing 123. By making the Gateway preferred,
you can reach Steve by picking up the phone and dialing 123#.
D-4
STRATA CS ADMINISTRATOR MANUAL
BETA DOCUMENT - PRELIMINARY & CONFIDENTIAL
To make a Gateway preferred
1.
In Internet Switchboard, click Speed Dials to show the list of Gateways.
2.
Right-click your Strata CS Gateway in the list and choose Preferred. A
check mark appears next to Preferred in the shortcut menu, and a “P”
appears next to the Gateway name in the list.
Setting up the Strata CS IP address as a Hot Line
You can use Quicknet Internet Switchboard to make your Strata CS Gateway a
Hot Line number. Doing this enables you to connect to Strata CS just by picking
up the receiver.
1.
In Internet Switchboard, choose Phone > Switchboard Wizard. Click
Next to continue.
2.
On the Main Switchboard wizard screen, choose Telephone Gateways
from the Switchboard drop-down list. Click Next to continue.
APPENDIX D. USING QUICKNET AND E-TEL WITH STRATA CS
BETA DOCUMENT - PRELIMINARY & CONFIDENTIAL
D-5
3.
On the Telephone Gateways screen, select your Strata CS Gateway.
If you have not created a Gateway yet, follow the instructions in the
section, “Setting up Quicknet to dial Strata CS” on page D-2.
4.
Check Hot Line.
5.
Click Next to continue.
6.
Click Next on the SpeedDials wizard screen.
7.
Click Finish.
The IP address of Strata CS's Internet span is now set up as a Hot Line. Whenever
you pick up the receiver of the phone attached to the Quicknet card, a call is
automatically placed to Strata CS.
Using Quicknet with Internet Switchboard 4.0
Setting up Quicknet to connect to Strata CS
The following instructions explain how to create a Preferred Internet Switchboard
Gateway that enables you to dial outbound calls as if you were sitting at a normal
Strata CS station. You do not need to dial * and Strata CS's IP address, or the
access code for the Gateway, in order to connect to Strata CS. As soon as you pick
up the receiver of the Quicknet phone you can dial Strata CS extensions, dial
access codes (such as 9) to place outbound calls through the Strata CS Server, log
in to your account, and do anything else you could do from a remote station.
Whenever you place a call, the process of logging in to Strata CS is handled
automatically behind the scenes, using your extension and password as you enter
them in the following instructions.
D-6
STRATA CS ADMINISTRATOR MANUAL
BETA DOCUMENT - PRELIMINARY & CONFIDENTIAL
The following tasks are explained in the sections that follow:
n
Creating the Gateway
n
Eliminating access code conflicts
n
Transferring and handling calls with a Quicknet phone
Creating the Gateway
1.
Start Internet Switchboard if it is not already running. Choose Start >
Programs > Internet Switchboard > Internet Switchboard.
2.
Click Show SpeedDials if the SpeedDials pane is not already showing.
3.
Right-click in the SpeedDials pane and choose New > Gateway.The
H.323 Gateway dialog box opens.
4.
Enter the required information in the following fields in the H.323
Gateway dialog box:
n
Top unlabeled field. Enter a name for new H.323 Gateway.
n
Number. Enter one or more digits that you want to serve as the access
code for this Gateway. Even though you will make this Gateway
Preferred, so that you will never have to dial the access code, you
must still enter a number. Do not enter a number that is the same as
a Strata CS dialing service access code.
n
Gateway. Enter the same name that you entered in the top unlabeled
field.
APPENDIX D. USING QUICKNET AND E-TEL WITH STRATA CS
BETA DOCUMENT - PRELIMINARY & CONFIDENTIAL
D-7
n
Address. Enter the IP address of the Strata CS Server’s Internet span.
Ask your Strata CS system administrator for this number.
n
Account. Enter your Strata CS extension.
n
PIN. Enter your Strata CS password. The extension and password are
sent to Strata CS behind the scenes so that Strata CS automatically
logs you in when you make a call.
5.
Click OK to return to the Telephone Gateways main screen. Your new
Gateway appears in the SpeedDials pane.
6.
Right-click your Gateway in the list.
7.
Check Preferred. Doing this enables you to pick up the Quicknet phone
and dial numbers directly through Strata CS, without having to dial
Strata CS’s IP address first, or even the access code for the Strata CS
Gateway.
When you are done, the SpeedDials pane should appear as shown in the
following illustration, with a P next to your Gateway.
D-8
STRATA CS ADMINISTRATOR MANUAL
BETA DOCUMENT - PRELIMINARY & CONFIDENTIAL
Eliminating access code conflicts
If there are any Gateways with the same access codes as Strata CS dialing
services, you must change the access codes in Quicknet. For example, if there is
a Quicknet Gateway with access code 9, and 9 is the access code you dial to get
an outside line in Strata CS, you must change the Quicknet Gateway’s access code
to a number other than 9.
Look in the Telephone Gateways list under the Number column. If there is a
conflict, right-click the Gateway and select Properties. Change the access
code—the field will be called either Number or Extension, depending on the type
of Gateway—and then click OK.
Transferring and handling calls with a Quicknet phone
You must make a configuration change to Quicknet in order to transfer and handle
calls using Strata CS's telephone commands. After the configuration change is
made, you can transfer and handle Strata CS calls just as you would from a normal
phone.
The configuration change involves the Flash command. When using Strata CS
from a remote phone—IP or otherwise—you must press ** instead of Flash. In
order to use ** from Quicknet, you must first do the following:
1.
From the Internet Switchboard menu, choose Show Advanced
Features, if the advanced features are not already showing.
2.
From the Internet Switchboard menu, choose Properties. The Internet
Switchboard Properties dialog box opens.
3.
Click the Calling tab.
APPENDIX D. USING QUICKNET AND E-TEL WITH STRATA CS
BETA DOCUMENT - PRELIMINARY & CONFIDENTIAL
D-9
4.
Click Audio.
5.
Uncheck Allow Remote Volume Control. By default Quicknet uses **
as a volume control hot key. Unchecking this box disables Quicknet’s **
feature so your ** entries can be sent to Strata CS.
6.
Click OK to return to the Properties dialog box.
7.
Click OK to close the Properties dialog box.
You can now press ** while in a call—from either the telephone keypad or your
PC's keyboard—and send a Flash command to Strata CS.
For complete information on call handling using Strata CS's telephone
commands, see Chapter 4 of Strata CS Client User Guide.
Important note about Quicknet Hot Lines
It is recommended that you do not set up a Quicknet Gateway to Strata CS as a
Hot Line. This Quicknet feature allows you to automatically send digits as soon
as you pick up the receiver of the Quicknet phone, such as the digits necessary to
log in to Strata CS. If the digits you dial are entered too quickly, the call will fail.
Calling a Quicknet card from Strata CS
To call a phone attached to a Quicknet card from Strata CS, do the following:
1.
From the Strata CS Client, choose File > New > Call.
2.
Choose the Number tab in the Place Call To dialog box.
3.
From the Call using drop-down list, choose an Internet dialing service.
Your system must have an Internet dialing service available for you to
call a Quicknet card.
4.
In the Address field, enter the IP address of the Quicknet card.
5.
Click OK to place the call.
If a user’s calls are forwarded to a Quicknet phone, you can dial the user's
extension and your call will automatically be forwarded to the Quicknet phone.
See the next section.
Forwarding your calls to a Quicknet phone
You can forward your calls to a Quicknet card, so that anyone who dials your
extension is forwarded to your Quicknet phone. To do so:
1.
From the Strata CS Client, choose Tools > Call Forwarding. The Call
Forwarding dialog box opens.
2.
Check Forward Calls.
D-10
STRATA CS ADMINISTRATOR MANUAL
BETA DOCUMENT - PRELIMINARY & CONFIDENTIAL
3.
From the Call using drop-down list, choose an Internet dialing service.
Your system must have an Internet dialing service available for you to
call a Quicknet card.
4.
In the Address field, enter the IP address of the Quicknet card.
5.
Click OK.
Using the Strata CS Client with a Quicknet card
While working remotely, you can access most Strata CS Client functions through
your browser, using the Strata CS Web Client. See Strata CS Client User Guide
for more information.
However, you cannot use the Strata CS Client to place or manage calls (transfer,
conference, and so on) while you are using a Quicknet connection. Future Strata
CS releases will enable you to do so.
For More Information
See Chapter 13, “Configuring Internet Telephony Support” in Strata CS
Administrator Manual for more information.
Contacting Quicknet
For more information about setting up and using Quicknet cards and Internet
Switchboard, contact Quicknet using the following information:
Quicknet Technologies
520 Townsend Street, Suite D
San Francisco, CA 94103 USA
Phone: 415-864-5225
Fax: 415-864-8388
E-mail: [email protected]
Web: www.quicknet.net
APPENDIX D. USING QUICKNET AND E-TEL WITH STRATA CS
BETA DOCUMENT - PRELIMINARY & CONFIDENTIAL
D-11
Using an E-tel FreeRide IP phone with Strata CS ____________
E-tel’s FreeRide phone connects to your PC and LAN and enables you to make or
receive calls over the Internet or a private IP network. Using the FreeRide phone
together with Strata CS’s Internet Telephony support, you can set up a remote
Strata CS station that is connected to your Strata CS Server over TCP/IP. You can
pick up the FreeRide phone and dial Strata CS extensions, dial access codes (such
as 9) to place outbound calls through the Strata CS Server, log in to your account,
and do anything else you could do from a normal Strata CS station.
For instructions on connecting a FreeRide phone and installing Configuration
Builder, please refer to your e-tel documentation.
To set up a FreeRide phone as a Strata CS station, you must make the following
changes to the configuration of the FreeRide phone, using e-tel’s Configuration
Builder software.
Setting up a FreeRide phone to connect to Strata CS
The following instructions describe how to configure a remote e-tel FreeRide
phone to act as a Strata CS station.
1.
Start e-tel’s Configuration Builder software.
2.
Click Settings and Support.
3.
Make sure the Connect Using box matches the COM port into which
the FreeRide phone is plugged. To check that your selection is correct,
click Test. After a few seconds, a message box appears with the test
results.
If the COM port is correct, but the test has failed, check the following
items:
n
n
n
n
4.
Make sure the phone has power. Check the LCD display screen for
characters.
Check that the serial cable is properly connected.
Check the COM port settings from Control Panel to make sure that
there are no problems with the port.
Reboot the phone, wait 20 seconds, and then test communication
again.
When the test is successful, click Done.
APPENDIX D. USING QUICKNET AND E-TEL WITH STRATA CS
BETA DOCUMENT - PRELIMINARY & CONFIDENTIAL
D-13
5.
On the main Configuration Builder screen, click Network
Configuration.
6.
Enter the FreeRide phone’s IP address and Subnet mask. For these
numbers contact your system administer or consult your LAN’s
configuration.
7.
In the Default Gateway boxes, enter the IP address of the gateway on
your LAN through which IP traffic to external addresses passes.
8.
Click Done. When prompted to reboot your phone, do so.
9.
Start Configuration Builder again, and on the main screen, click
General Configuration.
10. In My Phone Number, enter your Strata CS extension.
11. In Codec, select the codec that matches the codec used by the Strata CS
Server’s Internet span. To find that codec, use the Strata CS
D-14
STRATA CS ADMINISTRATOR MANUAL
BETA DOCUMENT - PRELIMINARY & CONFIDENTIAL
Administrator as follows: go to the Trunks view, right-click the Internet
span, choose Open Span, and click the Codecs tab. The codec used by
the span is displayed on that tab.
12. If the Strata CS Server uses VAD, then check Enable VAD. You can
check whether the Strata CS Server uses VAD by using the Strata CS
Administrator as described in step 11. The VAD option is on the Codecs
tab.
13. Click the Dial Plan tab.
On the Dial plan tab you configure how the FreeRide phone responds to
each initial digit you can press on it. To set up FreeRide as a Strata CS
station, you must configure each digit to connect to the Strata CS
Server’s IP address and log in using your extension and password. In the
example above, when you pick up the FreeRide phone and dial 333, the
dial plan reads the initial digit, 3, and connects to the Destination
Address 10.11.12.7 (the Strata CS Server), then logs in using extension
208 and password 209, then dials extension 333 on the Server. All this
occurs behind the scenes; the result is that you are connected
immediately to extension 333.
14. Click Add or Edit to configure each digit between 0 and 9, and the #
character. For each digit, do the following:
n
n
n
Under Destination Address, enter the IP address of your Strata CS
Server.
Under Prefix Add, enter your Strata CS extension and password
separated by the star character (*) as follows:
*<extension>*<password>*.
Specify a minimum and maximum length of the dial string as shown
in the illustration above. For most digits, this will be the length of a
Strata CS extension. For 0, specify a minimum and maximum length
APPENDIX D. USING QUICKNET AND E-TEL WITH STRATA CS
BETA DOCUMENT - PRELIMINARY & CONFIDENTIAL
D-15
of 1, since 0 is always dialed alone. For 9 (or whichever digit is your
Server’s access code for an outside line, specify a minimum length of
7 and a maximum of 10, to cover the length of a typical external
phone number. If you will be dialing longer numbers, for instance to
make international calls, set your maximum accordingly. For the #
character, specify a minimum and maximum of 1.
15. Click the Time Outs tab.
16. In Terminating Digit, delete the # character. By default, FreeRide
phones use # as an optional user input to signal the end of a dial string
and commence dialing. In order for you to press # to log into your Strata
CS account, as you would do from a normal station, you must delete the
use of # as FreeRide’s Terminating Digit.
17. Click Done.
Transferring and handling calls with a FreeRide phone
When you are connected to Strata CS—either on a call you placed or on a call you
received from another Strata CS user—you can use Strata CS’s Telephone
Commands to transfer, conference, or otherwise manipulate the call, just as you
would from a normal Strata CS station. The exception is that ** replaces Flash.
For example, to transfer a call you would normally press Flash 1. From a remote
FreeRide phone, press ** 1.
D-16
STRATA CS ADMINISTRATOR MANUAL
BETA DOCUMENT - PRELIMINARY & CONFIDENTIAL
E-tel contact information
For more information about FreeRide phones and other e-tel products, you can
contact e-tel in the following ways:
E-tel corporation
207 Quaker Lane, Suite 200
West Warwick, RI 02893
Phone: 401.826.1520
Fax: 401.826.4477
Web: www.e-telcorp.com
APPENDIX D. USING QUICKNET AND E-TEL WITH STRATA CS
BETA DOCUMENT - PRELIMINARY & CONFIDENTIAL
D-17
APPENDIX E
APPENDIX E
USING PERFORMANCE COUNTERS
CHAPTER CONTENTS
The Strata CS performance counters. . . . . . . . . . . . . . . . . . . . . . . E-2
Viewing performance counters in Windows NT/2000 . . . . . . . . . . . E-2
BETA DOCUMENT - PRELIMINARY & CONFIDENTIAL
The Strata CS performance counters______________________
When the Strata CS Server is installed, the installer registers with Windows
NT/2000 a set of Strata CS-specific performance counters for tracking statistics
of the Server as it runs. The counters are organized into two groups: Strata CS
Calls and Strata CS Devices. The counters can be monitored by system
administration tools such as the performance monitoring utilities provided with
Windows.
The Strata CS Calls group has the following counters:
n
Existing calls. Total number of active calls currently being handled by
Strata CS.
n
Total calls. Total number of calls handled by the Server since it was last
started.
The Strata CS Devices group has the following counters:
n
Stations. Total number of configured stations (phones) in the system.
n
Station in use. Number of stations off-hook.
n
% stations in use. Percentage of stations off-hook.
n
Trunks. Total number of configured trunks in the system.
n
Trunks in use. Number of trunks allocated to calls.
n
% trunks in use. Percentage of trunks allocated to calls.
n
Voice Resources. Total number of voice resources available to Strata
CS.
n
n
Voice Resource in use. Number of voice resources currently being used.
% voice resources in use. Percentage of voice resources currently being
used.
Viewing performance counters in Windows NT/2000_________
The performance monitoring utility that comes with Windows NT/2000 is the
application most commonly used to view performance counter information. You
can add Strata CS counters to a performance monitor’s display just as you can
with the pre-installed Windows counters.
Note: This appendix does not describe the performance monitoring utility in
depth. See the utility’s Help if you need more detailed information.
In Windows NT, the utility is a stand-alone program called the Performance
Monitor. To start Performance Monitor, choose Start > Administrative Tools >
Performance Monitor.
E-2
STRATA CS ADMINISTRATOR MANUAL
BETA DOCUMENT - PRELIMINARY & CONFIDENTIAL
In Windows 2000, the utility is part of the Microsoft Management Console and is
called the System Monitor. To start the Management Console, choose Start >
Administrative Tools > Performance. The following examples use the System
Monitor from Windows 2000.
To add the Strata CS counters to the System Monitor display, right-click on the
display and choose Add Counters from the shortcut menu. In the Add Counters
dialog box, choose one of the Strata CS groups from the Performance object
drop-down list.
As shown in the next illustration, Strata CS performance counters for the group
you have chosen are listed under Select counters from list. To add a counter,
select it from the list and click Add. Repeat this process for each counter that you
want to display. When you have selected all of the counters that you want to view,
click Close.
APPENDIX E. USING PERFORMANCE COUNTERS
BETA DOCUMENT - PRELIMINARY & CONFIDENTIAL
E-3
The counters you have selected are listed below the performance graph in the
main System Monitor window.
E-4
STRATA CS ADMINISTRATOR MANUAL
BETA DOCUMENT - PRELIMINARY & CONFIDENTIAL
GLOSSARY
A and B Bits Signaling information on a T1 line. T1 carriers set the A and B bits on
or off to signal events and actions such as incoming call, line dropped, pick up, hang up,
and wink.
See also: robbed-bit signaling (p. G-22), T-1 (p. G-24), wink (p. G-27)
A-Law The voice amplitude compression/expansion standard that is used in Europe and
in areas outside of North American influence.
Access code When placing a call via a Strata CS phone, the preliminary number to
dial to access a particular dialing service. For example, dial “7” to access a Centrex/PBX
extension.
Account code Number that a user enters to accompany a phone call, that identifies
the call for billing or other purposes. Strata CS can be configured to prompt users to enter
account codes whenever they place calls. Users can also enter account codes voluntarily
before or during calls.
ACD agent Member of An ACD workgroup.
See also: ACD workgroup (p. G-1), automatic call distribution (ACD) (p. G-3)
ACD workgroup Automatic call distribution method in which a workgroup of agents
answers calls to a single extension, and callers wait on hold until an agent is available.
Examples of ACD workgroups include a sales or technical support department. An ACD
workgroup uses an ACD workgroup user with a special routing list to answer calls and
forward them to a workgroup that contains the agents. The ACD workgroup method is not
as fully featured as the Strata CS call center method of call distribution.
See also: ACD agent (p. G-1), call center (p. G-4)
ACD workgroup user Special type of user for use in creating an ACD workgroup.
See also: ACD workgroup (p. G-1), ACD agent (p. G-1)
Active State in which a Strata CS greeting or routing list is used to handle incoming calls
by default. Only one greeting and one routing list can be active at a time; the rest are in
storage and are not used by incoming calls unless specified in a call rule.
See Also:Active greeting (p. G-1), Active routing list (p. G-1)
Active greeting The greeting that callers hear when they reach voice mail. Specified
callers can hear another greeting if you apply a call rule.
See also: greeting (p. G-14), call rule (p. G-19)
Active routing list The routing list that incoming calls to an extension follow.
Specified callers can follow another routing list if you apply a call rule.
BETA DOCUMENT - PRELIMINARY & CONFIDENTIAL
See also: routing list (p. G-22), call rule (p. G-6)
Active Settings Collection of Strata CS settings that together determine how
incoming calls are handled. Active Settings include the active routing list, active greeting,
Where I Am location, and ringer status. Active settings change with personal status and can
also be changed directly. Changing active settings directly overrides personal status.
See Also: personal status (p. G-19), Where I Am (p. G-27), greeting (p. G-14), routing
list (p. G-22)
ActiveX Microsoft’s specification for language-independent modules that can be
imbedded in an application and accessed as if they were part of the application.
See also: ActiveX control (p. G-2)
ActiveX Control Also called: control
The Windows-based software components that can be embedded in applications to add new
functionality. Hundreds of controls are available to perform data access, imaging, host
connectivity, multimedia, and so forth.
Administrator Also called: Strata CS administrator, system administrator
The person who is primarily responsible for, or in charge of, the Strata CS system. The
Strata CS administrator can set up users, trunks, auto attendants, and modify all other
system settings.
See also: Administrator (Strata CS program) (p. G-2)
Administrator (Strata CS program) Also called: Strata CS Administrator
The Windows-based software application that is used to configure, monitor, and manage
the Strata CS system.
See also: administrator (p. G-2)
Administrator User Any Strata CS user who has administrator permissions, which
allow the user to log on to the Strata CS Administrator. Also indicates the Admin user that
ships by default with Strata CS.
See also: Administrator (Strata CS program) (p. G-2), Operator user (p. G-18)
After Hours greeting An audio greeting that a caller hears after business hours,
usually accompanied by an invitation to leave a voice mail message.
See also: active greeting (p. G-1), grab-and-hold greeting (p. G-13), greeting (p. G-14)
Agent User who answers calls to a call center or ACD workgroup.
See Also: call center (p. G-4), ACD workgroup (p. G-1)
GLOSS-2
STRATA CS ADMINISTRATOR MANUAL
BETA DOCUMENT - PRELIMINARY & CONFIDENTIAL
Analog DID Direct Inward Dialing (DID) over special analog phone lines that do not
ring when a call arrives. Typically requires a special box such as those available from
Exacomm to connect to regular analog devices such as Dialogic boards.
See also: direct inward dial (DID) (p. G-11)
Analog Telephony A type of telephone transmission or switching in which the
transmitted analog signal consists of sound traveling over lines as variations in an electrical
current. The signal is in essentially the same format as the original spoken signal. Analog
signals are very vulnerable to interference and noise on the line. Over long distances,
analog transmissions can fade, distort, or pick up static. They are also limited to the
bandwidth of amplifiers, analog-to-digital converters, and other network equipment.
See also: digital telephony (p. G-10)
Analog Trunk Also called: analog line
A regular (nondigital) phone line from the telephone company.
See also: analog telephony (p. G-3), digital trunk (p. G-10), trunk (p. G-26)
Application Programming Interface (API) Also called: API
A set of routines that an application program uses to access functions provided by another
application, device, or service. For example, the Windows Telephony API (TAPI) provides
a device-independent means to access devices such as phones, modems, and fax machines.
See also: Messaging Application Programming Interface (MAPI) (p. G-17), Telephony
Application Programming Interface (TAPI) (p. G-25)
Archive A copy of information or data that is placed into long-term storage.
Audiotex Generic term for a subset of interactive voice response equipment and
services. Audiotex typically presents telephony-based voice menus that offer selection
options. For example, “Press 1 to hear directions, or 2 for our latest specials.”
Auto attendant Strata CS item that automatically answers calls to a phone number,
enables callers to dial extensions, and offers callers other options that you define, for
example, “For Sales, press 1, For Support, press 2.”
Automatic Call Distribution (ACD) Also called: call distribution
See: ACD workgroup (p. G-1), call center (p. G-4)
Automatic Number Identification (ANI) Also called: ANI
The identification of the originating phone number of an incoming call. For example, if a
person calls an 800 number from 617 555 1212, the device that answers the call can retrieve
the ANI digits (617 555 1212) and use that information to identify the caller.
See also: caller ID (p. G-6)
Backup A copy of information for redundancy, so that the information can be restored
if it is lost, damaged or needed for other reasons.
GLOSS-3
BETA DOCUMENT - PRELIMINARY & CONFIDENTIAL
Blind Transfer A type of call transfer in which a user transfers a call to another
extension without first speaking to the recipient.
See also: external transfer (p. G-12), supervised transfer (p. G-24), transfer (p. G-25)
Blocked Number A phone number that cannot be accessed from any Strata CS
Client because it has been blocked by the Strata CS system administrator.
See also: blocking (p. G-4)
Blocking Also called: call blocking
A Strata CS feature that enables the Strata CS system administrator to prevent Clients from
calling a specific telephone number or certain types of telephone numbers. For example,
access to long-distance numbers, international numbers, and group conversation lines can
be blocked by the Strata CS system administrator.
See also: blocked number (p. G-4)
Browser A software application that is used to view HTML pages or Web sites. Strata
CS supports Netscape Navigator and Microsoft Internet Explorer browsers.
Business Communications Platform (BCP) Also called: BCP
The Dialogic hardware used to connect analog telephone trunks and user extensions to the
Strata CS Server. The BCP also provides telephony functions such as recording voice files,
playing voice files, and processing touch-tone digits.
See also: touch-tone digit (p. G-25), trunk (p. G-26)
Call A connection between two parties (people or machines). Also the actions and
operations required to establish and maintain a connection between two parties.
Call Accounting A system that stores and organizes call detail recording
information, which can then be used to generate reports.
See also: call detail recording (CDR) (p. G-5)
Call Announcing Also called: call screening, screening a call
A Strata CS feature that verbally announces a caller before putting a call through, allowing
the recipient to decide whether or not to accept the call. Strata CS announces the name of
callers it recognizes, and can prompt unidentified callers to say their names before they hear
the recipient’s phone ring.
Call Center Any workgroup of agents (sales, support, and so forth) whose primary job
is to place or answer calls. Inbound call centers use automatic call distribution systems and
outbound call centers use predictive dialers. These automate the handling of large volumes
of calls.
See also: automatic call distribution (ACD) (p. G-3), predictive dialer (p. G-20)
GLOSS-4
STRATA CS ADMINISTRATOR MANUAL
BETA DOCUMENT - PRELIMINARY & CONFIDENTIAL
Call Center Agent Also called: agent
User, operator, or representative who participates in a queue. Typically a person handling
sales or customer service calls.
See also: automatic call distribution (ACD) (p. G-3)
Call Center Agent License A license purchased from Toshiba for each Call
Center Agent in a queue. In an ACD workgroup, a license purchased from Toshiba for each
agent on whom you want to run reports using the Call Center Reporter. If ACD workgroup
reports are made by trunk only, just one license is required.
Call Control Also called: call handling
All of the options that can be used to control a call including answering, holding,
forwarding, transferring, and conferencing.
Call Detail Recording (CDR) Also called: call accounting, CDR
A feature that allows a telephone system to collect information and statistics about
incoming and outgoing calls. Typically collected by a PBX, call detail recording
information can be used to generate call usage reports that identify callers and recipients,
duration of calls, and on what station and trunk calls occurred. Strata CS Reporter and Call
Log provide CDR functionality.
See also: private branch exchange (PBX) (p. G-20)
Call forwarding Also called: “follow me” call forwarding, forwarding a call
A feature that, without answering an incoming call, routes it to an appropriate extension,
phone number, voice mail system, and so forth.
Call Log A view in Strata CS that displays a record of all calls made on the system.
Administrators can use the Call Log to analyze system usage patterns. Individual users can
view their own Call Log information to review what calls they have answered, placed, or
missed.
Call Monitor A view in the Strata CS Client that displays a user’s current call activity,
and from which a user manages calls.
Call Pickup A Strata CS feature that allows a Client to answer an incoming call that is
ringing on another phone.
Call Progress The series of events and states that occur during a call. These can
include dialing, ringing, busy signal, and so forth.
Call Pursuit Also called: “follow me” service
A Strata CS feature that tracks down a person at any of the phone numbers that are included
on a routing list.
Call Recording A feature in the Strata CS Client that allows a user to record a
telephone conversation.
GLOSS-5
BETA DOCUMENT - PRELIMINARY & CONFIDENTIAL
Call Routing Also called: routing a call
The process of sending a call to a succession of destinations (extensions or external
numbers), or several destinations simultaneously. Also describes a variety of methods for
directing a call within an organization, for example, using an auto attendant, DID, or ACD
workgroup.
See also: auto attendant (p. G-3), automatic call distribution (ACD) (p. G-3), direct
inward dial (DID) (p. G-11)
Call Rules A Strata CS feature that allows users to automatically handle calls from
specific callers using a unique routing list and greeting. For example, users can create a call
rule for their spouses so that when the spouses call, they are routed first to a cell phone
number, then their home number, and finally to a unique voice mail greeting tailored
specifically for them.
See also: routing list (p. G-22)
Call Waiting A feature that alerts a user who is already on a call that another call is
arriving. If call waiting is not enabled, incoming calls are automatically sent to voice mail.
Caller ID An optional service provided by Regional Bell Operating Companies
(RBOC’s) on analog lines that identifies a caller by providing the originating phone number
and (if enabled) the caller’s name.
See also: automatic number identification (ANI) (p. G-3), caller ID on call waiting (p.
G-6), dialed number identification service (DNIS) (p. G-9), direct inward dial (DID) (p.
G-11), Regional Bell Operating Company (RBOC) (p. G-21)
Caller ID on Call Waiting A feature available on some phones that provides
identification of incoming callers when the recipient is already on a call.
See also: call waiting (p. G-6), caller ID (p. G-6)
Carrier Any company such as a RBOC, long-distance phone company, or CLEC that
provides telecommunications circuits and services such as analog lines, T1 lines, local or
long-distance service and caller ID, ANI, or DID/DNIS services.
See also: automatic number identification (ANI) (p. G-3), caller ID (p. G-6), common
carrier (p. G-8), Competitive Local Exchange Carrier (CLEC) (p. G-8), dialed number
identification service (DNIS) (p. G-9), direct inward dial (DID) (p. G-11), private carrier
(p. G-20), Regional Bell Operating Company (RBOC) (p. G-21), T-1 (p. G-24)
Central Office (CO) Also called: CO
A telephone company facility where subscribers' phone lines are connected to switching
equipment.
Centrex A phone company service that provides PBX functionality such as extensions,
conferencing, call forwarding and transferring.
See also: call forwarding (p. G-5), conference call (p. G-8), private branch exchange
(PBX) (p. G-20), transfer (p. G-25)
GLOSS-6
STRATA CS ADMINISTRATOR MANUAL
BETA DOCUMENT - PRELIMINARY & CONFIDENTIAL
Channel Associated Signaling (CAS) Also called: CAS
A type of robbed-bit signaling usually used on E1 lines.
See also: E-1 (p. G-11), robbed-bit signaling (p. G-22)
Channel Service Unit (CSU) Also called: CSU
A device located on the customer’s premises that allows hardware such as Dialogic digital
network cards to connect to digital lines installed by a digital line provider, such as a T1
lines.
See also: digital line (p. G-10), digital service unit (DSU) (p. G-10), T-1 (p. G-24)
Circuit A physical connection of computer, telephony, and network equipment over
which a telephonic conversation takes place.
CLASS Telephone An analog telephone that supports Bell Communications
Resource (Bellcore) Custom Local Area Signaling Services (CLASS) features such as
caller ID, caller ID on call waiting, and message waiting. For a list of phones that have these
features, see Strata CS Installation & Maintenance Manual.
Client A computer that requests information from a Server computer over a network.
The client runs an application that requests the information from the Server, and then
displays it in a usable format.
See also: client/Server (p. G-7), Server (p. G-22)
Client (Strata CS Program) Also called: Strata CS Client (program)
A Strata CS software application employed by users on client computers. Used to make and
receive calls, access voice mail, create contact lists, and so forth. Also used to assign
customized routing lists and greetings for specific users.
See also: client (p. G-7),
Client License A license purchased from Toshiba for each Client logged on to the
Strata CS Server. For example, with five Strata CS Client licenses you can have a
maximum of five simultaneous Client applications logged on to the Server.
Client/Server A type of computing that splits processing between client computers
and Server computers over a network. Client computers manage the user interface, make
requests over the network to Server computers, and perform local processing of data.
Server computers process client requests and return only the results needed. Before
client/Server computing, clients were dumb terminals that displayed data that was
processed by a mainframe or minicomputer.
See also: client (p. G-7), Server (p. G-22)
Codec The technology that compresses and decompresses voice signals for
transmission over an IP network. When an IP link is established, both devices negotiate a
mutually supported codec that will be used. Since one codec may be preferable to another
GLOSS-7
BETA DOCUMENT - PRELIMINARY & CONFIDENTIAL
for bandwidth or voice quality reasons, codecs are listed in the Strata CS Administrator in
order of preference. Strata CS supports the following codecs: G.729A, G.723.1, G.711,
MSGSM, ETSI-GSM.
Common Carrier The local phone company or long-distance company that provides
telecommunications circuits and services to the general public. Common carriers are
regulated and licensed by state or federal agencies.
See also: private carrier (p. G-20)
Competitive Local Exchange Carrier (CLEC) Also called: CLEC
A company that competes with a LEC to provide local exchange service. CLECs are
allowed to buy access to the LEC network for resale, or they can build their own network.
See also: Local Exchange Carrier (LEC) (p. G-16)
Computer Telephone Integration (CTI) Also called: CTI
The integration of computers with standard telephone switches (PBX’s) to allow more
sophisticated switching. For example, a switch could supply a computer with a caller ID
for an incoming call. The computer could then look up the caller ID in a database and
provide the switch with appropriate routing information. Computer telephone integration
is just one aspect of computer telephony.
See also: caller ID (p. G-6), computer telephony (CT) (p. G-8), private branch exchange
(PBX) (p. G-20), switch (p. G-24)
Computer Telephony (CT) Also called: CT
Computer technology applied to telephony. CT is an umbrella term for such diverse
technologies as computer telephone integration (CTI), interactive voice response (IVR), IP
telephony, PC PBXs, and fax-on-demand.
See also: computer telephone integration (CTI) (p. G-8), fax-on-demand (p. G-12), interactive voice response (IVR) (p. G-15), IP telephony (p. G-16), PC PBX (p. G-19)
Conference Call A call that involves three or more callers.
Connection A “continuity of circuit” that enables two or more parties or devices to
communicate via a phone line.
Contact A record that contains a person's name, address and/or phone number.
See also: global contact (p. G-13), personal contact (p. G-19)
Contact Manager Also called: personal information manager (PIM), PIM
A software application that stores names, addresses, phone numbers, schedules, and other
personal information for contacts. Popular contact management software includes: Strata
CS Client, Act!, Goldmine, and Outlook.
See also: contact (p. G-8)
GLOSS-8
STRATA CS ADMINISTRATOR MANUAL
BETA DOCUMENT - PRELIMINARY & CONFIDENTIAL
Contact Manager Assistant Strata CS program that automatically displays
screen-pops with contact information when a contact from another contact manager calls.
Requires the Strata CS TAPI Service Provider.
See Also: contact manager (p. G-8), TAPI Service Provider (p. G-24)
Contact Voice Title An audio recording of a Strata CS contact’s name. When call
screening is enabled, this recording announces incoming calls from the contact.
Default Phone Number For a contact that has many phone numbers, the phone
number most frequently dialed to reach the contact. With speed dial, the default number is
dialed automatically.
See also: speed dial (p. G-23)
Device Monitor An application on the Strata CS Server and a view in the Strata CS
Administrator that displays the current status of all stations and trunks in the Strata CS
system.
See also: Administrator (Strata CS program) (p. G-2), station (p. G-23), trunk (p. G-26)
Dial-by-name directory A Strata CS feature that gives callers the ability to search
for a user by entering the first few letters of the user’s first or last name using their
telephone keypads.
Dial Plan The setting that defines how to dial local, long-distance, and international
phone numbers in a particular country or area.
Dial Tone The sound that callers hear after picking up a telephone indicating that they
can dial a number. Dial tone is provided by the local telephone company or PBX.
See also: private branch exchange (PBX) (p. G-20)
Dialed Number Identification Service (DNIS) Also called: DNIS
A feature of 800 and 900 telephone lines that provides the number that was dialed to the
receiving telephony system. This enables the receiving system to accurately route the call,
and allows for many 800 or 900 numbers to be routed through a single telephony system.
See also: T-1 (p. G-24)
Dialing Exception The rule defined by the Strata CS administrator that tells Strata
CS when it should dial the area code of a phone number, and when it should dial the number
as a local call. Strata CS invokes these rules whenever it dials a number automatically, such
as when a user places a call to a contact or returns a call from a voice mail message.
Dialing service Mechanism for routing outbound calls to the trunk type appropriate
for that call. For example, routing phone calls to a normal telephone service trunk, Internet
calls to an Internet trunk, and Centrex calls to a Centrex trunk. By default Strata CS comes
with one dialing service, Phone Number, that routes all calls to your telephone trunks.
When placing a call, users select the dialing service to use by dialing the access code for
that service before dialing the number, for example 9 to place an external call.
GLOSS-9
BETA DOCUMENT - PRELIMINARY & CONFIDENTIAL
See also: Access code (p. G-1), routing service (p. G-22)
Dialogic Driver The specialized software provided by Dialogic to allow applications
to run with Dialogic telephony boards.
Dialogic SCBus Device Also called: SCBus
The Dialogic board resource for handling a specific type of telephony data. Dialogic SCBus
devices are a telephony handling resource for LSI devices to connect to analog phone lines;
DTI devices for connecting to T1, ISDN and E1 phone lines; VOX devices for playing files,
recording files, getting touch-tone digits. and detecting or generating tones; and FAX
devices for sending and receiving faxes.
See also: analog line (p. G-3), E-1 (p. G-11), Integrated Services Digital Network
(ISDN) (p. G-15), T-1 (p. G-24), touch-tone digit (p. G-25)
Digit Collection The Strata CS configuration for T1 lines that enables recognition of
ANI or DID/DNIS information
See also: automatic number identification (ANI) (p. G-3), dialed number identification
service (DNIS) (p. G-9), direct inward dial (DID) (p. G-11), T-1 (p. G-24)
Digital Service Unit (DSU) The digital counterpart of a CSU. Typically used for
ISDN lines.
See also: channel service unit (CSU) (p. G-7)
Digital Signal Processor Also called: DSP
A specialized digital microprocessor that performs calculations on digitized signals that
were originally analog. In telephony, DSPs are used for call progress monitoring, voice
processing, and the compression of voice and video signals.
See also: telephony hardware (p. G-25)
Digital Span In Strata CS, 24 digital trunks that make up a T1 line, or 30 digital trunks
that make up an E1 line.
See also: digital trunk (p. G-10), E-1 (p. G-11), T-1 (p. G-24)
Digital Telephony Telephone transmission or switching in which the original signal
is sampled and converted to binary data before transmission. Digital telephony is much
cleaner than analog telephony because the signal can be reproduced precisely, and does not
fade or pick up distortion or static.
See also: analog telephony (p. G-3)
Digital Trunk Also called: digital line
A digital T1, E1, or ISDN phone line obtained from the telephone company.
See also: analog trunk (p. G-3), digital telephony (p. G-10), E-1 (p. G-11), T-1 (p. G-24),
trunk (p. G-26)
GLOSS-10
STRATA CS ADMINISTRATOR MANUAL
BETA DOCUMENT - PRELIMINARY & CONFIDENTIAL
Direct Inward Dial (DID) Also called: DID
A telephone company service that assigns up to 50 different numbers to a single analog line.
When answering calls, DID information is used to determine which number the caller
dialed and then to deliver the call to that number. Strata CS uses DID to assign each user a
unique 7-digit phone number, so callers can dial it to reach a user directly without having
to go through an auto attendant.
See also: analog line (p. G-3), auto attendant (p. G-3)
Directory A list of names, phone numbers, and other related information.
See also: voice mail (p. G-26)
Driver The low-level software that provides an API to hardware. The drivers for the
Dialogic boards are required to run Strata CS.
See also: Dialogic driver (p. G-10)
Dual Tone Multi-Frequency (DTMF) Also called: DTMF
The touch-tone signaling format used by home or business touch-tone phones.
See also: Multi-Frequency (MF) (p. G-18)
E&M Signaling The most common supervisory signaling protocol used to
interconnect PBXs or to connect a PBX to a T1 carrier.
See also: private branch exchange (PBX) (p. G-20), T-1 (p. G-24)
E-Mail Notification A Strata CS feature that sends e-mail messages to users when
they receive new or urgent voice messages. E-mail notifications can include voice
messages attached as .WAV files.
See also: WAV file (p. G-27)
E1 The European version of a T1 line. Contains 30 channels (while a T1 has 24). Encoded
in A-law instead of µ-law format.
See also: T-1 (p. G-24)
Emergency Number The number to dial to access the emergency reporting service
in a location, for example, is 911 in the United States.
ETSI-GSM The IP codec supported by Strata CS. Largely superseded by G.729A, it
runs at 13.2 kbs.
Event Signaling How telephone actions (that is, pick up and hang up) and events
(that is, incoming call and line dropped) are communicated on a robbed-bit T1 line by
setting the A or B bits on or off. Defined in Strata CS Robbed Bit T1 Experimenter.
See also: A and B bits (p. G-1), robbed-bit signaling (p. G-22), T-1 (p. G-24)
GLOSS-11
BETA DOCUMENT - PRELIMINARY & CONFIDENTIAL
Export To prepare or convert information from one application so it can be used in
another. Strata CS allows users to export system prompts, Call Log, and contact
information in comma-separated value (CSV) format for use in spreadsheet and database
applications.
See also: import (p. G-14), private branch exchange (PBX) (p. G-20)
Extension A unique number where a Strata CS user may be reached. Auto attendants,
queues, workgroups, and IVR Plug-ins can also have extensions.
External call Any call to or from a phone number outside Strata CS. Calls between
extensions are not external calls.
See also: external direct call (p. G-12), internal call (p. G-15)
External Direct call Any call to a Strata CS user from an external number in which
the caller did not dial an extension from an auto attendant. In other words, a call using a
DID number or a trunk that is set up to connect directly to a user.
See also: auto attendant (p. G-3), direct inward dial (DID) (p. G-11), external call (p.
G-12), internal call (p. G-15)
External Transfer A call transferred to a number outside the Strata CS phone
system.
See also: blind transfer (p. G-4), supervised transfer (p. G-24), transfer (p. G-25)
Fast Busy Tone An audible tone that indicates all trunks are busy processing other
calls.
See also: trunk (p. G-26)
Fax Server A server that is set up to send and receive faxes on behalf of networked
clients.
See also: client (p. G-7), Server (p. G-22)
Fax-On-Demand Also called: fax-back
A combination of fax and voice processing technology that allows a person to call a
computer and request that a catalog of available documents or one or more specific
documents be faxed to them.
Feature Phone A business phone that has features such as a display, message
waiting light, and specialized buttons for speed dial, transfer, conference, and so forth.
See also: speed dial (p. G-23)
Final action An action that Strata CS initiates when a caller reaches the final step of a
routing list. Final actions include send to voice mail, hang up, transfer, and so forth.
See also: routing list (p. G-22)
GLOSS-12
STRATA CS ADMINISTRATOR MANUAL
BETA DOCUMENT - PRELIMINARY & CONFIDENTIAL
Flash Quickly pressing and releasing the flash hook (hang up) button on a telephone
handset cradle or pressing the flash button. Signals a PBX or Centrex system that special
instructions will follow, such as placing a call on hold or transferring a call to another
extension.
See also: Centrex (p. G-6), private branch exchange (PBX) (p. G-20)
Flash Hook The button in the telephone handset cradle that hangs up the phone and
releases the phone to make another call. The flash hook can also be used to send a flash
signal to a PBX or Centrex system. Some phones refer to this as the Link Button.
See also: Centrex (p. G-6), private branch exchange (PBX) (p. G-20)
G.711 The IP codec supported by Strata CS. It is supported by all H.323 gateways and
terminals, but uses high bandwidth. It runs at 64 kbs.
G.723.1 The IP codec supported by Strata CS. The best codec for use with Intimating
and other H.323 terminals, it runs at 5.3 kbs. or 6.3 kbs.
G.729A The IP codec supported by Strata CS. The best codec for Strata CS
Server-to-Strata CS Server connections, providing a good balance between sound quality
and bandwidth. It runs at 8.8 kbs.
Global Contact A contact record (name, address, and so forth) that is accessible to
all Clients on a Strata CS Server.
See also: personal contact (p. G-19)
GlobalCall Dialogic’s protocol-independent technology that allows an application to
connect to a variety of T1 and E1 networks using various protocols (such as ISDN or
DPNSS) without changing code.
See also: E-1 (p. G-11), Integrated Services Digital Network (ISDN) (p. G-15), T-1 (p.
G-24)
Grab-and-Hold While on a call, if a second call arrives, a Strata CS user can “grab”
the second call and put it on hold without interrupting the current call. While on hold, the
second caller hears a customizable grab-and-hold greeting and is then presented with the
option to continue to hold or leave a message. Using grab-and-hold, users can make sure
they never miss an important call.
See also: grab-and-hold greeting (p. G-13)
Grab-and-Hold Greeting Also called: hold greeting
A customizable message that a caller hears when grabbed and put on hold. For example, a
caller might hear, “I’m on the phone right now, but I know you’re there and your call is
very important to me.” After playing the grab-and-hold greeting, Strata CS always prompts,
“To leave a message, press 1, or stay on the line to continue holding.”
See also: grab-and-hold (p. G-13)
GLOSS-13
BETA DOCUMENT - PRELIMINARY & CONFIDENTIAL
Graphical User Interface Also called: GUI
The visual interface used in all Windows applications, composed of windows, dialog
boxes, menus, buttons, and tool bars that make the application easy to operate.
Greeting The recorded message that a caller hears, typically when sent to voice mail.
See also: active greeting (p. G-1), after hours greeting (p. G-2), grab-and-hold greeting
(p. G-13)
See also: call rule (p. G-19), voice mail (p. G-26)
H.323 The standard that defines how real-time voice and video are transmitted over IP
networks.
Hands-free Using telephony equipment without using the hands. Examples of
hands-free equipment include headsets, speakerphones, and voice recognition equipment.
In Strata CS, hands-free answering enables a user to keep a phone continually off-hook, and
be alerted to incoming calls by a short beep before they are automatically connected.
Handset The part of the phone that a person holds to speak and listen.
Hold To temporarily leave a phone call without disconnecting it.
See also: silent hold (p. G-23)
Hold Audio Also called: hold music
Hold prompts Call center recordings that callers hear while they are waiting on hold
for an agent. Hold prompts can play once, or repeatedly, or variably as determined by
conditions you define.
See Also: call center (p. G-4), welcome prompt (p. G-27)
Hunt Group A group of related trunks set up by the phone company. Incoming calls
to the first trunk, or main number, search the group until they find an available trunk. A
busy signal is returned only if every trunk in the group is busy.
See also: trunk (p. G-26)
Import To incorporate information from another application. Strata CS can import
contact names and related information created or stored in other popular contact managers.
See also: contact manager (p. G-8)
Inbound Call A call coming from a source external to the Strata CS phone system.
See also: outbound call (p. G-19)
Inbound Trunk A trunk on which a user can receive incoming calls.
See also: inbound call (p. G-14), outbound trunk (p. G-19)
GLOSS-14
STRATA CS ADMINISTRATOR MANUAL
BETA DOCUMENT - PRELIMINARY & CONFIDENTIAL
Incoming Call A call that has arrived in the Strata CS system.
Integrated Services Digital Network (ISDN) Also called: ISDN
An international standard for voice, data, and signaling that was designed to overcome
limitations in the PSTN by offering expanded bandwidth, digital circuits, a standard
out-of-band signaling system, combined voice and data networks, and special services.
ISDN is offered in two forms, Basic Rate Interface (BRI) and Primary Rate Interface (PRI).
See also: Primary Rate Interface (PRI) (p. G-20), public switched telephone network
(PSTN) (p. G-20)
Interactive Voice Response (IVR) Also called: ASR, automatic speech
recognition (ASR), IVR, speech recognition
An application that users can interact with using a remote touch-tone phone. An IVR
program typically uses recorded or synthetic speech to provide information and present the
user with options. The user selects an option by entering a number on the touch-tone phone.
Some IVR programs can use voice recognition to interpret the user’s spoken responses.
See also: touch-tone digit (p. G-25)
Interconnect Value-added reseller (VAR) that sells, installs, and maintains one or
more brands of telephone systems, working with the phone company as needed. The word
interconnect comes from the process of connecting phone systems with the phone
company.
Internal Call A call within the Strata CS phone system, a call between two users.
See also: external call (p. G-12), external direct call (p. G-12)
International Callback A business service that can provide dramatic cost savings
for international callers dialing U.S. phone numbers. Callback services take advantage of
the fact that international calls to the U.S. are many times more expensive than international
calls placed from the U.S. International callers dial a special number in the United States.
The call is not answered, but the system dials the caller back immediately and places calls
to the U.S. on their behalf using U.S. instead of international rates.
International Prefix The number dialed before the country code in order to make an
international call.
Internet The worldwide computer network, made up of thousands of interconnected
networks. A standard set of communications protocols makes it possible to route data
between any two computers on the Internet.
See also: Internet Protocol (p. G-15), intranet (p. G-16)
Internet Protocol Also called: IP
The basic protocol for transmitting packets of data over the Internet. Data is parceled into
small chunks, and each chunk is combined with a destination address and other information
to create an IP packet. When a packet is transmitted over the Internet, the address
information is used by IP routers, which act as way-stations on the packet’s journey.
GLOSS-15
BETA DOCUMENT - PRELIMINARY & CONFIDENTIAL
Packets are passed from router to router until they reach the specified destination address.
Each packet travels individually: two packets sent consecutively can take entirely different
routes, travel at different speeds, and show up in a different order than when they were sent.
On the receiving end, higher-level protocols are used to reassemble the packets in the
correct order and request re-transmission of any missing packets.
See also: Internet (p. G-15)
Internet Protocol Address Also called: Internet address, IP address
Unique identifier that allows data to be routed over the Internet to a specific location.
See also: Internet (p. G-15), Internet Protocol (p. G-15)
Internet Protocol Telephony Also called: Internet telephony, IP telephony, Voice Over IP
Transmission of voice over the Internet (or a local computer network) in real time.
See also: Internet (p. G-15), Internet Protocol (p. G-15)
Internet Service Provider Also called: ISP, service provider
A company that provides dial-up or dedicated access to the Internet, typically for a fee.
See also: Internet (p. G-15)
Intranet A “private Internet.” An intranet runs on a private network and can only be
used by people given access to that network, but it uses the same software and
communications protocols as the Internet.
See also: Internet (p. G-15)
IP Gateway Feature that enables two Strata CS Servers to communicate as one over
the Internet, so that users on one can directly dial extensions on the other.
IP Gateway user Special type of user used for creating an IP Gateway.
IVR Plug-In A custom application that extends the call-processing functions of Strata
CS by sharing the Dialogic hardware with the Strata CS Server.
Key System Phone system in which callers select a specific inbound or outbound
trunk by pressing a button on the phone before taking or placing a call.
Least Cost Routing System of routing a long-distance call by using the least
expensive carrier for that call.
Local Exchange Carrier Also called: ILEC, LEC
A local phone company. Also known as an Incumbent Local Exchange Carrier (ILEC), a
LEC has some legacy connection to the old Bell system.
See also: Competitive Local Exchange Carrier (CLEC) (p. G-8)
GLOSS-16
STRATA CS ADMINISTRATOR MANUAL
BETA DOCUMENT - PRELIMINARY & CONFIDENTIAL
Location Settings Settings in the Strata CS Administrator that specify the country
and area code of the office in which Strata CS is installed, defined for each Dialing Service.
See also: Administrator (Strata CS program) (p. G-2)
Logging The act of saving event and status information to a log file or window. Logs
can be used to troubleshoot problems or produce activity reports.
Long-distance Prefix The number dialed to make a call outside the local service
area.
Loop Start The type of trunk leased from the local phone company that can be attached
to a regular phone or used by other single-line installations and with key systems.
See also: key system (p. G-16), trunk (p. G-26)
Main menu A company’s primary auto attendant, the one that first handles incoming
calls to the company.
See Also: auto attendant (p. G-3)
Message Waiting A feature available on some phones that notifies the user when a
new voice message is received by activating the message-waiting indicator on the phone.
Message waiting can be indicated by a LED indicator on the phone that lights up or blinks,
or by a special stutter dial tone when the station goes off-hook. Message waiting is available
on certain analog telephones that support CLASS features. For a list of phones that have
these features, see Strata CS Installation & Maintenance Manual Installation Guide. An
Administrator setting tells Strata CS that a user has a phone that supports message-waiting.
The user enables or disables the feature from the Client.
See also: off-hook (p. G-18), station (p. G-23), stutter dial tone (p. G-24)
Messaging Application Programming Interface Also called: MAPI
Microsoft's set of functions and Component Object Model (COM) interfaces that let
Windows-based messaging clients (such as Microsoft Outlook) interact with message
service providers. MAPI-conformant mail clients, address books, and contact managers
from various manufacturers can be used together.
See also: application programming interface (API) (p. G-3), contact manager (p. G-8)
Microsoft Intimating An H.323-based conferencing and collaborative tool
supported by Strata CS, designed to run over IP networks.
Microsoft Windows NT Server Also called: NT Server
The version of Microsoft Windows NT that is required by the Strata CS Server.
Modular Station Interface Also called: MSI
Dialogic board that allows applications to ring, switch, and conference a variety of local
analog devices such as telephones, modems, and fax machines.
See also: telephony hardware (p. G-25)
GLOSS-17
BETA DOCUMENT - PRELIMINARY & CONFIDENTIAL
MSGSM IP codec supported by Strata CS. Largely superseded by G.729A, it runs at
13.0 kbs.
Mu-Law The voice amplitude compression/expansion standard used in North America.
Multi-Frequency Also called: MF
A tone-signaling format used within telephone networks that uses different tones than
DTMF.
See also: Dual Tone Multi-Frequency (DTMF) (p. G-11)
Network Interface Card Also called: NIC
Card that allows a computer to send and receive data on a computer network.
Notification E-mail or page sent to a user to inform them that they have received a new
voice message.
See also: e-mail notification (p. G-11), pager notification (p. G-19)
Off-Hook When the telephone handset is lifted from its cradle, or when the phone is in
use, the phone is considered “off-hook.”
See also: on-hook (p. G-18)
On-Hook When the telephone handset is in its cradle, the phone is considered
“on-hook.”
See also: off-hook (p. G-18)
On call State in which a call center agent receives calls from a queue when signed in.
The system administrator or call center supervisor determines whether an agent is on call
for a given queue. When not on call, the agent does not receive calls from the queue even
when signed in, although the agent can still view incoming queue calls in the Call Monitor.
See Also: call center (p. G-4), Call Monitor (p. G-5)
Operator Person that assists in the answering, routing, and completion of telephone
calls. Computerized operators are called auto attendants.
See also: auto attendant (p. G-3)
Operator Intercept What happens when a caller dials a number that is not in
service. The phone company plays a sequence of three distinctive tones followed by a
message, for example, “The number you have dialed is not in service at this time. Please
check the number and dial again.”
Operator User Strata CS user with Operator permissions. In the Strata CS Client, an
operator user can view real-time status updates of users who are already on calls.
See also: Administrator user (p. G-2)
GLOSS-18
STRATA CS ADMINISTRATOR MANUAL
BETA DOCUMENT - PRELIMINARY & CONFIDENTIAL
Outbound Call Any call made from Strata CS to an external number.
See also: inbound call (p. G-14)
Outbound Trunk A trunk on which a user can make outbound calls.
See also: inbound trunk (p. G-14), outbound call (p. G-19)
Overflow agents Backup call center agents that receive calls only if all primary
agents are unavailable.
Overflow skill Special skill used to distinguish overflow agents from primary agents
in a call center.
Pager Notification The process that pages users whenever they receive new or
urgent voice messages.
Parking a Call Also called: call park
A feature similar to putting a call on hold. When a call is parked, the system returns the
number on which the call is parked. After a call is parked, the call can be picked up from
any phone by dialing the feature code followed by the number.
Party Line Telephone line shared by several subscribers.
PC PBX Also called: unPBX
A PBX that runs on a PC.
See also: private branch exchange (PBX) (p. G-20)
Permissions Series of settings applied to users that control their access to individual
Strata CS features. Agents in a call center queue also have permissions that control their
access to call center features.
See Also: call center (p. G-4), roles (p. G-22)
Personal Contact A contact that appears only in a Strata CS user’s own Client, and
no one else’s.
See also: global contact (p. G-13)
Personal Information Number Also called: contact PIN, PIN
A number that a Strata CS user can assign to a contact. The PIN can uniquely identify a
contact’s calls. When the contact dials the user's extension + PIN, Strata CS identifies the
contact by matching the PIN to the contact.
Personal status Strata CS feature that enables users to indicate their location and
availability to other users, and handle incoming calls accordingly.
Plain Old Telephone Service Also called: POTS
The basic telephone service that allows a person to place and take calls.
GLOSS-19
BETA DOCUMENT - PRELIMINARY & CONFIDENTIAL
Plexar A Centrex service that is offered in Texas.
See also: Centrex (p. G-6)
POP3 Version 3 of the Post Office Protocol, an Internet protocol used for retrieving
e-mail.
See also: Internet (p. G-15)
Predictive Dialer An automated dialing system that allows a small number of agents
to process an enormous amount of outbound calls by automatically dialing numbers from
a database until someone picks up. It then connects the call immediately to an available
agent who will handle it.
See also: call center (p. G-4)
Primary Interexchange Carrier (PIC) Code In the U.S., a dialing prefix to
access a particular carrier, for example, 1010321.
Primary Rate Interface Also called: PRI
One of two interfaces in ISDN (the other is Basic Rate Interface). PRI is the ISDN protocol
running on a T1 line. Also known as 23B+D, PRI consists of 23 bearer B-channels at
1.544mbps and one data D-channel at 2.048mbps. The B-channels are used for voice, video
conferencing, fax, and so forth. The D-channel carries control and signaling information
about incoming and outgoing calls.
See also: Integrated Services Digital Network (ISDN) (p. G-15)
Private Branch Exchange Also called: PABX, PBX
A privately owned version of the phone company’s central switching office that processes
and directs phone calls. A PBX is located on the premises of a telephone company
customer.
See also: PC PBX (p. G-19)
Private Carrier Private company that provides telecommunications circuits and
services. A private carrier is not regulated and can refuse to provide service.
See also: common carrier (p. G-8)
PTT Post Telegraph and Telephone administration that provides telephone and
telecommunications service in most countries (except the United States). PTTs are usually
controlled by the government.
Public Switched Telephone Network Also called: PSTN
The world wide phone network, including all carriers, switches, CO’s, and local and
long-distance lines.
See also: central office (CO) (p. G-6), common carrier (p. G-8), switch (p. G-24)
GLOSS-20
STRATA CS ADMINISTRATOR MANUAL
BETA DOCUMENT - PRELIMINARY & CONFIDENTIAL
Queue Strata CS call center element that automatically answers incoming calls to an
extension, puts the callers on hold until agents becomes available, and then forwards the
calls to those agents. A caller on hold is said to be “in the queue.”
See Also: call center (p. G-4)
Queue Monitor Client view that is only available to call center agents who have
permission to see it. Displays real-time statistics for call center queues.
See Also: call center (p. G-4)
Recovery Time Amount of time after an ACD agent completes a call in which no
new calls are received. Recovery time provides an agent time to perform any work required
to complete the previous call before taking the next call.
See also: automatic call distribution (ACD) (p. G-3)
Redundant Array of Inexpensive Disks Also called: RAID
Protocol for combining several standard disk drives into an integrated, fault-tolerant unit.
If one of the disks in the array fails, its contents can be reconstructed from data stored on
the other disks.
Regional Bell Operating Company Also called: RBOC
One of the Bell operating companies set up after their divestiture from AT&T in 1984.
Remote Access Server Also called: RAS
Computer and software that allows a person to connect to a network from a remote location
by dialing a number.
See also: Internet (p. G-15)
Remote Office/Branch Office Also called: ROBO
The Remote Office/Branch Office telecom market.
See also: Small Office/Home Office (SOHO) (p. G-23)
Reorder Tone The “Fast busy” dial tone indicating that a call cannot be completed,
for example, if all switching paths or trunks are busy.
Ring Pattern The pattern of sounds a telephone makes to indicate a call is arriving.
Ring patterns can be customized so that users can differentiate between internal and
external calls or identify their own phones from others in the immediate area.
See also: splash ring pattern (p. G-23)
Ringback Tone The sound a caller hears when the called party’s phone is ringing.
GLOSS-21
BETA DOCUMENT - PRELIMINARY & CONFIDENTIAL
Robbed Bit T1 Experimenter The Strata CS utility that lets the administrator
define Robbed Bit T1 call events, test them, and save the correct definitions for Strata CS
to use. Using the Robbed Bit T1 Experimenter after installing the Dialogic hardware and
software—but before installing the Strata CS Server—can ensure that the T1 trunks are
functioning correctly before continuing with the installation.
Robbed-Bit Signaling Signaling mechanism used with T1 lines that replaces the
least significant bits in specific locations in the T1 transmission with signaling information,
for example, whether the caller’s line is on-hook or off-hook. The specific locations that
contain signaling information are called A and B bits. T1 suppliers use different patterns of
A-bit and B-bit values to signal various events.
See also: A and B bits (p. G-1), Channel Associated Signaling (CAS) (p. G-7), T-1 (p.
G-24)
Role Permission set that can be applied broadly to many users at once. By default Strata
CS includes two roles: Administrators and Users. You can create new roles to represent
different permission sets, or modify the Users role.
See Also: Permissions (p. G-19)
Round Robin Call Distribution A method of evenly distributing calls to a
queue or an ACD workgroup. Round robin call distribution sends each consecutive call to
the next agent on the list. If that agent is busy, the call goes to the next agent, and so on.
See also: ACD agent (p. G-1), ACD workgroup (p. G-1), simultaneous call distribution
(p. G-23), top-down call distribution (p. G-25)
Routing List A list of extensions or external numbers that Strata CS will try in order
to connect incoming calls to the user. Each user has a default routing list and can also have
call rules that specify unique routing lists for individual contacts. Routing lists typically try
a user’s “Where I Am” location first, then a list of optional locations, and if unsuccessful,
the final action.
See also: active routing list (p. G-1), final action (p. G-12), call rule (p. G-19), Where I
Am (p. G-27)
Routing service Type of dialing service that routes outbound calls to other dialing
services depending on the number dialed.
See Also: dialing service (p. G-9)
Screen Pop A small window that automatically opens on the computer screen when
a call arrives and shows information about the caller.
Server A computer that processes client requests and returns information to a client
computer over a network. The client computer runs an application that requests the
information from the Server, and then displays the results in usable format.
See also: client (p. G-7), client/Server (p. G-7)
Server License A license purchased from Toshiba for each Strata CS Server.
GLOSS-22
STRATA CS ADMINISTRATOR MANUAL
BETA DOCUMENT - PRELIMINARY & CONFIDENTIAL
Shift In Strata CS, a period that divides up call center statistics for easy comparative
viewing.
See Also: call center (p. G-4)
Silent Hold In Strata CS, when the user puts a caller on silent hold, the repeated
playing of Strata CS’s call-handling prompts (“Press 1 to transfer,” and so forth) are
suppressed. From the caller’s point of view, silent hold is identical to regular hold, as the
caller still hears call-handling prompts and hold music, if it is used.
See also: hold (p. G-14)
Simultaneous ring The process in which a single call is sent simultaneously to all
members of a workgroup. All phones ring simultaneously, and the first user who answers
is connected to the caller. Simultaneous ring is one method of distribution for call centers
and ACD workgroups.
See also: ACD workgroup (p. G-1), call center (p. G-4), automatic call distribution
(ACD) (p. G-3), round robin call distribution (p. G-22), top-down call distribution (p.
G-25)
Small Office/Home Office Also called: SOHO
The Small Office/Home Office telecom market. Commonly comprised of consultants,
small businesses, and telecommuters.
See also: Remote Office/Branch Office (ROBO) (p. G-21)
Speed Dial A shortcut to a frequently dialed phone number.
Splash Ring Pattern A ring pattern in which 2 or 3 short rings are grouped
together, followed by a pause.
See also: ring pattern (p. G-21)
SQL Server A Microsoft database Server application. The Strata CS database is stored
in SQL Server and is accessible by the Strata CS Server and its clients.
Station Any phone connected to Strata CS.
See also: station ID (p. G-23)
Station ID The number that uniquely identifies a telephone connected to Strata CS.
Multiple extensions can share a single station ID, which allows different users to receive
calls at the same phone.
See also: extension (p. G-12), station (p. G-23)
Station License A license purchased from Toshiba for each Strata CS phone
(station).
See also: station (p. G-23)
GLOSS-23
BETA DOCUMENT - PRELIMINARY & CONFIDENTIAL
Stutter Dial Tone A feature available on some phones that notifies a user of new
voice messages by means of a special dial tone. When a message has been received, the
user hears a stutter dial tone when the station goes off-hook. This feature is available on
specific analog telephones that support CLASS features. For a list of phones that have this
feature, see Strata CS Installation & Maintenance Manual. An Administrator setting tells
Strata CS that a user has a phone that supports stutter dial tone message waiting. Users
enable or disable the feature from the Client.
See also: dial tone (p. G-9), message waiting (p. G-17)
Supervised Transfer A method of call transfer in which the user speaks to the
target party (“I have Jim on the line for you.”) before transferring the call. If the target party
informs the user that the call cannot be accepted, the user can return to the call or transfer
it to another party.
See also: blind transfer (p. G-4), external transfer (p. G-12), transfer (p. G-25)
Switch A PBX, CO, or any mechanical, electric, or electronic device that manages
communications circuits.
See also: central office (CO) (p. G-6), private branch exchange (PBX) (p. G-20)
System Prompt An audio prompt that Strata CS plays to callers to offer instructions.
For example, “To log in, press pound.”
T1 A digital phone line that carries 24 voice channels.
TAPI Service Provider Also called: TSP
A Strata CS component that lets any TAPI-compatible application place outbound calls or
receive notification of inbound calls. Strata CS has been tested with several
TAPI-compliant contact managers including Act!, GoldMine, and Microsoft Outlook to
place calls to contacts and receive screen-pop notification of incoming calls.
See also: contact manager (p. G-8), Telephony Application Programming Interface
(TAPI) (p. G-25)
Telephone Commands The commands that control Strata CS’s behavior through
any touch-tone phone. For example, pressing Flash 1 plus an extension on a station during
a call will transfer the caller to the dialed extension. A list of available commands is printed
on a wallet card and also verbally presented through the system prompts.
See also: flash (p. G-13), system prompt (p. G-24)
Telephony The science of transmitting and managing voice, fax, and other data over
the PSTN.
See also: public switched telephone network (PSTN) (p. G-20)
GLOSS-24
STRATA CS ADMINISTRATOR MANUAL
BETA DOCUMENT - PRELIMINARY & CONFIDENTIAL
Telephony Application Programming Interface Also called: TAPI
The Microsoft API for computer-telephone integration. TAPI presents a common API for
applications that is hardware- and telephone network-independent. Part of TAPI is the
service provider interface (SPI), the component that all hardware vendors must implement
to be TAPI-compliant.
See also: application programming interface (API) (p. G-3)
Telephony Hardware Any voice-processing hardware, such as voice and fax
modems, voice boards, or digital signal processor (DSP) boards. Telephony hardware that
connects to the PSTN or local stations and can detect call progress signals, generate and
play tones, play and record voice files, and so forth.
See also: Business Communications Platform (BCP) (p. G-4), call progress (p. G-5), digital signal processor (DSP) (p. G-10), Modular Station Interface (MSI) (p. G-17), public
switched telephone network (PSTN) (p. G-20)
Strata CS Call Center Reporter Strata CS component that produces Microsoft
Excel reports on call center and ACD workgroup activity. For more information, see Strata
CS Installation & Maintenance Manual.
Strata CS Server The computer on which the Strata CS Server software and
database reside.
See also: Server (p. G-22)
Terminal Server A software application that enables a system administrator to
monitor, troubleshoot, and control a remote computer system without being on-site.
Tip and Ring An electrical circuit that carries a voice or data signal, derived from the
tip wire and ring wire of the old-fashioned switchboard operator’s plug.
Toll Bypass Avoiding the long-distance carrier network (and associated tolls) when
connecting to another subscriber outside of the local area, by means of the Internet, a
private network, tie lines, and so forth.
Top-Down Call Distribution Method of distributing calls to the best agents in a
queue or an ACD workgroup, by sending each call to the first agent on the list. If that agent
is busy, the call goes to the next agent, and so on.
See also: ACD agent (p. G-1), ACD workgroup (p. G-1), round robin call distribution (p.
G-22), simultaneous call distribution (p. G-23)
Touch-Tone Digit A DTMF tone generated by pressing a button on a touch-tone
phone.
See also: Dual Tone Multi-Frequency (DTMF) (p. G-11)
Transfer To redirect a caller to another extension or external number on a PBX or other
switch.
GLOSS-25
BETA DOCUMENT - PRELIMINARY & CONFIDENTIAL
See also: blind transfer (p. G-4), external transfer (p. G-12), private branch exchange
(PBX) (p. G-20), supervised transfer (p. G-24), switch (p. G-24)
Trunk An analog phone line or a single channel of a digital line. Also, the Strata CS
representation of that line or channel.
See also: analog trunk (p. G-3), digital trunk (p. G-10)
Trunk License A license purchased from Toshiba for each trunk connected to Strata
CS.
Unified Messaging Also called: integrated messaging
The ability to access all messaging (for example, voice mail, e-mail, and fax) in one place,
such as the phone or an e-mail client such as Microsoft Outlook.
User A person using a software product. In Strata CS, a person with a Strata CS phone
who is added as a user in the Strata CS Administrator.
See also: Administrator (Strata CS program) (p. G-2)
Validation Process by which Strata CS checks a number that has been entered, and
does not proceed unless the number matches the correct criteria. Validation can be set up
for account codes entered by users, and custom data entered by callers to a call center.
See Also: account code (p. G-1), call center (p. G-4)
Voice File File containing an audio sample that has been digitized into a format such
as VOX or WAV.
See also: VOX file (p. G-26), WAV file (p. G-27)
Voice Mail The audio recordings left by callers and stored in an electronic mailbox.
See also: voice mailbox (p. G-26)
Voice Mailbox The folder or location in which a voice mail messages are stored.
Voice mailboxes typically have a limited amount of space for messages.
See also: voice mail (p. G-26)
Voice Title The recorded name of a Strata CS user or contact. Voice titles are played
whenever a caller searches the Strata CS dial-by-name directory and to announce a call
from another user. Users can create voice titles for their contacts and set Strata CS to play
them when the contacts call.
VOX File One of two major voice file formats used in telephony. VOX files are highly
compressed and are designed for telephone lines where the frequency range is between 6
and 8KHz.
See also: WAV file (p. G-27)
GLOSS-26
STRATA CS ADMINISTRATOR MANUAL
BETA DOCUMENT - PRELIMINARY & CONFIDENTIAL
Watchdog Mode The Dialogic safety mode that monitors the system for a power
failure or Strata CS Server computer failure. When either is detected, the first four trunks
on the system are routed directly to the first four Strata CS stations.
WAV File One of two major voice file formats used in telephony. WAV files are used
primarily for multimedia devices. Because their frequency range is between 8 and 44 KHz,
they require considerably more disk space than VOX files.
See also: VOX file (p. G-26)
Welcome prompt Call center recording that callers hear once when they first reach
the queue, for example, “Welcome to the Technical Support Department. Please hold and
an agent will be with you shortly.”
See Also: call center (p. G-4), queue (p. G-21)
Where I Am A user’s current telephone location, usually the station at the user’s desk
or a number to which calls have been forwarded.
See Also: call forwarding (p. G-5), active settings (p. G-2)
Wink Brief period of going off-hook and then back on-hook (the opposite of a flash). A
wink can be sent to the CO to request special services or signal readiness to receive DID
digits, ANI digits, or an incoming call. Also indicates that a person is about to dial a
number.
See also: automatic number identification (ANI) (p. G-3), central office (CO) (p. G-6),
direct inward dial (DID) (p. G-11), flash (p. G-13), off-hook (p. G-18), on-hook (p. G-18)
Workgroup A user-defined collection of users, contacts, or both. Users can share a
voice mailbox with groups, broadcast voice mail to workgroups, or create a call rule to
handle calls from anyone in a workgroup.
Wrap-up time In a call center or ACD workgroup, the time an agent has after
finishing a call to process any work relating to that call, before another call arrives.
See Also: call center (p. G-4), ACD workgroup (p. G-1)
GLOSS-27
BETA DOCUMENT - PRELIMINARY & CONFIDENTIAL
INDEX
A
access codes
for dialing services, 8-8
reassigning to a new dialing service, 8-8
ringbacks, setting default for, 8-9
special, 4-12
updating phone numbers after changing, 8-8
using 0, 8-9
Access. see Microsoft Access
account codes
described, 10-2
entering for a call, 10-7
examples, 10-2
how users enter, 10-7
in call log, 10-8
setting for a user, 10-4
setting general options, 10-3
setting minimum and maximum length, 10-3
text file of valid codes, 10-5
where prompt occurs, 10-3
account codes, minimum/maximum length for, 10-3
ACD
routing calls to, 9-2
Admin user, 6-4
Administering Strata CS, 1-10
Agent license requirement, Call Center, 3-2
alarms, T1, 11-19
allocating space
for SQL Server database, 4-10
for voice files and greetings, 4-11, 6-15
analog trunks, 5-10
archiving
Call Log, 4-8
Attendant, Default Auto, 9-5
Attendants view, Auto, 2-4
audio recordings
changing file format, 2-10
creating, 2-10
file formats, 2-10
voice file formats, 2-10
VOX files, 2-10
WAV files, 2-10
audio recordings to new file format, converting, 2-10
audio, hold, 4-4
auto attendant
routing calls to, 9-2
Auto Attendant, Default, 9-5
auto attendants
about, 9-4
and DID, 9-2
creating, 9-7
creating menu choices for callers, 9-8
default, 9-5
defining menu choices for, 9-8
example, 9-4
routing calls, 9-2
scheduling transfers and greetings for, 9-14
setting up, 9-7
using, 9-4
what caller hears, 9-5
Auto Attendants view, 2-4
B
bar, view, 2-5
blocked numbers, 6-34
BRI, adding a digital span, 5-18
business hours
defined, 4-5
defining, 4-5
setting, 4-6
buttons
toolbar, 2-6
BETA DOCUMENT - PRELIMINARY & CONFIDENTIAL
view buttons in the view bar, 2-4
views, 2-4
buttons, creating new items with, 2-8
C
Call Center Agent license requirement, 3-2
call center agents
routing calls to, 9-2
call forwarding
to a mobile phone, 6-27
to another extension, ??–6-26
turning off, 6-27
turning on, 6-25
with voice mail, 6-27
call forwarding, follow me, 6-27
call handling
ACD, 5-5
fax routing, setting up, 5-7
inbound calls
on a trunk, 5-5
routing, 5-4
multiple users at one station, 6-13
outbound calls
managing, 8-1
on a trunk, 5-5
restricting, 8-26
routing, 5-4
Call Log
archiving, 4-8, 4-9
setting Strata CS to log internal calls, 4-8
Call Log view, 2-4
call routing
about, 9-2
flowchart
for Administrator, 9-3
for Client, 9-3
to a single ACD workgroup, 9-2
to a single user, 9-18
to an auto attendant, 9-2
to an IVR Plug-in, 9-2
to groups, 9-2
trunk directly to a user, 9-2
using DID, 9-2
call screening, setting up, 6-24
calls
entering account codes, 10-7
CAS, adding a digital span, 5-17
Center Agent license requirement, Call, 3-2
Centrex/PBX Extension dialing service
adding, 8-12
Centrex/PBX transfer, 6-27
changing
default Server, 2-3
station ID, 2-3
CLASS, 6-28
Client license requirement, 3-2
codecs
for Internet transmissions, 5-22, 8-21
specifying for an Internet dialing service, 8-21
codes for a call, entering account, 10-7
codes, minimum/maximum length for account, 10-3
columns
showing or hiding in a view, 2-9
columns, in Administrator views, 2-9
commands
shortcut menu, 2-6
using in views, 2-6
using toolbar, 2-6
confirmation menu, voice mail, 4-18
converting audio recordings to new file format, 2-10
CS 2.1, Upgrading from Strata, 1-7
CSV files, for system prompts, 12-3, 12-4
D
Default Auto Attendant, 9-5
defaults
0 for extension of Operator user, 8-9
access codes
viewing in the Administrator, 8-9
INDEX-2
BETA DOCUMENT - PRELIMINARY & CONFIDENTIAL
STRATA CS ADMINISTRATOR MANUAL
viewing in the Client, 8-9
access codes for ringbacks, 8-9
auto attendant, 9-5
database size, 4-11
dialing service, 8-2, 8-3, 8-7
dialing timeouts, 4-13
for caller ID, 4-3
Operator user’s extension always 0 for callers, 8-9
search method in dial-by-name directory, 4-17
Device Monitor, 11-3
Device Monitor view, 2-4
dial-by-name directory
listing user in, 6-27
dialing exceptions
importing and exporting, 8-25
specifying, 8-22
dialing permissions, setting, 8-26
dialing service, Internet-to-Centrex/PBX
Extension, 13-13
dialing service, Internet-to-Phone Number, 13-15
dialing services
about, 8-2
access code, defined, 8-2, 8-7
access code, example, 8-2, 8-7
adding, 8-4
Centrex/PBX Extension dialing service, 8-12
exporting and importing dialing exceptions, 8-25
Internet Address dialing service, 8-14
Internet-to-Centrex/PBX Extension dialing
service, 8-17
Internet-to-Phone Number dialing service, 8-15
Phone Number dialing service, 8-7, 8-10
setting up dialing exceptions, 8-22
and access codes, 8-8
avoiding dialing ambiguities, 8-8
Centrex/PBX Extension dialing service
using a prefix and suffix, 8-14
choosing names for, 8-7
default, 8-3
defined, 8-2
deleting, 8-6
disabling while creating, 8-7
entering location settings, 8-20
for IP Gateways, 13-13
identifying trunks allocated by, 8-18
Internet-to-Centrex/PBX Extension, 13-13
Internet-to-Phone Number, 13-15
permissions
example, 8-27
Phone Number dialing service
using a prefix and suffix, 8-11
setting permissions, 8-26
specifying codecs used by an Internet service, 8-21
types, 8-2
types supported, 8-2
using to troubleshoot trunks, 8-7
Dialing services view, 2-4
dialing timeouts, setting, 4-12
Dialogic devices
disabling, A-13
DID
sending digits to stations, 14-4
digit collection
about, 5-5
setting up on analog trunk, 5-11
digital spans, 5-9
Direct Inward Dialing (DID)
assigning number to a user, 6-13, 7-5
routing calls to auto attendants, 9-2
routing calls to users, 9-2
disabling
dialing services while creating them, 8-7
Dialogic devices, A-13
digital spans, 11-5
record of in Maintenance Log view, 11-20
disconnect tones, A-12
tones
fax detection, A-12
disk space
allocating for users, 4-11
display phone format, MDMF, 6-43
INDEX-3
BETA DOCUMENT - PRELIMINARY & CONFIDENTIAL
display phones, changing format from MDMF to
SDMF, 6-43
documentation
online Help, 1-10
SDK Help, 1-10
duration, wink, 5-14
E
e-mail
NT Event Log notifications, 4-4
e-mail synchronization, Microsoft Exchange
Server, 4-18
emergency calls, settings for, 4-14
English language prompts
U.K., 4-4
U.S., 4-4
entering account codes for a call, 10-7
Event Log, viewing, 11-14
Excel. See Microsoft Excel
Exchange Server. see Microsoft Exchange Server
exporting
Call Log, 11-11
Phone Number service dialing exceptions, 8-25
system prompt files, 12-3, 12-4
voice files, 2-11
extension
and station ID, 6-12
assigning to a workgroup, 7-4
assigning to users, 6-10, 7-4
Extension dialing service,
Internet-to-Centrex/PBX, 13-13
file formats, for voice files, 2-10
files
moving voice files, 4-11
VOX, 2-10
WAV, 2-10
folders, working with, 2-9
follow me call forwarding, ??–6-27
format, converting audio recordings to new file, 2-10
format, MDMF display phone, 6-43
forwarding, follow me call, 6-27
G
Gateway users, 13-17
Gateways view, IP, 2-5
greeting, recording for a user, 6-41
greetings
creating, 2-10
group
hunt, 5-4
terminated hunt, 5-4
group conversation lines, blocking, 6-34
H
help, where to find, 1-10
hold audio, 4-4
hours
business, defining, 4-5
hunt group, 5-4
terminated, 5-4
I
F
fax machine
routing calls to, 9-2
fax routing, 5-7
fax server
integrating, 14-4
file format, converting audio recordings to new, 2-10
icons
clicking for views, 2-6
creating new items with, 2-8
importing
Phone Number service dialing exceptions, 8-25
voice files, 2-11
inbound-only, configuring, 5-4
INDEX-4
BETA DOCUMENT - PRELIMINARY & CONFIDENTIAL
STRATA CS ADMINISTRATOR MANUAL
indicator, visual message waiting, 6-44
integrating
third-party devices, 14-4
internal calls, logging, 4-8
Internet Address dialing service
adding, 8-14
Internet calls
enabling, 8-5
Internet span, adding, 5-21
Internet telephony, 13-1
Internet, using to connect to Servers, 13-7
Internet-to-Centrex/PBX Extension dialing
service, 13-13
adding, 8-17
Internet-to-Phone Number dialing service, 13-15
adding, 8-15
Internet-to-Phone Number service
entering location settings for, 8-20
IP Gateways
calling extensions on a remote Server, 13-13
Centrex/PBX calls through a remote Server, 13-16
creating, 13-9
dialing services for, 13-13
outbound calls through a remote Server, 13-15
overview, 13-7
view, 13-10
IP Gateways view, 2-5
IP network
codecs for, 5-22
IP network, using to connect two Servers, 13-7
IP port license requirement, 3-2
ISDN BRI, adding a digital span, 5-18
ISDN, adding a digital span, 5-17
items
copying and pasting into the Problem Report
Wizard, 2-9
creating, 2-8
creating a new item based on an existing item, 2-8
deleting, 2-9
in views, 2-5
using commands on, 2-6
items, working with, 2-6
IVR Plug-in
licensing, 14-11
routing calls to, 9-2
IVR Plug-ins view, 2-5
L
language prompts
English, 4-4
Spanish, 4-4
U.K. English, 4-4
U.S. English, 4-4
language, system prompts, 4-4
length for account codes, minimum/maximum, 10-3
license requirement
Call Center Agent, 3-2
Client, 3-2
IP port, 3-2
Server, 3-2
Trunk, 3-2
license requirement, Station, 3-2
licenses
adding, 1-9
entering, 3-4
Server, 3-2
light, message waiting, 6-44
location settings
entering, 8-20
Log view, Call, 2-4
Log view, Maintenance, 11-20
logging in
at another station, 6-13
options, ??–C-2
using command line arguments, C-1
M
mailbox permissions, with Microsoft Exchange, 4-18
Maintenance Log view, 11-20
INDEX-5
BETA DOCUMENT - PRELIMINARY & CONFIDENTIAL
MDMF display phone format, 6-43
me call forwarding, follow, 6-27
menu, shortcut, 2-6
message waiting indicator, visual, 6-44
message waiting light, 6-44
messages
moving files, 4-11
Microsoft Exchange Server, synchronizing with Strata
CS, 4-18
Microsoft NetMeeting
calling DID number from, 13-5
calling Strata CS Server from, 13-5
minimum/maximum length for account codes, 10-3
mobile phones, issues with forwarded calls, 6-27
Monitor view, Device, 2-4
Monitor, Device, 11-3
moving
voice files, 4-11
multiple users, 6-13
music, on-hold, 4-4
N
NetMeeting. see Microsoft NetMeeting
new file format, converting audio recordings to, 2-10
notifications
scheduling, 6-19
setting, 6-17
NT Event Log
notifications, setting up, 4-4
T1 alarms, 11-19
Number dialing service, Internet-to-Phone, 13-15
numbers, blocked, 6-34
numbers, blocking specific, 6-34
O
on-hold, playing music while, 4-4
Operator user, 6-4
options
setting for user, 6-6
outbound-only, configuring, 5-4
P
PBX
customizing trunk disconnect tones, A-12
permissions
setting dialing service permissions, 8-26
phone format, MDMF display, 6-43
Phone Number service
adding, 8-10
dialing permissions, setting, 8-26
entering location settings for, 8-20
local area dialing exceptions, 8-22
phones
changing format from MDMF to SDMF, 6-43
playing system prompts, 12-3
Plug-ins view, IVR, 2-5
port license requirement, IP, 3-2
prefix and suffix
in Centrex/PBX Extension dialing service, 8-14
in Phone number dialing service, 8-11
prompts
English language, 4-4
Spanish language, 4-4
U.K. English language, 4-4
U.S. English language, 4-4
prompts view, System, 2-4
prompts, playing system, 12-3
prompts, translating system, 12-5
Q
Queues view, 2-4
R
recording
system prompts, 12-8
user’s voice title and greeting, 6-41
recordings
changing file format, 2-10
INDEX-6
BETA DOCUMENT - PRELIMINARY & CONFIDENTIAL
STRATA CS ADMINISTRATOR MANUAL
creating, 2-10
file formats, 2-10
voice file formats, 2-10
VOX files, 2-10
WAV files, 2-10
recordings to new file format, converting audio, 2-10
registry keys
tones for disconnect detection, A-12
tones for fax detection, A-12
registry settings
changing in Windows NT/2000, 4-3
requirement, Call Center Agent license, 3-2
requirement, Client license, 3-2
requirement, IP port license, 3-2
requirement, Server license, 3-2
requirement, Station license, 3-2
requirement, Trunk license, 3-2
restricted numbers for outbound calls, setting, 8-26
right-click menus, using, 2-6
ringbacks, setting default access codes for, 8-9
rings, setting number of, 4-3
Robbed Bit T1
adding a digital, 5-13
signaling
configuring, 5-13
template for, 5-15
roles
users, 6-4
routing calls
directly to auto attendants, 9-2
directly to users, 9-2
to call centers, 9-2
to fax machine, 9-2
to IVT Plug-in, 9-2
routing services
adding, 8-33
defining patterns, 8-38
adding new routing variables, 8-38
defined, 8-3
defining a new number for a routing rule, 8-40
defining stop rules, 8-37
using for least cost routing, 8-31
using for long-distance calls over an IP
gateway, 8-30
routing variables
adding new, 8-38
example, 8-38
routing, fax, 5-7
S
SDMF, changing display phone format to, 6-43
Server license requirement, 3-2
service, Internet-to-Centrex/PBX Extension
dialing, 13-13
service, Internet-to-Phone Number dialing, 13-15
services view, Dialing, 2-4
settings
access code for dial-by-name directory, 4-12
audio outpub over your computer speakers, 2-11
audio output
over the phone, 2-11
business hours, 4-6
changing Windows NT/2000 registry settings, 4-3
confirmation menu before voice mail, 4-18
database space, 4-10
dialing service permissions, 8-26
example, 8-27
dialing timeouts, 4-12
disk space, 4-11
e-mail synchronization, Microsoft Exchange
Server, 4-18
emergency calls, 4-14
generating tones, 4-4
in the status bar, 2-11
permissions, dialing services, 8-26
recipient of Windows Event Log Notifications, 4-4
view currently installed licenses, 3-2
viewing database and disk usage, 4-10
workgroup extension, 7-4
shortcut menu, 2-6
INDEX-7
BETA DOCUMENT - PRELIMINARY & CONFIDENTIAL
Spanish language prompts, 4-4
spans, digital, 5-9
SQL Server database
allocating space, 4-10
station ID
and user’s extension, 6-12
assigning to a user, 6-11
Station license requirement, 3-2
stations
monitoring activity, 11-3
restarting with Device Monitor, 11-6
sending DID digits to, 14-4
stop rules
defining in routing services, 8-37
Strata CS 2.1, Upgrading from, 1-7
support, technical, 1-10, 1-11
system prompts
changing encoding format of files, 12-3, 12-4
customizing, 12-2
editing, 12-3
exporting text for CSV files, 12-3, 12-4
importing and exporting audio files for, 12-3, 12-4
playing, 12-3
recording, 12-8
testing, 12-10
translating, 12-5
System prompts view, 2-4
system prompts, playing, 12-3
system prompts, translating, 12-5
system settings
access codes
for dial-by-name directory, 4-12
allocating disk space, 4-9
archiving the Call Log, 4-9
business hours, 4-6
changing Windows NT/2000 registry settings, 4-3
confirmation menu before voice mail, 4-18
database space, 4-9
dial-by-name directory, 4-17
dialing timeouts, 4-12
e-mail synchronization, Microsoft Exchange
Server, 4-18
emergency calls, 4-14
generating tones using software, 4-4
hold audio, 4-3
language for prompts, 4-3
logging internal calls, 4-8
number of rings before answering (analog only), 4-3
Server configuration, 4-3
viewing database and disk usage, 4-10
Windows Event Log Notifications, 4-3
T
T1 alarms, 11-19
technical support, 1-10, 1-11
telephone receiver, using computer speakers for, 2-11
telephony, Internet, 13-1
terminated hunt group, 5-4
third-party devices
sending DID digits to, 14-4
tie-lines. see IP Gateways
timeouts, dialing, 4-13
tones
disconnect detection, A-12
tones, disconnect, A-12
toolbar, 2-6
transfer
between two Centrex/PBXs, 6-27
transfer, Centrex/PBX, 6-27
translating system prompts, 12-5
troubleshooting
trunks, 8-7
Trunk license requirement, 3-2
trunks
adding, 5-2
analog, adding, 5-10
ANI/DID, 5-5
configuring, 1-9
configuring signaling on, 5-13
deleting, 5-3
INDEX-8
BETA DOCUMENT - PRELIMINARY & CONFIDENTIAL
STRATA CS ADMINISTRATOR MANUAL
digit collection, setting up, 5-11
digital, 5-9
disconnect tones, customizing, A-12
identifying those allocated by dialing services, 8-18
Internet, 5-9
Internet span, adding, 5-21
number of, 5-10
restarting with Device Monitor, 11-6
Robbed Bit T1, 5-13
routing to a user, 9-2
setting defaults for, 5-16
setting properties for, 5-9
view, adding Robbed Bit T1 in, 5-13
Trunks view, 2-4
trunks, analog, 5-10
TVConvert.exe, 12-3, 12-4
U
U.K. English language prompts, 4-4
U.S. English language prompts, 4-4
Upgrading from Strata CS 2.1, 1-7
user, Admin, 6-4
user, Operator, 6-4
users
account code modes, 10-4
adding, 6-7, 6-9
Admin, 6-4
and DID, 9-2
management tasks, list of common, 6-41
managing, 6-1, 7-1
moving, 6-42
Operator, 6-4
ringing multiple users simultaneously, 9-2
roles, 6-4
routing calls directly to, 9-18
routing trunks directly to, 9-2
setting options, 6-6
Users view, 2-4
users, Gateway, 13-17
users, multiple, 6-13
Using Strata CS, 1-10
V
view bar, 2-5
view, Auto Attendants, 2-4
view, Call Log, 2-4
view, Device Monitor, 2-4
view, Dialing services, 2-4
view, IP Gateways, 2-5
view, IVR Plug-ins, 2-5
view, Maintenance Log, 11-20
view, Queues, 2-4
view, System prompts, 2-4
view, Trunks, 2-4
view, Users, 2-4
view, Workgroups, 2-4
viewing
Windows Event Log, 11-14
views
buttons, 2-4
customizing columns in, 2-9
deleting, 2-9
description of, 2-4
Maintenance Log, 11-20
reference table, 2-4
using commands in, 2-6
working with, 2-6
visual message waiting indicator, 6-44
voice files
allocating space for, 4-11
converting, 12-3, 12-4
importing and exporting, 2-11
moving, 4-11
supported formats, 2-10
working with, 2-10
voice mail
with call forwarding, 6-27
voice messages
playing from computer speakers, 2-11
urgent, 6-18
INDEX-9
BETA DOCUMENT - PRELIMINARY & CONFIDENTIAL
voice title, recording for a user, 6-41
VOX files, 2-10
converting, 12-3, 12-4
W
waiting indicator, visual message, 6-44
waiting light, message, 6-44
WAV files, 2-10
Windows Event Log
viewing, 11-14
wink duration, 5-14
workgroups
adding members, 7-4
assigning a DID number, 7-5
assigning an extension, 7-4
benefits of, 7-2
creating, 7-3
entering general information, 7-3
listing in dial-by-name directory, 7-5
public and personal, defined, 7-2
specifying timeout parameter, 7-5
Workgroups view, 2-4
Workgroups, About, 7-2