1
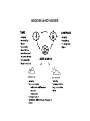
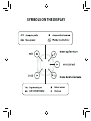
en
USER GUIDE
MODES AND VIEWS
MENU CONTENT
storm alarm
SYMBOLS ON THE DISPLAY
1 Welcome . . . . . . . . . . . . . . . . . . . . . . . . . . . . . . . . . . . . . . . . . . . . . . . . . . . . . . . . . . . . . . . . . . . . . . 5
2 Introduction . . . . . . . . . . . . . . . . . . . . . . . . . . . . . . . . . . . . . . . . . . . . . . . . . . . . . . . . . . . . . . . . . . 6
3 Changing strap length . . . . . . . . . . . . . . . . . . . . . . . . . . . . . . . . . . . . . . . . . . . . . . . . . . . . . . . 7
4 General settings . . . . . . . . . . . . . . . . . . . . . . . . . . . . . . . . . . . . . . . . . . . . . . . . . . . . . . . . . . . . . . 9
4.1 Button tones . . . . . . . . . . . . . . . . . . . . . . . . . . . . . . . . . . . . . . . . . . . . . . . . . . . . . . 9
4.2 Tone guides . . . . . . . . . . . . . . . . . . . . . . . . . . . . . . . . . . . . . . . . . . . . . . . . . . . . . . . 9
4.3 Units . . . . . . . . . . . . . . . . . . . . . . . . . . . . . . . . . . . . . . . . . . . . . . . . . . . . . . . . . . . . . . 10
4.4 Language . . . . . . . . . . . . . . . . . . . . . . . . . . . . . . . . . . . . . . . . . . . . . . . . . . . . . . . . 10
4.5 Backlight . . . . . . . . . . . . . . . . . . . . . . . . . . . . . . . . . . . . . . . . . . . . . . . . . . . . . . . . . 10
4.6 Activating button lock . . . . . . . . . . . . . . . . . . . . . . . . . . . . . . . . . . . . . . . . . . . 11
5 Using TIME mode
......................................................
5.1 Introduction . . . . . . . . . . . . . . . . . . . . . . . . . . . . . . . . . . . . . . . . . . . . . . . . . . . . . .
5.2 Changing TIME mode settings . . . . . . . . . . . . . . . . . . . . . . . . . . . . . . . . . .
5.2.1 Setting time . . . . . . . . . . . . . . . . . . . . . . . . . . . . . . . . . . . . . . . . . . .
5.2.2 Setting date . . . . . . . . . . . . . . . . . . . . . . . . . . . . . . . . . . . . . . . . . . .
5.2.3 Setting sunrise and sunset times . . . . . . . . . . . . . . . . . . . .
5.2.4 Setting dual time . . . . . . . . . . . . . . . . . . . . . . . . . . . . . . . . . . . . .
5.2.5 Using stopwatch . . . . . . . . . . . . . . . . . . . . . . . . . . . . . . . . . . . . . .
5.2.6 Using day counter . . . . . . . . . . . . . . . . . . . . . . . . . . . . . . . . . . . .
5.2.7 Setting alarm . . . . . . . . . . . . . . . . . . . . . . . . . . . . . . . . . . . . . . . . .
12
12
13
13
13
13
14
15
15
16
6 Using ALTI & BARO mode
. . . . . . . . . . . . . . . . . . . . . . . . . . . . . . . . . . . . . . . . . . . . . 18
6.1 How ALTI & BARO works . . . . . . . . . . . . . . . . . . . . . . . . . . . . . . . . . . . . . . . . . 18
6.1.1 Matching profile to your activity . . . . . . . . . . . . . . . . . . . . . 18
2
6.1.2 Getting correct readings . . . . . . . . . . . . . . . . . . . . . . . . . . . . .
6.1.3 Getting incorrect readings . . . . . . . . . . . . . . . . . . . . . . . . . . .
6.2 Setting reference value and profiles . . . . . . . . . . . . . . . . . . . . . . . . . . . .
6.2.1 Setting altitude reference value . . . . . . . . . . . . . . . . . . . . .
6.2.2 Setting profiles . . . . . . . . . . . . . . . . . . . . . . . . . . . . . . . . . . . . . . .
6.3 Using weather trend indicator . . . . . . . . . . . . . . . . . . . . . . . . . . . . . . . . . .
6.4 Activating storm alarm . . . . . . . . . . . . . . . . . . . . . . . . . . . . . . . . . . . . . . . . . .
19
20
21
21
22
22
24
6.5 Using altimeter profile
. . . . . . . . . . . . . . . . . . . . . . . . . . . . . . . . . . . . . 24
6.5.1 Using altitude difference measurer . . . . . . . . . . . . . . . . . . 25
6.5.2 Recording logs . . . . . . . . . . . . . . . . . . . . . . . . . . . . . . . . . . . . . . . . 26
6.6 Using barometer profile
. . . . . . . . . . . . . . . . . . . . . . . . . . . . . . . . . . . 28
6.6.1 Recording logs . . . . . . . . . . . . . . . . . . . . . . . . . . . . . . . . . . . . . . . . 29
6.7 Using automatic profile
. . . . . . . . . . . . . . . . . . . . . . . . . . . . . . . . . . . . 30
7 Using COMPASS mode
................................................
7.1 How compass works . . . . . . . . . . . . . . . . . . . . . . . . . . . . . . . . . . . . . . . . . . . . .
7.2 Getting correct readings . . . . . . . . . . . . . . . . . . . . . . . . . . . . . . . . . . . . . . . .
7.2.1 Setting declination value . . . . . . . . . . . . . . . . . . . . . . . . . . . . .
7.3 Using compass . . . . . . . . . . . . . . . . . . . . . . . . . . . . . . . . . . . . . . . . . . . . . . . . . . .
31
31
31
33
33
8 Using memory
. . . . . . . . . . . . . . . . . . . . . . . . . . . . . . . . . . . . . . . . . . . . . . . . . . . . . . . . . 35
8.1 Viewing logs . . . . . . . . . . . . . . . . . . . . . . . . . . . . . . . . . . . . . . . . . . . . . . . . . . . . . 35
8.2 Viewing and resetting log totals . . . . . . . . . . . . . . . . . . . . . . . . . . . . . . . . 35
3
en
9 Replacing battery . . . . . . . . . . . . . . . . . . . . . . . . . . . . . . . . . . . . . . . . . . . . . . . . . . . . . . . . . . .
10 Specifications . . . . . . . . . . . . . . . . . . . . . . . . . . . . . . . . . . . . . . . . . . . . . . . . . . . . . . . . . . . . . .
10.1 Technical data . . . . . . . . . . . . . . . . . . . . . . . . . . . . . . . . . . . . . . . . . . . . . . . . . .
10.2 Trademark . . . . . . . . . . . . . . . . . . . . . . . . . . . . . . . . . . . . . . . . . . . . . . . . . . . . . .
10.3 Copyright . . . . . . . . . . . . . . . . . . . . . . . . . . . . . . . . . . . . . . . . . . . . . . . . . . . . . . .
10.4 CE . . . . . . . . . . . . . . . . . . . . . . . . . . . . . . . . . . . . . . . . . . . . . . . . . . . . . . . . . . . . . . .
10.5 Patent notice . . . . . . . . . . . . . . . . . . . . . . . . . . . . . . . . . . . . . . . . . . . . . . . . . . .
10.6 Disposal of device . . . . . . . . . . . . . . . . . . . . . . . . . . . . . . . . . . . . . . . . . . . . . .
Index . . . . . . . . . . . . . . . . . . . . . . . . . . . . . . . . . . . . . . . . . . . . . . . . . . . . . . . . . . . . . . . . . . . . . . . . . .
4
37
39
39
40
40
40
40
41
43
1 WELCOME
en
"For over 70 years Suunto has provided accurate, reliable information to people
in need of it. Our instruments enable our users to reach their goals more effectively
and get more out of their sports experience. Our products are often very critical to
the user. Therefore we at Suunto take pride in maintaining highest quality standards
for our products. "
Founded in 1936, Suunto is the world leader in precision compasses, dive
computers and wristop computers. Trusted by climbers, divers and explorers
on every continent, Suunto Outdoor instruments deliver legendary design,
accuracy and dependability. In 1987, Suunto pioneered the first dive computer,
followed by the first ABC wristop in 1998. Offering the latest advancements in
altimeter, sports fitness and GPS devices, Suunto remains the foremost choice
of today’s outdoor professional. To learn more about Suunto Outdoor
instruments and the people who use them, visit www.suunto.com.
5
2 INTRODUCTION
We took you through the basic features and functions of your Suunto Lumi in
the Quick Guide. Now you can start getting to really know how to use your
new device. We will coach you through each process to help you get the most
from your Suunto Lumi wristop.
The wristop is not just for outdoor-related activities. You can be original and
use it indoors as well – perhaps to navigate through a crowded department
store! Enjoy your new Suunto Lumi!
- the Suunto Lumi design team
6
3 CHANGING STRAP LENGTH
en
To change the strap length of your Suunto Lumi:
1. Use a pin, paper clip or other pointed tool to release the spring bar from
the buckle. Remove the strap from the buckle and remove the spring
bar from the strap.
2. Twist the measurement paper included in the package around your
wrist so that the strap is comfortable (not too tight or loose). The number
shown in the opening is the sum of lines, along which the straps need
to be cut. For example 9 equals 5 + 4 pieces per strap.
3. Cut the needed amount of pieces along the cutting lines on the under
side of the strap.
4. Insert the spring bars in the last spring holes of each strap. Push the
spring bar into the buckle simultaneously pushing the moving part at
the end so that it slides into place. The spring bar should lock into the
buckle.
7
8
4 GENERAL SETTINGS
en
If you have not yet activated your Suunto Lumi wristop, please do so now! Just
press any button, and then enter your personal preferences: language,
measurement units, time and date. To change any settings, you need to enter
MENU.
To enter MENU, press [Mode] for 2 seconds - the MENU icon in the upper right
corner will blink twice. Use [Up] or [Down Light] to scroll through the menu
items until you reach GENERAL. Press [Mode] to enter GENERAL. Any changes
you make in MENU will take effect immediately. Press [View] to return to the
previous menu item.
4.1 Button tones
Button tones can be turned either on or off. If you choose to turn button tones
on, you will hear a beep whenever you press a button.
In GENERAL, press [Mode] to enter BUTTON TONES. Press [Up] or [Down Light] to
turn the button tones on or off.
4.2 Tone guides
Tone guides can be turned either on or off. If you choose to turn tone guides
on, you will hear a beep after you have made a setting or whenever your Suunto
Lumi wants your attention.
You will hear tone guides when you:
● change a setting value
● should set the altitude reference value
● start or stop the log recorder
9
● start or stop measuring altitude difference
● start or stop the stopwatch
● are using AUTOMATIC profile and the device switches between ALTIMETER
and BAROMETER profile.
In GENERAL, press [Mode] to enter GUIDES. Press [Up] or [Down Light] to turn
the tone guides on or off.
4.3 Units
In GENERAL, press [Down Light] to reach and [Mode] to enter UNITS.
You can choose either metric or imperial units for the following items:
● Air pressure: hPa or inHg
● Altitude: m or ft
● Temperature: °C or °F
● Date: dd.mm. or mm.dd.
● Time: 24 h or 12 h
Press [Up] or [Down Light] to change the value.
4.4 Language
Select a language for your Suunto Lumi. You can choose from 4 languages:
English, French, Spanish and German.
In GENERAL, press [Mode] to enter LANGUAGE. Press [Up] or [Down Light] to
scroll through the language options.
4.5 Backlight
You can activate the backlight in any mode by pressing [Down Light]. The
backlight will automatically turn off after 5 seconds. To use the backlight while
10
in MENU, you will need to activate it in the TIME, ALTI & BARO or COMPASS mode
before entering MENU. The backlight will then be activated until you exit MENU.
NOTE: Heavy use of the backlight will significantly reduce battery life.
4.6 Activating button lock
You can activate and deactivate the button lock by keeping [Down Light]
pressed down. When the button lock is activated, it is indicated with a lock
symbol .
NOTE: You can change views and use the backlight when the button lock is
activated.
11
en
5 USING TIME MODE
5.1 Introduction
The TIME mode includes features related to time measurement. To access the
TIME mode, press [Mode] until TIME is selected. By pressing [View], you can
scroll through the various views within the TIME mode.
There are 8 different views in the TIME mode:
● Empty: no supplementary information
● Weekday: displays the current day of the week
● Date: displays the current date
● Seconds: displays the seconds counter
● Dual time: displays the alternative time zone reading
● Sunrise and sunset: displays the sunrise and sunset times of a chosen
location
● Stopwatch: can be used as a timer
● Day counter: countdown to/from a specified event
The current time will always be displayed in the center. Only the view displayed
below the current time will change.
12
5.2 Changing TIME mode settings
en
5.2.1 Setting time
You set the time in MENU. To enter MENU, press [Mode] for 2 seconds - the menu
icon in the upper right corner will blink twice.
In MENU, press [Down Light] to reach and [Mode] to enter TIME. Press [Down
Light] again to reach and [Mode] to enter TIME. Change the hours, minutes and
seconds by pressing [Up] or [Down Light].
5.2.2 Setting date
You set the date in MENU. To enter MENU, press [Mode] for 2 seconds - the menu
icon in the upper right corner will blink twice.
In MENU, press [Down Light] to reach and [Mode] to enter DATE. Press [Down
Light] again to reach and [Mode] to enter DATE. Change the year, month and
day by pressing [Up] or [Down Light].
5.2.3 Setting sunrise and sunset times
You can select a reference city for which you want to view the sunrise and
sunset times.
You set the sunrise and sunset times in MENU. To enter MENU, press [Mode] for
2 seconds - the menu icon in the upper right corner will blink twice.
In MENU, press [Down Light] to reach and [Mode] to enter SUNRISE. You will
need to input a general location, a region, as well as the nearest city. Press [Up]
or [Down Light] to scroll through the choices. After you have set the
information, your Suunto Lumi will automatically calculate both sunrise and
sunset times.
13
NOTE: If you want to set the sunrise and sunset times for a location that is not
listed in your device, select another reference city from the same time zone. Select
the closest city north or south from your location according to the map.
Handy tip: Setting sunrise and sunset times
You’re on holiday in Toronto and you decide to take a walk. You want to know
when the sun sets so that you get back to your hotel before it gets dark. You choose
“Toronto” as your reference city. Your Suunto Lumi will then tell you when the sun
sets!
5.2.4 Setting dual time
Dual time is a nifty feature! If you want to follow the current time of two
locations that so happen to have different time zones, then you can set one
of those times as the dual time.
You set the the dual time in MENU. To enter MENU, press [Mode] for 2 seconds
- the menu icon in the upper right corner will blink twice.
In MENU, press [Down Light] to reach and [Mode] to enter TIME. Press [Down
Light] to reach and [Mode] to enter DUAL TIME. Change the time by pressing
[Up] or [Down Light].
NOTE: We recommend that you always set the current time of your location
as the primary time as the alarm clock will sound according to that time.
Handy tip: Knowing the time at home
You travel abroad and you want to know what time it is at home. You set the dual
time as the time at home. Just check your dual time from the TIME mode and now
you know what time it is at home, in case you want to telephone friends or family.
14
5.2.5 Using stopwatch
You can use the stopwatch to measure time. It is ideal for timing your various
sport activities!
To use the stopwatch, go to the TIME mode. Use [View] to scroll through the
various views until you see stopwatch. Use [Start Stop] to start and stop the
stopwatch. To reset, press [Up] until the time is cleared.
NOTE: Times recorded with the stopwatch are not stored into the memory.
Handy tip: Measuring time
You've moved to a new apartment. You want to know exactly how long it takes
for you to walk to the bus stop so you won't be late for work the next day. You start
the stopwatch and start walking to the bus stop. The result: 3 minutes and 40
seconds. Now you know what time you have to leave in the morning!
5.2.6 Using day counter
The day counter is another one of our smart features! You can program any
special day that you would like to remember, and the countdown to or from
that event will start to scroll! You can countdown: your birthday, your
anniversary, your better half’s birthday, (for our pregnant wearers) your due
date, the day you begin your adventure, the day you have to go back to work
after your incredible holiday ends and so on…
You set the day counter in MENU. To enter MENU, press [Mode] for 2 seconds the menu icon in the upper right corner will blink twice.
15
en
In MENU, press [Down Light] to reach and [Mode] to enter DATE. Press [Mode]
to enter DAY COUNTER. Change the year, month and day by pressing [Up] or
[Down Light].
5.2.7 Setting alarm
Your Suunto Lumi works as an alarm clock!
You set the alarm in MENU. To enter MENU, press [Mode] for 2 seconds - the
menu icon in the upper right corner will blink twice.
In MENU, press [Down Light] to reach and [Mode] to enter TIME. Press [Mode]
to enter ALARM. First switch the alarm on or off by using [Up] or [Down Light].
Press [Mode] and then set the alarm time by using [Up] or [Down Light]. Press
[Mode] to confirm your settings.
When the alarm is switched on, the symbol appears on the display.
When the alarm sounds, you stop it by selecting NO. The alarm will sound the
same time the following day.
24h
5min
You can turn on the snooze function by selecting YES when the alarm sounds.
The snooze function is also turned on if you don't select anything. The alarm
will sound every 5 minutes until you select NO. You can snooze up to 12 times
within 1 hour.
16
TIP: When the snooze is turned on, you can deactivate it in the TIME mode by
keeping [View] pressed down.
Handy tip: Waking up in the morning
Your holiday starts tomorrow and you’re going on a long trip. You want to wake
up early to make sure you have packed everything.You set your Suunto Lumi alarm
for 6:30 and go to bed. The alarm wakes you up the next morning, but you feel like
you need just a bit more sleep. So you choose YES when the device asks whether
you want to snooze for another five minutes. The alarm goes off again. This time
you get up and enthusiastically start preparing for your trip. What a difference
those five minutes make!
17
en
6 USING ALTI & BARO MODE
6.1 How ALTI & BARO works
The ALTI & BARO mode includes three different profiles: ALTIMETER, BAROMETER
and AUTOMATIC.
To access the ALTI & BARO mode, press [Mode] until ALTI & BARO is selected. By
pressing [View], you can scroll through the various views within the ALTI & BARO
mode. You can select a profile in MENU – see Section 6.2.2 Setting profiles on page
22 for more information!
TIP: If you press [View] for 2 seconds in the ALTI & BARO, you will reach ALTI-BARO
in MENU, where you can change your settings!
6.1.1 Matching profile to your activity
What is the difference between profiles? An altimeter measures current altitude
and is used for vertical movements. The altimeter is based on air pressure – so
the lower your altitude then the more air above you. The ALTIMETER profile in
18
Suunto Lumi is combined with a memory that keeps track of your total and
cumulative vertical ascents and descents. You can use the ALTIMETER profile
while biking, hiking, skiing, snowboarding, climbing – basically for whatever
outdoor activity including movement in altitude that you want to monitor!
A barometer measures barometric air pressure when there is no increase or
decrease in altitude. This is useful for weather forecasting. Low-pressure weather
systems usually bring cloudy skies and precipitation (rain or snow), while
high-pressure weather systems bring few clouds or precipitation. When the
barometric pressure drops rapidly, there is a greater chance for bad weather.
You can use the BAROMETER profile for any outdoor activity that does not involve
changes in altitude (surfing, sailing, canoeing) – or if you just want to play
meteorologist!
To help you use the right mode in the right situation, we have designed the
AUTOMATIC profile that automatically switches between the ALTIMETER and
BAROMETER profile depending on your whereabouts. But, even if you use the
AUTOMATIC profile, your Suunto Lumi will still prompt you when it switches
from the ALTIMETER to the BAROMETER profile or vice versa. Handy, isn’t it?!
6.1.2 Getting correct readings
Suunto Lumi measures the surrounding air pressure (absolute air pressure),
which is affected by the altitude of the device and the weather.
If you are engaged in an outdoor activity, you need to enter the altitude
reference value for your location, which is found on most topographic maps.
Your Suunto Lumi will now give you the correct readings.
19
en
Absolute air pressure is measured constantly
Absolute air pressure + Reference altitude = Sea level air pressure (BAROMETER
profile)
Absolute air pressure + Reference altitude = Altitude (ALTIMETER profile)
Changes in local weather conditions will affect altitude readings. If local weather
changes often, it is advisable to frequently reset the local reference altitude
value, preferably before starting your journey and when an altitude reference
value is available. If local weather is stable, the local altitude reference value
can be set just once a day.
6.1.3 Getting incorrect readings
ALTIMETER + standing still + weather change
If you use the ALTIMETER profile for a longer period of time without any elevation
change and the weather changes, then your Suunto Lumi reads the weather
changes as altitude changes.
ALTIMETER + altitude moving + weather change
If the weather is frequently changing as you are either ascending or descending,
your Suunto Lumi will give incorrect readings.
BAROMETER + altitude moving
If you use the BAROMETER profile for a longer period of time as you are either
ascending or descending, your Suunto Lumi assumes you are standing still
and reads your altitude changes as weather changes.
20
Handy tip: Setting altitude reference value
You’re on the second day of your two-day hike. You realize that you forgot to switch
from the BAROMETER profile to the ALTIMETER profile when you started out in the
morning. So you hike to the nearest location shown on your topographic map for
which a reference altitude value is provided. You set your Suunto Lumi altitude
reference value accordingly. Your altitude readings are correct again.
6.2 Setting reference value and profiles
6.2.1 Setting altitude reference value
It is really important to provide an accurate altitude reference value. The altitude
reference is the exact altitude of where you are currently standing. You can
find this measurement from any topographic map. The more often you insert
an altitude reference value, the more precise the current reading will be as the
air pressure usually changes depending on your location. Your Suunto Lumi
will remind you to set the altitude reference value, if needed!
You can set your altitude reference value in MENU. To enter MENU, press [Mode]
for 2 seconds - the menu icon in the upper right corner will blink twice.
21
en
In MENU, press [Down Light] to reach and [Mode] to enter ALTI-BARO. In
ALTI-BARO, press [Mode] to enter REFERENCE. Change the value by pressing [Up]
or [Down Light].
We would like to stress the importance of accuracy here. Try to find what your
altitude reference value will be before heading out on your journey. All you
need to do is input your altitude reference value, and Suunto Lumi will calculate
the rest!
Changes in weather conditions will affect your altitude readings. If the weather
is variable, then you will need to frequently set a new reference value. If the
weather is stable, then you need to set the value only once a day.
6.2.2 Setting profiles
You set profiles in MENU. To enter MENU, press [Mode] for 2 seconds - the menu
icon in the upper right corner will blink twice.
In MENU, press [Down Light] to reach and [Mode] to enter ALTI-BARO. In
ALTI-BARO, press [Down Light] to reach and [Mode] to enter PROFILE. You can
choose from 3 profiles: ALTIMETER, BAROMETER or AUTOMATIC. Press [Up] or
[Down Light] to scroll through the profiles. Press [Mode] to select the desired
profile. It’s very important that you use the profile that directly relates to your
activity in order to get an accurate reading!
6.3 Using weather trend indicator
The weather trend indicator on the top of the display shows which way the air
pressure has changed. The weather trend indicator is displayed in the ALTI &
BARO mode.
The arrow pointing right from center shows values 3 hours prior to the current
value, and the line pointing left from center shows values 3 hours prior to that
22
value. So you have a good 6 hours of air pressure change values. This is a useful
feature when you are planning to head out for a hike or when you need to look
for shelter since it provides an indication of the weather conditions.
Handy tip: Anticipating the weather
You're on holiday and you want to anticipate tomorrow's weather, so you switch
your Suunto Lumi to the BAROMETER profile for the night. In the morning, you check
the weather trend indicator and note that the air pressure remained stable for the
last six hours. Hopefully this will continue during the day!
The weather trend indicator can indicate 9 different patterns in the barometric
trend, for example:
Situation 3-6 hours ago
Situation last 3 hours
Dropped heavy (>2 hPa/3hours) Dropping heavily (>2 hPa/3hours)
Remained stable
Rising heavily (>2 hPa/3hours)
Rose heavy (>2 hPa/3hours)
Dropping heavily (>2 hPa/3hours)
23
en
TIP: If the weather trend indicator shows that the air pressure is constantly
rising, there is a higher possibility of sunny weather upcoming. Again, if the air
pressure is constantly dropping, there is a higher possibility of rainy weather.
6.4 Activating storm alarm
The storm alarm notifies you with a warning alarm when there is a rapid fall of
barometric pressure during a 3-hour period - so you better take cover since a
storm is approaching! The storm alarm sounds and the alarm symbol flashes
on the display for 20 seconds. The storm alarm only works when the BAROMETER
profile is selected.
You set the storm alarm in MENU. To enter MENU, press [Mode] for 2 seconds the menu icon in the upper right corner will blink twice.
In MENU, press [Down Light] to reach and [Mode] to enter ALTI-BARO. In
ALTI-BARO, press [Down Light] to reach and [Mode] to enter STORM. Press [Up]
or [Down Light] to either turn on or off the storm alarm.
Handy tip: Getting surprised by a storm while hiking
You are on a two day hike and you are about to start your second day. The
BAROMETER profile is on and the storm alarm suddenly goes off. The sky is getting
dark. You take cover and postpone your hike for a few hours.
6.5 Using altimeter profile
The ALTIMETER profile calculates your altitude based on the altitude reference
value.
24
en
There are 5 views within the ALTIMETER profile:
● Empty: no supplementary information
● Log recorder: allows you to record your activities
● Temperature: displays the current temperature
● Altitude difference measurer: measures the difference in your altitude
● Time: shows the current time
By pressing [View] you are able to scroll through the views in the ALTI & BARO
mode. Your current altitude will always be displayed. Only the view displayed
below the current altitude will change.
NOTE: If you are wearing your Suunto Lumi on your wrist, you will need to
take it off in order to get an accurate temperature reading because your body
temperature will affect the initial reading. Your Suunto Lumi will remind you to do
this!
6.5.1 Using altitude difference measurer
The altitude difference measurer feature is quite impressive! It is a quick-read
measurement of your altitude difference starting from zero. It is handy when
you want to know how much your altitude difference is for example during a
climb.
25
You start the altitude difference measurer in the ALTI & BARO mode. Use [View]
to select the altitude difference measurer. Press [Start Stop] as you begin a
climb - your Suunto Lumi will do the math and calculate how high you climb.
To stop measuring, press [Start Stop] again. To reset, press [Up] until the view
is cleared.
NOTE: You need to stop the altitude difference measurer in order to reset it!
The altitude difference measurer is not dependent on your altitude reference
value – and always works regardless of the values you have or have not input!
You can also use it when the log recorder is on.
Handy tip: Measuring your climbing
You are about to start climbing a mountain that is 3280 feet (1000 m) high. You
want to be able to check your progress as you climb, so you activate the altitude
difference measurer. You start climbing, checking your altitude occasionally to see
how far you are from the next check point. At some point you start to get tired. You
check your altitude, and see that there’s still a lot of climbing ahead. Maybe you
should replan the next check point!
6.5.2 Recording logs
The log recorder is an interactive view which allows you to record your
movements in altitude. You can view the recorded information at a later time.
You start recording logs in the ALTI & BARO mode. Use [View] to select the log
recorder view. Press [Start Stop] to start and stop the log recorder. A log symbol
is displayed in all modes when the log recorder is on. To reset the log
recorder, press [Up] until the view is cleared.
26
NOTE: You need to stop the log recorder in order to reset it!
en
NOTE: Your Suunto Lumi has the capacity to store up to 5 logs. When you start
recording your 6th log, the first log erases from the memory while the second log
moves up into that first spot. Each log can be recorded for a maximum of 33 hours.
The altitude information is recorded every 30 seconds.
While you are recording logs, your Suunto Lumi shows you additional views
about your altitude change: altitude difference, ascent and descent.
● Altitude difference: indicates your altitude difference from when you
started your log
● Ascent: indicates how much you have ascended from the log start
● Descent: indicates how much you have descended from the log start
In the additional views:
is displayed when your altitude is above the starting point.
is displayed when your altitude is the same as at the starting point.
is displayed when your altitude is below the starting point.
is displayed when you view how much you have ascended from the log
start.
is displayed when you view how much you have descended from the log
start.
NOTE: These views are only displayed, when the log recorder is turned on. The
view disappears after you reset the log recorder.
27
You can access your recorded log history and log details in MENU, see Section
8.1 Viewing logs on page 35.
Handy tip: Recording altitude
You’re going on a mountain hike. You want to record how much you ascend and
descend to compare the figures with previous hikes. You set your Suunto Lumi to
the ALTIMETER profile and start the log recorder when you begin the hike. After the
hike, you stop your log recorder and reset it. Now you can compare it with your
previous logs.
6.6 Using barometer profile
The BAROMETER profile shows the sea level air pressure when there is no increase
or decrease in altitude, for example when you go sailing.
There are 4 views within the BAROMETER profile:
● Empty: no supplementary information
● Temperature: displays current temperature
● Log recorder: records your altitude changes in logs
● Time: displays the current time
28
By pressing [View], you are able to scroll through the views. The sea level air
pressure will always be displayed in the center. Only the view displayed below
the sea level air pressure will change.
NOTE: If you are wearing your Suunto Lumi on your wrist, you will need to
take it off in order to get an accurate temperature reading because your body
temperature will affect the initial reading. Your Suunto Lumi will remind you to do
this!
Handy tip: Using the BAROMETER profile
You’re hiking and you’re getting tired. You decide to take a nap and set up your
tent. Since your altitude will stay the same, you activate the BAROMETER profile.
When you wake up, you can check the changes in sea level air pressure.
6.6.1 Recording logs
When you are using the log recorder in the ALTIMETER profile, you can switch
to the BAROMETER profile for example when you take a break during your hike.
The log recorder will continue recording the log, but the recorded altitude
values will remain constant as you have switched to the BAROMETER profile.
The device assumes you are standing still. For information on using the log
recorder, see Section 6.5.2 Recording logs on page 26.
NOTE: If you have started the log recorder in the ALTIMETER profile, you can
stop it also in the BAROMETER profile. You can start the log recorder in barometer
profile, but it will not record changes in altitude.
29
en
6.7 Using automatic profile
The AUTOMATIC profile switches automatically between the ALTIMETER and
BAROMETER profile according to your movements. The AUTOMATIC profile
switches from ALTIMETER to BAROMETER profile when the device does not move
in altitude for 12 minutes. When the device has moved 5 meters in altitude
within 3 minutes, the automatic profile switches from BAROMETER to ALTIMETER
profile. Depending on which profile is active, you can access the ALTIMETER or
BAROMETER profile views by pressing [View].
30
7 USING COMPASS MODE
en
7.1 How compass works
The compass allows you to orient yourself in relation to the magnetic North.
There are three different views in the COMPASS mode:
● Empty: displays no supplementary information
● Heading: displays the numerical degree value of your heading
● Time: displays the current time
7.2 Getting correct readings
To ensure correct compass readings while in COMPASS mode, you need to
calibrate the compass correctly when prompted, set the correct declination
value, keep the device level, and keep away from metal (for example, jewelry)
and magnetic fields (for example, power lines).
To calibrate the compass you need to keep the device level (do not tilt it in any
directions), slowly rotate the device clockwise (around 15 seconds per round)
until the compass is activated. The compass will switch itself to power saving
mode after a minute. You can reactivate it by pressing [Start Stop].
NOTE: If the compass is not showing consistent values, you need to calibrate
it. Keep the device level and rotate it slowly clockwise until the north indicator is
stable again. This can take up to 3 rotations.
31
32
7.2.1 Setting declination value
Declination is the angle between the true and magnetic North, and this function
allows you to correct that difference. An interesting fact about declination is
that the location of the magnetic North changes slightly every year. You can
find the declination value from a map. For the most up-to-date value, do a
search from the Internet (the National Geophysical Data Center in the United
States supplies very accurate information).
You can set the declination value in MENU. To enter MENU, press [Mode] for 2
seconds - the menu icon in the upper right corner will blink twice.
In MENU, press [Down Light] to reach and [Mode] to enter COMPASS. You can
set the declination to off or choose between East (E) or West (W) by pressing
[Up] or [Down Light] and then [Mode]. Then set the declination value of your
current location by pressing [Up] or [Down Light].
7.3 Using compass
The moving arrow segment on the outer rim of the display indicates the
direction of North. Your own heading is at 12 o’clock and its cardinal point is
33
en
shown in the center. When in the empty view, you will only see the cardinal
point. When in the heading view, you will see the numerical degree value of
your heading.
Remember to keep your compass level, and keep away from metal (for example,
jewelry) and magnetic fields (for example, power lines) to get correct readings.
NOTE: The compass will switch itself to power saving mode after a minute.
You can reactivate it by pressing [Start Stop].
34
8 USING MEMORY
en
8.1 Viewing logs
You can view data for a specific log in MENU. To enter MENU, press [Mode] for
2 seconds - the menu icon in the upper right corner will blink twice.
In MENU, press [Mode] to enter MEMORY. In MEMORY, press [Up] or [Down Light]
to scroll through the log listings. Press [Mode] to view the chosen log. Press
[Up] or [Down Light] to scroll through the data list. You can view the overall
duration, the altitude graph and the highest and lowest point information.
What’s neat about the altitude graph is that you are able to view that entire
log with [Mode]! Use [Up] and [Down Light] to control the speed or direction
of the scrolling graph. When you start to scroll, the corresponding time will be
displayed below the scrolling graph. To stop scrolling, press [Mode].
NOTE: Your Suunto Lumi has the capacity to store up to 5 logs. When you start
recording your 6th log, the first log erases from the memory while the second log
moves up into that first spot. Each log can be recorded for a maximum of 33 hours.
The altitude information is recorded every 30 seconds.
8.2 Viewing and resetting log totals
Log totals is an interesting function because you can see the combined total
of each and every log recorded since the last log totals reset. You can view the
various cumulative totals for all of your logs in MENU. To enter MENU, press
[Mode] for 2 seconds - the menu icon in the upper right corner will blink twice.
35
In MENU, press [Mode] to enter MEMORY. Then press [Mode] again to enter LOG
TOTALS. Press [Mode] to enter VIEW and use [Up] and [Down Light] to scroll
through the list.
If you want to reset your log totals data, press [Down Light] to reach and [Mode]
to enter RESET. Use [View] to store or [Down Light] to reset your log totals data.
36
9 REPLACING BATTERY
en
Your Suunto Lumi operates on a 3-volt lithium cell, type: CR 2032.
NOTE: To reduce the risk of fire or burns, do not crush, puncture or dispose of
used batteries in fire or water. Only replace them with manufacturer-specified
batteries. Recycle or dispose of used batteries properly.
Use a coin to open the battery compartment on the back of your device. First
make sure that the O ring and all surfaces are clean and dry. Then remove the
old battery. Place the new battery into the battery compartment with the
positive side facing up. Slide the battery gently against the contact plate on
the side, ensuring that it does not break or bend out of place. When you are
replacing the cover, rotate it carefully counter-clockwise with your thumb in
order to align the threads. The cover should rotate easily at first without having
to use force. If you have to use force right at the start, the threads are misaligned
and they may be damaged. Finally tighten the cover with a suitably sized coin.
37
NOTE: The markings on the cover may be left unaligned once the cover has
been tightened. If the old cover is undamaged, it does not need to be replaced.
NOTE: If the threads of the battery compartment cover are damaged, send
your device to an authorized Suunto representative for service.
NOTE: Replace the battery with extreme care to ensure that your Suunto Lumi
remains water resistant. Careless battery replacement may void the warranty.
NOTE: Heavy use of the backlight will significantly reduce battery life.
38
10 SPECIFICATIONS
en
10.1 Technical data
General
●
●
●
●
●
Operating temperature -20 °C to +60 °C / -4°F to +140°F
Storage temperature -30 °C to +60 °C / -22°F to +140°F
Water-resistant 30 m / 100 ft (according to ISO 2281)
Mineral glass
User-replaceable battery CR2032
Altimeter
● Display range -500 m to 9000 m / -1640 ft to 32760 ft
● Resolution 1 m / 3 ft
Barometer
● Display range 300 to 1100 hPa / 8.8 to 32.6 inHg
● Resolution 1 hPa / 0.03 inHg
Thermometer
● Display range -20°C to 60°C / -4°F to 140°F
● Resolution 1°C / 1°F
39
10.2 Trademark
Suunto, Wristop Computer, Suunto Lumi, their logos, and other Suunto brand
trademarks and made names are registered or unregistered trademarks of
Suunto Oy. All rights are reserved.
10.3 Copyright
Copyright © Suunto Oy 2007. All rights reserved. This publication and its
contents are proprietary to Suunto Oy and are intended solely for the use of
its clients to obtain knowledge and key information regarding the operation
of Suunto Lumi products. Its contents shall not be used or distributed for any
other purpose and/or otherwise communicated, disclosed or reproduced
without the prior written consent of Suunto Oy.
While we have taken great care to ensure that information contained in this
documentation is both comprehensive and accurate, no warranty of accuracy
is expressed or implied. Its content is subject to change at any time without
notice. The latest version of this documentation can always be downloaded
at www.suunto.com.
10.4 CE
The CE mark is used to mark conformity with the European Union EMC directives
2004/ 108/EY and 99/5/EEC.
10.5 Patent notice
This product is protected by pending patent applications.
40
10.6 Disposal of device
en
Please dispose of the device in an appropriate way, treating it as electronic
waste. Do not throw it in the garbage. If you wish, you may return the device
to your nearest Suunto representative.
41
42
Index
A
B
absolute air pressure, 20
accessing
ALTI & BARO mode, 18
COMPASS mode, 31
TIME mode, 12
alarm, 16
ALTI & BARO mode
accessing, 18
getting correct readings, 19
getting incorrect readings, 20
profiles, 18, 22
altimeter profile, 18
setting, 22
using, 24
views, 25
altitude difference measurer, 25
altitude reference value, 19
automatic profile, 19
setting, 22
using, 30
backlight, 10
barometer profile, 19
setting, 22
using, 28
views, 28
button tones, 9
C
CE, 40
changing strap length, 7
compass
using, 33
COMPASS mode
accessing, 31
using, 31
views, 31
D
date, 13
day counter, 15
declination, 33
disposal of device, 41
43
dual time, 14
altimeter, 18
automatic, 19
barometer, 19
G
general settings
button tones, 9
language, 10
tone guides, 9
units, 10
getting incorrect readings, 20
R
recording logs, 26, 29
replacing battery, 37
S
language, 10
log recorder
using, 26, 29
views, 27
logs
erasing, 35
viewing, 35
log totals
resetting, 35
viewing, 35
sea level pressure, 19
setting
alarm, 16
altitude reference value, 21
day counter, 15
declination value, 33
profiles, 22
storm alarm, 24
stopwatch, 15
storm alarm, 24
strap length, 7
sunrise and sunset, 13
M
T
magnetic North, 31
technical data, 39
temperature, 25, 28
time, 13
TIME mode
accessing, 12
L
P
patent notice, 40
profile
44
setting date, 13
setting dual time, 14
setting sunrise and sunset, 13
setting time, 13
views, 12
tone guides, 9
trademark, 40
U
units, 10
using
altimeter profile, 24
automatic profile, 30
barometer profile, 28
compass, 33
V
views
altimeter profile, 25
barometer profile, 28
COMPASS mode, 31
log recorder, 27
TIME mode, 12
W
weather trend indicator
patterns, 23
using, 22
45
www.suunto.com
Copyright © Suunto Oy 6/2007, 9/2007.
All rights reserved.