1
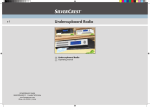
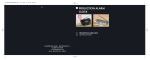
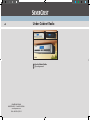
Under-Cabinet Radio 6 KH 2396 Under-Cabinet Radio Operating manual KOMPERNASS GMBH BURGSTRASSE 21 ⋅ D-44867 BOCHUM www.kompernass.com ID-Nr.: KH 2396-3/10-V3 KH 2396 INDEX PAGE Intended Use 2 Items supplied 2 Technical data 2 Safety instructions 3 The appliance components 6 Setting up the appliance 6 Fixing the kitchen radio beneath a wall cabinet 7 Setting up the kitchen radio 7 The settings menu 8 Radio operation 12 Non-functionality 14 Cleaning 14 Disposal 14 CE Conformity 15 Importer 15 Warranty and Service 15 Read the operating instructions carefully before using the appliance for the first time and preserve this booklet for later reference. Pass this booklet on to whoever might acquire the appliance at a future date. -1- Intended Use This Kitchen Radio is intended for use either free-standing or for assembly beneath a wall cabinet. The kitchen radio is intended exclusively for the reception of FM radio stations as well as for alarm wake up by signal tone or radio. This Kitchen Radio is not intended for utilisation in commercial or industrial applications. No warranty/liability will be assumed for damage resulting from improper use or from unauthorised reconstruction of the device! Items supplied 1 1 4 2 1 Kitchen radio KH 2396 Mounting plate Screws Batteries type AAA/Micro Operating manual Technical data Power supply: 220 - 240 V~, 50 Hz Power consumption: Operation: Standby: 5 Watt Max. 2 Watt Output level: 1 Watt at 10% THD Frequency range UKW (FM) 87.5 – 108 MHz Operating temperature: +5 ~ +35°C Humidity: 5 ~ 90 % (No condensation) Dimensions (W x H x D): 21,8 x 12 x 5,1 cm Weight: 575 g Protection class: II / Backup batteries 2 x 1.5 V Type AAA/Micro The technical features of this appliance enable an adjustable reception capability that exceeds the permitted frequency range of 87,5 - 108 MHz. In some countries, different national regulations may apply to the assigned radio frequency ranges. Please note that information received outside of the assigned radio frequency ranges may not be utilised, passed on to third parties or otherwise misused. -2- Safety instructions • This appliance is not intended for use by individuals (including children) with restricted physical, physiological or intellectual abilities or deficiencies in experience and/or knowledge unless they are supervised by a person responsible for their safety or receive from this person instruction in how the appliance is to be used. Children should be supervised to ensure that they do not play with the appliance. • Always remove the power plug before cleaning the appliance. • Check the appliance and all parts for visible damages. The safety concept can work only if the appliance is in a faultless condition. • The power plug must always be easily accessible, so that in the event of an emergency the appliance can be quickly disconnected from the mains power supply. Risk of electrical shocks. • Connect the appliance only to correctly installed and earthed mains power sockets. Ensure that the rating of the local power supply tallies completely with the details given on the rating plate of the appliance. • Arrange for Customer Services to repair or replace connecting cables and/or appliances that are not functioning properly or have been damaged. • NEVER submerse the appliance in water. Wipe it only with a slightly damp cloth. • Do not expose the appliance to rain and never use it in a humid or wet environment. • Always take hold of the power cable by the plug. Do not pull on the cable itself and never touch the power cable with wet hands, this could result in either a short circuit or you receiving an electric shock. • Do not place the appliance, furniture or anything else on the power cable and ensure that it does not become clamped. • NEVER make a knot in the power cable and do NOT bind it together with other cables. The power cable should be positioned so that no one can step on or trip over it. • Ensure that the power cable does not become wet during operation. -3- • You are not permitted to open the appliance housing or repair the appliance. If the housing is opened, you run the risk of receiving a potentially fatal electric shock and the warranty lapses. • Protect the appliance against drip and spray water. Do not place any water-filled vessels (e.g. flower vases) on or near the appliance. Risk of fire! • Do not use the appliance near hot surfaces. • Do not place the appliance in locations that are subject to direct sunlight. Otherwise, it may overheat and become irreparably damaged. • Do not locate the kitchen radio directly above hotplates. The kitchen radio may be damaged. There is a danger of fire! • Never leave the appliance unattended while it is being used. • Never cover the ventilation slots of the appliance while it is on. • Do not place open fire sources, such as candles, on or near the appliance. Risk of personal injury! • Keep the power cable and appliance away from children. Children frequently underestimate the dangers of electrical appliances. • Provide a stable location for the appliance. • Do not operate the appliance if it has sustained a fall or is damaged. • Arrange for the appliance to be checked and/or repaired by qualified technicians. • Keep batteries well away from children. Children can put batteries into their mouths and swallow them. • If a battery is swallowed medical assistance must be sought immediately. Note: • Some aggressive furniture finishes can have a destructive influence on the appliance's rubber pads. If necessary, place the appliance on a nonslip pad. Thunderstorms! • Equipment connected to a power supply can be damaged during a thunderstorm. You should therefore always remove the plug from the power socket when there is a storm. -4- Notice regarding separation from mains-power The ON/OFF switch does not completely disconnect the appliance from the power network. Additionally, the appliance consumes power when in standby-mode. To completely separate the appliance from mains power, the power plug MUST be removed from the mains power socket. Notice regarding electrical power surges (EFT / electrical fast transient) and electrostatic discharges: In a case of malfunction due to an electrical fast transient (power surge) and/or electrostatic discharge, the appliance must be returned to default settings in order to re-establish normal operation. Possibly the power supply must be separated and then reconnected. The batteries (if present) must be removed and then reinserted. Information regarding the handling of batteries The appliance uses batteries for memory conservation. For the handling of batteries please observe the following: Risk of explosion! • Do not throw batteries into a fire. Do not recharge the batteries. • Never open batteries, never solder or weld batteries. The risk of explosions and injuries exists! • Regularly check the condition of the batteries. Leaking batteries can cause damage to the appliance. • If you do not intend to use the appliance for an extended period, remove the batteries. • Should the batteries leak, put on a pair of protective gloves and clean the battery compartment and terminals with a dry cloth. Important! No liability/warranty will be considered for damage to the Kitchen Radio caused by the effects of moisture, water penetration or overheating! -5- The appliance components q Mounting plate/Baseplate w Power cable e Wire aerial r Display t ON/OFF - On/off switch, radio function y DOWN - Selection button down u UP - Selection button up i PRESET — - for the selection of memory slots o PRESET + - for the selection of memory slots a Battery compartment s A.O.T./SNOOZE - control for the timer switch off / snooze button d MEMORY/ - Save button/button lock f TIMER - control for the timer programming g MODE/BASS - activates the super bass function switches to display options h VOL. — - Volume decrease ALARM SET q - alarm function 1 control j VOL. + - Volume increase ALARM SET w - alarm function 2 control Setting up the appliance First take all appliance components from the packaging and remove all packing foil and tape. Inserting the back-up batteries The back-up batteries ensure that the time, date and alarm time setting are not lost in the event of a power cut. For this you require two 1.5 V batteries of the type AAA/Micro. 1. Open the lid of the battery compartment a on the underside of the kitchen radio. 2. Insert the batteries. Make sure the polarities are correct. Otherwise, the memory receipt will not function and damage may be caused to the appliance. 3. Close the lid of the battery compartment a. The lid must audibly engage. Note: The back-up batteries must be checked at least once per year and, if necessary, exchanged for new ones. -6- Fixing the kitchen radio beneath a wall cabinet Caution: The following described procedures must only be carried out by persons with corresponding experience since if they are carried out incorrectly it can lead to device damage and/or cupboard surface damage. With the supplied mounting plate q you can fix the kitchen radio below, for example, a kitchen wall cabinet: 1. Determine a suitable location for the kitchen radio. 2. Press the two retaining levers on the back of the appliance down. Push the mounting plate q back and remove it. 3. Place the mounting plate q against the installation location. Allow 4,5 cm space to the front edges. This way the kitchen radio will later fit flush. 4. Mark the four points for the drillholes with a pencil. 5. Using a spike, make a small depression at the marking points. Firmly secure the mounting plate q with the supplied screws. 6. Hold the kitchen radio slanted, with the two recesses in the retaining lugs on the mounting plate q. Press the kitchen radio upwards until it noticeably engages. Disassembly • To disassemble the kitchen radio, press the two retaining levers at the rear of the appliance downwards. Then pull the radio out to the front and remove it. • Unscrew the screws and remove the assembly plate q. Setting up the kitchen radio Do not set the kitchen radio up without the mounting plate q. Otherwise the speakers are covered and the sound is scarcely audible. To fit the kitchen radio with the supplied mounting plate q: 1. Simultaneously press the two retaining levers on the back of the appliance down. Push the mounting plate q back and remove it. 2. Push the two retainer lugs on the mounting plate q into the recesses on the lower rear side of the kitchen radio. 3. Firmly press the front part of the mounting plate q down until you hear it engage. You can now set up the radio. -7- Providing mains power • Insert the plug into a mains power socket. The display r is illuminated, the time begins to run but the radio is switched off (Automatic mode). The settings menu Setting the time The radio must be off to set the time. 1. In automatic mode press the button BASS/MODE g once. The time blinks. 2.Press the buttons UP/DOWN u/y, to set the time of day in minute intervals. Press and hold the keys to change the time in quick succession. 3.Press the button MODE/BASS g again to save the time of day and move to the date settings. If, during the settings, you do not press a button within 15 seconds the device saves the setting and returns to the automatic mode. Setting the date 1.In automatic mode press the button MODE/BASS g twice. In the display r appears “01.01.10“ and the date indicator blinks. 2.Press the buttons UP/DOWN u/y, to set the date in daily intervals. Press and hold the keys to change the date in quick succession. 3.Press the button MODE/BASS g again to save the date and to move to the display brightness setting. Setting the display brightness 1. In automatic mode press the button MODE/BASS g three times. In the display r appears “L“ (low) and shows the lowest of the two brightness levels. 2.Press the button UP h to switch to the brighter illumination level “H” (high). Press the button DOWN y to switch back to the lower brightness level. 3.Press the button MODE/BASS g again to save the display brightness setting and to move to the remind function settings. Setting the remind function You can programme a date, which the device will remind you of when it arrives. 1.In automatic mode press the button MODE/BASS g four times. The display r shows, alternatively, a date and the SDA indicator for the remind date. -8- 2.Press the buttons UP/DOWN u/y to set the desired reminder date. Press and hold the keys to change the date in quick succession. 3.If you press the A.O.T./SNOOZE button s the date is deactivated and thus will remind you of this date every year. 4. To deactivate the remind function, programme a date that lies in the past. 5.Press the button MODE/BASS g again to save the remind function setting and to move to the 12 or 24 hour mode setting. Selecting 12 or 24 hour time display 1.In automatic mode press five times the button MODE/ BASS g. In the display r appears “24“ for the 24 hour mode. 2.Press the button DOWN y to set the 12 hour mode. In the display r appears “12“. Press the button UP u to switch back to the 24 hour mode. In the 12 hour mode from 12:00 to 23:59 „PM“ appears behind the time indicator, (post meridiem = after noon) in the display r. Press the button MODE/BASS g once again to complete the programmings. Kitchen timer 1. Press the button TIMER f. 2. Using the buttons UP/DOWN u/y, set the desired time interval (a time span between 1 minute and 23:59 h is possible). Press and hold one of the buttons to change the display in quick succession. Or press the PRESET +/— buttons o/i, to access a preprogrammed time for the kitchen timer. The following times have been preprogrammed at the factory: PRESET 0 = 5 min. (Display = T0) PRESET 1 = 10 min. (Display = T1) PRESET 2 = 20 min. (Display = T2) PRESET 3 = 30 min. (Display = T3) PRESET 4 = 40 min. (Display = T4) PRESET 5 = 50 min. (Display = T5) PRESET 6 = 70 min. (Display = T6) PRESET 7 = 80 min. (Display = T7) PRESET 8 = 90 min. (Display = T8) PRESET 9 = 100 min. (Display = T9) -9- 3. Press the button TIMER f once again to start the kitchen timer. In the display r a clock icon running in reverse and a cooking pot symbol appears. From 30 seconds before expiry of the time span an acoustic signal sounds every 5 seconds, repeating at shorter intervals the closer the set time approaches. When the time has expired a permanent signal is sounded. • Press the button TIMER f to terminate the acoustic signal. To go back to the time of day display press the button MODE/BASS g. Interrupting the kitchen timer. • To stop the kitchen timer, change back, if necessary, from radio operation to the kitchen timer mode by pressing the TIMER f button. • You can interrupt the kitchen timer by briefly pressing the button TIMER f. The time is halted, the indicator blinks for 15 seconds. After which the device returns to the previous mode. Then briefly press the button TIMER f to change over to the Timer modus. • Press the button TIMER f once again. The time then continues to run. Switching the kitchen timer off • To stop the kitchen timer hold down the TIMER f button until the clock symbol disappears and the kitchen radio displays the time of day or radio frequency again. Programming the kitchen timer You can programme frequently required times for the kitchen timer into the device so that you do not have to repeatedly enter them. 1. Press the button TIMER f. 2. Using the buttons UP/DOWN u/y programme in the desired time. 3. Press the button MEMORY/ d. In the display r "T" blinks. 4. Now select with the PRESET +/— buttons the memory slot into which the new kitchen timer time shall be saved. This number is now shown to the right of “T“. The time previously saved there is thus overwritten. 5. Press again the MEMORY/ -button d, to finalise the saving. - 10 - Setting alarm times (Alarms 1 and 2) You can programme two alarm times into your kitchen radio. Alarm function Symbol in the display r Acoustic signal Radio Switched off no symbol 1. In automatic mode, press the button VOL. —/ALARM SET 1 h (or VOL. +/ALARM SET 2 j). In the display r the last set alarm time and the symbol for the type of alarm are shown. 2. Press the buttons UP/DOWN u/y to set the desired alarm time. 3. Press the button VOL. —/ALARM SET 1 h (or VOL. +/ ALARM SET 2 j) repeatedly until the desired alarm function (see the table above) is indicated in the display r. 4. Press the button A.O.T./SNOOZE s to set the weekdays on which you require the alarm function: You can choose between "workdays" (MON, TUE, WED, THU, FRI), "weekends" (SAT, SUN) and "every day" (MON, TUE, WED, THU, FRI, SAT, SUN). 5. If you hold the button A.O.T./SNOOZE s pressed down for 2 seconds, you can also, through repeated brief pressing of the A.O.T./SNOOZE s button, select a specific weekday (e.g. only WED). The selected setting is indicated in the display r. 6. To return back to the selection of “workdays“, “weekends“ or “every day“ hold down the button A.O.T./ SNOOZE s again for 2 seconds. 7. Press the button MODE/BASS g to save the settings and return to automatic modus. When the alarm signal sounds... • and the alarm function "Radio" has been selected, the radio plays for one hour at a pre-defined alarm volume. • and the alarm function "Signaltones" has been selected, the signal tone sounds for 10 minutes, with an increasing volume. • To switch off the alarm for approx. 9 minutes press the A.O.T./SNOOZE button s. - 11 - • To halt it, press the button VOL. —/ALARM SET 1 h or VOL. +/ALARM SET 2 j. The Reminder function The device will remind you of the date that you have set with the remind function. In these cases, from 8:00 – 23:00 on that day, and at every full hour, the acoustic alarm sounds for 10 minutes. In addition, the SDA-panel in the display r blinks. To stop the reminder alarm, press any button. Radio operation For radio reception, completely unwind the wire aerial e and, with the radio switched on, determine the most favourable positioning for it. Switching the radio on and off 1. Press the button ON/OFF t. In the display r the currently selected frequency is shown. 2. Press the button ON/OFF t once again to switch the radio off and return the appliance to the automatic modus. Manual station selection 1. Press the button UP u to raise the frequency. 2. Press the button DOWN y to lower the frequency. Automatic station search You can have the kitchen radio search for stations. The kitchen radio searches the frequency range until it finds a station. 1. Press and hold the button UP u for two seconds: the kitchen radio searches for the station with the next highest frequency. 2. Press and hold the button DOWN y for two seconds: the kitchen radio searches for the station with the next lowest frequency. Repeat these steps until you have found a radio station to your liking. Programming stations You can save 30 radio stations in the appliance. 1. Tune in to the desired station. 2. Press the button MEMORY/ d. In the display r "MEM" blinks. 3. Press repeatedly the PRESET +/— buttons o/i, to select one of the memory slots 1-30. In the display r the number of the selected memory save location appears. - 12 - 4. Press the button MEMORY/ d once again. "MEM" and the memory position are constantly indicated, the radio station is saved. 5. To access saved radio stations, in radio operation, press repeatedly the PRESET +/— buttons o/i, until the number of the desired memory slot appears in the display r. Adjusting the volume. • In radio modus, repeatedly press the button VOL —/ ALARM SET 1 h to reduce the sound volume. • Repeatedly press the button VOL. +/ALARM SET 2 j to increase the sound volume. Bass Should you wish to have an amplified reproduction of the lower frequencies, press the button MODE/ BASS g when in radio modus. In the display r there then appears the BASS indicator. Press this button once again to deactivate the function. Lock function You can lock the kitchen radio so that settings cannot be altered by unauthorised people or children. • Press and hold the button MEMORY/ dfor 2 seconds. A key symbol appears in the display r. • When a key is pressed and the lock is activated, the key symbol blinks but no other functions are carried out. You can, however, turn off an activated alarm also when the button lock is switched on. • To disable the lock function, press and hold the button MEMORY/ duntil the key symbol extinguishes. A.O.T. - Switch-off timer This appliance is fitted with a switch-off timer for up to 120 minutes. 1. Press the button A.O.T./SNOOZE s to call up the function and, if need be, to switch the radio on. 2. Repeatedly press the AOT/SNOOZE button s, or hold this button down, to enter the minutes in increments of 5 minutes, for which the appliance is to remain switched on. In the display r the AOT indicator appears when the switch off timer function is activated. After a few seconds, the frequency is indicated once again. 3. At any time you can press the A.O.T./SNOOZE s button to blend in the remaining countdown time for a few seconds. - 13 - 4. On expiry of the time period the appliance switches itself off. 5. To simply switch the unit off, press the button ON/OFF t. Non-functionality • Do not attempt to take the device apart and/or, in the event of possible defects, to repair yourself. You could potentially damage the sensitive electronic components. • Repairs to your device must be carried out exclusively by qualified service personnel! • No warranty/liability will be assumed for damage resulting from improper use and/or opening of the device! • In the event of malfunction please get in touch with the corresponding service affiliate in your country. Cleaning Warning! Always remove the plug before cleaning the appliance! Moisture penetrating into the appliance creates the risk of electric shock! Additionally, the kitchen radio could become irreparably damaged! Clean the housing of the kitchen radio with a slightly moist cloth and a mild detergent only. Ensure that moisture cannot permeate into the appliance during cleaning! Disposal Do not dispose of the appliance in your normal domestic waste. This product is subject to the provisions of European Directive 2002/96/EC. Disposing of the appliance • Arrange for the product, or parts of it, to be disposed of by a professional disposal company or by your communal waste facility. • Observe the currently applicable regulations. In case of doubt, please contact your waste disposal centre. Disposal of batteries/accumulators • Used batteries/rechargeable batteries may not be disposed of in household waste. • Batteries/rechargeable batteries can contain toxic substances which may damage the environment. There- 14 - fore, dispose of the batteries/rechargeable batteries in accordance with statutory regulations. • Every consumer is statutorily obliged to dispose of batteries/rechargeable batteries to a community collection centre in their district or to a dealer. The purpose of this obligation is to ensure that batteries are disposed of in a non-polluting manner. • Only dispose of batteries when they are fully discharged. Disposal of packaging Dispose of all packaging materials in an environmentally friendly manner. CE Conformity This device complies, regarding conformity, to the basic requirements and other relevent provisions of the Low Voltage Directive 2004/108/EC, the Directive for Low Voltage Appliances 2006/95/EC and the Eco Design Directive 2009/125/EC (Ordinance 1275/2008 Appendix II, Number 1). Importer KOMPERNASS GMBH BURGSTRASSE 21 44867 BOCHUM, GERMANY www.kompernass.com Warranty and Service The warranty for this appliance is for 3 years from the date of purchase. The appliance has been manufactured with care and meticulously examined before delivery. Please retain your receipt as proof of purchase. In the event of a warranty claim, please make contact by telephone with our Service Department. Only in this way can a post-free despatch for your goods be assured. The warranty covers only claims for material and maufacturing defects, but not for transport damage, for wearing parts or for damage to fragile components, e.g. buttons or batteries. This product is for private use only and is not intended for commercial use. The warranty is void in the case of abusive and improper handling, use of force and internal tampering not carried out by our authorized service branch. Your statutory rights are not restricted in any way by this warranty. - 15 - The warranty period will not be extended by repairs made unter warranty. This applies alsoto replaced and repaired parts. Any damage and defects extant on purchase must be reported immediately after unpacking the appliance, at the latest, two days after the purchase date. Repairs made after the expiration of the warranty period are subject to payment. DES Ltd Tel.: 0871 5000 700 (£ 0.10 / minute) e-mail: [email protected] Kompernass Service Ireland Tel: 1850 930 412 (0,082 EUR/Min.) Standard call rates apply. Mobile operators may vary. e-mail: [email protected] - 16 -