1
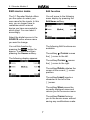
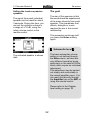
of Switzerland
of Switzerland
Re:source
5.1 Decoder Module
MK3
Dominating Entertainment.
Revox of Switzerland.
5.1 Decoder Module 3
Re:source
1
5.1 Decoder Module 3
Re:source
Contents
5.1 Decoder Module
Installation
3
4
5.1 Decoder connections
Line outputs
Digital inputs
Edit source name
5
5-6
6
7
5.1 Decoder menu
Room sound programs
Sound field description
Stereo-Pure Analogue
8
8
9
11
Amplifier Sub-menu
A) Level setting
Adjusting the Subwoofer
Level resetting
B) Bass and treble
C) Dynamic range
D) Lipsync Delay
12
12
13
13
14
14
15
Setup Amplifier
Speaker configuration
1 Large
2 Small
3 None
Speaker settings
Subwoofer settings
Adjusting volume
Speaker distance
Adjusting amplifier power
16
16
17
18
19
19-21
21-22
23-24
25
26
27
27
Technical data
Notes
Guarantee
2
5.1 Decoder Module 3
Re:source
5.1 Decoder Module
The 5.1 Decoder module forms
the core of the M51’s audio
processing with all functions,
which the puristic Stereo and
the inspired home cinema
listener expects. It monitors and
controls all the audio signals; it
generates all the home cinema
signals and sends them on to
the outputs.
The 5.1 Decoder Module
handles the conversion of the
symmetrical analogue signals in
ultra-linear stereo operation.
From here, it also goes through
gold-coated silver contact relays
to the output stages.
A further task, which the
5.1 Decoder Module handles is
the connection of three digital
sources. In this case, you can
either feed the digital signals in
using an optical fibre or coax
cable.
You can use all normal audio
formats such as Dolby
Surround, Dolby Pro Logic II,
Dolby Digital, DTS or MPEG
with the 5.1 Decoder Module,
naturally in high resolution 24
bit as well.
L Important
These signals are also made
available to external devices
through 6 cinch sockets.
The 5.1 Decoder module plays
a very significant role for the
whole system. Since it
represents the Audio Control
Centre, the system will not
operate without the decoder
module.
Additionally, using the Lipsync
function, a time delay of up to
170 ms can be defined for the
audio signal.
3
5.1 Decoder Module 3
Re:source
Installation
The 5.1 Decoder plug-in card
has the most modern
technology on it and should be
handled with care.
To be on the safe side, you
should discharge any static
from yourself by touching an
earthed metal object such as a
radiator.
Before you start to install the
card, the M51 must be switched
off and the power plug must be
removed from the power socket.
Remove the decoder module
from its packaging and insert it
into the slot position, using the
two tracks within the M51 to
guide it into position. The
lettering on the card must be at
the top. Just before the card is
fully inserted, you will feel a
certain mechanical resistance
as the card meets the M51
contact strip. Push the card fully
home by pushing in the area
where the 2 screw holes are
located and fix it in place with
the two screws.
Slot 7 is reserved for the
Decoder module, right next to
the speaker connections. No
other module should be plugged
in to this slot because this
provides the shortest possible
signal route to the outputs.
Loosen the two screws with the
TORX screwdriver supplied and
remove the slot blanking plate.
Before removing the Decoder
module from its packaging,
make sure that you are not
charged with any static
electricity. This could cause a
damaging power discharge
when you touch the module.
All further steps needed to
integrate the new module into
the M51 will be carried out
automatically next time the unit
is switched on.
4
5.1 Decoder Module 3
Re:source
5.1 Decoder connections
Line outputs
REVOX
The 5.1 Decoder offers 6 line
outputs where audio signals are
available in 5.1 format. The
following is an overview of the
individual signals:
DIGITAL
IN
3
1
2
OUT
L
OUTPUT L
Line output for the left-hand
front channel
OUTPUT R
Line output for the righthand front channel
PUTS
3
R
SUB
Line output for the active
subwoofer
CENTER
SUB
L
CENTER
Line output for the centre
channel
R
SURROUND
SURROUND L
Line output for the rear lefthand surround channel
SURROUND R
Line output for the rear
right hand surround
channel
5
5.1 Decoder Module 3
Re:source
Digital inputs
These line outputs are used to
supply external outputs. In the
same way, active speakers can
be connected. In Home cinema
operation, the active subwoofer
is principally controlled by the
SUB output.
The 5.1 Decoder Module can
play back digital sources such
as a CD, MD or DAT player
using the three digital inputs
DIGITAL IN 1-3. You should
connect the external devices to
the 5.1 Decoder Module using
either a Cinch cable (Digital IN
1/2 input / Softkey Coaxial 1/
Coaxial 1) or with a fibre-optic
cable with a TOSLink plug
(Digital IN 3 input/ Softkey
Optical).
The level of the 6 line outputs is
controlled synchronously to the
total volume.
L
Active loudspeakers are
speakers with integrated
outputs which don't need any
amplifier.
The external digital sources are
activated with the softkeys in
the Source menu:
- Optical
- Coaxial1
- Coaxial2
L
The line outputs are not muted
during headphone operation.
The externally connected digital
sources are not available at the
REC OUT output. They also
can't be used in neighbouring
rooms in Multiroom operation.
6
5.1 Decoder Module 3
Re:source
Edit source name
Edit function
The 5.1 Decoder Module offers
you the option to select your
own name for the inputs. In this
way, you no longer have to
remember which external
device you have connected to
which input. You can label it
accordingly.
You will move to the following
menu display by pressing the
Edit Name softkey.
Select the digital source in the
SOURCE menu whose name
you want to change.
The following Edit functions are
available:
You call this function by
pressing the Setup button for
approx. 2 seconds and then
pressing the Source softkey.
The softkey
Cursor moves
the [ ] cursor to the left.
The following display appears:
The softkey Cursor moves
the [ ] cursor to the right.
The softkey Delete deletes the
cursor at the current [ ] cursor
position.
The softkey Insert inserts a
character to the left of the
[ ] cursor.
The softkey Store saves the
currently displayed name and
returns you to the source menu.
The softkey Cancel returns
you to the source menu without
saving any modifications made.
7
5.1 Decoder Module 3
Re:source
5.1 Decoder menu
Room sound programs
As the 5.1 Decoder module is
the central unit for the processing
of audio signals, this module
has been assigned its own
function key, namely the large
key labelled as Amplifier on the
front of the M51.
The Amplifier button brings you
directly into the 5.1 Decoder
Main Menu. Here, you can
choose between 6 Surround
sounds and an ultra-lineal
stereo playback:
Movie
Music
Matrix
Spatial
X-Stereo
Stereo
L
The five large buttons on the
front of the M51 are shown as
Setup
Source Amplifier
Power Disc
The individual programmes can
be selected by pressing the
corresponding softkey and each
programme can be set
individually for each source.
in the following chapters.
The inner part of the display
shows a graphic of up to 5
speakers, including seating
positions. The speakers which
are activated by the individual
programs are shown dark; the
deactivated speakers are
shown light.
8
5.1 Decoder Module 3
Re:source
Sound field description
Pro Logic II is a further
development of Dolby Pro Logic
and was developed especially
for the surround-sound
playback of pure stereo
sources, alongside the other
well-known decoding of Pro
Logic sound material (mainly
films).
When you play a DVD, whether
using the M51's internal drive or
an external device over DIGITAL
IN, the 5.1 audio format that the
DVD requires is automatically
selected. These are:
Dolby Digital, DTS, MPEG
In this case, all other surround
sound programmes are blocked.
With Pro Logic II, this part
handles the Music sound field,
with the freely definable
parameters Center Width,
Dimension and Panorama.
Through this, you get a realistic,
enveloping sound, which you
would expect from 1 5.1
Channel System. It greatly
enriches the usual stereo sound
that you get from the Dolby
Digital multi-channel system.
Movie
The Movie mode has been
optimised for use with films or
programmes with a sound track
in Dolby Surround. It is also
suitable for video games. Movie
mode has all the important
properties of Pro Logic, while
the Stereo Surround outputs,
which cover the whole
frequency range, give you a
sound experience that much
more closely resembles the
quality of Dolby Digital.
Surround
With this setting, the 5.1
Decoder always adapts itself to
the current audio format of the
selected source. This setting is
recommended for use with Pro
Logic quality television films,
which are being shown in your
living room with the original
studio mix.
9
5.1 Decoder Module 3
Re:source
Center Width
This parameter allows you to
define the centre settings,
allowing you to choose to hear
the centre range just from the
Center speaker, to hear it as a
"phantom centre" using the right
and lefthand speakers or to setup a combination of all three
speakers.
Depending on the requirements
of your living room, you can
choose, for instance, to have a
partial mixture of the three front
speakers or a wider or more
compact sound picture.
Music
With pure stereo music
recordings, the Music mode
delivers a new level of live
atmosphere, which satisfies the
most discerning listener. You
can set up every conceivable
combination of settings using
the Center Width, Dimension
and Panorama parameters.
The choice of parameters is
made through the second Menu
page of Music.
Dimension
This parameter allows you to
position the sound field more to
the back or to the front. This
enables you to get a better
balance between the speakers
with different recordings.
Panorama mode
This mode widens the output
from the front speakers. In
combination with the surround
boxes, this gives you a
fascinating and enveloping
effect with those sounds that
are located at the edges of the
sound picture.
10
5.1 Decoder Module 3
Re:source
Matrix
This parameter primarily
increases the surround
effect for programmes
sources recorded in stereo
sound, by using an elaborate
Dolby Matrix decoder.
Stereo
Additionally, it is possible to
listen to music in pure stereo
with out the influence of any
room sound program. In the
lower display field this is
indicated with
.
In this case, the audio cables
are connected directly to the
outputs on an ultra linear
amplifier path.
Spatial
This is a living sound picture,
which was developed in the
Revox sound studios. It
emulates a small hall where
you might expect to hear
some live jazz or chamber
music. For this reason,
Spatial is particularly well
suited for listening to this or
similar music types.
If, however, you want to modify
the treble and bass settings in
stereo mode, this will take you
out of the ultra linear path.
Playback is then done through a
DSP as shown by the
display field at the bottom of the
screen.
X-Stereo
With this stereo sound, the
stereo signal is also sent to
the rear surround speakers
but as a mirror image. This
means that you have stereo
reproduction between each
pair of speaker.
With a square layout, this
can give a fantastic feeling
of space.
All surround speakers are
deactivated in this function and
are therefore shown as light
symbols on the display.
11
5.1 Decoder Module 3
Re:source
Amplifier sub-menu
A) Level setting
The sound fields have different
sub-menus where you can
define your specific sound
requirements. Not each submenu is available for all sound
fields.
The sub-menu shown below
suggests level settings for the
surround speakers, including
Center and Subwoofer:
A)
The speakers can be adjusted
to the correct volume ratio to
the main speakers using the
softkeys.
B)
This function allows you to
make a temporary adjustment
to the Center and Surround
volumes. The settings are
automatically reset as soon as
another source is selected or
the M51 is switched off.
C)
D)
The setting for the Subwoofer,
on the other hand is saved until
the next modification of the
subwoofer level or until a
complete reset using the Reset
key.
E)
You can get to the Amplifier
sub-menu by pressing the
menu softkey or by repeated
pressing of the Amplifier key.
E) Description P. 9:
Music
12
5.1 Decoder Module 3
Re:source
A) Adjusting the Subwoofer
Resetting the level
Unlike the normal passive
speakers that are connected to
the M51 speaker outputs, active
subwoofers have their own
volume control.
Level settings can be reset to
the neutral mid-position with the
Reset key.
To set the correct basic volume,
you should first bring the
subwoofer level to the neutral
mid-position with the Reset key.
Then you should adjust the
volume at the subwoofer itself to
suit your listening position.
The right basic volume setting
for the subwoofer is achieved
when the subwoofer doesn’t
dominate the sound picture but
nevertheless gives a sustained
support to the bass tone ranges.
L
Speakers, like the Center in the
above example, which are
deactivated in the basic
settings, are identified by the
text -Not Used-.
Tip: Automatic switch-on
The basic volume setting for all
speakers is set through the
Setup Adjusting volume menu.
Many active subwoofers have a
function that automatically switches
the subwoofer on as soon as there
is a bass signal with a particular
level.
If your subwoofer doesn’t switch on
automatically at normal room
volume levels, because the bass
signal is too low, you could
increase the level on the subwoofer
output through the amplifier menu,
until the auto switch-on function is
activated. After this, of course, the
volume at the subwoofer must be
adjusted again.
13
5.1 Decoder Module 3
Re:source
B) Bass and treble
C) Dynamic range
As well as the sound field
settings, you also have the
option of increasing or
decreasing the bass and treble
levels in the range of ± 12dB.
With DVD playback, you can
modify the volume dynamic
range.
If you select the setting
Maximum, the dynamics are
played back in an unmodified
form. This means that the
quietest and the loudest
passages maintain the whole
level range.
This option is only available with
the sound fields Stereo,
X-Stereo and Spatial.
You can access the bass/ treble
menu by pressing the Menu
softkey twice:
If you select the setting
Standard, the dynamic range is
cropped. This means that the
volume in the loudest passages
is lowered and in the quietest
passages, it is increased. This
is particularly useful if listening
to DVDs later in the evening
and you don't want to disturb
other people in the house.
Now with the Bass +/- and the
Treble +/- softkeys you can
adjust the bass and treble
ranges respectively.
If you press the Linear softkey,
you will restore the neutral
middle range settings.
14
5.1 Decoder Module 3
Re:source
D) Lipsync Delay
You can adjust the time delay in
steps of 5 ms using the two
softkeys – Delay +. To do this,
you are advised to select a DVD
which features drums or other
percussion instruments. This is
the easiest way to be able to
synchronise picture and sound
with each other.
Using the Lipsync Delay
setting, you can modify the
timing of the audio signal, to
allow for the time delay of the
video signal caused by the
system. Because of the digital
calculations required for the
picture signal in the plasma or
LCD screen, the sound signal
can get ahead of the picture
signal. This can be seen, for
example, when the lip movements are no longer synchronous to the sound. Using the
Lipsync function, the sound can
also be delayed sufficiently, that
the picture and the sound get
back in sync.
Lipsync in Multiroom system
In Multiroom operation, the M51
and the rooms in Zone 1 share
a common audio source, i.e.
both play the same source. This
is particularly advantageous in
open living areas, where the
rooms in Zone 1 adjoin the main
room with the M51.
This time delay can be set in a
range from 0 – 170 ms.
If the M51 audio signal experiences a delay through the
5.1 Decoder module, the M51
will transmit its sound later than
that in the rooms of Zone 1.
This time delay will be perceived as an echo in the
adjoining rooms.
The Lipsync function appears
as the last menu field within the
Amplifier menu and affects all
sources that the M51 can play.
The Lipsync function is not
available in the Pure Analog
sound field.
15
5.1 Decoder Module 3
Re:source
Amplifier Setup
Speaker configuration
Using the Setup menu, you can
adapt your loudspeakers to the
optimum acoustics with the M51.
The first page in the Amplifier
setup covers the configuration
of home cinema speakers.
Here, you can define which
speakers you have connected
and whether these are large
speakers with the full frequency
range or smaller speakers with
limited bass reproduction.
This menu is called by pressing
and holding the Setup key for
some 2 seconds and then
pressing the Amplifier key in
the display that follows.
There are three options for each
speaker type that can be
selected by repeated pressing
of the corresponding softkey:
Now you are in the 5.1 Decoder
Setup menu.
16
5.1 Decoder Module 3
Re:source
1 Large
2 Small
The speaker receives the full
frequency range.
The speaker only receives
frequencies above 80 Hz.
This is the right setting for
speakers whose bass speaker
has a diameter of at least 12cm
and as a result can reproduce
frequencies under 80 Hz.
This is the right setting for smaller
speakers, which because of their
smaller size cannot reproduce
frequencies under 80 Hz.
As a rule, these are small or
satellite speakers with bass
cones smaller than 12cm. The
bass part below 80 Hz is not
“lost”. Instead, it is added to the
subwoofer or the two front
speakers.
Level
Frequency response: Large
Frequency
Frequency response: Small
Level
80 Hz
Small speakers benefit from the
small setting by an increased
load capability and a nondistorted sound picture.
80 Hz
17
Frequency
5.1 Decoder Module 3
Re:source
3 None
The setting None deactivates the
speaker output. There is no
signal at the output available.
This setting is selected if you
want to work without this
speaker. This setting is only
available for the Center and rear
surround speakers.
Speakers with
the setting None
do not appear in
the amplifier
menu. In the
above example, the Center is
deactivated.
18
5.1 Decoder Module 3
Re:source
Subwoofer
Speaker settings
Main speaker
Using the Subwoofer menu,
you can setup the operation of
an active subwoofer in the
whole speaker concept.
The settings Large, Small and
Digital are available here.
Optically, the status of the
speakers is shown in the
display with the symbol
or
.
Center speaker
The Center can also be
configured as Large, Small or
None. With the None setting,
the Center signal is split
between the two front speakers.
Optically, the status of the
speaker is shown in the display
with the symbol
.
Surround speakers
By repeatedly pressing the
Subwoofer key, you will reach
the menus shown where you
can make the appropriate
settings for your use.
The surround speakers can also
be configured as Large, Small
or None. With the None setting,
the surround signal is split
between the two front speakers.
Optically, the status of the
speakers is shown in the
display with the symbol
or
.
19
5.1 Decoder Module 3
Re:source
Subwoofer
Sur. and Stereo
Subwoofer
Surround only
This mode is recommended if
the active subwoofer should
work with multi-channel
reproduction ( DSP Spatial,
Dolby Pro Logic, e.g.) and in
Pure Stereo operation.
In this mode, the subwoofer is
only activated if a surround
sound such as
Movie,
Matrix, DSP Spatial e.g. is
selected.
In Pure Analog operation such
as Pure Analog, DSP Stereo or
Digital Stereo, the subwoofer remains silent.
Such a setting is particularly
beneficial if the other speakers
can produce bass tones, but
only within a limited range. Main
compact or shelf-mounted
speakers with limited bass
reproduction belong to this
category.
This setting is ideal for the purist
listener who likes to experience
films and concerts on DVD with
all six channels, including the
subwoofer, but is happy to rely on
just the main speakers for normal
stereo operation such as CD or
Phono. This assumes, of course,
that both main speakers can
produce the required deep base
tones cleanly.
20
5.1 Decoder Module 3
Re:source
Subwoofer
None
Adjusting volumes
The second page of the setup
menu gives you the option of
adjusting the volume to the
listening position.
This mode should be selected if
no subwoofer is available.
In this case, the main speakers
must be capable of reproducing
the deepest bass sounds. This
is particularly necessary in the
action scenes of DVD films in
order to achieve the maximum
live atmosphere.
The layout in the centre of the
display mirrors your listening
area. The seating is in the
middle with the individual
speakers distributed around it.
The sixth speaker with a 5.1
system, the subwoofer, is not
shown in this layout.
As soon as the Noise key is
pressed, the M51 produces a
noise on the front left speaker
for some 3 seconds. During this
time, you can set up the volume
of the noise using the rotary
control knob.
Quit
To quit the Subwoofer menu,
simply press a softkey.
Once this time has elapsed, the
5.1 Decoder starts the adjusting
process itself. In this case, the
sounds are moved in a clockwise direction around the listener.
21
5.1 Decoder Module 3
Re:source
Setting the levels on passive
speakers
The goal
The aim of this exercise is that
the sound should be experienced
at the same intensity from each
speaker. This guarantees that
effects, dialogue or music
reaches the ear in the correct
relationship.
The signal from each individual
speaker can be heard for about
3 seconds. During this time, you
can set the optimum volume in
a range of ± 10 dB, using the
rotary volume control or the
remote control.
This procedure continues until
you press the Noise softkey
again.
.!. Subwoofer level .!.
The basic subwoofer volume
setting is not defined through
the Noise menu, as there are
very different recording levels,
particularly in the case of DVDs,
which often require an individual
adjustment.
This adjustment can be carried
out simply and comfortably in
the normal amplifier menu. You
can reach this directly through
the Amplifier key on the M51 or
using the remote control.
The activated speaker is shown
dark.
Please refer to the Chapter
level setting on page 13.
22
5.1 Decoder Module 3
Re:source
Speaker distances
Center distance
Distance selection between the
listening position and the individual speakers.
You can setup the centre
speaker distance by pressing
the Distance softkey again.
Here, you also use the rotary
control knob to set the distance.
L
In order to achieve optimum
acoustic reproduction, there
should be a certain relationship
between the front speaker
distances and the centre
speaker distance. For this
reason, the M51 offers you
exactly the correct range to
make your selection from.
The M51 offers the option to
make sure that the acoustic
signal reaches you at the right
time at the listening position.
Here, the M51 needs to know
the exact distance from the
speaker to the listener.
Example:
Selected distance:
and
= 4.5 m
Main speaker distance
Optimum distance:
= 3.0 – 4.5 m
The first time you press the
Distance softkey, you can set
the distance to the front
speakers
and
using the
rotary control knob. These two
speakers should be the same
distance from the listener and
you can select in the range from
2.0 to 9.9 metres.
If you can't position the Center
speaker within this distance
range, you will just have to
select a distance which most
closely approximates to it.
L
1m ≈ 40 inch
1m ≈ 3.3 feet
23
5.1 Decoder Module 3
Re:source
Surround speaker distance
Quit Distance
As opposed to the main
speakers, the rear surround
speakers can be set at different
distances from the listener.
Simply press one of the other
softkeys in the Setup menu if
you want to quit the Distance
menu field.
By pressing the Distance
softkey one more time, you can
set up first the right and then
the left rear surround speaker.
Also here, you use the rotary
control knob to set the distance.
If you don't want to make any
more settings through the
Setup menu, press either the
Source or Amplifier keys.
L
In the same way as with the
centre speaker, the M51 only
allows a certain distance range
in relation to the main speakers
Example:
Selected distance:
and
= 4.5 m
Optimum distance:
and
= 0.0 – 4.5 m
If you can't position the
surround speakers within this
distance range, just choose the
nearest alternative distance
available to you.
24
5.1 Decoder Module 3
Re:source
Adjusting amplifier power
The following table shows you the
relative volume reductions and the
remaining power:
The M51 can be equipped with
two outputs with different power
levels; either an analogue
output [5 x 60 watt] or the more
powerful digital alternative [5 x
200 watt].
Full
-1 dB
-2 dB
-3 dB
-4 dB
-5 dB
-6 dB
If you want to connect speakers
to the digital output, which are
not set up for this power level,
there is a menu point in the
Setup menu where you can
adjust the output power level.
- 100%
- 90%
- 80%
- 71%
- 63%
- 56%
- 50%
Example Analogue output
Reduction: –2 dB
Power: 80% of 60W = 48W
The three screenshots below
show you three of the six power
steps that can be selected:
Example: Digital output
Reduction: –2 dB
Power: 80% of 200W = 160W
Volume display
The reduction in volume is
visible in the display field if you
select a volume that is higher
than the reduction; the volume
bars flash in the corresponding
area as shown in grey in the
following graphic:
The power adjustment can be
used for the analogue and the
digital outputs and is applied
equally over all five channels.
25
5.1 Decoder Module 3
Re:source
Technical data
Formats:
Dolby Prologic II, Dolby Digital (AC3), dts
MPEG 1 Layer 2, MPEG 2 with/ without extension
MP3
Inputs:
Digital In 1
Digital In 2
Digital In 3
SPDIFF
SPDIFF
SPDIFF
32, 44.1, 48 kHz Coaxial1 (Cinch)
32, 44.1, 48 kHz Coaxial2 (Cinch)
32, 44.1, 48 kHz Optical (TOSLink)
Analogue outputs:
Front
Sub
Center
Rear
L/R
L/R
1.75 V / 100 kOhm
Min. 6.00 V / 100 kOhm
1.75 V / 100 kOhm
1.75 V / 100 kOhm
(based on 0dBFS
(based on 0dBFS
(based on 0dBFS
(based on 0dBFS
Harmonic distortion:
0.006%
0.009%
D / A conversion
6 x 24 bit
Low noise spacing :
92dB CCIR-ARM
90dB CCIR-ARM
Operating conditions
+10°...40 °C / 50°…104°F
Errors excepted
Product subject to modification
Description: ACC-3 version 1.10
26
)
)
)
)
Pure Analog
Dolby Digital
Pure Analog
Dolby Digital
(DIN 40040)
5.1 Decoder Module 3
Re:source
Notes
Guarantee
Manufactured under license
from Dolby Laboratories.
„Dolby“, „Pro-Logic“. „Dolby
Digital “ and the double DSymbol are trademarks of Dolby
Laboratories.
The guarantee period is 24
months from the date of
purchase.
Manufactured under license
from Digital Theatre Systems,
Inc. US Pat No. 5,451,942 and
other worldwide patents issues
and pending. „dts“, „ dts Digital
Surround „ are trademarks of
Digital Theatre Systems, Inc. C
1996 Digital Theatre Systems,
Inc. All rights reserved.
If he can't give you the help you
need, send Decoder module
carriage free and without any
accessories to your national
Sales Office.
Your dealer should be your first
contact if you need service.
Please supply a complete
description of the problem and a
full return postal address.
5.1 Decoder -Module MK3 Operating instructions / Part no.: 10.30.3086
27