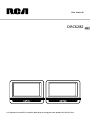
1
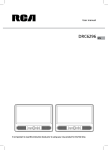
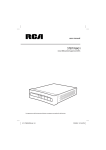
User manual
DRC6282
EN
It is important to read this instruction book prior to using your new product for the first time.
23
Safety Precautions
Placement information
• Do not use this unit in places that are extremely
hot, cold, dusty, or humid.
• Do not restrict the airflow of this unit by placing
it somewhere with poor airflow, by covering
it with a cloth, or by placing it on bedding or
carpeting.
Warning:
To reduce the risk of electric shock, do not
remove cover (or back). No user-serviceable
parts inside. Refer servicing to qualified service
personnel. To prevent fire or shock hazard,
do not expose this unit to rain or moisture.
Do not place objects filled with liquids on or
near this unit.
The lightning flash with arrowhead
symbol, within an equilateral triangle,
is intended to alert the user to the presence of
uninsulated “dangerous voltage” within the
product’s enclosure that may be of sufficient
magnitude to constitute a risk of electric shock
to persons.
The exclamation point within an
equilateral triangle is intended to alert
the user to the presence of important operating
and maintenance (servicing) instructions in the
literature accompanying the appliance.
Caution:
• This product utilizes a laser. Use of controls
or adjustments or performance of procedures
other than those specified herein may result
in hazardous radiation exposure. Do not
open covers and do not repair yourself. Refer
servicing to qualified personnel.
• Danger of explosion if battery is incorrectly
replaced. Replace only with the same or
equivalent type.
• Invisible laser radiation when open. Avoid
exposure to beam. Class 1 laser product. This
system must be opened only by qualified
technicians to prevent accidents caused by the
laser beam.
This product contains a
low power laser device.
Safety information
EN
• When connecting or disconnecting the AC
power adapter or car power adapter, grip the
power plug and not the cord itself. Pulling the
cord may damage it and create a hazard.
• When you are not going to use the unit for a
long period of time, disconnect the AC power
adapter or car power adapter.
Condensation information
When left in a heated room where it is warm and
damp, water droplets or condensation may form
inside the unit. When there is condensation inside
the unit, the unit may not function normally. Let
the unit stand for 1-2 hours before turning the
power on or gradually heat the room and allow
the unit to dry before use.
WARNING: Should any problems occur,
disconnect the AC power adapter or Car power
adapter and refer servicing to a qualified
technician.
Additional safety information
• Apparatus should not be exposed to dripping
or splashing liquids and no objects filled with
liquids, such as vases, should be placed on the
apparatus.
• Always leave sufficient space around the
product for ventilation. Do not place product
in or on a bed, rug, in a bookcase or cabinet
that may prevent air flow through vent
openings.
• Do not place lighted candles, cigarettes, cigars,
etc. on the product.
• Connect power cord only to AC power source
as marked on the product.
• Care should be taken so that objects do not
fall into the product.
• Do not attempt to disassemble the cabinet.
This product does not contain customer
serviceable components.
1
If your product operates on
batteries, adhere to the following
precautions:
EN
A. Any battery may leak electrolyte if mixed
with a different battery type, if inserted
incorrectly, or if all batteries are not replaced
at the same time.
B. Any battery may leak electrolyte or explode
if disposed of in fire or an attempt is made
to charge a battery not intended to be
recharged.
C. Discard leaky batteries immediately. Leaking
batteries can cause skin burns or other
personal injury. When discarding batteries,
be sure to dispose of them in the proper
manner, according to your state/provincial
and local regulations.
FCC Information
This device complies with Part 15 of the FCC
Rules. Operation is subject to the following two
conditions: (1) This device may not cause harmful
interference, and (2) this device must accept any
interference received, including interference that
may cause undesired operation.
This equipment has been tested and found to
comply with the limits for a Class B digital device,
pursuant to Part 15 of FCC Rules. These limits
are designed to provide reasonable protection
against harmful interference in a residential
installation. This equipment generates, uses,
and can radiate radio frequency energy and, if
not installed and used in accordance with the
instructions, may cause harmful interference to
radio communications.
However, there is no guarantee that interference
will not occur in a particular installation. If this
equipment does cause harmful interference
to radio or television reception, which can be
determined by turning the equipment off and
on, the user is encouraged to try to correct the
interference by one or more of the following
measures:
2
• Reorient or relocate the receiving antenna.
• I n c r e a s e t h e s e p a r a t i o n b e t w e e n t h e
equipment and receiver.
• Connect the equipment into an outlet on
a circuit different from that to which the
receiver is connected.
• Consult the dealer or an experienced radio/
TV technician for help.
WARNING:
Changes or modifications to this unit not
expressly approved by the party responsible for
compliance could void the user’s authority to
operate the equipment.
This product complies with DHHS Rules 21
CFR Subchapter J. Applicable at the date of
manufacture.
Important Safety Precautions
Please read and save for future
reference
Some of the following information may not
apply to your particular product; however, as
with any electronic product, precautions should
be observed during handling and use.
1.
2.
3.
4.
5.
6.
7.
Read these instructions.
Keep these instructions.
Heed all warnings.
Follow all instructions.
Do not use this apparatus near water.
Clean only with a dry cloth.
Do not block any ventilation openings.
Install in accordance with the manufacturer’s
instructions.
8. Do not install near any heat sources such
as radiators, heat registers, stoves, or other
apparatus (including amplifiers) that produce
heat.
9. Do not defeat the safety purpose of the
polarized or grounding-type. A polarized
power plug has two blades with one wider
than the other. A grounding type power plug
has two blades and a third grounding prong.
The wide blade or the third prong is provided
for your safety. When the provided power
cord does not fit into your AC power outlet,
consult an electrician for replacement of the
obsolete outlet.
10.Protect the AC power cord from being walked
on or pinched particularly at the power plug,
convenience receptacles, and the point where
they exit from the apparatus.
11.Only use attachments/accessories specified by
the manufacturer.
12.Use only with the cart, stand,
tripod, bracket, or table specified
by the manufacturer, or sold with
the apparatus. When a cart is used,
use caution when moving the cart/apparatus
combination to avoid injury from tip-over.
13.Unplug this apparatus during lightning storms
or when unused for long periods of time.
14.Refer all servicing to qualified service
personnel. Servicing is required when the
apparatus has been damaged in any way,
such as the AC power cord is damaged, liquid
has spilled or objects have fallen into the
apparatus, the apparatus has been exposed to
rain or moisture, does not operate normally,
or has been dropped.
EN
accessories
Please locate the included
accessories.
To order replacement units, visit http://
www.1800customersupport.com/RCA
Remote control (with battery) ................. x 2
Car power adapter splitter ........................ x 1
Car power adapter .................................... x 1
AC power adapter ..................................... x 2
AV cable ..................................................... x 1
Straps .......................................................... x 2
3
Table of Contents
Safety precautions .................... 1 - 2
Playing JPEG files ......................... 15
FCC information ............................. 2
DVD programmable playback .... 16
Important safety instructions ........ 3
Customizing the DVD function
settings ......................................... 16
Accessories ..................................... 3
EN Table of contents ........................... 4
Getting started .............................. 5
Remote control reference guide .. 6
Unit reference guide ..................... 7
Power supply .................................. 8
Using the car power adapter
Using the AC power adapter ............................ 8
Connections ................................... 9
Connecting unit to a TV
Listening to a stereo receiver or amplifier on unit
Playing a game systems / video equipment on unit .........
.................................................................................... 10
Playing a DVD on unit A and B
Using headphones / earphones
Placement ..................................... 11
Mounting in the vehicle
Using the stand ................................................ 12
Unit operation ............................. 12
Turning the unit on
Playing discs - basic functions ..... 13
Compatible discs
Compatible formats
Regional coding
Basic playback operations
Playback
Pausing playback (still mode)
Stopping playback
Skipping to a different track
Audio selection (DVD)
Subtitle selection (DVD)
Angle selection (DVD) ................................ 14
Special functions .......................... 14
Display function (DVD)
Locating a specific title (DVD)
Locating a specific chapter / track
Locating a specific time
Repeat playback .......................... 15
4
Repeating a chapter (DVD)
Repeating a title (DVD)
Repeating a single track (CD)
Repeating a specific section (DVD/CD)
Language setup
Video setup
System setup .................................................... 17
Additional information ............... 18
Troubleshooting
Compatible formats ........................................ 19
Notes on copyright
Sound system
Precautions .................................. 20
Use
Cleaning
Handling and caring for discs
Limited warranty ......................... 22
Getting Started
Remove the plastic sheet
before operating the
remote control.
Using the remote control
• Point the remote control at the REMOTE
SENSOR located on the unit.
• When using this unit in bright light, the infrared
REMOTE CONTROL SENSOR may not work
properly.
• The recommended effective distance for using
the remote control is about 16 feet.
To change remote battery
1. Open the
battery door. 2.Insert one
CR2025 (3V)
size battery.
Important battery information
• Do not mix different types of batteries or new
and old batteries. Do not use rechargeable
batteries.
• In order to avoid any risk of explosion,
observe the polarities indicated inside the
battery compartment. Replace only with the
type of batteries specified. Do not dispose of
them in a fire or recharge them.
• If you are not using the remote control for a
long period of time, remove the batteries.
• Battery should not be exposed to excessive
heat such as sunshine, fire or the like.
EN
Please respect the environment and
prevailing regulations. Before you
dispose of batteries, ask your dealer
whether they are subject to special
recycling and if they will accept them
for disposal.
Illustrations contained in this document are for
representation only.
Caution:
Danger of explosion if battery is incorrectly
replaced. Replace only with the same or equivalent
type.
Battery replacement
When the battery becomes weak, the operating
distance of the remote control will be greatly
reduced and you will need to replace the battery.
5
remote Control Reference Guide
Note:
The included remote controls
have different color keys to identity
which unit they operate. The remote
control with green keys operates Unit A
which has a green stripe on the front of
the unit. The remote control with blue
keys operates Unit B, with a similar blue
stripe on the front of the unit.
EN
1) VIDEO MODE button
Press to adjust Brightness, Panel Display
or Contrast of the unit of screen. Press to
adjust Brightness and use the button to
select other.
2)
PREV button
Press to move back through titles, chapters
or tracks on a disc.
3)
/
SEARCH buttons
SEARCH: Fast reverse playback.
SEARCH: Fast forward playback.
4) GOTO button
Press to skip directly to a location on a
DVD.
5) Cursor ( , , , ) buttons
Press to highlights selections on a menu
screen and adjust certain settings.
ENTER button
Press to confirm selections on a menu
screen.
6) MEMORY button
In DVD play mode, enter the number of a
selected titles or chapters.
7) Number (0 - 9) buttons
Use when creating programs and locating
a title/chapter/track or specific time.
8) REPEAT A-B button
Press to perform point-to-point repeat
playback on a DVD or CD.
REPEAT DISC button
Press to repeat a DVD chapter or title.
Press to repeat a CD track or the entire
disc.
6
SETUP button
When a DVD is stopped, brings up the unit’s
SETUP menu.
9) MENU button
Press to enter and exit the main DVD
menu.
10) NEXT button
Press to move forward through titles,
chapters or tracks on a disc.
11) STOP button
Press to stop playing a disc.
PLAY button
Press to start or resume playback of a disc.
PAUSE button
Press to pause playback and frame
advance.
12)DISPLAY button
Press to show status information on the
screen.
13)ANGLE button
Press to switch the camera angle of the video
presentation when scenes with multiple
camera angles are recorded on a DVD.
14)AUDIO button
Press to select audio soundtracks of a DVD
or change output mode of a CD.
15)SUBTITLE button
Press to select one of the subtitle languages
programmed on a DVD (if available).
RETURN button
Press to return to normal operation after
using the SETUP menu of a DVD.
Uuit Reference Guide
UNIT A (with green stripe on the front unit)
UNIT B (with blue stripe on the front unit)
EN
1)
button
Press the button and hold the front panel
to open the disc door.
SEARCH button
2)
Press to perform fast reverse playback.
SEARCH button
Press to perform fast forward playback.
PREV button
Press to select previous chapters or tracks
on a disc.
NEXT button
Press to select next title, chapter or track
on a disc.
STOP button
Press to stop playing a disc.
PAUSE button
Press to pause playback and frame
advance.
PLAY button
Starts or resumes playback of a disc.
3) STANDBY (power off) / ON switch
4) LCD screen
5) Headphone jack
6) VOLUME control
Adjusts the volume.
7) AV IN / DVD switch
8) AUDIO IN/OUT / VIDEO IN/OUT jacks
9) DC IN 9V-12V jack
10)Remote sensor
Receives the remote control signal.
POWER ON indicator
When the STANDBY / ON switch is in the ON
position, the green light will illuminate.
11)Stand
7
Power Supply
Using the car power adapter
The included 12V car power adapter is designed
for use with vehicles that have a 12V, negative
ground electrical system.
Using unit A and B together
EN
Caution:
• Use this unit only with the included 12V car power
adapter. Use with other car adapters could damage
the unit, or even your vehicle.
• The included 12V car power adapter is for use with this
unit only. Do not use it with any other equipment.
• In the interest of traffic safety, drivers should not
operate the unit or view videos while driving.
• When the inside of the 12V car socket is dirty with
ashes or dust, the power section may become hot
due to poor contact. Be sure to clean the 12V car
socket before use.
• After use, disconnect the 12V car power adapter
from both the unit and cigarette lighter socket.
• If the unit is not properly attached to a vehicle, it
may become airborne in the event of an accident
and cause damage, injury, or death.
• Check your local traffic laws for rules governing the
use of video devices in vehicles.
Using the AC power adapter
The included AC power adapter operates on AC
between 100V-120V.
• The supplied AC power adapter is suitable for
use on AC mains supplies of 100-120 Volts AC
and should only be connected to a mains supply
within these parameters.
Using one unit only
Fuse replacement
instructions
Caution
For continued
protection against
risk of fire, replace
only with same type
and rating of fuse.
IMPORTANT
This car adapter is for use with
12 volt batteries only.
8
WARNING:
Disconnect this car power adapter
when not in use. Not for use in
24V vehicles.
Caution:
• Turn off the unit before unplugging the AC
power adapter to avoid damage to the unit.
• When the unit is not going to be used for a long
time, disconnect the AC power adapter from the
AC outlet.
• The AC power adapter included with this unit
is for its use only. Do not use it with other
equipment.
IMPORTANT
• Be sure to use the unit close to the wall outlet
and make it is easily accessible. If a malfunction
occurs, disconnect the plug from the wall outlet
at once.
• When the AC power adapter is plugged in, the
apparatus is not completely disconnected from
the main power source, even when the unit is
turned off.
Connections
Connecting unit to a TV
If your TV has Audio/Video inputs, you can
connect the unit to your TV using Audio/Video
cable.
Listening to a stereo receiver or
amplifier on unit
The unit can play two channels Dolby Digital.
EN
Watching a DVD on your TV
1.Connect your TV to the unit using an Audio/
Video cable.
2. Turn on unit. Slide the DVD/AV IN switch to
DVD.
3.Turn on the TV and follow the instructions
included with it to play the DVD.
Note:
• Make sure to use the correct
Audio/Video cable. Connecting
the plugs incorrectly may cause a weak
signal.
• If your TV does not have Audio/Video
inputs, you will need to purchase an RF
modulator (sold separately) and follow the
instructions included with it to connect the
unit to your TV.
Listening external audio equipment
1. Connect the unit to the left/right Audio In
jacks on the other equipment using an Audio/
Video cable.
2. Turn on unit. Slide the DVD/AV IN switch to
AV IN.
3.Turn on your audio equipment and follow
the instructions provided with it to select the
AUDIO IN function.
Note:
• Make sure to use the correct
Audio cable. Connecting the
plugs incorrectly may cause a weak
signal.
• If you have a stereo VCR, make sure you
set it to stereo mode.
• Due to copyright protection, DVD movies
cannot be copied. If you copy a DVD movie
onto a videotape, the resulting copy will
be unclear, with poor sound quality. This is
NOT caused by a defective DVD system.
9
Playing a game systems/video
equipment on unit
Playing a DVD on unit A and B
You can watch the same DVD on unit A and B.
You can connect game systems or other video
equipment for playback through unit.
EN
Watching a DVD on unit A and B
Watching video equipment
1.Connect the other equipment to the unit using
an A/V Cable.
2.Turn on the unit. Slide the DVD/AV IN switch
to AV IN.
3.Turn on the video equipment and follow the
instructions provided with it to playback.
Note:
• Make sure to use the correct
Audio/Video cable. Connecting the plugs
incorrectly may cause a weak signal.
• If you have a mono VCR, the volume level
from the speakers will be low.
1.Connect the unit A and B using the included
Audio/Video cable.
2.Turn on unit A and B. Slide the DVD/AV IN
switch on unit A(B) to DVD and place a disc
on unit A(B), then slide the DVD/AV IN switch
on unit A(B) to AV IN.
3.Play a DVD on unit A(B); the other unit will
play at the same time.
Using headphones/earphones
Turn down the volume before connecting
the headphones/earphones. Slowly raise the
volume with the headphones on until you
reach your desired volume. When headphones
are connected, the speaker is automatically
disabled.
Caution:
Avoid listening to sound at excessive levels which
could be harmful to your ears.
10
Placement
Mounting in the vehicle
Use the supplied mounting straps to install the units on the back of the vehicle's headrests. Tightly wrap
the mounting strap around the headrest.
EN
SAFETY WARNING!
• This unit should never be used by the vehicle's driver or left unsecured in the vehicle while driving.
• If this unit is being used in your vehicle, be sure that it is secured or held safely, and does not obstruct
any safety device, including air bags or seat belts.
• All passengers should wear seat belts when using this unit in a moving vehicle.
• If in doubt, please contact your vehicle manufacturer for further advice.
11
Using the stand
You can stand the units up on a desk or table
using the stand on the back.
EN
Unit Operation
Turning the unit on
1)Slide the STANDBY/ON switch on the top of
the both units to the “ON” position.
2) Slide the AV IN / DVD switch of unit to DVD.
The logo (start-up picture) will appear on the
screen.
Note:
• When the unit is not going
to be used for a long time,
disconnect the AC power adapter from AC
outlet.
12
Playing Discs - Basic Functions
Compatible discs
• DVD, DVD-R, DVD-RW
• CD, CD-R, CD-RW
Compatible formats
• DVD, JPEG, CD
Regional coding
Your unit has been designed to process regional
management information stored on DVD discs.
The regional code for your unit is 1. Discs that
have a different regional code will not be
played.
Basic playback operations
Playback
1.Slide the STANDBY/ON switch to the ON
position. Slide the AV IN / DVD switch on unit
to DVD.
See CUSTOMIZING THE DVD FUNCTION
SETTINGS before proceeding to step 2.
2.Press the
button and hold the front panel
to open the disc door.
3.Hold the disc by its edge and gently push it
onto the spindle, with the label side facing the
front, until you hear a “click”.
4.Push the disc door gently to close it. It takes
a short while for your unit to load the disc.
After loading, for most DVDs, the unit will
automatically take you main menu or start
playing. If the unit does not automatically start
playing the DVD, press the PLAY button.
Pausing playback (still mode)
Press the PAUSE button. To resume normal
playback, press the PLAY button. Each time you
press the PAUSE button, the picture advances
one frame.
Stopping playback
Press the STOP button at the location where you
want to interrupt playback. To resume playback
at the position where the disc was stopped, press
the PLAY button.
If you press the STOP button twice, the unit’s
memory will be cleared and pressing the PLAY
button will reset the disc to the beginning.
Skipping to a different track
• Press the
PREV button to go back to
previous chapters/tracks.
• Press the
NEXT button to advance chapters/
tracks.
• For an audio CD, use the number buttons on
the remote control to go directly to the desired
track number.
EN
Audio selection (DVD)
On some discs, the sound is recorded in two or
more formats. Follow the directions below to
select the type of playback.
1.While a disc is playing, press the AUDIO button
to show the current audio format number.
2.Press the AUDIO button repeatedly to select
the desired audio format.
Note:
• If only one audio format is
recorded, the number does not change.
• About two seconds later, playback
continues in the new audio format.
Subtitle selection (DVD)
1.While a DVD is playing, press the SUBTITLE
button to display the current language
setting.
2.Press the SUBTITLE button repeatedly to select
the desired subtitle language.
Note:
• If only one language is recorded,
the language does not change.
• About two seconds later, playback
continues with the new subtitle selected.
• The number of languages recorded differs
depending on the disc.
• If no button is pressed within a few
seconds, playback continues without
changing the current subtitle.
• This function can only be used for discs
on which subtitles have been recorded in
multiple languages.
• On some DVDs, subtitles are activated
from the main menu of the DVD. Press
the MENU button to activate the main
menu.
13
Angle selection (DVD)
Some DVDs contain scenes that have been shot
from a number of different angles. For these discs,
the same scene can be viewed from each of these
different angles.
EN
1.While you are playing a DVD with different angles
recorded, press the ANGLE button to view the
number of current angles available.
2.Press the ANGLE button repeatedly to change the
scene to the next angle in those recorded.
•About two seconds later, playback continues
from the new angle selected.
•If no button is pressed within 10 seconds,
playback continues without changing the
current angle.
Note:
• This function can only be used
for discs on which scenes shot from multiple
angles have been recorded.
• If only one angle is recorded, “
” is
displayed.
Special Functions
Display function (DVD)
While the disc is playing, press the DISPLAY
button repeatedly to display information on
operation status:
Note:
• Many discs only have one title.
Locating a specific chapter /
track
If you know the chapter / track number you want
to play, you can locate a specific chapter / track by
directly selecting a chapter / track number.
1.Press the GOTO button to search for your
desired chapter / track.
2.Press the or button to highlight a chapter
/ track then press the corresponding number
button(s) for the chapter /track you want.
3.Press the ENTER button to confirm. Playback
starts from the selected chapter / track.
Locating a specific time
You can move to a specific location by entering its
corresponding time (hours, minutes, seconds)
1.Press the GOTO button twice.
2.Press the corresponding number buttons for
the setting point you want.
3.Press the ENTER button to confirm. Playback
starts from the selected location.
Locating a specific title (DVD)
14
If a DVD contains title numbers, you can locate a
specific title by directly selecting a title number.
1.In STOP mode, press the GOTO button.
2.Press the or button to highlight a specific
field and press the corresponding number
button(s) for the title you want.
3.Press the ENTER button to confirm. Playback
starts from the selected title.
Note:
• Some discs may not respond to
this process.
• Some scenes may not be located as
precisely as specified.
• This method for accessing specific locations
is available only within the current title of
the DVD.
Repeat Playback
You can play a specific title or chapter repeatedly.
(Chapter repeat, title repeat, A-B repeat)
Repeating a chapter (DVD)
You can play the same chapter repeatedly.
1.While the disc is playing, press the REPEAT
DISC button until the “
” indicator
displays on the screen. The current chapter is
played repeatedly.
Repeating a title
You can play the same title repeatedly.
2.While the disc is playing, press the REPEAT DISC
button until the “
” indicator displays
on the screen. The current title is played
repeatedly.
To resume normal playback
3.While the disc is playing, press the REPEAT DISC
button until the “
” indicator displays
on the screen.
You can play a single track or an entire disc
repeatedly.
Repeating a single track (CD)
You can play the same track repeatedly.
1.While the disc is playing, press the REPEAT
DISC button until the “
” indicator
displays on the screen. The current track is
played repeatedly.
Repeating an entire disc
2.While the disc is playing, press the REPEAT
DISC button until the “
” indicator
displays on the screen. The entire disc is played
repeatedly.
To resume normal playback
3. Press the REPEAT DISC button until the “
indicator displays on the screen.
”
Repeating a specific section (DVD/
EN
CD)
You can play a specific section repeatedly.
1.While the disc is playing, press the REPEAT A-B
button at the beginning of the section (
is
displayed) you want to play repeatedly.
2.Press the REPEAT A-B button again at the end
of the section (
is displayed) you want to
play repeatedly.
3.The unit will immediately begin replaying your
selection.
To resume normal playback
4.While the disc is playing, press the REPEAT A-B
button until the “
” indicator displays
on the screen.
Note:
• A-B repeat can only be used
within the same title. If the start and
end of the section to be repeated are in
different titles, A-B repeat is cancelled.
• The A-B repeat function does not operate
in scenes where different camera angles
are recorded.
Playing JPEG Files
This unit can play JPEG files recorded on CD-R
and CD-RW discs.
or
button to highlight a file
6.Press the
to play. Press the
PLAY button to start
playback.
Playing a JPEG file disc
1. Press the
button and hold the front panel
to open the disc door.
2.Hold the disc by its edge and gently push it
onto the spindle, with the label side facing
the front, until you hear a “click”.
3.Push the disc door gently to close it.
4. The unit will take a short while to load the
disc, then automatically begin playback. The
JPEG files will be playback one by one.
5.Press the
STOP button to go to the folder
list.
Note:
• You can press the
PAUSE
button to interrupt playback,
and press the
PLAY button to resume
playback.
• You also can use the GOTO function or use
the numbered buttons to enter the image
number to quickly select any image.
• Press the ANGLE button on the remote
control to rotate the picture orientation
by 90°.
15
DVD Programmable Playback
Programmable memory
The programmed playback provided by this unit
is title/chapter programmed playback.
Title/Chapter programmed playback
EN
1.Press the MEMORY button in PLAY mode.
2.Input the title (2 digits) and chapter (2 digits)
by pressing the number buttons. (For example
: 01 02, 02 05, 02 11.) It will move to the next
item automatically.
3.Repeat steps 2 to add additional titles and
chapters.
PLAY button to start the
4.Press the
programmed playback.
Customizing the DVD Function Settings
Language setup
1.In STOP mode, press the SETUP button.
2.Use the or button to select the option (OSD
Language, Audio, Subtitle or Disc Menu), then
press the button.
3.Use the
or
button to select your preferred
language, then press the ENTER button to
confirm.
button to go back to the previous
4.Press the
menu. Repeat steps 2 and 3 to adjust other
options.
5.To exit the SETUP MENU and return to the normal
screen, press the RETURN or SETUP button.
16
Note:
• Some DVDs may not play in the
audio language selected. A prior
language may be programmed on the disc.
• Some DVDs may be set to display subtitles in
a language other than the one selected. A
prior subtitle language may be programmed
on the disc.
• Some DVDs allow you to change subtitle
selections via the disc menu only. If this is the
case, press the MENU button and choose the
appropriate subtitle from the selection on the
disc menu.
• Some DVDs may not include your pre-selected
language. In this case, the DVD player
automatically displays disc menus consistent
with the disc’s initial language setting.
Video setup
1.In STOP mode, press the SETUP button.
2.Press the
or button repeatedly until VIDEO
SETUP appears.
3.Use the
or
button to select the option
(Brightness or Contrast), then press the button.
Use the or button to make adjustments, then
press the ENTER button (The screen will change
to your selected setting).
4.Repeat steps 2 and 3 above to adjust other
options.
5.To exit the SETUP MENU and return to the normal
screen, press the RETURN or SETUP button.
System setup
1.In STOP mode, press the SETUP button.
2.Press the
or button repeatedly until
SYSTEM SETUP appears.
3.Use the or button to select the option (Tv
Display or Default), then press the
button.
Use the
or button to make adjustments,
then press the ENTER button (The screen will
change to your selected setting).
4.Repeat steps 2 and 3 above to adjust other
options.
5.To exit the SETUP MENU and return to the
normal screen, press the RETURN or SETUP
button.
Note:
• The displayable picture size is
preset on the DVD. Therefore the playback
picture of some DVDs may not conform to
the picture size you select.
• When you play DVDs recorded in the 4:3
aspect ratio, the playback picture will always
appear in the 4:3 aspect ratio regardless of
the TV TYPE setting.
EN
Default
It takes 3-5 seconds to reset the DVD settings to the
factory default.
Tv display
Pan Scan
• When wide-screen video is played, this mode clips
the right and left sides of the image so that it can
be viewed on a conventional screen.
• Some wide-screen DVDs that
off when a widedo not permit Pan Scan mode Cut
screen video image is
played.
playback are automatically
played in letterbox mode
(black bands that appear at
the top and bottom of the
screen).
Letter Box
PAN SCAN
• When wide-screen video is
played in this mode on a
conventional screen, black
bands appear at the top and
bottom of the screen.
LETTER BOX
Wide screen
• This is the correct mode for
playing wide-screen videos
on the unit or other external
WIDE SCREEN
wide-screens.
17
Additional Information
Troubleshooting
The unit does not switch on.
• Make sure it is plugged in.
• Turn on the unit.
EN The device switches off spontaneously.
• The device switches off automatically when
it is in STOP mode for more than 30 minutes
without any user intervention. Switch it on
again.
• It might be impossible to read the disc.
• Insert the disc with the printed side facing
up.
• Make sure disc can actually be played by this
device.
• Make sure disc’s regional code matches the
unit’s regional code. This unit’s regional code
is 1.
• Clean the disc.
There is no picture.
• Make sure you have switched on the TV set.
• Check the connections.
• Select the AV input/output assigned to unit
on the TV.
The picture is of poor quality (with snow
or lines).
• Check the connections.
There is no sound or the sound is of poor
quality.
• Check the connections.
I can’t find my file in the JPEG listing.
• Make sure the filename is valid.
18
The remote control does not work or works
only intermittently.
• Make sure batteries are inserted or change
them.
• Aim the remote control at the unit. The
infrared beam must not be blocked or
interrupted.
• Make sure the remote control is configured to
control the device you are trying to operate
with it.
The subtitles do not appear.
• Make sure the DVD provides subtitles.
• Refer to the section on how to display
subtitles.
The disc menu language is not the correct
one.
• The disc menu language has not been set
up.
• The language of your choice is not available
on the disc.
Compatible Formats
Jpeg files
In order to ensure playback, discs must conform
with DVD and CD standards. This unit may not
play some recordings or files due to differences
in recording formats, software used and disc
types.
CD-R and CD-RW with JPEG files. Certain JPEG
files, including progressive JPEG files, cannot be
read by this unit.
DVD-Video
Digital video discs - 12 cm, single or
double sided, single or dual layer. DVDs
are high density optical discs on which
high quality picture and audio are recorded by
means of digital signals.
DVD-R, DVD-RW
Most DVD-R (one recording only) and
DVD-RW discs (rewritable), depending on
the DVD writer and discs used. Recordings
using DVD-R and DVD-RW discs must be
made in Video DVD mode.
DV D+Rewritable
Audio CDs
Audio CDs (12 cm).
CD-R, CD-RW
Most CD-R (one recording only) and
CD-RW discs (rewritable).
CD-Rs written during a multisession recording
can be played, provided that the session has
ended before the disc is played (depending on
the write software).
However, depending on the condition of the CDwriter, computer and the disc used, you may find
that not all discs will play. When playing a CD-R disc,
it is normal for the unit to take up to 20 seconds to
recognize the disc before starting to play.
If the disc is not recognized after a period of 20
seconds, remove the disc, and insert it again.
• Do not use its full capacity.
• CD-Rs should be preferably used instead of
CD-RWs (rewritable CDs) as, in certain cases,
CD-RW playback may be faulty.
• Use reliable, good-quality CD writing
software.
• Close all other applications on the computer
to ensure reliable CD-R disc recording.
The total number of files and folders on the disc
should be less than 650. Make sure that files have
the “.jpg” extension. Files without the “.jpg”
extension will not be able to be read by the
unit — even though the files are shown as JPEG
images on your computer.
EN
Notes on copyright
It is forbidden by law to copy, broadcast, show,
broadcast on cable, play in public, or rent
copyrighted material without permission.
Apparatus Claims of U.S. Patent Nos. 6,836,549;
6,381,747; 7,050,698; 6,516,132; and 5,583,936
licensed for limited viewing uses only.
This product incorporates copyright protection
technology that is protected by U.S. patents
and other intellectual property rights. Use of
this copyright protection technology must be
authorized by Macrovision, and is intended for
home and other limited viewing uses only unless
otherwise authorized by Macrovision. Reverse
engineering or disassembly is prohibited.
Caution:
This unit is designed and manufactured to respond
to the Region Management Information. If the
Region number of a DVD does not correspond to
the Region number of this DVD player, this player
cannot play the disc. The Region number for this
DVD player is Region 1.
Sound Systems
Dolby Digital
Dolby Digital is a technology developed by Dolby
Laboratories. Soundtracks encoded in Dolby
Digital can reproduce from one to 5.1 discrete
channels of excellent quality audio.
The unit automatically recognizes the Dolby
Digital bitstream and provides a downmix suitable
for two-channel listening. An additional Dolby
Digital decoder is required for reproduction of
the discrete multi-channel soundtracks available
on many DVDs.
Manufactured under license
from Dolby Laboratories.
‘Dolby’ and the double-D
symbol are trademarks of
Dolby Laboratories.
19
Precautions
Use
EN
• If your unit has been stored in a cool place
for any length of time during a journey for
example, wait for about 2 hours before using
it.
• During thunderstorms, we recommend that
you isolate the unit from the electrical supply
so that it is not damaged by electrical or
electromagnetic surges.
• This unit is designed for continuous use.
Switching off the unit to standby mode does
not disconnect it from the mains supply. To
completely isolate the equipment, remove
the plug from the power outlet as some
components remain connected to the electrical
supply.
• If you notice any burning or smoke, disconnect
the unit immediately to avoid any risk of
electrocution.
• Do not attempt to look inside the unit through
the disk tray opening or any other opening.
You may be electrocuted or exposed to laser
radiation.
• This unit is for domestic use only and must
not be used for industrial purposes.
• Total or partial copying of recordings protected
by copyright legislation, without the explicit
permission of the holder of the rights,
contravenes current legislation. Copying
or downloading music files for sale or any
other business purpose constitutes or could
constitute a violation of copyright law.
Cleaning
• Use a soft, dry, clean cloth. Regularly dust the
vents at the back or sides.
• Using solvents, abrasive or alcohol-based
products risk damaging the unit.
• If an object or liquid enters inside the unit,
unplug it immediately and have it checked
by an authorized servicer or service center.
20
Handling and caring for discs
• Handle your discs with care. Hold the disc
with your fingers at the edges or through
the hole.
• Insert the disc with the label facing up (for a
single-sided disc).
• Place the disc properly into the tray in the
allotted holder.
• Use a soft cloth to clean discs if necessary,
always wiping from the center to the edge.
• Always put discs back in their cases after use
and store in a vertical position.
• Do not close the tray with two discs in it
or with a disc not sitting correctly in the
holder.
• Do not play cracked, chipped or warped discs
nor try to repair them with adhesive tape or
glue.
• Do not write on a disc.
• Do not move the unit when a disc is being
played.
• Do not scratch discs or store them in places
exposed to direct sunlight, high humidity or
high temperatures.
• Do not use aerosol cleaners, benzene, antistatic liquids or any other solvent for cleaning
discs. When cleaning, wipe gently with a soft
damp (water only) cloth from the center to
the edge, avoiding circular motions, which
could cause scratches and interference during
playback.
Limited Warranty
AVC MULTIMEDIA (“AVC”) makes the following limited warranty. This limited warranty extend to the original consumer
purchaser and is limited to non-commercial use of the product.
One Year Parts & Labor Warranty
AVC products purchased in the United States are warranted to be free from defects in materials or workmanship for a period
of one year from the date of their original retail purchase. If the unit fails to conform to this warranty, we will service the
product using new or refurbished parts and products, at AVC’s sole discretion.
During a period of one year from the effective warranty date, AVC will provide, when needed, service labor to repair a
manufacturing defect at its designated Service Center. To obtain warranty service in the Untied States, you must first call
our Customer Support Center at 1-800-506-5746 or 1-877-252-6873, during the hours listed in the box below. The
determination of service will be made by AVC Customer Support. PLEASE DO NOT RETURN YOUR UNIT TO AVC WITHOUT
PRIOR AUTHORIZATION. New or remanufactured replacements for defective parts or products will be used for repairs by
AVC at its designated Service Center for one year from the effective warranty date. Such replacement parts or products are
warranted for an additional one year from the date of repair or replacement. The Customer will be required to ship the
unit to the Service Center indicated at the time Customer Support is contacted to make the necessary repairs. The customer
is responsible for all transportation charges to the service facility.
EN
Packaging and Shipping Instruction
When you send the product to the AVC service facility you must use the original carton box and packing material or an
equivalent as designated by AVC.
LIMITED WARRANTY
Your Responsibility
(1) You must retain the original sale receipt to provide proof of purchase.
(2) These warranties are effective only if the product is purchased and operated in the U.S.A. or Canada.
(3) Warranties extend only to defects in material or workmanship, and do not extend to any product or parts which have
been lost or discarded, or damage to product or parts caused by misuse, accident, improper operation or maintenance,
or use in violation of instructions provided with the product, or to product which has been altered or modified without
authorization of AVC, or to products or parts thereof which have had the serial number removed or changed.
Out of Warranty
In the event your product requires repair after the limited warranty period has expired, please contact our Customer
Support Center at 1-800-506-5746, 1-877-252-6873 or www.1800customersupport.com/RCA
Hours: Monday–Thursday: 9am–7pm, Friday: 9am–5pm, Saturday: 9am–NOON Eastern time.
Important: You are responsible for any transportation, shipping or insurance relative to the return of product to our
Product Returns Center.
All warranties implied by state law, including the implied warranties of merchantability and fitness for a particular purpose,
are expressly limited to the duration of the limited warranties set forth above. With the exception of any warranties implied
by state law as hereby limited, the foregoing warranty is exclusive and in lieu of all other warranties, guarantees, agreements
and similar obligations of manufacturer or seller with respect to the repair or replacement of any parts. In no event shall
AVC be liable for consequential or incidental damages.
No person, agent, distributor, dealer or company is authorized to change, modify or extend the terms of these warranties
in any manner whatsoever. The time within action must be commenced to enforce any obligation of AVC arising under the
warranty or under any statute, or law of the United States or any state thereof, is hereby limited to one year from the date
of purchase. This limitation does not apply to implied warranties arising under state law.
This warranty gives you specific legal rights and you may also have other rights, which may vary, from state to state. Some
states do not allow limitation on how long an implied warranty lasts, when an action may be brought, or the exclusion or
limitation of incidental or consequential damages, so the above provisions may not apply to you.
For more information on other products and services, please visit our web site at
www.1800customersupport.com/RCA
Important: Also keep your “Bill of Sale” as proof of purchase.
Model no. ............................................................................................. .Product name ...................................................................
Type of set ........................................................................................................................................................................................
Serial no. ................................................................................................Invoice no. ........................................................................
Date purchased .................................................................................... .Dealer name .....................................................................
FOR SERVICE AND REPAIR, PLEASE VISIT www.1800customersupport.com/RCA
Specifications and external appearance are subject to change without notice.
21
EN
IMPORTER
AVC Multimedia
Markham, Ontario L3R 1E3
© 2008 AVC Multimedia
http://www.1800customersupport.com/RCA
Printed in China
811-728191W011
22