1
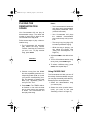
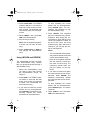
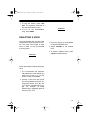
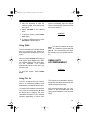
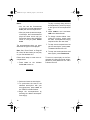
42-4031.fm Page 1 Wednesday, August 11, 1999 4:22 PM
Concertmate 410
OWNER’S MANUAL
Portable Electronic Keyboard
Please read before using this equipment.
illustration
Cat. No. 42-4031
42-4031.fm Page 2 Wednesday, August 11, 1999 4:22 PM
FEATURES
Your Optimus Concertmate 410 Portable Electronic Keyboard is a state-ofthe-art musical instrument with many
exciting features. You can set the keyboard to sound like 12 different musical instruments. To accompany your
music, the keyboard has 12 different
preset rhythms, as well as percussion
sounds and auto-accompaniments.
Lesson Function — turns the beginner into a musician by taking you
phrase-by-phrase through a demonstration song until you master it.
Your Concertmate 410’s features include:
Melody Recording — lets you store
melodies of up to 17 notes.
18 Demonstration Songs — let you
hear samples of what you and the
Concertmate 410 can do.
OCTAVE Key — lets you quickly raise
the sound of the keyboard by one musical octave.
12 Different Sounds — let you set
your Concertmate 410 to sound like
anything from a flute to a bell.
Polyphonic Sound — lets you play
and hear up to four notes at the same
time.
12 Auto-Rhythms — give you a
steady beat for several styles of music
from disco to waltz.
Two Built-In Speakers — provide excellent sound to help make your music
come alive.
Tempo Controls — let you speed up
or slow down the tempo of any selected music pattern.
Output Jack — lets you connect
headphones so you can play without
disturbing others, or an external amplifier so you can play for a crowd.
Fill In Rhythm — lets you insert a
short variation into any auto-rhythm.
Auto Accompaniment — lets you
play chords on the accompaniment
keys using chord formations of from
one to three notes.
Melody Off Function — lets you turn
off the melody of a demonstration song
so you can play the melody while the
keyboard plays the accompaniment.
Three Power Options — let you power the keyboard from internal batteries
(not supplied), standard AC power
(with an optional adapter), or your vehicle’s cigarette lighter socket (with an
optional adapter) so you can make music almost anywhere.
© 1996 Tandy Corporation.
All Rights Reserved.
Optimus and Concertmate are registered trademarks used by Tandy Corporation.
RadioShack is a trademark used by Tandy Corporation.
2
42-4031.fm Page 3 Wednesday, August 11, 1999 4:22 PM
To fully enjoy the features and functions of this electronic keyboard,
please read this manual carefully and
completely.
Note: This owner’s manual explains
how to use this electronic keyboard. It
does not teach music.
THE FCC WANTS YOU
TO KNOW
This keyboard complies with the limits
for a Class B digital device as specified
in Part 15 of FCC Rules. These limits
provide reasonable protection against
radio and TV interference in a residential area. However, your keyboard
might cause TV or radio interference
even when it is operating properly. To
eliminate interference, you can try one
or both of the following corrective measures:
• Increase the distance between the
keyboard and the radio or TV
• Use outlets on different electrical
circuits for the keyboard and the
radio or TV
Consult your local RadioShack store or
an experienced radio/TV technician if
the problem still exists.
3
42-4031.fm Page 4 Wednesday, August 11, 1999 4:22 PM
CONTENTS
Preparation ...........................................................................................................
Powering Your Keyboard .................................................................................
Using Batteries ..........................................................................................
Using AC Power ........................................................................................
Using Vehicle Battery Power .....................................................................
Connecting Headphones .................................................................................
Listening Safely .........................................................................................
Connecting an External Amplifier ....................................................................
5
5
5
6
6
7
7
8
A Look at Your Keyboard .................................................................................... 9
Operation ............................................................................................................
Basic Operation .............................................................................................
Playing the Demonstration Songs .................................................................
Using CHORD ONLY ..............................................................................
Using LESSON and REVIEW .................................................................
Selecting a Voice ...........................................................................................
Using the Auto-Rhythms ................................................................................
Using SYNC ............................................................................................
Using FILL IN ..........................................................................................
Using Auto Accompaniment ..........................................................................
10
10
11
11
12
13
14
15
15
15
Special Features ................................................................................................
Using REC .....................................................................................................
Using the Percussion Pads ...........................................................................
Storing a Percussion Pattern ..................................................................
Using REVERB ..............................................................................................
Using OCTAVE ..............................................................................................
17
17
17
18
19
19
Troubleshooting ................................................................................................. 20
Care and Maintenance ....................................................................................... 21
Chord Chart ........................................................................................................ 22
Specifications ..................................................................................... Back Cover
4
42-4031.fm Page 5 Wednesday, August 11, 1999 4:22 PM
PREPARATION
POWERING YOUR
KEYBOARD
illustration
You can power your Concertmate 410
with.
• Internal batteries (see “Using Batteries”)
• Standard AC power using an
optional AC adapter (see “Using
AC Power” on Page 6)
2. Put the batteries in the compartment as indicated by the polarity
symbols (+ and –) marked inside.
• A vehicle’s cigarette lighter socket
using an optional DC adapter (see
“Using Vehicle Battery Power” on
Page 6)
illustration
Notes:
• Connecting an AC or DC adapter
automatically disconnects internal
batteries.
• Always disconnect the AC or DC
adapter when you finish using the
Concertmate 410.
Using Batteries
Your Concertmate 410 can use six C
batteries (not supplied) for power. We
recommend alkaline batteries, such as
RadioShack Cat. No. 23-551.
Caution: Only use fresh batteries of
the required size and type.
3. Replace the cover.
Notes:
• If you do not plan to power the
Concertmate 410 from batteries
for a week or more, or if you plan
to use only AC or vehicle battery
power, remove the batteries.
• If the Concertmate 410 sounds
weak or does not work properly,
replace all six batteries. Do not
mix old and new batteries.
Caution: Dispose of old batteries
promptly and properly.
1. Press the tabs on the battery compartment cover, then pull up in the
direction of the arrows to remove
the cover.
5
42-4031.fm Page 6 Wednesday, August 11, 1999 4:22 PM
Using AC Power
You can power your Concertmate 410
from a standard AC outlet using a 9volt AC adapter (not supplied), such as
RadioShack Cat. No. 273-1650 or 2731662.
2. Set the adapter’s voltage switch to
9 volts.
3. Insert the adapter’s barrel plug
into the DC9V jack on the back of
the Concertmate 410.
4. Plug the adapter into a standard
AC outlet.
Cautions:
• You must use an AC adapter that
supplies 9 volts, and delivers at
least 300 milliamps. Its center tip
must be set to positive, and its
plug must correctly fit the
Concertmate 410’s DC9V jack.
The recommended adapter meets
these specifications. Using an
adapter that does not meet these
specifications could damage the
Concertmate 410 or the adapter.
• Always plug the AC adapter into
the Concertmate 410 before you
plug it into the AC outlet. Always
unplug the AC adapter from the
AC outlet before you unplug it
from the Concertmate 410.
Using Vehicle Battery Power
You can power your Concertmate 410
from your vehicle’s cigarette lighter
socket using a 9-volt DC adapter (not
supplied), such as RadioShack Cat.
No. 270-1560A.
Cautions:
• You must use a DC adapter that
supplies 9 volts, and delivers at
least 300 milliamps. Its center tip
must be set to positive, and its
plug must properly fit the
Concertmate 410’s DC9V jack.
The recommended adapter meets
these specifications. Using an
adapter that does not meet these
specifications could damage the
Concertmate 410 or the adapter.
illustration
1. Plug the 5.5 mm outer-diameter/
2.1 mm inner-diameter barrel plug
into the cable so it reads TIP
+POS.
6
• Always plug the DC adapter into
the Concertmate 410 before you
plug it into the cigarette lighter
socket. Always unplug the DC
adapter from the cigarette lighter
socket before you unplug it from
the Concertmate 410.
42-4031.fm Page 7 Wednesday, August 11, 1999 4:22 PM
To connect a pair of headphones, insert the headphones’ 1/8-inch plug into
the PHONE jack on the back of the keyboard.
illustration
illustration
1. Plug the 5.5 mm outer-diameter/
2.1 mm inner-diameter barrel plug
into the cable so it reads +TIP.
2. Set the adapter’s voltage switch to
9 volts.
3. Insert the adapter’s barrel plug
into the DC9V jack on the back of
the Concertmate 410.
4. Plug the other end of the adapter
into the vehicle’s cigarette lighter
socket.
CONNECTING
HEADPHONES
To listen to your Concertmate 410
without disturbing others, you can connect a pair of stereo headphones with
a 1/8-inch plug (not supplied). Your local RadioShack store sells a wide selection of headphones.
Note: Connecting headphones disconnects the Concertmate 410’s builtin speakers.
Listening Safely
To protect your hearing, follow these
guidelines when you use headphones.
• Set the volume to the lowest setting before you begin listening.
After you begin listening, adjust
the volume to a comfortable level.
• Do not
volume
volume
manent
listen at extremely high
levels. Extended highlistening can lead to perhearing loss.
• Once you set the volume, do not
increase it. Over time, your ears
adapt to the volume level, so a
volume level that does not cause
discomfort might still damage your
hearing.
7
42-4031.fm Page 8 Wednesday, August 11, 1999 4:22 PM
CONNECTING AN
EXTERNAL AMPLIFIER
To amplify your Concertmate 410’s
sound, you can connect it to an external amplifier (not supplied) using an
audio cable (not supplied) with a 1/8inch plug.
To connect an external amplifier to
your keyboard, insert the cable’s plug
into the PHONE jack on the back of the
keyboard, and connect the other end
of the cable to the amplifier’s input
jack(s) (such as AUX IN or TAPE IN).
illustration
Your local RadioShack store sells a full
line of amplifiers, speakers, and connection cables.
8
42-4031.fm Page 9 Wednesday, August 11, 1999 4:22 PM
A LOOK AT YOUR KEYBOARD
illustration
1.
2.
3.
4.
5.
6.
7.
8.
9.
10.
11.
12.
13.
VOICE A1-B6 Voices List
POWER Switch
VOLUME Control
REC Button
PROG Button
A.B.C Button
RHYTHM A1-B6 Rhythms List
VOICE Button
RHYTHM Button
SONG Button
PLAY/SPACE Button
REVERB Button
START/STOP Button
14.
15.
16.
17.
18.
19.
20.
21.
22.
23.
24.
25.
26.
SYNC Button
OCTAVE Button
Percussion Pads
SONG A1-C6 Songs List
A Button
B Button
C Button
FILL IN Button
TEMPO Buttons
DEMO Button
CHORD ONLY Button
LESSON Button
REVIEW Button
9
42-4031.fm Page 10 Wednesday, August 11, 1999 4:22 PM
OPERATION
BASIC OPERATION
1. Set VOLUME to MIN (minimum).
illustration
4. To make your own music, simply
begin playing the keyboard.
To hear some of the Concertmate
410’s many different sounds, play
the demonstration songs (see
“Playing
the
Demonstration
Songs” on Page 11).
Notes:
Important: To prevent hearing
damage,
always
set
the
Concertmate 410’s volume to its
lowest level ( MIN) before you turn
it on and before you begin playing
it again after changing the settings.
2. Slide POWER to ON . The POWER
and TEMPO indicators turn on.
illustration
3. Adjust VOLUME to the desired setting. Slide it toward MAX (maximum) to increase the volume, or
toward
MIN
(minimum)
to
decrease it.
illustration
10
• The Concertmate 410 automatically selects the “voice” (musical instrument) PIANO (A1)
each time you turn it on. To
select a different voice, see
“Selecting a Voice” on Page 13.
• To select an auto-rhythm, see
“Using the Auto-Rhythms” on
Page 14.
• To play a harmonic auto accompaniment, see “Using Auto
Accompaniment” on Page 15.
5. To turn off the Concertmate 410,
slide POWER to OFF. All indicators
turn off.
Note: If you do not press a key for
about 21/2 minutes, the Concertmate 410 will chime “Ding Dong”
about every 21/2 minutes to remind
you to turn it off.
42-4031.fm Page 11 Wednesday, August 11, 1999 4:22 PM
PLAYING THE
DEMONSTRATION
SONGS
Your Concertmate 410 can play 18
demonstration songs. The name and
number of each song is listed on the
Concertmate 410’s top panel.
Follow these steps to play a demonstration song.
1. The Concertmate 410 automatically selects the song Twinkle,
Twinkle, Little Star (A1) each time
you turn it on. To play another
song, press SONG.
Notes:
• The Concertmate 410 automatically plays each demonstration
song with a preselected “voice”
(musical instrument).
• Your Concertmate 410 plays
the selected demonstration
song continuously until you turn
it off.
• The song Long Long Ago (C6)
includes synthesized singing.
• While the song is playing, you
can adjust the tempo (see
“Using the Auto-Rhythms” on
Page 14).
4. Adjust VOLUME to the desired setting.
illustration
5. To turn off the demonstration song
at any time, press DEMO again.
6. To select a different song, press
SONG, then repeat Step 2.
2. Choose a song from the SONG
list, then repeatedly press the corresponding button (A, B, or C) until
you hear the corresponding number. For example, to select Jingle
Bells (C2), repeatedly press C
until you hear “Two.”
3. Press DEMO. The TEMPO indicator flashes in time with the beat
and a voice counts one measure
of beats. The Concertmate 410
then plays that song.
Using CHORD ONLY
The Concertmate 410 lets you turn off
the melody of a demonstration song so
you can play the melody while the keyboard plays the accompaniment.
1. Select the demonstration song
you want to play.
2. Select the voice (musical instrument) you want to use (see
“Selecting a Voice” on Page 13).
11
42-4031.fm Page 12 Wednesday, August 11, 1999 4:22 PM
3. Press CHORD ONLY. The TEMPO
indicator flashes in time with the
beat and a voice counts one measure of beats. The keyboard then
continuously plays the accompaniment.
4. Adjust TEMPO s and t and VOLUME to the desired levels.
5. Play the song’s melody.
Note: See the supplied songbook.
It shows you the notes for each
song.
6. Press CHORD ONLY or DEMO to
stop playing the demonstration
song.
Using LESSON and REVIEW
The Concertmate 410 lets you learn
each demonstration song. Lessons
take you phrase-by-phrase through a
demonstration song.
1. Select the demonstration song
you want to learn (see “Playing
the Demonstration Songs” on
Page 11).
2. Press DEMO. The TEMPO indicator flashes in time with the beat
and a voice counts one measure
of beats. The Concertmate 410
then plays that song.
3. If you want to review the current
phrase and its accompaniment,
press REVIEW. The keyboard continuously repeats the current
phrase and its accompaniment.
12
To stop repeating the current
phrase and its accompaniment,
press REVIEW again. The Concertmate 410 continues to play
the demonstration song.
4. Press LESSON. Your keyboard
plays the selected song phraseby-phrase. After playing the current phrase, it stops and the voice
counts one measure of beats. At
the end of the count, the same
measures play again without the
melody so you can play the melody on the keyboard.
Notes:
• The Concertmate 410 automatically uses the preset voice used
in each demonstration song.
• Refer to the songbook supplied
with this manual. It shows you
the notes for each song. The
instrument sounds when you
play the melody on the keyboard.
5. If you want to review and replay
the current phrase and its accompaniment, press REVIEW. The
keyboard continuously repeats
the current phrase and its accompaniment.
To stop repeating the current
phrase and its accompaniment,
press REVIEW again. The lesson
continues.
6. Adjust TEMPO s and t and VOLUME to the desired levels.
42-4031.fm Page 13 Wednesday, August 11, 1999 4:22 PM
7. To stop the lesson, press LESSON . The keyboard continues to
play the demonstration song.
illustration
8. To turn off the demonstration
song, press DEMO.
SELECTING A VOICE
Your Concertmate 410 can sound like
12 different musical instruments (“voices). The name and number of each
voice is listed on the Concertmate
410’s top panel.
3. Press any key(s) on the keyboard
to hear the selected voice.
4. Adjust VOLUME to the desired
level.
5. To select a different voice, press
VOICE and repeat Step 2.
illustration
Follow these steps to select and play a
voice.
1. The Concertmate 410 automatically selects the voice PIANO (A1)
each time you turn it on. To play
another voice, press VOICE.
2. Choose a voice from the VOICE
list, then repeatedly press the corresponding button ( A or B) until
you hear the corresponding number. For example, to select
E.BASS (B2), repeatedly press B
until you hear “ Two.”
13
42-4031.fm Page 14 Wednesday, August 11, 1999 4:22 PM
USING THE AUTORHYTHMS
Your Concertmate 410 has 12 autorhythms that provide a steady beat for
your music. The name and number of
each auto-rhythm is listed on the Concertmate 410’s top panel.
3. Press START/STOP to start the
selected
auto-rhythm.
The
TEMPO indicator flashes in time
with the beat, and the keyboard
plays the selected rhythm.
illustration
Follow these steps to select and play
an auto-rhythm.
1. The Concertmate 410 automatically selects the rhythm DISCO
(A1) each time you turn it on. To
select another rhythm, press
RHYTHM.
4. To slow down the auto-rhythm,
repeatedly press TEMPO t. To
speed it up, repeatedly press
TEMPO s.
illustration
illustration
2. Choose an auto-rhythm from the
RHYTHM list, then repeatedly
press the corresponding button (A
or B) until you hear the corresponding number. For example, to
select 16 BEAT (A3), repeatedly
press A until you hear “Three.”
illustration
14
Notes:
• You can adjust TEMPO s and t
to play an auto-rhythm from 40
to 218 beats per minute.
• To reset the tempo to its default
(original) speed (128 beats per
minute), press both TEMPO s
and t at the same time. The
rhythm plays at the original
speed.
42-4031.fm Page 15 Wednesday, August 11, 1999 4:22 PM
5. Play the keyboard to hear the
selected preset voice along with
the rhythm.
rhythm is selected), then the original
rhythm automatically resumes at the
end of the variation.
6. Adjust VOLUME to the desired
level.
7. To stop the rhythm, press START/
STOP again.
illustration
8. To select a different rhythm, press
RHYTHM and repeat Step 2.
Using SYNC
The Concertmate 410’s SYNC feature
lets you synchronize the start of an
auto-rhythm with the beginning of your
music.
After you press RHYTHM and enter an
auto-rhythm, press SYNC so the TEMPO indicator flashes, then begin playing the keyboard. The rhythm
automatically starts to play when you
press any key.
Note: To insert the variation for longer
than 1 to 2 measures, press and hold
FILL IN. The Concertmate 410 plays
the variation until you release the button.
USING AUTO
ACCOMPANIMENT
illustration
To stop the rhythm, press START/
STOP .
Using FILL IN
The FILL IN feature lets you insert a
short (1- to 2-measure) variation in the
beat pattern of a selected auto-rhythm.
The 14 keys on the left side of the keyboard with note labels above them are
called accompaniment keys.
To insert a short variation in a beat pattern, press and release FILL IN while
the auto-rhythm is playing. The Concertmate 410 inserts a 1- to 2-measure
variation (depending on which auto-
Auto accompaniment lets you play
chords on the accompaniment keys
using chord formations of one to three
notes.
15
42-4031.fm Page 16 Wednesday, August 11, 1999 4:22 PM
Notes:
• You can use the Concertmate
410’s rhythm controls (FILL IN and
SYNC ) with auto accompaniment.
• After you press the auto accompaniment keys, the Concertmate 410
plays the same chord until you
press other keys to play a different
chord or until you press START/
STOP.
To play a melody along with the
accompaniment, press any key(s)
to the right of the accompaniment
keys.
5. Adjust TEMPO s and t and VOLUME to the desired levels.
6. To change chords without interrupting the rhythm, simply press
the auto accompaniment key(s)
required to form the new chord.
The accompaniment keys you press
determine the type of chord played.
7. To stop auto accompaniment but
not the auto-rhythm, press A.B.C.
The A.B.C indicator turns off.
Note: See “Chord Chart” on Page 22
for a list of all the chords you can play
on your Concertmate 410.
8. To stop auto accompaniment and
auto-rhythm, press START/STOP.
Follow these steps to start auto accompaniment.
1. Press A.B.C so the
beside A.B.C turns on.
indicator
illustration
2. Select and enter an auto-rhythm.
3. To synchronize the start of the
selected auto-rhythm with your
accompaniment, press SYNC so
the TEMPO indicator flashes.
4. Begin the accompaniment by
pressing the desired accompaniment key(s).
16
To return to normal play on the Concertmate 410 after using auto accompaniment, press A.B.C so the A.B.C
indicator turns off.
42-4031.fm Page 17 Wednesday, August 11, 1999 4:22 PM
SPECIAL FEATURES
USING REC
The Concertmate 410 has a memory
storage function that allows you to
record and play back a melody of up to
17 notes.
Note: The recording is lost when
you play the keyboard keys again,
press REC, PROG, DEMO, CHORD
ONLY, or turn off the Concertmate
410.
1. Select the preset voice you want
to use (see “Selecting a Voice” on
Page 13).
USING THE
PERCUSSION PADS
2. Press REC. The REC indicator
lights and recording starts.
The Concertmate 410’s percussion
pads put the sound of five different percussion instruments — bass drum,
snare drum, cymbal, hi-hat, and tom —
at your fingertips.
illustration
To play a percussion pad sound, simply press the desired pad at any time
during play. The keyboard plays the
selected percussion sound once each
time you press the pad. Repeatedly
press the pad to play the selected
sound several times in a row.
3. Play your desired melody, up to
17 notes.
illustration
Notes:
• During recording, remember to
enter one note at a time. Do not
press two or more notes at the
same time.
• You cannot record a particular
percussion sound into memory.
4. Press PLAY/SPACE to start playing
back the melody.
5. Press PLAY/SPACE again to stop
playback before the end.
Note: The Concertmate 410 has four
sound channels. This means that you
can play and hear up to four notes at
one time on the keyboard. The percussion pad you play uses one of the
sound channels.
17
42-4031.fm Page 18 Wednesday, August 11, 1999 4:22 PM
Storing a Percussion Pattern
The Concertmate 410 lets you use the 5 percussion pads to create your own percussion pattern of up to 16 beats including rests.
1. Choose the desired rhythm (see “Using the Auto-Rhythms” on Page 14).
2. Press PROG . The indicator beside PROG lights.
3. Using the percussion pads, enter your own percussion pattern.
Notes:
• To enter a rest in the pattern, simply press PLAY/SPACE .
• If you choose WALTZ (B6) as the rhythm, enter only 12 beats.
If you enter fewer than 12 beats, you must enter a rest in each place that is
not filled with a beat until all 12 beats are filled.
To enter a waltz pattern, follow this example:
illustration
• If you choose any pattern other than a waltz, enter 16 beats.
If you enter fewer than 16 beats, you must enter a rest in each place that is
not filled with a beat until all 16 beats are filled.
To enter a pattern other than a waltz pattern, follow this example:
illustration
4. Press PLAY/SPACE. The Concertmate 410 continuously plays the pattern you
just entered.
18
42-4031.fm Page 19 Wednesday, August 11, 1999 4:22 PM
5. To play a melody along with the
percussion rhythm, press any keyboard key(s).
6. Adjust TEMPO s and t and VOLUME to the desired levels.
7. To stop the percussion rhythm,
press PLAY/SPACE.
8. To re-start the rhythm, press
PLAY/SPACE .
Note: The percussion pattern is
lost when you press the percussion pads again, press PROG ,
REC , DEMO, CHORD ONLY, or turn
off the Concertmate 410.
USING REVERB
The reverb feature turns off automatically when you play the rhythm, use
REC, LESSON, or CHORD ONLY.
USING OCTAVE
The Concertmate 410 automatically
selects the tone of middle C each time
you turn it on. For added flexibility, you
can raise the sound of the keyboard by
one musical octave.
To quickly raise the key one octave,
press OCTAVE while the keyboard is silent. Press OCTAVE again while the
keyboard is silent to return to middle C.
illustration
The Concertmate 410’s reverb feature
lets you reverberate (echo) the tone of
the key you press. The reverb feature
uses one of the four sound channels
and is automatically selected each
time you turn on the keyboard.
To turn off the reverb feature, simply
press REVERB before or during play.
illustration
To turn on reverb again, press REVERB .
19
42-4031.fm Page 20 Wednesday, August 11, 1999 4:22 PM
TROUBLESHOOTING
If your Concertmate 410 is not performing as it should, these suggestions might
help. If you still cannot solve the problem, take the keyboard to your local RadioShack store for assistance.
Symptom
No sound, even if
keys are pressed.
Possible Cause
Remedy
POWER is set to OFF.
Set POWER to ON.
VOLUME is turned down.
Turn up VOLUME.
Headphones are connected.
Unplug headphones.
Power supply problem.
Check the power supply.
• Ensure batteries are
installed correctly.
• Ensure batteries are
fresh.
• Check for correct AC/
DC adapter connection.
VOLUME is turned down.
Adjust VOLUME.
Rhythm was not started.
Press START/STOP.
No accompaniment
when accompaniment keys are
pressed.
VOLUME is turned down.
Adjust VOLUME.
Accompaniment button
not pressed.
Press A.B.C.
No sound when connected to an external amplifier.
POWER is set to OFF.
Set POWER to ON.
VOLUME is turned down.
Turn up VOLUME.
Defective connection
cord.
Replace the connection
cord.
Problem with external
amplifier.
Check the external amplifier.
No rhythm.
20
42-4031.fm Page 21 Wednesday, August 11, 1999 4:22 PM
CARE AND MAINTENANCE
Your Optimus Concertmate 410 Portable Electronic Keyboard is an example of superior design and craftsmanship. The following suggestions will help you care for
your Concertmate 410 so you can enjoy it for years.
Keep the Concertmate 410 dry. If it gets wet, wipe it dry immediately.
Liquids might contain minerals that can corrode the electronic circuits.
Handle the Concertmate 410 gently and carefully. Dropping it can
damage circuit boards and cases and can cause the keyboard to
work improperly.
Use and store the Concertmate 410 only in normal temperature environments. Temperature extremes can shorten the life of electronic
devices and distort or melt plastic parts.
Keep the Concertmate 410 away from dust and dirt, which can cause
premature wear of parts.
Use only fresh batteries of the required size and type. Old batteries
can leak chemicals that damage your keyboard’s electronic parts.
CLEANER
Wipe the Concertmate 410 with a damp cloth occasionally to keep it
looking new. Do not use harsh chemicals, cleaning solvents, or
strong detergents to clean the Concertmate 410.
Modifying or tampering with the Concertmate 410’s internal components can cause
a malfunction, might invalidate its warranty, and void your FCC authorization to use
it. If your Concertmate 410 is not performing as it should, take it to your local RadioShack store for assistance.
21
42-4031.fm Page 22 Wednesday, August 11, 1999 4:22 PM
CHORD CHART
22
42-4031.fm Page 23 Wednesday, August 11, 1999 4:22 PM
23
42-4031.fm Page 24 Wednesday, August 11, 1999 4:22 PM
SPECIFICATIONS
Number of Keys ....................................................................................................37
Polyphonic Sound ...................................................................... 4-note (Maximum)
Preset Voices ........................................................................................................12
Auto-Rhythm .........................................................................................................12
Rhythm Controls ....................................... TEMPO, FILL IN, SYNC, START/STOP
Effects ....................................................................................... REVERB, OCTAVE
Melody Memory ............................................................................... Up to 17 notes
Accompaniments ........................................................................................... A.B.C
Demonstration Songs ............................................................................... 18 Songs
Percussion Pads .............. BASS DRUM, SNARE DRUM, CYMBAL, HI-HAT, TOM
Other Functions .................................. CHORD ONLY, LESSON, REVIEW, PROG
Built-in Speakers ..................................................................... 31/2 Inch × 2 (4 ohm)
Jacks ............................................................................................... PHONE, DC9V
Power Sources ................................................ DC: 6 C batteries (Cat. No. 23-551)
AC: 120V, 60Hz, with AC adapter (Cat. No. 273-1650 or 273-1662)
Vehicle Battery: 9-12V, with DC adapter (Cat. No. 270-1560A)
Power Consumption ............................................................................... DC <– 1.5 W
Dimensions (HWD) ........................ 31/16 × 225/8 × 83/4 Inches (78 × 575 × 222 mm)
Weight (Without Batteries) ......................................................... 3 lb 1.4 oz (1.4 kg)
Specifications are typical; individual units might vary. Specifications are subject to
change and improvement without notice.
RadioShack Limited Warranty
This product is warranted against defects for 1 year from date of purchase from RadioShack company-owned stores and authorized RadioShack franchisees and dealers. Within this period, we will
repair it without charge for parts and labor. Simply bring your RadioShack sales slip as proof of
purchase date to any RadioShack store. Warranty does not cover transportation costs. Nor does it
cover a product subjected to misuse or accidental damage.
EXCEPT AS PROVIDED HEREIN, RadioShack MAKES NO EXPRESS WARRANTIES AND ANY
IMPLIED WARRANTIES ARE LIMITED IN DURATION TO THE DURATION OF THE WRITTEN
LIMITED WARRANTIES CONTAINED HEREIN. Some states do not permit limitation or exclusion
of implied warranties; therefore, the aforesaid limitation(s) or exclusion(s) may not apply to the purchaser.
This warranty gives you specific legal rights and you may also have other rights which vary from state to state.
We Service What We Sell
10/95
RadioShack
A Division of Tandy Corporation
Fort Worth, Texas 76102
6A6
Printed in Hong Kong