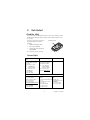
1
Copyright © 2004 Nokia. All rights reserved.
Copyright © 2004 Nokia. Todos los derechos reservados.
Printed in Canada / Impreso en Canadá
User Guide
www.nokia.com/us
www.nokia.com/latinoamerica
Manual del Usuario
NS333 BilESGenUG_P1 8/31/04 1:39 AM Page 1
Nokia 2651 User Guide
Nota: La traducción en español de este manual inicia en la Página 47.
Nokia 2651 User Guide
1
Copyright © 2005 Nokia
LEGAL INFORMATION
PART NO. 9241442, ISSUE NO. 1A
Copyright© 2005 Nokia. All rights reserved.
Nokia, Nokia 2651, Nokia Connecting People, and the Nokia Original Enhancements logos
are trademarks or registered trademarks of Nokia Corporation. Other company and product
names mentioned herein may be trademarks or trade names of their respective owners.
T9 text input software Copyright© 1999-2005. Tegic Communications, Inc.
All rights reserved.
The information contained in this user guide was written for the Nokia 2651 product. Nokia
operates a policy of ongoing development. Nokia reserves the right to make changes to any
of the products described in this document without prior notice.
UNDER NO CIRCUMSTANCES SHALL NOKIA BE RESPONSIBLE FOR ANY LOSS OF DATA OR
INCOME OR ANY SPECIAL, INCIDENTAL, AND CONSEQUENTIAL OR INDIRECT DAMAGES
HOWSOEVER CAUSED. THE CONTENTS OF THIS DOCUMENT ARE PROVIDED "AS IS." EXCEPT
AS REQUIRED BY APPLICABLE LAW, NO WARRANTIES OF ANY KIND, EITHER EXPRESS OR
IMPLIED, INCLUDING, BUT NOT LIMITED TO, THE IMPLIED WARRANTIES OF MERCHANTABILITY
AND FITNESS FOR A PARTICULAR PURPOSE, ARE MADE IN RELATION TO THE ACCURACY
AND RELIABILITY OR CONTENTS OF THIS DOCUMENT. NOKIA RESERVES THE RIGHT TO
REVISE THIS DOCUMENT OR WITHDRAW IT AT ANY TIME WITHOUT PRIOR NOTICE.
EXPORT CONTROLS
This device may contain commodities, technology, or software subject to export laws and
regulations from the U.S. and other countries. Diversion contrary to law is prohibited.
FCC/INDUSTRY CANADA NOTICE
Your device may cause TV or radio interference (for example, when using a telephone in close
proximity to receiving equipment). The FCC or Industry Canada can require you to stop using
your telephone if such interference cannot be eliminated. If you require assistance, contact
your local service facility. This device complies with part 15 of the FCC rules. Operation is
subject to the condition that this device does not cause harmful interference.
2
Copyright © 2005 Nokia
Manufactured or sold under one or more of the following U.S. Patents:
4868846
4945633
4969192
5001372
5083240
5101175
5124672
5151946
5152004
5173927
5212834
5230091
5241583
5266782
5271056
5311151
5311179
5317283
5331638
5335362
5341149
5353328
5371481
5378935
5384782
5390223
5392460
5396657
5400949
5408504
5416435
5430740
5442521
5444816
5446364
5446422
5477422
5479476
5487084
5526366
5534878
5548616
5551067
5553125
5557639
5565821
5566201
5570369
5581244
5594797
5600708
5606548
5613235
5625274
5640395
5664053
5675611
5677620
5692032
5697074
5699482
5701392
5722074
5729534
5729541
5754976
5760568
5782646
5787341
5794142
5797102
5802465
5802465
5805301
5809413
5819165
5821891
5822366
5827082
5835858
5835889
5839101
5842141
5844884
5845219
5850607
5857151
5859843
5862178
5870683
5884103
5884190
5887266
5889770
5892475
5898775
5898925
5903832
5903839
5907823
5912570
5914690
5914796
5915440
5917868
5920826
5926138
5926147
5929813
5930233
5946651
5953665
5956332
5956625
5956633
5960354
5960389
5963901
5966374
5966378
5970059
5977887
5983081
5987137
5987639
5991716
5991857
6005857
6006114
6009328
6011853
6011971
6014113
6014551
6014573
6025802
6026161
6028567
6029128
6031827
6035189
6035194
6038238
6043760
6047196
6049796
6050415
6054954
6054966
6055439
6060193
6069923
6072787
6073001
6079993
6081534
6081732
6084471
6084855
6084920
6084962
6088746
6094587
6097964
6105784
6112099
6115617
6118775
6119002
6119180
6121846
6122498
6128322
6128509
6130650
Nokia 2651 User Guide
3
Copyright © 2005 Nokia
6133884
6137789
6138091
6140966
6144243
6144676
6148209
6151485
6151507
6163609
6164547
6167038
6167248
6167273
6170073
6171127
6178535
6182101
6184592
6185295
6185302
6185422
6188909
6195338
6198928
6199035
6201712
6201876
6202109
6219560
6223037
6223059
6230020
6240076
6240079
6249584
6259312
6262735
6266321
6266330
6269126
6271794
6272361
6282436
6285888
6292668
6295286
6307512
6308084
6310609
6311054
6314166
6317083
6324389
6333716
6347218
6356759
6359865
6359904
6363259
6370362
6370389
6377803
6377820
6381468
6385254
6385451
6392605
6392660
6400958
6417817
6430163
6434133
6437711
6438370
6445932
6453179
6456237
6456826
6463278
6470470
6487397
6487424
6510148
6522670
6591116
6606508
4
Copyright © 2005 Nokia
Contents
1
For your safety . . . . . . . . . . . . . . . . . . . . . . . . . . . . . . . . . . . . . 7
About your device . . . . . . . . . . . . . . . . . . . . . . . . . . . . . . . . . . . . . . . . . 8
Network Services. . . . . . . . . . . . . . . . . . . . . . . . . . . . . . . . . . . . . . . . . . 8
Shared memory . . . . . . . . . . . . . . . . . . . . . . . . . . . . . . . . . . . . . . . . . . . 9
Accessibility solutions . . . . . . . . . . . . . . . . . . . . . . . . . . . . . . . . . . . . . . 9
2
Get started. . . . . . . . . . . . . . . . . . . . . . . . . . . . . . . . . . . . . . . 10
Find the label . . . . . . . . . . . . . . . . . . . . . . . . . . . . . . . . . . . . . . . . . . . . 10
Insert the SIM card . . . . . . . . . . . . . . . . . . . . . . . . . . . . . . . . . . . . . . . 11
Insert the battery. . . . . . . . . . . . . . . . . . . . . . . . . . . . . . . . . . . . . . . . . 11
Charge the battery . . . . . . . . . . . . . . . . . . . . . . . . . . . . . . . . . . . . . . . 12
Attach the wrist strap . . . . . . . . . . . . . . . . . . . . . . . . . . . . . . . . . . . . . 12
Open the fold . . . . . . . . . . . . . . . . . . . . . . . . . . . . . . . . . . . . . . . . . . . . 12
Keys, indicators, and connectors . . . . . . . . . . . . . . . . . . . . . . . . . . . . 13
Switch on and off . . . . . . . . . . . . . . . . . . . . . . . . . . . . . . . . . . . . . . . . 14
Internal antenna . . . . . . . . . . . . . . . . . . . . . . . . . . . . . . . . . . . . . . . . . 14
3
Call functions. . . . . . . . . . . . . . . . . . . . . . . . . . . . . . . . . . . . . 15
Make a call. . . . . . . . . . . . . . . . . . . . . . . . . . . . . . . . . . . . . . . . . . . . . . 15
Answer a call . . . . . . . . . . . . . . . . . . . . . . . . . . . . . . . . . . . . . . . . . . . . 16
In-call operations . . . . . . . . . . . . . . . . . . . . . . . . . . . . . . . . . . . . . . . . 16
Number screening . . . . . . . . . . . . . . . . . . . . . . . . . . . . . . . . . . . . . . . . 16
Lock the keypad (keyguard) . . . . . . . . . . . . . . . . . . . . . . . . . . . . . . . . 17
4
Writing text . . . . . . . . . . . . . . . . . . . . . . . . . . . . . . . . . . . . . . 18
Predictive text input . . . . . . . . . . . . . . . . . . . . . . . . . . . . . . . . . . . . . . 18
Traditional text input . . . . . . . . . . . . . . . . . . . . . . . . . . . . . . . . . . . . . 19
5
Menu functions . . . . . . . . . . . . . . . . . . . . . . . . . . . . . . . . . . . 20
Messages . . . . . . . . . . . . . . . . . . . . . . . . . . . . . . . . . . . . . . . . . . . . . . . 20
Contacts . . . . . . . . . . . . . . . . . . . . . . . . . . . . . . . . . . . . . . . . . . . . . . . . 24
Call log . . . . . . . . . . . . . . . . . . . . . . . . . . . . . . . . . . . . . . . . . . . . . . . . . 25
Settings . . . . . . . . . . . . . . . . . . . . . . . . . . . . . . . . . . . . . . . . . . . . . . . . 27
Alarm clock . . . . . . . . . . . . . . . . . . . . . . . . . . . . . . . . . . . . . . . . . . . . . 32
Nokia 2651 User Guide
5
Copyright © Nokia 2005
Reminders . . . . . . . . . . . . . . . . . . . . . . . . . . . . . . . . . . . . . . . . . . . . . .33
Games . . . . . . . . . . . . . . . . . . . . . . . . . . . . . . . . . . . . . . . . . . . . . . . . .33
Extras . . . . . . . . . . . . . . . . . . . . . . . . . . . . . . . . . . . . . . . . . . . . . . . . . .33
SIM services . . . . . . . . . . . . . . . . . . . . . . . . . . . . . . . . . . . . . . . . . . . . . 36
Prepaid . . . . . . . . . . . . . . . . . . . . . . . . . . . . . . . . . . . . . . . . . . . . . . . . .36
6
Reference information . . . . . . . . . . . . . . . . . . . . . . . . . . . . . . 37
Battery information . . . . . . . . . . . . . . . . . . . . . . . . . . . . . . . . . . . . . . .37
Enhancements . . . . . . . . . . . . . . . . . . . . . . . . . . . . . . . . . . . . . . . . . . .38
Enhancements, batteries, and chargers . . . . . . . . . . . . . . . . . . . . . . .38
Care and maintenance. . . . . . . . . . . . . . . . . . . . . . . . . . . . . . . . . . . . .39
Additional safety information. . . . . . . . . . . . . . . . . . . . . . . . . . . . . . . 40
Technical information . . . . . . . . . . . . . . . . . . . . . . . . . . . . . . . . . . . . .44
Index . . . . . . . . . . . . . . . . . . . . . . . . . . . . . . . . . . . . . . . . . . . 45
6
Copyright © Nokia 2005
For your safety
1
For your safety
Read these simple guidelines. Not following them may be dangerous or illegal.
Read the complete user guide for further information.
SWITCH ON SAFELY
Do not switch on the phone when wireless phone use is prohibited
or when it may cause interference or danger.
ROAD SAFETY COMES FIRST
Obey all local laws. Always keep your hands free to operate the
vehicle while driving. Your first consideration while driving should
be road safety.
INTERFERENCE
All wireless phones may be susceptible to interference, which could
affect performance.
SWITCH OFF IN HOSPITALS
Follow any restrictions. Switch the phone off near medical
equipment.
SWITCH OFF IN AIRCRAFT
Follow any restrictions. Wireless devices can cause interference
in aircraft.
SWITCH OFF WHEN REFUELING
Don't use the phone at a refueling point. Don't use near fuel
or chemicals.
SWITCH OFF NEAR BLASTING
Follow any restrictions. Don’t use the phone where blasting is
in progress.
USE SENSIBLY
Use only in the normal position as explained in the product
documentation. Don’t touch the antenna unnecessarily.
QUALIFIED SERVICE
Only qualified personnel may install or repair this product.
ENHANCEMENTS AND BATTERIES
Use only approved enhancements and batteries. Do not connect
incompatible products.
Nokia 2651 User Guide
7
Copyright © 2005 Nokia
WATER-RESISTANCE
Your phone is not water-resistant. Keep it dry.
BACKUP COPIES
Remember to make back-up copies or keep a written record of all
important information stored in your phone.
EMERGENCY CALLS
Ensure the phone is switched on and in service. Press C as many
times as needed to clear the display and return to the main screen.
Enter the emergency number; then select Call. Give your location.
Do not end the call until told to do so.
• About your device
The wireless device described in this guide is approved for use on the GSM 850
and GMS 1900 networks. Contact your service provider for more information
about networks.
When using the features in this device, obey all laws and respect privacy and
legitimate rights of others.
Warning: To use any features in this device, other than the alarm clock,
the phone must be switched on. Do not switch the device on when
wireless phone use may cause interference or danger.
• Network Services
To use the phone you must have service from a wireless service provider. Many
of the features in this device depend on features in the wireless network to
function. These Network Services may not be available on all networks or you
may have to make specific arrangements with your service provider before you
can utilize Network Services. Your service provider may need to give you additional
instructions for their use and explain what charges will apply. Some networks
may have limitations that affect how you can use Network Services. For instance,
some networks may not support all language-dependent characters and services.
Your service provider may have requested that certain features be disabled or
not activated in your device. If so, they will not appear on your device menu.
Contact your service provider for more information.
8
Copyright © 2005 Nokia
For your safety
• Shared memory
The following features may share memory: contact list, text messages, and
reminders. Use of one or more of these features may reduce the memory available
for the remaining features sharing memory. Your phone may display a message
that the memory is full when you try to use a shared memory feature. In this
case, delete some of the information or entries stored in the shared memory
features before continuing.
• Accessibility solutions
Nokia is committed to making mobile phones easy to use for all individuals,
including those with disabilities. For more information about phone features,
enhancements, alternate format user guides, and other Nokia products designed
with your needs in mind, visit the Web site at www.nokiaaccessibility.com.
Your phone is compatible with TTY devices that comply with the TSB 121 industry
standard. Please check with the manufacturer of your TTY device to ensure that
it supports digital wireless transmission. By using the Nokia HDA-9 adapter, your
phone can be connected to a “cellular ready” or “cellular compatible” TTY/TDD
device by using a special cable. If this cable was not provided with your TTY
device, contact your TTY device manufacturer to purchase the connector cable.
Important: Once your TTY/TDD device is connected, select Menu >
Settings > Enhancement settings > TTY/TDD to enable the
TTY/TDD mode.
Nokia 2651 User Guide
9
Copyright © 2005 Nokia
2
Get started
• Find the label
If you ever need to call Nokia Customer Care or your service provider, you must
provide specific information about your phone. This information appears on the
phone label.
The label is on the back of the phone
(under the battery). It shows the
following:
•
Model number (Nokia 2651)
•
Phone type and FCC ID
•
International mobile equipment
identity (IMEI)
Information label
Do not remove or deface the label.
Contact Nokia
Nokia Customer Care Center,
USA
Customer Care, Canada
Nokia Mobile Phones
7725 Woodland Center Blvd.
Suite #150
Tampa, Florida 33614
Tel: 1-888-NOKIA-2U
(1-888-665-4228)
Fax: 1-813-249-9619
For TTY/TDD users:
1-800-24-NOKIA
(1-800-246-6542)
Nokia Products Ltd.
601 Westney Road South
Ajax, Ontario L1S 4N7
Tel: 1-905-427-1373
1-888-22-NOKIA
(1-888-226-6542)
Fax: 1-905-619-4360
Web site: www.nokia.ca
Centro Nokia de Servicio al Cliente
NOKIA MOBILE PHONES
6000 Connection Dr.
Irving, Texas 75039 EE.UU.
Tel.: (972) 894-5000
Fax: (972) 894-5050
www.nokia.com/latinoamerica
Para usuarios de TTY/TDD:
1-800-246-NOKIA
(1-800-246-6542)
NOKIA MÉXICO, S.A.
de C.V.
Paseo de los Tamarindos 400-A
Piso 16
Col. Bosques de las Lomas
C. P. 05120
México D.F., MÉXICO
Tel.: (55) 261-7200
Fax: (55) 261-7299
10
NOKIA ARGENTINA,
S.A.
Azopardo 1071
C1107ADQ Buenos Aires
ARGENTINA
Tel.: (11) 4307-1427
Fax: (11) 4362-8795
Copyright © 2005 Nokia
Get started
• Insert the SIM card
Keep all SIM cards out of the reach of
small children. For availability and
information on using SIM card services,
contact your SIM card vendor. This may
be the service provider, network operator,
or other vendor.
1
Open the SIM cover on the side of
the phone by pulling it out and
bending it down (1).
2
Insert the SIM card into the phone
with the bevelled corner facing
right and the gold-colored
contacts on the card facing
downward (toward the front
side of the phone) (2).
3
Push the SIM card in and close the
SIM cover (3).
• Insert the battery
Note: Avoid touching electronic components while changing the
covers. Always store and use the phone with the covers attached.
Always switch the device off and disconnect the charger before removing
the battery.
While pressing the release catch (1), remove the back cover (2). Insert the
battery so that the gold-colored connectors on the battery align with the
connectors on the phone (3). Replace the back cover (4).
Nokia 2651 User Guide
11
Copyright © 2005 Nokia
• Charge the battery
Do not charge the battery if the phone
covers are removed.
1
Connect the charger to an ac wall outlet.
Connect the charger plug into
the connector in the phone.
The battery indicator bar
on the display starts scrolling.
When the battery is fully charged, the
bar stops scrolling.
2
Disconnect the charger from the phone and the ac outlet.
• Attach the wrist strap
Thread the strap through the hole as shown,
and tighten it.
• Open the fold
To use the phone, you must first open the
fold. Do not try to force the fold to open
more than the hinge allows.
Close the fold by pushing from the top
part of the phone, not from the hinge.
12
Copyright © 2005 Nokia
Get started
• Keys, indicators, and connectors
1
Signal intensity of the cellular
network at your current location
2
Battery charge level
3
Cellular network in use or the
operator logo
4
Current function of the Left
selection key
5
Current function of the Right
selection key
6
Selection keys—perform the
function displayed above them.
7
4-way scroll key for scrolling
through names, phone numbers,
menus, or settings. Scroll left or
right to adjust the earpiece volume
during a call.
In the standby mode, scroll up or
down to show names and phone
numbers saved in Contacts. Scroll
left to write a message.
8
Call key—dials a phone number and answers calls or shows the most
recently dialed numbers when pressed in the standby mode.
9
End key—ends an active call or rejects an incoming call. Press to exit from
any function. Closing the fold also exits from any function.
The End key also switches the phone on and off. When the phone is on and
in the standby mode, quickly press the End key to access a list of profiles
(see “Profiles” on page 28), or for 3 seconds to switch the phone off.
10 Use keys 0 through 9 to enter numbers and characters.
Use the and # for various purposes in different functions.
*
11 Charger connector
12 Headset connector
13 Microphone
Nokia 2651 User Guide
13
Copyright © 2005 Nokia
• Switch on and off
Warning: Do not switch the phone on when wireless phone use is
prohibited or when it may cause interference or danger.
The phone does not have a dedicated key for turning the phone on and off; the
on-off function is combined with the End key.
Press and hold the End key. If the phone is on, you will be shown the standby
mode, followed by the list of profiles, before the phone switches off.
When switching the phone on, it may request a PIN code or security code; key
in the code, and select OK. The preset security code is 12345. See “Security
settings” on page 31 for more information on phone codes.
If the phone displays Insert SIM card even though the SIM card is properly
inserted, or SIM card not supported, contact your network operator or service
provider. Your phone does not support 5-V SIM cards.
• Internal antenna
Your device has an
internal antenna.
As with any other radio
transmitting device, do not
touch the antenna area
unnecessarily when the device
is switched on. Contact with
the antenna affects call
quality and may cause the
phone to operate at a higher
power level than otherwise needed. Avoid contact with the antenna area when
operating the phone to optimize the antenna performance and the battery life.
14
Copyright © 2005 Nokia
Call functions
3
Call functions
• Make a call
1
Open the fold, and key in the phone number including the area code.
Select Clear to delete the last entered digit.
2
Press Call. During the call, scroll left or right to adjust the volume of the
earpiece or headset.
3
Press End or close the fold to end the call or cancel the call attempt.
Make a call with Contacts
In the standby mode, scroll up or down to find the name or number you want.
Press Call to call the number.
Call a recently dialed number
To redial one of the last 20 phone numbers that you have called or attempted
to call, press Call, scroll to the name or number you want, and press Call again.
Call your voice mailbox
To program your phone to dial your voice mailbox, do the following:
1
Select Contacts > Settings > Voice mailbox number.
2
Enter the phone number of your voice mailbox, and press OK.
To call your voice mailbox, from the standby mode, press and hold the 1 key.
1-touch dialing
You can set the keys 2–9 as 1-touch dialing keys. After assigning a number to a
key, press and hold the key in standby mode to make a call. Or press the number
and the Call key.
To assign a phone number to a key, do the following:
1
2
Select Contacts > 1-touch dial. > Edit.
Scroll to the desired key, and select Assign.
If a phone number is already assigned to the key, select Options to view,
change, or delete the number assignment.
3
Select Assign to SMS or Assign to call, and press Select.
1-touch dialing must be turned on before it can be used. To turn it on, select
Contacts > 1-touch dial. > On.
Nokia 2651 User Guide
15
Copyright © 2005 Nokia
• Answer a call
Open the fold and press Call. If you do not press Call the call will go to your
voice mailbox. To reject a call without answering it, open the fold and quickly
close it, or press End.
If Delayed answering is activated, by selecting Menu > Settings > Call
settings > Fold call handling > Delayed answering, there will be a short delay
after you open the phone until you can answer the call.
• In-call operations
During a call, select Options for some of the following functions: Lock keys
(if a headset is attached), Hold/Unhold, New call, End active call, Touch
tones, Contacts, Menu, Mute/Unmute, and Hold.
Conference calls (network service)
To join two calls into a conference call, do the following:
1
Call the first participant.
2
To call a new participant, select Options > New call.
3
Enter the new number or select it from the contacts list, and select Call.
The first call is put on hold and the second number is dialed.
4
When the call is answered, select Options > Swap to switch between the
two calls, or select Options > Conference to join the conference call.
5
To have a private conversation with one of the participants, select Private
call and the participant. To rejoin the call, select Options > Conference.
6
To end the conference call, press End.
Call waiting (network service)
You can answer a call while you have another call in progress if you have activated
the Call waiting function in the Call settings menu (network service). To answer
the waiting call, select Options > Answer or press Call. See also “Call settings”
on page 29.
• Number screening
You can set your phone to screen calls and messages from certain numbers.
When you receive a call from a screened number, there is no ringing tone or
vibration, no matter which profile is selected. The call information is stored
under Call log > Missed calls.
16
Copyright © 2005 Nokia
Call functions
Add a number
To add a number to the list of screened numbers, select Contacts >
No. screening > Options > Add number, enter the number you want to
screen, and select OK.
Remove a number
To remove a number from the list, select Contacts > No. screening, scroll to
the number you want to remove, and select Options > Delete from list.
The No. screening option is also available by selecting Menu > Messages >
Message settings > No. screening.
View screened calls and messages
When you receive a call or message from a screened number, an alert message
is displayed.
• Lock the keypad (keyguard)
The keypad lock prevents accidental key presses. To lock or unlock the keypad,
press the Left selection key, and quickly press . Keyguard is not activated
when you close the fold.
*
When the keypad is locked, the
icon is shown at the top of the display.
You can still answer a call by pressing Call.
When keyguard is on, it may still be possible to call the official emergency number
programmed into your phone. Key in the emergency number, and press Call.
Nokia 2651 User Guide
17
Copyright © 2005 Nokia
4
Writing text
To enter text, use the traditional text input (indicated with the
predictive text input (indicated with
).
icon) or use
When writing text, select Options > Predictive text > English.
To revert to traditional text input, select Options > Predictive text >
Prediction off.
• Predictive text input
Predictive text input is an easy way to write text. It is based on a built-in
dictionary to which you can also add new words.
1
2
Key in the word you want by pressing each key once for one letter.
The word changes after each keystroke. For example, to write “Nokia”
when the English dictionary is selected, press 6 6 5 4 2.
•
To delete the character to the left of the cursor, select Clear. To clear
the screen, select and hold Clear.
•
To switch between upper and lowercase or between traditional and
predictive text input, press # repeatedly, and check the icon at the top
of the display.
•
To switch between letters and numbers, press and hold #.
•
To get a list of special characters, press and hold , select the
character that you want, and select Use.
•
To insert a number, press and hold the number key you want. To insert
several numbers, press and hold #, and key in the numbers.
*
If the displayed word is the that one you want, press 0 to create a space,
and start writing the next word.
•
To change the word, press
want appears.
* repeatedly until the word that you
•
If ? is displayed after the word, the word is not in the dictionary.
To add the word to the dictionary, select Spell, key in the word
(using traditional text input), and select OK.
18
Copyright © 2005 Nokia
Writing text
• Traditional text input
Repeatedly press the key marked with the letter that you want until the
letter appears.
Use the following functions to edit the text:
•
To move the cursor, press the scroll keys.
•
To add a space, press 0.
•
To delete the character to the left of the cursor, select Clear. To clear the
screen, select and hold Clear.
•
To switch between upper and lowercase or between traditional and
predictive text input, press # repeatedly and check the icon at the top of
the display.
•
To switch between letters and numbers, press and hold #.
•
To add a number, press and hold the desired key.
•
To add a punctuation mark or special character, press ; select the desired
character and Use.
•
To key in a letter that is on the same key as the previous one, scroll up or
down (or wait until the cursor appears), and key in the new letter.
*
Nokia 2651 User Guide
19
Copyright © 2005 Nokia
5
Menu functions
You can use the menus in the following ways:
Scrolling
1
Select Menu in the standby mode.
2
Scroll up or down to the main menu you want, and select it.
3
If the menu contains submenus, select the one you want. Select Back to
return to the previous menu level, or press End to exit to the standby mode.
Shortcuts
The menus, submenus, and setting options are numbered. The shortcut number
of the menu is shown at the top right of the display.
In the standby mode, select Menu, and quickly key in the shortcut number of
the menu you want to access. Repeat for submenus.
• Messages
Before sending messages, you must set your message settings.
For more information, see “Message settings” on page 23.
Linked messages
Your phone can send and receive long text messages (network service). Text
messages that exceed 160 characters are automatically split into multiple
messages and sent as a series. The series of messages is linked by the compatible
phone when received and displayed as a single SMS message. For this feature to
work properly, the receiving phone must also support linked messages.
While you write a message, the number of available characters and the current
part number of linked message (for example, 120/2) are shown in the top right
corner of the display.
If there are special characters in your message, the indicator may not show the
message length correctly. Before the message is sent, the Nokia 2651 phone
tells you if the message exceeds the maximum length allowed for one message.
To cancel sending, select Cancel; or save the message in the Drafts folder.
Write messages
To send a message, the phone number of your message center must be saved in
the phone. See “Message settings” on page 23.
1
Select Menu > Messages > Create message, and enter the message.
The number of available characters and the current part number are shown
on the top right of the display.
20
Copyright © 2005 Nokia
Menu functions
2
3
While writing the message, select Options to access other options.
When the message is complete, select Options > Send; enter the recipient’s
phone number, or select Find to search for it in contacts; and select OK.
OR
Select Options > Sending options > Send to many, Send to list, Send
later, or Sending profile.
When sending messages, your device may display Message Sent. This is an
indication that the message has been sent by your device to the message center
number programmed into your device. This is not an indication that the message
has been received at the intended destination. For more details about messaging
services, check with your service provider.
Read a text message (Inbox)
When you have received text messages in the standby mode, the number of
new messages and the new message icon (
) are shown on the display.
1 Select Read to view the message immediately.
To view the message later, press Exit. When you are ready to read the
message, select Menu > Messages > Inbox and the message that you
want to read. Scroll up and down to browse through the message.
2 While reading the message, select Options to access other options.
Sent items and drafts
The Sent items folder stores copies of the messages that you have sent. The Drafts
folder stores messages that you saved while you were writing them. (To save a
message while writing, select Options > Save message.)
While viewing a message, select Options to access other options.
Picture messages
You can receive and send messages that contain pictures (network service).
Picture messages are saved in the phone. Note that each picture message is
comprised of several text messages. Therefore, sending one picture message
may cost more than one text message.
Note: Picture message function can be used only if it is supported by
your network operator or service provider. Only compatible devices that
offer picture message features can receive and display picture messages.
Create a picture message
1
2
3
Select Menu > Messages > Picture messages.
Scroll to the desired picture, and select Use.
To add text and send the message, see “Write messages” on page 20, and
follow the prompts.
Nokia 2651 User Guide
21
Copyright © 2005 Nokia
Receive a picture message
1
Select Read to view the message immediately.
To view the message later, press Exit. When you are ready to read the
message, select Menu > Messages > Inbox and the message that you
want to read. Scroll up and down to browse through the message.
2
While reading the message, select Options to access other options.
Distribution lists
If you need to send messages frequently to a fixed group of recipients, you can
define a distribution list, and use it when sending a message. You can define up
to 6 distribution lists with up to 10 recipients in each. The phone sends a text
message to each recipient separately.
Create a list
1
Select Menu > Messages > Distribution lists > Options > Add list.
2
Enter a name for the list, and select OK.
3
To add a contact to the list, select Options > View list > Options > Add
contact and the contact or contacts that you want to add to the list.
4
When you are through adding contacts, press Back.
Send to a list
1
Creating the message.
2
Select Options > Sending options > Send to list, and the desired
distribution list.
3
Select OK to confirm your decision.
If a message fails to be sent to one or more recipients, a report is displayed
listing the number successfully sent and the number failed.
Screened messages
This feature allows messages from unwanted numbers to be filtered out by adding
the sender to a list of screened numbers. See “Number screening” on page 16.
Delete messages
•
Select Menu > Messages > Delete messages.
•
To delete all read messages from all folders, select All read. When Delete
read messages from all folders? appears, select OK.
•
To delete all the read messages in a particular folder, scroll to the folder,
and select OK. When Delete all read messages from folder? appears,
select OK.
22
Copyright © 2005 Nokia
Menu functions
Message counter
1
2
Select Menu > Messages > Message counter.
Scroll down to view the numbers of sent and received messages.
The number of messages appears at the bottom right of the display.
3
To reset message counters, select Clear counters and the counter that you
want to reset.
The Message counter submenu is also located under the Call log main menu.
Message settings
Select Menu > Messages > Message settings and one of the following:
Info service—Receive messages from the network on various topics, such as traffic
conditions (network service). Contact your service provider for more information.
Templates—View, edit, or delete preset message templates.
Smileys—Use preset smileys, such as :-) in messages. You can also edit and
delete the existing smileys and create new smileys.
Signatures—Add a signature file to your messages. Select Signature text to
create or edit your signature. Select Include sig. > On or Off to set automatic
signature insertion on or off.
Sending profile—Set up your message sending profile. Select a profile, then
select each of the following:
•
Message center number—Save the phone number needed for sending
messages. Contact your service provider for this number.
•
Messages sent as—Select Text, Fax, Paging, or E-mail (network service).
•
Message validity—Choose how long the network should attempt to deliver
your message (network service).
•
Rename sending profile—Change the name of the sending profile.
Delivery reports—Request the network to send delivery reports for your sent
messages (network service). Select On or Off.
Reply via same center—Allow the recipient of your message to send you a reply
through your message center (network service). Select Yes or No.
Character support—Select Full to send all Unicode characters to compatible
phones, or Reduced to attempt to convert Unicode characters into the
corresponding non-Unicode characters (network service).
No. screening—See “Number screening” on page 16.
Nokia 2651 User Guide
23
Copyright © 2005 Nokia
Service command editor
You can send service requests to your service provider (network service).
Select Menu > Messages > Service com. editor, enter the characters you want,
and select Send to send the request.
Contact your service provider for more information.
• Contacts
You can save names and phone numbers in phone memory and in SIM card
memory. The phone memory can store up to 50 names.
Search for a name and phone number
1 In the standby mode, select Contacts > Find.
2 Enter the first (or more) letters of the name you are looking for, and select Find.
3 Scroll to find the name you want.
4 To call the number, select Call.
If the name or phone number is saved in SIM card memory,
is shown at the
upper right corner of the display; if it is saved in phone internal memory,
is shown instead.
For a quick search, scroll down in the standby mode, enter the first letter of the
name, and scroll to find the name you want.
Options
The following submenus are available in the Contacts menu:
Find—Search for a name in the contact list.
Add name—Save names and phone numbers in the phone book.
Delete—Delete names and phone numbers from the phone book one by one or
all at once.
Edit—Edit the names and numbers in Contacts.
Assign tone—Set the phone to play the ringing tone you want when you receive
a call from a particular phone number. Select the phone number or name you
want and select Assign; then select the desired ringing tone. This function only
works when both the network and the phone are able to identify and send the
caller´s identity.
Send phone number—Send a person´s phone number as an over the air (OTA)
message (network service).
Copy—Copy names and phone numbers all at once or one by one from phone
memory to SIM card memory, or vice versa.
Settings—Modify the contacts settings. See “Contacts settings” on page 25.
1-touch dial.—Activate the 1-touch dialing feature and edit the numbers
assigned to the 1-touch dialing keys. See “1-touch dialing” on page 15.
24
Copyright © 2005 Nokia
Menu functions
Own numbers—Display the phone number of your phone.
No. screening—Set up a list of screened phone numbers. See “Number screening”
on page 16.
Service numbers—Call the service numbers of your service provider if the
numbers are included on your SIM card (network service).
Info numbers—Call the info numbers of your service provider if the numbers
are included on your SIM card (network service).
Contacts settings
In the standby mode, select Contacts > Settings and one of the following:
Voice mailbox number—Save and change the phone number of your voice
mailbox (network service).
Memory in use—Select whether the names and phone numbers are saved in
SIM card or Phone. Note that when you change the SIM card, SIM card
memory is automatically selected.
Contacts view—Select how the names and phone numbers are shown. Select
either Name and no. (one name and number at a time), Name list (names only,
four names at a time), or Name only (names only, three names at a time, in a
larger font).
Memory status—Check how many names and phone numbers can still be saved
in phone book.
• Call log
The call log records the phone numbers of missed, received, and
dialed calls, the approximate length of your calls, and the number
of sent and received messages. For call log to work properly, the
following conditions must be met:
• You must be in a digital network, your service provider must support caller
ID, and it must be enabled in the phone.
• Your calls cannot be blocked.
• Your phone must be on and within the service area or in a compatible
network if roaming.
Missed, received, or dialed calls
1
2
3
Select Menu > Call log > Missed calls, Received calls, or Dialed numbers.
Scroll through the list of numbers and highlight your selection.
Select Options and one of the following:
Send message—Send a text message to the person who called you or
whom you called.
Send number—Send the phone number as a message to a compatible device.
Nokia 2651 User Guide
25
Copyright © 2005 Nokia
Time of call—Show the time when the call was connected.
Edit number—Edit the number and save it with a name to your phone book.
Save—Enter a name for the number and save both to your phone book.
Delete—Erase the number from the call list.
Add to scrn. list—Add the number to the list of screened numbers.
Delete recent call lists
You cannot undo this operation.
Select Menu > Call log > Delete recent call lists > All, Missed, Received,
or Dialed.
Call timers
Your phone tracks the approximate amount of time you spend on each call.
Note: The actual time invoiced for calls by your service provider may
vary, depending on network features, rounding off for billing, taxes, etc.
Note: Some timers may be reset during service or software upgrades.
Select Menu > Call log > Call timers and one of the following:
Duration of last call—Show the approximate call duration of the last call.
Duration of received calls—Show the approximate duration of all received calls.
Duration of dialed calls—Show the approximate duration of all calls dialed.
Duration of all calls—Show the approximate call duration of all calls that have
been made and received since you reset the timers.
Clear timers—Clear all call timers for the currently selected phone number. (Your
phone includes separate timers for each number used.) You need to enter your
security code to clear timers. This action cannot be undone.
Prepaid credit
Note: This feature is not available in all areas and may not appear in
the menu. Check with your service provider for availability.
When using a prepaid SIM card, you can make calls only when there are enough
credit units on the SIM card (network service). Options are Credit info display
(show or hide remaining units in the standby mode), Credit available (amount
of remaining units), Last event costs, and Recharge status.
Note: When no more charging units or currency units are left, calls
may only be possible to the official emergency number programmed
into the phone.
26
Copyright © 2005 Nokia
Menu functions
• Settings
In this menu you can adjust various settings of the phone. You
can also reset some menu settings to their default values by
choosing Restore factory set.
Tone settings
In this menu you can change the settings of the currently selected profile.
See “Profiles” on page 28 for more information.
Select Menu > Settings > Tone settings and one of the following:
Ringing tone—Set the tone that you hear when you receive a call.
Ringing volume—Set the volume level for the ringing and message alert tones.
Vibrating alert—Set the phone to vibrate when you receive a call or a text
message. The vibrator does not operate when the phone is connected to a charger.
Message alert tone—Set the tone that you hear when you receive a text message.
Keypad tones—Set the volume for keypad tones.
Warning tones—Set the phone to sound tones (for example, when the battery
is almost discharged).
Display settings
Select Menu > Settings > Display settings and one of the following:
Themes—Choose a theme to customize the appearance of your phone display
screen. Themes control the display background, the wallpaper, and the appearance
of the signal and battery bars in the standby mode. Highlight the desired theme,
and select Options and one of the following:
•
Activate—Select For current profile or For all profiles.
•
Preview—View the appearance of the theme.
•
Edit—Select the wallpaper, the menu background, and the signal and
battery bars.
Menu view—Set the main menu display format. Select List or Grid.
Power saver clock—Set the phone to show the digital clock and all the main
display icons as a screen saver. The displayed icons indicate missed calls, keypad
lock, silent mode and received messages.
Cell info display—Set the phone to indicate when it is used in a cellular network
that is based on microcellular network (MCN) technology (network service).
Backlight time—Select whether the backlights are switched on for 15 seconds
(Normal), for 30 seconds (Extended), or not at all (Off). Even if the backlight
is set to off, it stays on for 15 seconds when the phone is switched on.
Brightness—Modify the display brightness by scrolling left and right.
Nokia 2651 User Guide
27
Copyright © 2005 Nokia
Screen saver—Set the elapsed time before the screen saver is activated (select
Time-out and the desired length of time). Choose the picture you want to use
for a screen saver (select Screen saver, the desired picture, then Options > Use).
Select On or Off to activate or deactivate the screen saver.
Profiles
You can customize the phone for different events and environments. After you
have personalized a profile you can activate the profile whenever you want to
use it.
Activate
Select Menu > Settings > Profiles, the desired profile, then Activate.
To activate a profile in the standby mode, press the power key briefly, scroll to
the desired profile, and select OK.
Customize
Select Menu > Settings > Profiles, the desired profile, then Customize. Select
the option you want and follow the prompts.
You can also change the settings of the currently selected profile in Tone settings
(see “Tone settings” on page 27) and in Display settings (see “Display settings”
on page 27).
Timed
Timed profiles can be used to prevent missed calls. For example, suppose you
attend an event that requires your phone be set to Silent before the event
starts, but you forget to return it to Normal until long after the event. During
this time, you have missed several calls because the ringing tone was silent.
With the timed profile feature, you can set a profile to expire after any length of
time up to 24 hours. When the profile expires, your phone automatically returns
to the default profile.
1
2
Select Menu > Settings > Profiles, the desired profile, then Timed.
Enter the date and time for the profile to expire.
The profile you have set for expiration is now active and appears in the
standby mode along with a small clock icon.
Time settings
Select Menu > Settings > Time settings and one of the following:
Clock—Set the phone to show or hide the current time in the standby mode, set
the time, and select the 12- or 24-hour time format. If the battery was removed
from the phone, you may need to set the time again.
Date setting—Set the date. If the battery was removed from the phone, you
may need to set the date again.
28
Copyright © 2005 Nokia
Menu functions
Auto-update of date and time—Set the phone to update the date and time
from the network when you turn the phone on (network service). If the clock in
your phone is 30 seconds or more off the network time, the phone will be
updated automatically to reflect the network time. Select On, Confirm first, or
Off. If you select Confirm first, the network will request confirmation before
updating the time. You can accept or decline the update.
The automatic update of date and time does not change the time you have set
for the alarm clock or the reminder notes. Updating may cause some alarms to
expire without sounding.
Call settings
Select Menu > Settings > Call settings and one of the following:
Call forwarding—Forward incoming calls to your voice mailbox or to some
other phone number (network service).
•
Select the forwarding option you want. For example, select Forward if not
available to forward the calls when you are on a call or when you reject a call.
•
Several forwarding options may be active at the same time. When Forward
all voice calls is active,
appears in the standby mode.
•
Set the selected option on (Activate) or off (Cancel), check whether the
option is activated by selecting Check status, or specify a delay for certain
forwarding options in Set delay time (not available for all forwarding options).
Fold call handling—Set your phone for Delayed answering, Instant answering,
or Off.
Automatic redial—Set your phone to redial up to ten times after an unsuccessful
call attempt. Select On or Off.
Call waiting—Set your phone to notify you of a new incoming call while you
have a call in progress (network service) by selecting Activate.
Send my caller ID—Set your phone number to appear (Yes) or be hidden from
(No) the person you are calling (network service). When you select Default, the
setting agreed with your service provider is used.
Line for outgoing calls—Select either phone line 1 or 2 for making calls, or
prevent line selection, if supported by your SIM card (network service).
No. screening—See “Number screening” on page 16.
Phone settings
Select Menu > Settings > Phone settings and one of the following:
Language—Select the language for the display texts.
Keyguard settings—Automatically lock the phone keypad after a preset time
delay. The phone must be idle in the standby mode. Select one of the following:
Nokia 2651 User Guide
29
Copyright © 2005 Nokia
•
Automatic keyguard > On—When Set delay appears, set the time.
You can set the time from 10 seconds to 60 minutes. To deactivate the
automatic keyguard, select Off.
• Keyguard code—Enter the security code, and select OK. After you have
selected On, the phone asks for the security code every time you select
Unlock. To deactivate the security keyguard, select Off.
Network selection—Select Automatic to have the phone automatically select
a cellular network available in your area. Select Manual to select the network
manually. The network you select must have a roaming agreement with your
home network.
Start-up tone—Switch on or off the tone that sounds when the phone is
switched on.
Welcome note—Enter a message that will be shown briefly on the display
when the phone is switched on.
Confirm SIM service actions—Set the phone to show or hide confirmation
messages when you use the SIM card services. See “SIM services” on page 36.
Cost control
Note: The actual invoice for calls and services from your service provider
may vary, depending on network features, rounding off for billing, taxes,
and so forth.
Select Menu > Settings > Cost settings and one of the following:
In-call timer—Turn on or off the display of call time while calling.
Call summary—Turn on or off the report of approximate call time after calling.
Call costs—Show the approximate cost of your last call or all calls in terms of
units specified within the Show costs in function (network service).
Fixed dialling—Restrict your outgoing calls to selected phone numbers, if allowed
by your SIM cards.
Prepaid credit—When using a prepaid SIM card, you can make calls only when
there are enough credit units on the SIM card (network service).
Note: When no more charging units or currency units are left, calls
may only be possible to the official emergency number programmed
into the device.
Enhancement settings
You can use your phone with many Nokia enhancements. The Enhancement
settings menu appears only after an enhancement has been connected to the
phone at least once.
Select Menu > Settings > Enhancement settings > Headset, Handsfree,
Loopset, or TTY/TDD and one of the following, depending on the enhancement:
30
Copyright © 2005 Nokia
Menu functions
Default profile—Select the profile the phone uses when the enhancement
is connected.
Automatic answer—Set the phone to automatically answer an incoming call
after 5 seconds.
Security settings
Your phone uses several types of codes to help prevent unauthorized use:
• The security code, supplied with the phone, helps to protect your phone
against unauthorized use. The preset code is 12345.
• The PIN code, supplied with the SIM card, helps to protect the card against
unauthorized use. The preset code is 1234. If you enter the PIN code
incorrectly three times in succession, the SIM card is blocked. You must
enter the PUK code to unblock the SIM card and set a new PIN code.
• The PIN2 code is supplied with some SIM cards and is required to access
certain services, such as charging unit counters. If you enter the PIN2 code
incorrectly three times in succession, PIN2 code blocked appears on the
display, and you will be asked for the PUK2 code.
• The PUK and PUK2 codes may be supplied with the SIM card. If this is not
the case, contact your local service provider.
When security features that restrict calls are in use (such as call restriction,
closed user group, and fixed dialing), calls still may be possible to the official
emergency number programmed into your phone.
Select Menu > Settings > Security settings and one of the following:
PIN code request—Set your phone to ask for the PIN code of the SIM card when
the phone is switched on. Some SIM cards do not allow this function at all times.
Call restrictions—Set your phone to restrict various types of incoming and
outgoing calls (network service). Choose an option and select Activate, Cancel,
or check whether a service is activated (Check status). When security features
that restrict calls are in use, calls still may be possible to the official emergency
number programmed into your phone.
Closed user group—Specify a group of people whom you can call and who can
call you (network service). Select On, Off, or Default. If you select On, enter
the group number provided by your service provider.
Security level—The security level determines your access to features when a
non-owner SIM card is used. A non-owner SIM card is one (other than the original)
that is inserted after you power off the phone. There are three security levels:
• Off—Owner and non-owner cards are treated the same.
• Memory—The phone asks for the security code when the SIM card memory
is selected, and you want to change the memory in use or copy from one
memory to another.
• Phone—The security code is required whenever a new SIM card is inserted.
Nokia 2651 User Guide
31
Copyright © 2005 Nokia
When you change the security level, all the recent calls lists may be cleared,
including missed calls, received calls, and dialed numbers.
Change access codes—Lets you change the security code, PIN code, PIN2 code,
or restriction password. These codes can include the numbers 0 to 9 only.
Avoid using access codes similar to the emergency numbers, such as 911, to
prevent accidental dialing of the emergency number.
Right navigation key setting
When you scroll right in the standby mode, the phone displays a list of shortcuts
to various functions. To define the functions to be shown in this list, select
Menu > Settings > R. navigation key settings and one of the following:
Select options—Scroll to each function that you want as a shortcut and select
Mark. The functions are listed in the shortcut list in the order you select them.
When you have selected all desired functions, select Back > Yes. To exit the
menu without saving, press Back twice.
Organize—Scroll to the function you want to move. Select Move and the moving
option that you want. When you are finished organizing functions, select Back >
Yes to save the changes. To exit the menu without saving, press Back twice.
Restore factory settings
You can reset some of the menu settings to their original values.
1 Select Menu > Settings > Restore factory set.
2 Enter the security code and select OK.
The names and phone numbers saved in the phone book are not deleted.
• Alarm clock
You can set the alarm to sound at the time you want just once,
or repeatedly (for example, every working day).
1 Select Menu > Alarm clock > Alarm time, enter the time
for the alarm, and select OK.
2 Select Alarm tone to choose the tone for the alarm.
3 Select Repeat alarm > Alarm once to set the alarm to sound only once,
or select Repeat alarm > Repeat alarm to select the days on which you
want the alarm to sound.
When the alarm sounds, press End to stop it. If you select Snooze, the alarm
stops and rings again in 10 minutes.
If the alarm time is reached while the phone is switched off, the phone switches
itself on and starts sounding the alarm tone. If you press End, the phone asks
whether you want to activate the phone for calls. Press End to switch off the
phone, or select Yes to make and receive calls. Do not select Yes when wireless
phone use may cause interference or danger.
32
Copyright © 2005 Nokia
Menu functions
• Reminders
You can save short text notes with or without an alarm. The alarm
is activated when the set date and time is reached.
Select Menu > Reminders > Add new, View all, Calendar, Delete, or Alarm tone.
When the reminder time is reached, to stop the alarm, press End. If you select
Snooze, the alarm sounds again in 10 minutes.
While viewing a reminder, you can select Options > Delete, Edit, or Send.
• Games
The phone has several games. Each game is provided with a brief
help text.
To play a game, select Menu > Games and the desired game;
then select Instructions for an explanation of how to play the game and how
to use the other options.
To set the game settings, select Games > Settings > Games sounds or Shakes.
When Warning tones is off, there may be no sound even if Game sounds is on.
When Vibrating alert is off, the phone does not vibrate even if Shakes is on.
• Extras
Calculator
The phone is provided with a calculator that can also be used for rough
currency conversions.
Note: This calculator has limited accuracy and is designed for
simple calculations.
Select Menu > Extras > Calculator.
Make a calculation
1
Enter the first number in the calculation.
Press a number key (1-0) to insert a digit. Press # to insert a decimal point.
Press Clear to delete the last digit. To change the sign, select Options >
Change sign.
2
Press once for add (+), twice for subtract (-), three times for multiply (x),
and four times for divide (/).
3
Enter the second number in the calculation, and select Options > Equals.
4
Press Clear to clear the display for a new calculation.
*
Nokia 2651 User Guide
33
Copyright © 2005 Nokia
Currency conversion
To save an exchange rate, select Menu > Extras > Calculator > Options >
Exchange rate > Foreign units in home units or Home units in home units,
enter the value (press # for a decimal point), and select OK.
To make the conversion, enter the currency amount to be converted, and select
Options > To home or To foreign.
Note: When you change base currency, you must enter the new rates.
Spreadsheet
The spreadsheet lets you calculate your expenses on a daily or monthly basis.
The daily spreadsheet can total expenses for up to a month, and the monthly
spreadsheet can total expenses for up to a year.
1
2
Select Menu > Extras > Spreadsheet > Daily account or Monthly
account, and scroll to highlight various cells in the spreadsheet.
With a cell highlighted, select Options and one of the following:
Edit—Edit an expense value, an expense category name, or the spreadsheet
name (depending on where the cursor is when you select Options).
Add row or Delete row—Add a new expense category or delete an existing
expense category.
Delete all data—Erase all the data in the current view.
Set row value—Insert the same value for each day or month on the
selected expense category.
Save—Save the spreadsheet. If you modify a spreadsheet and then try to
exit without saving, the phone prompts you to save.
View details—View the details of the selected cell. To view details you can
also press and hold #.
Sync. expense—Synchronize the values from a daily spreadsheet to the
corresponding month in a monthly spreadsheet. This option is available
only under Monthly account.
Calendar
To view a calendar for the current month, select Menu > Extras > Calendar.
Scroll to go to another date.
Countdown timer
You can set an alarm to sound after a period of lapsed time.
1
Select Menu > Extras > Countd. tim.
2
Enter the alarm time, and select OK.
34
Copyright © 2005 Nokia
Menu functions
3
Enter a note for the alarm, if desired, and select OK.
While the timer is running, you can select Menu > Extras > Countd.
tim. > Change time or Stop timer.
When the timer is running,
is shown in the standby mode. When the alarm
time is reached, a tone sounds, the display flashes, and the alarm note appears.
Press any key to stop the alarm.
Stopwatch
The stopwatch can be used for time measurement, such as in sports.
1 Select Menu > Extras > Stopwatch.
2 Select Start to start timing.
3 To record the time, select Stop.
4 When the timing is stopped, select Options > Start, Reset, or Exit.
If you select Start, timing continues from the previous stop time. Reset
stops the current timing and sets the time to zero.
To set the timing to continue in the background, press and hold Back.
While the time is running,
is flashing in the standby mode.
Using the stopwatch or allowing it to run in the background when using other
features increases the demand on battery power and reduces the battery life.
Composer
You can create your own ringing tones.
1 Select Menu > Extras > Composer.
A tone name in a location is a tone that you have previously created.
(empty) indicates an empty and available location for a new ringing tone.
2 Select an (empty) location.
3 Enter the notes of the musical scale as shown in
the picture. For example, press 4 for note F.
Press 8 (-) to shorten and 9 (+) to lengthen the
duration of the note or rest.
Press 0 to insert a rest.
Press to set the octave and # to make the note
sharp (not available for notes E and B).
Scroll left and right to move the cursor left or
right through the notes of your tone.
Press Clear to delete a note or rest to the left of the cursor.
4 When the tone is complete, select Options > Save, enter a name for your
tone, select OK, and select a location for your ringing tone.
5 When the notes of your tone are displayed, you can select Options to
access Play, Save, Tempo, Send, Clear screen, or Exit.
*
Nokia 2651 User Guide
35
Copyright © 2005 Nokia
• SIM services
This menu appears only if your SIM card provides additional
services. The name and contents of this menu depend on the
services available.
For availability, rates, and information on using SIM services, contact your SIM
card vendor or service provider.
• Prepaid
With prepaid service, you buy wireless network services in advance. Your phone
works the same way it did before, with some additional features. You can check
your prepaid balance, add money to your account, and call customer service.
Prepaid service may not be available from your wireless service provider.
Contact your service provider for details.
In the Prepaid menu, you can activate and deactivate prepaid service, replenish
your prepaid credits, and provide other information requested by the prepaid
service provider.
Select Menu > Prepaid > Code entry mode, IMEI number, SIM serial number,
Phone number, Airtime tank info, Airtime display, or Redeem airtime.
36
Copyright © 2005 Nokia
Reference information
6
Reference information
• Battery information
Charging and discharging
Your device is powered by a rechargeable BL-4C standard battery. The full
performance of a new battery is achieved only after two or three complete charge
and discharge cycles. The battery can be charged and discharged hundreds of times
but it will eventually wear out. When the talk and standby times are noticeably
shorter than normal, buy a new battery. Use only Nokia approved batteries, and
recharge your battery only with Nokia approved chargers designated for this device.
Unplug the charger from the electrical plug and the device when not in use.
Do not leave the battery connected to a charger. Overcharging may shorten its
lifetime. If left unused, a fully charged battery will lose its charge over time.
Temperature extremes can affect the ability of your battery to charge.
Use the battery only for its intended purpose. Never use any charger or battery
that is damaged.
Do not short-circuit the battery. Accidental short-circuiting can occur when
a metallic object such as a coin, clip, or pen causes direct connection of the
positive (+) and negative (-) terminals of the battery. (These look like metal
strips on the battery.) This might happen, for example, when you carry a spare
battery in your pocket or purse. Short-circuiting the terminals may damage the
battery or the connecting object.
Leaving the battery in hot or cold places, such as in a closed car in summer or
winter conditions, will reduce the capacity and lifetime of the battery. Always try
to keep the battery between 59°F and 77°F (15°C and 25°C). A device with a hot
or cold battery may not work temporarily, even when the battery is fully charged.
Battery performance is particularly limited in temperatures well below freezing.
Do not dispose of batteries in a fire, as they may explode. They may also explode
if damaged. Dispose of batteries according to local regulations. Please recycle
when possible. Do not dispose as household waste.
Nokia 2651 User Guide
37
Copyright © 2005 Nokia
• Enhancements
A few practical rules about accessories
and enhancements:
•
Keep all accessories and enhancements
out of the reach of small children.
•
When you disconnect the power cord of any accessory or enhancement,
grasp and pull the plug, not the cord.
•
Check regularly that enhancements installed in a vehicle are mounted and
are operating properly.
•
Installation of any complex car enhancements must be made by qualified
personnel only.
• Enhancements, batteries, and chargers
Check the model number of any charger before use with this device. This device
is intended for use when supplied with power from charger ACP-7, or other
compatible charger. See “Compatible Nokia enhancements” on page 38.
Warning: Use only batteries, chargers, and enhancements approved by
Nokia for use with this particular model. The use of any other types may
invalidate any approval or warranty, and may be dangerous.
For availability of approved enhancements, please check with your dealer.
When you disconnect the power cord of any enhancement, grasp and pull the
plug, not the cord. See also “Insert the battery” on page 11 and “Charge the
battery” on page 12.
Your device and its enhancements may contain small parts. Keep them out of
reach of small children.
Compatible Nokia enhancements
Headset audio
• Headset (HDC-5, HDB-5, HDE-2)
• Dual headset (HDD-1, HS-7)
• Music player (HDR-1)
• Mobile inductive loopset (LPS-3)
Car
• Plug-in HF car kit (PPH-1)
• Microphone (HFM-8)
• Headrest handsfree (BHF-2)
Accessibility
• Phone adapter (HDA-9)
Battery
• Standard 760 Li-Ion battery (BL-4C)
Chargers
• Standard charger (ACP-7)
• Travel charger (ACP-8, ACP-12)
• Retractable travel charger (AC-1)
• Mobile charger (LCH-12)
Other
• Carrying cases
• Wrist strap wearables
38
Copyright © 2005 Nokia
Reference information
• Care and maintenance
Your device is a product of superior design and craftsmanship and should be
treated with care. The suggestions below will help you protect your warranty
coverage and enjoy your device for many years.
•
Keep the device dry. Precipitation, humidity, and all types of liquids or moisture
can contain minerals that will corrode electronic circuits. If your device does
get wet, remove the battery and allow the device to dry completely before
replacing it.
•
Do not use or store the device in dusty, dirty areas. Its moving parts and
electronic components can be damaged.
•
Do not store the device in hot areas. High temperatures can shorten the life
of electronic devices, damage batteries, and warp or melt certain plastics.
•
Do not store the device in cold areas. When the device returns to its normal
temperature, moisture can form inside the device and damage electronic
circuit boards.
•
Do not attempt to open the device other than as instructed in this guide.
•
Do not drop, knock, or shake the device. Rough handling can break internal
circuit boards and fine mechanics.
•
Do not use harsh chemicals, cleaning solvents, or strong detergents to
clean the device.
•
Do not paint the device. Paint can clog the moving parts and prevent
proper operation.
•
Use only the supplied or an approved replacement antenna. Unauthorized
antennas, modifications, or attachments could damage the device and
may violate regulations governing radio devices.
•
Use chargers indoors.
All of the suggestions apply equally to your device, battery, charger, or any
enhancement. If any device is not working properly, take it to the nearest
authorized service facility for service.
Nokia 2651 User Guide
39
Copyright © 2005 Nokia
• Additional safety information
Operating environment
Remember to follow any special regulations in force in any area and always switch
off your device when its use is prohibited or when it may cause interference or
danger. Use the device only in its normal operating positions. This device meets
RF exposure guidelines when used either in the normal use position against the
ear or when positioned at least 5/8 inch(1.5 cm) away from the body. When a
carry case, belt clip, or holder is used for body-worn operation, it should not
contain metal and should position the device at least 5/8 inch (1.5 cm) away
from your body.
In order to transmit data files or messages, this device requires a quality connection
to the network. In some cases, transmission of data files or messages may be
delayed until such a connection is available. Ensure the above separation distance
instructions are followed until the transmission is completed.
Medical devices
Operation of any radio transmitting equipment, including wireless phones, may
interfere with the functionality of inadequately protected medical devices.
Consult a physician or the manufacturer of the medical device to determine if
they are adequately shielded from external RF energy or if you have any questions.
Switch off your phone in health care facilities when any regulations posted in
these areas instruct you to do so. Hospitals or health care facilities may be
using equipment that could be sensitive to external RF energy.
Pacemakers
Pacemaker manufacturers recommend that a minimum separation of 6 inches
(15.3 cm) be maintained between a wireless phone and a pacemaker to avoid
potential interference with the pacemaker. These recommendations are
consistent with the independent research by and recommendations of Wireless
Technology Research. To minimize the potential for interference, persons with
pacemakers should
•
Always keep the device more than 6 inches (15.3 cm) from their
pacemaker when the device is switched on
•
Not carry the device in a breast pocket
•
Hold the device to the ear opposite the pacemaker
If you have any reason to suspect that interference is taking place, switch off
your device immediately.
Hearing aid
Some digital wireless devices may interfere with some hearing aids. If interference
occurs, consult your service provider.
40
Copyright © 2005 Nokia
Reference information
Vehicles
RF signals may affect improperly installed or inadequately shielded electronic
systems in motor vehicles such as electronic fuel injection systems, electronic
antiskid (antilock) braking systems, electronic speed control systems, air bag
systems. For more information, check with the manufacturer or its representative
of your vehicle or any equipment that has been added.
Only qualified personnel should service the device, or install the device in a vehicle.
Faulty installation or service may be dangerous and may invalidate any warranty
that may apply to the device. Check regularly that all wireless device equipment
in your vehicle is mounted and operating properly. Do not store or carry flammable
liquids, gases, or explosive materials in the same compartment as the device, its
parts, or enhancements. For vehicles equipped with an air bag, remember that an
air bags inflate with great force. Do not place objects, including installed or portable
wireless equipment in the area over the air bag or in the air bag deployment area.
If in-vehicle wireless equipment is improperly installed and the air bag inflates,
serious injury could result.
Aircraft
FCC regulations prohibit using your wireless device while in the air. The use of
wireless telephones in an aircraft may be dangerous to the operation of the
aircraft, disrupt the wireless telephone network, and may be illegal.
Failure to observe these instructions may lead to suspension or denial of telephone
services to the offender, legal action, or both.
Potentially explosive environments
Switch off your device when in any area with a potentially explosive atmosphere
and obey all signs and instructions. Potentially explosive atmospheres include
areas where you would normally be advised to turn off your vehicle engine.
Sparks in such areas could cause an explosion or fire resulting in bodily injury
or even death. Switch off the device at refuelling points such as near gas pumps
at service stations. Observe restrictions on the use of radio equipment in fuel
depots, storage, and distribution areas, chemical plants or where blasting
operations are in progress. Areas with a potentially explosive atmosphere are
often but not always clearly marked. They include below deck on boats, chemical
transfer or storage facilities, vehicles using liquefied petroleum gas (such as
propane or butane), and areas where the air contains chemicals or particles
such as grain, dust or metal powders.
Nokia 2651 User Guide
41
Copyright © 2005 Nokia
EMERGENCY CALLS
Important: Wireless phones, including this phone, operate using radio
signals, wireless networks, landline networks, and user-programmed
functions. Because of this, connections in all conditions cannot be
guaranteed. You should never rely solely on any wireless phone for
essential communications like medical emergencies.
To make an emergency call:
1
If the phone is not on, switch it on. Check for adequate signal strength. Some
networks may require that a valid SIM card is properly inserted in the phone.
2
Press the End key as many times as needed to clear the display and ready the
phone for calls. You may need to disable any security features activated on
the phone.
3
Key in the official emergency number for your present location. Emergency
numbers vary by location.
4
Press the Call key.
If certain features are in use, you may first need to turn those features off before
you can make an emergency call. Consult this guide or your service provider. When
making an emergency call, give all the necessary information as accurately as
possible. Your wireless phone may be the only means of communication at the
scene of an accident. Do not end the call until given permission to do so.
42
Copyright © 2005 Nokia
Reference information
CERTIFICATION INFORMATION (SAR)
THIS MODEL PHONE MEETS THE GOVERNMENT'S REQUIREMENTS FOR
EXPOSURE TO RADIO WAVES.
Your mobile device is a radio transmitter and receiver. It is designed and
manufactured not to exceed the limits for exposure to radio frequency (RF)
energy adopted by the governments of the USA through the Federal
Communications Commission (FCC) and Canada through Industry Canada (IC).
These limits establish permitted levels of RF energy for the general population.
The guidelines are based on standards that were developed by independent
scientific organizations through periodic and thorough evaluation of scientific
studies. The standards include a substantial safety margin designed to assure
the safety of all persons, regardless of age and health.
The exposure guidelines for mobile devices employ a unit of measurement
known as the Specific Absorption Rate or SAR. The SAR limit adopted by the
USA and Canada is 1.6 watts/kilogram (W/kg) averaged over one gram of tissue.
The limit incorporates a substantial margin of safety to give additional
protection for the public and to account for any variations in measurements.
Tests for SAR are conducted using standard operating positions with the device
transmitting at its highest certified power level in all tested frequency bands.
The actual SAR level of an operating device can be well below the maximum
value because the device is designed to use only the power required to reach
the network. That amount changes depending on a number of factors such as
how close you are to a network base station.
The highest SAR value reported to the FCC and IC for this device type when
tested for use at the ear is 0.87 W/kg, and when properly worn on the body is
0.87 W/kg. SAR information on file with the FCC can be found under the Display
Grant section of http://www.fcc.gov/oet/fccid after searching on FCC ID
QTKRH-54. SAR values reported in other countries may vary depending on
differences in reporting and testing requirements and the network band.
Additional SAR information may be provided under product information at
www.nokia.com.
Nokia 2651 User Guide
43
Copyright © 2005 Nokia
• Technical information
Weight
3.41 oz (97 g) with 760-mAh Li-Ion battery
Size
Volume: 4.7 in3 (77 cc)
Length: 3.39 in (86 mm)
Width: 1.81 in (46 mm)
Thickness: 0.90 in (22.9 mm)
Frequency range GSM850
824–849 MHz (TX)
869–894 MHz (RX)
GSM1900
1850–1910 MHz (TX)
1930–1990 MHz (RX)
Transmitter
output power
Up to 2 W
Battery voltage
3.7 V
Operating
temperature
14°F to + 131°F
a
Talk time: up to 3 hours
Standby time: up to 300 hours
Talk time,
standby time
(-10°C to +55°C)
a. Battery talk and standby times are estimates only and depend on signal
strength, network conditions, features used, battery age and condition
(including the effect of charging habits), temperatures to which battery is
exposed, use in digital mode, and many other factors. Please note that the
amount of time a phone is used for calls will affect its standby time.
Likewise, the amount of time that the phone is turned on and in the
standby mode will affect its talk time.
44
Copyright © 2005 Nokia
Index
Numerics
D
1-touch dialing 15
date setting 28
delete
call lists 26
messages 22
dialed calls 25
display settings 27
distribution list 22
A
access codes 31
accessibility
Web site 9
accessories 7
alarm clock 32
answering calls 16
automatic update of time 29
E
enhancement settings 30
erase, see delete
C
calculator 33
calendar 34
call
call waiting 16
conference 16
dialed calls 25
duration 26
forward 29
log 25–26
making calls 15
redialing 15
settings 29
using the contacts list 15
waiting 29
charge the battery 12
clear call lists 26
clock
alarm 32
set 28
composer 35
conference calling 16
contacts 24–25
cost settings 30
countdown timer 34
currency conversion 34
Nokia 2651 User Guide
G
games 33
I
IMEI 10
in-call operations 16
input methods 18
insert a SIM card 11
L
label 10
lock the keypad 17
M
memory status 25
messages 20–24
missed calls 25
model number 10
N
network services 8
Nokia Customer Care 10
45
Copyright © 2005 Nokia
P
service commands 24
set alarm clock 32
settings
menu 27–32
message 23
signature file 23
SIM
services 36
spreadsheet 34
standby time 44
stopwatch 35
phone
security 31
settings 29
phone label 10
picture messages 21
PIN and PIN2 codes 31
prepaid service 36
profiles 28
PUK and PUK2 codes 31
R
T
read a text message 21
received calls 25
reminders 33
restore factory settings 32
right navigation key 32
ringing tone composer 35
talk time 44
time settings 28
timers, call 26
tone settings 27
traditional input 19
V
S
view
dialed calls 25
messages 21
missed calls 25
received calls 25
voice mail 25
safety instructions 7
screened messages 22
screened numbers 22
search for a contact 24
security
code 31
settings 31
46
Copyright © 2005 Nokia
Nokia 2651 Manual del Usuario
Importante: Para prevenir cualquier malfuncionamiento y evitar daños, lea
detalladamente este manual de instrucciones antes de conectar y operar este
aparato. Conserve el manual para referencias futuras.
Nokia 2651 Manual del Usuario
47
Copyright © 2005 Nokia
INFORMACIÓN LEGAL
PARTE NO. 9241442, EDICIÓN Nº. 1A
Copyright © 2005 Nokia. Todos los derechos reservados.
Nokia, Nokia 2651, Nokia Connecting People, y el logo Nokia Original Enhancements son
marcas, registradas o no, de Nokia Corporation. Otros nombres de productos y compañías aquí
mencionados podrían ser marcas o nombres, registrados o no, de sus respectivos propietarios.
Software Ingreso Intuitivo de Texto T9. Copyright © 1999-2005. Tegic Communications, Inc.
Todos los derechos reservados.
La información en este manual del usuario fue escrita para el producto Nokia 2651. Nokia
opera bajo un sistema de desarrollo continuo. Nokia se reserva el derecho de hacer cambios
y mejoras en cualquier producto descrito en este manual sin previo aviso.
BAJO NINGÚN CONCEPTO NOKIA SERÁ RESPONSABLE POR CUALQUIER PÉRDIDA DE DATOS
O GANANCIAS O POR CUALQUIER OTRO DAÑO ESPECIAL O INCIDENTAL, POR CUALQUIER
CAUSA DIRECTA O INDIRECTA. EL CONTENIDO DE ESTE DOCUMENTO ESTÁ PROVISTO "TAL
CUAL". ADEMÁS DE LAS EXIGIDAS POR LAS LEYES, NO SE EMITE NINGUNA OTRA GARANTÍA
DE NINGÚN TIPO, SEA EXPRESA O IMPLÍCITA, INCLUYENDO, PERO SIN LIMITARSE A,
GARANTÍAS IMPLÍCITAS DE MERCADEO Y DE CAPACIDAD PARA UN PROPÓSITO PARTICULAR,
EN CUANTO A LA PRECISIÓN Y FIABILIDAD O CONTENIDO DE ESTE DOCUMENTO. NOKIA SE
RESERVA EL DERECHO DE REVISAR ESTE DOCUMENTO O DESCONTINUAR SU USO EN
CUALQUIER MOMENTO SIN PREVIO AVISO.
CONTROL DE EXPORTACIONES
Este dispositivo podría contener bienes, tecnología o software sujetos a leyes y regulaciones
de exportación de los Estados Unidos y otros países. Se prohíbe su desvío contraviniendo
las leyes.
AVISO FCC/INDUSTRIA CANADIENSE
Su teléfono puede causar interferencias radioeléctricas y televisivas (ej., cuando usted usa su
teléfono muy próximo a equipos receptores electrónicos). La FCC/Industria Canadiense puede
exigirle que deje de usar su teléfono si tales interferencias no se pueden eliminar. Si necesita
ayuda, póngase en contacto con su centro de servicio local. Este dispositivo cumple con la
sección 15 de los reglamentos de la FCC. El funcionamiento de este aparato está sujeto a la
condición de que no cause interferencia perjudicial.
48
Copyright © 2005 Nokia
Fabricado o a la venta bajo una o más de las siguientes Patentes EE.UU.:
4868846
4945633
4969192
5001372
5083240
5101175
5124672
5151946
5152004
5173927
5212834
5230091
5241583
5266782
5271056
5311151
5311179
5317283
5331638
5335362
5341149
5353328
5371481
5378935
5384782
5390223
5392460
5396657
5400949
5408504
5416435
5430740
5442521
5444816
5446364
5446422
5477422
5479476
5487084
5526366
5534878
5548616
5551067
5553125
5557639
5565821
5566201
5570369
5581244
5594797
5600708
5606548
5613235
5625274
5640395
5664053
5675611
5677620
5692032
5697074
5699482
5701392
5722074
5729534
5729541
5754976
5760568
5782646
5787341
5794142
5797102
5802465
5802465
5805301
5809413
5819165
5821891
5822366
5827082
5835858
5835889
5839101
5842141
5844884
5845219
5850607
5857151
5859843
5862178
5870683
5884103
5884190
5887266
5889770
5892475
5898775
5898925
5903832
5903839
5907823
5912570
5914690
5914796
5915440
5917868
5920826
5926138
5926147
5929813
5930233
5946651
5953665
5956332
5956625
5956633
5960354
5960389
5963901
5966374
5966378
5970059
5977887
5983081
5987137
5987639
5991716
5991857
6005857
6006114
6009328
6011853
6011971
6014113
6014551
6014573
6025802
6026161
6028567
6029128
6031827
6035189
6035194
6038238
6043760
6047196
6049796
6050415
6054954
6054966
6055439
6060193
6069923
6072787
6073001
6079993
6081534
6081732
6084471
6084855
6084920
6084962
6088746
6094587
6097964
6105784
6112099
6115617
6118775
6119002
6119180
6121846
6122498
6128322
6128509
6130650
Nokia 2651 Manual del Usuario
49
Copyright © 2005 Nokia
6133884
6137789
6138091
6140966
6144243
6144676
6148209
6151485
6151507
6163609
6164547
6167038
6167248
6167273
6170073
6171127
6178535
6182101
6184592
6185295
6185302
6185422
6188909
6195338
6198928
6199035
6201712
6201876
6202109
6219560
6223037
6223059
6230020
6240076
6240079
6249584
6259312
6262735
6266321
6266330
6269126
6271794
6272361
6282436
6285888
6292668
6295286
6307512
6308084
6310609
6311054
6314166
6317083
6324389
6333716
6347218
6356759
6359865
6359904
6363259
6370362
6370389
6377803
6377820
6381468
6385254
6385451
6392605
6392660
6400958
6417817
6430163
6434133
6437711
6438370
6445932
6453179
6456237
6456826
6463278
6470470
6487397
6487424
6510148
6522670
6591116
6606508
50
Copyright © 2005 Nokia
Contenido
1
Para su seguridad . . . . . . . . . . . . . . . . . . . . . . . . . . . . . . . . . . 53
Acerca de su dispositivo . . . . . . . . . . . . . . . . . . . . . . . . . . . . . . . . . . . 54
Servicios de Red. . . . . . . . . . . . . . . . . . . . . . . . . . . . . . . . . . . . . . . . . . 54
Memoria compartida. . . . . . . . . . . . . . . . . . . . . . . . . . . . . . . . . . . . . . 55
Soluciones de acceso . . . . . . . . . . . . . . . . . . . . . . . . . . . . . . . . . . . . . 55
2
Inicio . . . . . . . . . . . . . . . . . . . . . . . . . . . . . . . . . . . . . . . . . . . 56
Encontrar la etiqueta . . . . . . . . . . . . . . . . . . . . . . . . . . . . . . . . . . . . . 56
Insertar la tarjeta SIM. . . . . . . . . . . . . . . . . . . . . . . . . . . . . . . . . . . . . 57
Insertar la batería . . . . . . . . . . . . . . . . . . . . . . . . . . . . . . . . . . . . . . . . 57
Cargar la batería . . . . . . . . . . . . . . . . . . . . . . . . . . . . . . . . . . . . . . . . . 58
Instalar la correa . . . . . . . . . . . . . . . . . . . . . . . . . . . . . . . . . . . . . . . . . 58
Abrir la cubierta desplegable . . . . . . . . . . . . . . . . . . . . . . . . . . . . . . . 58
Teclas, indicadores y conectores . . . . . . . . . . . . . . . . . . . . . . . . . . . . 59
Encender/Apagar . . . . . . . . . . . . . . . . . . . . . . . . . . . . . . . . . . . . . . . . . 60
Antena interior . . . . . . . . . . . . . . . . . . . . . . . . . . . . . . . . . . . . . . . . . . 60
3
Funciones de llamada . . . . . . . . . . . . . . . . . . . . . . . . . . . . . . . 61
Hacer llamadas . . . . . . . . . . . . . . . . . . . . . . . . . . . . . . . . . . . . . . . . . . 61
Contestar llamadas . . . . . . . . . . . . . . . . . . . . . . . . . . . . . . . . . . . . . . . 62
Operaciones durante una llamada . . . . . . . . . . . . . . . . . . . . . . . . . . . 62
Filtrar los números . . . . . . . . . . . . . . . . . . . . . . . . . . . . . . . . . . . . . . . 62
Bloquear el teclado (Bloqueo de teclas) . . . . . . . . . . . . . . . . . . . . . . 63
4
Redacción. . . . . . . . . . . . . . . . . . . . . . . . . . . . . . . . . . . . . . . . 64
Ingreso predecible de texto . . . . . . . . . . . . . . . . . . . . . . . . . . . . . . . . 64
Ingreso tradicional de texto . . . . . . . . . . . . . . . . . . . . . . . . . . . . . . . . 65
5
Funciones del menú . . . . . . . . . . . . . . . . . . . . . . . . . . . . . . . . 66
Mensajes . . . . . . . . . . . . . . . . . . . . . . . . . . . . . . . . . . . . . . . . . . . . . . . 66
Contactos . . . . . . . . . . . . . . . . . . . . . . . . . . . . . . . . . . . . . . . . . . . . . . . 70
Registro . . . . . . . . . . . . . . . . . . . . . . . . . . . . . . . . . . . . . . . . . . . . . . . . 71
Configuraciones. . . . . . . . . . . . . . . . . . . . . . . . . . . . . . . . . . . . . . . . . . 73
Reloj de alarma . . . . . . . . . . . . . . . . . . . . . . . . . . . . . . . . . . . . . . . . . . 79
Nokia 2651 Manual del Usuario
51
Copyright © 2005 Nokia
Recordatorios . . . . . . . . . . . . . . . . . . . . . . . . . . . . . . . . . . . . . . . . . . .80
Juegos . . . . . . . . . . . . . . . . . . . . . . . . . . . . . . . . . . . . . . . . . . . . . . . . .80
Extras . . . . . . . . . . . . . . . . . . . . . . . . . . . . . . . . . . . . . . . . . . . . . . . . . .80
Servicios SIM . . . . . . . . . . . . . . . . . . . . . . . . . . . . . . . . . . . . . . . . . . . .83
Prepago . . . . . . . . . . . . . . . . . . . . . . . . . . . . . . . . . . . . . . . . . . . . . . . . .83
6
Información de referencia . . . . . . . . . . . . . . . . . . . . . . . . . . . 84
Información sobre baterías . . . . . . . . . . . . . . . . . . . . . . . . . . . . . . . . .84
Accesorios. . . . . . . . . . . . . . . . . . . . . . . . . . . . . . . . . . . . . . . . . . . . . . .85
Accesorios, baterías y cargadores. . . . . . . . . . . . . . . . . . . . . . . . . . . . 85
Cuidado y mantenimiento . . . . . . . . . . . . . . . . . . . . . . . . . . . . . . . . . .86
Información adicional de seguridad . . . . . . . . . . . . . . . . . . . . . . . . . .87
Información técnica. . . . . . . . . . . . . . . . . . . . . . . . . . . . . . . . . . . . . . . 91
Índice . . . . . . . . . . . . . . . . . . . . . . . . . . . . . . . . . . . . . . . . . . . 93
52
Copyright © 2005 Nokia
Para su seguridad
1
Para su seguridad
Lea estas normas sencillas antes de utilizar su teléfono. El incumplimiento de
estas normas puede ser peligroso o ilegal. Lea este manual del usuario completo
para información más detallada.
ENCENDER CON SEGURIDAD
No encienda el teléfono cuando se prohíba el uso del teléfono
celular o cuando su uso pueda causar interferencia o peligro.
LA SEGURIDAD DEL TRÁFICO ANTE TODO
Obedezca todos los reglamentos locales. No ocupe las manos en
otras tareas mientras conduce. Su primera consideración cuando
conduce debe ser la seguridad en la carretera.
INTERFERENCIA
Todos los teléfonos celulares pueden ser susceptibles a interferencias,
lo cual puede afectar su rendimiento.
APAGUE EL TELÉFONO EN LOS HOSPITALES
Cumpla con cualquier restricción. Apague su teléfono cuando esté
cerca de equipos médicos.
APAGUE EL TELÉFONO EN LAS AERONAVES
Cumpla con cualquier restricción. Los dispositivos inalámbricos
pueden causar interferencias en las aeronaves.
APAGUE EL TELÉFONO CUANDO CARGUE COMBUSTIBLE
No use el teléfono en estaciones de servicio. Tampoco cerca de
combustibles o elementos químicos.
APAGUE EL TELÉFONO CERCA DE DONDE SE
REALIZAN EXPLOSIONES
Cumpla con cualquier restricción. No utilice el teléfono donde se
estén realizando explosiones.
ÚSELO SENSATAMENTE
Úselo solamente en la posición normal, como está explicado en
la documentación del producto. No toque la antena a no ser que
sea necesario.
SERVICIO ESPECIALIZADO
Sólo personal de servicio especializado puede instalar o reparar
este producto.
Nokia 2651 Manual del Usuario
53
Copyright © 2005 Nokia
ACCESORIOS Y BATERÍAS
Utilice sólo baterías y accesorios homologados por Nokia.
No conecte productos incompatibles.
NO MOJE EL TELÉFONO
Su teléfono no es resistente al agua. Manténgalo seco.
COPIAS DE SEGURIDAD
Acuérdese de hacer copias de seguridad o de tener un registro escrito
de toda la información importante almacenada en su teléfono.
LLAMADAS DE EMERGENCIA
Asegúrese de que el teléfono esté encendido y en servicio. Oprima
la tecla C las veces necesarias para borrar lo mostrado y regresar
a la pantalla inicial. Ingrese el número de emergencia, y oprima
Llamar. Indique su ubicación. No corte la llamada hasta que reciba
la instrucción de hacerlo.
• Acerca de su dispositivo
El dispositivo celular descrito en este manual está homologado para ser usado
en las redes GSM 850 y GMS 1900. Contacte a su proveedor de servicio para
más información sobre servicios de red.
Cuando use las opciones en este dispositivo, obedezca todas las leyes y respete
la privacidad y los derechos legítimos de los demás.
Aviso: Para usar cualquiera de las opciones de este dispositivo, a
excepción de la alarma, el teléfono deberá estar encendido. No
encienda este dispositivo cuando el uso del teléfono celular pueda
causar interferencia o peligro.
• Servicios de Red
Para usar el teléfono debe estar suscrito con un proveedor de servicio celular.
Muchas de las opciones de este dispositivo dependen de las opciones de la red
inalámbrica de servicio para su funcionamiento. Estos Servicios de Red podrían
no estar disponibles en todas las redes, o usted tendría que hacer arreglos
específicos con su proveedor de servicio antes de utilizar los Servicios de Red.
Su proveedor de servicio podría darle instrucciones adicionales acerca de su uso
y explicarle los cargos que aplican. Algunas redes pueden tener limitaciones
que afectan la manera como se usan los Servicios de Red. Por ejemplo, ciertas
redes pueden no respaldar todos los servicios y caracteres de idiomas.
Su proveedor de servicio puede haber pedido que ciertas opciones en su dispositivo
sean inhabilitadas o no activadas. De ser así, éstas no aparecerán en el menú de su
dispositivo. Para más información, contacte a su proveedor de servicio.
54
Copyright © 2005 Nokia
Para su seguridad
• Memoria compartida
Las opciones siguientes podrían compartir la memoria: lista de contactos,
mensajes de texto y recordatorios. El uso de una o más de estas funciones
podría reducir la memoria disponible para cualquier función que comparta
la memoria. Su teléfono puede mostrar un mensaje avisando que la memoria
está llena cuando trate de usar una opción de memoria compartida. De ser así,
borre algunos datos o ingresos guardados en la memoria compartida, y luego
podrá continuar.
• Soluciones de acceso
Nokia ha asumido el reto de hacer teléfonos celulares más manejables y amigables,
incluso para los usuarios con limitaciones. Para más información sobre las
funciones del teléfono, accesorios, otros formatos del manual y otros productos
Nokia diseñados para ajustarse a sus exigencias, visite la página Web
www.nokiaaccessibility.com.
Su teléfono es compatible con los dispositivos TTY que cumple el estándar de la
industria TSB 121. Verifique con el fabricante de su dispositivo TTY para asegurarse
de que respalda la transmisión celular digital. Con el Adaptador Nokia HDA-9,
su teléfono puede ser conectado a un dispositivo TTY/TDD "listo para el celular"
o "compatible con el celular" vía un cable especial. Si este cable no fue facilitado
por su dispositivo TTY, contacte al fabricante del dispositivo TTY para comprar
el cable de conector.
Importante: Una vez conectado el dispositvo TTY/TDD, elija Menú >
Configuraciones > Conifguraciones de accesorios > TTY/TDD para
habilitar el modo TTY/TDD.
Nokia 2651 Manual del Usuario
55
Copyright © 2005 Nokia
2
Inicio
• Encontrar la etiqueta
Si por alguna razón necesita llamar al Centro Nokia de Servicio al Cliente o a
su proveedor de servicio, deberá proveer datos específicos sobre su teléfono.
Esta información aparece en la etiqueta del teléfono.
La etiqueta se encuentra en la parte
Etiqueta
posterior del teléfono (debajo de la
batería). La etiqueta indica lo siguiente:
• Número de Modelo (Nokia 2651)
• Tipo de teléfono e ID de la FCC
• Identificación Internacional del
Equipo Móvil (IMEI)
No retire ni borre esta etiqueta.
Contacto con Nokia
Centro Nokia de Servicio al Cliente
NOKIA MOBILE PHONES
6000 Connection Dr.
Irving, Texas 75039 EE.UU.
Tel.: (972) 894-5000
Fax: (972) 894-5050
www.nokia.com/latinoamerica
Para usuarios de TTY/TDD:
1-800-246-NOKIA
(1-800-246-6542)
NOKIA MÉXICO, S.A.
de C.V.
Paseo de los Tamarindos
400-A Piso 16
Col. Bosques de las Lomas
C. P. 05120
México D.F., MÉXICO
Tel.: (55) 261-7200
Fax: (55) 261-7299
Centro Nokia de Servicio al
Cliente, EE.UU
Nokia de Servicio al
Cliente, Canadá
Nokia Mobile Phones
7725 Woodland Center Blvd.
Suite #150
Tampa, Florida 33614
Tel: 1-888-NOKIA-2U
(1-888-665-4228)
Fax: 1-813-249-9619
Para usuarios de TTY/TDD:
1-800-24-NOKIA
(1-800-246-6542)
Nokia Products Ltd.
601 Westney Road South
Ajax, Ontario L1S 4N7
Tel: 1-905-427-1373
1-888-22-NOKIA
(1-888-226-6542)
Fax: 1-905-619-4360
Web site: www.nokia.ca
56
NOKIA ARGENTINA, S.A.
Azopardo 1071
C1107ADQ Buenos Aires
ARGENTINA
Tel.: (11) 4307-1427
Fax: (11) 4362-8795
Copyright © 2005 Nokia
Inicio
• Insertar la tarjeta SIM
Mantenga las tarjetas SIM fuera del
alcance de los niños. Para disponibilidad
e información sobre el uso de los
servicios de tarjetas SIM, contacte a su
vendedor de tarjeta SIM. Éste puede ser
el proveedor de servicio, la operadora
de red u otro vendedor.
1
Abra la cubierta SIM al lado del
teléfono halándola y llevándola
hacia abajo (1).
2
Inserte la tarjeta SIM en el teléfono
con la esquina biselada hacia el lado
derecho y los contactos dorados de
la tarjeta hacia abajo (hacia el lado
frontal del teléfono) (2).
3
Empuje la tarjeta SIM y cierre la
cubierta SIM (3).
• Insertar la batería
Nota: Evite tocar los componentes electrónicos mientras cambia las
cubiertas. Guarde y use el teléfono con las cubiertas instaladas.
Siempre apague el dispositivo y desconecte el cargador antes de retirar la batería.
Al oprimir el botón soltador (1) retire la cubierta posterior (2). Inserte la batería
de modo que los conectores dorados en la batería queden alineados con los
conectores en el teléfono (3). Reinstale la cubierta posterior (4).
Nokia 2651 Manual del Usuario
57
Copyright © 2005 Nokia
• Cargar la batería
No cargue la batería si las cubiertas del
teléfono han sido retiradas.
1
Conecte el cargador a una
tomacorriente estándar AC.
Conecte el enchufe del cargador en
el conector del teléfono. La barra de
indicador de la batería empieza a
oscilar en la pantalla.
Cuando la batería esté completamente cargada, la barra dejará de oscilar.
2
Desconecte el cargador del teléfono y de la tomacorriente.
• Instalar la correa
Inserte la correa por los huecos, como se
muestra, y ajústela.
• Abrir la cubierta desplegable
Para usar el teléfono, primero deberá de
abrir la cubierta desplegable. No trate de
abrirla más allá de la extensión permitida
por las bisagras.
Cierre la cubierta desplegable desde la
parte superior, no desde las bisagras.
58
Copyright © 2005 Nokia
Inicio
• Teclas, indicadores y conectores
1
Intensidad de la señal de la red
celular en su ubicación actual
2
Nivel de carga de la batería
3
Red celular en uso o logo
del operador
4
Función actual de la tecla de
Selección izquierda
5
Función actual de la tecla de
Selección derecha
6
Teclas de selección—ejecutan la
función indicada sobre éstas.
7
Tecla direccional de 4 vías para
recorrer los nombres, números
telefónicos, menús o configuraciones.
Recorra hacia la izquierda o derecha
para ajustar el volumen del
auricular durante la llamada.
En la modalidad inactiva, recorra
hacia arriba o abajo para ver los
nombres y números telefónicos
guardados en Contactos. Recorra a la izquierda para redactar un mensaje.
8
Tecla Llamar—marca un número telefónico y contesta las llamadas o muestra
los números marcados más recientes al oprimirla en la modalidad inactiva.
9
Tecla Finalizar—termina la llamada activa o rechaza la llamada entrante.
Oprímala para salir de cualquier función. Al cerrar la cubierta desplegable
también saldrá de cualquier función en uso.
La tecla Finalizar también enciende y apaga el teléfono. Cuando el
teléfono está encendido y en la modalidad inactiva, rápidamente oprima la
tecla Finalizar para acceder a una lista de perfiles (vea “Perfiles” pág. 74),
o por 3 segundos para apagarlo.
10 Use las teclas de la 0 a la 9 para ingresar números y caracteres.
Use las teclas y # para varios propósitos en diferentes funciones.
*
11 Conector al cargador
12 Conector del auricular
13 Micrófono
Nokia 2651 Manual del Usuario
59
Copyright © 2005 Nokia
• Encender/Apagar
Aviso: No encienda el teléfono cuando se prohíba el uso del teléfono
celular o cuando su uso pueda causar interferencia o peligro.
El teléfono no tiene una tecla específica para apagarlo y encenderlo; esta
función está combinada con la tecla Finalizar.
Mantenga oprimida la tecla Finalizar. Si el teléfono está encendido, verá la
modalidad inactiva, seguida por la lista de perfiles, antes de que se apague
el teléfono.
Cuando encienda el teléfono, podría pedirle un código PIN o de seguridad;
ingrese el código, y elija OK. El código de seguridad predeterminado es 12345.
Ver “Configuraciones de seguridad” pág. 78, para más información sobre los
códigos del teléfono.
Si el teléfono muestra Insertar tarjeta SIM, aunque esté correctamente instalada
o Tarjeta SIM no compatible, contacte a su operadora de red o proveedor de
servicio. El teléfono no soporta tarjetas SIM- 5V.
• Antena interior
Su dispositivo tiene una
antena interna.
Igual como sucede con
cualquier dispositivo
radiotransmisor, la antena no
deberá tocarse sin necesidad
cuando el teléfono está
encendido. El contacto con la
antena afecta la calidad de la
llamada y puede hacer que el
teléfono funcione con una potencia más alta de la necesaria. El evitar el
contacto con el área de la antena cuando opera el teléfono optimiza el
rendimiento de la antena y el tiempo de vida de la batería.
60
Copyright © 2005 Nokia
Funciones de llamada
3
Funciones de llamada
• Hacer llamadas
1
Abra la cubierta desplegable, y marque el número telefónico y el código
de área.
Elija Borrar para eliminar el último dígito que ingresó.
2
Oprima Llamar. Recorra hacia la izquierda o derecha para ajustar el
volumen del auricular o audífono.
3
Oprima Finalizar o cierre la cubierta desplegable para terminar la llamada
o dejar de tratar de hacer la llamada.
Hacer una llamada usando Contactos
En la modalidad inactiva, recorra hacia arriba o abajo para encontrar el nombre
o número deseado. Oprima Llamar para marcar el número.
Llamar a un número recientemente marcado
Para remarcar uno de los 20 últimos números que ha llamado o marcado, oprima
Llamar, recorra al nombre o número deseado, y oprima Llamar de nuevo.
Llamar a su buzón de mensajes de voz
Para programar su teléfono a marcar su correo de voz, haga lo siguiente:
1
Elija Contactos > Configuraciones > Número de buzón de correo de voz.
2
Ingrese el número de su buzón de correo de voz, y oprima OK.
Para llamar a su número del buzón de correo de voz, desde la pantalla inicial,
mantenga oprimida la tecla 1.
Marcación de 1 toque (marcación rápida)
Puede programar las teclas de la 2 a la 9 para la marcación de 1 toque. Tras asignar
un número a una tecla, mantenga oprimida la tecla asignada en la modalidad
inactiva para hacer una llamada. U oprima el número y la tecla Llamar .
Para asignar un número de teléfono a una tecla:
1
Elija Contactos > Marcación rápida > Editar.
2
Vaya a la tecla deseada, y elija Asignar.
Si la tecla ya tiene un número asignado, elija Opciones para ver, cambiar,
o eliminar el número asignado.
3
Elija Asignar a SMS o Asignar a llamada, y oprima Seleccionar.
Deberá activar la función de marcación de 1 toque antes de usarla. Para apagarla,
elija Contactos > Marcación rápida > Activar.
Nokia 2651 Manual del Usuario
61
Copyright © 2005 Nokia
• Contestar llamadas
Abra la cubierta desplegable y oprima Llamar. Si no oprime Llamar la llamada
se va a su buzón de correo de voz. Para rechazar la llamada sin contestarla, abra
la tapa y ciérrela rápidamente, u oprima Finalizar.
Si Demora contest. no está activada, la selección de Menú > Configuraciones >
Configuraciones de llamadas > Cont. al abrir tel. > Demora contest. resultará
en un breve retraso después de abrir la tapa hasta que pueda contestar la llamada.
• Operaciones durante una llamada
Durante una llamada, elija Opciones para estas funciones: Bloquear teclas
(si un auricular está conectado), Retener/Atender, Llamada nueva, Finalizar
llamada activa, Tonos DTMF, Contactos, Menú, Desactivar/Activar y Retener.
Llamadas de conferencia (servicio de red)
Para conectar dos llamadas en una conferencia, haga lo siguiente:
1
Llame al primer participante.
2
Para llamar a un participante nuevo, elija Opciones > Nueva llamada.
3
Marque el número nuevo o recupérelo de la lista de contactos, y elija Llamar.
La primera llamada es retenida y el segundo número es marcado.
4
Cuando la llamada es contestada, elija Opciones > Cambiar para cambiar
entre las dos llamadas, o elija Opciones > Conferencia para conectar la
llamada de conferencia.
5
Para mantener una conversación privada con uno de los participantes,
elija Privada y el participante. Para regresar a la llamada, elija
Opciones > Conferencia.
6
Para finalizar la llamada de conferencia, oprima Finalizar.
Llamada en espera (servicio de red)
Puede contestar una llamada mientras tiene otra en progreso si tiene activada la
función Llamada en espera en el menú Configuraciones de llamadas (servicio
de red). Para contestar la llamada en espera, elija Opciones > Contestar u oprima
Llamar. También vea“Configuraciones de llamadas” pág. 75.
• Filtrar los números
Programe su teléfono para que filtre las llamadas y mensajes procedentes de
ciertos números. Cuando entra una llamada de un número filtrado, no suena el
timbrado y queda desactivada la alerta vibrante, sin importar el perfil elegido.
Los datos de la llamada son guardados en Registro > Llamadas perdidas.
62
Copyright © 2005 Nokia
Funciones de llamada
Agregar un número
Para añadir un número a la lista de números filtrados, elija Contactos > Números
filtrados > Opciones > Agregar número, ingrese el número que quiere filtrar,
y elija OK.
Eliminar un número
Para descartar un número de la lista, elija Contactos > Números filtrados,
recorra hasta el número que quiera borrar, y elija Opciones > Eliminar de lista.
La opción Números filtrados también está disponible al elegir Menú >
Mensajes > Configuraciones de mensajes > Números filtrados.
Ver llamadas y mensajes filtrados
Cuando reciba una llamada o mensaje de un número filtrado, aparecerá un
mensaje de alerta.
• Bloquear el teclado (Bloqueo de teclas)
El bloqueo del teclado es para evitar los tecleos accidentales. Para bloquear o
desbloquear el teclado, oprima la tecla de Selección izquierda, y rápidamente
oprima . El bloqueo de teclas no esta activado cuando cierra la cubierta
desplegable.
*
Cuando el teclado está bloqueado, el ícono
aparece en la parte superior de
la pantalla. Todavía puede contestar una llamada oprimiendo Llamar.
Cuando el Bloqueo de teclas está activado, es posible hacer llamadas al número
de emergencia programado en su teléfono. Marque el número de emergencia,
y oprima Llamar.
Nokia 2651 Manual del Usuario
63
Copyright © 2005 Nokia
4
Redacción
Para ingresar texto, use el ingreso tradicional de texto (indicado por el ícono
) o use el ingreso predecible de texto (indicado por
).
Al redactar, oprima Opciones > Texto predictivo > Español.
Para regresar al ingreso tradicional de texto, elija Opciones > Texto
predictivo > Predicción desactivada.
• Ingreso predecible de texto
El ingreso predecible de texto es una manera fácil para la redacción. Está
basado en un diccionario incorporado al cual se le pueden añadir palabras.
1
2
Ingrese la palabra deseada oprimiendo cada tecla una vez por letra. La palabra
cambia tras cada tecleo. Por ejemplo, para escribir "Nokia" con el diccionario
Español seleccionado, oprima 6 6 5 4 2.
•
Para borrar el carácter a la izquierda del cursor, oprima Borrar.
Para borrar la pantalla, mantenga oprimida Borrar.
•
Para cambiar entre mayúsculas y minúsculas, o entre texto tradicional
y predecible, oprima # repetidamente y verifique el indicador en la
parte superior de la pantalla.
•
Para cambiar entre letras y números, mantenga oprimida la tecla #.
•
Para obtener una lista de caracteres especiales, mantenga oprimida ,
elija el carácter, y oprima Usar.
•
Para insertar un número, mantenga oprimida la tecla del número que
desea. Para insertar varios números, mantenga oprimida # e ingrese
los números.
*
Si la palabra mostrada es la que desea, oprima 0 para crear un espacio y
comience a escribir la siguiente palabra.
•
Para cambiar la palabra, oprima repetidamente hasta que la palabra
que quiere aparezca.
•
Si ? aparece después de la palabra, significa que esta palabra no está en
el diccionario. Para agregar una palabra al diccionario, oprima Deletreo,
ingrese la palabra (usando el ingreso tradicional) y oprima OK.
*
64
Copyright © 2005 Nokia
Redacción
• Ingreso tradicional de texto
Oprima varias veces la tecla con la letra deseada hasta que aparezca la letra.
Cuando edite el texto, use las funciones siguientes:
•
Para mover el cursor, oprima las teclas direccionales.
•
Para insertar un espacio, oprima 0.
•
Para borrar el carácter a la izquierda del cursor, oprima Borrar. Para borrar
la pantalla, mantenga oprimida Borrar.
•
Para cambiar entre mayúsculas y minúsculas, o entre texto tradicional y
predecible, oprima # repetidamente y verifique el indicador en la parte
superior de la pantalla.
•
Para cambiar entre letras y números, mantenga oprimida la tecla #.
•
Para insertar un número, mantenga oprimida la tecla correspondiente.
•
Para agregar un signo de puntuación o carácter especial, oprima ; elija el
carácter y Usar.
•
Para ingresar una letra que está en la misma tecla a la anterior, recorra
hacia arriba o abajo (o espere hasta que el cursor aparezca), e ingrese la
nueva letra.
*
Nokia 2651 Manual del Usuario
65
Copyright © 2005 Nokia
5
Funciones del menú
Puede usar los menús de la manera siguiente:
Recorrer
1
2
3
Oprima Menú en la modalidad inactiva.
Recorra hacia arriba/abajo hacia el menú que quiera y elíjalo.
Si el menú contiene submenús, elija el que desee. Elija Atrás para regresar al
nivel anterior del menú, u oprima Finalizar para salir a la modalidad inactiva.
Atajos
Los menús, submenús y las opciones de configuración están numerados. El
número de atajo del menú aparece en la parte superior derecha de la pantalla.
En la modalidad inactiva, elija Menú e ingrese rápidamente el número de atajo
del menú que quiera acceder. Repita para los submenús.
• Mensajes
Antes de enviar mensajes, deberá ajustar sus configuraciones
de mensajes. Para más detalles, vea “Configuraciones de mensajes”
pág. 69.
Mensajes enlazados
Su teléfono puede enviar y recibir mensajes de textos largos (servicio de red). Los
mensajes de texto que tengan más de 160 caracteres son automáticamente
divididos en mensajes múltiples y enviados por partes. Los mensajes en partes
son enlazados por el teléfono cuando son recibidos y mostrados como un
mensaje SMS. Para que esta opción funcione bien, el teléfono destinatario debe
respaldar mensajes enlazados.
Mientras escribe un mensaje, la cantidad de caracteres disponibles y el número
del mensaje vinculado (por ejemplo, 120/2) aparecen en la parte superior
derecha de la pantalla.
Si hay caracteres especiales en su mensaje, el indicador podría no mostrar la
longitud del mensaje correctamente. Antes de que el mensaje sea enviado, el
teléfono Nokia 2651 le dice si el texto excede la longitud máxima permitida
para un mensaje. Para cancelar el envío, elija Cancelar, o guarde el mensaje en
la carpeta de Borradores.
Escribir mensajes
Para enviar un mensaje, el número telefónico de su centro de mensajes debe haber
sido almacenado en el teléfono. Vea “Configuraciones de mensajes” pág. 69.
1 Elija Menú > Mensajes > Crear mensaje, e ingrese el mensaje.
La cantidad de caracteres disponibles y el número actual de parte aparecen
en la esquina superior derecha de la pantalla.
66
Copyright © 2005 Nokia
Funciones del menú
2
3
Al escribir el mensaje, elija Opciones para acceder a las otras funciones.
Cuando el mensaje esté completo, elija Opciones > Enviar; ingrese el
número telefónico del destinatario, o elija Buscar para encontrarlo en el
directorio, y elija OK.
O BIEN
Elija Opciones > Opciones de envío > Varias copias, Enviar a lista,
Enviar más tarde, o Perfil de envío.
Al enviar mensajes, su dispositivo podría mostrar Mensaje enviado. Esto
significa que el mensaje ha sido enviado por su dispositivo al número del centro
de mensajes programado en su teléfono. No significa que el mensaje ha sido
recibido por el destinatario. Para más detalles sobre los servicios de mensajería,
consulte con su proveedor de servicio.
Leer un mensaje de texto (Buzón de entrada)
Cuando recibe mensajes de texto en la modalidad inactiva, el número de
mensajes nuevos y el ícono de mensaje nuevo (
) aparecen en la pantalla.
1 Elija Leer para ver el mensaje inmediatamente.
Para leer el mensaje más tarde, oprima Salir. Cuando esté listo para leer el
mensaje, elija Menú > Mensajes > Buzón de entrada y el mensaje que
quiere leer. Recorra hacia arriba/abajo para navegar por el mensaje.
2 Al escribir el mensaje, elija Opciones para acceder a las otras funciones.
Elementos enviados y borradores
La carpeta Elementos enviados almacena las copias de los mensajes enviados.
La carpeta Borradores almacena los mensajes guardados al redactarlos. (Para
guardar un mensaje durante su redacción, elija Opciones > Guardar mensaje.)
Al ver el mensaje, elija Opciones para acceder a otras optiones.
Mensajes con imágenes
Usted puede recibir y enviar mensajes que contienen imágenes (servicio de red).
Los mensajes con imágenes son guardados en el teléfono. Cada mensaje de
imagen consiste en varios mensajes de texto. Así que, enviar un mensaje de
imágenes podría costar más que enviar un mensaje de texto.
Nota: Puede usar la función de mensajes con imágenes solamente si es
respaldada por su operadora de red o proveedor de servicio. Sólo los
dispositivos compatibles que ofrecen la función de mensajes con imágenes
pueden recibir y mostrar dichos mensajes.
Crear un mensaje con imágenes
1
2
3
Elija Menú > Mensajes > Mensajes con imágenes.
Recorra hasta la imagen que quiera, y elija Usar.
Para agregar texto y enviar el mensaje, vea “Escribir mensajes” pág. 66 y
siga las indicaciones.
Nokia 2651 Manual del Usuario
67
Copyright © 2005 Nokia
Recibir un mensaje con imágenes
1
2
Elija Leer para el mensaje inmediatamente.
Para leer el mensaje más tarde, oprima Salir. Cuando esté listo para leer el
mensaje, elija Menú > Mensajes > Buzón de entrada y el mensaje que
quiere leer. Recorra hacia arriba/abajo para navegar por el mensaje.
Al leer el mensaje, elija Opciones para acceder a las otras funciones.
Listas de distribución
Si necesita enviar frecuentemente mensajes a un grupo fijo de destinatarios,
puede definir una lista de distribución y usarla cuando envíe un mensaje. Usted
puede definir hasta 6 listas de distribución con un máximo de 10 destinatarios
por lista. El teléfono envía un mensaje de texto a cada destinatario por separado.
Crear una lista
1
2
3
4
Elija Menú > Mensajes > Listas de distribución > Opciones >
Agregar lista.
Ingrese un nombre para la lista y oprima OK.
Para añadir un contacto a la lista, elija Opciones > Ver lista > Opciones >
Agregar contacto y el/los contacto/s que quiera añadir a la lista.
Cuando acabe de agregar los contactos, oprima Atrás.
Enviar a una lista
1
2
Crear el mensaje
Elija Opciones > Opciones de envío > Enviar a lista, y la lista de
distribución deseada.
3 Oprima OK para confirmar su selección.
Si no logra el envío del mensaje a uno o más destinatarios, la pantalla mostrará
una lista de los números enviados con éxito y sin éxito.
Mensajes filtrados
Esta opción filtra los mensajes de los números no deseados enviando al
remitente una lista de los números filtrados. Vea “Filtrar los números” pág. 62.
Eliminar mensajes
•
•
•
Oprima Menú > Mensajes > Eliminar mensajes.
Para borrar de todas las carpetas todos los mensajes leídos, elija Todos los
leídos. Cuando ¿Eliminar todos los mensajes de todas las carpetas?
aparezca, elija OK.
Para borrar todos los mensajes leídos de una carpeta, vaya a la carpeta y
oprima OK. Cuando ¿Eliminar todos los mensajes de todas las carpetas?
aparezca, elija OK.
68
Copyright © 2005 Nokia
Funciones del menú
Contador de mensajes
1
Elija Menú > Mensajes > Contador de mensajes.
2
Recorra hacia abajo para ver los números de los mensajes enviados y recibidos.
La cantidad de mensajes aparece en la parte inferior derecha de la pantalla.
3
Para reprogramar los contadores, elija Borrar contadores y el contador que
quiera reconfigurar.
El submenú Contador de mensajes también está en el menú principal Registro.
Configuraciones de mensajes
Elija Menú > Mensajes > Configuraciones de mensajes y una de las
opciones siguientes:
Servicio de información—Recibir mensajes de la red sobre varios temas, tales
como, condiciones de tráfico (servicio de red). Para más información, contacte
a su proveedor de servicio.
Plantillas—Ver, editar o eliminar plantillas de mensajes preconfigurados.
Emoticones—Usar emoticones preconfigurados, como :-) en los mensajes.
También puede editar y borrar los emoticones existentes y crearlos.
Firmas—Agregue una archivo de firma a sus mensajes. Elija Texto de firma
para crear o editar su firma. Elija Incluir firma > Activar o Desactivar para
configurar la inserción automática de firma a activada/desactivada.
Perfil de envío—Configure su perfil de envío de mensajes. Elija un perfil, luego
seleccione una de las opciones siguientes:
•
Número de centro de mensajes—Guarde el número telefónico que se
necesita para enviar mensajes. Contacte a su proveedor de servicio para
obtener este número.
•
Mensajes enviados como—Elija Texto, Fax, Pager, o E-mail (servicio de red).
•
Validez de los mensajes—Elija cuánto tiempo debe intentar la red para
entregar su mensaje (servicio de red).
•
Renombrar perfil de envío—Cambia el nombre del perfil de envío.
Informe entrega—Solicite a la red que envíe informes de entrega para sus
mensajes enviados (servicio de red). Elija Activar o Desactivar.
Responder por mismo centro—Permita que el destinatario de su mensaje le
envíe la respuesta vía su centro de mensajes (servicio de red). Elija Sí o No.
Caracteres compatibles—Elija Completo para enviar todos los caracteres Unicode
a teléfonos compatibles, o Reducido para tratar de convertir los caracteres Unicode
en caracteres no Unicodes correspondientes (servicio de red).
Lista filtrada—Ver “Filtrar los números” pág. 62.
Nokia 2651 Manual del Usuario
69
Copyright © 2005 Nokia
Editor de comandos de servicio
Usted puede enviar pedidos de servicio a su proveedor (servicio de red).
Elija Menú > Mensajes > Editor comandos de servicio, ingrese los caracteres
que quiera, y elija Enviar para mandar el pedido.
Para más información, contacte a su proveedor de servicio.
• Contactos
Puede guardar nombres y números telefónicos en la memoria del teléfono y de
la tarjeta SIM. El directorio puede almacenar hasta 50 nombres.
Buscar un nombre y un número telefónico
1
En la modalidad inactiva, oprima Contactos > Buscar.
2
Introduzca una o las primeras letras del nombre que está buscando, y
elija Buscar.
3
Recorra para hallar el nombre deseado.
4
Para llamar al número, elija Llamar.
Si el nombre o el número telefónico está guardado en la memoria de la tarjeta
SIM,
es mostrado en la esquina superior derecha de la pantalla; si está
guardado en la memoria interna del teléfono,
es mostrado.
Para una búsqueda rápida, recorra hacia abajo en la modalidad inactiva, ingrese
la primera letra del nombre, y recorra para encontrarlo.
Opciones
Los submenús siguientes están en el menú Contactos:
Buscar—Buscar un nombre en la lista de contactos.
Agregar nombre—Guardar nombres y números telefónicos en el directorio.
Eliminar—Borrar nombres y números telefónicos del directorio, uno a uno o
todos a la vez.
Editar—Editar los nombres y números en Contactos.
Asignar tono—Configurar el teléfono para que suene el timbrado musical que
quiera cuando se recibe una llamada de un número particular. Elija el número
telefónico o nombre que quiera y elija Asignar; luego elija el timbrado musical.
Esta opción sólo funciona cuando tanto la red como el teléfono están
capacitados para identificar y enviar la identidad del llamante.
Enviar número de teléfono—Enviar el número telefónico de una persona como
un mensaje Sobre el Aire (OTA) (servicio de red).
Copiar—Copiar nombres y números telefónicos, todos a la vez o uno a uno,
desde la memoria del teléfono a la de la tarjeta SIM o viceversa.
70
Copyright © 2005 Nokia
Funciones del menú
Configuraciones—Modificar las configuraciones de contactos.
Vea “Configuraciones de contactos” pág. 71.
Marcación rápida -—Activar la función marcación rápida y editar los números
de las teclas de marcación de 1 toque. Vea “Marcación de 1 toque (marcación
rápida)” pág. 61.
Mis números—Mostrar su número telefónico.
Lista filtrada—Configurar una lista de números telefónicos filtrados.
Vea “Filtrar los números” pág. 62.
Números de servicio—Llamar a los números de servicio de su proveedor si están
incluidos en su tarjeta SIM (servicio de red).
Números de información—Llamar a los números de información de su proveedor
de servicio si los números están incluidos en su tarjeta SIM (servicio de red).
Configuraciones de contactos
En la modalidad inactiva, elija Contactos > Configuraciones y una de las
opciones siguientes:
Número del buzón de voz—Guardar y cambiar el número telefónico de su
buzón de voz (servicio de red).
Memoria en uso—Elegir entre guardar los nombres y números telefónicos en la
Tarjeta SIM o Teléfono. Cuando cambia la tarjeta SIM, la memoria Tarjeta SIM
es seleccionada automáticamente.
Vista de contactos—Elegir la forma de mostrar los nombres y números de
teléfono. Elija entre Nombre y número (un nombre y número a la vez), Lista de
nombres (sólo nombres, cuatro nombres a la vez), o Sólo nombre (sólo nombres,
tres nombres a la vez, en tamaño más grande).
Estado de memoria—Verifique cuántos nombres y números telefónicos aún
podrá guardar en el directorio.
• Registro
El Registro guarda los números telefónicos de las llamadas perdidas,
recibidas y marcadas; la duración aproximada de sus llamadas, y el
número de llamadas enviadas y recibidas. Para que el Registro funcione bien,
observe las condiciones siguientes:
•
Debe estar en una red digital, su proveedor de servicio debe respaldar la
función ID de Llamada, y dicha función debe estar activada en el teléfono.
•
Sus llamadas no podrán estar bloqueadas.
•
Su teléfono deberá estar activado y dentro del área de servicio o dentro de
una red compatible si está en la opción roaming (viajero).
Nokia 2651 Manual del Usuario
71
Copyright © 2005 Nokia
Llamadas perdidas, recibidas o números marcados
1
Elija Menú > Registro > Llamadas perdidas, Llamadas recibidas, o
Números marcados.
2
Recorra la lista de números y resalte su preferencia.
3
Oprima Opciones y elija una de las siguientes:
Enviar mensaje—Enviar un mensaje de texto a la persona que lo llamó o a
quien usted llamó.
Envíar número—Enviar el número telefónico como mensaje a un
dispositivo compatible.
Hora de llamada—Mostrar la hora cuando se conectó la llamada.
Editar número—Editar el número y guardarlo con un nombre en su directorio.
Guardar—Ingresar un nombre para el número y guardarlo en su directorio.
Eliminar—Borrar un número de la lista de llamadas.
Agregar a lista filtrada—Añadir el número a la lista de números filtrados.
Eliminar listas de llamadas recientes
Una vez ejecutada esta función, no podrá restituir los datos.
Elija Menú > Registro > Eliminar listas llamadas recientes > Todas,
Perdidas, Recibidas o Marcadas.
Duración de las llamadas
Su teléfono registra el tiempo aproximado de cada llamada.
Nota: El tiempo real facturado por su proveedor de servicio para las
llamadas podría variar según los servicios de red, redondeo de la
factura, impuestos, y así sucesivamente.
Nota: Algunos cronómetros podrían ser reprogramados durante el
servicio o actualizaciones de software.
Elija Menú > Registro > Duración de llamadas y una de estas opciones:
Duración de última llamada—Muestra la duración aproximada de la
última llamada.
Duración de llamadas recibidas—Muestra la duración aproximada de todas las
llamadas recibidas.
Duración de llamadas marcadas—Muestra la duración aproximada de todas
las llamadas marcadas.
Duración todas las llamadas—Muestra la duración de todas las llamadas hechas
y recibidas desde que reprogramó los cronómetros de duración de llamadas.
72
Copyright © 2005 Nokia
Funciones del menú
Contadores a cero—Borra todos los cronómetros de duración de llamadas para el
número telefónico seleccionado actualmente. (Su teléfono incluye cronómetros
separados para cada número usado.) Deberá ingresar su código de seguridad para
borrar los cronómetros. No podrá restituir los datos tras esta operación.
Crédito prepagado
Nota: Esta opción no está disponible en todas las áreas y puede no
aparecer en el menú. Consulte con su proveedor de servicio para detalles.
Cuando usa una tarjeta SIM prepagada, usted puede hacer llamadas sólo
cuando hay suficientes unidades de crédito en la tarjeta SIM (servicio de red).
Las opciones son: Mostrar información de crédito (mostrar u ocultar las
unidades remanentes en la modalidad inactiva), Crédito disponible (cantidad
de unidades remanentes), Costos últimos eventos y Estado de recarga.
Nota: Cuando no disponga más de unidades de cargo o de fondos, sólo
podrá hacer llamadas al número oficial de emergencia programado en
el teléfono.
• Configuraciones
En este menú se pueden ajustar varias configuraciones del
teléfono. También puede reprogramar algunas configuraciones
del menú a sus valores predeterminados oprimiendo Restaurar
configuraciones de fábrica.
Configuración de tonos
En este menú se pueden cambiar las configuraciones del perfil elegido actualmente.
Ver “Perfiles” pág. 74, para más información.
Elija Menú > Configuraciones > Configuraciones de Tono y elija una de las
siguientes opciones:
Tono del timbre—Programa el tono que suena cuando recibe una llamada.
Volumen del timbre—Programa el nivel de volumen para el timbrado y para los
tonos de aviso para mensajes.
Alerta vibrante—Programa el teléfono para que vibre cuando recibe una
llamada o un mensaje de texto. La opción Alerta Vibrante no funciona cuando
el teléfono está conectado a un cargador.
Tono de aviso para mensajes—Programa el tono que suena cuando recibe un
mensaje de texto.
Tonos del teclado—Programa el volumen para los tonos del teclado.
Tonos de aviso—Programa el teléfono para que suene un tono (por ejemplo,
cuando el teléfono esta casi descargado).
Nokia 2651 Manual del Usuario
73
Copyright © 2005 Nokia
Configuraciones de pantalla
Elija Menú > Configuraciones > Configuraciones de pantalla y elija una de
las siguientes opciones:
Temas—Elija un tema para personalizar la apariencia de la pantalla de su
teléfono. Los Temas controlan la pantalla en segundo plano, el papel de fondo
y el aspecto exterior de las barras de la fuerza de la señal y carga de la batería
en la modalidad inactiva. Resalte el mensaje deseado y oprima Opciones y elija
una de las siguientes:
•
Activar—Elegir Para perfil actual o Para todos perfiles.
•
Previsualizar—Ver el aspecto exterior del tema.
•
Editar—Elegir el papel de fondo, fondo del menú y las barras de la fuerza
de la señal y de la batería.
Vista de menú—Configurar el formato de la pantalla del menú principal.
Elija entre Lista o Cuadrícula.
Reloj ahorro de energía—Programar el teléfono a mostrar el reloj digital y
todos los íconos de la pantalla principal como protector de pantalla. Los íconos
mostrados indican las llamadas perdidas, bloqueo del teclado, modalidad
Silencio y los mensajes recibidos.
Ver información de celular—Configurar el teléfono a indicar cuando es usado en
una red celular basada en tecnología de red microcelular (MCN) (servicio de red).
Tiempo de luces—Elegir la activación de las luces de fondo entre 15 segundos
(Normal), 30 segundos (Extendida), o apagada (Desactivar). Al encender el
teléfono, la luz de fondo queda encendida durante 15 segundos aunque
esté desactivada.
Brillo—Modificar el brillo de pantalla recorriendo horizontalmente.
Protector de pantalla—Configurar el lapso de tiempo antes de activar el protector
de pantalla (elija Límite de tiempo y la duración de tiempo que quiera). Elija la
foto que quiera usar como protector de pantalla (elija Protector de pantalla, la
imagen que quiera, luego Opciones > Usar). Elija Activar o Desactivar para
activar/desactivar la función Protector de pantalla.
Perfiles
Se puede personalizar el teléfono para eventos y entornos diferentes. Tras
personalizar un perfil, lo podrá activar cuando quiera utilizarlo.
Activar
Elija Menú > Configuraciones > Perfiles, el perfil deseado, luego Activar.
Para activar un perfil en la modalidad inactiva, oprima la tecla Encender/apagar
brevemente, recorra hasta el perfil, y elija OK.
74
Copyright © 2005 Nokia
Funciones del menú
Personalizar
Elija Menú > Configuraciones > Perfiles, el perfil elegido y luego Personalizar.
Elija la opción que quiera y siga las indicaciones.
También, puede cambiar las configuraciones del perfil elegido actualmente en
Configuraciones de tonos (ver “Configuración de tonos” pág. 73) y en
Configuraciones de pantalla (ver “Configuraciones de pantalla” pág. 74).
Activado
Se pueden usar los perfiles activados para no perder llamadas. Por ejemplo,
suponga que está en un evento que le requiere configurar su teléfono a Silencio
antes de que éste comience, pero se le olvidó configurar su teléfono a Normal
al terminar. Pudo haber perdido varias llamadas ya que su tono del timbre
estaba en silencio.
Con la función Perfil activado, podrá configurar un perfil para que expire tras un
lapso de tiempo hasta de 24 horas. Cuando el perfil expira, su teléfono regresa
automáticamente al perfil predeterminado.
1 Elija Menú > Configuraciones > Perfiles, el perfil que quiera, y Programado.
2 Ingrese la fecha y hora de vencimiento del perfil.
El perfil que ha programado para vencer ya está activo y aparece en la
pantalla inicial junto con el ícono de un reloj pequeño.
Configuraciones de hora
Elija Menú > Configuraciones > Configuraciones de hora y una de las
siguientes opciones:
Reloj—Le permite programar el teléfono para mostrar la hora actual en la
modalidad inactiva, ajustar la hora y seleccionar el formato de 12 ó 24 horas.
Si la batería fue retirada, tendría que programar la hora de nuevo.
Configuración de fecha—Programar la fecha. Si la batería fue retirada, podría
necesitar programar la fecha de nuevo.
Actualización automática de fecha y hora—Programar el teléfono, cuando lo
enciende, a actualizar el reloj con la fecha y hora de la red (servicio de red). Si
el reloj lleva un retraso de 30 segundos o más de la hora de la red, el teléfono
lo autoactualizará para que refleje la hora de la red. Elija Activar, Confirmar
primero, o Desactivar. Si elige Confirmar primero, la red pedirá la confirmación
antes de actualizar la hora. Puede aceptar o rechazar la actualización.
La autoactualización de fecha y hora no cambia la hora de alarma o las notas de
recordatorio. La actualización podría hacer que algúnas alarmas expiren sin sonar.
Configuraciones de llamadas
Elija Menú > Configuraciones > Configuraciones de llamadas y una de las
siguientes opciones:
Nokia 2651 Manual del Usuario
75
Copyright © 2005 Nokia
Desvío de llamadas—Traslada las llamadas entrantes a su buzón de voz o a
algún otro número telefónico (servicio de red).
• Elija la opción de desvío. Por ejemplo, elija Desviar si está ocupado para
trasladar las llamadas mientras está en una llamada o cuando rechaza
una llamada.
• Varias opciones de desvío podrían estar activadas a la vez. Al activar Desviar
todas las llamadas de voz,
aparece en la modalidad inactiva.
• Configure la opción elegida a (Activar) o (Cancelar), verifique si la opción
está activada al elegir Verificar estado, o especifique un tiempo de demora
para algunas opciones de desvío en Fijar demora (no está disponible en
todas las opciones de desvío).
Fold call handling—Configurar su teléfono para Demora contest., Cont.
instantánea o Desactivar.
Remarcación automática—Configurar su teléfono a remarcar hasta diez veces
después de tratar de llamar sin éxito. Elija Activar o Desactivar.
Llamada en espera—Configure su teléfono para que le avise de una llamada
mientras tiene una llamada en curso (servicio de red), eligiendo Activar.
Enviar ID de llamante—Configure su número telefónico para que aparezca (Sí)
o quede oculto (No) en la pantalla del teléfono que está llamando (servicio de
red). Cuando oprime Predeterminado, la configuración acordada con su
proveedor de servicio es usada.
Línea en uso—Elija entre la línea 1 ó 2 para hacer llamadas, o prevenir la selección
de línea, si esta función es respaldada por su tarjeta SIM (servicio de red).
Lista filtrada—Ver “Filtrar los números” pág. 62.
Configuraciones de teléfono
Elija Menú > Configuraciones > Configuraciones de teléfono y una de las
siguientes opciones:
Idioma—Elija el idioma para los textos en la pantalla.
Configuraciones de bloqueo—Bloquea el teléfono automáticamente tras un
tiempo de demora preconfigurado. El teléfono debe estar en la modalidad
inactiva. Elija una de las opciones siguientes:
• Bloqueo automático > Activar—Cuando Fijar demora aparezca,
configure la hora. Podrá fijar la hora desde 10 segundos hasta 60 minutos.
Para desactivar el bloqueo automático, oprima Desactivar.
• Código de bloqueo—Ingrese el código de seguridad, y elija OK. Tras haber
elegido Activar, el teléfono le pedirá el código de seguridad cada vez
que oprima Desbloquear. Para desactivar la seguridad del bloqueo,
oprima Desactivar.
Selección de red—Elija Automática para que el teléfono elija automáticamente
la red celular disponible en su zona. Elija Manual para elegir la red manualmente.
La red que seleccione debe tener un acuerdo de viajero (roaming) con su red local.
76
Copyright © 2005 Nokia
Funciones del menú
Tono de inicio—Enciende o apaga el tono que suena al encender el teléfono.
Saludo inicial—Permite ingresar el mensaje que será mostrado brevemente en
la pantalla al encender el teléfono.
Confirmar acciones de servicio SIM—Permite programar el teléfono para que
se muestren u oculten los mensajes de confirmación cuando usted usa los
servicios de la tarjeta SIM. Vea “Servicios SIM” pág. 83.
Control de costo
Nota: El tiempo real facturado por su proveedor de servicio para las
llamadas y servicios podría variar según los servicios de red, redondeo
de la factura, impuestos, y así sucesivamente.
Elija Menú > Configuraciones > Configuraciones de costos y una de las
siguientes opciones:
Duración de llamadas—Activar o desactivar la duración de llamada en la
pantalla durante una llamada en curso.
Resumen de llamada—Activar o desactivar el informe acerca de la duración
aproximada de una llamada después de la llamada.
Costos de llamadas—Mostrar el costo aproximado de su última llamada o de
todas las llamadas en cuanto a términos de unidades especificados bajo la
función Mostrar costos en (servicio de red).
Marcación fija—Restringir sus llamadas salientes a números telefónicos
elegidos, si esta función es respaldada por su tarjeta SIM.
Crédito prepagado—Cuando usa una tarjeta SIM prepagada, puede hacer
llamadas sólo cuando hay suficientes unidades de crédito en la tarjeta SIM
(servicio de red).
Nota: Cuando no disponga de más unidades de cargo o de fondos, sólo
podrá hacer llamadas al número oficial de emergencia programado en
el dispositivo.
Configuración de accesorios
Puede usar su teléfono con muchos accesorios Nokia: Sin embargo, el menú
Configuración de accesorios aparece sólo si uno de los accesorios ha sido
conectado al teléfono por lo menos una vez.
Elija Menú > Configuraciones > Configuraciones de accesorios > Auricular,
Manos libres, Audífono, o TTY/TDD y una de las siguientes, dependiendo
del accesorio:
Perfil predeterminado—Elija el perfil que el teléfono usa cuando se conecte
un accesorio.
Respuesta automática—Configure el teléfono a contestar automáticamente
una llamada después de 5 segundos.
Nokia 2651 Manual del Usuario
77
Copyright © 2005 Nokia
Configuraciones de seguridad
Su teléfono usa varios tipos de códigos para prevenir su uso no autorizado:
• El código de seguridad, suministrado con el teléfono, protege su teléfono
contra el uso desautorizado. El código original es 12345.
• El código PIN, suministrado con la tarjeta SIM, protege la tarjeta contra el
uso desautorizado. El código predeterminado es 1234. Si ingresa un código
PIN incorrecto tres veces sucesivamente, la tarjeta SIM queda bloqueada.
Deberá ingresar el código PUK para desbloquear la tarjeta SIM y configurar
un código PIN nuevo.
• El código PIN2 es suministrado con ciertas tarjetas SIM para acceso a
ciertos servicios, tales como contadores de unidades de cargo. Si ingresa
el código PIN2 incorrecto tres veces sucesivamente, verá en la pantalla,
Código PIN2 bloqueado y se le pedirá el código PUK2.
• Los códigos PUK y PUK2 podrían ser suministrados con la tarjeta SIM.
Si éste no es el caso, contacte a su proveedor de servicio local.
Cuando se usan las funciones de seguridad que restringen las llamadas (tales como
restricción de llamadas, grupo de usuarios cerrado y marcación fija) aún es posible
hacer llamadas al número oficial de emergencia programado en su teléfono.
Elija Menú > Configuraciones > Configuraciones de seguridad y una de las
siguientes opciones:
Solicitud de código PIN—Programe su teléfono para que pida el código PIN de
la tarjeta SIM cuando lo encienda. Ciertas tarjetas SIM no permiten esta función.
Restricción de llamadas—Programe su teléfono para que restrinja varios tipos de
llamadas entrantes y salientes (servicio de red). Elija una opción y oprima Activar,
Cancelar o verifique si un servicio es activado (Verificar estado). Cuando se usan
las funciones de seguridad que restringen las llamadas, aún es posible hacer
llamadas al número oficial de emergencia programado en su teléfono.
Grupo de usuarios cerrado—Especifique un grupo de personas a quienes puede
llamar y lo pueden llamar (servicio de red). Elija entre: Activar, Desactivar o
Predeterminado. Si elige Activar, ingrese el número de grupo provisto por su
proveedor de servicio.
Nivel de seguridad—determina su acceso a las funciones cuando una tarjeta
SIM "no propietario" es usada. Una tarjeta SIM "no propietario" es una tarjeta
(que no es la original) que se inserta tras haber apagado el teléfono. Hay 3
niveles de seguridad:
• Desactivar—Las tarjetas de propietario y no propietario son tratadas de la
misma manera.
• Memoria—El teléfono pide el código de seguridad cuando se inserta la tarjeta
SIM, y usted desea cambiar la memoria en uso o copiar de una memoria a otra.
• Teléfono—El código de seguridad es requerido cuando se inserta una
tarjeta SIM nueva.
78
Copyright © 2005 Nokia
Funciones del menú
Cuando cambia el nivel de seguridad, todas las llamadas recientes son borradas,
incluso las llamadas perdidas, recibidas y números marcados.
Cambiar códigos de acceso—Permite cambiar el código de seguridad y los
códigos PIN y PIN2, o la contraseña de restricción. Estos códigos pueden incluir
sólo los números del 0 al 9.
No use códigos de acceso similares a los números de emergencia, como 911,
para evitar la marcación accidental de números de emergencia.
Configurar la tecla de navegación derecha
Cuando recorre hacia la derecha en la modalidad inactiva, el teléfono muestra
una lista de atajos a varias funciones. Para definir las funciones que se muestran
en la lista, elija Menú > Configuraciones > Config. tecla nav. derecha y una
de estas opciones:
Seleccionar opciones—Navegue hacia cada función que quiere como un atajo
y elija Marcar. Las funciones aparecen en la lista de atajos siguiendo el orden
en que las eligió. Cuando haya elegido todas las funciones deseadas, elija
Atrás > Sí. Para salir del menú sin guardar, oprima Atrás dos veces.
Organizar—Recorra hasta la función que quiere mover. Elija Mover y la opción
de traslado que quiera. Cuando termine organizando las funciones, elija
Atrás > Sí para guardar los cambios. Para salir del menú sin guardar, oprima
Atrás dos veces.
Restaurar configuraciones de fábrica
Puede reprogramar algunas de las configuraciones de los menús a sus
programaciones originales.
1
Elija Menú > Configuraciones > Restaurar configuraciones de fábrica.
2
Ingrese el código de seguridad, y oprima OK.
Los nombres y números telefónicos guardados en el directorio no son borrados.
• Reloj de alarma
Usted puede programar la alarma para que suene a la hora que
quiera sólo una vez, o repetidamente (por ejemplo cada día laboral).
1
Elija Menú > Despertador > Hora de alarma, ingrese la hora
de la alarma, y elija OK.
2
Elija Tono de alarma para elegir el tono de alarma.
3
Elija Repetir alarma > Alarma una vez para que la alarma suene sólo una
vez o elija Repetir alarma > Repetir alarma para elegir los días que quiere
que suene la alarma.
Cuando suene la alarma, oprima Finalizar para detenerla. Si oprime Pausa, la
alarma se detiene y suena de nuevo en 10 minutos.
Nokia 2651 Manual del Usuario
79
Copyright © 2005 Nokia
Cuando llegue la hora de la alarma y con el teléfono apagado, éste se enciende
y suena el tono. Si oprime Finalizar, el teléfono le pregunta si quiere dejarlo
encendido para las llamadas. Oprima Finalizar para apagarlo o Sí si desea hacer
y recibir llamadas. No oprima Sí cuando el uso del teléfono celular pueda causar
interferencia o peligro.
• Recordatorios
Es posible guardar notas de texto cortos sin o con una alarma.
La alarma se activa cuando llega a la fecha y hora programada.
Elija Menú > Recordatorios > Agregar nuevo, Ver todos, Calendario,
Eliminar, o Tono de alarma.
Cuando llegue la hora del recordatorio, para detener la alarma, oprima Finalizar.
Si elige Pausa, la alarma volverá a sonar en 10 minutos.
Mientras aparece un recordatorio, puede elegir Opciones > Eliminar,
Editar, o Enviar.
• Juegos
El teléfono tiene varios juegos. Cada juego es provisto con un
breve texto de ayuda.
Para jugar, elija Menú > Juegos y el juego que quiera; después
elija Instrucciones para saber cómo jugarlo y usar las otras opciones.
Para fijar las configuraciones de juegos, elija Juegos > Configuraciones >
Sonidos de juegos o Sacudidas.
Cuando Tonos de aviso está desactivado, puede no haber sonido aunque
Sonidos de juegos esté activado. Cuando Alerta vibrante está desactivada, el
teléfono no vibra aunque Sacudidas esté activada.
• Extras
Calculadora
El teléfono es provisto con una calculadora que también puede ser usada para
conversiones aproximadas de divisas.
Nota: Esta calculadora tiene precisión limitada y está diseñada para
cálculos simples.
Oprima Menú > Extras > Calculadora.
Hacer una operación
1
Ingrese el número base para la operación
Oprima la tecla numérica (1-0) para insertar un dígito. Oprima # para
insertar un decimal. Elija Borrar para eliminar el último dígito. Para cambiar
el signo, elija Opciones > Cambiar signo.
80
Copyright © 2005 Nokia
Funciones del menú
2
Oprima una vez para sumar (+), dos veces para restar (-), tres veces para
multiplicar (*) y cuatro veces para dividir (/).
3
Ingrese el segundo número de la operación, y oprima Opciones > Resultado.
4
Oprima Borrar para borrar y preparar la pantalla para la operación.
*
Convertir moneda
Para guardar la tasa de cambio, elija Menú > Extras > Calculadora > Opciones >
Tipo de cambio > Unid. extranjeras a nacionales o Unid. nacionales a
extranjeras, ingrese el valor (oprima # para ingresar un punto decimal), y elija OK.
Para hacer la conversión, ingrese la cantidad y elija Opciones > A nacional o
A extranjera.
Nota: Cuando convierta la divisa base, deberá ingresar las nuevas tasas.
Hoja de cálculo
La hoja de cálculo le permite hacer sus cálculos de gastos diariamente o
mensualmente. La hoja de cálculo diaria puede sumar los gastos de hasta un
mes, y la hoja mensual, hasta de un año.
1
Elija Menú > Extras > Hoja de cálculo > Cuenta diaria o Cuenta
mensual, y recorra para resaltar varias celdas en la hoja de cálculo.
2
Con una celda resaltada, elija Opciones y una de estas opciones:
Editar—Editar un valor de gasto, nombre de categoría de gasto o nombre de
la hoja de cálculo (dependiendo de donde esté el cursor al elegir Opciones).
Agregar fila o Eliminar fila—Agregar una categoría nueva de gasto o
eliminar una categoría existente de gasto.
Eliminar todos datos—Borrar todos los datos en la vista actual.
Fijar valor de fila—Insertar el mismo valor para cada día o mes en la
categoría elegida de gasto.
Guardar—Almacenar la hoja de cálculo. Si cambia una hoja de cálculo y
trata de salir sin guardar, el teléfono le indica que la guarde.
Ver detalles—Ver los detalles de la celda elegida. Para ver los detalles,
también podrá mantener oprimida la tecla #.
Sincronizar gastos—Sincronizar los valores de una hoja de cálculo diario
al mes correspondiente en una hoja de cálculo mensual. Esta opción sólo
está disponible bajo la Cuenta mensual.
Agenda (calendario)
Para ver un calendario del mes en curso, elija Menú > Extras > Calendario.
Navegue para ir a otra fecha.
Nokia 2651 Manual del Usuario
81
Copyright © 2005 Nokia
Temporizador
Usted puede configurar la alarma para que suene después de un intervalo
de tiempo.
1
Oprima Menú > Extras > Cuenta regr.
2
Ingrese la hora de alarma y elija OK.
3
Ingrese una nota para la alarma, si lo desea, y elija OK.
Mientras funciona el temporizador, puede elegir Menú > Extras >
Cuenta regr. > Cambiar hora o Parar cuenta regr.
Cuando el temporizador esta funcionando,
es mostrado en la modalidad
inactiva. Cuando llega la hora de alarma, se oye un tono, la pantalla destella y
aparece la nota de alarma. Oprima cualquier tecla para detener la alarma.
Cronómetro
Se puede usar el cronómetro para el cronometraje como en eventos deportivos.
1
Oprima Menú > Extras > Cronómetro.
2
Oprima Iniciar para empezar el cronometraje.
3
Para tomar el tiempo, oprima Parar.
4
Cuando termine el cronometraje, oprima Opciones > Iniciar,
Restaurar o Salir.
Si opta por Iniciar, el cronómetro continúa desde la lectura anterior.
Restaurar detiene la medición de tiempo actual y fija el tiempo a cero.
Para programar el cronometraje a continuar en segundo plano, oprima
Atrás. Mientras el tiempo corre,
destella en la modalidad inactiva.
El usar el cronómetro o el dejarlo funcionando en segundo plano cuando está
haciendo otras operaciones consume la energía de la batería y reducirá su
tiempo de funcionamiento.
Compositor
Usted puede crear sus propios tonos del timbre.
1
Oprima Menú > Extras > Compositor.
Un nombre de tono en una ubicación es un tono creado anteriormente.
(vacía) indica una ubicación vacía y disponible para un nuevo tono
del timbre.
2
Elija una ubicación (vacía).
82
Copyright © 2005 Nokia
Funciones del menú
3
Ingrese las notas de la escala musical como se ve
en la imagen. Por ejemplo, oprima 4 para la nota F.
Oprima 8 para acortar (-) y 9 para prolongar
(+) la duración de la nota o del silencio.
Oprima 0 para insertar un silencio.
Oprima para configurar una octava, y #
para sostener la nota (no disponible para las
notas E y B).
*
Recorra hacia la izquierda y derecha para mover el cursor por las notas
de su tono.
Oprima Borrar para eliminar una nota o silencio a la izquierda del cursor.
4
Cuando la nota esté completa, elija Opciones > Guardar, ingrese un
nombre para su tono, elija OK, y una ubicación para su tono del timbre.
5
Cuando las notas de su tono aparezca, podrá elegir Opciones para acceder
a Juegos, Guardar, Tempo, Enviar, Borrar pantalla, o Salir.
• Servicios SIM
Este menú aparece sólo si su tarjeta SIM provee servicios
adicionales. El nombre y contenido de este menú dependen
de los servicios disponibles.
Para disponibilidad, tarifas e información acerca del uso de los servicios SIM,
contacte con su distribuidor de tarjetas SIM o su proveedor de servicio.
• Prepago
Con el servicio prepagado, se compra por adelantado los servicios de redes
celulares. Su teléfono funcionará igual como antes, pero con unas funciones
agregadas. Podrá verificar su saldo de prepagado, agregar dinero al saldo y llamar
al centro de servicio al cliente.
Puede que su proveedor de servicio no ofrezca el servicio de prepagado. Contacte
a su proveedor de servicio para detalles.
Con el menú Prepagado, se puede activar o desactivar el servicio prepago,
agregar a su crédito de prepagado y proveer otra información solicitada por el
proveedor de servicio prepagado.
Elija Menú > Prepagado > Modo ingreso de código, Número IMEI, Número
de serie SIM, Número de teléfono, Información tiempo de uso restante,
Pantalla tiempo de uso, o Recuperar tiempo de uso.
Nokia 2651 Manual del Usuario
83
Copyright © 2005 Nokia
6
Información de referencia
• Información sobre baterías
Carga y descarga
Su dispositivo es potenciado por una batería estándar BL-4C recargable. El
rendimiento completo de una batería nueva sólo se adquiere tras dos o tres
ciclos de carga y descarga. La batería puede ser cargada y descargada centenares
de veces pero se gastará eventualmente por sí sola. Cuando el tiempo de
operación (de conversación y de reserva) es mucho más corto que el normal, ya
es el momento para adquirir una batería nueva. Use sólo baterías y cargadores
homologados por Nokia, los cuales han sido diseñados para este dispositivo.
Desconecte el cargador del enchufe y del dispositivo cuando no esté en uso. No
deje la batería conectada al cargador por demasiado tiempo. La sobrecarga
puede acortar su tiempo de vida. Cuando se deje sin usar, una batería cargada
completamente se descargará eventualmente por sí misma. Las temperaturas
extremas afectan la capacidad de carga de su batería.
Utilice la batería solamente para su finalidad destinada. Nunca utilice ninguna
batería o cargador desgastado o dañado.
No ponga la batería en cortocircuito. Un cortocircuito accidental puede ocurrir
cuando un objeto metálico (moneda, clip o bolígrafo) causa una conexión directa
entre los terminales + y - de la batería. (Estas parecen tiras metálicas en el costado
de la batería). Puede ocurrir, por ejemplo, cuando lleva una batería de repuesto en
su bolsillo o bolsa. El cortocircuito podría dañar la batería o el objeto que lo origina.
Dejar la batería en lugares calurosos o fríos, tales como dentro de un automóvil
cerrado y expuesto a la intemperie veraniega o invernal reducirá la capacidad
y vida de la batería. Intente siempre mantener la batería a una temperatura
entre los 59° F y 77° F (15° C y 25° C). Un dispositivo con batería caliente o fría
podría dejar de funcionar momentáneamente, aún cuando la batería esté
completamente cargada. El rendimiento de las baterías se ve limitado
particularmente a temperaturas bajo 32°F (0°C).
No arroje las baterías en el fuego, ya que podrían explotar. También podrían
explotar en caso de estar dañadas. Disponga de las baterías de acuerdo a las
ordenanzas locales. Por favor, recicle cuando le sea posible. No disponga de
éstas con los desperdicios domésticos.
84
Copyright © 2005 Nokia
Información de referencia
• Accesorios
Unas pocas reglas prácticas sobre los accesorios:
•
Mantenga todo tipo de accesorios fuera del
alcance de los niños.
•
Cuando desconecte el cordón eléctrico de
cualquier accesorio, sujete el enchufe,
no el cordón, y entonces desenchúfelo
•
Verifique regularmente que los accesorios instalados en un vehículo estén
montados y operando en forma adecuada.
•
Sólo personal especializado debe instalar el equipo para automóvil.
• Accesorios, baterías y cargadores
Verifique el modelo del cargador antes de usarlo con su dispositivo. Este
dispositivo ha sido diseñado para obtener carga del cargador ACP-7, u otro
cargador compatible. Vea “Accesorios Nokia compatibles” pág. 86.
Aviso: Utilice sólo baterías, cargadores y accesorios homologados por
Nokia para este modelo particular de teléfono. El uso de cualquier otro
tipo de accesorio podría anular cualquier garantía aplicable al teléfono
y podría ser peligroso.
Para disponibilidad de accesorios aprobados, consulte con su distribuidor. Cuando
desconecte el cordón eléctrico de cualquier accesorio, sujete el enchufe, no el
cordón, y entonces desenchúfelo. Ver también “Insertar la batería” pág. 57 y
“Cargar la batería” pág. 58.
Su dispositivo y accesorios pueden contener partes pequeñas. Manténgalos
fuera del alcance de los niños.
Nokia 2651 Manual del Usuario
85
Copyright © 2005 Nokia
Accesorios Nokia compatibles
Auricular de audio
• Equipo Auricular
(HDC-5, HDB-5, HDE-2)
• Equipo Auricular Doble
(HDD-1, HS-7)
• Reproductor de Música (HDR-1)
• Adaptador para Auxiliares
Auditivos (LPS-3)
Accesorios para auto
• Equipo Enchufable para Auto
(PPH-1)
• Micrófono (HFM-8)
• Equipo Auricular Manos Libres
(BHF-2)
Accesorio de Acceso
• Adaptador para Teléfono
(HDA-9)
Batería
• Batería Estándar Li-Ion 760 (BL-4C)
Cargadores
• Cargador Estándar (ACP-7)
• Cargador Rápido (ACP-8, ACP-12)
• Cargador Rápido Retráctil (AC-1)
• Cargador para Auto (LCH-12)
Otros
• Estuches
• Correas de muñeca
• Cuidado y mantenimiento
Su dispositivo es un producto de diseño y acabado superior, por lo tanto deberá
ser tratado con cuidado. Las siguientes sugerencias le ayudarán a cumplir con
cualquier obligación de garantía y disfrutar de este producto por muchos años.
• Mantenga el dispositivo seco. Las precipitaciones, la humedad y los líquidos
contienen minerales que corroen los circuitos electrónicos. Si su dispositivo
llega a mojarse, retire la batería y déjelo secar completamente antes
de reinstalarla.
• No use el dispositivo ni lo almacene en lugares polvorientos o sucios.
Ello podría dañar sus partes movibles y componentes electrónicos.
• No almacene el dispositivo en lugares calurosos. Las temperaturas altas
pueden acortar la vida de los dispositivos electrónicos, dañar la batería o
torcer o derretir ciertos plásticos.
• No almacene el dispositivo en lugares fríos. Cuando el dispositivo alcanza su
temperatura normal, se puede producir humedad internamente, lo cual
podría dañar las tarjetas de circuitos electrónicos.
• No trate de abrir el dispositivo a no ser para un procedimiento tratado en
esta guía.
• No deje caer el dispositivo, no lo sacuda, ni lo golpee. Los manejos bruscos
pueden dañar las tarjetas interiores de circuitos y mecanismos delicados.
86
Copyright © 2005 Nokia
Información de referencia
•
No use productos químicos abrasivos, solventes de limpieza, ni detergentes
para limpiarlo.
•
No pinte el dispositivo. La pintura puede bloquear las partes movibles e
impedir un funcionamiento apropiado.
•
Utilice sólo la antena suministrada o un repuesto homologado. El uso de
antenas, modificaciones o accesorios no aprobados podrían perjudicar el
dispositivo e infringir los reglamentos sobre el uso de dispositivos de radio.
•
Utilice cargadores en el interior.
Todas estas sugerencias sirven igual para su dispositivo, batería, cargador o
cualquier accesorio. Si cualquier dispositivo no funciona, llévelo a su centro
de servicio especializado más cercano.
• Información adicional de seguridad
Entorno operativo
Respete la normativa especial vigente en la zona donde se encuentra y siempre
apague su dispositivo cuando esté prohibido utilizarlo o cuando su uso pueda
causar interferencia o peligro. Use el dispositivo en su posición normal de
funcionamiento. Este dispositivo cumple con los requerimientos de exposición a
la radiofrecuencia (RF) cuando cerca de la oreja o a una distancia mínima de
5/8 de pulg (1.5 cms) del cuerpo. Al portar el dispositivo, utilice sólo estuches, clip
de cinturón o portadores que no contengan metal y que coloquen el dispositivo a
una distancia mínima de 5/8 de pulg (1.5 cms) del cuerpo.
Para poder transmitir carpetas de datos o mensajes, este dispositivo requiere una
conexión de calidad para la red. En algunos casos, la transmisión de archivos de
datos o mensajes podrían retrasarse hasta que dicha conexión esté disponible.
Asegúrese de que la información sobre las distancias sean respetadas hasta que
la transmisión haya finalizado.
Dispositivos médicos
El funcionamiento de cualquier equipo de transmisión radial, incluso teléfonos
celulares, puede interferir con el funcionamiento del equipo o de los dispositivos
médicos que están inadecuadamente protegidos. Si usted tiene alguna pregunta,
o para determinar si tales dispositivos tienen blindaje contra la energía de RF
externa, consulte a un médico o al fabricante del dispositivo médico. Apague
su teléfono en instalaciones de cuidado sanitario donde tengan avisos puestos
avisándole que lo apague. Puede que los hospitales y centros de sanidad estén
empleando equipos delicados que podrían ser afectados por la potencia de las
señales RF.
Nokia 2651 Manual del Usuario
87
Copyright © 2005 Nokia
Marcapasos
Los fabricantes de marcapasos recomiendan que se mantenga una separación
mínima de 6 pulgadas (15.3 cms) entre un teléfono celular y un marcapasos
para evitar posible interferencia con el marcapasos. Estas recomendaciones son
consistentes con la investigación independiente efectuada y recomendada por
la entidad Wireless Technology Research. Para minimizar la posibilidad de
interferencia, las personas con marcapasos deben:
• Mantener siempre una distancia de más de 6 pulgadas (15.3 cms) entre el
dispositivo y su marcapasos siempre que tengan el dispositivo encendido.
• No deben llevar el dispositivo en el bolsillo superior (chaqueta o camisa).
• Deben usar el dispositivo con la oreja contraria al marcapasos.
Apague inmediatamente su dispositivo, si tiene alguna razón para sospechar
que existan interferencias.
Aparatos Auditivos
Algunos dispositivos celulares digitales pueden interferir con ciertos aparatos
auditivos. En caso de tal interferencia, consulte con su proveedor de servicio.
Vehículos
Las señales de RF pueden afectar los sistemas electrónicos que están
incorrectamente instalados o protegidos inadecuadamente en los automóviles
(ej., sistemas electrónicos de inyección directa, sistemas electrónicos de frenos
antirresbalantes (antibloqueo), sistemas electrónicos de control de velocidad, o
sistemas de airbag). Para más información, consulte con el fabricante o al
concesionario del vehículo o de cualquier equipo que haya sido añadido en
su automóvil.
Sólo personal especializado debe reparar el dispositivo o instalarlo en un automóvil.
Una instalación o reparación defectuosa podría resultar peligrosa y podría
anular la garantía aplicable al dispositivo. Revise periódicamente que todo el
equipo del dispositivo celular en su automóvil esté montado y funcionando
adecuadamente. No almacene ni transporte líquidos inflamables, gases o
materiales explosivos en el mismo lugar que el dispositivo celular, sus piezas o
accesorios. Para los automóviles con sistemas de airbag incorporado, recuerde
que el airbag se infla con un mucha fuerza. No coloque objetos, incluso equipos
instalados o celulares en el área encima del airbag o en la zona donde éste
pueda desplegarse. Si un equipo celular de instalación para automóvil está
incorrectamente instalado y el airbag se infla, podría resultar en heridas graves.
Aeronaves
Las regulaciones de la FCC prohíben el uso de su dispositivo celular a bordo de
una aeronave. El uso de teléfonos celulares en una nave aérea puede poner en
peligro el funcionamiento de la nave y alterar la red de servicio celular, y podría
ser ilegal.
88
Copyright © 2005 Nokia
Información de referencia
El incumplimiento de estas instrucciones puede resultar en la suspensión o
denegación de los servicios de teléfonos celulares al infractor, y/o iniciar acción
legal en su contra o ambas medidas.
Entornos potencialmente explosivos
Apague su dispositivo cuando se encuentre en cualquier zona con un ambiente
potencialmente explosivo y cumpla con todas las señales e instrucciones. Los
entornos potencialmente explosivos incluyen las zonas donde existan avisos
reglamentarios requiriéndole que apague el motor de su vehículo. Las chispas
en tales zonas podrían producir explosiones o incendios que podrían resultar en
daño corporal o incluso la muerte. Apague el dispositivo cuando se encuentre
en lugares de abastecimiento de combustible tales como estaciones de servicio
o gasolineras. Respete las restricciones en el uso de equipo de radio en depósitos
de combustible (áreas de almacenamiento y distribución de combustible), plantas
químicas o lugares donde se llevan a cabo operaciones de explosiones. Las zonas
en entornos de potencia explosiva suelen estar marcadas, pero no siempre con
claridad. Entre ellas se incluyen las cubiertas de buques, o instalaciones de
almacenamiento y transporte de productos químicos, automóviles que utilizan
gas de petróleo licuado (como propano o butano), o zonas donde el aire contiene
partículas o elementos químicos, tales como grano, polvo o partículas metálicas.
LLAMADAS DE EMERGENCIA
Importante: Este teléfono, como cualquier otro teléfono celular, funciona
utilizando radioseñales, redes de servicios celulares y terrestres, así como
funciones programadas por el usuario. Por lo tanto, no se puede garantizar
una conexión bajo todas las condiciones. Nunca dependa solamente de
cualquier teléfono celular para comunicaciones esenciales, por ejemplo,
emergencias médicas.
Hacer una llamada de emergencia:
1 Si el teléfono está apagado, enciéndalo. Compruebe la fuerza de la señal.
Ciertas redes podrían requerir que inserte una Tarjeta SIM válida en
su teléfono.
2 Oprima la tecla Finalizar las veces necesarias para borrar la pantalla y
preparar el teléfono para las llamadas. Es posible que tenga que inhabilitar
opciones activadas en el teléfono.
3 Ingrese el número de emergencia oficial para el área donde se encuentra. Los
números de emergencia varían por zonas.
4 Oprima la tecla Llamar.
Si se están usando ciertas opciones, puede ser necesario desactivarlas primero
antes de que usted pueda hacer la llamada de emergencia. Consulte esta guía
o a su proveedor de servicio. Cuando haga una llamada de emergencia, recuerde
dar toda la información necesaria de la forma más exacta posible. Recuerde que
su teléfono celular puede ser el único medio de comunicación en el lugar del
accidente. No corte la llamada hasta que reciba instrucción de hacerlo.
Nokia 2651 Manual del Usuario
89
Copyright © 2005 Nokia
INFORMACIÓN DE CERTIFICADO (SAR-TAE)
ESTE MODELO DE TELÉFONO CELULAR CUMPLE CON TODOS LOS REQUERIMIENTOS
GUBERNAMENTALES SOBRE EXPOSICIÓN A LA RADIOFRECUENCIA.
Su dispositivo móvil es radiotransmisor y receptor. Esta diseñado y fabricado de
modo que no exceda los límites de exposición a radiofrecuencias (RF) adoptados
por la Comisión Federal de Comunicaciones (FCC) del gobierno de los Estados
Unidos y Canadá a través de la Industria de Canadá (IC). Estos límites permiten
establecer los niveles de energía RF para el público en general. Las referidas normas
están basadas en los estándares que fueron desarrollados por organizaciones
científicas autónomas por medio de evaluaciones completas y periódicas de
estudios científicos. Las normas contemplan un considerable margen de seguridad,
ofreciendo protección al público, independientemente de la edad y salud.
La norma de exposición para dispositivos móviles emplea una unidad de medida
denominada SAR - Specific Absorption Rate (Tasa de Absorbencia Específica - TAE).
En los Estados Unidos de América y Canadá, el límite SAR establecido es de 1.6
Vatios/kilogramo (W/kg) con un promedio de un gramo por tejido. La norma
incorpora un margen de seguridad considerable para proveer más protección al
público y para considerar cualquier variación en las medidas. Las pruebas SAR
son efectuadas mediante el uso en posiciones estándares, con el dispositivo
transmitiendo al nivel más alto de potencia certificado, en todas las bandas de
frecuencia comprobadas. El nivel SAR actual de un dispositivo en funcionamiento
puede estar muy por debajo del valor máximo debido a que el dispositivo ha
sido diseñado para sólo usar la potencia requerida para acceder a la red. Este
nivel cambia según varios factores, por ejemplo, cuan cerca esté a una estación
de red.
Según la información suministrada a la FCC, el valor SAR (TAE) máximo para este
tipo de dispositivo cuando fue probado para uso junto a la oreja, es de 0.87 W/kg,
y cuando está contacto con el cuerpo, es de 0.87 W/kg. La información SAR de este
modelo de teléfono está en el archivo de la FCC y se puede encontrar bajo la
sección Display Grant en http://www.fcc.gov/oet/fccid tras buscar en FCC ID
QTKRH-54. Los valores SAR podrían variar dependiendo de las diferencias en los
requerimientos de informe y pruebas y la banda de la red. Información adicional
sobre SAR podría ser provista en la sección de información de productos en
www.nokia.com.
90
Copyright © 2005 Nokia
Información de referencia
• Información técnica
Peso
3.41 oz (97 g.) con Batería de Li-Ion 760 mAh
Tamaño
Volumen: 4.7 pulg3 (77 cc)
Longitud 3.39 pulg (86 mm)
Ancho: 1.81 pulg (46 mm)
Espesor: 0.90 pulg (22.9 mm)
Banda de
frecuencia
GSM850
824-849 MHz (TX)
869-894 MHz (RX)
GSM1900
1850-1910 MHz (TX)
1930-1990 MHz (RX)
Potencia de
salida del
transmisor
Hasta 2 W
Voltaje de la
batería
3.7 V
Temperatura de
funcionamiento
14°F hasta + 131°F
a
Tiempo de conversación: hasta 3 horas
Tiempo de reserva: hasta 300 horas
Tiempo de
conversación,
tiempo de
reserva
(-10°C hasta + 55°C)
a. Los tiempos de conversación y de reserva son sólo estimaciones y dependen
de varias condiciones, tales como: nivel de potencia de transmisión, condiciones
de la red, funciones usadas, la condición y vida de la batería (incluso
procedimiento de carga), temperaturas a las cuales se expone la batería, uso
en modo digital y muchos otros factores. Observe que la cantidad de tiempo
que el teléfono es usado para llamadas afectará el tiempo de reserva.
También, la cantidad de tiempo durante la cual se deja el teléfono encendido
en la modalidad inactiva influye en el tiempo de conversación.
Nokia 2651 Manual del Usuario
91
Copyright © 2005 Nokia
NOTAS
92
Copyright © 2005 Nokia
Índice
A
conversión de moneda 81
correo de voz 71
cronómetro 82
accesibilidad
página Web 55
accessorios 54
actualización automática de hora 75
agenda 81
archivo de firma 69
D
duración, llamadas 72
E
B
eliminar
listas de llamadas 72
mensajes 68
estado de la memoria 71
etiqueta 56
etiqueta del teléfono 56
bloquear el teclado 63
borrar listas de llamadas 72
borrar, ver eliminar
buscar un contacto 70
C
H
calculadora 80
cargar la batería 58
códigos de acceso 78
códigos PIN y PIN2 78
códigos PUK y PUK2 78
comandos de servicio 70
compositor 82
compositor de tono de timbrado 82
configuración de accesorios 77
configuración de fecha 75
configuración de tonos 73
configuraciones
llamadas 75
mensaje 69
menú 73–79
configuraciones de costos 77
configuraciones de hora 75
configuraciones de pantalla 74
configuraciones de seguridad 78
configurar reloj de alarma 79
contactos 70–71
contestar llamadas 62
Nokia 2651 Manual del Usuario
hoja de cálculo 81
I
IMEI 56
ingreso de texto tradicional 65
insertar una tarjeta SIM 57
instrucciones de seguridad 53
J
juegos 80
L
leer un mensaje de texto 67
lista de distribución 68
llamada
conferencia 62
desviar 76
duración 72
en espera 76
llamada en espera 62
llamadas marcadas 72
registro 71–73
93
Copyright © 2005 Nokia
llamadas perdidas 72
llamadas recibidas 72
llamar
hacer llamadas 61
remarcado automático 61
usar la lista de contactos 61
reloj de alarma 79
restaurar configuraciones
de fábrica 79
S
seguridad
código 78
Servicio al Cliente Nokia 56
servicio prepagado 83
servicios de red 54
servicios SIM 83
M
marcación de 1 toque 61
mensajes 66–70
mensajes con imágenes 67
mensajes filtrados 68
métodos de ingreso 64
T
operaciones de llamadas en línea 62
tecla de navegación derecha 79
teléfono
configuraciones 76
seguridad 78
temporizador 82
tiempo conversación 91
tiempo de reserva 91
P
V
perfiles 74
ver
N
número de modelo 56
números filtrados 68
O
llamadas marcadas 72
llamadas perdidas 72
llamadas recibidas 72
mensajes 67
R
recordatorios 80
reloj
alarma 79
configurar 75
94
Copyright © 2005 Nokia
NOTAS
Nokia 2651 Manual del Usuario
95
Copyright © 2005 Nokia
Nokia 2651 User Guide
Nokia 2651 Manual del Usuario
9241442
96
Copyright © 2005 Nokia