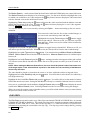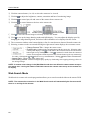
1
Digital Video Recorder WARNING RISK OF ELECTRIC SHOCK DO NOT OPEN WARNING: TO REDUCE THE RISK OF ELECTRIC SHOCK, DO NOT REMOVE COVER (OR BACK). NO USER-SERVICEABLE PARTS INSIDE. REFER SERVICING TO QUALIFIED SERVICE PERSONNEL. The lightning flash with arrowhead symbol, within an equilateral triangle, is intended to alert the user to the presence of uninsulated "dangerous voltage" within the product's enclosure that may be of sufficient magnitude to constitute a risk of electric shock. The exclamation point within an equilateral triangle is intended to alert the user to the presence of important operating and maintenance (servicing) instructions in the literature accompanying the appliance. WARNING: TO PREVENT FIRE OR SHOCK HAZARD, DO NOT EXPOSE THIS APPLIANCE TO RAIN OR MOISTURE. CAUTION: TO PREVENT ELECTRIC SHOCK DO NOT USE THIS (POLARIZED) PLUG WITH AN EXTENSION CORD, RECEPTACLE OR OTHER OUTLET UNLESS THE BLADES CAN BE FULLY INSERTED TO PREVENT BLADE EXPOSURE. i User’s Manual AVERTISSEMENT DANGER D’ÉLECTROCUTION NE PAS OUVRIR AVERTISSEMENT: POUR ÉLIMINER TOUT RISQUE D’ÉLECTROCUTION, NE PAS OUVRIR LE COUVERCLE (OU LA PARTIE ARRIÈRE). AUCUNE PIECE RÉPARABLE PAR L’UTILISATEUR NE SE TROUVE À L’INTÉRIEUR. POUR TOUTE INTERVENTION D’ENTRETIEN OU DE RÉPARATION SE CONFIER AUX TECHNICIENS QUALIFIÉS. La fl èche symbolisant l’éclair dans un triangle équilateral a pour objet de tirer l’attention de l’utilisateur sur le fait, qu’ il y a des “tensions dangereuses” non-isolées à l’intérieur de l’enceinte du produit qui peuvent être suf fi samment importantes pour conduire au risque d’électrocution. Le point d’exclamation au sein d’un triangle équilateral a pour objet de tirer l’attention de l’utilisateur sur le fait qu’ il y a des instructions de mise en service et d’entretien (de réparation) dans les fi ches descriptives de l’appareil qui doivent obligatoirement être respectées. AVERTISSEMENT: AFIN D’ÉVITER TOUT RISQUE D’INCENDIE OU D’ÉLECTROCUTION, NE PAS EXPOSER CET APPAREIL À LA PLUIE NI À L’HUMIDITÉ. ATTENTION: POUR PRÉVENIR LES CHOCS ÉLECTRIQUES NE PAS UTILISER CETTE FICHE POLARISÉE AVEC UN PROLONGATEUR, UNE PRISE DE COURANT OU UNE AUTRE SORTIE DE COURANT, SAUF SI LES LAMES PEUVENT ÊTRE INSÉRÉES À FOND SANS EN LAISSER AUCUNE PARTIE À DÉCOUVERT. ii Digital Video Recorder Important safeguards PLEASE READ ALL THESE INSTRUCTIONS REGARDING YOUR RECORDER AND RETAIN FOR FUTURE REFERENCE. FOLLOW ALL WARNINGS AND INSTRUCTIONS MARKED ON THE RECORDER. 1. Read Instructions All the safety and operating instructions should be read before the appliance is operated. 2. Retain Instructions The safety and operating instructions should be retained for future reference. 3. Heed Warnings All warnings on the appliance and in the operating instructions should be adhered to. 4. Follow Instructions All operating and use instructions should be followed. 5. Cleaning Unplug this product from the wall outlet before cleaning. Do not use liquid or aerosol cleaners. Use a damp cloth for cleaning. 6. Attachments Do not use attachments not recommended by the product manufacturer as they may cause hazards. 7. Water and Moisture Do not use this product near water – for example, near a bath tub, wash bowl, kitchen sink, or laundry tub, in a wet basement, or near a swimming pool, and the like. 8. Accessories Do not place the product on an unstable cart, stand, tripod, bracket, or table. The product may fall, causing serious injury. Any mounting of the appliance should follow the manufacturer’s instructions, and should use a mounting accessory instructions, and should use a mounting accessory. An appliance and cart combination should be moved with care. Quick stops, excessive force, and uneven surfaces may cause the appliance and cart combination to overturn. 12. Power-Cord Protection Power-supply cords should be routed so that they are not likely to be walked on or pinched by items placed upon or against them, paying particular attention to cord at plugs, convenience receptacles, and the point where they exit from the appliance. 13. Lightning For added protection for this product receiver during a lightning storm, or when it is left unattended and unused for long periods of time, unplug it from the wall outlet. This will prevent damage to the product due to lightning and power-line surges. 14. Overloading Do not overload wall outlets and extension cords as this can result in a risk of fire or electric shock. 15. Object and Liquid Entry Never spill liquid of any kind on the product. 16. Servicing Do not attempt to service this product yourself as opening or removing covers may expose you to dangerous voltage or other hazards. Refer all servicing to qualified service personnel. 17. Damage requiring Service Unplug this product from the wall outlet and refer servicing to qualified service personnel under the following conditions: A. When the power-supply cord or plug is damaged. B. If liquid has been spilled, or objects have fallen into the product. C. If the product has been exposed to rain or water. D. If the product does not operate normally by following the operating instructions. Adjust only those controls that are covered by the operating instructions as an improper adjustment of other controls may result in damage and will often require extensive work by a qualified technician to restore the product to its normal operation. E. If the product has been dropped or the cabinet has been damaged. F. When the product exhibits a distinct change in performance, this indicates a need for service. 18. Replacement Parts When replacement parts are required, be sure the service technician has used replacement parts specified by the manufacturer or have the same characteristics as the original part. Unauthorized substitutions may result in fire, electric shock or other hazards. 9. Ventilation Slots and openings in the cabinet are provided for ventilation and to ensure reliable operation of the product and to protect it from overheating, and these openings must not be blocked or covered. This product should never be placed near or over a radiator or heat register. This product should not be placed in a built-in installation such as a bookcase or rack unless proper ventilation is provided or the manufacturer’s instructions have been adhered to. 10. Power Sources This product should be operated only from the type of power source indicated on the marking label. For products intended to operate from battery power, other sources, refer to the operating instructions. 11. Grounding or Polarization This product is equipped with a 3-wire grounding-type plug, a plug having a third (grounding) pin. This plug will only fit into a groundingtype power outlet. This is a safety feature. If you are unable to insert the plug into the outlet, contact your electrician to replace your obsolete outlet. Do not defeat the safety purpose of the grounding-type plug. 19. Safety Check Upon completion of any service or repairs to this product, ask the service technician to perform safety checks to determine that the product is in safe operating conditions. 20. Heat The product should be situated away from heat sources such as radiators, heat registers, stoves, or other products (including amplifiers) that product heat. 21. Correct Batteries Warning: Risk of explosion if battery is replaced by an incorrect type. Dispose of used batteries according to the instructions. 22. This equipment does not provide connection for used with outdoor or cable distribution systems. iii User’s Manual NOTE This equipment has been tested and found to comply with the limits for a Class A digital device, pursuant to Part 15 of the FCC Rules. These limits are designed to provide reasonable protection against harmful interference when the equipment is operated in a commercial environment. This equipment generates, uses, and can radiate radio frequency energy and, if not installed and used in accordance with the instruction manual, may cause harmful interference to radio communications. Operation of this equipment in a residential area is likely to cause harmful interference in which case the user will be required to correct the interference at his own expense. Changes or modifications not expressly approved by the party responsible for compliance could void the user's authority to operate the equipment. NOTE THIS CLASS A DIGITAL APPARATUS COMPLIES WITH CANADIAN ICES-003. CET APPAREIL NUMÉRIQUE DE LA CLASSE A EST CONFORME À LA NORME NMB-003 DU CANADA. Microsoft, Windows and Windows Vista are either registered trademarks or trademarks of Microsoft Corporation in the United States and/or other countries. All other company and product names appearing herein are the property of their respective owners. iv Digital Video Recorder Caution and care HEAVY OBJECTS SHOULD NEVER BE PLACED ON THE UNIT (E.G., MONITOR) NEVER REMOVE THE TOP COVER AND TOUCH OR INSERT ANY OBJECT INSIDE THE UNIT Touching the inside of the cabinet or inserting foreign objects of any kind through the disc loading slot or ventilation holes not only creates a safety hazard but can also cause extensive damage. PROTECT THE POWER CORD Damage to the power cord may cause fire or electrical shock. If the power cord is damaged, turn OFF the MAIN switch and carefully replace it with a new power cord. Do not move this product with the power-on as the built-in HDD may be damaged. If you need to move the product, turn the unit OFF and disconnect power from the unit. Confirm that more than one minute has passed since the power cord and the connecting cords were disconnected, then move this unit. Make sure to take the disc out and close the disc loading slot. UNPLUG THE POWER CORD DURING A LONG ABSENCE Turn off the power and unplug the power cord during a long absence. MAINTAIN GOOD VENTILATION Do not obstruct the many ventilation holes on the unit. For maximum ventilation, leave some space around the unit and place the unit on a hard level surface only, and ensure it is not covered during use. Heavy objects should never be placed on the unit. WHEN NOT IN USE When not in use, always eject the disc and turn OFF the MAIN switch. CABINET CARE Never use petroleum-based cleaners. Clean with a soft cloth moistened with soap and water and wipe dry. PVC cables or leads should not be left in contact with the cabinet surface for long periods. INSTALLATION LOCATION For excellent performance and lasting reliability install in a location that is:1. Well ventilated, out of direct sunlight and away from direct heat. 2. A solid vibration-free surface. 3. Free from high humidity, excessive dust and away from magnetic fields. 4. Please ensure that the ventilation fan located on the unit’s back panel is not blocked. UNSUITABLE LOCATIONS Placing the unit in the following places might shorten the product life: Extremely cold places, such as refrigerated warehouses and ice houses Places where excessive hydrogen sulfide is likely to be generated, such as hot-springs areas Places or locations with salt air environment. NO OBJECTS FILLED WITH LIQUIDS, SUCH AS VASES, SHALL BE PLACED ON THE APPARATUS. DO NOT PLACE HEAVY OBJECT ON THIS UNIT. DO NOT STEP ONTO THIS UNIT. DO NOT PLACE ANY OBJECTS IN FRONT OF THE DISC LOADING SLOT. The unit may drop or fall by losing its balance. It may cause injury or failure of the unit. WARNING: TO PREVENT FIRE OR SHOCK HAZARD, DO NOT EXPOSE THIS APPARATUS TO RAIN OR MOISTURE. THIS APPARATUS MUST BE GROUNDED. WARNING: The supplied power cord is used for 120 V only. Never connect to any outlet or power supply having a different voltage or frequency. Notice about construction of the surveillance system using this unit This unit can be controlled by the external devices via RS-232C terminal or NETWORK terminal. This unit can also be used to control external devices via external terminal, or RS-232C terminal. Owning to these functions, this unit flexibly applies to the high grade security system, but the whole surveillance system may be affected by the malfunction of this unit or the external devices depending on the setting contents of this unit, the connection with the external devices,, or combination between this unit and the external devices. When configuring a surveillance system using this unit, it is recommended to confirm first that this unit operates normally with the other devices connected. It is recommended to copy or back up the important recorded contents. Damages rising out of any operational error of the surveillance system or loss of the recorded data or any other damages because of any user malfunction of this unit are not covered. Do not use the notification function of this unit for making critical judgment nor nay purpose related to human lives. When this unit cannot recognize the external device which is being used for recording due to the power failure, decreased voltage, or other failures, the recording point may be moved to the internal HDD of this unit or the other external HDD. To prevent occurrence of such problem, it is recommended to use uninterruptible power supply. If the power plug is disconnected or the breaker switch is turned off during recording, HDD may be damaged or playback of recorded data may become impossible. If the breaker switch is turned on and off everyday, set the timer recording to be performed only for the period that the breaker is on and do not turn off the breaker during recording. v User’s Manual CLASS 1 LASER PRODUCT There may be cases when the unit’s built-in motion detection function does not operate properly due to external condition, video input signal, or other factors. The user will not be indemnified for problems (e.g., recording failure or playback failure) that occur with either the unit or a connected device during operation. It is recommended to back up the important recordings regularly as a precaution against possible breakdowns and accidents. This unit uses a built-in HDD, which is a precision device. Handle this unit with sufficient care Do not subject this unit to vibrations or shocks. This may cause trouble specially when the power of the unit is turned on or when the HDD is being accessed, and sufficient care is required. Do not disconnect the power plug while the power of the unit is turned on or while recording or playing. For early detection of faults, we recommend that you request inspection once a year. The HDD and cooling fan of this unit are driving parts. For stable recording, it is recommended that both of these parts are replaced every 30,000 hours. (This interval is for reference purpose only and does not indicate the warranty period of the parts.) DISCLAIMER In any event, Mitsubishi assumes no responsibility or reliability for the following: 1. Disassembly, repair, or alteration of this unit by user or installer. 2. Failure or breakdown in or damage to this unit resulting from misuse or careless handling by user or installer. 3. Inconvenience or damages arising out of inability to display of record pictures due to any reason or cause other than breakdown or failure in this unit. 4. Failure in this unit due to combination with other equipment manufactured by a third party or inconvenience or damages resulting from such failure. 5. Inconvenience, damages, or claims arising out of breakdown in this unit or loss of recorded video data due to replacement of the built-in HDD by user or installer. 6. Inconvenience or damages arising out of breakdown in this unit or inability to display or record pictures due to natural disaster including earthquake and storm. 7. Inconvenience, damages, or claims arising out of breakdown in this unit or loss of recorded video data due to impact or vibration to the built-in HDD or an environmental factor such as temperature at the installation site. 8. Demand for damages or other claim of infringement of privacy if the pictures monitored or recorded by user become public or are used for any purpose other than surveillance for whatever reason. INSTALLATION LOCATION AND HANDLING Place this unit horizontally an in a stable place. If this unit is not placed correctly and used in an unstable place, the unit may be damaged. Do not place this unit close to other electronic or magnetic equipment. This will avoid video and audio distortion. When a monitor and this unit are placed vertically, the pictures may be distorted. PRECAUTION CONCERNING EXTERNAL DEVICE The various external HDDs can be connected to this unit in order to expand the memory or to use as the copy device However, during recording or playing back a picture at high rate, some pictures may be missed due to the slow rate of data transfer or the slow speed of response from the external device connected. Be sure to check the operation sufficiently in advance. Do not use the power control function of the external device which uses bus power of this unit. The external device to be used may be unsuitable for the operation you want to set. It is recommended to consult your dealer when using the external device. ATTACHED POWER CORD The attached power cord is to be used exclusively for this DVR. Never use them for other products. The attached power cord is rated at 120 V AC. Never connect this cord to any outlet or power supply using other voltages or frequencies than rated. GENERAL INFORMATION ABOUT SOFTWARE APPLIED BY GNU GPL This Digital Video Recorder equips software “BusyBox”, “Das U-boot”, “dvd+rw tools”, “MontaVista Linux Kernel”, “cdrtools”, “YAFFS”, “pppoe” and “IJG JPEG” those are applied by GNU General Public License (GNU GPL). The users shall have the right to obtain, modify and redistribute the source code of the software. For details, refer to the text file “gpl.txt” in the included Accessory CD. vi Digital Video Recorder Table of Contents Chapter 1 ─ Introduction .............................................................................................. 1 Features ................................................................................................................... 1 Technical Overview .................................................................................................. 1 Chapter 2 ─ Installation ................................................................................................ 3 Package Contents .................................................................................................... 3 Required Installation Tools ....................................................................................... 3 Video Input ........................................................................................................... 3 Video Loop Through ............................................................................................. 4 RS232C Port ........................................................................................................ 4 Factory Reset Switch ........................................................................................... 4 Alarm Input/Output ............................................................................................... 4 RS485 Port ........................................................................................................... 5 Network Port ......................................................................................................... 5 Video Out ............................................................................................................. 5 Audio In/Out ......................................................................................................... 5 Power Cord Connector ......................................................................................... 6 Chapter 3 ─ Configuration............................................................................................ 7 Front Panel Controls ................................................................................................ 7 POWER LED ........................................................................................................ 7 HDD LED .............................................................................................................. 7 ALARM LED ......................................................................................................... 7 NETWORK LED ................................................................................................... 8 COPY LED ........................................................................................................... 8 Camera Buttons (1 to 16) ..................................................................................... 8 Display/Spot Button .............................................................................................. 8 Group/Sequence Button ....................................................................................... 8 PTZ/Zoom Button ................................................................................................. 8 Playback Button ................................................................................................... 8 Clip Copy Button .................................................................................................. 9 Alarm Button ......................................................................................................... 9 Play/Pause Button ................................................................................................ 9 Arrow Buttons ....................................................................................................... 9 Menu/Cameo Button ............................................................................................ 9 Panic Button ......................................................................................................... 9 USB Ports ........................................................................................................... 10 Turning on the Power ............................................................................................. 10 Initial Unit Setup ..................................................................................................... 10 Setup Screen.......................................................................................................... 11 System Setup ..................................................................................................... 11 Record Setup ..................................................................................................... 19 Event Setup ........................................................................................................ 23 vii User’s Manual Network Setup .................................................................................................... 30 Camera Setup .................................................................................................... 35 Device Setup ...................................................................................................... 37 Display Setup ..................................................................................................... 40 Status Screen ..................................................................................................... 43 Chapter 4 ─ Operation ............................................................................................... 45 Turning on the Power ............................................................................................. 45 Live Monitoring ....................................................................................................... 45 Live Monitoring Menu ......................................................................................... 46 PTZ Mode ........................................................................................................... 48 Zoom Mode ........................................................................................................ 49 Spot Monitoring .................................................................................................. 49 Active Cameo Mode ........................................................................................... 49 Event Monitoring ................................................................................................ 50 Covert Camera ................................................................................................... 50 Using a Mouse ....................................................................................................... 50 Recording Video ..................................................................................................... 51 Panic Recording ................................................................................................. 52 Recording Audio ..................................................................................................... 52 Playing Recorded Video ......................................................................................... 52 Searching Video ..................................................................................................... 53 Search Menu ...................................................................................................... 54 Record Table Search ......................................................................................... 55 Event Log Search ............................................................................................... 57 Text-In Search .................................................................................................... 58 Motion Search .................................................................................................... 59 Clip Copy ............................................................................................................ 60 Appendix A ─ USB Hard Disk Drive Preparation ....................................................... 63 Preparing the USB hard disk drive in Windows 2000 ............................................. 63 Preparing the USB hard disk drive in Windows 98 ................................................. 63 Appendix B ─ Text-In Search Examples .................................................................... 64 Search Example I ................................................................................................... 64 Search Example II .................................................................................................. 64 Appendix C ─ WebGuard ........................................................................................... 66 Web Monitoring Mode ............................................................................................ 67 Web Search Mode.................................................................................................. 68 Appendix D ─ Troubleshooting .................................................................................. 71 Appendix E ─ Connector Pin Outs ............................................................................. 72 I/O Connector Pin Outs .......................................................................................... 72 RS485 Connector Pin Outs .................................................................................... 72 viii Digital Video Recorder Appendix F ─ Map of Screens ................................................................................... 73 Appendix G ─ System Log Notices ............................................................................ 74 Appendix H ─ Error Code Notices .............................................................................. 75 Appendix I ─ Specifications........................................................................................ 76 ix User’s Manual List of Illustrations Figure 1 ─ Typical DVR installation. .......................................................................................... 2 Figure 2 ─ 16-Channel DVR rear panel. .................................................................................... 3 Figure 3 ─ 16-Channel DVR front panel. ................................................................................... 7 Figure 4 ─ Setup screen. ......................................................................................................... 11 Figure 5 ─ System General setup screen. ............................................................................... 11 Figure 6 ─ Date/Time setup screen. ........................................................................................ 13 Figure 7 ─ Account setup screen. ............................................................................................ 15 Figure 8 ─ Storage setup screen. ............................................................................................ 17 Figure 9 ─ Monitoring setup screen. ........................................................................................ 18 Figure 10 ─ Record menu. ....................................................................................................... 19 Figure 11 ─ Record General setup screen. ............................................................................. 20 Figure 12 ─ Schedule (Basic) setup screen............................................................................. 21 Figure 13 ─ Schedule (Advanced) setup screen. .................................................................... 22 Figure 14 ─ Event menu. ......................................................................................................... 23 Figure 15 ─ Motion setup screen. ............................................................................................ 24 Figure 16 ─ Alarm-In setup screen. ......................................................................................... 26 Figure 17 ─ Video Loss setup screen. ..................................................................................... 27 Figure 18 ─ Text-In setup screen............................................................................................. 28 Figure 19 ─ Network Menu. ..................................................................................................... 30 Figure 20 ─ Network General setup screen. ............................................................................ 30 Figure 21 ─ IP Address setup screen. ..................................................................................... 31 Figure 22 ─ DVRNS setup screen. .......................................................................................... 33 Figure 23 ─ Mail setup screen. ................................................................................................ 34 Figure 24 ─ Callback setup screen. ......................................................................................... 35 Figure 25 ─ Camera Menu. ...................................................................................................... 35 Figure 26 ─ Camera General setup screen. ............................................................................ 36 Figure 27 ─ PTZ setup screen. ................................................................................................ 36 Figure 28 ─ Device Menu. ....................................................................................................... 37 Figure 29 ─ Audio setup screen............................................................................................... 38 Figure 30 ─ Alarm-Out setup screen. ...................................................................................... 38 Figure 31 ─ Remote Control setup screen............................................................................... 39 Figure 32 ─ Display Menu. ....................................................................................................... 40 Figure 33 ─ OSD setup screen. ............................................................................................... 40 Figure 34 ─ Main Monitor setup screen. .................................................................................. 41 Figure 35 ─ Spot Monitor setup screen. .................................................................................. 42 Figure 36 ─ Status menu. ........................................................................................................ 43 Figure 37 ─ Event screen. ....................................................................................................... 43 Figure 38 ─ Storage screen. .................................................................................................... 44 Figure 39 ─ Live Monitoring menu. .......................................................................................... 46 Figure 40 ─ Mouse Display menu. ........................................................................................... 50 Figure 41 ─ Search menu. ....................................................................................................... 53 Figure 42 ─ Record Table Search screen................................................................................ 55 Figure 43 ─ Event Log Search screen. .................................................................................... 57 Figure 44 ─ Text-In Search screen. ......................................................................................... 58 Figure 45 ─ Motion Search screen. ......................................................................................... 59 Figure 46 ─ Clip-Copy screen. ................................................................................................. 61 Figure 47 ─ WebWatch screen. ............................................................................................... 67 Figure 48 ─ WebSearch screen. .............................................................................................. 69 x Digital Video Recorder Chapter 1 ─ Introduction FEATURES Your color digital video recorder (DVR) provides recording capabilities for eight or 16 camera inputs. It provides exceptional picture quality in both live and playback modes, and offers the following features: 8 or 16 Composite Video Input Connectors Compatible with Color (NTSC or PAL) and B&W (CCIR and EIA-170) Video Sources Auto Detection for NTSC and PAL Multiple Monitor Connectors: 1 BNC Video Out, 1 Spot, 1 VGA Dual Codec (MPEG-4 and H.264) Multiple Search Engines (Date/Time, Calendar, Event) Records up to 120/100 Images per Second (NTSC/PAL) “Loop-Through” Video Connectors Continuous Recording in Disk Overwrite Mode 2 USB 2.0 Ports Continues Recording while Transmitting to Remote Site and during Playback User-friendly Graphical User Interface (GUI) Menu System Multiple Recording Modes (Time-lapse, Pre-event, Event and Panic) 4-Channel Audio Recording and 1-Channel Audio Playback Two-way Audio Communication Text Input for ATM and POS Alarm Connections Include: Input, Output and Reset Input Built-in Alarm Buzzer Live or Recorded Video Access via Ethernet Time Synchronization using industry standard protocol Built-in DVD RW Drive Self-diagnostics with automatic notification including hard disk drive S.M.A.R.T. protocol TECHNICAL OVERVIEW In addition to replacing both a time-lapse VCR and a multiplexer in a security installation, your DVR has many features that make it much more powerful and easier to use than even the most advanced VCR. The DVR converts analog NTSC or PAL video to digital images and records them on a hard disk drive. Using a hard disk drive allows you to access recorded video almost instantaneously; there is no need to rewind tape. The technology also allows you to view recorded video while the DVR continues recording video. Digitally recorded video has several advantages over analog video recorded on tape. There is no need to adjust tracking. You can freeze frames, fast forward, fast reverse, slow forward and slow reverse without image streaking or tearing. Digital video can be indexed by time or events, and you can instantly view video after selecting the time or event. Your DVR can be set up for event or time-lapse recording. You can define times to record, and the schedule can change for different days of the week and user defined holidays. 1 User’s Manual The DVR can be set up to alert you when the hard disk drive is full, or it can be set to record over the oldest video once the disk is full. Your DVR uses a proprietary encryption scheme making it nearly impossible to alter video. You can view video and control your DVR remotely by connecting via Ethernet. There are two USB ports that can be used to upgrade the system or copy video clips to external hard disk, CD-RW and flash drives. NOTE: This manual covers the 8- and 16-channel digital video recorders. The DVRs are identical except for the number of cameras and alarms that can be connected and the number of cameras that can be displayed. For simplicity, the illustrations and descriptions in this manual refer to the 16-camera model. Figure 1 ─ Typical DVR installation. 2 Digital Video Recorder Chapter 2 ─ Installation PACKAGE CONTENTS The package contains the following: Digital Video Recorder Power Cord User’s Manual (This Document) DX-PC For View Software CD and User’s Manual REQUIRED INSTALLATION TOOLS No special tools are required to install the DVR. Refer to the installation manuals for the other items that make up part of your system. Figure 2 ─ 16-Channel DVR rear panel. Video Input Video Loop Through RS232C Port Factory Reset Switch Alarm Input/Output RS485 Port Network Port Video Out Audio In/Out Power Cord Connector Your DVR can be used with either NTSC or PAL equipment. NOTE: You cannot mix NTSC and PAL equipment. For example you cannot use a PAL camera and an NTSC monitor. Video Input Connect the coaxial cables from the video sources to the BNC Video In connectors. 3 User’s Manual Video Loop Through If you would like to connect your video source to another device, you can use the Loop BNC connectors. NOTE: The Loop BNC connectors are auto terminated. Do NOT connect a cable to the Loop BNC unless it is connected to a terminated device because it will cause poor quality video. RS232C Port An RS232 port is provided to connect a remote control keyboard. Factory Reset Switch The DVR has a Factory Reset switch to the left of the Alarm Output connectors on the rear panel. This switch will only be used on the rare occasions that you want to return all the settings to the original factory settings. CAUTION: When using the Factory Reset, you will lose any settings you have saved. To reset the unit, you will need a straightened paperclip: 1. Turn the DVR off. 2. Poke the straightened paperclip in the unlabeled hole to the left of the Alarm Output connectors, and turn the DVR on. 3. Hold the reset switch until the DVR turns on and live monitoring screen appears. 4. Release the reset switch. All of the DVR’s settings are now at the original settings it had when it left the factory. Alarm Input/Output NOTE: To make connections on the Alarm Connector Strip, press and hold the button and insert the wire in the hole below the button. After releasing the button, tug gently on the wire to make certain it is connected. To disconnect a wire, press and hold the button above the wire and pull out the wire. AI 1 to 16 (Alarm-In): You can use external devices to signal the DVR to react to events. Mechanical or electrical switches can be wired to the AI (Alarm-In) and GND (Ground) connectors. The maximum voltage should not exceed 3.3V. The threshold voltage for NC (Normally Closed) is above 2.4V and for NO (Normally Open) is below 0.3V, and should be stable at least 0.5 seconds to be detected. Refer to Chapter 3 ─ Configuration for configuring alarm input. GND (Ground): Connect the ground side of the Alarm input and/or alarm output to the GND connector. NOTE: All the connectors marked GND are common. NC/NO (Relay Alarm Outputs): The DVR can activate external devices such as buzzers or lights. Connect the device to the C (Common) and NC (Normally Closed) or C and NO (Normally Open) connectors. NC/NO is a relay output which sinks 2A@125VAC and 1A@30VDC. Refer to Chapter 3 ─ Configuration for configuring alarm output. 4 Digital Video Recorder ARI (Alarm Reset In): An external signal to the Alarm Reset In can be used to reset both the Alarm Out signal and the DVR’s internal buzzer. Mechanical or electrical switches can be wired to the ARI (Alarm Reset In) and GND (Ground) connectors. The threshold voltage is below 0.3V and should be stable at least 0.5 seconds to be detected. Connect the wires to the ARI (Alarm Reset In) and GND (Ground) connectors. RS485 Port The DVR can be controlled remotely by an external device or control system, such as a control keyboard, using RS485 half-duplex serial communications signals. The RS485 connector can also be used to control PTZ (pan, tilt, zoom) cameras. Connect RX-/ TX- and RX+/TX+ of the control system to the TX-/RX- and TX+/RX+ (respectively) of the DVR. Refer to Chapter 3 ─ Configuration and the PTZ camera or remote controller manufacture’s manual for configuring the RS485 connection. Network Port The DVR can be networked using the 10/100Mbps Ethernet connector. Connect a Cat5 cable with an RJ-45 jack to the DVR connector. The DVR can be networked with a computer for remote monitoring, searching, configuration and software upgrades. Refer to Chapter 3 ─ Configuration for configuring the Ethernet connections. CAUTION: The network connector is not designed to be connected directly with cable or wire intended for outdoor use. Video Out A VGA connector is provided so that you can use a standard, multi-sync computer monitor as your main monitor. Use the cable supplied with your monitor to connect it to the DVR. Connect the main monitor to the Video Out connector. Connect the Spot monitor to the SPOT connector as needed. NOTE: It is possible that the DVR will not detect a VGA monitor automatically if the connected VGA monitor does not support the auto detection function. In this case, press and hold the Panic button on the front panel for 5 seconds or longer to switch the video output to VGA out. Pressing and holding the Panic button for 5 seconds or longer again returns to the previous video output mode. Audio In/Out Your DVR can record audio from up to four sources. Connect the audio sources to Audio In 1, Audio In 2, Audio In 3 and Audio In 4 as needed using RCA jacks. Connect Audio Out to your amplifier. NOTE: It is the user’s responsibility to determine if local laws and regulations permit recording audio. NOTE: The DVR does not have amplified audio output, so you will need a speaker with an amplifier. The DVR does not have a pre-amplifier for audio input, so the audio input should be from an amplified source, not directly from a microphone. 5 User’s Manual Power Cord Connector Connect the AC power cord to the DVR and then to a wall outlet. WARNING: ROUTE POWER CORDS SO THAT THEY ARE NOT A TRIPPING HAZARD. MAKE CERTAIN THE POWER CORD WILL NOT BE PINCHED OR ABRADED BY FURNITURE. DO NOT INSTALL POWER CORDS UNDER RUGS OR CARPET. THE POWER CORD HAS A GROUNDING PIN. IF YOUR POWER OUTLET DOES NOT HAVE A GROUNDING PIN RECEPTACLE, DO NOT MODIFY THE PLUG. DO NOT OVERLOAD THE CIRCUIT BY PLUGGING TOO MANY DEVICES IN TO ONE CIRCUIT. Your DVR is now ready to operate. Refer to Chapter 3 ─ Configuration and Chapter 4 ─ Operation. 6 Digital Video Recorder Chapter 3 ─ Configuration NOTE: Your DVR should be completely installed before proceeding. Refer to Chapter 2 ─ Installation. FRONT PANEL CONTROLS Figure 3 ─ 16-Channel DVR front panel. POWER LED NETWORK LED Display/Spot Button Clip Copy Button Arrow Buttons Menu/Cameo Button HDD LED COPY LED Group/Sequence Button Alarm Button Play/Pause Button USB Connectors ALARM LED Camera Buttons PTZ/Zoom Button Playback Button Panic Button The front panel looks and operates much like a VCR combined with a multiplexer. Many of the buttons have multiple functions. The following describes each button and control. Take a few minutes to review the descriptions. You will use these to initially set up your DVR and for daily operations. NOTE: You can also use a USB mouse (not supplied) to navigate through the screens and menus much like you would on a computer. POWER LED The POWER LED is lit when the unit is On. HDD LED The HDD LED flickers when the DVR is recording or searching video on the hard disk drive. ALARM LED The ALARM LED is lit when alarm output or internal buzzer is activated. 7 User’s Manual NETWORK LED The NETWORK LED is lit when the unit is connected to a network via Ethernet. COPY LED The COPY LED is lit when the DVR is clip-copying. Camera Buttons (1 to 16) Pressing the individual camera buttons will cause the selected camera to display full screen. Buttons 1 to 9 are also used to enter passwords. In the PTZ mode, pressing the button 1 zooms in the screen and the button 2 zooms out the screen, pressing the button 3 focuses near and button 4 focuses far, and pressing the button 5 moves to the preset and button 6 saves the preset. Display/Spot Button Pressing the Display/Spot button toggles between different display formats. The available formats are: PIP, 2x2, 3x3 and 4x4. Pressing and holding the button for three seconds or longer allows you to select which cameras will display on the Spot monitor. Group/Sequence Button When in the live mode, pressing the Group/Sequence button changes the screen from the current camera group to the next camera group, and the screen displays the page number. Pressing and holding the button for three seconds or longer displays live channels sequentially. PTZ/Zoom Button In the live monitoring mode, pressing the PTZ/Zoom button enters the PTZ mode, and pressing the button again exits the PTZ mode and enters the zoom mode. When in the zoom mode, pressing the button again exits the zoom mode. NOTE: Pressing the PTZ/Zoom button enters the zoom mode directly if there is no PTZ camera you set up in the Camera setup. When in the PTZ mode, pressing the arrow buttons or Menu/Cameo button allows you to control properly configured cameras. When in the zoom mode, a rectangle displays on the screen. A rectangle shows the area that will be enlarged. You can move the rectangle around using the arrow buttons. Pressing the (Play/Pause) button enlarges the area in rectangle. Playback Button Pressing the Playback button enters the playback mode, and pressing the button again exits the playback mode. When entering the playback mode, video is paused. Pressing the (Play/Pause) button plays back video at regular speed. The screen displays when the DVR is in the Pause mode and the screen displays when the DVR is playing back video. 8 Digital Video Recorder Clip Copy Button Pressing the Clip Copy button allows you to copy video clips. Alarm Button Pressing the Alarm button resets the DVR’s outputs including the internal buzzer during an alarm. Play/Pause Button In the live monitoring mode, pressing the button freezes the current screen and the screen displays icon. When in the playback mode, pressing the button plays back images at regular speed or pauses playing video. Pressing the setup. button selects a highlighted item or completes an entry that you have made during system Arrow Buttons These buttons are used to navigate through menus and GUI. You can also use them to change numbers by highlighting a number in the menu and using the Up and Down arrow buttons to increase or decrease the number’s value. These buttons are also used to control Pan and Tilt when in the PTZ mode. When in the PIP display format, pressing the Up and Down arrow buttons moves the position of the small screen counter-clockwise and clockwise, and pressing the Left and Right buttons moves through screen pages. In the playback mode, pressing the button plays video backward at high speed. Pressing the button again toggles the playback speed from , and . The screen displays , and respectively. Pressing the button plays video forward at high speed. Pressing the button again toggles the playback speed from , respectively. When in the pause mode, and . The screen displays , and pressing the button moves to the next image and pressing the button moves to the previous image. Panic Button Pressing the Panic button starts panic recoding of all camera channels, and displays Pressing the button again will stop panic recording. on the screen. NOTE: When the DVR does not detect a VGA monitor automatically, pressing and holding the Panic button on the front panel for 5 seconds or longer switches the video output to VGA out manually. Menu/Cameo Button In the live monitoring mode and search mode, pressing the Menu/Cameo button displays the menu at the top of the screen. Pressing the button also hides the menu. During menu setup, pressing the button closes the current menu or setup dialog box. Pressing and holding the button for three seconds or longer in any multi-view format enters the cameo mode. The yellow outline surrounding the video indicates the active cameo, and pressing the arrow buttons moves the active cameo. Pressing the desired camera button in the active cameo edits the cameo and displays the video of selected camera. Pressing the (Play/Pause) button exits the Active Cameo mode. Selecting Exit Group Edit in the cameo menu displayed when pressing the Menu/Cameo button also exits the Active Cameo mode. 9 User’s Manual NOTE: A cameo is defined as any cell within multi-screen display. The cameo mode allows you to change the screen layout by editing the cameo. USB Ports Two USB ports on the front panel are provided to connect external hard disk, CD-RW or flash drives for video clip copying or system upgrades. Position external drives close enough to the DVR so that you can make the cable connections, usually less than 6 feet. Use the USB cable provided with the hard disk drive to connect it to the DVR. A USB mouse (not supplied) can be connected to one of the ports. You can use the mouse to navigate through the screens and menus much like you would on a computer. A USB to Serial converter can be connected to the USB port. Multiple text-in devices can be used with a USB to Serial converter. TURNING ON THE POWER Connecting the power cord to the DVR turns on the unit. The unit takes approximately 60 seconds to initialize. INITIAL UNIT SETUP Before using your DVR for the first time, you will want to establish the initial settings. This includes items such as time and date, display language, camera, audio, remote control, record mode, network and password. Your DVR can be set up using various screens and dialog boxes. Throughout the screens you will see . Highlighting the and pressing the you the opportunity to reset that screen to its default settings. (Play/Pause) button gives Press the Menu button to enter the setup screens. The Login screen appears. Select a User and enter the password by pressing the appropriate combination of Camera number buttons and then the button. There is no default password when logging in the admin user for the first time. NOTE: To assure the secure management of the system, setting up a password is strongly recommended. NOTE: You can use a mouse (not supplied) to access the Login screen in addition to using the front (Login) in the Live panel buttons. Move the mouse pointer to the top of the screen and then select Monitoring menu to display the Login screen. To enter a password, click the button, and the virtual keyboard displays. See instructions below for using the virtual keyboard. NOTE: To log the user out of the system, press the Menu button or move the mouse pointer to the top of the screen and then select (Logout) in the Live Monitoring menu. The Logout screen displays asking you to confirm whether or not you want to log out the current user. 10 Digital Video Recorder SETUP SCREEN Figure 4 ─ Setup screen. Press the Menu button or move the mouse pointer to the top of the screen and then select (Setup) in the Live Monitoring menu to enter the setup screen. While setting up the DVR, there will be many opportunities to enter names and titles. When making these entries, a Virtual Keyboard will appear. Use the arrow keys to highlight the character you want in the name or title and press the button. That character appears in the title bar and the cursor moves to the next position. Pressing toggles between the upper and lower case keyboards, backspaces, and deletes entered characters. You can use up to 31 characters including spaces in your title. Special characters can be created using ^ and a capital letter; e.g., ^J for NL (New Line), ^M for CR (Carriage Return). Special characters are commonly used by text input devices and will be useful when performing Text-In Searches. SYSTEM SETUP General Settings (SYSTEM General Tab) Figure 5 ─ System General setup screen. 11 User’s Manual In the General screen, you can assign a System ID number, select the language the screens are displayed in, display software version number, upgrade the software, import or export the DVR settings, show the System Log, and shut the system down. Highlight the box beside System ID and press the button. Change the number by highlighting it and using the Up and Down arrow buttons to increase and decrease the number from 0 to 99. NOTE: The System ID number is used to identify the unit when it is connected with other DVRs through the RS485 port. You cannot use the same ID number for two or more DVRs that are in the same RS485 network. It is possible to have multiple DVRs with System ID 0 that are in the same area as long as they are not part of an RS485 network. Highlight the box beside Language and press Highlight the desired language and press the button. A drop-down menu displays the available languages. button. The box beside Version displays the software version of the DVR. To upgrade the software, connect a USB device containing the upgrade package file to the DVR. Highlight Upgrade… and press the button. The Upgrade screen appears. The screen displays the upgrade package file names that are available. The “.rui” indicates that the file is for software upgrades and “.ofi” indicates that the file is for optical drive firmware upgrades. Select the desired file and press the button. Highlighting the Install button and pressing the button will install the selected software package. Highlighting the Cancel button and pressing the button will close the window without upgrading the software. If the upgrade package file is not installed on the DVR properly, you will get an error message. The system restarts automatically after completing the upgrade, and it takes approximately one minute to restart. CAUTION: The USB device must be FAT16 or FAT32 format. You can import saved DVR settings or export the current DVR settings. To import saved DVR settings, connect the USB device containing the setup file (.dat) to the DVR. Highlight Setup – Import… and press the button. Select the desired setup file and press the Import button to import the selected settings and change the DVR settings accordingly. Highlight Include Network Setup and press the button to toggle between On and Off. When set to Off, the network settings will not be changed. To export the current DVR settings, connect the USB device to the DVR. Highlight Setup – Export… and press the button. Highlight the box beside File name and press the button. A virtual keyboard allows you to enter the file name. Selecting Export will save the current settings in .dat file format on the USB device. NOTE: Even after changing the DVR settings by importing saved settings, the time-related settings (Date/Time, Time Zone and Daylight Saving Time) will NOT be changed. CAUTION: The USB device must be FAT16 or FAT32 format. 12 Digital Video Recorder Highlight Show System Log… and press the button to display the System Log. The System Log screen lists system activities (up to 5,000 from the latest) that have occurred along with the time and date. The icon will be displayed in the last column for system activities of the remote site. You can scroll through the log pages by using the Up and Down arrows, or you can go directly to a log page by entering the log page number in the box at the bottom left of the screen. Highlight Close and press the button to exit the screen. Highlight System Shutdown and press the button. The Shutdown screen displays asking you to confirm whether or not you want to shut the system down. After selecting Shutdown and pressing the button, a screen will appear telling you when it is safe to disconnect power. After you are finished with the General Screen, you can highlight Save and press the button to save the changes and exit the screen. If you do not wish to save the changes, highlight Cancel and press the button to exit the screen. Date/Time Settings (SYSTEM Date/Time Tab) Figure 6 ─ Date/Time setup screen. Highlight the first box beside Date and press the button. The individual sections of the date will highlight. Use the Up and Down arrow buttons to change the number. Use the Left and Right arrow buttons to move between month, date and year. Once you have the correct date, press the button. Highlight the Format box beside Date and press the button. Select from the three available date formats and press the button to save your selected format. Highlight the first box beside Time and press the button. The individual sections of the time will highlight. Use the Up and Down arrow buttons to change the number. Use the Left and Right arrow buttons to move between hour, minutes and seconds. Once you have the correct time, press the button. 13 User’s Manual Highlight the Format box beside Time and press the button. Select from the three available time formats and press the button to save your selected format. NOTE: The clock will not start running until you have highlighted Save and pressed the Highlight the box beside Time Zone and press the the button. button. button. Select your time zone from the list and press Highlight Enable Daylight Saving Time and press the On and Off. button. Pressing the button toggles between Highlighting Time Sync.… and pressing the button displays the Time Sync. setup screen. You can set up time synchronization between the DVR and standard time servers that are available in most time zones and countries, or between the DVR and another DVR. Highlight the box beside Automatic Sync. and press the button. This toggles between On and Off. Highlight the box beside Time Server and press the button. A virtual keyboard appears that you can use to enter the IP address or domain name of the time server. NOTE: You can use the domain name instead of IP address if you already set up the DNS Server when setting up the LAN. Highlight the box beside Interval and press the 30 minutes to 1 day at various time intervals. button. Set the time interval for synchronization from Last Sync-Time displays the last time the DVR was synchronized with the time server. Highlight Run as Server and press the button. Pressing the button toggles between On and Off. When it is On, the DVR you are setting up will run as a time server. Highlighting Holiday… and pressing the button displays the Holiday setup screen. You can set up holidays by highlighting + and pressing the date appears. button. The current Highlight the month and day and change them by using the Up and Down arrow buttons. Press the button to add the date. Dates can be deleted by highlighting the beside the date and pressing the button. NOTE: Holidays that do not fall on the same date each year should be updated once the current year’s holiday has passed. You can save your Date/Time changes by highlighting Save and pressing the exits the screen without saving the changes. button. Selecting Cancel Account Settings (SYSTEM Account Tab) The Account setup screen displays the authorized groups and users. You can add and delete groups and users. When adding a group, you can assign authority levels to the group. 14 Digital Video Recorder Figure 7 ─ Account setup screen. The +/- column is used to collapse and expand user groups. If there is a + or – in this column, it indicates the item is a Group Name. If there is a – in front of the Group Name, it indicates that the group has been “expanded” and all of the User Names within that group are displayed below the Group Name. If there is a + in front of the Group Name, it indicates that the group has been “collapsed” and all of the User Names within that group are hidden. To collapse or expand a group, highlight the +/- column in front of the desired group and press the button. Highlighting a Group Name and pressing the to the group. button allows you to change the authority levels assigned CAUTION: Write down the new password and save it in a secure place. If the password is forgotten, the unit must be reset using the Factory Reset Button and all data settings will be lost. Highlighting a User Name and pressing the button allows you to add or change the password assigned to that user. You can also change the group to which the user is assigned. The column can be used to delete a User Name or an entire Group. If the is grayed out, that Group or User cannot be deleted. Highlight the and press the button. You will be asked to confirm that you want to delete the User or Group. To delete the User currently logged into the DVR on a local system or a PC running DX-PC For View, log the user out of the system first and then delete the user. To add a Group, highlight the + Group… box and press the you to enter the Group name. button. A virtual keyboard appears allowing You can use up to 15 characters including spaces in the group name. Enter the name and assign authority levels to the group. Highlighting the Authority box and pressing the button will toggle between all authority levels being turned On and Off. Highlighting the individual authority level boxes and pressing the button will toggle between that authority level being turned On and Off. 15 User’s Manual The authority levels that can be turned On and Off are: Shutdown ─ The user can shut the system down on a local system. Upgrade ─ The user can upgrade the software on a local system or a PC running DX-PC For View. System Time Change ─ The user can change the system date and time on a local system or a PC running DX-PC For View. Data Clear ─ The user can clear all video data or format disks on a local system or a PC running DX-PC For View. Setup ─ The user without Setup authority cannot establish any system settings excluding system shutdown and logout on a local system or a PC running DX-PC For View. Color Control ─ The user can control brightness, contrast, hue and saturation for cameras on a local system or a PC running DX-PC For View. PTZ Control ─ The user can control the PTZ camera on a local system or a PC running DX-PC For View. Alarm-Out Control ─ The user can reset the DVR’s outputs including the internal buzzer during an alarm by pressing the Alarm button on a local system or alarm-out control button on a PC running DX-PC For View. Covert Camera View ─ The user can view video from cameras set as Covert while in the live monitoring or search mode on a local system or a PC running DX-PC For View. Record Setup ─ The user can establish all Record settings on a local system or a PC running DX-PC For View. Search ─ The user can access the search mode on a local system or a PC running DX-PC For View. Clip-Copy ─ The user can copy video clips on a local system or a PC running DX-PC For View, and save video data in an AVI, bitmap or JPEG file format. To add a User, highlight the + User… box and press the you to enter the User Name. button. A virtual keyboard appears allowing Enter the name and assign the User to a Group and password. You can use camera buttons 1 to 9 on either the front panel to assign the password. The password can be up to 8 digits. You will be asked to confirm the password. NOTE: In addition to using the front panel buttons, you can use the virtual keyboard to assign the password. To display the virtual keyboard click the button using the mouse (not supplied). Highlighting the box beside Auto Login allows you to select a User to be automatically logged in when the DVR is powered up. It can also be set to never automatically login a user. Highlighting the box beside Auto Logout allows you to select from a list of times that the user will be automatically logged out. The options are: Never, 1 min., 3 min., 5 min., 10 min., 15 min., 20 min., 30 min. and 1 hr. You can save your Account changes by highlighting Save and pressing the exits the screen without saving the changes. button. Selecting Cancel Storage Settings (SYSTEM Storage Tab) The Storage setup screen displays information about the DVR’s storage devices. 16 Digital Video Recorder Figure 8 ─ Storage setup screen. The capacity of the storage device is displayed in the box beside Capacity. The status of the storage device is displayed in the box beside Status. Highlighting the box beside Status for the desired storage device and pressing the button displays the Disk Bad, Temperature and S.M.A.R.T. information of the storage device. Disk Bad ─ Displays the damage status of the storage drive. (Not Formatted (The device is not formatted), Good (%) (The device is working properly though some portion (%) of the storage is damaged.) or Bad (More than 90% of the storage is damaged.)) Temperature ─ Displays the temperature of the storage drive. (N/A (The DVR cannot read the temperature.), Good (The temperature is normal.) or Bad (The temperature is 70oC (158oF) or higher.)) S.M.A.R.T. ─ Displays S.M.A.R.T. information of the storage. (Good (The storage condition is normal.), Bad (Data cannot be written on or read from the storage drive.) or N/A (The S.M.A.R.T. monitoring is not working or supported.)) NOTE: When the S.M.A.R.T. displays Bad, the screen displays a message box. Once the “Bad” message displays, replacing the hard disk drive is recommended, usually within 24 hours. NOTE: Temperature and S.M.A.R.T. information will be available only for internal hard disk drives supporting the SMART (Self-Monitoring Analysis and Reporting Technology) monitoring program. The box beside Information displays whether the device is being used or not. Other indicates the device has been used for another DVR. Highlight the box beside Information for the desired storage device and press the button, and the time information of recorded data displays. Highlighting Clear and pressing the button will clear all video data. You will be asked to verify that you wish to clear all data before the DVR erases the video data. Selecting Clear will not clear the System Log. The box beside Format indicates the device is used for recording (Record) or not (Not Using). Not formatted indicates the device is not formatted. indicates when the device has temporary space set aside so that video clips can be saved on a CD-RW or DVD RW. 17 User’s Manual Highlight the box beside Format for the desired storage device and press the button. You will be able to format the device for recording. When selecting Not Using from Use As and highlighting the Format button, the device will not be used for recording. Selecting Close and pressing the button exits the screen. You can also set aside space to store temporary files for CD or DVD burning by selecting Partition – CD/DVD Burn. The box beside Recorded Data – From / To displays the time information of recorded data. Highlighting Clear All Data… and pressing the button will clear all video data. You will be asked to verify that you wish to clear all data before the DVR erases the video data. Clear All Data… will not clear the System Log. You can save your Storage changes by highlighting Save and pressing the exits the screen without saving the changes. button. Selecting Cancel Monitoring Settings (SYSTEM Monitoring Tab) The DVR can be configured to run self-diagnostics and report the results, and also can be set to react to system events. Figure 9 ─ Monitoring setup screen. Highlighting the Settings box beside System and pressing the button allows you to select the interval that you want the DVR to run self-diagnostics on the system. You can select from 1 hr. to 30 days or Never. Highlighting the Settings box beside Check Recording and pressing the Recording setup screen. button displays the Check Highlighting Schedule On and pressing the button toggles On and Off. When set to On, you can select the day, time range and interval that you want the DVR to run self-diagnostics on the recorder. The Interval can be selectable from 1 min. to 7 days or Off. The box allows you to delete a check recording schedule. 18 Digital Video Recorder Highlighting the Settings box beside Check Alarm-In and pressing the button allows you to change the interval that you want the DVR to run self-diagnostics on Alarm Inputs. You can select from 1 hr. to 30 days or Off. Highlighting the Settings box beside Disk Almost Full and pressing the button allows you to select the percentage level of disk usage at which you want the DVR to trigger an alert. Percentage levels range from 80% to 99%. Highlighting the Settings box beside Disk Bad and pressing the button allows you to select the percentage level of bad disk sectors at which you want the DVR to trigger an alert. Percentage levels range from 10% to 90%. Highlighting the Settings box beside Disk Temperature and pressing the button allows you to set the temperature (ºC (Celsius) or ºF (Fahrenheit)) threshold. Refer to the hard disk drive manufacturer’s documentation for the correct temperature setting. If the temperature of hard disk drive exceeds the defined threshold, the system triggers an alert. Highlighting the Actions box beside each event and pressing the button allows you to set up actions the DVR will take whenever it detects system events. System events can sound the DVR’s internal buzzer and/or notify a number of different devices. NOTE: The Beep action cannot be set to System event. NOTE: For the Notify action to work, the Mail should be enabled in the NETWORK – Mail setup screen. RECORD SETUP Your DVR offers a variety of flexible recording modes. You can set it up to record all the time or to only record events. It can be set up to continue recording once the hard disk drive is full by recording over the oldest video, or you can set it up to alert you when the hard disk is full and stop recording. Figure 10 ─ Record menu. 19 User’s Manual General Settings (RECORD General Tab) Figure 11 ─ Record General setup screen. Highlighting Recycle and pressing the button toggles between On and Off. In the Recycle mode, the DVR records over the oldest video data once all available storage space has been used. When Recycle is turned off, the DVR stops recording once all available storage space has been used. Highlight the box beside Codec and select from MPEG-4 and H.264. Selecting the new codec displays a message asking you to confirm whether or not you want to restart the system because the system must be restarted before applying the new codec and you will lose all recording data. CAUTION: When changing the codec all recording data is deleted before applying the new codec. If you don’t want to delete the recording data, back up it using the clip-copy function. NOTE: Selecting the H.264 codec and enabling the VGA Enhancement function will cause the recording speed to be decreased by half. Refer to the Display Setup, Main Monitor Settings section in this chapter for setting up the VGA Enhancement function. NOTE: The maximum recording and playback speed when using the H.264 codec is as follows. When the DVR is in the Recording Mode only Disable VGA Enhancement Enable VGA Enhancement 120 ips (100 ips PAL) 60 ips (50 ips PAL) When the DVR is in the Recording mode and Playback mode at the same time Recording Speed Playback Speed 60 ips (50 ips PAL) 120 ips (100 ips PAL) Highlight the box beside Resolution and select from Very High, High and Standard. NOTE: The total ips of all camera channels will be limited to 60 ips (50 ips PAL) when set to High resolution and 30 ips (25 ips PAL) when set to Very High resolution. NOTE: When set to High or Very High resolution, the maximum recording speed of each camera channel decreases by half. However the maximum recording speed of 30 ips (25 ips PAL) will be maintained if the number of cameras that are turned On is two or less. 0 ─ No. of cameras set to On and High or Very High resolution 1 2 3 to 16 30 ips (25 ips PAL) 30 ips (25 ips PAL) 15 ips (12.5 ips PAL) Highlighting Record Audio and pressing the button toggles between On and Off. When it is On the DVR will record audio when video is recording. The DVR will not record audio when the recording speed is set to less than 1 ips. 20 Digital Video Recorder Highlight the slide bar beside Auto Deletion, and use the Left and Right arrow buttons to adjust the length of time recorded data will be kept from 1 to 99 days. The DVR automatically deletes video recorded earlier than the user-defined period under three conditions: at midnight, whenever the system reboots or whenever the user changes the Auto Deletion settings. Selecting Never will disable the Auto Deletion function. Highlighting Use Panic Recording and pressing the button toggles between On and Off. Highlight the box beside Panic Recording – Duration and set the duration of panic recording. Panic recording will stop automatically after the preset duration as long as the Panic button is not pressed to stop the panic recording. You can set the dwell from 5 minutes to 1 hour. Select No Limit if you want to stop panic recording manually. Highlighting the box beside Panic Recording – ips and pressing the button allows you to set the images per second for Panic recording. You can select from 0.10 to 30.0 (25.0 PAL) images per second. Highlighting the box beside Panic Recording – Quality and pressing the button allows you to set the recorded image quality for Panic recording. You can select from: Very High, High, Standard and Low. You can save your Record settings by highlighting Save and pressing the the screen without saving the changes. button. Selecting Cancel exits Schedule Settings (RECORD Schedule Tab) Setting up the Basic Schedule… Figure 12 ─ Schedule (Basic) setup screen. Highlight the box beside Schedule Type and press the the Basic recording schedule. button. Selecting Basic allows you to set up Highlighting the box beside Record Mode and pressing the button allows you to select the desired recording mode. (– : No record, : Time (Time-lapse) recording, : Event recording, : Time & Event recording) When the DVR is in the No Record mode, it will not record during the preset day and time range as long as the Panic button is not pressed. Use the No Record mode when you do NOT want the DVR to record during certain times. When the DVR is in the Time mode, the icon displays at the top-left corner of the screen. The DVR will record and displays the icon at the top-left corner of the screen during the scheduled times. When the DVR is in the Event mode, the red icon displays at the top-left corner of the screen. The DVR will record and displays the icon at the top-left corner of the screen when any event occurs. When the DVR is in the Pre-Event recoding mode, the yellow icon displays when there is no event, and the DVR is not recording. When the DVR is in the Pre-Event mode, the red and display when any event occurs and the DVR starts recoding. 21 User’s Manual When the DVR is in the Time & Event mode, the DVR will follow the Time settings and the The DVR follows the Event settings and the icon displays. Highlighting the box beside Record Schedule and pressing the range that the scheduled recording will take place. icon displays. button allows you to change the time Highlighting the box beside Time Record ips and pressing the button allows you to set the images per second for Time recording. You can select from 0.10 to 30.0 (25.0 PAL) images per second. Highlighting the box beside Time Record Quality and pressing the button allows you to set the recorded image quality for Time recording. You can select from: Very High, High, Standard and Low. Highlighting the box beside Event Record ips and pressing the button allows you to set the images per second for Event recording. You can select from 0.10 to 30.0 (25.0 PAL) images per second. Highlighting the box beside Event Record Quality and pressing the button allows you to set the recorded image quality for Event recording. You can select from: Very High, High, Standard and Low. Highlighting the box beside Event Record Dwell and pressing the of time you would like to record for the associated event. button allows you to set the length Highlighting the box beside Pre-Event Record Dwell and pressing the button allows you to set the length of time you would like to record prior to the associated event. Selecting None will disable the pre-event recording function. Setting up the Advanced Schedule… Figure 13 ─ Schedule (Advanced) setup screen. Highlight the box beside Schedule Type and press the up the Advanced recording schedule. button. Selecting Advanced allows you to set Highlighting Setup… beside Pre-Event Record and pressing the button allows you to set up the pre-event recording. Set up the ips, Quality and Dwell for pre-event recording. Selecting None will disable the pre-event recording function. Highlighting the box beside Post-Event Record Dwell and pressing the length of time you would like to record for the associated event. 22 button allows you to set the Digital Video Recorder Highlight the + and press the button to add a schedule item. NOTE: The higher the number under the No. heading, the higher its priority. The Day box allows you to change the days that the scheduled recording will take place. Choose from: Sun, Mon, Tue, Wed, Thu, Fri, Sat, M~F, Hol and All. The Range box allows you to change the time range that the scheduled recording will take place. The smallest time segment you can use is 15 minutes. The Mode box allows you to change the recording mode that will be used. (– : No record, : Time (Time-lapse) recording, : Event recording, : Time & Event recording) Refer to the Setting up the Basic Schedule… section for information regarding each recording mode. The Channel box allows you to select which cameras will be recorded. Highlight the box under the Settings heading and press the button to define the recording settings. You can set the ips and Quality of the recording for any modes you set up in the Mode column. If you do not set the ips and Quality in the Settings column, the DVR will follow the default settings. See below for details. Highlight the box under the heading and press the button to delete the recording settings. You will be asked to confirm that you want to delete the settings. Highlight Default… and press the button. The Default screen appears. Highlighting boxes under ips and pressing the button allows you to set the images per second for Time and Event recording. You can select from 0.10 to 30.0 (25.0 PAL) images per second. Highlighting boxes under Quality and pressing the button allows you to set the recorded image quality for Time and Event recording. You can select from: Very High, High, Standard and Low. You can save your Schedule changes by highlighting Save and pressing the exits the screen without saving the changes. button. Selecting Cancel EVENT SETUP Your DVR can be set to detect many different events. You can also determine how it reacts to these events. Figure 14 ─ Event menu. 23 User’s Manual Motion Settings (EVENT Motion Tab) Figure 15 ─ Motion setup screen. Your DVR has built-in video motion detection. Video motion detection can be turned On or Off for each camera. Highlighting the box under the Sensitivity heading and pressing the button allows you to adjust the DVR’s sensitivity to motion for Daytime and Nighttime independently. There are five settings with 1 being the least sensitive and 5 being the most sensitive. You can define the area of the image where you want to detect motion; e.g., a doorway. Highlight the box under the Zone heading, and press the button. The Motion Detection Zone screen displays. The Motion Detection Zone screen is laid over the video for the selected camera. You can set up motion detection zones by selecting or clearing blocks. NOTE: You can set up motion zones one block at a time in groups of 8 individual block groups. A block group is positioned within the image area using the Up and Down arrow buttons, and individual blocks within the block groups are selected or cleared using the camera buttons. Press the button to display the menu screen. The menu on the setup screen has the following functions: Select ─ Activates highlighted blocks to detect motion. Clear ─ Deactivates highlighted blocks so that they will not detect motion. Reverse ─ Activates inactive highlighted blocks and deactivates active highlighted blocks. Select All ─ Activates all blocks to detect motion. Clear All ─ Deactivates all blocks so that they will not detect motion. Reverse All ─ Activates inactive blocks and deactivates active blocks. Zone View ─ Displays any detected motion within the zone in red. OK ─ Accepts changes and closes Zone setup. Cancel ─ Exits Zone setup without saving changes. You can adjust the minimum number of detection blocks that must be activated to trigger a motion alarm. Highlighting the box under the Min. Blocks heading and pressing the button allow you to adjust the minimum number of detection blocks for Daytime and Nighttime independently. Smaller numbers provide greater sensitivity because fewer detection blocks must be activated. 24 Digital Video Recorder The DVR can be set to react to motion detection differently for each camera. Highlighting the box under the Actions heading and pressing the button allows you to set up event actions for motion detection. NOTE: You can associate multiple cameras with a camera that detects motion. Record ─ Associate as many cameras with that camera as you wish. If the DVR detects motion on the selected camera, it starts recording video from all the associated cameras highlighted blocks to detect motion. Alarm-Out ─ Associate Alarm-Outs with that camera as you wish. When the DVR detects motion on the selected camera’s input, it triggers output signals on the associated Alarm-Out connectors. You can also have the DVR’s internal buzzer sound if motion is detected on the selected camera. Notify ─ You can toggle the individual notification items On and Off by highlighting that item and pressing button. Highlight OK and press the button to accept your changes. the PTZ ─ Select the preset position for each PTZ camera, where you want PTZ cameras to move to whenever the DVR detects motion on the selected camera’s input. Spot Monitor ─ Associate a camera with the Spot monitor. The DVR will display the associated camera on the Spot monitor whenever it detects motions on the selected camera. NOTE: For the Record action, the camera you select should be set to the Event or Time & Event recording mode in the Record Schedule setup screen. NOTE: For the Alarm-Out action, the alarm output and beep you select should be set to the Event mode in the Alarm-Out setup screen (Schedule tab). NOTE: For the Notify action, the notify item you select should be enabled in the Notification setup screen and the DVR should be registered in the DX-PC For View (Remote Administration System). You can control excessive event logging and remote notification of motions detected after the motion dwell time by adjusting the motion ignoring dwell intervals. Highlight the box beside Motion Ignoring Interval and press the button. A list of intervals ranging from 1 to 5 seconds or Never appears. The DVR will not log and notify motion events occurred during the preset interval range. NOTE: The record action for motion events will not be affected by the Motion Ignoring function. Highlighting the box beside Daytime Setup and pressing the button allow you to set up the Daytime range. Highlight the box beside Daytime and press the button. Use the Up and Down arrow buttons to set the Daytime range. The DVR will consider the remaining time range as the Nighttime. You can save your Motion changes by highlighting Save and pressing the exits the screen without saving the changes. button. Selecting Cancel 25 User’s Manual Alarm-In Settings (EVENT Alarm-In Tab) Figure 16 ─ Alarm-In setup screen. The alarm terminal strip on the back of the DVR has inputs associated with each alarm. You can set up each input on the Alarm-In screen. You can turn each input On or Off by highlighting the alarm number and pressing the button. Each input can be given a title. Highlight the desired Title box and press the appears allowing you to enter a title name. button. A virtual keyboard Each input can be set as NO (normally open) or NC (normally closed). You can set the actions the DVR will take whenever it senses an input on one of its alarm input connectors. Highlighting the box under the Actions heading and pressing the button allows you to set up event actions for alarm input. Record ─ Select the cameras that you want the DVR to record whenever it detects an input on the associated alarm input. Alarm-Out ─ Select between Alarm Output and Beep (DVR’s internal buzzer) that you would like to activate and to sound whenever the DVR detects an input on the associated alarm input. Notify ─ You can toggle the individual notification items On and Off by highlighting that item and pressing the button. Highlight OK and press the button to accept your changes. PTZ ─ Select the preset position for each PTZ camera, where you want PTZ cameras to move to whenever the DVR detects an input on the associated alarm input. Spot Monitor ─ Associate a camera with the Spot monitor. The DVR will display the associated camera on the Spot monitor whenever it detects an input on the associated alarm input. NOTE: For the Record action, the camera you select should be set to the Event or Time & Event recording mode in the Record Schedule setup screen. NOTE: For the Alarm-Out action, the alarm output and beep you select should be set to the Event mode in the Alarm-Out setup screen (Schedule tab). NOTE: For the Notify action, the notify item you select should be enabled in the Notification setup screen and the DVR should be registered in the DX-PC For View (Remote Administration System). You can save your Alarm-In changes by highlighting Save and pressing the exits the screen without saving the changes. 26 button. Selecting Cancel Digital Video Recorder Video Loss Settings (EVENT Video Loss Tab) Figure 17 ─ Video Loss setup screen. The DVR checks to see if anything is obscuring the camera. Highlight the slider bar beside Check Obscuration, and use the Left and Right arrow buttons to adjust the setting. The sensitivity can be set from Never to 10 (extremely sensitive). The DVR can be set to react to video loss differently for each camera. Highlighting the box under the Actions heading and pressing the button allows you to set up event actions for video loss. Record ─ Associate as many cameras with that camera as you wish. If the DVR detects video loss on the selected camera, it starts recording video from all the associated cameras. Alarm-Out ─ Select between Alarm Output and Beep (DVR’s internal buzzer) that you would like to activate and to sound whenever the DVR detects video loss on the selected camera. Notify ─ You can toggle the individual notification items On and Off by highlighting that item and pressing the button. Highlight OK and press the button to accept your changes. PTZ ─ Select the preset position for each PTZ camera, where you want PTZ cameras to move to when the DVR detects video loss on the selected camera’s input. Spot Monitor ─ Associate a camera with the Spot monitor. The DVR will display the associated camera on the Spot monitor whenever it detects video loss on the selected camera. NOTE: For the Record action, the camera you select should be set to the Event or Time & Event recording mode in the Record Schedule setup screen. NOTE: For the Alarm-Out action, the alarm output and beep you select should be set to the Event mode in the Alarm-Out setup screen (Schedule tab). NOTE: For the Notify action, the notify item you select should be enabled in the Notification setup screen and the DVR should be registered in the DX-PC For View (Remote Administration System). You can save your Video Loss changes by highlighting Save and pressing the exits the screen without saving the changes. button. Selecting Cancel 27 User’s Manual Text-In Settings (EVENT Text-In Tab) Figure 18 ─ Text-In setup screen. The DVR can be set to react to text input from devices such as ATMs (Automated Teller Machines) and POS (Point of Sale; i.e., cash registers). This screen allows you to configure the DVR for each text-in device. Highlight the box under the Setup heading, and press the button. Selecting the Setup heading changes all the parameters excluding Port settings of all the text input channels. NOTE: The system performance might be affected when a large quantity of text inputs are detected from several channels at the same time. Highlight the box beside Port, and press the button. Select from None, RS232, RS485 and USB-Serial (1~8). NOTE: If you have set the Port as None, you will not be able to make any changes to the screen. NOTE: When using the USB to serial text-in device, do NOT remove the USB cable from the port while the system is running. Highlight Setup…, and press the button. Use the ATM or POS manufacturer’s recommended settings when configuring the RS232, RS485 or USB-Serial ports. Highlight the box beside Text-In Product, and press the button. Select your device from the list. NOTE: The following description is for a Generic Text Device. The screen changes for different types of text input devices, and there will be different parameter boxes for you to enter information. Highlight the box beside Transaction Start, and press the button. Use the virtual keyboard to enter the Transaction Start string. Refer to the device manufacturer’s documentation for the text string that the device first sends when a transaction starts. If you want the DVR to react to any character sent from the text input device, you will want to turn On Any Character. Highlight Any Character, and press the button to toggle between On and Off. NOTE: If Any Character is turned On, you will not be able to enter any text in the Transaction Start box. 28 Digital Video Recorder Highlight the box beside Transaction End, and press the button. Use the virtual keyboard to enter the Transaction End string. Refer to the device manufacturer’s documentation for the text string that the device sends when a transaction ends. Highlight the more line(s) box, and press the button. Select the number of additional lines of text that you want the DVR to record. You can choose from 0 to 10. Highlight the box beside Line Delimiter, and press the button. Use the virtual keyboard to enter the character(s) that the device uses to indicate the end of a line. Special characters can be created using ^ and a capital letter; e.g., ^J for NL (New Line), ^M for CR (Carriage Return). Refer to the device manufacturer’s documentation for Line Delimiter character(s). Highlight the box beside Ignore String, and press the button. Use the virtual keyboard to enter any strings of text that you want the DVR to ignore. Refer to the device manufacturer’s documentation for text strings that the device sends during transactions, so you will know which ones you do not want recorded. Highlight the Case Sensitive box, and press the button to toggle between On and Off. Refer to the device manufacturer’s documentation to determine if the text strings are Case Sensitive. If the device distinguishes between upper and lower case letters, make certain the Case Sensitive box is turned On. Highlight the box beside Time Out, and press the button. Set the length of time to wait for the new text string. The DVR will consider a transaction complete if no new text strings are entered between the last text input and the dwell time out. You can adjust the Time Out dwell from 5 seconds to 15 minutes. The DVR can be set to react to text input. Highlighting the box under the Actions heading and pressing the button allows you to set up event actions for alarm input. Record ─ Select the cameras that you want the DVR to record whenever it detects text input. Alarm-Out ─ Select between Alarm Output and Beep (DVR’s internal buzzer) that you would like to activate and to sound whenever the DVR detects text input. Notify ─ You can toggle the individual notification items On and Off by highlighting that item and pressing the button. Highlight OK and press the button to accept your changes. PTZ ─ Select the preset position for each PTZ camera, where you want PTZ cameras to move to whenever the DVR detects text input. Spot Monitor ─ Associate a camera with the Spot monitor. The DVR will display the associated camera on the Spot monitor whenever it detects text input. NOTE: For the Record action, the camera you select should be set to the Event or Time & Event recording mode in the Record Schedule setup screen. NOTE: Recording video of text-in events might NOT be made properly when the recording speed is set too low. NOTE: Recording video of text-in events might NOT be made properly when the recording speed is set too low. NOTE: For the Alarm-Out action, the alarm output and beep you select should be set to the Event mode in the Alarm-Out setup screen (Schedule tab). NOTE: For the Notify action, the notify item you select should be enabled in the Notification setup screen and the DVR should be registered in the DX-PC For View (Remote Administration System). You can save your Text-In changes by highlighting Save and pressing the exits the screen without saving the changes. button. Selecting Cancel 29 User’s Manual NETWORK SETUP In the Main screen, use the Left or Right arrow buttons to display the Network menu. Figure 19 ─ Network Menu. General Settings (NETWORK General Tab) Figure 20 ─ Network General setup screen. Highlight the first box beside Remote Watch – bps/ips. Press the Up and Down arrow buttons to set the Transfer Speed from 50Kbps to 100Mbps or 0.1 ips to 30 ips. Highlight the second box beside Remote Watch – bps/ips. You can select the unit of measure for the transfer speed between: bps and ips. Press the button to set the transfer speed. NOTE: The local recording speed might be affected by various network bandwidth (Transfer Speed) conditions. Highlight the box beside Remote Watch – Quality and press the button. You can select the Quality from: Very High, High, Standard and Low. Press the button to set the Quality. NOTE: The higher Quality settings require higher Transfer Speed settings. The transfer speed you set is the maximum speed. Depending on the network environment, this speed may not be achieved. You can limit the network bandwidth settings so that system does not consume too much network bandwidth. Highlight the box beside Network Bandwidth Limit and press the Up and Down arrow buttons to set the desired maximum bandwidth from 50Kbps to 100Mbps. 30 Digital Video Recorder NOTE: When limiting the network bandwidth, the remote watch image on the PC running DX-PX For View or WebGuard might not be displayed properly. The DVR supports two-way audio communication between a local system and a PC running DX-PC For button allows you to select View. Highlighting the box beside Remote Audio Channel and pressing the the audio channel that sends audio to the remote site. Selecting Select From DX-PC For View will send audio of the channel selected from DX-PC For View. NOTE: Depending on network conditions, audio might be interrupted or out of synchronization during transmission. Highlight Enable WebGuard Service and press the button to toggle between On and Off. Refer to Appendix C — WebGuard for detailed descriptions of the WebGuard service. Highlight the box beside Port and press the button. Set the port number used when accessing WebGuard by using the Up and Down arrow buttons to increase or decrease the numbers. Highlight Enable SSL for Transferring Data and press the button to toggle between On and Off. When it is On, the security of data except video and audio transmitted for remote monitoring or remote recording can be enhanced by using the SSL (Secure Sockets Layer) authentication. When using the SSL function, the DVR cannot be connected with a remote program or a network keyboard which does not support the SSL function. CAUTION: The remote connection will be disconnected temporarily after changing the SSL settings. NOTE: This product includes software developed by the OpenSSL Project for use in the OpenSSL Toolkit (http://www.openssl.org/). You can save your General changes by highlighting Save and pressing the exits the screen without saving the changes button. Selecting Cancel IP Address Settings (NETWORK IP Address Tab) Figure 21 ─ IP Address setup screen. Highlight the box beside Type and press the button. You can select the type of network configuration from: Manual, DHCP and ADSL (with PPPoE). Select the desired type and press the button. Selecting Manual from the Type allows you to set up LAN parameters manually. NOTE: You will need to get the appropriate IP Address, Gateway and Subnet Mask from your network administrator. 31 User’s Manual Change the numbers by highlighting them and using the Up and Down arrow buttons to increase or decrease the number. The factory default LAN settings are: IP Address: Gateway: Subnet Mask: 192.168.1.129 192.168.1.254 255.255.255.0 Highlight the box beside DNS Server. Press the Up and Down arrow buttons to set the IP address of the DNS server. Highlight the Port Number Setup… box and press the button. The Port Number Setup screen appears. Change the numbers by highlighting them and using the Up and Down arrow buttons to increase or decrease the number. The factory default Port settings are: Remote Admin: Remote Callback: Remote Watch: Remote Search: Remote Audio: 8200 8201 8016 10019 8116 NOTE: You will need to get the appropriate Port Numbers for each DX-PC For View and WebGuard related program (Admin, Callback, Watch and Search) from your network administrator. NOTE: Do NOT use the same port number for two different programs, otherwise, the DVR cannot be connected with the PC running DX-PC For View or WebGuard. CAUTION: When changing the port settings, you must change the port settings on the PC running DX-PC For View or WebGuard as well. Refer to the DX-PC For View manual for details. Selecting DHCP from the Type and highlighting Save button reads the current IP address of the DVR configured by DHCP (Dynamic Host Configuration Protocol) network. Selecting ADSL (with PPPoE) allows you to set up the ADSL network. Highlight the box beside ID and press the button. A virtual keyboard appears allowing you to enter the ID for ADSL connection. Highlight the box beside Password and press the button. A virtual keyboard appears allowing you to enter the password for ADSL connection. NOTE: Entering the ID and Password and highlighting OK reads the current IP address of the DVR configured by the ADSL network. 32 Digital Video Recorder NOTE: If the DVR is configured for DHCP or an ADSL network, the IP address of the DVR might change whenever the unit is turned on. You can save your IP Address changes by highlighting Save and pressing the exits the screen without saving the changes button. Selecting Cancel DVRNS Settings (NETWORK DVRNS Tab) Figure 22 ─ DVRNS setup screen. Highlight Enable DVR Name Service and press the button to toggle between On and Off. NOTE: The DVRNS (DVR Name Service) allows the DVR to use Dynamic IP addresses for remote connection. When this feature is On, you can access your DVR remotely using the DVR name instead of its IP address. For the DVRNS feature, the DVR should be registered on the DVRNS server. Highlight the box beside DVRNS Server and press the button. A virtual keyboard appears allowing you to enter the IP address or domain name of the DVRNS server. NOTE: You will need to get the IP Address or domain name of the DVRNS Server from your network administrator. NOTE: You can use the domain name instead of IP address if you already set up the DNS Server when setting up the LAN. Highlight the box beside Port and press the button. Set the port number of the DVRNS server using the Up and Down arrow buttons to increase or decrease the numbers. Highlight Enable NAT and press the button to toggle between On and Off. NOTE: When using the NAT (Network Address Translation) device, refer to the NAT manufacturer’ instructions for the proper network settings. Highlight the box beside DVR Name and press the button. A virtual keyboard appears allowing you to enter the DVR name to be registered on the DVRNS server. Highlight the Check box and press the button to check whether or not the name you entered can be used. NOTE: The DVR name you entered should be checked by selecting Check, otherwise the DVRNS changes will not be saved. Highlighting Save and pressing the button registers the DVR on the DVRNS server. Proper DVRNS settings will display the help desk information of the DVRNS server in the box beside Help Desk. 33 User’s Manual Mail Settings (NETWORK Mail Tab) The DVR can be set up to send an e-mail when an event occurs. Figure 23 ─ Mail setup screen. Highlight Enable and press the the settings if Mail is enabled. button to toggle between On and Off. You will only be able to change Highlight the box beside SMTP Server and press the button. A virtual keyboard appears that you can use to enter the IP address or domain name of the SMTP server. NOTE: You will need to get the IP Address or domain name of the SMTP Server from your network administrator. NOTE: You can use the domain name instead of IP address if you already set up the DNS Server when setting up the LAN. Highlight the box beside Port and press the button. Use the arrow buttons to enter the SMTP Server port number obtained from your system administrator. The default port number is 25. Highlight Use SSL/TLS and press the button to toggle between On and Off. When it is On, the DVR can send an e-mail via an SMTP server requiring SSL (Secure Sockets Layer) authentication. Highlight the box beside Authentication and press the button. An Authentication screen appears. Highlight Use and press the button to toggle between On and Off. Highlight the box beside User/Password and press the button. A virtual keyboard appears allowing you to enter the user ID and password. NOTE: This product includes software developed by the OpenSSL Project for use in the OpenSSL Toolkit (http://www.openssl.org/). Highlight the box beside Sender and enter the sender’s e-mail address. Use the virtual keyboard to enter the e-mail address. NOTE: The e-mail address must include the “@” character to be a valid address. Highlight the box beside Recipient and enter the recipient’s e-mail address. Use the virtual keyboard to enter the e-mail address. You can save your Mail changes by highlighting Save and pressing the the screen without saving the changes. 34 button. Selecting Cancel exits Digital Video Recorder Callback Settings (NETWORK Callback Tab) The DVR can be set up to contact a computer running DX-PC For View (Remote Administration System) when an event occurs. Figure 24 ─ Callback setup screen. Highlight Enable and press the can change the IP addresses. button to toggle between On and Off. When Enable is turned On you Highlight the IP Address box that you want to change and press the button. Enter the IP address of the computer you want contacted during an event. You can enter up to five IP addresses. Highlight the box beside Retry and enter the number of times you would like the DVR to try contacting the computer. You can select from 1 to 10 retries. You can save your Callback changes by highlighting Save and pressing the exits the screen without saving the changes. button. Selecting Cancel CAMERA SETUP Figure 25 ─ Camera Menu. 35 User’s Manual General Settings (CAMERA General Tab) Figure 26 ─ Camera General setup screen. You can turn the camera number On or Off, and you can change the Title of each camera using the virtual keyboard. You can also determine which cameras will display on the monitors by selecting Normal, Covert 1 or Covert 2 from a drop-down list in the Use column. NOTE: When selecting the Covert 1, the DVR displays the camera title and status icons on the covert video. When selecting the Covert 2, the DVR displays only camera title on the covert video. NOTE: A user who does not have Covert Camera View authority cannot view video from cameras set to Covert 1 or Covert 2 in both the live monitoring and playback modes. You can save your General changes by highlighting Save and pressing the exits the screen without saving the changes. button. Selecting Cancel PTZ Settings (CAMERA PTZ Tab) Figure 27 ─ PTZ setup screen. NOTE: You will only be able to set up PTZ devices if the PTZ port is set to RS232 or RS485. Highlight the box in the Product column for the PTZ camera you wish to configure and press the A list of PTZ devices appears. 36 button. Digital Video Recorder Select your camera from the list and press the button. You will need to connect the camera to the RS232 or RS485 connector on the back of the DVR following the camera manufacturer’s instructions. You can assign IDs to each camera by highlighting the box under the ID heading and pressing the button. Change the number by highlighting it and using the Up and Down arrow buttons to increase and decrease the number. The PTZ ID number can be set from 0 to 256. Highlight the Setup… box and press the button. The Port Setup window appears. Configure the port’s setting based on the PTZ camera manufacturer’s instructions. You can save your PTZ changes by highlighting Save and pressing the the screen without saving the changes. button. Selecting Cancel exits DEVICE SETUP Figure 28 ─ Device Menu. You can configure the audio, alarm, display and remote control devices connected to the DVR. 37 User’s Manual Audio Settings (DEVICE Audio Tab) Figure 29 ─ Audio setup screen. The DVR can record up to four audio inputs. Highlight the box beside the input and press the button. A list of cameras appears, and you can select which camera you want associated with that audio input. Highlight Enable Audio-Out and press the out. button. This toggles between enabling and disabling audio NOTE: The DVR will NOT record audio when the recording speed is set to less than 1 ips. You can save your Audio changes by highlighting Save and pressing the the screen without saving the changes. button. Selecting Cancel exits Alarm-Out Settings (DEVICE Alarm-Out Tab) The Alarm-Out screen allows you to change the settings and establish a schedule for each alarm output from the DVR. Figure 30 ─ Alarm-Out setup screen. Highlighting the box beside Dwell Time and pressing the button allows you to set the dwell time of the alarm output. Dwell times range from 5 seconds to 15 minutes. You can add and edit alarm output schedules on this screen. Highlight the + and press the button to add a schedule. Highlighting the boxes under the Column heading and pressing the button allows you to edit the information in those boxes. 38 Digital Video Recorder The Day box allows you to select the days that the alarm schedule will be active. The choices are: Sun, Mon, Tue, Wed, Thu, Fri, Sat, M~F, Hol and All. The Range box allows you to set the time that the alarm schedule will be active in 15-minute increments from 00:00 to 24:00. The Mode box allows you to set how the alarm reacts during the scheduled time. When set to On, the Alarm-Out is active during the scheduled time. When set to Event, the Alarm-Out is only active when there is an Event during the scheduled time. The Alarm-Out box allows you to set which alarm outputs will be active. You can also select the DVR’s internal buzzer. The box allows you to delete an alarm output schedule. You will be asked to confirm whether or not you really wish to delete the schedule. You can save your Alarm-Out changes by highlighting Save and pressing the exits the screen without saving the changes. button. Selecting Cancel Remote Control Settings (DEVICE Remote Control Tab) The Remote Control setup screen allows you to select a port and make correct settings for a remote keyboard. Figure 31 ─ Remote Control setup screen. Highlight the box beside Port and select from None, RS232 and RS485. If the RS232 port and RS485 port are in use for PTZ control, networking or text input, the remote keyboard cannot be configured. Highlight Setup… and select the correct Baud Rate, Parity, Data Bits and Stop Bits for the device you are connecting to the DVR. Highlight the box beside Remote Control Product and select the device from the list. You can save your Remote Control settings by highlighting Save and pressing the Cancel exits the screen without saving the changes. button. Selecting 39 User’s Manual DISPLAY SETUP Figure 32 ─ Display Menu. OSD Settings (DISPLAY OSD Tab) The OSD screen allows you to select what information will be displayed on the monitor. Figure 33 ─ OSD setup screen. Highlighting an item and pressing the button toggles that item On and Off. When an item is On, there is a checkmark in the box beside it. The following items can be turned On or Off: Zoom ─ The icon displays on the enlarged video. Network ─ The icon displays when the unit is connected to a network via Ethernet. Freeze & Sequence ─ The icon displays while in the Freeze mode, and the displays while in the Sequence mode. Screen Group ─ The number of screen group displays when the DVR is not in the 4x4 display mode of the 16-channel DVR, and 3x3 mode of the 8-channel DVR. Free Space ─ The icon displays when the DVR is in the Recycle mode, and the percentage of available storage space displays when the DVR is not in the Recycle mode. Date/Time ─ The current date and time information displays. User Name ─ The name of the current user logged in displays. Camera No. ─ The camera number displays at the top-left corner of each camera screen. Camera Title ─ The camera title displays at the top-left corner of each camera screen. Record ─ The record related icons display on each camera screen. 40 Digital Video Recorder Audio ─ The icon displays on each camera screen for which the DVR can play live audio. PTZ ─ The icon displays on each PTZ camera screen. Text-In ─ The text input strings display on the screen. You can adjust the Display Dwell time (sec.) for the text input strings displayed on the screen. You can adjust the transparency of the setup screens by highlighting Transparency and using the Left and Right arrow buttons. Highlighting OSD Margin… and pressing the OSD text will be displayed on the monitor. button displays how You can adjust the horizontal and vertical margins so that text and icons will not be hidden beyond the edges of the monitor. You can save your OSD settings by highlighting Save and pressing the the screen without saving the changes. button. Selecting Cancel exits Main Monitor Settings (DISPLAY Main Monitor Tab) Figure 34 ─ Main Monitor setup screen. Highlight the box beside Mode and press the Sequence. button. You can select between Full Sequence and Cameo Pressing the Sequence button causes the DVR to sequence cameras, and the DVR can sequence cameras in two modes: “Full” and “Cameo”. In the Full mode, the DVR sequences through the cameras and displays them full screen. In the Cameo mode, the bottom right window in a multi-screen format sequences through the cameras. NOTE: Any cameras that are Off, have lost video or are set to Covert (unless the user has authority to view covert cameras) will be excluded from the Cameo sequence. You can define the screen layout in a variety of formats and set the DVR to sequence through the different screen layouts (pages) so that all the cameras will be displayed. You can also set up the DVR to display one camera or a group of cameras all the time while cycling through the remaining cameras in a “cameo” window. This can be done with one camera displayed full screen while displaying the cameo window as a PIP (picture in picture), or displaying the cameras in a grid pattern with the bottom right window as the cameo. NOTE: Sequence cannot be used in the 4x4 display mode of the 16-channel, and 3x3 mode of the 8-channel DVR. Highlight the box beside Interval and press the camera displayed on the main monitor. button. You can adjust the display dwell time for each 41 User’s Manual Highlight Event Monitoring On and press the button. Pressing the button toggles between On and Off. When it is On, the DVR will display the camera associated with the event when an event occurs. Highlight Enable VGA Enhancement and press the button toggle On and Off. When it is On, the DVR provides clearer live video by reducing visual defects called interlace artifacts. NOTE: When enabling the VGA Enhancement function, the recording speed will decrease by half. Use the arrow buttons on the setup screen to move the VGA screen position in the direction you want. Selecting the default button at the center cancels the screen positioning operation and reloads the default position. You can save your Main Monitor settings by highlighting Save and pressing the exits the screen without saving the changes. button. Selecting Cancel Spot Monitor Settings (DISPLAY Spot Monitor Tab) Figure 35 ─ Spot Monitor setup screen. You can define which cameras display sequentially on the Spot Monitor. Highlight the box beside the Channels column and press the button. You can save your Spot Monitor settings by highlighting Save and pressing the exits the screen without saving the changes. 42 button. Selecting Cancel Digital Video Recorder STATUS SCREEN Figure 36 ─ Status menu. Event Screen (STATUS Event Tab) Figure 37 ─ Event screen. The Event Status screen displays the status of the DVR’s systems and inputs. Events will be highlighted, and related channels or events will flicker for five seconds when detected. Alarm-In, Motion, Video Loss and Text-In will be highlighted when each event is detected based on the settings you made in the Alarm-In, Motion Detection and Text-In setup screen on the Event menu. Check Alarm-In and Check Recording will be highlighted when each event is detected based on the settings you made in the System Event setup screen on the Event menu. Panic Record will be highlighted while the DVR is in the panic recording mode. Fan Error will be highlighted when the cooling fan to the left of the power cord on the rear panel is not working for more than four seconds. Disk Almost Full will be highlighted when the DVR is not in the Recycle mode and the level of disk usage reaches the Disk Almost Full percentage you made in the Monitoring setup screen on the System menu. Disk Full will be highlighted when the DVR is not in the Recycle mode and all available storage space has been used. 43 User’s Manual Storage Screen (STATUS Storage Tab) Figure 38 ─ Storage screen. The Storage screen displays the Disk Bad, Temperature and S.M.A.R.T. information of the storage device. Disk Bad ─ Displays the damage status of the storage drive. (Not Formatted (The device is not formatted), Good (%) (The device is working properly though some portion (%) of the storage is damaged.) or Bad (More than 90% of the storage is damaged.)) Temperature ─ Displays the temperature of the storage drive. (N/A (The DVR cannot read the temperature.), Good (The temperature is normal.) or Bad (The temperature is 70oC (158oF) or higher.)) S.M.A.R.T. ─ Displays S.M.A.R.T. information of the storage. (Good (The storage condition is normal.), Bad (Data cannot be written on or read from the storage drive.) or N/A (The S.M.A.R.T. monitoring is not working or supported.)) NOTE: When the S.M.A.R.T. displays Bad, the screen displays a message box. Once the “Bad” message displays, replacing the hard disk drive is recommended, usually within 24 hours. NOTE: Temperature and S.M.A.R.T. information will be available only for internal hard disk drives supporting the SMART (Self-Monitoring Analysis and Reporting Technology) monitoring program. 44 Digital Video Recorder Chapter 4 ─ Operation NOTE: This chapter assumes your DVR has been installed and configured. If it has not, please refer to Chapters 2 and 3. The DVR’s controls are similar to a VCR. As with a VCR, the main functions are recording and playing back video. However, you have much greater control over recording and playing back video. You can establish recording schedules based on time of day and day of the week. The DVR allows you to search through the recorded video using much more sophisticated tools than those available with VCRs. Additional DVR features that are not available with VCRs are remote control and viewing, and recording video at the same time you are watching previously recorded video. The front panel controls are described in Chapter 3 ─ Configuration. TURNING ON THE POWER Once you have installed the DVR following the instructions in Chapter 2 ─ Installation, it is ready to record. LIVE MONITORING As soon as the DVR completes its initialization process, it will begin showing live video on the attached monitor and playing live audio through the attached speaker. The default mode is to display all cameras at once. Pressing any camera button will cause that camera to display full screen. It displays live video and plays live audio until the user enters another mode. Pressing the Display button cycles the DVR through the different display formats, and pressing the Group button changes the screen from the current camera group to the next camera group. You can display a Picture-in-Picture (PIP) by pressing the Display button in the single-screen mode. You can change the location of the PIP counterclockwise and clockwise by pressing the Up and Down arrow buttons and moves through screen pages by pressing the Left and Right arrow buttons. While in the live monitoring mode, press the Menu button displays the following Live Monitoring menu at the top of the screen. Pressing the Menu button again hides the menu. You can navigate through menus and items by pressing the arrow buttons. 45 User’s Manual Freeze Sequence Camera Menu Alarm Reset Panic Setup Search Mode Login/Logout Figure 39 ─ Live Monitoring menu. NOTE: The Live Monitoring menu also can be displayed by moving the mouse pointer to the top of the screen. LIVE MONITORING MENU Freeze Selecting (Freeze) in the Live Monitoring menu will freeze the current image on the screen until you select again. It is the same as pressing the (Play/Pause) button on the front panel. While in the Freeze mode, the icon displays in bottom-left corner if Freeze is selected in the Display setup screen (OSD tab). Sequence Selecting (Sequence) in the Live Monitoring menu causes the cameras to display sequentially. It is the same as pressing and holding the Group/Sequence button on the front panel for three seconds or longer. When in one of the multi-view formats, pressing this button will cause the DVR to go through predefined screen layouts (Full Sequence). Or, the bottom, right screen will display live cameras sequentially (Cameo Sequence). Selecting again in the Live Monitoring menu exits the Sequence mode. When in one of the multi-view formats, pressing the Group/Sequence button will cause the DVR to go to the next page. For example, if you press the Group/Sequence button in the 2x2 format, the DVR changes pages as follows: If all the cameras in a page are Off, have lost video or are set to Covert (unless the user has authority to view covert cameras), that page will be excluded from the sequence. NOTE: The Full Sequence for the full sequence monitoring and the Cameo Sequence for the cameo sequence monitoring should be selected in the Display setup screen (Main Monitor tab). 46 Digital Video Recorder Camera Menu Selecting (Camera Menu) in the Live Monitoring menu displays the following Camera Menu. PTZ: Selecting PTZ and choosing the camera number allows you to control the selected camera as long as it has Pan, Tilt and Zoom capabilities. It is the same as pressing the PTZ/Zoom button on the front panel. Refer to the following PTZ Mode section for details. Zoom: Selecting Zoom and choosing the camera number zooms the current image of the selected camera on the screen. It is the same as pressing the PTZ/Zoom button on the front panel. Selecting Zoom again in the Camera Menu again exits the Zoom mode. Refer to the following Zoom Mode section for details. Audio: Selecting Audio toggles audio output On and Off. Color Control: Selecting Color Control and choosing the camera number allows you to control brightness, contrast, hue and saturation for each camera for the selected camera if a user who has Color Control authority logs into the system. It is the same as pressing and holding a camera button for a few seconds. NOTE: It is important that cameras and monitors are correctly installed and adjusted prior to making any image adjustments using the DVR’s controls. NOTE: Any image adjustments you make will be applied to both the live video on the monitors and the recorded video. Spot Monitor: Selecting Spot Monitor allows you to select the camera you want to display on a Spot monitor. Refer to the following Spot Monitoring section for details. NOTE: The Camera Menu also can be displayed by clicking the right mouse button on the screen while in the live monitoring mode. Group Edit: Selecting Group Edit enters the cameo mode. It is the same as pressing the Cameo button on the front panel. Selecting Exit Group Edit in the cameo menu exits the Active Cameo mode. Refer to the following Active Cameo Mode section for details. Alarm Reset Selecting (Alarm Reset) in the Live Monitoring menu resets the DVR’s outputs including the internal buzzer during an alarm. It is the same as pressing the Alarm button on the front panel. Panic Selecting (Panic) in the Live Monitoring menu starts panic recording of all cameras, and selecting again stops panic recording. It is the same as pressing the Panic button on the front panel. Setup Selecting (Setup) in the Live Monitoring menu enters the Main Setup screen. Refer to Chapter 3 ─ Configuration for detailed descriptions of system setup. Search Mode Selecting (Search Mode) in the Live Monitoring menu exits the live monitoring mode and enters the search mode. It is the same as pressing the Playback button on the front panel. 47 User’s Manual Login/Logout Selecting (Login) in the Live Monitoring menu accesses the Login screen, and you will be asked to select a User and enter the password to log into the system. Selecting (Logout) in the Live Monitoring menu displays the Logout screen asking you to confirm whether or not you want to log out the current user. PTZ MODE If a user who has PTZ Control authority logs into the system, the user can control PTZ cameras. The DVR will control cameras with Pan, Tilt and Zoom capabilities. Press the PTZ button to display the PTZ camera menu and enter the PTZ mode, and press the button again to exit the PTZ mode. Select the PTZ camera you wish to control. The icon flickers on the PTZ camera screen. You can control the camera using front panel control buttons, by setting up presets or by selecting the expanded PTZ features. To use the front panel buttons, press the Left and Right arrow buttons to pan left and right. Press the Up and Down arrow buttons to tilt the camera up and down. Press the camera button 1 to zoom in, and press the button 2 to zoom out. You can use the button 3 and button 4 to focus the image. You can establish preset positions for PTZ cameras. Press the camera button 6 to establish Presets. You can quickly move PTZ cameras to Preset positions. Press the camera button 5 to view an establish camera Preset position. You can save camera position settings as “presets” so that you can go directly to desired views. Once you have the camera at the desired settings, press the button, and the PTZ Preset dialog box will appear. Select the number you want to assign to the preset and press the (Play/Pause) button. Use the virtual keyboard to enter the preset name. Press the button to load the PTZ preset and the Preset View dialog box will appear. Select the desired preset and press the button to load the preset. Pressing the Menu button displays the following PTZ menu. Set the feature you wish to control by selecting it from the menu. Refer to the camera manufacturer’s instructions for the proper settings. Depending on the camera specifications, some features may not be supported. 48 Digital Video Recorder You can use a mouse for convenient PTZ control. Position the mouse pointer at the bottom of the screen, and the following PTZ toolbar will display. Zoom In / Out Iris Open / Close Focus Near / Far Set / Load Preset Clicking on the left side exits the toolbar. If you want to display the toolbar again, position the mouse pointer at the bottom of the screen. Change the toolbar location by clicking the empty space on the left side of the toolbar and drag it to where you want it located on the screen. Use the arrow buttons on the toolbar to pan or tilt the camera in the direction you want. ZOOM MODE You can enlarge an area of the video by pressing the Zoom button on the front panel. For a few seconds after pressing the Zoom button, a rectangle displays on the screen. A rectangle shows the area that will be enlarged. You can move the rectangle around using the arrow buttons. Pressing the (Play/Pause) button in the Zoom mode enlarges the area in rectangle. Exit the Zoom mode by pressing the Zoom button. While in the Zoom mode, the icon displays if Zoom is selected in the Display setup screen (OSD tab). SPOT MONITORING You can select the camera you want to display on a Spot Monitor. Press and hold the Spot button on the front panel for three seconds or longer displays the Sequence Menu. Select the camera to be displayed on the Spot Monitor. Selecting Sequence from the menu displays more than one camera on a Spot Monitor sequentially. Select Sequence again to stop sequencing on the Spot Monitor. Any cameras that are Off, have lost video or are set to Covert (unless the user has authority to view covert cameras) will be excluded from the sequence. When the Spot Monitor is in the sequence mode, you can set the camera’s display dwell time. Refer to Chapter 3 – Configuration – Display Setup section for details. ACTIVE CAMEO MODE You can enter the Active Cameo mode by pressing and holding the Cameo button for three seconds or longer in any multi-view format. The yellow outline surrounding the video indicates the active cameo, and pressing the arrow buttons moves the active cameo. Pressing the (Play/Pause) button exits the Active Cameo mode. Selecting Exit Group Edit in the cameo menu displayed when pressing the Cameo button also exits the Active Cameo mode. The active cameo mode will remains in effect for 15 seconds if there is no further operation. In active cameo mode, press the button for the camera you want to display in the active cameo. After setting the camera number to active cameo, the DVR moves the active cameo to the next cameo. When the camera number exists on the current screen, the active cameo is changed with the existing camera number. When the camera number does not exist on the current screen, the active cameo is replaced by the camera number. You can change the screen layout in this way. 49 User’s Manual EVENT MONITORING When an event occurs, the DVR will display the camera associated with the event if Event Monitoring On is selected in the Display setup screen (Main Monitor tab). How the cameras are displayed depends on the number of cameras associated with the event. If one camera is associated with the event, the DVR will display the camera full screen. If two to four cameras are associated with the event, the DVR will display the cameras on a 2x2 screen. If five to nine cameras are associated with the event, the DVR will display the cameras on a 3x3 screen. If 10 or more cameras are associated with the event, the DVR will display the cameras on a 4x4 screen. Event monitoring lasts for the dwell time set for event recording. After the dwell time has elapsed, the monitor returns to the previous screen unless another event has occurred. If you want to return to the live monitoring mode before the dwell time has elapsed, press the Display button or one of the camera buttons. COVERT CAMERA If a camera is set up as Covert 1 in the Camera setup screen (General tab), that camera will not be displayed unless a user with Covert Camera View authority logs into the system. However the camera title and status icons will be displayed on the monitor. If a camera is set up as Covert 2 in the Camera setup screen (General tab), that camera appears to be Off unless a user with Covert Camera View authority logs into the system. The camera title will be grayed out and status icons will not be displayed on the monitor. NOTE: When a camera is set up as Covert 1, the DVR displays the camera title and status icons on the covert video. When set up as Covert 2, the DVR displays only the camera title on the covert video. If a user who has Covert Camera View authority logs into the system, the user can view video from cameras set to Covert 1 or Covert 2 including the camera titles and status icons. USING A MOUSE You can use a mouse instead of the front panel buttons to perform many of the DVR functions. In the Live Monitoring mode or Search mode, moving the mouse pointer to the left edge of the screen displays the following Mouse Display menu icons. Full Screen PIP 2x2 3x3 4x4 Previous Group Next Group OSD Figure 40 ─ Mouse Display menu. 50 Digital Video Recorder Full Screen Selecting (Full Screen) in the Mouse Display menu and choosing the camera number button displays the selected camera full screen. It is the same as pressing the individual camera buttons on the front panel or clicking the left mouse button on a camera image when in one of the multiview formats (i.e., 2x2, 3x3 or 4x4). Clicking the left mouse button on the screen again returns to the previous display mode. PIP, 2x2, 3x3, 4x4 Selecting , , or (PIP, 2x2, 3x3 or 4x4) in the Mouse Display menu displays the cameras in the selected multiview screen mode (PIP, 2x2, 3x3 or 4x4). Selecting each display mode is the same as pressing the Display button on the front panel or scrolling the mouse wheel up and down when in one of the multiview formats (i.e., 2x2, 3x3 or 4x4). NOTE: The PIP display mode will not be supported in the search mode. Previous Group, Next Group Selecting or (Previous Group or Next Group) in the Mouse Display menu moves to the previous or next page. It is the same as pressing the Group button on the front panel. OSD Selecting (OSD) in the Mouse Display menu toggles OSD On and Off. RECORDING VIDEO Once you have installed the DVR following the instructions in Chapter 2 ─ Installation, it is ready to record. The DVR will start recording based on the settings you made in the Record menu. Refer to Chapter3 ─ Configuration. Recycle On or Recycle Off. The factory default is Recycle On. It does this by recording over the oldest video once the hard disk is full. Setting the DVR to Recycle Off causes it to stop recording once the hard disk is full. MPEG-4 or H.264. The factory default codec is MPEG-4. When set to H.264, the DVR can record more images by compressing more effectively than using MPEG-4. However, the recording speed might decrease depending on the display option and DVR’s operation mode. Refer to the Chapter 3 – Configuration – Record Setup, Display Setup sections for details. Standard (CIF), High (Half D1) or Very High (D1). The factory default resolution is Standard. When set to Standard, the DVR has a maximum recording speed of 120 ips (100 ips PAL). When set to High, the DVR has a maximum recording speed of 60 ips (50 ips PAL). When set to Very High, the DVR has a maximum recording speed of 30 ips (25 ips PAL). Although you will be able to record without changing the unit from its original factory settings, you will want to take advantages of the DVR’s many tools. Refer to Chapter 3 ─ Configuration for detailed descriptions of the recording mode options. 51 User’s Manual PANIC RECORDING Pressing the Panic button starts panic recording of all cameras, and pressing the button again stops panic recording. If you set the Panic Recording Duration in the Record General setup screen, panic recording will stop automatically according to the preset duration as long as the Panic button is not pressed. NOTE: When the DVR is not in the Recycle mode and all available storage space has been used, panic recording will not operate. RECORDING AUDIO If the DVR was set up to record audio, it will record audio from up to four inputs when video is recording. The DVR will not record audio when the recording speed is set to less than 1 ips. NOTE: Make certain you comply with all local and federal laws and regulations when recording audio. PLAYING RECORDED VIDEO If a user who has Search authority logs into the system, the user can view recorded image. Once video has been recorded, you can view it by pressing the Playback button. When playing video for the first time, the DVR will display the most recent image. When playing video subsequent times, the DVR will start playing video from the last recalled image. Recorded audio will be played when the DVR displays a camera with recorded audio in full screen mode. NOTE: Only the administrator and users with Covert Camera View authority can view video from covert cameras. The covert cameras in the playback mode are determined by the current camera settings. Playback Button: Pressing the Playback button enters the playback mode, and pressing the button again exits the playback mode. When entering the playback mode, video is paused. Pressing the button plays back video at regular speed. The screen displays when the DVR is in the Pause mode and the screen displays when the DVR is playing back video. Play/Pause Button: Pressing the button plays back images at regular speed or pauses playing video. Arrow Buttons: Pressing the button plays video backward at high speed. Pressing the button again and . Pressing the button plays video forward at high toggles the playback speed from , speed. Pressing the button again toggles the playback speed from , and . When in the pause mode, pressing the button moves to the next image and pressing the button moves to the previous image. Camera Buttons (1 to 16): Pressing the individual camera buttons will cause the selected camera to display full screen. Zoom Button: Pressing the Zoom button zooms in the current image on the screen. Display/Spot Button: Pressing the Display/Spot button toggles different display formats. The available formats are: 2x2, 3x3 and 4x4. Pressing and holding the button for three seconds or longer allows you to select which cameras will display on the Spot monitor. Group Button: Pressing the Group button changes the screen from the current camera group to the next camera group, and the screen displays page number. 52 Digital Video Recorder Cameo Button: Pressing and holding the button for three seconds or longer enters the cameo mode. The yellow outline surrounding the video indicates the active cameo, and pressing the arrow buttons moves the active cameo. Pressing the desired camera button in the active cameo edits the cameo and displays the video of selected camera. Pressing the button exits the Active Cameo mode. Selecting Exit Group Edit in the cameo menu displayed when pressing the Cameo button also exits the Active Cameo mode. NOTE: A cameo is defined as any cell within multi-screen display. The cameo mode allows you to change the screen layout by editing the cameo. You can use a mouse for convenient playback control. Position the mouse pointer on the playback screen, and the following Record Table Search screen (Standard View mode) will display. The individual controls perform the following functions: Go to the previous image Fast backward play Selecting Play Fast forward play Go to the next image in the top-left corner exits the Record Table Search screen. SEARCHING VIDEO While in the search mode, press the Menu button displays the following Search menu at the top of the screen. Pressing the Menu button again hides the menu. You can navigate through menus and items by pressing the arrow buttons. Search Go To Export Camera Menu Alarm Reset Panic Data Source Exit Figure 41 ─ Search menu. NOTE: The Search menu also can be displayed by moving the mouse pointer to the top of the screen. 53 User’s Manual SEARCH MENU Search Selecting (Search) in the Search menu allows you to search using a recording table (Record Table Search), select video from the event log (Event Log Search), searches text input strings (Text-In Search) or searches motion events (Motion Search). See the following Record Table Search, Event Log Search, Text-In Search and Motion Search sections for details. Go To Selecting (Go To) in the Search menu displays the following GO TO menu. Go to the First: Selecting Go to the First displays the first recorded image. Go to the Last: Selecting Go to the Last displays the last recorded image. Go to the Date/Time: Selecting Go to the Date/Time displays the Go to the Date/Time screen. Move the cursor over the date and time and press the (Play/Pause) button. You can use the Left and Right arrow buttons to highlight the year, month, day, hours, minutes and seconds. Use the Up and Down arrow buttons to change to the date and time you want to search for video. Once you have set the date and time you want, press the button. Then highlight Go and press the button. The selected date and time will display. (If no video was recorded during the selected time, a message appears alerting you that no image was recorded at that time.) The button and arrow buttons can now be used to review the surrounding video. Export Selecting (Export) in the Search menu allows you to clip a video segment and save it. It is the same as pressing the Clip Copy button on the front panel. See the following Clip Copy section for details. Camera Menu Selecting (Camera Menu) in the Search menu displays the following Camera Menu. Zoom: Selecting Zoom and choosing the camera number zooms the current playback image of the selected camera on the screen. It is the same as pressing the PTZ/Zoom button on the front panel. Selecting Zoom again exits the Zoom mode. Audio: Selecting Audio toggles audio playback On and Off. Recorded audio will be played when the DVR displays a camera with recorded audio in full screen mode. Enable De-Interlace: Selecting Enable De-Interlace turns the de-interlace filters on. NOTE: The video signal has a time difference of 1/60 second (1/50 second for PAL) between odd and even fields because it is composed of 60 interlaced fields per second (50 fields for PAL). When recording video with Very High (D1) resolution, video is made up of frame units combining two fields – one odd field and one even field. This can cause horizontal scan lines or flashes in areas with motion because of the time difference between the two fields. Turning on the de-interlace filter provides clearer video by eliminating these horizontal scan lines and flashes. 54 Digital Video Recorder NOTE: The Camera Menu also can be displayed by clicking the right mouse button on the screen while in the search mode. Group Edit: Selecting Group Edit enters the cameo mode. Selecting Exit Group Edit in the cameo menu exits the Active Cameo mode. Refer to the Live Monitoring – Active Cameo Mode section of this chapter for details. Alarm Reset Selecting (Alarm Reset) in the Search menu resets the DVR’s outputs including the internal buzzer during an alarm. It is the same as pressing the Alarm button on the front panel. Panic Selecting (Panic) in the Search menu starts panic recording of all cameras, and selecting panic recording. It is the same as pressing the Panic button on the front panel. again stops Data Source Selecting (Data Source) in the Search menu allows you to select the data source to be searched. Selecting Record searches recorded data on primary storage installed in the DVR, and selecting Other searches recorded data on storage used for another DVR then installed in this DVR. Exit Selecting (Exit) in the Search menu exits the search mode and enters the live monitoring mode. RECORD TABLE SEARCH < Standard View > < Compact View > < Expanded View > Figure 42 ─ Record Table Search screen. Recording information about video images currently displayed on the screen displays on the recording status bar. A grey vertical line indicates the current search position. To search specific video, move the vertical line by using the Left or Right arrow buttons on the front panel or by clicking the mouse on the desired segment. If the DVR’s time and date have been reset to a time that is earlier than some recorded video, it is possible for the DVR to have more than one video stream in the same time range. In this case, the overlapping time range in the record table will be separated by a yellow vertical line. 55 User’s Manual NOTE: The recorded data in the time range located after the yellow vertical line is the latest. There are three view modes. Standard view, Expanded view and Compact view. Standard view (default) displays combined recording information of all camera channels currently displayed on the screen. In the Standard view mode, selecting the icon located at the bottom switches to the Expanded view mode. The Expanded view displays the recording information of each camera channel currently displayed on the screen. Selecting the icon in the Standard view mode switches to the Compact view mode which displays only the toolbar. Selecting the icon in the Compact view mode switches to the Standard view mode, and selecting the icon in the Expanded view mode switches to the Standard view mode. Selecting or located at the bottom zooms the record table. Selecting displays eight hours (1-minute based), and selecting displays 24 hours (3-minute based) at once. To move to earlier or later times that are not shown in the current record table screen, select the arrows located at the end of the times by using the arrow buttons on the front panel. NOTE: If the DVR has images recorded in more than one recording mode in the same time range, the recording status bar displays recording information in the following priority order: Panic Pre-Event Event Time. The color of the bar indicates different recording modes: Red for Panic, Yellow for Pre-Event, Purple for Event, and Blue for Time. Selecting located at the bottom displays the Calendar Search screen. Days with recorded video display on the calendar with white numbers. You can select the days with recorded video by using the arrow buttons on the front panel. Once you have selected a day, pressing the button displays the first recorded image of the selected date on the screen. Once you have selected the date you want to search, review the surrounding video by using the playback controls located at the bottom. Refer to the Playing Recorded Video section of this chapter for information regarding playback controls. Selecting located at the bottom displays the Search menu. Go To: Displays the first or last recorded image, or searches by date and time (see the previous Searching Video – Go To section of this chapter for more details). Clip-Copy: Copies a video segment and saves it (see the following Clip Copy section for more details). Zoom: Zooms the current playback image. Enable De-Interlace: Turns the de-interlace filter on. Slow Play: Plays video at low speed (x1/2, x1/3, x1/4, x1/6 and x1/8). The individual playback controls at the bottom perform the following functions as described below: Go to the previous image Fast backward play Selecting 56 Play Fast forward play in the top-left corner exits the Record Table Search screen. Go to the next image Digital Video Recorder EVENT LOG SEARCH Figure 43 ─ Event Log Search screen. The DVR maintains a log of each time the Alarm Input port is activated. The Event Log Search screen displays this list. Use the arrow buttons to highlight the event for which you would like to see video. Pressing the (Play/Pause) button will extract the event video and display the first image of the event. Pressing the button will start playing the “event” video segment. Pressing Playback button returns to live monitoring. NOTE: It is possible that no recorded image displays on the current screen. Press the Display button and change the screen mode to 4x4. You will be able to easily see the camera have recorded video during target time. You can also narrow your event search by selecting the Option… button and setting up the new search condition. You can search video from the first to last recorded images, or you can set the start and stop times and dates. Highlight the box beside From and press the button to toggle between On and Off. When set to Off, you can enter a specific Date and Time. When set to On, the search will be from the first recorded image. Highlight the box beside To and press the button to toggle between On and Off. When set to Off, you can enter a specific Date and Time. When set to On, the search will be from the last recorded image. Highlight the box beside Check Time Overlap and press the button. It toggles between On and Off. You will only be able to turn the Check Time Overlap on or off if a user-defined date and time is set to From and To. If the DVR’s date and time have been reset, it is possible for the DVR to have more than one overlapping start and stop time. When set to On, you will be asked to select one of the overlapping start and stop time. When set to Off, the DVR will display search results from all start times to all stop times. Highlight the box beside Alarm-In and press the to include in your search. Highlight the box beside Motion and press the any reports of motion detection. button. You can select the alarm inputs that you want button. You can select the cameras for which you want 57 User’s Manual Highlight the box beside Video Loss and press the want any reports of lost video. Highlight the box beside Text-In and press the any report of text input. button. You can select the cameras for which you button. You can select the text-in devices which you want Highlight the box beside Record Channels and press the button. You can select the cameras that you want to search for any reports of event recorded data. The DVR will display the events (not the camera channels) that occurred and that also are recorded on the camera channel that you selected. If you do not select a camera channel in this field, the DVR will search events that are not associated with cameras. You can also toggle On and Off self-diagnostic events as part of your search. The choices are: Panic Record Check Recording Check Alarm-In Disk Almost Full Disk Bad Disk Temperature Disk S.M.A.R.T. Fan Error Once you set your desired search conditions, highlight Search and press the button to display the search results in the Event Log Search screen. Selecting Cancel exits the screen without saving the changes. TEXT-IN SEARCH Figure 44 ─ Text-In Search screen. The DVR maintains a log of each time there is Text Input. The Text-In Search screen displays this list. Use the arrow buttons to highlight the event for which you would like to see video. Pressing the (Play/Pause) button will extract the video associated with the Text Input and display the first image of the event. Pressing the button will start playing the “event” video segment. Pressing Playback returns to live monitoring. NOTE: It is possible that no recorded image displays on the current screen. Press the Display button and change the screen mode to 4x4. You will be able to easily see the camera have recorded video during target time. NOTE: Text Input information will be overlaid on the image while the recorded video is played at regular speed. 58 Digital Video Recorder You can also narrow your event search by selecting the Option… button and setting up the new search condition. You can search video from the first to last recorded images, or you can set the start and stop times and dates. Highlight the box beside From and press the button to toggle between On and Off. When set to Off, you can enter a specific Date and Time. When set to On, the search will be from the first recorded image. Highlight the box beside To and press the button to toggle between On and Off. When set to Off, you can enter a specific Date and Time. When set to On, the search will be from the last recorded image. Highlight the Channel and press the button. Select the text-in devices that you want to search for text input. Highlight the text input device box and press the button. Select your Text Input Device from the list. Highlighting the + and pressing the button allows you to add a new set of search parameter. Set up the desired search parameter. Refer to the Appendix B – Text-In Search Examples for further information on setting up search parameters. The column can be used to delete a set of search parameter or entire sets of search parameters. Highlight Case Sensitive and press the button. This will toggle between On and Off. When this feature is On, the search will find only those text strings in which the case matches. Highlight Load and press the settings. button to load saved search option settings. Select the desired search option Highlight Save and press the button to save the current search option settings. A virtual keyboard appears that you can use to enter the search option name. Once you set your desired search conditions, highlight Search and press the button to display the search results in the Text-In Search screen. Selecting Cancel exits the screen without saving the changes. MOTION SEARCH Figure 45 ─ Motion Search screen. 59 User’s Manual The Motion Search… can be selected from the Search menu while the DVR displays the camera full screen. The Motion Search screen displays a list of motion events. Use the arrow buttons to highlight the event for which you would like to see video and press the (Play/Pause) button to display the video associated with the selected event on the small search screen. Highlighting Close and pressing the button will extract the video associated with the Motion event and display the first image of the event. Pressing the button will start playing the “event” video segment. Pressing Playback returns to live monitoring. You can also narrow your event search by selecting the Option… button and setting up the new search condition. You can search video from the first to last recorded images, or you can set the start and stop times and dates. Highlight the box beside From and press the button to toggle between On and Off. When set to Off, you can enter a specific Date and Time. When set to On, the search will be from the first recorded image. Highlight the box beside To and press the button to toggle between On and Off. When set to Off, you can enter a specific Date and Time. When set to On, the search will be from the last recorded image. Highlight the box beside Type and press the button. You can select between Motion Search and Museum Search. Motion Search detects motion in the defined area. Museum Search detects if a defined object has moved. Highlight the box beside Zone and press the button. An image from the video appears with a grid overlaid. You can turn sensor blocks On and Off to define the area of the picture in which you want to search for motion. NOTE: When setting the Museum Search Zone, the zone should be placed inside of the border line of the target object. If the selected block is placed on the border line, the sensitivity of the Museum Search may decrease. The zone should be placed or focused on the centre or, at least, within the outline of targeted object. Highlight the box beside Sensitivity and press the to 5 (high sensitivity). button. You will be able to select from 1 (low sensitivity) Highlight the box beside Min. Blocks and press the button. You will be able to set the number of sensor blocks that must be activated. Setting the Min Blocks will only be available if Motion Search is selected. Once you set your desired search conditions, highlight Search and press the button to display the search results in the Motion Search screen. Selecting Cancel exits the screen without saving the changes. When you search for motion events of another camera, you will be asked whether or not you want to delete the previous search results from the list. CLIP COPY The Clip-Copy screen can be used to copy video clips to an internal CD-RW or DVD RW drive, or external USB hard disk, CD-RW or flash drive. The copied video clips can be viewed on computers running Microsoft Windows 98, ME, 2000, XP or Vista. Refer to the Appendix A ─ USB Hard Disk Drive Preparation for information on preparing the external drive for clip copy. The clip copy can be simply done by pressing the Clip Copy button. 60 Digital Video Recorder Pressing and holding the Clip Copy button for more than three seconds while in the Live monitoring mode, and the Clip-Copy screen appears to allow clip copy setup. Pressing the Clip Copy button during playback will set the starting point of the video to be clip copied, and the icon displays at the bottom-left corner of the screen. Pressing the Clip Copy button again will set the ending point of the video to be clip copied by displaying the Clip-Copy screen. Pressing and holding the Clip Copy button for more than three seconds while in the Playback mode or live monitoring mode initiates the One-Touch Clip Copy function. The last recorded image will be the ending point of video to be clip copied, and the system will automatically begin to calculate the possible video data size that the selected storage media can handle. Figure 46 ─ Clip-Copy screen. You can search video from the first to last recorded images, or you can set the start and stop times and dates. Highlight the box beside From and press the (Play/Pause) button to toggle between On and Off. When set to Off, you can enter a specific Date and Time. When set to On, the search will be from the first recorded image. Highlight the box beside To and press the button to toggle between On and Off. When set to Off, you can enter a specific Date and Time. When set to On, the search will be from the last recorded image. Highlight the box beside Channels and press the like to include in your video clip. button. You can select the cameras that you would Highlight the box beside Password and press the enter the password for reviewing the video clips. button. A virtual keyboard appears allowing you to Highlight the box beside Dest. and press the button. You can select the storage device on which you would like to record the video clip. You can choose from Internal CD-RW, Internal DVD RW, USB Storage and USB CD-RW. CAUTION: The USB device for clip copy must be FAT 16 or FAT32 format. NOTE: While copying video clips on the CD-RW or DVD RW, the recording speed might decrease. NOTE: When the error message “Firmware update of the optical drive is required” displays, update the firmware of the installed CD-RW drive or DVD RW drive. Please follow the instructions described in Chapter 3 – Configuration – System Information section. The DVR automatically assigns a file name to the video clip. However, you can give the video clip file a different name. Highlight the box beside File Name and press the button. A virtual keyboard appears. Enter a file name for the video you are backing up and select Close. 61 User’s Manual NOTE: When naming a file, you cannot use the following characters: \, /, :, *, ?, “, <, >, |. Highlight Include Text-In Data and press the button. This will toggle between On and Off. When this feature is On, you can include text-in data when copying video if the video was recorded with text-in data. Once you have given the video clip a file name, highlight the Start button and press the button. The confirmation screen displaying data size will appear. When the storage device does not have enough space, the DVR will ask if you want to copy as much of the video clip as possible in the available space. Highlight the Continue button and press the button to continue clip copy. Once the clip copy starts, you can cancel it by selecting Cancel or hide the screen by selecting Close. When selecting Close, Clip Copy continues and a confirmation screen will display when complete. NOTE: Only 4.7GB DVD media is available. To clip copy video on the DVD media using remaining space, the size of previously recorded data on the DVD media should be less than 4GB. NOTE: Select the Full Erase option when erasing recorded data on DVD media, otherwise the media will not operate properly when rewritten. NOTE: The file size for clip copy is limited to 2GB. You can use other functions on the DVR while video is being backed up. To do this, highlight the Close button and press the button. You can return to the Clip-Copy screen at any time to check the progress. You do not need to install any special software on your personal computer to review the video clips. Refer to the DX-PC For View manual for instructions on how to review video clips you have copied. NOTE: During Clip Copy, you cannot shut the system down, clear data on the storage device, or format the storage device. CAUTION: Do NOT disconnect the USB cable or the power from the external drive while copying video clips. If the external drive is shut down or the USB cable is disconnected while copying video clips, THE DVR SYSTEM MAY NOT WORK NORMALLY OR THE EXTERNAL DRIVE COULD BE DAMAGED, and you will get an error message the next time you try to copy video clips. You will need to power down the DVR and restart it to get rid of the error message. Once the file system of the USB hard disk drive has been corrupted, this error message cannot be dismissed. Even after restarting the DVR it may automatically restart while preparing to clip copy. You must recover the file system using the recovery program, or you must reformat the hard disk drive. 62 Digital Video Recorder Appendix A ─ USB Hard Disk Drive Preparation Preparing the USB hard disk drive in Windows 2000 NOTE: Preparing a USB hard disk drive under Windows XP and Windows Vista is almost identical to Windows 2000. 1. 2. 3. 4. 5. 6. Connect the USB hard disk drive to your computer using the USB Cable. Turn on your computer. The USB device icon should display on the Taskbar. If the USB hard disk drive is partitioned or has data, it will show up in My Computer as a hard disk drive icon. Check the file system by right clicking on the icon and checking under Properties > General > File System. If the file system is NOT FAT32 format, format the USB hard disk drive using the FAT32 format. If the USB hard disk drive is not partitioned, go to Administrative Tools in Control Panel and launch Computer Management. Open Disk Management in Storage and right click an unallocated region of the USB hard disk drive. Then, click Create Partition. In the Create Partition wizard, click Next then Primary Partition, and follow the instructions on the screen. Make sure that the FAT32 is selected for the file system. NOTE: The partition size should be less than 32GB because of Microsoft limitations. After formatting is complete, the USB hard disk drive will be added to My Computer. 7. Connect the USB hard disk drive to the DVR. Preparing the USB hard disk drive in Windows 98 NOTE: Preparing a USB hard disk drive under Windows ME is almost identical to Windows 98. 1. 2. 3. 4. 5. 6. 7. 8. 9. 10. 11. 12. 13. 14. Connect the USB hard disk drive to your computer using the USB Cable. Turn on your computer. The Add New Hardware wizard window will appear. Install the device driver for the USB backup device following the instructions provided with your USB hard disk drive. If the USB hard disk drive is partitioned or contains data, it will show up in My Computer as a hard disk drive icon. Check the file system in Properties > General > File System. If the file system is NOT FAT32 format, format the USB hard disk drive with FAT32 format. Run the FDISK utility by clicking Start then RUN. Type “fdisk” and click OK. When the MS-DOS command prompt appears, type “Y” and hit the enter key. In the FDISK Option menu, choose “5. Change current fixed disk drive.” Choose the appropriate letter corresponding to the USB hard disk drive. In the FDISK Option menu, choose “1. Create DOS partition or Logical DOS Drive.” In the Create DOS Partition or Logical DOS Drive menu, choose “1. Create Primary DOS Partition.” And Type “Y” to use all available space and hit the enter key. Hit ESC to exit the screen after the USB hard disk drive partition is created. Restart your computer and verify the newly created drive is in My Computer. Right click the newly created hard disk drive icon and select “Format”. In the Format Screen, select “Full” as the “Format type” and click “Start”. After formatting is complete, connect the USB hard disk drive to the DVR. NOTE: Microsoft is either registered trademarks or trademarks of Microsoft Corporation in the United States and/or other countries. 63 User’s Manual Appendix B ─ Text-In Search Examples Search Example I 1 2 3 4 5 6 123456789012345678901234567890123456789012345678901234567890 Item Unit price Qty amount ================================================== Coke | $ 2.20 | 2(s) | $ 2.20 Fanta | $ 2.20 | 1(s) | $ 2.20 Hotdog | $ 3.50 | 3(s) | $ 10.50 Pepsi | $ 1.95 | 1(s) | $ 1.95 ================================================== total : $ 16.85 Thank you~~ In the above text-in data, you can find that the comparison value is located at 17th (Unit price, $ mark will be ignored automatically), 28th (Qty) and 40th (amount) characters (including spaces) from the left. In this case, you can enter “17”, “28” and “40” in each Column box. For example, if you want to search for Coke with a Qty (Quantity) of more than 1 and Hotdog with an amount totaling over $8, the following search condition can be set. Search Example II 1 2 3 4 5 6 123456789012345678901234567890123456789012345678901234567890 Item Unit price Qty amount ================================================== Coke | $ 2.20 | 2(s) $ 2.20 Fanta | $ 2.20 | 1(s) $ 2.20 Hotdog | $ 3.50 | 3(s) $ 10.50 Pepsi | $ 1.95 | 1(s) $ 1.95 ================================================== total : $ 16.85 Thank you~~ 64 Digital Video Recorder In the above text-in data, you can find that the comparison value is located at 17th (Unit price, $ mark will be ignored automatically), 28th (Qty) and 40th (amount) characters (including spaces) from the left, but the value of amount category is located on a different line from Item. In this case, you can enter “17”, “28” and “40” in each Column box and enter “1” in the Line box for the next line. For example, if you want to search for Coke with a Qty (Quantity) of more than 1 and Hotdog with an amount totaling over $8, the following search condition can be set. NOTE: All other company and product names appearing herein are the property of their respective owners. 65 User’s Manual Appendix C ─ WebGuard WebGuard allows you to access a remote DVR, monitor live video images and search recorded video using Internet Explorer web browser anytime from virtually anywhere. Computer system requirements for using the WebGuard program are: Operating System: Microsoft® Windows® 2000, Microsoft® Windows® XP or Microsoft® Windows® Vista CPU: Intel Pentium III (Celeron) 600MHz or faster RAM: 128MB or higher VGA: 8MB or higher (1024x768, 24bpp or higher) Internet Explorer: Version 6.0 or later Start Internet Explorer on your local PC. You can run the WebGuard program by entering the following information in the address field. – – – “http://IP address:port number” (The DVR IP address and the WebGuard port number (default: 12088) set in the Network setup screen (General tab)) Or, “http://DVRNS server address/DVR name” (The DVRNS server address and the DVR name registered on the DVRNS server) Or, “http://www.dvronline.net” (Entering the DVR IP address or the DVR name will be required when logging in) NOTE: WebGuard only works with Microsoft Internet Explorer and will NOT work with other browsers. Select between the WEBWATCH (Web monitoring) and WEBSEARCH (Web search) modes and enter the appropriate port number of the program. Entering ID and PASSWORD and clicking the [LOGIN] button logs in using the selected mode. Selecting Save ID saves the ID you entered. You will need to enter the DVR IP address in the DVR ADDRESS field when running the WebGuard program by entering http://www.dvronline.net. Selecting the Enable DVRNS option allows you to enter the DVR name registered on the DVRNS server instead of the IP address. You must enter the DVRNS server address and port number in the SETUP setting when selecting the Enable DVRNS option. NOTE: The port numbers for WATCH and SEARCH should be the same with port numbers for Remote Watch and Remote Search set during Network setup. NOTE: When running the updated WebGuard for the first time, Internet Explorer might occasionally load the information of the previous version. In this case, delete the temporary internet files by selecting Tools Internet Options General tab, and then run WebGuard again. NOTE: There might be a problem that the bottom of WebGuard page is cropped due to the address or status bars in Microsoft Internet Explorer 7.0. In this situation, it is recommended that websites open windows without address or status bars by changing the internet setting. (Go to the Tools Internet Options Security tab Click the Custom level… button Select Enable for the Allow websites to open windows without address or status bars option) 66 Digital Video Recorder NOTE: When running WebGuard in the Microsoft Windows Vista operating system, it is recommended to start Internet Explorer with elevated administrator permissions. Click the right mouse button on the Internet Explorer icon and select the Run as administrator option from the context menu. Otherwise, some functions of WebGuard might be limited. NOTE: There might be a problem with screen display or screen update due to low image transmission speed when using the Microsoft Windows Vista operating system. In this situation, it is recommended you disable the Auto Tuning capability of your computer. Run the Command Prompt with elevated administrator permissions (Go to the Start Menu Accessories Command Prompt Click the right mouse button and select the Run as administrator option). Then enter “netsh int tcp set global autotuninglevel=disable” and hit the enter key. Restart your computer to apply the changes. If you want to enable the Auto Tuning capability again, enter “netsh int tcp set global autotuninglevel= normal” after running the Command Prompt with elevated administrator permissions. Restart your computer to apply the changes. Web Monitoring Mode WebWatch is a remote web monitoring program that allows you to monitor live video transmitted in real-time from the remote DVR. Figure 47 ─ WebWatch screen. ① Click the to log out the WebGuard program. ② Click the to access to the web search mode. ③ Position the mouse pointer on the WebWatch logo to see the version of the WebGuard program. ④ The DVR information window displays the login information of WebGuard. ⑤ Click the screen format to select the desired display mode. When changing the screen format, the selected camera on the current screen will be located in the first cell of the new layout. 67 User’s Manual ⑥ Click the camera button (1 to 16) to select the camera to be viewed. ⑦ Click the to adjust the brightness, contrast, saturation and hue of monitoring image. ⑧ Click the to control pan, tilt and zoom of the camera from a remote site. ⑨ Click the to control alarm out devices at the remote site. ⑩ Click to save the current image as a bitmap or JPEG file format. ⑪ Click to set up the image drawing mode and OSD display. You can adjust the display speed by changing the image drawing mode, and select OSD information to be displayed on the screen. ⑫ The event status window at the bottom displays a list of events that were detected from the remote site. ⑬ Selecting a camera on the screen and clicking the right mouse button displays the text menu screen. Change Camera Title: Changes the camera name. Enable Audio: Enables audio communication with the remote site. When the audio control panel displays, click to send audio to the connected remote site and click the button again to stop sending audio. Click to monitor live audio from the connected remote site through the attached speaker and click the button again stop monitoring live audio. Clicking both and allows two-way communication. Clicking disables audio communication. Aspect Ratio: Changes the image aspect ratio. Anti-Aliasing Screen: Enhances image display quality by eliminating stair stepping (aliasing) effects in the enlarged image. NOTE: A camera name change in the Web Watch mode does not affect the camera name set up on the remote site. Leaving the Camera Title blank causes the camera name set up on the remote site to display. Web Search Mode WebSearch is a remote web search program that allows you to search recorded video on the remote DVR. NOTE: The remote site connection in the Web Search mode will automatically be disconnected if there is no activity for 30 minutes. 68 Digital Video Recorder Figure 48 ─ WebSearch screen. ① Click the to log out the WebGuard program. ② Click the to access to the web monitoring mode. ③ Position the mouse pointer on the WebSearch logo to see the version of the WebGuard program. ④ The DVR information window displays the time information of recorded data on the remote DVR and login information of WebGuard. ⑤ Click the to blur, sharpen, equalize and interpolate playback images. Click the to zoom out or zoom in the recorded image. Click the to adjust the brightness of the recorded images. NOTE: Image processing works only in the pause mode. ⑥ The playback function buttons include fast backward, pause, play, fast forward, go to the first image, go to the previous image, go to the next image, and got to the last image. ⑦ Click the screen format to select the desired display mode. ⑧ Click the to enter the time-lapse search mode which allows you to search for recorded data by time and then play back images found within the time parameters. The Timetable window located at the bottom displays the time information for the image of the date selected on the calendar. If more than one video stream in the same time range, you can select the video stream you want to search. Clicking a specific time displays the image recorded at that time on the screen. Selecting the allows you to display an image from a specific time. ⑨ Click the to enter the event search mode which allows you to search for event log entries using specific conditions and play back the images associated with those event entries. ⑩ Click the to save any video clip of recorded data as an executable file, or click the to save the current image in a bitmap or JPEG file format. Click the to print the current image on a printer connected to your computer. 69 User’s Manual ⑪ Click to set up the image drawing mode and OSD display. You can change the display speed by adjusting the image drawing mode, and select OSD information to display on the screen. ⑫ Click the to reload the recording data. ⑬ The timetable displays recorded data of the selected camera by time (in hour segments). ⑭ Selecting a camera on the screen and clicking the right mouse button displays the text menu screen. Change Camera Title: Changes the camera name. Enable Audio: Plays audio while playing back recorded video that has recorded audio. (Single-Screen Layout Only) Aspect Ratio: Changes the image aspect ratio. Deinterlacing: Using a deinterlace filter for interlaced video enhances image display quality by eliminating horizontal scan lines and noise in areas with motion. Anti-Aliasing Screen: Enhances image display quality by eliminating stair stepping (aliasing) effects in the enlarged image. NOTE: A camera name change in the Web Search mode does not affect the camera name set up on the remote site. Leaving the Camera Title blank causes the camera name set up on the remote site to display. 70 Digital Video Recorder Appendix D ─ Troubleshooting Problem Possible Solution No Power Check power cord connections. Confirm that there is power at the outlet. No Live Video Live Video Very Bright If a cable is attached to the “Loop” connector, make certain it is connected to a properly terminated device. No Live Video on the VGA Monitor If the DVR does not detect a VGA monitor automatically, press and hold the Panic button on the front panel for 5 seconds or longer to switch the video output from Video out to VGA out. DVR has stopped recording If hard disk drive is full, you will either need to delete video or set the DVR to the Overwrite Mode. The icon displays, however, the DVR is not recording. When the DVR is in the Pre-Event recording mode, the yellow and display when there is no event, and the DVR is not recording. The red and display when any event occurs and the DVR starts recording. Check camera video cable and connections. Check monitor video cable and connections. Confirm that the camera has power. Check camera lens settings. 71 User’s Manual Appendix E ─ Connector Pin Outs I/O Connector Pin Outs AI (1 to 16) GND Alarm Inputs 1 to 16 Chassis Ground (5 connectors) NC Relay Alarm Outputs (Normally Closed) NO Relay Alarm Outputs (Normally Open) C Relay Common ARI Alarm Reset In RS485 Connector Pin Outs Master Unit Slave Unit RX-/TX- → To → TX-/RXRX+/TX+ → To → TX+/RX+ 72 Digital Video Recorder Appendix F ─ Map of Screens 73 User’s Manual Appendix G ─ System Log Notices Boot Up Shutdown Restart Upgrade Upgrade Failure Power Failure Time Change Time Zone Change Time Sync Time Sync Failed Disk Bad Login Logout Setup Begin Setup End Remote Setup Change Remote Setup Failure Setup Imported Setup Import Failure Setup Exported Setup Export Failure Setup Export Canceled 74 Schedule On Schedule Off Panic On Panic Off Clear All Data Clear Disk Format Disk Disk Full Auto Deletion Search Begin Search End Clip-Copy Begin Clip-Copy End Clip-Copy Cancel Clip-Copy Failure Clip-Copy User: Clip-Copy From: Clip-Copy To: Duration of Video: Clip-Copy Camera: Callback Failure Digital Video Recorder Appendix H ─ Error Code Notices System Upgrade Related No. 0 1 2 3 4 100 101 102 103 104 105 106 300 301 302 303 304 400 401 402 500 Description Unknown error. File version error. Operating system version error. Software version error. Kernel version error. Upgrade device mounting failed. Package is not found. Extracting package failed. LILO failed. Rebooting failed. Invalid package. ODD firmware upgrade failed. Remote connection failed. Remote network error. Remote upgrade is not authorized. Saving remote package failed. Remote upgrade is cancelled by the user. USB device mounting failed. Reading upgrade package on the USB device failed. Copying upgrade package on the USB device failed. System is busy clip copying. Clip Copy Related No. 0 1 2 3 4 5 6 7 8 9 10 11 12 13 14 15 16 17 Description Unknown error. Device error. Mounting failed. No media. Invalid media. File already existed. Not enough space. Creating temporary file failed. Opening disk failed. Formatting disk failed. Database has been changed. Appending failed. Bad sector. No executable file. Opening executable file failed. Writing executable file failed. Creating image failed. Burning failed. 18 Burning is out of time. 22 Verify failed. 75 User’s Manual Appendix I ─ Specifications VIDEO Signal Format Video Input Monitor Outputs Video Resolution Playback/Record Speed (images per second) NTSC or PAL (Auto Detect) Composite: 8 or 16 looping inputs, 1 Vp-p, auto-terminating, 75 Ohms Composite: 1 BNC, 1 Vp-p, 75 Ohms Spot: 1 BNC, 1 Vp-p, 75 Ohms VGA: 1 Composite: 720x480 (NTSC), 720x576 (PAL) VGA: 800x600 @ 60Hz 120/120ips (NTSC), 100/100ips (PAL) INPUTS/OUTPUTS Alarm Input Alarm Output Alarm Reset Input Internal Buzzer Network Connectivity Audio Input Audio Output Text Input 8 or 16 terminal, programmable as NC or NO, 2.4V (NC) or 0.3V (NO) threshold, 3.3VDC 1 relay output, terminal blocks, programmable as NC or NO, 2A@125VAC, 1A@30VDC 1 TTL, terminal block 80dB at 10cm 10/100 Mbps Ethernet (RJ-45) RCA Input: 4, Line In RCA Output: 1, Line Out POS Interface, ATM Interface CONNECTORS Video Input Video Loop Monitor Output Audio In Audio Out Alarm Input/Output Ethernet Port RS232C Serial Port RS485 Serial Port USB Port Composite: 8 or 16 BNC Composite: 8 or 16 BNC (Auto Terminating) Composite: 1 BNC VGA: 1 VGA Spot (Composite): 1 BNC 4 RCA connector 1 RCA connector Terminal blocks RJ-45 DB9 (P) Two-connector terminal block 2 (USB 2.0) STORAGE Primary Storage Secondary Storage* SATA hard disk drive (up to 2) Built-in DVD RW drive USB hard disk drive or flash drive * When installing an internal DVD RW drive, connect the SATA I/O cable to the SATA3 socket. Specifications are subject to change without notice. 76 Digital Video Recorder GENERAL Dimensions (W x H x D) Unit Weight Shipping Weight Shipping Dimensions (W x H x D) Operating Temperature Operating Humidity Power Power Consumption Approvals 16.9" x 3.5" x 15.7" (430mm x 88mm x 400mm) 14 lbs. (6.3kg) 21 lbs. (9.3kg) 21.3" x 11.4" x 23.2" (540mm x 290mm x 590mm) 41°F to 104°F (5°C to 40°C) 0% to 90% 100 – 240 VAC, 1.2 – 0.6 A, 60/50Hz Max. 35W FCC Part15 SubpartB : Class A, CANADIAN ICES-003 : Class A UL** 60950-1, 1st Edition, CSA C22.2 No. 60950-1-03, 1st Edition ** CAUTION: Risk of Explosion if Battery is replaced by an Incorrect Type. Dispose of Used Batteries According to the Instructions. This equipment is indoor use and all the communication wiring are limited to inside of the building. Specifications are subject to change without notice. V1.1 77