1
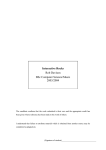
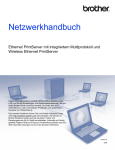
English Manual
English Manual
Introduction:
The LINDY USB MiniCam is a high-resolution camera with audio support. A
single cable connects the camera to your computers USB and MIC IN ports.
Technical Specifications
Sensor
Max. Resolution:
Supp. Resolutions:
USB MiniCam
User Manual
Benutzerhandbuch
English
Deutsch
Frame rate:
Capture Resolution:
Focus Distance:
Lens angle:
Colour Format:
Power Consumption: 160mW
Supported OS:
Interface:
1/7” CMOS
640 x 480
640 x 480; 352 x 288; 176 x 144
and 160 x 120
Up to 30 @ 352 288, 35 @ 176 x 144
Up to 640 x 480
3cm - ∞
56 degree
24 bit RGB
Windows 98/2000/ME/XP
USB 1.1 Full Speed
Driver Installation
You must install the USB MiniCam drivers before you connect the MiniCam
to your computers USB port.
1.
2.
3.
4.
5.
6.
7.
8.
9.
Insert the driver CD – the driver installation menu will be
displayed automatically.
Select ‘Driver Install’, the computer will run the driver installation
process.
The ‘Install Shield Wizard’ dialogue box will appear; click ‘Next’
and the installation will start.
Select the necessary language and select OK.
Follow the on-screen instructions to complete the installation
procedure.
Select ‘Finish’ when prompted to complete the installation.
Click ‘Exit’ on the ‘Software Installer’ screen
You MUST now reboot your computer.
When your machine has rebooted, plug-in the LINDY USB
MiniCam to the USB port. Windows will automatically detect the
new hardware and configure the device.
Note: If you are using Windows XP your system may display a ‘Driver
Signature’ notification message, select ‘Continue Anyway’ to install the
driver.
Recording and capturing pictures
For live recording:
1. Under ‘Amcap’ click ‘File’, select ‘Set capture File’, give a
filename and save. The file will be stored as *.avi-file.
2. If you click ‘Capture’ and select Capture Audio’, then sound
picked up by the cameras microphone will also be recorded.
3. Click ‘Set Frame Rate’ to change the frame rate. Select ’Use
Frame Rate’ and click ‘OK’ to save the setting.
4. Under ‘Set Time Limit’ you may adjust the time period you
want to record by setting the period in seconds, selecting
‘Use Time Limit ‘.
5. Click ‘Capture’ – ‘Start Capture’ to start recording and
confirm by clicking ‘OK’ when the recording is finished.
Capture one or several pictures
2. Under the ‘Start’ menu – ‘Programs’ - ‘Qcam’ select
‘VidCap’ to get the capture software.
3. To get the live camera picture, you have to click on this
Button:
4.
5.
For a single frame, click on the
- Button, then click ‘File’
and select ‘Save Single Frame’ to name and store your
picture file.
If you want to capture several images subsequently, click on
the
6.
- Button
By clicking this Button:
, you may also capture a video
sequence with the software. Preselect the compression
mode and the frame rate and then click ‘OK’ to start the
recording.
Using the LINDY USB MiniCam together with Netmeeting®
1.
2.
Adjusting the Picture Parameters
The LINDY USB MiniCam picture parameters may be adjusted depending
on your environment, and your requirements.
1.
2.
LINDY Art.No. 32887
www.LINDY.com
© LINDY ELECTRONICS LIMITED & LINDY-ELEKTRONIK GMBH - SECOND EDITION (Oct - 2003)
3.
4.
From the Start menu open ‘Programs’ – ‘Qcam’ – ’AMCAP’
In the ‘options’ menu select ‘Video Capture Filter’ to enter the
properties settings of the camera. You may adjust the following
values:
•
Auto Exposure value
•
Anti-Flickering: According to your power frequency: 50 or
60Hz or none if you’re using the camera as an outdoor
device.
•
Video output: Mirroring or vertical flip
•
Contrast, saturation and gamma correction
•
Sharpening, quality and brightness
Click ‘Apply’
Select ‘Option’ and choose ‘Video Capture Pin’ to adjust the
frame rate or colour mode.
3.
4.
5.
After having installed the ‘QCam
driver’, plug the camera into your
computer’s USB port and start the
Netmeeting program.
If it is the first time that you start
Netmeeting, a setup wizard program
will run asking you for the properties,
such as your name, your email
address, connection speed etc.
Under ‘Extra’ – ‘Options’ – ‘Video’ you
can determine the video source, it
should say ‘Q-CAM’!
After having given that information to
the setup program, click ‘Finish’ to
complete the Netmeeting setup.
Click the ‘Dial’-Icon and type in the IP
address of the computer you want to
connect to.
’Dial’-Icon
IP-Address field
Deutsches Benutzerhandbuch
Einleitung
Die LINDY USB MiniCam ist eine hochauflösende Kamera mit AudioFunktionalität, die über den USB-Port mit Ihrem Computer verbunden
wird.
Technische Sepzifikationen
Sensor:
1/7“ CMOS
Max. Auflösung:
480 x 640 Pixel
Unterstütze Auflösungen:
640 x 480, 352 x 288, 176 x 144
und 160 x 120
Bildübertragungsrate:
Bis zu 30 /s bei 352 x 288,
bis zu 35 /s bei 176 x 144
Aufl. für Capture-Funktion:
bis zu 640 x 480
Schärfentiefe:
3cm - ∞
Bildwinkel der Linse:
56 Grad
Farbtiefe:
RGB 24 Bit
Leistungsaufnahme:
160mW
Unterstütze Betriebssysteme: Windows 98SE / ME / 2000 / XP
Schnittstelle:
USB 1.1 Full Speed (12Mbit/s)
Treiberinstallation
1. Booten Sie den Computer und stellen Sie sicher, dass Ihr USBPort richtig funktioniert.
2. Legen Sie die Treiber-CD ein – das Installationsmenu wird
automatisch angezeigt.
3. Klicken Sie auf ‚QCam Driver’ , das System startet den
Treiberinstallationsprozess.
4. Der ‚Install Shield Wizard erscheint nun, klicken Sie auf
‚Weiter’, um die eigentliche Installation zu starten.
5. Nach erfolgter Installation, wählen Sie ‚Computer neu starten’
und klicken Sie auf ‚Fertig stellen’, um die Installation zu
komplettieren. Der Rechner bootet jetzt neu.
6. Schließen Sie nun die LINDY USB MiniCam an den USB-port
an. Das System wird sie automatisch erkennen und
konfigurieren.
Einstellung der Bildparameter
1. Öffnen Sie im Startmenu ‚Programme’ – ‚QCam’ – ‚Amcap’
2. Wählen Sie ‚Video Capture Filter’ im Menu ‚Options’, um die
Einstellungen der Kamera zu editieren. Die folgenden Werte
können eingstellt werden:
•
Vollautomatische Bildeinstellung an/aus
•
‚Anti-Flickering’: je nachdem, welche Netzfrequenz
verwendet wird, kann dieser Wert auf 50 Hz, 60Hz gesetzt
werden, um das Flimmern des Bildes zu unterdrücken.
‚None’ sollte gewählt werden, wenn die Kamera im Freien
verwendet wird.
•
‚Video output’: Abhängig von der Montageposition der
Kamera kann hier ‚mirroring’ für spiegelverkehrte, und
‚vertical flip’ für um 180 ° gedrehte Bildausgabe eingestellt
werden.
•
Kontrast, Farbsättigung (‚Saturation’) und Gammakorrektur
•
Bildschärfe, Qualität und Helligkeit.
3. Klicken Sie ‚Apply’
4. Unter ‚Option’ wählen Sie ‚Video Capture Pin’ um die
Bildübertragungsrate und den Farbmodus zu justieren.
Deutsches Benutzerhandbuch
Aufnahme
1. Unter ‚Startmenu’ ‚Programme’ – ‚QCam’ – ‚Amcap’ wählen
Sie ‚File’ und klicken auf ‚Set Capture File’, vergeben einen
Dateinamen und speichern. Die Datei wird im avi-Format
gesichert.
2. Wählen Sie ‚CaptureAudio’ unter ‚Capture’, um das
Audiosignal mit aufzunehmen.
3. Klicken Sie auf ‚Set Frame Rate’ und justieren Sie die
Bildwiederholungsrate. Markieren Sie ‚Use Frame Rate’ und
klicken Sie auf ‚OK’, um die Einstellung zu sichern
4. Unter ‚Set Time Limit kann die gewünschte Aufnahmelänge
in Sekunden gesetzt werden. Markieren Sie ‚Use Time Limit’
und klicken Sie auf ‚OK’, um die Einstellung zu sichern
5. Klicken Sie auf ‚Capture’ – ‚Start Capture’, um die Aufnahme
zu starten und Bestätigen Sie durch einen Klick auf ‚OK’
wenn die Aufnahme beendet ist.
Aufnahme eines oder mehrerer Einzelbilder
1. Mit einem Klick auf ‚VidCap’ unter ‚Start’ – ‚Programme’ –
‚QCam’ wählen Sie die Software für Einzelbildaufnahme
an.
2. Um das ‚Live’-Bild der Kamera zu sehen, klicken Sie auf
3.
.
diesen Button:
Um ein Einzelbild aufzunehmen, klicken Sie auf diesen
4.
, danach auf ‘File’ und ‘Save Single Frame’ um
Button:
die Bilddatei zu benennen und zu sichern.
Wenn Sie mehrere Einzelbilder hintereinander aufnehmen
wollen, klicken Sie auf dieses Feld:
5.
können mit dieser
Durch Anklicken dieses Feldes:
Software ebenfalls Videosequenzen aufgenommen
werden. Wählen Sie den Kompressionsmodus und die
Bildübertragungsrate vor, und klicken Sie auf ‚OK’ um die
Aufnahme zu starten.
Verwendung der MiniCam mit Netmeeting®
1. Nachdem die ‚QCam-Treiber installiert
sind, verbinden Sie die Kamera mit dem
USB-Port und starten Netmeeting.
2. Beim ersten Start von Netmeeting läuft
ein Installationsassistent, der die
notwendigen Einstellungen ( Name,
Email-Adreesse, etc.) abfragt.
3. Nachdem diese Informationen hinterlegt
wurden, klicken sie auf ‚Fertig stellen’
um das Setup abzuschließen.
4. Unter ‚Extras’, ‚Optionen’ – ‚Video’ kann
die Aufnahmequelle festgelegt werden –
hier sollte ‚QCam’ stehen.
5. Klicken Sie auf das ‚Anwahl’-Icon, und
geben Sie die IP-Adresse des Rechners
ein, den sie anwählen wollen.
Radio Frequency Energy, Certifications
Shielded cables must be used with this equipment to maintain
compliance with radio frequency energy emission regulations and
ensure a suitably high level of immunity to electromagnetic
disturbances.
FCC Compliance Statement (United States)
This equipment has been tested and found to comply with part 15 of
FCC rules.
Operation is subject to the following two conditions:
(1) This device may not cause harmful interference.
(2) This device must accept any interference received.
Including interference that may cause undesired
operation.
Canadian Department of Communications RFI statement
This equipment does not exceed the class B limits for radio noise
emissions from digital apparatus set out in the radio interference
regulations of the Canadian Department of Communications.
Le présent appareil numérique n’émet pas
de bruits radioélectriques dépassant les
limites applicables aux appareils numériques
de la classe A prescrites dans le règlement
sur le brouillage radioélectriques publié par
le ministère des Communications du Canada
European EMC directive 89/336/EE CE statement
This equipment complies with the requirement for CE mentioned in the European
Directive and Standards EN55022 and
EN55024.
This equipment has been tested and found
to comply with the limits (for a class B
computing device) in accordance with the specifications in the
European Standard EN55022. These limits are designed to provide
reasonable protection against harmful interference. This equipment
generates, uses and can radiate radio frequency energy and if not
installed and used in accordance with the instructions may cause
harmful interference to radio or television reception. However, there
is no guarantee that harmful interference will not occur in a
particular installation. If this equipment does cause interference to
radio or television reception, which can be determined by turning the
equipment on and off, the user is encouraged to correct the
interference with one or more of the following measures: (a)
Reorient or relocate the receiving antenna. (b) Increase the
separation between the equipment and the receiver. (c) Connect the
equipment to an outlet on a circuit different from that to which the
receiver is connected. (d) Consult the supplier or an experienced
radio / TV technician for help.
Anwahl-Icon
IP-Adressfeld
© LINDY ELECTRONICS LIMITED & LINDY-ELEKTRONIK GMBH - SECOND EDITION (Oct - 2003)