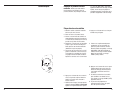
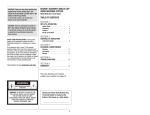
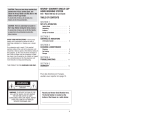
1
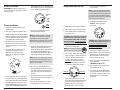
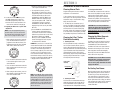
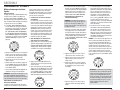
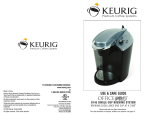
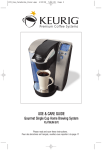
CAUTION: There are two sharp needles that
puncture the K-Cup® portion pack, one
above the K-Cup Holder and the other in the
bottom of the K-Cup Holder.
To avoid risk of injury, do not put your
fingers in the K-Cup Chamber.
KEURIG® GOURMET SINGLE CUP
HOME BREWING SYSTEM
Model B50 Use & Care Guide
TABLE OF CONTENTS
SECTION 1
CAUTION: There is extremely hot water in
the K-Cup Holder during the brew process.
To avoid risk of injury, do not lift the Handle
or open the K-Cup Chamber during the
brew process.
SET-UP & OPERATION
Helpful Hints . . . . . . . . . . . . . . . . . . . . . . . .
Unpacking . . . . . . . . . . . . . . . . . . . . . . . . . . .
Features . . . . . . . . . . . . . . . . . . . . . . . . . . . .
Set-Up & First Brew . . . . . . . . . . . . . . . . . .
4
4
5
6
SECTION 2
SHORT CORD INSTRUCTIONS: A short power
supply cord is provided to reduce the risk of
becoming entangled in or tripping over a longer
cord.
If an extension cord is used, (1) the marked
electrical rating of the cord set or extension cord
should be at least as great as the electrical rating of
the appliance, (2) the cord should be arranged so
that it will not drape over the countertop or tabletop where it can be pulled on by children or tripped
over unintentionally and (3) the extension cord
must include a 3-prong grounding plug.
THIS PRODUCT IS FOR HOUSEHOLD USE ONLY.
CONTROLS & INDICATORS
LCD Control Center . . . . . . . . . . . . . . . . . . .
9
SECTION 3
CLEANING & MAINTENANCE
Cleaning . . . . . . . . . . . . . . . . . . . . . . . . . . . . 11
De-Scaling . . . . . . . . . . . . . . . . . . . . . . . . . . 11
Storage . . . . . . . . . . . . . . . . . . . . . . . . . . . . . 12
SECTION 4
TROUBLESHOOTING . . . . . . . . . . . . . . . . .
13
SECTION 5
WARRANTY . . . . . . . . . . . . . . . . . . . . . . . . . .
14
Pour des directives en Français,
veuillez vous reporter à la page 15.
WARNING
RISK OF FIRE OR ELECTRIC SHOCK
DO NOT OPEN
WARNING: TO REDUCE THE RISK OF FIRE
OR ELECTRIC SHOCK, DO NOT REMOVE
THE BOTTOM COVER. NO USER
SERVICEABLE PARTS ARE INSIDE. REPAIR
SHOULD BE DONE BY AUTHORIZED
SERVICE PERSONNEL ONLY.
Record your Brewer Serial Number here.
The Serial Number is located on the
bottom of the Brewer on a white sticker.
_________________________________
3
SECTION 1
Features
SET-UP & OPERATION
Helpful Hints
Unpacking Instructions
1. Keep your Brewer turned ‘ON’
at all times.
1. Place Brewer box on a large steady surface
(such as a table or countertop) or
on the floor. Open the box.
2. Remove the Quick Start Guide, Use & Care
Guide and other literature.
3. Remove the package of complimentary
K-Cup® portion packs.
4. Turn the box on its side with front of box
face down.
5. Reach into the box and grasp the plastic
bag that contains the Brewer.
6. Carefully pull the plastic bag (and
packaging materials) toward you and out
of the box. The Brewer will still be encased
in the polyfoam and be on its side.
7. Remove the top polyfoam packaging
material.
8. Carefully lift Brewer off of the bottom
polyfoam and place it upright on a flat,
steady surface.
9. Lift plastic bag off of Brewer.
10. Carefully turn the Brewer on its side and
record on page 3 of this book the Serial
Number located on the white sticker on the
bottom of the Brewer. The Serial Number
is also located on the bottom of the Brewer
box.
11. Place the Brewer upright on a flat,
steady surface. Remove tape holding
Water Reservoir in place.
We recommend you save all packing materials
in case future shipping of the product
is necessary.
To brew a fresh cup of coffee or tea anytime
you want, we suggest you keep your Brewer
turned ‘ON’ all the time.
However, the Brewer is fully programmable so
you can set it to turn on and off automatically
to match your schedule. Or, if you prefer, set
the Brewer to automatically turn off after a
period of time.
Follow the simple instructions on page 9
to make using the Brewer convenient for you.
2. For the best tasting gourmet coffee or tea,
Keurig recommends using bottled or filtered
water.
Water quality varies from place to place. If you
notice an undesirable taste in your cup of coffee
such as chlorine or other mineral taste, we
recommend you consider using bottled water or
water from a filtration system.
3. Choose from two serving sizes.
The perfect cup of coffee means something
different to each coffee lover. With its wide
variety of coffees to choose from and the ability
to brew a regular large cup (7.25 oz serving) or
stronger small cup (5.25 oz serving), the
Brewer lets you enjoy your own personal cup
brewed to perfection. Follow the simple
instructions on page 7.
4. Plug Brewer into its own grounded outlet.
If the electric circuit is overloaded with
other appliances, your Brewer may not
function properly. The Brewer should be
operated on its own circuit, separate from
other appliances.
5. Brewing into a travel mug.
To brew into a travel mug, simply remove the
Drip Tray Assembly and place the travel mug
on the Drip Tray Base.
4
WARNING: Keep all plastic bags away
from children.
Model B50 Brewer
A
Water Reservoir Lid
B
Water Reservoir
C
Water Reservoir Lock Tab Slots
D
Handle
E
K-Cup® Portion Pack Holder (E and F are
the K-Cup Holder Assembly)
F
Funnel
G
Lid
R
O
Q
P
H
K-Cup® Portion Pack Assembly Housing
I
Housing
J
Drip Tray Plate
O
Small Cup/Hour Button
K
Drip Tray
P
Menu Button
L
Drip Tray Base
Q
Large Cup/Minute Button
M
Vent
R
LCD Control Center
N
Power Cord
S
Power Button
Controls and Indicators
S
5
Set-Up & First Brew
IMPORTANT: You cannot use your Keurig
brewer until it has been primed for its first use
as set forth below.
LCD Control Center, be sure the handle is all
the way down. Please note, a K-Cup should
not be used for the Priming Sequence.
Ready to Brew your First Cup
NOTE: If you do not push the Brew Buttons
in 60 seconds, the LCD Control Center will
return to ‘READY’ and the Brew Buttons will
be disabled to prevent accidental activation.
Re-activate the Brew Buttons by raising and
lowering the Handle completely.
Large Cup
Icon
PRIME
Large
Cup
Button
Priming your Brewer
1. Unwrap cord and plug the brewer into a
grounded outlet.
2. Place a cup or mug on the Drip Tray Plate.
3. Remove the Water Reservoir from Brewer by
first removing Lid from Reservoir, then lifting
Reservoir straight up and away from Brewer
(may be tight). Rinse with fresh water.
4. Fill Water Reservoir with fresh water so
that the water level reaches the top edge
of the clear viewing area. (Be careful not to
over fill.)
5. Place Water Reservoir base into the left
side of the Brewer and be sure the
Water Reservoir Lock Tabs engage
with the Brewer. Replace Lid on Water
Reservoir.
1. LCD Control Center will indicate ‘READY’.
8. Press the Large Cup Button below the
flashing Large Cup indicator.
NOTE: If the Water Reservoir is empty or
not in place on the Brewer, then the LCD
Control Center will also indicate ‘ADD
WATER’. None of the buttons will be activated
until water is added to the Water Reservoir.
9. The Brewer will automatically fill the Brewer
(priming it) and then the water will be
heated. This will take about 3 minutes. During
the heating period 'NOT READY' is displayed on the LCD Control Center. When the
water is heated, 'READY' will be displayed.
10.Press the Large Cup Button below the
flashing Large Cup Icon to start a cleansing
brew, during which hot water will flow into
your cup or mug. Pour the hot water into
the sink.
7. The LCD Control Center will come on and
indicate ‘PRIME’ and the icon for the Large
Cup will flash. If 'NOT READY' appears in
6
8. The LCD will now display the word
‘BREWING’ and the serving size
you selected.
Power
Button
NOTE: You may see small amounts of water
coming from the Vent and dripping into the
Water Reservoir during this and subsequent
heating – this is normal.
6. Press Power Button found on upper right
panel of the Brewer. The green light surrounding the Power Button will become illuminated.
the Small Cup choice will yield a
5.25 oz serving.
11.The Brewer may take 15 seconds to reheat
water between brews and then 'READY' will
again be displayed.
12. The one-time priming process is now
complete and you are ready to brew!
2. Place a cup or mug on the Drip Tray Plate.
3. Lift the Handle and the K-Cup Holder will
open toward you.
CAUTION: There are two sharp needles that
puncture the K-Cup® portion pack, one above
the K-Cup Holder and the other in the bottom
of the K-Cup Holder. To avoid risk of injury,
do not put your fingers in the K-Cup Chamber.
4. Select a K-Cup® portion pack.
NOTE: Do not remove the foil lid or
puncture the K-Cup® portion pack.
5. Place a K-Cup® portion pack in the K-Cup
Holder (as shown in exhibit at top of page).
6. Lower the Handle to close the Lid over
the K-Cup Holder, (when it is closed
completely, the LCD Control Center will
indicate ‘BREW’ and the large and small
cup icons will blink up to 60 seconds).
BREWING
CAUTION: There is extremely hot water in
the K-Cup Holder during the brew process.
To avoid risk of injury, do not lift the
Handle or open the K-Cup Chamber
during the brew process.
9. There may be a short pause before the
brewing process begins. The process lasts
for approximately 40 seconds and ends
with a burst of air to remove all liquid
coffee or tea from the K-Cup.
10. Lift the Handle and remove and dispose
of the used K-Cup.
CAUTION: K-Cup will be hot.
11. Enjoy your first cup of Keurig Brewed®
gourmet coffee or tea!
Small Cup
BREW
Large Cup
12. Your Brewer may display ‘NOT READY’
as it heats water for the next brew cycle.
The ‘READY’ indication will return to the
LCD Control Center in approximately
15 seconds.
7. Choose the amount of coffee or tea you
wish to brew by pressing the button under
the Small Cup or Large Cup Icon that
indicates your choice. The Large Cup
choice will yield a 7.25 oz serving and
7
SECTION 2
Stopping the Brew Process
Brewing Hot Water
CONTROLS & INDICATORS
If you need to stop the brewing after the
process has started, press the Power Button to
turn the Brewer ‘OFF’. The flow of coffee
or tea will stop, the heating element will shut
off and the green light illuminating the Power
Button will disappear.
Your Brewer is able to produce a cup of hot
water for making hot chocolate, for use in
cooking, for making soups, etc. Simply raise
and lower the handle on the Brewer without
adding a K-Cup® portion pack. The LCD
Control Center will display 'READY' and the
Small and Large Cup Icons will blink. Be sure
to have a mug or cup on the Drip Tray and
then select the size you would like.
LCD Control Center
Programing On/Off Features
Setting the Clock
The Brewer provides three modes so that you
can enjoy gourmet coffee or tea on your own
schedule. By programming your Brewer to
turn on each morning, you will never have to
wait for the Brewer to warm up to brew a
gourmet cup of coffee.
Purging the Brewer
b. The word 'OFF' will appear at the top of the
LCD Control Center to indicate that the
clock is not set. The words 'SET CLOCK',
'SET AUTO OFF' and 'SET ON TIME' will
appear in the LCD Control Center with an
arrow pointing to 'SET CLOCK'. H (Hour)
and M (Minute) will appear and blink.
NOTE: You may get less coffee or tea in
your cup during your next brew. We
recommend that you perform a cleansing
brew with water only after a terminated brew.
Then your NEXT brew will be the volume
you have selected.
Adding Water
The LCD Control Center of your Brewer will
indicate when the water level in the tank is low
or if the Water Reservoir has been removed by
displaying the words ‘ADD WATER’. The
Brewer will not allow you to brew when ‘ADD
WATER’ is displayed.
NOT
READY
ADD WATER
The Water Reservoir can be filled in two ways.
1. Lift off the Water Reservoir Lid and pour
water directly into the Water Reservoir
while it is still attached to the Brewer, then
replace the Lid.
If your Brewer has not been used for more
than one week, you should purge the water
from the inner tank.
1. If there is water in the Water Reservoir,
remove the Lid, then lift Reservoir straight
up and away from Brewer. Discard water,
rinse and refill with water. Place the Water
Reservoir back on the Brewer and replace
the Lid. (If there is no water in Reservoir,
simply refill.)
8
a. Press the button below 'MENU'.
OFF
Á SET CLOCK
SET AUTO OFF
SET ON TIME
H
MENU
M
2. Be sure the Brewer is turned on. Raise and
lower the handle on the Brewer without
inserting a K-Cup.
3. The LCD Control Center will display ‘READY’
and the Small and Large Cup Icons will
blink. Be sure to have a mug on the Drip
Tray and then select the larger size brew.
4. Repeat steps 2 and 3 two more times to
completely purge water from inner tank.
c. Press or hold the black button under the
blinking H until you have reached the
appropriate hour. If the hour has passed
12, the indicator switches from AM to PM
on the LCD.
f. The correct time should now be displayed
in the LCD Control Center.
If you are experiencing any problems with
your Brewer, please contact Customer
Service at 1-866-901-BREW (2739).
1. Leave it ON all the time (recommended).
The Brewer can be left on all the time so
that it is always ready to brew a fresh cup
of gourmet coffee or tea. To turn the
Brewer off at any time, simply press the
Power Button. (Note: Although the clock
remains on if set, you can not brew a cup
of coffee or tea.) Press the Power Button
again to restore power to the Brewer. You
will have to wait for the water to heat up
before the Brewer is ready to brew.
2. Set the Brewer to turn off at a specified
period of time after the last brew.
a. Press the MENU button twice to program
the AUTO OFF feature. The LCD Control
Center will now display 'SET AUTO OFF'
with a small arrow next to it.
10:00PM
SET CLOCK
OFF
SET ON TIME
H MENU
ÁSET AUTO
d. Press or hold the black button under the
blinking M to set the minutes.
e. When you have reached the correct time,
press the menu button four times to scroll
through the remaining programming
options and return to 'READY' mode.
2. Remove the Water Reservoir from Brewer
by first removing Lid from Reservoir, then
lifting Reservoir straight up and away from
Brewer. Fill with water. Place the Water
Reservoir back on the Brewer and replace
the Lid.
IMPORTANT: Do not remove the Water
Reservoir during the brewing process.
Setting the clock is optional. When the clock is
set, the time will appear in the LCD Control
Center. NOTE: You must set the clock if you
will be using the Auto On/Off Time programming feature.
NOTE: If power is interrupted to the
Brewer by unplugging it, or if power is lost,
follow the procedure above to reset the
time as the clock will not be visible until
the time is set.
b. Press and release the H Button to
advance 1 hour at a time, up to 9 hours.
c. After setting the desired AUTO-OFF time,
press the MENU button three times to
scroll through the remaining program
ming options and return to 'READY'
mode. 'AUTO OFF' will now be displayed
to indicate that it has been set.
9
SECTION 3
e. Repeat the procedure above in steps b &
c to set your desired OFF time.
10:00PM
SET
READY AUTO OFF
MENU
d. To cancel the AUTO-OFF feature, press
the MENU button twice to reach the
AUTO-OFF programming mode. Press
and release the H button to advance one
hour at a time until ‘OFF’ is displayed.
3. Program your Brewer for a specific Auto
On/Off Time.
NOTE: To use this programming feature,
the clock must be set to the correct time.
The clock will not be displayed unless the
time is set. See page 9 to set the clock.
a. After setting the correct time (required),
press the Menu Button three times to
program the Auto On time feature. The
LCD Control Center will show ‘SET ON
TIME’ with a small arrow next to it.
6:15AM
SET CLOCK
SET AUTO OFF
TIME
ÁSET ON
H
MENU
M
b. Press or hold the black button under the
H to scroll through the hours to your
desired ON time.
c. Press or hold the black button under the
M to scroll through the minutes to your
desired ON time.
d. After setting the desired time, press the
Menu Button to save the On Time and
move to the SET OFF TIME.
10:00PM
SET CLOCK
SET AUTO OFF
ÁSET OFF TIME
H
10
MENU
M
f. To complete the process, press the
Menu Button one more time to exit the
programming mode. The Control Center
will now indicate that you have set an
AUTO ON time and/or AUTO OFF time.
‘ON OFF TIME’ will be displayed if you
have set both options. ‘ON TIME’ will
be displayed if you have set only the
AUTO ON time and ‘OFF TIME’ will be
displayed if you have set only the AUTO
OFF time.
g. The AUTO ON time and AUTO OFF time
functions operate independently from
one another. To cancel either set function,
follow the steps above and use the H and
M buttons to advance to 12:00AM.
When you reach 12:00AM, the Control
Center will display ‘OFF’ at the top and
the function will be disabled.
EXAMPLE: If you chose to set the On Time
at 6:15 AM and the Off Time for 10:00 PM,
then the Brewer will be ‘ON’ and maintain
hot water in the tank during that time so
that it is always ready for you to brew a cup
of coffee or tea. If you wanted a cup at a
time outside this window, simply press the
Power Button and you can brew as soon as
the water is heated and the ‘READY’ indicator
is displayed on the LCD Control Center.
10:00
PM
SET
READY AUTO OFF
ON OFF TIME
MENU
CLEANING & MAINTENANCE
Cleaning External Parts
3. Cleaning the Exit Needle
Regular cleaning of the Brewer’s external
components is recommended.
The Exit Needle is located on the inside bottom of the K-Cup Holder Assembly. Should a
clog arise due to coffee grinds, it can be
cleaned using a paper clip or similar tool.
Remove K-Cup Holder, insert the paper clip
into the Needle to loosen the clog and push it
out. The K-Cup Holder is dishwasher safe.
1. Never immerse the base unit in water or
other liquids. The Housing and other external
components may be cleaned with a soapy,
damp, non-abrasive cloth.
2. The Drip Tray can accumulate up to 8
ounces of overflow. The Drip Tray and Drip
Tray Plate should be periodically inspected
and rinsed clean. To remove the Drip Tray
Assembly, simply slide it toward you, keeping
it level at all times to avoid spilling. The Drip
Tray and Drip Tray Plate are dishwasher safe.
Cleaning the K-Cup® Portion
Pack Holder Assembly
1. Cleaning the Parts
The K-Cup Holder Assembly is dishwasher
safe. To remove from the Brewer, open the
cover by lifting the Handle. Grasp the top of
the K-Cup Holder with one hand while pushing
up on the bottom of the K-Cup Holder from
underneath with the other until it releases.
After cleaning, align the K-Cup Holder with the
opening using the two front ribs as a guide
and snap into place from the top.
K-Cup Holder
Assembly
CAUTION: There are sharp needles that
puncture the K-Cup above the K-Cup Holder
and in the bottom of the K-Cup Holder. To
avoid risk of injury, do not put your fingers in
the K-Cup Chamber.
Cleaning the Water Reservoir
and Water Reservoir Lid
The Water Reservoir Lid should be cleaned
with a damp soapy non-abrasive cloth. Lid
should not be put into the dishwasher.
The Water Reservoir can be placed into the
dishwasher for cleaning or can be cleaned
with soapy water and rinsed thoroughly.
Do not dry the inside of the Water Reservoir
with a cloth as lint may remain.
CAUTION: Please rinse the Water Reservoir
thoroughly after cleaning to ensure that no
cleaners or cleaning solutions remain in
this area as they may contaminate the water
supply in the Brewer.
K-Cup Holder
De-Scaling Your Brewer
NOTE: The AUTO OFF Timer and the AUTO
ON/OFF Time programming options operate
independently, but can also be programmed
to work together. For example, you can set
the AUTO ON Time function to turn on at
7:00 AM and then set the AUTO OFF Timer
function to turn off the Brewer two hours
after the last brew.
Funnel
2. Cleaning the Funnel
The Funnel can be removed from the K-Cup
Holder by pulling on it until it snaps off. The
Funnel is dishwasher safe. To replace it just
snap it back onto the K-Cup Holder Assembly.
Mineral content in water varies from place to
place. Depending on the mineral content of
the water in your area, calcium deposits or
scale may build up in your Brewer. Scale is
non-toxic, but left unattended, it can hinder
Brewer performance. De-scaling your Brewer
helps maintain the heating element, and other
internal parts of the Brewer that come in
contact with water.
11
SECTION 4
The Brewer should be de-scaled every 6
months to ensure optimal performance. It is
possible for calcium deposits to build up faster,
making it necessary to de-scale more often.
6:15AM
DE-SCALE
MENU
Step 3: Repeat the brew process until the
Water Reservoir is empty, pouring the
contents of the cup into the sink after each
cycle. Remember to open and close the lid
between each cycle so the cup sizes will
flash.
Step 1: Ensure the Water Reservoir is filled
with fresh water.
Step 2: Place a ceramic cup on the Drip Tray
and run a regular brew cycle. Pour the
contents of the cup into the sink.
Step 3: Repeat brew process until the Water
Reservoir is empty.
NOTE: The Brewer will continue to function
even when 'DE-SCALE' is displayed.
However, if you do not de-scale soon after it
is displayed, continued scale build-up could
damage the Brewer. If this occurs,
'DE-SCALE' will begin to blink to alert you to
the potential damage to the Brewer if you do
not de-scale immediately.
NOTE: If 'DE-SCALE' is still displayed on
the LCD Control Center after completing the
procedure, repeat the de-scaling
procedure above.
a. PREPARE
Step 1: Make sure you have at least 48
ounces of undiluted white vinegar on hand.
You will also need an empty sink and a
ceramic cup (do not use a paper cup.)
Step 2: Empty the water in the Water
Reservoir.
b. FILL AND CLEAN
Step 1: Pour the vinegar into the Water
Reservoir and fill it to the top edge of the
clear viewing area.
Step 2: Place a ceramic cup in the Drip Tray
and run a brew cycle. DO NOT USE A
K-CUP® portion pack just press the Large
Cup Button. Pour the contents of the cup
into the sink.
12
Brewer Does Not
Have Power
Brewer will not brew
when used for the
first time
• The Brewer must be primed for use by filling the internal hot water
tank before the first brew. ‘PRIME’ will be displayed on the LCD
Control Center (refer to page 6).
• If Brewer is cold/frozen, wait for two hours for it to reach room
temperature.
Brewer will not brew
• After placing the K-Cup® portion pack in the K-Cup Holder, make sure
that the Handle is pushed down securely and the LCD Control Center
changes from ‘READY’ to ‘BREW’, then press either the Large Cup or
Small Cup Button.
• If the LCD Control Center indicates ‘ADD WATER’, add water to Water
Reservoir or make sure the Water Reservoir is seated
properly in its base.
• If the LCD Control Center indicates ‘ADD WATER’ even after refilling,
contact Customer Service at 1-866-901-BREW (2739).
Brewing a partial cup
• The Exit Needle may be clogged. (refer to page 11).
• Clean K-Cup Holder if necessary and rinse under faucet. (refer to page 11).
• The Water Reservoir may have been removed during brewing.
Replace the Water Reservoir and perform a cleansing brew.
• If the LCD Control Center indicates ‘DE-SCALE’, descale the Brewer
(refer to page 11).
• If you have repeated the descale procedure on your Brewer two times
and the message is still displayed, contact Customer Service at
1-866-901-BREW (2739).
The time is not
displayed on the
LCD Message Center
• The time will not be displayed on the LCD unless you have set it.
To set the clock, follow the procedure on Page 9.
• If power is interrupted to the Brewer, you will need to set the clock
again using the procedure on page 9.
My brewer shuts off
automatically
• Check to make sure that the Auto Off Timer and/or On/Off Time
features have not been set. To do this, press the black button below
'MENU' and scroll through the programming options. 'OFF' should
be displayed for Auto Off Timer and On/Off. If 'OFF' is not displayed,
follow directions on pages 9-10 to reset.
Step 4: You may need to perform additional
rinse cycles if you notice any residual taste.
Storage
Empty the Water Reservoir before storing and
take care to ensure that you store your Brewer
in a safe and frost free environment. Please be
sure to store your Brewer in its upright position
to avoid water leakage from the inner tank. If
you store the Brewer in a cold environment,
you run the risk of water freezing inside the
Brewer and causing damage. When you prepare to use it after storage, we recommend
rinsing the Water Reservoir with fresh water
and running three cleansing brews without a
K-Cup.
If you plan to move your Brewer to a different
location, turn the Brewer off, unplug it and
empty the Water Reservoir. If your Brewer has
been in an environment below freezing, please
be sure to let it warm to room temperature for
2 hours before using.
SOLUTION
• Plug Brewer into an independent outlet.
• Check to be sure that it is plugged in securely.
• Plug into a different outlet.
• Reset circuit breaker if necessary.
• Make sure that the Power Button has been turned on and is
illuminated.
Step 5: Now let the Brewer stand for
4 hours while still on.
You should promptly de-scale if ‘DE-SCALE’ is
displayed on the LCD Control Center. Properly
follow the de-scaling procedure described below.
De-Scaling
SITUATION
Step 4: Rinse the Water Reservoir
thoroughly and fill with fresh water.
c. RINSE
This Brewer is equipped with sensors to detect
when scale buildup is interfering with the
performance of the Brewer. When this is
detected, 'DE-SCALE' will be displayed on the
LCD Control Center.
TROUBLESHOOTING
If any problems persist, contact Customer Service at 1-866-901-BREW (2739).
13
MANUEL D'UTILISATION ET D'ENTRETIEN
FONCTIONNEMENT ET UTILISATION SANS DANGER
WARRANTY
RÈGLES DE SÉCURITÉ IMPORTANTES
Limited One Year Warranty
Keurig warrants that your Brewer will be free
of defects in materials or workmanship under
normal home use for one year from the date
of purchase. It is recommended that you fill
out and return the warranty card enclosed
with your Brewer so that your purchase information will be stored in our system. Keurig
will, at its option, repair or replace the Brewer
without charge upon its receipt of proof of
the date of purchase. If a replacement Brewer
is necessary to service this warranty, the
replacement Brewer may be new or reconditioned. If a replacement Brewer is sent, a new
limited one year warranty will be applied to
the replacement Brewer.
This warranty only applies to Brewers
operated in the United States and Canada.
This warranty gives you specific legal rights,
and you may also have other rights that vary
from state to state and, in the case of Canada,
from Province to Province.
What is not covered by the
Limited Warranty?
THIS WARRANTY DOES NOT COVER CONSEQUENTIAL OR INCIDENTAL DAMAGES
SUCH AS PROPERTY DAMAGE AND DOES
NOT COVER INCIDENTAL COSTS AND
EXPENSES RESULTING FROM ANY BREACH
OF THIS WARRANTY, EVEN IF FORESEEABLE.
Some states or Provinces do not allow the
exclusion or limitations of incidental or consequential damages, so the above limitation
or exclusion may not apply to you depending
on the state or Province of purchase.
Nor does this warranty cover damages
caused by services performed by anyone
other than Keurig or its authorized service
providers, use of parts other than genuine
Keurig parts, or external causes such as
abuse, misuse, inappropriate power supply
or acts of God.
14
Other Limitations
THIS WARRANTY IS EXCLUSIVE AND IS IN
LIEU OF ANY OTHER EXPRESS WARRANTY,
WHETHER WRITTEN OR ORAL. THE
DURATION OF ANY IMPLIED WARRANTIES,
INCLUDING BUT NOT LIMITED TO ANY
IMPLIED WARRANTIES OF MERCHANT ABILITY OR FITNESS FOR A PARTICULAR
PURPOSE, IS EXPRESSLY LIMITED TO THE
PERIOD OF DURATION OF THIS
LIMITED WARRANTY. Some states or
Provinces do not allow limitations on how
long an implied warranty lasts, so the above
limitation may not apply to you depending on
the state or the Province of purchase.
How do you obtain warranty service?
Keurig Brewers are high quality
appliances and, with proper care, are
intended to provide years of satisfying
performance. However, should the need arise
for warranty servicing, simply call Keurig
Customer Service at our toll free phone
number 1-866-901-BREW (2739). Please
do not return your Brewer for servicing
without first speaking to Keurig Customer
Service to obtain an Authorization to Return
number (ATR). Keurig Brewers returned
without an ATR number will be returned to
the sender without servicing.
Keurig, Incorporated
101 Edgewater Drive
Wakefield, MA 01880
1-866-901-BREW (2739)
Lorsque vous utilisez des appareils électriques,
vous devriez suivre les mesures de sécurité de
base suivantes :
1. Veuillez lire toutes les instructions avant
l’utilisation.
13. Pour débrancher la cafetière, appuyer
sur le bouton de mise en marche situé
sur le dessus de la cafetière pour la mettre
en position ‘OFF’ et retirer le cordon
de la prise.
2. Ne pas toucher les surfaces chaudes.
Utiliser les poignées.
14. Ne jamais laisser des enfants utiliser
la cafetière ni rester à proximité sans
surveillance.
3. L’utilisation d’un accessoire qui n’a pas été
testé avec cet appareil peut causer des
blessures.
15. Ne pas soulever la poignée pour ouvrir le
couvercle de la cafetière durant l’infusion.
4. Éviter le contact ou la proximité de
l’appareil avec un élément électrique ou un
brûleur à gaz. Éviter également de placer
l’appareil à l’intérieur d’un four chaud.
5. Ne pas utiliser à l’extérieur.
6. Pour éviter les risques de chocs
électriques, ne pas immerger la fiche, le
cordon d’alimentation ou l’appareil dans
l’eau ou dans tout autre liquide.
7. Ne pas trop remplir le réservoir d’eau.
16. Toujours laisser le couvercle sur le
réservoir d’eau, sauf lors du remplissage.
17. L’appareil est équipé d’un cordon
d’alimentation muni d’un conducteur et
d’une prise de mise à la terre. L’appareil
doit être mis à la terre en utilisant une
prise de courant à contact de mise à la
terre à trois trous. En cas de court-circuit,
la mise à la terre réduit les risques de
chocs électriques.
8. N’utiliser que de l’eau dans cet appareil!
Ne verser aucun autre liquide ou aliment
dans le réservoir d’eau à l’exception des
produits mentionnés dans les directives
de nettoyage du présent manuel.
18. Si la prise de courant est une prise de
courant murale standard à deux trous,
le propriétaire a l’obligation et la
responsabilité de la faire remplacer
par une prise de courant de mise à la
terre à trois trous.
9. Débrancher la cafetière avant de la nettoyer
ou de la réparer. Laisser l’appareil refroidir
avant d’ajouter ou d’enlever des pièces et
avant de le nettoyer.
19. Il ne faut en aucun cas couper ou enlever
la troisième broche (mis à la terre)
du cordon d’alimentation, ni utiliser
un adaptateur.
10. Pour une utilisation optimale, brancher
l’appareil dans une prise de courant séparée
sur un circuit spécialisé pour éviter que les
lumières vacillent, que les fusibles sautent
ou que les disjoncteurs se déclenchent.
20. Consulter un électricien qualifié si les
instructions sur la mise à la terre ne sont
pas parfaitement comprises ou en cas de
doutes sur la mise à la terre de l’appareil.
11. Ne jamais utiliser un appareil dont la
fiche ou le cordon d’alimentation est
endommagé ou un appareil qui présente
un trouble de fonctionnement ou qui
a été endommagé.
12. Ne pas laisser le cordon d’alimentation
pendre d’une table ou d’un comptoir ni
entrer en contact avec une surface chaude.
21. Ne pas utiliser l’appareil pour une autre fin
que celle pour laquelle il a été conçu.
CONSERVER
CE MANUEL.
15
SECTION 1
ATTENTION : Les parties inférieure et
supérieure du support à K-Cup sont munies
d’aiguilles pointues servant à perforer la
dose individuelle K-Cup®. Pour éviter tout
risque de blessure, ne pas mettre les doigts
dans le compartiment de la K-Cup.
ATTENTION : L’eau se trouvant dans le
support à K-Cup durant l’infusion est
extrêmement chaude. Pour éviter tout risque
de blessure, ne pas soulever la poignée ni
ouvrir le compartiment de la K-Cup durant
l’infusion.
DIRECTIVES POUR CORDON D’ALIMENTATION
COURT : L’appareil est doté d’un cordon d’alimentation court pour éviter qu’il s’emmêle ou que
quelqu’un trébuche dans un cordon long.
Si une rallonge est utilisée, (1) les caractéristiques
électriques inscrites sur la rallonge doivent égaler
ou excéder celles de l’appareil et (2) le cordon
doit être fixé de façon à ce qu’il ne pende pas
d’une table ou d’un comptoir pour éviter qu’un
enfant puisse le saisir ou que quelqu’un trébuche.
(3) la rallonge doit être munie d’une prise de mise
à la terre à trois broches.
CE PRODUIT EST DESTINÉ À UNE UTILISATION
DOMESTIQUE SEULEMENT.
SYSTÈME D’INFUSION UNE
TASSE À LA FOIS POUR LA
MAISON DE KEURIG
RÉGLAGES ET FONCTIONNEMENT DE LA CAFETIÈRE
Manuel d’utilisation et d’entretien
du modèle B50
1. Laissez votre cafetière en marche en
tout temps.
Conseils utiles
TABLE DES MATIÈRES
SECTION 1
RÉGLAGES ET FONCTIONNEMENT
DE LA CAFETIÈRE . . . . . . . . . . . . . . . . . . .
Conseils utiles . . . . . . . . . . . . . . . . . . . . . . . .
Déballage de la cafetière . . . . . . . . . . . . .
Caractéristiques . . . . . . . . . . . . . . . . . . . . . . .
Réglages et première infusion . . . . . . . .
17
17
17
18
19
SECTION 2
COMMANDES ET VOYANTS
..........
22
Afficheur de
messages à cristaux liquides . . . . . . . . . . . .
22
SECTION 3
NETTOYAGE ET ENTRETIEN . . . . . . . . . . .
24
Nettoyage . . . . . . . . . . . . . . . . . . . . . . . . . . . 24
Détartrage . . . . . . . . . . . . . . . . . . . . . . . . . . 25
Entreposage . . . . . . . . . . . . . . . . . . . . . . . . 25
SECTION 4
DÉPANNAGE
. . . . . . . . . . . . . . . . . . . . . . . . . 26
SECTION 5
GARANTIE
. . . . . . . . . . . . . . . . . . . . . . . . . . . 27
AVERTISSEMENT
RISQUE D’INCENDIE ET DE CHOCS
ÉLECTRIQUES. NE PAS OUVRIR
AVERTISSEMENT : POUR RÉDUIRE LES
RISQUES D’INCENDIE ET DE CHOCS
ÉLECTRIQUES, NE PAS RETIRER LE
COUVERCLE INFÉRIEUR. CET APPAREIL NE
CONTIENT AUCUNE PIÈCE RÉUTILISABLE.
LES RÉPARATIONS NE DEVRAIENT ÊTRE
EFFECTUÉES QUE PAR UN TECHNICIEN DE
SERVICE AGRÉÉ.
Inscrivez le numéro de série de votre
cafetière ici. Le numéro de série est
indiqué en dessous de la cafetière, sur
une étiquette blanche.
_________________________________
16
Nous vous suggérons de toujours laisser le
commutateur de votre cafetière à la position
‘ON’. De cette façon, il vous sera possible
de savourer une tasse de café ou de thé
fraîchement infusé à tout moment.
Toutefois, la cafetière est entièrement programmable, ce qui vous permet de la mettre en
marche ou de l’arrêter aux moments qui vous
conviennent. Si vous préférez, vous pouvez
également régler la cafetière pour qu’elle
s’arrête après une certaine période de temps.
Veuillez consulter les directives à la page 22
pour que le réglage de votre cafetière réponde
à vos besoins.
2. Pour obtenir le meilleur café gourmet ou thé
de spécialité possible, Keurig recommande
l’utilisation d’eau embouteillée ou filtrée.
La qualité de l’eau varie d’un endroit à l’autre. Si
votre café a un goût désagréable de chlore ou de
minéraux, nous vous recommandons d’utiliser
de l’eau embouteillée ou de l’eau filtrée à l’aide
d’un système de filtration d’eau.
3. Choisissez entre deux formats de tasse.
La tasse de café parfaite n’est pas la même
pour tous les amateurs de café. Grâce à sa
vaste gamme de cafés et à la possibilité qu’elle
offre d’infuser une grande tasse de café régulier
de 214 ml (7,25 oz) ou une petite tasse de café
fort de 155 ml (5,25 oz), cette cafetière vous
permet de déguster un café infusé à la perfection, selon vos propres goûts. Vous n’avez qu’à
suivre les directives à la page 20.
4. Branchez la cafetière dans sa propre prise
mise à la terre.
Une surcharge du circuit électrique avec
plusieurs appareils risque de nuire au
fonctionnement de votre cafetière. Celle-ci
devrait être branchée séparément des autres
appareils, sur son propre circuit électrique.
5. Infusez votre café dans une tasse à emporter.
Pour infuser un café dans une tasse à
emporter, vous n’avez qu’à retirer la cuvette
d’égouttage et à placer la tasse à emporter sur
la base de la cuvette.
Déballage de la cafetière
1. Placez la boîte de la cafetière sur une grande
surface plane, comme une table ou un
comptoir, ou sur le plancher. Ouvrez la boîte.
2. Retirez le Guide de démarrage et le Manuel
d’utilisation et d’entretien ainsi que tout
autre document.
3. Retirez le paquet de doses individuelles
K-Cup® gratuites.
4. Couchez l’emballage sur le côté, avec la
partie avant de la boîte en dessous.
5. Ouvrez la boîte et saisissez le sac de
plastique contenant la cafetière.
6. Tirez soigneusement le sac de plastique
(et les matériaux d’emballage) vers vous
pour le sortir de la boîte. La cafetière est
encastrée dans le polymousse et repose
sur le côté.
7. Retirez la partie supérieure du polymousse.
8. Retirez soigneusement la cafetière du reste
de polymousse et placez-la debout sur une
surface plane et uniforme.
9. Enlevez le sac de plastique de la cafetière.
10. Couchez soigneusement la cafetière sur le
côté et inscrivez à la page 3 de ce manuel
le numéro de série indiqué sur l’étiquette
blanche en dessous de la cafetière. Le
numéro de série est aussi indiqué en
dessous de la boîte de la cafetière.
11. Placez la cafetière debout sur une surface
plane et uniforme. Enlevez le ruban adhésif
qui maintient le réservoir d’eau en place.
Nous vous recommandons de conserver tous
les matériaux d’emballage au cas où il serait
nécessaire de retourner la cafetière.
AVERTISSEMENT : Gardez tous les sacs de
plastique hors de la portée des enfants.
17
Caractéristiques
Réglages et première infusion
IMPORTANT : N’utilisez par votre cafetière
Keurig avant de l’avoir préparée pour une
première utilisation, tel qu’indiqué ci-dessous.
Si le message ‘NOT READY’ (PAS PRÊT)
apparaît sur l’afficheur de messages à cristaux
liquides, assurez-vous que la poignée est
complètement abaissée. Veuillez noter que la
procédure de préparation se fait sans K-Cup.
Préparation de votre cafetière
1. Déballez le cordon et branchez la cafetière
dans une prise mise à la terre.
2. Placez une tasse sur le plateau à tasse.
3. Enlevez le réservoir d’eau de la cafetière en
retirant d’abord le couvercle du réservoir, puis
en le soulevant à la verticale pour le retirer (il
peut être serré). Rincez à l’eau courante.
4. Remplissez le réservoir avec de l’eau fraîche
jusqu'à ce que le niveau d’eau atteigne la
limite supérieure de la fenêtre translucide.
(Attention de ne pas trop remplir.)
5. Fixez la base du réservoir d’eau sur le côté
gauche de la cafetière et assurez-vous que
les languettes de verrouillage du réservoir
s’engagent correctement dans la cafetière.
Replacez le couvercle sur le réservoir d’eau.
6. Appuyez sur le bouton de mise en marche
situé sur le panneau supérieur droit de la
cafetière. La lumière verte entourant le
bouton s'allumera.
7. L’afficheur de messages à cristaux liquides
s’allume. Le message ‘PRIME’ (PRÉPARATION)
apparaît et le voyant Grande tasse clignote.
18
8. Appuyez sur le bouton noir sous le voyant
Grande tasse qui clignote.
9. L’infuseur se remplit automatiquement
(préparation) et l’eau est chauffée. Ce
processus prend environ trois minutes.
Durant la période de chauffage, le message
‘NOT READY’ (PAS PRÊT) apparaît sur
l’afficheur de messages à cristaux liquides.
Quand l’eau est chaude, le message
‘READY’ (PRÊT) s’affiche.
10. Appuyez sur le bouton noir sous le voyant
clignotant Grande tasse pour lancer une
infusion de nettoyage, durant laquelle de
l’eau chaude coulera dans votre tasse.
Jetez l’eau.
11. La cafetière prend environ 15 secondes
pour réchauffer l’eau. Quand l’eau est
assez chaude, le message ‘READY’ (PRÊT)
apparaît de nouveau.
12. Le processus de préparation est
maintenant terminé et vous êtes prêt à
faire votre première infusion!
19
Infusion de votre première tasse
Dose
individuelle
K-Cup®
Poignée
Support à
la K-Cup
1. L’afficheur de messages à cristaux liquides
indique ‘READY’ (PRÊT).
2. Placez une tasse sur le plateau à tasse.
3. Soulevez la poignée, et le support à K-Cup
s’ouvrira.
ATTENTION : Les parties inférieure et
supérieure du support à K-Cup sont munies
d’aiguilles pointues servant à perforer la
dose individuelle K-Cup®. Pour éviter tout
risque de blessure, ne pas mettre les doigts
dans le compartiment de la K-Cup.
7. Choisissez la quantité de café ou de thé que
vous désirez infuser en appuyant sur le
bouton d’infusion sous les voyants Petite
tasse ou Grande tasse, selon votre choix. Le
bouton Grande tasse produira une boisson
de 214 ml (7,25 oz) et le bouton Petite
tasse, une boisson de 155 ml (5,25 oz).
REMARQUE : Si vous n’appuyez pas sur le
bouton d’infusion dans les 60 secondes,
l’afficheur de messages retourne à la
mention ‘READY’ (PRÊT) et le bouton
d’infusion est désactivé pour éviter une
infusion accidentelle. Activez de nouveau
le bouton d’infusion en soulevant et en
rabaissant la poignée.
8. L’afficheur de messages présente ensuite
la mention ‘BREWING’ (EN COURS
D’INFUSION) et le format que vous
avez sélectionné.
BREWING
MENU
4. Choisissez une dose individuelle K-Cup .
5. Placez la dose individuelle K-Cup® dans le
support à K-Cup (tel qu’illustré au haut de
la page.)
Voyant
Petite tasse
BREW
MENU
Voyant
Grande tasse
6. Rabaissez la poignée pour fermer le couvercle
sur le support à K-Cup. (Quand il est
complètement fermé, l’afficheur de messages
à cristaux liquides indique ‘BREW’ (INFUSION)
et les voyants Grande tasse et Petite tasse
clignotent pendant 60 secondes.)
20
REMARQUE : Après l’infusion, votre cafetière
se remplit pour la prochaine infusion. La pompe
fera un bruit de vibration. Ce bruit est normal.
Annulation d’une infusion
Si vous devez annuler une infusion en cours de
processus, appuyez sur le bouton de mise en
marche pour fermer la cafetière. L’écoulement
de café ou de thé s’arrêtera, et l’élément de
chauffage de même que le bouton de mise en
marche s’éteindront.
REMARQUE : Il est possible que vous ayez
moins de café ou de thé dans votre tasse lors
de la prochaine infusion. Nous vous recommandons d’effectuer une infusion de nettoyage
à l’eau seulement après l’annulation d’une infusion. Votre PROCHAINE infusion vous donnera
ensuite la quantité de café ou de thé choisie.
Ajouter de l’eau
®
REMARQUE : Ne perforez pas la dose
individuelle K-Cup® et n’enlevez
pas son couvercle d’aluminium.
READY’ (PAS PRÊT), c’est qu’elle
réchauffe l’eau pour une prochaine
infusion. Environ 15 secondes plus tard,
la mention ‘READY’ (PRÊT) apparaîtra sur
l’afficheur de messages à cristaux liquides.
ATTENTION : L’eau se trouvant dans le
support à K-Cup durant l’infusion est
extrêmement chaude. Pour éviter tout risque
de blessure, ne pas soulever la poignée ni
ouvrir le compartiment de la K-Cup durant
l’infusion.
9. Une courte pause peut précéder le début
du processus d’infusion. Le processus
dure environ 40 secondes et se termine
par un jaillissement d’air permettant
d’évacuer le liquide de la K-Cup.
10. Soulevez la poignée, retirez la K-Cup et
jetez-la. ATTENTION : La K-Cup est
chaude.
11. Il ne vous reste plus qu’à savourer votre
première tasse de café gourmet ou de thé
Keurig Brewed®!
12. Si votre cafetière indique ensuite ‘NOT
L’afficheur de messages à cristaux liquides de
votre cafetière vous indiquera que le niveau
d’eau dans le réservoir est bas ou que le
réservoir d’eau a été enlevé en affichant ‘ADD
WATER’ (AJOUTER DE L’EAU). Il est impossible
de faire une infusion lorsque l’indication ‘ADD
WATER’ (AJOUTER DE L’EAU) clignote.
NOT
READY
ADD WATER
Le réservoir d’eau peut être rempli de
deux façons.
1. Enlevez le couvercle du réservoir d’eau
et versez de l’eau directement dans le réservoir alors que celui-ci est fixé à la cafetière,
puis replacez le couvercle.
2. Enlevez le réservoir d’eau de la cafetière en
retirant d’abord le couvercle du réservoir,
puis en le soulevant à la verticale pour le
retirer. Remplissez d’eau. Replacez le réservoir
d’eau sur la cafetière et remettez le couvercle.
IMPORTANT : N’enlevez pas le réservoir
d’eau pendant le processus d’infusion.
Préparer de l’eau chaude
Votre cafetière peut préparer une tasse d’eau
chaude pour un chocolat chaud ou une soupe
déshydratée, ou pour réaliser une recette, etc.
Il suffit de soulever et de rabaisser la poignée
sans insérer de dose individuelle K-Cup®.
L’afficheur de messages à cristaux liquides
affichera le message ‘READY’ et les voyants
Grande tasse et Petite tasse clignoteront.
Placez une tasse sur le plateau à tasse et
choisissez le format voulu.
Vidanger la cafetière
Si la cafetière n’a pas été utilisée pendant plus
d’une semaine, vous devriez vidanger l’eau du
réservoir interne.
1. S’il y a de l’eau dans le réservoir, enlevez le
couvercle puis soulevez le réservoir à la
verticale pour le retirer de la cafetière. Jetez
l’eau, rincez le réservoir et remplissez-le à
nouveau. Replacez le réservoir d’eau sur la
cafetière et remettez le couvercle. (S’il n’y a
pas d’eau dans le réservoir, remplissez-le
simplement d’eau fraîche.)
2. Assurez-vous que la cafetière est en
marche. Soulevez et rabaissez la poignée
sans insérer de K-Cup.
3. L’afficheur de messages à cristaux liquides
affichera le message ‘READY’ (PRÊT) et les
voyants Grande tasse et Petite tasse
clignoteront. Placez une tasse sur le plateau
et choisissez le format Grande tasse.
4. Répétez les étapes 2 et 3 deux autres fois
pour vidanger complètement l’eau du réservoir interne. Pour tout problème avec votre
cafetière, veuillez communiquer avec le
Service à la clientèle au 1 866 901-2739.
21
SECTION 2
COMMANDES ET VOYANTS
Afficheur de messages à cristaux
liquides
Réglage de l’horloge
Le réglage de l’horloge est facultatif. Quand l’horloge
est réglée, l’heure est affichée sur l’afficheur de
messages à cristaux liquides. REMARQUE : Vous
devez régler l’horloge pour programmer la fonction de
mise en marche et d’arrêt automatique de la cafetière.
a. Appuyez sur le bouton sous ‘MENU’.
b. Le mot ‘OFF’ (HORS FONCTION) s’affiche au
haut de l’afficheur de messages pour indiquer
que l’horloge n’est pas réglée. Les options ‘SET
CLOCK’ (RÉGLER L’HORLOGE), ‘SET AUTO
OFF’ (RÉGLAGE DE L’ARRÊT AUTOMATIQUE)
ET ‘SET ON TIME’ (RÉGLAGE DE L’HEURE DE
MISE EN MARCHE) apparaissent sur l’afficheur
de messages, et une flèche pointe ‘SET CLOCK’
(RÉGLER L’HORLOGE). Les lettres H et M
clignotent.
OFF
Á SET CLOCK
SET AUTO OFF
SET ON TIME
H
MENU
M
c. Appuyez sur le bouton noir sous le H clignotant
jusqu’à ce qu’à ce que la bonne heure s’affiche.
L’horloge alterne entre AM et PM pour indiquer
s’il s’agit du matin ou de l’après-midi.
d. Appuyez sur le bouton noir sous le M pour
régler les minutes.
e. Quand la bonne heure est indiquée, appuyez sur
le bouton MENU quatre fois pour faire défiler les
autres options de programmation et revenir en
mode ‘READY’ (PRÊT).
f. L’heure exacte devrait maintenant apparaître sur
l’afficheur de messages à cristaux liquides.
REMARQUE : Si la cafetière est débranchée ou s’il y
a une panne d’électricité, suivez la procédure cidessous pour régler à nouveau l’heure. L’horloge ne
sera pas visible tant que l’heure ne sera pas réglée.
Programmation de la fonction mise en
marche/arrêt automatique
La cafetière est dotée de trois modes de fonctionnement pour vous permettre de savourer du thé ou
22
du café gourmet comme il vous convient. En programmant votre cafetière pour qu'elle s'allume
automatiquement chaque matin, vous n'aurez plus
à attendre qu'elle se réchauffe avant de vous préparer une tasse de café gourmet.
1. Cafetière laissée en marche en tout temps
(recommandé).
La cafetière peut être laissée en marche en tout
temps de manière à ce qu’elle soit toujours prête
à infuser une tasse de thé ou de café gourmet. À
tout moment, pour éteindre la cafetière, appuyez
simplement sur le bouton de mise en marche.
(REMARQUE : Même si l'horloge demeure en
fonction, vous ne pourrez pas infuser de café ou
de thé.) Appuyez de nouveau sur le bouton de
mise en marche pour rallumer la cafetière. Vous
devrez attendre que l’eau soit chaude avant que
la cafetière soit prête à être utilisée.
2. Arrêt automatique de la cafetière dans un
délai voulu après la dernière infusion.
a. Appuyez deux fois sur le bouton Menu pour programmer l'arrêt automatique. La fonction ‘SET
AUTO OFF’ (RÉGLAGE DE L’ARRÊT AUTOMATIQUE), précédée d’une petite flèche, apparaît
sur l’afficheur de messages à cristaux liquides.
d. Pour désactiver l'arrêt automatique, appuyez
deux fois sur le bouton MENU pour accéder au
mode de programmation de l'arrêt automatique.
Appuyez sur le bouton H et relâchez-le pour
avancer d'une heure à la fois, jusqu'à ce que
l'afficheur indique 'OFF' (HORS FONCTION).
3. Programmation de la fonction mise en
marche/arrêt automatique
REMARQUE : Pour utiliser cette fonction de
programmation, l’horloge doit être réglée à la
bonne heure. L’horloge n’est affichée que
lorsque l’heure est réglée. Voir la page 22 pour
le réglage de l’horloge.
a. Après avoir correctement réglé l’heure (obligatoire), appuyez trois fois sur le bouton Menu
pour régler la fonction ‘Auto On Time’ (Mise en
marche automatique). L'afficheur de messages
à cristaux liquides affiche une petite flèche à
côté de 'SET ON TIME' (RÉGLAGE DE L'HEURE
DE MISE EN MARCHE).
6:15AM
SET CLOCK
SET AUTO OFF
ÁSET ON TIME
H
MENU
M
10:00PM
SET CLOCK
OFF
SET ON TIME
H MENU
ÁSET AUTO
b. Appuyez sur le bouton H et relâchez-le pour
avancer d’une heure à la fois, jusqu’à un maximum de 9 heures.
c. Après avoir réglé l’heure de l’arrêt automatique,
appuyez sur le bouton MENU trois fois pour faire
défiler les options de programmation et revenir
en mode ‘READY’ (PRÊT). Le message 'AUTO
OFF' (ARRÊT AUTOMATIQUE) est maintenant
affiché pour indiquer que la fonction a été activée.
b. Appuyez sur le bouton noir sous le H pour
régler l’heure de mise en marche voulue.
c. Appuyez sur le bouton noir sous le M pour
régler les minutes de l’heure de mise en
marche voulue.
d. Après avoir réglé l’heure de mise en marche
désirée, appuyez sur le bouton de Menu pour
la sauvegarder et passer à l’heure d’arrêt
automatique.
10:00PM
SET CLOCK
SET AUTO OFF
ÁSET OFF TIME
H
MENU
M
10:00PM
SET
READY AUTO OFF
MENU
e. Répétez les étapes b et c ci-dessus et pour
régler l’heure d’arrêt automatique ‘Off Time’
désirée.
f. Pour terminer, appuyez sur le bouton Menu
une dernière fois pour quitter le mode de programmation. L’afficheur de messages indiquera
que vous avez réglé une heure de mise en
marche automatique et/ou une heure d’arrêt
automatique. Le message ‘ON OFF TIME’
s’affichera si vous avez réglé les deux fonctions. Le message ‘ON TIME’ s’affichera si vous
avez réglé seulement l’heure de mise en
marche automatique, et le message ‘OFF TIME’
s’affichera si vous avez réglé seulement l’heure
d’arrêt automatique.
g. Les fonctions de mise en marche et d’arrêt
automatique fonctionnent indépendamment
l’une de l’autre. Pour annuler l’une ou l’autre
des fonctions, suivez les étapes ci-dessus et
utilisez les boutons H et M pour régler l’heure à
12:00 AM. L’afficheur de messages indiquera
‘OFF’ (HORS SERVICE) dans le haut de l’écran
et la fonction sera désactivée.
EXEMPLE : Si vous choisissez de régler l’heure de
mise en marche automatique (On Time) à 06:15
a.m. et l’heure d’arrêt automatique (Off Time) à
10:00 p.m. (22:00), l’eau du réservoir sera gardée
chaude durant toute cette période pour que la
cafetière soit toujours prête à infuser une tasse de
café ou de thé. Pour infuser une tasse après cette
période, appuyez simplement sur le bouton de
mise en marche et vous pourrez procéder dès que
l’eau sera chaude et que le voyant ‘READY’ (PRÊT)
s’allumera.
10:00PM
READY
SET
AUTO OFF
ON OFF TIME
MENU
REMARQUE : La minuterie d’arrêt automatique
et la fonction de mise en marche/arrêt automatique peuvent être programmées pour fonctionner de concert ou indépendamment l’une de
l’autre. Par exemple, vous pouvez régler la mise
en marche automatique à 07:00 puis la minuterie d’arrêt automatique de façon à ce qu’elle
éteigne la cafetière deux heures après la
dernière infusion.
23
SECTION 3
NETTOYAGE ET ENTRETIEN
pièces internes qui touchent l’eau.
Nettoyage des pièces
2. Nettoyage de l’entonnoir
Il est recommandé de nettoyer régulièrement
les éléments externes de la cafetière.
L’entonnoir peut être enlevé du support à K-Cup
en tirant dessus jusqu’à ce qu’il se déclenche
et peut être mis au lave-vaisselle. Pour le
remettre en place, il suffit de l’enclencher dans
l’assemblage du support à K-Cup.
1. Ne plongez jamais la base de l’appareil dans
l’eau ni dans tout autre liquide. Le boîtier et
tous les autres éléments externes de la
cafetière peuvent être nettoyés à l’aide d’un
chiffon non abrasif et d’eau savonneuse.
2. La cuvette d’égouttage peut recueillir jusqu’à
236 ml (8 oz) de liquide. La cuvette d’égouttage
et le plateau à tasse doivent être vidés et
rincés régulièrement. Pour enlever la cuvette
d’égouttage et le plateau à tasse, tirez-les
simplement vers vous en prenant soin de
toujours les garder à l’horizontale pour éviter
que le contenu de la cuvette d’égouttage ne se
renverse. Le plateau à tasse et la cuvette
d’égouttage peuvent être mis au lave-vaisselle.
Nettoyage de l’assemblage du
support à dose individuelle K-Cup®
1. Nettoyage des pièces
L’assemblage du support à K-Cup peut être mis
au lave-vaisselle. Pour l’enlever de la cafetière,
ouvrez le couvercle en soulevant la poignée.Tenez
le tiroir à K-Cup fermement avec vos pouces et
placez les doigts sous la partie inférieure de
l’entonnoir. Saisissez le dessus du support à
K-Cup d’une main, et poussez vers le haut sur le
fond du support à K-Cup de l’autre main jusqu’à
ce qu’il se libère. Après le nettoyage, enlignez le
support à K-Cup avec l’ouverture en vous
guidant sur les deux entailles à l’avant et
enclenchez-le en place.
Assemblage du
support à K-Cup
Support à
la K-Cup
Entonnoir
24
La cafetière devrait subir un détartrage tous les
six mois pour assurer son fonctionnement optimal. Cependant, il arrive que le tartre s’accumule
plus rapidement; il est alors nécessaire de
procéder au détartrage plus souvent.
3. Nettoyage de l’aiguille de sortie
L’aiguille de sortie se trouve au fond de
l’assemblage du support à K-Cup. Si des grains
de café l’obstruent, elle peut être nettoyée à
l’aide d’un trombone ou d’un instrument
similaire. Insérez le trombone dans l’aiguille
de sortie et nettoyez-la en poussant ce qui
l’obstrue vers l’extérieur. Le support à K-Cup
peut être mis au lave-vaisselle.
ATTENTION : Les parties inférieure et supérieure
du support à K-Cup sont munies d’aiguilles
pointues servant à perforer la dose individuelle
K-Cup®. Pour éviter tout risque de blessure, ne pas
mettre les doigts dans le compartiment de la K-Cup.
Cette cafetière est munie de capteurs qui
détectent le moment où le tartre risque de
nuire au bon fonctionnement de la cafetière.
Dans ce cas, le message ‘DE-SCALE’
(DÉTARTRAGE) s’affichera sur l’afficheur de
messages à cristaux liquides.
Lorsque ce message s’affiche, il est préférable
de procéder sans tarder à un détartrage. Suivez
attentivement la procédure ci-dessous.
Nettoyage du réservoir d’eau et
de son couvercle
K-CUP®, appuyez simplement sur le bouton
d’infusion pour grande tasse. Jetez ensuite le
contenu de la tasse dans l’évier.
3e étape : Répétez le processus d’infusion
jusqu’à ce que le réservoir soit vide, en
jetant chaque fois le contenu de la tasse.
N’oubliez pas d’ouvrir et de refermer le
couvercle entre chaque cycle.
4e étape : Rincez le réservoir d’eau à fond et
remplissez-le d’eau fraîche.
5e étape : Laissez ensuite la cafetière
reposer en marche pendant 4 heures.
c. RINÇAGE
1re étape : Assurez-vous que le réservoir
d’eau est rempli d’eau fraîche.
2e étape : Placez une tasse de céramique
sur le plateau à tasse et effectuez une
infusion ordinaire. Jetez ensuite le contenu
de la tasse dans l’évier.
3e étape : Répétez le processus d’infusion
jusqu’à ce que le réservoir d’eau soit vide.
4e étape : Vous devrez peut-être effectuer
des cycles de rinçage supplémentaires si
vous décelez un goût résiduel de vinaigre.
Le couvercle du réservoir d’eau doit être nettoyé à
l’aide d’un chiffon non abrasif et d’eau savonneuse.
Le réservoir peut être mis au lave-vaisselle ou
nettoyé dans de l’eau savonneuse et rincé à fond.
Ne séchez pas l’intérieur du réservoir d’eau à l’aide
d’un chiffon car des peluches pourraient y rester.
Détartrage
a. PRÉPARATION
Détartrage de votre cafetière
La teneur en minéraux et en chlore de l’eau
varie d’un endroit à un autre. Selon la teneur en
minéraux de l’eau de votre région, il peut y
avoir accumulation de dépôts calcaires ou de
tartre dans votre cafetière. Le tartre n’est pas
toxique, mais s’il n’est pas enlevé, il peut nuire
à la performance de votre cafetière. Un
détartrage de votre cafetière aide à garder en
bon état l’élément de chauffage et les autres
1re étape : Assurez-vous d’avoir au moins
1,4 litre (48 oz) de vinaigre blanc non dilué.
Vous aurez aussi besoin d'un évier vide et
d'une tasse de céramique (n'utilisez pas une
tasse de carton)
2e étape : Videz l’eau du réservoir.
b. REMPLISSAGE ET NETTOYAGE
1re étape : Remplissez le réservoir de
vinaigre jusqu’à la limite supérieure de la
fenêtre translucide.
2e étape : Placez une tasse de céramique sur
le plateau à tasse et effectuez une infusion.
N’UTILISEZ PAS DE DOSE INDIVIDUELLE
Entreposage
Avant d’entreposer la cafetière, videz le réservoir
d’eau et assurez-vous de placer la cafetière à l’abri
du gel. Assurez-vous d’entreposer la cafetière à la
verticale pour éviter que l’eau s’écoule du réservoir
interne. Si vous entreposez votre cafetière dans un
lieu trop froid, l’eau à l’intérieur de la cafetière
risque de geler et d’endommager l’appareil. Pour
réutiliser la cafetière après l’avoir entreposée, nous
vous recommandons de remplir le réservoir d’eau
fraîche et d’effectuer trois cycles de rinçage. Si
vous prévoyez transporter votre cafetière dans un
autre endroit, éteignez-la, débranchez-la et videz le
réservoir d’eau. Si la cafetière a été placée dans un
endroit où la température était sous le point de
congélation, laissez-la au moins deux heures à la
température ambiante avant de l’utiliser.
25
SECTION 4
DÉPANNAGE
PROBLÈME
SOLUTION
La cafetière ne
fonctionne pas
• Branchez la cafetière séparément.
• Vérifiez que la cafetière est bien branchée.
• Branchez la cafetière dans une autre prise.
• Réenclenchez le disjoncteur au besoin.
• Assurez-vous que le bouton de mise en marche a été
actionné et que la lumière verte s’allume.
La cafetière n’infuse
pas lorsqu’on l’utilise
pour la première fois
• La cafetière doit être préparée en remplissant le réservoir interne
d’eau chaude avant la première infusion. Le message ‘PRIME’
(PRÉPARATION) s’affichera sur l’afficheur de messages à cristaux
liquides (voir page 19).
• Si la cafetière est froide/gelée, attendez deux heures pour qu’elle
atteigne la température ambiante.
La cafetière
n’infuse pas
• Après avoir placé une dose individuelle K-Cup® dans le support à
K-Cup, assurez-vous que la poignée est bien rabaissée et que le message sur l’afficheur passe de ‘READY’ (PRÊT) à ‘BREW’ (INFUSION),
puis appuyez sur le bouton d’infusion Grande tasse ou Petite tasse.
• Si l’afficheur de messages indique ‘ADD WATER’ (AJOUTER DE
L’EAU), versez de l’eau dans le réservoir ou assurez-vous que le
réservoir est bien installé sur sa base.
• Si l’afficheur de messages indique ‘ADD WATER’ (AJOUTER DE
L’EAU) même après que vous ayez rempli le réservoir, communiquez
avec le service à la clientèle au 1 866 901-2739.
La cafetière n’infuse
pas complètement
• L’aiguille de sortie est peut-être obstruée (voir la page 24).
• Nettoyez le support à K-Cup si nécessaire et rincez-le sous le robinet
(voir la page 24).
• Le réservoir d’eau a peut-être été enlevé pendant l’infusion.
Replacez le réservoir d’eau et effectuez une infusion de nettoyage.
• Si l’afficheur de messages indique ‘DE-SCALE’ (DÉTARTRAGE),
procédez au détartrage de la cafetière (voir la page 24).
• Si vous avez effectué le détartrage deux fois et que le message
continue à être affiché, communiquez avec le service à la clientèle au
1 866 901-2739.
L'heure n'apparaît pas
sur l'afficheur de
messages à cristaux
liquides
• L’heure ne s’affiche pas tant qu’elle n’a pas été réglée. Pour régler
l’horloge, suivez les directives de la page 23.
• Si l’alimentation de la cafetière a été coupée, vous devez régler à
nouveau l’horloge en suivant les directives de la page 23.
La cafetière s’éteint
automatiquement
• Assurez-vous que la minuterie d'arrêt automatique et la fonction
mise en marche/arrêt automatique n'ont pas été programmées.
Pour ce faire, appuyez sur le bouton noir sous ‘MENU’ et faites
défiler les options de programmation. Les fonctions ‘Auto Off’ (arrêt
automatique) et ‘On/Off’ (mise en marche et arrêt) devraient être à
la position ‘OFF’ (HORS SERVICE). Si la position ‘OFF’ n’est pas
affichée, suivez les directives des pages 22-23 pour le régler.
26
Si le problème persiste, communiquez avec le service à la clientèle au 1 866 901-2739.