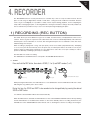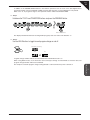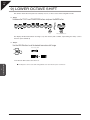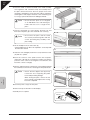
1
PART NAMES AND FUNCTIONS PLAYING THE PIANO LESSON FUNCTION 3 RECORDER 4 FUNCTION BUTTONS Owner's Manual 2 5 APPENDICES CN 31 1 6 Page 3 THANK YOU FOR PURCHASING A KAWAI DIGITAL PIANO! This KAWAI digital piano is a revolutionary new keyboard instrument, combining the latest in electronic advances with traditional craftsmanship inherited from KAWAI’s many years of experience building fine pianos. The CN31 keyboard provides the touch response and full dynamic range required for a superb performance of piano, harpsichord, organ, and other instruments. The CN31’s Lesson function helps performers to practice the piano with a collection of etudes from Czerny and Burgmüller, or songs from Alfred’s Basic Piano Library and Alfred’s Premiere Piano Course lesson books (USA, Canada, Australia and UK only). In addition, the CN piano is equipped with reverb and digital effects processors, providing an unrivalled richness of sound. Industry standard MIDI (Musical Instrument Digital Interface) jacks are included, allowing a number of other electronic instruments to be controlled and played simultaneously, creating a range of musical possibilities. This Owner's Manual contains valuable information to help performers make full use of the instrument's many capabilities. Please read all sections carefully and keep this manual handy for future reference. Table of Contents ¡ Important Safety Instructions ..............4 4. RECORDER ......................................31 FRONT PANEL ............................................................ 8 PEDALS ....................................................................... 8 HEADPHONES ............................................................ 9 1) RECORDING (REC BUTTON) ...................................... 31 RECORDING A SECOND PART .............................. 32 2) PLAYING BACK A SONG............................................... 34 PLAYING BACK RECORDED PARTS SEPARATELY ... 34 3) ERASING A SONG ....................................................... 35 2. PLAYING THE PIANO ......................10 5. FUNCTION BUTTONS ......................36 1) BASIC OPERATIONS..................................................... 10 SETTING UP THE PIANO ........................................ 10 DEMO SONGS ......................................................... 11 SELECTING A PRESET SOUND ............................. 12 2) DUAL .............................................................................. 13 3) SPLIT.............................................................................. 14 4) ‘FOUR HANDS’ MODE ................................................... 16 ENTERING ‘FOUR HANDS’ MODE ........................... 16 EXITING ‘FOUR HANDS’ MODE ............................... 16 5) EFFECTS/REVERB ...................................................... 17 ADDING REVERB .................................................... 17 ADDING OTHER EFFECTS ..................................... 18 6) SELECTING THE TOUCH SENSITIVITY ....................... 19 7) TRANSPOSING THE PIANO ......................................... 20 8) PLAYING WITH CONCERT MAGIC ............................... 21 SELECTING A SONG ............................................... 21 LISTENING TO THE SONG ...................................... 21 PERFORMING A SONG ........................................... 22 CONCERT MAGIC PART VOLUME BALANCE ......... 22 CONCERT MAGIC SONG ARRANGEMENT TYPES ... 23 STEADY BEAT ......................................................... 24 CONCERT MAGIC DEMO MODES ........................... 24 CONCERT MAGIC PLAYBACK SPEED .................... 25 9) METRONOME ................................................................ 26 STARTING THE METRONOME ................................ 26 CHANGING THE TIME SIGNATURE ........................ 26 ADJUSTING THE METRONOME VOLUME ............. 27 ENTERING A FUNCTION MODE .............................. 36 EXITING A FUNCTION MODE .................................. 36 1) TUNING .......................................................................... 37 2) TEMPERAMENT ............................................................ 38 KEY SIGNATURE OF TEMPERAMENT ................... 39 MIDI OVERVIEW ....................................................... 40 CN31 MIDI functions .................................................. 40 3) MIDI CHANNEL .............................................................. 41 4) TRANSMIT PROGRAM CHANGE ON/OFF ................... 42 5) LOCAL CONTROL ON/OFF........................................... 44 6) MULTI-TIMBRAL MODE ON/OFF .................................. 45 7) CHANNEL MUTE ........................................................... 46 8) SENDING PROGRAM CHANGE NUMBERS ................ 47 9) LOWER OCTAVE SHIFT ................................................ 48 10) LOWER PEDAL ON/OFF ............................................. 49 1. PART NAMES AND FUNCTIONS .......8 3. LESSON FUNCTION.........................28 1) SELECTING A BOOK/SONG ........................................ 28 2) LISTENING TO AND PLAYING A SONG ...................... 29 EXITING THE LESSON FUNCTION ......................... 29 PRACTICING THE LEFT AND RIGHT-HAND PARTS ... 29 ADJUSTING THE TEMPO OF A SONG .................... 29 3) RECORDING A SONG PRACTICE .............................. 30 PLAYING BACK THE RECORDING .......................... 30 ERASING THE RECORDING .................................... 30 6. APPENDICES....................................50 CONNECTING TO OTHER DEVICES ....................... 50 ASSEMBLY INSTRUCTIONS .................................... 51 SPECIFICATIONS ..................................................... 53 MIDI EXCLUSIVE DATA FORMAT ............................. 54 MIDI IMPLEMENTATION CHART ............................. 55 Page 4 Important Safety Instructions SAVE THESE INSTRUCTIONS INSTRUCTIONS PERTAINING TO A RISK OF FIRE, ELECTRIC SHOCK, OR INJURY TO PERSONS WARNING TO REDUCE THE RISK OF FIRE OR ELECTRIC SHOCK, DO NOT EXPOSE THIS PRODUCT TO RAIN OR MOISTURE. CAUTION RISK OF ELECTRIC SHOCK DO NOT OPEN AVIS : RISQUE DE CHOC ELECTRIQUE - NE PAS OUVRIR. TO REDUCE THE RISK OF ELECTRIC SHOCK, DO NOT REMOVE COVER (OR BACK). NO USER-SERVICEABLE PARTS INSIDE. REFER SERVICING TO QUALIFIED SERVICE PERSONNEL. The lighting flash with arrowhead symbol, within an equilateral triangle, is intended to alert the user to the presence of uninsulated "dangerous voltage" within the product's enclosure that may be of sufficient magnitude to constitute a risk of electric shock to persons. The exclamation point within an equilateral triangle is intended to alert the user to the presence of important operating and maintenance (servicing) instructions in the leterature accompanying the product. Examples of Picture Symbols denotes that care should be taken. The example instructs the user to take care not to allow fingers to be trapped. denotes a prohibited operation. The example instructs that disassembly of the product is prohibited. denotes an operation that should be carried out. The example instructs the user to remove the power cord plug from the AC outlet. Read all the instructions before using the product. 1) Read these instructions. 10) Protect the power cord from being walked on or pinched particularly at plugs, convenience 2) Keep these instructions. receptacles, and the point where they exit from 3) Heed all warnings. the apparatus. 4) Follow all instructions. 11) Only use attachments/accessories specified by the manufacturer. 5) Do not use this apparatus near water. 6) Clean only with dry cloth. 7) Do not block any ventilation openings. Install in accordance with the manufacturer's instructions. 8) Do not install near any heat sources such as radiators, heat registers, stoves, or other apparatus (including amplifiers) that produce heat. 9) Do not defeat the safety purpose of the polarized or grounding-type plug. A polarized plug has two blades with one wider than the other. A grounding type plug has two blades and a third grounding prong. The wide blade or the third prongs are provided for your safety. If the provided plug does not fit into your outlet, consult an electrician for replacement of the obsolete outlet. 12) Use only with the cart, stand, tripod, bracket, or table specified by the manufacturer, or sold with the apparatus. When a cart is used, use caution when moving the cart/apparatus combination to avoid injury from tip-over. 13) Unplug this apparatus during lightning storms or when unused for long periods of time. 14) Refer all servicing to qualified service personnel. Servicing is required when the apparatus has been damaged in any way, such as power-supply cord or plug is damaged, liquid has been spilled or object have fallen into the apparatus, the apparatus has been exposed to rain or moisture, does not operate normally, or has been dropped. Page 5 WARNING - When using electric products, basic precautions should always be followed, including the following. a potential hazard that could result in death WARNING Indicates or serious injury if the product is handled incorrectly. The product should be connected to an AC outlet of the specified voltage. 120V 230V 240V ● If you are going to use an AC power cord, make sure that its has the correct plug shape and conforms to the specified power voltage. ● Failure to do so may result in fire. Do not insert or disconnect the power cord plug with wet hands. Doing so may cause electric shock. The chair must be used properly (it must be used only when playing the product). ● Do not play with it or stand on it. ● Only one person is allowed to sit on it. ● Do not sit on it when opening the lid. ● Re-tighten the bolts occasionally. Doing so may cause the chair to fall over or your fingers to be trapped, resulting in injury. When using the headphones, do not listen for long periods of time at high volume levels. Doing so may result in hearing problems. Do not lean against the keyboard. Doing so may cause the product to fall over, resulting in injury. Do not disassemble, repair or modify the product. Doing so may result in product breakdown, electric shock or short-circuit. When disconnecting the AC power cord's plug, always hold the plug and pull it to remove it. ● Pulling the AC power cord itself may damage the cord, causing a fire, electric shock or short-circuit. The product is not completely disconnected from the power supply even when the power switch is turned off. If the product will not be used for a long time, unplug the AC power cord from the AC outlet. ● Failure to do so may cause fire in case of lightning. ● Failure to do so may over-heat the product, resulting in fire. This product may be equipped with a polarized line plug (one blade wider than the other). This is a safety feature. If you are unable to insert the plug into the outlet, contact an electrician to replace your obsolete outlet. Do not defeat the safety purpose of the plug. It is a good practice to have the instrument near the AC outlet and the power cord plug in a position so that it can readily be disconnected in an emergency because electricity is always charging while the plug is in the AC outlet even in a power switch off condition. Page 6 CAUTION Indicates a potential hazard that could result in injury or damage to the product or other property if the product is handled incorrectly. Do not use the product in the following areas. ● Areas, such as those near windows, where the product is exposed to direct sunlight ● Extremely hot areas, such as near a heater ● Extremely cold areas, such as outside ● Extremely humid areas ● Areas where a large amount of sand or dust is present ● Areas where the product is exposed to excessive vibrations Using the product in such areas may result in product breakdown. Use the product only in moderate climates (not in tropical climates). When you close the keyboard cover, close it gently. Closing it roughly may trap your fingers, resulting in injury. Before connecting cords, make sure that the power to this product and other devices is turned OFF. OFF Failure to do so may cause breakdown of this product and other devices. Take care not to allow any foreign matter to enter the product. Entry of water, needles or hair pins may result in breakdown or short-circuit. The product shall not be exposed to dripping or splashing. No objects filled with liquids, such as vases, shall be placed on the product. Do not drag the product on the floor. Take care not to drop the product. Please lift up the product when moving it. Please note that the product is heavy and must be carried by more than two persons. Dropping the product may result in breakdown. Do not place the product near electrical appliances such as TVs and radios. ● Doing so may cause the product to generate noise. ● If the product generates noise, move the product sufficiently away from the electrical appliance or connect it to another AC outlet. When connecting the AC power cord and other cords, take care not to get them tangled. Failure to do so may damage them, resulting in fire, electric shock or short-circuit. Do not wipe the product with benzene or thinner. ● Doing so may result in discoloration or deformation of the product. ● When cleaning the product, put a soft cloth in lukewarm water, squeeze it well, then wipe the product. Do not stand on the product or exert excessive force. ● Doing so may cause the product to become deformed or fall over, resulting in breakdown or injury. Do not place naked flame, such as lighted candles on the product. Doing so may cause the illumination to fall over, resulting in fire. Page 7 Ensure that the ventilation is not impeded by covering the ventilation openings with items, such as newspaper, table-cloths, curtains, etc. Failure to do so may over-heat the product, resulting in fire. The product should be located so that its location or position does not interfere with its proper ventilation. Ensure a minimum distance of 5cm around the product for sufficient ventilation. The product should be serviced by qualified service personnel when: ● The power supply cord or the plug has been damaged. ● Objects have fallen, or liquid has been spilled into the product. ● The product has been exposed to rain. ● The product does not appear to operate normally or exhibits a marked change in performance. ● The product has been dropped, or the enclosure damaged. Notes on Repair Should an abnormality occur in the product, immediately turn the power OFF, disconnect the power cord plug, and then contact the shop from which the product was purchased. CAUTION: To prevent electric shock, match wide blade of plug to wide slot, fully insert. ATTENTION: Pour éviter les chocs électriques, introduire la lame la plus large de la fiche dans la borne correspondante de la prise et pousser jusqu'au fond. Instruction for AC power cord (U.K.) Do not plug either terminal of the power cord to the ground of the AC outlet on the wall. FCC Information This equipment has been tested and found to comply with the limits for a Class B digital device, pursuant to Part 15 of the FCC Rules. These limits are designed to provide reasonable protection against harmful interference in a residential installation. This equipment generates, uses and can radiate radio frequency energy and, if not installed and used in accordance with the instructions, may cause harmful interference to radio communications. If this equipment does cause harmful interference to radio or television reception, which can be determined by turning the equipment off and on, the user is encouraged to try to correct the interference by one or more of the following measures: • Reorient or relocate the receiving antenna. • Increase the separation between the equipment and receiver. • Connect the equipment into an outlet on a different electrical circuit from the receiver. • Consult the dealer or an experienced radio/TV technician for help. Canadian Radio Interference Regulations This instrument complies with the limits for a class B digital apparatus, pursuant to the Radio Interference Regulations, C.R.C., c. 1374. An information on Disposal for users If your product is marked with this recycling symbol it means that, at the end of its life, you must dispose of it separately by taking it to an appropriate collection point. You should not mix it with general household waste. Disposing of this product correctly will prevent potential negative effects on the environment and human health which could otherwise arise due to inappropriate waste handling. For further details, please contact your local authority. (European Union only) Page 1 PART NAMES AND FUNCTIONS 8 1. PART NAMES AND FUNCTIONS This section explains the locations and functions of the panel buttons and sliders. FRONT PANEL z CONCERT MAGIC Press the CONCERT MAGIC button to enjoy listening to or performing a collection of pre-programmed piano songs. Concert Magic will provide the correct melody and accompaniment notes, regardless of which keys are pressed. Anybody, young or old, can enjoy Concert Magic from the moment they sit down at the CN piano (page 21). z LESSON z LED DISPLAY Press the LESSON button to access the etudes or Alfred lesson books (USA, Canada, UK, AU only), for an enjoyable piano lesson experience (page 28). The LED display provides useful information such as the currently selected sound type. It also shows values or status when other functions are active. z VALUE These two buttons are used to change the value for various functions. z MASTER VOLUME z SOUND SELECT This slider controls the piano’s master volume level. Move this slider to the right to increase the volume and move it to the left to decrease the volume. This slider also controls the headphone volume and the LINE output level of the piano’s sound. Press the SOUND SELECT button below the name of the instrument to be played. When the button is pressed, an LED indicator will turn on, indicating that the sound has been selected (page 12). PEDALS The CN piano has three pedals—just like a grand piano. They are Sustain, Sostenuto and Soft. ¡ Sustain pedal Sustains the sound after hands are lifted from the keyboard. The sustain pedal is capable of responding to half pedaling. Soft pedal Sustain pedal Sostenuto pedal ¡ Sostenuto pedal Depressing this pedal after playing the keyboard and before releasing the keys sustains the sound of only the keys just played. Any keys that are pressed after the Sostenuto pedal is depressed will not be sustained after the keys are released. ¡ Soft pedal Depressing this pedal softens the sound and reduces its volume. When the rotary effect is active the soft pedal is used to change the speed of the rotor between slow and fast. Page PART NAMES AND FUNCTIONS 9 z EFFECTS Use the EFFECTS button to add chorus, delay, tremolo and rotary speaker effects to the sound. (page 17). z BALANCE Use the balance slider to adjust the volume balance between the two sounds in Dual or Split mode. The balance slider also controls the volume of Left & Right-hand lesson/ recorded parts. z METRONOME z POWER SWITCH Use these buttons to turn on/off the metronome, and to set the tempo, beat, and volume (page 26). Press this button to turn on/off the power. Be sure to turn off the instrument after playing. z REVERB z SPLIT z TOUCH Use the REVERB button to add reverberation to the sound, simulating the acoustic environment of a recital room, stage, or concert hall (page 17). The split function divides the keyboard into two sections— upper and lower—allowing either part to be played with a different sound. (page 14). The TOUCH function allows different touch sensitivities for the keyboard to be selected, other than the standard touch of an acoustic piano. When this function is turned off, the touch sensitivity returns to the standard touch of an acoustic piano (page 19). z TRANSPOSE z RECORDER The REC button is used for recording performances and when using the lesson function, to record practices for comparison with the built in songs and etudes. The PLAY/STOP button is used to select a song and part to play, and to start/stop playback of the recorded songs. It is also used to start/stop playback when using the lesson function (page 31). The transpose function allows the piano’s keys to be raised or lowered in half steps. This is particularly useful when accompanying instruments with different tones, or when a song learned in one key must be played in another key. The transpose feature allows the song to be played in the original key, but heard in another key (page 20). z FUNCTION Pressing the TOUCH and TRANSPOSE buttons simultaneously enters the FUNCTION modes, allowing various advanced parameters within the CN piano, such as tuning and MIDI operation, to be adjusted (page 36). HEADPHONES ¡ Headphone jack (x 2) There are two headphone jacks located on the left underside of the piano. Up to two pairs of headphones can be connected simultaneously. • See Page 52 for information on attaching the headphone hooks. 1 Page 10 2. PLAYING THE PIANO 1) BASIC OPERATIONS 2 PLAYING THE PIANO This section provides the basic procedures for turning the power on and playing the CN piano. SETTING UP THE PIANO The CN piano is equipped with stereo speakers and an amplifier—no addition equipment is required to begin playing the instrument, provided AC power is available. Step1 Backside of the unit Connect one end of the AC power cable to the piano's power jack and the other end of the cable to a wall AC outlet. Speaker Step2 Press the POWER SWITCH to turn on the power. Power cable entry point Side panel The POWER SWITCH is located at the right end of the front panel. Press the POWER SWITCH again to turn off the power. When the POWER button is pressed, the LED indicator for the PIANO1 button will turn on and the Concert Grand sound will automatically be selected. ON Step3 Adjust the volume level using the MASTER VOLUME slider. The MASTER VOLUME slider controls the volume level of the speakers and connected headphones. Move this slider to the right to increase the volume and move it to the left to decrease the volume. Use this slider to set the volume to a comfortable listening level—the middle is often a good starting point. Page 11 DEMO SONGS PIANO 1 Concert Grand : Valse Romantique / Debussy Studio Grand : KAWAI Mellow Grand : La Fille aux Cheveux de lin / Debussy PIANO 2 Modern Piano : KAWAI Rock Piano : KAWAI ELECTRIC PIANO Classic E.Piano : KAWAI Modern E.P. : KAWAI Modern E.P. 2 : KAWAI DRAWBER Jazz Organ : KAWAI Drawbar Organ : KAWAI Drawbar Organ 2 : KAWAI CHURCH ORGAN Church Organ : Toccata / Eugene Gigout Diapason : Wohl mir, daß ich Jesum habe / Bach Full Ensemble : KAWAI HARPSI & MALLETS Harpsichord : French Suite No.6 / Bach Vibraphone : KAWAI Clavi : KAWAI STRINGS Slow Strings : KAWAI String Pad : KAWAI String Ensemble : Le quattro stagioni La primavera / Vivaldi CHOIR & PAD Choir : KAWAI Choir 2 : KAWAI New Age Pad : KAWAI Atmosphere : KAWAI BASS Wood Bass : KAWAI Fretless Bass : KAWAI W. Bass & Ride : KAWAI KAWAI regret that sheet music for KAWAI original demo songs is not available. Step1 Press the CONCERT MAGIC and LESSON buttons simultaneously. The LED indicators for the CONCERT MAGIC button and the LESSON button will turn on and the SOUND SELECT buttons will start to flash. The demo song for the Piano 1 category will start. After the Piano 1 demo songs have finished playing, the demo songs for another sound category will be selected at random. There are 3 songs stored for the PIANO1 sound, which will be played in order. Pressing the PIANO1 button repeatedly will select the next piano song. Step2 Press the other SOUND SELECT buttons while the demo is playing to listen to demos from each category. When this button is pressed, demo songs for the newly selected category will be played. Demo songs from another category will then be selected at random. Step3 Press the CONCERT MAGIC and LESSON buttons simultaneously again, or press the PLAY/STOP button to exit the demo mode. PLAYING THE PIANO The CN31 includes 27 built-in sound demo songs. Each of the demo songs presents a musical piece to introduce the different preset sounds. 2 Page 12 SELECTING A PRESET SOUND Step1 Press the SOUND SELECT button below the name of the instrument to be played. 2 PLAYING THE PIANO ON When the button is pressed, the LED indicator will turn on, indicating that this sound has been selected. When a SOUND SELECT button is pressed, the variation number is briefly shown in the display. Multiple sounds are assigned to each button; pressing the same SOUND SELECT button again will select the next variation sound assigned to that SOUND SELECT button. To select a Church Organ sound, press the CHURCH ORGAN button as shown above. The LED indicator for the CHURCH ORGAN button will turn on. Preset sounds can also be selected by pressing the VALUE buttons. PRESET SOUNDS PIANO 1 PIANO 2 ELECTRIC PIANO DRAWBAR CHURCH ORGAN Concert Grand Studio Grand Mellow Grand Jazz Grand Modern Piano Honky Tonk Rock Piano New Age Piano Classic E.Piano Modern E.P. 60’s E.P. Modern E.P. 2 Jazz Organ Drawbar Organ Drawbar Organ 2 Be 3 Church Organ Diapason Full Ensemble Diapason Oct HARPSI & MALLETS STRINGS CHOIR & PAD BASS Harpsichord Harpsichord 2 Vibraphone Clavi Slow Strings String Pad Warm Strings String Ensemble Choir Choir 2 New Age Pad Atmosphere Wood Bass Finger Bass Fretless Bass W. Bass & Ride Step2 Play the keyboard. The selected sound will be heard as the keys are pressed. Use the MASTER VOLUME slider to adjust the volume if necessary. The CN piano is capable of playing up to 96 notes simultaneously (96-note polyphony). However, when playing in dual mode, or when playing a stereo piano sound, the polyphony will be reduced by half because the piano has to produce two sounds for each note. Page 13 2) DUAL The DUAL function allows two preset sounds to be layered together, creating a more complex sound. For example, a piano can be layered with strings, or a church organ with a choir sound. Press and hold down a SOUND SELECT button to select the first desired sound. Then press another SOUND SELECT button to select the second desired sound. The LED indicators for each button will turn on, indicating that the two sounds have been selected. The display will also briefly show the combination of the selected sound variation numbers. The left number represents the first sound and the right number represents the second sound. For example, to layer a piano sound and a string sound, press the PIANO 1 and STRINGS buttons simultaneously as shown in the diagram. ON ON Press two SOUND SELECT buttons at the same time. Pressing either of the SOUND SELECT buttons again will select the other sound variations assigned to that button. For example, to change the String Ensemble sound to Slow Strings, press and hold the PIANO 1 button and press the STRINGS button again. If two sound variations assigned to the same SOUND SELECT button are to be layered, while pressing the desired SOUND SELECT button, use the VALUE buttons to select the desired sound variation. For example, to layer Concert Grand and Mellow Grand together, first press the PIANO 1 button to select Concert Grand, and then use the VALUE buttons to select Mellow Grand while still holding down the PIANO 1 button. Sound variations number 1 and 3 will be layered. Step 2 Play the keyboard. Two different sounds will be heard at the same time. Step 3 Use the BALANCE slider to adjust the volume balance between the two sounds. Increases the volume of the sound assigned to the leftmost selected SOUND button. Increases the volume of the sound assigned to the rightmost selected SOUND button. Step 4 Press any individual SOUND SELECT button to cancel DUAL mode. PLAYING THE PIANO Step1 2 Page 14 3) SPLIT The SPLIT function divides the keyboard into two sections—upper and lower—allowing each part to be played with a different sound. Step1 2 PLAYING THE PIANO Press the SPLIT button. ON The LED indicator for the SPLIT button will turn on. The LED indicator for the upper SOUND SELECT button will also be turned on, while the LED indicator for the lower SOUND SELECT button will start to flash. When SPLIT mode is enabled, the display will show the combination of the selected sound variation numbers. The left number represents the lower sound and the right number represents the upper sound. The default split point is set between B2 and C3. This point can be moved to any key on the keyboard. Step2 Press and hold the SPLIT button, then press a key on the keyboard. The pressed key will become the lowermost note for the upper section. Split point Lower section Upper section Step3 Play the keyboard. Hold down the button. Different sounds will be produced in the upper and lower sections. An ensemble performance can be enjoyed by playing the chords and the melody with the right hand, while playing a bass line with the left hand. Step4 To change the upper sound while SPLIT mode is enabled, press the desired SOUND SELECT button. The LED indicator for the selected SOUND SELECT button will turn on. Press the same button repeatedly to select another sound variation assigned to that button. Page 15 Step5 Hold down the button. The LED indicator for the selected SOUND SELECT button will start to flash. Press the same button repeatedly to select another sound variation assigned to that button. Step6 Use the BALANCE slider to adjust the volume balance between the upper and lower sections. Lower section Upper section Step7 Press the SPLIT button to exit the split mode. The LED indicator for the SPLIT button will turn off. When SPLIT mode is enabled, ‘Lower Octave Shift’ can be used to adjust the octave range for the lower section. (page 48). The Sustain pedal can also be turned ON / OFF for the lower section. (page 48). PLAYING THE PIANO To change the lower sound while SPLIT mode is enabled, press and hold the SPLIT button, then press the desired SOUND SELECT button. 2 Page 16 4) ‘FOUR HANDS’ MODE 2 PLAYING THE PIANO In ‘FOUR HANDS’ mode the CN piano keyboard is split into upper and lower sections, allowing two players to play the piano together. The sounds in the upper section are transposed two octaves down from the original pitch, while sounds from the lower section are transposed two octaves up from the original pitch, with both players playing in the same key range. The left pedal can also be used as a damper pedal for the player sitting on the left. ENTERING ‘FOUR HANDS’ MODE Step1 Press and hold the SPLIT button, then press the sustain (right) pedal and the soft (left) pedal together. Hold down the button. Soft pedal Sustain pedal Depress the pedals The LED indicator for the SPLIT button will start to flash, indicating that the piano is in ‘FOUR HANDS’ mode. ¡ Selecting Sounds in ‘Four Hands’ Mode When in ‘FOUR HANDS’ mode, the method for selecting sounds is the same as in SPLIT mode. Press the desired SOUND SELECT button to change the sound for the upper section, or press and hold the SPLIT button, then press the desired SOUND SELECT button to change the sound for the lower section. ¡ Changing Split Point When in ‘FOUR HANDS’ mode, the method for changing the SPLIT point is the same as in SPLIT mode. Press and hold the SPLIT button, then press a key on the keyboard. The pressed key becomes the lowermost note for the upper section. The default SPLIT point is set between E3 and F3. Finally, when in ‘FOUR HANDS’ Mode, the OCTAVE SHIFT function can also be used to change the octave of the lower section. Please see page 48. EXITING ‘FOUR HANDS’ MODE Step1 To exit ‘Four Hands’ Mode, press the SPLIT button again. The LED indicator for the SPLIT button will turn off. Page 17 5) EFFECTS/REVERB When selecting some preset sounds, the LED indicator for the EFFECTS or REVERB buttons may turn on automatically. This is because certain preset sounds are prepared with an effect enabled as their default setting. Adding an effect to the sound enhances tonal quality and improves acoustic realism. This CN piano features two separate groups of effects. The first is reverb and the second contains chorus, delay, tremolo and rotary speaker. ¡ REVERB Reverb adds reverberation to the sound, simulating the acoustic environment of a recital room, stage, or concert hall. There are five types of reverb available: Room 1, Room 2, Stage, Hall 1 and Hall 2. Step1 Press the REVERB button. The LED indicator will turn on to indicate that reverb is in use. Press and hold the REVERB button to show the currently selected reverb type in the display. Step2 To change the reverb type, use the VALUE buttons while holding down the REVERB button. Room 1 Room 2 Stage Hall 1 Hall 2 Hold down the button. To turn off the reverb, press the REVERB button again. Press the REVERB button once again to turn the reverb back on. The previously selected reverb type will be used. Any changes made to the reverb type or on / off status will remain until the power is turned off. When the power is turned off the reverb settings will return to the default settings. PLAYING THE PIANO ADDING REVERB 2 Page 18 ADDING OTHER EFFECTS ¡ CHORUS Chorus is an effect that simulates the rich character of a vocal choir or string ensemble, enriching the original voice by over-layering a slightly detuned version of the sound. 2 PLAYING THE PIANO ¡ DELAY Delay is an effect that adds echoes to the sound. There are three types of delay available (delay 1, delay 2 and delay 3), each with a different length of delay between the echoes. ¡ TREMOLO This is a vibrato type effect. ¡ ROTARY This effect simulates the sound of the Rotary Speaker cabinet commonly used with electronic organs. Rotary 1 is normal rotary and Rotary 2 is with distortion effect. The soft pedal is used to change the speed of the rotor between SLOW and FAST. Step1 Press the EFFECTS button. The LED indicator will turn on to indicate that the effect is in use. Press and hold the EFFECTS button to show the currently selected effect in the display. Step2 To change the effect type, press and hold the EFFECTS button and press the VALUE buttons. Chorus Delay 1 Delay 2 Delay 3 Rotary 2 Rotary 1 Tremolo Hold down the button. To turn off the effects, press the EFFECTS button again. Press the EFFECTS button once again to turn the effects back on. The previously selected effect type will be used. Any changes made to the effect type or on / off status will remain until the power is turned off. When the power is turned off the effect settings will return to the default settings. Page 19 6) SELECTING THE TOUCH SENSITIVITY The TOUCH function allows different touch sensitivities for the keyboard to be selected, other than the standard touch of an acoustic piano. The sensitivity can be changed to one of five different settings: Light 1, Light 2, Heavy 1, Heavy 2 or Off. dLight 2 eNormal fHeavy 1 gHeavy 2 hOff : For those still developing finger strength. A louder volume is produced even when playing with a soft touch. : For players with a delicate touch. Requires less striking force to achieve a forte note. : Reproduces the standard touch sensitivity of an acoustic piano. This touch setting is selected when the LED indicator for the TOUCH button is off. : Perfect for those with strong fingers. Requires a heavier touch to produce a loud volume. : Requires more striking force to achieve a loud volume. : A constant volume is produced regardless of how hard the keys are struck. This setting is suitable for sounds that have a fixed dynamic range such as Organ and Harpsichord. Loud PLAYING THE PIANO cLight 1 Sound volume Soft Gentle Force applied to the keys Strong Step1 Press the TOUCH button to change from the standard (Normal) touch setting. The LED indicator for the TOUCH button will turn on, indicating that the piano is using a different touch setting. Step2 To change the touch type, press and hold the TOUCH button and press the VALUE buttons. Hold down the button. Heavy 2 Heavy 1 Light 1 Light 2 Off Press and hold the TOUCH button to show the currently selected touch curve in the display. Press the TOUCH button again to return to the standard (Normal) touch setting. The touch setting is global for all of the preset sounds. It is not possible to have individual touch settings for each preset sound. When the power is turned off the touch settings will return to the default settings. LIGHT and HEAVY do not represent the physical weight of the keys. These are settings that affect the sensitivity of the keys, which determines the volume level in response to the key movement. 2 Page 20 7) TRANSPOSING THE PIANO The transpose function allows the piano’s keys to be raised or lowered in half steps. This is particularly useful when accompanying instruments with different tones, or when a song learned in one key must be played in another key. The transpose feature allows the song to be played in the original key, but heard in another key. 2 PLAYING THE PIANO Step1 Press and hold the TRANSPOSE button. While holding the TRANSPOSE button, use the VALUE buttons or the keyboard keys from C2 to C4 to specify the transposition amount. Hold down the button. The display will show a number indicating how many half steps up or down the piano has been transposed. ‘-5’, for example, represents a transposition that is 5 half steps lower. ‘0’ indicates no transposition. Each time the VALUE S button is pressed, the transpose value is increased by one half step, while each time the VALUE T button is pressed, the transpose value is decreased by one half step. The piano can be transposed by up to 12 half steps higher or 12 half steps lower. The ‘C’ key at the middle of the keyboard corresponds to the value 0. Hold down the button. -12 0 C +12 Pressing the TRANSPOSE button again turns the TRANSPOSE function off. The TRANSPOSE function remembers the current setting as long as the power is on. Transpose is active when the LED indicator is on, and the notes are transposed according to the set transpose value. For example if the setting is ‘-3’ and the LED indicator for the TRANSPOSE button is on, the notes will be transposed 3 half steps lower. When the LED indicator for the TRANSPOSE button is turned OFF, the transpose setting will automatically return to ‘0’ (no transposition) with one touch. When the value is set to ‘0’, the LED indicator will not turn on. The CN31 piano’s transpose setting defaults to ‘0’ each time the power is turned on. Page 21 8) PLAYING WITH CONCERT MAGIC With CONCERT MAGIC, absolutely anyone can sit at the CN piano and make real music - even complete beginners who have never taken a piano lesson in their life. To enjoy performing with Concert Magic, simply select a favorite piece from the 88 pre-programmed songs and tap any key with a steady rhythm and tempo. Concert Magic will provide the correct melody and accompaniment notes, regardless of which keys are pressed. With Concert Magic anybody, young or old, can enjoy playing music from the moment they sit down at the CN piano. SELECTING A SONG The 88 Concert Magic songs are assigned to each of the 88 keys, and classified by song category into eight groups, such as Children's Songs, American Classics, Christmas Songs etc. Please refer to the separate 'Internal Song List' booklet for a complete listing of available Concert Magic songs. Song No. Step1 To select a song, press and hold the CONCERT MAGIC button and press the key to which the desired song is assigned. The song number will be briefly shown in the display. Hold down the button. LISTENING TO THE SONG If the performer is already familiar with the selected Concert Magic song, he/she may wish to begin playing straight away. However, those unfamiliar with the piece may alternatively wish to listen to the song first, before attempting to play it. Step1 Song No. To listen, press the PLAY/ STOP button. The CN piano will start playing back the selected song. The speed or tempo of the song can be adjusted by pressing and holding the TEMPO button and pressing the VALUE buttons. Button lights Hold down the button. While listening, different Concert Magic songs can be selected by pressing the VALUE buttons. Step2 Press the PLAY/STOP button again to finish listening to the song. PLAYING THE PIANO The great German composer Johann Sebastian Bach once said "Playing the keyboard is simple. Just strike the right keys at the right time" . Many pianists wish it were quite that straightforward. Fortunately, KAWAI have devised a method of playing the keyboard that is very simple, without even needing to strike the right keys. 2 Page 22 PERFORMING A SONG Step1 2 PLAYING THE PIANO Tap out the rhythm of the selected song on any one of the piano’s 88 black or white keys. Concert Magic songs will respond to changes in playing style. As the keys are tapped harder, the music will grow louder; if the keys are tapped more softly, the music will become quieter. Tapping faster will cause the music to speed up, while tapping slower will make the music slow down accordingly. Using Concert Magic, even inexperienced pianists can sound like they have been playing for years, simply by pressing one key with one finger. Concert Magic is a perfect method for small children to learn music, especially when developing a sense of rhythm. For older people who may believe it is too late to learn the piano, Concert Magic offers an enjoyable first step. With Concert Magic, the CN piano can be enjoyed by everyone in the family, even those who have never touched a musical instrument in their life. CONCERT MAGIC PART VOLUME BALANCE When used with Concert Magic, the BALANCE slider adjusts the volume balance of the melody part and the accompaniment. Step1 Move the balance slider to the right or left to adjust the volume balance. Accompaniment Melody As the slider is moved to the right, the sound of the melody becomes louder and the accompaniment becomes softer. The balance changes in the opposite way when the slider is moved to the left. Page 23 CONCERT MAGIC SONG ARRANGEMENT TYPES After playing with Concert Magic for a while, performers may feel that such playing is too easy and that there is very little to learn. While it is true that some of the songs are very easy to play, even for beginners, there are also some songs which will prove challenging, and require practice to play proficiently. Each of the 88 Concert Magic songs fall into one of three different arrangement types, depending on the skill level required to perform them. These are the easiest songs to play. To perform them, simply tap out a constant steady beat on any key on the keyboard. Look at the following example, ‘Für Elise’. Press the key with a steady sixteenth note rhythm. Key on X X X X X X X X X X X X X X X X X X X X MELODY PLAY These songs are also quite easy to play, especially if they are familiar to the player. To perform them, tap out the rhythm of the melody on any key on the keyboard. Singing along as the rhythm is tapped can be helpful. Play ‘Twinkle, Twinkle, Little Star’ for example. Follow the melody's rhythm as shown. Key on X X X X X X X X X X X X X X When performing fast songs with Concert Magic, it is sometimes easier to tap two different keys with two alternating fingers in order to play at greater speed. SKILLFUL These songs range in difficulty from moderately difficult to difficult. To perform them, tap out the rhythm of both the melody and the accompaniment notes on any key on the keyboard, such as ‘Waltz of the Flowers’ shown below. Key on X X X X X X X X X X X X X It may take a little practice to perform the Concert Magic songs proficiently. A good way to learn is to listen to these pieces first, and then try to tap out the rhythms that are heard. The separate 'Internal Song List' booklet lists the arrangement type next to each song title as ‘EB’ for Easy Beat, ‘MP’ for Melody Play and ‘SK’ for Skillful. PLAYING THE PIANO EASY BEAT 2 Page 24 STEADY BEAT Steady Beat allows Concert Magic songs to be played by simply tapping any key with a constant steady beat, regardless of the song arrangement type. Step1 Press and hold the CONCERT MAGIC button. 2 PLAYING THE PIANO The display will show the current Concert Magic mode (C-1). Step2 While still holding the CONCERT MAGIC button, use the VALUE button to change the Concert Magic mode to STEADY BEAT (C-2). Hold down the button. Step3 Start by tapping any key with a constant steady beat. The tapping speed will set the tempo for the song. Both the accompaniment and melody parts will be played automatically in time with the tapped tempo. CONCERT MAGIC DEMO MODES There are three ways to listen to the Concert Magic songs in the DEMO mode. ¡ ALL PLAY Press the CONCERT MAGIC button and then press the PLAY/STOP button without selecting a song. The CN piano will play back all of the Concert Magic songs in order. ¡ RANDOM PLAY Press the CONCERT MAGIC button and then press the LESSON button. The CN piano will play back all of the Concert Magic songs in random order. ¡ CATEGORY PLAY Press and hold the CONCERT MAGIC and LESSON buttons and press the piano key to which the desired song is assigned. The CN piano will play back the selected song and then continue to play the rest of the songs in the same category. To stop the demo, press the PLAY/STOP button. Page 25 CONCERT MAGIC PLAYBACK SPEED The TEMPO button is also used to adjust the playback speed of Concert Magic songs. Step1 After selecting a Concert Magic song to play back, press and hold the TEMPO button. The tempo value will be shown in the display. While holding down the TEMPO button, use the VALUE buttons to change the tempo. Increase the tempo Hold down the button. Decrease the tempo The tempo of the selected Concert Magic song can be adjusted either before play back, or while the song is playing. PLAYING THE PIANO Step2 2 Page 26 9) METRONOME Rhythm is one of the most important elements when learning music. It is important to practice playing the piano at the correct tempo and with a steady rhythm. The CN piano's metronome tool helps learners to achieve this by providing a steady beat to play along with. 2 PLAYING THE PIANO STARTING THE METRONOME Step1 Press the TEMPO button. The LED indicator for the TEMPO button will turn on and the metronome will begin counting with a steady beat. The tempo in beats per minute will be shown in the display. Step2 Press the VALUE buttons to increase or decrease the tempo within the range of 10 - 300 beats per minute. (20-600 BPM with eighth note rhythms). Step3 Press the TEMPO button again to stop the metronome. CHANGING THE TIME SIGNATURE The metronome produces two types of click, with the louder click heard on every fourth beat - this is a 4-beat or 4/4 time signature. The metronome is capable of providing a down beat to indicate the beginning of the measure. It is possible to select a different signature where appropriate. There are seven different times signatures available on the CN piano: 1/4, 2/4, 3/4, 4/4, 5/4, 3/8 and 6/8. Step1 Press the BEAT button. The LED indicator for the BEAT button will turn on and the metronome will begin counting. The time signature will be shown in the display. Page 27 Step2 Press the VALUE buttons to select the desired time signature. The currently selected time signature will be shown in the display. 2/4 3/4 4/4 5/4 3/8 6/8 Step3 Press the BEAT button again to stop the metronome. Both the TEMPO button and the BEAT button can be used to turn the metronome on and off, depending on whether the tempo or time signature is being adjusted. ADJUSTING THE METRONOME VOLUME The volume level of the metronome can also be adjusted. Step1 Press the TEMPO and BEAT buttons simultaneously. The volume level of the metronome will be shown in the display, represented by numbers ranging from 1 (soft) to 10 (loud). The default metronome volume level is 5. Step2 Press the VALUE buttons to increase or decrease the volume level of the metronome. Step3 Press the TEMPO and BEAT buttons simultaneously again to stop the metronome. PLAYING THE PIANO 1/4 2 Page 28 3. LESSON FUNCTION The CN31’s Lesson function helps performers to practice the piano with a collection of etudes from Czerny and Burgmüller, or songs from Alfred’s Basic Piano Library and Alfred’s Premiere Piano Course lesson books (USA, Canada, Australia and UK only). It is possible to listen to each etude or song at various tempos, practicing the left and right hand parts separately, before eventually recording a practice session for self-evaluation. 3 LESSON FUNCTION Alfred’s Basic Piano Library and Alfred’s Premiere Piano Course lesson books are sold separately. Please check with local dealers or contact Alfred’s customer service by telephoning 818-892-2452 (USA & Canada), 0-95240033 (Australia), +44 (0)1279828960 (UK). Or alternatively, by e-mailing [email protected]. 1) SELECTING A BOOK/SONG Step1 Press the LESSON button. The LED indicator for the LESSON button will turn on to indicate that lesson mode is enabled. An alphabet letter and a 2-digit number will be shown in the display. The alphabet letter refers to a song book and the 2-digit number refers to a song number. Lesson availability differs according to geographical location: US, Canada, UK, Australia Rest of the World Letter A B C D B C Lesson Book Name Alfred’s Premier Piano Course Lesson 1A Alfred’s Premier Piano Course Lesson 1B Alfred’s Basic Piano Library Lesson Book Level 1A Alfred’s Basic Piano Library Lesson Book Level 1B Burgmüller: 25 Progressive Pieces, Opus 100 Czerny: 30 Czerny Etudes de Mécanisme, Opus 849 Step2 Press and hold the LESSON button and press the VALUE buttons to change the lesson book type. Step3 Press the VALUE button (without holding the LESSON button) to change the lesson song. It is also possible to select a song directly by holding down the LESSON button and pressing a key on the keyboard. Please refer to the separate 'Internal Song List' booklet for a complete listing of available lesson songs. Hold down the button. Page 29 2) LISTENING TO AND PLAYING A SONG Step1 Press the PLAY/STOP button to play the selected song. There will be a one bar count-in before the song starts to play. Press the PLAY/STOP button to stop and reset the song. If the PLAY/STOP button is pressed again, the song will restart from the beginning. EXITING THE LESSON FUNCTION Step 1 The LED indicator of the LESSON button will turn off, and the unit returns to the normal operation mode. PRACTICING THE LEFT AND RIGHT-HAND PARTS The volume balance of the left and right-hand parts can be adjusted using the BALANCE slider. Step 1 After selecting a song, move the BALANCE slider to the left or to the right. Decreases the volume of the right-hand part Decreases the volume of the left-hand part Moving the balance slider partially to the left will gradually decrease the volume of the right-hand part, allowing the right-hand part to be practiced while the pre-recorded part plays softly as a guide. When the balance slider is moved fully to the left, the pre-recorded right-hand part will be muted completely. ADJUSTING THE TEMPO OF A SONG STEP1 Press and hold the TEMPO button and press the VALUE S or VALUE T buttons to increase or decrease the tempo of the song. To reset the tempo to the default speed, select another song. LESSON FUNCTION Press the LESSON button. 3 Page 30 3) RECORDING A SONG PRACTICE While in Lesson mode, song practice can be recorded for playback and self-evaluation. The pre-recorded left and right-hand parts will be heard while the song practice is recorded. As noted previously, the BALANCE slider may be used to mute either pre-recorded left or right-hand parts. Step 1 Adjust the BALANCE slider to set the left and right-hand playing volume for the piece to be practiced. Decrease the volume of the right-hand part. Decrease the volume of the right-hand part. 3 LESSON FUNCTION Step2 Press the REC button (while the LESSON button is lit). There will be a one bar count-in before the recording starts. Step3 Press the PLAY/STOP button again to stop the recording and reset the song to the beginning. Recording will also stop automatically at the end of the lesson song. PLAYING BACK THE RECORDING Step1 Press the PLAY/STOP button to listen to the recording. The performance that has been recorded will be played. The left and right-hand playing volume can be changed using the BALANCE slider. Accompaniment Melody ERASING THE RECORDING Step1 Press the PLAY/STOP and REC buttons simultaneously to erase the recording. Recordings made while using the Lesson Function cannot be saved and are intended for temporary reference only. When changing to another song, exiting the Lesson Function or turning off the CN31 power, Lesson recordings will be erased. Preset Lesson songs cannot be permanently overwritten or erased. Page 31 4. RECORDER The RECORDER function records performances in a similar way to that of a tape recorder. However, the CN piano records songs as digital data, instead of audio data - storing the music inside the instrument. Because each song is stored digitally, it is possible to modify various aspects during playback, such as adjusting the tempo without changing the pitch, or selecting different sound types and effects settings. Once fully understood, the recorder function provides an easy to use tool for both practicing and playing the piano. 1) RECORDING (REC BUTTON) RECORDER The CN31 allows up to three different songs to be recorded, stored in memory, and played back at the touch of a button. Each song has two separate tracks called ‘Parts’ that can be recorded independently. This allows the left-hand part to be recorded first on one track, then the right-hand part to be recorded later on the other track, while listening to the first part. When recording or playing back a song, each part (track) can be re-recorded or played back freely. Attempting to re-record a part will automatically erase all previously recorded performance information for that part, therefore when recording parts separately, it is most important to select the correct part carefully, in order to prevent accidentally overwriting a previously recorded part. The REC button is used for recording. The SONG buttons and PART buttons correspond to the SOUND SELECT buttons. STEP1 Press and hold the REC button, then select a SONG (1, 2 or 3) and PART number (1 or 2). 1 Hold down the REC button. 3 2 Select a song Select a part While pressing the REC button, the LED indicators for one SONG button and one PART button will start to flash, indicating the song and the part to be recorded. During this time, the SONG and PART to be recorded can be changed freely by pressing the desired SONG or PART button. If no PART is selected PART1 will be selected automatically. When the REC button is released, the LED indicators for the selected SONG and PART buttons will stop flashing and the LED indicator for the REC button will turn on. This is the Standby state for recording. Furthermore, the LED indicator for the SOUND SELECT button will also turn on, allowing the sound for recording to be changed. 4 Page 32 Step2 Start to play the piano. The recorder will automatically start recording with the first note played. During this time, the LED indicators for the REC and PLAY/STOP buttons will be turned on. Any changes made to the sound while recording will also be recorded. The recording can be started by pressing the PLAY/STOP button instead of pressing a key, allowing a blank bar to be inserted at the beginning of a song. Step3 4 RECORDER Press the PLAY/STOP button to stop recording. The LED indicators for the PLAY/STOP button and the REC button will turn off and the newly recorded part will be saved to memory automatically. Saving may take a few moments and during this time the piano will not perform any other operations. To record the piece again, simply repeat the above procedure. The new recording will completely erase the previous one. RECORDING A SECOND PART A second part can be recorded in the second track of the same song. After recording the first part, select the other track and record the second part. Step1 Press and hold the REC button again and press the BASS button to select to record PART2. Select part 2. 2 1 Hold down the REC button. The LED indicators for the SONG1 button and PART2 button will start to flash, indicating that they are selected for recording. Furthermore, the LED indicator for the PART1 button will now be turned on, indicating that PART1 has already been recorded. Page 33 Step2 Start to play the piano. While recording the second part, the previously recorded first part will also play. During this time, the LED indicators for the REC button and PLAY/STOP button will be turned on. To start playing back the first part and then recording the second part from a certain point, later in the song, press the PLAY/STOP button instead of playing the keyboard to start playback, then begin recording the second part when necessary. Step3 The LED indicators for the PLAY/STOP button and the REC button will turn off and the newly recorded part will be saved to memory automatically. The total recording capacity of the CN piano’s memory is approximately 15,000 notes, with button and pedal presses also counted as one note. When the maximum capacity is reached, recording will stop and all music recorded up until that point will be saved to memory automatically. Performance data stored inside the CN piano’s memory will be saved even after turning off the power. It is possible to temporarily turn off (mute) a previously recorded part, for example PART1, before recording a new part, for example PART2. This function can be useful to avoid distraction while recording. To mute PART1, hold the PLAY/STOP button and press the PART1 button, the LED indicator for PART1 will turn off. Panel operations stored during recording: x Changes made to the sound type. x Shifts between DUAL and SPLIT modes. Panel operations NOT stored during recording: x Changes made to effect settings – the selected effect will be applied to the selected sound type. x Changes made to tempo. x Changes made using the BALANCE slider in DUAL or SPLIT modes – the volume balance set immediately before recording will be stored, however. x Turning the TOUCH CURVE or TRANSPOSE functions ON or OFF – regardless of the transpose settings the performance will be replayed at the pitch originally used for the recording. RECORDER Press the PLAY/STOP button to finish recording. 4 Page 34 2) PLAYING BACK A SONG The PLAY/STOP button is used to start and stop playback of the recorded song, and to also select which song and part is played. Step1 Press the PLAY/STOP button to start playing the recorded song. 1 2 Hold down the button. Press the PLAY/STOP button again to stop playback. To select a different song for playback, hold the PLAY/STOP button and press the SOUND SELECT button that corresponds to the desired song. The song will begin playback when the two buttons are released. 4 RECORDER While the song is being played, performance information is also sent to supported devices as MIDI data (See page 40). PART1 is sent on 1ch and PART2 is sent on 2ch. When recording in DUAL mode, additional information for PART1 is sent on 9ch and additional information for PART2 is sent on 10ch. PLAYING BACK RECORDED PARTS SEPARATELY When selecting a song recorded with two parts, it is possible to playback PART1 and PART2 separately. First hold the PLAY/STOP button. If LED indicators corresponding to PART1 and PART2 turn on, both parts have been recorded successfully. Releasing the PLAY/STOP button will begin playing PART1 and PART2 simultaneously. Step1 Hold the PLAY/STOP button and press the SOUND SELECT button that corresponds to either PART1 or PART2. 2 1 Hold down the button. The LED indicator will turn off accordingly, indicating that the part will not be played back. The song will begin playback when the PLAY/STOP button is released. Page 35 3) ERASING A SONG This function allows any songs that are no longer listened to, to be cleared. Step1 Hold down the REC and PLAY/STOP buttons. The LED indicators will display which songs have been recorded. Step2 While holding the REC and PLAY/STOP buttons, select the desired song to be erased by pressing the corresponding SOUND SELECT button. The LED indicator of the selected song will start to flash. Step3 2 3 1 Hold down the both buttons. The LED indicator of the selected PART will turn off, indicating that the part has been erased. In the diagram above, PART1 of Song 2 is erased. When both PART1 and PART2 of a song are erased, the song becomes empty. Selecting the song only, without selecting PART1 and/or PART2, will not erase it. Repeat the steps above in order to erase a number of songs and parts. To erase all songs from memory at once, first turn off the power and then turn it on again, holding down both the REC button and the PLAY/STOP button. RECORDER While still holding the REC and PLAY/STOP buttons, select the desired PART to be erased by pressing the corresponding SOUND SELECT button. 4 Page 36 5. FUNCTION BUTTONS The function buttons are responsible for controlling advanced parameters within the CN31, including Tuning, Temperament, MIDI Transmit and Receive Channel, Transmit Program Change On/Off, Local On/Off, Multitimbral Mode, Channel Mute, Program Change Number, Lower Octave Shift and Lower Pedal On/Off. ENTERING A FUNCTION MODE Step1 Hold down the TOUCH and TRANSPOSE buttons and press one of the SOUND SELECT or EFFECT buttons. The functions are assigned as listed below. Tuning Temperament MIDI Channel Transmit Program Change On/Off Local Control On/Off Multi-Timbral Mode On/Off Channel Mute Program Change Number Lower Octave Shift 5 FUNCTION BUTTONS Lower Pedal On/Off 1 2 Hold down both buttons. The LED indicator of the corresponding button will start to flash, indicating that the function is selected. EXITING A FUNCTION MODE Step1 Press any of the SOUND SELECT buttons or either the TOUCH or TRANSPOSE button. The LED indicator of the button will stop flashing and return to its normal state. When the power is turned off, settings will be reset to the factory default value. Page 37 1) TUNING The TUNING function allows the piano’s pitch to be finely adjusted, and may prove useful when playing with other instruments. Step1 Hold down the TOUCH and TRANSPOSE buttons and press the PIANO 1 button. 2 1 Hold down both buttons. The display will alternate between showing ‘tun’ (Tuning) and a number representing the pitch for ‘A’ in Hz (Hertz). Step2 Use the VALUE buttons to raise or lower the pitch. TUNING 427.0 ~ 453.0 The pitch will increase or decrease by 0.5 Hz increments each time one of the VALUE buttons is pressed. The range of adjustment is from 427.0 to 453.0 Hz (displayed as 27.0 – 53.0). The factory default value is set to the modern standard A = 440.0 Hz (displayed as 40.0). When pressing a key while using tuning mode, the sound that was selected prior to entering tuning mode will be heard. To use a different sound whilst tuning, first exit the tuning mode, select the desired sound, then repeat ‘Step 1’ and ‘Step 2’ again. When the power is turned off, tuning settings will reset to the factory default value of 440.0 Hz (displayed as 40.0). FUNCTION BUTTONS = 5 Page 38 2) TEMPERAMENT The CN piano offers immediate access to a variety of musical temperaments popular during the Renaissance and Baroque periods. It may prove interesting and educational to experiment with different temperaments, other than the modern ‘equal temperament’ standard this is dominant in music today. BRIEF EXPLANATION OF TEMPERAMENTS EQUAL TEMPERAMENT (PIANO ONLY) MERSENNE PURE TEMPERAMENT (MAJOR) MERSENNE PURE TEMPERAMENT (MINOR) PYTHAGOREAN TEMPERAMENT MEANTONE TEMPERAMENT 5 FUNCTION BUTTONS WERCKMEISTER III TEMPERAMENT KIRNBERGER III TEMPERAMENT EQUAL TEMPERAMENT (FLAT) EQUAL TEMPERAMENT This is the default temperament. If a piano sound is selected the tuning is stretched like an acoustic piano (EQUAL TEMPERAMENT). If any other type of sound is selected the tuning will be EQUAL (FLAT). An explanation of EQUAL TEMPERAMENT and EQUAL TEMPERAMENT (FLAT) is provided later in this section. If a piano sound is used in a layer with any other sound, then both sounds will use the EQUAL TEMPERAMENT (stretched) tuning. This temperament, which eliminates dissonances for thirds and fifths, is still popular for choral music because of its perfect harmony. Performers must be aware which key they are playing in when using this temperament. Any key modulation will result in dissonances. When playing music in a particular key, the key of the temperament must also be correctly matched. When playing in a major key select Pure (Major) and when playing in a minor key select Pure (minor). This temperament, which uses mathematical ratios to eliminate dissonance for fifths, is very limited for use with chords, but it produces very characteristic melodic lines. This temperament, which uses a mean between a major and minor whole tone to eliminate dissonance for thirds, was devised to eliminate the lack of consonances experienced with certain fifths for the Mersenne pure temperament. It produces chords that are more beautiful than those with the equal temperament. These two temperaments are placed in between Meantone and Pythagorean. For music with few accidentals, this temperament produces the beautiful chords of the mean tone, but as accidentals increase, the temperament produces the characteristic melodies of the Pythagorean temperament. It is used primarily for classical music written in the Baroque era to revive the original characteristics. This is an ‘unstretched’ equal temperament that divides the scale into twelve equal semitones. This produces the same chordal intervals in all twelve keys, and has the advantage of limitless modulation of the key. However the tonality of each key becomes less characteristic and no chord is in pure consonance. This is the most popular piano temperament. The hearing ability of a human is uneven and is not as accurate with high frequency and low frequency as it is with the middle range. This temperament's tuning is stretched to compensate for this so the sound will be heard naturally to the ears. This ‘stretched’ equal temperament is a practical variation of the ‘unstretched’ equal temperament which was invented on a mathematical basis. Step1 Hold down the TOUCH and TRANSPOSE buttons and press the PIANO 2 button. 2 1 Hold down both buttons. The display will alternate between showing ‘tMP’ (Temperament) and a symbol to indicate which type of temperament is in use. Page 39 Step2 Use the VALUE buttons to change the type of temperament. Temperament Equal (Piano) Pure (Major) Pure (Minor) Pythagorean Meantone Equal Equal (Flat) Kirnberger III Werckmeister III When the power is turned off, the temperament will reset to the factory default ‘equal temperament (piano only)’ type. If a piano sound is selected when using the factory default ‘equal temperament (piano only)’ type, the tuning is stretched like an acoustic piano (EQUAL TEMPERAMENT). If any other type of sound is selected, the tuning will be EQUAL (FLAT). After selecting the desired temperament, please read the following section on selecting a key signature for the temperament before continuing. KEY SIGNATURE OF TEMPERAMENT Step1 Press one of the 88 piano keys to select the key signature of the temperament. The note name of the key pressed will be shown in the display and chosen as the key of the temperament. Changing the key of the temperament will only change the ‘balance’ of the tuning, the pitch of the keyboard will remain unchanged. Use the TUNING or TRANSPOSE functions to change the pitch of the whole keyboard. The key of the temperament function will have no effect when equal temperament is selected. C D# F# A C# E G A# D F G# B FUNCTION BUTTONS Limitless modulation of the key became available only after the invention of equal temperament. When using a temperament other than equal temperament, care must be taken to choose the key signature to play in. For example, if the song to be played is written in D major, ‘D’ would be chosen as the temperament key. 5 Page 40 MIDI OVERVIEW The term MIDI is an acronym for Musical Instrument Digital Interface, an international standard for connecting synthesizers, sequencers (MIDI recorders) and other electronic instruments so that they can exchange performance data. The CN31 is equipped with two MIDI jacks for exchanging data: MIDI IN and MIDI OUT. Each uses a special cable with a DIN connector. MIDI IN : For receiving note, program change and other data. MIDI OUT : For sending note, program change and other data. MIDI uses channels to exchange data back and forth between MIDI devices. There are receive (MIDI IN) and transmit (MIDI OUT) channels. Most musical instruments or devices with MIDI functions are equipped with both MIDI IN and OUT jacks and are capable of transmitting and receiving data via MIDI. The receive channels are used to receive data from another MIDI device and the transmit channels are used to transmit data to another MIDI device. Connection to an external sequencer When connected as shown in the illustration below, songs played on the CN31 can be recorded using a MIDI recorder, with preset sounds (such as piano, harpsichord and vibraphone, etc.) controlled by the CN31’s MULTITIMBRAL MODE function to create a multi-layer MIDI recording. MIDI OUT SONG1 2 3 4 5 MIDI IN PART 1 2 STRINGS CHOIR MIDI OUT METRONOME MIDI IN RECORDER VALUE min max 5 FUNCTION BUTTONS MASTER VOLUME TOUCH TRANSPOSE PIANO 1 PIANO 2 E.PIANO CHURCH ORGAN HARPSICHORD VIBRAPHONE EFFECTS REVERB left right Dual Balance TEMPO BEAT VOLUME PLAY/STOP REC CONCERT MAGIC DEMO CN31 MIDI functions Transmit / receive keyboard note information By transmitting MIDI data from the CN piano (MIDI out) a MIDI-connected keyboard can be played from the CN piano. Or alternatively, by receiving data (MIDI IN), the CN piano can be played from another MIDI-connected keyboard or device. Transmit / receive channel setting Specify transmit/receive channels within the range of 1 to 16. Transmit / receive Program change (sound type) number Transmit/receive program change data to/from a MIDI-connected musical instrument or device. Transmit / receive pedal data Transmit/receive sustain pedal and sustain pedal data from a MIDI-connected musical instrument or device. Sostenuto pedal data can also be transmitted. Receive volume data The CN piano will respond to MIDI volume data sent from a MIDI-connected musical instrument or device. Multi-timbral setting The CN piano is able to receive multiple channel MIDI data from a MIDIconnected musical instrument or device, when multi-timbral mode is turned on. Transmit / receive exclusive data Transmit/receive front panel or menu function settings as exclusive data. Transmit recorder playback data Songs recorded using the recorder can be played back from a MIDI-connected musical instrument or recorded by an external sequencer via the MIDI OUT jack. Please refer to the ‘MIDI implementation chart’ (page 55) for further information regarding the CN31’s MIDI functions. Page 41 3) MIDI CHANNEL This function is used to determine on which MIDI channel the CN piano will exchange MIDI information with external MIDI devices and instruments or a personal computer. The selected channel will function as both the transmit and receive channel. Step1 Hold down the TOUCH and TRANSPOSE buttons and press the ELECTRIC PIANO button. 2 1 Hold down both buttons. The display will alternate between showing ‘Chn’ (Channel) and the channel number. The default channel is 1. Step2 Use the VALUE buttons to change the channel number. MIDI Channel The CN piano’s MIDI channel setting defaults to receiving MIDI channel information from all channels, 1 to 16. each time the power is turned on. This is called ‘omni mode on’. The CN piano will switch to ‘omni mode off’ when a specific channel is selected using the MIDI channel function, and data will only be received on that specified channel. In order to specify channel 1 in the ‘omni mode off’ state, first select channel 2, then select channel 1. FUNCTION BUTTONS The channel number can be set from 1 to 16. 5 Page 42 4) TRANSMIT PROGRAM CHANGE ON/OFF This function determines whether or not the CN piano will transmit program change information when pressing the SOUND SELECT buttons. When transmit program change is turned on, pressing the SOUND SELECT buttons will send the program change numbers as listed below. Sound Button PIANO 1 PIANO 2 ELECTRIC PIANO DRAWBAR CHURCH ORGAN HARPSI & MALLETS 5 FUNCTION BUTTONS STRINGS CHOIR & PAD BASS Sound Name Concert Grand Studio Grand Mellow Grand Jazz Grand Modern Piano Honky Tonk Rock Piano New Age Piano Classic E.Piano Modern E.P. 60’s E.P. Modern E.P. 2 Jazz Organ Drawbar Organ Drawbar Organ 2 Be 3 Church Organ Diapason Full Ensemble Diapason Oct Harpsichord Harpsichord 2 Vibraphone Clavi Slow Strings String Pad Warm Strings String Ensemble Choir Choir 2 New Age Pad Atmosphere Wood Bass Finger Bass Fretless Bass W. Bass & Ride Off, On1 Prog # 1 2 3 4 5 6 7 8 9 10 11 12 13 14 15 16 17 18 19 20 21 22 23 24 25 26 27 28 29 30 31 32 33 34 35 36 Multi-Timbral mode On2 Bank MSB Bank LSB 121 0 121 1 121 2 95 8 121 0 121 0 121 1 95 9 121 0 121 0 121 3 121 1 121 0 121 0 121 1 95 2 121 0 95 7 95 1 95 6 121 0 121 3 121 0 121 0 95 1 95 8 95 1 121 0 121 0 95 53 121 0 121 0 121 0 121 0 121 0 95 1 Prog # 1 1 1 1 2 4 2 1 5 6 5 6 18 17 17 17 20 20 21 20 7 7 12 8 45 49 49 49 53 54 89 100 33 34 36 33 Page 43 In addition to the SOUND SELECT buttons, other button operations such as touch curve, dual, digital effects and reverb settings can be transmitted as MIDI exclusive data when the corresponding buttons are pushed. When set to off, no program change or other panel information will be transmitted via MIDI. Step1 Hold down the TOUCH and TRANSPOSE buttons and press the DRAWBAR button. 2 1 Hold down both buttons. The display will alternate between showing ‘PGM’ (Program) and on/off status. The default is on. Step2 Use the VALUE buttons to toggle transmit program change on and off. Transmit Program Change ON Program change numbers will also be transmitted when multi-timbral mode is on. When using DUAL mode, on/off information and sound type settings are transmitted as exclusive data, but program change numbers will not be transmitted. The CN piano’s transmit program change setting defaults to ‘ON’ each time the power is turned on. FUNCTION BUTTONS OFF 5 Page 44 5) LOCAL CONTROL ON/OFF This function determines whether the CN piano’s sound will be played from the piano’s keyboard (‘ON’) or only from an external MIDI instrument (‘OFF’). Even with local control set to ‘OFF’ the piano’s keyboard will still transmit to external MIDI devices and instruments or a personal computer. Step1 Hold down the TOUCH and TRANSPOSE buttons and press the CHURCH ORGAN button. 2 1 Hold down both buttons. The display will alternate between showing ‘LcL’ (Local) and on/off status. The default is on. Step2 Use the VALUE buttons to toggle local control on and off. Local Control 5 FUNCTION BUTTONS OFF ON When local control is set to ‘OFF’, there will be no sound heard when the keys are pressed. The CN piano’s local control setting defaults to ‘ON’ each time the power is turned on. Page 45 6) MULTI-TIMBRAL MODE ON/OFF This function allows the CN piano to receive data on more than one MIDI channel simultaneously. In this mode, the CN piano can play different musical parts with different sounds for each part. With multi-timbral mode enabled, an external sequencer can be used to enjoy an ensemble performance playing multiple sound types (multi-timbral) on a single CN piano. ¡ Multi-Timbral On (On1 and On2) This turns on the flexible 16 part multi-timbral capability. Individual MIDI channels can be turned on and off, and assigned any preset sound. The preset sound for each MIDI channel can be changed when the program change number for the desired sound is received from external MIDI device and instruments or a personal computer. The CN piano's normal program change numbers are assigned in On1 (Please see page 42 for a list of the program change numbers), and General MIDI program change numbers are assigned in On2. ¡ Multi-Timbral Off This turns off the multi-timbral capability. Only one MIDI channel will be active and only the sound currently selected will be heard when a MIDI signal is received. Step1 Hold down the TOUCH and TRANSPOSE buttons and press the HARPSI & MALLETS button. 2 1 The display will alternate between showing ‘MLt’ (Multi) and on/off status. The default is off. Step2 Use the VALUE buttons to toggle multi-timbral on1, on2 and off. Multi-timbral mode OFF ON1 ON2 When the multi-timbral mode is OFF and MIDI information is received, only the currently selected preset sound will be heard. When the multi timbral mode is ON, the preset sound that is heard corresponds to any program change number that was received from external MIDI devices and instruments or a personal computer. This sound may be different from the preset sound that is currently selected using the SOUND SELECT buttons on the panel. When multi-timbral mode is ON, the ON/OFF setting for each individual MIDI receive channel can also be set (See page 46). The CN piano’s multi-timbral mode defaults to ‘OFF’ each time the power is turned on. FUNCTION BUTTONS Hold down both buttons. 5 Page 46 7) CHANNEL MUTE This function determines which MIDI channels are activated to receive MIDI information when multi-timbral mode is set to ON. Each of the 16 channels can be individually activated or deactivated. Step1 Hold down the TOUCH and TRANSPOSE buttons and press the STRINGS button. 2 1 Hold down both buttons. The display will alternate between showing ‘P01’ (Play 01) and ‘On’, indicating that the channel 1 is activated. When multi-timbral mode is set to OFF, the ‘channel mute’ function can not be selected. Step2 Use the VALUE buttons to toggle channel mute on and off. 5 FUNCTION BUTTONS To turn the other channels on and off, use the 16 left-most white keys to select a desired channel. The display will change to indicating the selected channel. Then use the value buttons to toggle channel mute on and off. Channel 1 2 3 4 5 6 7 8 9 10 11 12 13 14 15 16 Press the key Channel1 Channel16 OFF ON When changing the channel mute settings, no sound will be heard when the keys are pressed to select the individual channels. When the multi-timbral mode is first turned ON after the power has been turned on, all MIDI receive channels 1-16 will be set to ‘ON’. This is the default setting. Page 47 8) SENDING PROGRAM CHANGE NUMBERS This function allows the CN piano to send program change numbers beyond the 32 pre-defined numbers transmitted by the SOUND SELECT buttons. Using this function, any number from 1 to 128 can be sent. Step1 Hold down the TOUCH and TRANSPOSE buttons and press the CHOIR & PAD button. 2 1 Hold down both buttons. The display will alternate between showing ‘PG#’ (Program #) and a program change number. Step2 Use the VALUE buttons to change the program change number. Program change number Step3 FUNCTION BUTTONS Press both VALUE buttons simultaneously to send the program change number. 5 Page 48 9) LOWER OCTAVE SHIFT This function allows the lower part to be raised by one, two, or three octaves when using SPLIT mode. Step1 Hold down the TOUCH and TRANSPOSE buttons and press the BASS button. 2 1 Hold down both buttons. The display will alternate between showing ‘Lot’ (Lower Octave) and a number, representing how many octaves the lower part is shifted up. Step2 Use the VALUE buttons to set the desired lower octave shift range. Lower Octave Shift 5 FUNCTION BUTTONS Lower Octave Shift can be set from 0 to 3. The CN piano’s lower octave shift setting defaults to ‘0’ each time the power is turned on. Page 49 10) LOWER PEDAL ON/OFF This function determines if the sustain pedal will be active for lower part sound when in SPLIT mode. The default setting is off, which means the sustain pedal is not active for lower part sound. The sustain pedal will still be active for the upper sound. Step1 Hold down the TOUCH and TRANSPOSE buttons and press the EFFECTS button. 2 1 Hold down both buttons. The display will alternate between showing ‘LPd’ (Lower Pedal) and on/off status. The default is off. Step2 Use the VALUE buttons to toggle lower pedal on and off. Lower Pedal OFF ON FUNCTION BUTTONS The CN piano’s lower pedal setting defaults to ‘OFF’ each time the power is turned on. 5 Page 50 6. APPENDICES CONNECTING TO OTHER DEVICES Caution y Do not directly connect the LINE IN and LINE OUT jacks of the CN31 together with a cable. An audio loop (oscillation sound) will occur, resulting in damage to the unit. 1 2 3 4 5 / Pedal cable Amplifiers, Speakers, or similar equipment Audio equipment or electronic instruments Headphones External MIDI devices 6 APPENDICES 1 LINE OUT JACKS These jacks provide stereo output of the CN31 piano’s sound to amplifiers, tape recorders or similar equipment. The audio signal coming through the LINE IN jacks is also routed to these jacks. The CN31 piano’s sound is mixed with the LINE IN signals. The CN31 piano’s VOLUME slider controls the output level of its own sound without affecting the level of the LINE IN signal. 2 LINE IN JACKS These jacks are used to connect a pair of stereo outputs from other audio equipment or electronic instruments to the CN31 piano’s speakers. The audio signal coming through these jacks bypasses the CN31 piano’s volume control. To adjust the volume level, use the output control of the external device. 3 MIDI JACKS These jacks are used to connect external MIDI devices with the CN piano. There are two terminals: MIDI IN and MIDI OUT. 4 PEDAL JACK Connect the pedal cord from the pedal board to this jack. 5 HEADPHONE JACKS There are two headphone jacks located on the left underside of the piano. The piano's sound and any audio signal that is connected to the LINE IN jacks will be heard through the headphones. Page 51 ASSEMBLY INSTRUCTIONS Caution y Ensure that this instruction manual is read thoroughly before attempting to assemble the CN piano, and that two or more people work on assembly. y It may be necessary to tilt the unit by 90 degrees while assembling the CN piano. During this time, ensure that hands are not caught in the piano, keyboard lid, or score stand, and that the piano is not dropped on an individual’s feet. PARTS PROVIDED Before attempting to assemble the CN piano unit, ensure that all parts are included. A Phillips-head screwdriver will also be required to assemble the unit (not included). (A) Piano (x 1) (B) Pedal board (x 1) (G) (H) (I) (E) (F) (J) (K) (C) End panel (x 1 each for left and right) Adjuster bolt φ 4 x 16 φ 4 x20 φ 4 x30 M6 x 25 Cord clamp Headphone hook and screws (D) Back panel (x 1) (E) Adjuster bolt (x 1) (F) Screw: φ 4 x 16 (x 4) (G) Screw: φ 4 x 20 (x 4) Screw (H) Screw: φ 4 x 30 (x 2) (x 2) (I) Screw: M6 x 25 (x 4) (J) Cord clamp (x 2) (K) Headphone hook and screws (x 1 set) (L) Power cord (x 1) ASSEMBLY SEQUENCE Caution y Be careful not to scratch or damage the floor, piano, or stand at the time of assembly. 1 1. Screw the adjuster bolt (E) into the threaded screw hole provided on the pedal. 3. While pressing the end panel (C) against the pedal board (B), tighten the already-provided screws, one each on the left and right sides, and then tighten two screws (F) on each side. (E) 2y3 Already-provided screw (F) 4. Untie and pull out the pedal cable. (F) 5. Set the back panel (D) and tighten the screws (G) (H) into the prepared holes. Loosely tighten the screws with the * symbol. (C) (B) 4y5 (H)* (D) (G) (H)* (G) (Untie this twist tie from the cable) (G) APPENDICES 2. From the side of the screw that is already on the backside of the pedal board (B), slide and insert the bracket of the end panel (C). 6 Page 52 6. Place the stand so that the backside of the stand assembly rests against a wall, and then slowly and carefully insert the piano. Ensure that more than two people work on the assembly. If attempting to insert the piano without resting the stand against a wall, support the back of the stand using your foot or leg to prevent the stand from sliding backwards. 6y7y8 (A) (K) Caution y Ensure that the piano is not dropped on an individual's feet, and that fingers, hands and feet are not caught in the piano. 7. Press the end panel (C) of the stand to the piano (A), and then fasten the piano (A) to the stand with four screws (I). Caution (I) (I) 9 y 10 y Ensure that the piano and the stand are securely fastened together with the screws, preventing the possibility of the piano falling. 8. Fix the headphone hook and screws (K). *If the headphone hook will not be required, it can be kept with the instruction manual. Protrusion (J) (J) (H)* 11 9. Raise the unit and tightly fasten the loosely fastened screws (H) with the * symbol. 10. Insert the connector of the pedal cord into the receptacle, and fix the cord with the cord clamp (J) (make sure that the protrusion of the connector is facing the correct direction, and insert the connector straight). 11. Turn the adjustor bolt (E) at the bottom of the pedal stand until the bolt firmly touches the floor and supports the pedal board. 6 APPENDICES Caution y Ensure that the adjuster bolt (E) firmly touches the floor, supporting the pedal board and preventing damage. When moving the piano, remove the adjustor bold (E) and readjust after moving has been completed. (E) 12 (L) 12. Insert the power cord (L) into the piano. 13. Remove the protective film from the display. 13 Assembly is now complete. Page 53 Keyboard 88 Weighted Keyboard with Advanced Hammer Action IV Polyphony Maximum 96 Number of Sound 36 Sound Categories Piano 1, Piano 2, Electric Piano, Drawbar, Church Organ, Harpsi&Mallets, Strings, Choir&Pad, Bass Effects Reverb (Room1/2, Stage, Hall1/2), Chorus, Tremolo, Delay (1/2/3), Rotary (1/2) Temperaments Equal (Piano Only), Mersenne pure (Major), Mersenne pure (minor), Pythagorea, Meantone, Werckmeister III, Kirnberger III, Equal (flat), Equal Other Features Demo (27 Preset Songs), Concert Magic (88 Preset Songs), Volume, Dual, Split, Balance Slider, Transpose, Tune, Lower Octave Shift, Lower Pedal On/Off, Touch Curve (Light 1, Light 2, Normal, Heavy 1, Heavy 2, Off), MIDI (16 part multi-timbral capability) Lesson Function Right/left part balance adjustable, Tempo adjustable. Please refer to the separate 'Internal Song List' booklet for a complete listing of available lesson songs. Recorder 2 Tracks, 3 Songs. The total memory capacity of the recorder is approximately 15,000 notes. Metronome Beat: 1/4, 2/4, 3/4, 4/4, 5/4, 3/8, 6/8 Pedals Sustain, Sostenuto, Soft Jacks Headphones (2), LINE IN (L, R), LINE OUT (L/MONO, R), MIDI (IN, OUT) Output Power 16 W x 2 Speakers 16 cm x 2 Key Cover Slide type Power Consumption 50 W Dimensions WxDxH (with music rack flattened) 139cm x 48cm x 89cm Weight 52 kg APPENDICES SPECIFICATIONS 6 Page 54 MIDI EXCLUSIVE DATA FORMAT 1st byte 2nd byte 3rd byte 4th byte 5th byte 6th byte 7th byte 9th byte 9th byte 10th byte 1 2 3 4 5 6 7 8 9 10 6 APPENDICES 1 2 3 4 5 6 7 8 9 10 F0 ..........................Start code 40...........................KAWAI’s ID number 00 - 0F ...................MIDI channel 10, 30.....................Function code (30 when setting MULTI TIMBRE ON/OFF) 04...........................Indicates that the instrument is Electronic Piano 02...........................Indicates that the piano is one of ‘CA’ or ‘CN’ series data 1 data 2.....................(See the table below.) data 3 F7 ..........................End code data 1 data 2 data 3 Function 00 00 ---------- Multi Timbre Off 00 01 ---------- Multi Timbre On 1 00 02 ---------- Multi Timbre On 2 0D 00-07 ---------- 00: Effect Off, 01: Chorus, 02: Delay 1, 03: Delay 2, 04: Delay 3, 05: Tremolo, 06: Rotary 1, 07: Rotary 2 0E 00-03, 06, 07 ---------- 00: Reverb Off, 01: Room 2, 02: Stage, 03: Hall 1, 06: Room 1, 07: Hall 2 14 00-7F ---------- Dual/Split balance 16 1F-60 ---------- Tune, 40: 440 Hz 17 00, 7F ---------- 00: Program Change Off, 7F: Program Change On 18 00-05 ---------- 00: Light 1, 01: Normal, 02: Heavy 1, 03: Off, 04: Light 2, 05: Heavy 2 19 00-03 ---------- Lower Octave Shift 20 00-23 00-23 Dual, data 2: Right sound, data 3: Left sound 21 00-23 00-23 Split, data 2: Upper sound, data 3: Lower sound 25 00-08 00-0B data 2: Temperament, data 3: Key 26 00, 7F 00-0F Multi Timbre, data 2: 00 (On), 7F (Off), data 3: channel Page 55 MIDI IMPLEMENTATION CHART Date : November 2006 Version : 1. 0 KAWAI DIGITATL PIANO MODEL : CN31 Function Transmit Receive Remarks Basic channel Default Changes 1 1 - 16 1 1 - 16 Mode Default Messages Altered 3 ° ÄÄÄÄÄÄÄÄÄ 1 1, 3* ° * The default for the OMNI mode is ON. Specifying MIDI channels automatically turns it OFF. True voice 9 - 120** ÄÄÄÄÄÄÄÄÄ 0 - 127 0 - 127 ** The value depends on the Transpose setting. Velocity Note ON Note OFF After touch Key’s Channel’s { 9nH v=1-127 ° 9nH v=0 Pitch bend 0,32 7 11 64 66 67 Control change Program change True # System exclusive { ° ° ° ° ° ° ° { ° ° { (Right pedal) { (Center pedal) { (Left pedal) { { { { { { { 0 - 127 ÄÄÄÄÄÄÄÄÄ {*** { { Common Song Position Song Select Tune ° ° ° ° ° ° System Real time Clock Commands ° ° ° ° Aux Local On / Off All notes Off Active Sense Reset ° ° { ° { { (123 - 127) { ° Bank select Volume Expression pedal Sustain pedal Sostenute pedal Soft pedal *** See the Program Change Number Mapping in page 42. On / Off Selectable APPENDICES Note number Notes Mode 1: omni mode On, Poly, Mode 2: omni mode On, Mono Mode 3: omni mode Off, Poly, Mode 4: omni mode Off, Mono {: Yes °: No 6 CN31 Owner's Manual OW1004E-S0701 Printed in Japan Copyright © 2007 KAWAI Musical Instruments Mfg. Co.,Ltd. All Rights Reserved.