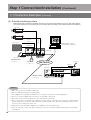
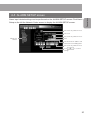
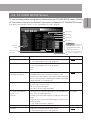
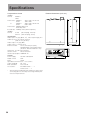
1
NETWORK CODEC
DM–NC40
CF
For Customer Use :
Enter below the Serial No. which is located on the body.
Retain this information for future reference.
Model No. DM-NC40
Serial No.
INSTRUCTIONS
ENCODE
DECODE
HOLD
IN 1
PLAY
STOP
HOLD
SELECT
IN 2
POWER
P inP
This instruction book is mode from 100%
recycled paper.
LST0176-001A
IMPORTANT SAFEGUARDS
1.
2.
3.
4.
5.
6.
7.
8.
9.
10.
11.
12.
13.
14.
15.
16.
17.
18.
19.
2
Read all of these instructions.
Save these instructions for later use.
All warnings on the product and in the operating instructions should be adhered to.
Unplug this appliance system from the wall outlet before cleaning. Do not use liquid cleaners or aerosol cleaners.
Use a damp cloth for cleaning.
Do not use attachments not recommended by the appliance manufacturer as they may cause hazards.
Do not use this appliance near water – for example, near a bathtub, washbowl, kitchen sink, or laundry tub, in a wet
basement, or near a swimming pool, etc.
Do not place this appliance on an unstable cart, stand, or table. The appliance may fall, causing
serious injury to a child or adult, and serious damage to the appliance.
Use only with a cart or stand recommended by the manufacturer, or sold with the appliance.
Wall or shelf mounting should follow the manufacturer’s instructions, and should use a mounting
kit approved by the manufacturer.
An appliance and cart combination should be moved with care. Quick stops, excessive force,
and uneven surfaces may cause the appliance and cart combination to overturn.
Slots and openings in the cabinet and the back or bottom are provided for ventilation, and to
insure reliable operation of the appliance and to protect it from overheating, these openings
must not be blocked or covered. The openings should never be blocked by placing the appliance on a bed, sofa, rug,
or other similar surface. This appliance should never be placed near or over a radiator or heat register. This appliance
should not be placed in a built-in installation such as a bookcase unless proper ventilation is provided.
This appliance should be operated only from the type of power source indicated on the marking label. If you are not
sure of the type of power supplied to your home, consult your dealer or local power company. For appliance designed
to operate from battery power, refer to the operating instructions.
This appliance system is equipped with a 3-wire grounding type plug (a plug having a third (grounding) pin). This
plug will only fit into a grounding-type power outlet. This is a safety feature. If you are unable to insert the plug into the
outlet, contact your electrician to replace your obsolete outlet. Do not defeat the safety purpose of the grounding
plug.
For added protection for this product during a lightning storm, or when it is left unattended and unused for long
periods of time, unplug it from the wall outlet and disconnect the antenna or cable system. This will prevent damage
to the product due to lightning and power-line surges.
Do not allow anything to rest on the power cord. Do not locate this appliance where the cord will be abused by
persons walking on it.
Follow all warnings and instructions marked on the appliance.
Do not overload wall outlets and extension cords as this can result in fire or electric shock.
Never push objects of any kind into this appliance through cabinet slots as they may touch dangerous voltage points
or short out parts that could result in a fire or electric shock. Never spill liquid of any kind on the appliance.
Do not attempt to service this appliance yourself as opening or removing covers may expose you to dangerous
voltage or other hazards. Refer all servicing to qualified service personnel.
Unplug this appliance from the wall outlet and refer servicing to qualified service personnel under the following
conditions:
a. When the power cord or plug is damaged or frayed.
b. If liquid has been spilled into the appliance.
c. If the appliance has been exposed to rain or water.
d. If the appliance does not operate normally by following the operating instructions. Adjust only those controls that
are covered by the operating instructions as improper adjustment of other controls may result in damage and will
often require extensive work by a qualified technician to restore the appliance to normal operation.
e. If the appliance has been dropped or the cabinet has been damaged.
f. When the appliance exhibits a distinct change in performance – this indicates a need for service.
When replacement parts are required, be sure the service technician has used replacement parts specified by the
manufacturer that have the same characteristics as the original part. Unauthorized substitutions may result in fire,
electric shock, or other hazards.
Upon completion of any service or repairs to this appliance, ask the service technician to perform routine safety
checks to determine that the appliance is in safe operating condition.
SAFETY PRECAUTIONS
FOR USA AND CANADA
CAUTION
RISK OF ELECTRIC SHOCK
DO NOT OPEN
AUTION :
TO REDUCE THE RISK OF ELECTRIC SHOCK,
DO NOT REMOVE COVER (OR BACK).
NO USER SERVICEABLE PARTS INSIDE.
REFER SERVICING TO QUALIFIED SERVICE PERSONNEL.
WARNING:
TO REDUCE THE RISK OF FIRE OR ELECTRIC
SHOCK, DO NOT EXPOSE THIS APPLIANCE TO
RAIN OR MOISTURE.
This unit should be used with 120V AC only.
CAUTION:
To prevent electric shocks and fire hazards, do NOT use
any other power source.
NOTE:
The lightning flash with arrowhead symbol, within an
equilateral triangle is intended to alert the user to the
presence of uninsulated “dangerous voltage” within the
product’s enclosure that may be of sufficient magnitude to constitute a risk of electric shock to persons.
The exclamation point within an equilateral triangle is
intended to alert the user to the presence of important
operating and maintenance (servicing) instructions in
the literature accompanying the appliance.
INFORMATION FOR USA
INFORMATION
This equipment has been tested and found to comply with the limits
for a Class B digital device, pursuant to Part 15 of the FCC Rules.
These limits are designed to provide reasonable protection against
harmful interference in a residential installation. This equipment
generates, uses, and can radiate radio frequency energy and, if not
installed and used in accordance with the instructions, may cause
harmfull interfrence to radio communications. However, there is no
guarantee that interference will not occur in a particular installation.
If this equipment does cause harmful interference to radio or
television reception, which can be determined by turning the
equipment off and on, the user is encouraged to try to correct the
interference by one or more of the following measures:
● Reorient or relocate the receiving antenna.
● Increase the separation between the equipment and receiver.
● Connect the equipment into an outlet on a circuit different from
that to which the receiver is connected.
● Consult the dealer or an experienced radio/TV technician for help.
The rating plate (serial number plate) is on the rear panel.
CAUTION
To prevent electric shock, do not open the cabinet. No user serviceable parts inside. Refer servicing to qualified service personnel.
AVERTISSEMENT :
POUR EVITER LES RISQUES D’INCENDIE OU
D’ELECTROCUTION, NE PAS EXPOSER
L’APPAREIL A L’HUMIDITE OU A LA PLUIE.
Ce magnétoscope ne doit être utilisé que sur du courant
direct en 120V.
ATTENTION :
Afin d’eviter tout resque d’incendie ou d’électrocution,
ne pas utillser d’autres sources d’alimentation électrique.
REMARQUE :
La plaque d’identification (numéro de série) se trouve sur le panneau
arrière de l’appareil.
CAUTION
CHANGES OR MODIFICATIONS NOT APPROVED BY JVC
COULD VOID USER’S AUTHORITY TO OPERATE THE
EQUIPMENT.
THIS DEVICE COMPLIES WITH PART 15 OF THE FCC RULES.
OPERATION IS SUBJECT TO THE FOLLOWING TWO
CONDITIONS : (1) THIS DEVICE MAY NOT CAUSE HARMFUL
INTERFERENCE, AND (2) THIS DEVICE MUST ACCEPT ANY
INTERFERENCE RECEIVED, INCLUDING INTERFERENCE
THAT MAY CAUSE UNDESIRED OPERATION
INFORMATION (FOR CANADA)
RENSEIGNEMENT (POUR CANADA)
This Class B digital apparatus complies with Canadian
ICES-003.
Cet appareil numérique de la Class B est conforme à la norme
NMB-003 du Canada.
3
Features
Thank you for purchasing this JVC product. Before operating this unit, please read this instructions carefully
to ensure the best possible performance.
These instructions are for DM-NC40U.
Video/Audio codec
ISMA streaming
The unit is equipped with both encoding and
decoding features.
The unit is also equipped with an echo canceller feature.
ISMA-compliant video and audio streaming.
Contact the nearest JVC-authorized service
agent for details concerning ISMA-compliant
players.
High-picture quality MPEG-4 codec
External control terminal
• Encoding up to 2Mbps
• 30fps video display at 352 240 resolution
Control devices such as monitoring camera
system, etc.
PinP (Picture-in-Picture) feature
Unicast and multicast transmission
Two camera video images can be combined
for display on the PC or monitor.
Supports unicast and multicast for various system solutions.
(Up to 5 streams for unicast)
Built-in CF (Compact Flash) slot
Synchronizes with the alarm for recording of
video images to a CF card (not included).
(JPEG images only)
How to view this manual
■ Symbols used
Items concerning the operations of this product are described.
Note
References concerning the usage, restrictions, etc. of this product are described.
Memo
Reference pages and reference items are indicated.
■ Button names in operation procedures are enclosed using [ ].
Example: Menu button → [Menu]
■ About the contents of this manual
● All rights reserved by JVC. Unauthorized duplication or reprinting of this manual, in whole or in part, is
strictly prohibited.
● Windows is a registered trademark of Microsoft Corporation in the U.S.
● All other product names used in this manual are trademarks or registered trademarks of their respective
companies. Please note that marks such as ™, ®, ©, etc. have been omitted in this manual.
● Illustrated designs, specifications and other contents of this manual are subject to change without prior
notice.
4
Introduction
Introduction
Contents
Step 5 Mode Setup
5-1
Setting in the MODE SETUP Screen ........... 29
Features ................................................................ 4
Contents ................................................................ 5
Step 6 Detailed Setup
Operational Environment ...................................... 6
6-1
NETWORK SETUP screen ................... 30
Cautionary Notes .................................................. 7
6-2
ENCODE PARAMETERS screen ......... 32
Names and Operations of Parts ............................ 8
6-3
TELEPHONE BOOK screen .................. 34
6-4
SECURITY SETUP screen .................... 35
6-5
ALARM SETUP screen .......................... 37
6-6
OUTPUT PIN SETUP screen ............... 39
Various Applications ............................................ 11
6-7
SERIAL PORT SETUP screen ............... 40
Preparation Flow ................................................. 12
6-8
CF CARD SETUP screen ..................... 41
Preparations
Step 1 Connection/Installation
1-1
Connection Examples ............................ 13
1-2
Connecting a LAN Cable ....................... 17
1-3
Inserting a CF (Compact Flash) Card .... 17
Operating the Teleconference System ............. 42
1-4
SERIAL Ports and ALARM Port ............. 18
Operating the Monitor System ......................... 44
1-5
Connecting the Power Cord ................... 19
Operating the ISMA Server System ................. 47
1-6
Attaching Rack Mount Brackets ............. 19
DHCP Operations and
Operations
IP Address Display during Startup ......... 48
Step 2 PC Network Setup
2-1
Setting the IP Address of the PC ........... 20
(For Windows XP)
2-2
DHCP Operation ........................................... 48
IP Address Display ........................................ 48
Operating the CF Card ..................................... 49
Setting the IP Address of the PC ........... 22
Operating in the CF CARD SETUP screen ... 49
(For Windows 2000)
Operating with CF Card Reader ................... 50
Operating of FTP .......................................... 51
Step 3 Launching the Web Browser
Settings Using the Terminal Software of a PC ... 53
3-1
About the Web Browser ......................... 24
Settings by Telnet of the PC ............................. 55
3-2
About Access Restriction Levels ............ 25
About the Alarm ............................................... 56
3-3
Launching the Browser .......................... 26
Step 4 Initial Settings
4-1
Changing the IP Address of the Unit ...... 27
4-2
Time Setup ............................................. 28
Others
Specifications ................................................... 58
5
Operational Environment
The operational environment is as of September 2003. For the latest operational environment, please consult the person in charge of professional equipment at your nearest JVC-authorized service agent.
Compatible PC
The following operation environment is required when connecting a PC to this unit.
OS:
Windows XP Home Edition, Windows XP Professional, Windows 2000
CPU:
Pentium III 700MHz or higher
Memory:
256MB or more
Monitor:
640 X 480 pixels or higher
Web browser
Settings of this unit can be performed using Web browser.
● Internet Explorer 6.0, Netscape 7.0 and browsers compatible with JavaScript and frames.
● For CPU performance, required memory, etc., please refer to the recommended values of the Web
browser.
Player software
● ISMA-compliant player is available as viewer software.
Please consult the person in charge of professional equipment at your nearest JVC-authorized service
agent for details concerning ISMA-compliant players.
LAN environment
● Use 100BASE-TX compatible network devices. Set ports of the devices to Auto Negotiation.
● By using a cross cable, direct 1-to-1 connection can be made between the PC and unit.
(Please check the used LAN board of the PC since in rare cases the use of a cross cable may not be
supported.)
Compatible CF cards
● TYPE I cards only
● Supported cards:
Hagiwara Sys-com Z series
128 MB (HPC-CF 128Z)
256 MB (HPC-CF 256Z)
512 MB (HPC-CF 512Z)
Fast CF cards over 1.5 MB/s are recommended for recording JPEG files.
• With the exception of the user being the copyright holder or when permission has been granted concerning duplication, etc. by the copyright holder, permission is required in principle for the duplication, modification, transmission, etc. of copyrighted video/audio.
Unauthorized duplication, modification, transmission, etc. of copyrighted material may constitute a copyright infringement and the user may be liable to compensate for any damages. When using copyrighted
video/audio, be sure to check thoroughly the license agreement, etc. of the copyrighted material. When
there are rights or right holders of the duplicating subject, usage or processing permission may be required. Be sure check thoroughly the licensing conditions, etc.
• Open source software is partially used for this unit. For information concerning the software, click “Open
Source Software” in the STATUS screen of page 26.
6
Storage/usage location
■ Do not use or store the unit in the following locations. Malfunction may occur as a result.
• Location outside the allowed operating temperature range (0°C ~ 40°C) where the temperature may become extremely hot or cold.
• Location outside the allowed operating humidity range (30% ~ 80%) where the humidity is
high.
• Location with strong magnetic force such as
from a transformer, motor, etc.
• Location with presence of electric waves such
as from a transceiver, mobile phone, etc.
• Location that is dusty or sandy.
• Location with strong vibrations.
• Location with condensation.
• Location where radiation, x-ray or corrosive gas
is generated.
Handling
■ To prevent the internal temperature from rising,
do not stack units when using.
■ Do not place the unit on its side.
■ Handle the unit with caution and do not apply excessive force.
■ Wipe the unit with a soft cloth.
The surface may fog or even melt when wiped
with benzene or paint thinner. For stubborn dirt,
use neutral detergent diluted in water and then
dry wipe.
■ To completely cut off the power, disconnect the
power cable from the wall outlet or remove the
power cord from the AC inlet (AC IN) of the unit.
Installation
■ Be sure to ground the unit.
■ Place the unit near a wall outlet.
■ Always use the specified (included) power cord.
Use of a cord other than that specified or a cord
that has been damaged may result in fire or electrical shock.
■ Do not use the included power cord other than
with this unit.
■ Do not place heavy objects such as a monitoring
television on top of the unit. Malfunction may occur as a result.
■ Always request installation to the dealer of purchase.
Introduction
Cautionary Notes
■ About the echo canceller
The echo canceller of the unit is provided for the
prevention of howling. However, repeated echoing of sound other than from a DM-NC40 may not
be suppressed sufficiently.
When using a speaker and a microphone at the
same time, place them apart, change the direction of the microphone or take caution so that the
playback sound from the speaker is not picked up
by the microphone.
When using a camcorder with audio AGC (Auto
Gain Control), the echo canceller may not work
properly. Please turn off the AGC.
If the AGC feature cannot be turned off, use a separate microphone amplifier with no AGC.
■ When not using the unit for a long time, turn the
power of the unit off for conserving energy.
■ About electrical interference
When using the unit near a television, radio receiver or transceiver, screen images may become
disturbed or noise may be heard. In this case, try
the following:
• Place the unit away from radios and televisions
or change the direction of the unit.
• If an indoor antenna is used, change the direction or the location of the antenna.
• Use a wall outlet other than the one used for
radios, televisions, etc.
• Install a commercially-available noise filter between the wall output and power plug.
JVC assumes no responsibility whatsoever of
any effects that may occur as a result of
operating this unit.
7
Names and Operations of Parts
Front
!1
CF
ENCODE
DECODE
HOLD
IN 1
PLAY
STOP
HOLD
SELECT
IN 2
POWER
P inP
q
!0
o
i u
y
1 [POWER] Power button and display lamp
Turns the unit power on and off.
Press securely until a click is heard.
The display lamp turns green when the power is on.
2 [PinP] Picture-in-Picture button
When in the Monitor mode, (VIDEO1)
pressing the button on the
monitoring side will light the
(VIDEO2)
button and display 2 videos inputted to the camera side as
shown on the right.
Monitor mode
When pressing the 3 SELECT
button during PinP display, the (Other party)
displayed videos will switch.
When in the Teleconference
(User)
mode, videos of both sides are
displayed as shown on the
Teleconference mode
right.
3 [SELECT IN 1, IN 2] Select
button and display lamps
Selects the input signal between VIDEO IN 1 and VIDEO
IN 2. When in the Monitor mode, pressing the button on the
monitoring side select input videos to camera side. Pressing the button on the camera side select input videos to
camera side.
When in the Teleconference mode, pressing the button
select input videos to own side.
4 [HOLD] Operation lock button and display lamp
Pressing the button for 3 seconds or more will light the
display lamp and button operations other than the 1
[POWER] button will be locked. Pressing the button
again for 3 seconds or more while the lamp is on will
cancel the lock and the lamp will turn off.
(Factory setting: HOLD)
8
t
r
e
w
5 [STOP] Stop button
Pressing the button will terminate connection and the
0 connection number display will turn off.
( See “Operations”, pages 42 and 43)
6 [PLAY] Play button
Pressing the button will establish connection. The connecting destination will be displayed in the 0 connection number display.
( See “Operations”, page 42)
7 [CF] Compact Flash button
The button will light when a CF (Compact Flash) card
is inserted in the A CF card slot. During the Monitor
mode, recording can be made on the camera side.
Pressing this button while the lamp is on will start image recording and the lamp will flash. While recording
is in progress, pressing the button again will stop recording.
( See “About the Alarm”, page 56)
8 [ENCODE, DECODE] Encode and decode display
lamps
Displays the operation status of the unit.
When the ENCODE lamp is on, the unit is operating as
an encoder.
When the DECODE lamp is on, the unit is operating as
a decoder. When both lamps are on, the unit is operating as a codec.
9 Number Select buttons
Used when selecting a connecting destination. The currently selected digit will be indicated using a flashing
display.
• Press 왗 or 왘 to select the digit.
• Press 왔 or 왖 to increase or decrease the value of the
selected digit.
Introduction
Back
SERIAL 1
ALARM
RS485
IN
AUDIO
OUT
SERIAL 2
SERVICE
RS232C
VIDEO
IN 1
VIDEO
OUT
CONTROL
VIDEO
IN 2
AC IN
L
LOOP
THRU
LOOP
THRU
100BASE-TX
R
OPEN
RESERVED
@2
@1
@0
!9
0 Connection number display
While in the Teleconference or Monitor mode, the connecting destination number is displayed. The display
will flash when establishing connection and the lamp
will change to a constant display when connection is
established.
While in the ISMA mode, the number of streams transmitted is displayed.
A CF card slot
CF card can be inserted after removing the screw.
( See “Inserting a CF Card”, page 17)
B RXD display lamp
The lamp turns on when data is being sent/received
via the C 100BASE-TX terminal.
C [100BASE-TX] 100BASE-TX terminal
100BASE-TX terminal for connecting a LAN cable.
( See “Connecting a LAN Cable, page 17)
D LINK display lamp
The lamp turns on when the 100BASE-TX terminal is
ready for communication.
E [75Ω/OPEN] Input 2, 75Ω terminal switch
75Ω terminal switch for the F VIDEO IN 2 terminal.
Select “OPEN” during loop-through connection. Otherwise, select “75Ω”. Video may not be displayed correctly if the switch is not set properly.
(Factory setting: 75Ω)
!8
!7
OPEN
!6
!5 !4 !3 !2
G [75Ω/OPEN] Input 1, 75Ω terminal switch
75Ω terminal switch for the H VIDEO IN 1 terminal.
Select “OPEN” during loop-through connection. Otherwise, select “75Ω”. Video may not be displayed correctly if the switch is not set properly.
(Factory setting: 75Ω)
H [VIDEO IN 1] Video input terminal 1
Input terminal 1 for video signal. Used for inputting video
signal from a camera, etc.
I [VIDEO OUT] Video output terminal
Output terminal for video signal.
Used only when in the Teleconference or Monitor mode.
J [AUDIO OUT] Audio output terminal
Output terminal for audio signal. Used for connecting
audio input terminal of a monitor, etc.
Used only when in the Teleconference or Monitor mode.
(RESERVED: Currently cannot be used)
K [AUDIO IN L/R] Audio input terminal
Input terminal for audio signals.
L and R channels can be used when in the ISMA mode.
The L channel terminal can be used when in the teleconference or Monitor mode.
L [AC IN] AC power input terminal
Input commercial AC120V using the included power
cord.
( See “Connecting the Power Cord”, page 19)
F [VIDEO IN 2] Video input terminal 2
Input terminal 2 for video signal. Used for inputting video
signal from a camera, etc.
9
Names and Operations of Parts (Continued)
Back (Continued)
@3
@4
@5
ALARM
@7
SERIAL 1
RS485
AUDIO
OUT
IN
@6
VIDEO
OUT
SERIAL 2
SERVICE
RS232C
VIDEO
IN 1
CONTROL
VIDEO
IN 2
AC IN
L
LOOP
THRU
LOOP
THRU
100BASE-TX
R
RESERVED
M [ALARM] Alarm port (Dsub 15-pin, female)
Input terminals for alarm signals, and output terminals
for device control.
( See “Alarm Port”, page 18)
( See “ALARM SETUP screen”, page 37)
N [RS485/RS232C] Protocol select switch of Serial
Port 1
Selects the protocol of O SERIAL 1 port.
RS485:
Performs input/output using signals with
electrical properties that comply with EIA/
ITA RS-485.
RS232C:
Performs input/output using signals with
electrical properties that comply with EIA/
ITA RS-232C.
(Factory setting: RS232C)
O [SERIAL 1] Serial Port 1 for device control
(Dsub 9-pin, male)
Used to connect to an external control device such as
a remote control unit, etc.
The signal protocol can be selected using the N RS485/
RS232C select switch.
The unit is equipped with a pass-through feature for
remote control via network.
10
OPEN
OPEN
P [SERVICE/CONTROL] Protocol select switch of
Serial Port 2
Selects the protocol of Q SERIAL 2 port.
SERVICE:
Only used during servicing. Do not use
this setting.
CONTROL: Performs input/output using signals with
electrical properties that comply with EIA/
ITA RS-232C.
(Factory setting: CONTROL)
Q [SERIAL 2] Serial Port 2 for device control
(Dsub 9-pin, male)
Used to connect to an external control device such as
a remote control unit, etc.
The unit is equipped with a pass-through feature for
remote control via network.
Various Applications
Teleconferencing
(Connection example:
page 13)
CH-1
CH-2
PROFESSINAL
AUDIO
LEVEL
CF
ENCODE
DECODE
HOLD
IN 1
PLAY
STOP
HOLD
SELECT
IN 2
POWER
P inP
FOCUS
IRIS
OPEN
ND FILTER
ON
OFF
Preparations
Live video/audio can be sent/received.
AUTO
MANU
DV CAMCORDER GY-DV300
PUSH
AUTO
MIC 1 IN
Y/C OUT
DV
EARPHONE
Network
CF
Remote monitoring
(Connection example:
ENCODE
DECODE
HOLD
IN 1
PLAY
STOP
HOLD
SELECT
IN 2
LINE
CH-2 OUT CH-1 VIDEO OUT
MIC 2 IN
POWER
P inP
pages 14 and 15)
H
Av Pk L
ALC LEVEL
Remote monitoring can be performed while having audio communication.
CF
H
Av Pk L
ENCODE
DECODE
HOLD
IN 1
PLAY
STOP
HOLD
SELECT
IN 2
POWER
P inP
ALC LEVEL
Camera
Camera
Network
Amplifier
Microphone
Speaker
CF
ENCODE
DECODE
HOLD
IN 1
PLAY
STOP
HOLD
SELECT
IN 2
POWER
P inP
Amplifier
Microphone
* The echo canceller is set to OFF when shipped. To use bidirectional audio communication, see page 53 to
set the echo canceller to ON.
Streaming (ISMA compliant)
(Connection example:
page 15)
Playback can be performed using a ISMA compliant player.
CH-1
CH-2
PROFESSINAL
AUDIO
LEVEL
CF
IRIS
ENCODE
DECODE
HOLD
IN 1
PLAY
STOP
HOLD
SELECT
IN 2
POWER
P inP
FOCUS
OPEN
ND FILTER
ON
OFF
AUTO
MANU
DV CAMCORDER GY-DV300
PUSH
AUTO
00:02:30
Network
ISMA compliant player
11
Preparation Flow
Perform settings using the steps shown below.
Step 1 Connection/Installation
• Connect cables to the back of the unit.
Page 13 ~
• For recording, insert a CF card
• When completed, turn on the power.
Step 2 PC Network Settings
• Network settings for the unit have been performed at the time of shipment.
Page 20 ~
First, perform network settings for the connecting PC.
Step 3 Launching the Web Browser
• Launch the Web browser and input the IP address of the unit (Factory setting
of IP address, 10.0.0.1, is enabled if there is no DHCP server in the LAN.)
Page 24 ~
• Login as the administrator. Input the user name and password for administrator.
<Settings hereafter will be performed using the Web browser.>
Step 4 Initial Settings
• Change IP address of the unit according to the network environment.
You need reconnect Web browser with new IP address after changed.
Page 27 ~
• Set the date and time to the unit.
Step 5 Mode Setting
• Select mode of the unit according to the application.
( See “1-1 Connection Examples”, page 13)
Page 29 ~
Step 6 Detailed setup
• Perform detailed setup for each application.
About the ISMA Server Mode
• ISMA-compliant player is available with the ISMA Server mode.
12
Page 30 ~
For details, please consult the person in
charge of professional equipment at your
nearest JVC-authorized service agent.
Step 1 Connection/Installation
Preparations
1-1 Connection Examples
(1) Teleconference system
CH-1
CH-2
PROFESSINAL
VIDEO OUT
AUDIO
LEVEL
ON
OFF
IRIS
FOCUS
OPEN
ND FILTER
AUTO
MANU
DV CAMCORDER GY-DV300
PUSH
AUTO
AUDIO OUT
AUDIO IN
VIDEO IN 1
SERIAL 1
ALARM
RS485
IN
AUDIO
OUT
VIDEO
OUT
VIDEO
IN 1
Teleconference mode
( page 29)
SERIAL 2
SERVICE
RS232C
CONTROL
VIDEO
IN 2
AC IN
L
LOOP
THRU
LOOP
THRU
100BASE-TX
100BASE-TX
R
RESERVED
V. IN
A. IN
OPEN
OPEN
AUDIO OUT
MIC 1 IN
VIDEO OUT
Network
AUDIO OUT
VIDEO OUT
AUDIO IN
MIC 2 IN
VIDEO IN 1
SERIAL 1
ALARM
RS485
IN
AUDIO
OUT
VIDEO
OUT
SERIAL 2
SERVICE
RS232C
VIDEO
IN 1
CONTROL
VIDEO
IN 2
AC IN
L
Te l e c o n f e r e n c e
mode ( page 29)
LOOP
THRU
LOOP
THRU
100BASE-TX
R
RESERVED
OPEN
OPEN
V. IN
A. IN
100BASE-TX
VIDEO OUT
AUDIO OUT
Memo
•
•
•
•
•
Make sure to set each IP address differently.
Use of a dedicated network is recommended.
Use 100BASE-TX compatible network devices. Set ports of the devices to Auto Negotiation.
Use the L channel of AUDIO IN. R channel is not available in this mode.
Videos to be used in the Teleconference mode are from cameras for conference. Video with fast motion such as
a movie, etc. may cause block noise or lowering of the frame rate than the setting.
13
Step 1 Connection/Installation (Continued)
1-1 Connection Examples (Continued)
(2) Remote monitoring system
Bidirectional audio conference is available. The units can reconnect automatically by power on after power failures.
(CF card recording can only be performed on the camera side. Recording on the monitoring side is not available.)
H
Av Pk L
ALC LEVEL
Camera 1
H
Av Pk L
ALC LEVEL
Camera 2
VIDEO IN 2
VIDEO IN 1
ALARM
INPUT 1~4
Alarm signal
JPEG images can be
monitored ( Page 46)
AUDIO OUT
ALARM
SERIAL 1
RS485
Speaker
IN
AUDIO
OUT
VIDEO
OUT
SERIAL 2
SERVICE
RS232C
VIDEO
IN 1
CONTROL
100BASE-TX
VIDEO
IN 2
AC IN
L
LOOP
THRU
LOOP
THRU
100BASE-TX
R
RESERVED
Microphone
OPEN
OPEN
Amplifier
Camera mode
( Page 29)
CF card
( Page 17)
Network
Microphone
Amplifier
AUDIO OUT
AUDIO IN
ALARM
SERIAL 1
RS485
IN
AUDIO
OUT
A. IN
VIDEO
OUT
SERIAL 2
SERVICE
RS232C
VIDEO
IN 1
CONTROL
VIDEO
IN 2
AC IN
L
Monitor mode
VIDEO
OUT
LOOP
THRU
LOOP
THRU
100BASE-TX
V. IN
R
RESERVED
OPEN
OPEN
( Page 29)
Monitor
Memo
•
•
•
•
•
•
Make sure to set each IP address differently.
Use of a dedicated network is recommended.
Use 100BASE-TX compatible network devices. Set ports of the devices to Auto Negotiation.
Use the L channel of AUDIO IN. R channel is not available in this mode.
Automatic recovery works by power on when working unit is turned off.
When connection is resumed by the automatic recovery feature, flashing of the connection number display
may be longer than usual or the video and audio output may take some time after the display turns on. However, this is not a malfunction of the unit.
Video input is to be inputted in VIDEO IN 1 or VIDEO IN 2 on the camera side.
•
• The echo canceller is set to OFF when shipped. To use echo canceller for bidirectional audio communication,
see page 53.
14
When using the unit in the ISMA Server mode, an ISMA-compliant player is required. For details of
ISMA compliant player, please consult the person in charge of professional equipment at your nearest
JVC authorized service agent.
CH-1
CH-2
PROFESSINAL
AUDIO
LEVEL
IRIS
FOCUS
OPEN
ND FILTER
ON
OFF
AUTO
MANU
DV CAMCORDER GY-DV300
PUSH
AUTO
VIDEO OUT
AUDIO OUT
AUDIO IN
VIDEO IN
ALARM
ISMA Server
mode
SERIAL 1
RS485
AUDIO
OUT
IN
VIDEO
OUT
SERIAL 2
SERVICE
RS232C
VIDEO
IN 1
CONTROL
100BASE-TX
VIDEO
IN 2
AC IN
L
LOOP
THRU
LOOP
THRU
100BASE-TX
R
RESERVED
OPEN
OPEN
( Page 29)
00:02:30
Network
ISMA compliant player
Memo
•
•
•
•
Make sure to set each IP address differently.
Use of a dedicated network is recommended.
Up to 5 players can be connected for unicast.
Audio is compatible with MPEG-4 AAC-LC stereo.
15
Preparations
(3) Streaming system (ISMA compliant)
Step 1 Connection/Installation (Continued)
1-1 Connection Examples (Continued)
Caution when connecting different modes
For teleconference application, set units to Teleconference mode. For remote monitoring application, set units to Camera/Monitor
mode. Connecting units in different application modes will result some problems as following:
Teleconference mode - Monitor mode
Teleconference side: Audio of the monitor side is played back. Video will not be played back.
Monitor side: Video and audio of the teleconference side are played back.
Teleconference mode - Camera mode
Teleconference side: Video and audio of the camera are played back.
Camera side: Audio of the teleconference side is played back.
Teleconference mode - ISMA Server mode
Teleconference side: Video is played back and audio will be noise.
Streaming side: No playback
Monitor mode - ISMA Server mode
Monitor side: Video is played back and audio will be noise.
Streaming side: No playback
Camera mode - ISMA Server mode
Camera side: Audio will be noise.
Streaming side: No playback
Monitor mode - Monitor mode
Only audio will be played back.
Camera mode - Camera mode
Only audio will be played back.
Observing the video and audio using another DM-NC40 unit (observer mode)
Observing stream is available by connecting another DM-NC40 unit to working DM-NC40.
• Camera mode accepts observing at the time of shipment. For teleconference mode, a setting change using
API is required to accept observing. ( Page 54)
Remote Monitoring system (Camera mode and Monitor mode)
Observing is available by connecting from Monitor mode to Camera mode that is connected already to another Monitor
mode.
(At this time, ENCODE display lamp: OFF, DECODE display lamp: ON, SELECT button light: OFF (operation disabled),
PinP button light: OFF (operation disabled) on the observing unit.)
* The automatic recovery feature does not work with observing unit. Please reconnect.
Teleconference system (Teleconference mode and Teleconference mode)
After observing is enabled by API, observing is available by connecting from teleconference mode to teleconference
mode that is connected already to another teleconference mode.
(At this time, ENCODE display lamp: OFF, DECODE display lamp: ON, SELECT button light: OFF (operation disabled),
PinP button light: OFF (operation disabled) on the observing unit.)
When connecting different modes
See “Caution when connecting different modes”, above.
16
Preparations
1-2 Connecting a LAN Cable
Connect the unit to a hub or a PC using a LAN cable. For the cable, select category 5 or higher.
ALARM
SERIAL 1
RS485
DIO
OUT
VIDEO
OUT
SERVICE
RS232C
VIDEO
IN 1
OPEN
When connecting to a hub:
Use a straight cable.
CONTROL
VIDEO
IN 2
LOOP
THRU
RESERVED
SERIAL 2
LOOP
THRU
100BASE-TX
When connecting to a PC:
Use a cross cable.
OPEN
Note
Please check the specifications of the LAN board
of the PC since in rare cases the use of a cross
cable may not be supported.
1-3 Inserting a CF (Compact Flash) Card
JPEG images can be saved to a CF card. Insert a CF card by following the steps shown below.
Note
Always turn off the power when inserting/removing a CF card. Inserting/removing the card with the power on may
cause damage to the recorded files of the card or the card itself.
1.
Remove the cover
2.
Insert a CF card
3.
Collapse the EJECT button
4.
Reattach the cover
If the mounting screw is difficult to turn,
use a hexagonal wrench (bolt width:
2.5mm).
Make sure the top side is facing up and
insert the card securely.
EJECT button
* For detailed setup concerning the CF card, see “CF CARD SETUP screen”, page 41.
17
Step 1 Connection/Installation (Continued)
1-4 SERIAL Ports and ALARM Port
Signal names of SERIAL ports and ALARM port located on the back of the unit are shown
below.
[SERIAL 1, 2] Serial ports 1, 2
(Dsub 9-pin, male)
[ALARM] input port for alarm and output port for control
(Dsub 15-pin, female)
When viewing from the back of unit
SERIAL 1 port
(when set to RS485)
SERIAL 1 port
(when set to RS232C)
SERIAL 2 port
Pin no.
1
2
3
4
5
6
7
8
9
Signal name
NC
RXD
TXD
NC
GND
NC
NC
NC
NC
Pin no.
1
2
3
4
5
6
7
8
9
When viewing from
the back of unit
Signal name
NC
RX –
TX –
NC
GND
NC
TX +
RX +
NC
Pin no.
1
2
3
4
5
6
7
8
9
10
11
12
13
14
15
Signal name
OUTPUT 1
OUTPUT 2
OUTPUT 3
OUTPUT 4
OUTPUT 5
OUTPUT 6
OUTPUT 7
OUTPUT 8
INPUT 1
INPUT 2
INPUT 3
INPUT 4
GND
GND
GND
For detailed setup concerning the SERIAL ports,
see “Serial Port Setup screen”, page 40)
Alarm input port
Output terminal
Alarm input port
Unit
Example of sensor
DC5V
R
Output terminal
Unit
Example of controlled device
DC5V
VCC
INPUT
1~4
OUT
R
R
OUTPUT
1~8
IN
5V
GND
GND
GND
GND
Alarm input equivalent circuit
<Input conditions>
• Signal length setting ( Trigger Duration, page 38)
• Polarity setting ( Trigger, page 38)
• Connection to 5V power, 10kΩ internally
• Current of 10mA or less for input terminal
18
<Output conditions>
• Open collector output equivalent
• Polarity setting ( OutputPin 1 ~ 8, page 39)
• External connection capacity: DC5V, 10mA
Connect the unit to AC120V outlet using the included power cord. Fix the cord using the
locking bracket.
•
•
Do not use the included cord other than for
this unit.
To completely cut-off power, remove the power
plug from the wall outlet or remove the power
cord from the AC IN terminal of the unit.
Use of a cord other than that specified or a cord that
has been damaged may result in fire or electrical
shock.
1-6 Attaching Rack Mount Brackets
The rack mount brackets (optional) can be used to install the unit to a rack. Request installation
to the dealer of purchase.
* For details concerning the rack mount brackets, please consult the person in charge of professional equipment at your nearest JVC-authorized service agent.
● In case of 1 unit
1.
CF
EN
CO
DE
PL
AY
2.
3.
DE
CO
DE
ST
OP
HO
LD
HO
LD
IN
1
SE
LE
CT
IN
2
P in
PO
WE
R
P
Remove the 4 feet on the bottom of the unit.
Use a set of long-nose pliers or a flat-head
screwdriver to pull out the feet using the protrusions on the center.
Remove the 4 screws on the sides.
Install the rack mount brackets (WT-Z11J) as
shown in the diagram. (Screws are included
with the rack mount brackets.)
● In case of 2 units
1.
CF
EN
CO
DE
PL
AY
DE
CO
DE
ST
OP
HO
LD
HO
LD
IN
1
IN
2
SE
LE
CT
PO
WE
R
P in
P
2.
CF
EN
CO
DE
PL
AY
DE
CO
DE
ST
OP
HO
LD
HO
LD
IN
1
IN
2
SE
LE
CT
PO
WE
R
P in
P
3.
4.
Remove the 4 feet on the bottom of the unit.
Use a set of long-nose pliers or a flat-head
screwdriver to pull out the feet using the protrusions on the center.
Remove the 2 screws on the bottom of each
unit.
Mount the coupling plate (DM-Z300J).
Install the rack mounting brackets (PA-U22) as
shown in the diagram. (Screws are included
with the rack mount brackets.)
19
Preparations
1-5 Connecting the Power Cord
Step 2 PC Network Setup
2-1 Setting the IP Address of the PC (For Windows XP)
When connection and installation are completed, the IP address of the PC controlling the unit
is set.
For Windows XP, perform the setting using the steps shown below. (For Windows 2000, see
page 22)
1. Click
• Right click “My Network” and select
2.
.
Select the network of the PC that will be used for Web browser operations
• Right click and select
.
Confirm that the checkbox is selected.
Memo
If “Client for Microsoft Network” and “Internet
Protocol(TCP/IP)” are not displayed, perform “Install
(N)...”.
3. Select “Internet Protocol (TCP/IP)” and click
1 Select “Internet Protocol (TCP/IP)”.
2 Click
20
.
Preparations
4.
Set the IP address
1 Select “Use the following IP address”.
2 Set “IP address”. (For use at default setting without
DHCP server, enter 10.0.0.100)
Memo
• Always take a memo of the original IP address
before making changes.
• Do not use the same IP addresses within a LAN.
3 Enter appropriate values for “Subnet mask”. If
unknown, ask to your network administrator.
(For compatibility with default settings use
255.0.0.0)
4 If there is a “Default gateway”, enter the IP
address. (For example, 10.0.0.254)
5 Click
5. Click
.
in the “Local Area Connection Properties” dialog box” screen
1 Click
.
21
Step 2 PC Network Settings (Continued)
2-2 Setting the IP Address of the PC (For Windows 2000)
When connection and installation are completed, the IP address of the PC controlling the unit
is set.
For Windows 2000, perform the setting using the steps shown below. (For Windows XP, see
page 20).
1. Click
.
• Click “Settings” → “Network and dialup connections”.
2.
Select “Local Area Connections”
• Right click and select
.
1 Click
.
3. Select “Internet Protocol (TCP/IP)” and click
.
1 Select “Internet Protocol (TCP/IP”).
2 Click
22
.
Preparations
4.
Set the IP address
1 Select “Use the following IP address”.
2 Set “IP address”. (For use at default setting
without DHCP server, enter 10.0.0.100)
3 Enter appropriate values for “Subnet mask”. If
unknown, ask to your network administrator.
4 If there is a “Default gateway”, enter the IP
address. (For example, 10.0.0.254)
5 Click
5.
Click
.
in the “Local Area Connection Properties” dialog box
1 Click
.
23
Step 3 Launching the Web Browser
Settings for the unit are performed using a Web browser. Login as an administrator to perform
settings.
3-1 About the Web Browser
About Web page images
Look and feel of Web pages may slightly differ from the printed images in this Manual depending on Web
browser or PC display settings.
If not all items within the page are displayed, resize the browser window, etc. to display all items.
Printed pages in this manual are screen copy of Internet Explorer as examples.
For Internet Explorer 6.0
When the password of the unit is changed, the user may be prompted to enter the password twice in the
password confirmation window. In this case, enter the same password twice.
For Netscape 7.0
Web page will not be refreshed even if window size of Netscape is changed. Click the “Refresh” button of
Netscape to refresh the Web page.
URL registration
For quick access to DM-NC40, registration of IP address of the unit to browser is recommended.
Selecting “Add” during accessing to DM-NC40 enables registration to “Favorites” in Internet Explorer, or
“Bookmarks” in Netscape.
24
Preparations
3-2 About Access Restriction levels
DM-NC40 has 3 access levels for protection of settings/data.
Access restriction level (: Settings permitted, : Settings not permitted, –: None)
Administrator
Operator
Level
Screen
Settings
Browsing
Settings
Browsing
STATUS
–
–
TIME SETUP
MODE SETUP
NETWORK SETUP
(*1)
ENCODE PARAMETERS
TELEPHONE BOOK
SECURITY SETUP
ALARM SETUP
OUTPUT PIN SETUP
SERIAL PORT SETUP
CF CARD SETUP
User
Settings
Browsing
–
*1) “START” and “STOP” operations of Multicast can be performed.
Factory set user names and passwords
Administrator
admin
Can be changed in the
User name
SECURITY SETUP screen
Password
dm-nc40
Can be changed in the
SECURITY SETUP screen
Operator
OPERATOR (Uppercase)
(Cannot be changed)
User
USER (Uppercase)
(Cannot be changed)
dm-nc40
Can be changed in the
SECURITY SETUP screen
None
(Cannot be changed)
Screen displayed after authentication
Displayed screen
Administrator
Operator
STATUS screen
STATUS screen
User
ENCODE PARAMETERS
screen
25
Step 3 Launching the Web Browser (Continued)
3-3 Launching the Browser
When the IP address of DM-NC40 is specified in the Web browser and login as an administrator
is performed, the initial setup (STATUS) screen is displayed.
1. Launch the Web browser
1 Enter the IP address of the unit.
(Factory setting, 10.0.0.1, is
available when there is no
DHCP server.)
2 Click “Go”.
Memo
Direct specification of the IP address may not be possible when
a proxy server is used for
Internet access. In this case, disable the proxy setting.
2.
Enter the user name and password (Login as an administrator)
1 Enter user name of administrator. Factory setting
is “admin”.
2 Enter password of administrator. Factory setting
is “dm-nc40”.
3 Click
.
To login by different access level, close previous browser and reconnect or open new browser and
connect.
3.
Network Codec screen (STATUS) is displayed
Click “Detailed Setup” to
display submenus.
26
Step 4 Initial Settings
DHCP of the unit is enabled in factory settings. When DHCP server is available in the network,
see page 30.
DHCP of the unit can be disabled using API. In this case you can change the IP address of
the unit as following.
1. Click “Detailed Setup” on the left of the Network Codec screen and then
click “Network Setup”
• The NETWORK SETUP screen is displayed.
1 Change the IP address to the
address assigned by network
administrator or per mitted
address.
2 Set the subnet mask. If unknown,
ask to network administrator.
3 Set the default gateway.
2.
Reconnect to the changed IP address using the Web browser
• When the IP address of the DM-NC40 is changed, you need reconnect with new IP address for more
settings by Web browser.
Example: When changing the IP address from 10.0.0.1 to 10.0.0.10
Enter http://10.0.0.10 in the address bar of the browser. ( See page 26)
• To connect from PC to new IP address of the unit, changing IP address and subnet mask of PC may be
required in some cases.
Example: When changing IP address of DM-NC40 from 10.0.0.1 to 192.168.0.1
and
Subnet mask from 255.0.0.0 to 255.255.255.0
You may change IP address of PC from 10.0.0.2 to 192.168.0.2
and
Subnet mask from 255.0.0.0 to 255.255.255.0
Connection can be reestablished by entering
http://192.168.0.1
in the address bar of the Web browser.
27
Preparations
4-1 Changing the IP Address of the Unit (Be sure to perform)
Step 4 Initial Settings (Continued)
4-2 Time Setup (Be sure to perform)
Set the time and date of the unit. Be sure to perform these settings since they are used as file
names of JPEG recorded to the CF card.
1. Click “Time Setup” on the left of the Network Codec screen
• The TIME SETUP screen will be displayed.
1 Select the country/region of use.
Memo
The “Second” is for display only
and cannot be entered or
changed.
2 Enter the year, month, date, hour
and minute.
Memo
When changing the Timezone,
be sure to set Date&Time Setup
with the correct values as well.
3 Press the “SET” button to
register the entered values.
4 Current time and date can be
confirmed by pressing the
“RELOAD” button.
28
Step 5 Mode Setup
Preparations
5-1 Setting in the MODE SETUP screen (Be sure to perform)
Select mode of the unit according to the system of use.
1. Click Mode Setup in the Network Codec screen
• The MODE SETUP screen is displayed.
1 Select the mode.
(Factor y setting: CAMERA
mode)
2 Click “Initialize to Preset Values”
to reset to the initial values of the
mode selected in 1.
Memo
When clicking this button, the
HOLD display lamp will turn on and
panel operations will be locked.
3 Click “Delete User Mode” to
delete the user mode.
4 Click “Save User Mode” to
register the current settings as
the user mode.
Click “Detailed Setup” to display
submenus.
Select the mode according to the system of use.
Mode
Camera
Monitor
Teleconference
ISMA Server
User Mode
System of use
Camera side of remote monitoring system ( see page 14)
Monitoring side of remote monitoring system ( see page 14)
Teleconference system ( see page 13)
Streaming system ( see page 15)
Values changed in “Step 6 Detailed Setup” are saved.
Name of the mode will be “User_Mode_Camera”, etc. It means user defined mode
changed from Camera mode.
* The following screen appears on the Browser after performing changes, and the number display of the unit
will show a circling display.
and
are displayed
Memo
• When the mode is changed, the unit will restart and all settings will return to their initial values of each mode.
• If the current mode is “User Mode”, “User Mode” can not be deleted even when clicking “Delete User
Mode”. Do not click “Delete User Mode” during “User Mode”.
• Only one “User Mode” can be saved.
Cautions concerning setting changes
• Settings can not be changed when the unit is communicating with other units. Warning page is displayed on
Web browser if you try to chang settings during communication.
• In such case, stop all communications with other units.
• To check current communications, refer to “Telnet Settings” on page 54 and execute the “stat” command.
29
Step 6 Detailed Setup
6-1 NETWORK SETUP screen
Network related settings can be made on NETWORK SETUP screen. Click Network Setup
on the left of the Network Codec screen to display the NETWORK SETUP screen.
Select the
screen
Enter
Enter
Multicast is stopped when
current mode is changed to
another.
Click
For details of network settings, ask to network administrator.
to confirm
settings
Mandatory settings (be sure to perform)
Item
Address Setup
Manual: Set the address according to the used environment.
DHCP: Address is acquired from the DHCP server.
* Changing from DHCP to Manual is possible from Web browser, but
you need to use API command to change from Manual to DHCP.
For details concerning API commands, see the Command
Table of page 54.
* During DHCP is enabled, IP Address, Subnet Mask, Default
Gateway, Domain Name and DNS Server settings cannot be
set from Web browser.
Default value
DHCP
IP Address
Set the IP address.
IP address is noted using 4 decimal numbers.
When the IP address is changed, reconnect from Web browser
using the new IP address for more settings.
10.0.0.1
Subnet Mask
Set the subnet mask.
The subset mask is noted using 4 decimal numbers.
255.0.0.0
Default Gateway
30
Content
Set the default gateway.
The default gateway is noted using 4 decimal numbers.
10.0.0.254
If you failed to set default gateway address, try again from setting
of IP address.
If there is no default gateway, enter “0.0.0.0”.
Preparations
Optional settings (set as needed)
Item
Host Name
Domain Name
DNS Server
NTP Server
NTP Refresh Interval
IP Broadcast
RTSP Server
Acceptance
Multicast
Multicast Address
Memo
Content
A name for distinguishing the unit connected to a network is set.
Allowed characters are alphanumerical characters, hyphen (-) and
period (.).
Maximum number of characters allowed is 64.
Names can be set individually for a system connected with multiple
DM-NC40 units.
Allowed characters are alphanumerical characters, hyphen (-) and
period (.).
Maximum number of characters allowed is 64.
The address of the DNS server can be set.
Set when synchronizing the time of multiple DM-NC40 units.
Set interval for referencing current time to the NTP server.
[Variable: 5min, 10min, 30min, 1h, 2h, 4h, 8h, 12h, 1 day]
Set according to the used broadcast protocol.
All 1: Normally, select this setting.
All 0 (Old Protocol): Select this setting when other devices are
supporting old broadcast protocol.
Set whether to enable the RTSP server feature.
Enabled: Enables the feature. (Connection from an RTSP client is allowed.)
Disabled: Disables the feature.
How to accept communication request from other units. This setting is
valid in teleconference mode and Monitor mode.
Auto: Accepting connection automatically.
OFF: Refusing connection.
KEY: Accepting by PLAY button on the unit.
Multicast streaming is controlled.
START: Multicast transmission is started when the button is clicked.
The START button is yellow during Multicasting.
STOP: Multicast transmission is stopped when the button is clicked.
The STOP button is yellow when Multicast stream is not transmitted.
The multicast destination IP address is set.
When the START button of Multicast is clicked, multicast stream is sent
to this IP address.
Default value
dm-nc40
network
0.0.0.0
0.0.0.0
1h (1 hour)
All 1
Enabled
KEY
STOP
225.0.1.1
• Make sure setting different IP multicast addresses to units when multiple multicast streams are used. Select the address
from “225.0.1.1” to “225.127.255.254”.
• To send multicast stream, default gateway setting is required even if there is no default gateway. In this case, set an IP
address that is not used in the network as default gateway address.
Multicast Port for
Sending
For Audio
For Video
Unicast Port for
Recieving
For Audio
For Video
API Port
Pass Through Port
for Serial 1
Pass Through Port
for Serial 2
The multicast destination port number is set.
When the START button of Multicast is clicked, multicast stream is sent
to this port number. Only even port numbers are allowed.
Set the port number for audio. (Setting range: 2 ~ 65534)
Set the port number for video. (Setting range: 2 ~ 65534)
The destination port number of unicast stream to receive by this unit is
displayed.
The port number for audio is displayed.
The port number for video is displayed.
The port number for API control of DM-NC40 is displayed.
The port number used by the pass-through feature of SERIAL 1 port is
displayed.
The port number used by the pass-through feature of SERIAL 2 port is
displayed.
50000
50002
49200
49300
23
49152
49153
31
Step 6 Detailed Setup (Continued)
6-2 ENCODE PARAMETERS screen
Encoding related settings can be performed on the ENCODE PARAMETERS screen. Click
Encode Parameters on the left of the Network Codec screen to display the ENCODE
PARAMETERS screen.
Current setting of bitrate
is displayed.
1 The bitrate is selected by
directly clicking the select
bar.
2 Fine adjustments are
made using the
and
buttons.
Select the
screen
Bitrate being changed by
adjust buttons or clicking
is displayed.
Setting is selected from
the pull-down menu.
Setting is selected from
the pull-down menu.
Click
settings.
to confirm
Memo
• For teleconference system or remote monitoring system, all units need to have same settings of Video Frame
Rate and Video Frame Size.
• The bitrate is average value when inputting standard video. Real bitrate can be higher/lower than the set value
depending on the input video.
Item
Video Frame Rate
Video Frame Size
JPEG Size
Compression Format
Content
The video frame rate is set.
[Variable: High, Mid, Low]
The video frame size is set.
[Variable: 352240, 320240, 176120, 160120]
The JPEG frame size is set.
[Variable: 704480, 640480]
The compression format is set.
[Variable: ISMA(SP), ISMA(ASP), MPEG-4+G.726]
Default value
High
352240
704480
Memo
ISMA (SP) and ISMA (ASP) are available only in the ISAM
Server mode.
SP: Simple Profile, ASP: Advanced Simple Profile of MPEG4 visual
JPEG
Selects the input signal for recording to the CF card when there
is input of an alarm signal or when the CF button is pressed.
[Variable: Video In 1, Video In 2, Disabled]
Setting is available only in the Camera mode.
Disabled
• When the encode parameters are changed during communication with other DM-NC40, the playback can freeze for a while. This is a characteristic of this unit and is not a malfunction.
• When the encode parameters are changed during streaming in the ISMA Server mode, playback on
ISMA compliant player can be damaged, and restart of the player may be required.
32
• When the Video Frame Rate is set to High (H), Mid (M) or Low (L), the value of frame rate will be as follows,
depending on the selected bitrate.
Camera mode, Monitor mode, Teleconference mode
Bitrate (kbps)
54
64
76
91
108
128
160
192
224
256
288
320
352
384
424
460
512
640
768
Actual frame rate
H
3
3
3
6
6
6
6
15
15
15
15
15
15
15
30
30
30
30
30
30
30
30
30
30
(fps)
M
2
2
2
5
5
5
5
10
10
10
10
10
10
10
15
15
15
15
15
15
15
15
15
15
L
1
1
1
3
3
3
3
6
6
6
6
6
6
6
10
10
10
10
10
10
10
10
10
10
audio rate (bps)
16k
Display bar color
Blue
1000 1200 1500 1700 2000
32k
Green
Yellow
Red
ISMA Server mode
Bitrate (kbps)
54
64
76
91
108
128
160
192
224
256
288
320
352
384
424
460
512
640
768
Actual frame rate
H
–
–
–
–
–
–
–
–
–
6
6
10
10
15
15
15
15
30
30
30
30
30
30
30
(fps)
M
–
–
–
–
–
–
–
–
–
5
5
6
6
10
10
10
10
15
15
15
15
15
15
15
L
–
–
–
–
–
–
–
–
–
3
3
5
5
6
6
6
6
10
10
10
10
10
10
10
audio rate (bps)
–
1000 1200 1500 1700 2000
96k
128k
(–: Cannot be set)
Memo
• When in the Teleconference mode or Monitor mode, set Bitrates for all DM-NC40 units so that they have same
color on the bitrate select bar.
• When setting a high bit rate, the video may not play back smoothly depending on the input video. However, this
•
is not a malfunction of the unit. If keeping frame rate is more important than picture quality, lower the bitrate.
When bitrate and frame rate settings are low, interval of video frames becomes long and delay time looks to be
long.
When complicated video source is inputted, video delay become ling for while.
• The audio rate will be as shown below.
When the audio format is AAC-LC
Bitrate
Larger than 512kbps
512kbps or less
Audio bitrate (kbps)
128 (Max)
96 (Max)
When the audio format is G.726
Bitrate
Larger than 160kbps
160kbps or less
Audio bitrate (kbps)
32 (Constant Bitrate)
16 (Constant Bitrate)
Cautions when changing settings
• To check current communication, refer to “Telnet Settings” on page 53 and execute the “stat” command.
• Do not change settings during CF recording. Malfunction may occur as a result.
• Set values in this page are default values. Working ENCODER PARAMETERS can be changed by request from
other units. Working values are displayed in this page during communication, and default values are displayed
during stop. If same settings are used to each units, such confusion can be avoided. Same settings are recommended to avoid problems during automatic recovery after power on.
33
Preparations
About Frame Rate
Step 6 Detailed Setup (Continued)
6-3 TELEPHONE BOOK screen
Registration of destination address can be performed on the TELEPHONE BOOK screen. Click
Telephone Book on the left the Network Codec screen to display the TELEPHONE BOOK screen.
Registered IP addresses
are listed.
Select the
screen
Enter
Click “Add to Book” to
register entered values.
To delete the registered number, enter “Edit No.” and
click “Del from Book”.
Item
Edit No.
IP Address
Host Name
Port Number
Encode
Parameter
Content
Default value
3 digit registration number to the telephone book. [Required]
Blank
(Setting value: 000 ~ 999)
Enter the IP address to register. [Required]
Blank
Enter the host name to register. (Up to 64 characters) [Required]
Blank
Set the port number for connecting to registered IP address. [Optional]
----API: Set the destination port number for API to connect to registered IP
address.
Audio: Set the destination port number for sending audio.
Video: Set the destination port number for sending video.
These port numbers may be required by a network using NAT or NAPT.
Normally, use the default values of “-----”.
Set the bitrate and frame rate for encoding. [Optional]
----Bitrate: The bitrate to be used by own and by the destination is set.
Frame rate: The frame rate to be used by own and the destination is set.
* These bitrate and frame rate are invalid in the observing mode.
Memo
• If the setting is “-----”, values in the Network Setup settings and Encode Parameters settings are used.
• There are restrictions for connection between different modes as shown on page 16.
• As shown on page 37, automatic connection triggered by alarm is available. When monitor mode receives
request of automatic connection, it uses registered parameters in telephone book for connection. If telephone
book has multiple settings for same IP address, smallest Edit No. item is valid.
By registering a multicast address to the telephone book, multicast receiving can be started by panel operation.
When multicast address is registered to the telephone book, Port Number and Encode Parameter settings are invalid.
For multicast sending/receiveing:
Camera side:
Click the “START” button of Multicast in the NETWORK SETUP screen of the camera side unit.
Monitor side:
To receive the multicast packets from camera side, destination port number of the multicast need to be set
in “Multicast Port for Sending” in NETWORK SETUP screen.
34
Security related setting can be performed on the SECURITY SETUP screen. Click Security
Setup on the left of the Network Codec screen to display the SECURITY SETUP screen.
Select the
screen
Click “Change” to display
the Change Setting
screen.
Change Setting Screen
Enter the current user
name.
Enter the current
password.
Enter the new user name.
Enter the new password.
Enter the new password
again.
35
Preparations
6-4
SECURITY SETUP
screen
6-4Å@SECURITY
SETUPâÊñ
Step 6 Detailed Setup (Continued)
6-4 SECURITY SETUP screen (Continued)
Item
Content
Password
For telnet
The password required for Telnet via network, or Terminal nc40api
software via serial port can be changed.
(Fixed)
dm-nc40
Web Browser:
Administrator
Account information (user name and password) of
Administrator for access using the Web browser can
be changed.
admin
dm-nc40
Web Browser:
Operator
Password of Operator for access using the Web
browser can be changed.
OPERATOR
dm-nc40
(Fixed)
JPEG Server
Account information (user name and password) to get
JPEG files via Web browser can be changed.
nc40jpeg
dm-nc40
Pass Through
The pass-through account information
(user name and password) can be changed.
nc40serial
dm-nc40
Characters allowed for user name and password
Numbers, alphabets, underscore (_), hyphen (-), period (.)
Number of characters allowed for user name and password
Telnet API only
User name: Minimum of 3 characters and a maximum of 64 characters
Password: Minimum of 3 characters and a maximum of 16 characters
Other items
User name: Minimum of 1 character and a maximum of 64 characters
Password: Minimum of 1 character and a maximum of 16 characters
36
Default values
User name
Alarm input related settings can be performed on the ALARM SETUP screen. Click Alarm
Setup on the left the Network Codec screen to display the ALARM SETUP screen.
Select from the pull-down menu
Select one
Select from the pull-down menu.
Select the
screen
Enter
Enter destination IP address and
parameters for forwarding alarm
Select from the pull-down menu
Click
settings.
to confirm
37
Preparations
6-5 ALARM SETUP screen
Step 6 Detailed Setup (Continued)
6-5 ALARM SETUP screen (Continued)
Item
Input Pin
* Following settings are to
be performed for each pin.
Content
Select the pin no. of the alarm port to set.
[Variable: 1~4]
Default value
1
Trigger
Select the polarity of the alarm input signal.
Input signal is invalid when setting to Disable.
[Variable: Low, High, Disabled]
Disabled
Trigger Duration
Set the length of input signal to assume as an alarm.
[Variable: 50ms, 100ms, 200ms, 300ms, 400ms, 500ms]
100ms
Recording Duration
CF recording duration triggered by alarm is set. Duration
before the alarm and duration after the alarm are set.
The maximum time for CF recording triggered by one alarm
is 30 seconds. (Set so that the total time of Before Trigger
and After Trigger is 30 seconds or less.)
0 cannot be set for both Before Trigger and After Trigger.
* For CF recording, set JPEG in the ENCODE PARAMETERS
screen to “Video In 1” or “Video In 2”. (See page 32)
* Recording will be made before and after for about 1 second even when setting to 0s.
Before Trigger
Set the length of time of CF recording before alarm input.
[Variable: 0s, 5s, 10s, 15s, 20s] (Unit: sec)
10s
After Trigger
Set the length of time of CF recording after alarm input.
[Variable: 0s, 5s, 10s, 15s, 20s] (Unit: sec)
20s
Input characters must be alphanumerical characters
with a maximum of 64 characters.
dm-nc40
Item
IP Address
Content
Set the address to send the alarm information.
Up to 2 destination addresses can be specified.
Default value
Blank
Port
Set the port number to send the alarm information.
The maximum value is 65535.
10000
Data
Set the sending data. Up to 64 characters can be entered.
data
Protocol
Set the transmission protocol:
TCP: Alarm information is sent by TCP.
Character string entered in Data will be sent to the
set port no.
Some custom application software may be required
to receive the alarm information by TCP.
API: Select when sending the alarm information to
monitor side DM-NC40 for automatic connection.
Port is set to “-----” (default) and Data is set to
“Disable”.
TCP
Comment
Send To
* When clicking
38
with Comment and Data left blank, an underscore (_) will be inserted automatically.
The polarity of output pins can be set on the OUTPUT PIN SETUP screen. Click Output Pin
Setup on the left of the Network Codec screen to display the OUTPUT PIN SETUP screen.
Select one for each item
Select the
screen
Click
settings.
Item
Output Pin 1 ~ 8
Content
Set high or low to output pins in the alarm port.
High: Outputs high level
Low: Outputs low level
(Outputs are TTL level.)
to confirm
Default value
High
* These output pins are not alarm output of the unit.
These output pins are available to control external devices.
39
Preparations
6-6 OUTPUT PIN SETUP screen
Step 6 Detailed Setup (Continued)
6-7 SERIAL PORT SETUP screen
Serial I/O port related settings can be performed on the SERIAL PORT SETUP screen. Click
Serial Port Setup on the left of the Network Code screen to display the SERIAL PORT SETUP
screen.
Select from the pull-down menu
Select one for each item
Enter
Select from the pull-down menu
Select one
Select the
screen
Default values are same for both Serial 1 and Serial 2 ports.
Item
Baudrate
Data Length
Parity
Stop Bit
Comment
Timeout (sec)
40
Content
Select communication rate.
[Variable: 4800bps, 9600bps, 19200bps, 38400bps]
Select the data length from 8-bits and 7-bits.
[Variable: 8, 7]
Select parity bit
[Variable: Even, Odd, None]
Select stop bit length.
[Variable: 1, 2]
This can be used as a memo when viewing this screen
with a Web browser. Entry is optional. (64 characters or
less)
Set the timeout value when there is no communication.
Number up to 8 digits can be entered.
Timeout is disabled when 0 is entered.
Default value
19200bps
8
None
1
dm-nc40
0
CF card recording related settings can be performed on the CF CARD SETUP screen. Clicking
CF Card Setup on the left of the Network Codec screen to display the CF CARD SETUP screen.
(For details concerning CF cards, see “Compatible CF Cards”, page 6)
Select one
[Format]
Displayed
Select one
[Del Files]
Memo
Select the
screen
Operations will not be
accepted while formatting or deleting files.
Select one for
each item
Item
No. of files recorded on CF
card
Content
Default value
Format
Select the file system to format CF card.
See “Operating the CF Card”, page 49)
CF File System
Select the file system of the CF card.
See “Operating the CF Card”, page 49)
FAT32
Ext2
Maximum CF Card
Recording Capacity
Displays the currently available size (unit: M bytes) for
recording and the total size of the inserted CF card.
However, the entire capacity may not be used for recording
due to system restrictions concerning the number of recorded
images allowed. ( See page 56)
Log Record
Sets whether to leave log information (operation history
for servicing) in the CF card.
ON: Leaves log information
OFF: Does not leave log information
OFF
CF Card Over Writing
Alarm 1~4,
Manual
Sets whether to overwrite old image files recorded by previous alarm or button operation.
Enabled: Overwrites old image files (old files will be deleted)
Disabled: Does not overwrite old image files (old files will
not be deleted)
See “About the Alarm”, page 56
Disabled
Number of files
Displays the number of files recorded for each alarm.
Del Files
Image files will be deleted for each alarm.
See “Operating the CF Card”, page 49
FAT32
41
Preparations
6-8 CF CARD SETUP Screen
Operating the Teleconference System
In the Teleconference mode, both videos of teleconference can be displayed on a single
2 by PinP.
monitor
Connected party
CF
Number display
ENCODE
DECODE
HOLD
IN 1
PLAY
STOP
HOLD
SELECT
4.7.
IN 2
User
POWER
P inP
Network
6. 1.
<Connected party> Teleconference mode
1.
Set the power to ON.
(Off)
The number display circles, IP address is displayed as shown
on page 48, and then turns off when ready.
CF
Number display
2.
ENCODE
DECODE
HOLD
IN 1
PLAY
STOP
HOLD
SELECT
3.7.
IN 2
POWER
P inP
6. 1.
<User> Teleconference mode
1.
Set the power to ON.
(Off)
The number display circles, IP address is displayed as shown
on page 48, and then turns off when ready.
2.
Enter the number of the party to connect
(number registered in Edit No. of
TELEPHONE BOOK screen).
• Use 왗 and 왘 to select the digit to
input.
• Use 왔 and 왖 to increment/decrement the number of the selected
digit (0~9).
Memo
• Pressing 왗 or 왘 first will display the number of
the previous connection.
3.
Press the PLAY button.
The entered number will flash.
4.
The sent number will flash.
Press the PLAY button.
(Connection will not be established unless
this button is pressed.)
The sent number will flash.
For automatic connection without pressing the PLAY
button, set Acceptance in the NETWORK SETUP
screen to Auto.
“HHH” will be displayed if the party is not registered in TELEPHONE BOOK.
42
When connection is established:
5.
The display will change to a constant
display and the video of the connect
party will be displayed.
The display will change to a constant
display and the video of the connect
party will be displayed.
6.
Press the PinP button
6.
The videos of the user and the
connected party will be
displayed.
7.
Press the STOP button
Connection will be disconnected and
the number display and video display
will be cleared.
When connection is established:
Press the PinP button
The videos of the user and the
connected party will be
displayed.
7.
Press the STOP button
Connection will be disconnected and
the number display and video display will be cleared.
43
Operations
5.
Operating the Monitor System
For use as a Monitor system, the DM-NC40 connected to the camera side is set to the
Camera
side
Camera
mode and
the DM-NC40 on the monitoring side is set to the Monitor mode.
Camera side
CF
ENCODE
DECODE
HOLD
IN 1
PLAY
STOP
HOLD
SELECT
IN 2
Monitoring side
POWER
Network
P inP
1.
Number display
CF
Number display
2.
ENCODE
DECODE
HOLD
IN 1
PLAY
STOP
HOLD
SELECT
3.
IN 2
POWER
P inP
1.
<Camera side> Camera mode
<Monitoring side> Monitor mode
1.
1.
Set the power to ON.
(Off)
The number display circles, IP address is displayed as shown
on page 48, and then turns off when ready.
Set the power to ON.
(Off)
The number display circles, IP address is displayed as shown
on page 48, and then turns off when ready.
2.
Enter the camera-side number
• Use 왗 and 왘 to select the digit to input.
• Use 왔 and 왖 to increment/decrement
the number of the selected digit (0 ~9).
Memo
• Pressing 왗 or 왘 first will display the number of
the previous connection.
3. Press the PLAY button.
The sent number will flash.
4.
When connection is established:
The entered number will flash.
4.
When connection is established:
5.
Press the PinP button
The display will change to a
constant display.
5.
Press the PinP button
Video IN 1 and 2 videos will be
displayed simultaneously.
44
• The display will change to a constant
display and the video of the camera
selected using the SELECT button is
displayed.
• Pressing the SELECT button each time
switches the video between VIDEO IN
1 and VIDEO IN 2.
Video IN 1 and 2 videos will be
displayed simultaneously.
Press the VIDEO SELECT button
6.
VIDEO IN 1 and VIDEO 2 videos will switch every
time the button is pressed.
7.
Press the STOP button
Press the VIDEO SELECT button
VIDEO IN 1 and VIDEO 2 videos will switch every
time the button is pressed.
7.
Operations
6.
Press the STOP button
Connection will be disconnected and the number displayed will be cleared.
Connection will be disconnected and the number displayed will be cleared.
■ Multicast send/receive signals ( See page 34)
<Camera side>
1.
<Monitoring side>
Press the “START” button in Multicast of the
NETWORK SETUP screen.
2.
Enter the number that is registered for
multicast.
3.
3.
The ENCODE lamp and DECODE lamp will light.
Press the PLAY button.
The entered number and the DECODE lamp will
light.
Memo
When unicast communication is stopped in camera side, the number display on the camera side is
off even if the unit is sending multicast stream and
some monitor side is receiving it.
When configuring remote monitoring system, set same frame rate to camera mode unit and monitor mode unit. Set bitrates
within same color on the select bar to all units.
Settings are performed in the ENCODE PARAMETERS screen for both camera mode unit and monitor mode unit (page 32).
Monitor mode can set encode parameters for each destination camera side unit in the TELEPHONE BOOK screen.(page 34)
When settings in camera side and monitor side are different, connection may take for a few seconds because settings are
changed during connection. JPEG recording will also be unavailable during this time.
Same settings are recommended for units used for automatic alarm connection. (page 38).
45
Operating the Monitoring System (Continued)
H
Av Pk L
H
ALC LEVEL
Av Pk L
ALC LEVEL
Web browser can get and display JPEG images from camera mode.
ALARM
SERIAL 1
RS485
IN
AUDIO
OUT
VIDEO
OUT
SERIAL 2
SERVICE
RS232C
VIDEO
IN 1
CONTROL
VIDEO
IN 2
AC IN
L
LOOP
THRU
LOOP
THRU
100BASE-TX
R
RESERVED
OPEN
OPEN
Amplifire
Network
Refreshing images
• Up to 3 JPEG images from the unit can be displayed per second.
• To refresh an image, press the Refresh button on the browser.
Specifying URL
Specify JPEG URL of the unit as follows:
http://IP address : port number/live.jpg
Example: http://10.0.0.1:8009/live.jpg
This value is fixed.
Value set in the “Network Setup Screen”.
(Default user name is “nc40jpeg” and default password is “dm-nc40”. The password can be changed.)
Enabling JPEG server of the unit
To enable JPEG server of the unit, set JPEG in the ENCODE PARAMETERS screen to “Video In 1” or “Video
In 2”. When “Disabled” is selected, Web browser can not get JPEG images from the unit.
( See page 32)
46
Operating the ISMA Server System
To play the stream from ISMA Server mode, ISMA-complaint player is required.
2 are 2 types of streaming: unicast that-is available only for one client, and multicast that
There
is available
for multiple clients. Operation of player differs depending on the streaming type.
1Å@ÉpÉ\ÉRÉìÇÃIPÉAÉhÉå
Server side
ENCODE
DECODE
HOLD
IN 1
PLAY
STOP
HOLD
SELECT
IN 2
Operations
CF
Player side
POWER
P inP
Network
Number display
Perform the following steps on PC.
For unicast
For multicast
1.
1.
Set the IP address of the PC for connection
with DM-NC40.
Set the IP address of the PC for connection
with DM-NC40.
See “Setting the IP Address”, pages 20 and 22
See “Setting the IP Address”, pages 20 and 22.
Memo
Make sure the same IP addresses have not been
set within the same network.
2.
Launch the ISMA-compliant player.
3.
Select “Open URL”
Launch the Web browser
In Network Setup of the unit ( page 30), set the
Multicast stream start button to “ON”.
The multicast stream is transmitted from the DMNC40.
Enter:
“rtsp://*.*.*.*/Iive.mp4”
(*.*.*.* is the IP address of DM-NC40)
4.
2.
To stop, close the player by clicking on the
top right of the window.
Memo
When transmitting multicast streams from multiple
DM-NC40 units, make sure the same multicast IP
addresses or port numbers are not used.
3.
Receive multicast streams with an ISMAcompliant player
For receiving multicast stream, contact the nearest
JVC-authorized service agent.
Memo
•
UP to 5 players can be connected simultaneously for unicast. (Number of players will be
counted as 2 even if connections from 2 players are from the same PC.)
Memo
Number display during transmission
Number of unicast clients(0-5)
0: Multicast transmission not in progress
1: Multicast transmission in progress
47
DHCP Operation and IP Address Display during Startup
DHCP Operation
DM-NC40 supports DHCP.
If there is DHCP server in same LAN, network settings, i.e. IP address, subnet mask, default
gateway, are provided from the DHCP server to the unit after power on or rebooting.
After turning on the power or rebooting, the unit displays IP address. If there is DSCP server
in same LAN, provided IP address from the DHCP server will be displayed on the front of the
unit.
If there is no DHCP server, IP address “10 0 0 1” is displayed after about 2 minutes and the
IP address and subnet mask are set to the default values of 10.0.0.1 and 255.0.0.0,
respectively.
If the IP address could not be acquired:
After about 2 minutes
Initialization operation
When DHCP server is not available, network settings by manual may be required. Use Web
browser (see page 30) or API commands described in page 54 to change the setting to
“Manual”.
* Changing from DHCP to Manual is possible from Web browser, but you need to use API
command to change from Manual to DHCP.
* During DHCP is enabled, IP Address, Subnet Mask, Default Gateway, Domain Name and
DNS Server settings cannot be set from Web browser.
IP Address Display
The IP address is displayed after the power of DM-NC40 is turned on.
When the power is turned on, the unit performs initialization and current IP address is displayed
twice on the connection number display of the unit.
Display example when the IP address is 10. 0. 0. 1:
Initialization operation
To disable the displaying IP address, see the API commands described in page 54 to turn the
display setting off.
48
Operating the CF card
JPEG files can be recorded to the CF card. Formatting CF card and deleting JPEG files are
available from Web browser. Seeing JPEG files is available from PC.
Format
–
–
See
–
Delete
Operations
CF CARD SETUP screen
Card reader
Via FTP
: Allowed, – : Not allowed
Operating in the CF CARD SETUP screen
In the CF CARD SETUP screen, the CF card can be formatted and image files can be deleted.
Login as an administrator to perform settings. ( See “3-3 Launching the Browser”, page 26)
Format
When clicking “Format”, formatting of the CF
card will start.
When “Log Record” is enabled, log data is
stored in the CF card.
Delete
When clicking “Del Files”, selected image files
are deleted.
* Do no delete CF files during connection.
Number of files for each alarm (total number
in jpeg-1 and jpeg-2 directories) is displayed.
(For jpeg-1- and jpeg-2, see page 50)
• FAT32 or Ext2 can be selected as file system for formatting CF card. Ext2 is recommended because of robustness.
However, the Ext2 format cannot be read by Windows. When using a CF card reader with Windows, format the CF
card using the FAT32.
• When deleting, all files in the jpeg-1 and jpeg-2 directories of each Alarm directory will be deleted.
• The unit does not support hot-swap of CF card. Turn off the power when inserting/removing a CF card.
49
Operating the CF card (Continued)
Operating with CF Card Reader
With the CF card reader, you can read image files recorded in a CF card. Remove the CF
card from DM-NC40 and set it to the CF card reader.
Caution: Windows cannot read CF cards formatted to Ext2. Please format the CF card to FAT32.
Image files are recorded in CF cards as follows. You can open the files using standard software
on Windows. You can also move, copy, or delete files with standard Windows software.
Alarm-recorded image folders (“alarm 1 ~ 4”
are image folders recorded by alarm 1 ~ 4.
“manual” is image folder recorded using panel
operation of the unit.)
Each image folder contains 2 folders:
Jpeg-1: Image folder of VIDEO IN1
Jpeg-2: Image folder of VIDEO IN2
Each image is saved using the file name shown below in jpeg-1 or jpeg-2 folders.
YYMMDDHHmmss**.jpg
YY: last 2 digits of year, MM: month (01 ~ 12), DD: date (01 ~ 31), HH: hour (00 ~ 23), mm: minute (00 ~ 59), ss:
second (00 ~ 59), **: running number within the second value (00, 01, 02)
However, running numbers at the second of the start are 70, 71 and 72 to show the beginning. Running numbers at
the second of the end are 80-, 81 and 82 to show the last. Running numbers at the second of alarm input or manual
start are 90, 91 and 92 to show the timing.
Example: Recorded files at 12:34:56 on April 1, 2003.
File names will be:
03040112345600.jpg
03040112345601.jpg
03040112345602.jpg
If there is another alarm during previous recording, 3
files with running numbers 90 ~ 92 are recorded to show
the alarm timing.
(Example) 03040112345690.jpg
03040112345691.jpg
03040112345692.jpg
Important
• File name shows the time when the file was recorded. (Timestamp of file properties may differ from the actual time
of recording.)
View
Double click the file to open and view it.
Delete
Select the file, right click, and select “delete”.
50
Operating of FTP
1.
From the command prompt of PC, type “ftp” to login. Default settings of
DM-NC40, 10.0.0.1 as IP address, OPERATOR as user, and dm-nc40 as
password, are used in following steps.
1 Enter “10.0.0.1” (IP address of the unit) after
“ftp” and press the Enter key.
2 Enter “OPERATOR” for User and press the
Enter key.
3 Enter “dm-nc40” for Password and press
the Enter key. (Password will not be
displayed)
2.
Type “ls” to list image files or directories
4 Enter “ls” and press the Enter key.
5 Directories at root directory are shown.
(“manual” is directory including image files
recorded by panel operation)
Each directory contains 2 directories.
Jpeg-1: Image file directory of VIDEO IN1
Jpeg-2: Image file directory of VIDEO IN2
Each image file is saved using the file name shown below in jpeg-1 or jpeg-2 directories.
YYMMDDHHmmss**.jpg
YY: last 2 digits of year, MM: month (01 ~ 12), DD: date (1 ~ 31), HH: hour (00 ~ 23), mm: minute (00 ~ 59), ss:
second (00 ~ 59), **: running number within the second value (00, 01, 02)
However, running numbers at the second of the start are 70, 71 and 72 to show the beginning. Running numbers at
the second of the end are 80-, 81 and 82 to show the last. Running numbers at the second of alarm input or manual
start are 90, 91 and 92 to show the timing.
Example: Recorded files at 12:34:56 on April 1, 2003
File names will be:
03040112345600.jpg
03040112345601.jpg
03040112345602.jpg
:
If there is another alarm during previous recording, 3
files with running numbers 90 ~ 92 are recorded to show
the alarm timing.
(Example) 03040112345690.jpg
03040112345691.jpg
03040112345692.jpg
51
Operations
Image files can be transferred from CF card in DM-NC40 to PC by FTP. Use FTP client installed PC.
Operating the CF Card (Continued)
3.
Use “cd” command to change directory, and type “ls” to list files in the
directory.
1 Type “cd” + path of directory to move to the
directory.
(Here, jpeg-1 directory of alarm1 is selected.)
2 Enter “ls” and press the Enter key.
3 File names in current directory are displayed.
4.
Use “get” command to copy files from CF card to PC.
1 Enter “get” + file name of image and press the
Enter key.
2 Transfer file to the C drive as pict1.jpg
3 When “Transfer complete” is displayed, the
transfer is completed.
Check
View the transferred file using JPEG compatible viewer.
5.
Use “del” command to delete files
1 Enter “del” + file name to delete and press the
Enter key.
2 When “DEL command successful” is
displayed, the deletion is completed.
52
Settings Using the Terminal Software of a PC
Connection
During the power of the unit is off, connect the SERIAL 2 port of the unit to the COM port of
the PC with cross cable.
Set the Protocol select switch of Serial Port 2 to SERVICE.
Memo
Operations
Some PC may restart the unit when PC is turned on with the unit connected to PC via serial port.
Start terminal software on the PC.
Launch the terminal software using the PC.
For Windows XP:
[Start] ➜ [Accessories] ➜ [Communication] ➜ [Hyper Terminal]
Set the terminal software as follows:
Baud rate: 115200bps
Data length: 8 bits
Parity: None
Stop bit: 1 bit
Flow control: None
Launch screen
When the DM-NC40 is running, the prompt will appear in the terminal software when the
Enter key is pressed.
(Terminal software cannot work during Telnet is connected to the unit. Please terminate telnet
before using terminal software.)
When “dm-nc40 login:” appears on the screen, enter “nc40api” as the login name and “dmnc40”
as the password and then press the Enter key.
Enter commands while in this state.
53
Settings Using the Terminal Software of a PC (Continued)
Command Table (none of the commands require arguments)
Command name
stat
set mode
set mode Camera
set mode Monitor
set mode Teleconference
set mode ISMA_Server
set mode User_Mode_xxx
set aec
set aec on
set aec off
set tcp
set tcp on
set tcp off
.set brmon start
.set brmon stop
set mode default
reboot
ctrl+c or exit
071:GET IPDISPLAY
071:SET IPDISPLAY ON
071:SET IPDISPLAY OFF
370: GET DHCPCLIENT
371: SET DHCPCLIENT ON
371:SET DHCPCLIENT OFF
Operation
Network information, encoder information and connection information are displayed.
Available modes to select are displayed.
Camera mode is set.
Monitor mode is set.
Teleconference mode is set.
ISMA Server mode is set.
User more is set. * xxx is the mode name saved by the user.
Example: set mode User_Mode_Camera
(This command is invalid when user mode is not saved.)
Displays on/off of the echo canceller.
Default setting differs depending on the mode.
Teleconference mode: on
Monitor mode: off
Camera mode: off
ISMA Server mode: off (AEC is unavailable)
* Set to off when audio is not used. Disabling echo canceller improves video quality.
* Set to on when the echo canceller is necessary for audio communication.
Enables the echo canceller.
Disables the echo canceller.
Displays whether the transporting of audio and video stream is UDP or TCP.
Default setting is UDP. When setting to TCP, smoother audio and video playback in a
network with low reliability may be achieved.
* In the case of TCP mode, used ports are audio: 49298 and video: 49398. Port settings
in NETWORK SETUP screen are not used. In the UDP mode, used ports are audio:
49200 and video: 49300.
* In the case of RTCP, transmission will be done in UDP even when in TCP mode. When
TCP is selected, used ports for RTCP are audio: 49299 and video: 49399.
* Multicast is UDP protocol. Multicast does not turn to TCP.
Switches to TCP mode.
Switches to UDP mode.
Displays the output bitrate.
(Not available in the ISMA Server and Monitor modes)
Disables the output bitrate display.
(Not available in the ISMA Server and Monitor modes)
Initialize settings of current mode to the factory settings. * Invalid for user mode.
Restarts the unit
Quit the access by terminal software
Shows current setting of IP address display at start
Enables IP address display at start
Disables IP address display at start
Show status of DHCP
Sets to DHCP mode (enabling of this command requires the DM-NC40 to be rebooted
or the power to be turned off and turned back on.)
Set to Manual mode (enabling of this command requires the DM-NC40 to be rebooted
or the power to be turned off and turned back on.)
For details concerning other commands, contact the nearest JVC-authorized service agent.
54
Connection
Connect the unit and PC using a network.
Ping command is available to test connection via network.
<Checking method>
Example: If the IP address of the unit is 10.0.0.1 (factory set IP address)
1.
Start command prompt on the PC.
2.
Type “ping 10.0.0.1”.
3.
If setting and connection are correct, responses such as shown below will be displayed.
“Reply from 10.0.0.1: bytes: 32 time tieme<10ms TTL=64”
If there is some problem, the following timeout error will be displayed.
“Request timed out.”
Launching Telnet
Start telnet on PC
Example: When the IP address of the unit is 10.0.0.1 (factory set IP address)
1.
Start command prompt.
2.
Type “telnet 10.0.0.1”.
3.
Enter “nc40api” as the user name and “dm-nc40” as the password.
Memo
• When displayed lines in the telnet window are not enough, increase the buffer size in the settings of the Telnet
software.
Commands
Commands are the same for the terminal software. ( i See page 54)
Memo
• When restarting from Telnet, the Telnet connection will be disconnected.
• To continue operation from Telnet, perform the connection procedure again after the unit reboot.
Exiting Tenet
Enter “exit”.
Memo
• If Telnet cannot be exited properly due to network or PC problems, reconnection of Tenet will fail since the unit
keeps previous Telnet connection. Reconnection will be possible in 10 minutes by timeout of previous telnet
connection.
Telnet can be disconnected by rebooting the unit.
55
Operations
Settings by Telnet of the PC
About the Alarm
In camera mode, image files are recorded to CF card when the CF button is pressed or alarm
is inputted to the ALARM INPUT port.
(To see the image, see “Operating the CF Card”, page 49)
Settings
● Select input video
Select input video for JPEG in the ENCODE PARAMETERS screen. “Video In 1” or “Video In 2”.
● Alarm input settings
Polarities of ALARM INPUT 1 -4 (pin 9 - 12th in Dsub for alarm), recording time, etc. are set in the ALARM SETUP
screen.
● CF card settings
Settings concerning the CF card are made in the CF CARD SETUP screen.
Operations
● Approximate maximum number of images and recording time for each alarm
CF card size
512M
256M
128M
Number of images
1440
720
350
Recording time
480 second
240 second
115 second
* JPEG frame rate will be between 1 ~ 3 fps
depending on the input video.
Memo
• A new alarm within one second from the previous alarm is ignored in camera side.
● Operation of multiple alarm inputs (AL1: first alarm, AL2: second alarm)
The operation when there are multiple alarms in the same alarm input will differ depending on whether CF
Card Over Write is set to Disabled or Enable.
Disabled
Enable
: Image files are recorded until the CF card is full. Even when the card is full, old files are not deleted.
: Image files are recorded, and when the card becomes full, old files are overwritten by new image files.
• When there are continuous alarms from the Alarm port
When the interval is longer than Before/After time
When the interval is short
AL1
AL1
AL2
AL2
Recording
Recording
Before set time
After set time
Before set time After set time
• When the CF button is continuously pressed
When the CF button is pressed once
(Automatically stopped after the set time)
Before recording time is
10 seconds (fixed)
56
After set time for AL2
Before set time
When the interval is short
Press the CF button
Press the CF button
Recording
After set time for AL1
Press the CF button
Recording
After recording time is
20 seconds (fixed)
Before recording time is 10
seconds (fixed)
Stopped by the second press
About the Alarm (Continued)
When alarm settings are set to send alarm information to DM-NC40 with API, the monitor mode DM-NC40 that
receives the notification works as follows: (For details on settings, see page 37)
1. If the source unit is registered in the telephone book, the number of source unit flashes on the number
display of the monitor unit.
2. If the monitor is connected to another unit, the connection is disconnected when the PLAY button is
pressed, and new connection to the source unit is made.
3. When monitor unit receives multiple alarms from many source units, and if STOP button is pressed
instead of PLAY button, each source unit numbers flash on the panel. If there are no more alarms, the
unit will return to the previous connection before the first alarm.
Memo
• Up to 10 alarm notifications can be handled as above.
• When connected with PLAY button, encode parameters in the telephone book of the monitor unit are used. If
there are multiple registrations having same IP addresses in the telephone book, smallest Edit No. is used. (In
observing mode, monitor unit obeys settings of camera side.)
• Alarm notifications from DM-NC40 units not registered in the TELEPHONE BOOK is ignored.
• Alarm notifications from current connecting DM-NC40 is ignored.
• If the acceptance is set to automatic (AUTO), monitor unit connects to the alarm source unit automatically
without pressing PLAY button.
• If the acceptance is disabled (OFF), alarm notifications is ignored. (Acceptance setting can be changed in
NETWORK SETUP screen.)
• When encode parameters of camera mode are changed by connection from monitor mode, image file recording
is stopped during the parameter change is in progress. Same settings to both camera mode and monitor mode
are recommended to avoid such problem.
• Alarm notification is ignored during IP address display at start.
57
Operations
Alarm notification using API
Specifications
Compressions format
External dimensions (unit: mm)
301
MPEG-4
JPEG
Frame sizes: MPEG-4
352 240, 176 120
JPEG
704 480
or
MPEG-4
320 240, 160 120
JPEG
640 480
Frame rates MPEG4: 30fps max
JPEG 3fps max
Encode rate: 2.0Mbps max (ISMA compliant)
<Audio>
Format:
G.726
(8k sampling, monoral)
AAC-LC (32k sampling, stereo)
Input/output
CF
ENCODE
DECODE
HOLD
IN 1
PLAY
STOP
HOLD
SELECT
Overall
Power supply:
AC120V 50Hz/60Hz
Rated current:
0.3A
Mass:
2.6kg
Operational environment: 0 ˚C to 40 ˚C
Safety standard:
UL, CSA
EMC standard:
FCC Class B
Accessories:
*
58
INSTRUCTIONS..........1
Power Cord..........1
Specifications and design of this product is subject and
connecting devices are subject to change without prior
notice for improvements.
210
IN 2
P inP
POWER
86
90
Video input: 1 V (p-p) (BNC, 75Ω, with/ loop-through) 2
Audio input: Lch, Rch RCA, (2 Vrms)
(AAC-LC only for Rch)
Video output: 1 V (p-p) BNC
Audio output: 1 channel, RCA
External control:
2 lines, D-sub 9-pin (male)
RS485/RS232C switching possible
(However, RS232C fixed for 1 line)
Alarm port: D-sub 15-pin (female)
Stream control:
RTSP, Telnet API
Stream input/output: 100BASE-TX
(338)
<Video>
Format:
59
DM-NC40 NETWORK CODEC
VICTOR COMPANY OF JAPAN, LIMITED
®
®
is a registered trademark owned by VICTOR COMPANY OF JAPAN, LTD.
is a registered trademark in Japan, the U.S.A., the U.K. and many other countries.
© 2003 VICTOR COMPANY OF JAPAN, LIMITED
Printed in Japan
LST0176-001A