1
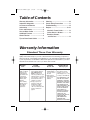
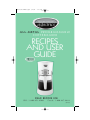
840126600 ENv05.qxd
9/1/04
1:38 PM
Page 1
A L L - M E TA L P R O G R A M M A B L E
COFFEEMAKER
RECIPES
AND USER
GUIDE
READ BEFORE USE
USA : 1-800-851-8900
Canada: 1-800-267-2826
840126600
840126600 ENv05.qxd
9/1/04
1:38 PM
Page 2
Dear Coffeemaker Owner,
Congratulations on your purchase. The Hamilton Beach® Eclectrics™
Collection adds a modern twist to those dependable, all-metal
appliances you remember from yesteryear.
Owning a Hamilton Beach® is like owning a piece of history. In 1904,
Louis Hamilton and Chester Beach teamed up to bring motorized
appliances like vacuums, sewing machines, and mixers into American
households. In honor of their 100-year legacy, we’ve combined the
“built to last” metal construction of the past with the styling of today
to bring lasting quality and style to your kitchen.
As you use your all-metal appliance, think about the history that came
before it. Enjoy the confidence you have in a product backed by years
of experience and a 3-year warranty. But most of all, fill your home
with the delicious aroma of homemade recipes that your appliance
helps you create!
I hope you enjoy your Hamilton Beach® Eclectrics™ appliance for many
years to come.
Sincerely,
Michael J. Morecroft
President and Chief Executive Officer
Hamilton Beach/Proctor-Silex, Inc.
2
840126600 ENv05.qxd
9/1/04
1:38 PM
Page 3
Table of Contents
Warranty Information ...................... 3
Important Safeguards ...................... 4
Assistance and Service
Information ........................................ 5
Parts and Features............................ 6
How to Make Coffee ........................ 7
Additional Features .......................... 8
Water Filtration ................................ 8
Tips to Brew Good Coffee .............. 9
Cleaning .......................................... 10
Carafe Safety Precautions ............ 11
Troubleshooting .............................. 12
Recipes ...................................... 13-16
Alcoholic Frozen Drinks .............. 13
Coffee Drinks & Shakes .............. 13
Breakfast, Breads,
and Desserts ..............................14
Warranty Information
Standard Three Year Warranty
Congratulations! You now own one of the finest coffeemakers. We’re so confident in the
quality and craftsmanship of your new coffeemaker that we’re backing your purchase
with a No-Hassle 3-Year Replacement Warranty. If your coffeemaker malfunctions within
3 years of purchase, we will deliver a brand new replacement coffeemaker to your door
and remove the old unit at no cost to you. Here’s how it works:
Warranty
Term
Three years from
date of original
purchase for
coffeemakers
operated in the
continental
United States,
Alaska, and
Hawaii.
This warranty
applies only to
the original
consumer
purchaser.
To fulfill
the warranty:
1. Follow the instructions
in this Manual. Refer to
Tips to Brew Good
Coffee section if you
have any problems operating the unit. If you have
any questions, call one of
the Customer Service
numbers on page 5.
2. Keep your proof of
purchase. If the unit
malfunctions within
3 years of purchase,
call one of the Customer
Service numbers on
page 5.
Hamilton
Beach® will
Hamilton Beach®
will not pay for
1. Send a pre-paid
shipping label so
you can send us
the unit.
2. Ship a brand
new replacement
unit to your
address.
Product failures arising
from abuse, misuse,
neglect, use for commercial purposes, or use
contrary to this Manual.
THIS WARRANTY IS IN
LIEU OF ANY OTHER
WARRANTY, EXPRESS
OR IMPLIED, WRITTEN
OR ORAL, INCLUDING
ANY WARRANTY OF
MERCHANTABILITY OR
FITNESS FOR A PARTICULAR PURPOSE.
ANY LIABILITY IS
EXPRESSLY LIMITED
TO THE PURCHASE
PRICE PAID. ALL
CLAIMS FOR SPECIAL,
INCIDENTAL OR
CONSEQUENTIAL
DAMAGES ARE
EXPRESSLY EXCLUDED.
3
840126600 ENv05.qxd
9/1/04
1:38 PM
Page 4
IMPORTANT SAFEGUARDS
When using electrical appliances, basic
safety precautions should always be followed to reduce the risk of fire, electric
shock, and/or injury to persons, including
the following:
1. Read all instructions.
2. Do not touch hot surfaces. Use handles or knobs. Care must be taken, as
burns can occur from touching hot
parts or from spilled, hot liquid.
3. To protect against electric shock, do
not place cord, plug or
coffeemaker in water or other liquid.
4. Close supervision is necessary when
any appliance is used by
or near children.
5. Unplug from outlet when either the
coffeemaker or clock is not in use and
before cleaning. Allow to cool before
putting on or taking off parts and
before cleaning the appliance.
6. Coffeemaker must be operated on a
flat surface away from the edge of
counter to prevent accidental tipping.
7. Do not operate any appliance with a
damaged cord or plug, or after the
appliance malfunctions or is dropped
or damaged in any manner. Call our
toll-free customer service number for
information on examination, repair, or
adjustment.
8. The use of accessory attachments not
recommended by Hamilton Beach/
Proctor-Silex, Inc. may result in fire,
electrical shock or personal injury.
9. Do not use outdoors.
10. Do not let cord hang over edge of
table or counter or touch hot surfaces,
including stove.
11. The carafe is designed for use with
this coffeemaker. It must never be
used on a range top or in a microwave
oven.
12. Do not set a hot carafe on a wet or
cold surface.
13. Do not use a cracked carafe or one
with loose or weakened handle.
14. Do not clean carafe or hot plate with
cleansers, steel wool pads, or other
abrasive material.
15. Be certain carafe lid is securely in place
during brew cycle and when pouring
coffee. Do not use force when placing
lid on carafe.
16. To disconnect coffeemaker, turn
controls to OFF, then remove plug
from wall outlet.
17. Do not place coffeemaker on or near a
hot gas or electric burner or in a heated
oven.
18. Warning: To reduce the risk of fire or
electric shock, do not remove the bottom cover. No user serviceable parts
are inside. Repair should be done by
authorized service personnel only.
19. Do not use appliance for other than
intended use.
SAVE THESE INSTRUCTIONS
Other Consumer Safety Information
This appliance is intended for household use only.
This appliance is equipped with a groundedtype 3-wire cord (3-prong plug). This type
of plug will only fit into an electrical outlet
made for a 3-prong plug. This is a safety
feature intended to help reduce the risk of
electrical shock. If the plug should fail to fit
contact a qualified electrician to replace the
obsolete outlet. Do not attempt to defeat
the safety purpose of the grounding pin by
modifying the plug in any way.
4
The length of the cord used on this appliance was selected to reduce the hazards
of becoming tangled in, or tripping over a
longer cord. If a longer cord is necessary
an approved extension cord may be used.
The electrical rating of the extension cord
must be equal to or greater than the rating
of the coffeemaker. Care must be taken to
arrange the extension cord so that it will
not drape over the countertop or tabletop
where it can be pulled on by children or
accidentally tripped over.
To avoid an electrical circuit overload, do
not use another high wattage appliance on
the same circuit with your coffeemaker.
840126600 ENv05.qxd
9/1/04
1:38 PM
Page 5
Assistance and Service
Information
Before Calling for Assistance
Please read before calling:
• The coffeemaker may warm up
during use. After brewing several
pots of coffee the base of the unit
may feel warm to the touch. This is
normal.
• The coffeemaker may emit an
odor, especially when new. This is
common with heated appliances.
• The coffeemaker may steam or
make sounds at the end of
brewing. This is common with
automatic drip coffeemakers.
If your coffeemaker should
malfunction or fail to operate,
please check the following:
• Is the coffeemaker plugged in?
• Is the fuse in the circuit to the coffeemaker in working order? If you
have a circuit breaker box, be sure
the circuit breaker is closed.
• Unplug the coffeemaker off for
10 to 15 seconds, then plug the
coffeemaker back in.
• If the problem is not due to one of
the items mentioned above, see
Customer Service Information
section.
• DO NOT return the coffeemaker to
the retailer (store) as they do not
provide service.
Customer Service Information
If you have a question about your coffeemaker, call our toll-free customer service
number. Before calling, please note the model, type, and series numbers and fill
in that information below. These numbers can be found on the bottom of your
coffeemaker. This information will help us answer your question much more
quickly.
MODEL:___________________ TYPE :___________________ SERIES: __________________
CUSTOMER SERVICE NUMBERS
In the U.S. 1-800-851-8900
In Canada 1-800-267-2826
hamiltonbeach.com
KEEP THESE NUMBERS FOR FUTURE REFERENCE!
5
840126600 ENv05.qxd
9/1/04
1:39 PM
Page 6
Parts and Features
1. Filter Basket
2. Clock and Controls
3. Carafe
4. Keep-Hot Plate
5. Cover
6. Water Reservoir
7. Water Level Guide
8. Pause ‘N Serve
9. Coffee Scoop*
* optional
ON/OFF Button
with Red
Indicator Light
Hour Button
6
Program Button
with Green
Indicator Light
Minute Button
840126600 ENv05.qxd
9/1/04
1:39 PM
Page 7
How to Make Coffee
1. To ensure best possible taste, wash
the carafe then clean the inside of
unit. See “Cleaning Instructions.”
2. Plug in Coffeemaker. The numbers
on Clock will flash until time is set.
3. Press H to set current hour with
AM or PM. Press M to set current
minutes. The clock is now set.
4. Fill carafe with the desired amount
of cold tap water. Flip open top
cover and pour water into reservoir.
5. Return the carafe with carafe lid
attached to the Keep-Hot Plate.
Make sure that the carafe is firmly
in place.
6. Place a disposable No. 4 coneshaped paper filter in filter basket.
A permanent filter may also be
used.
7. For each cup of coffee being
made, place one level scoop or
tablespoon of medium-ground
automatic drip coffee into filter.
Lower top cover to close.
8. Press ON/OFF button once to brew
coffee now and the light will glow
red. To brew later, see “To Program
Automatic Brew.”
NOTE: To serve coffee during the
brewing cycle, remove carafe and
pour a cup. By removing the
carafe, the flow of coffee from
the bottom of the filter basket
will stop.
CAUTION
To Program Automatic Brew
NOTES:
• The Automatic Brew feature must
be programmed each time it is
used.
• Make sure you have placed the
desired amount of water and coffee
in the unit before using the
Automatic Brew feature.
1. Plug in Coffeemaker. The numbers
on the Clock will flash until the time
is set.
2. Press the H button until the current
hour is displayed. AM or PM will
appear on display. Press the M
button until the current minute is
displayed. The Clock is now set.
3. To program Coffeemaker to automatically begin brewing, press and
hold the Prog/Auto button for two
seconds to enter the setting mode.
While still pressing Prog/Auto,
press the H button to set hours and
then press the M button to set minutes until the desired brew time is
displayed.
4. To have Coffeemaker automatically
begin brewing at the preset time,
press Prog/Auto button momentarily. The Prog/Auto button will glow
green to indicate Automatic Brew is
set and coffeemaker is ready to
begin brewing at the specified time.
“Auto” will appear in the display.
5. The Coffeemaker will shut off two
hours after brewing begins.
Burn Hazard
Return Carafe to Keep-Hot Plate
and ensure Auto Pause ’n Serve
is engaged wintin 20 seconds.
Hot water continues to flow into
the Filter Basket when the Auto
Pause ’n Serve feature is used.
Overflowing coffee and hot water
are a burn hazard.
9. The unit will shut off automatically
after two hours. When finished,
unplug from outlet.
7
840126600 ENv05.qxd
9/1/04
1:39 PM
Page 8
Additional Features
Pause ’n Serve
Automatic Shutoff
This feature allows you to pour a cup
of coffee before the entire brew cycle
has completed. By removing the
Carafe, the flow of coffee from the
bottom of the Filter Basket will stop.
The Automatic Shutoff feature shuts
off the Keep-Hot Plate 2 hours after
brew cycle begins. Always turn
Coffeemaker OFF and unplug when
finished.
CAUTION: Return carafe to KeepHot Plate within 20 seconds. Hot
water continues to flow into the Filter
Basket when this feature is used.
Overflowing coffee and hot water are
a burn hazard.
Water Filtration
Removing unwanted chlorine and
impurities through a water filtration
process can help achieve a bettertasting cup of coffee.
For this reason, the reservoir on your
Hamilton Beach Eclectrics coffeemaker
was designed to accommodate special
water filter pods by Hamilton Beach.
For details on how to order a
Hamilton Beach water filter kit,
please refer to the infomation below.
Improve Coffee Flavor with a Water Filter Kit
Each water filter kit (model 80674) includes two filters and one holder.
To order in the U.S.:
Call 1-800-455-7213
Order online at www.HBAccessories.com
To order in Canada:
Call 1-800-267-2826
8
840126600 ENv05.qxd
9/1/04
1:39 PM
Page 9
Tips to Brew Good Coffee
Quality coffee comes from quality
ingredients. For the best coffee, you
should start with freshly ground
coffee from freshly roasted beans.
The beans can be purchased and
stored in an airtight container. Just
prior to brewing, remove the amount
needed and grind the beans. Once
the bean is broken, the intense, rich
flavor begins to deteriorate.
If the beans are ground too finely, it
will produce a bitter taste. If ground
too coarsely the coffee will taste weak
and watery.
Some specialty coffees recommend
using more than one tablespoon of
ground coffee per cup. Your new
coffeemaker is designed to brew
good quality coffee using less
amounts of ground coffee. One level
tablespoon of ground coffee per
cup is recommended. Of course,
the amount of ground coffee used
depends upon your personal
preference.
The amount of coffee to water
depends upon personal preference.
One tablespoon of ground coffee per
cup is recommended.
Automatic coffeemakers generally use
a 5-ounce cup size. The coffeemaker’s Carafe and Reservoir are marked
in “cups” for easy measuring.
Try different flavored coffees and
flavored creamers available at supermarkets or specialty coffee stores.
Regular coffee can be flavored at
home. Add a sprinkle of cinnamon* or
a drop of a pure extract–like almond,
vanilla, or mint–to the ground coffee
before brewing. For a mocha flavor,
stir a spoon of chocolate syrup or
instant cocoa mix to each cup of
brewed coffee.
* (Too much cinnamon may clog the
filter causing Filter Basket overflow.)
The quality of your drinking water
will affect the flavor of your coffee. If
you do not drink water straight from
the tap, do not use it to make coffee.
If your water has an off-taste or smell,
or if you have extremely hard water,
use bottled drinking water or filtered
water to make coffee. If the water is
from the tap, it should be freshly
drawn and cold for the best coffee
flavor.
9
840126600 ENv05.qxd
9/1/04
2:27 PM
Page 10
Cleaning
To maintain the performance of your coffeemaker, clean your
coffeemaker once a month. Periodic cleaning removes mineral
deposits that slow down brew time and results in bitter coffee taste.
To Clean Inside of Coffeemaker:
1. Remove water filter and water
filter holder if present.
2. Make sure the filter basket is
empty.
3. Place empty carafe on Keep-Hot
Plate.
4. Pour one pint of plain white
vinegar into the reservoir.
5. Plug unit into electrical outlet.
6. Press the ON/OFF button once
and the indicator light will glow
red. After 30 seconds, turn OFF.
7. Wait 30 minutes to allow the vinegar to clean. Then turn ON again.
When the brew cycle is finished,
wait for unit to cool.
8. Empty carafe and rinse. Pour one
carafe of cold tap water into the
reservoir. Place carafe on KeepHot Base.
9. Press ON/OFF button once.
When the brew cycle is complete,
empty the carafe. Allow the coffeemaker to cool, then repeat this
step with one more carafe of cold
tap water.
10. Wash carafe and filter basket
before making a beverage.
10
To Clean Carafe and Filter
Basket:
1. Wash carafe by hand in hot, soapy
water.
2. To remove the filter basket, open
filter lid and lift straight up by handle.
Wash filter basket by hand in hot,
soapy water. To maintain performance, clean the filter basket often.
To Clean Exterior of
Coffeemaker:
Wipe the exterior with a soft cloth and
warm, soapy water. Do not use abrasive cleaners as they will scratch the
finish of the product.
840126600 ENv05.qxd
9/1/04
1:39 PM
Page 11
Carafe Safety Precautions
This symbol alerts you to the potential danger for personal injury if
you fail to read and follow these safety precautions.
This symbol reminds you that glass is fragile and can break which
could result in personal injury.
• Do not place carafe in dishwasher.
• Do not use a cracked carafe or a
carafe having a loose or weakened
handle.
• This carafe is designed to be used
only on the Keep-Hot Plate of your
coffeemaker. Do not use on a gas or
electric rangetop, or in a microwave
or conventional oven.
• To avoid breakage, handle carafe
with care. Avoid impact. Glass will
break as a result of impact. Use
care when filling with water to avoid
hitting faucet.
• Do not place hot carafe on cool or
wet surface. Allow to cool before
washing or adding liquids.
• Do not set empty carafe on a hot
heating surface.
• Do not clean with steel wool pads,
abrasive cleanser, or any other
materials that may scratch.
• Do not place hands inside carafe.
When handling, be careful if wearing
any hand jewelry, especially diamond rings. Jewelry can scratch the
glass, which increases possibility of
breakage.
• Do not bump, scratch, or boil dry
the carafe.
• Discard carafe if it is cracked,
scratched, or heated while empty
for an extended period of time.
• To avoid accidents, do not pour in
the direction of people.
• If stirring in the carafe, use only
wooden, plastic, or rubber utensils.
Do not use metal utensils.
• Follow the above safety precautions
carefully to avoid serious burn
injuries which may result if breakage
occurs while carafe holds heated
liquids.
11
840126600 ENv05.qxd
9/1/04
1:39 PM
Page 12
Troubleshooting
POTENTIAL PROBLEM PROBABLE CAUSE/SOLUTION
Filter basket overflows
or coffee brews slowly.
• Excessive amounts of coffee. One level tablespoon of ground coffee per cup is recommended.
• Coffee ground too finely (not automatic drip
grind).
• Carafe not securely placed on Keep-Hot Plate.
• Carafe removed during brewing for more than
20 seconds and not placed securely back on
Keep-Hot plate.
• Coffeemaker needs cleaning.
• Coffee grounds between paper filter and filter
basket.
• Paper filter not open and in proper position.
• Rinse filter basket before inserting paper filter so
the edges will remain pressed against the sides
of the basket.
• Poor quality paper filter.
Coffee tastes bad.
• Coffeemaker needs cleaning.
• Coffee ground other than automatic drip.
• Coffee-to-water ratio unbalanced. Adjust for
personal preference.
• Poor coffee quality and freshness.
• Poor water quality (use filtered or bottled water).
Coffee not brewing/
unit will not turn on.
• Water reservoir is empty.
• Unit is unplugged.
• Power outage.
• Power surge. Unplug then plug the unit back in.
• Clock requires reset after power outage.
• The Auto Shutoff feature turns coffeemaker off
after two hours. Turn coffeemaker off and back
on to brew additional pots of coffee. See “How
to Make Coffee” for additional infomation.
Longer than normal
brew time.
• Mineral deposits can build up in the pump of
your coffeemaker. Periodic cleaning of the inside
of the unit is recommended. More frequent
cleaning may be necessary, depending on the
hardness of your water. See “Cleaning” for more
information.
NOTE: Do not disassemble the unit.
12
840126600 ENv05.qxd
9/1/04
1:39 PM
Page 13
Alcoholic Frozen Drinks
Creamy Coffee
6 cups brewed coffee (chilled)
1
⁄2 pint vanilla ice cream
8 ounces Irish Crème liqueur
Place all ingredients in blender jar; cover. Blend on medium speed until desired
consistency is reached. Yield: 4 servings.
Coffee Shake Supreme
4 scoops vanilla ice cream
1 tablespoon Irish Crème liqueur
1 cup strong coffee, chilled
(optional)
1
⁄2 banana, mashed
Whipped cream (for garnish)
2 tablespoons powdered sugar
Place all ingredients into blender jar (except whipped cream); cover. Blend on
high speed until desired consistency is reached. Garnish with whipped cream.
Yield: 1 servings.
Coffee Drinks & Shakes
Cappuccino Cooler
Ice
2 cups cold coffee
Whipped cream (for garnish)
2 cups vanilla ice cream
1
⁄2 cup chocolate syrup
In blender jar, combine cold coffee, ice cream and chocolate syrup; cover.
Blend until smooth. Pour over crushed ice. Top with whipped cream if desired.
Yield: 4 servings.
Coffee & Cream
1 cup strong cold coffee
6 ounces nonfat coffee yogurt
1 cup ice
2 tablespoons sugar
Place all ingredients into blender jar; cover. Pulse for 20 seconds or until
smooth. Yield: 2 servings.
Iced Latte
1
1 cup club soda
⁄4 cup coffee
1
⁄2 cup vanilla syrup
1 cup ice
1 cup non-fat powdered milk
Place all ingredients into blender jar; cover. Blend on medium speed until
smooth. Yield: 2 servings.
13
840126600 ENv05.qxd
9/1/04
1:39 PM
Page 14
Breakfast, Breads and
Desserts
Breakfast Casserole
1⁄2 teaspoon black pepper
1 pound hot pork sausage
10 eggs, lightly beaten
1 teaspoon salt
1 cup frozen, chopped green pepper
4 cups frozen potato tots
1 cup frozen, chopped onion
2 cups shredded sharp Cheddar cheese
1⁄2 cup milk
Preheat oven to 325ºF. In large skillet; cook sausage over medium-high heat,
stirring frequently until thoroughly cooked and no longer pink. Drain on paper
towel and allow to cool. In large mixing bowl, combine cooked sausage, eggs,
green pepper, onion, milk, pepper and salt; stir well. Distribute frozen potato
tots evenly in a greased 9” x 13” x 2” baking dish. Pour the egg mixture into
the casserole. Top with cheese. Bake uncovered for 45 minutes, or until eggs
are set. Makes: 8 to 10 servings.
Banana Bread
2 cups flour
2 eggs
3⁄4 teaspoon baking soda
11⁄2 cups mashed ripe banana (about
1⁄2 teaspoon salt
3 bananas)
1⁄3 cup plain low fat-fat yogurt
1 cup sugar
1⁄4 cup butter
1 teaspoon vanilla extract
Preheat oven 350ºF. Lightly spoon flour into dry measuring cup; level with a
knife. Combine the flour, baking soda, and salt, stirring with a whisk. Place sugar
and butter in a large bowl and beat with a mixer at medium speed until well
blended. Add in eggs one at a time mixing well after each addition. Add banana,
yogurt, and vanilla into mixture. Add flour mixture and beat just until mixed in.
Spread evenly into an 8 x 4-inch greased loaf pan. Bake for 1 hour.
Coffeecake
1 cup butter, softened
Topping:
1⁄2 cup brown sugar
11⁄2 cups sugar
1⁄4 cup sugar
2 eggs
11⁄2 teaspoon vanilla extract
2 teaspoon cinnamon
1⁄2 cup pecan or walnuts, chopped
2 cups cake flour
1 teaspoon baking powder
1 teaspoon baking soda
1 cup sour cream
Preheat oven to 350ºF. Butter a 9 x 13-inch baking pan.
In a mixing bowl, cream butter and gradually add sugar, eggs, and vanilla extract,
beating well after each addition. In another bowl mix flour, baking powder, and
baking soda. Add flour mixture alternately with sour cream to creamed mixture.
Topping: Mix sugars and cinnamon. Pour half of batter in pan. Sprinkle walnuts
and half of topping on top of batter. Add remaining batter and sprinkle remaining topping on top. Bake for 45 minutes. Serve warm.
14
840126600 ENv05.qxd
9/1/04
1:39 PM
Page 15
New York Style Cheesecake
Crust
1 cup (4 ounces) graham cracker crumbs
1 cup walnuts chopped (finely)
1 tablespoon sugar
6 tablespoons unsalted butter, melted; divided
Preheat oven to 500ºF. Combine graham cracker crumbs, chopped walnuts,
and sugar in medium bowl. Add 5 tablespoons of melted butter and toss with
fork until evenly mixed. Empty crumb mixture into 9-inch springform pan and
press evenly into pan bottom. Set aside.
Filling
21⁄2 pounds cream cheese, softened
1⁄8 teaspoon salt
11⁄2 cups sugar
1⁄3 cup sour cream
1 tablespoon lemon juice
2 teaspoons vanilla extract
2 large egg yolks plus 6 large whole eggs
Place cream cheese into a large bowl and beat at low speed to break up and
soften, about 1 minute; scraping bowl as necessary. Add salt and sugar and
beat at medium-low speed until combined, about 1 minute. Scrape bowl; add
sour cream, lemon juice, and vanilla; beat at low speed until combined. Scrape
bowl; add yolks and beat at medium-low speed until thoroughly combined.
Add whole eggs two at a time, beating until thoroughly combined and scraping
bowl between additions, as needed.
Grease sides of springform pan with remaining melted butter. Set springform
pan on rimmed baking sheet. Pour filling into pan and bake 10 minutes; without
opening oven door, reduce oven temperature to 200ºF and continue to bake
until center of cheesecake has a jelly consistency (150ºF internal temperature),
about 1 hour 15 minutes.
Transfer cake to wire rack and cool 5 minutes. To avoid cracking, free cheesecake from the sides of the pan with a paring knife before allowing it to cool fully.
Cool until barely warm, 2 to 3 hours. Wrap tightly in plastic wrap and refrigerate
until cold, at least 3 hours.
To unmold cheesecake, remove sides of pan. Slide thin metal spatula between
crust and pan bottom to loosen, then slide cake onto serving plate.
Makes: 12 to 16 servings.
15
840126600 ENv05.qxd
9/1/04
1:39 PM
Page 16
Company’s Coming Chocolate Cake
21⁄4 cups flour, divided
12⁄3 cups sugar
3⁄4 cup butter, softened
3 tablespoons baking cocoa
11⁄4 cups water
11⁄4 teaspoons baking soda
1 teaspoon salt
1 teaspoon vanilla
1⁄4 teaspoon baking powder
2 eggs
Preheat oven to 350°F. Grease and lightly flour a bundt cake pan or two 8 or 9inch round pans.
Place all ingredients in a medium bowl and beat with an electric mixer on low
speed until moistened; scrape bowl. Beat on high speed 3 minutes, scraping
bowl as needed. Bake 50 minutes or until toothpick inserted in center comes
out clean. Cool 10 minutes; remove from pans and cool on wire rack until
completely cooled.
Chocolate Glaze
2 cups powdered sugar
4 tablespoons baking cocoa
4 teaspoons water
2 tablespoons vegetable oil
Combine sugar and cocoa in a small bowl. Gradually stir in water and oil.
Immediately pour over cooled cake.
Banana Liquor & Chocolate Chip Biscotti
1 cup sugar
1⁄2 cup butter, softened
1⁄4 cup banana liquor
(any flavor is acceptable)
1 teaspoon vanilla extract
2 eggs
3 cups flour
3 teaspoons baking powder
1⁄4 teaspoon salt
1⁄2 cup mini semisweet chocolate chips
Preheat the oven to 350ºF. Grease a large cookie sheet with nonstick cooking
spray. Beat sugar and butter in a large bowl with an electric mixer. Beat in
banana liquor, vanilla extract, eggs, flour, baking powder and salt until smooth.
Stir in the chocolate chips. Divide dough in half. Place on cookie sheet to one
side. Shape into a 3 x 10-inch loaf about one inch thick. Repeat with the remaining dough. Bake for 25 to 30 minutes, or until firm and light golden. Remove from
the oven and reduce the heat to 325ºF. Allow the loaves to cool for 5 minutes.
Cut into 1⁄2-inch slices and place cut side down on the cookie sheets. Bake for 15
minutes, then turn the cookies over and bake for 15 more minutes, or until very
crisp. Allow to cool. Store in an airtight container. Makes 32 servings.
16
840126600 ENv05.qxd
9/1/04
1:39 PM
Page 17
17
840126600 ENv05.qxd
18
9/1/04
1:39 PM
Page 18
840126600 ENv05.qxd
9/1/04
1:39 PM
Page 19
19
840126600 ENv05.qxd
9/1/04
1:39 PM
Page 20
HAMILTON BEACH PROCTOR-SILEX, INC.
263 Yadkin Road, Southern Pines, North Carolina 28387
840126600
20
hamiltonbeach.com
9/04