1
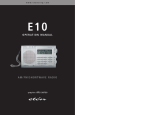
E10 AM/FM/Shortwave Radio OWNER’S MANUAL E10 OWNER’S MANUAL DO YOU NEED HELP? Thank you for purchasing the E10 AM/FM/Shortwave Radio. We want you to thoroughly enjoy the use of this product. To take advantage of its many excellent and unique features, we urge you to carefully read the owner’s manual. If you need help while learning its operation, please contact us, using the methods below. Monday-Friday, 8:30 a.m. - 4:00 p.m., North American Pacific Time. 1-800-872-2228 from the U.S. 1-800-637-1648 from Canada 1-650-903-3866, worldwide FAX: 650-903-3867 [email protected] Web Site: www.etoncorp.com Mailing Address: Etón Corporation 1015 Corporation Way Palo Alto, CA 94303 USA 1 E10 OWNER’S MANUAL TABLE OF CONTENTS 1 DO YOU NEED HELP?............................................................................... 1 DELETING ALL MEMORY PAGE CONTENTS........................13 2 TABLE OF CONTENTS...............................................................................2 MOVING A STORED FREQUENCY................................................13 3 MAJOR FEATURES OF THE ETÓN E10........................................3 CUSTOMIZING MEMORY PAGES...................................................13 4 DIAGRAMS........................................................................................................4 HOW TO USE THE ATS FEATURES............................................ 13 5 GETTING STARTED.....................................................................................6 9 SYSTEM SET CODES................................................................................. 14 WHAT THE E10 INCLUDES.............................................................6 SYSTEM SET CODE TABLE................................................................14 INSTALLING BATTERIES...................................................................6 CHANGING THE CLOCK FROM 24 to PREVENTING BATTERY ACID LEAKAGE.............................. 6 12 HOUR FORMAT..................................................................................15 14 USING THE INCLUDED AC ADAPTER/CHARGER........ 6 DEFAULT SYSTEM SET CODES.....................................................15 CHARGING BATTERIES IN THE E10........................................7 MONITORING THE CURRENT STATUS OF SET................. 15 6 BASIC RADIO OPERATIONS..................................................................7 CODES AND OTHER SETTINGS....................................................15 7 CLOCK AND TIMER FEATURES.........................................................10 10 ADDITIONAL E10 CONTROLS............................................................16 SETTING THE CLOCK.......................................................................... 11 11 LISTENING TO SHORTWAVE STATIONS..................................... 17 SETTING THE TIMERS....................................................................... 11 SELECTING A SHORTWAVE METER BAND STORING A RADIO STATION INTO TIMER MEMORY..... 11 WITH THE E10..........................................................................................17 ACTIVATING/DEACTIVATING THE TIMER............................ 11 SHORTWAVE TIME STATIONS....................................................... 18 USING THE SNOOZE FEATURES.................................................11 SHORTWAVE PUBLICATIONS: FINDING 8 WORKING WITH MEMORY..................................................................... 12 SPECIFIC STATIONS...............................................................................19 STORING STATIONS INTO MEMORY..........................................12 12 UNDERSTANDING SHORTWAVE BANDS...................................19 SELECTING/CHANGING MEMORY PAGES............................ 12 13 TROUBLESHOOTING.................................................................................22 ACCESSING WHAT IS STORED INTO MEMORY................. 12 14 WARRANTY REGISTRATION...............................................................23 DIRECT MEMORY ACCESS...............................................................12 15 LIMITED WARRANTY TO THE ORIGINAL CUSTOMER......24 MANUAL MEMORY SEARCH......................................................... 12 16 SERVICE INFORMATION........................................................................25 MEMORY AUTO-SCAN........................................................................12 DELETING A MEMORY’S CONTENTS....................................... 13 2 E10 OWNER’S MANUAL 3 MAJOR FEATURES OF THE ETÓN E10 • FM Frequency Range: 87 – 108 MHz (For America); 76 – 108 MHz (For Japan) • Shortwave Frequency Range: 1711 – 29999KHz • 9/10KHz step selector for Medium Wave (AM) reception • 1KHz step for the display of Medium wave and Shortwave • SW IF SET feature, shifts the intermediate frequency to minimize interference during shortwave reception. • Shortwave antenna trimmer • ATS (Auto tuning system) for the memory storage of FM/MW reception • Manual Tuning • Auto Scan Tuning • Direct Keypad Frequency Entry • Digital Tuning Knob • 550 Programmable Memories • Memory Page Customization • Auto-Scan and manually scan stations stored into memory • Direct Memory Access • Fast/Slow tuning rate selection for manual tuning • Sleep Function • Two Turn-On Timers With Station Memory • Snooze Function: 10 minutes, repeated three times. • FM Stereo/Mono selection • High/Low Tone Control • LCD Backlight • Key Lock • 12/24 Hr Format selection • Built-in Ni-MH battery charger • SYSTEM SET CODES 3 E10 OWNER’S MANUAL 4 DIAGRAMS POWER/SLEEP Lock Button Timer A Button Timer B Button LCD Display Light Snooze Button Tuning Mode Button Up/Hour Down/Min Page Button Scan Mode Button SWIF Set Button Bandwidth Button FM/AM Band (ATS) Button Memory & Edit/Time set Button Charger On/Off Button Enter/Sys. Set Button SW (SW Meter) Band Button Numeric Keypad Hand Carry Belt FM/SW ANT. Socket Tuning Knob ANT. Gain DX/Normal/Local Stand Tone Control ANT. Trim Earphone Socket DC 6V Socket Vertical Stand 4 Volume Knob Reset Button E10 OWNER’S MANUAL 4 DIAGRAMS continued RADIO OFF DISPLAY RADIO ON DISPLAY Triangle Pointer Triangle Pointer Battery Symbol Battery Symbol Antenna Symbol 1-5 Scale Clock Digits Antenna Symbol Alarm AM/PM Indicator 1-5 Scale Sleep Timer Symbol Alarm Clock Digits Alarm Activation Symbol Clock Digits Time AM/PM Indicator FM, MW, Frequency Digits Shortwave Indicators Bandwidth 450K IF Ni-MH Battery Symbol Alarm Activation Symbol MEMORY DISPLAY SHORTWAVE METER BAND DISPLAY Refers only to the display’s upper right corner. Refers only to the display’s upper right corner. Memory Display Delete Indicator Shortwave Meter Band Display SYSTEM SET CODE DISPLAY 5 E10 OWNER’S MANUAL 5 GETTING STARTED WHAT THE E10 INCLUDES CHARGING BATTERIES IN THE E10 • • • • • The E10 will play using whatever type of AA batteries are in the battery compartment, but only nickelmetal-hydride batteries can be charged within it. If non-rechargeable batteries are installed, the E10 has a built-in safeguard system that will prevent them from being charged. This safeguard system works with the E10 set to either SYSTEM SET CODE 28 or 29, as described below, and only with the included AC Adaptor/Charger. Earbud style earphones Carrying pouch AC adaptor/charger 4 - 1100 mAh, Ni-MH rechargeable batteries. Owner’s manual NOTE: In the instructions below, numbers in parenthesis ( ), refer to the diagrams. INSTALLING BATTERIES The battery compartment is located on the back of the E10. Its cover is on the lower right corner of the back. To remove the battery compartment cover, apply thumb pressure and slide it towards the bottom of the radio. Install 4 AA alkaline batteries into the battery compartment, observing the battery polarity diagram on the back of the radio. NOTE: If you don’t plan to use rechargeable batteries at all, then it’s a good idea to set SYSTEM SET CODE 29. To do this, see the section titled SYSTEM SET CODES. This assures that the battery strength indicator will display correctly for your non-rechargeable batteries. This is not a mandatory procedure and the E10 will function if it is not done. PREVENTING BATTERY ACID LEAKAGE To avoid battery acid leakage, only use high quality alkaline, lithium or rechargeable nickel-metal-hydride batteries. Never intermix old with new, or different brands or types of batteries. Damage caused by battery acid leakage is not covered by this product’s warranty. If the batteries leak, don’t throw them away and immediately contact the manufacturer of the batteries to inquire about their battery leakage warranty program. USING THE INCLUDED AC ADAPTOR/CHARGER To power the E10 with the included AC Adaptor/ Charger, plug it into a wall outlet first, and then into the socket on the left side of the E10, labeled DC 6 V. Batteries can be in the radio while using the AC Adaptor/Charger. 6 WARNING: Use only the included AC Adaptor/Charger to recharge Ni-MH batteries. Use of any other device may cause the rechargeable batteries to overheat, become damaged and possibly damage the E10. The built-in safeguard system, described above, works only with the included AC Adaptor/Charger. Damage caused to the E10 resulting from failure to observe this warning is not covered by the warranty and voids the warranty. The included AC Adaptor/Charger may be used to charge 4 Ni-MH rechargeable batteries (included) when installed onto the E10’s battery compartment. Before charging, the E10 must be set up for use with Ni-MH batteries and the correct charging rate must be selected for them to be charged. Ni-MH batteries are manufactured with specific capacities rated in milliamp-hours (mAh). These capacities vary from about 1100 mAh up to 2400 mAh at the time of this writing (usually printed on the batteries). For proper charging without damage to the batteries, the correct charging rate must be set. To set the charging rate, plug in the AC adaptor and turn the E10 off. Then follow the instructions below. 1. Enter SYSTEM SET CODE 28. See instructions in the section titled SYSTEM SET CODES. 2. While ‘1100’ flashes in the display, use the UP HOUR/DOWN MIN buttons to select the mAh rating of your Ni-MH batteries. To charge Ni-MH batteries: 1. Install 4 Ni-MH AA batteries. 2. Connect the adaptor/charger to the AC wall 3. Press/release the CHARGER ON/OFF button. ‘CHARGE’ will flash in the display and the charge E10 OWNER’S MANUAL 5 GETTING STARTED continued indication bars will advance from left to right on the 0 – 5 scale in the upper left corner of the display. The digits in the upper right corner of the display will change to 00:00 and will count up in minutes and hours until charging is finished. Once charging is finished, ‘CHARGE’ will stop flashing and the charging indicator bars in the upper left corner will stay on 5. Charging time varies depending on the milliamphour rating of the batteries. The charging circuit automatically senses the milliamp-hour rating of the batteries and will charge them for the correct amount of time. Charging time can take from 6 hours for 1100 mAh batteries to 13 hours for 2300 mAh batteries. The charging circuit will sense when the batteries are fully charged and automatically go into trickle-charge mode, thus safeguarding the batteries from being overcharged. Disconnecting the adaptor/charger ACG-10 from the E10 or pressing the CHARGER ON/OFF button will also stop charging. 6 BASIC RADIO OPERATION TURNING THE E10 ON AND OFF The E10 can be turned on by the two methods shown below. To turn it off, press the POWER/SLEEP button (1). 1. BATTERY SAVER/TIMER METHOD: Perform a quick, short press of the POWER/SLEEP button (1). This turns the radio on with 90 in the display and causes the radio to shut off automatically after 90 minutes. The sleep timer symbol, , also appears in the display. To change the automatic shut off time from 90 minutes to the number of minutes-to-play of your preference, use the Up/Hour or Down/Min. buttons (9, 10) immediately after turning on the radio. This allows selection of 1 – 480 minutes of playtime before automatic shut-off occurs. The number of minutes that you last set are also used the next time the radio is turned on. 2. TIMER-DEFEAT METHOD: This method defeats the automatic minute timer and causes the radio to stay on until deliberately turned off, until the batteries drain or indefinitely if used with an AC adaptor. Hold down the POWER button for about 3 seconds, then release. Note that ‘On’ appears in the display and that he sleep timer symbol does not appear when this method is used. SIGNAL STRENGTH AND BATTERY STRENGTH INDICATOR When the radio is turned off, the upper left corner of the display (6) shows battery strength on the 1–5 scale (36), with the triangle pointer (33) under the battery symbol (34) on the far left side of the scale. When the radio is turned on, the pointer is under the antenna symbol (35) and the 1-5 scale shows relative signal strength. VOLUME AND TONE CONTROLS • The volume control (31), labeled VOLUME, is located on the right side of the radio. To change the volume, rotate the volume control knob. • The tone control (24), on the left side of the radio is labeled TREBLE/BASS. Use the position producing the sound that you like best. USING EARPHONES Earphones/headphones with a 1/8 inch stereo plug can be used. Plug them into the earphone socket (25) on the left side of the radio. 7 E10 OWNER’S MANUAL 6 BASIC RADIO OPERATION continued SELECTING FM, AM or SHORTWAVE MANUAL TUNING When listening to FM or shortwave, fully extend the telescopic antenna (5). It need not be extended when listening to AM stations. After turning on the E10, perform quick, short presses of the ‘FM/AMATS’ button (15) to select FM or AM. Note that when the AM band is selected, the display shows MW, not AM. To select SW press the ‘SW METER BAND’ button (16). Each sequential press of the SW METER BAND button or of the UP/HOUR or DOWN/ MIN buttons places the radio at the beginning of a specific shortwave meter band. The frequency digits (46) appear toward the center portion of the display. The local stations of the area that you are currently in will be heard on AM and FM, while shortwave stations from around the world can be heard on SW. Quick, short presses of the Up/Hour-Down/Min. buttons (9,10) enables tuning up or down frequency. NOTE: If you are new to shortwave, see the special shortwave sections later in this manual. LISTENING IN FM STEREO FM stereo can be heard when using earphones/ headphones. To hear FM in stereo, press the FM STEREO button (14). ‘FM-STEREO’ will appear in the display. SETTING UP AM AND FM OUTSIDE OF NORTH AMERICA You can skip this section if you are in North America and just purchased the E10. It is already set-up in the factory for use in North America. Outside of North America, AM stations (MW in the E10’s display) are spaced in 9 KHz tuning steps. The FM frequency range may be different from that used in North America, e.g. like that used in Japan, 76108MHz. To make these changes, see the SYSTEM SET CODE TABLE and the instructions CHANGING SYSTEM SET CODES. TUNING IN STATIONS There are four ways to tune-in stations, described below. They are Manual Tuning, Auto-scan Tuning, Direct Frequency Entry and Fine Tuning. 8 AUTO-SCAN TUNING Pressing the Up/Hour or Down/Min. buttons (9, 10) for just over 1 second enables automatic scan-tuning. The radio will then automatically stop on the next station encountered. Use the Up/Hour button to auto-scan upward in frequency and the Down/Min. button to auto-scan downward in frequency. DIRECT FREQUENCY ENTRY When the desired frequency is known, it can be entered via the numeric keypad (17) and the ‘Enter’ button (20). First, make sure that the correct band is selected - AM, FM or SW. Most AM and Shortwave frequencies are designated in kilohertz (KHz), e.g. 810 KHz or 9475 KHz. All FM frequencies are designated in megahertz (MHz), e.g. 102.9 MHz. To enter such frequencies: 1. Press/release the ‘Enter’ (20) button. 2. Enter the frequency using the numeric keypad (17). Sometimes Shortwave frequencies are designated in megahertz (MHz). If you encounter such a shortwave frequency and it has less than three digits after the decimal point (e.g. 15.10 MHz or 6.92 MHz), then use the following method to enter it. However, if there are three digits after the decimal point (e.g. 15110 MHz or 5.975 MHz), use the method described previously. 1. Press/release the ‘Enter’ (20) button. 2. Enter the frequency using the numeric keypad (17). 3. Press/release the ‘Enter’ button again. E10 OWNER’S MANUAL 6 BASIC RADIO OPERATION continued TUNING KNOB CANCELLING TUNE-MUTE The TUNING knob control (28) is located on the right side of the radio. Use it to ‘fine-tune’ stations or as you would a tuning knob. The tune-mute cancellation capability makes the E10 ‘feel’ more like an analog tuned radio, even though it’s a high-tech digital tuner. The difference is somewhat subtle and is mainly noticeable in slow tuning mode using the tuning knob. Note that it may be difficult for some to actually hear the difference. For those who can hear the difference, tuning may sound somewhat ‘smoother’ when using the tuning knob. To cancel Tune-Mute, press/release the SYSTEM SET button, then the TUNING MODE button. The display will read OFF. The Tune-Mute feature is now cancelled. To reactivate, do the same and the display will read ON. LOCKING THE TUNING KNOB To prevent accidentally tuning off of the radio station, the tuning knob can be locked while the radio is turned on. To lock it, press and hold the TUNING MODE button for about three seconds. Notice that the key-lock symbol flashed twice in the lower right side of the display. The tuning knob is now locked. If turned, the frequency does not change and the key-lock symbol flashes. To unlock it, press the TUNING MODE button for about three seconds. TUNING MODE – FAST TUNING – SLOW TUNING The TUNING MODE button (8) allows selection of fast or slow tuning when using the tuning knob or the UP/HOUR and DOWN/MIN controls. FAST or SLOW appear in the display. When tuning with the tuning knob (28), fast tuning is usually appropriate. When tuning with the UP/HOUR and DOWN/MIN buttons, use slow tuning to tune in stations and fast tuning to move up or down frequency at a rapid rate. Then use slow to actually tune in stations. Experiment with this control to see which tuning mode that you prefer. USING THE BANDWIDTH BUTTON The BANDWIDTH button (14) is used when listening to AM and SW stations. Its purpose is to help minimize interference. The preferred setting is WIDE, which provides best audio fidelity. Use NARROW when there is interference. W or N will appear in the display. USING THE SW IF SET CONTROL The SW IF SET control (13) shifts the intermediate frequency oscillator, which may help to minimize interference. This functions both for AM and shortwave. When activated, pIF shows in the display. 9 E10 OWNER’S MANUAL 7 CLOCK AND TIMER FEATURES SETTING THE CLOCK The factory has set the clock to function as a 24hour format clock. If you prefer a 12 hour, AM/PM clock format, see the section titled CHANGING THE CLOCK FROM 24 TO 12 HOUR FORMAT in the section titled SYSTEM SET CODES. There are three methods for setting the clock. CLOCK SET METHOD 1 – UP/HOUR and DOWN/MIN buttons: 1. Turn the radio off. The clock digits appear in the center of the display (40). 2. Press/release the button labeled ‘Time Set’ (18). The clock’s digits flash in the display. 3. Within 5 seconds, set the hour using the Up/ Hour button and the minutes using the Down/ Min button (9, 10). Within 5 seconds of finishing, press/release the TIME SET button or wait until the clock digits stop flashing. CLOCK SET METHOD 2 – NUMERIC KEYPAD: When using this method, only 24 hour key-in format can be used to enter the time, even if the clock is set for 12 hr format time display. 1. Turn the radio off. The clock digits appear in the center of the display (40). 2. Press/release the button labeled ‘Time Set’ (18). The clock’s digits flash in the display. 3. Use the numeric keypad to key-in the time in 24 hour format. Within 5 seconds of finishing, press/release the TIME SET button or wait until the timer digits stop flashing. CLOCK SET METHOD 3 – TUNING KNOB 3. Within 5 seconds, press/release the Up/Hour button, then use the tuning knob to set the hour. 4. Within 5 seconds, press/release the Down/Min button, then use the tuning knob to set the minutes. 5. Within 5 seconds of finishing, press/release the TIME SET button or wait until the clock digits stop flashing. SETTING THE TIMERS (use as wake-up alarm) The E10 has two, independently programmable timers, timer A and B, enabling the E10 to turn on and play the radio for 30 minutes and then turn off. The timers can be used as wake-up alarms. After setting a timer, store a radio station into timer memory and activate the timer. See the next sections titled STORING A RADIO STATION INTO TIMER MEMORY and ACTIVATING/DEACTIVATING THE TIMER. NOTE: A radio station must be stored into timer memory. If this is not done, there will only be static once the timer is activated. When the timer activates, it turns on the radio, with the timer activation symbol appear flashing in the display. The radio will play the station stored into timer memory for 30 minutes or until you turn the radio off with the POWER/SLEEP button. The ‘snooze’ feature can also be used (see section titled USING THE SNOOZE FEATURE). There are three methods to set the timer. TIMER SET METHOD 1 – UP/DOWN MIN BUTTONS: 1. Turn the radio off. The timer digits (38) appear in the upper right corner of the display. 1. Turn the radio off. The clock digits appear in the center of the display (40). 2. Press and hold down TIMER A or B button for about two seconds. The timer digits flash in the display. 2. Press/release the button labeled ‘Time Set’ (18). The clock digits flash in the display. 3. Within 5 seconds, set the hour using the Up/Hour button and the minutes using the Down/Min but- 10 E10 OWNER’S MANUAL 7 CLOCK AND TIMER FEATURES continued ton. Within 5 seconds of finishing, press the A or B button once or just wait until the timer digits stop flashing. TIMER SET METHOD 2 – NUMERIC KEYPAD: 1. Turn the radio off. The timer digits (38) appear in the upper right corner of the display. 2. Press and hold down TIMER A or B button for about two seconds. The timer digits flash in the display. 3. Use the numeric keypad to key-in the wake up time in 24 hour format. Within 5 seconds of finishing, press the A or B button once or just wait until the timer digits stop flashing. TIMER SET METHOD 3 – TUNING KNOB 1. Turn the radio off. The timer digits (38) appear in the upper right corner of the display. 2. Press and hold down TIMER A or B button for about two seconds. The timer digits flash in the display. The timer symbol flashes in the display twice. NOTE: To monitor the frequencies stored into timer memory A and B, perform a three second press of the SYSTEM SET button while the radio is turned off. The set code information and the frequencies stored into timer memory flash in the display. ACTIVATING/DEACTIVATING THE TIMER For a timer to turn on the radio, it must be activated. A timer can be activated/deactivated with the radio on or off. To activate the timer, press/release the TIMER A or TIMER B button. The timer symbol will appear in the display. To deactivate a timer, press/ release the TIMER A or TIMER B button. The timer symbol will disappear from the display. USING THE SNOOZE FEATURE When the timer activates and turns the radio on, the timer activation symbol (39) appears flashing in the display. While it is flashing, press/release the SNOOZE/LIGHT button (7). The radio will turn off and then turn on again in 10 minutes. This process can be repeated 3 times. 3. Within 5 seconds, press/release the Up/Hour button, then use the tuning knob to set the hour. 4. Within 5 seconds, press/release the Down/Min button, then use the tuning knob to set the minutes. 5. Within 5 seconds of finishing, press/release the TIMER A or B button that’s being worked with or wait until the timer digits stop flashing. STORING A RADIO STATION INTO TIMER MEMORY To hear a radio station when the timer activates, the station must be stored into timer memory. Here’s the 3 step procedure: 1. Turn on the E10 and tune to the desired station. 2. Press/Release the MEMORY button. 3. Press/Release the TIMER A or TIMER B button. 11 E10 OWNER’S MANUAL 8 WORKING WITH MEMORY At the factory, the E10 is set up with 10 pages of memory, each page holding 50 frequencies. This enables storing of 500 frequencies into memory. This factory setting can be changed and tailored to your personal needs or can be left as-is. When first learning to store stations into memory, we suggest using the factory setting. To change the factory setting, see the section CUSTOMIZING MEMORY PAGES. When working with memory, the term PRESET appears in the display under the memory numbers. STORING STATIONS INTO MEMORY 1. Turn on the radio. 2. Tune to the desired station. 3. Press/release the PAGE button to finalize the page change. ACCESSING WHAT IS STORED INTO MEMORY There are three ways to access what has been stored into memory: Direct Memory Access, Manual Memory Search and Memory Auto-scan. These three methods are described below. When the memory page and memory preset numbers appear in the upper right corner of the display, as it will in the descriptions below, the radio is in MEMORY ACCESS MODE. This mode can be exited any time with a press/release of the SCAN MODE button (12). If you first need to change memory pages, see the previous section, SELECTING/CHANGING MEMORY PAGES. 3. Press/release the MEMORY button (18). Note that the memory number digits, labeled PRESET (48) flash in the upper right corner of the display. The memory page number, labeled PAGE, also appears, but does not flash. DIRECT MEMORY ACCESS 4. Within 5 seconds use the numeric keypad to enter the memory number that you wish to store the station into. For memories 1-9, enter the numbers as 01 – 09. MANUAL MEMORY SEARCH 5. Within 5 seconds press the MEMORY button, or wait 5 seconds. This finalizes storing into memory and after a few seconds, the upper right corner’s display returns to showing the clock. Use the numeric keypad to key-in the memory number. For example, if the desired radio station is in memory number 01, just press ‘0’, then ‘1’, and it will go to memory 01. Manual Memory Search enables manual searching through the memories within a memory page, as shown below: 1. Press/release the SCAN MODE (12) button. 2. Use quick, short presses on the Up/Hour-Down/ Min. buttons or use the tuning knob to search through the memories. SELECTING/CHANGING MEMORY PAGES 3. Press the SCAN MODE button when finished. To select/change memory pages: MEMORY AUTO-SCAN 1. Press/release the PAGE button (11). The page number flashes in the display. Memory Auto-scan enables scanning through the memories within the selected memory page. Each filled memory is accessed for about 5 seconds, after which the scan move on to the next used memory automatically, staying on it for about 5 seconds. This continues indefinitely on the selected page until deliberately stopped. Unused memories are not accessed. 2. Within three seconds, use either the UP/HOURDOWN/MIN button to change to the page of your choice. Alternately, use the numeric keypad to enter the page. 12 E10 OWNER’S MANUAL 8 WORKING WITH MEMORY continued 1. Press/release SCAN MODE (12) button. 2. Press/hold either the Up/Hour or Down/Min. button for about a second. Then release it. Note that PRESET flashes under the memory number, indicating that memory scanning is functioning with each memory being scanned for about 4 seconds. It then moves on to the next memory for another 4 seconds. 3. Within 3 seconds, use the UP/HOUR or DOWN/ MIN button to select the required memory page. 4. Press/release the MEMORY button twice. 5. Within 5 seconds use the numeric keypad to enter the memory number that you wish to store the station into. To stop memory preset auto-scan, press/release either the Up/Hour or Down/Min. button. 6. Within 5 seconds press/release the MEMORY button. DELETING A MEMORY’S CONTENTS CUSTOMIZING MEMORY PAGES 1. Press/release the SCAN MODE button (12). 2. Use the Up/Hour or Down/Min. button (5,6) to select the memory preset location of the frequency that you wish to delete. Alternately, use the numeric keypad to enter the memory number. 3. Press/hold the MEMORY button (18) for about 2 seconds and then release it. ‘dEL’ appears flashing in the display. 4. While ‘del’ is still flashing, press/release the MEMORY button. DELETING ALL MEMORY PAGE CONTENTS 1. Press/release the PAGE button (11). 2. Press/hold the MEMORY button (18) for 5 seconds and then release it. ‘Del’ and PAGE (48, 49) appear flashing in the display. 3. Within 2 seconds, press/release the MEMORY button. MOVING A STORED FREQUENCY A stored frequency can be moved to a different memory or memory page. 1. Turn on the radio. 2. Press/release the PAGE button. The E10 is configured at the factory with 10 memory pages, each page having 50 memories, for a total of 500 memories. You can change this set-up via the SYSTEM SET CODES, shown below. HOW TO USE THE ATS FEATURE To automatically store your strongest local AM and FM stations into memory, press and hold the FM/AM-ATS button for 2 seconds. The E10 scans FM stations first and then AM stations, from the lowest frequency to the highest, storing the strongest stations into memory. Once they are stored, use the UP/HOUR and DOWN/MIN buttons to recall the stations. During the searching/storing process, pressing “FM/AM.ATS” stops the process, with the E10 in memory access mode, allowing the “UP/HOUR” or “DOWN/MIN” to access stations that were stored in memory. If undesired weak or noisy FM stations are stored into memory, shorten the telescopic antenna and run the ATS scanning process again. If undesired weak or noisy AM stations are stored, switch the gain control switch to NORMAL or LOCAL and run the ATS scanning process again. Stations are stored on page 0, starting with location 01, until 50 frequencies have been stored. If the number of stations is less than 50, ATS search automatically stops and the last station stored is heard. Whenever a new ATS search is performed, the new searched/stored stations will replace any previously stored stations in the ATS memory. 13 E10 OWNER’S MANUAL 9 SYSTEM SET CODES System Set Codes allow the radio to be tailored to your needs by changing certain programmable functions. These functions and their descriptions are noted in the table. SYSTEM SET CODE TABLE CODE NUMBER FUNCTION IN DISPLAY 00 (factory default setting) Divide the memories into 10 pages with 50 locations 10:50 20 Divide the memories into 20 pages with 25 locations 20:25 25 Divide the memories into 25 pages with 20 locations 25:20 50 Divide the memories into 50 pages with 10 locations 50:10 09 Set the tuning steps for MW (AM) to 9KHz 9kHz 10 Set the tuning steps for MW (AM) to 10KHz 10kHz 12 Set the clock system to 12 Hr format 12H 24 Set the clock system to 24 Hr format 24H 22 Check all the segments on LCD display 28 Rechargeable battery to be used 29 Normal AA battery to be used 76 Set the FM frequency range to 76-108MHz (for Japan) 76 108 87 (factory default setting) Set the FM frequency range to 87-108MHz (N. America/Europe) 87 108 14 Ni-MH E10 OWNER’S MANUAL 9 SYSTEM SET CODES continued CHANGING SYSTEM SET CODES • Rechargeable batteries to be used. Code 28. To enter a system code of your choice, use the procedure below. • 87-108 MHz FM frequency coverage. Code 87. 1. Turn off the radio. MONITORING THE CURRENT STATUS OF SET CODES AND OTHER SETTINGS 2. Press/release the SYSTEM SET button (20). Note that ‘- - ‘ (51) appears in the upper right corner of the display and the clock digits disappear. Performing a three second press of the SYSTEM SET button, with the E10 turned off, allows monitoring of key set codes and other settings. This information quickly flashes in the display in the following order. 3. Within 5 seconds, enter the desired numeric code with the numeric key pad, then immediately press/release the button labeled SYSTEM SET. The code ICON (52) will briefly appear in the lower right corner of the display. CHANGING THE CLOCK FROM 24 TO 12 HOUR FORMAT – AN EXAMPLE OF CHANGING A SYSTEM SET CODE The instructions below serve as an excellent example of how to change a system set code, in this case changing the clock system to a 12 hour format: 1. Time format 2. 9 or 10 kilohertz setting 3. FM tuning range setting 4. Timer A’s radio frequency 5. Timer B’s radio frequency 6. Rechargeable battery milliamp-hour setting 1. Turn off the radio. 2. Press/release the SYSTEM SET button. Note that ‘- - ‘ appears in the upper right corner of the display and the clock digits disappear. 3. Within 5 seconds, enter 12 with the numeric keypad, then immediately press/release the SYSTEM SET button. ‘12H’ briefly appears in the display. DEFAULT FACTORY SYSTEM SET CODES When shipped from the factory, the radio’s System Set Code Table is set up as follows. Changes can be made via the procedure shown in the section titled CHANGING SYSTEM SET CODES. • Ten pages with 50 memories each. Code 08. • 10 KHz AM (MW) tuning rate. Code 10. • 24 hour clock system. Code 24. 15 E10 OWNER’S MANUAL 10 ADDITONAL E10 CONTROLS USING THE LIGHT A quick, short press/release of the SNOOZE/LIGHT button (7), located on the front of the radio’s upper right corner, will turn on the display light, shining from the left side of the display, for about 5 seconds. A longer press/release of the button (about 3 seconds) will cause it to stay on indefinitely (note that this will decrease battery life). Turn off the light with a quick short press of the button. The E10 has a ‘timed backlight’ feature. When this feature is activated, pressing any key during the hours of 6 pm to 7 am activates the backlight for 3 seconds. Follow the instructions below to turn this feature on or off. 1. Turn on the radio. 2. Press/release the ‘ENTER/SYSTEM SET button. 3. Press/release the LIGHT/SNOOZE button. The display shows either ON or OFF, depending on its last state. USING THE ANTENNA GAIN SWITCH The Antenna Gain switch (23) has three positions, DX, NORMAL and LOCAL. This switch should normally be in the DX position, providing maximum receiving performance. If the AM or Shortwave station that you are listening to is overwhelmingly powerful and causes distortion, try the NORMAL or LOCAL position. This switch is not used for FM stations. USING THE ANTENNA TRIMMER CONTROL This control knob, labeled ANT TRIM and located on the right side of the E10, enables optimization of the E10’s telescopic antenna when listening to shortwave. While listening to the station, adjust the knob for best reception. USING THE LOCK BUTTON Pressing the LOCK button causes all button-activated controls to be ‘locked’ and the lock symbol appears in the lower right corner of the dis- 16 play. A quick, short press engages the LOCK feature. A longer press disengages it and the symbol disappears. This is an excellent feature to use when traveling, as it keeps the radio from being accidentally turned on. Before placing the radio into a suitcase, purse or briefcase, turn it off and then lock it. This control does not disengage timer functions. USING THE EXTERNAL ANTENNA SOCKET The external antenna socket is used to improve shortwave or FM performance. There are many such antennas on the market today. Typing in ‘shortwave antennas’ or ‘FM antennas’ on your favorite Internet search site will provide further information E10 OWNER’S MANUAL 11 LISTENING TO SHORTWAVE STATIONS Are you new to shortwave listening? If so, you’ll want to read this section and the next section called UNDERSTANDING SHORTWAVE BANDS. WHAT ARE SHORTWAVE STATIONS? These are radio broadcast stations around the world broadcasting on frequencies that can be heard over vast distances, often many thousands of miles. In the United States, there are also about 30 domestic shortwave broadcasters with religious, politically and ideologically oriented broadcasts. WHY LISTEN TO SHORTWAVE STATIONS? There are many reasons why you may enjoy shortwave stations. Here are just some, as reported to us by our customers. • Listening to news and information from other world sources often exposes you to different and unique perspectives on national and world events. • Exposure to other languages and cultures, including their music and perspectives. Hearing a country’s native or ‘folk’ music can be very enjoyable, even if you don’t understand the language. • Learning a language by hearing native speakers. • Keeping in touch with another part of the world, perhaps your original homeland or that of your family’s heritage. • Religious, politically and ideologically oriented broadcasts. GENERAL SHORTWAVE ‘RULES-OF-THUMB’ • Night shortwave reception is usually better than daytime shortwave. This can change from timeto-time, so it’s worth checking the bands during the day too. • During daytime the most active shortwave bands are 13, 15, 16, 19, and 22 meters. 16 and 19 usually being the best. At night, the most active bands are 25, 31, 41 and 49 meters, with 31 and 49 usually best. • Around sunset and sunrise, both the day and night bands may be good, sometimes exceptionally good. Listening at these times can often be quite rewarding. • The construction materials of some buildings severely block shortwave signals. To counteract this, hold the radio in your hands and get very close to a window. SELECTING A SHORTWAVE METER BAND WITH THE E10 All 14 of the international broadcast bands can be accessed with the E10. The bands are numbered 120, 90, 75, 60, 49, 31, 25, 22, 19, 16, 15, 13 and 11 meters and are commonly called ‘Meter Bands’. The E10 offers two ways to access a shortwave band. Each method places the tuner at the beginning of the band’s frequency range. 1. Each successive quick, short press of the button labeled SW METER BAND (16) places the radio at the beginning of a band. While pressing the button, the band number shows in the upper right corner of the display (50) and disappears a few seconds after it is released, causing the clock to reappear in the corner. Start tuning only after the clock reappears. If you don’t wait, then method 2, below will automatically be used. 2. Perform one quick, short press of the button labeled SW METER BAND, immediately followed by quick, short presses of either the Up/Hour or Down/ Min. tuning buttons. The band number appears in the upper right corner of the display. Once the band of choice is selected, start tuning after the clock reappears in the upper right corner. AUTO-SCAN TUNING WHILE IN SHORTWAVE In shortwave, auto-scan tuning scans in the shortwave frequency ranges noted in the Band Chart below. To tune shortwave frequencies that are inbetween these ranges, or outside of these ranges, use one of the other tuning methods, e.g. Regular Tuning (manual tuning) or Direct Frequency Entry as discussed titled TUNING IN STATIONS. 17 E10 OWNER’S MANUAL 11 LISTENING TO SHORTWAVE STATIONS continued BAND CHART OF SHORTWAVE AUTO-SCANING RANGES BAND (METERS) 120 90 75 60 49 41 FREQUENCY RANGE 2250 – 2550 3150 - 3450 3850 - 4050 4700 - 5100 5800 – 6300 7100 – 7500 31 9400 – 10000 FREQUENCY RANGE 25 11500 – 12150 22 13500 – 13900 19 15000 – 15900 16 17450 - 18000 15 18850 - 19100 13 21450 - 21950 11 25600 - 26100 SHORTWAVE TIME STATIONS (North America) The United States and Canada have shortwave time stations. The time of day is broadcast continually in Universal Time, also know as UTC and Greenwich Mean Time. The frequencies are noted below. 18 CHU-time(Canada) 3330 Best at night CHU-time(Canada) 7335 Day/night CHU-time(Canada) 14670 Best during daylight WWV-time/weather(US) 2500 Best at night WWV-time/weather(US) 5000 Best at night WWV-time/weather(US) 10000 Day/night WWV-time/weather(US) 15000 Best during daylight WWV-time/weather(US) 20000 Best during daylight E10 OWNER’S MANUAL 11 LISTENING TO SHORTWAVE STATIONS continued SHORTWAVE PUBLICATIONS: FINDING SPECIFIC STATIONS To help find specific stations and their broadcast times, frequencies and target areas, review the two excellent publications shown below. They are available from major bookstores and at online booksellers. PASSPORT TO WORLD BAND RADIO. Published by International Broadcasting Services. Address: IBS North America, Box 300, Penn’s Park, PA 18943. Phone: 215-598-3794. Web: www.passband.com. Another way to find shortwave station information is to use an Internet search site, typing in search criteria such as ‘shortwave radio stations’ or ‘shortwave frequencies’. LEARNING MORE ABOUT SHORTWAVE To learn more about shortwave see the next section titled UNDERSTANDING SHORTWAVE BANDS. Another successful way to learn more is to use your favorite Internet search site. Type in ‘shortwave listening’ or ‘shortwave stations’ and many articles will show. WORLD RADIO TV HANDBOOK. Published in North America by Watson Guptil Publications, 770 Broadway – 7th Floor, New York, NY 10003-9595. www. watsonguptill.com. 12 UNDERSTANDING SHORTWAVE BANDS continued THE KEY TO ENJOYING YOUR SHORTWAVE RADIO Now that you have a shortwave radio, no doubt you’ll want to hear worldwide stations right away. If you’re new to shortwave, please take some time to learn the basics outlined below. Even if you are an experienced shortwave listener, you may find this a useful refresher. WHAT ARE BANDS? To fully enjoy shortwave listening, this is the most important concept to learn right away. names like 25 meters, 31 meters, 49 meters, etc. These are abbreviated 25m, 31m and 49m. Just like in AM and FM radio, one simply gets into the shortwave band and tunes around, looking for stations. For example, the 19 meter shortwave band encompasses the frequency range of 15100 to 15600 kilohertz. In the chart below is a list of the shortwave bands used for international shortwave broadcasts and their corresponding frequency ranges. Since some radios show frequency in megahertz and some in kilohertz, both are shown here. The E10 shows shortwave radio frequencies in kilohertz, KHz. To successfully listen to shortwave stations you must know how to find them. They are found in the shortwave bands. If you have ever listened to AM or FM radio, then you already know what a band is. The AM band is a frequency range stretching form 530 to 1600 kilohertz, the FM band is 66-108 megahertz. A band is simply a frequency range where stations are located. When you look for stations in these “bands”, you simply tune around with your tuning buttons (or the tuning knob on an analog radio) until you find a station you like. Shortwave is similar and the shortwave bands have The following information can be used with any shortwave radio. Look at your radio’s tuning scale or digital display (or owner’s manual) to determine which frequency designation it uses in shortwave. Most radios use the abbreviations KHz or MHz. On some shortwave radios these frequencies will look like 15100 KHz, 15105 KHz or 15110 KHz, but on other radios they might look like this: 15.1 MHz, 15.105 MHz or 15.11 MHz. That’s because some radios show frequencies as kilohertz and others show the frequencies as megahertz, as in the accompanying table. The exact frequency ranges for these 19 E10 OWNER’S MANUAL 12 UNDERSTANDING SHORTWAVE BANDS continued bands may vary somewhat from one radio model to another. This is perfectly OK. On some radios the bands are clearly marked, on others they are not marked at all. If it is not apparent how to get into a band on your radio, consult the owner’s manual, the Etón Corporation web site (www.etoncorp.com) or contact Etón Corporation and we’ll show you how this is done for your model. A HELPFUL ANALOGY: a shortwave band is like a street with many individual addresses on it. Think of a shortwave band as you would a street with a full range of individual addresses on it, each address is a specific frequency. The 19 meter band could be called 19 Meter Street. As on any street, we have a range of addresses encompassing individual house numbers such as 15100, 15105, 15110, etc., each of these house numbers representing an individual house that you could visit on the street. In the 19 meter shortwave band, these ‘addresses’ or ‘house numbers’ are called frequencies and on each frequency you might visit a different shortwave radio station. THE GENERAL SHORTWAVE BAND CHART, SHOWN BELOW, SHOWS ALL OFFICIALLY ALLOCATED SHORTWAVE BANDS. 20 BAND MEGAHERTZ (MHz) KILOHERTZ (KHz) 120m 2.300-2.500MHz 2300-2500 KHz 90m 3.20-3.40 MHz 3200-3400 KHz 75m 3.90-4.00 MHz 3900-4000 KHz 60m 4.750-5.060 MHz 4750-5060 KHz 49m 5.950-6.20 MHz 5950-6200 KHz 41m 7.10-7.60 MHz 7100-7600 KHz 31m 9.20-9.90 MHz 9200-9900 KHz 25m 11.600-12.200 MHz 11600-12100 KHz 22m 13.570-13.870 MHz 13570-13870 KHz 19m 15.10-15.80 MHz 15100-15800 KHz 16m 17.480-17.90 MHz 17480-17900 KHz 13m 21.450-21.850 MHz 21450-21850 KHz 11m 25.60-26.10 MHz 25600-26100 KHz E10 OWNER’S MANUAL 12 UNDERSTANDING SHORTWAAVE BANDS continued DAY BANDS AND NIGHT BANDS THE DIFFERENCE IS IMPORTANT Because shortwave signals depend on such factors as the sun, the ionosphere and interaction with the earth itself, signals cannot be heard on all bands throughout the day. Some bands are best during the daylight hours, and some are best at night. In general, the bands with frequencies below 13 MHz (13000 KHz) are better at night and the bands with frequencies above 13 MHz (13000 KHz) are best during the day. Listed below are the characteristics of the major shortwave bands. Follow these guidelines for best listening results. How to get into a specific band will vary from one radio to another. Consult your owner’s manual for instruction on how to access the bands on your radio or call Etón Corporation if it’s not clear to you. SUNSET AND SUNRISE OFTEN THE VERY BEST TIME TO LISTEN. We are often asked whether there is a truly best time for listening to shortwave, when signals are strongest and clearest. Often, this is a window of hours right around sunset and sunrise. Sometimes it’s a two-hour window, other times three or four hours. Experiment to determine when it’s best in your area. DAYTIME LISTENING EVENING/NIGHT LISTENING Shortwave listening is generally at its poorest during the daylight hours of about 10 a.m. to 3 p.m. The major reason for this is that the broadcasters are not transmitting to North America at this time, assuming that we are all either at work or at school and are not able to listen during the day. If you want to try daytime listening, use the guidelines below. Typically, daytime shortwave tends to be better in Eastern North America than in Western North America. The best daytime bands are shown in BOLD print in the table below. This is the best time to listen, because the broadcasters are deliberately transmitting to North America. BAND (METERS) 120 90 75 60 49 41 FREQUENCY RANGE These bands may be extremely good around sunset and sunrise too. Best night bands are shown in BOLD print in the table below. NIGHT BANDS CHARACTERISTICS 25m Similar to 31m 31m Good all night everywhere. Often extremely good at sunrise and sunset. Good results often start about an hour before sunset. 41m Similar to 49m. Good all night in Eastern North America; varies in Western North America. 49m The best overall night band. 2250 – 2550 3150 - 3450 3850 - 4050 4700 - 5100 5800 – 6300 7100 – 7500 21 E10 OWNER’S MANUAL 12 UNDERSTANDING SHORTWAVE BANDS continued IF YOUR BUILDING BLOCKS SIGNALS: If you notice that the signal strength of a stations substantially improves when you get very close to a window or when you go outside, then it is certain that your building blocks shortwave signals. This blockage is due to the construction materials of your building or to having one or more stories or levels above you. The solutions to this are to do your listening very close to a window, to go outside or to set up an outdoor shortwave antenna. For ideas on how to set up an outdoor shortwave antenna, use your favorite Internet search site and type in ‘shortwave antennas’. If you don’t have Internet access, contact us, Etón Corporation, using the contact methods noted at the beginning of this manual. 13 TROUBLESHOOTING RESET PROCEDURE The RESET button is on the bottom of the E10. When performing a reset, have good batteries in the radio or power it with an AC adaptor and turn it off. Perform a reset if the solutions outlined below don’t resolve the issue. To perform a reset, press the reset button with a paper clip or similar object. WILL NOT TURN ON 1. Assure that the LOCK feature is not engaged. 2. Assure that the radio has power (batteries installed or AC adaptor plugged in. 3. Assure that batteries are inserted with correct polarity 4. Assure that the batteries are not depleted 5. If using an AC adaptor, assure that it is plugged into the household outlet (mains socket) and into the radio’s DC socket. Take care not to plug it into the earphone socket. Also, assure that the AC adaptor is of the correct DC voltage output and polarity and that its plug-tip is of the correct inner and outer diameter. SHUTS OFF ABRUPTLY WHILE PLAYING DURING BATTERY USE This is caused by depleted batteries. Replace them. 22 SHUTS OFF ABRUPTLY WHILE BEING MOVED DURING AC ADAPTOR USE This is usually caused by a broken wire or loose connection in the AC adaptor’s cord or if the AC adaptor’s plug-tip is of the wrong diameter. OPERATES ERRATICALLY Perform a RESET, as described in the section titled RESET PROCEDURE. STATIONS ARE RECEIVED TOO WEAK • Assure that the ANTENNA GAIN switch is set to the DX position. • Assure that the telescopic antenna is pulled up all the way for FM and Shortwave reception. • When listening to AM stations, swivel the radio. The AM internal ferrite bar antenna is highly directional. • On shortwave, adjust the ANTENNA TRIMMER. THERE IS NO SOUND FROM THE SPEAKER Assure that earphones/headphones are not plugged in and that the volume control is turned up. A STATION CAUSES SEVERE AUDIO DISTORTION, BUT SEEMS TO BE VERY STRONG IN SIGNAL STRENGTH This is probably a strong, local station, very close to your location. Because of its close proximity to you, its signal is too strong. To reduce signal E10 OWNER’S MANUAL 13 TROUBLESHOOTING continued strengths, place the ANTENNA GAIN switch into the NORMAL or LOCAL position. THE BATTERY COMPARTMENT HAS A STICKY LIQUID OR DRIED WHITE POWDER IN IT This is the result of battery acid leakage. To avoid battery acid leakage, only use high quality alkaline or rechargeable nickel-metal-hydride batteries. Never intermix old with new, or different brands or types of batteries. If the batteries leak, immediately contact the manufacturer of the batteries and don’t throw them away. Damage caused by battery acid leakage is not covered under warranty. 14 WARRANTY REGISTRATION To ensure full warranty coverage or product updates, registration of your Etón or Grundig product should be complete as soon as possible after purchase or receipt. To register your radio, please select one of the following methods: 1. Register by visiting our website at http://www.etoncorp.com 2. Call our toll-free registration number anywhere in the United States or Canada at (888) 889-4391 or world-wide by dialing (204) 336-6547. French and English speaking operators available. Product Registration Include your name, full mailing address, phone number, model purchased, date purchased, retail vendor name and product serial number (typically located in or near the battery compartment). 3. Mail your registration information to the following address: Etón Corporation 1015 Corporation Way Palo Alto, CA 94303 23 E10 OWNER’S MANUAL 15 LIMITED WARRANTY TO THE ORIGINAL CUSTOMER This Etón or Grundig brand product, as supplied and distributed by Etón Corporation (Etón) is warranted by Etón against manufacturing defects in material and workmanship for the following limited warranty period: One (1) year parts and labor This limited warranty begins on the original date of purchase, and is valid only on products purchased through an authorized Etón retailer and does not include transportation, installation, removal or reinstallation. Warranty repairs must be performed by Etón or Etón’s authorized service center. To receive warranty service, the original dated bill of sale must be presented upon request as proof of purchase to Etón or Etón’s authorized service center. Transportation to Etón or Etón’s authorized service center is the responsibility of the purchaser. Etón will repair or replace this product, at our option and at no charge with new or reconditioned parts, if found to be defective during the limited warranty period specified above. The product must be returned no later than 15 days beyond the expiration of the warranty period with transportation charges prepaid to Etón or Etón’s designated service center for warranty coverage. Prior to returning any product for warranty service, the purchaser must contact Etón for problem determination and service procedure. All replaced parts and products become the property of Etón. Replacement parts and products assume the remaining original warranty, or ninety (90) days, whichever is longer. 24 This limited warranty covers manufacturing defects in material and workmanship encountered in normal, noncommercial use of this product and shall not apply to the following, including, but not limited to: damage which occurs due to applications and uses for which the product was not intended; failures or problems which are caused by products or equipment not supplied by Etón; accidents, misuse, abuse, neglect, misapplication, fire, water, lightning, or other acts of nature; incorrect line voltage, fluctuations or surges; damage caused by improper or faulty installation (including batteries, which may create an acid leak with irreversible circuit damage); damage caused by acid leakage; product alteration or modification; or use of unauthorized parts, supplies, accessories, or equipment which damage this product or result in service problems. E10 OWNER’S MANUAL 16 SERVICE INFORMATION Service your Etón or Grundig product To obtain service for your Etón or Grundig product we recommend first contacting an Etón service representative at 800-872-2228 US, 800-637-1648 Canada or (650) 903-3866 for problem determination and trouble-shooting. Many of the common questions can be resolved quickly over the phone. There are two service types should your Etón or Grundig product need repair. 1. WARRANTY– If your product is still in warranty and the Etón service representative determines that warranty service is needed, a return authorization will be issued and instructions for shipment to an authorized warranty repair facility. Do Not ship your radio back without obtaining the return authorization number. 2. NON-WARRANTY – If your product is no longer under warranty and requires service our technical staff will refer you to the nearest repair facility that will be able to best handle the repair. 25 E10 OWNER’S MANUAL 26 Etón Corporation Corporate Headquarters 1015 Corporation Way Palo Alto, California 94303 USA tel +1 650-903-3866 tel +1 800-872-2228 fax +1 650-903-3867 Etón Europe/Lextronix Germany Rosenstrasse 2 D-10178 Berlin, Germany tel +49 [0]30 243102142 Etón Canada 1 Yonge Street, Suite 1801 Toronto, Ontario M5E 1W7 Canada tel +1 416-214-6885 v. 01-12-06