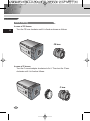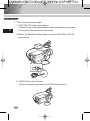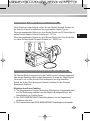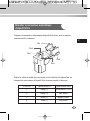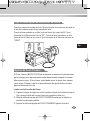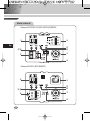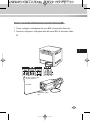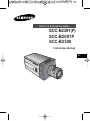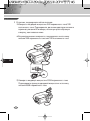
1
DIGITAL COLOR CAMERA SCC-B2391(P) SCC-B2091P SCC-B2300 E D F Sp User’s Manual I Pl R Important Safety Instructions CAUTION RISK OF ELECTRIC SHOCK DO NOT OPEN E CAUTION: TO REDUCE THE RISK OF ELECTRIC SHOCK, DO NOT REMOVE REAR COVER. NO USER SERVICEABLE PARTS INSIDE. REFER TO QUALIFIED SERVICE PERSONNEL. This symbol indicates high voltage is present inside. It is dangerous to make any kind of contact with any inside part of this product. This symbol alerts you that important literature concerning operation and maintenance has been included with this product. To prevent damage which may result in fire or electric shock hazard, do not expose this appliance to rain or moisture. This device complies with part 15 of the FCC Rules. Operation is subject to the following two conditions. 1) This device may not cause harmful interference, and 2) This device must accept any interference that may cause undesired operation. CAUTION: Danger of explosion if battery is incorrectly replaced. Replace only with the same or equivalent type recommended by the manufacturer. Dispose of used batteries according to the manufacturer’s instructions. 2 1. 2. 3. 4. 5. 6. 7. 8. 9. 10. 11. 12. 13. 14. Read these instructions. Keep these instructions. Heed all warnings. Follow all instructions. Do not use this apparatus near water. Clean only with dry cloth. Do not block any ventilation openings. Install in accordance with the manufacturer’s instructions. Do not install near any heat sources such as radiators, heat registers, or other apparatus (including amplifiers) that produce heat. Do not defeat the safety purpose of the polarized or groundingtype plug. A polarized plug has two blades with one wider than the other. A grounding type plug has two blades and a third grounding prong. The wide blade or the third prong are provided for your safety. If the provided plug does not fit into your outlet, consult an electrician for replacement of the obsolete outlet. Protect the power cord from being from being walked on or pinched particularly at plugs, convenience receptacles, and the point where they exit from the apparatus. Only use attachments/accessories specified by the manufacturer. Use only with cart, stand, tripod, bracket, or table specified by the manufacturer, or sold with the apparatus. When a used, caution when moving the cart/apparatus combination to avoid injury from tip-over. Unplug this apparatus. When a cart is used, use caution when moving the cart/apparatus combination to avoid injury from tipover. Refer all servicing to qualified service personnel. Servicing is required when the apparatus has been damaged in any way, such as power-supply cord or plug is damaged, liquid has been spilled or objects have fallen into the apparatus, the apparatus has been exposed to rain or moisture, does not operate normally, or been dropped. 3 E Contents Chapter 1 Introduction ........................................................ 5 Chapter 2 Special Features ............................................. 6 Chapter 3 Installation ........................................................... 7 E Checking the contents of the package .............. 7 Precautions in Installation and Use ................... 8 Connecting Auto Iris Lens Connector ................ 9 Lens Fixing ........................................................... 10 Setting Lens Selection Switch .................... 11 Back Focus Adjustment ................................ 11 Connecting Cables and Checking Operation ....... 13 Chapter 4 Part Names and Functions ............................... 15 Product Specification ........................................ 20 4 Chapter 1 Introduction DAYNIGHT camera is a low brightness camera, which improves the sensitivity by operating with a color mode at the over of regular brightness and operated with a B/W mode by canceling the IR Cut function at the below of regular brightness. Also, it can be used linked with the separated infrared ray emission device. SCC-B2391(P)/B2091P has a high resolution with the 540 TV Lines of horizontal resolution through the digital signal processing and OLPF. [DAYNIGHT] It is a function of a color camera to delete the fiter with the IR Cut function in an illumination below the standard value so that it has a better sensitivity. ❉ In the mechanical fluorescent light environment, if you attach MANUAL IRIS LENS and turn the ELC switch among FUNCTION switches on, color may be rolled. In this case, supply AC power before you turn L/L switch among FUNCTION switches on. (NTSC:60HZ , PAL:50HZ) COLOR ROLLING is the problem that color on the monitor screen changes non-periodically. This happens when White Balance is not fixed, because a mechanical fluorescent light flickers when it’s cycle is the same to the cycle of the power frequency. 5 E Chapter 2 Special Features High Sensitivity It has an up-to-date 1/3" Super-HAD IT CCD for an image of high sensitivity. E Resolution It realizes high resolution resulting from full digital image processing supported by a state-of-art digital signal technology. Superior Back Light Adjustment Function In case the object has a bright illumination or sunlight behind it, this camera adjusts the image shaded by the back light for clear photographs. Digital Power Supply Synchronization Method The Full Digital Method Line Lock is realized in this camera, which adjusts the vertical camera synchronization directly to improve controllability and reliability of the camera. 6 Chapter 3 Installation This chapter describes what should be checked before installation, how to set the installation environment, and what should be done during installation. Then, it describes how to install the camera and connect the cable in actual circumstances. Checking the contents of the package Be sure to check if the following items are included in the package. Camera User's Manual Camera Holder(Mount) C Mount Adapter Auto Iris Lens Connector 7 E Precautions in Installation and Use E ① Do not attempt to disassemble the camera yourself. ➁ Be cautious in handling the camera. Avoid striking or shaking the camera. Be cautious to avoid damage on the camera caused by improper storage or operation. ➂ Do not expose this camera to rain or moisture. Do not operate this camera on a wet place. ➃ Do not use strong or abrasive detergents when cleaning the camera body. Use a dry cloth to clean the camera. ⑤ Keep the camera at a cool place away from the direct sunlight. Leaving it under the direct sunlight may result in the malfunction of the unit. 8 Connecting Auto Iris Lens Connector Prepare the following Auto Iris Lens Connector supplied with the camera. E Rb Pin3 Pin1 Pin4 Pin2 Connect the cable of the control cable, whose covering is stripped, to the Auto Iris Lens Connector as shown below. Pin No. DC Control Type VIDEO Control Type 1 Damp(-) Power (+12V) 2 Damp(+) N/A 3 Drive(+) VIDEO Signal 4 Drive(-) GROUND 9 Lens Fixing E In case of CS lenses Turn the CS lens clockwise until it is fixed as shown as follows. CS lens In case of C lenses Turn the C-mount adapter clockwise to fix it. Then turn the C lens clockwise until it is fixed as follows. C lens 10 Setting Lens Selection Switch When lens mounting is completed, set the Lens selection Switch on the side of the camera according to the mounted lens type. When the mounted lens is an Auto Iris Lens of the DC control type, set the Lens Selection Switch to "DC". When the mounted lens is an Auto Iris Lens of the Video control type, set the Lens Selection Switch to "VIDEO". Back Focus Adjustment The camera back focus is adjusted at the plant before delivery, but some lenses are out of focus though the number differs in types. If it's the case, you should make the back focus adjustment as follows. First, this is the back focus adjustment procedure for fixed focus lenses. Lenses without zoom function ① Image an object with high resolution(letticed) at more than 10m distance and put the lens focus ring in the infinite(∞) position. ➁ Rotate the BACK FOCUS control bar until the object is seen best. ➂ Tighten the BACK FOCUS control bar fixing screw. 11 E E Lenses with zoom function ① Image an object with high resolution(letticed) at a distance of 3 to 5 m and zoom in the lens as close to TELE as possible. Then adjust the lens focus bar until the object is seen best. ➁ Zoom in the lens as close to WIDE as possible and adjust the BACK FOCUS adjustment bar until the object is seen best. ➂ Repeat from ① to ➁ above 2 or 3 times until the focus on the ZOOM TELE side is in line with that on the ZOOM WIDE side. BACK FOCUS CONTROL BAR 12 Connecting Cables and Checking Operation 1 First, connect the connector of the BNC cable to the Video Out terminal 2 Second, connect the other connector of the BNC cable to the Video In terminal. Video In Terminal of Monitor Rear Surface BNC cable Video Out Terminal 13 E E 3 Third, connect the power cable. ① AC24V/DC12V Power Input Camera. Connect 2 lines of the power adapter using a screwdriver to the power IN Terminal of the camera as shown below. ❉ Without the distinction of the polarity, connect to the AC24V or DC12V power source. ➁ AC230V Power Input Camera Connect the power input cord to the AC230V power source. 14 Chapter 4 Part Names and Functions Side View ➂ Auto Iris Lens Connector ① Mount Adapter Fixing Groove E ➅ Back Focus Control Bar ⑤ ALC Lens Selection Switch ➃ Auto Iris Lens Control Cable ➁ Camera Lens ① Mount Adapter Fixing Groove This groove is used for screwing the mount adapter, a part of the bracket where the camera will be installed. ➁ Camera Lens(Option) This lens is installed in the camera. ❉ A camera lens with a stained surface should be cleaned softly with a lens tissue or ethanol painted cotton cloth. ➂ Auto Iris Lens Connector This connector provides the automatic shutter lens with power supply, control signal, video signal, or DC signal necessary for the control of the lens shutter. ➃ Auto Iris Lens Control Cable This cable transmits signal which controls the Iris. ⑤ ALC Lens Selection Switch This Switch is used for select the type of Lens. ➅ Back Focus Control Bar This bar is used for set back focus of the camera. 15 Rear View AC24V/DC12V Camera (SCC-B2391(P)/B2300) E ⑤ ⑨ ➂➃ ➁ ➅ ① ⑦ ⑧ AC230V Camera (SCC-B2091P) ⑤ ① ➂➃ ➁ ➅ ⑨ ⑦ ⑧ 16 ① Power connection port AC24V/DC12V Camera : It is a port connected to the power adaptor cable. AC230V Camera : It is Power cord. E ➁ POWER LED If the power of a camera is supplied normally, the LED is ON. ➂ ➃ INC and DEC Switch Both switches increase or decrease the profit of RED and BLUE to fix a color temperature as you wish while AWB among the FUNCTION switches is off(USER) and control the vertical synchronous phase while both AWB and L/L are on. ⑤ FUNCTION Switch 1. L/L 3. FL 2. ELC 4. AWB ON SW1 SW2 SW3 SW4 17 E 1) SW1(L/L) : Set to OFF, the camera activates the internal synchronization mode and set to ON, the power synchronization mode. If you connect multi cameras to the sequential switcher to enter the automatic conversion mode, the screen will bounce every screen while the camera stays in INT(internal synchronization). Such bouncing phenomena may be cleared and screen conversion becomes smooth by setting the L/L switch to ON and using the INT/DEC switch to control the vertical synchronous phase. ❉ If you want to control the vertical synchronous phase with the INT/DEC switch when L/L is set to ON, you shall set SW4 to AWB ON. ❉ In case of DC12V, INT(internal synchronizer) will be fixed without regard to ON/OFF of L/L. 2) SW2(ELC) : Use this switch with the Manual Iris Lens. While this switch is ON, the speed of the electronic shutter varies with the brightness of the subject from 1/60(50) to 1/100,000 sec for automatically controlling the brightness of the screen. However, with the Auto Iris Lens (DC or Video Control), be sure to switch OFF. Color Rolling may occur in this mode. In that case, input AC power source to the camera and select SW1 "ON". (NTSC : 60HZ, PAL : 50HZ) 3) SW3(FL): This is to prevent flicker on the screen when NTSC system is used in 50HZ power supply region and PAL system is used in 60HZ power supply region. That is to prevent shaking on the screen resulted from the discordance of the vertical sync frequency and the flicker frequency of the illumination. While this switch is ON, the electronic shutter is fixed to 1/100sec (NTSC) or 1/120 sec (PAL). 4) SW4(AWB): When setting up ON, the color of screen is adjusted automatically in accordance with the change of lighting color temperature by the change of outer environment. (ATW) If the lighting condition is steady, OFF setting is available. The camera memorizes the lighting color temperature at the time when the switch setting is changed from ON to OFF, and the camera color is adjusted to the memorized color temperature. (AWC) If the lighting color temperature is changed and you want to make the camera be memorized/operated with the changed color temperature, re-operate the switch On/Off operation. However, be aware that an error may occur under the following conditions. First, a case that the subject is big, single color of the high chroma, and in the center of the screen or a case with almost no white color on the screen. Second, a case with a specific illumination such as a natrium lamp 18 ➅ DC IRIS Level Controller When the ALC lens selection switch is set to DC, use the same control bar as the driver to control the IRIS level. E ⑦ Video Output Port This port shall be connected to the monitor video input port or equivalent. You may output camera video signals through this port. ⑧ DAYNIGHT Selection Switch If you set this switch to AUTO, the DAYNIGHT function will be automatically activated according to the illumination. Under poor illumination, IR Filter will be automatically eliminated in the black and white mode(BW Mode) to raise the sensitivity but under good illumination, IR Filter will be automatically inserted in the color mode(COLOR Mode). IR Filter responds to the preset Duration Time (Delivery Condition:10 seconds). When you convert DAYNIGHT in the AUTO mode, you shall set Duration Time as follows. (Please turn off the L/L switch and the AWB switch to begin with). Whenever you convert the DAYNIGHT selection switch from EXT to AUTO while you hold on to the INC/DEC switch, DURATION TIME becomes 10s, 30s, 60s, 90s, 120s, and 150s in sequence. Upon setup, you shall cancel pressing the INC/DEC switch to save the setup condition in the camera. Upon saving, the DAYNIGHT mode will be automatically converted depending on DURATION TIME even in the event of POWER On/Off. For resetting, please repeat the above procedure. (Upon resetting, you may r eturn both L/L and AWB to the previous condition.) If you set this switch to EXT, COLOR/BW Mode varies depending on the external signal input to the DAYNIGHT external signal input port(⑨). ⑨ DAYNIGHT External Signal Input Port When the DAYNIGHT selection switch(⑧) is set to EXT, COLOR/BW Mode varies depending on the input signal to this port. The input terminal shall be DC5V pull-up input and over 0.2mA. OFF : Open contact ON : Closed contact 19 Product Specification SCC-B2391P/2091P ITEM E Product Type Contents CCTV Camera Broadcasting System PAL STANDARD SYSTEM CCD 1/3 Super-HAD CCD Effective Pixels 752(H) x 582(V) Scanning Type 625 Line, 2:1 Interlace INTERNAL : 15,625Hz(H) 50 Hz(V) Frequency LINE LOCK : 15,625Hz(H) 50 Hz(V) INTERNAL Sync Type LINE LOCK(When AC Power source is used) Resolution(H) 540(Color)/570(B/W) TV Lines S/N Ratio About 50dB Minimum Illumination 0.3 Lux(Color) / 0.06 Lux(B/W) of Object DAYNIGHT 20 AUTO / EXT ITEM Contents E ALC DC IRIS LENS ALC/ELC VIDEO LENS ELC Electronic Shutter Iris Function (Max. 1/100 Ksec) Color Temperature AWB/MANUAL BLC ON AGC ON Video Output COMPOSITE VIDEO OUT 1V p_p 75Ω/BNC Power Source Power Consumption AC24V ±10%(50Hz±0.3Hz), DC12V+10%~-5% B2391P : About 3W B2091P : About 4W Operating Temp -10°C~+50°C Operating Humidity ~90% Size 68(W)x55(H)x128.5(D)mm(included BNC) Weight B2391P : 450g B2091P : 550g 21 Product Specification SCC-B2391/B2300 ITEM E Product Type Contents CCTV Camera Broadcasting System NTSC STANDARD SYSTEM CCD 1/3 Super-HAD CCD Effective Pixels B2391 : 768(H) x 494(V) B2300 : 510(H) x 492(V) Scanning Type 525 Line, 2:1 Interlace INTERNAL : 15,734Hz(H) 59.94 Hz(V) Frequency LINE LOCK : 15,750Hz(H) 60 Hz(V) INTERNAL Sync Type LINE LOCK(When AC Power source is used) Resolution(H) B2391 : 540(Color)/570(B/W) TV Lines B2300 : 400(Color)/420(B/W) TV Lines S/N Ratio About 50dB(AGC OFF) Minimum Illumination B2391 : 0.3 (Color) / 0.06 (B/W)Lux of Object B2300 : 0.2 (Color) / 0.03 (B/W)Lux DAYNIGHT 22 AUTO / EXT ITEM Contents E ALC DC IRIS LENS ALC/ELC VIDEO LENS ELC Electronic Shutter Iris Function (Max. 1/100 Ksec) Color Temperature AWB/MANUAL BLC ON AGC ON Video Output COMPOSITE VIDEO OUT 1V p_p 75Ω/BNC Power Source AC24V ±10%(60Hz±0.3Hz), DC12V+10%~-5% Power Consumption About 3Watts Operating Temp -10°C~+50°C Operating Humidity ~90% Size 68(W)x55(H)x128.5(D)mm(included BNC) Weight 450g 23 Correct Disposal of This Product (Waste Electrical & Electronic Equipment) (Applicable in the European Union and other European countries with separate collection systems) This marking shown on the product or its literature, indicates that it should not be disposed with other household wastes at the end of its working life. To prevent possible harm to the environment or human health from uncontrolled waste disposal, please separate this from other types of wastes and recycle it responsibly to promote the sustainable reuse of material resources. Household users should contact either the retailer where they purchased this product, or their local government office, for details of where and how they can take this item for environmentally safe recycling. Business users should contact their supplier and check the terms and conditions of the purchase contract. This product should not be mixed with other commercial wastes for disposal. Part No.:AB68-00511B DIGITAL FARBE KAMERA SCC-B2391(P) SCC-B2091P SCC-B2300 BEDIENUNGSANLEITUNG D Sicherheitshinweise Ziel dieser Informationen ist es, den ordnungsgemäßen Gebrauch dieses Geräts sicherzustellen und dadurch Gefahren oder Sachbeschädigungen zu vermeiden. Bitte befolgen Sie alle Anweisungen. D Achtung Warnung Die Nichtbeachtung eines Warnhinweises kann Die Nichtbeachtung eines mit Achtung gekennzeichneten zum Tode oder zu schweren Verletzungen führen. Hinweises kann zu Verletzungen und Sachschaden führen. Warnung 1. Achten Sie darauf, dass Sie nur den mitgelieferten Adapter verwenden. (Die Verwendung eines anderen Adapters als des mitgelieferten kann Feuer, einen Stromschlag oder die Beschädigung des Geräts verursachen.) 2. Beim Anschließen der Netz- und Signalkabel müssen zuvor die externen Anschlussbuchsen überprüft werden. Schließen Sie die Alarmsignalkabeladern an die Alarmanschlüsse, den Netzadapter an die Netzsteckdose und den Gleichstromadapter an den Gleichstromeingang an, und achten Sie dabei auf die richrige Polarität. (Ein falscher Anschluss an das Stromnetz kann Feuer, einen Stromschlag oder die Beschädigung des Geräts verursachen.) 3. Schließen Sie nicht mehrere Kameras an einen Adapter an. (Wird die Kapazität überschritten, kann es zu einer anormalen Wärmeentwicklung oder Feuer kommen.) 4. Stecken Sie das Netzkabel fest in die Steckdose ein. (Ein loser Anschluss kann Feuer verursachen.) 5. Bei der Wand- oder Deckeninstallation bringen Sie die Kamera sicher und fest an. (Fällt die Kamera herunter, kann es zur Verletzung von Personen kommen.) 6. Plazieren Sie keine leitfähigen Gegenstände (wie z. B. Schraubenzieher, Münzen und metallene Objekte) oder mit Wasser gefüllte Behälter auf der Kamera. (Das kann zur Verletzung von Personen durch Feuer, Stromschlag oder herunterfallende Gegenstände führen.) 2 7. Die Kamera darf nicht an einem rußigen, staubigen oder feuchten Ort installiert werden. (Andernfalls besteht die Gefahr eines Brandes oder Stromschlags.) 8. Beim Auftreten eines ungewöhnlichen Geruchs oder einer Rauchentwicklung, die vom Gerät ausgehen, ziehen Sie unverzüglich das Netzkabel aus der Steckdose und wenden Sie sich an Ihr Kundendienstzentrum. (Die Fortsetzung des Gebrauchs kann in diesem Fall zu Feuer oder einem elektrischen Schlag führen.) 9. Sollte das Gerät nicht störungfrei funktionieren, setzen Sie sich mit Ihrem Händler oder dem nächsten Kundendienstzentrum in Verbindung. Das Gerät darf niemals in keiner Weise zerlegt oder modifiziert werden. (Samsung übernimmt keine Haftung für Probleme, die durch unbefugte Abänderungen oder einen Reparaturversuch herbeigeführt sind.) 10. Beim Reinigen darf Wasser niemals direkt auf die Geräteteile gelangen. (Andernfalls besteht die Gefahr eines Brandes oder Stromschlags.) Die Oberfläche kann mit einem trockenen Tuch abgewischt werden. Verwenden Sie für das Gerät keine Reinigungsmittel oder chemischen Reiniger, da sich durch solche Mittel die Farbe ablösen und der Oberflächenüberzug beschädigt werden kann. Achtung 1. Lassen Sie keine Gegenstände auf das Gerät fallen, und setzen Sie es keinen starken Stößen aus. Setzen Sie die Kamera keinen starken Vibrationen oder magnetischen Störfeldern aus. 2. Die Kamera darf nicht an Orten mit hohen Temperaturen (über 50 °C) bzw. tiefen Temperaturen (unter -10 °C) oder hoher Luftfeuchtigkeit installiert werden. (Andernfalls besteht die Gefahr eines Brandes oder Stromschlags.) 3. Installieren Sie das Gerät nicht in der Nähe von Wärmequellen, wie z. B. einem Heizgerät oder Heizkörper, und an Orten, an denen es direktem Sonnenlicht ausgesetzt ist. (Hier besteht Feuergefahr.) 4. Wenn Sie die bereits installierte Kamera an einen anderen Ort verlegen wollen, achten Sie darauf, die Kamera auszuschalten, bevor Sie sie abnehmen oder neu installieren. 5. Die Installation sollte an einer gut belüfteten Stelle erfolgen. 6. Ziehen Sie bei einem Gewitter den Netzstecker. (Die Nichtbeachtung kann zu Feuer oder einer Beschädigung des Geräts führen.) 3 D INHALTVERZEICHNIS D Kapitel 1 ÜBERSICHT ......................................................... 5 Kapitel 2 SPEZIALE MERKMALE ...................................... 6 Kapitel 3 Installation .............................................................. 7 Überprüfung des Inhalts in der Verpackung ........ 7 Sicherheitsmaßnahme bei Installation und .......... Verwendung ...........................................................8 Anschließen des Auto Blende Objektiv ................ Konnektor .............................................................. 9 Einstellung des Objektivs ................................. 10 Einstellung Objektiv Auswahl Schalter ............11 Einstellung des Rück-brennpunktes (Back Focus) ...................................................... 11 Anschluß der Kabel und Überprüfung des Betriebs .........................................................13 Kapitel 4 BEZEICHNUNG DER TEILE UND IHRE FUNKTIONEN .................................................... 15 Produkt Spezifikationen ...................................... 20 4 Kapitel 1 ÜBERSICHT DAYNIGHT(TAG/NACHT) Kamera ist eine niedrige Helligkeit Kamera, die in der Umgebung von über die bestimmten Helligkeit im Farbe Modus funktioniert, und die unter bestimmte Helligkeit IR Cut Funktion behebt und den S/W Modus aktiviert, um in der dunklen Umgebung den Gegenstand gut sichtbar zu machen. Und Sie können diese Kamera mit dem externen Infrarot Strahl Emission Gerät zusammen verwenden. SCC-B2391(P)/B2091P hat eine hohe Auflösung mit 540 TV Linie der Horizontalauflösung durch die digitale Signalverarbeitung und OLPF. [DAYNIGHT] Es ist eine Funktion einer Farbkamera; diese Funktion unter bestimmten Beleuchtung beseitigt den Filter, der eine IR Cut Funktion hat, um eine bessere Empfindlichkeit zu haben. ❉ In der mechanischen Leuchtstofflicht Umgebung, wenn Sie Manuelles BLENDE Objektiv anbringen und den ELC Schalter unter FUNKTION Schaltern einschalten, kann Farbe gerollt werden. In diesem Fall, versorgen Sie AC Strom bevor Sie L/L Schalter unter FUNKTION Schaltern einschalten. (NTSC: 60HZ, PAL: 50HZ) FARBE ROLLEN ist das Problem, dass sich die Farbe auf den Monitor Schirm nicht periodisch verändert. Dieses tritt auf, wenn Weißabgleich nicht fixiert ist, weil ein mechanisches Leuchtstofflicht flimmert, wenn sein Zyklus derselbe zum Zyklus der Strom Frequenz ist. 5 D Kapitel 2 Speziale Merkmale Hohe Empfindlichkeit Es hat ein neuesten 1/3" Super-HAD IT CCD für ein Bild der hohen Empfindlichkeit. D Resolution Es verwirklicht eine hohe Resolution von vollen digitalen Bild-Entwickellung mit der höchsten Digital Signal Technologie. Superior Gegenlicht Einstellung Funktion Im Fall von einer hellen Beleuchtung oder Sonnenstrahlen hinter dem Gegenstand kann das Bild, das wegen der Gegenlicht verdunkelt worden war, deutlich aufgenommen werden. Digital Stromquelle Synchronisation Methode Mit dem Vollen Digital Methode Linie Schluß (Line Lock) kann man die vertikale Synchronisation der Kamera direkt struern, so die Kontrollfähigkeit und die Zuverläßigkeit der Kamera zu verbessern. 6 Kapitel 3 Installation In diesem Kapitel wird erläutert, was vor der Installation der Kamera zu beachten ist, wie man eine geeignete Installationsstelle auswählt und welche Vorsichtsmaßnahmen bei der Installation zu treffen sind. Nun können Sie die Kamera installieren und die Kabel anschließen. D Überprüfung des Inhalts in der Verpackung Überprüfen Sie bitte, ob die folgende Zubehörteile im Lieferumfang enthalten sind. Kamera Manuale d’utenteBedienun gsanleitung Kamera Stütze (Passepartout) C Passepartout Adapter Auto Blende Objektiv Anschluß 7 Sicherheitsmaßnahme bei Installation und Verwendung ① Versuchen Sie nicht, sich die Kamera auseinanderzubauen. D ➁ Nehmen Sie sich von der Behandlung der Kamera in Acht. Vermeiden Sie, die Kamera anzuschlagen oder zu rütteln. Seien Sie vorsichtig, Beschädigung auf der Kamera zu vermeiden, die durch ungeeignete Lagerung oder Betrieb verursacht wird. ➂ Lassen Sie diese Kamera nicht mit Regen oder Feuchtigkeit in Kontakt bringen. Lassen Sie nicht diese Kamera auf einem nassen Platz laufen. ➃ Verwenden Sie keine starken oder abschleifenden Reinigungsmittel, wenn Sie das Kameragehäuse säubern. Benutzen Sie ein trockenes Tuch, um die Kamera zu säubern. ⑤ Halten Sie sich die Kamera an einem kühlen Platz, fern vom direkten Tageslicht. Wenn die Kamera unter dem direkten Tageslicht ausgesetzt wird, kann die Störung der Einheit ergeben. 8 Anschließen des Auto Blende Objektiv Konnektor Vorbereiten Sie den folgenden Auto Blende Objektiv Konnektor vor, der mit der Kamera geliefert wird. D Rb Pin3 Pin1 Pin4 Pin2 Schließen Sie das Kabel des Kontrollkabels, dessen Verkleidung abgestreift wird, an den Auto Blende Objektiv Konnektor an, wie unten gezeigt. Stecknadel Nr. DC Kontrolltyp VIDEO Kontrolltyp 1 Damp(-) Strom (+12V) 2 Damp(+) N/A 3 Drive(+) VIDEO Signal 4 Drive(-) GROUND 9 Einstellung des Objektivs CS Objektive Fall Der CS Objektiv im Uhrzeigersinn drehen, bis es wie unten befestigt wird. D CS Objektive C Objektive Fall Der C Passepartout Adapter im Uhrzeigersinn drenen, um es zu befestigen. Dann drehen der C Objektiv im Uhrzeigersinn, bis es wie unten befestigt wird. C Objektive 10 Einstellung Objektiv Auswahl Schalter Wenn Objektivmontage fertig ist, stellen Sie den Objektiv Auswahl Schalter auf der Seite der Kamera entsprechend der angebrachten Objektiv Typ ein. Wenn das angebrachte Objektiv ein Auto Blende Objektiv der DC Kontrolltyp ist, stellen Sie den Objektiv Auswahl Schalter auf ‚ ‘DC’ ein, Wenn das angebrachte Objektiv ein Auto Blende Objektiv der Video Kontrolltyp ist, stellen Sie den Objektiv Auswahl Schalter auf ‚ ‘VIDEO’ ein. Einstellung des Rück-brennpunktes (Back Focus) Die Kamera Rück-brennpunkt ist in der Fabrik vor der Lieferung eingestellt, aber einige Objektive sind aus dem Brennpunkt, je nach der Objektivtypen. Wenn es so ist, müßen Sie der Rück-brennpunkt wie folgt einstellen. Zuerst, es ist das Rück-brennpunkt Einstell-verfahren für die Fixierten Brennpunkt Objektive. Objektive ohne Zoom Funktion ① Ein Gegenstand mit hocher Resolution (Gitterförmige Gegenstand) über als 10m Entfernung einbilden und der Objektiv Brennpunktring in der Unendlichkeit (∞) Position legen. ➁ Der RÜCK-BRENNPUNKT Einstellring drehen, bis der Gegenstand deutlicher sein wird. ➂ Die Fixierschraube des RÜCK-BRENNPUNKT Einstellrings einschrauben. 11 D Objektive mit Zoom Funktion ① Ein Gegenstand mit hocher Resolution (Gitterförmige Gegenstand) einer Entfernung 3m bis 5m einbilden und der Zoom in dem Objektiv zu TELE als möglich nahe einstellen. Dann drehen der Objektiv Brennpunktring, bis der Gegenstand deutlicher sein wird. D ➁ Der Zoom in dem Objektiv zu WIDE als möglich nahe einstellen und dann drehen der RÜCK-BRENNPUNKT Einstellstab, bis der Gegenstand deutlicher sein wird. ➂ Nummer ① bis ➁ und für 2 oder 3 male wiederholen, bis der Brennpunkt auf der ZOOM TELE Seite mit denem auf der ZOOM WIDE Seite deutlich passen wird. BACK FOKUS STEUERLEISTE 12 Anschluß der Kabel und Überprüfung des Betriebs 1 Schließen Sie zuerst das eine Ende des BNC-Videokabels an den Videoausgang (VIDEO OUT) an. 2 Schließen Sie als nächstens das andere Ende des BNC-Kabels an die Videoeingangsbuchse des Monitors an. VIDEO EIN TERMINAL des Monitor-hinterteils BNC KABEL VIDEO AUS TERMINAL 13 D 3 Dritte schließt an das Stromkabel an. ① AC24V/DC12V Stromeingang Kamera Schließt 2 Linien des Stromadapters mit der Verwendung des Kreuzschraubenziehers an Strom EIN Terminal der Kamera an, wie unten angezeigt. D ❉ Ohne die Unterscheidung der Polarität, schließt an AC24V oder DC12V Stromquelle an. ➁ AC230V Stromeingang Kamera Schließt das Stromeingangskabel an AC230V Stromquelle an. 14 Kapitel 4 Teilnamen und Funktionen Rückseite Ansich ➂ Automatischer Verschluß Objektiv Anschluß ① Passepartout Adapter Befestigungsrille ➅ Gegen Brennpunkt (Back Focus) Kontrollstab ⑤ ALC Objektiv Auswahl Schalter ➃ Auto Blende Objektiv Steuerkabel ➁ Automatische Verschluß Objektive ① Passepartout Adapter Befestigungsrille Diese Rille benutzt für die Befestigung des Adapters, ein Teil der Klammer wo die Kamera installiert wird. ➁ Automatische Verschluß Objektive (Option) Dieses Objektiv ist in der Kamera installiert werden. ❉ Eine Objektiv der Oberfläche der Kamera muß mit einem Objektivpapier oder in Äthan benetzten Baumwolltuch sanft reinigen werden. ➂ Automatischer Verschluß Objektiv Anschluß Dieser Anschluß versorgt das automatische Verschluß Objektiv mit dem Stromversorgung, Kontrollsignal, Videosignal oder DC Signal, nötwendig für die Kontrolle des Objektiv-verschlußes. ➃ Auto Blende Objektiv Steuerkabel Dieses Kabel überträgt Signal, das die Blende steuert. ⑤ ALC Objektiv Auswahl Schalter Dieser Schalter wird für Auswahl des Objektivtypen verwendet. ➅ Gegen Brennpunkt (Back Focus) Kontrollstab Diese Leiste wird für Back Fokus Einstellung der Kamera verwendet. 15 D Vista Posteriore AC24V/DC12V KAMERA(SCC-B2391(P)/B2300) D ⑤ ⑨ ➂➃ ➁ ➅ ① ⑦ ⑧ AC230V KAMERA(SCC-B2091P) ⑤ ① ➂➃ ➁ ➅ ⑨ ⑦ ⑧ 16 ① Strom Anschlussport AC24V/DC12V Kamera : Es ist ein Port, das an das Strom Adapter Kabel angeschlossen wird. AC230V Kamera : Es ist Netzanschlusskabel. ➁ Strom LED Wenn der Strom einer Kamera normalerweise geliefert wird, schaltet LED ein. ➂ ➃ INC und DEC Schalter Beide Schalter erhöhen oder verringern den Profit von ROT und BLAU, um eine Farbe Temperatur zu regeln, wie Sie wünschen, während AWB unter den FUNKTION Schaltern aus(BENUTZER) ist, und steuern die vertikale synchrone Phase, während AWB und L/L eingeschaltet sind. ⑤ FUNKTION Schalter 1. L/L 3. FL 2. ELC 4. AWB EIN SW1 SW2 SW3 SW4 17 D D 1) SW1(L/L): Wenn es auf AUS eingestellt ist, aktiviert die Kamera den internen Synchronisierungsmodus und wenn es auf EIN eingestellt ist, der Power Synchronisierungsmodus. Wenn Sie Multi Kameras an den sequentiellen Schalter anschließen, um den automatischen Konvertierungsmodus einzugeben, prallt der Schirm jeden Schirm auf, während die Kamera in der INT(interne Synchronisierung) bleibt. Solche Aufprallen Phänomene können gelöscht werden und Schirm Konvertierung wird reibungslos, indem Sie den L/L Schalter auf EIN einstellen und den INT/DEC Schalter verwenden, um die vertikale synchrone Phase zu steuern. ❉ Wenn Sie die vertikale synchrone Phase mit dem INT/DEC Schalter steuern möchten, wenn L/L auf EIN eingestellt ist, stellen Sie SW4 auf AWB EIN ein. ❉ Falls von DC12V, wird INT(intern Synchronizer) ohne Rücksicht auf EIN/AUS von L/L festgelegt 2) SW2(ELC): Verwenden Sie diesen Schalter mit dem manuellen Blende Objektiv. Während dieser Schalter auf EIN einstellt ist, schwankt die Geschwindigkeit des elektronischen Shutters mit der Helligkeit des Gegenstandes von 1/60(50) bis 1/100,000 Sek. für automatische Steuerung der Helligkeit des Schirmes. Jedoch seien Sie sicher, mit dem Auto Blende Objektiv (DC oder Video Kontrolle) auf AUS einzustellen. Farbe Rollen kann in diesem Modus auftreten. In diesem Fall, geben Sie AC Stromquelle zur Kamera ein und wählen Sie SW1 auf "EIN" aus. (NTSC: 60HZ, PAL: 50HZ) 3) SW3 (FL): Dieses ist zur Verhinderung des Flimmers auf dem Schirm, wenn NTSC System in der 50HZ Stromversorgung Bereich benutzt wird und PAL System in der 60HZ Stromversorgung Bereich benutzt wird. Das ist zur Verhinderung der auf dem Schirm resultierten Erschütterung von der Uneinigkeit des vertikalen Synchr. Frequenz und der Flimmer Frequenz der Ablichtung. Während dieser Schalter auf EIN eingestellt ist, wird der elektronische Shutter an 1/100 Sek. (NTSC) oder an 1/120 Sek. (PAL) fixiert. 4) SW4 (AWB): Wenn es auf EIN eingestellt ist, wird die Farbe des Schirmes automatisch in Übereinstimmung mit der Änderung der Beleuchtungsfarbe Temperatur durch die Veränderung der außen Umgebung justiert. (ATW) Wenn der Beleuchtungszustand unveränderlich ist, ist AUS Einstellung verfügbar. Die Kamera merkte sich die Beleuchtungsfarbe Temperatur, zu der Zeit wenn die Schalter Einstellung von EIN nach AUS geändert wird, und die Kamera Farbe wird auf die gemerkte Farbe Temperatur justiert. (AWC) Wenn die Beleuchtungsfarbe Temperatur sich verändert wird und Sie die Kamera mit der geänderten Farbe Temperatur gemerkt/betriebt werden lassen möchten, betreiben Sie den Schalter EIN/AUS Betrieb wieder. Jedoch beachten Sie, dass eine Störung unter den folgenden Bedingungen auftreten kann. Zuerst ein Fall, dass der Gegenstand groß, einzelne Farbe mit dem hohen Sättigungsgrad und in der Mitte des Schirmes oder ein Fall mit fast keiner weißen Farbe auf dem Schirm ist. Zweitens, ein Fall mit einer spezifischen Ablichtung wie einer Natrium Lampe. 18 ➅ DC Blende Niveau Kontrolleur Wenn der ALC Objektiv Auswahl Schalter auf DC eingestellt wird, benutzen Sie den gleichen Kontrollleiste wie der Treiber, um das BLENDE Niveau zu steuern. ⑦ Video Ausgangsport Dieser Port wird an das Monitor Video Eingangsport oder an das Entsprechendes angeschlossen. Sie können Ausgang Kamera Videosignale durch diesen Port ausgeben. ⑧ DAYNIGHT Auswahl Schalter Wenn Sie diesen Schalter auf AUTO stellen, wird die DAYNIGHT Funktion automatisch entsprechend der Ablichtung aktiviert. Unter schlechter Ablichtung wird IR Filter automatisch im Schwarz und Weiß Modus(S/W Modus) behoben, um die Empfindlichkeit zu erhöhen, aber unter guter Ablichtung, wird IR Filter automatisch im Farbe Modus(FARBE Modus) eingesetzt. IR Filter reagiert auf einstellte Dauerzeit (Lieferung Condition:10 Sekunden). Wenn Sie DAYNIGHT im AUTO Modus konvertieren, stellen Sie Dauerzeit wie folgendes ein. (Schalten Sie bitte den L/L Schalter und den AWB Schalter aus, bevor Sie anfangen). Wann immer Sie den DAYNIGHT Auswahl Schalter von Ext. zu AUTO konvertiert, während Sie INC/DEC Schalter gleichzeitig gedrückt halten, wird DAUERZEIT 10S, 30S, 60S, 90S, 120S und 150S in der Reihenfolge. Nach der Einstellung beheben Sie das Betätigen des INC/DEC Schalters, um die Einstellung Bedingung in der Kamera zu speichern. Nach dem Speichern wird der DAYNIGHT Modus automatisch; abhängig von DAUERZEIT sogar im Falle von Betriebsschalter Ein/Aus konvertiert. Für die Zurückstellung wiederholen Sie bitte das oben genannte Verfahren. (Nach der Zurückstellung, können Sie L/L und AWB zum vorhergehenden Zustand zurückbringen. Wenn Sie diesen Schalter auf Ext. stellen, verändert FARBE/S/W Modus; abhängig von dem externen Signaleingang zum DAYNIGHT externen Signaleingang Port(⑨). ⑨ DAYNIGHT Externe Signal Eingangsport Wenn das DAYNIGHT Auswahl Schalter(⑧) auf Ext. eingestellt wird, variieren der FARBE/S/W Modus, abhängig von dem Eingangssignal zu diesem Port. Eingang Terminal ist ein DC 5V Pull-up Eingang und über 0.2mA AUS (OFF) : Offener Kontakt EIN (ON) : Geschlossener Kontakt 19 D Produkt Spezifikationen SCC-B2391P/B2091P ARTIKEL D BESCHREIBUNG Produkt Typ CCTV Kamera Rundfunksystem PAL STANDARD SYSTEM CCD 1/3” Super-HAD CCD Effektive Pixel 752 (H) x 582 (V) Scanning Typ 625 Linien, 2:1 Zeilensprung Intern : 15,625Hz(H) 50 Hz(V) Frequenz LINIE Schleuse : 15,625Hz(H) 50 Hz(V) INTERN Sync Typ LINIE Schleuse(Wenn AC Stromquelle besetzt ist) Auflösung 540(Farbe)/570(S/W) TV Linie S/N Ratio Ca. 50dB Minimale Ablichtung des Gegenstandes 0.3 Lux (Farbe) / 0.06 Lux (S/W) DAYNIGHT AUTO/EXT 20 ARTIKEL BESCHREIBUNG ALC/ELC ALC DC BLENDE OBJEKTIV VIDEO OBJEKTIV ELC Elektronische Shutter Blende Funktion (Max.1/100 Ksek) Farbe Temperatur AWB/MANELLE BLC(Gegenlichtko mpensation) EIN AGC EIN Video Ausgang Composite Videoausgang 1Vp-p 75 Ohms/BNC Stromquelle AC24V ±10%(50Hz±0.3Hz), DC12V+10%~-5% Energieverbrauch B2391P : Ca. 3W B2091P : Ca. 4W Temperatur bei Betrieb -10°C~+50°C Luftfeuchtigkeit bei Betrieb ~90% GröBe 68(W)x55(H)x128.5(D)mm(inkl. BNC) Gewicht B2391P : 450g B2091P : 550g 21 D Produkt Spezifikationen SCC-B2391/B2300 ARTIKEL D BESCHREIBUNG Produkt Typ CCTV Kamera Rundfunksystem NTSC STANDARD SYSTEM CCD 1/3” Super-HAD CCD Effektive Pixel B2391 : 768 (H) x 494 (V) B2300 : 510 (H) x 492 (V) Scanning Typ 525 Linien, 2:1 Zeilensprung INTERN : 15,734Hz(H) 59.94 Hz(V) Frequenz LINIE Schleuse : 15,750Hz(H) 60 Hz(V) INTERN Sync Typ LINIE Schleuse(Wenn AC Stromquelle besetzt ist) Auflösung B2391 : 540(Farbe)/570(S/W) TV Linie B2300 : 400(Farbe)/420(S/W) TV Linie S/N Ratio Minimale Ablichtung des Gegenstandes DAYNIGHT 22 Ca. 50dB (AGC OFF) B2391 : 0.3 Lux (FARBE) / 0.06 Lux (S/W) B2300 : 0.2 Lux (FARBE) / 0.03 Lux (S/W) AUTO/EXT ARTIKEL BESCHREIBUNG ALC DC BLENDE OBJEKTIV ALC/ELC D VIDEO OBJEKTIV ELC Elektronische Shutter Blende Funktion (Max.1/100 Ksek) Farbe Temperatur AWB/MANELLE BLC(Gegenlichtko mpensation) EIN AGC EIN Video Ausgang Composite Videoausgang 1Vp-p 75 Ohms/BNC Stromquelle AC24V±10%(60Hz±0.3Hz), DC12V+10%-5% Energieverbrauch Ca. 3W Temperatur bei Betrieb -10°C~+50°C Luftfeuchtigkeit bei Betrieb ~90% GröBe 68(W)x55(H)x128.5(D)mm(inkl. BNC) Gewicht 450g 23 Korrekte Entsorgung dieses Produkts (Elektromüll) (Anzuwenden in den Ländern der Europäischen Union und anderen euroäischen Ländern mit einem separaten Sammelsystem) Die Kennzeichnung auf dem Produkt bzw. auf der dazugehörigen Literatur gibt an, dass es nach seiner Lebensdauer nicht zusammen mit dem normalen Haushaltsmüll entsorgt werden darf. Entsorgen Sie dieses Gerät bitte getrennt von anderen Abfällen, um der Umwelt bzw. der menschlichen Gesundheit nicht durch unkontrollierte Müllbeseitigung zu schaden. Recyceln Sie das Gerät, um die nachhaltige Wiederverwertung von stofflichen Ressourcen zu fördern. Private Nutzer sollten den Händler, bei dem das Produkt gekauft wurde, oder die zuständigen Behörden kontaktieren, um in Erfahrung zu bringen, wie sie das Gerät auf umweltfreundliche Weise recyceln können. Gewerbliche Nutzer sollten sich an Ihren Lieferanten wenden und die Bedingungen des Verkaufsvertrags konsultieren. Dieses Produkt darf nicht zusammen mit anderem Gewerbemüll entsorgt werden. Part No.:AB68-00511B CAMÉRA NUMÉRIQUE COULEUR SCC-B2391(P) SCC-B2091P SCC-B2300 Manuel d’Utilisation F Précautions de sécurité L’objectif des précautions de sécurité est d’assurer l’utilisation correcte de ce produit afin d’éloigner tout risque et tout dégât à la propriété. Assurez-vous de bien observer toutes les précautions. F Avertissement Mise en garde Ne pas tenir compte d’un avertissement risque de causer des blessures graves, voire mortelles. Ne pas tenir compte d’une mise en garde peut entraåner des blessures cor porelles ou des dégâts à la propriété. Avertissement 1. Assurez-vous d’utiliser uniquement l’adaptateur fourni avec le produit. (L’utilisation d’un adaptateur autre que celui fourni peut endommager le produit ou causer un incendie ou des décharges électriques.) 2. Avant de brancher le cordon d’alimentation et les câbles de signal, vérifiez d’abord les bornes extérieures. Reliez les câbles des signaux d’alarme à leur borne respective. Branchez l’adaptateur CA sur la prise CA et l’adaptateur CC sur la prise CC tout en tenant compte de la bonne polarité. (La connexion incorrecte à la source d’alimentation peut endommager le produit ou causer un incendie ou des décharges électriques.) 3. Ne branchez jamais plus d’une caméra sur un seul adaptateur. (Le dépassement de la capacité de charge risque de générer une chaleur anormale au point de causer un incendie.) 4. Branchez le cordon d’alimentation sur la prise murale. Assurez-vous que la connexion est solidement fixée. (Une mauvaise connexion peut constituer le risque d’un incendie.) 5. Lorsque vous installez la caméra au mur ou au plafond, assurez-vous qu’elle y soit fixée solidement et de faáon sécuritaire. (La chute de la caméra peut causer des blessures corporelles.) 6. Ne placez jamais d’objets conducteurs (p. ex., un tournevis, des pièces de monnaie, tout autre objet métallique) ni de contenants remplis d’eau sur la 2 caméra. (Cela pourrait présenter un risque de blessures corporelles en raison d’un incendie, d’une décharge électrique ou de la chute d’un objet.) 7. N’installez pas la caméra dans un emplacement plein de suie, de poussière ou d’humidité. Cela pourrait causer un incendie ou provoquer une décharge électrique. 8. Si vous détectez une odeur étrange ou de la fumée qui sort du produit, débranchez immédiatement le cordon d’alimentation et contactez le centre de soutien technique. (Une sollicitation continue de l’appareil dans ces conditions pourrait causer un incendie ou provoquer des décharges électriques.) 9. Si ce produit cesse de fonctionner correctement, communiquez avec votre revendeur ou le centre d’entretien dans votre localité. Ne démontez ni ne modifiez jamais ce produit. (Samsung n’est pas responsable des problèmes techniques découlant d’une modification non autorisée ou d’une tentative de réparation.) 10. Lorsque vous nettoyez le produit, veillez à ne pas vaporiser d’eau directement sur les composants du produit. (Cela pourrait causer un incendie ou provoquer une décharge électrique.) Nettoyez la surface au moyen d’un chiffon doux. N’utilisez jamais de détersifs ni de nettoyants chimiques. Cela pourrait provoquer une décoloration ou endommager le fini du produit. Mise en garde 1. Ne laissez pas tomber d’objets sur le produit ni ne soumettez le produit à de forts coups. Ne placez pas le produit dans un emplacement où il pourrait subir de fortes vibrations ou des interférences magnétiques. 2. Ne placez pas le produit dans un emplacement où il fait très chaud (plus de 50°C/122°F), très froid (moins de ‘10°C/14°F) ou très humide. (Cela pourrait causer un incendie ou provoquer une décharge électrique.) 3. Évitez un emplacement où le produit est exposé à des rayons directs du soleil ou à une source de chaleur, telle qu’un radiateur ou un appareil de chauffage. (Le non-respect de cette consigne pourrait présenter un risque d’incendie.) 4. Si vous désirez déplacer le produit à la suite de son installation, assurez-vous de couper le courant avant son déplacement et sa réinstallation. 5. Installez le produit dans une aire bien ventilée. 6. En cas d’orage, débranchez le cordon électrique de la prise murale. (Le nonrespect de cette consigne pourrait provoquer un incendie ou endommager le produit.) 3 F Sommaire F Chapitre 1 Introduction ............................................................5 Chapitre 2 Caractéristiques .....................................................6 Chapitre 3 Installation ..............................................................7 Lors du déballage, vérifiez le contenu du paquet ..7 Précautions dans l’Installation et Utilisatio .............8 Brancher le connecteur automatique d'objectif d'iris ........................................................9 Fixation de l’objectif..............................................10 Réglage du bouton de sélection de l’objectif........11 Focalisation .........................................................11 Connexion du câble & Vérification du fonctionnement ...............................................13 Chapitre 4 Noms et Fonctions des Composants ...................15 Spécifications Techniques ...................................20 4 Chapitre 1 Introduction La caméra DAYNIGHT(JOUR/NUIT) est une caméra de basse luminosité, qui améliore la sensibilité par le fonctionnement avec un mode de couleur à l'excédent de la luminositét régulière et avec un mode de Noir/Blanc en décommandant la fonction de coupe IRE au ci-dessous de la luminosité régulière. En outre, il peut être employé en lien avec le dispositif infrarouge séparé d'émission de rayon. SCC-B2391(P)/B2091(P) se vante d’une haute résolution avec les 540 lignes de TV de la résolution horizontale par le traitement du signal numérique et l'OLPF. [DAYNIGHT] En dessous d’une certaine luminosité, le filtre coupant les infrarouges (IR Cut) est désactivé afin d’améliorer la sensibilité de la caméra. ❉ Dans l'environnement de lampe fluorescente, si vous activé I’IRIS MANUEL et mettez le bouton ELC parmi des boutons de FONCTION en marche, la couleur peut roulée. Dans ce cas-ci, appliquer le courant alternatif avant de mettre le bouton de L/L parmi des boutons de FONCTION en marche. (NTSC:60HZ , PAL:50HZ) Roulement de couleur est un problème sur l’écran de mouvements irréguliés. Cela se produit quand la Balance de blanc n’est pas fixé parce qu’une lampe fluorescente clignote lorsque son cycle est identique à celui de la fréquence d’alimentation. 5 F Chapitre 2 Caractéristiques Haute sensibilité La technologie de pointe ‘1/3" Super-HAD IT CCD’ permet d’obtenir des images d’une haute sensibilité. Résolution La caméra offre une haute résolution grâce à une technologie ultramoderne de traitement numérique des images. F Excellente correction du contre-jour Malgré la présence d’un éclairage puissant ou d’un rayonnement solaire derrière l’objet, cette caméra permet d’obtenir une prise de vue nette grâce à la correction des images assombries par le contre-jour. Mode de synchronisation numérique Le mode de synchronisation numérique des fréquences trame et réseau est intégré dans cette caméra pour un réglage direct de la synchronisation verticale de la caméra, permettant un contrôle plus pratique et fiable. 6 Chapitre 3 Installation Ce chapitre contient des informations relatives aux vérifications avant l’installation de la caméra, au choix de sa mise en place et aux précautions d’installation. Veuillez lire attentivement ces indications avant d’installer la caméra et de connecter le câble F Lors du déballage, vérifiez le contenu du paquet Vérifiez que les éléments suivants sont inclus dans l’emballage. Caméra Manuel d’utilisation Adaptateur (‘Mount’) Adaptateur ‘C Mount’ Connecteur de l’objectif à diaphragme automatique 7 Précautions dans l’Installation et Utilisatio ① N’essayez pas de démonter la caméra par vous même. F ➁ Soyez prudent en manipulant la caméra. Évitez de la frapper ou secouer. Soyez prudent pour éviter des dommages sur la caméra provoqué par stockage ou opération inapproprié. ➂ N'exposez pas cette caméra à la pluie ou à l'humidité. Ne l'actionnez pas dans un endroit humide. ➃ N'employez pas de détergents forts ou abrasifs pour la nettoyer. Employez un tissu sec pour nettoyer la caméra. ⑤ Conservez la caméra dans un endroit frais à l’abri du rayon de soleil direct. Autrement, cela peut provoquer un défaut de fonctionnement de l'unité. 8 Brancher le connecteur automatique d'objectif d'iris Préparer le connecteur automatique d'objectif d'iris fourni avec la caméra comme montré ci-dessous. F Rb Pin3 Pin1 Pin4 Pin2 Reliez le câble du câble de commande, dont la bâche est dépouillée, au connecteur automatique d'objectif d'iris comme montré ci-dessous. N° de la clé Type de contrôle DC Type de contrôle VIDEO 1 Damp (-) Alimentation (+12V) 2 Damp (+) Non utilisé 3 Drive (+) Signal VIDEO 4 Drive (-) GROUND 9 Fixation de l’objectif Lors de l’objectif CS : Vissez l’objectif CS dans le sens des aiguilles d’une montre, comme l’indique la figure ci-dessous. F l’objectif CS Lors de l’objectif C : Vissez d’abord le support d’installation dans le sens des aiguilles d’une montre. Vissez ensuite l’objectif C dans le même sens, comme l’indique la figure ci-dessous. l’objectif C 10 Réglage du bouton de sélection de l'objectif Lorsque le montage de l’objectif est accompli, installez le Bouton de sélection d'objectif à côté de la caméra selon le type d'objectif monté. Lorsque l'objectif monté est un objectif automatique d'iris du type de commande de CC, installez le bouton de sélection d'objectif au "CC", Quand l'objectif monté est un objectif automatique d'iris du type de commande Vidéo, installez le bouton de sélection d'objectif à la "VIDÉO". Focalisation La focale de la caméra est déjà réglée en sortie d’usine, mais cette focalisation peut ne pas correspondre à certains types d’objectif. Dans ce cas, réglez la focale selon les indications suivantes. Ceci est une méthode pour le réglage d’un objectif à focale fixe. Objectif sans fonction de zoom ① Prenez l’image d’un objet net (en forme de carreau) placé à une distance de plus de 10 m et positionnez l’anneau de la focale de l’objectif sur l’infini (∞). ➁ Tournez-le jusqu’à ce que l’image de l’objet soit la plus nette possible. ➂ Fixez l’anneau de réglage de la focale en serrant la vis. 11 F Objectif avec fonction de zoom ① Prenez l’image d’un objet net (en forme de carreau) placé à une distance de 3 à 5 m, puis réglez le zoom au maximum vers TELE. Ensuite, réglez l’anneau de la focale jusqu’à ce que l’image de l’objet soit la plus nette possible. ➁ Réglez le zoom au maximum vers WIDE et tournez la barre de F focalisation jusqu’à ce que l’image de l’objet soit la plus nette possible. ➂ Répétez ① ou ➁ fois les procédés 2 et 3 jusqu’à de que la focale sur le côté ZOOM TELE et celle sur le côté ZOOM WIDE soient correctement réglées. Barre de focalisation 12 Connexion du câble & Vérification du fonctionnement 1 Reliez d’abord un côté du connecteur du câble BNC à la sortie VIDEO (VIDEO OUT). 2 Reliez l’autre côté du connecteur du câble BNC à l’entrée VIDEO du moniteur. F Entrée Vidéo située derrière le moniteur Câble BNC Sortie Vidéo 13 F 3 Relier le câble d’alimentation ① Puissance consommée de la caméra : CA24V/CC12V Reliez 2 lignes de l'adapteur de puissance à l'aide d'un tournevis Phillips à la puissance de la borne IN de la caméra comme montré cidessous. ❉ Sans distinction de la polarité, reliez au blog d’alimentation CA24V ou CC12V. ➁ Puissance consommée de la caméra : CA230 Brancher le câble au bloc d’alimentation CA230V 14 Chapitre 4 Noms et Fonctions des Composants Seite Ansicht ➂ Le connecteur automatique d'objectif d'iris ① La cannelure de fixage d'adaptateur de monture ➅ Barre de focalisation F ⑤ Bouton de sélection de l’objectif ALC ➃ Câble de réglage de l’objectif à Iris automatique ➁ Objectif du caméra ① La cannelure de fixage d'adaptateur de monture Cette cannelure est employée pour visser l'adaptateur de monture, une pièce du support où la caméra sera installée. ➁ Objectif du caméra ( Option ) Cet objectif est installé dans le caméra. ❉ Un objectif de caméra avec une surface souillée devrait être nettoyé doucement avec un tissu d'objectif ou un tissu de coton imprégné d’éthanol. ➂ Le connecteur automatique d'objectif d'iris Ce connecteur fournit à l'objectif automatique d'obturateur l'alimentation d'énergie, le signal de commande, le signal visuel, ou le signal de C.C nécessaire pour la commande de l'obturateur d'objectif. ➃ Câble de réglage de l’objectif à Iris automatique Ce câble transmet le signal qui régle l’Iris. ⑤ Bouton de sélection de l’Objectif à ALC Ce bouton est utilisé pour sélectionner le type d’objectif. ➅ Barre de focalisation Cette barre est utilisée pour régler la focale minimale du zoom du caméra. 15 Vue arrière CA24V/CC12V Caméra(SCC-B2391(P)/B2300) F ⑤ ⑨ ➂➃ ➁ ➅ ① ⑦ ⑧ CA230V Caméra (SCC-B2091P) ⑤ ① ➂➃ ➁ ➅ ⑨ ⑦ ⑧ 16 ① Prise d’alimentation Caméra CA24V/CC12V: C’est un port relié au câble électrique d’adaptateur. Caméra CA230V : C’est un câble électrique. ➁ LED D’ALIMENTATION Si la caméra est alimentée normalement, le LED est allumé. ➂ ➃ Boutons INC et DEC Ces deux boutons augmentent ou diminuent la valeur de ROUGE et BLEU pour fixer la température de couleur selon votre goût tandis que AWB parmi les sélecteurs de fonctions est désactivé ( Utilisateur ) et commandent la phase synchrone verticale tandis que AWB et L/L sont activés. ⑤ Sélecteur de fonctions 1. L/L 3. FL 2. ELC 4. AWB ON SW1 SW2 SW3 SW4 17 F F 1) SW1(L/L) : Si vous le désactivez, la caméra active le mode de synchronisation interne et si vous l’activez, elle active le mode de synchronisation de puissance. Si vous reliez multi caméras au bouton séquentiel pour entrer le mode de conversion automatique, l'écran rebondira chaque écran tandis que la caméra reste dans l'INT(synchronisation interne). De tels phénomènes de rebondissement peuvent disparaître et la conversion d'écran devient lisse en allumant le bouton L/L et à l'aide du bouton INT/DEC pour commander la phase synchrone verticale. ❉ Si vous voulez commander la phase synchrone verticale avec le bouton INT/DEC quand le L/L est allumé, vous mettrez le SW4 à AWB allumé. ❉ En cas de CC12V, l'INT(synchronisation interne) sera fixé sans souci de "marche/arrêt" de L/L. 2) SW2(ELC) : Utilisez ce bouton avec l'objectif d'iris manuel. Tandis que ce bouton est activé, la vitesse de l'obturateur électronique change avec l'éclat du sujet de 1/60(50) à 1/100,000 sec pour commander automatiquement l'éclat de l'écran. Cependant, avec l'objectif automatique d'iris (CC ou commande vidéo), assurez-vous de Désactiver. Le roulement de couleur peut se produire dans ce mode. Dans ce cas, entrer la source d’alimentation de CA à la caméra et choisir SW1 “activé”. (NTSC : 60HZ, PAL : 50HZ) 3) SW3(FL): Ce doit empêcher le clignotement sur l'écran quand le système de NTSC est employé dans la région d'alimentation de l'énergie 50HZ et le système de pal est employé dans la région d'alimentation de l'énergie 60HZ. Ce doit empêcher secouer sur l'écran résultant de la discordance de la fréquence de synchro verticale et de la fréquence de clignotement de l'illumination. Tandis que ce commutateur est allumé, l'obturateur électronique est fixé à 1/100sec (NTSC) ou à 1/120 sec (pal). 4) SW4(AWB): En réglant ACTIVÉ, la couleur de l'écran est ajustée automatiquement selon la variation de température de couleur d'éclairage par le changement de l'environnement extérieur. (ATW) Si l'état d'éclairage est régulier, le réglage Désactivé est disponible. La caméra mémorise la température de couleur d'éclairage au moment où le réglage de bouton est modifié d’Acitivé vers Désactivé, et la couleur de caméra est ajustée sur la température de couleur enregistrée. (AWC) Si la température de couleur d'éclairage est modifiée et que vous voulez que la caméra soit memorisé/opérée avec la température de couleur modifiée, réopérez le bouton d'opération "Marche/Arrêt". Cependant, sachez qu'une erreur peut se produire dans les conditions suivantes : d'abord, au cas où le sujet serait grand, chaque couleur du chroma élevé, et au centre de l'écran ou à un cas avec presque aucune couleur blanche sur l'écran. En second lieu, un cas avec une illumination spécifique telle qu'une lampe de natrium. 18 ➅ Commandeur du niveau d’IRIS de type CC Quand le bouton de sélection de l'objectif d'ALC est placé au CC, utilisez la même barre de commande que le conducteur pour commander le niveau d'IRIS. ⑦ Port de sortie vidéo Ce port sera relié au port d’entrée de la caméra surveillance ou à l'équivalent. Vous pouvez produire les signaux visuels de la caméra par ce port. ⑧ Bouton de sélecton DAYNIGHT Si vous réglez ce bouton à l'AUTOMATIQUE, la fonction JourNuit sera automatiquement activée selon l'illumination. Sous l'illumination faible, le filtre IR sera automatiquement éliminé en mode noir et blanc (Mode BW) pour augmenter la sensibilité mais sous la bonne illumination, le filtre IR sera automatiquement inséré dans le mode de couleur ( MODE DE COULEUR ). Le filtre IR répond au temps de durée préréglé (Condition de livraison:10 secondes ). Quand vous convertissez DAYNIGHT en mode AUTOMATIQUE, vous réglerez le temps de durée comme le suit : (arrêtez le bouton de L/L et celui d'AWB pour commencer). A chaque fois que vous convertissez le bouton de sélection DAYNIGHT de l’EXT en AUTOMATIQUE pendant que vous tenez dessus sur le bouton d'INC/DEC, le TEMPS DE DURÉE devient 10s, 30s, 60s, 90s, 120s, et 150s dans l'ordre. Lors de l'installation, vous décommanderez l’appui sur le bouton d'INC/DEC pour enregistrer la condition d'installation dans la caméra. Lorsque vous voulez économiser, le mode DAYNIGHT sera automatiquement converti selon le TEMPS DE DURÉE même en cas de sous tension/hors tension. Pour remettre à zéro, répétez le procédé ci-dessus. (Lors du rajustement, vous pouvez renvoyer L/L et AWB à l'état précédent.) Si vous placez ce commutateur à l'EXT, le mode de COLOR/BW change selon l'entrée de signal externe au port d'entrée de signal externe de DAYNIGHT(⑨). ⑨ Port externe d'entrée de signal DAYNIGHT Quand le bouton de sélection DAYNIGHT est réglé à l'EXT(⑧), le mode de COULEUR/BW change selon le signal d'entrée à ce port. La borne d'entrée sera l'entrée de tirage-vers le haut CC5V et au dessus de 0.2mA. OFF : contact ouvert ON : contact fermé 19 F Spécification du produit SCC-B2391P/2091P ELÉMENT Type de produit Contenu Caméra surveillance Système De Radiodiffusion Système standard PAL F CCD CCD Super HAD 1/3 pouce’ Pixels effectifs 752(H) x 582(V) Type de balayage 625 Lignes, 2:1 entrelacement INTERNE : 15,625Hz(H) 50 Hz(V) Fréquence Verrouillage de ligne : 15,625Hz(H) 50 Hz(V) INTERNE Type Sync Verrouillage de ligne (Lorsque la source électrique CA est utilisée) Résolution 540(couleur)/570(B/W) TV Lignes Rapport S/N Environ 50dB Illumination minimale 0.3 Lux (Couleur) / 0.06 Lux(B/W) de l’Objet DAYNIGHT 20 AUTO / EXT ELÉMENT Contenu ALC Objectif à iris CC ALC/ELC OBJECTIF VIDÉO ELC Fonction obturateur électronique à IRIS (Max. 1/100 Ksec) Température de coleur AWB / MANUEL BLC (Compensation de cotre-jour) ON CAG ON Sortie Vidéo SORTIE VIDÉO COMPOSITE 1V p_p 75Ω/BNC Bloc d’alimentation AC24V ±10%(50Hz±0.3Hz), DC12V+10%~-5% Consommation électriquea B2391P: Environ 3W B2091P: Environ 4W Température d’exploitation -10°C~+50°C Humidité d’exploitation ~90% Taille Poids 68(L)x55(H)x128.5(D)mm(BNC inclus) B2391P : 450g B2091P : 550g 21 F SCC-B2391/B2300 ELÉMENT Type de produit Contenu Caméra surveillance Système De Radiodiffusion Système standard NTSC F CCD CCD Super HAD 1/3 pouce’ B2391 : 768(H) x 494(V) Pixels effectifs B2300 : 510(H) x 492(V) Type de balayage 525 Lignes, 2:1 entrelacement INTERNE : 15,734Hz(H) 59.94 Hz(V) Fréquence Verrouillage de ligne : 15,750Hz(H) 60 Hz(V) INTERNE Type Sync Verrouillage de ligne (Lorsque la source électrique CA est utilisée) Résolution B2391 : 540(couleur)/570(B/W) TV Lignes B2300 : 400(couleur)/420(B/W) TV Lignes Rapport S/N Environ 50dB (CAG OFF) Illumination minimale B2391 : 0.3 Lux((couleur) / 0.06 Lux(B/W) de l’Objet B2300 : 0.2 Lux((couleur) / 0.03 Lux(B/W) DAYNIGHT 22 AUTO / EXT ELÉMENT Contenu ALC Objectif à iris CC ALC/ELC OBJECTIF VIDÉO ELC F Fonction obturateur électronique à IRIS(Max. 1/100 Ksec) Température de coleur AWB / MANUEL BLC (Compensation de cotre-jour) ON CAG ON Sortie Vidéo SORTIE VIDÉO COMPOSITE Bloc d’alimentation AC24V ±10%(60Hz±0.3Hz), DC12V+10%~-5% 1V p_p 75Ω/BNC Consommation électrique Environ 3W Température d’exploitation -10°C~+50°C Humidité d’exploitation ~90% Taille 68(L)x55(H)x128.5(D)mm(BNC inclus) Poids 450g 23 Comment éliminer ce produit (déchets d’équipements électriques et électroniques) (Applicable dans les pays de l’Union Européen et aux autres pays européens disposant de systémes de collecte sélective) Ce symbole sur le produit ou sa documentation indique qu’il ne doit pas être éliminé en fin de vie avec les autres déchets ménagers. L’élimination incontrôlée des déchets pouvant porter préjudice à l’environnement ou à la santé humaine, veuillez le séparer des autres types de déchets et le recycler de façon responsable. Vous favoriserez ainsi la réutilisation durable des ressources matérielles. Les particuliers sont invités à contacter le distributeur leur ayant vendu le produit ou à se renseigner auprès de leur mairie pour savoir où et comment ils peuvent se débarrasser de ce produit afin qu’il soit recyclé en respectant l’environnement. Les entreprises sont invitées à contacter leurs fournisseurs et à consulter les conditions de leur contrat de vente. Ce produit ne doit pas être éliminé avec les autres déchets commerciaux. Part No.:AB68-00511B CÁMARA DIGITAL A COLOR SCC-B2391(P) SCC-B2091P SCC-B2300 Sp Manual del usuario Précautions de sécurité El propósito de esta información es garantizar el uso apropiado de este producto con el fin de prevenir cualquier peligro o daño a la propiedad. Sírvase tomar en cuenta todas las medidas de seguridad. Advertencia Precaución El ignorar este aviso de advertencia puede ocasionar una lesión grave o la muerte. El ignorar este aviso de precaución puede ocasionar una lesión o daño a la propiedad. Sp Advertencia 1. Asegúrese de usar solamente el adaptador suministrado. (El usar un adaptador diferente al suministrado puede ocasionar un incendio, un choque eléctrico o un daño al producto.) 2. Cuando vaya a conectar la fuente de alimentación y los cables de las señales, revise antes los terminales de conexión externa. Conecte los cables de las señales de alarma a los terminales para las alarmas, el adaptador de CA al receptáculo de entrada de CA y el adaptador de CC a la entrada de CC, asegurándose de tener en cuenta las polaridades. (Una conexión incorrecta de la fuente de alimentación puede ocasionar un incendio, un choque eléctrico o un daño al producto.) 3. No conecte varias cámaras a un adaptador. (El exceder la capacidad puede producir una generación anormal de calor o fuego.) 4. Enchufe firmemente el cable eléctrico en el receptáculo de corriente. (Una conexión floja puede producir fuego.) 5. Al instalar la cámara en una pared o un techo, sujétela bien y con firmeza. (Una cámara, al caer, puede causar daños corporales.) 6. No coloque objetos conductores (p.ej., destornilladores, monedas, u objetos metálicos) o envases llenos de agua encima de la cámara. (El hacerlo puede causar daños corporales debido a la posible ocurrencia de 2 fuego, choque eléctrico o la caída de los objetos.) 7. No la instale en un lugar tiznado, polvoriento o húmedo. (El hacerlo puede ocasionar un incendio o un choque eléctrico.) 8. Si hubiera olores inusuales o humo que parecieran ser causados por el producto, desconecte inmediatamente la fuente de alimentación y comuníquese con el centro de servicios. (El continuar usando la cámara en tales condiciones puede provocar un incendio o un choque eléctrico.) 9. Si este producto presenta una falla de operación, comuníquese con la tienda en donde lo adquirió, o con el centro de servicios más cercano. Nunca desarme ni modifique este producto de ninguna manera. (Samsung no es responsable por los problemas causados por modificaciones no autorizadas o por intentos de reparación.) 10. Al limpiarlo, no rocíe agua directamente en las piezas del producto. (Al hacerlo puede provocar un fuego o un choque eléctrico.) Limpie la superficie con un paño seco. Nunca use detergentes o limpiadores químicos en el producto, ya que esto puede causar decoloración de la superficie o causar un daño al acabado. Precaución 1. No deje caer objetos en el producto ni lo golpee. Manténgalo alejado de lugares sujetos a vibración excesiva o interferencia magnética. 2. No lo instale en un sitio sujeto a altas temperaturas( por encima de 500°C/122°F), bajas temperaturas (por debajo de -100°C/ 14°F), o alta humedad. (El hacerlo puede causar un incendio o un choque eléctrico.) 3. Evite los sitios expuestos a la luz del sol o cercanos a fuentes de calor tales como calentadores o radiadores. (El no observar esto puede ocasionar un riesgo de fuego.) 4. Si usted quiere cambiar de ubicación el producto ya instalado, no olvide apagarlo antes de moverlo o de reinstalarlo. 5. Instale en un sitio con buena ventilación. 6. Saque el enchufe del tomacorriente cuando haya una tormenta eléctrica. (El no observar esto puede ocasionar un incendio o un daño al producto.) 3 Sp Contenido Capítulo 1 Introducción.............................................................5 Capítulo 2 Características Especiales .....................................6 Capítulo 3 Instalación ...............................................................7 Lors du déballage, vérifiez le contenu du paquet .....7 Sp Precautions en la instalación y el uso....................8 Conectar Auto Conector de Lente de Iris ..............9 Fijación de la Lente...............................................10 Fijar El Interruptor de Selección de Lente ..........11 Ajuste de Foco Trasero .......................................11 Conectar Cables y Comprobar la Operación......13 Capítulo 4 Nombres de los Components y Funciones.........15 Xpecificaciones del Producto...............................20 4 Capítulo 1 Introducción La cámara de DAYNIGHT(DIA/NOCHE) es una cámara baja del brillo, que mejora la sensibilidad funcionado con un modo de color en el excedente del regular brillo y funcionado con un modo de B/W cancelando la función de corte IR en abajo del regular brillo. También, se puede utilizar ligado al dispositivo infrarrojo separado de la emisión del rayo. Esta cámara tiene una alta resolución con las 540 líneas de TV de la resolución horizontal por el proceso de la señal digital y OLPF. Sp [DAYNIGHT] Es una función de cámara de color para suprimir el filtro con el funcion IR Cut en una iluminación debajo del valor estándar para que tenga una mejora.sensibilidad ❉ En el ambiente ligero, fluorescente y mecánico, si usted conecta el Lente con Iris Manual y enciende el interruptor de ELC entre los interruptores de FUNCION, el color puede ser rodado. En este caso, proporcione la energía de AC antes de usted enciende el interruptor de L/L entre los interruptores de FUNCIÓN. (NTSC:60HZ, PAL:50HZ) COLOR ROLLING es el problema que el color en la pantalla del monitor cambia no periódicamente. Esto sucede cuando White Balance no es fijo, porque parpadea una luz fluorescente mecánica cuando el ciclo es igual al ciclo de la frecuencia de la energía. 5 Capítulo 2 Características Especiales Alta Sensibilidad Tiene un actualizado 1/3" Super-HAD IT CCD por la imagen de la alta sensibilidad. Resolución Realiza alta resolución resultado de proceso de imagen digital completo apoyado por la tecnología digital de la señal del estado-de-arte. Sp Función del Ajuste de Ligera Trasera del Superior En caso de que el objeto tenga una iluminación brillante o luz del sol detrás de él, esta cámara ajusta la imagen sombreada por la luz trasera para fotografías claras. Método de la Sincronización de la Fuente de Alimentación Digital La Cerradura de la Línea de Método Completo Digital se observa en esta cámara, que ajusta la sincronización vertical de la cámara directamente para mejorar controlabilidad y la confiabilidad de la cámara. 6 Capítulo 3 Instalación Este capítulo describe qué se debe comprobar antes de instalación, cómo fijar el ambiente de la instalación, y qué se debe hacer durante la instalación. Entonces, describe cómo instalar la cámara y conectar el cable en circunstancias reales Lors du déballage, vérifiez le contenu du paquet : Sp Configurese de que los artículos siguientes se incluyen en el paquete. Cámara Manual del usuario Soporte de cámara (Montaje) Adaptador de C-Montaje Conectador de Lente de Obturador Automático 7 Precautions en la instalación y el uso ① No procure desmontar la cámara por usted mismo. Sp ➁ Tenga cuidado en el manejo de la cámara. Evite golpear o sacudir la cámara. Tenga cuidado de evitar el daño en la cámara causada por almacenamiento u operación incorrectos. ➂ No exponga esta cámara a la lluvia o a la humedad. No funcione esta cámara en un lugar mojado. ➃ No utilice los detergentes fuertes ni abrasivos al limpiar el cuerpo de cámara. Utilice un paño seco para limpiar la cámara. ⑤ Mantenga la cámara en un lugar fresco lejos de la luz directa del sol. Dejarla bajo la luz directa del sol puede tener como resultado el malfuncionamiento de la unidad. 8 Conectar Auto Conector de Lente de Iris Prepare el Auto Conectador siguiente de Lente de Iris suministrado con la cámara. Rb Pin3 Sp Pin1 Pin4 Pin2 Conecte el cable del cable de control, que se pela cubierta, al Auto Conectador del Lente del Iris según lo mostrado abajo. Número de Pin El Tipo de Control de DC El Tipo de Control de VIDEO 1 Humédad (-) Alimentación (+12V) 2 Humédad (+) N/A 3 Impulsión (+) Señal de VIDEO 4 Impulsión (-) TIERRA 9 Fijación de la Lente En caso de las lentes de CS Dé vuelta la lente a la derecha hasta que está fijada según lo demostrado como sigue. lentes de CS Sp En caso de las lentes de C Dé vuelta el adaptador de C-Montaje a la derecha para fijarlo. Y luego dé vuelta la lente de C a la derecha hasta que está fijada como sigue. lentes de C 10 Fijar El Interruptor de Selección de Lente Cuando se termina el montaje de lente, fije el Interruptor de la selección de Lente en el lado de la cámara según el tipo montado de lente. Cuando el lente montado es un Auto Lente del Iris de tipo control de DC, fije el Interruptor de la Selección de Lente a "DC", Cuando el lente montado es un Auto Lente del Iris de Video de tipo control, fije el Interruptor de la Selección de Lente al "VIDEO". Sp Ajuste de Foco Trasero El Foco Trasero (BACK FOCUS)de la cámara se ajusta en la planta antes de la entrega, pero algunas lentes están desenfocado aunque el número diferencia en tipos. Si es el caso, usted debe hacer el ajuste foco trasero como sigue. Primero, éste es el procedimiento de ajuste de foco trasero para las lentes de foco fijo. Lentes sin la Función de Zoom ① Capture la imagen de objeto con el alto resolution (objeto) en la distancia más de 10m y ponga la anilla del foco de la lente en la posición infinita (∞). ➁ Rote la anilla del ajuste del FOCO TRASERO hasta que el objeto se mostra lo más mejor posible. ➂ Apriete la anilla del ajuste del FOCO TRASERO fijando el tornillo. 11 Sp Lentes con la Función de Zoom ① capture la imagen de objeto con el alto resolution (objeto) en la distancia de 3 a 5 m y zoom en la lente como cerca de TELE como sea posible. Entonces ajuste la anilla de foco de la lente hasta que el objeto se mostra lo más mejor posible. ➁ Enfoque en la lente como cerca de AMPLIO como posible y ajuste la barra del ajuste del FOCO TRASERA hasta que el objeto se mostra lo más mejor posible. ➂ Repita de ① a ➁ más de 2 o 3 veces hasta que el foco del lado de ZOOM TELE y del lado de AMPLIO de ZOOM se consideran lo más mejor possible. BARRA DE CONTROL DE FOCO TRASERO 12 Conectar Cables y Comprobar la Operación 1 Primero, conecte el conectador del cable de BNC con el terminal de salida de video. 2 En segundo lugar, conecte el otro conectador del cable de BNC con el terminal de entrada de video. Sp terminal de entrada de video en la vista posterior de monitor Cable de BNC TERMINAL DE SALIDA DE VÍDEO 13 3 terceros conecta el cable de energía. ① Cámara de Entrada de Energía de AC24V/DC12V Conecte 2 líneas del adaptador de la energía usando un destornillador de al terminal de la energía IN de la cámara según lo mostrado abajo. ❉ Sin la distinción de la polaridad, conecte a la fuente de la energía de AC24V o DC12V. Sp ➁ Cámara de Entrada de Energía de AC230V. Conecte la cuerda de la entrada de energía a la fuente de energía de AC230V. 14 Capítulo 4 Nombres de los Componentes y Funciones Vista Lateral ➂ Conectador Automático de la Lente del Obturador ① Adaptador de Montaje de la Fijación de Groove ➅ Barra de Control de Foco Trasera Sp ⑤ Interruptor de Selección de Lente de ALC ➃ Cable de Control para lentes Auto Iris ➁ Lente Automática de Obturador ① Adaptador de Montaje de la Fijación de Groove Este groove se utiliza para atornillar el adaptador de montaje, un par del soporte donde la cámara será instalada. ➁ Lente Automática de Obturador (Opción) Esta lente está instalada en la cámara. ❉ La lente de cámara con la superficie manchada debe limpiarse suavemente con tejido fino de lente o el paño del algodón pintado etanol. ➂ Conectador Automático De la Lente Del Obturador Este conectador provee de la lente automática del obturador la fuente de alimentación, la señal de control, la señal video, o la señal de la DC necesaria para el control del obturador de la lente. ➃ Cable de Control para lentes Auto Iris Este cable transmite la señal que controla Iris. ⑤ Interruptor de Selección de Lente de ALC Este interruptor se utiliza para seleccionar el tipo de lente. ➅ Barra de Control de Foco Trasero Esta barra se utiliza para configurar el foco trasero de cámara. 15 Vista Lateral Cámara AC24V/DC12V(SCC-B2391(P)/B2300 ⑤ ⑨ ➂➃ ➁ ➅ Sp ① ⑦ ⑧ Cámara AC230V (SCC-B2091P) ⑤ ① ➂➃ ➁ ➅ ⑨ ⑦ ⑧ 16 ① Puerto de la conexión de alimentación Cámara AC24V/DC12V : Es un puerto conectado al cable del adaptador de la energía. Cámara AC230V : Es cable eléctrico. ➁ Indicador de encendido Si la alimentación de una cámara se provee normalmente, el LED está ENCENDIDO. ➂ ➃ Interruptor INC y DEC Ambos interruptores aumentan o disminuyen el beneficio de ROJO y de AZUL para fijar una temperatura del color como usted desea mientras que AWB entre los interruptores de la FUNCIÓN está apagado (USUARIO) y controlar la fase síncrona vertical mientras que AWB y L/L están encendid. ⑤ Interruptor FUNCI 1. L/L 3. FL 2. ELC 4. AWB ON SW1 SW2 SW3 SW4 17 Sp Sp 1) SW1(L/L) : Fije APAGADO, la cámara activa el modo interno de sincronización y se fija a ENCENDIDO, el modo de la sincronización de la energía. Si usted conecta multicámaras al interruptor secuencial para entrar en el modo automático de la conversión, la pantalla negrará cada pantalla mientras que la cámara permanece en INT (sincronización interna).Tales fenómenos de vitalidad pueden ser despejaron y la conversión de la pantalla llega a ser lisa fijando el interruptor de L/L a ENCENDIDO y usando el interruptor de INT/DEC para controlar la fase síncrona vertical. ❉ Si usted desea controlar la fase síncrona vertical con el interruptor de INT/DEC cuando L/L se fija a ENCENDIDO, usted fijará SW4 a AWB ENCENDIDO. ❉ En caso de DC12V, INT (synchronizer interno) será fijado sin consideración alguna a CON./DESC. de L/L. 2) SW2(ELC) : Utilice este interruptor con el Lente Manual del Iris. Mientras que este interruptor está ENCENDIDO, la velocidad del obturador electrónico varía con el brillo del sujeto de 1/60(50) a 1/100.000 seg para controlar automáticamente el brillo de la pantalla. Sin embargo, con el Auto Lente del Iris (DC o Control Video), sea seguro apagar. Color Rolling puede ocurrir en este modo. En ese caso, la fuente de entrada de energía de AC a la cámara y seleccione SW1"on". (NTSC: 60HZ, PAL: 50HZ) 3) SW3(FL): Éste debe prevenir el parpadeo en la pantalla cuando el sistema de NTSC se utiliza en la región de alimentación 50HZ y sistema de PAL se utiliza en la región de alimentación 60HZ. Ése debe evitar sacudarir en la pantalla resultada de la discordancia de la frecuencia vertical de sincronización y la frecuencia de parpadeo de la iluminación. Mientras que este interruptor está ENCENDIDO, el obturador electrónico está fijado a 1/100seg (NTSC) o a 1/120 seg (PAL). 4) SW4(AWB): Al configurar ENCENDIDO, el color de la pantalla es ajustado automáticamente de acuerdo con el cambio de la temperatura del color de la iluminación por el cambio del ambiente exterior. (ATW) Si la condición de la iluminación es constante, el ajuste OFF está disponible. La cámara memoriza la temperatura del color de la iluminación cuando el ajuste del interruptor se cambia de ENCENDIDO a APAGADO, y el color de la cámara se ajusta a la temperatura memorizada del color. (AWC) Si se cambia la temperatura del color de la iluminación y usted desea hacer la cámara memorizada/operada con la temperatura cambiante del color, reopere la operación con./desc. del interruptor. Sin embargo, esté enterado que un error puede ocurrir bajo las condiciones siguientes. Primero, un caso que el sujeto es solo color grande y del chroma alto, y en el centro de la pantalla o un caso con casi ningún color blanco en el Segunda pantalla, un caso con una iluminación específica tal como una lámpara de natrium. 18 ➅ Controlador Llano de IRIS DC Cuando el interruptor de la selección de la lente de ALC se fija a la DC., utilice la misma barra del control como el conductor para controlar el nivel del IRIS. ⑦ Puerto de Salida de Video Este puerto será conectado al puerto de la entrada del video de monitor o el equivalente. Usted puede hacer salir las señales de video de la cámara a través de este puerto. ⑧ Interruptor de Selección por DAYNIGHT Si usted fija este interruptor al AUTO, la función DAYNIGHT será activada automáticamente según la iluminación. Bajo iluminación pobre, el filtro IR será eliminado automáticamente en el modo negro y blanco (Modo de BW)) para levantar la sensibilidad pero bajo buena iluminación, el filtro IR será insertado automáticamente en el modo del color (Modo del COLOR). El filtro IR responde al tiempo prefijado de la duración (Condición de la Entrega:10 segundos). Cuando usted convierte DAYNIGHT en el modo AUTO, usted fijará tiempo de la duración como sigue. (por favor apague el interruptor de L/L y el interruptor de AWB para comenzar). Siempre que usted convierta el interruptor de la selección de DAYNIGHT de EXT al AUTO mientras que usted se mantiene el interruptor de INC/DEC, el TIEMPO de la DURACIÓN se convierte en 10s, 30s, 60s, 90s, 120s, y 150s en secuencia. Después de la configuración, usted cancelará presionar el interruptor de INC/DEC para ahorrar la condición de la configuración en la cámara. Después del ahorro, el modo DAYNIGHT será convertido automáticamente dependiendo de TIEMPO de la DURACIÓN incluso en el evento de la ENERGÍA Con./Desc.. Para reajustar, por favor repite el procedimiento antedicho. (Después del reajuste, usted puede volver L/L y AWB a la condición anterior.) Si usted fija este interruptor a EXT, el modo de COLOR/BW varía dependiendo de la entrada de señal externa al puerto externo de la entrada de señal de DAYNIGHT(⑨). ⑨ Puerto Externo de Entrada de Señal por DAYNIGHT Cuando el interruptor de la selección de DAYNIGHT (⑧)se fija a EXT, el modo de COLOR/BW varía dependiendo de la señal de entrada a este puerto. El terminal de la entrada de DAYNIGHT tiene la entrada de DC 5V pull-up y más de 0.2mA. OFF : Abra el contacto. ON : Contacto cerrado 19 Sp Especificación de Producto SCC-B2391P/2091P ARTÍCULO Tipo de Producto DESCRIPCIÓN Cámara CCTV Sistema de Radiodifusión Sistema de Estándar PAL Sp CCD 1/3” CCD Súper HAD Pixeles Eficaces 752(H) x 582(V) Tipo de Exploración 625 Líneas, 2:1 Entrelazado INTERNO : 15,625Hz(H) 50 Hz(V) Frecuencia LÍNEA BLOC : 15,625Hz(H) 50 Hz(V) INT Tipo de Sinc LÍNEA BLOC(Cuando se utiliza la fuente de la enegía AC) Resolución 540(color)/570(B/W) Líneas de TV Proporción S/N Sobre 50Db Iluminación mínima de Objeto 0.3 Lux(Color) / 0.06 Lux(B/W) DAYNIGHT AUTO / EXT 20 ARTÍCULO DESCRIPCIÓN ALC/ELC ALC LENTE DE IRIS DC LENTE DE VIDEO ELC Función Electrónica de Iris de Obturador (Máximo 1/100 Kseg) Temperatura de Color AWB/MANUAL Sp BLC(Compensación de ON Luz Ambiental ) AGC ON Salida de Video COMPUESTO VÍDEO OUT 1V p_p 75Ω/BNC Fuente de Energía AC24V ±10%(50Hz±0.3Hz), DC12V+10%~-5% Consumo De Energía Sobre 3Watts Temperatura de Funcionamiento -10°C~+50°C Humedad de Funcionamiento ~90% Tamaño 68(W)x55(H)x128.5(D)mm(BNC incluido) Peso B2391P : 450g B2391P : 550g 21 Especificación de Producto SCC-B2391/B2300 ARTÍCULO Tipo de Producto DESCRIPCIÓN Cámara CCTV Sistema de Radiodifusión Sistema de Estándar NTSC CCD Sp 1/3” CCD Súper HAD B2391 : 768(H) x 494(V) Pixeles Eficaces B2300 : 510(H) x 492(V) Tipo de Exploración 525 Líneas, 2:1 Entrelazado INTERNO : 15,750Hz(H) 59.94 Hz(V) Frecuencia LÍNEA BLOC : 15,765Hz(H) 60 Hz(V) INT Tipo de Sinc LÍNEA BLOC (Cuando se utiliza la fuente de la enegía AC) Resolución B2391 : Líneas de TV 540(color)/570(BW) B2300 : Líneas de TV 400(color)/420(BW) Proporción S/N Iluminación mínima de Objeto DAYNIGHT 22 Más 50Db(AGC OFF) B2391 : 0.3 Lux(Color) / 0.06 Lux(B/W) B2300 : 0.2 Lux(Color) / 0.03 Lux(B/W) AUTO / EXT ARTÍCULO DESCRIPCIÓN ALC LENTE DE IRIS DC ALC/ELC LENTE DE VIDEO ELC Función Electrónica de Iris de Obturador (Máximo 1/100 Kseg) Temperatura de Color AWB/MANUAL BLC(Compensación de Luz Ambiental) ON AGC ON Salida de Video COMPUESTO VÍDEO OUT Sp 1V p_p 75Ω/BNC Fuente de Energía AC24V ±10%(60Hz±0.3Hz), DC12V+10%~-5% Consumo De Energía Sobre 3Watts Temperatura de Funcionamiento -10°C~+50°C Humedad de Funcionamiento ~90% Tamaño 68(W)x55(H)x128.5(L)mm(BNC incluido) Peso 450g 23 Eliminación correcta de este producto (material eléctrico y electrónico de descarte) (Aplicable en la Unión Europea y en países europeos con sistenmas de recogida selectiva de residuos) La presencia de esta marca en el producto o en el material informativo que lo acompaña, indica que al finalizar su vida útil no deberá eliminarse junto con otros residuos domésticos. Para evitar los posibles daños al medio ambiente o a la salud humana que representa la eliminación incontrolada de residuos, separe este producto de otros tipos de residuos y recíclelo correctamente para promover la reutilización sostenible de recursos materiales. Los usuarios particulares pueden contactar con el establecimiento donde adquirieron el producto, o con las autoridades locales pertinentes, para informarse sobre cómo y dónde pueden llevarlo para que sea sometido a un reciclaje ecológico y seguro. Los usuarios comerciales pueden contactar con su proveedor y consultar las condiciones del contrato de compra. Este producto no debe eliminarse mezclado con otros residuos comerciales. Part No.:AB68-00511B CAMERA COLORE DIGITALE SCC-B2391(P) SCC-B2091P SCC-B2300 Manuale d’Utente I Norme di sicurezza Scopo di queste informazioni è garantire l’uso corretto del prodotto per prevenire pericoli o danni alla proprietà. Attenersi a tutte le precauzioni. Avvertenza Attenzione La mancata osservanza di questa indicazione può provocare la morte o gravi lesioni. La mancata osservanza di questa indicazione può provocare lesioni o danni alla proprietà. I Avvertenza 1. Utilizzare esclusivamente l’adattatore in dotazione. (L’uso di un adatattatore diverso da quello fornito può provocare incendi, scosse elettriche o danni al prodotto.) 2. Quando si collegano i cavi dell’alimentatore e del segnale, controllare i terminali dei collegamenti esterni prima di effettuare i collegamenti. Collegare i cavi del segnale di allarme agli appositi terminali, l’adattatore AC alla presa di ingresso della corrente AC, e l’adattatore DC all’ingresso della corrente DC, rispettando le polarità corrette. (Un collegamento non corretto dell’alimentatore può provocare incendi, scosse elettriche o danni al prodotto.) 3. Non collegare più telecamere allo stesso adattatore. (Il superamento della capacità può provocare una generazione anomala di calore oppure incendi.) 4. Inserire il cavo di alimentazione nell’apposita presa. (Un collegamento allentato può provocare incendi.) 5. Quando si installa la telecamera a soffitto oppure a parete, fissare bene l’apparecchio. (Una telecamera instabile può cadere e provocare lesioni personali.) 6. Non collocare oggetti con capacità conduttive (cacciaviti, monete e altri oggetti metallici) oppure recipienti pieni d’acqua sopra la telecamera. (La mancata osservanza di questa norma può provocare lesioni personali dovute a incendi, scosse elettriche o alla caduta di oggetti.) 2 7. Non installare l’apparecchio in luoghi sporchi, polverosi o umidi. (In caso contrario si possono provocare incendi o scosse elettriche.) 8. Se dall’apparecchio provengono odori insoliti oppure fumo, scollegare immediatamente dall’alimentazione elettrica e rivolgersi al centro di assistenza. (Se si continua a utilizzare l’apparecchio in tali condizioni si possono provocare incendi o scosse elettriche.) 9. In caso di funzionamento difettoso dell’apparecchio, rivolgersi al rivenditore presso cui è stato effettuato l’acquisto oppure al centro di assistenza più vicino. Non smontare né modificare il prodotto. (Samsung non è responsabile di problemi causati da modifiche non autorizzate o da tentativi di riparazione.) 10. Durante la pulizia, non spruzzare acqua direttamente sui componenti del prodotto. (In caso contrario si possono provocare incendi o scosse elettriche.) Pulire la superficie con un panno asciutto. Non usare mai detergenti o prodotti chimici per la pulizia del prodotto, in quanto questi potrebbero provocare lo scolorimento della superficie e danneggiare il rivestimento esterno. Attenzione 1. Non far cadere oggetti sopra il prodotto e non sottoporre quest’ultimo a forti colpi. Il prodotto non va tenuto in un luogo soggetto a vibrazioni eccessive o a interferenze magnetiche. 2. Non installare il prodotto in un luogo soggetto ad alte (superiori ai 50 gradi) o basse temperature (- 10 gradi), oppure ad elevata umidità. (In caso contrario si possono provocare incendi o scosse elettriche.) 3. Evitare i luoghi esposti alla luce solare diretta e la vicinanza a sorgenti di calore come caloriferi e radiatori. (La mancata osservanza di questa norma può provocare incendi.) 4. Per spostare un apparecchio già installato, assicurarsi di averlo spento prima di spostarlo e reinstallarlo. 5. Installare l’apparecchio in un luogo ben ventilato. 6. In caso di temporali, staccare la spina dalla presa elettrica. (La mancata osservanza di questa norma può provocare incendi o danni al prodotto.) 3 I Contenuti Capitolo 1 Introduzione ..........................................................5 Capitolo 2 Caratteri Speciali..................................................6 Capitolo 3 Installazione ..........................................................7 Controllazione Gli Contenuti del Pacco............7 Precauzioni in Installazione e Uso ....................8 I Collegamento Auto Iris Lenti Connettore .........9 Fissaggio Lente..................................................10 Posizione Lenti Selezione Interruttore............11 Aggiustamento Fuoco Retro ............................11 Collegamento cavi e controllazione operazione .........................................................13 Capitolo 4 Nomi e Funzione dei componenti....................15 Specificazione Prodotto ....................................20 4 Capitolo 1 Introduzione Camera DAYNIGHT(GIORNO/NOTTE) è una camera luminosità bassa, che migliora la sensività da operando con una modalità colore alla sopra di luminosità regolare e operato con una modalità B/N da cancellando la funzione CUT IR al sotto di luminosità regolare. Anche, questo può essere usato collegato con il dispositivo emissione raggio infrarosso separato. Questa camera ha una risoluzione alta con il TV 540 Line di risoluzione orizzontale attraverso lo segnale digitale sviluppo e OLPF. I [DAYNIGHT] È una funzione della camera colore per cancellare il filtro con la funzione il IR Cut nell’illuminazione sotto il valore standardo perciò ha una sensitività migliore. ❉ Nel ambiente del luce fluorescente mecanicale, se attacca Lenti MANUALE IRIS e accende l’interruttore ELC fra FUNCTION, colore può essere rotollato. In questo caso, fornisce l’energia elettrica AC prima accende l’interruttore L/L fra interruttori FUNCTION (NTSC:60HZ, PAL:50HZ) COLORE ROTOLLATO è la problema che il colore sullo schermo di monitor cambia non periodicamente. Questo accade quando Bilancia Bianca non è fissato, perchè un luce fluorescente mecanicale lampeggia quando questo ciclo è lo stesso al ciclo della frequenza di energia elettrica. 5 Capitolo 2 Caratteri Speciali Sensibilità Alta Ha un up-to-date 1/3" Super-HAD IT CCD per un imaggine di sensibilità alta. Risoluzione Realizza la risoluzione alta risultando dall’immagine digitale intera di trasformazione sostenutp dalla tecnologia migliore di segnale digitale. I Funzione Adattamento Luce Retro Superiore Nel caso gli oggetti ha un illuminazione chiaro o luce di sole indietro, questa camera aggiusta l’imagine ombreggiato dalla luce per fotografare chiaro. Metodo Sincoronizazione Alimentazione Digitale La serratura linea metodo digitale intera in questa camera, che aggiusta la sincronizazione della camera verticale diretamente per improvare controllabilemente e la camera dell’attendibilità. 6 Capitolo 3 Installazione Questo capitolo descrive che cosa dovrebbe essere controllato prima l’installazione, come mettere l’ambiente d’installazione, e che cosa dovrebbe essere fatto mentre installazione. Poi, descrivere come per installare la camera e collegare il cavo nelle circostanze reale. Controllazione Gli Contenuti del Pacco Non mancare di controllare se l’articolo seguente sono incluso nel pacco. I Camera Manuale d’utente Supporto camera(Montatura) Adattatore supporto C Collegatore lente otturatore automatico 7 Precauzioni in Installazione e Uso ① Non tentare per smontare da solo la camera. ➁ Attentare per la trattamento della camera. Evitare colpendo o tremando la camera. Attenta per evitare il danneggio sulla camera causato dall’immagazinamento improprio o l’operazione. ➂ Non esporre questa camera allla pioggia o l’umidità. Non operare questa I camera sul posto bagnato. ➃ Non usare forza o abrasivo detergenti quando puliendo il corpo della camera. Usare una stofa asciugato per pulire la camera. ⑤ Mantenere la camera al posto fresco lontano dal luce del sole diretta. Lasciando sotto la luce del sole diretta può risultare il malfunzione della unita. 8 Collegamento Auto Iris Lenti Connettore Preparare Auto Iris Lenti Connettore seguente fornito con la camera. Rb Pin3 Pin1 I Pin4 Pin2 Collegare il cavo del cavo di controllo, suo coperto è tolto, al Auto Iris Lenti Connettore come mostrato a sotto. Numero Pin Tipo Controllo DC Tipo Controllo Video 1 Damp(-) Potenza (+12V) 2 Damp(+) N/A 3 Drive(+) Segnale Video 4 Drive(-) Ground 9 Fissaggio Lente Nel caso di lenti CS Girare il lenti CS in senso orario fino questo è fissato come è mostrato come seguente. lenti CS I Nel caso di lenti C Girare l’adattore C-supporto in senso orario per fissarlo. Poi girare il lente C in senso orario fino è fissato come seguenti. lenti C 10 Posizione Lenti Selezione Interruttore Quando la montatura dei lenti è completo, mette il Lenti di selezione Interruttore sul lato della camera secondo al tipo dei lenti montati. Quando i lenti montati è un Auto Iris Lenti del tipo di controllo Video, mette i Lenti Selezione Interruttore a “DC”, Quando i lenti montati è un Auto Iris Lenti del tipo di controllo, mette i Lenti Selezone Interruttore a “VIDEO”. I Aggiustamento Fuoco Retro La camera del fuoco retro è aggiustato alla pianta prima consegna, ma qualche lenti sono fuori di fuoco attraverso il numero differisce in tipi. Se questi è il caso, dovrebbe produrre il fuoco retro aggiustamento come seguenti. Prima, questo è il fouco retro aggiustamento procedura per fuochi fissati dei lenti Lenti senza funzione zoom ① Immaginare un oggetto con la risoluzione(letticed) alta a più che la distanza 10m e mette il fuoco di lente circondare nella posizione infinita(∞). ➁ Ruotare il FUOCO RETRO aggiustamento circondare fino l’oggetti è visto meglio. ➂ Ha Stringeto il FUOCO RETRO aggiustamento la vite anello fissando. 11 Lenti con funzione zoom ① Immaginare un oggetto con la risoluzione(letticed) alta a una distanza di 3 a 5m e zoom nel lente al più chiudere a TELE. Poi aggiustare il fuoco del lente anello fino l’oggetto è visto migliore. ➁ Zoom nel lente al più vicinare a WIDE e aggiustare il BACK FOCUS aggiustamente ilbar fino l’oggetto è visto migliore. ➂ Ripetere da (1) a (2) oltre 2 o 3 volte fino il fuoco sulla parte ZOOM TELE è nella linea con sulla parte ZOOM WIDE. I BAR CONTROLLO FUOCO DIETRO 12 Collegamento cavi e controllazione operazione 1 Prima, collegare il collegatore del cavo BNC al terminale Video Out. 2 Secondo, collegare il collegatore altro del cavo BNC al terminale Video IN. I Morsetto di Video in dello schermo posteriore. CAVO BNC MORSETTO VIDEO OUT 13 3 Terzo collega il cavo di energia elettrico ① AC24V/DC12V Energia elettrico Input Camenra Collegare 2 linee di energia elettrico adattatore usando una cacciavite all’energia elettrico IN Terminale della camera come mostrato a sotto. ❉ Senza la distinzione della polarità, collega al AC24V o DC12V sorgente energia elettrico. I ➁ AC230V Energia elettrico Input Camera Collegare l’energia elettrico della corda input lo sorgente energia elettrico AC230V. 14 Capitolo 4 Nomi e Funzione dei componenti Vista Fianco ➂ Connectore Lente Otturatore Automatica ① Solco Fissando Adattore Supporto ➅ Bar Controllo Fuoco Dietro ⑤ Interruttore Selezione Lenti Alc ➃ Cavo Controllo Lenti Iris Auto I ➁ Lenti Otturatore Automatica ① Solco Fissando Adattore Supporto Questo solco è usato per avvitando l’adattore supporto, una parte del parente dove la camera sarà essere installato. ➁ Lenti Otturatore Automatica (Opzionale) Questo lente è installato nella camera. ❉ La lente della camera con una superficia macchiata dovrebbe essere pulito leggeramente con un tessuto per lente o l’etnolo dipinto di tessuto cottone. ➂ Collegatore Lente Otturatore Automatica Questo Connectore fornisce la lente otturatore automatica con l’alimentazione, lo segnale controllo, segnale di video, o segnale necessaria di DC per il controllo del lente otturatore. ➃ Cavo Controllo Lenti Iris Auto Questo cavo transmette lo segnale che controlla il Iris. ⑤ Interruttore Selezione Lenti Alc Questo Interrutore è usato per selezionare il tipo dei lenti ➅ Bar Controllo Fuoco Dietro Questo bar è usato per mettere dietro dei fuochi della camera. 15 Vista Posteriore Camera AC24V/DC12V (SCC-B2391(P)/B2300) I ⑤ ⑨ ➂➃ ➁ ➅ ① ⑦ ⑧ Camera AC230V (SCC-B2091P) ⑤ ① ➂➃ ➁ ➅ ⑨ ⑦ ⑧ 16 ① Porto collegamento Potenza Camera AC24V/DC12V : Questo è un porto collegato al cavo di adattatore energia elettrica. Camera AC230V : Questo è corda di Energia elettrica. ➁ LED POTENZA Se la camera della potenza è fornito normalmente, il LED è ON. ➂ ➃ INC e DEC Interrutore Tutti due interrutori aumenta o diminuisce il profitto di ROSSO e BLU per fissare una temperatura del colore come vuole mentre AWB fra l’interruttore FUNCTION è off(USER/UTENTE) e controlla la fase sincrono verticale mentre tutti due AWB e L/L sono on. ⑤ Interruttore FUNZIONE 1. L/L 3. FL 2. ELC 4. AWB ON SW1 SW2 SW3 SW4 17 I 1) SW1(L/L) : Mette a OFF, la camera attiva la modalità sincronizzazione internale e mette a ON, la modalità sincronizzazione potenza. Se collega le camere muti al interrutore sequenziale per entrare la modalità conversione automatico, lo schermo sarà rimbalzare ogni schermo mentre la camera ferma in INT(Sincronazione Internale). Tale fenomeno di imbalza può essere pulito e la conversazione dello schermo diventa liscio da mettendo l’interrutore L/L a ON e usando l’nterruttore INT/DEC per controllare le fase sincrono verticale. ❉ Se vuole controllare la fase sincrono verticale con l’interruttore INT/DEC quando L/L è messo a ON, deve mettere SW4 a AWB ON. ❉ Nel caso di DC 12V, INT (Sincronizzatore Internale) sarà essere fissato senza riguardo a ON/OFF di L/L. I 2) SW2(ELC) : Usare questo interrutore con il Lenti Iris Auto. Mentre questo interruttore è ON, la velocity`a del otturatore elettronico varie con la luminosità del soggetto da 1/60(50) a 1/100,000 sec per controllando automaticamente la luminosità dello schermo, con il Auto Iris Lenti (DC o Video Controllo), assicura a interruttore OFF. Colore Rotollato può cauare in questa modalità. In quella caso, input sorgente energia elettrica alla camera e selezionare SW1 “ON”. (NTSC:60HZ, PAL: 50HZ) 3) SW3(FL): Questo è per preventire il tremolo sullo schermo quadno la sistema NTSC è usato nel regione l’erogazione energia elettrica 50HZ e la sistema PAL è usato nel regione l’erogazione energia elettrica. Quella sarà prevenire tremolando sullo schermo risultato dalla discordanza della frequenza sincronazione verticale e la frequenza di guizzo dell’illuminazione. Mentre questo interruttore è ON, l’otturatore elettronico è fissato a 1/100sec(NTSC) o 1/120sec(PAL). 4) SW4(AWB): Quando posiziona ON, il colore dello schermo è aggiustato automaticmente conformente al cambiamento della temperatura di colore per illuminazione dal cambiamento di ambiento estremo. (ATW) Se la condizione di illuminazione è progressivo, la posizione OFF è disponibile. La camera memorizza la temperatura del colore di illuminazione al tempo quando la posizione di interruttore è cambiato da ON a OFF, e il colore della camera è aggiustato alla temperatura di colore memorizzato. (AWC) Se la temperatura del colore di illuminazione è cambiato e vuole che la camera essere memorizzato/operato con la temperatura di colore cambiato, rioperata l’operazione di interruttore ON/OFF. Ma, essere consapovole che un errore può accadere sotto le condizioni seguente. Prima, un caso che il soggetto è grande, colore singolo della croma alta,e nel centro dello shcermo o un caso con quasi niente colore bianca sullo shcermo. Secondo, un caso con illuminazione specifico cosi come una lampada naturismo. 18 ➅ Controllore Levello DC IRIS Quando l’interrutore sezione dei lenti ALC è messo a DC, usare il bar di stesso controlo come il driver per controllare il levello IRIS. ⑦ Porto Output Video Questo porto deve essere collegato al porto input del video monitor o equivalente. Può gli segnali del video camera di output attraverso questo porto. ⑧ Interrutore Selezione DAYNIGHT Se mette questo interrutore a AUTO, la funzione DAYNIGHT sarà essere attivato automaticamente secondo l’illuminazione. Sotto povero illuminazione, Filtro IR sarà essere eliminato automaticamente nella modalità nero e bianca (Modo BW) per alzare la sensività ma sotto illuminazione buono, Filtro IR sarà essere inserito automaticamente nella modalità colore (Modalità COLORE) Filtro IR risponde alla Tempo Durazione preset (Condizione Consegna: 10 secondi ) Quando convertiene DAYNIGHT nella modalità AUTO, deve mettere Tempo Durazione come seguisce. (Per favore spengere l’interruttore L/L e l’interruttore AWB per iniziare) Quando convertiene l’interrutore selezione DAYNIGHT da EXT a AUTO mentre tiene all interrutore INC/DEC, TEMPO DURAZIONE diventa 10s, 30s, 60s, 90s, 120s e 150s in sequenza. Sopra setup, deve cancellare premedno interruttore INC/DEC per risparmiare la condizione setup nella camera. Sopra risparmiando, la modalità DAYNIGHT sarà essere convertito automaticamente secondo DURAZIONE TEMPO se nel evento di POWER On/Off. Per rimettendo, per favore ripetere il processo sopra. (Sopra rimettendo, può ritornare tutti due L/L e AWB alla condizione precedente. ) Se mette questo interruttore alla Modalità EXT, COLOR/BW varia secondo lo segnale esternale al porto input segnale esternale DAYNIGHT. ⑨ Porto Input Segnale Esternale DAYNIGHT Quando l’interrutore selezione DAYNIGHT è messo alla Modalità EXT COLOR/BW varia secondo lo segnale input a questo porto. Il terminale input deve essere DC5V tirare sopra input e sopra 0.2mA. OFF: Aprire Contatto ON : Chiudere Contatto 19 I Specificazione Prodotto SCC-B2391P/B2091P ARTICOLO I Contenuti Tipo Prodotto Camera CCTV Sistema Telecomunicazione SISTEMA STANDARDO PAL CCD 1/3" Supero-HAD CCD Pixel Efficace 752(H) X 582(V) Tipo Scansione Linea 625, 2:1 Intreccia INTERNALE : 15,625Hz(H) 50 Hz(V) Frequenza CHIUSA LINEA : 15,625Hz(H) 50 Hz(V) Tipo Sync INTERNALE CHIUSA LINEA (Quando Sorgente Energia elettrica è usato) Risoluzione 540(colore)/570(B/W) TV Linea Rapporto S/N Circa 50dB Illuminazione Minimo Lux 0.3 (Colore)/ Lux 0.06 (B/W) di Oggetto DAYNIGHT 20 AUTO / EXT ARTICOLO Contenuti ALC DC IRIS LENTI ALC/ELC VIDEO LENTI ELC Funzione Iris Otturatore Elettronico (Massimo 1/100 Ksec) Temperatura Colore AWB/MANUALE BLC (Compensazione Luce da dietro) ON AGC ON Output Video FOTOMONTAGGIO VIDEO OUT 1V p_p 75Ω/BNC Sorgente Energia elettrico AC24V ±10%(50Hz±0.3Hz), DC12V+10%~-5% Consumo Potenza B2391P: Circa 3 Wat B2091P: Circa 4 Wat Tempo Operazione -10°C~+50°C I Umidità Operazione ~90% Misura 68(W) x 55(H) x 128.5(D) mm (incluso BNC) Peso B2391P: 450g B2091P: 550g 21 SCC-B2391/B2300 ARTICOLO Contenuti Tipo Prodotto Camera CCTV Sistema Telecomunicazione SISTEMA STANDARDO NTSC CCD 1/3" Supero-HAD CCD B2391 : 768(H) X 494(V) I Pixel Efficace Tipo Scansione B2300 : 510(H) X 492(V) Linea 525, 2:1 Intreccia INTERNALE : 15,734Hz(H) 59.94 Hz(V) Frequenza CHIUSA LINEA : 15,750Hz(H) 60 Hz(V) INTERNALE Tipo Sync Risoluzione CHIUSA LINEA (Quando Sorgente Energia elettrica è usato) B2391:540(Colore)/570(B/W) TV Linea B2300:400(Colore)/420 (B/W) TV Linea Rapporto S/N Circa 50dB(AGC OFF) Illuminazione Minimo B2391:Lux 0.3 (Colore)/ Lux 0.06 (B/W) di Oggetto B2300:Lux 0.2 (Colore)/ Lux 0.03 (B/W) DAYNIGHT 22 AUTO / EXT ARTICOLO Contenuti ALC DC IRIS LENTI ALC/ELC VIDEO LENTI ELC Funzione Iris Otturatore Elettronico (Massimo 1/100 Ksec) Temperatura Colore BLC (Compensazione Luce da dietro) AWB/MANUALE I ON AGC ON Output Video FOTOMONTAGGIO VIDEO OUT 1V p_p 75Ω/BNC Sorgente Energia elettrico AC24V ±10%(60Hz±0.3Hz), DC12V+10%~-5% Consumo Potenza Circa 3 Wat Tempo Operazione -10°C~+50°C Umidità Operazione ~90% Misura 68(W) x 55(H) x 128.5(D) mm (incluso BNC) Peso 450g 23 Corretto smaltimento del prodotto (rifiuti elettrici ed elettronici) (Applicabile in i paesi dell’Unione Europea e in quelli con sistema di raccolta differenziata) Il marchio riportato sul prodotto o sulla sua documentazione indica che il prodotto non deve essere smaltito con altri rifiuti domestici al termine del ciclo di vita. Per evitare eventuali danni all'ambiente o alla salute causati dall'inopportuno smaltimento dei rifiuti, si invita l'utente a separare questo prodotto da altri tipi di rifiuti e di riciclarlo in maniera responsabile per favorire il riutilizzo sostenibile delle risorse materiali. Gli utenti domestici sono invitati a contattare il rivenditore presso il quale è stato acquistato il prodotto o l'ufficio locale preposto per tutte le informazioni relative alla raccolta differenziata e al riciclaggio per questo tipo di prodotto. Gli utenti aziendali sono invitati a contattare il proprio fornitore e verificare i termini e le condizioni del contratto di acquisto. Questo prodotto non deve essere smaltito unitamente ad altri rifiuti commerciali. Part No.:AB68-00511B DIGITAL KOLOR KAMERA SCC-B2391(P) SCC-B2091P SCC-B2300 Instrukcja obs∏ugi Pl Important Safety Instructions OSTRO˚NIE! NIE OTWIERAå - GROZI PORA˚ENIEM PRÑDEM Pl OSTRO˚NIE: ABY ZMNIEJSZYå RYZYKO PORA˚ENIA PRÑDEM NIE NALE˚Y ZDEJMOWAå TYLNEJ CZ¢ÂCI OBUDOWY. BRAK TAM CZ¢ÂCI DO SAMODZIELNEJ NAPRAWY PRZEZ U˚YTKOWNIKA. ZG¸O USZKODZENIE DO WYKWALIFIKOWANEGO PUNKTU SERWISU. Symbol ten ostrzega przed wysokim napi´ciem wewnàtrz. Niebezpieczny jest kontakt z jakimikolwiek elementami wewnàtrz urzàdzenia. Symbol ten informuje, i˝ do produktu do∏àczono opis funkcjonowania oraz utrzymania urzàdzenia. W celu unikni´cia uszkodzeƒ, które mogà doprowadziç do po˝aru lub pora˝enia pràdem, nie wystawiaç urzàdzenia na deszcz i nie umieszczaç w miejscach wilgotnych. Urzàdzenie podlega zasadom FCC (Federalnej Komisji Komunikacyjnej). Funkcjonowanie podporzàdkowane jest nast´pujàcym warunkom: 1) urzàdzenie nie mo˝e powodowaç zak∏óceƒ 2) Urzàdzenie musi zaakceptowaç zak∏ócenia, które mog´ prowadziç do niew∏aÊciewego funkcjonowania. OSTRZE˚ENIE: Wymiana baterii na niew∏aÊciwe grozi wybuchem. Wymieniaj baterie na identyczne lub na baterie zamienne zalecane przez producenta. Zu˝yte baterie nale˝y wyrzuciç zgodnie z zaleceniami producenta. 2 1. 2. 3. 4. 5. 6. 7. 8. 9. 10. 11. 12. 13. 14. Zapoznaj si´ z instrukcjami. Zachowaj instrukcje obs∏ugi. Zwracaj uwag´ na wszystkie ostrze˝enia. Post´puj zgodnie z instrukcjami. Nie u˝ywaj tego urzàdzenia w pobli˝u wody. CzyÊç jedynie suchà szmatkà. Nie blokuj wejÊç wentylacyjnych. Dokonaj instalacji zgodnie ze wskazówkami proucenta. Nie instaluj w pobli˝u êróde∏ ogrzewania, takich jak: grzejniki, kaloryfery, i inne urzàdzenia ( równie˝ wzmacniacze), które powodujà podwy˝szonà temperatur´. Nie ograniczaj bezpieczeƒstwa wtyczki polaryzowanej lub uziemienia. Wtyczka polaryzowana posiada dwie blaszki, jednà szerszà od drugiej. Wtyczka uziemienia posiada dwa metalowe bolce i trzeci uziemiajàcy. Szerokie blaszki lub bolec uziemiajàcy majà zapewniç bezpieczeƒstwo. JeÊli wtyczka w zestawie nie pasuje do gniazda, które znajduje si´ w miejscu instalacji, skonsultuj si´ z elektrykiem w celu wymiany gniazda. Zabezpiecz przewód zasilania przed deptaniem lub ÊciÊni´ciem, szczególnie w miejscu gdzie ∏àczy si´ z wtyczkà, przy prze∏àcznikach i przy wyjÊciu urzàdzenia. U˝ywaj jedynie zalecanych przez producenta dodatkowych urzàdzeƒ / akcesoriów. Ustawiaj jedynie na wózkach, stojakach, statywach podpórkach lub stolikach wskazanych przez producenta lub sprzedawanych wraz z urzàdzeniem. Aby uniknàç przewrócenia i uszkodzenia podczas przesuwania z∏àczonego zestawu nale˝y zachowaç ostro˝noÊç. Roz∏àcz urzàdzenie. JeÊli u˝ywasz wózka, ostro˝nie przesuwaj wózek/ zainstalowane na nim urzàdzenie aby uniknàç uszkodzeƒ w wyniku przewrócenia si´ sprz´tu. Wszelkie naprawy powierz wykwalifikowanej obs∏udze technicznej. Urzàdzenie nale˝y naprawiç w przypadku ka˝dego uszkodzenia, np. uszkodzenie przewodu sieciowego, wtyczki, rozlania p∏ynu na urzadzenie, lub w celu usuni´cia przedmiotu, który znalaz∏ si´ wewnàtrz urzàdzenia, w przypadku gdy urzàdzenie zosta∏o wystawione na deszczu lub w wilgoci, kiedy nie funkcjonuje w∏aÊciwie lub zosta∏o upuszczone. 3 Pl Spis treÊci Rozdzia∏ 1 Wprowadzenie.......................................................5 Rozdzia∏ 2 Charakterystyka.....................................................6 Rozdzia∏ 3 Instalacja ................................................................7 Sprawdzanie zawartoÊci opakowania ..................7 Ârodki ostro˝noÊci podczas instalacji i u˝ytkowania ...........................................................8 Pl Pod∏àczanie z∏àcza obiektywu z automatycznà .... przes∏onà................................................................9 Mocowanie obiektywu.........................................10 Ustawienia w∏àcznika wyboru obiektywu...........11 Regulacja ostroÊci t∏a ..........................................11 Pod∏àczanie przewodów I sprawdzania ................ funkcjonowania....................................................13 Rozdzia∏ 4 Nazwy i funkcje cz´Êci.........................................15 Dane techniczne..................................................20 4 Rozdzia∏ 1 Wprowadzenie Kamera DAYNIGHT(Dzieƒ/noc) jest kamerà o niskiej jasnoÊci, co powoduje zwi´kszenie czu∏oÊci przy funkcjonowaniu w trybie kolorów w jasnoÊci powy˝ej przeci´tnej jasnoÊci zaÊ w trybie B/W po anulowaniu funkcji IR Cut poni˝ej regularnej jasnoÊci. Mo˝e byç równie˝ stosowana w po∏àczeniu z oddzielnym urzàdzeniem emitujàcym promieniowanie podczerwieni. Kamera ta ma wysokà rozdzielczoÊç 540 Linii TV rozdzielczoÊci poziomej poprzez przetwarzanie sygna∏u cyfrowego oraz OLPF. [DAYNIGHT] Jest to funkcja kamery kolorowej s∏u˝àca usuwaniu filtra z funjkcjà IR Cut w oÊwietleniu poni˝ej standardowej wartoÊci, co poprawia czu∏oÊç. ❉ W otoczeniu Êwiat∏a jarzeniowego za∏àczenie Obiektyw z MANUALNÑ PRZES¸ONÑ (automatycznej przes∏ony) i w∏àczenie przycisku ELC wÊród prze∏àczników funkcyjnych (FUNCTION) mo˝e powodowaç falowanie barw. W takim przypadku nale˝y przed w∏àczeniem przycisku funkcyjnego L/L pod∏àczyç zasilania pràdem zmiennym AC. (NTSC:60HZ , PAL:50HZ) Falowanie barw polega na nieregularnych zmianach barw na ekranie. Problem ten pojawia si´, gdy balans bieli nie jest ustawiony ze wzgl´du na migotanie Êwiat∏a jarzeniowego wywo∏ane zmianami napi´cia zasilania. 5 Pl Rozdzia∏ 2 Charakterystyka Wysoka czu∏oÊç Dla obrazu o wysokiej czu∏oÊci posiada nowoczesny 1/3" Super-HAD IT CCD . RozdzielczoÊç Wysoka rozdzielczoÊç zapewniona jest dzi´ki pe∏nemu cyfrowemu przetwarzaniu obrazu w po∏àczeniu z doskona∏à technologià sygna∏u cyfrowego. Funkcja regulacji oÊwietlenia w tle W przypadku, gdy w tle za obiektem znajduje si´ ostre oÊwietlenie lub promienie s∏oneczne, kamera reguluje jasnoÊç obiektu przyciemnionego przez to oÊwietlenie w celu uzyskania w∏aÊciwego oÊwietlenia fotografii. Pl Metoda synchronizacji zasilania cyfrowego Kamera ta wyposa˝na jest w Full Digital Method Line Lock. Funkcja ta dostosowuje symchronizacj´ pionowà bezpoÊrednio, w celu poprawienia jakoÊci obs∏ugi i niezawodnoÊci kamery. 6 Rozdzia∏ 3 Instalacja Rozdzia∏ ten opisuje co nale˝y sprawdziç przed zainstalowaniem, w jaki sposób przygotowaç otoczenie instalowanego urzàdzenia i w jaki sposób nale˝y je zainstalowaç. Nast´pnie opisany zosta∏ sposób instalacji kamery oraz po∏àczenia przewodów w danych warunkach. Sprawdzanie zawartoÊci opakowania Sprawdê, czy nast´pujàce elementy znajdujà si´ w opakowaniu. Pl Kamera Instrukcja obs∏ugi Uchwyt (Mocowanie) Zasilacz mocowania C Automatyczna przes∏ona ¸àcze obiektywu 7 Ârodki ostro˝noÊci podczas instalacji i u˝ytkowania ① Nie rozmontowuj kamery samodzielnie ➁ Ostro˝nie obchodê si´ z kamerà. Unikaj wstrzàsów lub uderzeƒ. Przechowuj i pos∏uguj si´ kamerà we w∏aÊciwy sposób, by uniknàç jej uszkodzenia. ➂ Nie wystawiaj kamery na dzia∏anie deszczu lub wilgoci. Nie u˝ywaj kamery w mokrych miejscach. Pl ➃ Podczas czyszczenia unikaj silnie dzia∏ajàcych Êrodków. Kamer´ nale˝y przecieraç suchà szmatkà. ⑤ UmieÊç kamer´ w ch∏odnym miejscu z dala od bezpoÊredniego promieniowania s∏onecznego. BezpoÊredni wp∏yw promieni s∏onecznych mo˝e powodowaç niew∏aÊciwe funkcjonowanie kamery. 8 Pod∏àczanie z∏àcza obiektywu z automatycznà przes∏onà Przygotuj do∏àczone do kamery z∏àcze obiektywu z automatycznà przes∏onà. Rb Pin3 Pin1 Pin4 Pl Pin2 Pod∏àcz przewód obs∏ugi z os∏onà w paski do z∏àcza obiektywu z automatycznà przes∏onà. Nr Koƒcówki Typ kontroli pràdu sta∏ego Typ kontroli VIDEO 1 Damp(-) Power (+12V) 2 Damp(+) N/A 3 Drive(+) Sygna∏ VIDEO 4 Drive(-) UZIEMIENIE 9 Mocowanie obiektywu Dla obiektywów CS Przekr´caj obiektyw CS zgodnie z kierunkiem ruchu wskazówek zegara dopóki nie zostanie zamocowany jak na obrazku. Obiektyw CS Pl Dla obiektywów C Przekr´caj z∏àcze do monta˝u C zgodnie z ruchem wskazówek zegara, by go zamocowaç. Nast´pnie przekr´ç obiektyw C zgodnie z ruchem wskazówek zegara w celu jego zamocowania. Obiektyw C 10 Ustawienia w∏àcznika wyboru obiektywu Po zamontowaniu obiektywu ustaw przycisk wyboru obiektywu z boku kamery zgodnie z rodzajem zamontowanego obiektywu. W przypadku zamontowania obiektywu z automatycznà przes∏onà dzia∏ajàcego pod zasilaniem DC, ustaw prze∏àcznik wyboru obiektywu w pozycji “DC”. Je˝eli zamontowany obiektyw to obiektyw z automatycznà przes∏onà typu video, ustaw prze∏àcznik wyboru obiektywu na “VIDEO”. Pl Regulacja ostroÊci t∏a OstroÊç t∏a regulowana jest przed dostarczeniem, jednak niektóre obiektywy sà nieostre mimo ˝e liczba ró˝ni si´ w zale˝noÊci od typu. W takim przypadku nale˝y dokonaç nast´pujàcej regulacji. Jest to proces regulacji ostroÊci t∏a dla zamocowanych obiektywów. Obiektywy bez funkcji zoom ① Obejmij obiekt o du˝ej rozdzielczoÊci w dystansie powy˝ej 10m i ustaw obr´cz przes∏ony w pozycji nieskoƒczonoÊci(∞). ➁ Przekr´ç BACK FOCUS do chwili najlepszej widocznoÊci obiektu. ➂ Umocnij pozycj´ ustawienia BACK FOCUS przykr´cajàc Êrubk´. 11 Obiektywy z funkcjà zoom ① Obejmij obiekt o du˝ej rozdzielczoÊci w dystwnsie 3-5 m i przybli˝ zoom obiektywu najbli˝ej TELE jak to mo˝liwe. Nast´pnie reguluj ostroÊç obiektywu by ustawiç go w najlepszej widocznoÊçi. ➁ Przybli˝ zoom w oobiektywie najbli˝ej jak to mo˝liwe do WIDE i reguluj BACK FOCUS a˝ do uzyskania najlepszej widocznoÊci obiektu. ➂ 2 lub 3-krotnie powtórz kroki ① i ➁ do momentu, gdy obiektyw w ZOOM TELE b´dzie w równiej linii z linià z boku ZOOM WIDE. Pl Ognisko z ty∏u Kontrolka 12 Pod∏àczanie przewodów I sprawdzania funkcjonowania 1 Po∏àcz z∏àcze przewodu BNC do terminaly Video In. 2 Pod∏àcz inne z∏àcza kabla BNC do terminalu Video In. Pl terminal Video In z ty∏u urzàdzenia Przewód BNC Terminal WyjÊcia Video 13 3 Pod∏àcz przewód zasilania ① Kamera o zasilaniu AC24V/DC12V Pod∏àcz dwie linie zasilacza za pomocà Êrubokr´tu z terminalem IN kamery, jak na rysunku poni˝ej. ❉ Bez polaryzacji po∏àcz do êród∏a zasilania AC24V lub DC12V Pl ➁ Kamera o zasilaniu AC230V Po∏àcz przewód zasilania do êród∏a zasilania AC230V. 14 Rozdzia∏ 4 Nazwy i funkcje cz´Êci Widok z boku ① Mocowanie zasilania Wy˝∏obienie ➂ ¸àcznik obiektywu Auto Iris ➅ Ognisko z ty∏u Kontrolka ⑤ ALC prze∏àcznik wyboru obiektywu Pl ➃ Przewód zasilanie obiektywu z automatycznà przes∏onà ➁ Obiektyw kamery ① Mocowanie zasilania Wy˝∏obienie Wy˝∏obienie to wykorzystywane jest w celu przykr´cenia z∏àcznika, tego elementu gdzie kamera b´dzie zainstalowana. ➁ Obiektyw kamery (opcja) Obiektyw ten instalowany jest w kamerze. ❉ Obiektyw kamery w przypadku poplamienia powierzchni nale˝y czyÊciç chusteczkà do obiektywów lub bawe∏nianà szmatkà zmoczonà w etanolu. ➂ ¸àcznik obiektywu Auto Iris ¸àcznik ten doprowadza zasilanie, sygna∏ kontrolny lub sygna∏ DC do automatycznej przes∏ony. ➃ Przewód zasilanie obiektywu z automatycznà przes∏onà Przewód ten doprowadza sygna∏ kontrolujàcy przes∏on´. ⑤ ALC prze∏àcznik wyboru obiektywu S∏u˝y wybieraniu rodzaju obiektywu. ➅ Ognisko z ty∏u Kontrolka Przycisk ten s∏u˝y do ustawiania ogniska t∏a kamery. 15 Widok z ty∏u AC24V/DC12V Kamera (SCC-B2391(P)/B2300) ⑤ ⑨ ➂➃ ➁ ➅ ① Pl ⑦ ⑧ AC230V Kamera (SCC-B2091P) ⑤ ① ➂➃ ➁ ➅ ⑨ ⑦ ⑧ 16 ① Port zasilania Kamera AC24V/DC12V: Jest to port po∏àczony do przewodu zasilania. Kamera AC230V: Przewód zasilania. ➁ Dioda zasilania JeÊli zasilanie kamery odbywa si´ bez zak∏óceƒ dioda jest w pozycji ON(w∏àczonej). ➂ ➃ Prze∏àcznik INC oraz DEC Obydwa prze∏àczniki zwi´kszajà lub zmniejszajà korzystne ustawienia barwy czerwonej i niebieskiej w celu ustawienia oczekiwanej temperatury barwy, zaÊ AWB jeden z prze∏àczników funkcyjnych (FUNCTION) jest wy∏àczony (OFF) (U˚YTKOWNIK) i kontroluje pionowà synchronicznà faz´ podczas gdy AWB oraz L/L sà w∏àczone. ⑤ Prze∏àcznik funkcji 1. L/L 3. FL 2. ELC 4. AWB ON SW1 SW2 SW3 SW4 17 Pl 1) SW1(L/L) : W pozycji OFF kamera aktywuje tryb synchronizacji wewn´trznej, w pozycji ON tryb synchronizacji mocy. Pod∏àczanie kilku kamer do prze∏àcznika sekwencyjnego w celu wejÊcia w tryb automatycznej konwersji, ekran poka˝e ka˝dy z obrazów, gdy kamera pozostanie w trybie INT (synchronizacja wewn´trzna). Zjawisko to mo˝na wyczyÊciç i konwersja kamery staje si´ p∏ynna poprzez ustawienie L/L w pozycj´ ON i u˝ywanie prze∏àcznika INT/DEC w celu kontroli poziomej fazy synchronicznej. ❉ W celu obs∏ugi pionowej fazy synchronicznie z INT/DEC podczas gdy L/L jest ustawiony w pozycje ON, nale˝y ustawiç SW4 w pozycj´ AWB ON. ❉ Dla DC 12 V, INT (internal synchronizer, synchronizator wewn´trzny) zostanie ustawiony bez zwiàzku z pozycjà ON/OFF w L/L. Pl 2) SW2(ELC) : Tego prze∏àcznika u˝ywaj w przypadku obiektywu o przes∏onie manualnej. Gdy jest on w∏àczony (ON) pr´dkoÊç elektronicznej przes∏ony ró˝ni si´ w zale˝noÊci od jasnoÊci przedmiotu od 1/60(50) do 1/100.000 sek. w celu automatycznej kontroli jasnoÊci ekranu. Jednak˝e w przypadku obiektywu z przes∏onà automatycznà (DC lub video) nale˝y prze∏àcznik ten wy∏àczyç. W trybie tym mo˝e pojawiç si´ falowanie barw. W takim wypadku nale˝y pod∏àczyç kamer´ do zasilania AC i prze∏àczyç SW1 w pozycj´ “ON”. (NTSC : 60HZ, PAL : 50HZ) 3) SW3(FL): Zapobiega migotaniu obrazu na ekranie przy systemie NTSC w regionach zasilania 50HZ i systemie PAL w regionach zasilania 60 HZ. Zapobiega poruszeniom na ekranie spowodowanych niespójnoÊcià pionowych cz´stotliwoÊci synchronicznych i cz´stotliwoÊci migotania oÊwietlenia. W∏àczenie ON powoduje ustawienie elektronicznej migawki w 1/100 sek(NTSC) i 1/120 sek (PAL). 4) SW4(AWB): W∏àczenie ustawieƒ powoduje dostosowanie barwy ekranu automatycznie zgodnie ze zmianami temperatury barwy oÊwietlenia spowodowanymi oÊwietleniem otoczenia (ATW). JeÊli oÊwietlenie jest niezmienne mo˝na wy∏àczyç ustawnienie.Kamera zapami´tuje temperatur´ barwy oÊwietlenia w chwili prze∏àczania z pozycji ON w OFF i do zapami´tanej temperatury barwy dostosowana zostaje barwa obrazu.(AWC) Je˝eli oÊwietlenie zmienia si´ i chcesz, by kamera zmieni∏a ustawienia temperatury barwy, ponownie prze∏àcz przycisk ON/OFF. Jednak˝e w nast´pujàcych przypadkach mo˝e wystàpiç b∏àd. Po pierwsze przy du˝ym rozmiarze obiektu o jednorodnym zabarwieniu wysokiej chromatycznoÊci znajdujàcym si´ w centrum ekranu, gdzie w obrazie nie wyst´puje prawie biel. Po drugie, w przypadku specyficznego oÊwietlenia, np. za pomocà lampy natrium. 18 ➅ Kontrola poziomu DC IRIS (migawki zasilanej pràdem) Kiedy prze∏àcznik wyboru obiektywu ALC ustawiony jest w pozycji DC, u˝ywaj tego samego sterownika jak driver, w celu obs∏ugiwania poziomu IRIS. ⑦ Port wyjÊcia video Port ten powinien zostaç po∏àczony z portem wejÊcia video monitora lubjego ekwiwalentem. Port ten s∏u˝y do wyjÊcia sygna∏ów kamery. ⑧ Przycisk wyboru DAYNIGHT Ustawienie tego prze∏àcznika w pozycj´ AUTO powoduje automatyczne aktywowanie funkcji DAYNIGHT. W s∏abym oÊwietleniu filtr IR zostanie automatycznie wprowadzony do trybu barwy (COLOR). Filtr IR odpowiada ustawionemu czasowi trwania (wanrunek dostarczenia: 10sekund). Przy konwertowaniu DAYNIGHT w tryb AUTO nale˝y wykonaç nast´pujàce operacje ustawiania czasu trwania (nale˝y wy∏àczyç przycisk L/L i AWB). Przy ka˝dej konwersji DAYNIGHT z EXT na AUTO podczas przestawiania EXT w AUTO równoczeÊnie przytrzymujàc prze∏àcznik, czas trwania przestawia si´ 10s, 30s, 60s, 90s, 120s i 150s w sekwencji. Po ustawieniu nale˝y anulowaç poprzez przyciÊni´cie INC/DEC aby zapisaç w kamerze ustawione warunki. Po zapisaniu, tryb DAYNIGHT b´dzie automatycznie konwertowany w zale˝noÊci od czasu trwania, nawet w przypadku prze∏àczania ON/OFF. Aby zresetowaç nale˝y powtórzyç powy˝szà procedur´ (po zresetowaniu mo˝na ponownie uruchomiç L/L oraz AWB do poprzedniego stanu). Wybór trybu EXT/COLOR/BW ró˝ni si´ w zale˝noÊci od sygna∏u zewn´trznego wprowadzonego do zewn´trznego portu wejÊcia sygna∏u DAYNIGHT(⑨). ⑨ Port wejÊcia sygna∏u zewn´trznego DAYNIGHT Kiedy prze∏àcznik DAYNIGHT(⑧) ustawiony jest w trybie EXT, COLOR/BW tryb ró˝ni si´ w zale˝noÊci od sygna∏u wprowadzonego do tego portu. Sygna∏ ten powinien wynosiç DC5V i ponad 0.2 mA. OFF : kontakt otwarty ON : kontakt zamkni´ty 19 Pl Dane techniczne SCC-B2391P/B2091P POZYCJA OPIS Typ produktu Kamera CCTV System nadawania SYSTEM PAL STANDARD CCD 1/3”Super-HAD CCD Pixele efektywne 752(H) x 582(V) Typ skanowania 625 linii, 2:1 Interlace WEWN¢TRZNE : 15,625Hz(H) Pl 50 Hz(V) Cz´stotliwoÊç BLOKADA LINII : 15,625Hz(H) 50 Hz(V) Typ Sync WEWN¢TRZNE BLOKADA LINII (Przy zastosowaniu zasilania pràdu zmiennego) RozdzielczoÊç 540(kolor)/570(B/W) Linii TV Stosunek S/N Oko∏o 50dB Minimalne naÊwietlenie 0.3 Lux(kolor) / 0.06 Lux(B/W) przedmiotu DAYNIGHT 20 AUTO / EXT POZYCJA OPIS ALC/ELC ALC OBIEKTYW DC IRIS(migawka zasilana pràdem) OBIEKTYW VIDEO ELC Funkcja elektronicznej migawki obiektywu (Max. 1/100 Ksek) Temperatura koloru AWB/R¢CZNY BLC W¸ (Kompensacja oÊwietlenia t∏a) AGC W¸ WyjÊcie video Z¸O˚ONE WYJÂCIE VIDEO Pl 1V p_p 75Ω/BNC èród∏o zasilania Zu˝cie energii AC24V ±10%(50Hz±0.3Hz), DC12V+10%~-5% B2391P : Oko∏o 3Wat B2091P : Oko∏o 4Wat Temperatura dopuszczalna -10°C~+50°C WilgotnoÊç dopuszczalna ~90% Rozmiar Waga 68(W)x55(H)x128.5(D)mm(included BNC) B2391P : 450g B2091P : 550g 21 Dane techniczne SCC-B2391/B2300 POZYCJA OPIS Typ produktu Kamera CCTV System nadawania SYSTEM NTSC STANDARD CCD 1/3”IT Metoda CCD Pixele efektywne B2391 : 768(H)x494(V) B2300 : 510(H)x492(V) Typ skanowania Pl 525 linii, 2:1 Interlace WEWN¢TRZNE : 15,734Hz(H) 59.94 Hz(V) Cz´stotliwoÊç BLOKADA LINII : 15,750Hz(H) 60 Hz(V) Typ Sync WEWN¢TRZNE BLOKADA LINII (Przy zastosowaniu zasilania pràdu zmiennego) B2391 : 540(kolor)/570(B/W) Linii TV RozdzielczoÊç B2300 : 400(kolor)/420(B/W) Linii TV Stosunek S/N Oko∏o 50dB (AGC WY¸.) Minimalne naÊwietlenie B2391 : 0.3 Lux(kolor) / 0.06Lux(B/W) przedmiotu B2300 : 0.2 Lux(kolor) / 0.03Lux(B/W) DAYNIGHT 22 AUTO / EXT POZYCJA OPIS ALC/ELC ALC OBIEKTYW DC IRIS(migawka zasilana pràdem) OBIEKTYW VIDEO ELC Funkcja elektronicznej migawki obiektywu (Max. 1/100 Ksek) Temperatura koloru AWB/R¢CZNY BLC W¸ (Kompensacja oÊwietlenia t∏a) AGC W¸ WyjÊcie video Z¸O˚ONE WYJÂCIE VIDEO Pl 1V p_p 75Ω/BNC èród∏o zasilania AC24V ±10%(60Hz±0.3Hz), DC12V+10%~-5% Zu˝cie energii Oko∏o 3Wat Temperatura dopuszczalna -10°C~+50°C WilgotnoÊç dopuszczalna ~90% Rozmiar 68(Szer.)x55(Wys.)x128.5(D)mm (w∏àcznie z BNC) Waga 450g 23 Prawid∏owe usuwanie produktu (zu˝yty sprz´t elektryczny i elektroniczny) Oznaczenie umieszczone na produkcie lub w odnoszàcych si´ do niego tekstach wskazuje, ˝e produktu po up∏ywie okresu u˝ytkowania nie nale˝y usuwaç z innymi odpadami pochodzàcymi z gospodarstw domowych. Aby uniknàç szkodliwego wp∏ywu na Êrodowisko naturalne i zdrowie ludzi wskutek niekontrolowanego usuwania odpadów, prosimy o oddzielenie produktu od innego typu odpadów oraz odpowiedzialny recykling w celu promowania ponownego u˝ycia zasobów materialnych jako sta∏ej praktyki. W celu uzyskania informacji na temat miejsca i sposobu bezpiecznego dla Êrodowiska recyklingu tego produktu u˝ytkownicy w gospodarstwach domowych powinni skontaktowaç si´ z punktem sprzeda˝y detalicznej, w którym dokonali zakupu produktu, lub z organem w∏adz lokalnych. U˝ytkownicy w firmach powinni skontaktowaç si´ ze swoim dostawcà i sprawdziç warunki umowy zakupu. Produktu nie nale˝y usuwaç razem z innymi odpadami komercyjnymi. Part No.:AB68-00511B ñÇÖíçÄü ñàîêéÇÄü ÇàÑÖéäÄåÖêÄ SCC-B2391(P) SCC-B2091P SCC-B2300 êÛÍÓ‚Ó‰ÒÚ‚Ó ÔÓθÁÓ‚‡ÚÂÎfl R LJÊÌ˚ ԇ‚Ë· ÚÂıÌËÍË ·ÂÁÓÔ‡ÒÌÓÒÚË ÇçàåÄçàÖ éèÄëçéëíú èéêÄÜÖçàü ùãÖäíêàóÖëäàå íéäéå, çÖ éíäêõÇÄíú! ÇçàåÄçàÖ: Çé àáÅÖÜÄçàÖ èéêÄÜÖçàü ùãÖäíêàóÖëäàå íéäéå, çÖ ëçàåÄâíÖ áÄÑçûû äêõòäì. Ççìíêà àáÑÖãàü çÖí ÑÖíÄãÖâ, íêÖÅìûôàï éÅëãìÜàÇÄçàü èéãúáéÇÄíÖãÖå. éÅëãìÜàÇÄçàÖ ÑéãÜçé Çõèéãçüíúëü äÇÄãàîàñàêéÇÄççõåà ëèÖñàÄãàëíÄåà èé íÖïçàóÖëäéåì éÅëãìÜàÇÄçàû ùÚÓÚ ÒËÏ‚ÓÎ Û͇Á˚‚‡ÂÚ Ì‡ ÚÓ, ˜ÚÓ ‚ÌÛÚË ËÁ‰ÂÎËfl ËÏÂÂÚÒfl ‚˚ÒÓÍÓ ̇ÔflÊÂÌËÂ. ã˛·ÓÈ ÍÓÌÚ‡ÍÚ Ò ‚ÌÛÚÂÌÌËÏË ‰ÂÚ‡ÎflÏË ‰‡ÌÌÓ„Ó ËÁ‰ÂÎËfl fl‚ÎflÂÚÒfl ÓÔ‡ÒÌ˚Ï. R ùÚÓÚ ÒËÏ‚ÓÎ Ô‰ÛÔÂʉ‡ÂÚ ‚‡Ò Ó ÚÓÏ, ˜ÚÓ ËÏÂÂÚÒfl ‚‡Ê̇fl ËÌÙÓχˆËfl ÓÚÌÓÒËÚÂθÌÓ ˝ÍÒÔÎÛ‡Ú‡ˆËË Ë Ó·ÒÎÛÊË‚‡ÌËfl ËÁ‰ÂÎËfl. 2 ÇÓ ËÁ·ÂʇÌË ÔÓ‚ÂʉÂÌËÈ, ÒΉÒÚ‚ËÂÏ ÍÓÚÓ˚ı ÏÓÊÂÚ ·˚Ú¸ ÔÓʇ ËÎË ÔÓ‡ÊÂÌË ˝ÎÂÍÚ˘ÂÒÍËÏ ÚÓÍÓÏ, Ì ÔÓ‰‚„‡ÈÚ ‰‡ÌÌÓ ËÁ‰ÂÎË ‚ÓÁ‰ÂÈÒڂ˲ ‰Óʉfl ËÎË ‚·„Ë. чÌÌÓ ÛÒÚÓÈÒÚ‚Ó ÒÓÓÚ‚ÂÚÒÚ‚ÛÂÚ Ú·ӂ‡ÌËflÏ, ËÁÎÓÊÂÌÌ˚Ï ‚ ó‡ÒÚË 15 臂ËΠθÌÓÈ ÍÓÏËÒÒËË Ò‚flÁË (ëòÄ). èË ˝ÍÒÔÎÛ‡Ú‡ˆËË ‰‡ÌÌÓ„Ó ÛÒÚÓÈÒÚ‚‡ ‰ÓÎÊÌ˚ ‚˚ÔÓÎÌflÚ¸Òfl ÒÎÂ‰Û˛˘Ë ‰‚‡ ÛÒÎÓ‚Ëfl: 1) чÌÌÓ ÛÒÚÓÈÒÚ‚Ó Ì ‰ÓÎÊÌÓ ÒÓÁ‰‡‚‡Ú¸ ‚‰Ì˚ı ‡‰ËÓÔÓÏÂı, Ë 2) чÌÌÓ ÛÒÚÓÈÒÚ‚Ó ‰ÓÎÊÌÓ ÌÓχθÌÓ ‡·ÓÚ‡Ú¸ ÔË Ì‡Î˘ËË ‡‰ËÓÔÓÏÂı, ‚Íβ˜‡fl Ú ‡‰ËÓÔÓÏÂıË, ÍÓÚÓ˚ ÏÓ„ÛÚ Ó͇Á˚‚‡Ú¸ Ì··„ÓÔËflÚÌÓ ‚ÓÁ‰ÂÈÒÚ‚Ë ̇ Â„Ó ‡·ÓÚÛ. ÇçàåÄçàÖ: R çÂÔ‡‚Ëθ̇fl Á‡ÏÂ̇ ‡ÍÍÛÏÛÎflÚÓ‡ ÏÓÊÂÚ ÔË‚ÂÒÚË Í ‚Á˚‚Û. á‡ÏÂÌflÈÚ ‡ÍÍÛÏÛÎflÚÓ ‡ÍÍÛÏÛÎflÚÓÓÏ ÚÓ„Ó Ê ÚËÔ‡, ËÎË ˝Í‚Ë‚‡ÎÂÌÚÌ˚Ï ‡ÍÍÛÏÛÎflÚÓÓÏ, ÍÓÚÓ˚È ÂÍÓÏẨӂ‡Ì ËÁ„ÓÚÓ‚ËÚÂÎÂÏ. ìÚËÎËÁ‡ˆËfl ÓÚ‡·ÓÚ‡‚¯Â„Ó Ò‚ÓÈ ÒÓÍ ‡ÍÍÛÏÛÎflÚÓ‡ ‰ÓÎÊ̇ ‚˚ÔÓÎÌflÚ¸Òfl ‚ ÒÓÓÚ‚ÂÚÒÚ‚ËË Ò ËÌÒÚÛ͈ËflÏË ËÁ„ÓÚÓ‚ËÚÂÎfl. 3 ëÓ‰ÂʇÌË É·‚‡ 1 ǂ‰ÂÌËÂ....................................................................5 É·‚‡ 2 ëÔˆˇθÌ˚ ÙÛÌ͈ËË.............................................6 É·‚‡ 3 ìÒÚ‡Ìӂ͇...................................................................7 èÓ‚Â͇ ÍÓÏÔÎÂÍÚ‡ ÔÓÒÚ‡‚ÍË ................................7 åÂ˚ Ô‰ÓÒÚÓÓÊÌÓÒÚË ÔË ÛÒÚ‡ÌÓ‚ÍÂ Ë ËÒÔÓθÁÓ‚‡ÌËË...........................................................8 èÓ‰ÒÓ‰ËÌÂÌË ‡Á˙Âχ ‰Îfl ÔÓ‰Íβ˜ÂÌËfl Ó·˙ÂÍÚË‚‡ Ò ‡‚ÚӉˇه„ÏÓÈ ................................9 ìÒÚ‡Ìӂ͇ Ó·˙ÂÍÚË‚‡ ....................................................10 ìÒÚ‡Ìӂ͇ ÒÂÎÂÍÚÓÌÓ„Ó ÔÂÂÍβ˜‡ÚÂÎfl Ó·˙ÂÍÚË‚‡ ................................................................11 ê„ÛÎËӂ͇ Á‡‰ÌÂ„Ó ÙÓÍÛÒ‡ (ÔÓ‰ÒÚÓÈ͇ ÔÓÎÓÊÂÌËfl èáë-χÚˈ˚) ...............11 èÓ‰Íβ˜ÂÌË ͇·ÂÎÂÈ Ë ÔÓ‚ÂÍË ........................13 É·‚‡ 4 ç‡Á‚‡ÌË ÍÓÏÔÓÌÂÌÚÓ‚ Ë ÙÛÌ͈ËË........................15 R íÂıÌ˘ÂÒÍË ı‡‡ÍÚÂËÒÚËÍË ÚÓ‚‡‡ ...................20 4 É·‚‡ 1 ǂ‰ÂÌË ä‡Ï‡ DAYNIGHT(ÑÖçú/çéóú) Ô‰ÒÚ‡‚ÎflÂÚ ÒÓ·ÓÈ Í‡ÏÂÛ ÌËÁÍÓÈ flÍÓÒÚË, ÍÓÚÓ‡fl ÛÎÛ˜¯‡ÂÚ ˜Û‚ÒÚ‚ËÚÂθÌÓÒÚ¸, ·Î‡„Ó‰‡fl ÔÓ‰Íβ˜ÂÌ˲ Í ÂÊËÏÛ ˆ‚ÂÚÌÓ„Ó ‚ÓÒÔÓËÁ‚‰ÂÌËfl ÔË Ô‚˚¯ÂÌËË Ì‡‰ÎÂʇ˘ÂÈ flÍÓÒÚË, Ë ‚Á‡ËÏÓ‰ÂÈÒÚ‚ÛÂÚ Ò ÂÊËÏÓÏ B/M, ·Î‡„Ó‰‡fl ÛÒÚ‡ÌÂÌ˲ ÙÛÌ͈ËË IR Cut (Ó·ÂÁ‡ÌË ËÌه͇ÒÌÓ„Ó ËÁÎÛ˜ÂÌËfl) ÔË ÒÌËÊÂÌËË Ì‡‰ÎÂʇ˘ÂÈ flÍÓÒÚË. äÓÏ ˝ÚÓ„Ó, Ó̇ ÏÓÊÂÚ ËÒÔÓθÁÓ‚‡Ú¸Òfl, ÒÓ‰ËÌÂÌÌÓÈ Ò ÔË·ÓÓÏ, ‡ÒÔÓÒÚ‡Ìfl˛˘ËÏ ËÁÎÛ˜ÂÌËÂ. SCC-B2391(P)/B2091P ËÏÂÂÚ ‚˚ÒÓÍÓ ‡Á¯ÂÌËÂ Ò 540 íÇ ÎËÌËflÏË „ÓËÁÓÌڇθÌÓ„Ó ‡Á¯ÂÌËfl, Á‡ Ò˜ÂÚ ˆËÙÓ‚ÓÈ Ó·‡·ÓÚÍË Ò˄̇· Ë OLPF (ÓÔÚ˘ÂÒÍËÈ ÙËÎ¸Ú ÌËÊÌËı ˜‡ÒÚÓÚ). [DAYNIGHT] ùÚ‡ ÙÛÌ͈Ëfl ˆ‚ÂÚÌÓÈ ‚ˉÂÓ͇ÏÂ˚, ÍÓÚÓ‡fl ÔË ÌËÁÍÓÈ ÓÒ‚Â˘ÂÌÌÓÒÚË ÓÚÍβ˜‡ÂÚ àä ÙËθÚ, ‚ ÂÁÛθڇÚ ˜Â„Ó Û‚Â΢˂‡ÂÚÒfl ˜Û‚ÒÚ‚ËÚÂθÌÓÒÚ¸ ‚ˉÂÓ͇ÏÂ˚. R ❉ ÖÒÎË ‚ Ò‰ ÏÂı‡Ì˘ÂÒÍÓ„Ó ÙÎÛÓÂÒˆÂÌÚÌÓ„Ó Ò‚ÂÚ‡ ÔËÒÓ‰ËÌËÚ¸ é·˙ÂÍÚË‚ Ò êìóçéâ ÑàÄîêÄÉåéâ Ë ‚Íβ˜ËÚ¸ ÔÂÂÍβ˜‡ÚÂθ ELC ÒÂ‰Ë ÔÂÂÍβ˜‡ÚÂÎÂÈ FUNCTION, ÂÒÚ¸ ‚ÂÓflÚÌÓÒÚ¸ ÔÓÍÛÚÍË ˆ‚ÂÚ‡. (NTSC:60Ɉ , PAL:50Ɉ) ñÇÖíçÄü èêéäêìíäÄ fl‚ÎflÂÚÒfl ÔÓ·ÎÂÏÓÈ, ÔË ÍÓÚÓÓÈ ÔÓËÒıÓ‰ËÚ ı‡ÓÚ˘ÂÒÍÓ ËÁÏÂÌÂÌË ˆ‚ÂÚÓ‚ ̇ ˝Í‡Ì ÏÓÌËÚÓ‡. чÌÌÓ fl‚ÎÂÌË ÔÓËÒıÓ‰ËÚ, ÍÓ„‰‡ Ú‚Â‰Ó Ì ÛÒÚ‡ÌÓ‚ÎÂÌ ·‡Î‡ÌÒ ·ÂÎÓ„Ó, Ô˘Ë̇ ˜Â„Ó ‚ ÏÂı‡Ì˘ÂÒÍÓÏ ÙÎÛÓÂÒˆÂÌÚÌÓÏ Ò‚ÂÚÂ, ‡·Ó˜ËÈ ˆËÍÎ ÍÓÚÓÓ„Ó Ó‰Ë̇ÍÓ‚ Ò ˆËÍÎÓÏ ˜‡ÒÚÓÚ˚ ÒÂÚË. 5 É·‚‡ 2 ëÔˆˇθÌ˚ ÙÛÌ͈ËË Ç˚ÒÓ͇fl ˜Û‚ÒÚ‚ËÚÂθÌÓÒÚ¸ Ç ‚ˉÂÓ͇Ï ËÒÔÓθÁÛÂÚÒfl ÒÓ‚ÂÏÂÌ̇fl èáë-χÚˈ‡ ÔÓ‚˚¯ÂÌÌÓÈ ˜Û‚ÒÚ‚ËÚÂθÌÓÒÚË ‚ ‚ˉËÏÓÈ Ë ·ÎËÊÌÂÈ àä ӷ·ÒÚË ÒÔÂÍÚ‡ Ò Ì‡ÍÓÔÎÂÌËÂÏ ‰˚ÓÍ Ë ÔÓÒÚÓ˜Ì˚Ï ÔÂÂÌÓÒÓÏ Super ‡ÁÏÂÓÏ 1/3 ‰˛Èχ. ê‡Á¯ÂÌË Ç˚ÒÓÍÓ ‡Á¯ÂÌË ‚ˉÂÓ͇ÏÂ˚ Ó·ÂÒÔ˜˂‡ÂÚÒfl Ò ÔÓÏÓ˘¸˛ ËÒÔÓθÁÓ‚‡ÌËfl ÔÓÎÌÓÒÚ¸˛ ˆËÙÓ‚ÓÈ Ó·‡·ÓÚÍË ËÁÓ·‡ÊÂÌËfl Ë ÔËÏÂÌÂÌËfl ÒÓ‚ÂÏÂÌÌ˚ı ˆËÙÓ‚˚ı ÚÂıÌÓÎÓ„ËÈ. îÛÌ͈Ëfl ÍÓÏÔÂÌÒ‡ˆËË ‚ÒÚ˜ÌÓÈ Á‡Ò‚ÂÚÍË ÖÒÎË ÔÓÁ‡‰Ë Ó·˙ÂÍÚ‡ ̇ıÓ‰ËÚÒfl ËÒÚÓ˜ÌËÍ flÍÓ„Ó Ò‚ÂÚ‡, ËÎË ÒÓÎ̈Â, ‰‡Ì̇fl ‚ˉÂÓ͇χ ‚˚ÔÓÎÌflÂÚ ÍÓÏÔÂÌÒ‡ˆË˛ Á‡ÚÂÏÌÂÌËfl ËÁÓ·‡ÊÂÌËfl, ‚˚Á‚‡ÌÌÓ„Ó ‚ÒÚ˜ÌÓÈ Á‡Ò‚ÂÚÍÓÈ, Ë Ó·ÂÒÔ˜˂‡ÂÚ ÔÓÎÛ˜ÂÌË ÌÓχθÌÓ„Ó ËÁÓ·‡ÊÂÌËfl. R ñËÙÓ‚‡fl ÒËÌıÓÌËÁ‡ˆËfl ‡Á‚ÂÚÍË ÓÚ ÒÂÚË ÔÂÂÏÂÌÌÓ„Ó ÚÓ͇ Ç ‰‡ÌÌÓÈ ‚ˉÂÓ͇Ï ËÒÔÓθÁÛÂÚÒfl ÔÓÎÌÓÒÚ¸˛ ˆËÙÓ‚‡fl ÒËÌıÓÌËÁ‡ˆËfl ‡Á‚ÂÚÍË ÓÚ ÒÂÚË ÔÂÂÏÂÌÌÓ„Ó ÚÓ͇, ÍÓÚÓ‡fl ÌÂÔÓÒ‰ÒÚ‚ÂÌÌÓ ÔÓ‰Òڇ˂‡ÂÚ ÒËÌıÓÌËÁ‡ˆË˛ ͇‰Ó‚ÓÈ ‡Á‚ÂÚÍË Í ˜‡ÒÚÓÚ ÒÂÚË Ë ÛÎÛ˜¯‡ÂÚ ÛÔ‡‚ÎflÂÏÓÒÚ¸ Ë Ì‡‰ÂÊÌÓÒÚ¸ ‚ˉÂÓ͇ÏÂ˚. 6 É·‚‡ 3 ìÒÚ‡Ìӂ͇ Ç ˝ÚÓÏ ‡Á‰ÂΠÓÔËÒ‡ÌÓ, ͇ÍË ÔÓ‚ÂÍË ‰ÓÎÊÌ˚ ·˚Ú¸ ‚˚ÔÓÎÌÂÌ˚ Ô‰ ÛÒÚ‡ÌÓ‚ÍÓÈ ‚ˉÂÓ͇ÏÂ˚, Í‡Í ÔÓ‰„ÓÚÓ‚ËÚ¸ ÏÂÒÚÓ ‰Îfl ÛÒÚ‡ÌÓ‚ÍË ‚ˉÂÓ͇ÏÂ˚, ‡ Ú‡ÍÊ ˜ÚÓ ÌÛÊÌÓ Ë ˜ÚÓ Ì ÌÛÊÌÓ ‰Â·ڸ ‚Ó ‚ÂÏfl ÛÒÚ‡ÌÓ‚ÍË ‚ˉÂÓ͇ÏÂ˚. á‡ÚÂÏ ÓÔËÒ˚‚‡ÂÚÒfl, Í‡Í ‚˚ÔÓÎÌËÚ¸ ÛÒÚ‡ÌÓ‚ÍÛ ‚ˉÂÓ͇ÏÂ˚ Ë Í‡Í ÔÓ‰Íβ˜ËÚ¸ Í ÌÂÈ Í‡·Âθ ‚ ÍÓÌÍÂÚÌ˚ı ÛÒÎÓ‚Ëflı. èÓ‚Â͇ ÍÓÏÔÎÂÍÚ‡ ÔÓÒÚ‡‚ÍË èӂ¸ÚÂ, ˜ÚÓ ‚ ÛÔ‡ÍÓ‚Ó˜ÌÓÈ ÍÓÓ·Í ̇ıÓ‰flÚÒfl ÔÓ͇Á‡ÌÌ˚ ÌËÊ ÍÓÏÔÓÌÂÌÚ˚. R ÇˉÂÓ͇χ êÛÍÓ‚Ó‰ÒÚ‚Ó ÔÓθÁÓ‚‡ÚÂÎfl ÑÂʇÚÂθ ‚ˉÂÓ͇ÏÂ˚ (ÓÒÌÓ‚‡ÌËÂ) èÂÂıÓ‰ÌËÍ ‰Îfl Ó·˙ÂÍÚË‚‡ ëÍÂÔÎÂÌËÂÏ ê‡Á˙ÂÏ ‰Îfl ÔÓ‰Íβ˜ÂÌËfl Ó·˙ÂÍÚË‚‡ Ò ‡‚ÚÓχÚ˘ÂÒÍÓÈ ‰Ë‡Ù‡„ÏÓÈ 7 åÂ˚ Ô‰ÓÒÚÓÓÊÌÓÒÚË ÔË ÛÒÚ‡ÌÓ‚ÍÂ Ë ËÒÔÓθÁÓ‚‡ÌËË ① ç Ô˚Ú‡ÈÚÂÒ¸ Ò‡ÏÓÒÚÓflÚÂθÌÓ ‡Á·Ë‡Ú¸ ͇ÏÂÛ. ➁ ÅÛ‰¸Ú ÓÒÚÓÓÊÌ˚ ‚Ó ‚ÂÏfl ˝ÍÒÔÎÛ‡Ú‡ˆËË Í‡ÏÂ˚. àÁ·Â„‡ÈÚ ۉ‡Ó‚ Ë ‚Ë·‡ˆËË Í‡ÏÂ˚. àÁ·Â„‡ÈÚ ÔÓ‚ÂʉÂÌËÈ Í‡ÏÂ˚, ÒÂ‰Ë ‚ÓÁÏÓÊÌ˚ı Ô˘ËÌ ÍÓÚÓ˚ı ÏÓÊÂÚ ·˚Ú¸ ÌÂ̇‰ÎÂʇ˘Â ı‡ÌÂÌË ËÎË ˝ÍÒÔÎÛ‡Ú‡ˆËfl. ➂ àÁ·Â„‡ÈÚ ÔÓÔ‡‰‡ÌËfl ̇ ͇ÏÂÛ Í‡ÔÂθ ‰Óʉfl ËÎË ‚·„Ë. ç ˝ÍÒÔÎÛ‡ÚËÛÈÚ ‰‡ÌÌÛ˛ ͇ÏÂÛ ‚Ó ‚·ÊÌ˚ı ÏÂÒÚ‡ı. R ➃ èË ˜ËÒÚÍ ÍÓÔÛÒ‡ Ì ËÒÔÓθÁÛÈÚ ÊÂÒÚÍË ÏÓ˛˘Ë Ò‰ÒÚ‚‡. ÑÎfl ˜ËÒÚÍË Í‡ÏÂ˚ ËÒÔÓθÁÛÈÚ ÒÛıÓÈ Ï‡Ú¡Î. ⑤ ï‡ÌËÚ ͇ÏÂÛ ‚ ÔÓı·‰ÌÓÏ ÏÂÒÚÂ, ËÁ·Â„‡fl ÔÓÔ‡‰‡ÌË ÔflÏ˚ı ÒÓÎ̘Ì˚ı ÎÛ˜ÂÈ. ÑÓ΄Ó ‚ÓÁ‰ÂÈÒÚ‚Ë ÔflÏ˚ı ÒÓÎ̘Ì˚ı ÎÛ˜ÂÈ ÏÓÊÂÚ ÒÚ‡Ú¸ Ô˘ËÌÓÈ ÌÂËÒÔ‡‚ÌÓÒÚÂÈ ‚ ‡·ÓÚ ͇ÏÂ˚. 8 èÓ‰ÒÓ‰ËÌÂÌË ‡Á˙Âχ ‰Îfl ÔÓ‰Íβ˜ÂÌËfl Ó·˙ÂÍÚË‚‡ Ò ‡‚ÚӉˇه„ÏÓÈ èÓ‰„ÓÚÓ‚¸Ú ÌËÊÂÒÎÂ‰Û˛˘ËÈ ‡Á˙ÂÏ ‰Îfl ÔÓ‰Íβ˜ÂÌËfl Ó·˙ÂÍÚË‚‡ Ò ‡‚ÚӉˇه„ÏÓÈ, ÛÍÓÏÔÎÂÍÚÓ‚‡ÌÌÓÈ Ò ‰‡ÌÌÓÈ Í‡ÏÂÓÈ. Rb Pin3 Pin1 Pin4 Pin2 R èÓ‰ÒÓ‰ËÌËÚ ˜‡ÒÚ¸ ÍÓÌÚÓθÌÓ„Ó Í‡·ÂÎfl Ò Ó·Ì‡ÊÂÌÌ˚Ï ÔÓÍ˚ÚËÂÏ Í ‡Á˙ÂÏÛ ‰Îfl ÔÓ‰Íβ˜ÂÌËfl Ó·˙ÂÍÚË‚‡ Ò ‡‚ÚӉˇه„ÏÓÈ, Í‡Í ÔÓ͇Á‡ÌÓ ÌËÊÂ. íËÔ Â„ÛÎËÓ‚ÍË ÔÓÒ‰ÒÚ‚ÓÏ ÔÓÒÚÓflÌÌÓ„Ó ÚÓ͇ íËÔ Â„ÛÎËÓ‚ÍË ‚ˉÂÓÒ˄̇· 1 ÑÂÏÔÙËÛ˛˘ËÈ (-) èËÚ‡ÌË (+12 Ç) 2 ÑÂÏÔÙËÛ˛˘ËÈ (+) ç ÔÓ‰Íβ˜ÂÌ 3 èË‚Ó‰ (+) ÇˉÂÓÒ˄̇Π4 èË‚Ó‰ (-) áÂÏÎfl ‹ Pin(äéçíÄäíÄ) 9 ìÒÚ‡Ìӂ͇ Ó·˙ÂÍÚË‚‡ ÑÎfl Ó·˙ÂÍÚË‚Ó‚ Ò CS-ÍÂÔÎÂÌËÂÏ Ç‚ÂÌËÚ ‚ ‚ˉÂÓ͇ÏÂÛ Ó·˙ÂÍÚË‚ (‚‚Ó‡˜Ë‚‡ÂÚÒfl ÔÓ ˜‡ÒÓ‚ÓÈ ÒÚÂÎÍÂ, ‰Ó ÛÔÓ‡), Í‡Í ÔÓ͇Á‡ÌÓ Ì‡ Ô‰ÒÚ‡‚ÎÂÌÌÓÏ ÌËÊ ËÒÛÌÍÂ. é·˙ÂÍÚË‚ Ò CS-ÍÂÔÎÂÌËÂÏ R ÑÎfl Ó·˙ÂÍÚË‚Ó‚ Ò C-ÍÂÔÎÂÌËÂÏ Ç‚ÂÌËÚ ‚ ‚ˉÂÓ͇ÏÂÛ ÔÂÂıÓ‰ÌËÍ ‰Îfl Ó·˙ÂÍÚË‚‡ Ò ë-ÍÂÔÎÂÌËÂÏ (‚‚Ó‡˜Ë‚‡ÂÚÒfl ÔÓ ˜‡ÒÓ‚ÓÈ ÒÚÂÎÍÂ, ‰Ó ÛÔÓ‡). á‡ÚÂÏ ‚‚ÂÌËÚ ‚ ÌÂ„Ó Ó·˙ÂÍÚË‚ (‰Ó ÛÔÓ‡), Í‡Í ÔÓ͇Á‡ÌÓ Ì‡ Ô‰ÒÚ‡‚ÎÂÌÌÓÏ ÌËÊ ËÒÛÌÍÂ. é·˙ÂÍÚË‚ Ò C-ÍÂÔÎÂÌËÂÏ 10 ìÒÚ‡Ìӂ͇ ÒÂÎÂÍÚÓÌÓ„Ó ÔÂÂÍβ˜‡ÚÂÎfl Ó·˙ÂÍÚË‚‡ èË Á‡‚¯ÂÌËË ÔÓ‰„ÓÚÓ‚ÍË Ó·˙ÂÍÚË‚Ó‰ÂʇÚÂÎfl ‰ÓÔÓÎÌËÚÂθÌÓ Í Í‡ÏÂÂ, ÛÒÚ‡ÌÓ‚ËÚ ÒÂÎÂÍÚÓÌ˚È ÔÂÂÍβ˜‡ÚÂθ Ó·˙ÂÍÚË‚‡, ‚ ÒÓÓÚ‚ÂÚÒÚ‚ËË Ò ÚËÔÓÏ ‚ÏÓÌÚËÓ‚‡ÌÌÓ„Ó Ó·˙ÂÍÚË‚‡. Ç ÒÎÛ˜‡Â, ÂÒÎË ‚ÏÓÌÚËÓ‚‡ÌÌ˚È Ó·˙ÂÍÚË‚ Ô‰ÒÚ‡‚ÎflÂÚ ÒÓ·ÓÈ Ó·˙ÂÍÚË‚ Ò ‡‚ÚӉˇه„ÏÓÈ ÍÓÌÚÓθÌÓ„Ó ÚËÔ‡ DC, ÛÒÚ‡ÌÓ‚ËÚ ÒÂÎÂÍÚÓÌ˚ÈÔÂÂÍβ˜‡ÚÂθ Ó·˙ÂÍÚË‚‡ ̇ "DC", Ç ÒÎÛ˜‡Â, ÂÒÎË ‚ÏÓÌÚËÓ‚‡ÌÌ˚È Ó·˙ÂÍÚË‚ Ô‰ÒÚ‡‚ÎflÂÚ ÒÓ·ÓÈ Ó·˙ÂÍÚË‚ Ò ‡‚ÚӉˇه„ÏÓÈ ‚ˉÂÓÍÓÌÚÓθÌÓ„Ó ÚËÔ‡, ÛÒÚ‡ÌÓ‚ËÚ ÒÂÎÂÍÚÓÌ˚ÈÔÂÂÍβ˜‡ÚÂθ Ó·˙ÂÍÚË‚‡ ̇ "VIDEO". R ê„ÛÎËӂ͇ Á‡‰ÌÂ„Ó ÙÓÍÛÒ‡(ÔÓ‰ÒÚÓÈ͇ ÔÓÎÓÊÂÌËfl èáë-χÚˈ˚) ê„ÛÎËӂ͇ Á‡‰ÌÂ„Ó ÙÓÍÛÒ‡ ‚ˉÂÓ͇ÏÂ˚ ‚˚ÔÓÎÌflÂÚÒfl ̇ Á‡‚Ó‰ÂËÁ„ÓÚÓ‚ËÚÂΠÔ‰ ÓÚÔ‡‚ÍÓÈ Á‡Í‡Á˜ËÍÛ, ÌÓ ‚ ÌÂÍÓÚÓ˚ı ÒÎÛ˜‡flı Á‡‰ÌËÈ ÙÓÍÛÒ ÏÓÊÂÚ ·˚Ú¸ ̇ۯÂÌ ËÁ-Á‡ ÚÓ„Ó, ˜ÚÓ ËÒÔÓθÁÛ˛ÚÒfl Ó·˙ÂÍÚË‚˚ ‡ÁÌ˚ı ÚËÔÓ‚. Ç ˝ÚÓÏ ÒÎÛ˜‡Â ‚˚ ‰ÓÎÊÌ˚ ‚˚ÔÓÎÌËÚ¸ „ÛÎËÓ‚ÍÛ Á‡‰ÌÂ„Ó ÙÓÍÛÒ‡, Í‡Í ÓÔËÒ‡ÌÓ ÌËÊÂ. ë̇˜‡Î‡ ÓÔËÒ‡ÌÓ Í‡Í ‚˚ÔÓÎÌflÂÚÒfl ˝Ú‡ „ÛÎËӂ͇ ‰Îfl Ó·˙ÂÍÚË‚Ó‚ Ò ÔÓÒÚÓflÌÌ˚Ï ÙÓÍÛÒÌ˚Ï ‡ÒÒÚÓflÌËÂÏ. é·˙ÂÍÚË‚˚ Ò ÔÓÒÚÓflÌÌ˚Ï ÙÓÍÛÒÌ˚Ï ‡ÒÒÚÓflÌËÂÏ(·ÂÁ Ú‡ÌÒÙÓ͇ÚÓ‡) ① 燂‰ËÚ ‚ˉÂÓ͇ÏÂÛ Ì‡ Ó·˙ÂÍÚ Ò ÍÓÌÚ‡ÒÚÌ˚ÏË ‰ÂÚ‡ÎflÏË (ÒÂÚ͇), ‡ÒÔÓÎÓÊÂÌÌ˚È Ì‡ ‡ÒÒÚÓflÌËË ·ÓΠ10 Ï ÓÚ ‚ˉÂÓ͇ÏÂ˚, Ë ÛÒÚ‡ÌÓ‚ËÚ ÍÓθˆÓ „ÛÎËÓ‚ÍË ÙÓÍÛÒ‡ ‚ ÔÓÎÓÊÂÌË “·ÂÒÍÓ̘ÌÓÒÚ¸”(∞). ➁ ë ÔÓÏÓ˘¸˛ ÔÂÂÏ¢ÂÌËfl ˚˜‡„‡ „ÛÎËÓ‚ÍË áÄÑçÖÉé îéäìëÄ ‰Ó·ÂÈÚÂÒ¸ ÓÔÚËχθÌÓ„Ó ËÁÓ·‡ÊÂÌËfl Ó·˙ÂÍÚ‡. ➂ á‡ÚflÌËÚ ÒÚÓÔÓÌ˚È ‚ËÌÚ ˚˜‡„‡ „ÛÎËÓ‚ÍË áÄÑçÖÉé îéäìëÄ. 11 é·˙ÂÍÚË‚˚ Ò ÔÂÂÏÂÌÌ˚Ï ÙÓÍÛÒÌ˚Ï ‡ÒÒÚÓflÌËÂÏ (Ò Ú‡ÌÒÙÓ͇ÚÓÓÏ) ① 燂‰ËÚ ‚ˉÂÓ͇ÏÂÛ Ì‡ Ó·˙ÂÍÚ Ò ÍÓÌÚ‡ÒÚÌ˚ÏË ‰ÂÚ‡ÎflÏË (ÒÂÚ͇), ‡ÒÔÓÎÓÊÂÌÌ˚È Ì‡ ‡ÒÒÚÓflÌËË ÓÚ 3 ‰Ó 5 Ï ÓÚ ‚ˉÂÓ͇ÏÂ˚, Ë ÛÒÚ‡ÌÓ‚ËÚ ˚˜‡„ Ú‡ÌÒÙÓ͇ÚÓ‡ Í‡Í ÏÓÊÌÓ ·ÎËÊÂ Í ÔÓÎÓÊÂÌ˲ TELE (íÖãÖéÅöÖäíàÇ), Á‡ÚÂÏ Ò ÔÓÏÓ˘¸˛ ÔÂÂÏ¢ÂÌËfl ˚˜‡„‡ „ÛÎËÓ‚ÍË áÄÑçÖÉé îéäìëÄ ‰Ó·ÂÈÚÂÒ¸ ÓÔÚËχθÌÓ„Ó ËÁÓ·‡ÊÂÌËfl Ó·˙ÂÍÚ‡. ➁ ìÒÚ‡ÌÓ‚ËÚ ˚˜‡„ Ú‡ÌÒÙÓ͇ÚÓ‡ Í‡Í ÏÓÊÌÓ ·ÎËÊÂ Í ÔÓÎÓÊÂÌ˲ WIDE (òàêéäéìÉéãúçõâ éÅöÖäíàÇ), ‡ Á‡ÚÂÏ Ò ÔÓÏÓ˘¸˛ ÔÂÂÏ¢ÂÌËfl ˚˜‡„‡ „ÛÎËÓ‚ÍË áÄÑçÖÉé îéäìëÄ ‰Ó·ÂÈÚÂÒ¸ ÓÔÚËχθÌÓ„Ó ËÁÓ·‡ÊÂÌËfl Ó·˙ÂÍÚ‡. ➂ èÓ‚ÚÓËÚ ÓÔËÒ‡ÌÌ˚ ‚ ÔÛÌÍÚ‡ı 1 Ë 2 ÓÔ‡ˆËË 2-3 ‡Á‡ ‰Îfl ÚÓ„Ó, ˜ÚÓ·˚ ‰Ó·ËÚ¸Òfl Ó‰Ë̇ÍÓ‚ÓÈ ÙÓÍÛÒËÓ‚ÍË ÔË ÛÒÚ‡Ìӂ͇ı Ú‡ÌÒÙÓ͇ÚÓ‡ ‚ ÔÓÎÓÊÂÌË íÖãÖéÅöÖäíàÇ Ë ‚ ÔÓÎÓÊÂÌË òàêéäéìÉéãúçõâ éÅöÖäíàÇ. R ê˚˜‡„ „ÛÎËÓ‚ÍË Á‡‰ÌÂ„Ó ÙÓÍÛÒ‡ 12 èÓ‰Íβ˜ÂÌË ͇·ÂÎÂÈ Ë ÔÓ‚ÂÍË 1 ë̇˜‡Î‡ ÔÓ‰ÒÓ‰ËÌËÚ ‡Á˙ÂÏ Í‡·ÂÎfl BNC (͇·Âθ Ò ÏËÌˇڲÌ˚ÏË ·‡ÈÓÌÂÚÌ˚ÏË ÒÓ‰ËÌËÚÂÎflÏË) Í „ÌÂÁ‰Û ‚˚ıÓ‰‡ ‚ˉÂÓÒ˄̇· (VIDEO OUT) ‚ˉÂÓ͇ÏÂ˚. 2 á‡ÚÂÏ ÔÓ‰ÒÓ‰ËÌËÚ ‚ÚÓÓÈ ‡Á˙ÂÏ Í‡·ÂÎfl BNC Í „ÌÂÁ‰Û ‚ıÓ‰‡ ‚ˉÂÓÒ˄̇· ̇ ÏÓÌËÚÓÂ. R ÇıÓ‰ ‚ˉÂÓÒ˄̇· ̇ Á‡‰ÌÂÈ ÒÚÓÓÌ ÏÓÌËÚÓ‡ 䇷Âθ BNC Ç˚ıÓ‰ ‚ˉÂÓÒ˄̇· ‚ˉÂÓ͇ÏÂ˚ 13 3 Ç ÚÂÚ¸Ëı, ÔÓ‰ÒÓ‰ËÌËÚ ͇·Âθ ÔËÚ‡ÌËfl. ① ä‡Ï‡ ÒÓ ‚ıÓ‰fl˘ÂÈ ÏÓ˘ÌÓÒÚ¸˛ 24Ç ÔÂÂÏÂÌÌÓ„Ó ÚÓ͇/12Ç ÔÓÒÚÓflÌÌÓ„Ó ÚÓ͇. èÓ‰ÒÓ‰ËÌËÚ ‰‚ ÎËÌËË ‡‰‡ÔÚ‡ ÔËÚ‡ÌËfl Í ÚÂÏË̇ÎÛ ÔËÚ‡ÌËfl IN ‚ ͇ÏÂÂ, ËÒÔÓθÁÛfl ÍÂÒÚÓÓ·‡ÁÌÛ˛ ÓÚ‚ÂÚÍÛ, Í‡Í ÔÓ͇Á‡ÌÓ ÌËÊÂ. ❉ ÅÂÁ ‡Á„‡Ì˘ÂÌËfl ÔÓÎflÌÓÒÚË, ÔÓ‰ÒÓ‰ËÌËÚÂ Í ËÒÚÓ˜ÌËÍÛ ÔËÚ‡ÌËfl 24Ç ÔÂÂÏÂÌÌÓ„Ó ÚÓ͇ ËÎË 12Ç ÔÓÒÚÓflÌÌÓ„Ó ÚÓ͇. R ➁ ä‡Ï‡ ÒÓ ‚ıÓ‰fl˘ÂÈ ÏÓ˘ÌÓÒÚ¸˛ 230Ç ÔÂÂÏÂÌÌÓ„Ó ÚÓ͇ èÓ‰ÒÓ‰ËÌËÚ ÔÓ‚Ó‰ ÔÓ‰‚Ó‰ËÏÓÈ ÏÓ˘ÌÓÒÚË Í ËÒÚÓ˜ÌËÍÛ ÔËÚ‡ÌËfl 230Ç ÔÂÂÏÂÌÌÓ„Ó ÚÓ͇. 14 É·‚‡ 4 ç‡Á‚‡ÌË ÍÓÏÔÓÌÂÌÚÓ‚ Ë ÙÛÌ͈ËË Çˉ Ò·ÓÍÛ ➂ ê‡Á˙ÂÏ ‰Îfl ÔÓ‰Íβ˜ÂÌËfl Ó·˙ÂÍÚË‚‡ Ò ‡‚ÚÓχÚ˘ÂÒÍÓÈ ‰Ë‡Ù‡„ÏÓÈ ① éÚ‚ÂÒÚËfl ‰Îfl ÍÂÔÎÂÌËfl ÔÂÂıÓ‰ÌË͇ ÛÒÚ‡ÌÓ‚Ó˜ÌÓ„Ó ÍÓ̯ÚÂÈ̇ ➅ ê˚˜‡„ „ÛÎËÓ‚ÍË Á‡‰ÌÂ„Ó ÙÓÍÛÒ‡ ⑤ ëÂÎÂÍÚÓÌ˚È ÔÂÂÍβ˜‡ÚÂθ Ó·˙ÂÍÚË‚‡ ALC ➃ 䇷Âθ ÛÔ‡‚ÎÂÌËfl Ó·˙ÂÍÚË‚‡ Ò ‡‚ÚÓχÚ˘ÂÒÍÓÈ Â„ÛÎËÓ‚ÍÓÈ ÒÍÓÓÒÚË Á‡Ú‚Ó‡ R ➁ é·˙ÂÍÚË‚ ‚ˉÂÓ͇ÏÂ˚ ① éÚ‚ÂÒÚËfl ‰Îfl ÍÂÔÎÂÌËfl ÔÂÂıÓ‰ÌË͇ ÛÒÚ‡ÌÓ‚Ó˜ÌÓ„Ó ÍÓ̯ÚÂÈ̇ ùÚË ÓÚ‚ÂÒÚËfl ËÒÔÓθÁÛ˛ÚÒfl ‰Îfl ÍÂÔÎÂÌËfl ÔÂÂıÓ‰ÌË͇ ÛÒÚ‡ÌÓ‚Ó˜ÌÓ„Ó ÍÓ̯ÚÂÈ̇, ÍÓÚÓ˚È fl‚ÎflÂÚÒfl ˜‡ÒÚ¸˛ ÍÓ̯ÚÂÈ̇, ̇ ÍÓÚÓÓÏ ÛÒڇ̇‚ÎË‚‡ÂÚÒfl ‚ˉÂÓ͇χ. ➁ é·˙ÂÍÚË‚ ‚ˉÂÓ͇ÏÂ˚ (‰ÓÔÓÎÌËÚÂθÌÓ) ùÚÓÚ Ó·˙ÂÍÚË‚ ÛÒڇ̇‚ÎË‚‡ÂÚÒfl ̇ ‚ˉÂÓ͇ÏÂÂ. ❉ èflÚ̇ Ò ÔÓ‚ÂıÌÓÒÚË Ó·˙ÂÍÚË‚‡ ‚ˉÂÓ͇ÏÂ˚ ÒΉÛÂÚ ‡ÍÍÛ‡ÚÌÓ Û‰‡ÎflÚ¸ Ò ÔÓÏÓ˘¸˛ ÒÔˆˇθÌÓÈ Ò‡ÎÙÂÚÍË ‰Îfl ÔÓÚËÍË ÓÔÚËÍË ËÎË Ò ÔÓÏÓ˘¸˛ ıÎÓÔ˜‡ÚÓ·ÛχÊÌÓÈ Ú͇ÌË, ÒÏÓ˜ÂÌÌÓÈ ‚ ˝ÚËÎÓ‚ÓÏ ÒÔËÚÂ. ➂ ê‡Á˙ÂÏ ‰Îfl ÔÓ‰Íβ˜ÂÌËfl Ó·˙ÂÍÚË‚‡ Ò ‡‚ÚÓχÚ˘ÂÒÍÓÈ ‰Ë‡Ù‡„ÏÓÈ óÂÂÁ ˝ÚÓÚ ‡Á˙ÂÏ Ì‡ Ó·˙ÂÍÚË‚ Ò ‡‚ÚÓχÚ˘ÂÒÍÓÈ ‰Ë‡Ù‡„ÏÓÈÔÓ‰‡ÂÚÒfl ÔËÚ‡˛˘Â ̇ÔflÊÂÌËÂ, ÛÔ‡‚Îfl˛˘ËÈ Ò˄̇Î, ‚ˉÂÓÒ˄̇ΠËÎË Ò˄̇ΠÔÓÒÚÓflÌÌÓ„Ó ÚÓ͇, Ò ÔÓÏÓ˘¸˛ ÍÓÚÓÓ„Ó ÓÒÛ˘ÂÒÚ‚ÎflÂÚÒfl ÛÔ‡‚ÎÂÌË ÒÍÓÓÒÚ¸˛ Á‡Ú‚Ó‡ ‚ Ó·˙ÂÍÚË‚Â. ➃ 䇷Âθ ÛÔ‡‚ÎÂÌËfl Ó·˙ÂÍÚË‚‡ Ò ‡‚ÚÓχÚ˘ÂÒÍÓÈ Â„ÛÎËÓ‚ÍÓÈ ÒÍÓÓÒÚË Á‡Ú‚Ó‡ чÌÌ˚È Í‡·Âθ Ô‰‡ÂÚ Ò˄̇Î˚, Û„ÛÎËÛ˛˘Ë ‰Ë‡Ù‡„ÏÛ. ⑤ ëÂÎÂÍÚÓÌ˚È ÔÂÂÍβ˜‡ÚÂθ Ó·˙ÂÍÚË‚‡ ALC чÌÌ˚È ÔÂÂÍβ˜‡ÚÂθ ËÒÔÓθÁÛÂÚÒfl ÔË ‚˚·Ó ÚËÔ‡ Ó·˙ÂÚË‚‡. ➅ ê˚˜‡„ „ÛÎËÓ‚ÍË Á‡‰ÌÂ„Ó ÙÓÍÛÒ‡ чÌ̇fl ¯Í‡Î‡ ËÒÔÓθÁÛÂÚÒfl ‰Îfl ÛÒÚ‡ÌÓ‚ÍË Á‡‰ÌÂ„Ó ÙÓÍÛÒ‡ ͇ÏÂ˚. 15 Çˉ ÒÁ‡‰Ë ä‡Ï‡ ÔÂÂÏ.ÚÓÍ 24Ç/ÔÓÒÚÓflÌ.ÚÓÍ 12Ç (SCC-B2391(P)/B2300) ⑤ ⑨ ➂➃ ➁ ➅ ① ⑦ ⑧ R ä‡Ï‡ ÔÂÂÏÂÌ.ÚÓÍ 230Ç (SCC-B2091P) ⑤ ① ➂➃ ➁ ➅ ⑨ ⑦ ⑧ 16 ① ÇıÓ‰ ÔÓ‰Íβ˜ÂÌËfl Í ÒÂÚË ä‡Ï‡ ÔÂÂÏÂÌ.ÚÓÍ 24Ç/ÔÓÒÚÓflÌ.ÚÓÍ 12Ç : ùÚÓ ÔÓÚ, ÔÓ‰ÒÓ‰ËÌfl˛˘ËÈ ÔËÚ‡ÌË ͇·ÂÎfl Ò ‡‰‡ÔÚÂÓÏ. ä‡Ï‡ ÔÂÂÏÂÌ.ÚÓÍ 230Ç : ùÚÓ ¯ÌÛ ÔËÚ‡ÌËfl. ➁ ëÇÖíéÑàéÑ èàíÄçàü èË ÌÓχθÌÓÏ ÔÓÒÚÛÔÎÂÌËË ÔËÚ‡ÌËfl ͇ÏÂ˚ Ò‚ÂÚÓ‰ËÓ‰ ̇ıÓ‰ËÚÒfl ‚ ÒÓÒÚÓflÌËË ‚Íβ˜ÂÌËfl. ➂ ➃ èÂÂÍβ˜‡ÚÂÎË INC Ë DEC é·‡ ÔÂÂÍβ˜‡ÚÂÎfl Û‚Â΢˂‡˛Ú ËÎË ÛÏÂ̸¯‡˛Ú ‚˚„Ó‰Û RED Ë BLUE, Ò ˆÂθ˛ ÙËÍÒËÓ‚‡ÌËfl Ê·ÂÏÓÈ ˆ‚ÂÚÓ‚ÓÈ ÚÂÏÔ‡ÚÛ˚, ‚Ó ‚ÂÏfl ÓÚÍβ˜ÂÌËfl (USER) AWB ÒÂ‰Ë ÔÂÂÍβ˜‡ÚÂÎÂÈ FUNCTION, ‡ Ú‡ÍÊ „ÛÎËÛ˛Ú ‚ÂÚË͇θÌÛ˛ ÒËÌıÓÌÌÛ˛ Ù‡ÁÛ, ‚Ó ‚ÂÏfl ‚Íβ˜ÂÌËfl AWB Ë L/L. ⑤ èÂÂÍβ˜‡ÚÂÎË FUNCTION 1. L/L 3. FL 2. ELC 4. AWB Çäã èÂÂÍÎ.1 èÂÂÍÎ.2 èÂÂÍÎ.3 èÂÂÍÎ.4 17 R 1) èÂÂÍÎ.1(L/L) : èË ÛÒÚ‡ÌÓ‚Í ̇ OFF, ͇χ ÔË‚Ó‰ËÚ ‚ ‰ÂÈÒÚ‚Ë ÂÊËÏ ‚ÌÛÚÂÌÌÂÈ ÒËÌıÓÌËÁ‡ˆËË, ‡ ÔË ÛÒÚ‡ÌÓ‚Í ̇ ON ÂÊËÏ ÒËÌıÓÌËÁ‡ˆËË ÔËÚ‡ÌËfl. èË ÔÓ‰ÒÓ‰ËÌÂÌËË ÌÂÒÍÓθÍËı ͇ÏÂ Í ÔÓÒΉӂ‡ÚÂθÌ˚Ï ÔÂÂÍβ˜‡ÚÂÎflÏ ‰Îfl ‚‚Ó‰‡ ‡‚ÚÓχÚ˘ÂÒÍÓ„Ó ÂÊËχ ÔÂÂÍβ˜ÂÌËfl, ‚Ó ‚ÂÏfl Á‡‰ÂÊÍË Í‡ÏÂ˚ ‚Ó ‚ÌÛÚÂÌÌÂÈ ÒËÌıÓÌËÁ‡ˆËË (INT) ÔË ÔÂÂÍβ˜ÂÌËË ˝Í‡Ì‡, ‚ÓÁÌË͇ÂÚ fl‚ÎÂÌË ÔÓ‰Ô˚„Ë‚‡ÌËfl ˝Í‡Ì‡. ä‡Ê‰˚È ˝ÙÙÂÍÚ ÔÓ‰Ô˚„Ë‚‡ÌËfl ÏÓÊÂÚ ÛÒÚ‡ÌflÚ¸Òfl Ë ÔÂÂÍβ˜ÂÌË ˝Í‡Ì‡ ÒÚ‡ÌÓ‚ËÚÒfl Ô·‚Ì˚Ï, ·Î‡„Ó‰‡fl ÛÒÚ‡ÌÓ‚Í ÔÂÂÍβ˜‡ÚÂÎfl L/L ̇ ON Ë ËÒÔÓθÁÓ‚‡Ì˲ ÔÂÂÍβ˜‡ÚÂÎfl INT/DEC Ò ˆÂθ˛ ÍÓÌÚÓÎfl ‚ÂÚË͇θÌÓÈ ÒËÌıÓÌÌÓÈ Ù‡Á˚. ❉ èË ÛÔ‡‚ÎÂÌËË ‚ÂÚË͇θÌÓÈ ÒËÌıÓÌÌÓÈ Ù‡ÁÓÈ Ò ÔÓÏÓ˘¸˛ ÔÂÂÍβ˜‡ÚÂÎfl INT/DEC ‚Ó ‚ÂÏfl ÛÒÚ‡ÌÓ‚ÍË L/L ̇ ÔÓÁËˆË˛ ON, ÌÂÓ·ıÓ‰ËÏÓ ÛÒÚ‡ÌÓ‚ËÚ¸ SW4 ̇ AWB ON. ❉ Ç ÒÎÛ˜‡Â Ò ÔÂÂÏÂÌÌ˚Ï ÚÓÍÓÏ 12Ç, ‚ÌÛÚÂÌÌËÈ ÒËÌıÓÌËÁ‡ÚÓ (INT) ‰ÓÎÊÂÌ ·˚Ú¸ Á‡ÙËÍÒËÓ‚‡Ì, ÌÂÁ‡‚ËÒËÏÓ ÓÚ ÒÓÒÚÓflÌËfl ON/OFF L/L. R 2) èÂÂÍÎ.2(ELC) : àÒÔÓθÁÛÈÚ ‰‡ÌÌ˚È ÔÂÂÍβ˜‡ÚÂθ Ò Ó·˙ÂÍÚË‚ÓÏ Ò Û˜ÌÓÈ ‰Ë‡Ù‡„ÏÓÈ. ÇÓ ‚ÂÏfl ‚Íβ˜ÂÌËfl ‰‡ÌÌÓ„Ó ÔÂÂÍβ˜ÂÌËfl, ÒÍÓÓÒÚ¸ ˝ÎÂÍÚÓÌÌÓ-ÓÔÚ˘ÂÒÍÓ„Ó Á‡Ú‚Ó‡ ËÁÏÂÌflÂÚÒfl ‚ Á‡‚ËÒËÏÓÒÚË ÓÚ flÍÓÒÚË Ó·˙ÂÍÚ‡ ÓÚ 1/60(50) ‰Ó 1/100,000 ÒÂÍ, Ò ˆÂθ˛ ‡‚ÚÓχÚ˘ÂÒÍÓ„Ó ÍÓÌÚÓÎfl flÍÓÒÚË ˝Í‡Ì‡. èË ˝ÚÓÏ, ‚ ÒÎÛ˜‡Â Ò Ó·˙ÂÍÚË‚ÓÏ Ò ‡‚ÚӉˇه„ÏÓÈ(DC ËÎË ÇˉÂÓÍÓÌÚÓθ), ۷‰ËÚÂÒ¸, ˜ÚÓ ÔÂÂÍβ˜‡ÚÂθ ‚˚Íβ˜ÂÌ. ñ‚ÂÚÓ‚‡fl ÔÓÍÛÚ͇ ÏÓÊÂÚ Ì‡·Î˛‰‡Ú¸Òfl ÔË ‰‡ÌÌÓÏ ÂÊËÏÂ. Ç ˝ÚÓÏ ÒÎÛ˜‡Â, ÔÓ‰‡ÈÚ ËÒÚÓ˜ÌËÍ ÔËÚ‡ÌËfl ÔÂÂÏÂÌÌÓ„Ó ÚÓ͇ ̇ ͇ÏÂÛ Ë ‚˚·ÂËÚ èÖêÖäã.1 “ON”. (NTSC : 60Ɉ, PAL : 50Ɉ) 3) èÂÂÍÎ.3(FL): чÌÌ˚È ÔÂÂÍβ˜‡ÚÂθ Ô‰ÓÚ‚‡˘‡ÂÚ Ïˆ‡ÌË ̇ ˝Í‡Ì ̇ ÚÓÚ ÏÓÏÂÌÚ, ÍÓ„‰‡ ÒËÒÚÂχ NTSC ËÒÔÓθÁÛÂÚÒfl ‚ „ËÓ̇ı Ò ÔÓ‰‡˜ÂÈ ˝Ì„ËË 50Ɉ Ë ÍÓ„‰‡ ÒËÒÚÂχ PAL ËÒÔÓθÁÛÂÚÒfl ‚ „ËÓ̇ı Ò ÔÓ‰‡˜ÂÈ ˝Ì„ËË 60Ɉ. éÌ ÒÎÛÊËÚ ‰Îfl Ô‰ÓÚ‚‡˘ÂÌËfl ‚Ë·‡ˆËË Ì‡ ˝Í‡ÌÂ, ˜ÚÓ fl‚ÎflÂÚÒfl ÂÁÛθڇÚÓÏ ÌÂÒÓ‚Ô‡‰ÂÌËfl ‚ÂÚË͇θÌÓÈ ˜‡ÒÚÓÚ˚ ÒËÌıÓÌËÁ‡ˆËË Ë ˜‡ÒÚÓÚ˚ ψ‡ÌËÈ ÓÒ‚Â˘ÂÌËfl. èË ‚Íβ˜ÂÌËË ‰‡ÌÌÓ„Ó ÔÂÂÍβ˜‡ÚÂÎfl ˝ÎÂÍÚÓÌÌÓ-ÓÔÚ˘ÂÒÍËÈ Á‡Ú‚Ó ÛÒÚ‡ÌÓ‚ÎÂÌ Ì‡ 1/100ÒÂÍ (NTSC) ËÎË 1/120 ÒÂÍ (PAL). 4) èÂÂÍÎ.4(AWB): èË ÛÒÚ‡ÌÓ‚Í ̇ ON, ˆ‚ÂÚ ˝Í‡Ì‡ „ÛÎËÛÂÚÒfl ‡‚ÚÓχÚ˘ÂÒÍË, ‚ ÒÓÓÚ‚ÂÚÒÚ‚ËË Ò ËÁÏÂÌÂÌËÂÏ ˆ‚ÂÚÓ‚ÓÈ ÚÂÏÔ‡ÚÛ˚ ÓÒ‚Â˘ÂÌËfl, Á‡ Ò˜ÂÚ ËÁÏÂÌÂÌËÈ ‚ ̇ÛÊÌÂÈ Ò‰Â. (ATW) Ç ÒÎÛ˜‡Â, ÂÒÎË ÛÒÎÓ‚Ëfl ÓÒ‚Â˘ÂÌËfl ÒÚ‡·ËθÌ˚, ÔËÏÂÌËχ ÛÒÚ‡Ìӂ͇ ̇ OFF. ä‡Ï‡ Á‡ÔÓÏË̇ÂÚ ˆ‚ÂÚÓ‚Û˛ ÚÂÏÂÔ‡ÚÛÛ ÓÒ‚Â˘ÂÌËfl ‚ ÚÓÚ ÏÓÏÂÌÚ, ÍÓ„‰‡ ÛÒÚ‡Ìӂ͇ ÔÂÂÍβ˜‡ÚÂÎfl ËÁÏÂÌflÂÚÒfl Ò ON ̇ OFF, Ë ˆ‚ÂÚ Í‡ÏÂ˚ ‡‰‡ÔÚËÛÂÚÒfl Í Á‡ÙËÍÒËÓ‚‡ÌÌÓÈ ‚ Ô‡ÏflÚË ˆ‚ÂÚÓ‚ÓÈ ÚÂÏÔ‡ÚÛÂ. (AWC) ÖÒÎË ˆ‚ÂÚÓ‚‡fl ÚÂÏÔ‡ÚÛ‡ ÓÒ‚Â˘ÂÌËfl ËÁÏÂÌÂ̇ Ë Ú·ÛÂÚÒfl ÓÚ„ÛÎËÓ‚‡Ú¸ ͇ÏÂÛ Ì‡ ÙËÍÒËÓ‚‡ÌË ‚ Ô‡ÏflÚË/ ˝ÍÒÔÎÛ‡Ú‡ˆË˛ ËÁÏÂÌÂÌÌÓÈ ˆ‚ÂÚÓ‚ÓÈ ÚÂÏÔ‡ÚÛ˚, ÌÂÓ·ıÓ‰ËÏÓ ‚ÓÒÒÚ‡ÌÓ‚ËÚ¸ ‰ÂÈÒÚ‚Ë ÔÂÂÍβ˜‡ÚÂÎfl On/Off. èË ˝ÚÓÏ, ÌÂÓ·ıÓ‰ËÏÓ ÔÓÏÌËÚ¸, ˜ÚÓ ÏÓÊÂÚ ÔÓËÁÓÈÚË Ó¯Ë·Í‡ ÔË ÒÎÂ‰Û˛˘Ëı ÛÒÎÓ‚Ëflı. ÇÓ-Ô‚˚ı, ˝ÚÓ ‚ÓÁÏÓÊÌÓ ‚ ÒÎÛ˜‡Â, ÍÓ„‰‡ Ó·˙ÂÍÚ ·Óθ¯Ëı ‡ÁÏÂÓ‚, ̇Ò˚˘ÂÌÌÓ Ó‰ÌÓˆ‚ÂÚÌ˚È, ̇ıÓ‰ËÚÒfl ‚ ˆÂÌÚ ˝Í‡Ì‡ ËÎË ‚ ÒÎÛ˜‡Â, ÍÓ„‰‡ ̇ ˝Í‡Ì ԇÍÚ˘ÂÒÍË ÓÚÒÛÚÒÚ‚ÛÂÚ ·ÂÎ˚È ˆ‚ÂÚ. ÇÓ-‚ÚÓ˚ı, Ô˘ËÌÓÈ ÏÓÊÂÚ ·˚Ú¸ ÓÒÓ·Ó ÓÒ‚Â˘ÂÌËÂ, ‚ ˜‡ÒÚÌÓÒÚË Ì‡ÚË‚‡fl ·ÏÔ‡. 18 ➅ ê„ÛÎflÚÓ ÛÓ‚Ìfl DC IRIS èË ÛÒÚ‡ÌÓ‚Í ÔÂÂÍβ˜‡ÚÂÎfl ‚˚·Ó‡ ÎËÌÁ ALC ̇ DC, Ò ˆÂθ˛ ÛÔ‡‚ÎÂÌËfl ÛÓ‚Ìfl IRIS ËÒÔÓθÁÛÂÚÒfl Ó‰Ë̇ÍÓ‚‡fl Ò ‰‡È‚ÂÓÏ ÎËÌÂÈ͇ ÛÔ‡‚ÎÂÌËfl. ⑦ èÓÚ ‚˚ıÓ‰‡ ‚ˉÂÓÒ˄̇· чÌÌ˚È ÔÓÚ ‰ÓÎÊÂÌ ·˚Ú¸ ÔÓ‰Íβ˜ÂÌ Í ÔÓÚÛ ‚ıÓ‰‡ ‚ˉÂÓÒ˄̇· ÏÓÌËÚÓ‡ ËÎË ‡Ì‡ÎÓ„Û. åÓÊÌÓ ‚˚‚Ó‰ËÚ¸ ‚ˉÂÓÒ˄̇Î˚ ͇ÏÂ˚ ˜ÂÂÁ ‰‡ÌÌ˚È ÔÓÚ. ⑧ èÂÂÍβ˜‡ÚÂθ ‚˚·Ó‡ DAYNIGHT èË ÛÒÚ‡ÌÓ‚Í ‰‡ÌÌÓ„Ó ÔÂÂÍβ˜‡ÚÂÎfl ̇ AUTO, ÙÛÌ͈Ëfl DAYNIGHT ·Û‰ÂÚ ‡‚ÚÓχÚ˘ÂÒÍË ÔË‚Ó‰ËÚ¸Òfl ‚ ‰ÂÈÒÚ‚ËÂ, ‚ Á‡‚ËÒËÏÓÒÚË ÓÚ ÓÒ‚Â˘ÂÌÌÓÒÚË. èË ÛÒÎÓ‚ËË Ò··ÓÈ ÓÒ‚Â˘ÂÌÌÓÒÚË, ÙËÎ¸Ú IR ·Û‰ÂÚ ‡‚ÚÓχÚ˘ÂÒÍË ÛÒÚ‡ÌflÚ¸Òfl ‚ ˜ÂÌÓ-·ÂÎ˚È ÂÊËÏ(BW Mode) Ò ˆÂθ˛ ÔÓ‚˚¯ÂÌËfl ˜Û‚ÒÚ‚ËÚÂθÌÓÒÚË, ‡ ÔË ıÓÓ¯ÂÈ ÓÒ‚Â˘ÂÌÌÓÒÚË ÙËÎ¸Ú IR ·Û‰ÂÚ ‡‚ÚÓχÚ˘ÂÒÍË ÔÓÏ¢‡Ú¸Òfl ‚ ˆ‚ÂÚÌÓÈ ÂÊËÏ(COLOR Mode). îËÎ¸Ú IR ‡„ËÛÂÚ Ì‡ ÛÒÚ‡ÌÓ‚ÎÂÌÌÛ˛ ÔÓ‰ÓÎÊËÚÂθÌÓÒÚ¸ (ÛÒÎÓ‚Ë ÔÓ‰‡˜Ë : 10 ÒÂÍÛ̉). èË ÔÂÓ·‡ÁÓ‚‡ÌËË DAYNIGHT ‚ ÂÊËÏ ÄÇíé, ÌÂÓ·ıÓ‰ËÏÓ ÛÒÚ‡ÌÓ‚ËÚ¸ ÔÓ‰ÓÎÊËÚÂθÌÓÒÚ¸ ÒÎÂ‰Û˛˘ËÏ Ó·‡ÁÓÏ. (è‰ ÛÒÚ‡ÌÓ‚ÍÓÈ Ò̇˜‡Î‡ ‚˚Íβ˜ËÚ ÔÂÂÍβ˜‡ÚÂθ L/L Ë ÔÂÂÍβ˜‡ÚÂθ AWB). ä‡Ê‰˚È ‡Á ÔË ÔÂÓ·‡ÁÓ‚‡ÌËË ÔÂÂÍβ˜‡ÚÂÎfl ‚˚·Ó‡ Ò EXT ̇ AUTO ÔË Ó‰ÌÓ‚ÂÏÂÌÌÓÏ Ì‡Ê‡ÚËË Ì‡ ÔÂÂÍβ˜‡ÚÂθ INC/DEC, ÔÓ‰ÓÎÊËÚÂθÌÓÒÚ¸(DURATION TIME) ÔÓÒΉӂ‡ÚÂθÌÓ ËÁÏÂÌflÂÚÒfl Í‡Í 10ÒÂÍ, 30ÒÂÍ, 60ÒÂÍ, 90ÒÂÍ, 120ÒÂÍ Ë 150ÒÂÍ. èË Á‡‚¯ÂÌËË ÛÒÚ‡ÌÓ‚ÍË, ÒÓı‡Ìfl˛Ú ÛÒÎÓ‚Ëfl ÛÒÚ‡ÌÓ‚ÍË Ì‡ ͇ÏÂÛ ÛÒÚ‡ÌÂÌËÂÏ Ì‡Ê‡ÚËfl ÔÂÂÍβ˜‡ÚÂÎfl INC/DEC. èÓÒΠÁ‡‚¯ÂÌËfl ÒÓı‡ÌÂÌËfl ÂÊËÏ DAYNIGHT ·Û‰ÂÚ ‡‚ÚÓχÚ˘ÂÒÍË ËÁÏÂÌflÚ¸Òfl, ‚ Á‡‚ËÒËÏÓÒÚË ÓÚ ÔÓ‰ÓÎÊËÚÂθÌÓÒÚË (DURATION TIME), ‰‡Ê ‚Ó ‚ÂÏfl ‚ÍÎ/ÓÚÍÎ (POWER On/Off). ÑÎfl ÔÂÂÛÒÚ‡ÌÓ‚ÍË ÌÂÓ·ıÓ‰ËÏÓ ÔÓ‚ÚÓËÚ¸ ‚˚¯ÂÛ͇Á‡ÌÌ˚ ‰ÂÈÒÚ‚Ëfl. (èË Á‡‚¯ÂÌËË ÔÂÂÛÒÚ‡ÌÓ‚ÍË, ÏÓÊÌÓ ‚ÂÌÛÚ¸ ÔÂÂÍβ˜‡ÚÂÎË L/L Ë AWB ‚ ÔÂÊÌ ÒÓÒÚÓflÌËÂ.) èË ÛÒÚ‡ÌÓ‚Í ‰‡ÌÌÓ„Ó ÔÂÂÍβ˜‡ÚÂÎfl ̇ EXT, ÂÊËÏ COLOR/BW ËÁÏÂÌflÂÚÒfl, ‚ Á‡‚ËÒËÏÓÒÚË ÓÚ ‚̯ÌÂ„Ó Ò˄̇·, ‚ıÓ‰fl˘Â„Ó ‚Ó ‚ıÓ‰ÌÓÈ ÔÓÚ(ÌÓÏ ⑨) ‚̯ÌÂ„Ó Ò˄̇· DAYNIGHT. ⑨ ÇıÓ‰ÌÓÈ ÔÓÚ ‚̯ÌÂ„Ó Ò˄̇· DAYNIGHT ÇÓ ‚ÂÏfl ÛÒÚ‡ÌÓ‚ÍË ÔÂÂÍβ˜‡ÚÂÎfl ‚˚·Ó‡ DAYNIGHT(ÌÓÏÂ⑧) ̇ EXT, ÂÊËÏ COLOR/BW ËÁÏÂÌflÂÚÒfl, ‚ Á‡‚ËÒËÏÓÒÚË ÓÚ ‚ıÓ‰fl˘Â„Ó Ò˄̇· ̇ ‰‡ÌÌ˚È ÔÓÚ. ÇıÓ‰ÌÓÈ ÚÂÏË̇Π‰ÓÎÊÂÌ ‚‚Ó‰ËÚ¸ ̇ÚflÊÂÌË DC5V Ë Ô‚˚¯‡Ú¸ 0.2ÏÄ. OFF : ê‡ÁÓÏÍÌÛÚ˚È ÍÓÌÚ‡ÍÚ ON : á‡ÏÍÌÛÚ˚È ÍÓÌÚ‡ÍÚ 19 R íÂıÌ˘ÂÒÍË ı‡‡ÍÚÂËÒÚËÍË ÚÓ‚‡‡ SCC-B2391P/2091P ÍÚÂËÒÚË͇ á̇˜ÂÌË Çˉ ÚÓ‚‡‡ ä‡Ï‡ CCTV ëËÒÚÂχ ‚¢‡ÌËfl ëàëíÖåÄ ëíÄçÑÄêíÄ PAL CCD 1/3” Super-HAD CCD ùÙÙÂÍÚË‚Ì˚ ÔËÍÒÂÎ˚ 752 (H) x 582(V) ë͇ÌËÛ˛˘ËÈ ÚËÔ ãËÌËfl 625, èÂÂÏÂÊÂÌË 2:1 ÇçìíêÖççüü ëàçïêéçàáÄñàü : 15,625Ɉ(H) 50 Ɉ(V) ó‡ÒÚÓÚ‡ R ÇçÖòçüü ëàçïêéçàáÄñàü LINE LOCK : 15,625Ɉ(H) 50 Ɉ(V) ÇçìíêÖççàâ ëËÌıÓÌËÁËÛ˛˘ËÈ ÇçÖòçàâ ÚËÔ (äÓ„‰‡ ËÒÔÓθÁÛÂÚÒfl ËÒÚÓ˜ÌËÍ ÔËÚ‡ÌËfl ÔÂÂÏÂÌÌÓ„Ó ÚÓ͇) êÂÁÍÓÒÚ¸ 540(ˆ‚ÂÚÌ)/570(˜ÂÌ/·ÂÎ) ãËÌËfl TV ëÓÓÚÌÓ¯ÂÌË «Ò˄̇Î-ÔÓÏÂı‡» éÍÓÎÓ 50‰Å åËÌËχθ̇fl ÓÒ‚Â˘ÂÌÌÓÒÚ¸ Ó·˙ÂÍÚ‡ 0.3 βÍÒ (ˆ‚ÂÚÌ) / 0.06 βÍÒ(˜ÂÌ/·ÂÎ) DAYNIGHT AUTO / EXT 20 ÍÚÂËÒÚË͇ á̇˜ÂÌË ALC/ELC ALC ãËÌÁ˚ Ò ‡‚ÚÓχÚ˘ÂÒÍÓÈ Ì‡ÒÚÓÈÍÓÈ ‰Ë‡Ù‡„Ï˚ ÇˉÂÓÎËÌÁ˚ ELC îÛÌ͈Ëfl IRIS(ÒËÒÚÂχ Û‰‡ÎÂÌÌÓ„Ó ÏÓÌËÚÓËÌ„‡ ˜ÂÂÁ ËÌÚÂÌÂÚ) ˝ÎÂÍÚÓÌÌÓ„Ó Á‡Ú‚Ó‡ (χÍÒ.1/100 Ksec) ñ‚ÂÚ̇fl ÚÂÏÔ‡ÚÛ‡ AWB/MANUAL BLC (äÓÏÔÂÌÒ‡ˆËfl ON ÔÂÂÓÚ‡ÊfiÌÌÓ„Ó Ò‚ÂÚ‡) AGC ON R Ç˚ıÓ‰ ‚ˉÂÓÒ˄̇· Ç˚ıÓ‰ ÍÓÏ·ËÌËÓ‚‡ÌÌÓ„Ó ‚ˉÂÓËÁÓ·‡ÊÂÌËfl 1V p_p 75Ω/BNC àÒÚÓ˜ÌËÍ ÔËÚ‡ÌËfl èÂÂÏÂÌ.ÚÓÍ24DZ10%(50Ɉ±0.3Ɉ), èÓÒÚÓflÌ.ÚÓÍ12DZ10%~-5% èÓÚ·ÎflÂχfl ÏÓ˘ÌÓÒÚ¸ B2391P: éÍÓÎÓ 3ÇÚ B2091P: éÍÓÎÓ 4ÇÚ ê‡·Ó˜‡fl ÚÂÏÔÂ. -10°C~+50°C ꇷӘ‡fl ‚·ÊÌÓÒÚ¸ ~90% ê‡ÁÏ ÇÂÒ 68(ò)x55(Ç)x128.5(Ñ)ÏÏ (‚Íβ˜‡fl BNC) B2391P: 450„ B2091P: 550„ 21 íÂıÌ˘ÂÒÍË ı‡‡ÍÚÂËÒÚËÍË ÚÓ‚‡‡ SCC-B2300 ÍÚÂËÒÚË͇ á̇˜ÂÌË Çˉ ÚÓ‚‡‡ ä‡Ï‡ CCTV ëËÒÚÂχ ‚¢‡ÌËfl ëàëíÖåÄ ëíÄçÑÄêíÄ íÖõë CCD 1/3” Super-HAD CCD ùÙÙÂÍÚË‚Ì˚ ÔËÍÒÂÎ˚ ë͇ÌËÛ˛˘ËÈ ÚËÔ B2391 : 768(H) x 494(V) B2300 : 510(H) x 492(V) ãËÌËfl 525, èÂÂÏÂÊÂÌË 2:1 ÇçìíêÖççüü ëàçïêéçàáÄñàü : 15,734Ɉ(H) ó‡ÒÚÓÚ‡ R 59.94 Ɉ(V) ÇçÖòçüü ëàçïêéçàáÄñàü LINE LOCK : 15,750Ɉ(H) 60 Ɉ(V) ÇçìíêÖççàâ ëËÌıÓÌËÁËÛ˛˘ËÈ ÇçÖòçàâ ÚËÔ (äÓ„‰‡ ËÒÔÓθÁÛÂÚÒfl ËÒÚÓ˜ÌËÍ ÔËÚ‡ÌËfl ÔÂÂÏÂÌÌÓ„Ó ÚÓ͇) êÂÁÍÓÒÚ¸ ëÓÓÚÌÓ¯ÂÌË «Ò˄̇Î-ÔÓÏÂı‡» B2391 : 540(ˆ‚ÂÚÌ )/570(B/W) íÇ ÎËÌËÈ B2300 : 400(ˆ‚ÂÚÌ )/420(B/W) íÇ ÎËÌËÈ éÍÓÎÓ 50‰Å (AGC OFF) åËÌËχθ̇fl ÓÒ‚Â˘ÂÌÌÓÒÚ¸ Ó·˙ÂÍÚ‡ B2391 : 0.3 βÍÒ (ˆ‚ÂÚÌ) / 0.06 βÍÒ(˜ÂÌ/·ÂÎ) DAYNIGHT AUTO / EXT 22 B2300 : 0.2 βÍÒ (ˆ‚ÂÚÌ) / 0.03 βÍÒ(˜ÂÌ/·ÂÎ) ÍÚÂËÒÚË͇ á̇˜ÂÌË ALC/ELC ALC ãËÌÁ˚ Ò ‡‚ÚÓχÚ˘ÂÒÍÓÈ Ì‡ÒÚÓÈÍÓÈ ‰Ë‡Ù‡„Ï˚ ÇˉÂÓÎËÌÁ˚ ELC îÛÌ͈Ëfl IRIS(ÒËÒÚÂχ Û‰‡ÎÂÌÌÓ„Ó ÏÓÌËÚÓËÌ„‡ ˜ÂÂÁ ËÌÚÂÌÂÚ) ˝ÎÂÍÚÓÌÌÓ„Ó Á‡Ú‚Ó‡ (χÍÒ.1/100 Ksec) ñ‚ÂÚ̇fl ÚÂÏÔ‡ÚÛ‡ AWB/MANUAL BLC ON (äÓÏÔÂÌÒ‡ˆËfl ÔÂÂÓÚ‡ÊfiÌÌÓ„Ó Ò‚ÂÚ‡) R AGC ON Ç˚ıÓ‰ ‚ˉÂÓÒ˄̇· Ç˚ıÓ‰ ÍÓÏ·ËÌËÓ‚‡ÌÌÓ„Ó ‚ˉÂÓËÁÓ·‡ÊÂÌËfl 1V p_p 75Ω/BNC àÒÚÓ˜ÌËÍ ÔËÚ‡ÌËfl èÂÂÏÂÌ.ÚÓÍ24DZ10%(60Ɉ±0.3Ɉ), èÓÒÚÓflÌ.ÚÓÍ12DZ10%~-5% èÓÚ·ÎflÂχfl ÏÓ˘ÌÓÒÚ¸ éÍÓÎÓ 3ÇÚ ê‡·Ó˜‡fl ÚÂÏÔ‡ÚÛ‡ -10°C~+50°C ꇷӘ‡fl ‚·ÊÌÓÒÚ¸ ~90% Ç̯ÌË ‡ÁÏÂ˚ 68(ò)x55(Ç)x128.5(Ñ)ÏÏ (‚Íβ˜‡fl BNC) ÇÂÒ 450„ 23 Part No.:AB68-00511B