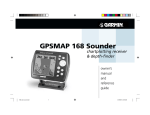
1
GPSMAP 76
owner’s
manual
&
reference
guide
covers.indd
1
03/14/01, 12:35 PM
©2001 GARMIN Corporation
GARMIN International, Inc.
1200 East 151st Street, Olathe, Kansas 66062 U.S.A.
Tel. 913/397.8200
Fax 913/397.8282
GARMIN (Europe) Ltd.
Unit 5, The Quadrangle, Abbey Park Industrial Estate, Romsey, SO51 9AQ, U.K.
Tel. 44/1794.519944
Fax 44/1794.519222GARMIN Corporation
No. 68, Jangshu 2nd Road., Shijr, Taipei County, Taiwan
Tel. 886/2.2642.8999
Fax 886/2.2642.9099
All rights reserved. Except as expressly provided herein, no part of this manual may be reproduced, copied, transmitted, disseminated, downloaded or stored in any storage medium, for any purpose without prior written consent of GARMIN Corporation.
GARMIN Corporation hereby grants permission to download a single copy of this manual onto a hard drive or other electronic
storage medium to be viewed for personal use, provided that such electronic or printed copy of this manual contains the
complete text of this copyright notice and provided further that any unauthorized commercial distribution of this manual is
strictly prohibited.
Information in this manual is subject to change without notice. GARMIN Corporation reserves the right to change or improve
its products and to make changes in the content without obligation to notify any person or organization of such changes. Visit
the GARMIN website for current updates and supplemental information concerning the use and operation of this and other
GARMIN products.
Website address: www.garmin.com
GARMIN is a registered trademark and eTrex is a trademark of GARMIN Corporation and may not be used without the express
permission of GARMIN Corporation.
March 2001
covers.indd
Part Number 190-00230-00 Rev. A
3
Printed in Taiwan
03/14/01, 11:50 AM
Registration
GPSMAP 76 Registration
Introduction
Help us better support you by completing your on-line registration
today!
Registration
Why should you register your GPSMAP 76?
• Notification of Product Updates
• Notification of New Products
• Lost or Stolen unit Tracking
Connect to our website (www.garmin.com) and look for the Product Registration link on the home page.
Thanks for choosing the GARMIN GPSMAP 76. If you have any questions
or comments regarding the use of the GPSMAP 76 you can visit our website or
contact our Customer Service Department M-F, 8:00-5:00 CST (except holidays)
at 1-800-800-1020.
F
POWER
If you have previously registered a GARMIN product purchase using
a mail-in registration card, we invite you to reregister that product
using our NEW on-line system. Many services provided by our new
product registration system are now being automated and reregistering your purchase ensures you the best possible support from
GARMIN.
1
190-00230-00.indd
1
03/15/01, 9:24 AM
WARNING: If you choose to use the GPSMAP 76 in a vehicle, it is the sole
responsibility of the owner/operator of the GPSMAP 76 to secure the GPS unit so
that it will not cause damage or personal injury in the event of an accident. Do
not mount the GPSMAP 76 over airbag panels or in a place where the driver or
passengers are likely to have an impact with it in an accident or collision.
Introduction
Warnings and Cautions
WARNING: If you choose to use the GPSMAP 76 in a vehicle, it is the
sole responsibility of the operator of the vehicle to operate the vehicle in a safe
manner, maintain full surveillance of all driving conditions at all times, and never
become distracted by the GPSMAP 76 to the exclusion of safe operating practices.
It is unsafe to operate the GPSMAP 76 while you are driving. Failure by the
operator of a vehicle equipped with an GPSMAP 76 to pay full attention to
operating the vehicle and road conditions while the vehicle is in motion could
result in an accident or collision with property damage and personal injury.
CAUTION: IT IS THE USER’S RESPONSIBILITY TO USE THIS PRODUCT
PRUDENTLY. THIS PRODUCT IS INTENDED TO BE USED ONLY AS A TRAVEL
AID AND MUST NOT BE USED FOR ANY PURPOSE REQUIRING PRECISE
MEASUREMENT OF DIRECTION, DISTANCE, LOCATION, OR TOPOGRAPHY.
CAUTION: The Global Positioning System (GPS) is operated by the government of the United States, which is solely responsible for its accuracy and
maintenance. The system is subject to changes which could affect the accuracy
and performance of all GPS equipment. Although the GPSMAP 76 is a precision
electronic NAVigation AID (NAVAID), any NAVAID can be misused or misinterpreted and, therefore, become unsafe.
2
190-00230-00.indd
2
03/15/01, 9:24 AM
The GPSMAP 76 complies with Part 15 of the FCC limits for Class B digital
devices. This equipment generates, uses, and can radiate radio frequency energy
and, if not installed or used in accordance with the instructions may cause
harmful interference to radio communications.
There is no guarantee that interference will not occur in a particular
instance. If this equipment does cause harmful interference to other equipment,
try to correct the problem by relocating the equipment.
Introduction
FCC Compliance Statement
Consult an authorized GARMIN dealer or other qualified service technician
if the problem cannot be corrected. Operation is subject to the following conditions: (1) This device cannot cause harmful interference, and (2) this device must
accept any interference received, including interference that may cause undesired
operation.
The GPSMAP 76 does not contain any user-serviceable parts. Repairs
should be made only by an authorized GARMIN service center. Unauthorized
repairs can void the warranty.
3
190-00230-00.indd
3
03/15/01, 9:24 AM
The GPSMAP 76 is a 7.5 ounce, 12 channel, hand held GPS receiver with a
built-in Quad Helix antenna. The GPSMAP 76 has nine Keys located on the front of
the unit, that allow the user to quickly access all of the units functions. The GPSMAP
76 has a large 180 X 240 pixel, 4 level gray monochrome display for easy viewing
Introduction
The GPSMAP 76 is a full function GPS with a built-in North American base
map that includes Interstate and State Highways and Exit Information. Using
MapSource™, GARMIN’s map data software (not included), you could choose to have
the GPSMAP 76 display a variety of different map information. We currently offer several mapping options including our; Metroguide™, Topo, Lights and Waterways,and
Fishing Hot Spots data. Check your local dealer or our web site (www.garmin.com)
for a complete listing of MapSource products.
Features
GARMIN designed your GPSMAP 76 with the user in mind. The GPSMAP 76
is waterproof to IPX 7 standards, floats and is rugged enough to endure the most
trying use and GARMIN’s friendly user interface will allow you to be navigating with
your GPS in no time. Your GPSMAP 76 can provide one more critical benefit, peace
of mind. With your GPSMAP 76 you will know where you are, where you’ve been
and where you’re going. And since you’ll always know the way back home, you can
concentrate on what you set out to do, explore the great outdoors.
Thank you for choosing GARMIN!
NOTE: You should always be prepared and capable of
navigating without the GPSMAP 76. It is designed to
compliment other forms of basic navigation, not entirely
replace them.
4
190-00230-00.indd
4
Other features include:
Waypoints: 500 with name and graphic symbol.
Tracks: Automatic Track Log; 10 saved Tracks.
Routes: 50 Routes that let you navigate through a set of 50 waypoints.
Trip Computer: Trip Odometer, Stopped Time, Moving Average Speed,
Moving Time, Overall Average Speed, Total Time, Max Speed and Odometer.
Tides: Displays tide information graphically.
Sun and Moon: Sunrise, Sunset, Moonrise, Moonset, Position in Sky, and
Moon Phase.
Hunt and Fish: Times
03/15/01, 9:24 AM
Introduction....................................1-7 Main Menu.................................. 37-59
Trip Computer............................ 37
Registration ........................................ 1
Tracks.................................... 38-39
Warnings and Precautions .................. 2
Waypoints .................................. 40
FCC Compliance Statement ............... 3
Points of Interest......................... 41
Features.............................................. 4
Cities .......................................... 42
Table of Contents ............................... 5
Exits ...................................... 42-43
“How To” Index.................................. 6
Addresses ................................... 44
GPSMAP 76 Unit Features.................. 7
Intersections ............................... 44
Section One: Getting Started .......8-20
Routes ................................... 45-48
Proximity.................................... 49
Installing the Batteries ........................ 8
Celestial................................. 50-52
Installing the Lanyard......................... 9
MapSource Info .......................... 53
Interface Keys................................... 10
Setup Menu- General Tab ........... 54
Main Pages ....................................... 11
Setup Menu-Time Tab ................ 55
Using the Built-In Simulator............. 12
Setup Menu-Units Tab................ 56
Using the Simulator.......................... 13
Setup Menu-Location Tab........... 57
Entering Data .............................. 14-15
Setup Menu-Alarms Tab ............. 58
Basic Navigation.......................... 16-20
Setup Menu-Interface Tab........... 59
Initializing the GPSMAP 76 .............. 18
Introduction
Table of Contents
Appendix G: Loran TD................ 69-70
Appendix H: Accessories .................. 71
Appendix I: Index ...................... 72-74
Appendix J: Warranty ..................... 75
Section Two: Reference ..............21-59 Appendices.................................60-75
Initializing the GPS Receiver........ 21-22
GPS Information Page ................. 23-25
Map Page..................................... 26-27
Map Page Options ....................... 28-33
Pointer Page ............................... 33-34
Highway Page.............................. 34-36
Appendix A: Specifications............... 60
Appendix B: Wiring and Interfacing . 61
Appendix C: Time Offsets ................ 62
Appendix D: Map Datums........... 63-64
Appendix E: Navigation Terms .... 65-66
Appendix F: Messages ................. 67-68
5
190-00230-00.indd
5
03/15/01, 9:24 AM
TO DO THIS:
SEE PAGE(S):
Turn the unit on or off . . . . . . . . . . . . . . . . . . . . . . . . . . . . . . . . . . . . . . 10, 12
Initialize the GPS receiver (first time use) . . . . . . . . . . . . . . . . . . . . . 18, 21-22
Adjust screen contrast or backlighting . . . . . . . . . . . . . . . . . . . . . . . . . . 10, 54
Enter data and select options . . . . . . . . . . . . . . . . . . . . . . . . . . . . . . . . . 14-15
Learn how the operate the unit’s function keys. . . . . . . . . . . . . . . . . . . . 10, 13
Mark your present location as a waypoint . . . . . . . . . . . . . . . . . . . . . . . . . . 16
Go to a destination . . . . . . . . . . . . . . . . . . . . . . . . . . . . . . . . . . . . . . 17, 19-20
Create and use a route . . . . . . . . . . . . . . . . . . . . . . . . . . . . . . . . . . . . . . 45-48
Learn about the Map page . . . . . . . . . . . . . . . . . . . . . . . . . . . . . 11, 16, 26-27
Pan using the map arrow . . . . . . . . . . . . . . . . . . . . . . . . . . . . . . . . . . . . . . . 26
Zoom in or out on the Map page . . . . . . . . . . . . . . . . . . . . . . . . . . . . . . 10, 26
Reconfigure the Map page display . . . . . . . . . . . . . . . . . . . . . . . . . . . . . 29-33
Access the Main Menu . . . . . . . . . . . . . . . . . . . . . . . . . . . . . . . . . . . . . . 10, 37
Change units of measure (statute, nautical, metric) . . . . . . . . . . . . . . . . . . . 56
Change the displayed time (zone) . . . . . . . . . . . . . . . . . . . . . . . . . . . . . . . . 55
Setup Loran TD . . . . . . . . . . . . . . . . . . . . . . . . . . . . . . . . . . . . . . . . . . . 69-70
View tide information. . . . . . . . . . . . . . . . . . . . . . . . . . . . . . . . . . . . . . . 50-51
View celestial information . . . . . . . . . . . . . . . . . . . . . . . . . . . . . . . . . . . 50-52
Set Alarms . . . . . . . . . . . . . . . . . . . . . . . . . . . . . . . . . . . . . . . . . . . . . . . . . . 58
See current position, date and time . . . . . . . . . . . . . . . . . . . . . . . . . . . . . . . 23
View a unit message . . . . . . . . . . . . . . . . . . . . . . . . . . . . . . . . . . . . . . . . 67-68
Introduction
“How To” Index
H
The list to the right is provided to help you quickly find
some of the more important procedures you will use on
your new GPSMAP 76.
6
190-00230-00.indd
6
03/15/01, 9:24 AM
Introduction
Internal Antenna
GPSMAP 76
External Antenna Connection
Battery Compartment
Interface Keys
External Data/Auxilary
Power Port
180 x 240 Four Level
Gray, Backlight Display
7
190-00230-00.indd
7
03/15/01, 9:24 AM
Getting Started
Turn D-ring 1/4 turn counterclockwise and remove cover
Installing the Batteries
Please dispose of used
batteries properly!
Please dispose of used
batteries properly!
Remove the batteries from your GPSMAP 76 if you don’t
expect to use it for several months. Be sure to observe the
proper polarity when inserting the batteries. Follow the battery manufacturer’s instructions on the proper care and handling of the batteries.
Installing the batteries
Installing the batteries:
1. Remove the Battery Cover by turning the D-ring 1/4 turn counter clockwise
and pulling the cover loose.
2. Check the battery polarity with the molded diagram in the battery compartment and install the batteries inserting the end toward the spring first.
3. Re-install the Battery Cover by reversing step 1.
8
190-00230-00.indd
8
03/15/01, 9:24 AM
Getting Started
Installing the Lanyard
To install the Lanyard:
1. Place the loop of the Lanyard through
the slot opening at the bottom of the
GPSMAP 76.
2. Route the strap through the loop and
pull tight.
9
190-00230-00.indd
9
03/15/01, 9:24 AM
IN — The Zoom IN Key is used to decrease the map scale. When you decrease
the map scale, you will view a smaller area on the map with greater detail.
OUT — The Zoom OUT Key is used to increase the map scale. When you
increase the map scale, you will view a larger area on the map with less
detail.
NAV / MOB — The NAV Key is used to begin or stop navigation. If the
NAV Key is pressed and held down, the GPS stores the current location (a
man overboard point) and gives you the opportunity to begin immediate
navigation to that point.
PAGE — The PAGE Key, will cycle you through the five main display pages
in sequence. The PAGE Key will end an operation in progress and return
you to the main page.
— The POWER Key is used to turn the unit on and off. To turn the
unit off press the POWER Key and hold it. The POWER Key is also used
to display the adjustment window for the backlight and contrast adjustment.
To activate the backlight/contrast adjustment window, with the unit on, press
and release the POWER Key.
MENU — The MENU Key is used to display page option menus. If pressed
twice, the Main Menu will be displayed.
QUIT — The QUIT Key, will cycle you through the five main display pages
in reverse sequence. The QUIT Key will end an operation in progress and
display the previous page.
ENTER — The ENTER Key is used to activate a data field or confirm a
selection. If the ENTER Key is pressed and held, the GPSMAP 76 will store
the current location and display the Mark Waypoint page.
ROCKER — The ROCKER Key, located in the center of the keypad, is used to
control the Up/Down and Left/Right movement of the cursor on the display
pages and during data entry.
Getting Started
Interface Keys
10
190-00230-00.indd
10
03/15/01, 9:24 AM
This exercise will provide you with the knowledge and skill to navigate the
pages and menus of your GPSMAP 76 with confidence.
As we progress through this Owner’s Manual you will often be directed to
press a specified Interface Key or highlight a field. When you are directed to press
a Key, you should press, then release the Key. If the Key needs to be held down
for a period of time, the instruction will tell you. The position of the highlight
is controlled by the ROCKER Key. When a field is highlighted, a dark strip
will encompass the field.
Getting Started
Main Pages
Let’s start by taking a look at the five main display pages. They are the GPS
Information Page, Map Page, Pointer Page, Highway Page and the Active Route
Page. You can cycle through these pages by pressing either the PAGE or QUIT
Key. When the GPSMAP 76 is turned on a Welcome Page will be displayed,
followed by an Information Page and a Warning Page. Acknowledge each of these
pages by pressing the PAGE Key while they are displayed. The GPS Information
Page will now be displayed.
GPS Information Page
Map Page
Pointer Page
Highway Page
Active Route Page
11
190-00230-00.indd
11
03/15/01, 9:24 AM
While learning the basic operation of the GPSMAP 76, let’s put the unit
into Simulator Mode. The Simulator Mode is great for practicing with the unit
while inside and satellite signals are not available. When the GPSMAP 76 is in
Simulator Mode, the GPS receiver is turned off (this will help conserve battery
power) and the unit cannot be used for actual navigation.
Getting Started
Using the Built-in Simulator
I
NOTE: Do not try to navigate using the Simulator Mode. While in the
Simulator Mode, the GPS receiver is turned off. Any Satellite Signal
Strength Indicators displayed are only simulations and do not indicate
the strength of actual satellite signals.
Activating the Simulator Mode
Press the POWER Key to turn the unit on. The Welcome Page will be
displayed, press the PAGE Key twice to display the GPS Information Page.
Putting the GPSMAP 76 in Simulator Mode:
1. With the GPS Information Page displayed press the MENU Key.
2. Using the ROCKER Key, highlight ‘Start Simulator’ then press the ENTER Key
to accept your selection.
When the Simulator Mode is active, the message ‘Simulating GPS’ will be
displayed along the top of the GPS Information Page.
Highlighted Field
12
190-00230-00.indd
12
03/15/01, 9:24 AM
The Interface Keys are your link with the GPSMAP 76. Let’s take a few
minutes and see what some of the Interface Keys are used for.
With the GPS Information Page displayed, press the PAGE Key several times.
Notice that each time you press the PAGE Key the next main page will be
displayed. Do the same with the QUIT Key. Notice the QUIT Key acts the same
as the PAGE Key except the pages are displayed in a reverse sequence. Press the
PAGE Key until the Map Page is displayed.
Getting Started
Using the Interface Keys
Each main page has an Options Menu. This Option Menu contains the setup
options, and/or functions that apply to that page.
To display the Options Menu:
1. Press the MENU Key.
Selecting an item on the Options Menu:
1. Using the ROCKER Key, highlight ‘Setup Map’.
2. Press ENTER.
Many of the Option and Setup menus in the GPSMAP 76 are arranged in a
‘Tab’ layout. Use the Left /Right ROCKER Key to move from Tab to Tab.
We will look at the options in depth in the Reference Section of this manual.
For now press either the PAGE or QUIT Key. Notice that either of these Keys
stops the current function and returns you to the main page. This is good to
know as you are learning how to use this unit. If you find that you are lost,
or if you start a function that you really did not want, just press the PAGE or
QUIT Key.
Interface Keys
13
190-00230-00.indd
13
03/15/01, 9:24 AM
There will be many times that you may need to enter data. An example is
naming a waypoint. The ROCKER Key is used to navigate through menu items
and to enter data.
Getting Started
Let’s combine a couple of lessons. We will create a new waypoint, enter a
waypoint name, and assign a symbol to the waypoint.
Entering Data
Symbol Field
The term ‘Waypoint’ may be new to you. You will find the term Waypoint
is used frequently when talking about navigation. A Waypoint is a position
stored in the unit’s memory. Waypoints are used for direct navigation or to build
a Route.
Name Field
Creating or ‘Marking’ a waypoint with the GPSMAP 76 is easy. The unit has
to be turned on and receiving at least three satellites (or simulating navigation)
to mark a waypoint.
Marking a waypoint:
1. Press and hold the ENTER Key.
When you held the ENTER Key the GPSMAP 76 captured it’s current position, and displayed the Mark Waypoint Page. You will notice that the unit
assigned a square as the default symbol and a number as the default name. The
‘OK’ Button is highlighted, pressing the ENTER Key will store the new waypoint
using the default settings for the symbol and name, but let’s change them to
something more meaningful.
Mark Waypoint Page
Changing the symbol:
1. Using the ROCKER Key, highlight the Symbol Field, then press ENTER.
2. Using the ROCKER Key, highlight the ‘Scenic Area’ symbol, then press ENTER.
14
190-00230-00.indd
14
03/15/01, 9:24 AM
Changing the name:
1. Press the ROCKER Key right to highlight the Name Field then press the
ENTER Key.
The Name Field will become active and the first zero will be highlighted.
Notice that there are now ten placeholders for alpha-numeric characters displayed.
Getting Started
1. Press the ROCKER Key to the left to clear the field.
Entering Data
2. Press the ROCKER Key up, scroll through the alpha-numeric list until the
letter ‘C’ is selected.
3. Press the ROCKER Key right to move to the next placeholder.
4. Press the ROCKER Key down, scroll through the alpha-numeric list until the
letter ‘R’ is selected.
You should be starting to get the feel of it. Continue entering letters until you
have spelled the word CREEK.
5. With the letter ‘K’ highlighted, press the ENTER Key to accept the name.
When you have finished renaming the waypoint you will need to store it in
the units’ memory.
Entering a name
To store the waypoint:
1. Using the ROCKER Key, highlight the ‘OK’ Button and press the ENTER Key.
UP
These are the same steps that you will use to enter names and change numbers
and select options in all of the fields in the GPSMAP 76.
LEFT
Here are a couple of tips:
RIGHT
1. If you press and hold the ROCKER Key while scrolling through the alphanumeric list, it will move quickly.
2. You can scroll through the alpha-numeric list in either direction.
3. Don’t press the ENTER Key until you have finished entering the data.
Remember, use the ROCKER Key to move to the next placeholder.
190-00230-00.indd
15
DOWN
Rocker Key Directions
15
03/15/01, 9:24 AM
You should now have enough knowledge to navigate through the main pages,
Option Menus and enter data into your GPSMAP 76. Now let’s learn how to
navigate!
Getting Started
Basic Navigation
The main use of a GPS is to be able to navigate to a known position. We have
already created a waypoint and named it CREEK. Let’s create another waypoint
on the Map Page using a different method, the Map Pointer.
Bearing and Distance from Pointer
to current GPS location.
Press the PAGE Key until the Map Page is displayed. Press the IN Key several
times until the Zoom Scale in the lower left corner of the Map Page reads 800ft.
The current GPS location is indicated by the triangle in the center of the map.
To display the Map Pointer:
1. Press the ROCKER Key any direction.
Using the ROCKER Key you can pan the Map Pointer around the map. As
you move around the map, the direction and distance from the Map Pointer to the
current GPS location is displayed along the top of the map.
To mark a waypoint using the Map Pointer:
1. With the Map Pointer at a location on the map about one mile from your
current location, and not on a road or map feature, press the ENTER Key.
The location of the Map Pointer will be captured and the New Waypoint Page
will be displayed. Change the waypoint name to MAP 1, and store the waypoint
in memory by highlighting the ‘OK’ Button then pressing the ENTER Key. Press
the QUIT Key to hide the Map Pointer and center the map on the current GPS
location.
Now that we have a destination, navigating to it is just a step away.
Map Pointer
16
190-00230-00.indd
16
03/15/01, 9:24 AM
Going to a waypoint:
1. Press the NAV Key.
2. Highlight ‘Go To Point’ then press the ENTER Key.
3. Highlight ‘Waypoints’ then press the ENTER Key.
4. Highlight ‘MAP 1’ then press the ENTER Key.
5. Highlight the Goto Button then press the ENTER Key.
The GPSMAP 76 is now navigating to the waypoint MAP 1.
For a GPS to navigate it has to be moving, fortunately you can simulate
movement in the GPSMAP 76. Press the PAGE Key until the Pointer Page is
displayed. Along the top of the Pointer Page there are several data fields, the
Speed Field is located in the upper left corner. To simulate movement, press the
ROCKER Key up one time. This will set a speed of 10 miles per hour. If you
continue to press or hold the ROCKER Key, the speed will increase in 10 mph
increments. For our purpose, 10 mph is fine.
On the Pointer Page are a Pointer and Compass Ring. The Pointer will always
point toward your destination (Bearing) while the Compass Ring reflects the
direction that you are traveling (Track). In short, when you are headed directly
toward your destination, the Pointer will be pointed toward the top of the display,
aligned with the vertical line on the Compass Ring. If you are no longer heading
toward your destination, the Pointer will turn away from the top of the display
to point toward your destination. To get headed toward your destination again,
turn until the Pointer is realigned with the vertical line in the Compass Ring and
pointed toward the top of the display.
The simulator will let you change the Track so that you can see what will
happen. Press the ROCKER Key to the right until your Track has changed about
40°. This will simulate a direction change to the right. The Pointer should now
be pointed toward the left of the display indicating that you need to turn to
the left to head toward the waypoint. This is exactly what will happen during
actual navigation.
190-00230-00.indd
17
Getting Started
Basic Navigation
Selecting a waypoint for navigation
17
03/15/01, 9:25 AM
Press the ROCKER Key to the left simulating a left turn, until the Pointer
is realigned with the vertical line in the Compass Ring. You are now headed
toward the waypoint.
Getting Started
Now that we have now gone through the basic operation of the unit using the
simulator, it is time to do some actual navigation!
Initializing the GPSMAP 76
To turn off the simulator:
1. With the GPS Information Page displayed, press the MENU Key.
2. Select ‘Stop Simulator’ then press the ENTER Key.
Before the GPSMAP 76 can be used for navigation the receiver has to be
initialized. This process is automatic and will only take a few minutes.
Take the unit outside where it will have an unobstructed view of the sky and
turn it on. The unit will search for satellite signals and begin to gather, and store
the information that it needs to become operational. This process should take
no more than five minutes. When the unit is operational the message ‘3D GPS
Location’ will be displayed on the GPS Information Page.
If for some reason the unit is not able to gather the necessary satellite
information an options page will be displayed. Select ‘New Location’ then
‘Automatic’ and allow the unit to continue initializing. This selection will force
the unit to search for satellites. It may take a little longer for the unit to become
operational using this method.
Turning off the Simulator
Starting to navigate
With the unit on and displaying ‘3D GPS Location’ on the GPS Information
Page, mark a waypoint at your current location. Name this waypoint ‘HOME’,
assign the ‘Residence’ Symbol and store the waypoint.
18
190-00230-00.indd
18
03/15/01, 9:25 AM
Before we take off walking lets clear the Track Log. The Track Log is the bread
crumb trail left on the Map Page and Highway Page.
To clear the Track Log:
1 Press the MENU Key twice to display the Main Menu.
2. Highlight Tracks then press the ENTER Key.
3. Highlight the ‘Clear’ Button then press the ENTER Key.
4. Highlight the ‘Yes’ Button then press the ENTER Key.
Getting Started
Basic Navigation
DESTINATION
4. Press the PAGE Key until the Map Page is displayed.
Current
Track 45°
Begin walking holding the GPSMAP 76 in front of you with the top of the
unit pointed toward the sky. As you move, you will see that the unit leaves a
bread crumb trail on the map indicating where you have been. Walk at least a
two minutes in one direction and then make either a right or left turn. Continue
walking in this new direction for approximately another two minutes.
Let’s start the trip back. Remember that GPS provides you with direct, straight
line navigation. It is not always possible to navigate using the most direct route,
don’t worry, the GPSMAP 76 will continuously update your Track and Bearing,
always pointing out the shortest route to your destination.
Bearing 000°
from START to
DESTINATION
To begin navigation:
START
1. Press the NAV Key.
Bearing 340° from current location
to DESTINATION
2. Select ‘Go To Point’ then press the ENTER Key.
3. Select ‘Waypoints’ then press the ENTER Key.
4. Select ‘HOME’ then press the ENTER Key.
5. With the ‘Goto’ Button highlighted, press ENTER.
The GPS provides a straight line, direct navigation course
to your destination. Since it is not always possible to
follow a straight line from start to finish, as you move,
the Pointer will always point toward your destination and
the Compass Ring will always show your current track.
Continued on next page
19
190-00230-00.indd
19
03/15/01, 9:25 AM
Start walking, as you move you will see that the Pointer is pointed at your
destination. As soon as you are able, turn toward the Pointer until it is aligned
with the vertical line in the Compass Ring. Continue walking, as you approach
your HOME waypoint a message will be displayed alerting you that you have
arrived.
Getting Started
Congratulations, you should have enough basic knowledge of your GPSMAP
76 to begin navigating on your own. Be safe; remember that while the GPS is very
reliable, you should always have a backup means of navigation.
Basic Navigation
DESTINATION
START
When you are able to turn toward the destination, follow
the Pointer until it points toward the top of the display
and aligns with the line in the Compass Ring. When the
Pointer and Line are aligned, your Track and Bearing will
be equal and you will be headed toward your destination.
When you are near your destination, a message ‘Arriving
at Destination’ will be displayed.
20
190-00230-00.indd
20
03/15/01, 9:25 AM
The Reference Section of this manual will describe the Main Display Pages
and their options in detail. The Getting Started section described the process of
navigating the Main Display Pages and the Option Menus. While this section will
provide some direction on how to select an item, its main intention is to describe
each Main Page and it’s Option Menu in detail.
Getting
Reference
Started
Initializing the GPS Receiver
Initializing the GPS Receiver
Before the GPSMAP 76 can be used for navigation, the GPS receiver must be
initialized. The GPS receiver should only need to be initialized the first time the
unit is used, or if it has been stored several months.
The GPSMAP 76 stores orbital data for each satellite in an Almanac. The
orbital data is supplied in the satellite signals. Each time the unit is used, the
Almanac is updated. This is how the GPSMAP 76 knows which satellites to
search for. If you do not use your GPS for several months, or move the unit
several hundred miles between uses, the Almanac can become “cold”, that is
to say that the orbital information is no longer valid. If the Almanac is “cold”,
your unit may have trouble locking on to satellite signals. If the unit is unable
to receive enough satellite signals to determine its Location’, it will display an
options menu.
Initializing the GPS Receiver:
1. With fresh batteries installed, take the unit outside where a clear 360° view
of the sky can be obtained.
Ready to Navigate
2. Turn the unit on and hold it in front of you with the top of the unit
tilted upward. Follow the screen prompts, pressing PAGE to display the GPS
Information Page.
3. The initialization process is automatic. It should take the GPSMAP 76
no longer than five minutes to acquire enough satellite signals to become
operational. When the unit is able to navigate, it will display either 2D GPS
Location or 3D GPS Location in the Receiver Status Field.
190-00230-00.indd
21
21
03/15/01, 9:25 AM
Initialization Options
Getting
Reference
Started
Initializing the GPS Receiver
If the GPSMAP 76 is unable to determine its location’, an options menu will
be displayed. Depending on the situation, select an option to help the unit
acquire satellites. To select an option, place the highlight over the option then
press ENTER.
Start Simulator — The Simulator can be used when you are indoors and the
GPS is unable to locate satellites. When you select ‘Simulator’, the GPS
receiver is turned off saving battery power.
New Location — If you have moved the unit to another state, province, or
country, and you are having trouble locking onto satellite signals select ‘New
Location’.
When you select ‘New Location’, another menu will be displayed. This menu
contains the options ‘Automatic’ or ‘Use Map’. If you select ‘Automatic’ the
unit will switch to the AutoLocate mode and begin searching for satellites. If
you select ‘Use Map’ you can use the Pointer on the Map Page to select your
approximate location and the unit will continue to acquire satellites normally.
‘Automatic’ may take longer to acquire satellites.
Stored w/o Batteries — If you have stored the unit without batteries the date
stored in the GPS may be incorrect. To check the date, highlight ‘Stored w/o
Batteries’ and verify the date displayed. If the date is incorrect select ‘Stored
w/o Batteries to search for satellites.
Initialization Options
Continue Acquiring — Select this option if you are in an area where the satellite
signals are being temporarily blocked.
22
190-00230-00.indd
22
03/15/01, 9:25 AM
GPS Information Page
The GPS Information Page displays your speed, elevation, the estimated
accuracy, receiver status, satellite locations, satellite signal strength, the date, time
and the GPS receiver’s current location.
Getting
Reference
Started
Speed, Elevation and Estimated Accuracy
GPS Information Page
When the GPS is receiving at least three satellite signals, it will provide you
with the current GPS Speed, and the estimated Accuracy of the GPS Location.
The GPS must be receiving at least four satellite signals to report the Elevation.
Current GPS Receiver status
The current status of the GPS receiver will always be displayed.
Autolocate — Forces the receiver to search for each satellite individually.
Acquiring Satellites — The receiver will begin in this mode each time the unit
is turned on. The GPS receiver will remain in this mode until it has acquired
at least 3 satellite signals.
2D GPS Location — Indicates that the receiver is only using three satellite
signals. When a 2D GPS Location is achieved, the GPS will display your
current position but is incapable of providing an altitude reading.
3D GPS Location — Indicates the receiver is currently using at least four
satellite signals and is capable of providing your current position and altitude.
2D Differential Location — Indicates the receiver is using DGPS or WAAS
differential data on three satellites.
Data Fields
Satellite
Signal
Strength
Receiver
Status
Satellite
Location
Time
Date
Location
3D Differential Location — Indicates the receiver is using DGPS or WAAS
differential data on at least four satellites.
Lost Satellite Reception — Indicates that the GPS receiver has lost satellite
reception.
Simulating GPS — Indicates the GPSMAP 76 is running in Simulator Mode and
the GPS receiver is turned off. It is important to remember when you are
using the Simulator, the GPSMAP 76 can not be used for actual navigation.
GPS Information Page
23
190-00230-00.indd
23
03/15/01, 9:25 AM
Satellite Location
The location of each available satellite is displayed over two location rings.
The outer ring represents the horizon, the inner ring represents 45° above the
horizon and the center represents directly overhead. When the unit is using
a satellite for navigation, the satellite number will become highlighted on the
location rings. The unit can be set to display satellite location with North, or your
current track toward the top of the display.
Getting
Reference
Started
GPS Information Page
Satellite Strength Indicator Bars
The Satellite Strength Indicator Bars not only show the strength of the signal
being received, they also show the status of the signal. The bars will be either
shaded with a light grey, or filled with solid black. If the bar is grey, it means
that the GPS is receiving a signal from the satellite and is in the process of storing
orbital data provided in the GPS signal. When the bar turns solid black, the GPS
is using the satellite signal for navigation. A “D” in or above the bar means that
differential corrections are being applied to that satellite.
Date, Time and Current Location
The GPS gets date and time information from the satellites. The satellites
are equipped with an atomic clock that is very accurate. Since the GPS clock
is derived from timing information sent from the satellite, the GPS clock is also
very accurate.
Satellite Sky VIew
When the GPS receiver has achieved a 2D or 3D GPS Location, the current
location will be displayed in the selected Location Format.
24
190-00230-00.indd
24
03/21/01, 10:37 AM
GPS Information Page Options Menu
To activate the Options Menu from the GPS Information Page, press the
MENU Key. To select an option, highlight the desired selection then press
ENTER.
Start/Stop Simulator — This option is used to Start or Stop the Simulator.
Getting
Reference
Started
GPS Information Page
Track Up/North Up — This option determines if the satellites are displayed with
the rings oriented with North toward the top of the display or your current
track toward the top of the display.
New Elevation — This option can be used to enter a different elevation. If
the GPS has a 2D GPS Location, entering a known elevation can increase
the GPS accuracy.
New Location — if you have moved the unit to another state, province, or
country, and you are having trouble locking onto satellite signals select ‘New
Location’.
When you select ‘New Location’, an options menu will be displayed. This
menu contains the options ‘Automatic’ or ‘Use Map’. If you select ‘Automatic’
the unit will switch to AutoLocate and begin searching for satellites. This
method can take up to five minutes for the unit to begin navigation.
If you select ‘Use Map’ you can use the Pointer on the Map Page to select your
approximate location and the unit will continue to acquire satellites normally
using the almanac for satellite reference. Using this method, the unit does not
need to reiniitalize and should receive satellite signals quickly.
Satellite Page Options
If the unit is in the ‘Simulator’ mode, the ‘Use Map’ feature will allow you to
move the simulated current location.
25
190-00230-00.indd
25
03/15/01, 9:25 AM
Map Page
The GPSMAP 76 comes with a built-in basemap of North America that
includes a database of Cities, Interstate, State and County Highways, Exit information, Lake and River outlines and Railway Lines. The standard basemap can be
enhanced using GARMIN’s MapSource products.
Getting
Reference
Started
Map Page
Changing the Zoom Scale
You can change the Zoom Scale on the Map Page allowing you to either view
a smaller area in greater detail or a larger area with less detail. As referred to
in this manual, when you decrease the Zoom Scale you will view a smaller area
with greater detail. The current Zoom Scale setting is displayed in the lower left
corner of the Map Page. If ‘Overzoom’ is displayed under the scale, no further
map information is available.
User Selectable Data Fields
To change the Zoom Scale:
1. Press the IN Key to decrease the Zoom Scale.
2. Press the OUT Key to increase the Zoom Scale.
Map Page Options
To access the Map Page Options, with the Map Page displayed, press the
MENU Key. To select an option from the Menu, highlight the desired selection
then press ENTER.
Full Screen Map — This option hides the data fields and expands the map to
include the entire display. When ‘Full Screen Map’ is selected the option will
change to ‘Show Data Fields’.
Measure Distance — This option will allow you to measure the distance
between two points. As you move the Map Pointer, the Distance, Bearing and
Location of the Pointer are displayed at the top of the map. To measure the
distance between to map points, press ENTER to set a reference, then move
the Map Pointer to the other location. The Bearing, and Distance are displayed
below the data fields.
Zoom Scale
26
190-00230-00.indd
26
03/15/01, 9:25 AM
Show Next Street — This option adds a window below the Data Fields that
will display the name of the next cross street. This will only function if ‘Lock
to Road’ is ‘On’ (see Setup Map — ‘Other’Tab on page 33) and MapSource
Metroguide or City Navigator data is loaded in the unit.
Setup Page Layout — This option allows you to select the number of data
fields rows and the size of text used in the fields. You have the option of
displaying, None, Small (1Row), Small (2 Rows), Small (3 Rows), Medium
(1 Row), Medium (2 Rows), Medium (3 Rows), Large (1 Row), or Large (2
Rows). To select an option, highlight the desired selection then press ENTER.
The new configuration will be displayed on the map.
Getting
Reference
Started
Map Page
Change Data Fields — This option allow you to select the type of data that
you want displayed in the data fields. To change a data type, place the
highlight over the desired data field, then press ENTER. Using the ROCKER,
scroll through the available selections. With the data type highlighted, press
ENTER to accept the selection.
Setup Map — This option contains the Map Page Setup features. The features
are arranged on a tab menu making it easy to locate the different setup items.
The ‘Map’, ‘Waypoint’, ‘Point’, ‘Line’, ‘Area’, ‘Topo’, ‘City’, ‘Road’, and ‘Other’
Tabs have setting for ‘Text’, ‘Zoom’ or both. Please read the description of
these settings to understand how they affect the display characteristics of the
options on the Map Page.
Map Page Options
• Text Setting — The ‘Text’ setting allows you to determine the size of text
used when displaying a name or label for an item on the Map Page. There are
four options for the ‘Text’ setting, Off, Small, Med, and Large. If you select
‘Off’, the item will be displayed on the map without a name or label. If you
select ‘Small’, ‘Med’ or ‘Large’, the name, the item will be displayed with a
name or label in the text size selected.
27
190-00230-00.indd
27
03/15/01, 9:25 AM
• Zoom Setting — This setting determines when items will be displayed on
the map. You have the option of selecting ‘Off’, ‘Auto’ or a ‘Zoom’ Scale that
coincides with the Zoom Scales for the map.
Getting
Reference
Started
If you select ‘Off’, the items for that option will not be displayed on the Map
Page. If you select ‘Auto’, the GPSMAP 76 will automatically determine the
zoom level at which to display the selected items. If you select a scale setting,
the items will be displayed on the map only when the Map Zoom Scale is at
or less than the selected scale .
Map Page Options
As an example, if you select 500ft as ‘Zoom’ Scale setting, the selected items
will only be displayed when the Map Zoom Scale is at 500ft or less.
Setup Map — ‘General’ Tab
The ‘General’ Tab contains the settings for Detail, Orientation, Colors, and
Auto Zoom. Below is a description of each feature. To change a setting,
highlight the appropriate field then press ENTER. Make your selection, then
press ENTER to accept the new selection.
Detail — Settings: Most, More, Normal, Less, and Least. The Detail settings
allow you to control the amount of map data displayed on the unit. If you
select a setting with high detail, the screen redraw times will be slower.
Orientation — Settings: North Up, Track Up, and Course Up. This options
allows you to determine how the map is displayed. If ‘North Up’ is selected,
North will always be at the top of the display. If ‘Track Up’ is selected, your
current track will always be toward the top of the display. If ‘Course Up’ is
selected, the active course line will always be toward the top of the display. If
you have ‘Course Up’ selected and do not have an active course, your current
track will be toward the top of the display.
Setup Map — ‘General’ Tab
28
190-00230-00.indd
28
03/15/01, 9:25 AM
Colors — This option gives you the ability to configure the map to display
either land or water as white. If you select ‘Land’ the land portion of the
display will be lighter in color than the water. If you select ‘Water’ the water
portion of the display will be lighter in color than the land.
Auto Zoom — This option allows you to have the map automatically zoom in
on a waypoint as you approach it.
Getting
Reference
Started
Map Page Options
Setup Map — ‘Map’ Tab
The ‘Map’ Tab contains settings for the Basemap, MapSource, Lat
Lon Grids, and Grid Labels. To change a setting, highlight the
appropriate field then press ENTER. Make your new selection then press
ENTER to accept the selection.
Basemap — This option allow you to turn the Basemap data ‘On’ or ‘Off’. If
you select ‘Off’, the Basemap will no longer be displayed.
MapSource — This option is only available if Mapsource™ CD data has been
loaded into the unit. If MapSource data is available, you can choose whether
or not to display the data on the map by selecting either ‘On’ or ‘Off’. If you
select ‘Off’, the MapSource data will not be displayed on the Map Page.
Lat Lon Grid — Lat Lon Grids will be displayed in smaller increments as the
Zoom Level on the Map Page is decreased. The ‘Zoom’ setting for this option
determines when the grids will begin displaying on the Map Page.
Setup Map — ‘Map’ Tab
If you select ‘Auto’, and have the Basemap or MapSource options set to ‘ON’,
the unit will not display a Lat Lon Grid.
Grid Labels — This option allows you to display the coordinates on the grid.
You must have the ‘Lat Lon Grid’ displayed for ‘Grid Labels’ to be displayed. If
you select ‘Auto’, and have the Basemap or MapSource options set to ‘ON’, the
unit will not display Grid Labels.
190-00230-00.indd
29
29
03/15/01, 9:25 AM
Setup Map — ‘Waypoint’ Tab
The ‘Waypoint ‘ Tab contains the Waypoint, and Active Route Waypoint
option settings. Each of the options has a ‘Text’ and ‘Zoom’ setting. To change
a setting, highlight the appropriate field then press ENTER. Make your new
selection, then press ENTER to accept the selection.
Getting
Reference
Started
Map Page Options
Waypoints — This option sets the display parameters for all waypoints.
Active Route Waypoint — This option sets the display parameters for waypoints
that are in an Active Route. As an example, if you have selected ‘Small’ as
the text option for all waypoints, but selected ‘Large’ as the setting for Active
Route Waypoints, the waypoints included in an Active Route will be displayed
with large text on the Map Page.
Setup Map — ‘Point’ Tab
The ‘Point’ Tab contains the Navaids, Points of Interest, Geo, and Exit option
settings. Each of the options has a ‘Text’ and ‘Zoom’ setting. To change a
setting, highlight the appropriate field then press ENTER. Make your new
selection, then press ENTER to accept the selection.
Setup Map — ‘Waypoint’ Tab
Navaids — are items displayed on the Map that aid navigation. Navaids can be
landmarks, milemarkers, hazards, light houses, buoys etc.
Points of Interest — include general business listings such as restaurants,
hotels, gas stations, etc..
Geo — include points such as schools, cemeteries, churches, towers, glaciers,
parks, etc.
Exits — includes exit information for the US and Canada.
30
Setup Map — ‘Point’ Tab
190-00230-00.indd
30
03/15/01, 9:25 AM
Setup Map — ‘Line’ Tab
The ‘Line’ Tab contains the ‘Zoom’ scale settings for Track Log, Saved Tracks,
Active Route, and a ‘Off/On setting for the Bearing Line. To change a setting,
highlight the appropriate field then press ENTER. Make your new selection,
then press ENTER to accept the selection.
Track Log — the Track Log is the bread crumb trail that is left behind as your
Getting
Reference
Started
Map Page Options
position changes on the Map Page.
Saved Tracks — are Track Logs that have been saved in the units memory.
Navigation Lines — controls the display of the Route Line and Bearing Line.
Bearing Line — If set to ‘On’, the Bearing Line will show the bearing from your
current location to the active waypoint. This will show the shortest path to
the waypoint. When the Bearing Line is on the Course Line (original course)
will still be displayed.
Setup Map — ‘Area’ Tab
The ‘Area’ Tab contains the ‘Text’ and ‘Zoom’ settings for River/Lakes, Parks,
Other, and Metro. To change a setting, highlight the field then press ENTER.
Make your new selection, then press ENTER to accept the selection.
Setup Map — ‘Line’ Tab
River/Lake — Rivers and Lakes will appear shaded on the map.
Park — Area Parks will appear as a shaded area.
Other — Geographical areas such as shopping centers, university campuses
will appear as a shaded area.
Setup Map — ‘Area’ Tab
31
190-00230-00.indd
31
03/15/01, 9:25 AM
Metro — Metropolitan areas will appear as a shaded area.
Setup Map — ‘Topo’ Tab
The ‘Topo’ Tab contains the ‘Text’ and ‘Zoom’ settings for Major Contour,
Intermediate Contour, and Minor Contour Lines. The Land Cover option
has a ‘Zoom’ setting. To change a setting, highlight the appropriate field
then press ENTER. Make your new selection, then press ENTER to accept
the selection.
Getting
Reference
Started
Map Page Options
The Contour Line settings are used to de-clutter the map. If ‘Auto’ is the
selected ‘Zoom’ setting, the Major and Minor Contour Lines will be displayed
at a higher Map Zoom Scale setting.
Setup Map — ‘City’ Tab
The ‘City’ Tab contains the ‘Text’ and ‘Zoom’ settings for Large City, Medium
City, Small City and Small Towns. To change a setting, highlight the field then
press ENTER. Make your selection, then press ENTER to accept.
Setup Map — ‘Topo’ Tab
The City settings are used to de-clutter the map. If ‘Auto’ is the selected
‘Zoom’ setting, the Large and Medium cities will be displayed at a higher Map
Zoom Scale setting.
Setup Map — ‘Road’ Tab
The ‘Road’ Tab contains the ‘Text’ and ‘Zoom’ settings for Local Road Names
and ‘Zoom’ settings for Freeway, Highway, and Local Roads. To change a
setting, highlight the appropriate field then press ENTER. Make your new
selection, then press ENTER to accept the selection.
Setup Map — ‘City’ Tab
Freeway — Interstate and U.S. Highways
Highway — State Highways and Local Highways
Local Roads — All Other Roads
32
Setup Map — ‘Road’ Tab
190-00230-00.indd
Local Road Names — Name Labels for Local Roads
32
03/15/01, 9:25 AM
Setup Map — ‘Other’ Tab
The ‘Other’ Tab contains the ‘Text’ and ‘Zoom’ settings for Railroad and a
On/Off setting for the Accuracy Circle. To change a setting, highlight the
appropriate field then press ENTER. Make your new selection, then press
ENTER to accept the selection.
Railroad — controls the display of railways lines on the Map Page.
Getting
Reference
Started
Map Page Options
Accuracy Circle — The Accuracy Circle is displayed around the Location
Triangle on the Map Page. The Accuracy Circle depicts the estimated accuracy
of the location. If your current location is matched to a road, no Accuracy
Circle will be displayed.
Heading Line — If the Heading line is ‘On’, a line showing your current
heading will be projected on the map from the current location. The Heading
line is a thin black line.
Lock to Roads — If ‘Lock to Roads’ is ‘On’, the unit will try to match your
location to a road.
Setup Map — ‘Other’ Tab
Pointer Page
The Pointer Page is best used for navigation when a straight line course can
not be followed. The Pointer Page has User Selectable Data Fields along the top, a
Status Bar, Compass Ring and a Pointer.
The Compass Ring is a graphic display of your current track. As you change
direction, the Compass Ring will rotate, aligning your track with the vertical
line. As you change direction+, the Pointer will always point toward the active
waypoint. When you are going directly toward the active waypoint, the Pointer
is aligned with the vertical line in the Compass Ring. When you arrive at the
waypoint, a message ‘Arriving at Destination’ will be displayed. It is important to
note that the Compass Ring does not act as a true compass. You must be moving
for the Pointer to update and correctly point towards your destination.
190-00230-00.indd
33
User Data
Fields
Pointer
Vertical
Line
Compass
Ring
Pointer Page
03/15/01, 9:25 AM
33
Pointer Page Options
To access the Pointer Page Options, with the Pointer Page displayed press
the MENU Key.
Setup Page Layout — This option allows you to select the number of data
field rows and the size of text used in the fields. You have the option of
displaying, None, Small (1Row), Small (2 Rows), Small (3 Rows), Medium
(1 Row), Medium (2 Rows), Medium (3 Rows), Large (1 Row), or Large (2
Rows). To select an option, highlight the desired selection then press ENTER.
The new configuration will be displayed on the map. Press QUIT to exit
the option.
Getting
Reference
Started
Pointer Page
Change Data Fields — This option allow you to select the type of data that
you want displayed in the data fields. To change a data type, place the
highlight over the desired data field, then press ENTER. Using the ROCKER,
scroll through the available selections. With the data type highlighted, press
ENTER to accept the selection.
Highway Page
The Highway Page is best used for navigation when a straight line course can
be followed. The Highway Page has User Selectable Data Fields along the top, a
Status Bar, and the Highway Display.
The Highway Page shares many features with the Map Page. Any tracks, saved
tracks or waypoints that are within the display area will be shown, the Zoom
Level can be changed using the IN and OUT Keys, and the Triangle represents
your current location.
To navigate using the Highway, just follow the road. If the Highway moves to
the right, turn right until the triangle is aligned with the White Line in the middle
of the Highway, and the Highway is pointed toward the top of the display. When
you are approaching a turn, the message “Approaching Turn” will be displayed.
As you approach your destination, the message ‘Arriving at Destination’ will be
displayed.
Pointer Page Options
34
190-00230-00.indd
Highway Page
34
03/15/01, 9:25 AM
Highway Page Options
To access the Highway Page Options, with the Highway Page displayed press
the MENU Key. To select an option from the Menu, highlight the desired
selection then press ENTER.
Setup Page Layout — This option allows you to select the text size and the
number of data fields rows. You have the option of displaying: None, Small
(1Row), Small (2 Rows), Small (3 Rows), Medium (1 Row), Medium (2 Rows),
Medium (3 Rows), Large (1 Row), or Large (2 Rows). To select an option,
highlight the desired selection then press ENTER. The new configuration will
be displayed on the map.
Getting
Reference
Started
Highway Page
Change Data Fields — This option allow you to select the type of data you want
displayed in the data fields. To change a data type, place the highlight over
the desired data field, then press ENTER. Using the ROCKER, scroll through
the available selections. With the data type highlighted, press ENTER to
accept the selection.
Setup Highway — This option contains the Highway Setup features. The
features are arranged on a tab menu making it easy to locate the different
setup items. To select an option from a Menu Tab, highlight the desired
selection then press ENTER.
Highway Page Options
Setup Highway — ‘Line’ Tab
The ‘Line’ Tab contains the On/Off settings for Active Log, Active Route, Track
Log and Saved Tracks. To change a setting, highlight the appropriate field
then press ENTER. Make your new selection, then press ENTER to accept
the selection.
Setup Highway Page
190-00230-00.indd
35
03/15/01, 9:25 AM
35
Active Leg — If ‘Off’ is selected, the Active Leg of the Graphic Highway will
not be displayed.
Active Route — If ‘Off’ is selected, the Graphic Highway will not be displayed.
Getting
Reference
Started
Track Log — If ‘Off’ is selected, the Track Log will not be displayed.
Highway Page
Saved Tracks — If ‘Off’ is selected, Saved Tracks will not be displayed.
Setup Highway — ‘Waypoint’ Tab
The ‘Waypoint’ Tab contains the On/Off settings for Next, Route, and Other.
To change a setting, highlight the appropriate field then press ENTER. Make
your new selection, then press ENTER to accept the selection.
Next — This setting determines if the next waypoint in a Route will be
displayed. If ‘On’ is selected, you will see the next waypoint in the Route. If
‘On’ is selected and the Route option is set to ‘Off’ only the Next Waypoint
in the Route will be displayed.
Route — This setting determines if the waypoints in a Route will be displayed.
If this selection is set to ‘Off’, Route Waypoints will not be on the Graphic
Highway.
Setup Highway — ‘Line’ Tab
Other — This setting determines if nearby waypoints are displayed.
Setup Highway — ‘Waypoint’ Tab
36
190-00230-00.indd
36
03/15/01, 9:25 AM
Main Menu Page
The Main Menu Page contains settings and features that are not on the Main
Pages. The Main Menu can be accessed from any of the Main Pages by pressing
MENU twice.
To select an item on the Main Menu, place the highlight over the menu item
then press ENTER.
Getting
Reference
Started
Main Menu
Trip Computer
Trip Computer
The Trip Computer has eight data fields: Trip Odom, Stopped Time, Moving
Avg, Moving Time, Overall Avg, Total Time, Max Speed, and Odometer.
Trip Odom — The Trip Odometer field will display the total distance traveled
since the Trip Computer was last reset.
Stopped Time — The Stopped Time field will display the total time that the
unit was not moving since the Trip Computer was last reset.
Moving Avg — The Moving Average (Speed) field will display an average speed
based on the time the unit was in motion since the Trip Computer was last
reset.
Main Menu
Moving Time — The Moving Time field will display the total time the unit was
in motion since the Trip Computer was last reset.
Overall Avg — The Overall Average (Speed) field will display the average speed
of the unit since the Trip Computer was last reset.
Total Time — The Total Time field will display the Total Time that the unit has
been turned on since the Trip Computer was last reset.
Max Speed — The Maximum Speed field will display the maximum speed the
unit traveled since the Trip Computer was last reset.
Main Menu — Trip Computer
Odometer — Will display the total distance traveled since it was last reset.
190-00230-00.indd
37
37
03/15/01, 9:25 AM
Trip Computer Options
Getting
Reference
Started
To access the Trip Computer Options, with the Trip Computer displayed,
press the MENU Key. To select an option, highlight the desired option then
press ENTER.
Main Menu
Tracks
Reset Trip — This option will reset all data fields except max speed and
odometer to zero.
Reset Max Speed — This option will reset the Max Speed data field to zero.
Reset Odometer — This option will reset the Odometer data field to zero.
Tracks
The Track Page displays the amount of Track Memory used, will allow you to
‘Save’ or ‘Clear’ the current Track Log, and displays a list of any Saved Tracks.
Save — When you select ‘Save’ you can choose how far back in the log
you wish to save. Select the appropriate choice, press ENTER to save the
selection.
Main Menu — Track Page
Clear — The ‘Clear’ Button will allow you to clear the Track Log. If the Map
Page is becoming cluttered from all of your tracks, clearing the Track Log
will clean up the map.
Track Page Options
To access the Track Options, with the Track Page displayed, press the
MENU Key.
Delete Saved Track — If you have saved tracks, this option will allow you to
delete the saved track.
Delete All Tracks — This option will delete all saved tracks.
38
Setup Track Log — This selection displays the Track Log Setup menu. This
Track Page Options
190-00230-00.indd
menu contains options for Track Recording, Record Method, and Interval.
38
03/15/01, 9:25 AM
• Record — ‘Off’, ‘Wrap When Full’ or ‘Stop When Full’. If ‘Wrap When
Full’ is selected, when track memory is full, the oldest track
point will be deleted and a new point added at the end.
• Record Method — Can be set to ‘Auto’, ‘Time’ or ‘Distance’
• Interval — is used to either select or enter an interval for the selected
Record Method.
Getting
Reference
Started
Main Menu
Tracks
Track Information Page
To access information on a Saved Track, highlight the desired track then press
ENTER. This will display the Track Information Page.
The Track Information Page contains data fields for the Name, Distance, and
Points. There are four Option Buttons along the bottom of the page.
Name — this field will allow you to change the Saved Track Name. When
tracks are saved the GPSMAP 76 will use a date as the default track name.
Distance — shows the total distance of the Saved Track
Points — shows the number of track log points in the Saved Track
Show on Map and Highway — when checked, will allow Saved Track to be
displayed on the Map and Highway Pages.
Delete Button — if the ‘Delete’ Button is selected, you will be prompted to
Track Information Page
verify you want to delete the Saved Track.
TracBack Button — will initiate TracBack Navigation. TracBack Navigation uses
Track Points in a saved track to automatically create a route. You will have the
option of navigating the route in the ‘Original’ or ‘Reverse’ direction.
Map Button — will display the Saved Track on the Map Page.
TIP:
If you know that you are going to want to use the
TracBack feature for a return trip, clear the Track Log
before you start the trip. This will ensure that you are
only navigating along the most recent Track.
OK Button — saves any changes and returns the display to the Tracks Page.
39
190-00230-00.indd
39
03/15/01, 9:25 AM
Points Page
The Points Page allow you to select Waypoints, Points of Interest, Cities, Exits,
Addresses, and Intersections using your current location or a location on the map.
To select a Point item, highlight the desired selection then press ENTER.
Getting
Reference
Started
Waypoints
Main Menu
Waypoints
When ‘Waypoints’ is selected, a user waypoint list will displayed. This list
can be displayed as ‘Waypoints by Name’, or by ‘Nearest Waypoints’. With the
waypoint list displayed, pressing the MENU Key will display an Options Menu.
Waypoint Options Menu
Find By Name / Find Nearest — This option allows you to select how the
Waypoint List will be displayed.
Find Nearest — will display a list containing the nearest waypoints within a
100 mile radius. The waypoints will be listed with the nearest waypoint at
the top of the list.
Find By Name — will display a list containing all User Waypoints. You have
the option of entering a waypoint name in the data field or scrolling through
the Waypoint List.
As you enter a waypoint name, the GPSMAP 76 will update the waypoint list
to show waypoint names that coincide with the letters that have been entered.
You can continue to enter the name if you like, or you can press the ENTER
Key and scroll through the list.
Main Menu — ‘Points’
Delete Waypoint — Will delete the selected waypoint.
Delete By Symbol — Will delete all waypoints having the same symbol as the
selected waypoint.
Delete All — Will delete all of the user waypoints.
40
190-00230-00.indd
40
03/15/01, 9:25 AM
Points Of Interest
Will only be avainable when MapSource CD data that contains Points of
Interest information is loaded in the unit. When ‘Points of Interest’ is selected, the
Points of Interest Selection Page is displayed. To select a Points of Interest item,
highlight the desired selection then press ENTER.
After an item is selected, either a list or selection menu will be displayed. If a
selection menu is displayed, make another selection and press ENTER. When a
list is displayed, pressing MENU will give you the option of searching the list by
name or by showing the nearest item.
Getting
Reference
Started
Main Menu
Points of Interest
To view information about an item in the list, highlight the item then press
ENTER. An Information window will be displayed showing the name, address
and phone number of the item. To save the item as a waypoint, press the MENU
Key and with ‘Save as Waypoint’ selected press ENTER.
Along the bottom of the list or Information Page are three buttons, GoTo, Map
and OK. ‘GoTo’ begins direct navigation to the point, ‘Map’ displays the item on
the Map Page and ‘OK’ returns the display to the list.
Points of Interest Options
The different Points of Interest displayed depends on the MapSource data that
is loaded in the unit.
Main Menu — ‘Points of Interest’
41
190-00230-00.indd
41
03/15/01, 9:25 AM
Cities
When ‘Cities’ is selected, a list of cities is displayed with the nearest city listed
first. If you press MENU, you will have the option of finding a city by name or
showing a list of the nearest cities. If you have MapSource CD map data loaded
in the unit, you can choose which map data you would like to use for creating the
Cities List. With a list of cities displayed, press MENU, highlight ‘Select Map’ then
press ENTER. You can now select from the available options.
Getting
Reference
Started
Main Menu
Cities — Exits
To view information about a city on the list, highlight the city then press
ENTER. An Information window will be displayed showing the city size (small,
medium or large) the name and country of the city, and the bearing/distance of
the city from your current location. To save the city as a waypoint, press MENU ,
with ‘Save as Waypoint’ selected press ENTER.
Along the bottom of the Information Page are three buttons, ‘GoTo’, ‘Map’ and
‘OK’. ‘GoTo’ begins direct navigation to the point, ‘Map’ displays the city on the
Map Page and ‘OK’ returns the display to the Cities List.
Exits
Cities — By Nearest
When ‘Exits’ is selected, a list of exit options is displayed. The included
options are: All Types, Services, Rest Area, and Other. To select a exit option
from the list, highlight the selection then press ENTER. When an exit option is
selected a list containing the selected data will be displayed.
Exit Options
All Types — Will display a list with data for Services, Rest Areas and Other.
Services — Will display exits with services such as Filling Stations, Restau-
rants, Hotels Auto Dealership and Parts Suppliers, Hospitals, Banks, Shopping, etc.
42
Rest Areas — Will display a list of rest areas closest to your location.
Main Menu — ‘Exits’
190-00230-00.indd
42
03/15/01, 9:26 AM
After you have selected an Exit Option, a list will be displayed. To view
information about a specific item, highlight the item then press ENTER. A
Page containing information about the item will be displayed. To begin direct
navigation to the item, highlight the ‘Go Exit’ Button then press ENTER.
If you would like to select a different road for exit information, press MENU,
highlight ‘Select Exit Road’ then press ENTER. A list of roads is displayed,
enter the road name then press ENTER to accept the selection. If you have
MapSource CD map data loaded in the unit, you can choose which map data
to use for creating the Exits List. With a list of exit options displayed, press
MENU, highlight ‘Select Map’ then press ENTER. You can now select from the
available options.
Getting
Reference
Started
Main Menu
Exits
Addresses
This option will only be available when MapSource CD data that contains
addresses is loaded in the unit. When ‘Addresses’ is selected, the Find Address
Page is displayed. To find an address, enter the Number and Street. You can also
enter the City and Postal Code, to shorten the search time.
After you have entered the search data, highlight the ‘Find’ Button then press
ENTER. The unit will display the Select Address Page.
Exit Information
The Select Address Page will show the addresses that closely match your entry.
Highlight the correct address then press ENTER. This will display the Address
Information Page.
To begin direct navigation to the address, highlight the ‘Goto’ Button then
press ENTER. To view the address on the Map, highlight the ‘Map’ Button then
press ENTER. To exit the page, highlight the ‘OK’ Button then press ENTER.
You also have the option of saving the address as a waypoint. To save the address
as a waypoint, press MENU, with ‘Save as Waypoint’ highlighted, press ENTER.
Find Address Page
190-00230-00.indd
43
03/15/01, 9:26 AM
43
Intersections
This option will only be available when MapSource CD data that contains
intersections is loaded in the unit. When ‘Intersection’ is selected, the Find
Intersection Page is displayed. To find an Intersection, you must enter the First
and Second street names. You can also enter the City and Postal Code, these
fields will shorten the search time.
Getting
Reference
Started
Main Menu
Addresses — Intersections
TIP:
When searching for an Address or Intersection, do not
put a prefix in front of the street name. When you do the
search, the unit will display a list where you can quickly
make the correct selection.
To enter a data in one of the fields, highlight the field then press ENTER.
When you have finished, press ENTER to exit the field. When you are ready to
search for an Intersection, highlight the ‘Find’ Button then press ENTER. The
unit will display the Select Intersection Page.
The Select Intersection Page will show Intersections that closely match your
entry. Highlight the correct Intersection then press ENTER. This will display
the Intersection Information Page. From this page you can Goto the Intersection,
view the Intersection on the Map Page, save the Intersection as a waypoint or
exit the page.
To begin direct navigation, highlight ‘Goto’ then press ENTER. To view
the Intersection on the Map, highlight ‘Map’ then press ENTER. To exit the
page, highlight ‘OK’ then press ENTER. You also have the option of saving the
Intersection as a waypoint. To save the Intersection as a waypoint, press the
MENU Key, with ‘Save as Waypoint’ highlighted, press ENTER.
Find Intersection Page
44
190-00230-00.indd
44
03/15/01, 9:26 AM
Routes
A Route is a series of waypoints used for point to point navigation. A route
must have at least two waypoints, a start and finish, but can contain as many as
fifty. The GPSMAP 76 can store fifty routes.
On the Routes Page you can create ‘New’ routes, determine how many empty
routes that you have left, and review a list of existing routes. To display the Routes
Page, highlight ‘Routes’ on the Main Menu then press ENTER.
Getting
Reference
Started
Main Menu
Routes
Routes Page Options
With the Routes Page displayed, press MENU to view the available options.
Start/Stop Navigation — Will start navigation of a highlighted route. Will stop
navigation of an Active Route.
Copy Route — Will make a copy of a highlighted route.
Delete Route — Will remove the highlighted route.
Delete All Routes — Will remove all routes from the Routes Page.
Creating a New Route
There are several methods that can be used to create a route. To begin creating
a new route, highlight the ‘New’ Button on the Routes Page then press ENTER. A
blank Route Page will be displayed. To display the Create Route Options, press
MENU. When you are creating a route, you should place the points in the route
in the order that you wish to navigate them.
Routes Page
45
190-00230-00.indd
45
03/15/01, 9:26 AM
Create Route Options
Use Map — This displays the Map Page with the Map Pointer active. You can
now point at any location or point on the map, and enter it into the route.
Getting
Reference
Started
When using the Map to create a route, you can select an existing User
Waypoint/Map Feature, or you can create a ‘New’ Waypoint. New Waypoints
are created if you place the Map Pointer on a location that is not a Map
Feature. A “New Waypoint” will be stored in the User Waypoint List and can
be edited as any other User Waypoint. When placing a “New Waypoint” in a
route, you will have to press ENTER to create the waypoint, ENTER to save
the waypoint and ENTER a final time to insert it into the route.
Main Menu
Routes
If you place the Map Pointer on a Map Feature (road, park, intersection, etc.)
the GPSMAP 76 will store that location only to the route using the feature
name as a reference. These points are not stored in the User Waypoint List. If
you would like to save a Map Feature Point as a User Waypoint, highlight the
point in the route, press ENTER, this will display an Information Page. With
the Information Page displayed, press MENU and select ‘Save as Waypoint’.
Add Waypoint — This will display the Points Menu (see page 40 for information on the Points Menu). As a note, if you highlight the dashed line in
the waypoint field on the Route Page and press ENTER it is the same as
making this selection. Use the Point Menu to display an Information Page,
then highlight the ‘OK’ Button and press ENTER.
Create Route Options
Using a combination of the Map Page and Route Page — You can create a route
using a combination of the methods described above. Starting with a blank
Route Page, either enter a waypoint manually or press the MENU Key and
select ‘Use Map’. You can select ‘Use Map’ at any time while creating a route.
After you have finished using the map, press QUIT to display the Route Page
where you can continue entering waypoints manually.
46
190-00230-00.indd
46
03/15/01, 9:26 AM
Naming the Route — the GPSMAP 76 will automatically name the route
using the first and last waypoint names as a reference. To change the Route
Name, place the highlight over the Name field then press ENTER. When
you have finished, press ENTER to save the new name.
Editing a Route
To edit a route the unit must be on the Route Page. When editing a route
you can Insert a Waypoint, Remove a Waypoint, Reverse the Route, Delete the
Route or choose to edit the route on the Map Page. To display the Route Edit
Options, press the MENU Key.
Getting
Reference
Started
Main Menu
Routes
Route Edit Options
Use Map — This will display the Map Page with the Route Line active and
the Map Pointer located on the waypoint highlighted on the Route Page.
‘Review’ Route Waypoint — To review information on a route waypoint, place
the Map Pointer on the waypoint then press ENTER. This will display
an options menu, highlight ‘Review’ then press ENTER to display the
waypoint information.
Inserting a New waypoint — There are two methods that can be used to insert
a new waypoint into a route.
1. Place the Map Pointer on the route leg that you want to insert the new
point in, the line will turn to a small dashed line. Press ENTER, the
Map Pointer will have “Ins” under it. Move the Map Pointer dragging
the Route Line to the location that you want the new point at then press
ENTER. If the new location is a Map Feature, the point will be inserted
in the leg. If the location is not on a Map Feature, the New Waypoint
Page will be displayed, press ENTER to save the new waypoint then
ENTER again to insert the new waypoint in the route.
190-00230-00.indd
47
Route Edit Options
47
03/15/01, 9:26 AM
2. Place the Map Pointer over a location that is not a Map Feature then press
ENTER. The New waypoint Page will be displayed, press ENTER to save
the new waypoint. Place the Map Pointer over the route leg that you want
to insert the waypoint into then press ENTER.
Getting
Reference
Started
‘Remove’ a Point or Waypoint — To remove a point or waypoint from the route,
Main Menu
Routes
place the Map Pointer over the point or waypoint that you want to remove
then press ENTER, this will display an options menu. Highlight ‘Remove’
then press ENTER. The point or waypoint will be removed and the Map
Pointer will move to the next point in the route.
‘Move’ a Waypoint — Only User Waypoints can be moved. To move a waypoint,
place the Map Pointer on the waypoint then press ENTER, this will display an
options menu. Highlight ‘Move’ then press ENTER. Place the Map Pointer at
the desired new location, press ENTER to move the waypoint.
‘Next’ point in Route — to move the Map Pointer to the next point in the route,
with the Map Pointer on a route point or waypoint, press ENTER. This will
display an options menu. Highlight ‘Next’, press ENTER and the Map Pointer
will move to the next point or waypoint in the route.Insert Waypoint — When ‘Insert Waypoint’ is selected the Points Menu is
displayed (see page 40 for more information on the Points Menu). Select a
point from the menu to insert it into the route. The new point will be inserted
into the route above the waypoint highlighted on the Route Page.
Inserting a Route Waypoint
Remove Waypoint — Will remove the waypoint that is highlighted on the Route
Page. With a waypoint highlighted, press MENU. Highlight ‘Yes’ and press
ENTER to remove the waypoint.
Reverse Route — Will reverse the direction of the route placing the last
waypoint at the top of the list.
48
190-00230-00.indd
48
03/15/01, 9:26 AM
Plan Route — To plan a route, enter a Speed, Fuel Flow, Depart Time and
Depart Date. Fuel Flow is measured in “units per hour” it may be necessary to
consult your vehicles Owner’s Manual for performance specifications.
The Active Route Page and Route Page display trip-planning information for
each leg or the entire route. Available information includes Course, ETA,
Fuel to point, Leg Fuel, Leg Time, Sunrise & Sunset at point location, Time
to Point and Leg Distance. To show a specific field, with the Active Route
or Route Page displayed, press the ROCKER right or left to cycle through
the fields.
Getting
Reference
Started
Main Menu
Proximity
Delete Route — Will remove the selected route from the Routes Page.
Proximity
Proximity waypoints can be used to alert you when you are approaching a
predetermined area. When you place a waypoint in the Proximity List, you will
enter a ‘Radius’ that will determine when a Proximity Alarm will be displayed.
You can turn the Proximity Alarm On or Off for your convenience.
Proximity Options
To view the available options with the Proximity Page displayed press MENU.
Add Waypoint — When ‘Add Waypoint’ is selected, the Points Menu is dis-
played (see page 40 for more information on the Points Menu). Select a point
from the menu to insert it into the Proximity List. With the ‘Radius’ field
highlighted, press ENTER. Enter a radius for an alert to be displayed. You
can also add a waypoint by highlighting the dashed entry line and pressing
ENTER.
Proximity Page
Remove Point — Removes the highlighted waypoint from the Proximity List.
Remove All — Removes all waypoints from the Proximity List.
49
190-00230-00.indd
49
03/15/01, 9:26 AM
Celestial
The Celestial Menu let’s you view information for Tides, Sun and Moon ,
or Hunt and Fish.
Getting
Reference
Started
Main Menu
Celestial
Date
Local Time
Max Level
Current Tide
Level
Low Tide
Curve
Min Level
Station Name
Current Time
Day
Night
MLLW
Station Time
Celestial Selections
Event Times
Tides — Displays a graphical chart which displays tide station information in a
24 hour span starting at midnight station time. You can choose from different
dates and over 3000 tide stations around the USA coastline, Alaska, Hawaii,
western Canada and several of the Caribbean Islands.
50
190-00230-00.indd
50
03/15/01, 9:26 AM
The top of the page will display the date being referenced with the tide station
being referenced, below. The top of the chart will show a 24-hour block
of local time (LCL) for your position, with the reported station time (STA)
appearing at the bottom. Daylight (light bar) and night (dark bar) will show
across the time scale, with the time progressing from left to right. (Local
time scales and sunrise/sunset info may not be available for a few stations).
The solid, light vertical lines are in 4-hour increments, with the light, dotted
vertical lined in one-hour increments. A dark vertical line (with arrows at the
ends of the line) will indicate the time of day when using current date and will
intersect the tide graph to show their relation.
The tide curve will show as a shaded area, with higher tides being taller and
lower tides shorter. The dark horizontal line (with arrows at the ends of
the line) will indicate the current tide height. The figure to the left of the
line will show the current tide level in feet. The Mean Lower Low Water
(MLLW) will appear as a solid vertical line near the bottom of the chart (This
line will only appear if the tide ranges to the zero value or below). The
top and bottom numbers to the left of the chart, ‘LCL and ‘STA’ indicate the
maximum/minimum levels, respectively. The four data fields below the chart,
indicate event times and levels at which the tide changes starting in the upper
left field, going downward, then to the upper right and down again.
Getting
Reference
Started
Main Menu
Celestial
Hunt and Fish Page
Hunt and Fish — The Hunt and Fish Page displays data for Good and Best
times for hunting and fishing at the selected location. There is also a Rating
(excellent, good, normal, poor) displayed, that will reflect the productivity of
the day. You may display this information for your current location or you
can use the Map or Points Menu to select a location. To display the location
options, press ENTER with Location field highlighted. You can also use the
current date and time or enter a date and time of your choice.
190-00230-00.indd
51
51
03/15/01, 9:26 AM
Sun and Moon — The Sun and Moon Page displays data for Sunrise/Sunset,
Moonrise/Moonset, and the approximate location of the Sun and Moon on a
skyview. The moon phase will display the current visible portion of the moon
in a light color. You may display this information for your current location
or you can use the Map or Points Menu to select a location. To display the
location options, press ENTER with Location field highlighted. You can also
use the current date and time or enter a date and time of your choice.
Getting
Reference
Started
Main Menu
Celestial
Time
Date
Location
Moon
Phase
Sky
View
Location Options
Moon
Position
Data Fields
Sun
Position
Horizon (0°)
45°
Overhead (90°)
52
190-00230-00.indd
52
03/15/01, 9:26 AM
MapSource Info
The MapSource Info Page displays a list of the MapSource data stored in the
unit and description of the highlighted list item. You can choose to ‘Show’ the
data on the map, by placing a checkmark in the ‘Show’ Box. To select/deselect a
box, place the highlight over the MapSource Item then press ENTER.
System Info
Getting
Reference
Started
Main Menu
MapSource Info
The System Info Page will show your software version number and the unit
ID number.
Setup Menu
The Setup Menu is arranged in an easy to use tab format. Each tab (General,
Time, Units, Location, Alarms, Interface) contains the settings that will determine
how the unit functions. To select a tab, the highlight must be on the tab name
then use the ROCKER Key (right/left) to scroll through the tabs. To select a data
field on a tab, user the ROCKER Key (up/down) to highlight the selection then
press ENTER. To restore the GPSMAP to the factory settings for items on the tab,
press MENU and with ‘Restore Defaults’ highlighted press ENTER.
Setup Menu — ‘General’ Tab
The ‘General’ Tab contains settings for the Receiver Mode, WAAS, Backlight
Time Out, and Beeper. To change a setting highlight the field then press ENTER.
Make your selection then press ENTER to activate the selection.
Mode — The Mode selections are ‘Normal’, ‘Battery Saver’ and ‘Simulator’
‘Normal’ — This is the default mode set from the factory. Use this setting
for best performance.
53
190-00230-00.indd
53
03/15/01, 9:26 AM
‘Battery Saver’ — When ‘Battery Saver’ is selected, the receiver is optimized to
save battery power. When in the Battery Saver mode you may experience
slower screen updates, but should notice a significant increase in battery
life.
Getting
Reference
Started
‘Simulator’ — When in ‘Simulator’ mode the GPS receiver is turned off and
Main Menu
Setup Menu — General Tab
the unit simulates satellite reception. Use the Simulator mode when the
unit is indoors and you wish to practice with the unit.
‘WAAS’ — WAAS is an acronym for “Wide Area Augmentation System”. You
can use the WAAS capability of the GPSMAP 76 to increase the accuracy
to approximately 3 meters. When enabled the GPS receiver searches for a
WAAS satellite, then receives data that will help correct differentials in the
GPS signal. When the unit is using WAAS data, a “D” will be displayed in
the Satellite Strength Indicators on the GPS Information Page, and the receiver
status will indicate a 2D or 3D Differential Location.
Currently the WAAS system is not fully operational and there are only two
satellites in place, one over the Pacific Ocean and one over the Atlantic Ocean.
You must have a clear unobstructed view of the sky for the GPSMAP 76 to
be able to receive a WAAS signal, even then, at times it may not be possible
to receive a WAAS signal. WASS satellites are not received in Battery Saver
Mode.
General Tab
For more information on the WAAS system visit the Federal Aviation Administration website at (gps.faa.gov).
‘Backlight Timeout’ — Sets the time that the Backlight will remain on once
activated. The options are ‘Stays On’, ‘15 Seconds’, ‘30 Seconds’, ‘1 Minute’
and ‘2 Minutes’.
‘Beeper’ — This setting determines when the Beeper is used. The options are
‘Key and Message’, ‘Message Only’, and ‘Off’.
54
190-00230-00.indd
54
03/15/01, 9:26 AM
Setup Menu — ‘Time’ Tab
The ‘Time’ Tab contains settings for Time Format, Time Zone, Daylight Savings time, Current Date, and Current Time. To change a setting highlight the
field then press ENTER. Make your selection then press ENTER to activate
the selection.
‘Time Format’ — Using this setting you can have the GPSMAP 76 display time
in a 12 or 24 hour format.
Getting
Reference
Started
Main Menu
Setup Menu — Time Tab
‘Time Zone’ — The ‘Time Zone’ setting has nine options, Atlantic, Eastern,
Central, Mountain, Pacific, Alaska, Hawaii, Samoa, and Other. If you choose
‘Other’ a new field “UTC Offset” will be displayed. Enter the correct offset for
your Time Zone. You can find a chart with UTC Offsets in Appendix C.
‘Daylight Savings Time’ — Has three options, ‘Yes’, ‘No’, and ‘Auto’. If you
select ‘Auto’ the unit will automatically determine when Daylight Savings
Time should be displayed. If you select ‘Yes’ Daylight Savings Time for the
current location will be displayed. If you select ‘No’, Daylight Savings Time
will not be displayed. If you have ‘Other’ selected in the ‘Time Zone’ field, this
option will not be available and Daylight Savings Time will be off.
‘Current Date’ — This field shows the current date as determined by the unit,
it is not accessible by the user.
‘Current Time’ — This field shows the time at the current location. This field
Time Tab
reflects any settings in the ‘Daylight Savings Time’ field, and is not accessible
by the user.
55
190-00230-00.indd
55
03/15/01, 9:26 AM
Setup Menu — ‘Units’ Tab
The ‘Units’ Tab contains settings for Elevation, Depth, Distance and Speed,
Temperature, Direction Display, and Speed Filter. These settings are used in
related fields throughout the unit.
‘Elevation’ — Can be set to show in ‘Feet’ or ‘Meters’.
Getting
Reference
Started
Main Menu
Setup Menu — Units Tab
‘Depth’ — Can be set to display in ‘Feet’, ‘Fathoms’ and ‘Meters’. The GPSMAP
76 cannot measure depth on its own. The depth input has to come from a
NMEA device providing the “DPT” sentence.
Location Formats
hddd.ddddd°
hddd°.mm.mmm’
hddd°.mm’ss.s’’
British Grid
Dutch Grid
Finnish Grid
German Grid
India Zone 0
India Zone IA
India Zone IB
India Zone IIA
India Zone IIB
India Zone IIIA
India Zone IIIB
India Zone IVA
India Zone IVB
Irish Grid
LORAN TD
Maidenhead
MGRS
New Zealand
QNG Grid
Swedish Grid
Swiss Grid
Taiwan Grid
UTM UPS
W Malayan RSO
User UTM Grid
‘Distance and Speed’ — Can be set to ‘Nautical’, ‘Statute’ or ‘Metric’.
‘Temperature’ — Can be set to ‘Fahrenheit’ or ‘Celsius’.
‘Direction Display’ — Can be set to ‘Numeric Degrees’ or ‘Cardinal Letters’. The
setting will be used in all fields that relate to direction throughout the unit.
‘Speed Filter’ — Can be set to ‘Auto’ or a ‘User’ defined setting. If ‘User’ is
selected, a Seconds field will be displayed. To enter a ‘User’ defined setting,
highlight the Seconds field then press ENTER. When finished, press ENTER
to save the entry. When using a ‘User’ defined setting, the unit will average
the speed and heading at the rate specified in the time setting.
Setup Menu — ‘Location’ Tab
User UTM Grid
The ‘User UTM Grid’ will let the user define a grid for a
location format. The user will have to know the Longitude
Origin, Scale, False Easting, and False Northing to create
the grid.
For more information on grids and datums, we recommend that you visit the National Imagery and Mapping
Agency at http://www.nima.mil
The ‘Location’ Tab contains the settings for ‘Location Format’, ‘Map Datum’,
‘North Reference’ and ‘Magnetic Variation’. The settings are used in related fields
throughout the unit.
‘Location Format’ — There are 28 different formats to choose from. See the
sidebar for a list of the formats. You should not need to change the format
unless you are using a chart or paper map for navigation. If so, find the
format that most closely matches your chart or map.
56
190-00230-00.indd
56
03/15/01, 9:26 AM
‘Map Datum’ — Datums are used to describe geographic positions for survey-
ing, mapping, and navigation and are not actual maps built in the unit.
Although there are over 100 datums available to choose from, you should
only need to change the Map Datum if you using a chart or paper map that
specifies a different datum in the legend.
F
WARNING: Selecting the wrong map datum can result in substantial
position errors. When in doubt, use the default WGS 84 datum for
best overall performance.
Getting
Reference
Started
Main Menu
Setup Menu — Location Tab
‘North Reference’ — Let’s you select the reference used in calculating heading
information. You can select from, ‘Auto’ ‘True’, ‘Magnetic’, ‘Grid’ or ‘User’.
‘Auto’ provides magnetic north heading references which are automatically
determined from your current location. ‘True’ provides headings based upon a
true north reference. ‘Grid’ provides headings based on a grid north reference
(used in conjunction with the grid location formats described on page 56).
‘User’ allows you to specify the magnetic variation at your current location, and
provides magnetic north heading references based on the value you entered.
F
WARNING: If ‘User’ is selected, you must periodically update the
magnetic variation at your present position. Failure to update this
setting may result in substantial differences between the information
displayed on your unit and external references, such as a magnetic
compass.
Setup Menu — ‘Location’ Tab
‘Magnetic Variation’ — displays the magnetic variation at your current location. If ‘User’ is selected for the ‘North Reference’, this field is used to enter
the magnetic variance.
190-00230-00.indd
57
57
03/15/01, 9:26 AM
Setup Menu — ‘Alarms’ Tab
The ‘Alarms’ Tab contains settings for Anchor Drag, Approach and Arrival, Off
Course, Shallow Water, and Deep Water. These settings will determine if, and
when an warning beep is sounded and/or a message is displayed.
Getting
Reference
Started
Main Menu
Setup Menu — Alarms Tab
‘Anchor Drag’ — The Anchor Drag Alarm will alert you when the boat has
drifted more than a distance set by the user. The alarm can be turned ‘On’
or ‘Off’.
‘Approach and Arrival’ — The Approach and Arrival Alarms alert you when you
are approaching a turn or arriving at your destination. ‘Automatic’ will alert
you between 15 and 90 seconds before depending on your speed. ‘Distance’
and ‘Time’ alert you at the specified distance or time.
‘Off Course’ — The Off Course Alarm will alert you when you are off course
more than the distance set. The Off Course alarm can be turned ‘On’ or ‘Off’.
‘Shallow Water’ — This alarm requires input from a NMEA device supplying
the “DPT” sentence. The Shallow Water alarm will alert you when the water
depth is less than the depth set.
‘Deep Water’ — This alarm requires input form a NMEA device supplying the
“DPT” sentence. The Deep Water Alarm will alert you when the water is
deeper than the depth set.
Setup Menu — ‘Alarms’ Tab
58
190-00230-00.indd
58
03/15/01, 9:26 AM
Setup Menu — ‘Interface’ Tab
The Interface Tab contains one field, ‘Serial Data Format’. This field contains
eight settings that allow the GPSMAP 76 to communicate with computer software
and other electronic devices.
• GARMIN — Allows the GPSMAP 76 to communicate with GARMIN software
and other GARMIN GPS units.
• GARMIN DGPS — Allows the GPSMAP 76 to communicate with GARMIN
Differential Correction devices. The unit can have the beacon receiver scan
for available DGPS beacon or can tune the beacon receiver to the frequency
and bit rate of a nearby DGPS beacon.
• NMEA — Causes the unit to transmit NMEA data. It also allows the
GPSMAP 76 to accept NMEA data from another NMEA device, like a
echo sounder. The baud (speed of communication in bits per second) is
displayed in the Baud field.
• Text Out — Allows the GPSMAP 76 to output simple text data that includes,
date, time, position, and velocity information. The Baud can be set to 1200,
2400, 4800, or 9600 bps.
• RTCM In — Allows the GPSMAP 76 to accept DGPS information from a
device supplying RTCM data in a SC-104 format. The Baud can be set to
1200, 2400, 4800, or 9600 bps.
• RTCM In/NMEA Out — Functions the same as the ‘GARMIN DGPS’ setting
except, the unit will output NMEA 0183, version 2.3 sentences, GPRMC,
GPGGA, GPGSA, GPGSV, GPGLL, GPBOD, GPRTE, and GPWPL.
• RTCM In/Text Out — Functions the same as the ‘RTCM In’ setting except,
the unit will output simple text data that includes date, time, position,
and velocity information. The Baud can be set to 1200, 2400, 4800, or
9600 bps.
• None — Turns off all serial communication.
190-00230-00.indd
59
Getting
Reference
Started
Main Menu
Setup Menu — Interface Tab
Setup Menu — ‘Interface’ Tab
59
03/15/01, 9:26 AM
Physical Specifications
Size:
Weight:
Display:
Getting
Appendix
Started
A
Specifications
Case:
Temp. Range:
1.3”x2.7”x6.2”
7.5 ozs (??kg)
2.9" diagonal (6.0cm) high-contrast, 4-level gray
LCD with backlighting (180 x 240 pixels)
Fully gasketed, floatable, high-impact plastic alloy,
waterproof to IEC 529-IPX-7
5°F to 158°F (-15°C to 70°C)
Performance
Battery Life:
Receiver:
Acquisition Times:
Update Rate:
GPS Accuracy:
DGPS (USCG) Accuracy:
DGPS (WAAS) Accuracy:
Velocity Accuracy:
Dynamics:
16 Hours in Battery Saver Mode
Differential-ready 12 parallel channel receiver
Approx. 15 seconds (warm start)
Approx. 45 seconds (cold start)
Approx. 5 minutes (First Time/AutoLocate™)
1/second, continuous
*< 15 meters (49 feet) RMS 95% typical
3-5 meters (10-16 ft), 95% typical
,3 meters (10ft) 95% typical with DGPS corrections
0.1 knot RMS steady state
6g's
* Subject to accuracy degradation to 100m 2DRMS under the U.S. DOD-imposed Selective Availability Program.
Power
Batteries:
Source:
Fuse:
1
The temperature rating for the GPSMAP 76 may exceed the usable range of some batteries. Alkaline batteries can rupture
at high temperatures. Alkaline batteries lose a significant amount of their capacity as temperature decreases. Use lithium
batteries when operating the GPSMAP 76 in below-freezing conditions. Extensive use of screen backlighting will significantly
reduce battery life.
60
190-00230-00.indd
Two 1.5-volt AA batteries1
8-35V DC
AGC/3AG - 2.0 Amp
60
03/15/01, 9:26 AM
Connecting the Power/Data
The power/data cable connects the GPSMAP 76 to a 8-35 volt DC system and
provides interface capabilities for connecting external devices. The color code in
the diagram below indicates the appropriate harness connections. Replacement
fuse is a AGC/3AG - 2.0 Amp fuse.
Appendix
B
Getting
Started
Wiring & Interfacing
Red: Power
Unit View
Black: Ground
8-35
Brown: Data Out
Data In
White
Ground
Black
Power
Red
Data Out
Brown
3
White: Data In
Interfacing
The following formats are supported for connection of external devices:
GARMIN proprietary Differential GPS (DGPS), NMEA 0180, 0182, 0183 (versions 1.5, 2.0, 2.3), ASCII Text Output, RTCM SC-104 input (version 2.0).
Cable View
Data In
White
Power
Red
Ground
Black
Data Out
Brown
The following are the sentences for NMEA 0183, version 2.3 output:
Approved sentences — GPRMC, GPGGA, GPGSA, GPGSV, GPGLL, GPBOD,
GPRTE, and GPWPL; Proprietart sentences — PGRME, PGRMZ, and PSLIB. The
GPSMAP 76 also includes NMEA input with support for the DPT, MTW, and
VHW sentences.
You can dowload a copy of GARMIN’s proprieatry communication protocol on the
Help and Support section of our website at www.garmin.com
190-00230-00.indd
61
61
03/15/01, 9:26 AM
The chart below gives an approximate UTC (Universal Time Coordinate) time
offset for the various longitudinal zones. Check with local charts for more detailed
information. If you are in daylight savings time, add one hour to the offset.
Getting
Appendix
Started
C
Time Offsets
Longitudinal Zone
Offset
Longitudinal Zone
Offset
W180.0º to W172.5º
-12
E007.5º to E022.5º
+1
W172.5º to W157.5º
-11
E022.5º to E037.5º
+2
W157.5º to W142.5º
-10
E037.5º to E052.5º
+3
W142.5º to W127.5º
-9
E052.5º to E067.5º
+4
W127.5º to W112.5º
-8
E067.5º to E082.5º
+5
W112.5º to W097.5º
-7
E082.5º to E097.5º
+6
W097.5º to W082.5º
-6
E097.5º to E112.5º
+7
W082.5º to W067.5º
-5
E112.5º to E127.5º
+8
W067.5º to W052.5º
-4
E127.5º to E142.5º
+9
W052.5º to W037.5º
-3
E142.5º to E157.5º
+10
W037.5º to W022.5º
-2
E157.5º to E172.5º
+11
W022.5º to W007.5º
-1
E172.5º to E180.0º
+12
W007.5º to E007.5º
0
62
190-00230-00.indd
62
03/15/01, 9:26 AM
Adindan
Afgooye
AIN EL ABD ‘70
Anna 1 Ast ‘65
ARC 1950
Ascnsn Isld ‘58
Astro B4 Sorol
Astro Bcn “E”
Astro Dos 71/4
Astr Stn ‘52
Aus Geod ‘66
Aus Geod ‘84
Austria
Bellevue (IGN)
Bermuda 1957
Bogata Observ
Campo Inchspe
Canton Ast ‘66
Cape
Cape Canavrl
Carthage
CH-1903
Chatham 1971
Chua Astro- Paraguay
Corrego Alegr
Djakarta
Dos 1968
Dutch
Easter Isld 67
European 1950
Adindan- Ethiopia, Mali, Senegal, Sudan
Afgooye- Somalia
AIN EL ANBD 1970- Bahrain Island, Saudi Arabia
Anna 1 Astro ‘65- Cocos I.
ARC 1950- Botswana, Lesotho, Malawi, Swaziland, Zaire, Zambia RC 1960
Kenya, Tanzania
Ascension Island ‘58- Ascension Island
Sorol Atoll- Tern Island
Astro Beacon “E”- Iwo Jima
Astro Dos 71/4- St. Helena
Astronomic Stn ‘52- Marcus Island
Australian Geod ‘66- Australia, Tasmania Island
Australian Geod ‘84- Australia, Tasmania Island
Austria
Efate and Erromango Islands
Bermuda 1957- Bermuda Islands
Bogata Obsrvatry- Colombia
Campo Inchauspe- Argentina
Canton Astro 1966- Phoenix Islands
Cape- South Africa
Cape Canaveral- Florida, Bahama Islands
Carthage- Tunisia
CH 1903- Switzerland
Chatham 1971- Chatham Island (New Zealand)Chua Astro
Corrego Alegre- Brazil
Djakarta (Batavia)- Sumatra Island (Indonesia)
Dos 1968- Gizo Island (New Georgia Islands)
Dutch
Easter Island 1967
European 1950- Austria, Belgium, Denmark, Finland, France, Ger
many, Gibraltar, Greece, Italy, Luxembourg, Netherlands, Norway,
Portugal, Spain, Sweden, Switzerland
European 1979- Austria, Finland, Netherlands, Norway, Spain,
European 1979
Sweden, Switzerland
Finland Hayfrd
Finland Hayford- Finland
Gandajika Base
Gandajika Base- Republic of Maldives
190-00230-00.indd
63
Getting
Appendix
Started
D
Map Datums
GDA
Geod Datm ‘49
Guam 1963
Gux 1 Astro
Hjorsey 1955
Hong Kong ‘63
Hu-Tzu-Shan
Indian Bngldsh
Indian Thailand
Indonesia 74
Ireland 1965
ISTS 073 Astro
Johnston Island
Kandawala
Kerguelen Islnd
Kertau 1948
L. C. 5 Astro
Liberia 1964
Luzon Mindanao
Luzon Philippine
Mahe 1971
Marco Astro
Massawa
Merchich
Geocentric Datum of Australia
Geodetic Datum ‘49-New Zealand
Guam 1963- Guam Island
Guadalcanal Island
Hjorsey 1955- Iceland
Hong Kong
Taiwan
Indian- Bangladesh, India, Nepal
Indian- Thailand, Vietnam
Indonesia 1974-Indonesia
Ireland 1965- Ireland
ISTS 073 ASTRO ‘69- Diego Garcia
Johnston Island NAD27 Central
Kandawala- Sri Lanka
Kerguelen Island
West Malaysia, Singapore
Cayman Brac Island
Liberia 1964- Liberia
Luzon- Mindanao Island
Luzon- Philippines
(excluding Mindanao Isl.)
Mahe 1971- Mahe Island
Marco Astro- Salvage Isl.
Massawa- Eritrea (Ethiopia)
Merchich- Morocco
03/15/01, 9:26 AM
63
Old Hawaiian
Oman
Ord Srvy GB
Getting
Appendix
Started
D
Pico De Las Nv
Potsdam
Ptcairn Ast ‘67
Prov S Am ‘56
Map Datums
Midway Ast ‘61
Minna
NAD27 Alaska
NAD27 Bahamas
NAD27 Canada
NAD27 Canal Zone
NAD27 Caribbn
NAD27 Central
NAD27 CONUS
NAD27 Cuba
NAD27 Grnland
NAD27 Mexico
NAD27 San Sal
NAD83
Nhrwn Masirah
Nhrwn Saudi A
Nhrwn United A
Naparima BWI
Obsrvtorio ‘66
Old Egyptian
Midway Astro ‘61- Midway
Minna- Nigeria
North American 1927- Alaska
North American 1927- Bahamas
North American 1927- Canada and Newfoundland
North Am. 1927- Canal Zone
North American 1927- Caribbean
(Barbados, Caicos Islands, Cuba, Dom. Rep., Grd. Cayman,
Jamaica, Leeward and Turks Islands)
North American 1927-Central America (Belize, Costa Rica, El
Salvador, Guatemala, Honduras, Nicaragua)
North Am. 1927- Mean Value (CONUS)
North American 1927- Cuba
North American 1927- Greenland
(Hayes Peninsula)
N. American 1927- Mexico
North American 1927- San Salvador Island
North American 1983- Alaska, Canada,
Central America, CONUS, Mexico
Nahrwn- Masirah Island (Oman)
Nahrwn- Saudi Arabia
Nahrwn- United Arab Emirates
Naparima BWI- Trinidad and Tobago
Observatorio 1966- Corvo and Flores Islands (Azores)
Old Egyptian- Egypt
Prov S Chln ‘63
Puerto Rico
Qatar NationalQornoq
Reunion
Rome 1940
RT 90
Santo (Dos)
Sao Braz
Sapper Hill ‘43
Schwarzeck
Sth Amrcn ‘69
South Asia
SE Base
SW Base
Timbalai 1948
Tokyo
User
Tristan Ast ‘68
Viti Levu 1916
Wake-Eniwetok
WGS 72
WGS 84
Zanderij
Old Hawaiian- Mean Value
Oman- Oman
Old Survey Grt Britn- England, Isle of Man, Scotland, Shetland
Isl., Wales
Canary Islands
Potsdam-Germany
Pitcairn Astro ‘67- Pitcairn
Prov So Amricn ‘56- Bolivia, Chile,Colombia, Ecuador, Guyana,
Peru, Venezuela
So Chilean ‘63- S. Chile
Puerto Rico & Virgin Isl.
Qatar South Greenland
Qornog-South Greenland
Reunion- Mascarene Island
Rome 1940- Sardinia Isl.
Sweden
Santo (Dos)- Espirito Santo
Sao Braz- Sao Miguel, Santa Maria Islands
Sapper Hill 1943- East Falkland Island
Schwarzeck- Namibia
S. American ‘69- Argentina, Bolivia, Brazil, Chile, Colombia,
Ecuador, Guyana, Paraguay, Peru, Venezuela, Trin/Tobago
South Asia- Singapore
Southeast Base- Porto Santo and Madiera Islands
Southwest Base- Faial, Graciosa, Pico, Sao Jorge and Terceira
Timbalai 1948- Brunei and E. Malaysia (Sarawak and Sabah)
Tokyo- Japan, Korea, Okinawa
User-defined custom datum
Tristan Astro 1968- Tristan da Cunha
Viti Levu 1916- Viti Levu/Fiji Islands
Wake-Eniwetok- Marshall
World Geodetic System 72
World Geodetic System 84
Zanderij- Surinam (excluding San Salvador Island)
64
190-00230-00.indd
64
03/15/01, 9:26 AM
Elevation— Height above mean sea level (MSL).
Avg Speed— The average of all second-by-second speed readings since last reset.
Bearing (BRG)— The compass direction from your current location to a destination.
Getting
Appendix
Started
E
Course— The desired course between the active ‘from’ and ‘to’ waypoints.
Distance (Dist)— The ‘great circle’ distance from current location to a destination.
Navigation Terms
Dist to Dest— The ‘great circle’ distance from current location to a GOTO destina-
tion, or the final waypoint in a route.
Dist to Next— The ‘great circle’ distance from current location to a GOTO destina-
tion, or the next waypoint in a route.
ETA— Estimate Time of Arrival. The estimated time you will reach your destination
waypoint, based on current speed and track.
ETA at Dest— The estimated time you will reach a GOTO destination, or the final
waypoint in a route.
ETA at Next— The estimated time you will reach a GOTO destination, or the next
waypoint in a route.
Fuel— The fuel required to travel from current location to the indicated route
waypoint.
Leg Dist— The distance between two route waypoints.
Leg Fuel— The fuel required to travel from a route waypoint to the next waypoint
(in sequence) in the route.
Leg Time— The time required to travel from a route waypoint to the next waypoint
(in sequence) in the route.
Max Speed— The maximum second-by-second speed recorded since last reset.
Moving Average Speed— Average speed while the unit is moving.
Moving Trip Timer— Total time the unit has been moving.
190-00230-00.indd
65
65
03/15/01, 9:26 AM
Odometer— A running tally of distance travelled, based upon the distance between
second-by-second position readings.
Off Course— The distance you are off a desired course in either direction, left or
right. Also referred to as ‘cross-track error’ or ‘course error’.
Speed— The current velocity at which you are travelling, relative to a ground
position. Also referred to as ‘ground speed’.
Time To— The estimated time required to reach a GOTO destination, or the next
waypoint in a route. Also referred to as ‘estimated time en route’.
Time to Dest— The estimated time required to reach a GOTO destination, or the
final waypoint in a route.
Time to Next— The estimated time required to reach a GOTO destination, or the
next waypoint in a route.
To Course— The recommended direction to steer in order to reduce course error
or stay on course. Provides the most efficient heading to get back to the desired
course and proceed along your route.
Track— The direction of movement relative to a ground position. Also referred to
as ‘ground track’.
Trip Odometer— A running tally of distance travelled since last reset. Also see
‘Odometer’.
Total Average Speed— Average speed of unit for both moving and stopped speeds
since last timer reset.
Total Trip Timer— Total time the unit has been in operation since last reset of the
trip timers.
Turn— The angle difference between the bearing to your destination and your
current track. ‘L’ indicates you should turn left, ‘R’ indicates you should turn right.
The degrees indicate the angle you are off course.
VMG— Velocity Made Good. The speed you are closing in on a destination along a
desired course. Also referred to as the ‘vector velocity’ to your destination.
Getting
Appendix
Started
E
Navigation Terms
66
190-00230-00.indd
66
03/15/01, 9:26 AM
Cannot display all found, use city or postal code — The unit found too many items to
display. Narrow the search using the city or postal code.
Dragging Anchor — is the message displayed when the distance set in the Anchor
Alarm is exceeded.
Approaching Turn — is displayed when you are nearing a turn in a route.
Getting
Appendix
Started
F
Messages
Arriving at Destination — is displayed when you are nearing your destination.
Batteries Low — when displayed you have less than 10 minutes of battery left.
Deep Water — The water is deeper than the amount set in the Deep Water Alarm.
Database Error — Internal problem with the unit. Contact your dealer or GARMIN
Customer Service to have the unit repaired.
No Diff GPS Location — RTCM is selected but the unit is not receivig DGPS data.
Memory Full — Unit memory is full, no further data can be saved.
None Found — No data matched the search criteria.
No Tide Stations for that Area — No tide stations within 100 miles of the area.
Off Course — You are off course the distance set in the ‘Off Course’ Alarm.
Lost Satellite Reception — The unit is unable to continue receiving satellite signals.
Near Proximity Point — You have reached the distance set for a proximity waypoint.
Proximity Memory Full — No additional proximity waypoints can be saved.
Proximity Radius Overlaps — The radius of two proximity waypoints overlap.
Route Already Exists — You have entered a route name that already exists.
Route Memory Full — No additional routes can be saved.
Route Truncated — Uploaded route from another device has more than 50 waypoints.
Route Waypoint Memory Full — No additional route waypoints can be saved.
190-00230-00.indd
67
67
03/15/01, 9:26 AM
Shallow Water — The water is shallower than the amount set in the Shallow Water Alarm.
Track Already Exists — A saved track with the same name already exists.
Getting
Appendix
Started
F
Track Memory Full — No more track data ca be stored without deleting old data.
Track Log Full — Indicates the track log is full and track recording has been turned
Messages
off. To be able to record more track points you will need to clear the track log and
turn track recording on. This will only be displayed when the track recording
setting is set to ‘Stop When Full”.
Track Truncated — A complete uploaded track will not fit in memory. The oldest
track log points have been deleted.
Cant Unlock Maps — No applicable unlock code for one or more maps was found.
All MapSource map are not accessable.
Waypoint Already Exists — A waypoint with the same name already exists.
Waypoint Memory Full — The unit has stored the maximum number of waypoints.
Transfer Complete — Data transfer has been completed.
68
190-00230-00.indd
68
03/15/01, 9:26 AM
Loran TD System
LORAN C is a radio navigation aid operated and maintained in the United
States by the United States Coast Guard. The name LORAN is an acronym for
“LOng RAnge Navigation”. The LORAN system covers the entire United States
and the U.S. Coastal Confluence Zone. From the perspective of a mariner, the
system is used for ocean and coastal navigation. It can be used as a supplemental
system for harbor and harbor approach navigation, and it is used for inland
navigation by recreational vehicles.
Getting
Appendix
Started
G
Loran TD
LORAN TD Feature
The LORAN TD (Time Delay) feature eases the transition from using LORAN
to using GPS. The GPSMAP unit automatically converts GPS coordinates to
LORAN TDs for those who have a collection of LORAN fixes for favorite fishing
spots and other waypoints recorded as TDs. You can display your position as a TD
or enter waypoints as TDs. The accuracy to be expected from this conversion is
approximately thirty meters. When the unit is placed in the LORAN TD format
mode, it simulates the operation of a LORAN receiver. Position coordinates may
be displayed as TDs, and all navigation functions may be used as if the unit was
actually receiving LORAN signals.
Using the LORAN TD Format
When creating new waypoints using LORAN TD coordinates, you must set
the correct LORAN chain number and secondary stations in the Setup TD field
before storing the waypoint. After the waypoint is stored in unit memory, it
will always reference the LORAN chain number and secondary stations currently
selected in the Setup TD field. If you enter a different LORAN chain number,
change the secondary stations or offsets in the Setup TD field, the active waypoint
information will reflect those changes. Since the GPSMAP unit does not rely on
the LORAN signal for navigation, it can reference a different GRI chain and/or
secondary stations and still navigate to the location stored in memory.
190-00230-00.indd
69
69
03/15/01, 9:26 AM
The LORAN Position Format field is located under the Units tab in the Main
Menu. The ‘LORAN TD Setup’ window contains the fields to select the Loran
GRI-Chain Number, Primary and Secondary Stations, and TD Offsets.
Getting
Appendix
Started
G
To setup Loran TD from the Main Menu:
1. Using the ARROW KEYPAD, highlight the “Units” tab and then the “Position
Format” field press ENTER/MARK.
Loran TD
2. Highlight ‘Loran TD’, press ENTER/MARK, then highlight ‘Setup’ then press
ENTER/MARK.
3. To change the settings of any of the five fields, highlight the field, press
ENTER/MARK, select/enter the desired setting then press ENTER/MARK.
4. When done, press the QUIT key to return to the Main Menu.
To setup Loran TD from the Status Page:
1. Press MENU, then use the ARROW KEYPAD, highlight the ‘Loran
TD On’ then press
ENTER/MARK.
2. To change the settings of any of the five fields, highlight the field, press
ENTER/MARK, select/enter the desired setting then press ENTER/MARK.
3. When done, press the QUIT key to return to the Status Page.
If the active GRI Chain, secondary stations or offsets have been changed since
the waypoint was created, the waypoint will now reference the active GRI-chain
and secondary stations and adjust the TD coordinates accordingly. Remember that
the GPS is not relying on the LORAN signal for navigation and actually converts
the TD coordinate to a useful LAT/LON coordinate before storing the waypoint to
memory or using it for navigation. Because of this the unit can navigate to a TD
coordinate anywhere in the world.
70
190-00230-00.indd
70
03/15/01, 9:26 AM
Standard Accessories
Owner’ Manual
Part No. 190-00230-00
Getting
Appendix
Started
H
Quick Reference Guide
Part No. 190-00230-01
Lanyard
Accessories
Part No. 013-00052-00
Provides convenient method for carrying the GPSMAP 76.
Optional Accessories
Automotive Mounting Bracket
Part No. 010-10305-00
Requires the Marine Mount Part No. 010-10300-00. This kit includes the mounting base,
temporary and permanent adhesive pads and a new swivel bracket.
Marine Mount
Part No. 010-10300-00
The bracket can rotate 360° and tilt more than 45° backward or forward.
Carrying Case
Marine Mount
Part No. 010-10117-01
Protects the GPSMAP 76 when not in use.
Power Data Cable
Part No.010-10082-00
Wiring harness can be used to hardwire the unit to auxiluary power and to interface with
other NMEA devices.
PC Data Cable
Automotive Mount
Part No. 010-10141-00
Allows for serial data transfer with a PC.
Cigarette Lighter Adapter
Part No. 010-10085-00
Allows the GPSMAP 76 to operate for external auto power.
Remote Antenna
PC Cable
Part No. 010-10174-00
MapSource® Map Data CD-ROMs
Enhance the Basemap and Map Data, create waypoints and routes from your PC.
190-00230-00.indd
71
71
03/15/01, 9:26 AM
Getting
Appendix
Started
I
Index
A
Accuracy .................................................23
Accuracy Circle ......................................33
Active Route Page..............................36, 45
Active Route Page Options ......................46
Addresses ................................................44
Alarms ....................................................58
Anchor Drag Alarm ................................58
Approach & Arrival Alarms..........................58
B
Backlighting ......................................10, 54
Bearing Line ...........................................31
Bearing/Distance Measuring ....................26
Beeper ....................................................54
C
Capabilities ..............................................4
Cautions ...................................................2
Celestial Page Settings ....................... 50-52
Changing Data Fields ...............................7
Cities.......................................................42
Clearing the Track Log .....................19, 38
Configuring the Map ........................28, 33
Contrast Setting ......................................10
Cursor Movement ....................... 10, 13-15
D
Data Transfer ...........................................59
Date/Time .........................................21, 55
Datum, Map ............................... 57, 63-64
Daylight Savings Time ............................55
Deep Water Alarm ..................................58
Depth .......................................................6
DGPS Interface Settings ..........................59
DGPS Status .....................................23, 24
Differential Status .............................23, 24
Distance ..................................................56
72
190-00230-00.indd
72
03/15/01, 9:26 AM
E
Editing Waypoints ............................14, 15
ENTER Key ............................................10
Exits. ................................................. 42-43
F
Follow Track (TracBack) ..........................39
Follow Route...........................................45
Full Screen Map .....................................27
G
Go To Waypoint .....................................17
Going to Destination ................... 17, 40-44
H
Heading (North Ref.)...............................57
Highway Page............................. 11, 34-36
Highway Page Setup.......................... 35-36
Highway Page Options ...........................35
How To Enter Data ........................... 14-15
“How To” Index.........................................6
I
IN Key ....................................................10
Initialization ............................... 18, 21-22
Getting
Appendix
Started
I
Index
Interface Formats ...................................59
Interfacing ........................................59, 61
Intersections............................................44
K
Keypad Usage .........................................10
L
Land Colors ............................................28
Local Time Offset .............................55, 62
Location Format ......................................57
Loran TD Setup................................. 69-70
M
Main Menu..................................10, 37, 59
Main Menu Page .....................................37
Map Configuration ........................... 27-33
Map Datums ............................... 57, 63-64
73
190-00230-00.indd
73
03/15/01, 9:26 AM
O
Odometers, Trip .....................................31
Off Course Alarm ...................................58
OUT Key ................................................10
Overzoom ..............................................26
Getting
Appendix
Started
I
Index
Map Page .................................... 11, 26-27
Map Page Layout ....................................26
Map Page Options ............................ 26-33
Map Pointer ...........................................16
Map Scales .............................................26
Map, Zooming ..................................10, 26
MapSource Info Page ..............................53
Measure Distance/Bearing .......................26
MENU Key .............................................10
Messages ........................................... 67-68
MOB ......................................................10
Moonrise/Moonset ..................................52
N
NAV/MOB Key .......................................10
NavigationTerms .............................. 65-66
Nearest Tide Station ............................... 51
Nearest Waypoint List ............................40
NMEA
Output Formats ....................59, 61
74
190-00230-00.indd
74
P
PAGE Key................................................10
Plan Route ..............................................49
Pointer Page ................................ 11, 33-34
Pointer Page Options...............................34
Points of Interest .....................................41
Power Off ...............................................10
Power On ................................................10
Power Key ...............................................10
Proximity Waypoints ..............................49
Q
QUIT Key ...............................................10
R
Receiver Status .................................. 23-24
Registration ..............................................1
Reviewing Waypoints .............................40
ROCKER Key ..........................................10
03/15/01, 9:26 AM
Route List Page .......................................45
Routes .............................................. 45-49
Routes- Activating ..................................45
Routes- Copying .....................................45
Routes- Creating ............................... 45-46
Routes- Deactivating ...............................45
Routes- Deleting .....................................49
Routes- Editing ................................. 47-48
Routes- Insert/Add .................................47
Routes- Inverting ....................................48
Routes- Naming .....................................47
Routes- Plan Route .................................49
Routes- Remove Points ...........................48
Routes- Reviewing Points .......................47
S
Satellite Sky View (Location) ...................23
Serial Data Format ............................ 59-61
Serial Number ........................................53
Setup Page Layout ..................................55
Shallow Water Alarm ..............................58
Signal Strength Bars ................................23
Simulator ...............................................18
Simulator Speed .....................................18
Software Version .....................................53
190-00230-00.indd
75
Getting
Appendix
Started
I
Index
Specifications .........................................60
Speed ..................................................3, 56
Speed Filter ............................................56
Status Page ....................................... 23-24
Status Page Options ................................25
Sunrise/Sunset ........................................52
Symbols, Waypoint ................................14
System Mode ..........................................54
T
Table of Contents .....................................5
Tide Charts .............................................50
Tide Page Settings ...................................51
Time Format ..........................................55
Time Offsets ...........................................62
Time Zone ..............................................55
75
03/15/01, 9:26 AM
Getting
Appendix
Started
I
Index
Time, Daylight Savings ...........................55
Timers, Trip ............................................37
TracBack..................................................39
Track Log- Clearing ..........................19, 38
Track Log- Deleting .......................... 38-39
Track Log- Displaying .............................39
Track Log- Saving ...................................38
Track Log- Showing on Map....................39
Track Setup ............................................38
Trip Odometers ......................................37
Trip Timers .............................................37
U
Units Setting ...........................................56
User Datum ............................................57
W
Warnings ..................................................2
Warranty ................................................77
Wide Area Augmentation System
(WAAS). ..................................................54
Water Colors ..........................................28
Waypoint Lists .......................................40
Waypoint Options ..................................40
Waypoints- Creating ...............................16
Waypoints- Deleting ...............................40
Waypoints- Editing ........................... 14-15
Waypoints- Naming ...............................15
Waypoints- Nearest ................................40
Waypoints- Proximity .............................49
Waypoints- Reviewing ............................40
Wiring Installation .................................61
Z
Zooming ...........................................10, 26
76
190-00230-00.indd
76
03/15/01, 9:26 AM
LIMITED WARRANTY
GARMIN Corporation warrants this product to be free from defects in materials and manufacture for one year from the date of purchase. GARMIN will, at
its sole option, repair or replace any components that fail in normal use. Such
repairs or replacement will be made at no charge to the customer for parts or
labor. The customer is, however, responsible for any transportation costs. This
warranty does not cover failures due to abuse, misuse, accident or unauthorized
alteration or repairs.
Getting
Appendix
Started
J
Warranty
THE WARRANTIES AND REMEDIES CONTAINED HEREIN ARE EXCLUSIVE AND IN LIEU OF ALL OTHER WARRANTIES EXPRESS OR IMPLIED OR
STATUTORY, INCLUDING ANY LIABILITY ARISING UNDER ANY WARRANTY
OF MERCHANTABILITY OR FITNESS FOR A PARTICULAR PURPOSE, STATUTORY OR OTHERWISE. THIS WARRANTY GIVES YOU SPECIFIC LEGAL
RIGHTS, WHICH MAY VARY FROM STATE TO STATE.
IN NO EVENT SHALL GARMIN BE LIABLE FOR ANY INCIDENTAL, SPECIAL, INDIRECT OR CONSEQUENTIAL DAMAGES, WHETHER RESULTING
FROM THE USE, MISUSE, OR INABILITY TO USE THIS PRODUCT OR FROM
DEFECTS IN THE PRODUCT. SOME STATES DO NOT ALLOW THE EXCLUSION OF INCIDENTAL OR CONSEQUENTIAL DAMAGES, SO THE ABOVE
LIMITATIONS MAY NOT APPLY TO YOU.
To obtain warranty service, call the GARMIN Customer Service department
(913-397-8200) for a returned merchandise tracking number. The unit should
be securely packaged with the tracking number clearly marked on the outside of
the package and sent freight prepaid and insured to a GARMIN warranty service
station. A copy of the original sales receipt is required as the proof of purchase
for warranty repairs. GARMIN retains the exclusive right to repair or replace the
unit or software or offer a full refund of the purchase price at its sole discretion.
SUCH REMEDY SHALL BE YOUR SOLE AND EXCLUSIVE REMEDY FOR ANY
BREACH OF WARRANTY.
190-00230-00.indd
77
77
03/15/01, 9:26 AM
190-00230-00.indd
78
03/15/01, 9:26 AM
© 2001 GARMIN Corporation
GARMIN International, Inc.
1200 East 151st Street, Olathe, Kansas 66062, U.S.A.
GARMIN (Europe) Ltd.
Unit 5, The Quadrangle, Abbey Park Industrial Estate, Romsey, SO51 9AQ, U.K.
GARMIN Corporation
No. 68, Jangshu 2nd Road., Shijr, Taipei County, Taiwan
www.garmin.com
Part Number 190-00230-00 Rev. A
covers.indd
2
03/14/01, 11:50 AM