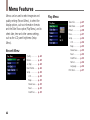
1
ENGLISH
We recommend that first-time users of the Canon PowerShot A5 start
by consulting the Quick Start Guide. Read this guide for additional details about
the use and functions of the Canon PowerShot A5. This guide presents
individual explanations of each camera function.
Introduction
Thank you for purchasing a Canon PowerShot
A5, the easy-to-use, compact digital camera with
a large range of functions incorporated into a
card-sized body.
Please read this guide and the Quick Start
Guide to gain maximum benefit of the highquality digital imaging made possible with the
PowerShot A5.
Please read the Handling and Safety
Precautions section of this guide before
attempting to use the camera.
About the LCD panel
The LCD panel incorporates extremely highprecision technology. When the panel is in
use, minute black, red or green spots may
appear and linger. The pixels are operating at
99.99% effectiveness, and this does not
constitute a malfanction. Moreover, these
spots have no effect on the image you
record.
Copyright © 1998 Canon Inc. All rights reserved.
2
Disclaimer
While every effort has been made to ensure that the
information contained in this manual is accurate and
complete, no liability can be accepted for any errors or
omissions. Canon Inc. reserves the right to change the
specifications of the hardware and software described
herein at any time without prior notice.
No part of this manual may be reproduced, transmitted,
transcribed, stored in a retrieval system, or translated into
any language in any form, by any means without prior
written permission of Canon Inc.
Canon Inc. makes no warranties for damages resulting
from corrupted or lost data due to a mistaken operation
or malfunction of the camera, the CompactFlashTM cards
(CF cards), personal computers, peripheral devices or use
of non-Canon CF cards.
Trademark Acknowledgement
Canon and PowerShot are trademarks of Canon Inc.
Adobe and Adobe Photoshop are trademarks of Adobe Systems Incorporated.
Apple, Macintosh and Power Macintosh are trademarks of Apple Computer, Inc.
CompactFlash is a trademark of SanDisk Corporation.
IBM is a registered trademark of International Business Machines Corporation.
Microsoft and Windows are registered trademarks of Microsoft Corporation in the
U.S. and other countries.
Ulead Systems, Inc. and PhotoImpact are trademarks of Ulead Systems, Inc.
Other names and products not mentioned above may be trademarks or registered
trademarks of their respective companies.
Table of Contents
Quick Guide to Page Numbers by Category ........... 5
Handling and Safety Precautions ............................ 9
Guide to Components ........................................... 16
Basic Functions of the PowerShot A5 ................... 18
Image Size and Quality Specifications ............. 18
Power On/Off Switch ........................................ 19
Power Save Function ..................................... 19
Camera Modes .................................................. 20
Display Panel ..................................................... 21
Viewfinder ........................................................ 22
Viewfinder Frame Marks ............................... 22
Indicators .......................................................... 23
Shutter Button .................................................. 24
Pressing Halfway ............................................ 24
Pressing Fully .................................................. 25
Continuous/Self-Timer (+) Button .................... 25
Flash (-) Button ................................................. 26
Macro/Jump Button .......................................... 28
LCD Button ........................................................ 29
MENU Button .................................................... 29
SET Button ........................................................ 30
Mode Dial Functions ............................................. 31
Lock ................................................................... 31
Auto Mode ........................................................ 31
Buttons Available in Auto Mode ................... 31
Program Mode .................................................. 32
Buttons Available in Program Mode .............
Stitch Assist Mode .............................................
What is Stitch Assist? .....................................
Play Mode .........................................................
Multi Mode .......................................................
PC Mode ............................................................
Taking Pictures in Stitch Assist Mode ...................
Buttons Available in Stitch Assist Mode ........
Retaking a Picture ..........................................
When a Sequence is Complete ......................
Shooting Hints ..................................................
Procedures for Shooting Horizontal/Vertical
Sequences .........................................................
2x2 Shot Procedures .........................................
Menu Features ......................................................
Record Menu ..................................................
Play Menu ......................................................
Basic Menu Operations .....................................
MENU Button .................................................
+/- Buttons ......................................................
SET Button ......................................................
Record Menu .....................................................
Quality ............................................................
Review ............................................................
+/- (Exp.) .........................................................
Reset File No. .................................................
32
33
33
34
34
35
36
36
36
36
37
38
39
42
42
42
43
43
43
43
44
44
45
45
46
3
Table of Contents continued... 2/2
About File Numbers .......................................
Play Menu .........................................................
Show Info. ......................................................
Slide Show ......................................................
Protect ............................................................
Erase ...............................................................
Print Mark ......................................................
Setup .................................................................
LCD .................................................................
Beep ...............................................................
Power Save .....................................................
Reset ...............................................................
Date/Time .......................................................
Format ............................................................
Language .......................................................
Connecting to a TV ...............................................
Connecting to a Computer ...................................
Connecting to a Windows Computer ..............
Connecting to a Macintosh Computer .............
Changing the Button Battery and Setting
the Date/Time ........................................................
Changing the Button Battery ...........................
Setting the Date/Time .......................................
Camera Maintenance ............................................
Optional Accessories .............................................
Soft Case ...........................................................
4
46
47
47
47
50
51
51
52
52
53
53
53
53
54
54
55
56
56
56
58
58
60
61
62
62
CF Cards .............................................................
CF Cards and Capacities .................................
PCMCIA Card Adapter ......................................
CF Card Reader .................................................
Digital Printer CD-200 .......................................
Troubleshooting ....................................................
List of Message Codes ...........................................
List of Messages ....................................................
Specifications .........................................................
Appendix A: Canon Battery Pack NB-5H ..............
Appendix B: Canon Compact Power Adapter ......
Appendix C: CompactFlash™ Card .......................
Index ......................................................................
Canon Customer Support .....................................
Ulead Customer Support ......................................
62
62
63
63
63
64
69
70
71
73
77
81
85
87
90
Quick Guide to Page Numbers by Category
Shooting
Flash photography with humans or animals as subjects .................................................................................................................. 26
How to aim the camera at your subject to improve the focus ......................................................................................................... 22
How to adjust the exposure setting (Exposure Compensation) ....................................................................................................... 45
How to compensate for a backlight subject ................................................................................................................................... 45
How to compensate for a subject in shadow ................................................................................................................................. 45
How to force the flash to go off .................................................................................................................................................... 26
How to press the Shutter button ................................................................................................................................................... 24
How to shoot continuous frames ............................................................................................................................................ 25, 32
How to shoot extreme close-ups with the Macro mode ................................................................................................................. 28
How to shoot moving objects (Continuous mode) ................................................................................................................... 25, 32
How to shoot multiple frames by pressing the shutter once ..................................................................................................... 26, 32
How to shoot pictures in a horizontal sequence for merging later ............................................................................................ 33, 38
How to shoot pictures in a vertical sequence for merging later ................................................................................................. 33, 38
How to shoot pictures without the red-eye effect .......................................................................................................................... 26
How to take a panorama shot ................................................................................................................................................. 33, 36
How to take a picture ................................................................................................................................................................... 31
How to stop the flash from going off ............................................................................................................................................ 26
How to use the frame marks inside the viewfinder ......................................................................................................................... 22
How to use the Self-Timer function ............................................................................................................................................... 25
How to use the viewfinder ............................................................................................................................................................ 22
Taking shots of panoramic scenes bigger than one frame .................................................................................................. 33, 37, 39
What mode should I use for everyday shots? ........................................................................................................................... 24, 31
5
Quick Guide to Page Numbers by Category continued....2/4
What to do if the image is too bright ............................................................................................................................................ 45
What to do if the image is too dark ............................................................................................................................................... 45
Replaying Images
Connecting the camera to a computer .................................................................................................................................... 35, 56
Connecting the camera to a television ........................................................................................................................................... 55
How to change the play time of images in a slide show ................................................................................................................. 50
How to check an image immediately after shooting ....................................................................................................................... 45
How to continuously replay recorded images ................................................................................................................................. 47
How to delete marks from images in a slide show ......................................................................................................................... 49
How to load camera images onto a computer ......................................................................................................................... 35, 56
How to make a slide show with only the images you select ........................................................................................................... 48
How to play images one at a time on the LCD panel ...................................................................................................................... 34
How to scroll through images displayed on the LCD panel ............................................................................................................. 28
How to scroll to the next set of images in Multi mode ................................................................................................................... 28
How to set a slide show to continuous display ............................................................................................................................... 50
How to use the Review function .................................................................................................................................................... 45
How to view camera images on a television ................................................................................................................................... 55
How to view images on the camera LCD panel .............................................................................................................................. 34
How to view images on the camera LCD panel while shooting ....................................................................................................... 29
How to view images on a television screen .................................................................................................................................... 55
How to view images with the slide show function ......................................................................................................................... 47
How to view the date/time information for an image ..................................................................................................................... 47
6
Quick Guide to Page Numbers by Category continued....3/4
Saving, Printing and Deleting Image Files
About image file names ................................................................................................................................................................ 46
How to change a file number ........................................................................................................................................................ 46
How to delete an unwanted image ............................................................................................................................................... 51
How to mark a file for printing ...................................................................................................................................................... 51
How to protect a file from accidental deletion ............................................................................................................................... 50
Saving an image file onto a computer ..................................................................................................................................... 35, 56
Settings
About each function ..................................................................................................................................................................... 18
About the symbols on the Mode Dial ............................................................................................................................................ 20
Changing date and time settings ............................................................................................................................................. 53, 60
How to change the date/time display format ........................................................................................................................... 53, 60
How to change error messages to another language ..................................................................................................................... 54
How to change the image quality setting and take a shot ........................................................................................................ 32, 44
How to change the image size setting and take a shot ............................................................................................................ 32, 44
How to change the LCD panel brightness ...................................................................................................................................... 52
How to reset default LCD panel, beep and Power Save settings ..................................................................................................... 53
How to select Menu options ......................................................................................................................................................... 43
How to turn the Power Save function on and off ........................................................................................................................... 53
How to turn the Review function on and off ................................................................................................................................. 45
How to turn off the beep .............................................................................................................................................................. 53
How to turn the power on and off .......................................................................................................................................... 19, 31
How to use the +/- buttons ........................................................................................................................................................... 43
7
Quick Guide to Page Numbers by Category continued....4/4
Other Topics
About part names ......................................................................................................................................................................... 16
Accessories ................................................................................................................................................................................... 62
Camera components list ............................................................................................................................................................... 16
How to use the Menu button ........................................................................................................................................................ 43
How to use the Menu features .......................................................................................................................................... 29, 42, 43
How to use the Mode Dial ............................................................................................................................................................ 31
How to use the Set button ............................................................................................................................................................ 43
How to view date/time data in Play mode ...................................................................................................................................... 47
I would like to use the CompactFlashTM (CF) card from another camera .......................................................................................... 54
What are the available image formats? .......................................................................................................................................... 18
What are the available image sizes? .............................................................................................................................................. 18
What can be done in Auto mode? ................................................................................................................................................ 31
What can be done in Program mode? ........................................................................................................................................... 32
What do the indicator lights mean? .............................................................................................................................................. 23
What do the LCD panel messages mean? ...................................................................................................................................... 70
What do the symbols and codes displayed in the LCD mean? .................................................................................................. 21, 69
What does the orange indicator light mean? ........................................................................................................................... 23, 28
What is the meaning of the beep when the shutter button is pressed? .................................................................................... 24, 25
What is the meaning of the indicator lights beside the viewfinder? ................................................................................................ 23
What to do if you detect a problem (troubleshooting) .................................................................................................................... 64
Why the power shuts off a few minutes the camera is set down .................................................................................................... 19
8
Handling and Safety Precautions
Please ensure that you have read and understood these handling and safety precautions before you
operate your PowerShot A5 Digital Camera. Once you have read the instructions on the next few
pages, we recommend that you keep the camera with you and try each function as you read about it
in the remaining pages.
Exclusion of Liability and Warning Against Copyright Infringement (Please Read)
Exclusion of Liability
Before you shoot images of subjects of importance to you, we highly recommend that you shoot
several trial images to confirm that you are operating the camera correctly. Please note that Canon
Inc., its subsidiaries and affiliates, and distributors of its digital cameras are not liable for any consequential damages arising from any malfunction in a PowerShot camera or CompactFlashTM CF card
that results in the failure of an image to be recorded or to be recorded in a format that is machine
sensible.
Warning Against Copyright Infringement
Please note that PowerShot digital cameras are intended for personal use and should never be used in
a manner that infringes upon or contravenes international or domestic copyright laws and regulations.
Please be advised that in certain cases the copying of images from performances, exhibitions, or
commercial properties by means of a camera or other device may contravene copyright or other legal
rights even if the image was shot for personal use.
9
Handling and Safety Precautions continued....2/7
Safety Precautions
• Before using the camera, please ensure that you have read and understood the safety precautions described below. Always ensure that the camera is operated correctly.
• The safety precautions noted on the following pages are intended to instruct you in the safe
and correct operation of the camera and its accessories to prevent injuries or damage to
yourself, other persons and equipment.
• In the next few pages, the term “equipment” refers primarily to the camera and its power
supply accessories.
Warnings
• Stop operating the equipment immediately if it should emit smoke or noxious fumes. Failure to
do so may result in fire or electrical shock. Immediately shut off the camera’s power switch,
remove the camera battery and unplug the power adapter cord from the power socket.
Confirm that smoke or fume emissions cease. Please consult your camera distributor or the
closest Canon Customer Support Help Desk.
• Stop operating the equipment if it is dropped or the casing is damaged. Failure to do so may
result in fire or electrical shock. Immediately shut off the camera’s power switch, remove the
camera battery and unplug the power adapter cord from the power socket. Please consult your
camera distributor or the closest Canon Customer Support Help Desk.
10
Handling and Safety Precautions continued....3/7
• Prevent the equipment from contact with, or immersion in, water and other liquids. Do not
allow liquids to enter the interior. The camera has not been waterproofed. If the exterior comes
into contact with liquid or salt air, wipe it dry with a soft, absorbent cloth. In the event that
water or other foreign substances enter the interior, immediately shut off the camera’s power
switch, remove the camera battery and unplug the power adapter cord from the power socket.
Continued use of the equipment may result in fire or electrical shock. Please consult your
camera distributor or the closest Canon Customer Support Help Desk.
• To avoid the risk of high-voltage electrical shock, do not touch the flash portion of the camera if
it has been damaged. In addition, never touch internal portions of the equipment that become
exposed as a result of damage. There is a risk of high-voltage electrical shock. Please take the
first opportunity to consult your camera distributor or the closest Canon Customer Support Help
Desk.
• Do not attempt to disassemble or alter any part of the equipment that is not expressly prescribed in this guide. Disassembly or alteration may result in high-voltage electrical shock.
Internal inspections, alterations and repairs should be conducted by qualified service personnel
authorized by your camera distributor or the closest Canon Customer Support Help Desk.
• Do not use substances containing alcohol, benzene or thinners or other flammable substances
on the equipment. The use of these substances may lead to fire or electrical shock.
• Do not cut, damage, alter or place heavy items on the power adapter cord. Any of these actions
may cause an electrical short circuit, which may lead to fire or electrical shock. Replace a broken
or damaged power adapter cord.
11
Handling and Safety Precautions continued....4/7
• Do not handle the power adapter cord if your hands are wet or moist. Handling the power
adapter cord with wet hands may lead to electrical shock. When unplugging the cord, ensure
that you hold the rigid portion of the plug. Pulling on the flexible portion of the cord may
damage or expose the wire and insulation, creating the potential for fires or electrical shocks.
• Store this equipment out of the reach of children and infants. Accidental damage to the
equipment by a child could result in serious injury.
• Use of power sources not expressly recommended for this equipment may lead to overheating,
distortion of the equipment, fire, electrical shock or other hazards. Use only the recommended
compact power adapter and accessories.
• Power down the computer and unplug the power adapter cord before attempting to connect
the interface cable to avoid the risk of electrical shock.
• Be particularly careful to keep the button-sized (CR2016 lithium) batteries used in the camera
out of the reach of children. Seek medical assistance immediately if a child swallows a battery.
• Do not place the batteries near a heat source or expose them to direct flame or heat. Neither
should you immerse them in water. Such exposure may damage the batteries and lead to the
leakage of corrosive liquids, fire, electrical shock, explosion and serious injury.
• Do not attempt to disassemble, alter or apply heat to the batteries. There is serious risk of injury
due to an explosion. Immediately flush with water any area of the body or clothing that comes
into contact with the inner contents of a battery.
12
Handling and Safety Precautions continued....5/7
• Avoid dropping or subjecting the battery to severe impacts that could damage the casing. It
could lead to leakage and injury.
• Do not short-circuit the battery terminals with metallic objects, such as key holders. It could lead
to overheating, burns and other injuries. Use the supplied battery case when transporting or
storing batteries.
• Before you discard a battery, cover the terminals with tape or other insulators to prevent direct
contact with other objects. Contact with the metallic components of other materials in waste
containers may lead to fire or explosions. Discard the batteries in specialized waste facilities if
they are available in your area.
• Use of batteries not expressly recommended for this equipment may cause them to explode or leak,
resulting in fire, injury and damage to the surroundings. Use only recommended batteries and
accessories.
• Use only the recommended compact power adapter to recharge the rechargeable batteries. Use
of chargers not expressly recommended may result in overheating, distortion, fire or electrical
shock.
• Disconnect the compact power adapter from both the camera and power socket after recharging and when the camera is not in use to avoid fires and other hazards.
• The camera terminal of the compact power adapter cord is designed for exclusive use with
PowerShot cameras. Do not use the compact power adapter with other products or batteries
There is a risk of fire and other hazards.
13
Handling and Safety Precautions continued....6/7
• Do not trigger the flash in close proximity to human or animal eyes. Exposure to the intense
light produced by the flash may injure eyesight. In particular, remain at least one meter (39
inches) away from infants when using the flash.
• Do not aim the camera directly into the sun or at other intense light sources that could injure
your eyesight.
Caution
• Avoid using, placing or storing the equipment in places subject to strong sunlight or high
temperatures, such as the dashboard or trunk (boot) of a car. Exposure to intense sunlight and
heat may cause the batteries to leak, overheat or explode, resulting in fire, burns or other
injuries. High temperatures may also cause deformation of the casing.
• Be sure to use the compact power adapter in a well ventilated area when recharging batteries
or performing other recommended procedures.
• Do not store the equipment in humid or dusty areas. Storage in these areas could lead to fire,
electrical shock or other damage.
• Be careful when wearing or holding the camera by the strap not to bang or subject it to strong
impacts or shocks that could lead to injury or damage the equipment.
• Be careful not to cover the flash with your fingers when shooting. In addition, do not touch the
surface of the flash after taking several pictures in rapid succession. Either action could result in
burns.
14
Handling and Safety Precautions continued....7/7
Preventing Malfunctions
Avoid Strong Magnetic Fields
Never place the camera in close proximity to electric motors or other equipment generating strong
electric fields. Exposure to strong magnetic fields may cause malfunctions or corrupt image data.
Avoid Condensation Related Problems
Moving the equipment rapidly between hot and cold temperatures may cause condensation (water
droplets) to form on its external and internal surfaces. You can avoid this by placing the equipment in
a plastic bag and letting the contents adjust to temperature changes slowly before removing it from
the bag.
If Condensation Forms Inside the Camera
Stop using the camera immediately if you detect condensation. Continued use may damage the
equipment. Remove the CF card, batteries and power adapter cord from the camera and wait until
the moisture evaporates completely before resuming use.
Extended Storage
When not using the camera for extended periods of time, remove the batteries (except the buttonsized CR2016 lithium battery) and store the equipment in a safe place. Storing the camera for
extended periods with the batteries installed will run down the battery and may damage the camera.
15
Guide to Components
• Shutter Button
➤➤➤p. 24
• Strap Holder
➤➤➤Quick Start Guide9 p.
• Lens
• Viewfinder ➤➤➤p. 22
• Autofocus (AF)
Auxiliary Light Emitter
• Display Panel ➤➤➤p. 21
• Flash ➤➤➤p. 26
• Red-Eye Reduction
lamp ➤➤➤p. 26
• Mode Dial ➤➤➤p. 31
• Viewfinder
➤➤➤p. 22
• Indicators
➤➤➤p. 23
• LCD panel
16
• Continuous/Self-Timer
(+) Button ➤➤➤p. 25
• Flash (-) Button ➤➤➤p. 26
• LCD Button ➤➤➤p. 29
Guide to Components continued....2/2
• Macro/Jump Button ➤➤➤p. 28
• MENU Button ➤➤➤p. 29, 43
• SET Button ➤➤➤p. 30, 43
• VIDEO Terminal ➤➤➤ p. 55
• DIGITAL Terminal ➤➤➤p. 56
• CF Card Slot Cover ➤➤➤Quick Start Guide p. 8
• Lock for CF Card Slot Cover
➤➤➤Quick Start Guide p. 8
• DC Coupler Cable Cover
➤➤➤Quick Start Guide p. 7
• Battery Cover ➤➤➤Quick Start Guide p. 5
• Battery Cover Lock
➤➤➤Quick Start Guide p. 5
• Tripod Socket
17
Basic Functions of the PowerShot A5
Image Size and Quality
Specifications
The PowerShot A5 can take pictures with the
following screen sizes and qualities.
Size/Quality
Compression
Format
File
Size
Large/Fine (1024 x 768)
Large/Normal (1024 x 768)
Small/Fine (512 x 384)
Small/Normal (512 x 384)
JPEG High Quality 180 KB
JPEG Normal
85 KB
JPEG High Quality 60 KB
JPEG Normal
30 KB
CCD RAW
No Compression
940 KB
• Large and small image sizes cover the
exact same scope of the photographic
subject but reproduce the images with
differing numbers of dots. On computer
monitors the large format images are
displayed at 1024 x 768 pixels, while the
small images are displayed at 512 x 384
pixels.
18
• The size and quality settings can be
changed before an image is shot with
the Menu feature in the Auto, Program
or Stitch Assist modes. (p. 44)
• In the Continuous mode, the default size
and quality settings are Small/Fine or
Small/Normal.
• Figures noted herein reflect standard
shooting conditions established by
Canon. Actual file sizes will vary between photographic subjects.
Basic Functions of the PowerShot A5 continued... 2/13
Power On/Off
Switch
The camera’s power is turned on and off with
the Mode Dial. The power is off when the dial
is set to the L (Lock) position and on when set
in any other position.
Power Save Function
Shooting Modes
The camera automatically closes the lens
cover and powers down if you do not use
a camera function for approximately
three minutes.
PC Mode
When connected to a computer, a
message is displayed on the computer
monitor if you do not use a camera
function for approximately five minutes.
If you do not use a camera function for
an additional minute, the camera
automatically powers down.
• To reactivate the camera after
powerdown, turn the Mode Dial or
press any button.
• You can deactivate the Power Save
function with the Menu feature. (p. 53)
Playback Modes
The camera automatically powers down
if you do not use a camera function for
approximately five minutes.
19
Basic Functions of the PowerShot A5 continued... 3/13
Camera Modes
The PowerShot A5 features six operating
modes that can be selected with the Mode
Dial.
: Auto Mode
Auto mode is for taking standard pictures.
The focus, exposure and white balance
settings as well as the flash are automatically selected or activated by the camera.
P : Program Mode
Program mode is also for taking pictures,
but the Flash On/Off and Continuous
settings can be selected manually. The
focus, exposure and white balance settings
are automatically selected by the camera.
However, the exposure setting may also be
adjusted manually with the Exposure
Compensation function. (p. 45)
20
: Stitch Assist Mode
Taking pictures in this mode is helpful if you
intend to merge several images into a
single high-quality panoramic image.
Merging images is easy if you use the
PhotoStitch utility software. In this mode,
the focus, exposure and white balance
settings are automatically selected by the
camera.
PLAY : Play Mode
Play mode is for viewing images recorded
on the CF card. Images are displayed on the
LCD panel one by one.
MULTI : Multi Mode
Multi mode is for viewing multiple images
recorded on the CF card. Images are displayed
on the LCD panel in groups of nine.
PC : PC Mode
PC mode is for viewing and processing
images with a computer.
Basic Functions of the PowerShot A5 continued....4/13
Display Panel
The Display Panel on the camera top shows
the status of camera settings, battery levels
and the approximate number of images that
can be stored in the CF card at the current size
and quality settings. Changing size and quality
settings will alter this number.
• Message codes on the Display Panel will
indicate errors or camera status. (p. 69)
Single Mode
Continuous Mode
Self-Timer Mode
Fine
Normal
CCD RAW
Large
Small
Flash On
Flash Off
Red-Eye Reduction
Macro Mode
Exposure Compensation
Beep On
Low Battery
Clock Not Set
21
Basic Functions of the PowerShot A5 continued....5/13
Viewfinder
Viewfinder Frame Marks
The camera is equipped with an optical
viewfinder for image composition.
The camera focuses on the area encompassed
by the square brackets in the viewfinder’s
center. When composing images, aim the
camera so that the photographic subject is in
the middle of the viewfinder.
• In Macro mode (photographic subject 950 cm from the lens), the actual area
shot by the lens is slightly lower than the
area shown in the viewfinder. The closer
the camera is to the photographic
subject, the larger the difference
between these areas.
• When taking shots in Macro mode,
be sure to confirm the image composition and focus in the LCD panel.
22
• Pressing the shutter button halfway locks
the focus until the button is released.
This allows you to focus on a particular
object while freely changing the image
composition. A moment after depressing
the shutter button halfway, two beeps
will sound and a green or red indicator
will light, indicating a focus lock. You are
now free to reorient the camera knowing that your target subject is in focus.
Basic Functions of the PowerShot A5 continued....6/13
Indicators
Two indicators appear to the left of the
viewfinder. These lights shine or flash when
the shutter button is pressed to confirm
various actions and camera modes.
Upper Indicator
Upper Indicator
Green:
Ready to take picture
(no flash)
Flashing Green: Storing to CF card
Red:
Flash On mode, ready to
take picture
Flashing Red:
Flash Off mode, insufficient
light (image may blur)
Lower Indicator
Orange:
Macro Mode On
Lower Indicator
23
Basic Functions of the PowerShot A5 continued....7/13
Shutter Button
The camera features a two-stage shutter
button.
Pressing Halfway
Press the shutter button halfway to automatically set the focus, exposure and white balance
to the optimal setting. When the camera
finishes metering, it will beep and lock the
shutter.
Shutter Button
24
• When the camera is ready to take a shot,
the upper indicator lamp will shine
green (no flash) or red (flash) and two
beeps will sound.
• When the LCD panel is turned on, the
image will freeze for an instant.
• In the Flash Off mode, the upper
indicator will flash red when there is
insufficient light for the exposure
setting. This is a warning that hand
tremors or camera movement will blur
the image.
• In the Macro mode, the lower indicator
will shine orange.
• In the Exposure Compensation mode,
the image of the photographic subject
will appear in the LCD panel after the
second beep.
Basic Functions of the PowerShot A5 continued....8/13
Pressing Fully
Pressing the shutter button all the way down
captures an image and stores the data on the
CF card.
• When an image is captured, a single
beep will sound and the upper indicator
will flash green while the data is stored
on the CF card.
• If the LCD panel is turned on while an
image is being stored, the window will
momentarily blank and display a Busy
message.
• If the LCD panel is turned off and the
Review function is set to On with the
Menu feature, a preview of the photographic subject will briefly appear in the
LCD panel while the shutter button is
fully depressed.
Continuous/Self-Timer
(+) Button
In Auto mode, this button turns the Self-Timer
mode on and off.
➜
In Program mode, this button switches
between the Single (frame), Continuous
(frame) and Self-Timer functions.
➜
➜
•
mark indicates the Single mode. A
single frame will be stored each time you
press the shutter button.
25
Basic Functions of the PowerShot A5 continued....9/13
•
mark indicates the Continuous mode.
The camera will record up to 15 frames
in rapid succession as long as the shutter
button is depressed and sufficient
memory is free. The images are stored at
the small size.
• mark indicates the Self-Timer mode.
The shutter will automatically activate 10
seconds after the shutter button is
pressed.
Flash (-) Button
In Play mode, this button displays the next
stored image.
•
In Multi mode, this button selects the next
stored image.
In the Menu feature, this button moves the
selection to the next option.
26
In Program or Stitch Assist mode, this button
switches between the Auto, Red-Eye Reduction, Flash On and Flash Off functions.
➜
➜
➜
mark indicates the Red-Eye Reduction lamp will light when you press the
shutter button.
The Red-Eye Reduction mode counteracts
the tendency for flash photography to
produce the red-eye effect in prints of
humans and animals, the result of light
reflected back from the subjects’ retinas.
The flash emitted before the actual
shutter operation causes the subjects’
irises to narrow in advance, thereby
Basic Functions of the PowerShot A5 continued....10/13
reducing the potential for reflections
back from the retinas.
In Play mode, this button displays the previous
stored image.
When shooting in the Red-Eye Reduction mode, press the shutter button
halfway and wait a moment before
pressing it fully. If the interval between
pressing the shutter halfway and all
the way is too short, the Red-Eye
Reduction lamp may not fire.
In Multi mode, this button selects the previously stored image.
In the Menu feature, this button moves the
selection to the previous option.
•
mark indicates the Flash On mode. The
flash will fire when you press the shutter
button.
•
mark indicates the Flash Off mode.
The flash will not fire when you press the
shutter button.
• When none of these symbols appear, the
camera is set to Auto Flash mode and the
light level detected by the camera will
automatically fire the flash.
27
Basic Functions of the PowerShot A5 continued....11/13
Macro/Jump Button
In Auto, Program or Stitch Assist mode, this
button turns the Macro mode on or off.
➜
•
mark indicates that the Macro mode is
on.
• In Macro mode, the lower indicator will
shine orange when the Shutter Button is
depressed halfway.
• In Macro mode, the actual area shot by
the lens is slightly lower than the area
shown in the viewfinder. The closer the
camera is to the photographic subject,
the larger the difference between these
areas.
28
• In Macro mode, the photographic
subject can be shot within a range of
9 to 50 cm and remain in focus.
• When shooting in Macro mode, check
the LCD panel to confirm that the
focus and scope of the image are
correct.
In Play and Multi mode, this button turns the
Jump mode on or off.
• In Play mode, turning the Jump mode on
enables you to skip to the first or last
image by pressing the +/- Buttons.
• In Multi mode, turning the Jump mode
on enables you to display the next or
previous set of nine images by pressing
the +/- Buttons.
Basic Functions of the PowerShot A5 continued....12/13
LCD Button
MENU Button
This button turns the LCD panel on or off in
the Auto and Program modes. In the Play and
Multi modes, the button turns the Video
Output function on or off.
This button displays the Recording (Rec.) Menu
when pressed in the Auto, Program and Stitch
Assist modes. (p.44)
• In Stitch Assist mode, the LCD panel is
automatically turned on.
• If the LCD panel is left on for a long
period the camera may become
warm. This is normal and does not
constitute a breakdown.
The button displays the Play Menu in the Play
and Multi modes. (p. 47)
• When a menu is already displayed on
the LCD panel, pressing the MENU
Button returns to the previous screen.
29
Basic Functions of the PowerShot A5 continued....13/13
SET Button
This button selects the current menu option
shown on the LCD panel.
MENU Button
SET Button
SET Button
pressed
30
Options displayed
LCD panel
Mode Dial Functions
The Mode Dial allows you to select between
the various shooting and playback modes
featured on the PowerShot A5.
Lock
The Mode Dial should be set to the Lock
position when the camera is not in use. In this
mode the lens cover will close and the camera
power will shut off.
• Ensure that you set the Mode Dial to
the Lock position before you change
a battery, eject a CF card or connect
the camera to a computer or television.
Auto Mode
not to use the flash and automatically chooses
focus, exposure and white balance settings.
The picture format is fixed at Large for this
mode, but the quality setting can be changed.
It is convenient to use this mode for normal
picture taking.
Buttons Available in Auto Mode
Macro Button
Use this button when you want to shoot a
photographic subject 9 to 50 cm distant
from the lens. The mark displays in the
Display Panel when this mode is selected.
Self-Timer Button
Use this button to activate the Self-Timer
mode. The mark displays in the Display
Panel when this mode is selected. The
shutter will activate 10 seconds after the
shutter button is pressed.
In Auto mode, the camera selects whether or
31
Mode Dial Functions continued....2/5
Program Mode
Macro Button
In Program mode, you can manually select the
Single or Continuous modes as well as the
image size and quality.
Continuous/Self-Timer Button
• You should select this mode to use
the CCD RAW function (no compression) for shooting.
Buttons Available in Program Mode
Flash Button
The Flash On, Flash Off and Red-Eye
Reduction functions can be manually set
with this button. The
mark indicates
that the Red-Eye Reduction is selected. The
mark indicates the Flash On mode is
selected. The
mark indicates the Flash
Off mode is selected.
32
Use this button when you want to shoot a
photographic subject 9 to 50 cm from the
lens. The mark is shown in the Display
Panel when this mode is selected.
Use this button to activate the Continuous
and Self-Timer modes. The
mark is
shown in the Display Panel when the
Continuous mode is selected. The mark
shows when the Self-Timer mode is
selected.
Mode Dial Functions continued....3/5
Stitch Assist Mode
Vertical Sequence
1
What is Stitch Assist?
The Stitch Assist mode is designed to make it
easier to merge separate panoramic images
into a single, seamless image using a computer. You can shoot a photographic subject that
won’t fit into a single frame, such as a
landscape, and stitch it together later with a
computer. This mode displays the previous
images while you shoot the next in a horizontal, vertical or matrix sequence of images.
2
3
4
2x2 (Matrix) Sequence
1
2
3
4
• See the Taking pictures in the Stitch
Assist Mode section for more detail on
this subject. (p. 36)
Horizontal Sequence
1
2
3
4
33
Mode Dial Functions continued....4/5
Play Mode
Multi Mode
In Play mode, you can display images from the
CF card one at time on the LCD panel.
In Multi mode, you can display images from the
CF card in groups of nine on the LCD panel.
• Press the + or - Button to display the
next or previous recorded image.
• Using the Macro/Jump Button to select
the Jump mode enables you to skip to
the first or last image with the + or Buttons.
• In the group of nine, the selected image
is indicated by a green border. Move the
selection between images using the +/Buttons and display the selection at full
size by turning the Mode Dial to the
PLAY position.
• Using the Macro/Jump Button to select
the Jump mode enables you to display
the next or previous group of nine
images with the +/- Buttons.
34
Mode Dial Functions continued....5/5
PC Mode
In PC mode, you can connect to a computer to
load and display images into an image
processing application program. (p. 56)
• The LCD panel will display [PC] when the
camera is ready to display or load images
on the computer.
• The camera may cease to respond when
the Mode Dial is turned from the PC
position to another setting. Turn the
Mode Dial again or press any button to
have it resume mal operation.
35
Taking Pictures in Stitch Assist Mode
Set the Mode Dial to the
(Stitch Assist)
position and follow the procedures below to
merge several images into one large panoramic scene. In Stitch Assist mode, images can
be shot in horizontal, vertical or 2x2 (matrix)
sequences.
Buttons Available in Stitch Assist
Mode
Flash Button
The Auto, Red-Eye Reduction, Flash On and
Flash Off modes can be set with this
button.
Macro Button
The Macro mode for shooting photographic subjects 9 to 50 cm distant from
the lens can be set with this button.
Retaking a Picture
• In this mode, repeatedly pressing the +
Button enables you to scroll through the
36
images to confirm the current merge
sequence and to retake an image if
required.
• To retake an image in a horizontal or
vertical sequence, press the + Button to
return to the previous image and take
the shot. Press the + Button again to
return to the original image.
• To retake an image in a 2x2 (matrix)
sequence, press the + Button to advance
to any image that you wish to replace
and take the shot.
When a Sequence is Complete
• When you have completed shooting a
sequence, press the SET Button to return
to the Stitch Assist menu.
• To exit Stitch Assist mode, turn the Mode
Dial to another setting, such as the L
(Lock) Position.
Taking Pictures in Stitch Assist Mode continued....2/6
Shooting Hints
• It is convenient to use the Stitch Assist
mode to quickly confirm as you shoot
that successive images overlap.
• When shooting images for 2x2 matrices,
ensure that each frame overlaps its
neighbor to prevent a gap appearing in
the middle of the merged image. Two
images that are askew or mismatched
from right to left (or top to bottom) will
result in such a gap.
• Shoot all images with the same focus
setting. Two images shot with substantially different focal distances — one
focused on the foreground, for example,
and another on the background — may
produce unsatisfactory results. Be
particularly careful with interior shots.
• When shooting a horizontal series of
scenery shots, hold the camera as level
(horizontal) as possible. Tilting the
camera up or down may prevent the
images from being successfully merged.
• Shooting images with a moving object in
the overlapped portion may produce
poor results.
• When shooting close-ups of documents
and magazines, avoid shooting segments
from different angles. Hold the camera
as close to parallel as possible.
• The difference in brightness of an image
shot with a flash and one without can
sometimes be too great to permit a
successful merge. If you intend to merge
images later with PhotoStitch, it is
recommended that you shoot without
the flash in relatively bright places.
37
Taking Pictures in Stitch Assist Mode continued....3/6
Procedures for Shooting
Horizontal/Vertical Sequences
1. Turn the Mode Dial to the
Assist) position.
(Stitch
• To change the direction, press the +
Button.
3. Shoot the first image. After the
indicator stops flashing green, the next
image appears beside the previous
image.
4. Orient the camera so that the second
frame overlaps a small portion of the
photographic subject of the first image
and press the shutter button to take
the next image.
2. Select [Horizontal] or [Vertical] with
the +/- Buttons and press the SET
Button.
Horizontal
Sequence
38
After the indicator stops flashing green,
the second recorded image will display
beside a preview of the new photo-
Taking Pictures in Stitch Assist Mode continued....4/6
graphic subject captured by the lens.
6. Finish the sequence by pressing the SET
Button after the last image has been
recorded.
• To retake the previous image in the
sequence, press the + Button before
shooting the next image. The previously
recorded image will be replaced by a
preview of the new photographic subject
captured by the lens.
2x2 Shot Procedures
5. Follow the same steps to shoot subsequent images in the sequence.
2. Select [2x2] with the +/- Buttons and
press the SET Button.
• Do not worry about minor discrepancies
in the overlapped areas because the
computer software can compensate for
them when the images are merged.
• You can check through a sequence by
repeatedly pressing the + Button.
Release the button to retake the
previous image.
• A maximum of 26 frames may be shot in
any horizontal or vertical sequence.
• By default, images are recorded in a
clockwise direction starting from the upper
right. To change the starting position, press
the + Button before taking the first shot.
1. Turn the Mode Dial to the
Assist) position.
(Stitch
39
Taking Pictures in Stitch Assist Mode continued....5/6
3. Shoot the first image. After the
indicator stops flashing green, the
recorded image will display in the
upper right, and a preview of the new
photographic subject captured by the
lens will appear in the lower right.
4. Overlap a small portion of the photographic subject of the first image and
shoot the next image in the sequence.
40
After the indicator stops flashing green,
the second recorded image will display
in the lower right, and a preview of the
new photographic subject captured by
the lens will appear in the lower left.
5. Orient the camera so that the third
image will correctly overlap a portion
of the second image and take the shot.
After the indicator stops flashing green,
the third recorded image will display in
the lower left, and a preview of the
new photographic subject captured by
the lens will appear in the upper left.
Taking Pictures in Stitch Assist Mode continued....6/6
6. Orient the camera so that the fourth
image will correctly overlap a portion
of the third image and take the shot.
After the indicator stops flashing green,
the fourth recorded image will display
in the upper left, and a preview of a
new photographic subject captured by
the lens will appear in the position of
the first image.
will cause the lens preview to disappear.
Releasing the button displays the image
immediately preceding the last image
displayed.
7. Finish the sequence by pressing the SET
Button after all the images have been
recorded.
• To retake a shot, press the + Button to
advance to the image you want to
replace, wait until the lens preview
displays and then retake the shot.
• Do not worry about minor discrepancies
in the overlapped areas because the
computer software can compensate for
them when the images are merged.
• You can check through the sequence by
repeatedly pressing the + Button , which
41
Menu Features
Menus can be used to select image size and
quality settings (Record Menu), to select the
display options, such as information formats
and the Slide Show option (Play Menu), and to
select date, time and other camera settings,
such as the LCD panel brightness (Setup
Menu).
Record Menu
Quality ................ p. 44
Review ................ p. 45
+/- (Exp.) .............. p. 45
Reset File No. ........ p. 46
Setup .................... p. 52
LCD .................. p. 52
Beep ................ p. 53
Power Save ....... p. 53
Reset ............... p. 53
Date/Time ........ p. 53
42
Play Menu
Show Info. ............. p. 47
Slide Show ............. p. 47
Protect ................... p. 50
Erase ...................... p. 51
Setup ..................... p. 52
LCD ................... p. 52
Beep ................. p. 53
Power Save ........ p. 53
Reset ................ p. 53
Date/Time .......... p. 53
Format ............. p. 54
Language .......... p. 54
Print Mark .............. p. 51
Menu Features continued....2/13
Basic Menu Operations
Menu functions are operated by the MENU,
+/- and SET Buttons.
next option and press the - Button to display
the previous option.
- Button
MENU Button
+/- Buttons
SET Button
+ Button
The selected item is highlighted
MENU Button
This button turns the menu display on or off.
This button also displays the previous menu
when a submenu has been selected.
+/- Buttons
These buttons move the selection from one
option to another within a menu. A highlight
appears around an option to indicate its
selection. Press the + Button to display the
SET Button
This button confirms the selection of a menu
option or a setting. When there is a submenu
available, pressing this button advances the
display to the next menu level. Once the SET
Button has been pressed, the selected setting
comes into force.
43
Menu Features continued....3/13
Record Menu
Pressing the MENU Button in the Auto,
Program or Stitch Assist modes displays the
Record Menu on the LCD panel.
Size/Quality
Compression Format
Large/Fine (1024 x 768)
JPEG High Quality
File Size
180 KB
Large/Normal (1024 x 768)
Quality
The Quality option is used to set the format in
which the image will be recorded. Image quality
can be set to Normal, Fine or CCD RAW and
the size can be set to Large or Small.
JPEG Normal
85 KB
Small/Fine (512 x 384)
JPEG High Quality
60 KB
Small/Normal (512 x 384)
JPEG Normal
30 KB
CCD RAW (960 x 768)
No Compression
940 KB
• JPEG file sizes will vary between photographic subjects.
• Figures noted herein reflect standard
shooting conditions established by Canon.
• The Small and CCD RAW sizes are not
available in Auto mode.
44
Menu Features continued....4/13
• The CCD RAW size is not available in
Stitch Assist mode.
as backlight shots and artificially illuminated
night shots.
Review
The Review function displays the picture on
the LCD panel if you continue to press the
shutter after a shot is taken. The Review
function will still display the picture even when
the LCD panel is turned off.
+/- (Exp.)
The Exposure Compensation function allows
you to adjust exposure settings to a variety of
situations in which a photographic subject is
shadowed or a light source is too intense, such
• To use this function, aim the camera at
the photographic subject and watch the
preview image in the LCD panel while
you adjust the exposure setting with the
+/- Buttons. The preview image will
reflect the changes. Press the SET Button
or MENU Button to set the setting. Once
you have selected a setting other than
zero, the Display Panel will
show the “+/-” symbol.
45
Menu Features continued....5/13
• The Exposure Compensation function
can not be activated in Auto mode.
Reset File No.
This function resets the file number that was
automatically assigned to each frame as it was
recorded. A new CF card will be assigned file
number 1 and previously recorded CF cards
will be assigned file numbers greater than
those on the new CF card.
46
About File Numbers
Images are recorded in folders on the CF
card. A single folder will accommodate up
to 50 images. The first folder accommodates file numbers 1 to 50, the second
numbers 51 to 100, the third numbers 101
to 150, and so on until the CF card is filled.
However, removing a battery will cause the
folder last accessed to close. When the
battery is replaced, new images are
assigned a file number starting from the
first number of the next available block of
50. For example, if the last image was
assigned file number 12, the first image
after battery replacement will be assigned
file number 51 and be placed in the next
folder.
Menu Features continued....6/13
Play Menu
Pressing the MENU Button in the Play or Multi
modes displays the Play Menu on the LCD
panel.
Show Info.
This function displays information about an
image, such as its shooting date and file
number.
file number, shooting date and time and
protection setting icon.
• In Multi mode, this function displays the
image number of the selected image and
the total number of images. When the
total number of images requires four or
more digits, all image numbers are
replaced by the number sign “#”.
Slide Show
This function automatically scrolls through the
images on a CF card displaying each in turn as
in a slide show. You can set the length of time
that each is replayed and specify a subset of
images to display with the Mark/Unmark
option.
•␣ Selecting this option causes the LCD
panel to display the image data. The
menu then shows the [Hide Info.] option.
• In Play mode, this function displays the
image number, total number of images,
47
Menu Features continued....7/13
Start
Begin the slide show by selecting the Start
option.
• The All Images option displays the
complete set of images on a CF card.
• Select Show 1, 2 or 3, then use the Mark
function to select the images you wish to
contain in that show. Images are displayed in order by file numbers.
• During a slide show, press the +/- Buttons
to pause or restart it.
• Press the MENU Button to stop a slide
show.
• When the Power Save function is on, the
camera automatically shuts down if five
48
minutes passes before a button is
operated. To prevent this occurring
during a long slide show, we recommend
you set the Power Save function to off
and use the compact power adapter to
conserve the camera battery.
• Only images shot with the PowerShot A5
will show the image number and total
number of marked images when the
Show Info function is on.
Mark/Unmark
This function is used to mark or unmark
images for replay in a slide show. A marked
image can be saved in shows 1 to 3.
Menu Features continued....8/13
• A Checkmark appears beside slide shows
in which marked images have already
been registered.
• Use the +/- Buttons to scroll through
images and the SET Button to mark an
image. If you select the marked image
and press the SET Button, the image is
unmarked. A checkmark will be associated with marked images.
• A checkmark will appear beside the
shows that contain marked images.
• A maximum of 100 images can be
marked.
Clear Marks
This function clears all marked data contained
in shows 1 to 3.
• Selecting the [OK] deletes the marks.
Selecting the [Cancel] returns the LCD
panel to the Slide Show menu.
49
Menu Features continued....9/13
Play Time
The length of time an image is displayed on
the LCD panel can be set to manual (+/-) or to
the 2-, 5- or 10-second settings.
• The MENU Button will still end the slide
show when pressed, even if the Repeat
function is active.
• With the manual setting, the slide show
can be advanced forward or backward
with the +/- Buttons.
• The actual play time for some images
may differ slightly from the selected
setting.
Repeat
Selecting this option enables you to automatically repeat the slide show once it reaches the
last image.
50
Protect
The Protect function locks an image file to
prevent accidental deletion from the CF card.
The function is also used to unlock image files.
Menu Features continued....10/13
• Use the +/- Buttons to scroll through
images and the SET Button to protect or
unlock an image.
• An icon will appear next to an image
that is protected.
Erase
This function can be used to erase image files
from a CF card.
function.
• Selecting the All option erases all the
images on a CF card with the exception
of protected images.
• When confirmation messages are
displayed, select [OK] to erase, or
[Cancel] to cancel, this operation.
Print Mark
This function marks CF card files for printing.
When the CF card is used with the optional
digital printer CD-200, selecting [Print All]
automatically prints the marked images.
• Selecting the Single option allows you to
scroll through images with the +/Buttons and select single images for
erasing.
• Protected files can not be erased until
their status is changed with the Protect
• Use the +/- Buttons to scroll through
images and the SET Button to mark or
51
Menu Features continued....11/13
unmark an image. A checkmark is
appears beside with the marked images.
• Use the camera to confirm the
checkmarks. The checkmarks can’t be
checked or altered once the CF card is
placed in the printer.
• A maximum of 100 images may be
marked.
Setup
Selecting the Setup option in either the Record
or Play menus displays the Setup submenu.
• CCD RAW images will not print as
part of the Print All queue on the CD200 printer even if it is marked.
• The [Format] and [Language] options do
not appear in the Setup submenu
accessed from the Record Menu.
LCD
The brightness of the LCD panel can be
switched between [Normal] and [Bright]
settings.
52
Menu Features continued....12/13
Beep
Date/Time
The beep that signals the completion of the
autofocus process and the closing of the
shutter can be turned on or off with this
function.
Use this setting to adjust the camera’s date
and time settings and display formats.
Power Save
This option turns the Power Save function on
or off. If turned on, the camera will automatically powerdown if left unused for several
minutes in any mode.
Reset
This function resets the LCD, Beep and Power
Save settings to the factory default settings.
• Factory Default
Settings
LCD:
Normal
Beep:
On
Power Save: On
• Press the SET Button to move between
the Style, Day, Month, Year, Hour and
Minute fields.
• Press the +/- Buttons to advance the
numbers or options in a field.
• Press the MENU Button to save the
settings and close the Date/Time menu.
53
Menu Features continued....13/13
Format
Language
This function enables you to format a CF card
for use with the camera.
Use the Language option to change the
language in which messages on the LCD panel
are displayed.
• Please note that formatting a CF card
permanently erases all the data, not
only the images, previously recorded
on it.
• Selecting the [OK] initiates the formatting process. Selecting the [Cancel]
returns the Setup menu to the LCD
panel.
54
• Use the +/- Buttons to move between
language selections and the SET Button
to execute the selection.
• In Play mode, you can go directly to this
window by pressing and holding the SET
Button, then pressing Macro/Jump
Button.
Connecting to a TV
You can connect your camera to a television to
display the images you have recorded by
following the procedures below.
1. Turn the camera’s Mode Dial to the L
(Lock) position (Off) and ensure that
the TV power switch is off.
2. Insert one end of the video cable
shipped with the camera into the
VIDEO Terminal and the other end into
the TV’s Video In jack.
TV Video In
VIDEO Terminal
Video Cable
(Supplied)
3. Turn the TV on and set its TV/Video
setting to Video.
4. Turn the camera’s Mode Dial to the
PLAY or MULTI position.
5. Confirm that an image displays on the
LCD panel, then press the LCD Button
to turn off the panel and display on the
TV screen.
6. Play images using the normal procedures.
7. When you finish viewing, turn the
camera Mode Dial to the L (Lock)
position before disconnecting the cable
from both devices.
• When you are using the +/- Buttons to
switch images, the display resolution will
drop slightly until the next image
appears.
55
Connecting to a Computer
Connecting to a Windows Computer
Connecting to a Macintosh Computer
The camera is shipped with a PC interface
cable that fits into the camera’s DIGITAL
Terminal so that it may be connected to the
serial port of a computer running a Windows
operating system.
The camera is also shipped with a Macintosh
interface cable that fits into the camera’s
DIGITAL Terminal so that it may be connected
to the modem or printer port of a computer
running a Macintosh operating system.
Printer Port
DIGITAL Terminal
Modem Port
DIGITAL
Terminal
Serial Port
PC Interface Cable
56
Macintosh Interface Cable
Connecting to a Computer continued....2/2
•␣ Before connecting the interface cable,
ensure that both the camera and
computer power switches are turned off.
This means that you should turn the
camera’s Mode Dial to the L (Lock)
position.
• Once the interface cables have been
connected and the power switches
turned on, you can load images onto the
computer from the camera by turning
the Mode Dial to the PC position and
starting up the image processing
software supplied with the camera.
• Please read the Quick Start Guide or
Help file provided with each software
program for specific instructions on their
use.
57
Changing the Button Battery and Setting the Date/Time
If the Clock Not Set message
flashes on the
Display Panel, it means that the button battery
charge is low and the date/time setting has
been lost. Purchase a generic CR2016 lithium
battery and exchange it for the spent battery
with the following procedures.
Changing the Button Battery
1. Ensure that the Mode Dial is set to the
L (Lock) position.
2. Slide the battery cover lock to the
release position and slide the battery
cover open.
3. Remove the battery pack.
4. Take out the button battery holder and
remove the spent battery.
To remove the button
battery holder from the
battery chamber, insert a
fingernail beneath the
indent and gently pry it
back and upward.
Button battery holder
58
Indent
Changing the Button Battery and Setting the Date/Time continued....2/3
5. Place the new button battery into the
holder with the negative terminal (-)
facing upward as shown.
7. Replace the battery pack.
Open End
(-)
Tabs
8) Close the battery cover and slide the
lock to the locked position.
6. Place the loaded button battery holder
back into place in the battery chamber.
Align the button battery holder with its slot and
lightly press it forward into place with your fingertip.
• Check to make sure that the lock is in the
locked position once you have closed the
battery cover. The camera will not
operate unless the lock is set.
59
Changing the Button Battery and Setting the Date/Time continued....3/3
Setting the Date/Time
Follow the procedures below to set the date/
time once you have changed the button
battery.
• The Clock Not Set message
will
continue to flash on the Display Panel
until you set the date/time, even if
you have changed the button
battery. Always set the date/time
after changing the button battery.
1. Turn the Mode Dial to the
position.
(Auto)
4. Use the +/- Buttons to select Date/Time
and press the SET Button.
5. Use the SET Button to move between
fields and the +/- Buttons to change the
values to the appropriate settings.
2. Press the MENU Button.
6. Press the Menu button when you finish
adjusting the settings.
3. Use the +/- Buttons to select Setup and
press the SET Button.
60
7. Turn the Mode Dial to the L (Lock)
position.
Camera Maintenance
Follow the procedures below to clean the
camera body, lens, viewfinder and LCD panel
when they become dirty.
• Never use thinners, benzene, synthetic
cleansers or water to clean the equipment. The use of these substances may
distort or damage the equipment.
Camera Body
Gently wipe dirt off the camera body with a
soft cloth or an eyeglass lens wiper.
Lens
Use a lens blower to remove dust and dirt
from the lens.
• Never wipe anything directly on the
lens, even a soft cloth or eyeglass lens
wiper. If the lens accumulates dirt
that will not come off with a lens
blower, contact your camera retailer
or the closest Canon Customer
Support Help Desk.
Viewfinder
Use a lens blower to remove dust and dirt
from the viewfinder. If necessary, gently wipe
the viewfinder with a soft cloth or eyeglass
lens wiper to remove stubborn dirt accumulations.
LCD panel
Use a lens blower to remove dust and dirt
from the LCD panel. If necessary, gently wipe
the LCD panel with a soft cloth or eyeglass
lens wiper to remove stubborn dirt accumulations.
• Never rub or press strongly on the
LCD panel. Rubbing or pressing firmly
on the LCD panel may damage it or
lead to other problems.
61
Optional Accessories
The follwing optional accessories are available
for the PowerShot A5.
Soft Case
This attractive case
protects the camera.
CF Cards
CompactFlashTM (CF) cards are used to store
images recorded by the camera. The card must
be installed into the camera to operate. Only
one card can be installed at a time. A CF card
is supplied with the camera at the time of
purchase. However, if you wish to purchase
additional cards, please see the list below for
the model names and capacities of the
available products.
62
FC-4M
FC-8M
FC-15M
CF Cards and Capacities
Small/N
Small/F
Large/N
FC-4M
118
63
45
Large/F
22
CCD RAW
FC-8M
236
125
89
44
8
FC-15M
442
235
169
81
15
4
• Figures noted herein reflect standard shooting conditions
established by Canon.
• The performance of the PowerShot A5 can be guaranteed
only with CF cards manufactured by Canon.
N=Normal F=Fine CCD RAW= Non compressed
Optional Accessories continued....2/2
PCMCIA Card Adapter
Digital Printer CD-200
An adapter to fit to a CF card so that it can be
used in a PCMCIA (PC card) slot in a computer.
A printer into which a CF card can be inserted
to print out high-quality image prints. Easy
operation.
If print marks are placed on your target images
with the PowerShot A5 camera, the printer
will automatically print only those images.
CF Card Reader
This device enables computers lacking a
PCMCIA (PC Card) slot to carry out read and
write operations on a CF card.
63
Troubleshooting
Problem
Camera will not operate
Camera will not shoot
64
Cause(s)
Solution(s)
Battery cover lock not in
lock position
• Slide the battery cover lock into the
locked position.
2CR5 lithium battery is
inserted the wrong way
• Install the 2CR5 lithium battery with
the terminals oriented toward the
back of the chamber.
Insufficient battery power
(LCD panel displays [Lb])
• Use a fully charged battery pack.
• Replace the battery.
• Use an approved AC power source.
Incorrect battery type
• Use the specified battery pack or
lithium battery.
Poor contact between
battery and camera
terminals
• Wipe the battery terminals with a
clean, dry cloth.
Mode Dial is set to L (Lock)
position
• Turn the Mode Dial to any one of
the (Auto), P (Program) or
(Stitch Assist) mode positions.
Troubleshooting continued....2/5
Problem
Camera will not shoot
Battery fails prematurely
Cause(s)
Solution(s)
Flash is charging
( mark flashes)
• Wait to press the shutter button
until the flash charges, the mark
changes from flashing to a steady
light and the indicator shines red.
CF card slot cover is open
(LCD panel displays “CF”)
• Firmly close and lock the CF card slot
cover.
CF card full
• Replace the CF card.
• Load the data of the CF card to a
computer and erase all or some of
the card’s images to create space.
CF card not formatted
correctly
(LCD panel displays “CF”)
• The logic circuits of the CF card may
be faulty or damaged. Please consult
the nearest Canon Customer
Support Help Desk.
Low ambient temperature
has diminished battery
output
• Restrict use of the battery pack to
places with ambient temperatures
over 0°C. When taking shots in
relatively cold conditions, keep the
camera warm next to your body or
in a pocket.
65
Troubleshooting continued....3/5
Problem
Battery fails prematurely
Battery pack will not charge
66
Cause(s)
Solution(s)
Battery capacity has
diminished after non-use for
a year or more
• The battery should recover if you
fully charge and fully discharge it
several times.
Battery pack life has been
exceeded
• This battery pack can no longer be
used to operate the camera. Replace
it with a new battery pack.
Poor connection between
battery pack and compact
power adapter
• Seat the battery pack more firmly
into the charger.
• Check the AC power cord connection between the wall socket and
the charger.
Camera is drawing power
from the AC power source
• The battery pack won’t charge when
the camera is drawing power from
the compact power adapter. Turn
the camera’s Mode Dial to the L
(Lock) position to initiate charging.
Troubleshooting continued....4/5
Problem
Image is blurred or
out of focus
Images are too dark
Cause(s)
Camera or photographic
subject is moving
Solution(s)
• Be careful not to move the camera
when pressing the shutter button.
Photographic subject is out
of focal range
• Move camera at least 50 cm from
subject.
• Use the Macro function to shoot
subjects between 9 and 50 cm from
the lens.
Autofocus (AF) Auxiliary
Light Emitter is obscured,
hampering autofocus
function
• Be careful not to block the AF
Auxiliary Light Emitter with your
finger, clothing or jewelry.
Insufficient ambient light
• Ensure that the Flash mode is set to
on.
Photographic subject is
insufficiently illuminated in
comparison with surroundings
• Adjust the Exposure Compensation
mode to a positive “+” setting.
67
Troubleshooting continued....5/5
Problem
Cause(s)
Solution(s)
• The effective range of the flash is 20
cm to 3.5 m .
Images are too dark
Photographic subject is
beyond the range of the
flash
Images are too bright
Photographic subject is too
close
• The effective range of the flash is 20
cm to 3.5 m.
Photographic subject is
brighter than surroundings
• Adjust the Exposure Compensation
function to a negative “-” setting.
Light is shining directly on
or reflected onto camera
from the photographic
subject
• Change the shooting angle.
Camera is set to Flash On
mode
• Set the camera to Auto or the Flash
Off mode.
Camera is set to Flash Off
mode
• Set the camera to Auto or Flash On
mode.
Flash will not work
68
List of Message Codes
The following codes may appear in the Display Panel. The significance of the message is explained
alongside.
Pb:
CF:
Lb:
PC:
Exx:
:
:
Image playback
No CF card installed, CF card slot cover is open or unlocked, or CF card error
Insufficient battery charge to operate camera
Camera connected to a PC in PC mode
(xx: number) Camera malfunction. Turn Mode Dial to L (Lock) position and retry shot or
replay. Problem exists if error code reappears. Note the number and contact Canon Customer Support Help Desk.
If error code displays directly after taking a picture, shot may not be recorded. Check image
with Play function.
2CR5 lithium battery or Battery Pack NB-5H charge low. Replace 2CR5 lithium battery or
recharge Battery Pack NB-5H.
Button battery charge low and date/time setting lost. Replace battery and reset date and
time.
69
List of Messages
The following messages may appear on the LCD panel.
Busy:
CF card full!:
No Image.:
Image too Large.:
CF card error!:
Naming error!:
Image is recording on CF card.
CF card is too full to accommodate more images.
No images recorded on CF card.
You attempted to view an image larger than the Large (1024 x 768) size.
CF card has experienced an anomaly.
There is a file in the root directory titled [DC97] or you attempted to
record a shot onto a CF card with a file entitled [AUT_0000.JPG] nestled
within the [CTG99999] and the [DC97] folders, respectively.
Incompatible JPEG format: You attempted to view an incompatible JPEG file.
No CF card:
You attempted to view or shoot an image without a CF card installed.
Corrupted Data:
You attempted to view an image with corrupted data.
70
Specifications
PowerShot A5
Image Sensor:
Gradation Reproduction:
Sensitivity:
Image Data Storage:
File Format:
Image Compression:
Compression Modes:
Recorded Image Size:
Image Properties:
Camera Modes:
Lens:
Viewfinder:
Shutter:
Shutter Speeds:
Focusing Method:
Focusing Range:
Auto Exposure Method:
Metering Range:
Exposure compensation:
Flash:
Flash Range:
810,000-pixel (total), 1/3-inch charge coupled device
8 bits x 3 colors (10-bit data processing)
Equivalent to ISO 100 (Large/CCD RAW), Equivalent to ISO 400 (Small)
CompactFlash™ card
CIFF (Camera Image File Format)
Images: JPEG and proprietary Canon format (CRW); Thumbnails: JPEG
Fine, Normal and CCD RAW
1024 x 768 or 512 x 384 pixels
Shooting date and time, image serial number, etc.
Auto, Program, Stitch Assist, Play, Multi and PC
5 mm (35 mm film equivalent : 35 mm), F2.5
Real-image optical viewfinder, Gives 86% coverage of actual picture area
2-inch low-temperature poli-silicone thin-film transistor liquid crystal display
Mechanical + electronic
1/6 to 1/750 sec.
Through the lens high-speed autofocus
Standard: 50 cm to infinity; Macro: 9 to 50 cm
Through the lens programmable auto exposure
EV 5 - 16.5
± 2 EV
Built-in (Auto, On, Off, Red-Eye Reduction)
0.2 to 3.5 m
71
Specifications continued....2/2
White Balance control:
Self-Timer:
Interfaces:
Power Supply:
TTL auto white balance
10-second delay
RS232C, CF Slot, Video Out
Nickel-hydride Battery Pack NB-5H (400 shots or more, or approximately 70 minutes of replay)
2CR5 lithium battery (700 shots or more, or approximately 100 minutes of replay)
Compact Power Adapter CA-PS100E
CR2016 lithium battery for Date / Clock backup
Tesing Conditions
Nickel-hydride Battery Pack NB-5H was used fully charged; 2CR5 lithium battery was used immediately
after purchase.
Shooting:settings were Large/Fine, LCD off; flash used once every four shots.
Replay: continuous replay, each image was displayed for 5 seconds.
Operating Temperatures:
Operating Humidity:
Dimensions:
Weight:
0° to 40° C
10 to 90 %
103 x 68 x 32.5 mm
Approximately 230 g, excluding batteries and CF card
*All data are based on Canon’s standard testing methods.
Subject to change without notice.
72
Appendix A
Before You Use Battery Pack NB-5H
Canon Battery Pack
NB-5H
Instructions
Fully charge Battery Pack NB-5H before
using it for the first time.
Please read the operating instructions
provided with Compact Power Adapter
CA-PS100E to charge.
Battery Pack NB-5H
Canon Battery Pack NB-5H is a nickel-hydride
battery pack intended for exclusive use with
Canon PowerShot digital cameras.
The battery pack can be charged with the
Canon Compact Power Adapter CA-PS100E for
approximately 300 charge cycles.
Compact Power Adapter CA-PS100E
73
Appendix A continued....2/4
Operating Precautions
Before you use the battery pack for the first
time, charge it fully.
Full Charging Time: Approx. 90 minutes
(Based on Canon’s standard testing method with
the Compact Power Adapter CA-PS100E. )
➤ Charge times will vary with ambient temperatures and battery charge states.
➤ To prolong the life of the battery pack and
prevent deterioration of performance, do not
charge for more than 24 hours at a time.
• Recharging before the battery pack is fully
discharged may diminish the capacity of the
battery. If this should occur, you may restore
it by fully charging and discharging it.
• The capacity of battery packs left unused
for long periods (more than 1 year) will be
shorter than normal immediately after use
is resumed.
74
The capacity can be restored by fully
charging and discharging the battery
pack several times.
• Replace a battery pack if it repeatedly fails to
record the rated number of images after being
charged the specified length of time.
Appendix A continued....3/4
Safety Precautions
• Do not charge this battery pack with chargers
other than those recommended by Canon.
• Do not use the Battery Pack NB-5H in products
other than those recommended by Canon.
• Do not short-circuit the positive and negative
terminals of the battery pack with metallic or
other objects. Use the supplied battery case
when transporting or storing the battery pack
outside the camera.
• Avoid dropping or subjecting the battery pack
to severe impacts.
• Do not attempt to disassemble or alter the
battery pack.
• Do not apply heat or expose the battery pack
to open flame.
• Store the battery pack well out of the reach of
children.
• Immediately flush water over parts of the
body or clothing that come into contact with
the inner contents of a battery if the outer
casing incurs damage. If any of these
substances should contact internal tissues,
such as eyes or the mouth, immediately flush
with water and seek medical assistance.
75
Appendix A continued....4/4
Storage Precautions
Specifications
Battery packs continually discharge small
amounts of energy while installed in the camera.
Long storage of a battery pack in the camera
could cause unnecessary discharge that will
shorten its life.
Type:
Nickel-hydride cells
Rated Voltage:
6V
We recommend that you remove the battery
pack from the camera if you do not anticipate
its immediate use. Store it in a cool, dry place in
the case provided. Before resuming use, ensure
that you charge the battery pack fully.
Operating Temperatures: 0° to 40°C
Rated Amperage: 650 mAH
Life-Span:
Approximately 300 charges cycles
Dimensions:
34 x 22 x 49 mm
Weight:
Approximately 70 g
Subject to change without notice.
76
Appendix B
Voltage Range
Canon Compact Power Adapter
CA-PS100E
Compact Power Adapter CA-PS100E is rated
for input voltages ranging between 100 and
240 volts.
Instructions
Compact Power Adapter CA-PS100E is designed
for exclusive use as the AC power source for
Canon PowerShot digital cameras using Battery
Pack NB-5H and the charger for NB-5H.
77
Appendix B continued....2/4
Charging the Battery Pack NB-5H
1. Connect the power cord to the compact
power adapter and plug it into a power
outlet.
2. Place the battery pack into the socket of the
compact power adapter (Fig. 1).
Battery Pack NB-5H
Compact Power Adapter CAPS100E
Charging Indicator
78
A fully depleted battery pack will require
approximately 90 minutes to charge fully
(based on Canon’s standard testing method).
Unplug the compact power adapter from
the power outlet after charging and when
the unit is not in use.
Fig. 1
To AC Power Outlet
While charging, the charging indicator on
the compact power adapter will flash
green. Once the battery pack has charged,
the indicator will remain lit.
Appendix B continued....3/4
Powering the Camera
with the Compact Power Adapter
1. Place the DC Coupler DR-100 into the
camera's battery chamber and connect the
DC terminal to the compact power adapter
(Fig. 2).
3. Connect the power cord to the compact
power adapter and plug it into a power outlet.
Fig. 2
2. Ensure that the camera's Mode Dial is set
to the [L] Lock position (power off).
Cable Cover
The DC indicator on the compact power
adapter will light red while powering the
camera.
Battery Pack NB-5H will not charge while
the compact power adapter is powering
the camera.
Unplug the power cord from the power
outlet after use.
DC Coupler
DR-100
Compact Power
Adapter
CA-PS100
DC Indicator
DC Terminal
79
Appendix B continued....4/4
Operating Precautions
• Do not use the compact power adapter to
charge products other than Battery Pack
NB-5H.
• To prolong the life of the battery pack and
prevent deterioration of performance, do not
charge it for more than 24 hours at a time.
• The use of this equipment as an AC power
source is limited to those devices that also use
Battery Pack NB-5H. Do not use this
equipment to power any other devices.
• Never disassemble or alter any part of this
equipment.
• Do not leave the equipment in places subject
to direct sunlight or high temperatures.
• Do not attempt to charge the battery pack in
places with poor air circulation.
Please read the operating instructions
provided with Battery Pack NB-5H.
80
Specifications
Input Voltage: AC 100 to 240 V (50/60 Hz)
Rated Output: Charging: 7.2 V, 0.65 A
Camera power supply: 6.5 V, 1.5 A
Input Rating: Charging: 23 to 26 VA (100 V)
Camera power supply: 18 to 20 VA (100 V)
Operating Temperature: 0° to 40°C
Dimensions:
75 x 102 x 39 mm
Weight:
Approximately 180 g
Subject to change without notice.
Appendix C
Instructions for Camera Installation
Canon
CompactFlash Card
™
Instructions
Install the CF card in accordance with the
handling instructions accompanying the
camera.
Instructions for PCMCIA Slot Installation
1. Insert the CF card firmly into the PCMCIA
adapter as shown in Fig. 1.
The CompactFlash™ Card (CF card) is designed
for exclusive use as storage media for
PowerShot digital cameras. CF cards can be
used to record images and sound when installed
in the camera. They can also be inserted into a
PCMCIA (PC card) slot (PCMCIA 2.1/JEIDA 4.2
Standard slot) with the addition of a PCMCIA
adapter and used directly with a computer to
load and save images.
Fig. 1
Arrow mark
CF Card
PCMCIA Adapter
81
Appendix C continued....2/4
2. Insert the PCMCIA adapter all the way into the
PC card slot as shown in Fig. 2.
Fig. 2
Operating Precautions
• Do not turn the camera power off or remove
the CF card while the camera is recording,
reading or deleting files on the CF card.
• CF cards are high-precision electronic devices.
Do not bend, apply strong force to or subject
them to impacts or strong shocks.
• Do not attempt to disassemble or alter
CF cards.
Inserting the PCMCIA adapter will cause the
eject button to pop out. Use this button to
eject the assembly.
82
• Moving a CF card rapidly between hot and
cold temperatures may cause condensation
(water droplets) to form on it, leading to
malfunctions. Avoid this problem by placing
the CF card in a plastic bag and letting it
slowly adjust to temperature changes before
removing it from the bag. If condensation
should occur, maintain the CF card at a
constant temperature and let the moisture
evaporate naturally.
Appendix C continued....3/4
• Store CF cards in the special case provided.
• Do not use or store CF cards in places subject
to the following conditions.
➤ strong magnetic fields
➤ abundant dirt or dust
➤ high temperatures, high humidity
Precautions with the FC-15M
Please note that a short interval of time (about 1
minute) may be required on certain computers
for the PC card icon to appear on the Taskbar
after the FC-15M has been inserted into the PC
card slot. If this is the case, you are recommended to remove the Windows® standard driver
and install the SanDisk ATA FlashDisk device
driver. The required procedures are listed below.
If you are unclear about these procedures, please
consult your computer manufacturer.
Procedures to Remove the Windows
Standard Driver
1. With the FC-15M inserted in the PC card slot,
click the [My computer] icon with the right
mouse button and select the [Properties]
option.
2. In the System Properties dialog box that
appears, click the [Device Manager] tab and
select the [View devices by connection] check
box at the top.
3. Click the [Computer] option, select the device
with the PC card icon and click the [Remove]
button.
4. When the Confirm Device Removal dialog
appears, click the [OK] button.
5. Close the System Properties dialog box.
6. Remove the FC-15M from the PC card slot.
83
Appendix C continued....4/4
Procedures to Install the SanDisk ATA
FlashDisk Device Driver
Specifications
1. Insert the FC-15M in the PC card slot.
Interface:
PCMCIA/ATA PCMCIA 2.1/JEIDA 4.2
2. When the New Hardware Found dialog
box appears, select the [Select from a list
of alternate drivers] option and click
the [OK] button.
Card Slot Type:
Type II
Dimensions:
86 x 54 x 5 mm
Weight:
Approximately 34 g
3. In the Select Device dialog box, select the
[Show all devices] option.
Subject to change without notice.
4. In the [Manufacturers] category, select
[SanDisk], which will automatically cause the
[SanDisk ATA FlashDisk] option to be selected
in the [Models] category. Finish by clicking
the [OK] button.
84
Index
Symbols
D
+ Button ................................... 25, 43
+/- Buttons ...................................... 43
- Button ................................... 26, 43
A
Auto Exposure .................................
Auto Flash mode .............................
Auto Mode ......................................
Auto White Balance .........................
Autofocus .......................................
Autofocus (AF) Auxiliary Light Emitter
24
27
20
24
24
16
B
Battery cover ............................ 17,
Battery cover lock ..................... 17,
Button battery .................................
Button battery holder ......................
58
58
58
58
C
Camera Modes ................................ 20
CCD RAW ................................ 18, 44
CF Card ........................................... 62
CF Card Reader ............................... 63
CF Card Slot Cover .......................... 17
Clock Not Set message .................... 58
Continuous Button .......................... 25
Continuous mode ............................ 26
Continuous/Self-Timer (+) Button ...........
...................................... 16, 25, 32
DC Coupler Cable Cover ..................
Digital Printer CD-200 ............... 51,
DIGITAL Terminal ...................... 17,
Display Panel ............................ 16,
Display status ..................................
17
63
56
21
21
E
Exposure settings ............................. 45
F
File Numbers ...................................
Flash ...............................................
Flash (-) Button ............ 16, 26, 32,
Flash Off mode ................................
Flash On mode ................................
46
16
36
27
27
I
Image Size ....................................... 18
Indicators ................................. 16, 23
J
Jump Button .................................... 28
Jump mode ..................................... 28
L
L (Lock) position .............................. 19
Large/Fine ................................. 18, 44
Large/Normal ............................ 18, 44
LCD Button .............................. 16,
LCD panel .......................................
Lens ................................................
Lock for CF Card Slot Cover .............
Lower Indicator ...............................
29
16
16
17
23
M
Macintosh Computer .......................
Macintosh Interface Cable ...............
Macro Button .............. 28, 31, 32,
Macro mode ............................. 22,
Macro/Jump Button .................. 17,
Maintenance ...................................
Camera Body ............................
LCD panel .................................
Lens ..........................................
Viewfinder ................................
Menu ..............................................
MENU Button ..................... 17, 29,
Mode Dial ................... 16, 19, 20,
Auto Mode ...............................
Lock ..........................................
Multi Mode ...............................
Play Mode .................................
Program Mode ..........................
Stitch Assist Mode .....................
Multi Mode .....................................
56
56
36
28
28
61
61
61
61
61
42
43
31
31
31
34
34
32
33
20
85
Index continued....2/2
P
PC Card Adapter .............................
PC Interface Cable ...........................
PC Mode .................................. 19,
PCMCIA Card Adapter .....................
Play Menu .......................... 29, 42,
Erase .........................................
Print Mark .................................
Protect ......................................
Show Info. ................................
Slide Show ................................
Play Mode .......................................
Playback Modes ...............................
Power Off ........................................
Power On ........................................
Power Save Function ........................
Pressing Fully ...................................
Pressing Halfway ..............................
Program Mode ................................
63
56
20
63
47
51
51
50
47
47
20
19
19
19
19
25
24
20
Q
Quality ..................................... 18, 44
R
Record Menu ...................... 29, 42,
+/- (Exp.) ...................................
Quality ......................................
Reset File No. ............................
Review ......................................
86
44
45
44
46
45
Red-Eye Reduction lamp ........... 16, 26
Red-Eye Reduction mode ................. 26
S
Self-Timer Button ..................... 25,
Self-Timer mode ..............................
SET Button ......................... 17, 30,
Setup Menu ....................................
Beep .........................................
Date/Time .......................... 53,
Format ......................................
Language ..................................
LCD ..........................................
Power Save ...............................
Reset ........................................
Shooting Modes ..............................
Shutter Button .......................... 16,
Single mode ....................................
Size .................................................
Small/Fine ................................. 18,
Small/Normal ............................ 18,
Soft Case .........................................
Stitch Assist Mode ...........................
2x2 (Matrix) Sequence ........ 33,
Horizontal Sequence .......... 33,
Vertical Sequence ............... 33,
Strap Holder ....................................
31
26
43
52
53
60
54
54
52
53
53
19
24
25
44
44
44
62
20
39
38
38
16
T
Television ......................................... 55
Tripod Socket ................................... 17
U
Upper Indicator ............................... 23
V
Video Cable .....................................
VIDEO Terminal ......................... 17,
Viewfinder ................................ 16,
Viewfinder Frame Marks ..................
55
55
22
22
W
Windows Computer ........................ 56
Canon Customer Support
CANON INC.
30-2 Shimomaruko 3-chome, Ohta-ku, Tokyo 146, Japan
NORTH AMERICA
Canon Computer Systems, Inc.
Canon U.S.A., Inc.
Computer Systems Customer Care Center
Phone (US) : 1-800-423-2366 (Automated Support. 24 hours/
day, 7 days/week)
Canon Canada Inc.
Computer Systems Customer Care Center
Phone (Canada) : 1-800-263-1121 (24 hours/day, 7 days/week)
EUROPE, AFRICA & MIDDLE EAST
Canon Europa N.V.
PO Box 2262, 1180 EG Amstelveen, The Netherlands
Canon (Uk) Ltd
For technical support, please contact the Canon Help Desk:
P.O. Box 431, Wallington, Surrey, SM6 0XU
Tel: (0990) 143723 (Calls may be recorded)
Fax: (0990) 143340 BBS: (0990) 143350
For sales enquiries, please call on (0121) 666-6262
Canon France S.A.
17, Quai Paul Doumer, 92414 Courbevoie Cedex, France
Standard: 01.41.99.77.77
Télécopie: 01.41.99.77.99
http://www.canon.fr
Canon Deutschland Gmbh
Postfach 528, 47705 Krefeld, Germany
Tel: 02151/345-0 Fax: 02151/345-102
Canon Hotline Service:
Customer Support: (02151) 349-555
Info Desk: (02151) 349-566
Mailbox: (02151) 349-577 Fax: (02151) 349-588
Canon Italia S.P.A.
Palazzo L, Strada 6, 20089 Milanofiori - Rozzano (MI), Italy
Tel: 02/8248.1 Fax: 02/8248.4604
Pronto Canon: 02/8249.2000 BBS: 02/8249.2099
http://www.canon.it
Canon Benelux Belgium N.V./S.A.
Bessenveldstraat 7, 1831 Diegem, Belgium
Canon Benelux N.V.
Neptunusstraat 1, 2132 JA Hoofddorp, The Netherlands
87
Canon Customer Support continued....2/3
Canon España S.A.
C/Joaquin Costa, 41, 28002 Madrid, Spain
Tel: (91) 538 45 00
Fax: (91) 411 4176
Help Desk: (91) 538 47 87 & (91) 538 47 88
E-mail: [email protected]
Canon Norge A.S.
Hallagerbakken 110, Postboks 33, Holmlia, 1210 Oslo 12, Norway
Tlf. 2262 9321 Fax. 2262 0615
E-mail: [email protected]
Canon Oy Ab
Kornetintie 3, 00380 Helsinki, Finland
Puhelin: 010 54420 Fax 010 544 4571
Help Desk 0600 0 22606 (maksu 14,80 mk/min)
Sähköposti [email protected]
http://www.canon.fi
Canon (Schweiz) Ag
Industriestrasse 12, 8305 Dietlikon, Switzerland
Tel. 01-835-6161, Fax 01-835-6860
Hotline 157 30 20
http://www.canon.ch
88
Canon Svenska Ab
Stensätravägen 13, S-127 88, Skärholmen, Sweden
Canon Gmbh
Zetschegasse 11, 1232 Wien, Austria
Bruhn A.S.
Vasekær 12, DK-2730 Herlev, Denmark
Hotline: 44 88 26 66
http://www.canon.dk
OCEANIA
Canon Australia Pty. Ltd.
Info-Line : (02) 9805 2864
Canon New Zealand Ltd.
Info-Line : 0900-522666
ASIA
Canon Hongkong Co., Ltd.
Phone : 852-2739-0802 Fax : 852-2739-6428
Canon Singapore Pte. Ltd.
79 Anson Road, #09-01 / 06, Singapore 079906
Phone : (65) 532 4400 Fax : (65) 221 7577
Canon Customer Support continued....3/3
Canon Marketing Services
2 Alexandra Road, #04-01A, Delta House, Singapore 159919
Phone : (65) 273 5311 Fax : (65)273 6786
Canon Marketing (Malaysia) Sdn. Bhd.
13A Jalan 219, 46100 Petaling Jaya, Selangor D.E., Malaysia
Phone: (60) 757 7210 Fax: (60) 757 7832
Canon Marketing (Thailand) Co., Ltd.
2nd Floor, Indosuez House, 152 Wireless Road, Bangkok 10330 Thailand
Phone: (662) 651 4000, Ext. 454 Fax: (662) 651 4095
89
Ulead Customer Support
For : Ulead PhotoImpact 4.0
INTERNATIONAL
Ulead Systems, Inc. (Taiwan)
Tel: +886-2-8787-6740
Fax: +886-2-8787-6741
Internet: [email protected]
Ulead Systems, Inc. (USA)
Tel: +1-310-523-9393
Internet: [email protected]
Fax: +1-310-523-9399
Germany Ulead Support Center
Tel: +49-2602-917-329
Fax: +49-2602-917-327
Internet: [email protected]
France Center d’assistance Ulead
Tel: +33-1-30-76-10-30
Fax: +33-1-30-76-22-87
Internet: [email protected]
BIT (UK) Limited
Tel: +44-1420-83811Fax: +44-1420-80657
World Wide Web
90
http://www.ulead.com
Internet: www.bit.co.uk
E-mail: [email protected]
ZZP-SC1XA210
92
© CANON INC. 1998
Printed in the EU