1
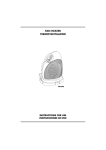
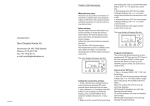
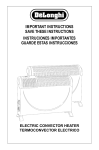
GB
10-05-2001 9:00
Pagina 1
OWNER’S INSTRUCTION
MODE D’EMPLOI
INSTRUCCIONES DE USO
FAN HEATER
RADIATEUR SOUFFLANT
TERMOVENTILADOR
READ AND SAVE THESE INSTRUCTIONS
LISEZ ET GARDEZ CES INSTRUCTIONS
REPASE Y GUARDE ESTAS INSTRUCCIONES
GB
10-05-2001 9:00
Pagina 2
IMPORTANT SAFEGUARDS
When using electrical appliances, basic precautions should always be followed to reduce
risk of fire, electric shock, and injury to persons, including the following:
1. Read all instructions before using the appliance.
2. This appliance is hot when in use. To avoid burns, do not let bare skin touch hot
surfaces. Use handle when moving this heater. Keep combustible materials, such as
furniture, pillows, bedding, papers, clothes and curtains at least 3 feet (0,9 m) from the
front and top of the heater and keep them away from the sides and rear.
3. Extreme caution is necessary when any appliance is used by or near children or
invalids and whenever the heater is left operating and unattended.
4. Always unplug appliance when not in use.
5. Do not operate any appliance with a damaged cord or plug or after the
appliance malfunctions, has been dropped or damaged in any manner.
Return heater to authorized service facility for examination, electrical or
mechanical adjustment, or repair.
6. Do not use outdoors.
7. This heater is not intended for use in bathrooms, laundry areas and similar indoor
locations. Never locate appliance where it may fall into a bathtub or other water
container.
8. Do not run cord under carpeting. Do not cover cord with throw rugs,
runners, or the like. Arrange cord away from traffic area and where it will
not be tripped over.
9. To disconnect the appliance, turn controls to off, then remove plug from outlet.
10. Connect to properly polarized outlets only.
11. Do not insert or allow foreign objects to enter any ventilation opening as this may
cause an electric shock, fire or damage the appliance.
12. To prevent a possible fire, do not block air intakes or exhaust in any manner. Do not
use on soft surfaces, like a bed, where openings may become blocked.
13. A fan heater has hot or arcing or sparking parts inside. Do not use it in
areas where gasoline, paint, or flammable liquids are used or stored.
14. Use this appliance only as described in this manual. Any other use not recommended
by the manufacturer may cause fire, electric shock, or injury to persons.
15. To prevent overload and blown fuses, be sure that no other appliance is plugged into
the same outlet (receptacle) or into another outlet (receptacle) wired into the same circuit.
16. It is normal for the heater’s plug and cord to feel warm to the touch. A plug or cord
which becomes hot to the touch or becomes distorted in shape may be a result of a
worn electrical outlet (receptacle). Worn outlets or receptacles should be replaced prior
to further use of the heater. Plugging heater into a worn outlet/receptacle/ may result
in overheating of the power cord or fire.
17. Do not use an extension cord because the extension cable may overheat
and cause a risk of fire. However, if you have to use an extension cable,
the cable shall be no. 14 AWG minimum size and rated not less than 1875
watts, and has to be used only for supplying power to this appliance.
18. Be sure that the plug is fully inserted into an appropriate receptacle. Please remember
that receptacles also deteriorate due to aging and continuous use: check periodically if
2
GB
10-05-2001 9:00
Pagina 3
signs overheating or deformations are evidenced by the plug. Do not use the
receptacle and CALL your electrician.
19. Check that neither the appliance nor the power cable have been damaged in any way
during transportation.
20. CAUTION: to prevent electric shock match wide blade of plug to wide slot, fully insert.
21. Do not cover the appliance while it is functioning in order to avoid overheating with the
attendant risk of fire.
SAVE THESE INSTRUCTIONS
Your product is equipped with a polarized alternating current line plug (a plug having one
blade wider than the other). This plug will fit into the power outlet only one way. This is a
safety feature. If you are unable to insert the plug fully into the outlet, try reversing the plug. If
the plug should still fail to fit, contact your electrician to replace your obsolete outlet. Do not
defeat the safety purpose of the polarized plug.
ELECTRIC CONNECTION
The fan heater must be connected to a properly polarized A/C 110/120 V household
outlet in perfect working condition.
Keep loose clothing or bedding, furniture and flammable material away from the wall outlet
where the heater is plugged in.
When you plug in the appliance, the red pilot light will illuminate (Fig. 1).
INSTALLATION
The fan heater can be easily positioned on any horizontal support surface in an upright
position.
FAN HEATER CONTROLS:
thermostat dial
pointer
TIMER ON
yellow lamp
red pilot light
AM
AUTO MAN
°F
O
Fig. 1
/
3
GB
10-05-2001 9:00
Pagina 4
OPERATION AND USE
1) SETTING THE CLOCK
For the first time, set the clock to the correct time, proceeding as follows:
• Press the button “hour” until the display shows the hours for the correct time and AM or
PM, then release the button (fig.1).
• Press the button “min” until the display shows the minutes for the correct time, then
release the button (fig. 1).
When setting the correct time, the numbers will flash on the display.
The flashing of the numbers will continue for a few seconds after the adjustment has finished
then stop on the correct time and the clock start working.
(Keep both pushbuttons pressed for more than 3 seconds to move through the hours and
minutes in fast mode).
To change the time, press pushbuttons “hour” for at least 5 seconds, then proceed as
above to modify both hours and minutes.
AM
AUTO
°F
O
current time
room temperature
2) MANUAL FUNCTIONING
To operate the heater without timer press the “ON MODE” button. (Fig. 1). By pressing the
“ON MODE” button one or more times, the appliance will select the operating heating
power, as follows:
AM
MAN
AM
MAN
AM
MAN
AM
MAN
AM
MAN
°F
Maximum power
Medium power
°F
°F
Minimum power
°F
Fan only (summer ventilation)
Off
O
4
°F
GB
10-05-2001 9:00
Pagina 5
If Maximum power has been selected, adjust the thermostat dial (Fig. 1) to the desired
comfort temperature, from 42° and 95° F (5°C to 35°C). By turning the thermostat dial the
display will show the selected temperature.
In addition, the smaller characters on the right-hand side of the display will indicate the
actual room temperature (see figure).
MAN
selected temperature
°F
room temperature
This heater has Electronic Climate Control which automatically monitors and selects the ideal
power setting to maintain your chosen temperature.
If the selected temperature is higher than the actual room temperature, the appliance will
start automatically and rapidly heat the room until it reaches the selected temperature. The
unit will automatically maintain the temperature at a constant level, by switching between
maximum, medium and minimum power.
If the room temperature exceeds the selected temperature level, the appliance will switch off.
The appliance will switch on automatically again when the room temperature falls below the
selected temperature level.
If medium power level has been selected using the “ON MODE” button, the appliance will
modulate between medium and minimum power to maintain a selected temperature.
3) ANTIFREEZE FUNCTION
Press the “ON MODE” button to select the “P max” power level.
Set the thermostat dial to the “ ” position (Fig. 1). The display will show 42°F (see figure).
When set in this way, the appliance will switch on automatically only if the room
temperature falls below 42°F (5°C), to prevent it from freezing, at minimum energy
consumption.
The display will show “LO” (see figure).
This function is not guaranteed in the event of black outs, even if lasting just a few seconds.
*
AM
MAN
5
GB
10-05-2001 9:00
Pagina 6
4) PROGRAMMING THE ELECTRONIC TIMER
The timer allows you to set 2 programmes in a 24 hour period to programme the timer.
1. Press the button “
AUTO” (fig. 2), this accesses the 1st programme (programme A).
The yellow timer ON lamp will light up.
AM
AUTO MAN
TIMER ON
yellow lamp
°F
O
Fig. 2
/
2. Set the start time for your programme by pressing the “hour button” to set the hour AM
and PM and the “min” button to set the minutes.
3. To select how long you require the heater to be on, push button “
“ and push
repeatedly until your chosen operating timespan appears. The time periods you are
able to choose from are (15’, 30’, 45’, 1hr, 2hr, 4hr (max)).
AM
AUTO
O
starting time program A
AUTO
AM
AUTO
°F
O
starting time program B
operation time
4. To programme the a second time period (programme B) press the “
AUTO” button
twice and proceed as above.
(Note: The operating period must be the same as in programme A, if the operating time
is changed eg. from 45 mins to 1hr, both programmes will operate for 1 hr).
5. Now set the comfort temperature as previously described by using the thermostat dial.
The power level will automatically be set to maximum and will reduce to the lower
power levels as required.
The heater will switch on automatically every day at the preset time for the designated
time period and will automatically maintain the selected confort temperature. If you wish
to cancel a programme depress the “
AUTO” button and then the “hour” and “min”
buttons until the display shows:
O
6
GB
10-05-2001 9:00
Pagina 7
Time Override
If you wish to operate the heater without timer, press the “ON MODE” button. The yellow
timer pilot light will go off.
5) MODELS WITH ROTATING BODY
This appliance is fitted with a motorized base and a rotating body.
To distribute the air flow over a larger area, press the oversized switch (Fig. 3).
When activated, the appliance will oscillate from right to left over an angle of
approximately 30°. To terminate oscillating, simply press the oversized switch again.
Fig. 3
IMPORTANT
You must leave the heater plugged in and switched on at the mains socket to keep the
heaters memory programmed.
If you do not require the heater to operate in accordance with the timed programmes simply
operate via the “ON MODE” button.
If the heater looses its electricity supply for more than 2 minutes, e.g. switched off at the
mains socket or in the event of a power failure, the heater’s programmes will be lost, and
the heater will not work until reset.
In the event of a blackout , the appliance will not switch on again automatically.
To switch the appliance back on, repeat the procedure described above.
MAINTENANCE AND SERVICE
Always remove the plug from the power socket and allow the heater to cool. After the heater
has cooled, clean it with a soft damp cloth, do not use detergents or abrasives. Periodically
clean the air intake and outlet grilles during the period in which the heater is in use with a
vacuum cleaner.
Should the heater not be in use over a certain length of time, store it in a dry place.
This appliance has been built to provide many years of trouble free service.
In case of malfunction, do not try to repair the heater yourself: it may result in fire hazard or
electric shock. Call the nearest Service Center (see attached list of Service Centers).
ATTENTION
A safety device switches the fan heater off if it accidentally overheats. An audible signal warns
of any problems. To reset the unit for normal operation, remove the plug from the mains socket
for a few minutes, eliminate the cause of overheating (e.g. air intake or outlet grilles obstructed)
and then plug the fan heater back in again. Contact your nearest Service Center if the fan
heater does not begin normal operation again.
7
GB
10-05-2001 9:00
Pagina 8
LIMITED WARRANTY
What DoesThis Warranty Cover? We warrant each appliance to be free from defects in material and
workmanship. Our obligation under this warranty is limited to replacement or repair, free of charge at our factory or
authorized service centers, of any defective part or parts thereof other than parts damaged in transit, which shall be
returned to us, transportation prepaid. This warranty shall apply only if the appliance is used in accordance with the
factory directions which accompany it, and on an Alternating Current (AC) circuit.
How Long Does The Coverage Last? This warranty runs for one year from the date of delivery and applies only to
the original purchaser for use.
What Does This Warranty Not Cover? This warranty does not cover defects or damage of the appliance which
result from repairs or alterations to the appliance outside our factory or authorized service centers, nor shall it apply to
any appliance which has been subject to abuse, misuse, negligence or accidents. Also, consequential and incidental
damages resulting from the use of this product or arising out of any breach of contract or breach of this warranty are not
recoverable under this warranty. Some states do not allow the exclusion or limitation of incidental or consequential
damages, so the above limitation may not apply to you.
How Do You Get Service? If repairs become necessary or spare parts are needed, please write to:
DE’ LONGHI AMERICA INC.
Park 80 West Plaza One, 4th floor
Saddle Brook, NJ 07663
or call Service Tel. No. 1-800-322-3848
or visit our internet site www.delonghiusa.com
The above warranty is in lieu of all other express warranties and representations. All implied warranties are limited to
the applicable warranty period set forth above. This limitation does apply if you enter into an extended warranty with
De’ Longhi. Some states do not allow limitations on how long an implied warranty lasts, so the above exclusions may
not apply to you. De’ Longhi does not authorize any other person or company to assume for it any liability in connection
with the sale or use of its appliance.
How Does State Law Apply? This warranty gives you specific legal rights, and you may also have other rights which
vary from state to state.
8