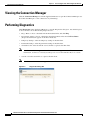
1
Administration Guide for Cisco
Virtualization Experience Client 6215
Firmware Release 8.6
September 5, 2012
Americas Headquarters
Cisco Systems, Inc.
170 West Tasman Drive
San Jose, CA 95134-1706
USA
http://www.cisco.com
Tel: 408 526-4000
800 553-NETS (6387)
Fax: 408 527-0883
THE SPECIFICATIONS AND INFORMATION REGARDING THE PRODUCTS IN THIS MANUAL ARE SUBJECT TO CHANGE WITHOUT NOTICE. ALL
STATEMENTS, INFORMATION, AND RECOMMENDATIONS IN THIS MANUAL ARE BELIEVED TO BE ACCURATE BUT ARE PRESENTED WITHOUT
WARRANTY OF ANY KIND, EXPRESS OR IMPLIED. USERS MUST TAKE FULL RESPONSIBILITY FOR THEIR APPLICATION OF ANY PRODUCTS.
THE SOFTWARE LICENSE AND LIMITED WARRANTY FOR THE ACCOMPANYING PRODUCT ARE SET FORTH IN THE INFORMATION PACKET THAT
SHIPPED WITH THE PRODUCT AND ARE INCORPORATED HEREIN BY THIS REFERENCE. IF YOU ARE UNABLE TO LOCATE THE SOFTWARE LICENSE
OR LIMITED WARRANTY, CONTACT YOUR CISCO REPRESENTATIVE FOR A COPY.
The Cisco implementation of TCP header compression is an adaptation of a program developed by the University of California, Berkeley (UCB) as part of UCB’s public
domain version of the UNIX operating system. All rights reserved. Copyright © 1981, Regents of the University of California.
NOTWITHSTANDING ANY OTHER WARRANTY HEREIN, ALL DOCUMENT FILES AND SOFTWARE OF THESE SUPPLIERS ARE PROVIDED “AS IS” WITH
ALL FAULTS. CISCO AND THE ABOVE-NAMED SUPPLIERS DISCLAIM ALL WARRANTIES, EXPRESSED OR IMPLIED, INCLUDING, WITHOUT
LIMITATION, THOSE OF MERCHANTABILITY, FITNESS FOR A PARTICULAR PURPOSE AND NONINFRINGEMENT OR ARISING FROM A COURSE OF
DEALING, USAGE, OR TRADE PRACTICE.
IN NO EVENT SHALL CISCO OR ITS SUPPLIERS BE LIABLE FOR ANY INDIRECT, SPECIAL, CONSEQUENTIAL, OR INCIDENTAL DAMAGES, INCLUDING,
WITHOUT LIMITATION, LOST PROFITS OR LOSS OR DAMAGE TO DATA ARISING OUT OF THE USE OR INABILITY TO USE THIS MANUAL, EVEN IF CISCO
OR ITS SUPPLIERS HAVE BEEN ADVISED OF THE POSSIBILITY OF SUCH DAMAGES.
Cisco and the Cisco logo are trademarks or registered trademarks of Cisco and/or its affiliates in the U.S. and other countries. To view a list of Cisco trademarks, go to this
URL: www.cisco.com/go/trademarks. Third-party trademarks mentioned are the property of their respective owners. The use of the word partner does not imply a partnership
relationship between Cisco and any other company. (1110R)
Any Internet Protocol (IP) addresses and phone numbers used in this document are not intended to be actual addresses and phone numbers. Any examples, command display
output, network topology diagrams, and other figures included in the document are shown for illustrative purposes only. Any use of actual IP addresses or phone numbers in
illustrative content is unintentional and coincidental.
Administration Guide for Cisco Virtualization Experience Client 6215 Firmware Release 8.6
© 2012 Cisco Systems, Inc. All rights reserved.
CONTENTS
Preface
vii
Overview
vii
Audience
viii
Organization
viii
Related Documentation
viii
Obtaining Documentation, Obtaining Support, and Security Guidelines
Document Conventions
CHAPTER
1
ix
Central Configuration Using Cisco VXC Manager
Cisco VXC Manager
INI Files
ix
1-1
1-1
1-1
Cisco VXC 6215 Add-Ons 1-2
Optional Voice and Video Firmware Add-on 1-3
Disabled Power Management Settings with Voice and Video Firmware Add-on
High-Level Administration Steps
1-3
Cisco VXC 6215 Deployment with a Cisco Virtual Office Router
1-4
Recognizing USB Devices with Citrix XenDesktop 1-5
Common Guidelines for XenDesktop 4.0, 5.0, and 5.5 1-5
Recognizing USB Cameras with Citrix XenDesktop 1-5
Guidelines for HDX Plug-n-Play with XenDesktop 4.0 1-6
Guidelines for HDX Plug-n-Play with XenDesktop 5.0 and 5.5 1-6
Guidelines for HDX RealTime Webcam for XenDesktop 5.0 and 5.5
Monitor Resolution Configuration
CHAPTER
2
1-3
1-7
1-7
Cisco VXC Manager Configuration Quick Reference
Client Discovery Using Cisco VXC Manager 2-2
Configuring the DHCP Server for Device Discovery
2-1
2-2
Create a wlx.ini File for Client Configuration 2-8
INI File Examples 2-8
Firefox Browser Configuration Example 2-8
XenDesktop INI Configuration Example 2-9
VMware View INI Configuration Example 2-9
RDP INI Configuration Example 2-9
Administration Guide for Cisco Virtualization Experience Client 6215 Firmware Release 8.6
iii
Contents
Create a Cisco VXC Manager Package for the wlx.ini File
2-10
Schedule Device Updates Using Default Device Configuration 2-12
Configuring Default Device Configuration Preferences 2-12
Procedure for First-Time Default Device Configuration 2-13
Procedure for Existing Default Device Configuration 2-13
Schedule Device Updates Using the Drag-and-Drop Method
Optional Voice and Video Firmware Add-On
2-15
Register a Package to Enable a Cisco Add-On
2-15
Update the Cisco VXC 6215 Base VDI Firmware
2-16
Configure Multimedia Redirection with a Proxy Server
Additional INI file examples 2-19
Enable VNC using an INI file 2-19
Time settings 2-19
Display and Keyboard settings 2-19
CHAPTER
Desktop Basics
3
Logging In
3-1
3-1
Using Your Desktop 3-2
Desktop Keyboard Shortcuts
Connecting to a Monitor
3-3
3-3
Shutting Down, Restarting, and Suspending
Viewing System Information
CHAPTER
3-4
Viewing the Connection Manager
Performing Diagnostics
Viewing Diagnostic Logs
4-2
4-3
Configuring Volume Control Settings
Configuring Display Settings
4-5
Viewing System Information
4-6
A
4-4
4-5
Opening a Firefox Web Browser Session
Taking Screenshots
4-1
4-2
Configuring the Cisco VXC Manager Agent
APPENDIX
3-4
Accessing Applications with the Application Browser
4
2-17
4-5
4-6
Central Configuration Using File Server
How INI Files Are Employed
A-1
A-1
How to Set Up Central Configuration Using a File Server
A-2
Administration Guide for Cisco Virtualization Experience Client 6215 Firmware Release 8.6
iv
2-14
Contents
Step 1: Prepare the Root Directory and Folder Structure on the File Server
Step 2: Direct the Thin Client to the Server A-3
Using DHCP A-4
Step 3: Rebooting A-5
APPENDIX
B
Using TightVNC Viewer to Shadow or Monitor a Thin Client
INI Configuration Example for Enabling VNC B-2
A-2
B-1
Administration Guide for Cisco Virtualization Experience Client 6215 Firmware Release 8.6
v
Contents
Administration Guide for Cisco Virtualization Experience Client 6215 Firmware Release 8.6
vi
Preface
Overview
The Cisco Virtualization Client 6215 (Cisco VXC 6215) delivers superior voice and video collaboration
capabilities in desktop virtualization. It unifies voice, video, and virtual desktop in one device.
The Cisco VXC 6215 provides workers with secure, real-time access to business applications and
content without compromising the collaborative user experience. Cisco VXC 6215 supports the
following capabilities:
•
Combines virtual desktops with voice and video capabilities
•
Supports processing capabilities that use network and data center CPU resources efficiently
•
Supports high-quality, scalable voice and video, delivering an optimal user experience
The Cisco VXC 6215 provides support for the following hosted virtual desktop protocols:
•
Citrix Independent Computing Architecture (ICA)
•
PC over IP (PCoIP) (in base virtual desktop infrastructure [VDI] mode only)
•
Remote Desktop Protocol (RDP) (in base VDI mode only)
By default, the firmware installed on the Cisco VXC 6215 client is Base VDI Firmware. The Base VDI
firmware supports desktop virtualization capabilities, but does not provide the additional voice and video
functionality required for Unified Communications. To support Unified Communications, you must
purchase and install the Voice and Video Firmware Add-on. For more information, see the Deployment
Guide for Voice and Video Firmware for Cisco Virtualization Experience Client 6215.
The following table describes the virtual desktop protocol releases that support Base VDI Firmware only
and those that support Base VDI Firmware with the Voice and Video Firmware Add-on.
Firmware
Supported Virtual Desktop Application Releases
Base VDI Firmware only
Base VDI Firmware with Voice
and Video Firmware Add-on
•
Citrix ICA Agent 12 with browser plug-in
•
Citrix XenDesktop 4.0, 5.0, and 5.5
•
VMware View Agent 4.6, which supports PCoIP or RDP 7
connections to VMware View Connection Server 4.6 and 5.0
•
Citrix ICA Agent 12 with browser plug-in
•
Citrix XenDesktop 4.0, 5.0, and 5.5 (Release 4.0 and 5.0 require
the latestVDA 5.5 plugin)
Administration Guide for Cisco Virtualization Experience Client 6215 Firmware Release 8.6
vii
Preface
Note
This document describes Base VDI firmware functionality only. For information on Voice and Video
Firmware, see the Deployment Guide for Voice and Video Firmware for Cisco Virtualization Experience
Client 6215.
Audience
This guide is intended for administrators of Cisco VXC 6215 clients. It provides information and
detailed system configurations to help you design and manage your thin client environment.
Organization
This manual is organized as described in the following table.
Chapter
Description
Chapter 1, “Central Configuration Using Provides information about basic thin client management
Cisco VXC Manager”
functions and describes how to centrally configure the thin
client
Chapter 2, “Cisco VXC Manager
Configuration Quick Reference”
Provides quick reference information for managing the thin
client using Cisco VXC Manager.
Chapter 3, “Desktop Basics”
Provides information to quickly learn the desktop basics
and get started using your thin client
Chapter 4, “Accessing Applications with
the Application Browser”
Provides detailed information about using the Application
Browser to access the applications, audio and video, and
system features installed on the thin client
Appendix A, “Central Configuration
Using File Server”
Describes an alternative method of central configuration
using a file server
Appendix B, “Using TightVNC Viewer to Describes how to use VNC for remote access and
Shadow or Monitor a Thin Client”
monitoring of the thin client
Related Documentation
For more information, see the documents available at the following URLs:
Cisco Virtualization Experience Client 6000 Series
http://www.cisco.com/en/US/products/ps11976/tsd_products_support_series_home.html
Cisco Virtualization Experience Client Manager
http://www.cisco.com/en/US/products/ps11582/tsd_products_support_series_home.html
Administration Guide for Cisco Virtualization Experience Client 6215 Firmware Release 8.6
viii
Preface
Obtaining Documentation, Obtaining Support, and Security
Guidelines
For information on obtaining documentation, obtaining support, providing documentation feedback,
security guidelines, and also recommended aliases and general Cisco documents, see the monthly What’s
New in Cisco Product Documentation, which also lists all new and revised Cisco technical
documentation, at:
http://www.cisco.com/en/US/docs/general/whatsnew/whatsnew.html
Subscribe to the What’s New in Cisco Product Documentation as a Really Simple Syndication (RSS)
feed and set content to be delivered directly to your desktop using a reader application. The RSS feeds
are a free service and Cisco currently supports RSS Version 2.0.
Document Conventions
This document uses the following conventions:
Note
Caution
Means reader take note. Notes contain helpful suggestions or references to material that is not covered
in the publication.
Means reader be careful. In this situation, you might do something that could result in equipment
damage or loss of data.
Warnings use the following convention:
Warning
IMPORTANT SAFETY INSTRUCTIONS
This warning symbol means danger. You are in a situation that could cause bodily injury. Before you
work on any equipment, be aware of the hazards involved with electrical circuitry and be familiar
with standard practices for preventing accidents. Use the statement number provided at the end of
each warning to locate its translation in the translated safety warnings that accompanied this
device. Statement 1071
SAVE THESE INSTRUCTIONS
Administration Guide for Cisco Virtualization Experience Client 6215 Firmware Release 8.6
ix
Preface
Administration Guide for Cisco Virtualization Experience Client 6215 Firmware Release 8.6
x
CH A P T E R
1
Central Configuration Using Cisco VXC Manager
This chapter provides information to help you manage your thin clients. It describes basic thin client
management functions and provides information about setting up the thin client for your users.
Cisco thin clients are designed to be centrally managed and configured using INI files and the Cisco
VXC Manager. Cisco VXC Manager allows you to automatically push updates and any desired default
configuration to all supported thin clients in your environment.
This chapter includes:
•
Cisco VXC Manager, page 1-1
•
INI Files, page 1-1
•
Cisco VXC 6215 Add-Ons, page 1-2
•
High-Level Administration Steps, page 1-3
•
Recognizing USB Devices with Citrix XenDesktop, page 1-5
•
Monitor Resolution Configuration, page 1-7
Cisco VXC Manager
Cisco VXC Manager is the standard tool used to push and schedule INI configuration updates to your
thin clients. Cisco VXC Manager allows you to configure, upgrade, and administer your clients from a
single interface. Cisco VXC Manager also allows you to specify default configurations that are common
to all of the thin clients in your environment. It also allows you to enable or disable add-ons, which can
provide additional functionality in addition to the underlying firmware.
For detailed information about using Cisco VXC Manager, see Administration Guide for Cisco
Virtualization Experience Client Manager.
INI Files
INI files are plain-text files that you can use to centrally manage and configure your thin clients on a
global level. For example, you can use INI files to configure and save information about connection
settings, display options, and printer options. The INI files are maintained on a central server (FTP,
HTTP, or HTTPS), and the thin client accesses the INI files from the server during the initialization
process.
Administration Guide for Cisco Virtualization Experience Client 6215 Firmware Release 8.7
1-1
Chapter 1
Central Configuration Using Cisco VXC Manager
Cisco VXC 6215 Add-Ons
INI files are employed as follows:
•
wlx.ini—This is the global INI file. One wlx.ini file is available to all users. It contains global
parameters for all thin clients accessing the server.
•
$MAC.ini—This file is used for device-specific configuration. It is stored in the same directory as
the wlx.ini file. If the thin client locates this INI file on the server, the thin client uses the $MAC.ini
file for its configuration rather than the wlx.ini file. In this case, the thin client does not access the
wlx.ini file unless you specify the include=wlx.ini parameter in the $MAC.ini file.
When a thin client is initialized, it accesses the global wlx.ini file (or $MAC.ini file, if present).
For detailed information on constructing and using INI files with the Cisco VXC 6215, see Cisco
Virtualization Experience Client 6215 INI Files Reference Guide.
Cisco VXC 6215 Add-Ons
The Cisco VXC 6215 firmware includes default add-ons that provide increased security for the thin
client and minimize the exposure of the SUSE Linux base operating system to users, while still providing
users with useful functionality.
Add-ons are feature-specific software components that provide additional customized functionality on
the Cisco VXC 6215 thin clients without affecting the underlying operating system files.
The Cisco add-on applications that are bundled by default on the Cisco VXC 6215 include the following:
Autologin
The Autologin (autologin-1.0-2.sletc11sp1.rpm) add-on allows the Cisco VXC 6215 to boot with the
thin user credentials without requiring the user to provide the credentials.
After the thin client boots up, the login screen initially appears, and after approximately 10 to 15
seconds, the thin client automatically logs the user into the thin client using thinuser/thinuser as the
default username and password.
Caution
For proper operation of the Cisco VXC 6215, the Autologin add-on must always be enabled and running
on the thin client (the default configuration). Do not remove or disable the Autologin add-on as this is
an unsupported configuration. Operation with the Autologin add-on enabled is the only supported mode
of operation. If you do remove the Autologin add-on, you must reinstall it by reinstalling the latest Base
VDI Firmware Release available on cisco.com.
CiscoConfig
The CiscoConfig add-on (ciscoconfig-1.0-2.sletc11sp1.rpm) provides additional functionality to the
user beyond that provided by the Autologin add-on. With the CiscoConfig add-on, the Cisco VXC 6215
provides access to additional applications including system information, display settings, Cisco VXC
Manager settings, and the Firefox browser through the Application Browser (Computer > More
Applications).
Caution
As the CiscoConfig add-on is required for proper functioning of the Autologin add-on, the CiscoConfig
add-on must always be enabled and running on the thin client (the default configuration). If you do
remove the CiscoConfig add-on, you must reinstall it by reinstalling the latest Base VDI Firmware
Release available on cisco.com.
Administration Guide for Cisco Virtualization Experience Client 6215 Firmware Release 8.7
1-2
Chapter 1
Central Configuration Using Cisco VXC Manager
High-Level Administration Steps
Ssh_opt
The Cisco VXC 6215 can support remote connections to the thin client using SSH. To provide increased
security, the ssh_opt add-on (ssh_opt-1.0-1.0.sletc11sp1.rpm) disables SSH functionality by default.
Note
To enable the SSH functionality on the Cisco VXC 6215 devices using Cisco VXC Manager, in the
Device Manager, right-click the device and choose Execute Command. In the Execute Command dialog
box, type /etc/init.d/sshd start to enable the SSH functionality. If the SshOpt add-on is installed on the
Cisco VXC device, then the SshOpt add-on sets the OpenSSH idle timeout to 30 minutes and the
maximum timeout to 60 minutes. (These default SSH idle timeout values cannot be modified.)
You can use the Cisco VXC Manager to enable and disable add-ons on your thin client. For more
information, see Administration Guide for Cisco Virtualization Experience Client Manager.
Optional Voice and Video Firmware Add-on
To support Unified Communications on the Cisco VXC 6215, you can purchase and install the Voice and
Video Firmware Add-on. The optional Voice and Video Firmware add-on provides Unified
Communications functionality for Cisco UC Integration for Microsoft Lync and Cisco Unified Personal
Communicator.
With the Voice and Video Firmware add-on, users in a virtual environment can use Cisco UC Integration
for Microsoft Lync or Cisco Unified Personal Communicator from their thin clients. The Voice and
Video Firmware runs on the thin client, and Cisco UC Integration for Microsoft Lync or Cisco Unified
Personal Communicator runs on the Windows hosted virtual desktop.
Disabled Power Management Settings with Voice and Video Firmware Add-on
By default with the Base VDI Firmware, the Cisco VXC 6215 supports a power management setting
(EnergyWise) whereby the clients enter the sleep mode after a specified period of time. When the Voice
Video Firmware add-on is enabled, this power management setting is disabled, and the clients do not
enter the sleep mode.
For more information on the optional Voice and Video Firmware add-on, see the Deployment Guide for
Voice and Video Firmware for Cisco Virtualization Experience Client 6215.
High-Level Administration Steps
The following are the high-level steps that are required to set up your thin client environment. See the
referenced guides and Chapter 2, “Cisco VXC Manager Configuration Quick Reference” for the detailed
steps required.
Procedure
Step 1
Set up your virtualization server (see your virtualization server documentation).
Step 2
Install and set up the Cisco VXC Manager (see Installation Guide for Cisco Virtualization Experience
Client Manager).
Step 3
Create the INI files to centrally configure the thin clients and place them on the server (see Cisco
Virtualization Experience Client 6215 INI Files Reference Guide).
Administration Guide for Cisco Virtualization Experience Client 6215 Firmware Release 8.7
1-3
Chapter 1
Central Configuration Using Cisco VXC Manager
Cisco VXC 6215 Deployment with a Cisco Virtual Office Router
Caution
By default, an administrator username and password admin/admin is specified on the thin
client. Cisco VXC 6215 does not support operation of the client using the administrator
username and password in the current release (the only supported mode of operation is using
the thinuser credentials). However, Cisco recommends that you change the administrator
password using INI parameters to prevent unauthorized access to the client.
Step 4
Set up a configuration package in Cisco VXC Manager referencing the desired INI configuration. You
can also optionally set up an add-on package to push additional add-ons to the thin clients (see
Administration Guide for Cisco Virtualization Experience Client Manager).
Step 5
Set up device discovery in Cisco VXC Manager (DHCP is the recommended method—see
Administration Guide for Cisco Virtualization Experience Client Manager).
Caution
Step 6
For proper operation of the thin clients, you must specify a value either for DHCP Option 15
(Domain Name) or for DHCP Option 6 (Domain Server) in the DHCP server configuration. If
you do not specify a standard domain name for DHCP Option 15, and you do not specify a
standard domain server for DHCP Option 6, you must specify “none” for DHCP Option 15.
This configuration is necessary whether or not you are using DHCP to direct the thin clients
to the central server.
Connect the thin clients to the network and power them up.
The thin clients automatically update to the latest INI file configuration and add-ons, as applicable.
Cisco VXC 6215 Deployment with a Cisco Virtual Office Router
When the Cisco VXC 6215 is first deployed behind a Cisco Virtual Office Router, the thin client must
authenticate with the Cisco Virtual Office Router VPN tunnel before accessing the network and
connecting to the Cisco VXC Manager. To authenticate the thin client, the user must use the Firefox
browser to enter the necessary credentials. In addition, to communicate with the Cisco VXC Manager,
the user must provide the Cisco VXC Manager server IP address.
Note
This procedure is required only for the initial connection to the network from behind a Cisco Virtual
Office router. The procedure assumes a factory new Cisco VXC 6215. Subsequent connections do not
require these steps. The procedure also assumes that you have set up the thin client environment,
including the configuration of connection parameters (Connect options) in the INI file to allow
connection to a virtualization server.
Procedure
Step 1
Connect the Cisco VXC 6215 to the Cisco Virtual Office router.
Step 2
Power up the Cisco VXC 6215.
Step 3
Click Computer > More Applications > Firefox to launch the Firefox web browser.
The Cisco Virtual Office router prompts the user for credentials.
Step 4
Enter the required Cisco Virtual Office router credentials.
Administration Guide for Cisco Virtualization Experience Client 6215 Firmware Release 8.7
1-4
Chapter 1
Central Configuration Using Cisco VXC Manager
Recognizing USB Devices with Citrix XenDesktop
Firefox displays the home page.
Step 5
From the desktop, click Computer > More Applications > VXC-M.
Step 6
In the VXC-M Server field, enter the IP address of the Cisco VXC Manager.
Step 7
In the Client to Server Port field, enter 80 (or a custom port for your Cisco VXC Manager setup, as
required).
Step 8
In the Secure Port field, enter 443 (or a custom port for your Cisco VXC Manager setup, as required).
Step 9
Click OK, and then wait for a period of 2 minutes to allow Cisco VXC Manager to discover the client.
When the device is discovered, it appears in the Cisco VXC Manager as a new device with a green status,
and the administrator can configure it.
Step 10
After the 2-minute period, reboot the thin client.
After the reboot the thin client downloads the wlx.ini file (the download can last a few minutes).
Step 11
After the download is complete, a Firefox shortcut icon appears on the desktop providing a connection
to the hosted virtual desktop. Double-click the icon to connect to the hosted virtual desktop.
Note
If required, the administrator can push a new build to the thin client, which obtains it when you
reboot in Step 10 or in a subsequent reboot.
Recognizing USB Devices with Citrix XenDesktop
The following are configuration guidelines for allowing the thin client to recognize USB devices in a
Citrix XenDesktop environment.
Common Guidelines for XenDesktop 4.0, 5.0, and 5.5
The following guidelines are common for XenDesktop 4.0, 5.0, and 5.5:
•
To allow the client to recognize any USB device, include the following option in the INI file for the
client.
ICADesktopApplianceMode=yes
•
To enable Multimedia Redirection for redirecting audio and video (WMV, MPEG, AVI, MP3, and
so on) to the Cisco VXC 6215, also include the following parameters in the INI file:
ICAMMVideo=yes
ICAMMAudio=yes
Recognizing USB Cameras with Citrix XenDesktop
To allow applications to use USB cameras within the XenDesktop session, you can configure the Cisco
VXC 6215 to use either HDX RealTime Webcam video compression or HDX Plug-n-Play technology.
With HDX RealTime Webcam video compression, the Cisco VXC 6215 captures the video data,
compresses it, and then sends the video data to the XenDesktop session.
Administration Guide for Cisco Virtualization Experience Client 6215 Firmware Release 8.7
1-5
Chapter 1
Central Configuration Using Cisco VXC Manager
Recognizing USB Devices with Citrix XenDesktop
With HDX Plug-n-Play technology, the USB camera is detached from the Cisco VXC 6215 and virtually
attached to the XenDesktop session. All the native functionalities of the USB camera are available in the
XenDesktop session.
Both HDX RealTime Webcam and HDX Plug-n-Play are supported with Base VDI-only firmware and
with the Voice and Video Firmware Add-on. However, HDX RealTime Webcam is the recommended
option as it is a more scalable and robust solution.
Note
HDX Plug-n-Play is available in XenDesktop 4.0, 5.0, and 5.5, but HDX RealTime Webcam is only
available in Release 5.0 and later.
For additional details, see XenDesktop documentation.
Guidelines for HDX Plug-n-Play with XenDesktop 4.0
To use HDX Plug-n-Play for USB camera operation with XenDesktop 4.0, see the following guidelines:
•
To allow the client to recognize any USB device, configure the XenDesktop policies to allow USB
redirection. (See XenDesktop documentation for details.)
•
In addition, include the ICAAllowUSB parameter in the INI file for the client, specifying the
VID/PID combination for the specific devices to be recognized.
For example, to recognize the Logitech Quickcam Pro 9000 (VID=046d, PID=0809) and the
Microsoft LifeCam Cinema (VID=045e, PID=075d), include the following in the INI file:
ICAAllowUSB=vid=046d,pid=0809,vid=045e,pid=075d
Guidelines for HDX Plug-n-Play with XenDesktop 5.0 and 5.5
To use HDX Plug-n-Play for USB camera operation with XenDesktop 5.0 and 5.5, see the following
guidelines:
•
To allow the client to recognize any USB device, configure the XenDesktop user policy to allow
USB redirection. (See XenDesktop documentation for details.)
•
To allow all USB devices or all devices of a certain class (for example, CD drives or cameras) to be
recognized, configure the XenDesktop default USB policy rules. (For details, see the XenDesktop
Administrator's Guide.)
Alternatively, or if you still encounter issues with particular devices even after configuring allowed
device classes, do the following:
– Configure the user policy to specify the PID and VID of the USB devices in use. (See
XenDesktop documentation for details.)
– Include the ICAAllowUSB parameter in the INI file for the client, specifying the VID/PID
combination for the specific devices to be recognized.
For example, to recognize the Logitech Quickcam Pro 9000 (VID=046d, PID=0809) and the
Microsoft LifeCam Cinema (VID=045e, PID=075d), enter the following:
ICAAllowUSB=vid=046d,pid=0809,vid=045e,pid=075d
Administration Guide for Cisco Virtualization Experience Client 6215 Firmware Release 8.7
1-6
Chapter 1
Central Configuration Using Cisco VXC Manager
Monitor Resolution Configuration
Guidelines for HDX RealTime Webcam for XenDesktop 5.0 and 5.5
To use HDX Realtime Webcam for USB camera operation with XenDesktop 5.0 and 5.5, see the
following guidelines:
•
Configure the XenDesktop policies to enable HDX RealTime. (See XenDesktop documentation for
details.)
•
Remove any ICAAllowUSB parameter configuration from the INI file for the thin client. Optionally,
you can also include the following parameter in the INI file:
ICADenyUSB=all
Monitor Resolution Configuration
For most monitors, the thin client automatically obtains the correct resolution to display from the
monitor itself.
For monitors that do not fully support the VESA standards (generally older models), the thin client may
not be able to display the monitor resolution correctly, resulting in a black screen. The workaround for
this issue is to push an INI file containing the correct display settings to the thin client using Cisco VXC
Manager or the FTP file server.
The following is an example configuration using the DisplaySettings INI parameter to specify the
resolution for monitor 1 to be 1024 x 768, with no rotation:
DisplaySettings=MON1 rotate-normal 1024x768
For more information about configuring this INI parameter, see Cisco Virtualization Experience Client
6215 INI Files Reference Guide.
Administration Guide for Cisco Virtualization Experience Client 6215 Firmware Release 8.7
1-7
Chapter 1
Monitor Resolution Configuration
Administration Guide for Cisco Virtualization Experience Client 6215 Firmware Release 8.7
1-8
Central Configuration Using Cisco VXC Manager
CH A P T E R
2
Cisco VXC Manager Configuration Quick
Reference
This chapter provides a quick reference for the Cisco VXC Manager procedures required to upgrade
client configurations, upgrade firmware, and enable add-ons on the Cisco VXC 6215. For detailed
information about using Cisco VXC Manager, see Administration Guide for Cisco Virtualization
Experience Client Manager.
Note
Before you can preform the procedures in this document, you must perform the following prerequisites:
•
Set up your virtualization server (see your virtualization server documentation).
•
Install and set up the Cisco VXC Manager (see Installation Guide for Cisco Virtualization
Experience Client Manager).
•
Connect at least one Cisco VXC 6215 to your network and power it on.
This document contains the following topics:
•
Client Discovery Using Cisco VXC Manager, page 2-2
•
Create a wlx.ini File for Client Configuration, page 2-8
•
Create a Cisco VXC Manager Package for the wlx.ini File, page 2-10
•
Schedule Device Updates Using Default Device Configuration, page 2-12
•
Schedule Device Updates Using the Drag-and-Drop Method, page 2-14
•
Optional Voice and Video Firmware Add-On, page 2-15
•
Register a Package to Enable a Cisco Add-On, page 2-15
•
Update the Cisco VXC 6215 Base VDI Firmware, page 2-16
•
Configure Multimedia Redirection with a Proxy Server, page 2-17
Administration Guide for Cisco Virtualization Experience Client 6215 Firmware Release 8.7
2-1
Chapter 2
Cisco VXC Manager Configuration Quick Reference
Client Discovery Using Cisco VXC Manager
Client Discovery Using Cisco VXC Manager
Cisco VXC Manager is the standard tool for managing the Cisco VXC 6215. Cisco VXC Manager allows
you to configure, upgrade, and administer your thin clients from a single interface. It also allows you to
specify default configurations that are common to all of the thin clients in your environment. You can
also use it to enable add-ons, which provide additional functionality in addition to the underlying
firmware.
Cisco VXC Manager can discover the Cisco VXC 6215 devices in your network using either dynamic
discovery or a manual process. After Cisco VXC Manager identifies the devices in the network, it stores
information about them in the Cisco VXC Manager Database. You can then use Cisco VXC Manager to
manage the devices.
For the Cisco VXC 6215, the recommended discovery method uses a DHCP server. In this case, you must
configure DHCP Option Tags (186 and 190, or 186 and 192) on your DHCP server to specify the IP
address and port of the Cisco VXC Manager Web Server. The Cisco VXC Manager Agent (HAgent) on
the Cisco VXC 6215 uses this information to communicate with the Cisco VXC Manager Web Server,
performing check-ins at boot up and at regular intervals. The Hagent provides the Cisco VXC Manager
with device information including device name, hardware information, network information, and image
version.
For detailed configuration steps for DHCP discovery, see Configuring the DHCP Server for Device
Discovery, page 2-2.
Caution
For proper operation of the thin clients, you must specify a value either for DHCP Option 15 (Domain
Name) or for DHCP Option 6 (Domain Server) in the DHCP server configuration. If you do not specify
a standard domain name for DHCP Option 15, and you do not specify a standard domain server for
DHCP Option 6, you must specify “none” for DHCP Option 15. This configuration is necessary whether
or not you are using DHCP to direct the thin clients to the central server.
For information about additional discovery methods with Cisco VXC Manager, see Administration
Guide for Cisco Virtualization Experience Client Manager.
Configuring the DHCP Server for Device Discovery
To allow Cisco VXC Manager to discover the Cisco VXC 6215 devices, configure the following option
tag values on your DHCP server:
Tip
•
Option tag 186—IP address of your Cisco VXC Manager server (for example, 192.168.1.10). The
value should be in 4-byte IP address format.
•
Option tag 190—Secure port number to which Cisco VXC Manager server listens (for example, port
443). The value should be in word format (value = 0x01bb) or 2-byte array format (value = 0x01
0xbb).
•
Option tag 192—Non-secure port number to which Cisco VXC Manager server listens (for example,
80). The value should be in either word format (value = 0x0050), or 2-byte array format (value=
0x00 0x50).
Do not run the Cisco VXC Manager server and the DHCP server on the same machine.
Administration Guide for Cisco Virtualization Experience Client 6215 Firmware Release 8.7
2-2
Chapter 2
Cisco VXC Manager Configuration Quick Reference
Client Discovery Using Cisco VXC Manager
To configure the Cisco VXC Manager server IP address and port option values on a Windows DHCP
server:
Procedure
Step 1
Open the DHCP management wizard, choose the DHCP server to be configured, right-click the server
name, and choose Set Predefined Options to open the Select Predefined Options and Values window.
Figure 2-1
DHCP Window
Administration Guide for Cisco Virtualization Experience Client 6215 Firmware Release 8.7
2-3
Chapter 2
Cisco VXC Manager Configuration Quick Reference
Client Discovery Using Cisco VXC Manager
Figure 2-2
Select Predefined Options and Values
Step 2
On the Predefined Options and Values screen, click the Add button. The Option Type window appears.
Step 3
In the Option Type window, enter the required information:
•
Name—Cisco VXC Manager Server
•
Code—186
•
Data Type—IP Address
•
Description (optional)—Enter desired information, or nothing
Administration Guide for Cisco Virtualization Experience Client 6215 Firmware Release 8.7
2-4
Chapter 2
Cisco VXC Manager Configuration Quick Reference
Client Discovery Using Cisco VXC Manager
Figure 2-3
Option Type: Server IP
Step 4
Click OK.
Step 5
Repeat Steps 2 and 3 for the Cisco VXC Manager Server port, with these changes:
Step 6
•
Name—Cisco VXC Manager Server Secure Port
•
Code—190
•
Data Type—Word
Repeat Steps 2 and 3 for the Cisco VXC Manager Server port, with these changes:
•
Name—Cisco VXC Manager Server Port
•
Code—192
•
Data Type—Byte or Word
Figure 2-4
Step 7
Option Type: Cisco VXC Manager Server Port
Click OK.
Administration Guide for Cisco Virtualization Experience Client 6215 Firmware Release 8.7
2-5
Chapter 2
Cisco VXC Manager Configuration Quick Reference
Client Discovery Using Cisco VXC Manager
Figure 2-5
Step 8
DHCP Scope Options: Cisco VXC Manager Server
From the DHCP management wizard, choose Scope Options (from the target DHCP Server Scope, as
shown in Figure 2-5), right-click, and choose Configure Options.
•
In the list of Available Options, check option number 186, and enter the IP address of the Cisco VXC
Manager server.
•
In the list of Available Options, check option number 190, and enter the port number at which your
Cisco VXC Manager server listens for secure communication.
•
In the list of Available Options, check option number 192, and enter the port number at which your
Cisco VXC Manager server listens (Port 80 is shown in Figure 2-6).
Administration Guide for Cisco Virtualization Experience Client 6215 Firmware Release 8.7
2-6
Chapter 2
Cisco VXC Manager Configuration Quick Reference
Client Discovery Using Cisco VXC Manager
Figure 2-6
Step 9
Click OK.
Figure 2-7
Step 10
DHCP Scope Options: Cisco VXC Manager Server Port
DHCP Scope Options List
Confirm that options 186, 190 and 192 are listed with proper values under the target DHCP server and
scope.
Administration Guide for Cisco Virtualization Experience Client 6215 Firmware Release 8.7
2-7
Chapter 2
Cisco VXC Manager Configuration Quick Reference
Create a wlx.ini File for Client Configuration
Create a wlx.ini File for Client Configuration
Cisco VXC 6215 Initialization (INI) files are plain-text files that you construct to specify the
configuration parameters you want to apply to your thin clients. The most commonly used INI file,
wlx.ini, contains the global parameters you want to apply to all thin clients in your environment. (Cisco
VXC Manager also allows you to specify a subset of thin clients to which a particular wlx.ini
configuration applies.)
The Cisco VXC 6215 supports a number of INI configuration parameters. See INI File Examples,
page 2-8 for some useful examples, including configurations required to create XenDesktop, VMware
View, and RDP connections. For a complete list of supported INI parameters, see Cisco Virtualization
Experience Client 6215 INI Files Reference Guide.
Caution
By default, an administrator username and password admin/admin is specified on the thin client. Cisco
VXC 6215 does not support operation of the client using the administrator username and password in
the current release (the only supported mode of operation is using the thinuser credentials). However,
Cisco recommends that you change the administrator password using the ChangeAdminPassword INI
parameter to prevent unauthorized access to the client.
To create the wlx.ini file, perform the following procedure.
Procedure
Step 1
Open a text file.
Step 2
Enter the INI parameters required in accordance with INI File Examples, page 2-8 or Cisco
Virtualization Experience Client 6215 INI Files Reference Guide.
Step 3
Save the file as wlx.ini.
Step 4
After you create the wlx.ini file, you must create a Cisco VXC Manager package to push the wlx.ini
configuration to your clients. See Create a Cisco VXC Manager Package for the wlx.ini File, page 2-10.
INI File Examples
Firefox Browser Configuration Example
The following is a simple INI file that you can use to test the Cisco VXC Manager client update process.
After the package process is successful using this file, the client will load the INI file, and launch the
Firefox browser with cisco.com as the home page.
Example:
CONNECT=BROWSER \
Description="Cisco Home Page" \
URL=http://www.cisco.com \
Resolution=FullScreen \
Mode=Normal \
autoconnect=yes \
LocalCopy=yes
Administration Guide for Cisco Virtualization Experience Client 6215 Firmware Release 8.7
2-8
Chapter 2
Cisco VXC Manager Configuration Quick Reference
Create a wlx.ini File for Client Configuration
XenDesktop INI Configuration Example
To create XenDesktop server connections, use the Mozilla Firefox Connect options to specify the URL
of the XenDesktop server to which users must connect. When the server URL is specified in the INI
configuration, Firefox opens to this URL and the user can enter their credentials to initiate the
connection to the HVD.
Example:
CONNECT=BROWSER \
Description="Windows Desktop" \
URL=http://xd.company.com \
Reconnect=yes \
ReconnectSeconds=5 \
AutoConnect=yes \
mode=kiosk
Caution
In the above example, replace xd.company.com with the URL of your XenDesktop server.
With the optional Autoconnect=yes parameter specified in the preceding example, the browser connects
to the specified URL when the client boots up. In addition, the optional Reconnect=yes and
ReconnectSeconds=5 parameters specify to reconnect a disconnected connection after 5 seconds.
Finally, the optional mode=kiosk parameter specifies to operate in kiosk mode, in which Firefox operates
in full-screen mode with no access to the address bar.
VMware View INI Configuration Example
The following is an example configuration for a VMware View connection.
Example:
CONNECT=VMWARE_VIEWCLIENT \
Description="VMview" \
Host=192.168.0.2 \
DomainName=$DN \
Username=Administrator \
Password=Password \
DesktopSize=800x600 \
Ping=yes \
LocalCopy=yes
Caution
In the above example, replace 192.168.0.2 with the IP address of your VMware View server.
RDP INI Configuration Example
The following is an example configuration for an RDP connection.
Example:
CONNECT=RDP \
Host=x.x.x.x \
Description="RDP_Server" \
Administration Guide for Cisco Virtualization Experience Client 6215 Firmware Release 8.7
2-9
Chapter 2
Cisco VXC Manager Configuration Quick Reference
Create a Cisco VXC Manager Package for the wlx.ini File
AutoConnect=yes \
Colors=16m \
Username=Administrator \
Password=Password \
Domainname=$DN \
Resolution=800x600 \
Reconnect=no \
Drives=J=disk \
Drives=k=floppy \
Sound=off \
LocalCopy=Yes
Caution
In the above example, replace x.x.x.x with the IP address of your RDP server.
Create a Cisco VXC Manager Package for the wlx.ini File
To push a wlx.ini file to your clients, you must first create a Cisco VXC Manager package, which you
can then schedule for distribution to your devices.
Caution
Do not modify INI files directly on the Cisco VXC 6215 as doing so can cause configuration issues and
operational errors. Only use Cisco VXC Manager to push the INI files to the clients.
Required Folder Structure with Cisco VXC Manager
With Cisco VXC Manager, you must create and register specific packages to push upgrades and
configurations to your clients.
Cisco VXC Manager packages are structured relative to the location of an RSP file. To register the
package with Cisco VXC Manager, the package must contain a unique RSP file and, at the same folder
level, a folder with the same name as the RSP filename. This folder serves as the root folder for the
remaining configuration files in the package.
For example, assuming <packagename>.rsp is the RSP file, the folder structure required to register the
package is as follows:
~/<packagename>.rsp
~/<packagename>/wlx
~/<packagename>/wlx/bitmap
~/<packagename>/wlx/certs
~/<packagename>/addons
You can create this structure in any location on your Cisco VXC Manager server, as long as the
placement of the folders relative to the RSP file remains the same.
Note
If a folder does not contain a required file for the package, the folder can be omitted from the package
directory structure. For example, if the package contains no graphics, the /wlx/bitmap folder is not
required.
After you register the package, Cisco VXC Manager stores the package files in the software repository
under c:\inetpub\ftproot\Rapport\<packagename>.
Administration Guide for Cisco Virtualization Experience Client 6215 Firmware Release 8.7
2-10
Chapter 2
Cisco VXC Manager Configuration Quick Reference
Create a Cisco VXC Manager Package for the wlx.ini File
Caution
Do not attempt to modify a registered package located in the Rapport folder. To modify a package, you
must create and register a new package that includes the required changes.
Use the following procedure to create a Cisco VXC Manager package containing the wlx.ini file for
Cisco VXC 6215 client configuration (see Create a wlx.ini File for Client Configuration, page 2-8 for
information on creating the wlx.ini file).
Procedure
Step 1
Create a folder to contain the client configurations, for example 6215Configs.
Step 2
In the 6215Configs folder, create an RSP file, for example SLE1.rsp, with the following content (to
create the RSP file, enter the required content in a text editor, and then save the file with a .rsp extension):
[Version]
Number=SLE1
OS=SLX
Category=Other Packages
USE_Pxe=NO
[Script]
RP "<regroot>"
EX "/usr/bin/perl /sbin/dhcp2registry"
EX "/usr/sbin/thinclient-config --set-update-mode both"
EX "/usr/sbin/thinclient-config --set-force-image-update no"
EX "sync"
EX "sleep 2"
RB
RB
Note
This RSP script is provided as an example; you may need to reconfigure the parameters depending on
your environment. See the Administration Guide for Cisco Virtualization Experience Client Manager for
details about configuring RSP files.
where the "Number=" segment must have the exact same value as the RSP file name.
Step 3
Also in the 6215Configs folder, create a subfolder using the same name as the RSP file name, for
example SLE1.
Step 4
In the SLE1 folder, create a subfolder named wlx.
Step 5
In the wlx folder, copy the wlx.ini that contains the required configuration.
For example:
•
Location and name of the .rsp file:
C:\VXC-M\6215Configs\SLE1.rsp
•
Location and name of the wlx directory:
C:\VXC-M\6215Configs\SLE1\wlx
•
Location and name of wlx.ini file in the wlx directory:
C:\VXC-M\6215Configs\SLE1\wlx\wlx.ini
Step 6
In the tree pane of the Administrator Console, expand Package Manager.
Step 7
In the details pane, right-click Other Packages and choose New > Package.
Step 8
Choose Register a Package from a Script file (.RSP) and click Next.
Administration Guide for Cisco Virtualization Experience Client 6215 Firmware Release 8.7
2-11
Chapter 2
Cisco VXC Manager Configuration Quick Reference
Schedule Device Updates Using Default Device Configuration
Step 9
Click Browse to choose the file path of the .rsp package file you want to register (For example:
C:\VXC-M\6215Configs\SLE1.rsp) and click Open.
Step 10
Click Next to display the Package Wizard summary.
Step 11
Click Next to see the Package Registration Progress screen.
Step 12
Click Next to create the package.
Step 13
After the package is created and registered, click Finish.
Step 14
To upgrade the Cisco VXC 6215, you can use the Default Device Configuration (DDC) method (see
Schedule Device Updates Using Default Device Configuration, page 2-12) or the Drag-and-Drop
method (see Schedule Device Updates Using the Drag-and-Drop Method, page 2-14).
Schedule Device Updates Using Default Device Configuration
To update a group of Cisco VXC 6215 devices, you can assign a Default Device Configuration (DDC).
A DDC allows you to set default configurations for a group of devices and ensures that the devices
conform to your configurations. That is, if there is any deviation from your default configurations, Cisco
VXC Manager reverts the devices to your specified configurations automatically (Cisco VXC Manager
automatically sends the Cisco VXC Manager packages in the DDC to the devices according to your
schedule and without your intervention).
See the following sections to configure a DDC:
•
Configuring Default Device Configuration Preferences, page 2-12
•
Procedure for First-Time Default Device Configuration, page 2-13
•
Procedure for Existing Default Device Configuration, page 2-13
Configuring Default Device Configuration Preferences
Before you create a Default Device Configuration, ensure to configure the DDC preferences as follows:
Procedure
Step 1
In the tree pane of the Administrator Console, choose Configuration Manager > Preferences.
Step 2
In the details pane, double-click Device Manager Preferences.
Step 3
In the tree pane of the Preferences dialog box, click DDC.
Step 4
Under Default Device Configuration, check the Enable Default Device Configuration box.
Step 5
Under Time to Schedule DDC Reconciliation, click Upon Checkin.
Step 6
In the tree pane of the Preferences dialog box, click Scheduling.
Step 7
Under Imaging Option, click Merlin.
Step 8
Click OK.
Administration Guide for Cisco Virtualization Experience Client 6215 Firmware Release 8.7
2-12
Chapter 2
Cisco VXC Manager Configuration Quick Reference
Schedule Device Updates Using Default Device Configuration
Procedure for First-Time Default Device Configuration
Perform this procedure each time you create a new image package that you want to specify as the default
image for client upgrades.
Procedure
Step 1
Determine whether a Default Device Configuration already exists:
a.
In the tree pane of the Administrator Console, expand Configuration Manager and click Default
Device Configuration.
b.
If a default configuration appears in the details pane, go to Procedure for Existing Default Device
Configuration, page 2-13. Otherwise, go to the next step.
Step 2
In the tree pane of the Administrator Console, expand Configuration Manager, right-click Default
Device Configuration, and choose New > Default Device Configuration to open the Default Device
Configuration Wizard.
Step 3
In the Operating System field, choose SUSE Linux.
Step 4
In the Media Size field, choose 4000 MB.
Step 5
In the Qualifying OS Image field, choose No Image.
Step 6
In the Software Packages tab, check the required package for the upgrade to and click Add to add it to
to the Selected column. (The packages listed in this tab match the packages that you have registered in
the Cisco VXC Manager.)
Step 7
Click Next and choose Whenever a device checks in.
Step 8
Click Next and click Finish.
Step 9
Right-click the Cisco VXC 6215 you want to upgrade, and choose Reboot.
When the selected devices reboot, they upgrade to any new OS image version available from Cisco VXC
Manager.
Step 10
In the tree pane of the Administrator Console, click Device Manager.
Step 11
Click the top Refresh icon to see the changed software revision.
To verify that Cisco VXC Manager has succesfully pushed a package to a device, click Device Manager,
and choose a target device. In the bottom right hand corner, of the details pane, click the plus icon (+)
to maximise the properties for the device, then click the Deployed Package tab to show all packages that
are on the device. You can also click the Log History tab to view the status of the most recent package
pushed to the device.
Procedure for Existing Default Device Configuration
Perform this procedure when you want to specify an existing image package as the default image for
client upgrades.
Administration Guide for Cisco Virtualization Experience Client 6215 Firmware Release 8.7
2-13
Chapter 2
Cisco VXC Manager Configuration Quick Reference
Schedule Device Updates Using the Drag-and-Drop Method
Procedure
Step 1
In the tree pane of the Administrator Console, expand Configuration Manager, and click Default
Device Configuration.
Step 2
Right click SUSE Linux, and choose Properties.
Step 3
In the Software Packages field, choose the package to upgrade to.
Step 4
Click Finish.
After a DDC has been configured for Cisco VXC 6215 clients, the clients are updated to the selected
package configuration automatically: either at their regularly scheduled checkin time or according to the
update time set in the Device Manager DDC preferences in Configuration Manager. You can also
right-click the Cisco VXC 6215 you want to upgrade, and choose Reboot to perform a manual upgrade.
Schedule Device Updates Using the Drag-and-Drop Method
As an alternative to Default Device Configuration, you can use the drag-and-drop method to schedule a
registered Cisco VXC Manager package to be distributed as an update to your clients.
Procedure
Step 1
In the tree pane of the Administrator Console, expand Package Manager and click the folder that
contains the package you have registered so that it appears in the details pane.
Step 2
Expand Device Manager to display the folder (or View) containing the devices that you want to update.
Step 3
Click and drag the package from the details pane and drop it onto the folder containing the target devices.
Step 4
In the Package Distribution Wizard that appears, choose the devices you want to receive the Cisco VXC
Manager package and click the arrow to move them to the Selected Devices list (use Ctrl-click or
Shift-click to choose multiple devices), and then click Next.
Step 5
Depending on whether or not any of the devices you selected are serviced by a Remote Repository (for
example, the Cisco VXC Manager package with the update is contained in a Remote Repository),
complete one of the following:
•
If no, the wizard prompts you to choose when the update should occur. Choose the time and date for
the update, click Next, and then continue with Step 6.
•
If yes, and you have set up your preferences to synchronize Remote Repositories, the wizard
prompts you for the synchronization information. Enter the information, click Next, and then
continue with step 6.
Step 6
When prompted to create the updates click Next.
Step 7
After the wizard notifies you that the updates have been created, click Finish.
To push the updated package to the clients, right-click the Cisco VXC 6215 devices you want to upgrade,
and choose Reboot.
Administration Guide for Cisco Virtualization Experience Client 6215 Firmware Release 8.7
2-14
Chapter 2
Cisco VXC Manager Configuration Quick Reference
Optional Voice and Video Firmware Add-On
To verify that Cisco VXC Manager has succesfully pushed a package to a device, click Device Manager,
and choose a target device. In the bottom right hand corner, of the details pane, click the plus icon (+)
to maximise the properties for the device, and then click the Deployed Package tab to show all packages
that are on the device. You can also click the Log History tab to view the status of the most recent
package pushed to the device.
Optional Voice and Video Firmware Add-On
To support Unified Communications on the Cisco VXC 6215, you must purchase and install the Voice
and Video Firmware add-on. The optional Voice and Video Firmware add-on provides Unified
Communications functionality for Cisco UC Integration for Microsoft Lync and Cisco Unified Personal
Communicator.
With the Voice and Video Firmware add-on, users in a virtual environment can use Cisco UC Integration
for Microsoft Lync or Cisco Unified Personal Communicator from their thin clients. The Voice and
Video Firmware runs on the thin client, and Cisco UC Integration for Microsoft Lync or Cisco Unified
Personal Communicator runs on the Windows hosted virtual desktop.
For detailed deployment information about the optional Voice and Video Firmware add-on, see the
Deployment Guide for Voice and Video Firmware for Cisco Virtualization Experience Client 6215.
To enable the Voice and Video Firmware add-on on the Cisco VXC 6215, see Register a Package to
Enable a Cisco Add-On, page 2-15.
Register a Package to Enable a Cisco Add-On
Use the following procedure to enable a Cisco add-on.
Procedure
Step 1
Download the add-on files from the Cisco Software Download page:
a.
Go to the following URL:
http://www.cisco.com/cisco/software/navigator.html
Step 2
Note
b.
Choose Products > Voice and Unified Communications > IP Telephony > Virtualized
Endpoints.
c.
Choose Cisco Virtualization Experience Client 6000 Series > Cisco Virtualization Experience
Client 6215.
d.
Choose the desired add-on from the list.
e.
Click the Download or Add to cart button and follow the prompts.
On the server on which you have Cisco VXC Manager installed, extract the add-on files to a local folder.
Assuming an add-on named ciscoaddontest1, the extracted add-on folder structure appears as follows:
~/ciscoaddontest1/wlx/wlx.ini
~/ciscoaddontest1/ADDONS/<rpmfilename>.rpm
~/ciscoaddontest1/ADDONS/directory
~/ciscoaddontest1.rsp
Administration Guide for Cisco Virtualization Experience Client 6215 Firmware Release 8.7
2-15
Chapter 2
Cisco VXC Manager Configuration Quick Reference
Update the Cisco VXC 6215 Base VDI Firmware
Step 3
In the extracted wlx.ini file, do not modify the existing parameters, but add any additional INI
configurations you require.
Note
If you have existing INI configurations on your clients, you must copy and paste these parameters into
the wlx.ini that you push with the add-on; otherwise, the clients will lose the pre-existing configurations.
Step 4
In the tree pane of the Administrator Console, right-click Package Manager and choose New > Package
to open the Package wizard.
Step 5
Click the Register a Package from a Script File (.RSP) option and click Next.
Step 6
Enter the file path to the Cisco VXC Manager script file (RSP) file contained in the extracted add-on
files (you can use Browse to find and choose a file), and then click Next to open the Software Package
Information dialog box.
The wizard obtains and displays the name, description, and category of the Cisco VXC Manager
package.
Step 7
To have the Cisco VXC Manager active for distribution, check the Active check box.
Step 8
Click Next.
The wizard notifies you that it is ready to create and register the new Cisco VXC Manager package.
Step 9
Click Next to create and register the Cisco VXC Manager package.
Step 10
After the Cisco VXC Manager package is created and registered, click Finish.
The Cisco VXC Manager package is copied to the Master Repository and is displayed under the
appropriate category. The Cisco VXC Manager package is now ready for distribution (see Schedule
Device Updates Using Default Device Configuration, page 2-12 or Schedule Device Updates Using the
Drag-and-Drop Method, page 2-14).
Update the Cisco VXC 6215 Base VDI Firmware
To update the Base VDI Firmware image on a Cisco VXC 6215 client, perform the following procedure.
Note
If the Cisco VXC 6215 is running the Voice and Video Firmware Add-on, after you upgrade the Base
VDI firmware, you must install the compatible release of the Voice and Video Firmware Add-on. See
Register a Package to Enable a Cisco Add-On, page 2-15.
Procedure
Step 1
Download the OS image from the Cisco Software Download page:
a.
Go to the following URL:
http://www.cisco.com/cisco/software/navigator.html
b.
Choose Products > Voice and Unified Communications > IP Telephony > Virtualized
Endpoints.
c.
Choose Cisco Virtualization Experience Client 6000 Series > Cisco Virtualization Experience
Client 6215.
d.
Choose the desired release version from the list.
Administration Guide for Cisco Virtualization Experience Client 6215 Firmware Release 8.7
2-16
Chapter 2
Cisco VXC Manager Configuration Quick Reference
Configure Multimedia Redirection with a Proxy Server
e.
Click the Download or Add to cart button and follow the prompts.
Step 2
On the server where you have Cisco VXC Manager installed, extract the zipped OS image files to a local
folder.
Step 3
In the extracted wlx.ini file, do not modify the existing parameters, but add any additional INI
configurations you require.
Note
Step 4
If you have existing INI configurations on your clients, you must copy and paste these parameters into
the wlx.ini that you push with the add-on; otherwise, the clients will lose the pre-existing configurations.
Register the image package:
a.
In the tree pane of the Administrator Console, expand Package Manager.
b.
In the details pane, right-click Other Packages and choose New > Package.
c.
Choose Register a Package from a Script file (.RSP) and click Next.
d.
Click Browse and choose the RSP file that is contained in the unzipped image files, and click Open.
e.
Click Next to display the Package Wizard summary.
f.
Click Next to see the Package Registration Progress screen.
g.
Click Next to create the package.
h.
After the package is created and registered, click Finish.
Step 5
Configure the DDC preferences (Configuring Default Device Configuration Preferences, page 2-12).
Step 6
To upgrade the Cisco VXC 6215, you can use Default Device Configuration or use the Drag-and-Drop
method (see Schedule Device Updates Using Default Device Configuration, page 2-12 and Schedule
Device Updates Using the Drag-and-Drop Method, page 2-14)
Note
If you downgrade a Cisco VXC 6215 thin client from a newer Image DDC (for example,
DDC_10) to any older Image DDC (for example, DDC_09), and then try to re-apply the newer
image DDC to the client, the operation fails. To successfully re-apply the newer image DDC
(DDC_10) to the thin client after a downgrade, you must first rename the newer image DDC
using Cisco VXC Manager (for example, to DDC_10a).
Configure Multimedia Redirection with a Proxy Server
When you enable Multimedia redirection to allow the thin client to fetch audio and video media directly,
if you have an internal proxy server running on your network, you must configure the thin client with
the address of your proxy server to allow the thin client to access the external media.
To configure the proxy server, you must push an RSP file to the clients using Cisco VXC Manager in
accordance with the following procedure. Note that you must also specify the internal domain for which
no redirection is required.
Procedure
Step 1
Create a folder to contain the client configurations, for example 6215Configs.
Administration Guide for Cisco Virtualization Experience Client 6215 Firmware Release 8.7
2-17
Chapter 2
Cisco VXC Manager Configuration Quick Reference
Configure Multimedia Redirection with a Proxy Server
Step 2
In the 6215Configs folder, create an RSP file, for example ProxyConfig.rsp, with the following content
(to create the RSP file, enter the required content in a text editor, and then save the file with a .rsp
extension):
[Version]
Number= ProxyConfig
OS=SLX
Category=Other Packages
USE_Pxe=NO
[Script]
RP "<regroot>"
EX "echo 'export http_proxy=http://<proxy-server.com:443>' >> /etc/bash.bashrc.local"
EX "echo 'export HTTP_PROXY=http://<proxy-server.com:443>' >> /etc/bash.bashrc.local"
EX "echo 'export https_proxy=http://<proxy-server.com:443>' >> /etc/bash.bashrc.local"
EX "echo 'export HTTPS_PROXY=http://<proxy-server.com:443>' >> /etc/bash.bashrc.local"
EX "echo 'export ftp_proxy=http://<proxy-server.com:443>' >> /etc/bash.bashrc.local"
EX "echo 'export FTP_PROXY=http://<proxy-server.com:443>' >> /etc/bash.bashrc.local"
EX "echo 'export all_proxy=http://<proxy-server.com:443>' >> /etc/bash.bashrc.local"
EX "echo 'export all_proxy=http://<proxy-server.com:443>' >> /etc/bash.bashrc.local"
EX "echo 'export no_proxy=<.local-domain.com>' >> /etc/bash.bashrc.local"
EX "echo 'export NO_PROXY=<.local-domain.com>' >> /etc/bash.bashrc.local"
RB
RB
Where:
•
You must replace <proxy-server.com:443> with the address and port of the proxy server for the
specified protocols.
•
You must replace <.local-domain.com> with your local domain name to be added to the proxy
bypass list. For example:
EX "echo 'export no_proxy=.cisco.com' >> /etc/bash.bashrc.local"
•
You must ensure the Number= segment has the exact same value as the RSP file name.
Step 3
Also in the 6215Configs folder, create a subfolder using the same name as the RSP file name, for
example ProxyConfig.
Step 4
In the ProxyConfig folder, create a subfolder named wlx.
Step 5
In the wlx folder, copy the wlx.ini file containing your existing INI configuration that you want retained
after the configuration update.
For example:
•
Location and name of the .rsp file:
C:\VXC-M\6215Configs\ ProxyConfig.rsp
•
Location and name of the wlx directory:
C:\VXC-M\6215Configs\ ProxyConfig\wlx
•
Location and name of wlx.ini file in the wlx directory:
C:\VXC-M\6215Configs\ ProxyConfig\wlx\wlx.ini
Step 6
In the tree pane of the Administrator Console, expand Package Manager.
Step 7
In the details pane, right-click Other Packages and choose New > Package.
Step 8
Choose Register a Package from a Script file (.RSP) and click Next.
Step 9
Click Browse to choose the file path of the .rsp package file you want to register (For example:
C:\VXC-M\6215Configs\ ProxyConfig.rsp) and click Open.
Step 10
Click Next to display the Package Wizard summary.
Administration Guide for Cisco Virtualization Experience Client 6215 Firmware Release 8.7
2-18
Chapter 2
Cisco VXC Manager Configuration Quick Reference
Configure Multimedia Redirection with a Proxy Server
Step 11
Click Next to see the Package Registration Progress screen.
Step 12
Click Next to create the package.
Step 13
After the package is created and registered, click Finish.
Step 14
To upgrade the Cisco VXC 6215, you can use Default Device Configuration or use the Drag-and-Drop
method (see Schedule Device Updates Using Default Device Configuration, page 2-12 and Schedule
Device Updates Using the Drag-and-Drop Method, page 2-14).
Additional INI file examples
Enable VNC using an INI file
Example:
DisableVnc=no
VNCAuthTypes=none
VNCPrompt=no
Time settings
Example:
Timeserver=yourntpserver.com
Timeformat="24-hour format"
TimeZone="US/Eastern" ManualOverride=1
Display and Keyboard settings
Example:
DisplaySettings=MON1 rotate-normal 1440x900
DesktopTaskBar=left
AutoHide=yes
Keyboard.layouts=us
Administration Guide for Cisco Virtualization Experience Client 6215 Firmware Release 8.7
2-19
Chapter 2
Cisco VXC Manager Configuration Quick Reference
Configure Multimedia Redirection with a Proxy Server
Administration Guide for Cisco Virtualization Experience Client 6215 Firmware Release 8.7
2-20
CH A P T E R
3
Desktop Basics
This chapter provides information to help you quickly get started using your thin client. It describes
basic thin client functions and provides instructions for setting up the thin client for you and your users.
It includes:
Tip
•
Logging In, page 3-1
•
Using Your Desktop, page 3-2
•
Connecting to a Monitor, page 3-3
•
Shutting Down, Restarting, and Suspending, page 3-4
•
Viewing System Information, page 3-4
Cisco thin clients are designed to be centrally managed and configured using Cisco VXC Manager and
INI files. You can use Cisco VXC Manager to automatically push updates and any desired default
configuration to all supported thin clients in your environment. For more information, see Central
Configuration Using Cisco VXC Manager, page 1-1.
Logging In
The options and menus that are available on the thin client depend on access levels and on the add-ons
that are enabled on the thin client. By default, the Autologin add-on is enabled on the thin client, which
automatically logs users into the local thin client desktop after they power up the thin client.
On initial connection to central configuration, plug in the network-connected Ethernet cable to the thin
client before starting the thin client to obtain the configuration settings (connections, system settings,
required certificates and so on) desired by the administrator.
Note
After the thin client boots up, there is a short delay before it initiates the autologin process. The user is
initially presented with the login screen, and after approximately 10 to 15 seconds, the thin client
automatically logs the user into the thin client using thinuser/thinuser as the default username and
password.
After the thin client is powered on, the users are presented with a Firefox connection icon on the desktop
which they can use to log into the HVD. To connect to the HVD, double-click the icon and enter the
required login credentials.
Administration Guide for Cisco Virtualization Experience Client 6215 Firmware Release 8.6
3-1
Chapter 3
Desktop Basics
Using Your Desktop
The following sections describe the available options on the thin client desktop that allow manual
configuration of certain options.
Although manual configuration is possible, Cisco highly recommends that you use central configuration
to automatically push updates and any desired default configuration to all supported thin clients in your
environment (see Administration Guide for Cisco Virtualization Experience Client Manager).
Using Your Desktop
The desktop provides various applications and tools for use.
Figure 3-1
Desktop
Use the following guidelines:
•
Computer button—Displays the Computer menu containing frequently used programs and common
system areas.
– Connection Manager—Opens the Connection Manager. Use the Connection Manager to view
connections on the thin client.
– More Applications—Opens the Application Browser. Use the Application Browser to use and
manage applications on the thin client (see Accessing Applications with the Application
Browser, page 4-1).
– Logout—Opens the Log Out dialog box (click Log Out to end your session but continue to run
the thin client).
– Shutdown—Opens the Shutdown dialog box (where you can shut down your thin client, restart
your thin client, or put your thin client in Standby mode. See Shutting Down, Restarting, and
Suspending, page 3-4).
Note
•
If you open the Shutdown dialog box and do not choose a shutdown option, the system
automatically shuts down after 60 seconds.
Calendar—Lists the day of the week, date, and time. You can click the calendar to open a calendar
window.
Administration Guide for Cisco Virtualization Experience Client 6215 Firmware Release 8.6
3-2
Chapter 3
Desktop Basics
Connecting to a Monitor
Desktop Keyboard Shortcuts
Depending on the type of application window you are using (full screen, standard, or seamless), you can
use shortcut keys (see Table 3-1) to manage windows.
Table 3-1
Tip
Window-Related Shortcut Keys
Window Action
Press
Maximize window
Alt+F10
Minimize window
Alt+F9
Restore maximized window to previous size
Alt+F5
Move focus to next window
Alt+Esc
Move focus to previous window
Alt+Shift+Esc
Switch windows using a dialog box
Alt+DownArrow
Switch panel focus
Alt+Ctrl+Shift+DownArrow
Show the window menu
Alt+Space (you can also right-click the window
title bar or border, or click the window icon)
Minimize/maximize all windows
Alt+Ctrl+DownArrow
Move window with arrow keys
Alt+F7 and press an arrow key
Resize window
Alt+F8 and press an arrow key
Show desktop panel
Alt+F1
Close the window
Alt+F4
The shortcut keys Alt+DownArrow (allows you to switch windows using a dialog box) and
Alt+Ctrl+DownArrow (minimizes or maximizes all windows) are useful for navigating multiple remote
sessions without having to log out.
Connecting to a Monitor
Monitor connections can be made using the DVI (digital) monitor port and the proper monitor
cables/splitters. For VGA (analog) monitor connections, you must use the included DVI-to-VGA
adapter. For information on configuring display settings, see Configuring Display Settings, page 4-5.
Tip
If you connect a DVI monitor and a VGA monitor to the DVI port using a DVI to DVI/VGA splitter, the
VGA monitor is the primary monitor.
If you connect one DVI monitor to the DVI port and a second DVI monitor to the Display Port using a
Display Port to DVI adapter, the Display Port monitor is the primary monitor.
Administration Guide for Cisco Virtualization Experience Client 6215 Firmware Release 8.6
3-3
Chapter 3
Desktop Basics
Shutting Down, Restarting, and Suspending
Shutting Down, Restarting, and Suspending
When you are finished using your thin client, you can click Computer > Shutdown and choose:
Tip
•
Shutdown—Shuts down and turns off your thin client.
•
Restart—Shuts down and restarts your thin client.
•
Suspend—Places the thin client in Standby mode to preserve power. To exit Standby mode, click the
mouse.
If the ReadyMode feature is enabled and you shut down the thin client, the session ends, the power button
LED is put in a state of OFF, and the thin client is placed in Standby mode to preserve power. When you
press the power button, the thin client exits Standby mode and immediately prompts the user with the
login dialog box. For more information on ReadyMode, see Cisco Virtualization Experience Client 6215
INI Files Reference Guide.
Viewing System Information
Click More Applications in the Computer menu (see Using Your Desktop, page 3-2) to open the
Application Browser. Click the System Information icon to open the System Information dialog box.
Use this dialog box to view Identity, Network, System Log, and Copyright information:
•
Identity tab—Displays identity information such as Website, Current User, Terminal Name, Product
Name, Platform, Build, SLETC, OS Version, Uptime, Processor, Processor Speed, Total Memory,
Free Memory, Flash Size, Serial Number, and BIOS version.
•
Network tab—Displays network information such as Network Device, MAC Address, Network
Speed, MTU, IP Address, IPv6 Address, Netmask, Gateway, Domain, Primary DNS, Secondary
DNS, DHCP Server, Lease, and Elapsed.
•
System Log tab—Displays the System Log information, including various messages generated
during the operation of the thin client.
•
Copyright tab—Displays the software copyright and patent notices.
Administration Guide for Cisco Virtualization Experience Client 6215 Firmware Release 8.6
3-4
Chapter 3
Desktop Basics
Viewing System Information
Figure 3-2
System Information dialog box
Administration Guide for Cisco Virtualization Experience Client 6215 Firmware Release 8.6
3-5
Chapter 3
Viewing System Information
Administration Guide for Cisco Virtualization Experience Client 6215 Firmware Release 8.6
3-6
Desktop Basics
CH A P T E R
4
Accessing Applications with the Application
Browser
This chapter provides detailed information about using the Application Browser to access the
applications, audio and video, and system features that are installed on the thin client.
Click More Applications in the Computer menu (see Using Your Desktop, page 3-2) to open the
Application Browser.
Figure 4-1
Application Browser
This chapter includes information on:
•
Viewing the Connection Manager, page 4-2
•
Performing Diagnostics, page 4-2
•
Viewing Diagnostic Logs, page 4-3
•
Configuring the Cisco VXC Manager Agent, page 4-4
•
Configuring Volume Control Settings, page 4-5
•
Opening a Firefox Web Browser Session, page 4-5
•
Configuring Display Settings, page 4-5
•
Viewing System Information, page 4-6
•
Taking Screenshots, page 4-6
Administration Guide for Cisco Virtualization Experience Client 6215 Firmware Release 8.6
4-1
Chapter 4
Accessing Applications with the Application Browser
Viewing the Connection Manager
Viewing the Connection Manager
Click the Connection Manager icon in the Application Browser to open the Connection Manager. Use
the Connection Manager to view connections on your Desktop.
Performing Diagnostics
Click Diagnostics in the Application Browser to open the Diagnostics dialog box. Use this dialog box
to choose and use one of the following diagnostic tools:
•
Ping—Enter or choose a destination from the Destination list and click Ping.
•
Trace Route—Enter or choose a destination from the Destination list and click Trace Route
(diagnostic information appears on the Trace Route tab).
•
Temporary Settings—View the temporary settings of the thin client.
•
Permanent Settings—View the permanent settings of the thin client.
•
wlx.ini/wnos.ini—View the wlx.ini or wnos.ini file as copied to the thin client.
Note
•
Note
The Cisco VXC 6215 supports wlx.ini files, but does not support wnos.ini files. For more
information, see the Cisco Virtualization Experience Client 6215 INI Files Reference Guide.
user.ini—View the user.ini file as copied to the thin client.
The Cisco VXC 6215 does not support the user.ini file.
Figure 4-2
Diagnostics Dialog Box
Administration Guide for Cisco Virtualization Experience Client 6215 Firmware Release 8.6
4-2
Chapter 4
Accessing Applications with the Application Browser
Viewing Diagnostic Logs
Viewing Diagnostic Logs
Click Diagnostics Log Viewer in the Application Browser to open the Diagnostics Log Viewer dialog
box. The Diagnostic Log Viewer allows you to display and export log files to a USB key or to a remote
server.
Figure 4-3
Diagnostic Log Viewer
To highlight a log file, click the name of the log file in the Log Name list. The Diagnostic Log Viewer
then displays messages related to the log file.
To include debug messages in the displayed list, check the More Logs check box, click Apply, and then
restart the device for the changes to take effect. When you highlight the log file after the reset, the
Diagnostic Log Viewer displays the debug messages.
You can export log files to a connected USB Key or to a Remote Server, as follows:
•
USB Key: Attach a USB key to the client, open the Diagnostics Log Viewer, and check the check
boxes for the logs you want in the Log Name list. In the Export To field, click USB Key, and then
click Next to use the Export Logs dialog box.
•
Remote Server: Check the check boxes for the logs you want in the Log Name list. In the Export To
field, click Remote Server and then click Next to use the Export Logs dialog box.
Note that you can export the files to a default server (server from the default registry) by clicking Use
server from default registry, or to any server by clicking Use the following server and specifying the
server path in the URL field.
Administration Guide for Cisco Virtualization Experience Client 6215 Firmware Release 8.6
4-3
Chapter 4
Accessing Applications with the Application Browser
Configuring the Cisco VXC Manager Agent
Figure 4-4
Note
Export Logs to Remote Server Dialog Box
Permanent and temporary registry logs are exported by default.
Configuring the Cisco VXC Manager Agent
Click Cisco VXC-M in the Application Browser to open the Cisco VXC-M Agent Configuration dialog
box. Use this dialog box to configure the Cisco VXC Manager server location.
Tip
After you configure the Cisco VXC Manager Agent properties, Cisco recommends that you reboot the
thin client.
Figure 4-5
VXC Manager Agent Configuration Dialog Box
To configure the Cisco VXC Manager server location, perform the following procedure:
Procedure
Step 1
Enter the VXC-M Server IP address.
Step 2
Enter the Client to Server Port (default is 80).
Step 3
Enter the Secure Port (HTTPS port default is 443).
Step 4
Click OK.
After you reboot the thin client, the thin client performs a checkin with the Cisco VXC Manager.
Administration Guide for Cisco Virtualization Experience Client 6215 Firmware Release 8.6
4-4
Chapter 4
Accessing Applications with the Application Browser
Configuring Volume Control Settings
Configuring Volume Control Settings
Click Volume Control in the Application Browser to open the Volume Control dialog box. Use this
dialog box to set volume preferences for Playback (system sounds), Recording (application recording
sounds), Output Devices (left and right sounds), Input Devices (left and right sounds), and Configuration
(profile). You can use the Show list on the Playback, Recording, Output Devices, and Input Devices tabs
to choose which items you want shown.
Figure 4-6
Tip
Volume Control Dialog Box
For these settings to take effect, sound must be supported and enabled on the server used for ICA
connections, RDP connections, or MPlayer. Sound requires significant bandwidth that may not be
available on some WAN and dial-up connections.
Opening a Firefox Web Browser Session
Click the Firefox icon in the Application Browser to open a Firefox web browser session.
Configuring Display Settings
Click Display in the Application Browser to open the Display Preferences dialog box. Use this dialog
box to set the monitor display settings (Primary Display Output, Resolution, Refresh Rate, and
Rotation). For most monitors, the thin client automatically obtains the correct resolution from the
monitor.
Note
With dual monitors, the screens are mirrored by default. To set up an extended desktop across two
monitors, uncheck the Mirror Screens check box.
Administration Guide for Cisco Virtualization Experience Client 6215 Firmware Release 8.6
4-5
Chapter 4
Accessing Applications with the Application Browser
Viewing System Information
Figure 4-7
Display Preferences Dialog Box
Viewing System Information
Click System Information in the Application Browser to open the System Information dialog box. See
Viewing System Information, page 4-6 for details.
Taking Screenshots
Click Take Screenshot in the Application Browser to open the Take Screenshot dialog box. Use this
dialog box to set screenshot preferences and effects (for example, entire desktop with pointer, current
window with a border, or a selected area). After setting your preferences, click Take Screenshot to take
the screenshot and open the Save Screenshot dialog box allowing you to name and save the file.
Figure 4-8
Take Screenshot Dialog Box
Administration Guide for Cisco Virtualization Experience Client 6215 Firmware Release 8.6
4-6
A P P E N D I X
A
Central Configuration Using File Server
This appendix contains information about configuring thin clients using a central file server as an
alternative to Cisco VXC Manager.
Cisco VXC Manager is the standard tool for central management. As an alternative method for thin client
management, you can configure a local file server from which the thin clients can obtain INI files for
their configuration.
Caution
Central configuration using a file server provides fewer capabilities for hands-on client management,
and is therefore recommended only in test environments or for troubleshooting. Cisco VXC Manager is
the standard tool for thin client management.
For information about configuring thin clients using Cisco VXC Manager, see Central Configuration
Using Cisco VXC Manager, page 1-1 and the Administration Guide for Cisco Virtualization Experience
Client Manager.
This appendix includes:
•
How INI Files Are Employed, page A-1
•
How to Set Up Central Configuration Using a File Server, page A-2
For detailed information on constructing and using INI files, see the Cisco Virtualization Experience
Client 6215 INI Files Reference Guide.
How INI Files Are Employed
INI files (created and maintained by the network administrator) determine how the thin client is
configured and updated. The thin client accesses INI files from the server during the initialization
process. Typically, INI files are accessed through FTP, HTTP, or HTTPS; if no protocol is specified, the
default is anonymous FTP.
INI files are employed as follows:
•
wlx.ini—This is the global INI file. One wlx.ini file is available to all users. It contains global
parameters for all thin clients accessing the server.
•
$MAC.ini—This file can be used for device-specific configuration. If the thin client locates this INI
file (it is stored in the same directory as wlx.ini), wlx.ini is not accessed, unless you use the
include=wlx.ini parameter.
When a thin client is initialized, it accesses the global wlx.ini file.
Administration Guide for Cisco Virtualization Experience Client 6215 Firmware Release 8.6
A-1
Appendix A
Central Configuration Using File Server
How to Set Up Central Configuration Using a File Server
How to Set Up Central Configuration Using a File Server
For the thin client to successfully access INI files and update itself from a server, you must set up the
server with the correct folder structure (where the INI files and other update files are located), direct the
thin client to the server, and then reboot or start the thin client.
After DHCP and servers are configured and available, the thin client checks (at each bootup) to see
whether or not any updates are available on a predefined server (DCHP Option 161 specifies the server
URL; DCHP Option 162 specifies the root path to the server). If updates are available, the updates are
automatically installed.
Step 1: Prepare the Root Directory and Folder Structure on the File Server
Set up the following folder structure on your server under the C:/inetpub/ftproot folder (for FTP) or
C:/inetpub/wwwroot folder (for HTTP or HTTPS) and place your INI files and other necessary files
inside the structure as noted (this list describes the folder structure, starting with the root directory).
/wyse/
/wyse/wlx
The root directory. It stores the wlx folder and the add-ons folder. It
also stores the following files, which are used for imaging and
updating devices:
•
Latest-image.raw
•
Latest-image.raw.info
The main INI configuration folder. It stores the following:
•
wlx.ini file or $MAC.ini file
•
bitmap folder
•
certs folder
/wyse/wlx/bitmap
The folder where you can place custom images you plan to use.
/wyse/wlx/certs
The folder where you can place the CA certificates that can be
imported to a thin client.
Note
/wyse/addons
Use the Certs and ImportCerts INI parameters in the wlx.ini
file to import the certificates to thin clients.
The folder where you can place the add-ons you want to use. It also
stores the directory file and the *.rpm packages available to be
installed on the thin client. The directory file should list all available
add-ons. The directory file is required in the add-ons folder to
guarantee that add-ons are properly located.
The following figure shows how to set up the folder structure on your file server and where to place INI
files and other necessary files inside the structure.
Administration Guide for Cisco Virtualization Experience Client 6215 Firmware Release 8.6
A-2
Appendix A
Central Configuration Using File Server
How to Set Up Central Configuration Using a File Server
Figure A-1
Folder Structure
Be sure to create/activate the required MIME Types (.ini, .raw, .info, .rpm, and .) under IIS (on a per site
basis) to enable downloading. Also be sure your web server can identify the file types used by Cisco thin
clients.
To create/activate a MIME Type:
Step 1
On your IIS server, use the File Types menu to add a New Type.
Step 2
In the File Type dialog box, enter the Associated extension: (.ini, .raw. .info, .rpm, or .). and Content
type.
Step 3
Click OK to apply the settings.
Repeat the steps above for each required MIME type, specifying the appropriate extension and content
type.
Step 2: Direct the Thin Client to the Server
After you set up the folder structure and populate it with the correct files, you must then direct the thin
client to the location of the server using DHCP.
Administration Guide for Cisco Virtualization Experience Client 6215 Firmware Release 8.6
A-3
Appendix A
Central Configuration Using File Server
How to Set Up Central Configuration Using a File Server
Using DHCP
With the DHCP method of configuring the file server location (recommended), the thin clients obtain
information about the server and root directory using the following DHCP options:
•
161—Specifies the server
•
162—Specifies the root path to the server (ftp/http/https)
– If no root path is defined, /wyse is assumed.
– If a root path is defined, the additional path is appended to the URL supplied by Option 161.
Tip
•
184—(Optional) Specifies the server username (for the server specified in Option 161)
•
185—(Optional) Specifies the server password (for the server specified in Option 161.
The thin clients perform the check-in for firmware updates early in the boot process. For that reason, a
unit may not receive changes in DHCP information until it completes a full boot. However, you can avoid
this scenario by forcing a renewing of the DHCP lease, which ensures that the unit has the latest
file-server location before the next firmware check.
Use the guidelines shown in Table A-1 when you create and add the DHCP options you need.
Table A-1
DHCP Option Tags
Option
Description
Notes
001
Client identifier
Always sent
002
Time Offset
Optional
003
Router
Optional but recommended. It is not required unless the appliance
must interact with servers on a different subnet.
006
Domain Name Server (DNS)
Optional but recommended
012
Host Name/Terminal Name
Optional string. The hostname or terminal name to be set.
015
Domain Name
Optional but recommended. See Option 6.
028
Broadcast Address
Optional
044
WINS servers IP Address
Optional
051
Lease Time
Optional but recommended
052
Option Overload
Optional
053
DHCP Message Type
Recommended
054
DHCP Server IP Address
Recommended
055
Parameter Request List
Sent by appliance
057
Maximum DHCP Message Size
Optional (always sent by appliance)
058
T1 (renew) Time
Optional but recommended
059
T2 (rebind) Time
Optional but recommended
061
Client identifier
Always sent
Administration Guide for Cisco Virtualization Experience Client 6215 Firmware Release 8.6
A-4
Appendix A
Central Configuration Using File Server
How to Set Up Central Configuration Using a File Server
Table A-1
DHCP Option Tags
Option
Description
Notes
161
Server (ftp/http/https)
Optional string. If this is an IP address or resolvable hostname, the
protocol is assumed to be FTP; however, it may be the leading
portion of a URL that specifies another protocol. If the URL form
is used, it should not include a trailing slash (for example,
http://server.example.com or ftp://192.168.0.1).
162
Root path to the server (ftp/http/https)
Optional string. The relative directory starting from the root
directory must be given. For example, on an FTP server, the full
directory may be C:/Inetpub/ftproot/wyse, where wyse is the
directory that contains the firmware. In this example, the correct
string value for this DHCP option is /wyse.
On a Linux server, an FTP user-based directory might be
/home/test/wyse. In this example, if the FTP user is test, then the
FTP root path is /wyse and not the full path (/home/test/wyse).
This value should use URL path notation (start with a forward
slash, /, and use a forward slash as folder separators).
181
PN Server
Optional string. IP address or FQDN of the PNLite server.
182
Admin List
Optional string. DHCP equivalent of the DomainList INI file
parameter.
184
Server Username
Optional string. Username to use when authenticating to the server
specified in Option 161.
185
Server Password
Optional string. Password to use when authenticating to the server
specified in Option 161.
186
Cisco VXC Manager
Optional binary IP address of the Cisco VXC Manager server. This
option can specify up to one Cisco VXC Manager server.
191
XenDesktop DDC URL
Optional string. You can connect to your XenDesktop URL by
using DCP Option tag 191 to specify the XenDesktop DDC URL.
194
Cisco VXC Manager FQDN
Optional FQDN of the Cisco VXC Manager server. This option can
specify up to one Cisco VXC Manager server.
Step 3: Rebooting
To reboot your thin client, click Computer > Shutdown and choose Restart.
Note
To reboot the client, use the Restart option to ensure the client performs a full boot sequence. This step
is especially important when you are upgrading client firmware or configurations; otherwise, the
upgrades may not take effect.
After you reboot (or start the thin client), the thin client searches in the defined root path for the latest
available image and updates if necessary. Additionally, it checks the directory file in the add-ons folder
to determine whether any updates for installed add-ons are defined. Add-ons that exist in the add-ons
folder but are not listed in the directory file are ignored during update check-in.
Administration Guide for Cisco Virtualization Experience Client 6215 Firmware Release 8.6
A-5
Appendix A
How to Set Up Central Configuration Using a File Server
Administration Guide for Cisco Virtualization Experience Client 6215 Firmware Release 8.6
A-6
Central Configuration Using File Server
A P P E N D I X
B
Using TightVNC Viewer to Shadow or Monitor a
Thin Client
TightVNC Server is installed locally on the thin client. It allows administrators to
shadow/operate/monitor a thin client from a remote machine on which TightVNC Viewer is installed
(TightVNC Viewer is available from the TightVNC website and must be installed on the
remote/shadowing machine before use; it is also included as a component of Cisco VXC Manager
software).
TightVNC (Server and Viewer) allows a remote administrator to configure or reset a thin client from a
remote location rather than making a personal appearance at the thin client site (VNC is intended
primarily for support and troubleshooting purposes). TightVNC Server starts automatically as a service
at thin client startup if the administrator has configured it using the INI file.
The administrator must configure the client using INI parameters to enable VNC access. You must use
the same INI file configuration to enable VNC whether you are using Cisco VXC manager or TightVNC
Viewer to access the thin client. See INI Configuration Example for Enabling VNC, page B-2 for an
example configuration, and see the Cisco Virtualization Experience Client 6215 INI Files Reference
Guide for additional configuration details.
Before an administrator on a remote machine (on which TightVNC Viewer is installed) can access a thin
client (with TightVNC Server) the administrator must know the following:
•
The IP address (or valid DNS name) of the thin client that is to be shadowed/operated/monitored
(see Viewing System Information, page 3-4).
•
The security password of the thin client that is to be shadowed/operated/monitored.
To shadow a thin client from a remote machine:
Procedure
Step 1
Open the New Tight VNC Connection dialog box (for example, from Microsoft Windows, click Start >
All Programs > TightVNC > TightVNC Viewer).
Administration Guide for Cisco Virtualization Experience Client 6215 Firmware Release 8.6
B-1
Appendix B
Figure B-1
Using TightVNC Viewer to Shadow or Monitor a Thin Client
New TightVNC Connection Dialog Box
Step 2
Enter the IP address or valid DNS name of the thin client that is to be shadowed/operated/monitored (you
can also set other options using the command buttons).
Step 3
Click OK to open the VNC Authentication dialog box.
Figure B-2
Step 4
Standard VNC Authentication Dialog Box
Enter the password of the thin client that is to be shadowed (this is the Security Password of the thin
client that is to be shadowed), and click OK. The thin client that is to be shadowed/operated/monitored
is displayed for the administrator in a separate window on the remote machine. Use the mouse and
keyboard on the remote machine to operate the thin client just as you would if you were operating it
locally.
INI Configuration Example for Enabling VNC
You can use the following example INI file configuration to enable VNC on the thin client:
Example:
DisableVnc=no
VNCAuthTypes=none
VNCPrompt=no
This example enables VNC connections on the client, with no password authentication required to access
the client, and without prompting the user to accept VNC shadowing before the shadowing starts.
For details about using INI files, see Cisco Virtualization Experience Client 6215 INI Files Reference
Guide.
Administration Guide for Cisco Virtualization Experience Client 6215 Firmware Release 8.6
B-2