1
CaHOH
_o_S_o,IXUS 310 HS
ELIF_H
SO0
HS
Camera
User
Guide
Make sure you read this guide, including the "Safety
Precautions"
section before using the camera.
Reading this guide will help ,.
learn to use the camera
properly.
Store this guide
use it in the future.
Getting
More
Out
of Your
Camera
This chapter exp,ains how to shoot in TV
and AV
modes.
107
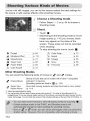
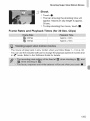
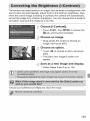
You can set the shutter to the speed at which you want to shoot. The camera
will set the appropriate
aperture value for the shutter speed you set.
TV stands for "Time value".
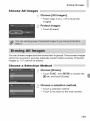
..... Choose a Shooting mode.
Follow Steps 1 - 2 on p. 64 to choose
TV.
Adjustthesetting.
Touch
Touch
choose
the [1/125].
the bar, or drag it left or right, to
a shutter
speed, then touch _Z).
shoot.
Available
Shutter Speeds
15", 13", 10", 8", 6", 5",4",3"2,2"5,2",
1"6, 1"3, 1", 0"8, 0"6, 0"5, 0"4, 0"3, 1/4, 1/5, 1/6,
1/8, 1/10, 1/13, 1/15, 1/20, 1/25, 1/30, 1/40, 1/50, 1/60, 1/80, 1/100, 1/125, 1/160, 1/200,
1/250, 1/320, 1/400, 1/500, 1/640, 1/800, 1/1000, 1/1250
2" indicates 2 seconds, 0"3 indicates
second.
0.3 second and 1/160 indicates
1/160
Depending on the zoom position, some shutter speeds may not be available.
108
iiiiiiiii_
iiiiiiiii_
iiiiiiiii_
iiiiiiiii_
Setting
t.e Ape_t.re
Value iiiiiiii
If the aperture value appears in orange when the shutter button is pressed
halfway, the scene has exceeded the correct exposure limits. Adjust the shutter
speed until the aperture value appears in white (Safety shift can also be used
(p. 110)).
You can set the aperture to a value at which you want to shoot. The camera
will set the appropriate
shutter speed for the aperture value you set.
AM stands for "Aperture value", which refers to the size of the aperture
opening inside the lens.
Choose a Shooting mode.
Follow Steps
1 - 2 on p. 64 to choose
AM.
Adjustthe setting.
Touch
[F4.0].
Touch the bar, or drag it left or right, to
choose an aperture value, then touch _Z).
; shoot.
Available Aperture Values
F2.0, F2.2, F2.5, F2.8, F3.2, F3.5, F4.0, F4.5, F5.0, F5.6, F5.8, F6.3, F7.1, F8.0
Depending on the zoom position, some aperture values may not be available.
109
Setting theApertureValue
If the shutter speed appears in orange when the shutter button is pressed halfway,
the scene has exceeded the correct exposure limits. Adjust the aperture value
until the shutter speed appears in white. Safety shift can also be used (see below).
In TV
[Safety
for the
Safety
110
and AV, if you touch FUNC. or MENU side to display the 0 tab, and set
Shift] to [On], the shutter speed or aperture value is automatically adjusted
correct exposure when it cannot otherwise be obtained.
Shift is disabled when the flash is enabled.
Using
Various
Functions
Shooting
for
Movies
This chapter serves as a more advanced version of the "Shooting
Movies" and "Viewing Movies" sections in Chapter 1, and explains how
to use various functions for shooting and viewing movies.
a _ ,,_
_i!!i:i%::_
¸
This chapter assumes that you have set the mode switch to 0.
The latter half of the chapter explaining movie playback and editing
assumes that you have pressed the [] button to enter Playback mode.
111
Just as with still images, you can let the camera select the best settings
the scene or add various effects while shooting movies.
for
..... Choose a Shooting mode.
Follow Steps
Shooting
1 - 2 on p. 64 to choose
a
mode.
shoot.
Touch
'
O.
Depending on the Shooting mode or movie
image quality (p. 116) you choose, black
bars may appear on the sides of the
screen. These areas will not be recorded
when shooting.
To stop shooting
the movie,
touch
Ill.
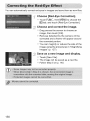
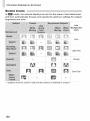
Miniature Effect
p. 113
_4} Beach
p. 65
Monochrome
Super Vivid
p. 74
p. 68
_[
"_
p. 65
p. 66
F Posier
E eoi
p 68
_!.,_.'_
Fireworks
,4A Color Accent
p. 72
[]
Foliage
Snow
p. 66
Other Shooting Modes
You can shoot the following
_,
iFrame Movie
kinds of movies
in _m, and _
modes.
Shoots movies that can be edited with iFrame .1 compatible
software .2 or devices.
Recording pixels are fixed to _ (p. 116).
Super Slow
Shoot fast moving subjects and play them back in slow motion
_- Motion Movie
(p. 114).
"1 Videotype advocatedby Apple.
*2 YoucanquicklyeditandsaveiFramemovieswithversion6.7.2or laterof ZoomBrowserEXor
ImageBrowser.If youareusingan earlierversionofthe software,downloadthe latestversionfromthe
Canonhomepage.Youcancheckthe versionof the includedsoftwareonthetop of the CD-ROM(p. 2).
112
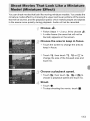
You can shoot movies that look like moving miniature models. You create the
miniature model effect by choosing the upper and lower portions of the scene
that will be blurred, and the playback speed, which makes people and objects
in the scene move quickly during playback. Audio will not be recorded.
Choose
_.
Follow Steps
A white frame
blurred)
1 - 2 on p. 64 to choose
_.
(the area that will not be
appears
on the screen.
Choose the area to keep in focus.
Touch the screen to change
the area to
keep in focus.
Touch
9,
then touch
9,
c-_ or E_ to
change the size of the focused
touch _.
Choose
area and
a playback speed.
Touch IOX, then touch 5]1, IOX or 2OX to
choose a playback speed and touch _.
:: shoot.
Touch
•
•
To stop shooting
the movie, touch
!!.
113
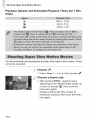
S.oot=ng
S.perSNow
Mot=on
Movies
Playback Speeds and Estimated Playback Times (for 1 Min.
Clips)
5X ....
Approx. 12 se 0.
IOX .....
App[ox. 6 se 6.
20X ....
Approx. 3 set.
You can shoot fast moving subjects
will not be recorded.
and play them back in slow motion.
Audio
Choose"_.
Follow Steps
1 - 2 on p. 64 to choose
_'.
Choose a frame rate.
After touching
FUNC.,
drag the menu
appearing on the left side of the screen
or down to choose _, then touch the
menu item again.
Choose a frame rate (the number
frames
per second),
item again.
114
then touch
up
of
the menu
Shooting
Super
Slow
Motion
Movies
Shoot.
Touch
0.
The bar showing
appear. Maximum
30 sec.
To stop shooting
the shooting
time will
clip length
is approx.
the movie, touch
m.
Frame Rates and Playback Times (for 30 Sec. Clips)
240 fps .........................................................
Approx: 4 m!n:
The movie will play back in slow motion when you follow Steps 1 - 3 on p. 33.
You can use the included software to change the playback speed of movies shot
in _ mode. Refer to the Software Guide for details,
115
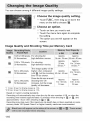
You can choose
among 4 different
image quality
settings.
..... Choose the image quality setting.
Touch FUNC., then drag up or down the
menu on the left to choose _.
Chooseanoption.
Touch
an item you want to set.
Touch the menu item again to complete
the setting.
The option
screen,
you set will appear
on the
image Quality and Shooting Time per Memory Card
1920 x 1080 pixels, For shooting full
24 frameslsec,
high-definition movies.
1280 x 720 pixels, For shooting
30 frameslsec,
high-definition
movies.
Approx.
Approx.
14 rain. 34 sec. 59 min. 40 sec.
Approx.
20 min.
43 sec. .1
Approx.
1 hr. 24 min.
54 sec. .2
The image quality will be
Approx.
higher when compared
Approx.
with I_, but the recording 43 rain. 43 sec. 2 hr. 59 min.
3 sec.
time will be shorter.
Since the file size is small,
Approx.
Approx.
320 x 240 pixels, shooting time will
I hr. 58 min.
8 hr. 4 min.
[_
30 frameslsec,
increase, but the image
19 sec.
30 sec.
quality will decrease.
"1 13 min.35 sec.for iFrememovies(p. 112).
*2 55 min.38 sec.for iFrememovies(p. 112).
640 x 480 pixels,
30 frameslsec,
Based on Carton's testing standards.
Recording will automatically stop when the clip file size reaches 4 GB, or when the
recording time reaches approximately 10 minutes when shooting in _ or _, and
approximately 1 hour when shooting in _ or _.
Recording may stop even if the maximum clip length has not been reached on some
memory cards. SD Speed Class 6 or higher memory cards are recommended.
N
116
N
The following functions can be used in the same way as for still images. Some
functions, however, may not be available or may not have an effect
depending on the Shooting mode.
Zooming in More Closely On Subjects
The sound of zoom operations will be recorded.
Using the Self-Timer (p. 58)
Using the Self-Timer to Prevent Camera Shake (p. 59)
Adjusting
the White Balance (p. 86)
Changing the Tone of an image (My Colors) (p. 92)
Shooting with the AF Lock (p. 99)
Turning Off the AF Assist Beam (p. 171)
Displaying
Grid Lines (p. 172)
Changing the IS-Mode Settings (p. 173)
Changing icon Order (icon Layout) (p. 174)
You can trim the beginnings
and ends of recorded
movies.
::!ii!ii!!ii!!i
i¸ Choose _.
Touch the screen during
movie playback
to
display the movie control panel.
Touch 4[[ , [[_ or the scroll bar to change
the displayed
frame (frames
are the basic
units that make up a movie).
will change to _,, at points where you
can edit the movie.
Touch _, or _.
[Delete section of movie] will appear
screen.
Even ifyou
the portion
on the
touch _ when it appears, only
from the nearest _ to the left
will be trimmed when [Cut Beginning] is
chosen. Only the portion from the nearest
to the right will be trimmed
End] is chosen.
when
[Cut
117
Editing
Choose a portion to delete.
Touch [Cut Beginning] or [Cut End].
[Cut Beginning] will delete from the
beginning
displayed
of the movie to the currently
scene.
[Cut End] will delete from the currently
displayed scene to the end of the movie.
Save the edited movie.
Touch [New File].
The movie will be saved as a new file.
To cancel editing, touch [Cancel].
To reset the editing range, touch _.
118
Using
Various
P|ayback
Editing
This chapter
Press the []
exp,ains
various
button to enter
ways
Playback
and
Functions
to p,ay back
and edit
mode before operating
images.
the camera.
119
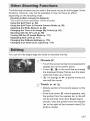
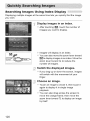
Searching
Displaying
images
multiple
images
Using
index
at the same
Display
time lets you quickly
find the image
you want.
:: Display images in an index.
After touching
_;;_, touch the number
images you want to display.
of
Images will display in an index.
You can also move the zoom lever toward
to display
zoom
images in an index. Move the
lever toward O, to reduce the
number
of images.
Switch the displayed
images.
If you drag up or down the screen,
will switch
finger.
with the movement
images
of your
..... Choose an image.
Touch an image to chose it, then touch
again to display it in single image
playback.
You can also drag across
the screen
it
to
move the orange frame, then move the
zoom lever toward O, to display an image
by itself.
120
Quickly Searching images
Searching
|mages
by Scrolling
Dragging across the screen will display images in a line letting you quickly
search them. You can also jump by the shooting date (Scroll Display).
Choose an image.
You can switch
image playback
screen.
Continuously
between images in single
by dragging across the
dragging
screen will display
(Scroll Display).
quickly
across
the
the screen on the left
In this display, drag across
choose images.
the screen to
Touching the center image restores
image playback.
single
While in Scroll Display,
up or down the screen,
if you quickly drag
you can search
images by the shooting
date.
121
QuickiySearching
Viewing
images
Movies
You can select movies
Made
with
Movie
Digest
iiiiiiiiiiiiiiiiiiiiiiiiiiiiiiiiiiiiiiiiiiiiiiiiiiiii
made in ,_"_ mode (p. 67) by date for viewing.
Choose _.
After touching
FUNC.,
drag the menu
appearing on the left side of the screen up
or down to choose ,_, then touch the
menu item again.
:
Choose
a movie
date.
Touch a date to choose it.
Play the movie.
Touch
the date chosen
The movie will play.
122
in Step 2.
When there are many images on the memory card, you can filter and display
them by a specified filter. You can also protect (p. 137) or delete (p. 139) all
images at once while filtered.
Choose _?.
Touch FUNC., then
drag up or down the
menu to the left to choose _Y.
Choose
afi ter.
Touch
an item you want to set.
If you drag up or down the menu on the
right, other items will appear.
Touch the item you chose again
complete the setting.
.......View the filtered
Touch the desired
(except for _r ).
Filtered playback
to
images.
filter, then touch it again
starts and a yellow
frame
appears.
If you drag across the screen, only the
chosen target images will display.
If you choose _ in Step 2, filtered
playback will be canceled.
Search filters
-_
Favorites
(_
Shot Date
Displays the images shot on a specified date
_
My Category
Displays the images of a specified category (p. 143)
%, Still image/Movie
Displays the images tagged as favorites (p. 141)
Displays still images, movies or movies made in o_ mode.
Filters that do not have any corresponding
images cannot be chosen.
123
viewingSlideshows
In filtered playback (Step 3), you can view filtered images with "Quickly Searching
Images" (p. 120), "Viewing Slideshows" (p. 124), and "Magnifying Images"
(p. 127). You can process all filtered images at once while performing operations
in "Protecting Images" (p. 137), "Erasing Images" (p. 139), or "Printing from the
Print List (DPOF)" (p. 159), by choosing all of the filtered images.
However, if you change the category (p. 143), or edit an image and save it as a
new image (p. 145), a message will appear, and filtered playback will cancel.
You can automatically
play back images recorded
image displays for approximately
3 seconds.
to a memory
card. Each
..... Choose _.
After touching
FUNC.,
drag the menu
appearing on the left side of the screen up
or down to choose @, then touch the menu
item again.
Choose a transition
Touch
effect.
an effect to choose
it.
Touch the menu item again to complete
the setting.
The slideshow will start a few seconds
after [Loading
image...]
appears.
In filtered playback (p. 123), only images
matching a filter play back.
Touch
124
the screen to stop the siideshow.
iiiiiiiii_
iiiiiiiii_
iiiiiiiii_
iiiiiiiii_
Changing
Settings
You can set a slideshow to repeat, or change transition effects and the time
that slideshow images are displayed. You can choose from 6 transition
effects when switching between images.
Choose
Touch
[]
[Slideshow].
FUNC., then MENU to
tab, and touch
choose
the
[Slideshow].
Chooseasetti.g.
Touch an item, then touch
_)' to make the
setting.
If you touch [Start], the slideshow
with your settings.
Touching the screen during
restore the menu screen.
starts
playback
will
125
You can magnify the area of a recorded
to check the focus.
image that was inside the AF Frame
..... Touch D ISR to switch the focus
check display (p. 44).
A white frame will appear where the AF
frame was when the focus was set.
A gray frame will appear
on a face
detected during playback.
The area within the orange
frame appears
magnified.
Switch frames.
Touch the lower right image, or move the
zoom lever toward O, once.
The screen shown on the left will appear.
Touch u,,= to move to a different frame
when
multiple
frames
appear.
Change the magnification
location.
level or
Moving the zoom lever, or touching the
magnified image on the lower right of the
screen, or _, _ will change
magnification
rate.
the displayed
If you drag across the image on the lower
right, you can move the location of the
displayed
Touching
area.
_, or the image in the upper left
resets the display
126
to Step 1.
Magnify an image.
When you touch the screen, the image will
magnify and _). and (_ will appear.
If you keep your finger on the screen, the
display will continue to zoom on that part of
the image
up to a factor of 1Ox.
You can also zoom
in or out on images
touching
_). or (_.
If you touch and hold
display
image.
Approximate Location of
Displayed Area
will continue
(_ or _,
zoom
by
the
in or out on the
If you drag across the screen, you can
move the location of the displayed area.
Touch _ to restore single image playback.
You can also tap the side of the camera
gently (p. 29) to switch between images at
the same zoom factor (Active Display).
127
Grouped
images
taken
in _
mode (p. 80) can also be viewed
individually.
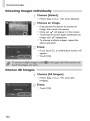
..... Choose an image group.
Drag left or right across
the screen to
choose an image that displays
touch @.
_),
then
View each image in the group.
If you drag left or right across the screen
only the images in the group wi[[ be
displayed.
Touch _Z) to exit group playback.
[n group playback (Step 2 above), you can use the FUNC. menu functions that
appear when you touch FUNC., as well as search (p. 120) and magnify (p. 127)
images. You can process all the images in a group at once while performing
operations in "Protecting Images" (p. 137), "Erasing All Images" (p. 139), or
"Printing from the Print List (DPOF)" (p. 159), by choosing a set of grouped
images.
128
iiiiiiiii_
iiiiiiiii_
iiiiiiiii_
iiiiiiiii_
U.groupJng
Images
Grouped images taken
individually.
in _j
mode can be ungrouped
Choose
Touch
[Group
and viewed
[Group images].
FUNC, and then MENU to
Images]
in the []
choose
tab.
Chooseasetti.g.
Touch
_ )' to choose
[Off].
Touch _Z) to complete the setting
restore single image playback.
and
Grouped images taken
ungrouped
and appear
in _ mode are
individually.
To regroup the images,
above and select [On].
follow the steps
129
The camera will choose four images based on the displayed image.
If you choose one of those images, the camera will select four more images
letting you enjoy playing back images in an unexpected order.
This will work best if you take many shots of various scenes.
.....Choose o.
Touch
FUNC.,then
drag up or down the
screen to choose _.
Four images will appear
as possibilities.
Choose an image.
Touch the image you want to view next.
The chosen image will be displayed in the
middle,
and the next four possibilities
will
appear.
If you touch the image in the center of the
screen, it will display full-screen. Touch the
screen to restore the original display.
Touch ::_ to return to single image view.
130
You can choose from 3 transition
single image playback.
effects
when switching
between
images
Choose [Transition].
Touch FUNC. and then MENU to
[Transition]
in the []
choose an effect.
in
choose
tab, then touch
4 _' to
In single image playback, you can quickly and easily call up functions that
have been registered to each of four set dragging patterns (Touch Actions).
Use a Function
Registered
to
Drag across
the screen as shown.
The function
registered
to _
will be called
up.
By dragging
across
the screen
as shown,
you can also call up the functions
registered to r _, _ and L_.
You can change the functions registered
Touch Actions.
to
131
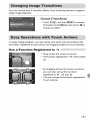
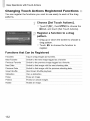
Easy Operations with Touch Actions
Changing
Touch
Actions
You can register the functions
patterns.
Registered
Functions
ii!!;!_iii:i_ii,
you want to use easily to each of the drag
Choose [Set Touch Actions].
Touch FUNC.,then MENU to choose
the
F¢] tab, and touch [Set Touch Actions].
Register
pattern.
a function
to a drag
Drag up or down the screen to choose
drag pattern.
Touch 4_ to choose the function to
register.
Functions
that Can be Registered
Favorites
Tag or untag images as favorites.
NexiFavoriie
Swiich
ioihenextimage
iagged
asa favoiiie
Previous Favorite
Switch to the previous image tagged as a favorite.
Next Date
Previous Date
Switch to first image with the next shooting date.
Switch io first image with {he previous shosting daiel
Slideshow
View a slideshow.
Erase
Erase an image.
Protect
Protect or unlock images.
132
a
You can connect
Viewing
the camera to a TV to view images
images
on a Standard
you have shot.
TV
Using the supplied stereo AV cable (p. 2), you can connect
TV and control the camera.
the camera
to a
Turn off the camera and TV.
Connect
the camera to the TV.
Open the camera's
terminal
cover and fully
insert the cable plug into the camera's
terminal.
Yellow _
Insert the cable plug fully into the video
input terminals as shown in the illustration.
_
Red
............................
Turn on the TV and switch it to the
input the cable is connected to.
133
Viewing
images
on
aTV
Turn on the camera.
Press the []
The image
button to turn on the camera.
will appear
on the TV (nothing
will appear on the screen of the camera).
Use the camera screen to perform
operations.
After you finish,
turn off the camera
and
TV, and unplug the cable.
Images will not display correctly if the camera's video output setting (NTSC/PAL)
does not match the TV system. Touch FUNC. then MENU to choose the ?T tab,
then choose [Video System] to switch to the correct video system.
Viewing
images
on a High=Definition
Using the separately sold HDMI Cable HTC-100,
to an HD TV and control the camera.
TV
you can connect
the camera
: Turn off the camera and TV.
Connect the camera to the TV.
Open the camera's terminal cover and fully
insert the cable plug into the camera's
terminal.
Fully insert the cable plug into the TV's
HDMI input.
Display
images.
Follow Steps 3 and 4 on p. 133 to display
the images.
134
Wo ,ng,m g son TV
i :!i:!i
Using
a TV Remote
to Control
the
Camera
When you connect the camera to an HDMI CEC compatible TV, you can use
the TV's remote control to operate the camera and p_ay back images or view
slideshows.
You may need to make settings on some TVs. For details, refer to the user
guide supplied
with the TV.
iiii!i
y Choose
iJ
Touch
[Ctrl via HDMI].
FUNC. and then MENU to
choose
[Ctrl via HDMI] in the ?_l' tab, then touch
4)' to choose [Enable].
Connect
the camera to the TV.
FollowSteps
1 - 2 on p. 134 to connectthe
camera to the TV.
Display images.
Turn on the TV and press the camera's
button.
The image will appear
will appear
[]
on the TV (nothing
on the screen of the camera).
Use the TV's remote control.
Press the remote
choose
control's
'_ _ buttons
to
an image.
Press the OK/Select
button to display
camera
control panel.
buttons
to choose
OK/Select
button
the
Press the 4)'
an item, then press the
again.
135
Viewing images on aTV
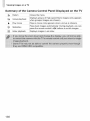
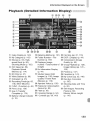
Summary of the Camera Control Panel Displayed on the TV
_
136
Group playback
Displays groups of High-speed Burst images (only appears
when grouped images are chosen).
Slideshow
Plays back images automatically. During playback, you san
press the remote control's ,__, buttons to switch images.
Index playback
Displays images in an index.
You can protect important images
with the camera (pp. 30, 139).
so that they cannot
be accidentally
erased
Protect the image.
Touch FUNC., then drag up or down the
menu to the left to choose 0"_.
Once set, [] will appear on the screen.
To unlock an image, touch FUN([. again,
then drag up or down the screen to choose
0"!1.
Using
the
Menu
Choose [Protect].
Touch FUNC.,
[]
then
tab, and touch
MENU to
choose
the
[Protect].
Choose a se,ection method.
Touch
a selection
Touch _
to return
method.
to the menu screen.
137
Protecting
Choos|ng
images
|b'_ages
|ndJv|dua|Jy
Choose [Select].
Follow Step 2 on p. 137 to touch
[Select].
Choose images.
Drag on the screen to choose
then touch the screen.
an image,
Once set, _ will appear on the screen.
Touching the screen again deselects the
image, and _ disappears.
To choose
above
multiple
images,
repeat the
operation.
Protect the image.
If you touch _,
a confirmation
appear.
Touch [OK].
The images
138
will be protected.
screen will
Erasing
Choose
A|J images
All
images
.......................................................................
Choose [All images].
Follow Step 2 on p. 137 to touch
[All
Images].
Protect images.
Touch
[Protect].
You can choose images and then erase them in groups. Since erased images
cannot be recovered,
exercise adequate caution before erasing. Protected
images (p. 137) cannot be erased.
Choose
a Selection
Method
choose [Erase].
Touch FUNC.,
[]
then
tab, and touch
MENU to
Choose a selection
Touch
a selection
Touch _
to return
choose
the
[Erase].
method.
method.
to the menu screen.
139
Erasing
AtlNmages
Choosing
images
|ndividua|Jy
Choose
[Select].
Follow Step 2 on p. 139, touch
Choose
[Select].
an image.
Drag across the screen to choose
image, then touch the screen.
an
Once set, V _ will appear on the screen.
Touching the screen again deselects the
image, and V _ disappears.
To choose
above
multiple
images,
repeat the
operation.
Erase.
If you touch _,
a confirmation
screen will
appear.
Touch [OK].
Choose
Ai| |mages
Choose
[All images].
::: Follow Step 2 on p. 139, touch
Images].
Erase.
Touch
140
[OK].
[All
When you tag images as favorites, you can easily categorize
images. You can also filter out just those images for viewing,
erasing (p. 123).
just those
protecting
or
Make the setting.
Touch FUNC., then
drag up or down the
menu to the left to choose "_.
Once set, [] will appear on the screen.
To unlock an image, touch FUNC. again,
then drag up or down the menu to the left
to choose -_-.
USin_
the
Menu
Choose
Touch
[]
[Favorites].
FUNC., then MENU to
tab, and touch
choose
the
[Favorites].
Choose an image.
Drag across the screen to choose
image, then touch the screen.
Once set, V _ will appear
an
on the screen.
Touching the screen again deselects
image and V _ disappears.
To choose multiple
above operation.
images,
the
repeat the
141
uuuuu_
uuuuu_
uuuuu_
uuuuu_
Tagging images as Favorites
Completethesetting.
If you touch _,
appear.
Touch [OK].
142
a confirmation
screen will
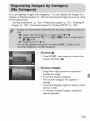
You can organize images into categories. You can display the images in a
category in filtered playback (p. 123) and process a[[ images at once by using
the functions below.
"Viewing Slideshows"
(p. 124), "Protecting
Images" (p. 137), "Erasing
Images" (p. 139), "Choosing Images for Printing (DPOF)" (p. 159)
All
Choose _I.
Touch FUNC., then
drag up or down the
screen and touch _-_!.
Choose images.
Drag left or right across the screen
choose an image.
Touch the desired category.
The chosen category will appear
to
in
orange.
Touch the category
will turn white.
again to cancel, and it
To choose
images,
multiple
repeat the
above operation.
143
Rotating
images
completethesetting.
If you touch _,
a confirmation
screen wiii
appear.
Touch [OK].
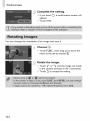
You can change
the orientation
of an image and save it.
.... Choose @.
Touch FUNC,,then
drag up or down the
menu to the left to choose _].
Rot.retheimaee.
Touch _ or "_ and the image will rotate
in the chosen direction in 90 ° increments.
Touch
144
_[C)to accept
the setting.
You can resize images to a lower pixel setting
a separate file.
and save the resized
image as
Choose [Resize].
Touch FUNC.,
[]
MENU to
then
tab, and touch
choose
the
[Resize].
Choose an image.
Drag across the screen to choose
image, then touch [OK].
an
Choosea. imagesi=e.
Touch M2, S or XS, then touch [OK].
[Save new image?] will appear on the
screen.
Savethe newimage.
Touch [OK].
The image will be saved as a new file.
Display the new image.
If you touch _,
[Display
new image?]
will
appear.
Touch [Yes].
The saved image will be displayed.
145
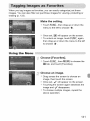
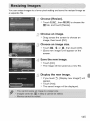
You can cut out a portion of a recorded
image and save it as a new image file.
.....
[: Choose
[Trimming].
Touch FUNC., then MENU to choose the
F¢] tab, and touch [Trimming].
Choose an image.
Drag across
Trimming Area
the screen
image, then touch
to choose
an
[OK].
Adjust the trimming area.
A frame will appear
around
the portion of
the image to be trimmed.
The original image will display
Trimming Area Display
Recorded pixels
after trimming
left and the trimmed
the lower right.
in the upper
image will display
in
If you move the zoom lever, touch _), _.
or the image on the lower right of the
screen, you can change the frame size.
If you drag on the image at the upper left or
the image on the lower right, you can move
the frame.
If you touch
orientation.
r_, you can change
the frame
In an image with detected faces, gray
frames appear around the faces located
the upper left image. The frames
used for trimming. You can switch
frames by touching
Touch [New File].
The [Save
[].
new image?]
screen will
appear.
Save as a new image and display.
Follow Steps 4 and 5 on p. 145.
146
in
can be
between
iiiiiiiii_
_,m_,°o
U,
147
You can change the color of an image and save it as a separate
to p. 92 for details on each menu item.
image. Refer
Choose [My Colors].
Touch FUNC., then MENU to
choose
the
F¢] tab, and touch [My Colors].
Choose an image.
Drag across the screen to choose
image, then touch [OK].
an
Choose an option.
Touch an option.
Touch ,_ to display
options.
other available
Touch [OK]=
The [Save new image?]
screen will
appear.
Saveas a new imageand display.
Follow Steps 4 and 5 on p. 145.
148
The camera can detect areas in an image, such as faces or backgrounds,
that
are too dark and automatically
adjust them to the optimum brightness. Also,
when the overall image is lacking in contrast, the camera will automatically
correct the image for a sharper impression.
You can choose from 4 levels of
correction, and save the image as a new file.
Choose
[i=Contrast].
then MENU to
Touch FUNC.,
F¢] tab, and touch
choose
the
[i-Contrast].
Choose an image.
Drag across
the screen to choose
image, then touch
an
[OK].
.... Chooseanoption.
Touch
{)'
to choose
an item, and touch
[OK].
The [Save new image?]
screen will
appear.
Save as a new image and display.
Follow Steps 4 and 5 on p. 145.
Choose [Low], [Medium] or [High] and adjust the image.
149
You can automatically
correct
red eyes in images
..... Choose
Touch
and save them as new files.
[Red-Eye Correction].
FUN(:,,then MENU to choose
F¢] tab, and touch [Red-Eye
the
Correction].
Choose and correct the image.
Drag across
the screen
image, then touch
Red-eye detected
to choose
[OK].
by the camera
corrected and a frame will appear
the corrected portion.
an
will be
around
You can magnify or reduce the size of the
image using the procedures in "Magnifying
Images"
(p. 127).
.....
:; Save as a new image and display.
Touch
[New
File].
The image will be saved as a new file.
Follow Step 5 on p. 145.
150
Printing
This chapter
using
explains
a Canon-brand
how to choose
PictBridge
images
compliant
for printing,
printer
and print
(sold separately).
Canon=Brand PictBridge Compliant Printers
This chapter
uses Canon-brand
SELPHY
CP series printers
in the
explanations.
The displayed screens and available functions will differ
depending
on the printer. Please also refer to the Printer User Guide.
151
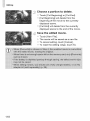
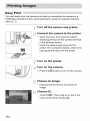
Easy Print
You can easily print the pictures you take by connecting the camera to a
PictBridge compliant printer (sold separately)
using the supplied interface
cable (p. 2).
Turn off the camera and printer.
Connect the camera to the printer.
Open the cover and insert the cable's
small plug firmly into the camera terminal
in the direction shown.
Insert the cable's
large plug into the
printer. For connection details, refer to the
user guide provided with the printer.
.... Turn
onthe
printer.
........Turn onthecamera.
Press the [] button to turn on the camera,
;::: Choose an image.
Drag across
image.
the screen
to choose
an
Choose8.
Touch
FUNC.,then
drag up or down the
menu at the left to choose r[2h.
152
Printing
images
Print images.
Touch [Print].
Printing will start.
If you want to print additional images,
repeat Steps 5 and 6 after printing has
completed.
After printing
has completed,
camera and printer,
interface cable.
turn off the
and unplug
the
153
Printing images
Making
Print
Settings
iiiiiiiiiiiiiiiiiiiiiiiiiiiiiiiiiiiiiiiiiiiiiiiiiiiiiiiiiiiiiiiiiiiiiiiiiiiiiiiiiiiiiiiiiiiiiiiiiiiiiiiiiiiiiiiiiiiiiiiiiii
Connect the camera to the printer.
Follow Steps 1 - 6 on p. 152 to display
screen on the left.
the
.... Chooseamenuoption.
Touch
an item to choose
it.
Choose the option settings.
Touch
No of Copies
Default
Date
File No.
Both
o,
4_
to choose
the option
setting.
hoose the number of cop!es
Follows the printer's settings.
Prints the date.
Prints the file number.
Prints both the date and file number.
_
Greens in trees, and blues in the sky and ocean are
iiiiiiiiii_;i:i:_;ji_iii,_,i,!i!zilili_i_i_i_i_i_i_i_iiii
_
iiBhoose
iheareaforpriniingl
Sets ihe paper size and iayou{i
. only appears when connected to a PIXMA series printer.
154
Printing
images
Trimming and Printing (Trimming)
You can cut out a portion
of an image
:
for printing.
Choose [Trimming].
Follow Steps
1 - 2 on p. 154 to choose
[Trimming].
A frame will appear
around
the portion
of
the image to be trimmed.
Choose the trimming area.
If you move the zoom
lever, you can
change the frame size.
Drag the frame to change its position.
Touch I.¥_ to rotate the frame.
Touch
[OK] to complete
the setting.
Print images.
Follow Step 7 on p. 153 to print.
155
Printing images
Choosing the Paper Size and Layout for Printing
..... Choose [Paper Settings].
Follow Steps
[Paper
1 - 2 on p. 154 to choose
Settings].
Choose a paper size.
Touch an option
[Next].
to choose
it, then touch
Choose the paper type.
Touch
an option
to choose
it, then touch
[Next].
Choose the layout.
Drag up or down the screen
layout.
to choose
a
Touch _ _ to set the number of prints when
[N-up] is chosen.
Touch
[OK].
Print images.
156
iiiiiiiii_
iiiiiiiii_
iiiiiiiii_
P.nt_°g._ages
Available Layout Options
Default
Bordered
Boidei]ess
N-up
Follows the printer's settings.
Prints with a border.
Piin{s withoui a borderl
Seiects how many copies of an images are piinied on a sheeil
ID Photo
Prints ID photos.
Only images with the same resolution as the camera's L (Large)
recording pixel setting and a 4:3 aspect ratio can be chosen.
Fixed Size
Choose the print size.
Choose from 3.5 x 5 in., postcard and wide sized prints.
Printing ID Photos
:
Choose lid Photo].
Follow Steps
1 - 4 on p. 156 to choose
Photo], then touch
[I D
[Next].
Choosethelengthandwidth.
Touch
an item to choose
Touch
,_'
to choose
it.
a length,
then touch
[Trimming].
: Choosethe printingarea.
Follow Step 2 on p. 155 to choose
printing area.
the
Print images.
157
Printing images
Printing
Movies
.... Connect the camera to the printer.
Follow Steps
1 - 6 on p. 152 to choose
movie and display
a
the screen on the left.
Choose a printing method.
After touching
printing
F_, touch
'_ _" to choose
a
method.
...........
Print images.
Printing Methods for Movies
sinoie
Sequence
158
pnnisOurrenity
aispiayed
soene
asastillimagel
Prints a Sequence of images fiom a specified scene on a single sheet of
paper. If [Caption] is set to [On], you can print the folder number, file
number, and the elapsed time for the frame at the same time.
You can choose up to 998 images on a memory card for printing and specify
settings such as the number of copies so that they can be printed together
(p. 162) or processed at a photo developer service. These selection methods
comply with the DPOF (Digital Print Order Format) standards.
Adding
Menu
images
to a Print
List with
You can add images to the print list (DPOF)
playback in the FUNC. menu.
Choose
directly
the
FUNC.
after shooting
or during
an image.
Drag left or right across the screen
choose
to
an image.
Choose r[_ (movies
.............
excluded).
After touching
FUNC.,
will be
drag the menu
appearing on the left side of the screen up
or down to choose r_h, then touch the
menu item again.
Add images to the print list.
Touch Av
to choose
the number
of
prints, then touch [Add].
159
Choosing images for Printing (DPOF)
Print Settings
You can set the print type, date and file number.
images chosen for printing.
These
settings
Choose [Print Settings].
Touch FUN(:.,then MENU to
tab, and touch
apply to all
choose
the
[Print Settings].
....Choose
a setting.
Touch ._'_" to choose and set an option.
Once you touch _Z), the settings will be
made, and the menu screen will reappear.
Standard
Index
Both
On
off
On
Off
160
Prints 1 image per page.
Prints several reduced size images per page.
Prints both standard and index formats.
Prints the shooting date.
Prinis the fiie num6eK
--
choos,ng
Images
forr,n,,ng
Choosing
the
Number
of Copies
Choose [Select images & Qty.].
Touch FUNC., then MENU to choose
tab, and touch
[Select
Images
the
&Qty.].
Choose an image.
Drag left or right across the screen
choose an image.
You will be able to set the number
copies.
For [Index],
touch
the screen.
to
of print
Once
chosen, _/will
appear. If you touch inside
the frame again, V # will disappear.
.... Set the number of prints.
Touch ,,Lv to set the number
(maximum
99).
Repeat
images
of prints
Steps 2 and 3 to choose other
and the number of prints for each.
You cannot set the number of copies for
index prints. You can only choose which
images to print (as shown in Step 2).
Touch _ to complete the setting and
return to the menu screen.
161
iiiiiiiii_
iiiiiiiii_
iiiiiiiii_
iiiiiiiii_
Clearing
All Selections
Choose
[Clear All Selections].
Follow Step 1 on p. 161 to touch [Clear All
Selections].
AIJselectionswill
Touch [OK].
becleared.
When there are images added
(pp. 159 - 162), the screen on
when you connect the camera
compliant printer. Touch [Print
images added to the print list.
to the print list
the left will appear
to a PictBridge
now] to easily print
If you stop the printer during printing and start
again, it will start from the next print.
162
Customizing
You can customize
Camera
Settings
various settings to suit your shooting preferences.
The first part of this chapter explains convenient
and commonly
used
functions. The latter part explains how to change shooting and
playback settings to suit your purposes.
163
You can customize
(p. 47).
Changing
convenient
and commonly
Sounds
You can change
used functions
from the _'1"tab
.................................................................................
each of the camera's
operation
sounds.
Touch [Sound Options].
Drag up or down the screen to choose an
option, then touch _
to choose a setting.
1
2
Turning
Off Hi.ts
You can turn off this function.
always display.
164
Preset sounds
(cannot be modified)
Preset sounds
You can use the included software to
change the sounds (p. 2).
& Tips
However,
hints and tips for menus (p. 47) will
Choose
[Hints
choose
[Off].
& Tips], then touch
,_
to
iiiiiiiii_
iiiiiiiii_
iiiiiiiii_
iiiiiiiii_
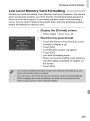
Low
Level
Memo_
Card
Formatting
Perform low level formatting when [Memory card error] appears, the camera
does not operate properly, you think that the recording/reading
speed of a
memory card has dropped, or recording suddenly stops while shooting a
movie. As you cannot retrieve the erased data, exercise adequate caution
before formatting
the memory card.
Display the [Format]
Follow Steps
screen.
1 and 2 on p. 23.
Start the low level format.
Touch the frame to the left of [Low Level
Format] to display a V _ .
Touch
[OK].
A confirmation
Touch [OK].
screen will appear.
Low level formatting
starts.
When low level formatting ends,
card formatting
the screen.
Touch
complete]
[Memory
will appear
on
[OK].
165
Changing CameraSettings
You can change
camera.
the start-up
screen that appears
Touch
Touch
Recorded
When you press the []
register an image.
[Start-up Image].
an option.
[_
No start-up image
1
Preset images
(cannot be modified)
Preset images
You can set recorded images, and use the
included software to change the images.
2
Registering
Screen
when you turn on the
images
as the
Start-up
button and set the camera to Playback
Touch
[Start-up
Touch
[2], then touch
mode, you can
Image].
_.
Drag across the screen to choose
image, then touch [OK].
The [Register?]
Touch [OK].
an
screen will appear.
The dedicated operation sounds and start-up images on the included software
can be registered to the camera. Refer to the Software Guide for details.
166
Changing Camera Settings
Changing
the
Screen
Color
Choose
choose
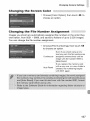
Changing
the
File
Number
[Color Option],
then touch
4)'
to
an option.
Assignment
Images you shoot are automatically
assigned file numbers in the order they
were taken, from 0001 - 9999, and saved to folders of up to 2,000 images.
You can change the file number assignment.
Choose [File Numbering],
to choose an option.
then touch
_
Even
ifyoushooiusinganew
Continuous
Auto Reset
memory card, the file numbers are
assigned consecutively until an
image with the number 9999 is
taken/saved.
If you replace the memory card
with a new one, or a new folder is
created, file numbering begins
with 0001 again.
167
uuuuu_
uuuuu_
uuuuu_
uuuuu_
Changing CameraSettings
Creating
Folders
by Shooting
Images are saved into folders created
create folders by shooting date.
Date
each month,
Choose
[Create
choose
[Daily].
however,
you can also
Folder], then touch
Images wi[[ be saved into folders
on each shooting date.
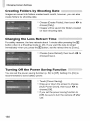
Changing
the
Lens
Retract
,_), to
created
Time
For safety reasons, the lens retracts about 1 minute after pressing the []
button when in a Shooting mode (p. 28). If you want the lens to retract
immediately
when you press the [] button, set the retract time to [0 sec.].
Choose [Lens Retract], then touch ,_
choose [0 sec.].
Turning
Off the
Power
Saving
You can set the power saving function
recommended
to save battery power.
to
Function
(p. 52) to [Off]. Setting
it to [On] is
Touch [Power Saving].
Drag up or down the screen to choose
[Auto Power Down], then touch ,_ to
choose
[Off].
If you set the power saving function to
[Off], be sure to turn the camera off after
use.
168
iiiiiiiii_
iiiiiiiii_
iiiiiiiii_
iiiiiiiii_
Ch og,oo
camoro
sott,°os
Setting
the
Screen
Shut-Off
Time
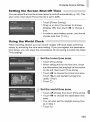
You can adjust the time the screen takes to shut off automatically
also works when [Auto Power Down] is set to [Off].
(p. 52). This
Touch [Power Saving].
Drag up or down the screen to choose
[Display Off], then touch 4_ to choose
time.
In order to save battery power,
choose less than [1 min.].
Using
the
WorJd
a
you should
Clock
When traveling abroad, you can record images with local dates and times
simply by switching the time zone setting. If you pre-register
the destination
time zones, you can enjoy the convenience
of not having to switch the Date/
Time settings.
Set the home time zone.
Touch
When
[Time Zone].
setting
this for the first time, check
the information that displays on the screen
on the left, then touch [Time Zone].
Touch
_
Touch
"_{_Fto set daylight
to choose
the home time zone.
saving time
(adds 1 hour).
Touch 2:3.
SetthewoHdt mezone.
Touch [:_World],
then touch [Time Zone].
Touch ,_ to choose the destination
time
zone.
You can also set the daylight
as in Step 1.
Touch _D.
saving time
169
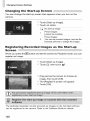
Changing
CameraSettings
Choose the world time zone.
Touch
[::_World],
:_ will appear
shooting
Calibrating
the
Touch
then touch _.
in the [Time Zone]
or
screen (p. 187).
Panel
You can calibrate the touch panel if you are having difficulty choosing
or buttons. Be sure to use the toggle attached to the strap to calibrate
touch panel accurately.
Touch
items
the
[Calibration].
Use the toggle
attached
to the strap to
touch ._ that appears on the screen
(p. 14).
Follow the on-screen
instructions
and
touch the screen four times in the following
order: in the upper left, lower left, lower
right and upper right parts of the screen.
170
If you set the mode switch to O,
settings in the O tab (p. 47).
Turning
Off the
and the mode to P, you can change
AF Assist
8earn
The lamp will automatically
light to assist focusing in low light conditions
you press the shutter button halfway. You can turn off the lamp.
Choose [AF-assist
to choose [Off].
Turning
Off the
The red-eye reduction
occurs when shooting
function.
Red-Eye
the
Reduction
Beam], then touch
when
4)'
Function
lamp lights in order to reduce the red-eye effect that
in dark conditions with the flash. You can turn off this
Touch
[Flash Settings].
Drag up or down the screen to choose
[Red-Eye Lamp], then touch 4)' to choose
[Off].
171
Changing Shooting Function Settings
Changing
the image
Display
Shooting
You can change
the length of time the images display
Choose
[Review],
choose
an option.
2-
Changing
Shooting
You can change
Time Right After
....................................................................
the Way the
10 sec.
right after shooting.
then touch
,_ _. to
Displays images for the set time.
Hold
The image displays until you press
the shutter button halfway.
Off
images wiii not disPiayl
image
Displays
the way the image displays
After
right after shooting.
Choose
[Review
choose
an option.
Off
Right
Info], then touch
_ _, to
Displays the image only.
Detailed
Dispiays detaiied information
(p. 189).
The area inside the AF frame is
magnified, allowing you to check
Focus Check the focus. The procedure is the
same as in "Checking the Focus"
(p. 126).
Displaying
You can display
Grid
Lines
grid lines on the screen
for vertical and horizontal
guidance
while shooting.
Choose
choose
172
[Grid Lines], then touch
[On].
,_ _ to
iiiiiiiii_
iiiiiiiii_
iiiiiiiii_
iiiiiiiii_
Cho°o,°oShoot,°o °°e,,oos
Changing
the
IS-Mode
Settings
Choose
choose
[IS Mode], then touch
_ _" to
an option.
Continuous
image stabilization is always on.
You can confirm the effects
directly on the display, which
makes it easier to check the
composition or focus.
When shooting movies, the
camera also reduces strong
camera shake, for example when
walking (Dynamic mode).
Shoot Only*
image stabilization is only active
at the moment of shooting.
image stabilization only counters
Panning*
up and down motion. This option
is recommended for shooting
objects moving horizontally.
* Setting changes to [Continuous]
shooting movies.
when
173
Changing Shooting Function Settings
You can add icons to the shooting
screen,
or change
their arrangement.
Adding icons
Display the settings screen.
In a shooting
the icons.
screen,
touch and hold one of
When [Changes which icons appear and
their positions] appears, lift your finger off
the screen once, then touch the center of
the screen.
The setting
screen
shown to the left will
appear.
Add an icon.
Drag the desired
icon that appears
center of the screen
position you want.
in the
in Step 1 to the
When you drag the icon near a position
where it can be placed, an orange frame
appears. Lift your finger off the screen to
add the icon there. The icon will exchange
places with any existing
position.
Positions with grayed
unavailable.
icon in that
out icons are
compietethese ng.
Touch
174
[Exit].
Changing
Shooting
Function
Settings
Rearranging icons
Drag the desired
icon that appears
in the
layout screen in Step 1 on p. 174 to the
position you want.
The icon will exchange places with any
existing icon in that position.
Removing icons
When
in the layout screen
that appears
in
Step 1 on p. 174, drag the icon you want to
remove to the center and then to .-=_.."that
will appear on the lower part of the screen.
If you drag an icon that cannot be
removed,
===_===
will not appear.
Preset Layouts
You can choose from 3 preset icon layouts.
displayed. Added icons will not appear.
Only default
icons will be
Touch [Preset Layouts] in the layout
screen in Step 1 on p. 174.
Touch the desired icon arrangement,
touch
then
[OK].
If you touch [Cancel], the layout will not
change, and the settings screen will
reappear.
175
You can adjust the settings
Turning
in the []
Off Active
tab by pressing
the []
button
(p. 47).
Display
You can turn off Active Display (pp. 29, I27) so that gently tapping the side
of the camera or tilting the camera does not cause images to switch.
Choosing
Playback
the
image
Choose
[Active Display],
choose
[Off].
that
First
Displays
Choose
[Resume],
choose
an option.
Last seen
then touch 4 _' to
in
then touch
< _, to
Resumes with the image last
viewed.
Lastshot
Resumes
wiih
ihemost
ieoeniiy
shot mage.
Turning
Off the
Auto
Rotate
Function
When you play back images on the camera, images shot in vertical
orientation automatically
rotate and display vertically. You can turn off this
function.
176
Select
[Auto Rotate],
select
[Off].
then touch
4_
to
Useful
|.formatio.
This chapter introduces how to use the AC adapter kit and Eye-Fi card
(both sold separately),
troubleshooting
tips, and contains lists of
functions and items that appear on the screen.
177
If you use AC Adapter Kit ACK-DC40
(sold separately),
you can use the
camera without worrying about how much charge is left in the battery.
.....Turn off the camera.
::
insert the coupler.
Follow Step 2 on p. 17 to open the cover,
then insert the coupler as shown until it
locks into place with a click.
Follow Step 5 on p. 18 to close the cover.
Terminal
Plug the cord into the coupler.
Open
the cover
and fully insert the plug
into the coupler.
:: Connect the power cord.
Connect
the power cord to the compact
power adapter, then plug the other end into
a power outlet.
Turn the camera on to use it.
After you finish,
turn off the camera
and
unplug the power cord from the power
outlet.
178
Before using an Eye-Fi card, be sure to check whether
authorized in the country or territory of use (p. 17),
Eye-Fi
card use is
When you put a prepared Eye-Fi card into the camera, you can automatically
transfer your images wirelessly
to a computer, or upload them to a web
service.
Image transfer is a function of the Eye-Fi card. For details on how to setup
and use the card, and concerning problems transferring
images, please refer
to the Eye-Fi card user guide, or contact the manufacturer.
If you put an Eye-Fi card into the camera, the connection
status can be
checked in the shooting screen (information
display) and playback screen
(simple information
display).
iGrayi
Not
connected
(Flashing white)
Connecting
,_ (Animated)
Transferring
inteiiuPted
Error retrieving Eye-Fi card info (Turn the camera off and on
again. If this continues to appear, there may be a problem with
[]
will appear
the card.)
on transferred
images.
179
Using
an
Eye-Fi
Card
Checking
Connection
You can check
the Eye-Fi card's
inforlTlation
access
Choose
Touch
point SSID,
or connection
status.
[Connection
info].
FUNC.,then MENU to choose
?T tab, and touch
[Eye-Fi
the
Settings].
Touch [Connection
info], then touch
[Connection
info] again.
The connection
Disabling
info screen will appear.
Eye=Fi Transfer
You can set the card to disable
Eye-Fi transfer.
Choose
Touch
[Disable] in [Eye-Fi trans.].
FUNC.,then MENU to choose the
?T tab, and touch
Choose
choose
[Eye-Fi
[Eye-Fi trans.],
[Disable].
Settings].
then touch
4_
to
[Eye-Fi Settings] will not appear when an Eye-Fi card is not inserted in the
camera, and when an Eye-Fi card's write-protect tab is in the locked position. For
this reason, settings cannot be changed for Eye-Fi cards equipped with a writeprotect tab when the tab is in the locked position.
180
If you think there is a problem with the camera, first check the following. If the
items below do not solve your problem, contact a Canon Customer Support
Help Desk as listed on the included customer support list.
Power
You pressed the power button, but nothing happened.
Confirm that the battery is the correct type, and is not depleted (p. 16).
Confirm that the battery is properly inserted (p. 18).
Confirm that the memory card/battery cover is securely closed (p. 18).
If the battery terminals are dirty, battery performance will decrease. Clean the terminals
with a cotton swab and re-insert the battery several times.
Battery is consumed
quickly.
Battery performance decreases at low temperatures. Warm the battery, for example, by
placing it in your pocket with the terminal cover on.
Lens will not retract.
Do not open the memory card/battery cover while the power is on. After closing the
memory card/battery cover, turn the power on then back off (p. 18).
TV
Output
Image is distorted
or not showing on TV (p. 134).
Shooting
Cannot shoot.
When in Playback mode (p. 22), press the shutter button halfway (p. 24).
Screen does not dispmay properly in dark places (p. 45).
Screen does not display properly while shooting.
Please note, the following will not be recorded in still images, but will be recorded in
movies.
When shooting under fluorescent or LED lighting, the screen may flicker, and a
horizontal bar may appear.
A flashing ,_ appears on the screen and the shot cannot be taken even
though the shutter button was pressed fully (p. 27).
appears when the shutter button is pressed halfway (p. 54).
Set the [IS mode] to [Continuous] (p. 173).
Set the flash to _. (p. 85).
Increase the ISO speed (p. 88).
Attach the camera to a tripod. Additionally, you should set the [IS Mode] to [Off] when
shooting with a tripod (p. 173).
181
Troubleshooting
image is blurred.
Press the shutter button halfway to focus on the subject, then press fully to shoot
(p. 24).
Shoot the subject within the focusing distance (p. 201).
Set the [AF-assist Beam] to [On] (p. 171).
Confirm that functions which you do not intend to use (macro, etc.) are not set.
Shoot using the focus lock or AF lock (pp. 96, 99).
Even when you press the shutter button halfway, the AF frame does not
appear, and the camera does not focus.
If you center on the light and dark contrasting area of the subject and push the shutter
button halfway, or repeatedly push the shutter button halfway, the AF frame will appear
and the camera will focus.
Subject is too dark.
Set the flash to ,_ (p. 85).
Correct the brightness with exposure compensation (p. 85).
Adjust the image with i-Contrast (pp. 89, 149).
Use spot metering or AE Lock to shoot (pp. 101,102).
Subject is too bright (overexposed).
Set the flash to _ (p. 54).
Correct the brightness with exposure compensation (p. 85).
Use spot metering or AE Lock to shoot (pp. 101,102).
Reduce the light illuminating the subject.
image is dark even though the flash fired (p. 27).
Shoot within an appropriate distance for flash photography (p. 85).
Increase the ISO speed (p. 88).
mmage taken using the flash is too bright (overexposed).
Shoot within an appropriate distance for flash photography (p. 85).
Set the flash to _) (p. 54).
White dots appear on the image when shooting with the flash.
Light from the flash has reflected off dust particles or other objects in the air.
mmage appears rough or grainy.
Shoot with the ISO speed on a lower setting (p. 88).
Depending on the Shooting mode, when shooting in a high ISO speed the image may
appear rough or grainy (pp. 65, 66).
Eyes appear red (p. 104).
Set the [Red-Eye Lamp] to [On] (p. 171). When shooting with the flash, the tamp (on the
front of the camera) lights (p. 42), and for approximately 1 second while the camera is
reducing red-eye, it is not possible to shoot. It is more effective if the subject is looking
directly at the lamp. Even better results can be obtained by increasing the lighting in
indoor settings or approaching closer to the subject.
Correct images with red-eye correction (p. 150).
182
Troubleshooting
Recording images to the memory card takes a long time, or continuous
shooting slows down.
Perforrn a low-level forrnat of the mernory card in the carnera (p. 165).
Cannot make settings for shooting functions
or FUNC. menu.
The items in which settings can be made differ depending on the shooting mode. Refer
to "Functions Available in Each Shooting Mode" and "Shooting Menu" (pp. 192 - 197).
Shooting
Movies
Correct shooting time does not display, or stops.
Format the memory card in the camera, or use a memory card capable of recording at
high speeds. Even when the shooting time does not display properly, the recorded
video will be the length that it was actually shot (pp. 23, 32).
10 appeared on the screen and shooting ended automatically.
The carnera's internal mernory was insufficient. Try one of the following:
Perform a tow-level format of the memory card in the camera (p. 165).
Change the image quality setting (p. 116).
Use a memory card capable of recording at high speeds (p. 116).
Subject appears distorted.
The subject may appear distorted if it passes quickly in front of the camera while
shooting.
Playback
Cannot play back images or movies.
If the file name or folder structure is changed on a computer, you may not be able to
ptay back images or movies. Refer to the Software Guide for information regarding
folder structure or file names.
Playback stops, or audio cuts out.
Use a memory card that has had a low-level format performed on it with this camera
(p. 165).
If you copy a movie to a memory card that reads slowly, playback may interrupt
momentarily.
Depending on its capabilities, when playing movies on a computer, frames may drop or
the audio may cut out.
Screen
......................................................
Touch operations
do not work as expected.
Since the carnera uses a pressure sensitive touch panel, try touching the screen slightly
harder or use the toggle attached to the strap (p. 14).
Calibrate the touch panel (p. 170).
!_ appears on the upper right of the screen.
You are touching the upper right part of the screen. Take your finger off the screen.
183
List
of
Messages
That
Appear
on
the
Screen
If error messages appear on the screen, try one of the following solutions.
No memory card
The memory card is not installed in the correct direction. Insta!! the memory card in the
correct direction (p. 18).
Memory card locked
The SD memory card, SDHC memory card, SDXC memory card or Eye-Fi card's write
protect tab is set to "LOCK". Unlock the write protect tab (p. 17).
Cannot record! [[[
You attempted to shoot an image without a memory card. Install the memory card in the
correct direction to shoot (p. 18).
Memory card error (p. 165)
If the same message appears even when a formatted memory card is installed in the
correct direction, contact a Canon Customer Support Help Desk (p. 18).
Insufficient
space on card
There is not enough free space on the memory card to shoot (pp. 25, 31, 53, 83, 111)
or edit images (pp. 145 - 150). Erase the images (pp. 30, 139) to open space for new
images, or insert an empty memory card (p. 17).
Touch AF unavailable
Touch AF cannot be used in your current Shooting mode (p. 192).
You are touching the upper right part of the screen (p. 13). Only touch the location
where you want to use Touch AF.
Touch AF canceled
The camera could no longer recognize the subject you selected using Touch AF (p. 98).
184
List of Messages That Appear on the Screen
Change the battery pack. (p. 17)
No Image.
There are no images recorded on the memory card that can be displayed
Protected! (p. 137)
Unidentified
Image/Incompatible
JPEG/Image too largeJCannot
play back
AVI/RAW
Unsupported images, or images with corrupted data cannot be displayed
Images manipulated on a computer, that have had their file name changed, or have
been taken with a different camera may not display
Cannot magnify!/Cannot
pmay back this content in Smart Shuffle/Cannot
rotate/Cannot
modify image/Cannot register this image!/Cannot modify/
Cannot assign to categorylUnselectable
image.
Incompatible images cannot be magnified (p 127), played back in Smart Shuffle
(p 130), tagged as favorites (p 141), rotated (p 144), edited (pp 145 - 150),
registered to the start-up screen (p 188), categorized (p 143), or added to a print list
(p. 159).
Grouped images cannot be processed (p. 80).
Images manipulated on a computer, that have had their file name changed, or have
been taken with a different camera may not be magnified, played back in Smart Shuffle,
tagged as favorites, rotated, edited, registered to the start-up screen, categorized, or
added to a print list.
Movies cannot be magnified (p. 127), played back in Smart Shuffle (p. 130), edited
(pp. 145 - 150), added to a print list (p. 159), or registered to the start-up screen
(p. 166).
Exceeded selection limit
You chose more than 998 images in print settings. Choose less than 998 images
(p. 161).
Print settings could not be saved correctly. Reduce the number of selected images and
try again (p. 161).
You chose 501 or more images in Protect (p. 137), Erase (p. 139), Favorites (p. 141),
My Category (p. 143) or Print Settings (p. 159).
Communication
error
Images could not be transferred to the computer or printed due to the large amount of
images (approx. 1000) stored on the memory card. Use a commercially available USB
card reader to transfer the images. Insert the memory card into the printer's card slot to
print.
Naming error!
The folder or image could not be created because there is an image with the same file
name as the folder or image that the camera is attempting to create, or the highest
possible file number has already been reached In the _1"menu, change [File
Numbering] to [Auto Reset] (p 167) or format the memory card (p 23)
185
List of Messages That Appear on the Screen
Lens Error
This error can occur if you hold the lens while it is in motion or when using it in a location
with excessive dust or sand in the air.
If this error message continues to appear, contact a Canon Customer Support Help
Desk as there may be a problem with the lens.
A camera error was detected (Error number)
If an error code appears directly after taking a picture, the shot may not have been
recorded. Check the image in Playback mode.
If this error code reappears, note the Error number (Exx) and contact a Canon
Customer Support Help Desk as there may be a problem with the camera.
Fime Error
Photos from other cameras or images that have been altered using computer software
may not be printable.
Print error
Check the paper size settings. If this message appears when the settings are correct,
turn the printer off and back on, then make the settings again.
Ink absorber full
Contact a Canon Customer Support Help Desk for an ink absorber replacement.
186
Shooting
(information
Display)
....................
® @
@ @@
Shooting
Scene
Mode
Icon (p. 188)
@ Camera
White
(_) Exposure
Shake
Quality
@ AF Frame
(p. 61)
(Movies)
Time (p. 116)
(p. 26)
Frame
(p. 94),
AF Lock (p. 99)
@ DigitatZoomMagnification
(Function)
@ Battery
Charge
(p. 46)
(p. 55) / Digital
Indicator
(p. 16)
_
@_ Compression
Quality)
(image
(p. 60) /
Recording
Pixels
116)
(pp. 60,
(p. 56)
Shooting
Movies
@ Flash Mode
(p. 31)
(pp. 54, 85)
(p. 150)
@ Date Stamp
(p. 172)
(p. 102)
Speed
Value
(_
MeteringMethod(p.
_}
i-Contrast
(p. 108)
(p. 109)
101)
(p. 89)
@ ISO Speed
(p. 88)
@ Super Slow
Motion Movie
Shooting
Correction
@ Self-Timer
Connection
Tele-
converter
{_) Red-Eye
Lock
@ Shutter
@ Aperture
Range
(p. 44)
_j) ND Filter (p. 27)
@ AE Lock (p. 102), FE
(p. 101)
_f_ Focusing
#_ DISP. (Display)
@ Grid Lines
(p. 95)
_6_ Spot AE Point
Warning
(_ FUNC.
Status
®
Shots
@ Remaining
(p. 91)
(p. 85)
_Z_ Camera
1_i_ Eye-Fi
@ Image
Compensation
Amount
@
(p. 116)
(p. 86)
(p. 92)
Mode
@
@ Recordable
Orientation*
Balance
(_ My Colors
¢5_ Drive
(p. 192),
@ Zoom
Time
@ Blink Detection
@ image
(p. 114)
Bar (p. 26)
Stabilizer
(p. 105)
(p. 173)
@ Time Zone (p. 169)
(pp. 58, 59)
(p. 57)
(p. 179)
: Standard, _, _ : Held vertically
When shooting, the camera detects if it is held vertically or horizontally, and adjusts
settings accordingly for the best shot. it also detects orientation during playback, so you
can hold the camera ineither orientation and it will automatically rotate images for correct
viewing.
This function may not operate correctly when the camera is pointed straight up or down.
187
information
Scene
Displayed
on
the
Screen
icons
In _
mode, the camera displays an icon for the scene it has determined
and then automatically
focuses and selects the optimum settings for subject
brightness
and color.
Icon
round
Color
Gray
Light Blue
Orange
H
* Appears when the scene is dark and the camera is attached to a tripod.
188
Dark Blue
®
®
@
@ ®®@
(_ Index Display (p. 120)
@ My Category (p. 143)
_) Movies (p. 33), Highspeed Burst (p. 80),
Shooting Mode (p. 192)
(_ ISO Speed (p. 88),
Playback Speed
(Movies) (p. 114)
ND Filter (p. 27)
White Balance (p. 86)
(Z_Histogram (p. 45)
(8) Recording Pixels (pp. 60,
116), MOV (Movies)
C9)FUNC. (Function) (p. 46)
Print List (p. 159)
@ Eye-Fi Transfer
Complete (p. 179)
@ Battery Charge Indicator
(p. 16)
@®
®
@ Metering Method (p. 101)
Folder Number - File
Number (p. 167)
Displayed image
number / Total number of
images
No information Display
(p. 44)
@ Shutter Speed (Still
Images) (p. 108), Image
Quality / Frame Rate
(Movies) (p. 116)
@ Aperture Value (p. 109)
_ Exposure Compensation
Amount (p. 85)
@ Flash (p. 85)
_ Focusing Range (p. 94)
@ i-Contrast (pp. 89, 149)
®
@ File Size (pp. 61,116)
@ DISP. (Display) (p. 44)
@ Compression (Image
Quality) (p. 60)
@ Group Playback(p. 128),
Image Editing (pp. 145 150)
@ Protect (p. 137)
@ Favorites (p. 141)
@ My Colors (pp. 92, 148)
_) Red-Eye Correction
(p. 15o)
@ Shooting Date and Time
(p. 20)
@ Still Images: Recording
Pixels (p. 60)
Movies: Movie Length
(p. 116)
189
information
Displayed
on
the
Screen
Summary of Movie Control Panel in "Viewing
(p. 33)
47)
Touch to display the volume panel, then touch Av
When the volume is set to 0, _t will appear.
Movies"
to adjust the volume.
Playback
skip backwaid* iContinues to skip 5ackward if you keep iouclhing ihe screenl)
411
Previous
I1_
Next frame (Slow advance
frame (Slow rewind ifyou touch and hold the icon.)
_!
Skip forward* (Continues
_-
Edit (p. 117)
if you touch and hold the icon.)
to skip forward ifyou keep touching the screen.)
* Displays the frame approx. 4 sec. before or after the current frame.
190
This camera is a high-precision
it to strong impacts.
electronic
device.
Do not drop it or subject
Never place the camera close to magnets, motors or other devices that
generate strong electromagnetic
fields. Exposure to strong magnetic fields
may cause malfunctions
or corrupt image data.
If water droplets or dirt become stuck on the camera or screen,
a dry soft cloth or eyeglass wiper. Do not rub or apply force.
Never use cleaners
screen.
containing
organic
solvents
wipe with
to wipe the camera
or
Use a commercially
available blower brush to remove dust from the lens.
For stubborn dirt contact a Canon Customer Support Help Desk as listed
on the customer support leaflet supplied with your camera.
When you move the camera rapidly from cold to hot temperatures,
condensation
may form on the internal or external surfaces of the camera.
To avoid condensation,
put the camera in an airtight, resealable plastic bag
and let it adjust to temperature
changes slowly before removing it from the
bag.
If condensation
has formed on the camera, stop using it immediately,
as
continued use may damage the camera. Remove the battery and memory
card, and wait until the moisture has completely
evaporated before
resuming use.
191
a
PAv Tv
Exposure Compensation (p. 85)
O
O
O
O
-O
d
C
O
O
O
O
O
O
O
O
O
O
O
O
O
O
O
O
O
O
O
0
0
0
0
0
0
_A
_.
O
_*
"1
o
o
(_
0
_F
0
O
0
0
0
0
0
0
0
0
0
0
0
0
O
O
C
O
O
O
Delay "s
O
O
O
C
O
O
O
Shots "4
O
O
O
C
O
O
O
O
C
O
O
O
Q
O
O
O
O
O
O
_6
*6
*6
O
O
C
O
O
O
O
O
Flash (pp. 54, 85)
Self-Timer Settings (p. 59)
AE Lock/FE Lock.5 (p. 102)
AF Lock (p. 99)
TouchAF
(p. 98)
Screen Display (p. 44)
O
No
O
"I Not se_ectablebut switches to i_ depending on me circumstances
*2 Not selectablebut switches to i_ when the flash fires.
*3 Cannot be set to 0 seconds when in modes where the number of shots cannot be set.
*4 Fixed to f shot when in modes where the number of shots cannot be set.
*5 FE Lock not available when set to _.
*6 Only available when a face isdetected.
192
--
iiiiiiiii_
U,
o
o
o
o
o
o
o
o
o
o
o
0
0
o
0
0
0
0
0
0
0
0
0
0
0
0
0
0
0
0
0 Selectable, or set automatically. - Not selectable.
193
Metering Method (p. 101)
E$}
0
C] C,3
0
My Colors (p. 92)
_V _N '_e q
_W°14p _L _D
0
0
C
0
0
o
o
c
o
-
0
0
C
0
0
O
O
C
O
--
o
o
c
o
o
0
0
C
0
--
0
0
0
0
0
0
0
0
O
O
O
o
o
o
0
0
0
_B _G '_R'_C"2
o
AWB
White Balance (p. 86)
_.'- d& _:
o
0000000000
ISO Speed (p. 88)
_
_
_
OOCO-O00CO00000
Focusing Range (p. 94)
_
OOCO
................................ []
Drive Mode (p. 91)
0000000000
000
O0
Aspect Ratio (Still Images)
O00C
00000
16=93=24=3 1=1
O00CO00000
Recording
PJxels (p. 60)
M1 _2
O00CO00000
M
s
Compression
Ratio (p. 60)
_
0000000000
Image Quality (Movies)
(pp. 114, 116)
0000000000
OOCO00000
0
0
0
C
000000
"I White balance isnot se_ectable.
*2 Contrast, sharpness, color saturation, red, green, blue, and skin tone can be set in 5 levels.
*3 Only 4=3and t6:9are available.
194
Functions
FUNC.
o
o
o
c
D o
0
o
o
0
0
0
D
0
0
0
0
0
Available
in Each
Shooting
Mode
M_nu
o
0
o
o
c
0
0
0
0
o
o
0
o
0
O000000OOOCO000000
O0
0
O0
ooOO0000
----
O0
000
o©OCO
OODO
000000
O0000CD--O0
0000
--
0
__
O0000CDO00
O0
CDO000000000
--
____'3--000000000
----0
--
o
0000
....
©
00--0
......
O00CO000000
000
O000CO00
00000
O00CO00
O000000CDDO
0
ooOOO
00000
....
--
--
--
0
O Selectable, or set automatically.- Not selectable.
195
0
Sheeting
Menu
o
d
Face AiAF .1
O0000000DO
AF Frame (p. 95)
OOOOOO
Fixed frame
Normal
AF Frame Size .2 (p. 96) Small
OOOOOO
OOOOOO
OOOOOOOODO
Digital Zoom (p. 55)
off
OOOOOOOOOO
Digital Tel........
(1.5x/2.0x)
&F-Point Zoom (p. 97)
tar
OOOOOOOODO
On
OOOO
Off
OOOOOOOOOO
OOO
On
Servo AF (p. 100)
AF-assist
Beam
(p. 171)
off*s
ODO
OO
--
OOOOOO
ODO
On
OOOOO
O
Off
OOOOO
O
On
FlashSe_ings
O
Red-EyeC°rroff
OOOOOOOODO
OOOOOOOODO
OOOOOOOODO
Auto
i-Contrast
OOO
(p. 89)
Safety Shift (p. 110)
Review (p. 172)
Off
On
OO
OOODO
Off
OOOOOOOODO
off/2 - 10 sec./Hold
OOOOOOOOOO
0000000000
Blink Detection
(p. 105)
On
Off
O
O
O
O
O
O
O
O
O
O
O
O
O
O
O
O
D
D
O
O
Grid Lines (p. 172)
On/Off
O
O
O
O
O
O
O
O
D
O
O
O
O
O
O
O
O
O
O
D
D
O
O
O
Icon Layout (p. 174)
Off
Continuous
IS Mode (p. 173)
O
O
O
O
O
O
O
D
O
Shoot Only
O
O
O
O
O
O
O
O
O
Panning
O
O
O
O
O
O
O
O
O
O
O
O
O
O
O
O
D
O
Off
"1 Operation
*2 Available
196
differs depending on the shooting
when the AF frame is set to [Fixed
O
mode when faces are not detected.
frame]. *3 [On] when moving people are detected
in l_).
Menus
0
0
0
0
o
o
0
0
Menus
_'TSet up Menu
Mute
On/Oft*
p. 49
Volume
Sound opiions
Set all operation sounds (5 levels),
Set the sounds for each cameia opeiaiionl
p. 49
p1164
LCD Brightness
Start-up Image
Sets screen brightness (5 levels),
Add an image as a start-up image,
p. 50
p. 166
Color Option
Orange*lBlue
Foimai
Gray/Khaki/Pink
Foimats memoiy cardl erasing aii daia
Create Folder
Monthly*/Daily
Lens Retraci
i mini*iO secl
Power Saving
Auto Power Down: On*lOft
Display Off: 10, 20 or 30 sec.ll*, 2 or 3 min.
Time Zone
Home*ANorld
Video System
NTSClPAL
p. 167
ppl 231 i65
p. 168
p1168
pp. 52, 168,
169
p. 169
p. 134
Ctrl via HDMI
Enable/Disable*
p. 135
Calibration
Eye-Fi Settings
Calibrates the touch panel,
Eye-Fi connection settings (only appears when
Eye-Fi card is inserted)
p. 170
p. 179
Language
Choose display ianguagel
p. 22
Reset All
* Default setting
Returns camera to default settings,
p. 51
198
iiiiiiiiiii
Me°°s
i i!i
[]
Playback
Menu
Slideshow
Plays back images automatically,
p. 124
Erase
Erases images (Select, All Images).
p. 139
Rotate
Rotates images,
p. 144
Favorites
Tags or untags images as favorites,
p. 141
My Category
Categorizes images,
p. 143
i-Contrast
Corrects dark portions and contrast in still
images.
p. 149
RegF:ye
coireciion
coiiectsredeyesinsiiiiimages:
p:i50
Resize
Resizes and saves still images,
p. 145
My Colors
Active Display
Scroll Display
Adjusts colors in still images,
On*lOft
On*lOft
p. 148
p. 176
p. 121
Group Images
On*lOft
p. 129
AuioRoiaie
6n_/6ff
p:if6
Transition
Fade*/Scroll/Slide/Off
p. 131
Set Touch Actions
Register a playback function to a drag pattern,
p. 132
* Default setting
Print
Menu
Print
'Displays printing screen (When connected to a
printer).
--
Select Images & Qty.
Seiect Aii images
Chooses individual images for printing,
Chooses aii images for piintingl
p. 161
pl i62
Clear All Selections
Cancels all settings for printing,
p. 162
Print Settings
Sets the printing style,
p. 160
199
Rotate
Print List
Rotates displayed image,
Selects or clears settings for printing displayed
image ([Print] appears when the camera is
connected to the printer).
p. 144
p. 159
Protect
Protects/un!ocks displayed image,
p. 137
Favorites
Tags/untags displayed image as favorites,
p. 141
Erase
Erases displayed image,
p. 139
Movie Digest Playback
Plays back movies made in the Movie Digest
mode.
p. 122
ii
Smart Shuffle
Fiiterecl Piayback
Starts Smart Shuffle.
Rterslcanceis fii{er for displayed imagel
p. 130
pl "123
Slideshow
Plays back images automatically,
p. 124
My Category
Categorizes images,
p. 143
2OO
Image Sensor
Camera
Effective Pixels .................. Approx.
12.1 million pixels
Lens
Focal Length ...................................
4.4x zoom: 4.3 (W) - 18.8 (T) mm
(35mm film equivalent:
Focusing Range ..............................
24 (W) - 105 (T) mm)
3 cm (1.2 in.) - infinity (W), 40 cm (1.3 ft.) - infinity (T)
• Macro 3 - 50 cm (W) (1.2 in. - 1.6 ft. (W))
Image Stabilizer
System ......................
Imaging Processor
..............................
Lens-shift
type
DIGIC 4
LCD Monitor
Type ................................................
TFT color (wide
Size .................................................
3.2 type
Effective Pixels ................................
Approx. 461,000
Aspect Ratio ....................................
16:9
Features ..........................................
Touch
viewing angle type)
dots
panel
Brightness
adjustment
Autofocus:
Single
(5 levels)
Focus
Control System ................................
(Continuous
in Auto mode), Servo AF/
Servo AE, Touch AF
AF Frame ........................................
Metering
System ..................................
Exposure
Evaluative,
Center-weighted
average,
Spot
Compensation
(Still images)
Exposure
Face AiAF, Fixed frame
/
Shift (Movies) ......................
+2 stops
in 1/3-stop increments
ISO Speed
(Standard
Output Sensitivity,
Recommended
Exposure
Index) ......... Auto, ISO 100/200/400/800/1600/3200
White Balance .....................................
Auto, Day Light, Cloudy,
Fluorescent
Shutter Speed ......................................
Tungsten,
Fluorescent,
H, Custom
1 - 1/1600 sec.
15 - 1/1600 sec. (Total shutter speed range)
Aperture
Type ................................................
Iris (Used together
f/number
f/2.0 -f/8.0
..........................................
with ND filter)
(W), f/5.8 -f/8.0
(T)
Flash
Modes .............................................
Auto, on, Stow Synchro,
Range ..............................................
50 cm - 5.0 m (W), 50 cm - 2.0 m (T)
(1.6-
16ft. (W), 1.6-6.6
off
ft. (T))
201
Specifications
Shooting
Modes ..................................
Auto .1, P, Av, Tv, Movie Digest, Portrait,
Smart Shutter .2, High-speed
Selection,
Handheld
Effect, Miniature
Night Scene, Low Light, Fish-eye
Effect, Toy Camera
Light Effect, Monochrome,
Color Accent, Color
Fireworks,
Kids&Pets,
Burst, Best Image
Effect, Creative
Super Vivid, Poster Effect,
Swap, Beach, Foliage,
iFrame Movie,
Snow,
Super Slow Motion Movie
• Movies are recorded by pressing the movie button.
"1 Smart Auto also available for movies
•2 Smile, Wink Self-timer,
Digital Zoom ........................................
Still images/Movies:
(up to approx.
Face Self-timer
Approx.
4.0x
18x in combination
with the optical zoom)
Safety Zoom, Digital tele-converter
Continuous Shooting
Mode ...............................................
Speed (Normal) ...............................
Number
Normal
Approx. 3.4 shots/sec.
(In P mode)
Approx. 8.2 shots/sec.
(In High-speed
Burst mode)
of Shots (Approximate)
(ClPA compliant)
Recording
.................................
Media .................................
Approx.
180
SD memory card, SDHC memory card, SDXC
card, MultiMediaCard,
File Format ..........................................
Design rule for Camera
memory
MMCptus card, HC MMCplus card
File system, DPOF
(Version
1.1)
compliant
Data Type
Still Images .....................................
Exif 2.3 (JPEG)
Movies .............................................
Movies: MQV (Image data: H.264; Audio data: Linear
PCM (stereo))
Number
of Recording
Pixets
Still Images .....................................
16:9
Large: 4000 x 2248, Medium
1:2816
x 1584, Medium 2:
1920 x 1080, Small: 640 x 360
3:2
Large: 4000 x 2664, Medium
1:2816
x 1880, Medium 2:
1600 x 1064, Small: 640 x 424
4:3
Large: 4000 x 3000, Medium
1:2816
x 2112, Medium 2:
1600 x 1200, Small: 640 x 480
1:1
Large: 2992 x 2992, Medium
1:2112
1200 x 1200, Small: 480 x 480
202
x 2112, Medium 2:
Specifications
Movies .............................................
Super Slow Motion Movie:
640 x 480 (120 fps .1 when shooting,
playback),
30 fps .2 during
320 x 240 (240 fps .3 when shooting,
30 fps .2
during playback)
Miniature Effect:
1280 x 720 .4, 640 x 480 *4
iFrame
Movie: 1280 x 720 (30 fps .2)
Movies
other than the above:
1920 x 1080 pixels
(24 fps*5), 1280 x 720 (30 fps*2), 640 x 480 (30 fps*2),
320 x 240 (30 fps .2)
"1 Actual
frame rate is 119.88 fps.
*2 Actual
frame rate is 29.97 fps.
*3 Actual
frame rate is 239.76 fps.
*4 Shooting:
6 fps/3 fps/1.5 fps, Playback:
30 fps .2
*5 Actuat frame rate is 23.976 fps.
Interface ...............................................
Hi-Speed
USB
HDMI output
Analog audio output (stereo)
Analog video output
Direct Print Standard ...........................
PictBridge
Power Source ......................................
Battery
Compact
Pack NB-6L
Power Adapter
DC Coupler
Dimensions
(NTSC/PAL)
CA-DCl0
(when used with
DR-40)
(CIPA compliant) .............. 100.6 x 55.4 x 25.0 mm (3.96 x 2.18 x 0.98 in.)
Weight (CIPA compliant)
.....................
Approx.
185 g (6.53 oz.) (Including
the battery and
memory card)
Approx.
165 g (5.82 oz.) (camera
body only)
203
Specifications
Battery
Pack
NB-6L
Format .................................................
Rechargeable
Nominal Voltage
3.7 V DC
..................................
Nominal
Capacity ................................
Charging
Cycles ..................................
Operating
Temperatures
Lithium-ion
Battery
Pack
1000 mAh
Approx. 300 times
.....................
0 -40
°C (32-
104 °F)
Dimensions ..........................................
34.4 x 41.8 x 6.9 mm (1.35 x 1.65 x 0.27 in.)
Weight .................................................
Approx. 21 g (Approx.
Battery
Charger
0.74 oz.)
CB-2LY/CB-2LYE
Rated Input ..........................................
100 V - 240 V AC (50/60 Hz), 0.085 A (100 V) - 0.05 A
(240 V)
Rated Output .......................................
4.2 V DC, 0.7 A
Charge Time ........................................
Approx.
Operating
0 -40
Temperatures
.....................
1 hour 55 min. (when using NB-SL)
°C (32-
104 °F)
Dimensions ..........................................
58.6 x 86.4 x 24.1 mm (2.31 x 3.40 x 0.95 in.)
Weight .................................................
Approx. 70 g (Approx.
2.47 oz.) (CB-2LY)
Approx. 81 g (Approx.
2.15 oz.) (CB-2LYE)
(excluding
power cord)
All data is based on tests
Camera
2O4
specifications
by Canon.
or appearance
are subject to change
without notice.
A
AC Adapter
Accessories
Changing
Kit ...................................
39, 178
...............................................
39
............................................
21
Setting .................................................
World Clock ......................................
20
169
Active Display ....................................
29, 176
AE Lock ...................................................
102
Default Settings .........................................
51
DIGITAL CAMERA Sotution Disk ................ 2
AF Frames ...........................................
AF -e Focus
Digital Tele-Converter
26, 95
................................
56
Digital Zoom ..............................................
55
AF Lock .............................................
99, 187
AF-Point Zoom ..........................................
97
Display Language ......................................
DPOF .......................................................
22
159
Aspect Ratio ..............................................
90
AUTO
25
Drag ...........................................................
Drive Mode ................................................
14
91
Dynamic Mode .........................................
173
Mode (Shooting
Av (Shooting
Mode) ...................
Mode) .................................
109
E
B
Battery
Charge Indicator .................................
Power Saving ......................
Recharge
Battery
16
52, 168, 169
............................................
Charger .....................................
Beach (Shooting
15
2, 39
Mode) .............................
Best Image Selection
(Shooting
Mode).....
Btack and White images ............................
Biink Detection .........................................
65
81
92
105
C
Calibration
...............................................
170
..........................................
149
My Colors ..........................................
148
Red-Eye
150
Correction
Resizing (Making
..........................
images Smaller)._
145
Trimming ...........................................
146
Erasing All Images ...................................
Erasing
images ..................................
Error Messages
140
30, 139
.......................................
184
Exposure
AE Lock ............................................
102
Correction
...........................................
85
FE Lock .............................................
Camera
Default Settings
..................................
51
Holding the Camera ............................
13
Camera
Editing
i-Contrast
Shake .............................
Color Accent (Shooting
Color Swap (Shooting
Eye-Fi Card .......................................
Mode) ....................
Face AiAF (AF Frame Mode) ....................
73
Face Self-Timer
(Shooting
_ Default Settings
Guide ....................................
42
Factory Settings
Compression
(image Quality) ....................
60
FE Lock ...........................................
91
File Numbering
Best Image Selection ..........................
81
Fireworks
High-speed
80
Fish-eye Effect (Shooting
Shooting
.................................
102, 187
........................................
(Shooting
95
Mode) ............. 78
Components
Continuous
17, 179
F
27, 54,173
Mode) .................. 72
102
167
Mode) .......................
66
Mode) ...............
69
Creative Light Effect (Shooting Mode) ....... 71
Custom White Balance ..............................
87
Fixed Frame (AF Frame Mode) .................
96
Flash
Off .......................................................
54
D
On .......................................................
Burst ................................
Stow Synchro ....................................
Focus
Date and Time -e Date/Time
Date/Time
Adding
to image ..................................
57
AF Frames
....................................
85
103
26, 95
2O5
Index
AF Lock ..............................................
99
AF-Point
97
Zoom ...................................
Servo AF ...........................................
100
Touch AF ............................................
98
Focus Check ...........................................
126
Focus Lock ................................................
96
Focusing
Range
Format
94
94
Mode) ...........................
65
-e Memory Cards, Formatting
Formatting (Memory
FUNC. Menu
Basic Operations
Mode) .......................
................................
46
192, 200
G
Grid Lines ........................................
172, 187
H
Handheld
NightScene
(Shooting
Mode) ........................................
Magnified
94
Display ....................................
127
Memory Cards ...........................................
Available
Shots .............................
..................................
17
19, 61
23, 165
Shooting Time ....................................
Menu
32
Basic Operations ................................
List ....................................................
47
196
Metering
Method
Miniature
Effect (Shooting
Monochrome
.....................................
Mode)......
101
70, 113
(Shooting
Mode) .................. 74
Movie Digest (Shooting
Movies
Mode) .................. 67
Editing ...............................................
65
High-speed Burst (Shooting Mode) ........... 80
Household Power ....................................
178
174
89, 149
Mode) ...............
-e Compression
112
Ratio
117
Pixels/
Frame Rate) .....................................
Shooting Time ............................
(Playback)
116
32, 116
.............................
MultiMediaCard/MMCplue/HC
i-Contrast ...........................................
iFrame Movie (Shooting
Image Quality (Recording
Viewing
I
Icon Layout ..............................................
65
M
Formatting
Card) ................ 23, 165
List ............................................
image Quality
Low Light (Shooting
42, 171
Macro (Focus Mode) .................................
Infinity .................................................
Macro ..................................................
Foliage (Shooting
L
Lamp .................................................
LCD Monitor -->Screen
MMCptus
33
-e
Memory Cards
My Category ............................................
143
My Colors (Playback)
148
..............................
My Colors (Shooting) .................................
92
Images
Display Time .....................................
Editing --> Editing
Erasing
P (Shooting
Images ...........................
30, 139
Playback _ Viewing
Protect ..............................................
included
137
Items _ Accessories
43, 45
Infinity (Focus Mode) .................................
Cabie ..............................
ISO Speed .........................................
206
(Shooting
Mode) ....................................
..........................................
Playback
--> Viewing
Playback
With Transition
Poster Effect (Shooting
Effects ............. 131
Power -e Battery, AC Adapter
Power Saving ............................
Mode) ......................
Printing
Kit
52, 168, 169
....................................................
Program AE ...............................................
Protect .....................................................
65
64
Mode) .................. 68
2, 36, 152
88, 187
84
40, 152
Mode) ...........................
94
K
Kids&Pets
PictBridge
Portrait (Shooting
indicator ...............................................
interface
P
172
152
84
137
index
R
Recording
Red-Eye
T
Pixeis (Image Size) ..................
Correction
.........................
60
104,150
Terminal .....................
Resizing (Making Images Smaller) .......... 145
Rotate ......................................................
144
S
Safety Shift ..............................................
Screen
Display Language
Information
Menu -e FUNC. Menu,
Switching
110
22
187, 189
Menu
Scroll Display ...........................................
SD/SDHC/SDXC
Cards
44
Actions ..................................
Touch
Touch
AF .............................................
28, 98
Panel ..............................................
14
Travel
Effect (Shooting
Trimming
131, 132
Mode) ......... 75
Abroad ..............................
16, 39, 169
..................................................
Tv (Shooting
.......................................
Mode) .................................
121
146
181
108
V
Memory Card _ Memory
Video
Self-Timer
14
14
Touch
Troubleshooting
the Display ..........................
141
36, 133, 134, 152, 178
Toggle ........................................................
Touch .........................................................
Toy Camera
...............................
Display ...................
Tag Images as Favorites .........................
-e Movies
Viewing
10 Second
Self-Timer .........................
58
Playback ..............................
123
Images on a TV ................................
133
Index Display ....................................
120
Face Self-Timer (Shooting Mode) ....... 78
Two Second Self-Timer ...................... 59
Magnified
127
Wink Self-Timer
Single Image Playback ....................... 28
Stideshow .........................................
124
Changing Delay and Number of
Shots ..................................................
(Shooting
59
Mode) ....... 77
Sepia Tones ..............................................
Servo AF ..................................................
92
100
Shooting
Filtered
Scroll Display ....................................
Smart Shuffle ....................................
Viewing
Number of Shots .....................
Display .............................
Images on a TV ..........................
16, 19, 61
Shooting
Date and Time _ Date/Time
Shooting
Info ....................................
121
130
133
W
187
White
Shooting Time .....................................
Stideshow ................................................
32
124
Wink Self-Timer (Shooting Mode) ............. 77
World Clock .............................................
169
Smart Shuffle ...........................................
130
Wrist Strap -e Strap
Smile (Shooting
Mode) ..............................
76
Snow (Shooting
Software
Mode) ..............................
66
DIGITAL
26, 31, 55
35
Guide .....................................
Transferring
.............................................
Solution Disk ......... 2
Installation ...........................................
Software
86
Z
Zoom
CAMERA
Balance ...........................................
2
Images to a Computer
for Viewing ..........................................
34
Sound Settings ..........................................
49
Stereo AV Cable ..................................
Strap ................................................
Super Slow Motion (Shooting
Super Vivid (Shooting
2, 133
2, 13, 14
Mode) ....... 114
Mode) .....................
68
2O7