Download Campbell Hausfeld PW3270 Pressure Washer User Manual
Transcript
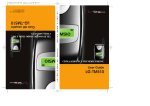
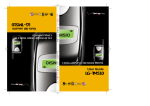
LG-TM520
User Guide
CDMA/AMPS/PCS TRI-MODE PHONE
FCC RF EXPOSURE INFORMATION
WARNING!
Read this information before using your phone
In August 1996 the Federal Communications Commission (FCC) of the United States
with its action in Report and Order FCC 96-326 adopted an updated safety standard
for human exposure to radio frequency electromagnetic energy emitted by FCC
regulated transmitters. Those guidelines are consistent with the safety standard
previously set by both U.S. and international standards bodies. The design of this
phone complies with the FCC guidelines and these international standards.
Use only the supplied or an approved antenna.
Unauthorized antennas,
modifications, or attachments could impair call quality, damage the phone, or result in
violation of FCC regulations.
Do not use the phone with a damaged antenna. If a damaged antenna comes into
contact with the skin, a minor burn may result. Please contact your local dealer for
replacement antenna.
Body-worn Operation
This device was tested for typical body-worn operations with the back of the
phone kept 2.0 cm. from the body. To maintain compliance with FCC RF
exposure compliance requirements, use only belt-clips, holsters or similar
accessories that maintain a 2.0 cm. separation distance between the user’s
body and the back of the phone, including the antenna, whether extended or
retracted. The use of third-party belt-clips, holsters and similar accessories
should not contain metallic components in its assembly. The use of
accessories that do not satisfy these requirements may not comply with FCC
RF exposure compliance requirements, and should be avoided.
For more information about RF exposure, please visit the FCC website at www.fcc.gov
Contents
Introduction
Highlights
Important Information
Check Accessories
Before You Start
FCC RF EXPOSURE INFORMATION
Chapter 1. Getting Started
Cautions
Phone Overview
On screen Icons
Chapter 2. Basic Functions
Turning the Phone On and Off
Making a Call
Correcting Dialing Mistakes
Receiving Calls
Using Quick Mode
Call Waiting
Mute
Redialing Calls
Adjusting the Volume
Power Save Mode
Signal Strength
Emergency Dialing
Mini Display
Speed Dialing
Caller ID
Phone Book Features
Chapter 3. Menu Features
General Guidelines to MENU Access and Settings
Sound
Display
System
Features
Utility
Security
Voice Services
Browser Start
Chapter 4. Book Features
Call History
Phone Book
Function of Scheduler
General Guidelines to Scheduler Access and Settings
Scheduler Item Descriptions
Schedule
Wake Up
Viewing Your Telephone Number
Chapter 5. Message Features
Voice
Send Msg
New Text
Old Text
Erase All
Setting
Chapter 6. Functions used during a call
Mute
Memo
Recording
Key Tone
Voice Privacy
Chapter 7. Accessories
Chapter 1. Getting Started
Cautions
l
l
l
l
l
l
l
l
l
Using the phone in proximity to receiving equipment (i.e., TV or radio) may cause
interference.
Keep your phone in a safe place when not in use.
Only use the batteries, antennas, and chargers provided by LG. Using the wrong
accessories could void your warranty.
Only authorized personnel should service the phone and its accessories. Faulty installation
or service may result in accidents and consequently invalidate the warranty.
Do not hold the antenna while the phone is in use.
Do not use the phone in designated “no cellular phone use” areas.
Do not expose the phone to high temperature or humidity.
Avoid getting your phone wet. If the phone gets wet, turn the power off immediately and
remove the battery pack. If the phone is mal-functional, return it to the dealer for service.
Avoid shock or impact on the phone.
Phone Overview
Function
Lamp
LCD screen
END/PWR
SEND
Mouse Key
Cellcase
Soft Keys
Side Keys
Scroll Keys
Alphanumeric
Keypad
Clear Key
Key Descriptions
The red light goes on when you use the power key to turn on the phone and when there are
incoming calls and messages.
Displays messages & indicator icons.
Used to turn power on/off. This key disconnects a call. Using this key, you can also exit out of
a menu back to the phone’s standby display without changing the setting.
Allows user to place or answer calls.
This mouse key allows quick access to text and voice mail notification messages. calendar,
outgoing call log, phonebook Find name.
Close the active cellcase to the terminate a call in progress.
Open the active cellcase to answer an incoming call.
The current operation of a soft key is defined by the word at the bottom of the display.
Soft Keys 2 :
If you press this key once in a menu, you can go back one level and if you press and hold the
key in a menu, you can go back to the standby display.
These keys enable you to adjust keybeep volume (in standby mode) and earpiece volume (in a
call status).
These keys are used to scroll through the memory locations and menu items.
- In the standby status, set the manner mode by pressing the button. (for 2 seconds)
- In the standby status, set the lock function by pressing the button. (for 2 seconds)
These keys enable you to enter numbers and characters and choose menu items.
On screen Icons
The phone screen displays several onscreen icons and onscreen icons appears when the phone is
power on.
Icons
Descriptions
Displays the strength of the signal received by the phone and current signal
strength is indicated as the number of bars displayed on the screen.
No service
The phone is not receiving a system signal.
In use
A call is in progress.
No icon indicates the phone is in standby mode.
Digital indicator
Digital service is available.
Analog indicator
Analog service is available
Indicates that a text message or voice mail has been received
Roaming
The phone is outside of its home service area.
Charge level
Indicates battery charge level.
Chapter 2. Basic Functions
Turning the Phone On and Off
Turning the Phone On
1. Install a charged battery pack or connect the phone to an external power source such as the
cigarette lighter adapter or car kit.
2. Press [END/PWR] for a few seconds until the red light on the top of the phone flashes.
l Fully extend the antenna for the best performance.
<Note> Like any other radio device, avoid any unnecessary contact with the antenna while your
phone is on.
Turning the Phone Off
1. Press and hold until display screen will be turned off, and then release the key.
2. Protect the antenna by pushing it back into the phone, if extended.
Making a Call
When you make a call, follow these simple steps:
1. Make sure the phone is turned on.
l If not, press [END/PWR].
2. Enter the phone number with area code, if needed.
3. Press [SEND].
l If the phone is locked, enter the lock code.
l “Call Failed” indicates that the call di d not go through.
4. Press [END/PWR] to disconnect the call.
Correcting Dialing Mistakes
If you make mistakes in dialing a number, press [CLR] key once to erase the last entered digit or
hold down [CLR] for at least two second to delete all digits, or simply press soft key 2 [BACK] to
exit dialing state.
Receiving Calls
1. When the phone rings, open cellcase or If cellcase is open, press any key (except [END/PWR],
[5][6], [3v4]) to answer.
l If you press the key [END/PWR], Side Keys ([5][6]) once when you receive a call, you
can hold the present call and ring sound or vibration stops. If you press the [END/PWR]
key, Side Keys ([5][6]) twice, the present call is terminated.
2. Press [END/PWR] to disconnect the call.
In call waiting mode, the present call is on hold as you answer another incoming call.
This service is provided by your service provider.
When the call waiting function is activated, your phone will beep to let you know if you have an
incoming call. Your phone may also display the incoming caller’s identification.
Dialing a call from Phone Book
You can place a call from any memory location either by speed dialing or by pressing [SEND] while
looking up the memory location.
One-Touch Dialing : One-touch dialing is a convenient feature which enables you to dial
frequently used numbers in your personal phone book by pressing a key (for memory location 1
through 8).
l Entry 9 is designated to Emergency Call.
l For locations 1 to 8, you can use one-touch dialing (if enabled, see “One -Touch” on page
37.) by pressing and holding down the key corresponding to the memory location.
OR
l Press digit, then press [SEND].
Two-Touch Dialing (Speed Dialing) : This dialing feature enables you to dial numbers in your
phone book through two keys (for locations 10 to 99).
1) Press the first digit.
2) Press and hold the key of the second digit.
OR
1) Press the first and second digits, then press [SEND].
Three-Touch Dialing (Speed Dialing) : This dialing feature enables you to dial numbers in your
phone book through three keys (for location 100 to 199).
1) Press the first and second digits.
2) Press and hold the key of the third digit.
Dialing from a Memory List
1) From a memory list, press the scroll keys to go to the memory location you want.
2) Press [SEND].
Dialing from a Memory Location.
On viewing and checking the memory location to call, press [SEND].
Chapter 3. Menu Features
General Guidelines to MENU Access and Settings
1. Press Soft Key [Menu]. The three menu items will appear on the display screen.
2. Press[v] to go through the list of menu features, or use the side keys.
3. Press the corresponding number to the menu item that you want to select. Then the sub-menu
list will appear on the screen.
4. Press the appropriate key to select the sub-menu you want to access.
5. Select preferred settings, using the [v] keys. Press Soft Key 2 [Back] to go one step backward
while accessing menu or selecting settings.
6. Press Soft Key 1 [Ok] to save the settings or Soft Key 2 [Back] to cancel without saving.
Sound ([Menu]+[1])
Ring Sound ([Menu]+[1]+ [1])
Select the ringer sound with [5] [6] or [v] key. The ring sound will notify that you have an
incoming call.
Ring Type ([Menu] +[1]+[2])
Select one out of four ring types (Ring, Vibrate, Vib+Ring and Lamp) with [5] [6] or [v] key.
Ring & Vibrate Volume ([Menu] +[1]+[3])
Adjust the volume of the ringer using the [5] [6] or [v] key.
Key Tone ( [Menu] +[1]+[4] )
Set Key Tone length and touch tone playback speed.
l Normal : Sends out a tone for a fixed period of time only if you keep the key pressed.
l Long : Sends out a continuous tone for as long as you keep the key pressed.
Key Volume ( [Menu] +[1]+[5] )
Adjust the key beep volume (the volume of sound on key pressing).
Ear Volume ( [Menu] +[1]+[6] )
Adjust the earpiece volume during a call, by pressing the side keys.
Alerts ( [Menu]+[1]+[7] )
1. Fade ( [Menu]+[7]+[1] )
Set an alert to inform you when you have lost a call or lose services.
2. Minute ( [Menu]+[7]+[2] )
Alerts you 10 seconds before the end of every minute during a call.
3. Service ( [Menu]+[7]+[3] )
If on, alerts you when service changes.
When you enter a service area, the phone displays “Entering Service Area” message.
When you leave a service area, the phone displays “Leaving Service Area” message.
4. Call Connect ( [Menu]+[7]+[4] )
Alert tones notify the user of the time when the call is connected.
Display ( [Menu]+[2] )
Backlight ( [Menu]+ [2]+[1] )
Allows you to select how long or when the display screen and keypad are backlit. The backlight is
turned off 10 seconds after the last key is pushed. the backlight is turned off 30 seconds after the
last key is pushed. “On when Cellcase open” means that the backlight is always on while Cellcase
is open. “Always on” means that the backlight is on regardless of the Status of Cellcase. Choosing
“Always on” significantly decreases talk time. “Always off” means that the backlight is never on.
Contrast( [Menu] [2]+ [2] )
Banner ( [Menu]+ [2]+[3] )
Theme ( [Menu]+ [2]+[4] )
You can set up the screen displayed on the LCD screen in the standby mode.(Default, Star theme)
Language ( [Menu]+ [2]+[5] )
Version ( [Menu]+ [2]+[6] )
View the software and PRL version.
Features ([Menu]+[3])
Data ([Menu]+ [3] +[1])
In “Data/Fax” setting, data and fax can be transmitted. Wireless data communication services refer
to utilization of subscriber terminals for access to internet with personal computer or laptops at
8Kbps or at maximum of 13Kbps.
l Data In : This setting enables the subscriber terminal to receive data calls.
l Fax In : This setting enables the subscriber terminal to receive fax transmittals.
Auto Answer ([Menu]+ [3] +[2])
Select the ring type before the phone automatically answers a call. This feature is most commonly
used with the car kit.
off
l after 1 ring(or melody 5 seconds)
l after 3 rings(or melody 10 seconds)
l Machine Enable
When you have incoming call, the phone automatically response with pre-recorded voice message
and record caller’s speech after 3 rings.
Auto Retry ([Menu]+ [3]+[3])
Set the length of time the phone waits before automatically redialing a number when the
attempted call fails.
l off / every 10 seconds / every 30 seconds / every 60 seconds
One-Touch ([Menu]+ [3]+[4])
Enable/Disable one-touch dialing.
Voice Privacy ([Menu]+ [3]+[5])
Set the voice privacy feature for CDMA calls as “Enhanced” or “Standard : CDMA offers inherent
voice privacy. Check with your service provider for availability of the enhanced voice privacy mode.
Audio AGC ([Menu]+ [3]+[6])
SIO Config ([Menu]+ [3]+[7])
If you want to use HSPD mode, you should set the baud rate as 230,400 bps in the menu 2 (Data
Baud menu).
1. Port Map (DATA DIAG OPTION)
U1 U2 -- : When using UART 1 and UART2 simultaneously
U1 -- HFK : When using UART 1 only for normal case
2. Data Baud (Data Baud Set)
AUTOBAUD : Default Data Baud Rate (ipr = 0)
9,600/19,200/38,400/57,600/115,200/230,400 : Optional Data Baud Rate
3. Diag Baud (Diag Baud Set)
38,400 : Default Diag Baud Rate
115,200 : Optional Diag Baud Rate
System ([Menu]+ [4])
System Select ([Menu]+ [4]+[1])
Choose setting to control which cellular company your phone uses. Leave this setting as default
unless you want to alter the system selection. (As instructed by your service provider.)
l Home is B (Automatic_B, Home only, Automatic_A) is displayed.
Set NAM ([Menu]+ [4]+[2])
Select the phone’ s NAM (Number Assignment Module) if the phone is registered with multiple
service provides.
Auto NAM ([Menu]+ [4]+[3])
Allows the phone to automatically switch to one of the programmed Telephone No. if it is operating
in the corresponding service provider area.
Force Call ([Menu]+ [4]+[4])
and phone numbers in Phonebook Entry. You can still receive calls in restrict mode. Check with
your service provider.
Clear Call ([Menu]+ [5]+[3])
Allows you to delete all the telephone number saved in the “Call History”.
Clear Data ([Menu]+ [5]+[4])
Deletes all information saved in the memory location(001-199) (Entry 9 is designated to
Emergency Call). Be careful since any deleted information is not recoverable.
Emergency # ([Menu]+ [5]+[5])
To enter 3 emergency numbers ([Edit] → enter → number → [Save] → [v] → ). You can call these
numbers and 911 even when the phone is locked or restricted.
New Lock Code ([Menu]+[5]+[6])
New Lock Code allows you to enter a new four-digit lock code number. For confirmation, it will ask
you to enter the new lock code twice. This is the same number as the pin code.
Voice Service ([Menu]+[6])
Allows you to make a call by simply saying the programmed word and when you are not available
to answer the phone, the caller can leave the message into voice mail and you can playback the
message later.
- Voice Dialing :
You can make a call by simply saying the programmed word.
- Voice Recording :
You can record conversation over the phone.
- Voice Memo :
When you are not available to answer the phone, the caller can leave the message into voice
mail.
- Auto Answering Machine :
When you are not available to answer the incoming call, you may set your phone as auto
answering machine and playback the recorded message later.
l To record the voice command, Press [CLR] key in Hands-Free Kit and record the voice
command as per your preference.
l When you hear “Incoming call answer?” in Hands -Free Kit, if the user say “yes” the call is
connected, say “no” the bell rings.
Voice Memo ([Menu]+[6]+[1])
When you are not available to answer the phone, the caller can leave the message into your voice
mail and you can playback the recorded message later.
There are 2 options, Playback or Record. In playback mode, you will have the list of the recorded
message and you can hear all recorded messages by pressing [v] key.
Training ([Menu]+ [6]+[2])
Allows you to practice the voice command(Yes/No)
Undo Train ([Menu]+ [6]+[3])
Allows you to delete the recorded voice command for the practice.
Voice Setup ([Menu]+ [6]+[4])
There are three options (Manual, Auto and Disable) for Voice Dialing. On manual mode, press
[CLR] to start this feature. On auto mode, this feature will be available upon opening the cellcase.
On Disable mode, Voice dialing is disabled when you press [CLR], Disabled message will be
displayed on the screen.
Chapter 4. Book Features
Call History ([PIM]+ [1])
Allows you to view the 30 most recently dialed phone numbers. Once you exceed the 30-number
storage limit, the oldest call history record is overwritten. These calls are divided into 3 types of
calls
Outgoing ([PIM]+ [1]+[1])
Allows you to view list of all outgoing calls you made and you may place a call by pressing the
[Send].
Incoming ([PIM]+ [1]+[2])
Allows you to view list of all incoming calls and you
Phone Book ([PIM]+[2])
Find Entry ([PIM]+[2]+[1])
1. Press Soft Key 2 [PIM]
2. Press [Phone Book] [Find Entry]
3. Your phone will prompt you to enter entry by displaying “Enter Entry #” on display screen.
4. Enter entry. If you select [OK] Key without entering any entry, you may view the entire list saved
in your phone book.
Search Name ([PIM]+[2]+[2])
1. Press Soft Key 2 [PIM]
2. Press [Phone Book] [Find Name]
3. Enter the name you want to search for and press [Find] key. If the name is found, the name will
be displayed and if the name is not found, “Not Found” message will appear.
Add Entry ([PIM]+[2]+[3])
You can save telephone numbers, pager number, and so on, up to 198 entries (Entry 9 is
designated to Emergency Call.)
1. Press Soft Key 2 [PIM]
2. Press [Phone Book] [Add Entry]
3. Enter phone number, then press [Next]
4. Select the memory location number
5. Select the desired phone label using [34]key.
6. Enter Name.
6-1. To enter Email address, select [Email] from label, press [6] key to move to the available enter
Email address.
7. You may select the desired ID ring type, secret, and voice recognition option using [v] key.
8. Press [Save] key when you are done.
<Note> Phone Type
Home : Entry of Home Phone Number
Office : Entry of Office Phone Number
Mobile : Entry of Mobile Phone Number
Pager : Entry of Pager Number
Data/Fax : Entry of Data/Fax Number
E-Mail : Entry of E-mail Address
Find Email ([PIM]+[2]+[4])
1. Press Soft Key 2 [PIM]
2. Press [Phone Book] [Find Email]
l Select the item you want to view using the [v].
3. Enter the Email address you want to search for and press [Find] key. If the Email address is
found, the Email address will be displayed and if the Email address is not found, “Not Found”
message will appear.
4. After selecting the Email address to edit from Email list, if you press Soft Key [OK], phone book
entry will be displayed.
5. After selecting Email label from level, press [6] Key to move to the available entry where to edit
or delete.
6. To save, press Soft Key [Save].
To delete Email address : Move to the Phone book from either Find Email or Find Entry and after
selecting the Email label, press [6] Key to move to the memory location, press [CLR] Key to delete
an press [Save] for confirmation.
Scheduler ([PIM]+[3])
WakeUp ([PIM]+[4])
Game ([PIM]+[5])
Calculator ([PIM]+[6])
Chapter 5. Message Features
Text message, page and voice mailbox become available as soon as the power is on. You can
access the above types of messages using the message key ([5]). In addition, you can make a
call to the call back number by pressing the [Send] during a message check.
The phone can store up to 30 messages (Voice message : 1, Text messages 29) with 245
characters per message. However, you should check whether your carrier provides the above
features.
The information that is stored on the message is determined by phone mode and service capability.
You can check types of messages by pressing the message key ([5]).
Massage Service
This service supports reception of the text message, alerting, and the voice mailbox. It is possible
to access the above functions with the text message key
It is possible to store up to total 23(new+old) messages. It is recommended to check the number of
character receivable because the capacity depends on the system service provider.
<Initial Message Service Image >
D
1: Voice
2: Send Msg
3: NewMsgs
4: OldMsgs
5:Erase All
SEL
Back
- Move the cursor with the upside and downside keys, and press Softkey(SEL) for the menu
requested. Press Softkey(BACK) to return to the initial image on the terminal.
<Type of Menu>
- Voice : Menu to check the number of voice messages in the voice mailbox
- Send Msg: Menu to send message.
- NewMsgs : Menu to check a new incoming text message
- OldMsgs : Menu to check the verified but not erased text messages
- Erase All : Menu to erase all the stored messages
1. Voice
D
07/09 12:30pm
VOICE MAIL
019-408-8144
1 New messages
Message
Qui
DEL
- It indicates the number of the voice messages in the voice mailbox.
2. Send Msg
D
Ok
<InputNum
<This field is to enter the destination address.>
Select ‘ ok’ to input the message.
D
Ok
<InputMsgs
<This field is to enter the messages.>
Select ‘ ok’ to send the message.
3. NewMsgs
- Menu to check the message received.
D
07/09 12:30p
MESSAGE from
019-408-8144
I love you
DEL
NEX
T
Select the ‘DEL’.
D
Erase
This
Message
yes
no
<When the Erase item>
4. OldMsgs
D
>I love you
DEL
VIE
- It indicates the checked but not erased messages in the form of he list.
- It indicates the checked and stored message in the form of the list. Move the location of > with the
upside or downside key to select the message.
5. Erase All
- This service enables erasing of all the messages stored by the message service.
D
Erase
All
Message
yes
no
<SMS SERVICE PROGRAM>
Enter ‘ MENU’ ->’ 4 System’ ->’ 0’ ->’ 000000’ ->’ 5 SMSMO’
Select <SMS MO >
1. SO : Select 8K or 13K
2. L3ACK : Select ON/OFF
3. ERRORS : View error class & CauseCode
Chapter 6. Functions used during a call
Mute (During a call : [MENU]+[1] )
l
l
Sometimes it is necessary to mute a call so that caller does not hear you or certain
background noise. To use this function during a call, Press Soft Key 1 [Menu] and [1].
If you need to release mute press the Soft Key 1 [Menu] and [1] key again.
Memo (During a call : [MENU]+[2] )
Recording (During a call : [MENU]+[3] )
Key Tone (During a call : [MENU]+[4] )
Set Key beep length and touch tone playback speed.
l Normal : Sends out a tone for the duration of time no matter how long you keep key
l
pressed.
Long : Sends out a continuous tone as long as you keep the key pressed.
Voice Privacy (During a call : [MENU]+[5] )
Set the voice privacy feature for CDMA calls as “Enhanced” or “Standard” :
CDMA offers inherent voice privacy. Check with your service provider for availability of the
enhanced voice privacy mode.
Chapter 7. Accessories
There are a variety of accessories available for the phone. You can select these options according
to your personal communication requirements. Consult your local dealer for availability.
Travel Charger
This charger, model TC-10W, allows you to charge the battery pack. It supports standard U.S.
120Volt 60Hz outlets. While an orange light indicates that it is charging, a green light indicates
charging is complete. It takes 5 hours to charge a completely discharged battery.
Battery (LGLi-AAEM)
Standard battery and Extended battery are available.
Desktop Charger
The desktop charger, model DC-41W, allows you to place the phone for charging the stand. It can
charge a completely discharged battery in 3 hours.
Cigar Lighter Charger
You can operate the phone and trickle charge the phone’s battery from your vehicle by using the
cigarette lighter charger, model CLC-11W. It takes 5 hours to charge a completely discharged
battery.
Hands-Free Car Kit (Portable)
The hands-free car kit, model PHF-30W, enables you to attach the phone to the car providing you
with hands-free operation. It will also charge a completely discharged battery in 5 hours.
Hands-Free Car kit(Install)
The installed hands-free car kit model IHF-51W is permanently installed in your car, and provides
you with hands-free operation. It will also charge a completely discharged battery is shows.
Data Cable Kit
Connects your phone to your PC.(Model KW-a)
Headset
Connects to your phone, allowing hands free operation. Includes earpiece, microphone and mute
key.
(Model Headset 1000)
AC Adaptor


