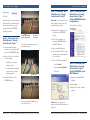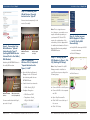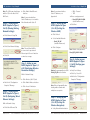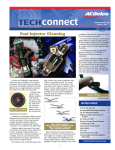
1
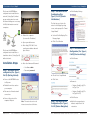
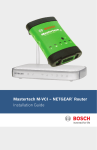
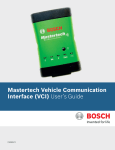
Robert Bosch LLC
Automotive Aftermarket Division
Diagnostics Business Unit
2040 Alameda Padre Serra, Ste 220
Santa Barbara, CA 93103
Toll Free: 800-321-4889
Fax: 805-966-9540
www.boschdiagnostics.com
BOSCH is a trademark licensed by Robert Bosch GmbH and/or its affiliated entities.
© 2009 Robert Bosch LLC, USA. All rights reserved.
2213461 0609
F00E900290
Mastertech M-VCI – NETGEAR Router
Installation Guide
®
Contents
1-5
Getting Started (Read Me First)
5-13
Installation Steps
5-7
Step 1 – NETGEAR Router Configuration
7-9
Step 2 – Connecting Your Wired Devices
9-10
Step 3 – Connecting Wireless PC’s
10-13 Step 4 – Setting up your VCI Scan Tool
14-15 Appendices
14
Appendix A – Static Network Reference Guide
14-15 Appendix B – Wireless Troubleshooting Guide
15
Appendix C – Configured Router Information
15-16 Appendix D – Multi Routers Information
Please note: The Mastertech VCI is referred to as “M-VCI” within this guide.
M-VCI – NETGEAR® Router Installation Guide Index | Version 1.0 | June 2009 Robert Bosch LLC
1 | Getting Started
Getting Started
Installation Overview
These installation instructions are
designed to guide you through
the process of configuring your
Mastertech VCI (M-VCI) to a
wireless access point and an
existing internet connection. There
are three (3) possible types of
connections we are addressing
within this guide: existing router,
DSL/cable modem, and no
internet connection.
Note: If you are not using an
internet connection, you will be
setting up this router as a stand
alone device to enhance the
wireless communication between
Getting Started | 2
additional wireless access
An install of one of these files is
computers, routers, network
points to networks that already
required during the configuration
printers, etc.
have wireless capabilities can
process of your router installation.
be accomplished with little or
no changes to your pre-existing
network settings or configuration.
The advantage of using the M-VCI
on a wireless network with
internet is that the M-VCI will have
better coverage compared to an
ad-hoc wireless connection, and
it allows simultaneous wireless
connection to the tool and
internet.
The first section of this guide will
help determine if your existing
network is compatible with the
procedures suggested within this
guide.
your PC and the M-VCI scan tool.
Please Note (applies to both
Please follow the directions as
internet and non-internet users):
they pertain to a Type III (non-
Shop Foreman Pro with M-VCI
internet) condition.
Manager must be installed on your
Follow these steps:
1. Please visit the software
There are two methods by which
every device on a network
receives its IP address:
download section of http://
Dynamic IP addressing (DHCP) is
www.boschdiagnostics.com
the most common. A single device
2. Select NETGEAR Router from
the menu
3. Select both files: Netgear_
Config_A.cfg and Netgear_
Config_B.cfg
4. Save these files to your PC
(Desktop or My Documents)
Later, during installation, you will
be prompted to browse to these
files and select the appropriate
.config file for your router.
on the network (usually a router)
assigns IP addresses to each new
device that is detected on the
network. This device is called a
DHCP Server.
Static IP networks do not use
a DHCP server, all IP addresses
are manually assigned at each
device by a network administrator.
Because we can not predict
the specific IP address range
assigned, the configurations
outlined in this guide require
Step A - Pre-qualifying your
existing setup
additional steps for networks
The first and most important
The M-VCI will still function on
NETGEAR Router installation.
criteria is:
these networks, but the set
network layouts as possible, there
Before Getting Started (applies
Is your network using Dynamic
is a small chance that the specific
to both internet and non-internet
steps may not be compatible
users): The router .config files
with your specific situation. In
need to be downloaded from the
these cases, you should contact
Bosch diagnostics website and
your network IT specialist for
saved to your PC. Saving them
assistance.
on your Desktop or in a New
Although this guide is designed
to be compatible with as many
Adding wireless capabilities
to a wired network, or adding
Robert Bosch LLC
PC prior to continuing with the
Folder within My Documents is
recommended.
M-VCI – NETGEAR® Router Installation Guide Index | Version 1.0 | June 2009
IP addressing, or Static IP
addresses?
IP Address: An IP address is
a device’s electronic “street
address” on a network. Every
device on a network must have
an IP address, this includes
using Static IP addressing.
up must be a manual process
that is specific to your network
configuration.
The first step in this process will
determine if your network uses
Static or Dynamic IP addressing.
Refer to Appendix A for additional
information.
M-VCI – NETGEAR® Router Installation Guide Index | Version 1.0 | June 2009 Robert Bosch LLC
3 | Getting Started
Getting Started | 4
Step B – Identifying your IP
Address Type
Step C – At the MS-DOS
Prompt – Check DHCP
follow the one pertaining to your
Start with a computer that is
1. Type: “ipconfig/all” (without
The Type III has no internet
currently running on your existing
quotes) into the command
network. To determine if your
window
computer network is using Static
or Dynamic IP’s:
2. Compare output to the
setup type.
connection but uses the
Type I (Current setup w/router.
Existing router as DHCP server)
examples below
1. Click: The Windows
Start Button
M-VCI to PC wireless
communication.
3. Output must include the line
Example – Final Setup
Configuration for Type I
“DHCP Enabled… Yes”
2. Click: Run
NETGEAR Router to enhance
4. Also verify that “DHCP Server”
is present
The actual numbers for the IP
addresses are irrelevant
1.
Type II (Current setup w/DSL or
cable modem and no router. The
ISP is the DHCP server)
2.
3. Enter: “cmd” into the Run
This shows the new NETGEAR
window (without quotes)
pre-configured router installed
4. Click: OK
into a network (Setup Type I) with
If your output matches the output
Type III (No internet connection)
above then you may continue this
If your setup looks most like Type
guide.
3.
4.
with this step, be sure your PC
a wireless or stand alone PC,
connect the new NETGEAR Router
to existing routers or computers.
Do not perform this final set up
Instructions for Type I”
additional steps must be taken
If your setup looks most like Type
to configure your new NETGEAR
II - Follow Instructions & “Special
Router first.
Appendix A – Static Network
Reference Guide)
Step D – Choosing your
Setup type and Special
Instructions
until directed to do so. You need
Instructions for Type II”
If your setup looks most like Type
is connected to your network or
to your modem. If you are using
network changes need to be made
If DHCP Enabled = No, then
to configure the M-VCI. (See
Important: Before proceeding
I - Follow Instructions & “Special
a pre-existing wireless router. No
III - Follow Instructions & “Special
Instructions for Type III”
Example – Final Setup
Configurations for Types II
& III
The M-VCI – NETGEAR Router
to your PC LAN port with the
install procedure is similar
provided Ethernet cable.
for all types. When a “Special
Instruction” is called out, please
Robert Bosch LLC
M-VCI – NETGEAR® Router Installation Guide Index | Version 1.0 | June 2009
M-VCI – NETGEAR® Router Installation Guide Index | Version 1.0 | June 2009 Robert Bosch LLC
5 | Installation Steps | Step 1
Installation Steps | Step 1 | 6
Step 1 - NETGEAR Router
Configuration (For:
Types I, II & III) (Router
Initialization)
This shows the NETGEAR preconfigured router installed into a
network (Setup Type II) without
any pre-existing wireless router.
No network changes are necessary
ff Click: Backup Settings
The first time you log into the
for DSL/cable modem or wired
router it will display a greeting
computers.
screen, and a prompt For “Smart
Setup Wizard”
ff Reboot the computer
(to renew the IP address)
ff Open your web browser
ff Uncheck: Do Not Display This
Message Again
ff Click: Close Window
ff Enter http://192.168.1.1 into
This shows the NETGEAR preconfigured router installed as a
your browser address bar and
Step 1 - NETGEAR Router
Configuration (For: Types I,
II & III) (Restore Settings)
press <Enter>
stand-alone device (Setup Type III)
ff Click: Browse
without internet.
Installation Steps
ff Enter User Name and Password
–– User Name: admin
Step 1 - NETGEAR Router
configuration (For: Types I,
II & III) (Getting Started)
–– Password: password
ff Check: No to Setup Wizard
ff Click: Next
ff Connect the NETGEAR router
ff Browse to:
to AC power
–– Netgear_Config_A.cfg (File
ff Disable the wireless card on
for Type I) or
your computer
–– Netgear_Config_B.cfg (File
ff Disconnect all wired network
for Types II & III)
connections
ff Click: Restore
ff Connect the router to the
computer LAN port
Note: The router does not need
internet connection at this time.
Robert Bosch LLC
M-VCI – NETGEAR® Router Installation Guide Index | Version 1.0 | June 2009
Step 1 - NETGEAR Router
Configuration (For: Types I,
II & III) (Router Navigation)
ff Wait for the progress bar to
indicate completion of the
restoration.
M-VCI – NETGEAR® Router Installation Guide Index | Version 1.0 | June 2009 Robert Bosch LLC
7 | Installation Steps | Step 2
Installation Steps | Step 2 | 8
ff Done!
Step 2 - Connecting Your
Wired Devices “Special
Instruction for Type II”
At this point, the router will reboot
Important: Use the same PC that
and you will lose communication,
was originally connected to the
this is normal. Disconnect the
Not used
computer from the NETGEAR
ff Using an Ethernet cable,
ff Click: Basic Settings
ff Connect the computer to the
Router at this time.
Step 2 - Connecting Your
Wired Devices “Special
Instruction for Type I”
modem for these steps.
Step 2 - Connecting Your
Wired Devices “Special
Instruction for Type II”
(Setting NETGEAR Router
configuration)
LAN port of the NETGEAR
For additional wired
devices (if needed)
To existing
router port
Router
ff Reboot the computer (to
renew the NETGEAR Smart
This shows a typical connection to
an existing router.
Wizard IP Address)
ff Open your Web Browser
connect one end into the LAN
ff Enter http://192.168.10.1 into
port on the NETGEAR Router.
your browser address bar and
ff Connect the other end to one
Press: <Enter>
of the following:
ff Enter User ID and Password
–– A LAN port on your pre-
–– User ID: admin
existing router or,
–– Password: Bosch_VCI_AP
–– An open network drop that
–– Click: OK
is connected to your preexisting network.
Connected
ff Provide AC power to the
Step 2 - Connecting Your
Wired Devices “Special
Instruction for Type II”
(Setting NETGEAR router
MAC Address)
ff Click: Use Computer MAC
NETGEAR Router
address
ff Click: Apply
ff Wait for the router to apply
settings
You are now finished with Step 2,
proceed to Step 3.
Caution! Do not connect the
router to the cable/DSLmodem at
this time.
Robert Bosch LLC
M-VCI – NETGEAR® Router Installation Guide Index | Version 1.0 | June 2009
M-VCI – NETGEAR® Router Installation Guide Index | Version 1.0 | June 2009 Robert Bosch LLC
9 | Installation Steps | Step 3
Installation Steps | Step 4 | 10
Step 2 - Connecting Your
Wired Devices “Special
Instruction for Type III”
Connect wired computer(s) to the
router (if needed).
Note: This is a typical screen
shot, however, your actual screen
may be different depending on
your brand of PC. Not all PC’s
Not used
Step 2 - Connecting Your
Wired Devices “Special
Instruction for Type II”
(Setting NETGEAR Router
Internet Port to the Cable/
DSL Modem)
Attaching the NETGEAR Router to
the cable/DSL modem.
require the confirmation of the
network key. Refer to Appendix B
for additional information. Refer to
Appendix D when using multiple
Additional wired
devices
Wired output
to PC(s)
Step 3 - Connecting
Wireless PC’s (if required)
“Special Instruction for
Types I, II & III”
ff Open the Wireless Network
Manager for the PC that will
NETGEAR Routers.
Step 4 – Setting up your
M-VCI (Applies to Types
I, II & III) (Verify USB
Connectivity)
ff Verify M-VCI shows up in M-VCI
connection window
ff Click: VCI Manager
Step 4 – Setting up your
VCI (Applies to Types I, II &
III) (Starting VCI Setup)
Note: Shop Foreman Pro w/VCI
Manager must be installed on
your PC prior to proceeding to the
following steps.
ff Click on the image of the M-VCI
ff Click: Connect
be interfacing with the new
NETGEAR Router.
“Internet Port”
(Input from
the Cable/DSL
Modem)
Additional wired
devices
Wired connection
to PC (If required)
ff Search for wireless networks
–– SSID = Bosch_VCI_AP
ff Configure Encryption
–– WPA Personal TKIP
–– Passphrase = Bosch_
You are now finished with Step 2,
VCI_800-321-4889
proceed to Step 3.
ff Connect M-VCI to the AC power
ff Connect M-VCI to the computer
via USB
ff Open Shop Foreman Pro
ff Click: M-VCI icon at the top of
the screen
ff Click: VCI Setup
Robert Bosch LLC
M-VCI – NETGEAR® Router Installation Guide Index | Version 1.0 | June 2009
M-VCI – NETGEAR® Router Installation Guide Index | Version 1.0 | June 2009 Robert Bosch LLC
11 | Installation Steps | Step 4
Note: The S/N shown should agree
with the S/N on the label of the
M-VCI unit.
Installation Steps | Step 4 | 12
ff Click: Enable Wired Ethernet
Interface
Note: If your network utilizes
Note: If your network utilizes
Static IP addresses, see
Appendix A.
Static IP addresses, do not enable
Step 4 – Setting up your
M-VCI (Applies to Types I,
II & III) (Clearing Existing
Network Settings)
Wired Interface with Static IP.
Step 4 – Setting up your
M-VCI (Applies to Types
I, II & III) (Setting the
Wireless SSID)
–– WPA – Personal
–– TKIP
ff Enter: security password
–– Bosch_VCI_800-321-4889
(include underscores)
ff Click: Next
ff Click: Refresh
ff Click: Network Setup Tab
ff Select: Available Network
–– Bosch_VCI_AP
(include underscores)
ff Click: Clear Network Settings
Note: This will allow M-VCI to
ff Click: Configure
Note: Double check password:
be connected to any network
Bosch_VCI_800-321- 4889
Ethernet port if there is limited or
ff Click: OK
no wireless coverage.
Step 4 – Setting up your
M-VCI (Applies to Types I, II
& III) (Configuring Wireless
Connection Settings)
While in Network Setup:
Step 4 – Setting up your
M-VCI (Applies to Types
I, II & III) (Verifying your
Settings)
Option: You can manually enter SSID
ff Verify Your Settings
Bosch_VCI_AP into the text box.
ff Click: Yes, Select OK
ff Wait for the “Configuration
Complete” Message
ff Click: Wireless (802.11) tab
ff Wait for the “Configuration
Complete” Message
ff Click: Enable Wireless Interface
ff Click: Access Point button
Step 4 – Setting up your
M-VCI (Applies to Types I,
II & III) (Configuring Wired
Ethernet Settings)
While in Network Setup:
ff Click: Wired Ethernet Tab
Robert Bosch LLC
M-VCI – NETGEAR® Router Installation Guide Index | Version 1.0 | June 2009
Note: Refer to Appendix D when
dealing with a network with
multiple access points.
Step 4 – Setting up your
M-VCI (Applies to Types
I, II & III) (Setting the
Wireless Encryption)
ff Verify: Network Authentication
M-VCI – NETGEAR® Router Installation Guide Index | Version 1.0 | June 2009 Robert Bosch LLC
13 | Installation Steps | Step 4
Step 4 – Setting up your
M-VCI (Applies to Types
I, II & III) (Verifying your
Wireless Strength)
Appendices | 14
–– Click the red “X” in the
upper right corner
Search for “Signal Quality” below.
Appendix A
Appendix B
Static Network Reference
Guide
Wireless Troubleshooting
Guide
If your shop network utilizes Static
Wireless performance can be
IP addresses:
affected by many factors:
ff An unused IP address must be
ff Physical obstructions to the
manually entered for the M-VCI
–– Subnet mask must match
the network
ff Utility such as Look@Lan may
After configuration, confirm signal
quality.
Step 4 – Setting up your
M-VCI (Applies to Types I,
II & III) (Final step before
starting)
From “Mastertech VCI Setup”:
Step 4 – Setting up your
M-VCI (Applies to Types I,
II & III) (Confirming your IP
Address)
Return to VCI Manager.
ff Click: Properties Tab
ff Select: Wireless VCI
–– Or, contact your network IT
specialist for assistance
ff Do not set Static IP address
on both wired and wireless
IP address and subnet mask.
networks
–– Microwave ovens
–– Wireless congestion (too
many networks utilizing the
same channel)
Ensure that the wireless router is
in a centralized location.
Position the wireless router as
high as possible in your shop to
assure optimum signal radiation.
If you are experiencing connection
issues:
ff Verify the M-VCI functions
correctly using a USB cable
ff If IP says “Not Set”, click
ff Ready to Use
ff Close the VCI Manager
Robert Bosch LLC
–– www.lookatlan.com
ff Unplug the USB cable from the
ff Confirm Wireless IP
Refresh
–– Other radios or wireless
address” to manually enter a valid
ff Confirm Wireless SSID
ff Interference from external
sources
Select “Use the following
status bar
access point
visit this site if needed:
ff Click: Apply
ff Verify the IP address in the
ff Distance from the wireless
be used to “Map” the network,
interfaces of the M-VCI
M-VCI
signal (walls)
M-VCI – NETGEAR® Router Installation Guide Index | Version 1.0 | June 2009
ff Verify that you are using the
latest software. Software
M-VCI – NETGEAR® Router Installation Guide Index | Version 1.0 | June 2009 Robert Bosch LLC
15 | Appendices
updates can be found at:
www.boschdiagnostics.com
ff Verify firewall and security
settings on the computer
ff Power-cycle the wireless
router and M-VCI
–– This will force the router to
check for “open” channels
ff Utilities such as NetStumbler
Appendices | 16
ff User Name: admin
used with an existing wireless
encounters. Thus, the M-VCI can
ff Password: Bosch_VCI_AP
router. Each NETGEAR router
be moved around in the repair
is configured separately as
facility, but there is no guarantee
described in the main body of this
that it will always communicate
document. In either recommended
with the same access point. This
configuration, the routers are
may result in some access points
connected together via LAN ports
handling more wireless traffic
(using Ethernet cables). The
than others. To force a particular
routers may be “daisy-chained”,
M-VCI to always communicate
or connected “hub-and-spoke”.
with a particular access point,
In this way, a single DHCP server
the SSID for the access point
is used for the entire wireless
must be altered. This is done
network.
through the NETGEAR router
If necessary employ the following
to reset the router to factory
settings:
ff With power applied to router,
hold down the Reset button
on the back of the unit for 30
seconds.
can assist in checking wireless
signal issues. NetStumbler
can be found at: http://www.
Appendix D
netstumbler.com/downloads/
Appendix C
Using Multiple NETGEAR
routers.
Other configurations using
multiple NETGEAR routers are
possible, but these may require
It is possible to use multiple
additional configuration of the
NETGEAR routers together in
individual NETGEAR routers.
a single installation. In most
Please consult Appendix C and the
These are your NETGEAR Router
installations, a single NETGEAR
NETGEAR router documentation.
settings when finished with
router is sufficient for handling
installation:
the communications between
Router Information
Router IP address (after initial
configuration)
However, there are situations,
such as a large repair facility,
where the use of multiple
ff Type I
–– IP: 194.194.194.1
–– Subnet Mask:
255.255.255.252
ff Type II & III
NETGEAR routers will improve
wireless network performance.
–– Subnet Mask: 255.255.255.0
Router login information (after
initial configuration):
configuration is to configure all
NETGEAR routers as Type I to be
M-VCI – NETGEAR® Router Installation Guide Index | Version 1.0 | June 2009
the wireless SSID in the M-VCI to
match the access point (see Step
4 – Setting the Wireless SSID),
and in any PC using the access
point.
access point to access point by
selecting the appropriate access
point prior to connection to the
M-VCI. Please consult the wireless
comes with your PC.
as Type I. Another recommended
access point, you must change
points. The PC can be moved from
for deploying multiple NETGEAR
the remaining NETGEAR routers
After altering the SSID of an
configuration of multiple access
software documentation that
NETGEAR router as Type III, and
C and NETGEAR documentation).
software supports the
One recommended configuration
routers is to configure a single
–– IP: 192.168.10.1
Robert Bosch LLC
a number of M-VCIs and PCs.
Most PC wireless interface
configuration utility (see Appendix
When all of the NETGEAR access
points in the wireless network
have the same SSID, the M-VCI
will typically communicate with
the first NETGEAR access point it
M-VCI – NETGEAR® Router Installation Guide Index | Version 1.0 | June 2009 Robert Bosch LLC