1
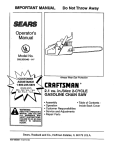
IMPORTANT
•
MANUAL
Not Throw
,,IHI
Away
manual
•
•
•
•
Assembly
Operation
Maintenance
Repair Parts
MODEL
NO.
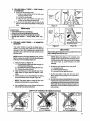
358-356280-2.8/18
358.356330-3.3/20"
'_
SF_/_RS / I:RRFTSMRN_
=7
H
'228/i8" ' 3.3/20"
GASOLINE CHAIN SAW
"k
•
,k
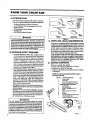
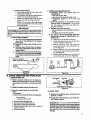
Record in the space provided below the Model No. and Serial No. of
your saw. These numbers are located _n the starting instructions
decal.
,_WARNING:
Carefully read and follow
Safety Rules, Precautions
and Operating Instructions.
Failure to do so can result
inserious personal injury.
........
t=-
"-%
-
"
Model No.
Serial No.
Retain "th_se numbersforfuture
reference:
•
,,,,,u
Sears,
53 0-067180-5.-01t30/90
Roebuck
and
Co., Cl_ea__,o_),
""'.
'...........
i"...............
Ill. 60684
U.S.A.
@Seats, Roebuck and
C0.,
1990
"
F_NT
(Excluding
<:>.-_
ON GASOLINE
Bar,. Chain,
Sparl<
pfu 9, Air Filter
CHAIN
and
SAW
Starter
Rope)
"
For one year from date of purchase, when you maintain, lubricate, and tune up this chain saw according to tf_. opeta_.:ng
maintenance instructiorts irt the operators m._nual, Sears will repair-defects in mate.r.ial or work:mansnip in mis ga.._,o_ne
chain saw at no ¢hatge.
'
This warranty excludes the bar, chain, spark plug, air filter, and" starter rope which are e._endabie parts and become worn
during normal use_
If this chain saw is used for commercial er renlat pulposes, this warranty sppliek; for only 30 days from date of pumhase.
WARRANTY S_-J_VICE IS AVAILABLE BY RE't'URNI_IG THE CHAIN SAW TO THE N_REST
SEARS SERVICE CENTER/
DEPAFTTMENT IN THE UNWED STATES.
This warranty gives you specific legal rights, and you may also have other rights which vary"from state to state.
Sears, Roebuck and Co., _ears Tower, Dept. 698F/3_A, Chicago, IL 60684
TABLE
Sl_lflmitlons
.... ; ..........................
SI=IECIAL._FEI_ SECTION... .......
; ..........
Know Your:Chaln Saw ........................
Preparing .your saw For Use ...................
A. GettingReady ..............................
B. Attaching The Handguard ....................
"C. Attaching The Spur .........................
D. /k_'mchingTheBarandOhain ..................
E. ChainTension .............................
:E FuelingYour Engine; ........................
G. Bar and_hain Lubricant ....................
Accessories .................................
Using Your Saw ............................
A. Control
Devices
.........................
B. Starting Instruclions
o
.....................
OF CONTENTS
2
3
6
7
7
7
7
8
8
9
10
"tO
1
11
11
Types
of Cutting
.......
......................
A, Basic Cutting Technique ..................
B. Tree Fel|ing Techniques . ..................
C. Bucking ............
- ........
...........
O. Debranching and Pruning .................
Mal(,_mance ...............................
A. Guide Bar and Chain ....................
R Spark Arrestor ...........................
C. Starter Rope ...........................
D, CarburetorAdjustments...................
E. CILr_ch
_u'(d
Drum ISprocket .................
F, Air Filter ...............................
G. Storage ...............................
I-f. Trouble Shooting Chart ...................
I. Maintenance Chart ......................
Repair Parts .................................
Quick Reference Page ........................
12
12
12
_4
15
16
16
17
18
19
20
20
20
21
22
23
27
iii
ii
, ,
i
SPECIAL
SAFETY
i,,11
i
SECTION
i]11
GUARDAGAINST.
iiii
i
ii ii "
i
..................
KIC KBACK
REDUCING
KickbackJsa
dangerous reaction that(an le_d tosedous
personal injury. Do not reJy only on the safety devtces ptovided withyoursaw. As a chain saw user, you must take
special safety pre_utions
to help keep your cutting jobs
free from accident or injury.
1.
2.
!"'
! ...........
_I_KICKBACK
WARNING
Kickbackcanoccurwhenthe
moving chain contacts
an object at the upper portion of the tip of thegu Ide bar
or whenthe wood closes Inand pinches thesewchain
l n the cut _Contact at the upperportion
of tim tip ot the
guideba_can cause thechain to dig tntothe object and
stop the_haln foran Instant. The_result Is a lightning
fast, teVetse reaction,whlch kicks the guldebar up and
back toward the operator. If the saw chain is pinched
along th_ top of the guide bai; the guide bar can be
driven rapidly back toward the operator. Either of
these reactions can cause loss of saw control which 1
can msult in serious injury,
j
KICKBACK PATH
3.
4.
5.
6.
7.
8.
9.
10.
K,ICKIM, CK
Recognize that kickback can happen. With a
basic understanding of kickback, you can reduce
the element of surprise which contributes to
accidents.
Ne_r let the moving chain contact any object at the
tlpof the guide bar. Figure 1.
Keep the working area free from obstructions
such as other trees, branches, rocks, fences,
stumps, etc. Figure 2. Eliminate or avoid any
obstruction that your saw chain could hit while you
are cutting through a particular log or branch.
Keep your saw chain stzarp and properly tensloned. FotlowSears chain sharpening and maintenance in_rucg0ns:(3heck tension at regular intervats
with the engine stopped, neverw_ththe engine running.
Make sure the bar cJampnuts are securely tightened
after tensicningthe chin. A loose or duli chain can
increase the chance of kickback.
Begin and continue cutting at full throttle. If the
chain-is movi_'_ga'_a slow_, speed, there is greater
chance for kickback,
Cut only one log at a time.
Use extremecaution
when re-entering a cut,
Do not attempt piunge cuts,
Watch forshifting logs orotherforcesthat
could
close a cut and pinch or Pall into the chain.
Use only the Reduced-Kickback
Guide Bar and
Low-Kickback Chain specified for your saw.
Figure 1
MAINTAINING
AVOID
OBSTRUCTIONS
1.
" CLEAR"
,.
WORKING
AREA
2.
_ " _
.
','/(
STAND
LEFT OF
,\ THESAW
iE_LOW
/
TO THE
3.
4.
T_raMB"ON
INDERSIDE
OF HANDLEBAR
Figure 3
5.
•6,
_
CONTROL
Keepa good firm grip on the saw with both hands
when the engine is running and don't let go.
Fig_.3.
A fi;_mgrip ,can neutral!ze kickback and
help you maimain control of the saw, Keep the
fingers of your left hand encircling
and your left thumb under the front h_,ndlebar. Keep your right
hand completely around the rear handle whether
you are right handed or left handed. Keep your left
arm straight with the elbow locked.
Position your left hand on the front handlebar soit
is in a straight line with your right ha nd on the rear
handle when making bucking cuts. Figure 3. Never
reverse right and left hand positions for any type of
Stand with your weight evenly balanced on
both feet.
Stand slightly to the left side of the saw, to keep
'_'pur body from being.,in a direct line'with
the
cutting, chain..Eigure 3 ..............
Do not overreach. You could be drawn or thrown
off balance and lose control of the saw.
Do not cut above shoulder height. It is difficult to
" maintain control of the saw above shoulder height.
sPECIAL
SAFETY
i ii
,,,,,i
SECTION
(continued)
iii
...............
Because a chain saw is a hlgh-speed wood-cutting tool, special safety precautions must
De ooserved to reduce the risk of personal accidents. Careless or improper use can
_.WARNtNG
:
j
c_use serious injury.
4.
DO not attempt to use your chain Saw during bad
weather conditions such as strong wind, rain, snow,
etc. or at night.
5. Plan your sawingoperation carefullyin advance. Do
not startcuttingur_ityouhavea clear work area, secure
footing,andifyouarefal(ingtrees,aplanned retreat path.
HEAVY DUTY GLOVES
AVOID
REACTIVE
FORCES
Pinch-Kickback
and PuIFin occur when the chain is
suddenty-stopped
by being_pinched,
caught, or by
contacting a foreign object in the wood. This results in a
_
ofthe chainfor_e used tocut wood ar_lcausesthe saw
to move in the opposite direction of chain rotation. PinchKickback drives the saw slraight back toward _ operator.
Pull*inpul/s_esawawayfromtheoperatOr.
Either reaction
can result in loss ofc_r_ol and poss_te sedous injury.
Figure4
KNOW
YOUR
SAW
!.
Read yourOperator's Manual camfuflyuntil youcorm
ptetely
_mde,'_d andfolk_w
all
s_atyroles
_,_d
opera,rig
instruotionsbefore'attemptingtooperatethe unit.
2. Restrict the use of your saw to adultuserswho under.stand .and follow the safety rules, precautions,and
operatinginstructionsin this manual.
PLAN
AHEAD
Wear protective gear. Figure 4, Alwaysusesteel.toed
safetYfootwearwithpoP_p.sot_; snug.#__!n
9 clothing;
t_eav_-duty non-slip g_oves; eye protections_Jchas
non-.f_j_
ping, _ented goggles or face screen; an approvedSafetyhard hat, and soundbarriers_ ear plugsor
mufflersto protectyour hearing. Regu]_ usePsshould
have hearingchecked regularlyas chainsaw noisa can
damage hearing°
2. Keep children, bystanders, and pets out of the work
' area -- a minimum of 30 feet (10 meters). Do notallow
other people oranimals to be near the chainsaw when
startingor operating the chain saw.
3. Do not handle or operate a chain saw when you are
fatigued, ii|, or upset; or if you have taken alcohol,
drugs or medication. You must be in good physical
condition and mentally alert. Chain saw work is
strenuous. If you have any condition.that might be
aggravated by strenuous work, checkwith yourdoctor
- before operating-a:chain-saw: ............_.........: .......
To avoid Pinch,Kickback:
t.
Be extremely aware of situations or obstructions
that can _se mate,_ial _opinch the top of or otherwise stop the chain.
2. Do not cut more than one log at a time.
3. Do not twist the saw as the bar is withdrawn from an
under-cut when bucking.
To avoid Pull-in:
1.
2.
Always begin cutting with the engine at full throttle
and the spur against the wood.
Usewedges made of plasticor _,
(_er Of metal)
to hotd thecut open.
1.
4
HANDLE
1.
2.
3,
4,
5.
6.
7.
FUEL
WiTH
CAUTION
Etiminate all sources of spad(s or flame in theareas
where fuel is mixed, poured, or stored. There should
• be no smoking, open flames, or work that could cause
sparks.
Mix and pourfuelin an outdoor area_ on bateground;
store fuel in a coot, dry, well-vent,.ated place;,and use
an approved, marked container for fuel.
Wipe up all spilled fuel before starting your saw.
Move at least 10 feet (3 meters} away from fuel and
fueling site before starting the engine.
Do not smoke while handling fuel or while opereting
the saw.
Turn the engine off and let your saw cool in a noncombustible area, not on dry leaves, straw, p_er, etc.
SLOWLY remove the fuel tank cap and refuel the unit
-'St_'r:e-t_"a_J_;__K
_;_vV_e_e
fuel_rS
cannot reach sparks or open flames from water heaters,
etectric motors or switches, _urnaces, etc.
OPERATE
YOUR
SAW
SAFELY
1. Do not operate a chain saw that is damaged, improperly adjusted, or not completely and securely
assembled.
2. Operate the chain saw only In outdoor areas.
3. Do not operate the saw from a ladder or in a tree,
4. Position_8!!parts of your body to the left of cut and
away froth'the saw chain when the engine Is
• running.
5. Cutwood onty.Do notcutmetal,plastics,masonry,nonwoodbuildingmated_lso
etc.Do not useyour sawto pryor
shoveaway limbs,rootsor otherobjects.
6. Ma_stzre.the chain willnot mai_ €_XttactWithar_ object while_arting the engine. Ne_rtryto startthe saw
when the guide bar isina-cut or kerr.
7. Use extremecaution when cutting small size brush
and saplings. Slender material can catch the saw
chain and be whipped toward you or pull you off
balance.
8. Be alert for springback when cutting a limb that is
under tension so you witl not be struck by the limb or
saw when the tension in the wood fibers is released.
9. Do not put.pressure on the saw at the end of a cut.
This can cause you to lose control when the cut is
completed.
10. Stop the engine before setting the saw down.
MAINTAIN
WORKING
YOUR SAW
ORDER
IN
Keep the vlbr_ion isolators in good condition.
Periodically
inspectisolators fortea_,dpsor separationof
the rubber p_on fromthe metalmountings.Haveyour
Sears Service Center replace the isolatorsif wornor
damaged,if vibrationincreasesorifmountsde.top an_ut
ofroundorswollenshapefromexposuretOgasolineand/or
oil itis recommended thatall isol_torsbereplacedwhen
a failure toone occur_
CARRY
AND
S_RE
YOUR
SAW
SAFELY
.1..Hand carrytheunit with the engine stopped,Ihe muffler away from yourbody, and theguide bar and.c%_into
tlie rearcoveredpreferablyv_h a scabbard.
2.
Before transporting in any vehicle orstodng in any
enclosure, allow your saw to cool completely,cover
the bar and chain and properly secure _o avoid
turnover,fuel spillage or damage.
3.
Drain oil and fuel tank before storing for more than
30 days.
Store in a dry area out of the reach of children _nd
away from where fuel vapomcan reach sparks oran
Open flame fromhctwater beaters, furnaces,etc.
4.
GOOD
SAVE THESE INSTRUCTIONS
t..Have all chai_ saw service performed byyour Sears
Service Center .Withthe exception0fthe itemslistedin
the ma;'t_*enance._-ct_on
of this manual, Forexample,if
improper ta0fs are used to felt'roveor hold the flywheel
when servicing.the clutch, st_'Ucturaldamage to the
flywheetcan occur andcause the flywhe!l toburst.
2. _ Keep fuel and oil caps, screws: and fasteners
securely tightened.
3 Keep the_handles dry, Clean, and free of oil or fuel
mixture..
4. Make certain the sawchainstops
moving when the
throttle trigger is released. For correction, refer to
page 19.for.carburetor idle adjustment instructions,
5. Stop fhe saw ff the.chaln strikes aforeign object. Inspect the unit and repairor replace parts as necessary.
6. Disconnect the spark plug before performing any
m_t_..,.ten_ncee_ce_ fo,_ca,_bur_or a_t,.st ,m_nts.
-7. Never modify ,your saw in any way, Use onlyattachments suppliedor specificallyrecommendedby Sears,
8. AlWays replace the handguard immediately if it
becomes damaged, or broken or is Otherwise
removed;
............. :.............................................
NOTE_-Exposureto vibrations through prolonged use of
chain saws may produce Whtteflnger disease
(Raynaud's phenomenon ). This phenomenon
_edu_-'_ the hatld's ability to fie_| _
i_julate
temperature, produces numbness and burning
sensations and can cause nerve and clmulation
damage andttssue necrosis.
,
An anti-vibration system designed to reduce
engine vibration is recommended for those using
chain saws on a regular or sustained b_sis and is
provided on this saw. However, an antivibration
system does not guarantee the avoidance of
Whitefinger disease, Continualand regular users
must monitor closely their use of chain saws and
phy_ca_ cop_d_mn.
Notice: Refer to the Code of Federal Regulations,Section
1910.266(5);2_1 of American National Standard
r
0_1-19"78;and relevant state safety codes when
using a chainsaw for logging purposes.
.5
_
i
i
KNOW
.i
i
i
YOUR
i i
i
i ii i
.
iii
ii
ii Ull
CHAIN
I
i
i
ii i
i
iiiiiiiii
Ji
,, ,,
/
,
ii i
SAW
i
.,,,,,,,,,,,,,,,,,,,
, ,,,,,,,,,,,,
,,l,=
ii
i|
i
. .
,........
A. INTRODUCTION
Yoursaw has been designed with safety in mind and
includesthe following f_atumsas standard equipment:
Reduced-f<ickbackGuide B_ (Lo-Kick_)
_- Low;Kickback Chain (Ek:_Guard
Link)
Spark Arrestor
"7 Temperature Limiting Muffler
Handguards
--Full Vibration IsolationSystem
GUJ4_OU*_K
KK:KI_C_
wf/OU_O
_XI_X
S_rlm_1;rm?Ai.
LOW_CREkt_
_m
IM0_ _1_
CUT.JR
.............
_kWARN{NG
The following features areincluded on your saw to help
reduce the hazard of kickback, however, such features
will not totally eliminate this dangerous reaction. Asa
chainsawuser, do not rely only on safety devices. You
must follow all safety precautions, instructions and
maintenance in this manual to help avoid kickbackand
other fomes which czn result in serious injury.
IL KICKBACK
SAFETY
FEATURES
-- Reduced-Kickback Guide Bar, designed with a
smaIIradius tipwhichreducesthesize ofthekickback
danger zone on the bar tip. Figure 5. A ReducedKickback Guide Baris one which has been demon.
strafed to significantly reduce the number and
,
.seriousnessOfkickbacks when testedin accordance
w_ththe safety requ,'ements for gasolinepowered
chainsav,sas setbytheAmer_cen Nationa_Sta_dards
Institute,In_, StandardB175.1-1985.
-- Low.Kickback Chain, designed with a contoured
d,epth gaugeand guard link whichdeflectthe kickback
force and _{Iowwoodtogradually fide intothe cutter.
•F'_jure5. Low-K'Jckback
Saw Chain is chain whichhas
met the kickback performance requirements ofANSI
B175.1when tested on a representative sample of
chain saws below 3B cubic inch displacement
_fied
_nANS! B175.1-198,5.
(.Am,
e,tcan Nativ,,a!
" Standard for PowerTools- Gasoline PoweredChaln
:. S_.:Safety Requirements).
• Handguard, designed to reducethe chanceofyour
}e_thandcor_cting the cha_ ffyourhandsfipsoffthe
frontlhandleb_.
-- Position of front arid rear handlebms, des_gr_ed
withdtstan_ebetweenhandlesand'_nline"wftheach
other.Thespr_ad _nd'_nline" position ofthel'_J_dlebatsworktogethertogive balanc_and resistance in
- controllingthesaw if kickbackOccurs.
"
,_ WARNING
Do not operate the chain saw unless the safety
devices or their specified replacements are prepedy
installed and maintained according to the instruc.
:tioms.in/hismanual..Do-notusa. anyother-guide bar
and chain combination that is not equivalent to the
odginal equipment or not certified to comply with
_,NSIB175.1-1985.Fai{ureto follow these instructions
can result tn serious injury,
S_attm_L
_Lt_l_S_J_
C. STATE
Figure 5
LOCAL REQUIREMENTS,
AND
Yoursaw is equipped with _ temperature limiting
mufffe_ and spark a rmst{ng_reen which m_ts the
raqui_ments of California Codes 4442 and 4443.
A][ U.S. f_e_ {and and the statesof California, Maine,
Washington and Oregon require many _nternalcombus_tionenginesto be equipped witha spark arrestorscreen
by law. Other statesare enacting s_milazlaws.
If you operate a chain saw in a state or locale where
such regulations exist, you are legally responsiblefor
maintaining the operating condition of these parts.
F_ilure to do so is a violation of the law. See "Spar_
ArrestorS'
in themaintenance section.
D, CARTON
CONTENTS
.
After you unpack the carton:
1. Check the contents against the list below.
2 Examine the items for damage.
3. NotiiyyourS_arsStoreimmediatelyffaP_rt_smtssing
or damaged.
NOTE: It is notmalto hearthefiJelfilter raffle in
an empty fuel tank.
KEY N0.
1
CARTON CONTENT_:
Powe_ Head
,
:
Z
Qrl'yo
1
GuideBar
:3
8 OZ. can, 2-Cycle Engine Oil
-Loose Part_Sag (not shown)
" LOOS_ PAR3_ £_,G CONTIENTS:
4
Handguar_
.5
C_p-Handgu_rd
1
1
1
1
s
ScrewsHat,guard(#_0_ _")
7
Spur
1
Screw -Spur (#'_0- 24 x 5t8'_
Chain
Scrench
2
"t
1
8
9
10
"
_
HexWr_,r:ch
(Sr_")forS_,_-head
__
C_e_a_'s
4
fan houslng _rews
Mat_ua,[ (not shown)
3
I
1
PREPARING
i
i
A. •GETTING
YOUR
H
III
SAW FOR USE
IIII
I{
I
READY
1. READ YOUR OPERATOR'S
2.
MANUAL
YourOperator's Manual has been developed to help
. you prepare your saw for use and to understand its
•safe operation, tt _s irnport,3nt that you mad your
;manuat ¢ornptete_yto become familiar with the unit
before you begin assembly or attempt operation.
HAVE THE FOLLOWING
AVAILABLE:
a. Protective gloves
b, ApproVed, marked, fuel container.
Regular unleaded gasoline. (See "Fueling
Your Engine;')
d, Two-cycle engine oil provided with unit.
e. Bar and Chain Lubricant. (See "Bar andChain Lubricant")
f. Screnc_rovided
with your unit. Use the
long end of the tool as a slotted screwdriver, the
srnaJIpipe end as a socket wrench, and the
larger pipe end to remove the spark plug.
g. PhifiipsScrewdriver.
'
B'
.
i
ATTACHING
i
THE
iiiiiii
i i"
i
"
i
i i
HANDGUARD
The.Handguard
is aofprotective
device
designedthe
to
reduce the chance
your left h_nd
contacting
chain if your hand Slips Off the front handlebar.
.:r
Jl,,,
,
............
:...........................
:......................
"
DO not use the saw without the handguard in place.
Always replace the
handguafd immediately if It I
_WARNING
Jbecomes damaged, bmi0enorls otherwise n_moved,
• Llftandcarrythechainsawbythehandlebar,
bythe handguard.
not
• Keep the handguatd securely fastened at all
times, Checkthe handguardscrewseach time the
saw is used.
%
• To instath
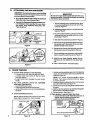
1. Atignthe Handguan_andHandguardCap around
the Handlebaras shownin Rgure 6.
2. Rt themountingpinontheHandguazdinto_'_hole
in the Handlebar.F_gure6.
3. lrksert
the3 mounting saev,sintothe3 h01es
on/_e
HandguardCap.
4. "rumeachscrewwith a Ph{liipsscrewdriver
a littie
at a.time dock'wise,_--'JL until the Handguard
Cap and Handguardmeet and there is no gap.
_n
thetwo pans.
,,,,,,
C.
ATTACHING
THE
,'I"',"''"
SPUR
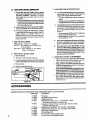
e The ,spuris a special piece ofequipment designed
to,assist the cuffing operation. When assembledto
tl_ _saw, the spurwif{dig into the tree or log and:
-_lr_lieve contact pressure adding ease to the saw[ng operation.
-allow the saw to be more easily rotated or pivoted
i_o the cut.
• To Install:
1 Removebar clamp nuts and bar ctamphousing.
NOTE: Be sureto_
the cardboardpecldngover
the barstudsbetweenthe bar clamp housingandthe ._2. Align thespuroverthetwo hol_ on thebar dampside
of the_.saw,
F_jure7.
3. Insert the two screws and tighten evenly and securely
Figure 7
,,,, i-,,
i
,............
i
D.
iiiii i i ii i iii
ATTACHING
THE
IHII
I
iii
I_TlON'i
l Wear protective gloves when handling
oroperattng yoursaw. The chalnissharpandcan cut
you even when it iS not mcMng!
.,
.......
Do not sta rt engine without guide bar and chain corn,
pletely assembled. Otherwise, the clutch can come off
•,WARNING
1
and sedous Injury can IvP_ult.
e Your saw is equipped with a Reduced-Kickback
Guide Bar and a Low-Kickback Chain.
•
i
BAR AND CHAIN
Use.only the Reduced-Kickback Guide Bar and
Low-Kickback Chain specified for your chain
saw model, when replaclngthese
parts. See
"'Specifications:'
t. "rumthe adjustingscrew counterclockwise
tomovetheadjusting pinalmost as faras itwillgo
tothemar._gure 10,
2. F_silionthe guide bar with the round hole be_the
large sFot.Figure&
3. Mountthe sletted end ofthe guide bar over the bar
mounting s_Jds and the smatl round hole on the
adjusting pin. Figure 8.
4. HoU chain with cuttersfacing as shown in Figure 9.
5. Piece chain overand behind thedutch drum onto
the sL:_'ocketand fit the bottom of the ddve links
between the teeth in the sprockeL
iiiIIIIIIIHIIIII IIIII
Figure 8
6. Start atthe topofthe barand fitthe chain drive links
into the groove around the guide bar. Figure 9.
7. Tumtheadjust_ngscTewclockwise
_
untilthe
chainissnucjinthe guide bar groove. F_gure10.
CHAIN
_
_
8. lnstaJtthe bar clamp housing, replace the bar
mountingnuts,then _htan the nuts f_ngertight
only,
9. Forlow"Chain Tension" instructions below.
Figureg
i
r.
CHAIN
.
iiiiii
i
i
ii
ii
• Correct chain tension is very important:
--a loose chain will wear the bar and itself.
--a loose chain can jump off the bar while
you are cutting.
_a r tight chain can damage the saw andlor
' break,
_e The _¢hain stretches during use, especially
when new. Check tension:
each time the saw is used
._ more frequently when thechain isnew
as the chain warms Upto normal operatingtemperature
•
i
i
iiiiii
ii ii i
ii
i
i i
TENSION
Chain tensioning
procedure:
NOTE: The bar clamp nuts must be no more than
finger tight to tension the chain correctly.
Figure 10
1. Hotdthetipoft_eguidebarupandtumtheadjusting
screw just until the chain does not sag beneath the
guide ba_ Figure 10.
NOTE: Turn screw clockwise_"ikto
tighten
_ension. Turn screw counterclockwise
to. loosen tensior_.
2. Checkthe tension by lifting the chain fromthe guide
bar at the center of the bar. Figure 11.
3. Continue turning theadjusting screw untilthe tension
is correct.
4. Hotdtf_etlp of the guide bar up and securely tighten
the bar clamp nuts with the scrunch.
5.. Recheck tension. _SeeFigure 11.
• Chain tension is correct when the Ichain:
can be lifted-about 118" from the guide bar at
a point near the middle of the bar, and
w*:t_move _J.y
_round the i=_r._
Rgure 11
F. FUELING
YOUR
ENGINE
3. USE THE FOLLOWING
ONLY:
(16 parts gasoline to i part oil)
t. FUEL SAFETY
a.
Use only recommended
,b. MIx and pour fueloutdoors
nO sparksor flames.
c. Use e contatnerapproved
fuel mlxtures.
and where there are
for fuel
d. Do not smoke or aliowsmoking
tool or while using the tool.
f. Move at least 10 feet away from fueling s_e
before starting engine.
(|t2 PT_
4. DO NOT USE:
•
before removing fuel cap.
ho Empty the fuel tank before storing the tool.
i. Store tooland fuel inan area where fuel vapors
cannot reach sparks oropen flames from water
hes;e_s, electric motors or switches, furnaces,
etc.
BIA OIL {Boating Institute of America) --- Does not.haveproper:additives
for air-cooled
2-cycle eng!nes, a_.d can caus e damage to your
unit.
•
AUTOMOTIVE OIL
-- Doesn_haveproperadditivesfor2._cleengine
andcan cause damage
5. HOW TO MIX FUEL AND FILL TANK
a. Pour 1/2 gallon regular unleaded gasoline into
an appreved, marked _;tntainer. Do not mix
gasoline and oil directly in the fuel _ntc.
2' FUEL MIXTURE
b, Addentire measure of engine oil,
• Your tool is poured by a two-cycle engine
which requires a fuel mixture of regular
unleaded gasoline and a high quality engine el{
_ spe_t;_llymade for 2-cyCte,atr cooled engtnes.
The intema_ designof the 2<_3_1e
engine requires
lubricationofmoving pats. Lubricationispro,tided
• when therecommendedmLxtuteofgasolineand o_
is used.
c, Cm,ercontainertightly and shake for one minute.
d, S!owlyremove fuel containercover.
.
e. Add-remainder of gasoline,
f. Ceveroont_nertightlyancl
shake sge}n.
g- Slmviyremove fuel containercover.
h. Slowlyremove fuel containercover. Refer to "Specifical{ons"for fuel cap location.
i. _l tj_ t_r_kU_g a'SpOUtorfunnek
• Gasoline must bec_eanand not over.twomonths
old,:Gasolinewitlchernicaltybreakdown and form
• compoundsth_ causehardstartir_J_.ndd_'=mage
in
•2-6ycie
engines.
•
F
...... I
.,6:i
I '
near fuel or the
e. Wipe up all fuel spills before starting engtne.
g. st0p:engine
-3L_
j. Reinstall the_fuel:cap securely.
The correct measure of gasoline to oil is very
important. Toomuchoil inthe mixture willfoulthe
spark plug,
_CAUTIONJ.'ToolittleOffor incon'ect
ollWill cause
the.....
_al_glneto ovedleat lind
•
Always mix the fuel thoroughly in a container
sincegasoline andoil donotreadily_ombin_ Donot
•
,.i.
"
i
j,,,
.
"
'
Figure 12
i
FUEL
AP
, .................. ,...........
"
"
t
G.
BAR AND
CHAIN
3. ADJU STING THE AUTOMATIC OILER
LUBRICANT
• The Guide _
and Cuffing Chain require
continuous lutx-lcl_fon
In oi_dertoremain In
operating condition.Lubricationisprovided
,by the automatic oiler sy$-_emwhen the oiltank
is kept filled.
-- L_ckof oilwlll qUlek:ly rutn the bar and chain.
-- Too little oit Willcause overheating shown by
smokecoming fromthe chain and/ordiscolora-_mA'rof,theguide bar rails.
• Use Sears 9at and Chain Lubrlcant (#71-36554
- gal. or/f71-36556 - qt.) or clean SAE 30W oil.
•
The adjust_bleautomatic
Oiler is set for maximum output at the factory. Some 1ypes of
cutting will require adjusting the oi|er.
-- less oil is required for soft or freshly cut
wood.
--maximum
ol! Is reqmred for hardwood or
wood that has been cut for a period of time.
The adjusting screw is located at the bottom of
the.saw on the cra_e
ne.xtto the bar clamp
houSingand can be adjusted with the screwdriver
end of the scrench provided with your saw.
_Figure _3.
-- To increase the 0il flow, turn the adjusting
screwcountemlockwise
_.
-- To decrease the oil flow, turn the adjusting
_crewdockwise
_.
In freezing weather oil will thicken, making
it necessary to thin bar and chain oil withe
small
amount
of Diesel
Fuel #I
or
Kerosene. Bar and chain oil must be free flowing for the oi! system to pump enough oi! for adequ ate lubrication.
1. USETHE
FOLLOWING:
3(PFor above -- lubricant-- undiluted.
30o-0°F--95%
lubdcant to 5% Dlese! Fuel
:
"
#1 or Kerosene.
Below0°F--90%
lubricant to 10% Diesel
Fuel # 1or Kerosene,
2.
o
HOW TO RLL THE OIL TANK
a. Gtop theengine.
.
b. "_Jmsaw on its side with oil cap up.
c. Loosencapslowly and waitfor pressureinthetank
¢obe_eleasedbeforeremovingt,hecap. Figure.12_
d. Fill theoiltank.
e. Replacethe 9ilcap securely.
It
i
ii
i
i
i
ii i
i iiii H I
ffthe oiler is adjustedtodecmase the oilflOW,
be sure to readjustthe oilerbefore returning to
typesofcuttingthat_uire greaterlubrication.
When the sew is tun at high RPM's for long
periods of time during certain types of cutring,such as pruningor del:iranching,moreoil
can bedeliveredthan isrequired.TOavoidrunning outof.chain oU before running out of fuel,
checkthe oil"_nk periodically.
IMPORTANT
POINTS
TO REMEMBER
a. Fill the oil tank each time you refill the fuel
tank _o ensure there will be suffic|ent oil for the
(:ham whenever you start, end_un _e saw.
b. Keep sawdust and debris cleaned from the
oil holes in the guide barto allow an adequate
Offflow tOthe _ and chin,
C. Keepspilled and spattered oilwiped from the
unit toavoid sm_ust and debris build-up. Pay
patt_ular attention to oil on thefan housing and
starter assemblyto avoid overheating the engine.
d. it is normal for a small amount of oil to ap
pear under the saw after the engine stops.
This is due tooil drain=ng from the bar and chain
- when not'in use.
" •
m,
J;
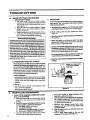
ACCESSORIES
A_i!able through your nearest Sears Store, Catalog Sales Office, or Serv'meCenter_
Catalog No.
Description
FileGuide
File (11/64" Dia.)
TwinPack
D,3pthG_uge Tool,
RePlacement Chain?or _8 - Low-Kickback - _33SL72 drive links) (requires 11164"dia.file)
71.3635
Replacement chain for 32 Low-Kickback-(78 drive links)•
(requires 11/64"die. file)
-7....t-36372:...
_...... Replaeement:Guide._ar--=18"*--J-o-Kic!__
71-365_
71-36527
71-36557
7_1-,3_34
10
71-36373
71-36401
71-36555
7t *36554
7,1-36556
ReplacementGuide
BB_-- -20 "- Low-Kic_ -Symmetrical
Spark Plug-ChampionCJ-4
2-Cycte Engine Oil
Barand Chain Lubricant_gaIIonsize)
Bar and Chain Lubrioant:,(quart-size)
,
USING
Jl=
....
A.
YOUR
J i,i
SAW
,111111
ii
CONTROL
DEVICES
Understanding the control devices on your saw is
an important part of learning how to properly and
safely operate the unit. Figure 14.
_l
2. The two-position Choke helps to star the saw by
con[roiling the air flow tothe fuel system.
IIH
5TART/S3OP
SwtTc,
H
START
_
3.
STOP
4.
•.HALF
i_' STARTING
|
i
The Throttle Lock, out preverrts the trigger from
becoming acc_den'_ e ng_ged. The throttle rock-out
must be pressed before the trigger can be acl_vated,
I
"
'
....
"
''"
L=
LL' 't"_''L' '
........
""
....................
' '
'
.
IN_rRU_ONS
"WARNING
Alway_ wear glo_s; safety footwear;, snug-fitting
clothing;-and eye, hearing, and head protection
devices when operating a chain saw.
1. BASIC PROCEDURE
a. Set the saw on fiat ground making certain the
saw chain isfree to turn without contactit_j any
object. Figure15.
b. Move ignition switch to the "Start" position.
c_ Pushdownon thethrottle lock-out, squeezethe
trigger, press and ho_ down the throttle lock,
then slowly release the trigger.
d. Ad|u_'chokeaccord_rig to"Starting Procedure
for Varyin9 Conditions'_ this page,
e. Hold front handlebarwithlefthand &p|ace right
foot through rear handle to stabilize saw.
f. R_tl starter rope quickly, with your right hand.
• .g.:SqueP, ze th_ttl_ t_ _elease.the throttle_lock
al!owing engine to idle.
•
The Trigge_'acceleraL.,=s andcontrols
the speeder the
engine and is designed to be used with the throttle
lock-out.
5. The YhmttteLockholdsthe,throt_elock-outandtr_gger in position whilethe engine is being started.
Releasethe throttleIockaftertheengine is _
by
lightly,squeezing
thetrigger.
Figure 14
""
The tgnition Switch is moved forward for the "Stz_"
pos_on and re_.rward for the "Stop" p<_ition.
1,
Thechain must not movewhen the engine runsat idle
speed. Refer to "Carburetor
Adjustment,' Page 19,
_LWARNING
for correction.
•h. Stop engine:by mbving the ignition switch to
the "STOP" position (Figure 14).
ST_,R_3NG
PO_
_-F!]ONT
MANI_E.aAR
ANDPt.ACE
It_
F(X_
,,,
,,,,
_
L
,= i
_NROfJGH
HANOLE.
Avoidbodily contact with the muffler when starting or
1 using a warm engine
"WARNING
l
to avoid serious burns.
b. WARMENGINE
i.)Leavech0ke at the off position. Figure 14.
2.) Pull statter:repe until engine runs.
c, FEFUELED WARM ENGINE AFTER
RUNNING OUT OF FUEL
1.) Pullchoke to full choke posit_on. _"igure 14.
2.) Pul! sta_er rope until engine attempts to run.
&) Push choke to the off position. Figure 14,
4.) Pull sta_er rope until engine runs,
3. IMPORTANT
POINI_S TO REMEMBER
a. When pulling the starter rope, do not use the full
_'_T'_Y_ofth_rope a.sthL_can cause the rope to breal<.
Do not let thest_er rope snap back. Hold the handle and let the rope rewind slowly.
b. If engine floods, let the unit set for a few minutes,
then r_peat starting p_um
using the half-choke
.........
'position=
.............................................
c. Forcold v,__.ather
starting, a!l_wengine to warmup
(1-2rain.)at the half-chokeposhion,then move choke
to the closedpos_on. Do no,cut wft_ the chokeat
the"fU!_"or "half' position.
....
FigU re 15
2. STARTING PROCEDURE FOR VARYING
CONDITIONS
NOTE: Be sure to follow "1. Basic Procedure;' as
described on this page.
a. COLD ENGINE
I.) Pullchoketo full chokeposition. Figure 14.
2.)Pullstarterropeunti!engine attemptsto run.
3.)Push chokeuntil half positionis felt. Figure 14.
4.) Pullstarter ropeuntilengine runs.
5.) After 5 secondwarm up, push choke to the off
position. F_jure 14.
.........
:
TYPES
A.
OF CUTTING
BASIC
CUTTING
TECHNIQUE
1. IMPORTANT POINTS.
a. Cut wood only. Do not cut meta!, plastk_s,
rnasorm/,non-woodbuildingmatenals,et¢.Donot
useyour saw_opryor shove awaylimbs, rootsor
otherobjects.
b. Stop the saw if the chain strikes a foreign
object. Inspect ",heunit and repair or replace
parts as necessary.
c. Keep the Chain OUt of dirt and sand.Even a
smaitamount ofdirtwill quicklydull a chainand
thus, increasethe possibilityof kickback.
KICKBACK WARNING
Kickback can occur when the moving chain contactsan
ob]ectat tlt e-upper portion of the tip or the guide baror
when _hewood closes in and pinches the sawchain in
the cut.Contact at the upper portion of the tip of the
guide bar claShcause
the chain to dig into the object and
stop the chain fora_ instant. The result is a lightning
fast, reverse reaction which kicks the guide bar up and
back toward the operator. If the saw chain is pinched
along the top of the guide bar, the guide bar can be
driven rapidly back toward the operator. Either of these
reactions can cause loss of saw control whichcan
result in serious injury.
2. UNDERSTAND REACTIVE FORCES
Pincb-Kickbackand Pul_-In occur when the chain
•is suddenly stopped by being pinched, caught, or
by contacting a foreign object in the wood, This
r_..sults
in a reversalofthe chain forceused to cutwood
at_l causesthe saw _omove in theopposite directionof
chain rotati0n.Eitherreactioncan resu{tin lossofc0ntmt and Doss_teserious personalinjury.
Pinch-KiCkback
--o_curswhenthe chain, on topof thebarissuddenty
stopped when the top of the baris usedforcut_ng.
r_dty dd._ the =_.awstrai_, back toward the
operator.
PROCEDURE
3_
,
P_ce cuttinga few smaillogsusingthek_lowingt_hniqueto getthe'Teer'of usingyoursawbeforeyou begina
major sawing operation.
_L Accelerate the engine to full throttle just before
entering the cut by squeezingthe throttletrigger.
b. Begin cutting with the spur against the wood.
Figure16.
c. Keep the engine at full throttle the entire time you
are cutting.
d. Allow the chain to cut for you; exert only light
downward pressuP_ ff yoUforce the cut, damageto
the bar,chain, or enginecan result.
e. Release the throttle trigger as soon as the cut is
completed, allowingthe engineto idfe.Ifyou runthe
saw at fullthrottle withouta cuffingload,unneoessaty
wear can occurto the chain, bar,and engine.
f. Do not put pressure onthemat
theend ofthecut
to avoidlosing controlwhen tl-_cut iscomplete.
g: Stop the engine before setting the saw down after
cutting.
=
• P_Jli_ln--.can occur when the chain on the bottom of the
bar is suddenly stopped.
--pulls the saw rapidly forward.
L_
TREE
FELLING
i
=u.=l
i i . J=
j
==
i
TECHNIQUES
1- PLAN YOUR SAWING OPERATION CAREFULLY IN ADVANCE
a. C_s._ _.e work area, You need a clear area at_
around the tree where you can have secure
footing.
b. Study the natural conditions that ca n cause
the tree to fall in a particular direction:
12
Figure 16•
B.
=,lll=l
BEGIN CUTTING WITH
THE SPURAGAINST
THE LOG
2.) TheLEAN ofthetree,
.3.} WEIGHTED with BRANCHES on one sfde.
4,} SurroundingTREES and OBSTACLES,
c. Look for decay and rot, If the trunk is rotted,
it coutdsnap and fall toward the operator.
d. Check for broken or dead branches which
could fall on yo'0while cutting.
e. Maim sure there isenough room for thetres to
fall Ma_r_n adis_eof_'_
_ee _-f_m
the nearest person or_her objects.Enginenoise
can drow_ out awam_ng carl
f. Remove dirt, stones, loose bark, trolls,.
staples, and wire from the tree where cuts
g. Plan to stand on the uphill side when cut.
ttng on a siope.
h. Plan a clear retreat path to the rear and
diagonal tothe Ilne0f falLF_gure 17.
2.
FELLING SMALL TREES -- LESS THAN 6"
|NDIAMETER
a. If you know the direction of fall:
1.) Make a singte felling cut on the side away
from the direction of fail
2.) Cut aJlthe way through.
3.) Stop the saw, put it down, and get away
quickly on your planned retreat path,
b. If you are not sure which way 1he tree wili fall,
use the notch method de_soribed for felling large
trees,
_,WARNING
DO NOTCUT:
-- nea_eleclricatwires or buildings.
m if you do not knowthe direction of tree fall.
at night since YoUwill not be able to see well.
---during I_d weather ---strong wind, snow, rain,
etc.
.3. iFELUNG
LARGE TREES --
6"_DIAMETER
OR MORE
T'e notch method is used to cut large trees. A
notch is ,cut on the side of the tree in the desired
direction of fall. After a felling cut is made on the
opposite side of the tree, the tree willtend to fall
•into the notch.
NOTE; If.thetree has large buttressroots,remove
' before making_the notch. Cut into the buU.resses
vertically,then horizontaJly.
Figure 18.
.a. Make thenotchcut. Figure 19.
1.) Cut _-_ebottomof the notchfirst,through1/3
,of the diameterof the bee.
2.} Complete thenotchby makingtheslantcut.
3.) Remove thenotchofwood.
b. Make lt,_efelling,c_t on ,the opposite side of the
notch about ,2' higher Ihan the bottom of the
¢: Leave enough uncut wood between the felling
,cut and thenoah to form a hinge,F_gure20.
; ,,=
.
...........
•NOllE: Tt_e,-hingehetps-to keep the tree from
:. twistir_jandfallingin the wrong direction.
.d. ,Use awedge if thereis any chance that the tree
will not fallin thedesireddireclJon.
Figure 19
Figure 20
_WARNING
Stayon the uphill side of the tree to avoidthe tree rolling or sliding downhill into you.
NOTE: Before the felling cut is complete, drive
wedges toopen up thecut when necessary to controlthedirectionoffalt. Use wood or plastic wedges
but never meta!, to avoid kickback and chain
damage.
Be alertforsigns that theBee is ready to fall:
1 .) crackingsounds
2.) wideningof the feUingcut
3.) movement in the upperbranches.
6 As .the tree st,_rts 'to fail, stop _e saw,"put it
down, and get away quickly on your planned retreat path.
..g, -Be extmmely.cau_usw_.p_____/_J._. L,-ees_
• maybepoodysupported:When a tree doesn't fall
compiet_,,settf_esawasideand pulldownthettee
with a cablewitch, block and tackle or tractor.To
avoid injury, do notcut downa partiallyfallen tree
withyoursaw.
DON'T PUT YOURSELF IN THESE PosmoI_S
tl
i¸
I
I
Checkthe Imdince.
Don'tc_tonv_ght=d slde.
13
iiiii
C.
i
ii ii
i1|1
m
BucKING
Bucking is the term used for cutting a fallen tree
to the desired log size.
1. IMPORTANT POINTS
2flO CUT
Cut only one log.at a time,
b. Cut shattered wood very carefully. Sharp
pieces of wood could be flung toward the
operator.
TSTCUT
<:. Use a sawhorse to cut small logs. Never
allow another person to hotd the log whi_e cutting and never hold the log wi_ your _j or foot.
_
_--"
PRESSURE
SIDE
Figure 21
I
d. Give special attentlon to logs under strainto
prevent the saw from pinching. Make the first
.cut on the pr_3sure side to relieve the stre<.,s
OVERCUT
1-
.,_onthe log, 'F_jure22.
Je-.-{_:not cut in an area where togs, limbs and
;ro0ts are tangled SUCh as in a blown down
,area. Pull outexpo_d and cleared Iogsfi_st.Drag
the logs into aciear _r_before
cutting.
UNDERCUT
Make the first bucking cut 1/3 of the way
through the log and finish with a 2i3 cut on
the opposite side. As the log is being cut, it wil|
_end to bend. The saw can become pinched or
hung in the kx3 if you ,make the first cut deeper
than 1/3 of the diameter of the log.
Figure 22
WEDGE USE_DTO
HOLD CUT OPEN.
/
2. TYPES OF CUTTING USED FKjure22.
_Ovemutting - beginonthetop sideofthe log with
spur against the log; exert light pressure
downward.
Undercutting -begin onthe undersideoftheiog
withthe spuragainstthe log;exertlightpressure
upward.Duringundercutting,the saw wil!tendto
push_ck atyou.Be preparedforthisreactionand
holdthe sawfirmly tomaintain control
Figure 23
I
"AWARNING
I saw
ever
turn the
saw upsidein this
downposition.
to undemut.
cannot
becontrolted
!
......
.
1st Cut.,
12ndCut J
The
WARNING
ifsaw becomes pinched or hung in a log, don't try to
rome:it ouL You can Iosecontro! of the saw resulting in
personal injuryand/ordame_e
to the saw. Stopthe saw,
drive a wedge of plastic or wood into the cut until the
s_w _a_. be m:v_..ved _!y.
_gu_
2_ PJ=_r_ the saw
and carefully reenter the cut. To avoid kicld_ack and
chain damage, do not use a metal wedge, Do not
_ttempt to restart your saw when it is pinched or hung
1st
Cut
USING
,ANOTHER
LOG AS A SUPPORT
-_ : ._-Figure 24
iAi
e
in a log,
" 3. BUCKINGmWlTHOUTASUPPOR"
•a. "_Overcut with a 1/3 diameter cut,
b. Roll!og over and finish with an overcu[
-t4
..
Figure 25
{Ai
4. BucKING -- USING ANOTHER LOG AS A
SUPPORT (Figure 24):
b. tn areaB:
1.) Overcut 1/3 of the waythmugh
2.) Finish with an undercut.
Do not stand onthelogbeing
cut. Any po_don can roll
_i causing loss of footing
_i, WARNING
and control;
the leg.
t
I
a. Inareah
1.) Undercut 1/3 of the way through the tog.
.::20 Finish with an overcut.
b. In area B:
1.)Overcut1/3oft_e way throughthe log.
.....
.:2,)Finishwfthan undercut.
BUCKING--
,
USING A STAND (Figure 25):
a. In areaA:
• .1.)Undercut1/3of the waythroughthe log.
2.)Finish wRhan overcuL
,
D.
,
i
i
DE'BRANCHING
i
AND
U_SECOMMON
iiiiiilUl i
i
iii
PRUN|NG
2.
•
Work slowly,
keeping both hands on the saw
with a firm grip. Maintain secure footing and balance. '
• Watch out for springpoles.
Use extreme caution
when _:uttir_j srna_ _J.ze limbs. S_
material__.an
catchthe sawchain and be whipped toward you or pull
•.you offbalanc_
• Be alert for springback, Wat_ out for branches
that are bent or under pressure as you are cutting
to.avoid being struck by the branch or the saw when
the tension in the wood fibersis re_eased.
• Keep a,clear work area. Frequently, dear branches
out:of the way to avoid trj'pp_ngover them.
l Never climb into a tree to debranch or prune. Do not
stand on ladders, platforms, a log or in any position
J which can causeyou tolose yourbalance or control of
J the saw.
":I
,&WARNING "
SENSE
M A_NTAJN SECURE
i
iiii
ilU
i
lUllUUu
FOOTING
i iiiii
ii
PRUNING
&
Limit pruning to limbs shoulder height or
below. Do not cut if bra.nches are higher than
your shoulder. Get a professional to do the
job.
b. Refer to 'Figure 27 for the pruning technique.
1.) Undercut 113of the way through the limb
near the trunk of the tree.
2.) Finish with an overcut farther out from the
trunk.
3-) Keep outer the way of the falling limb.
40 Cut the stump flush near the trunk ofthe
tree.
_WARNING
Be alert for and guard against kickback. Do not allow
the moving chain to contact any other branches or
objects at the nose.ofthe guidebar whend_bm,nchir_cj
or pruning. Allowingsuch contact can result in serious
injury.
"I.....
[I
1. .D:EBRANCHING
-_::- AlWayS debi_nch a tree after it is cut down.
Only then can debranching be done safely
:_ and properly.
•b.' Leave the larger lower limbs to support the
• __tree as you work.
c. Start at the base of the felled tree and work
towards the top, cutting branches
and
limbs. Remove small limbs with one CUt.Fig' Ure26.
'd: Keep the tree between youand the chain.
" "
Cut from the side of the tree opposite the
_-a_,ch-y_ ace_t_'_.
,e; Remove
larger, supporting,branches
with
the 1/3, ?d3cutting techniques described in
the bucking section.
f-
-.
.Remove,srnali .iimbs
_with one cut..
,_JL_
Figure 26
i
j_,
X#"
tHiRD
2//
w
Always use anovemut tocut smalland freety
-hanging llmb_-Undercutt_ngcan causelimbs-to-
fall and pinchthe saw.
.........
R! Ill
Figure 27
°=
t5
MAINTENANCE
i
{i re{ill
Ii
i
i
A good maintenance
program of regular inspec-,
tion and care will increase the service life and help
to maintain the safety and performance
of yOur
•
saw,
• Make all adjustments
or repairs (except car*
buretor adjustments) with:
spark plug wire disconnected
engine cool as opposed to a unit that has
just been run.
A.
GUIDE
BAR AND
Increase the service
Chain by:
Checkthesawforloosebolts,
scmws, nutsandfit.
tings regularly. Loose fasteners can cause an unsafe
condition as v_e!las damage to yoursaw. Toolsrequired
are described on page 7.
_1_ WARNING
Haveail chain saw serviceperformed by your Sears
Service Center with the exception of the itemsllsted
in the maintenance section ofthlsmanual
CHAIN
life of your Guide
Bar and
_Using
the saw properly and as recommended
in this_manuaL
_Maintaining
correct Chain Tension, page_J.
_ProperJubrication,
page 10.
=Regular maintenance as described in this section.
1. CHAIN
MAINTENANCE
• Sharpen the chain when:
_wood chips are small and powdery. Wood
chips made by the ,saw chain should be
about the size of the _;eeth of the chain.
--saw has to be forced through the cut.
--saw cuts _o one side.
|CA(JTIONiJ Always wear gloves when handling
the chain. The chain is sharp enough to cut you
even though it is too dull to cut wood.
a. SHARPENING
Items required:
Gloves
11/64 adia. File
6 _ Fife Holder
INSTRUCTIONS
Medium Flat File
Depth Gauge Tool
V_se
i,) StoP,,_ngine and di¢_'onnect spark plug,
2.) Adjus_ _he chain for p_'ol_r tett_ion;page
8.
3.) Work at the midpoint of the bar, moving the
chain forward by hand as each cutter is
filed.
4.) Sharpen cutters.
a. ) Pos_on tileholder (with 11/64_round Be) oncutter top plate and depth gauge. Figure 28.
b. ) Hold,the file holder leve_ with the 30 ° guide
mark paraltel to the center of the chain.
F_jure29.
_c.) _File from inside toward outside of cutter,
straight ac_'oss, on forward stroke only. Use
2 or 3 strokes per cutting edge. _gure 29,
d. ) Keep all cutters the same length.F_jure 30.
......
Figure 32
Figure 33
_, WARNING
._, ) F_!leenough to remove any damage to cutting
_ge (sicle&{Spp]&-_)-6fc_tt_r.-F_j_Jfe30:.............. Maintain -the-LPr°per-hoQ k-a og_--a-c-c° -rdii---ng--t°
-the.
f o) File chain to. m_et specificationsshown it_
manufacturer s specification for the chain you a_re
using. Improper hookangle will increase the chance of
Figure31.
kickback which c_n result in serious injury._gure 31
&33,
:16 •
5,) Correct Depth Gauges
a.); Place depth gauge tool over each cutter
• depth gauge. Figure 32,
b.) File level with the flat tile if depth gauge is
higher than the depth gauge tool,
c,) Maintain rounded front corner of depth
gauge with a fiat file. Figure 32&33.
NOT_: The very top of the depth gauge
shoutd be flat withthe front half-rounded • off with a flat tile.
'
I
&
WARNING
Depth ga_e
tool is required to insure proper depth
gauge. Fifi_he
depth gauge too deep wilt increase
the chance
iniury.
Of kickback
b. CHAIN
which-can
result in serious
RIEPLACEMENT
1.) Use only the Low-Kick Chain specified for
_your saw in "Specifications"
for replace.
.Z,:
:_:.ment chain.
_)_i;Reptace
the chain when cutters or links
.... br_,ako
3.) See your Sears Service Center to replace
and sharpen individual cutters for match. ing your chain.
4.) Atwayshave a worn sprocket replaced by
...... y0urSearsServiceCenterwheninstalling
a new chain to.avoid excessivewear to the
chain.
2. GUIDE BAR MAINTENANCE
• Conditions
which can require guide
maintenance:
_saw
cuts to one side
--saw has to be forced through a cut
bar
--inadequate
supply of oil to bar and
chain,
• Check the condition of the guide bar each
time the chain is sharpened. A worn guide
bar will damage the chain and make cutting more difficult.
• Replace the guide bar when:
--the inside groove of the guide bar rails is
WON'I.
--the guide bar is bent 0rcracked.
• Use only the ReducedJ<ickback
Guide Bar
specified for your saw in "Specifications"
for
replacement.
a. Remove the guide bar to Service.
b. Clean oil- holes at least once for each five
hours Of operation:Figure
34,
c. Remove Sawdust from
the guide bar
groove periodically
witt_ a putty knife or
a wire, Figure 34,
d. Remove buKs by filing the side edges
of the guide bar grooves square with a
'flat fi-le:Figure 35.
e. Restore
eqUateedges
to an uneven rai!
top by filing with a tlal file. F_jure 35.
REMOVE SAWDUST
FROM GUIDE BAR GROOVE
CORRECT
GUIDE BAR WORN-GROOVES
GROOVE
FILE EDGES
SQUARE
OIfL HOLES
Rgure 35
13. SPARK
ARRESTOR
: -dep s ts
.
AND SPARK
PLUG
bu.dup onthe sparkar-
' restor, aslhesawisusedand
must be removed to
avoid creating a fire hazard or causing engine damage.
sp K
• Rep_v_ethesparkarrestorifbre.aks occur.
............
Figure 36
• __l?;the
spark arrestor.clean
at alt times.
.C]_:_--_asrequired
--at least once foreach,25-30
hours of operation.
items required:
wire brush, 3/8 _ wrench
a. Disconnect the spark plug wire.
-,b. Removethe heatshield. Figure 36.
.c: ..Een_ore i:__. o'eenS__m._e .d.iff.u_.F: _
d, Clean the screen with a ._re brush or replace it
breaks are found.
e. Reassemb_ parts.
2. SPARK PLUG
•
Replace the spark-plug
Stock No, 71_6401.
when
I
If you perform thts maintenance
the "Caution"
below.
necessary.
Use
yourself, note
|CAUTION:IDo not mix chrome-colored fan
ho__sln_g.._...W.._ ._tf:_...b..!.a.c__l_=_qy_l_de
r.
.shroud screws.Otherthan color,thesescrewsare
similar In appearance; but If interchanged, they
can strip out andJor cause, permanent engine
damage.
17
i
C.
iii
ii
STARTER
•
ii
ii
ROPE
i
i
ii
REPAIRAND
i
i i
i
A Starter rope that breaks next to the pulley
can be repaired.
Replace the starter rope if the rope breaks more
than 2-3 inches away from the pulley as the rope
will be too short to repair properly,
•
_WARNING
Nwa3tswear eye protection when scrvic.
inS the starter rope, The ,recoil spdng
the pulley is under tension. Ifthe
_pdngpops out, serious injury can
result.
INO'_: The re¢_]spring,locatedbeneaththepulley,
is under tension. If the spring pops out, it will
requireconslderable time and effort tOreinstall.
Forthisreason, you may want to let yourSears Service Center handlethis repair. If you do tryto repair
thestarter rope and the recoilspdng pops out,take
the unit to your SearsService Center.
1.
-
_
i
REPLACEMENT
Rei_ove the four screws on the side of the fan
•housing. Figure38.
_CAUTION:J Do not mix chrome-colored fan
housing screwswith the black-colored cylinder
shroud screws. Other than color, these screws
are similar in appearance; but if interchanged,
they can strip out andlor cause permanent
engine damage.
Remove the fan housing.
3. Ifthe starterrope isbroken,proceedto step'14"]fthe
starter rope is notbroken, releasethe tension on the
spring asfollows:
a. Pult about t2 inches of rope from the pulleyand
• catchtheropeinthenotchasshowninRgure 38.
b. Tumthepulleycounterctockwise _
untilthe
spring tensionis released.
4.
Unthread thepulleyscrewinthecenterofthe pulley
withaS/32" ai_enwrenchunti! the pulleyassembly
can be removed from the _an housing.
5.
lift _e pulleycamfu#y
whi3egentlytwisting t_ePUl!ey
counterclockwise_
. Remove the old rope.
2.
6, Move_from
thefu_ tankand rne_,e endofthe
new rope to go into the pulley.
7 Allowthe melted end tO drip once: thenwhile the
ropeis still hot, pull the melted end through a rag
to obtain a smooth, pointed end.
8.
Feed theropethrough the roundstarterholein the
.thefan housing. F_gure39.
g, Guk_eropeins_de
_
_en thr=ucjhtops;_epuzk_/
hole by pushingthe rope from the undemidehole
with a small round object, such as a Phillips
screwdriver.See inset. F_um 39.
10. T_ a knotintheend ofthe rope leavingno morethan
a 3/8to 1/4inch tail and pullthe knotsnuglyinto the
cornerof the groove in the pulley.Figure 38.
11. Tuckthe _ailon the rope knot into the innercuwed
sectionto avoidinterferencewiththe ft,,heel. Figure
38 &4O.
t2. Set _ pu]l_f_
inthe housing;pushitdown
and engagethe spdng. :
l&
T_ghten_hepu!!ey screw. DQnotovertightenscrew.
NOT_: Ifyouremovethepulleyscrewfromthepulley
makesurethe starter dog, retainer,cam and wave
washer are positioned and installed properiy as
shownin Figure39. Ifpar_ havebeencteaned,apply
a small amountof grease to bothsides ofthe cam
and wave washer.
14. Makesure thecam :isinstalled Onthestarterdogin
the directionshow_in Figure39.Also makesurethe
wavewasherissealed around the top outeredge of
the retainer and not caught between the top of the
retainerand the pulley screw.
15. Catch theropein the notchin the pulley.Figure40,
I6. "rum the pulley clockwise _
to wind up the
spdngu_t itwillturnno morewithout forcing.Donct
/etgoofthepu/ley.Letthe pulleyunwindone full turn
and releasetherope from the slot.Continuetohold
pulley.
17. Hold thepulley, pul! thestarterrope tothefu!textent
oflengththen let the rope rewind s!owl_
18. Reinstallfan housing and the four chmmecotored
screws.Tightenscrews securely.
r"_...,--------'--'_M
:/
._-,-SCREWDRNER
F'_r_
"
Figure 39
_"
TURN
PU L LEY
COUNTERCLOCKWISE
_
TO RE LEA._E
TENSI ON
:18
Figure 38
TURN PULLEY
CLOC_VtS_
TOWINDUP
-SPRING
Figure40
WAVE WASHER
•
mllul
ii
iiiii
,,,,i
i
,,,,,,,,,,,
, i,m
D.
CARBURETOR
ADJUSTMENTS
•
Poorengineperformancecanbearesultofother
causes such as dirty air filter, carbon build-up on
muffler outlets, etc,See "Trouble Shooting Chart"
,before proceeding with carburetor adjustments,
e
The carburetor has been adjusted at the factory
forse_ level conditions. Adjustments may become
n_
il_the unit is used at significantly higher
._altitudesorif y0u no/ice any of/t_ followingcond_ons:.
_WARNING
Recheck id{e speed after each adjust ment below. The
chain must not move at idle speed to avoid serious
injury.
_ Chain moves when the engine runs at idle
speed. See "2. Idle Speed Adiustment:'
-_. Saw:will not idle. See "2. Idle SpeedAdjustment, and "3. _Low Speed Mixture AdjustmenU'
.... Lossofcuffin 9 power which isnot corrected by
•aWfiltercleaning.."See "5. High Speed Mixture
Adjustment."
-- J=nginedies or f_sltates when it should accelemte;'See "4. Acceleration Adjustment"
3. LOW SPEED MIXTURE ADJUSTMENT
a, Allow engine to idle.
b Turn the Low Speed .Mixture Screw Slowly
clockwise
_
until the RPM starts to drop.
Note the position.
c. Turn theLowSpeed
MixtureScrewcounterclockwise _
untiltheRPMspeedsupand_a,-ts
to drop again, Note lhe position.
d. Set the low Speed Mixture Screw a_ the m_dI;_,intbetween the two positions.
. AOCEL_RATION
ADJUSTMENT
If engine dies or hesitates instead of accelerat:ing, turn
the Low Speed Mixture Screw 1/16of aturn at a _ime
coun_er,c!ockw'_e _
until you have smooth
acceleration.
. HIGH
SPEED MIXTURE
ADJUSTMENT
CAUTION: j Permanent damagewiil oc_jr to any
2-cycle engine if incorrect carburetor adjustments am made,
• Iftheunitwillnotoperateproperlyaftermaking
these adjustments, take the unit to your Seam
Service'Center.
_WARNING
t
The chain will bemoving
dudngmost of thisprocedure__l_
Wear your protective gear _nd observe al! safe_
I precaut,ons.
1
1. PREPARATION
'.._..
a,_,Stop engine.
.
b. Use'a. fresh fuel mixture with proper gasoline/
oil r_io.
• c_ _ace_thes_yonasolid,
flatsudace and maP,esure
the chain will n_ contact any object.
d. Locate the three (3) carburetor adjusting screw
openingsto the rightofthe air _lter cover.Figure 41.
e: Start theengine and allowengine to idte3 minutes
lo warm up. The engine must be at operating
:temperature forproper ad_jJ_t_J_s to be m_de.
=
HHHH
/
H'_ ,N,H
;
U"
/
............
SPE_D SCR_'W
I
...... i:
...........................
-
"'
Figure 4_1
- -
,
2. IDLE SPEED ADJUSTMENT
a. Allow engine to idle•
b. Pd_ustldleSpe_dScrew untilenginecontinues_o
run without _Jing and without the chain moving.
Turn screw clockwise
_
to increase
engine _Tpeedif engine stalls or dies.
Turn screw counterclockwise
_
tO slow
engine down and/or to keep the chain from
turtiing.
c. No further adjustments
are necessary
if the
chain does not move at idle speed and if perfor*
mance is satislacto ry.
NOTE:Be
sure to properly prepare the s_w as
described in "1. Preparation" l_low, before making
anyadjustments.
•
,
-
CAUTIONS. Adjustments as small as 1/16 of a
turn can affect engine performance. It is important to turn the screw only 1/16ofa turn per adjustmentand test the performance of the saw befo re
m_king further adjustments.
a. Make a_est,cut.
b. Adjustthe High Speed Mixtu_ Scr_w l!16 of a turn
as follows:
--Clockwise
_
_ifsaw'smokes or loSespower,
-- Counterclockwise
_
if the saw has speed
out of the cut but Jackspower in the _ut.
Repeat te_. cut.
d. Continue 1/16 of a turnadju3tments untit the saw
runs smoothly in cut.
j C_ALtTION: JAtoo lean high speed setting (clockwise _
adiustment) will cause engine dam.
age to any 2-cycle engine from overheating and
lack of lubrication
:-Never set the high speed mixturescrewsofarclockwise
_-_
th_youh_e
high engine speed but lack power while cutting,
An effective approach follows:
-- Turn screw counterclockwise
_
until
engine loses power while cutting.
_-__Thenr,_Ltum."
.S.C.t_=_r.C.lO_kwise.._
ir_ 1l_; of a .....
turn increments
only until the engine has
power while ,cutting.
NOTE: _f the unit will not operate propedy after
making theseadjustments,
take _e un_ to y_urSears
service center,
19
-
l!li
ii
ii i | ,i
E.
CLUTCH
AND
,,,, i,,,,,,,,, iiii iiiiiiiii
.
iiii ii iii i
DRUM/SPROCKET
"H"""
F.
I"
'ii
•
A dirty air filter:
-- reduces cutting power
m increases fuel consumption
•
Clean the air filter:
frequently, especially in very dus_ cond'_ons.
_II_WARNING
Do not start engine without Guide Bar, Chain, and Bar
Clamp Housing completelyassembled.
The clutch can
come off without the g uide bar and chain completely
assembled and serious injury can result. The clutch
•shoes and drum can separate causing the clutch to
violently fly apart and serious injury can result.
• ''
AIR FILTER
always after 10 tanks of fuel mixture
of operation, whichever is less.
or 5 hours
• Replace the air filter if any damage occum to it,
•
jCAUTION:j
Never operate the unit without the
air filter in place to avoid damage to the engine.
Take the saw to your Seam Service Center for
full clutch inspection
and service after each 100
hours of operation, it is recommended thatyou do
notttyto service the dutch or dtum/sprocketyourself
unless you are a competent small engine mechanic
and'have the proper clutch service tools. Proper disassemblYat_d repair of the clutch is extremelyimportant to the:!ife of the engine and _e safety of the
operator.
1.
2.
• Clutch maintenance
is required when:
-- the chain continues to turn while engine idles
after the idle speed screw has been adjusted
tO its capacity.
slippage occurs during a cut.
a chattering noise occurs during cutting.
•
Clean the clutch, drum, sprocket and surrounding
area daily during heavy use of the saw. Check to see
that the dutch drum turns freely and smoothly.
•
Inspect the sprocket regularly for wear. A worn
sprocket will make the chain run er_aticaJly and wilt
shorten the life of the bar and chain: Figure 42.
•
Always have a worn sprocket replaced by your
Sears Service Center whenever a new chain is
installed in order to gain full life expectancy of
the chain.
3.
4.
5.
Items Required: soft bristled brush, such as a paint
brush.
Clean off ther..aYouretorcover and the area around it.
Pull choke to the ful} position (Figure 14, page 11)to
prevent dirt from entering the carburetor.
Remove the carburetor cover.
Removetheairfiitercarefully.
Rgure4&
_
singletop screw andseparate the two halve_
_CAUTION: ] Do not use gasoline or other flammable liquid to clean the filter toavoid creating a
tim hazard.
6_
7.
8.
9.
10.
_
filter in soap and water.
Brush away all dust and debris from the fitter.
Allow filter to dry.
Reassemble fitter.
Brush away all debris from surfaces on which the f_tter
ism be placed.
11. Rel_ace the fitter and carburetor cover.
SPROCKETWEAR
Figure 43
Figure42
G.
STORAGEWhen your saw is to be stored for over 30days
ways:
.1. DPJ_r_
5.eJta__in asafe manner (see "I_
to Remember;', ' page g).
aF
3. Drain oil tank..
4. Remove, dean, a'nddry the bar and chain.
Poir_ •
2. Start engine and aliow to run at idle speed until the
engine s_ops.
S.._Gtorethe chain ",_a c_,,t_er
vent rust
fi_-_
_d to pre-
6. Applya coatingof oilto the entire surfaceof the bar
and wrap itin heavy paper, clothor plastic,
fuel system.
_CAUT]ON:
t Wear protective gloves wh_ handling the chain. The chain is sharp and can cut
you even when it is not moving,
;,0.
8, Storethesawin a dryplaceout ofthe reachofchildren
andz_way
from wherefuel vaporscan reachsparksor
openflames from hot water.heaters,furnaces, ere.
•
H.
TROUBLE
.,Hi H
LIIIIII,IIIIIII
ill
SHOOTING
IIIIIIIIIIIIIIIIIt
_
III
TROUBLE
CAUSE
_€_IGINE WiLL NOT START
6, C_mpression tow•
1. Idtespeed set too low.
I.
l,J
Adjustidlesp_-_°ds_'ewc{ock'wiseto
increase speed.
2. Adjestidle speed screw countetctock-w_se
toreduce speed.
3, See,CarburetorAdjustments.
,5. -Contact your _ars ,',',',',',',',','_
ervi¢_ Center.
,,, ,=u_
1. Air filt;eris dir_.
2. Spark plug fouled.
3..Carbon build-upon exhaust portson muffleroutlets.
4. _-_.arburemtt_:_uires adjustment.
5. LowCornpression.
ACCELERATE LACKS
POWER OF;LDES
IN--CUT
III
Movcswitsh to"Start;'
F_{_-_aJ_k
with cor_'_ fuel mixture.
Install new plug/check ignition _stem.
See <Jtartingin_ructlons.
Check forditty fuel fitter;cleam Check for
kinked or spZitfuel line; repairor replace_
6. Contact yout,Se,_u'sSeryice Center-
3. Low speed screw requires adjustment.
4. Crankshafts,_=_swom.
S Compressionlow.
WILL_N=-
U,l,ll_lllllllllll
,,
1.
2,
3,
4.
.5`
2: Idle speed set too high.
ENGINE
.
REMEDY
1. Ignition Swilch off.
2, Fuel tankerupt.
3. Spad_Plug notFAng.
4..F._ineffooded•
5. Fuelr_z reaching carburetor.
ENGINE WtLk NOT IDI I=
PROPERLY
i
CHART
1_
2*
3,4.
5.
Clean or replace,air filter.
Clean or replace.Spark Plug andregap.
Comact yc_JrSears _rv_
Center.
See_arburetor Adjus_'nents.
Cont;_t your Se_rs SeP.,_ceCente_
.......
,..., ....
ENGINi_ SMOKES
_-X_SSIVELY
4. •Highspeed need_ requites adjustmen;.
5. Crankcaseleak•
1. Pu._hChoke in.
2, Clean or mp_ace air filter.
3. Em_,y fuel tank and refillwith cor_ec_fuel
mixture.
_.. _Z.ee_arburetorAdjustments.
5. Contact you_Seers Ser_ceCenter.
1.
2.
3,
4.
5,
6.
F_nRousing dff'ty.
Fue_M,3ctureincm"tect.
SparkPlug incO_-_:t.
HighSpeedMixturesettoolow.
Catbonbu_d--uponsparkarmstorsCr,_n.
.Carbonbuild-uponaxh_a,'_po_ormuffletOLlliet_
1.
2.
3.
4.
5.
_.
"L
2,
3.
4.
O_tank empty.
Imp_'opedyadjestedoiler=(If so equipped:)
Oil pump or oil filler clogged.
Guide bar oilhole blocked.
1. Choke partiallyon.
2., AirfiRet'dirty.
3. Oil richfuel mixture.
.....
"ENGINE
RUNS HOT
,,,,,
oi tNAomu r-o.
ANDCHAIN
LUBRfCATiON
cHAiN
........
,
,,,
,..H ........
...,
I. Fill oil tank.
2. Adjus_oiler.
3, COntact your Sea_3 Service C_n[er.
4. Remove bar _ cle_n.
,
1. Idlespeed'requiresadjus_ment.
2. Qutch requites repair,
IDLESPEED
,.,,.
Clean fan housing.
See F_tgineFuel Mixture.
Replace withco_
plug.
SeeC_rbur_0rAdjustments•
Cteansparkar_e_orscreen.
_;ontactyourSearsServ_ceCenter.
1, -See,Carbu_tor Adjustments.
,,,,,,,,,,,
CHAIN DOES NOT MOVE
WHEN FJ_IGINE,IS
ACCELERATF_.D ................
I.
2.
3.
• 4.
Chain tension too tigtrt.
.Ca_uRtor requires adjustmenL
Guide b_rails p_
_l_h
sIipp!ng.....
1. S_eChain Tension,
2. See Cat'buteto_'Mjustments.
3," .Repair.or rep!ae._.
4..:Contact yourSeam ServlceCentec
I. Chin tension incorrect.
2. Cuttersdamaged afler striking foreign
•material:
-3,. Chain wear du_ toconta_w_ diPt;sand
orfrozen w_X_.
4. Craters dull improperly sharpened; dept.h
gauges too hlgh.
5. Spresket worn,
[
lUl
i
I
IIII
II
1, SeeCh_in Tension,
2. Contactyou_Seam Se..vice
Centec
3, Resharpenor_._ace
chain.
4. S_eCha_n Shafpen{n9 l_st_'uc_ons.
5. _.ontact
yourSears SeEviceCemer.
II
I. Chain cutlet tops n_ filed fiat,
2. Guide b_r burred or be..nt;rails uneven.
3, CJ_h slipping.
1. See Chin Sharpen ing Instructions.
2. Repair o_ rep.i_ceGuide _a_.
I. Cutters dam_g_l on one s_ie.
1. Reshazpen u_ila!lcuttershaveequ_l
angles and lengths.
2. Re_haq_enuntJl_lh=.,'ttershaveequal
2. C;_aindu_lon one side.
.
a_es andlengths.
.........
3.; Gulde-bar_-=t;o_om;
....
_3:- :..p_.
_.L_:g_4!d_.:_.r..:.......................
21
,
L
Ill
I
MAINTENANCE
I
I I
III
I
III
•
II
r IIII III1,11
""""""""''"'
"""'
i ,,, ,,,H.i
,
CHART
• 1
IC°mplete n_chine
l
isual inspection {COndition. leaks)
Clean
i
I TllrOttle trigger, sate{y throt_{elock. stop Switch
Check operation
,J
t
t
CleanFelt
I Filter _nfuel tank
Replace fe[t -- when clogged or dirt7'
Fuel _h_
Chai&oil
._
Chain
Clean
Clean
lank
rt ....
iubdcation
Saw_:hain
!
1 i
tCheck
t27;2
I
l
!
I
i Inspect (wear. damage)
Clean
/'
X
I Gu_e bar
!
Lubricate sprocket
1
t
Deburr
X
Replace _ when worn or dam_.ged
.!Cha_ sprocket
Check
Clean
Repl_ce_
when worn or damaged . ".
,.
Clean
!
x
Clean
Cy_in_" f_rts
Ch_:k idle &d_ustment chs_n must not turn
C=_rb_etor
ReadjuSt idte,_
when chain _ums at idle
Spark_ug
All a¢_ess_
s_ev,_ _rd n_s
(no}
adjusting
screws)
Vib:ation mounts
Sparka_restorscreen
l
I
SEARS
CHAIN
•
SAW REPAIR
PARTS LIST MODEL
MODEL
358.356280-2.8/I8"
358.356330-3.3/20"
45 42
• Gask_
!
49
\
23
35
52
43
44
29
27
22
EL%
NO.
3t
32
33
1_4
3_
37
38
39 _
40
41
412
43
44
45
46
47
48
49
51
52
PART
NO.
530-015710
530-4127184
530-019160
530-014137
DES_ON
Screw
Spur
Cra -nksl_t Seal
Crankcase/_'y.
(Ind. _s 18,
26,33 ,L_,I26,127,
L37,138,
141 & I42)
r_o-olSTlS Screw
53P.-01572_
Washer
MufflerCover
530-028645
g30-027095,
Spark Arrestor Sa'een
MufflerDiffuser
530-028647
530-4"28"_16 _ Muffler Ba_le_Fl_te
530-,028644
• -Muffler Body
•' _rlinder
536-012155
Model 358,356280
530-012200
Model 358,356330
530-O3OO34 Spark Plug (C2-4)
530-03OO54
Sealant
Deflector
530-027838
Model 358.356330 Only
530-015697
530-001_24
Sc_e_
530-067180
Operator's Manu_d
530-027218
Carb. Adaptor
P_n
Ring
530--027090
Mode/358.355280
530-027607
Model 358.356330
530-015707
Screw
530--027285
Clamp Ass'2_
......................
B_.Clamp=&..F_n.I_g-i)_ah
Not Shoz_a
Carton
530-061329
53O--061330
Model358.356280
Model358.356330
SEA2.S
CHAIN
SAW REPAIR
PARTS
LIST MODEL358.356280-2.8/18":
MODEL
358.356330-3.3/20"
oo9
71
83
97
93
85
79 80
62
54
53
178 1719
54
76
54
4
,,,,,,, ,,,,,,,
....
[
Retainer Moun_
Screw
Chain C._tcher P_taLncr
Buraper-Carb. Cover
Lower Isolator
Rear Handle & Fuel Tank
CylLud_e_l Mount
Lqolator L4miter.
53_0
530-.0157H
530-027183
_0--027399
530-010877
• 530-027394
'
5,q0-.027187
_10-015715
:, 530--027888
._0-015702
530-O1O845
538-027191
53_0_598
530-027139
fi30-024772
530-015716
952-069253
530-069265
530-027178
530-015871
530-027134
530-027133
530-027271
530-069217
530-035201
530-023664
530-015785
530-010892
24
,,
KEY
NO.
DESCRIPTION
PART
,, ........NO-'
_
84
85
86
87
88
89
90
"
Renector
"C _ CIip
Fuel Cap ,_ss'y. (bad. _0"
Bracket
'
Screw
Throttle Lock
Throttle Lock Spring
Screw
Carb. Cover Winter Kit
Cylinder Shield Kit (IneL
62)
Carb. Cover
Screw
_gger
Latch Spring
Throttle Trigger
Grommet
----Bm_ke_
Gasket Set
Carburetor (HI)A--49)
Air Filter Pt_e
Carb.Mounting Stud
Air FiIter.M_'_
; [,,,,,,
k .
•I
91
92
93
94
95
96
97
98
I00
• 101 '
102
t0S
104
105
t73
t74
I77
178
179
180
PART
NO.,
DP-qCRIFI20N
,,,,,,
Thro_le Lockout
Rear Handle Cover
Throttle W'_e
ChOke Knob
_
Isolator Moua_
Nut
Dowel Pin
530-015_4
. Scrr_.
:
_30--069210
,LineI_t
(Bulk 81831"
530-091878
Fuel Filter Ass'_
"
530-039129
, Grommet
530-06922_
Switch Kit
530-027138
. Lead Wire _'y.
530-01_717
Screw
53_02_0_
_
Retainer
530-024475
Vent Fitting
530-026H9
Check Valve
530-031111
Hex Key
_530-02T339
- Ven_ Plug
530-02_922
Plug-AirBox
530-027341
Clamp
,_ l_c_ons
Decal
"530-027798
Model 358.356280
53_-027824
Model 358.356330
RepL Bar & Chain
530-027257
Model 358.3,56'280
_.530=027_,o-__
_3_8.__35_
9_
530-029347
Braek_
_30-015710
Scre_
530-015810
530-0155._2
Washer
,530-027135
531_027207
_30-027073
530-027075
580--027393
530-001_
530-015701
SEARS
CHAIN
SAW REPAIR
PARTS
LIST MODEL
MODEL
358356280-2.8t18"
358.356330-3.3120"
1, t!29
Chain Repair
Kit
1
144
142
Ii0 122
131
SEARS
cHAIN
SAW REPAIR
PARTS LIST MODEL
MODEL
Carburetor
Assembly
358.356280-2.8/18"
358.356330-3.3/20"
-//530-03520I
164
HDA -#49
163 162
168
169
151
/
"I47
t
149
148
RepsirKit1
Carb Gasket/
Diaphragm
Kit
i
170
•
';S
171
•"
.....
KEY
NO.,
PART
NO.
147
_237
i48
* + 530-038227
149 * +530.-035229
150
÷530-035249
151
53a-_35244
.i_i2 530-035216
L_3
+ 5Y,
O-V_352_.3
+_53041_236
+ 530-0352_0
+_,30-035252
157
+530-0,35241
158
530-035239
-_.g_0_5230
_-_
160
*+530-03.5228
_6
DESCRIPTION
......................................
Screw
Fuel Pump Gasket
Fuel Pump
Diaphragm
Inlet Screen
Throttle
Spring
Choke She_ &Le_er _'y
I_et _c_Je V_;'e
Screw
Pin
Metering Lever
SpriRg
SCrew
•Metering Diaphragm Gasket
KEY
NO.
161
162
PART
NO.
:77
._ DESCRIPTION
+_0-035204
Retaining
Ring
+_0-_35248
Ch_k ValveS_-en
,530-0352_6
163
BMI
164
5,q0_.3SPA0 Spring
530--035243 - Needle Adjusting Spring
165
530-035245
166
HighSpeedNeedle
!_7
IdleNeedle
_,3__35246
168
Idle
AdjustScrdw
169
530-035242
Idle Adjust Spring
I70
530--03,5209 Kwik RepOt Kit( + Indicates
Cor_e_nt@
Oa_k_Kit(=Indi_
171
530---035213 Garb.
------Conten*__
NotBhown
+_03,5S24
Welch Plug
PlugCup'
+ g30.-035_25
:
QUICK REFERENCE
......... Read-and-fottowall-Safety-R[ilb__i_,-and
Failure to do so can result
PAGE
Operating
in serious injury. _
Instructions.
page
SPECJAL
SAFETY
PREPARA_ON
1.
2.
3.
4.
5.
.
"3.
.
.
4o
5.
6.
7.
" .8.
3-5
.............................................................
THE ENGINE
3-5
g&10
engine.
........................................................
1-1
Hold saw firmly with the saw chain free to turn without making contact with any object.
Hold front handlebar with left hand &ptace right foot through rear handle to stabilize saw,
Use less than the full extent of the starter rope per pull;
Release the trigger after engine-starts allowing engine tO idle:
THE UNIT .........................................................
I:='
Cut wood only.
Accelerate the engine.to full throttte before entering the cut.
Begin cutting with spur against the log.
Cut only at furl throttle.
Release the trigger as soon as the cut is completed.
Stop the engine before settingthe saw down after cutting.
MAINTENANCE
1.
:. .................
OIL .............................................................
OPERATING
l.
2.
3.
4.
5.
6.
..
Eliminate all sources of sparks or flame where fuel is mixed, poured, or.stored.
Use:1part air<_o.Led,2-cycte englneoil to: lSpa,'ts_',_g'_arunteadedgasoline.
Use gasoline not over 2 months old.
Mix and pour fuel in an approved, marked containerand in an outdoor area.
Move a minimum of 10 feet (3 meters)away from fuel and fueling site before starting
Fiti the ,_1 t_nk ,_ach dime _he fuel tank is refueled.
STARTING
1.
•2.
3.
4.
..............................
Wear personal protective gear -- gloves; safety footwear;, snug fitting clothing; and eye,
hearing and head protection,
Check fo_worn, loose, missingor damagedpartsand repairor replaceas necessary. •
Check the chain for sharpness and tension.
Keep children,bystanders:andanimaJsa minimumof30 feet (10 meters) awayfromwork area.
Plan your sawing operation carefully in advam,_e.
FUELAND
1.
2.
3.
4.
5.
6_
SECTION.
..............................................................
lt_
Adjust orhave the carburetor,adjusted if the chain.moves .when the engine: idles,
Disconnect" spark plug befor,e:.pet:forming_maintenanoe except for _:arburetor-.adjustment.
Check the guide bar for wear each:timethe chain is sharpened.
Clea_nthe air filter frequently and always after 10 tanks of fueim_xture or 5 hoursOf o_er_tion,
Whichever is tess.
-Clean spark arres_r screen_atleastonce foreach25-30 hoursof Opera,on.
Take the saw to yourSears Service Center for full clutch inspection after each .100 hours
of operation.
Drain-fuel tank in a safe manner before stodngthe unit for 30 or more.days.
Store saw in a dry.place out of the reach of children.
WATCH OUT F'OR
KICKBACK
•
NOT USE
THE SAW WHEN
IT NEEDS REPAIR
NEVER USE THE SAW
WHEN TIRED
USE A FIRM GRiP
WITH BOTH ,HANDS
.............
L
'
•27
The Model Number will be found under the handle with the Seria!
"NUmb-_r:-Always-menfion_the.ModetJ_lumber-when._reques.tir'_g_
s_E
vice or repair parts for your Chain Saw.
All parts listed herein may be ordered ,from any SF_.ARS Service
Center and most Sears Stores.
WHeN
ORDERING
REPAIR
PARTS, ALWAYS
GIVE
'FOLLOWING INFORMATION AS SHOWN IN THIS LIST.
MODEL
1.
The PART NUMBER
3.
The PART D_SORIPTtON
2.
The MODEL NUMBER
358.356280-2J]/18"
358.356330-3,3/20"
4.
The NAME OF ITEM
Chain Saw
NO.
358.356280-2_/18"
358.356330-3.3120"
THE
If the parts you need are not stocked locally, your Order wilt be
_tectronically
transmitted
to a Sears 1_epair Parts Distribution
center for _handling.
When you buy merchandise from
Sears you get an extra something
that nobody else can .offer...Sears
Service.
i
Across town or across the country,
SearS Service.follows you, providing trustworthy, competent service
technicians using onlySears specified factory parts.
How to Order
Repair Parts
SEARS SERVICE
k
k
.az s. R(_
buck
and
Co.. Chic,%._).
IlL 60684
U.S.A.
i,
PRtNT_DIN
• .
:
"
.
.
.
'
L
U.S.A.