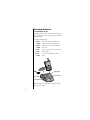
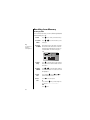
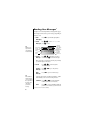
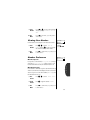
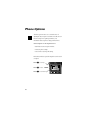
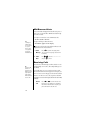
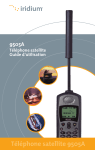
1
Welcome
Thank you for choosing Motorola—a global leader in
communications technology.
All Motorola phones are designed and manufactured
in the United States to meet Motorola’s exacting specifications
and world-class quality standards. During development,
our laboratory testing team took the durable Digital StarTAC®
phone through its paces. They cooked it, steamed it, shook it,
shocked it, dusted it, and dropped it—and the phone still
worked! We are confident that the one you purchased will meet
your own exacting standards.
Thank you for choosing Motorola, and we hope you enjoy your
Digital StarTAC wireless phone!
1
Guide Overview
Okay, you’ve got a brand new phone
with a bunch of nifty features.
Now what?
Afraid you’ll press the wrong key?
Or forget a feature or two?
Don’t sweat it!
We’ve designed this guide to take you
step-by-step through each feature of
your new Digital StarTAC® phone.
We’ll show you what key to press and what happens when you
press it. Follow along, chapter-by-chapter, and you’ll find it’s as
easy as 1-2-3.
Here’s an idea of what you’ll learn in each chapter.
Getting Started
First things first. Once the box is open, this section will show you
where to begin. We will explain what came with your new phone
and show you how to use the battery. Turn to page 10 to get
started.
The Basics
What do all those buttons and lights mean? How do I make my
first phone call? In this section, we’ll answer those questions and
teach you everything necessary to start using your new phone.
Begin learning “The Basics” on page 20.
Using Memory
Read “Using Memory,” beginning on page 34, and we will
explain how to make the most of your new phone’s internal
Phone Book. You will save time with dialing shortcuts and
memory features that make it easy to place quick calls.
2
Guide Overview
Using Messaging *
This Digital StarTAC® phone supports optional messaging
services, like Caller ID, which allows you to see who is calling
before you answer. It can even receive alphanumeric messages
just like a pager and tell you when you have Voice Mail. Turn to
page 50 to begin “Using Messaging.”
Using the MiniBrowser and Data Features*
With a service subscription, your phone can access up to the
minute information with the MiniBrowser! You can use the
phone to retrieve on demand weather reports, sports scores, stock
reports, and much more. See page 108.
With the addition of a data cable, you can hook your phone up
to a compatible computer and send and receive faxes and data.
See page 116.
The Works
When you are ready to learn the advanced features of your new
phone, turn to page 58 for “The Works.” We will explain
everything from navigating the menu system to electronically
locking your phone.
So relax!
Let us show you what your
Digital StarTAC phone can do!
* Contact your Service Provider for availability.
3
Contents
Introduction
Guide Overview . . . . . . . . . . . . . . . . . . . . . . . . . . . . . . . 2
Safety Information . . . . . . . . . . . . . . . . . . . . . . . . . . . . 6
Getting Started
Package Content Options . . . . . . . . . . . . . . . . . . . . . . 10
Introduction to Batteries . . . . . . . . . . . . . . . . . . . . . . 12
Installing Batteries . . . . . . . . . . . . . . . . . . . . . . . . . . . 13
Charging Batteries . . . . . . . . . . . . . . . . . . . . . . . . . . . 14
Phone Overview . . . . . . . . . . . . . . . . . . . . . . . . . . . . . 18
Using the Smart Button . . . . . . . . . . . . . . . . . . . . . . . 19
The Basics
Turning Your Phone On. . . . . . . . . . . . . . . . . . . . . . . 21
Reading the Indicators. . . . . . . . . . . . . . . . . . . . . . . . 23
Placing and Ending Calls . . . . . . . . . . . . . . . . . . . . . 26
Redialing Numbers . . . . . . . . . . . . . . . . . . . . . . . . . . 27
Receiving Calls . . . . . . . . . . . . . . . . . . . . . . . . . . . . . . 29
Basic Tone Controls . . . . . . . . . . . . . . . . . . . . . . . . . . 30
Your Phone & Its Shortcuts . . . . . . . . . . . . . . . . . . . . 32
Using Memory
Introduction . . . . . . . . . . . . . . . . . . . . . . . . . . . . . . . . 34
Making the Most of Memory . . . . . . . . . . . . . . . . . . . 35
Storing . . . . . . . . . . . . . . . . . . . . . . . . . . . . . . . . . . . . 36
Recalling. . . . . . . . . . . . . . . . . . . . . . . . . . . . . . . . . . . 38
Pause Dialing . . . . . . . . . . . . . . . . . . . . . . . . . . . . . . . 46
Using Calling Cards . . . . . . . . . . . . . . . . . . . . . . . . . . 48
4
Using Messaging
Contents
Introduction. . . . . . . . . . . . . . . . . . . . . . . . . . . . . . . . .50
Receiving Messages . . . . . . . . . . . . . . . . . . . . . . . . . . .51
Viewing Your Caller IDs . . . . . . . . . . . . . . . . . . . . . . . .52
Checking Your Voice Mail . . . . . . . . . . . . . . . . . . . . . .54
Reading Your Messages . . . . . . . . . . . . . . . . . . . . . . . .56
The Works
Introducing the Menu Features. . . . . . . . . . . . . . . . . .58
The Internal Phone Book . . . . . . . . . . . . . . . . . . . . . .60
Store and recall numbers
Using Call Timers . . . . . . . . . . . . . . . . . . . . . . . . . . . .68
Monitor the length of your calls
Setting Tone Controls. . . . . . . . . . . . . . . . . . . . . . . . . .74
Adjust your phone’s tone controls
Lock/Security Features. . . . . . . . . . . . . . . . . . . . . . . . .82
Control access to your phone
Phone Options . . . . . . . . . . . . . . . . . . . . . . . . . . . . . . .90
Personalize your phone’s operation
Using the MiniBrowser . . . . . . . . . . . . . . . . . . . . . . .108
Access valuable information with your phone
Using Data Features. . . . . . . . . . . . . . . . . . . . . . . . . .116
Make your phone a wireless modem
Reference Information
Accessory Options. . . . . . . . . . . . . . . . . . . . . . . . . . . .124
Troubleshooting. . . . . . . . . . . . . . . . . . . . . . . . . . . . .128
Glossary . . . . . . . . . . . . . . . . . . . . . . . . . . . . . . . . . . .132
Index . . . . . . . . . . . . . . . . . . . . . . . . . . . . . . . . . . . . .140
5
IMPORTANT EXPORT
INFORMATION
Because of federal export regulations applicable to
this Motorola phone, it cannot be sold for export from
the U.S.A. or Canada. Please read the following important notice.
EXPORT LAW ASSURANCES: This product is controlled under
the export regulations of the United States of America and Canada.
This product cannot be exported from the United States or Canada
without an export license issued by the U.S. Department of
Commerce. In addition to the U.S. license, if this product is to be
exported from Canada, an Export Permit issued by the Canada
Department of Foreign Affairs and International Trade must be
obtained before export.
Safety Information
Exposure
to Radio
Frequency
Signals
Your wireless handheld portable telephone is a low power radio
transmitter and receiver. When it is ON, it receives and also sends
out radio frequency (RF) signals. In August 1996, the Federal
Communications Commissions (FCC) adopted RF exposure
guidelines with safety levels for hand-held wireless phones. Those
guidelines are consistent with the safety standards previously set by
both U.S. and international standards bodies:
• ANSI C95.1 (1992)*
• NCRP Report 86 (1986)*
• ICNIRP (1996)*
Those standards were based on comprehensive and periodic
evaluations of the relevant scientific literature. For example, over
120 scientists, engineers, and physicians from universities,
government health agencies, and industry reviewed the available
body of research to develop the ANSI Standard (C95.1).
The design of your phone complies with the FCC guidelines (and
those standards).
* American National Standards Institute; National Council on Radiation Protection
and Measurements; International Commission on Non-Ionizing Radiation Protection
6
Safety Information
Use only the supplied or an approved replacement antenna.
Unauthorized antennas, modifications, or attachments could
damage the phone and may violate FCC regulations.
Antenna
Care
Normal Position:
Hold the phone as you would any other telephone, with the antenna
pointed up and over your shoulder.
Phone
Operation
Tips on Efficient Operation:
For your phone to operate most efficiently:
• Extend your antenna fully.
• Do not touch the antenna unnecessarily when the phone is in use.
Contact with the antenna affects call quality and may cause the
phone to operate at a higher power level than otherwise needed.
Caution: All batteries can cause property damage, injury or burns
if a conductive material, such as jewelry, keys or beaded chains,
touches exposed terminals. The material may complete an
electrical circuit and become quite hot. To protect against such
unwanted current drain, exercise care in handling any charged
battery, particularly when placing it inside your pocket, purse or
other container with metal objects. When the battery is detached
from the phone: your battery is packed with a protective cover.;
please use this cover for storing your battery when not in use.
Check the laws and regulations on the use of wireless telephones in
the areas where you drive. Always obey them. Also, if using your
phone while driving, please:
Batteries
Driving
• Give full attention to driving–driving safely is your first responsibility;
• Use hands-free operation, if available;
• Pull off the road and park before making or answering a call if
driving conditions so require.
Most modern electronic equipment is shielded from RF signals.
However, certain electronic equipment may not be shielded against
the RF signals from your wireless phone.
Electronic
Devices
7
Safety Information
Pacemakers
The Health Industry Manufacturers Association recommends that a
minimum separation of six (6”) inches be maintained between a
handheld wireless phone and a pacemaker to avoid potential
interference with the pacemaker. These recommendations are
consistent with the independent research by and recommendations
of Wireless Technology Research.
Persons with pacemakers:
• Should ALWAYS keep the phone more than six inches from their
pacemaker when the phone is turned ON;
• Should not carry the phone in a breast pocket;
• Should use the ear opposite the pacemaker to minimize the potential for interference.
• If you have any reason to suspect that interference is taking place,
turn your phone OFF immediately.
Hearing Aids
Some digital wireless phones may interfere with some hearing aids.
In the event of such interference, you may want to consult your
hearing aid manufacturer to discuss alternatives.
Other Medical Devices
If you use any other personal medical device, consult the
manufacturer of your device to determine if they are adequately
shielded from external RF energy. Your physician may be able to
assist you in obtaining this information.
Turn your phone OFF in health care facilities when any regulations
posted in these areas instruct you to do so. Hospitals or health care
facilities may be using equipment that could be sensitive to external
RF energy.
Vehicles
RF signals may affect improperly installed or inadequately shielded
electronic systems in motor vehicles. Check with the manufacturer
or its representative regarding your vehicle. You should also consult
the manufacturer of any equipment that has been added to your
vehicle.
8
Safety Information
Posted Facilities
Turn your phone OFF in any facility where posted notices so require.
FCC regulations prohibit using your phone while in the air. Switch
OFF your phone before boarding an aircraft.
Aircraft
To avoid interfering with blasting operations, turn your phone OFF
when in a “blasting area” or in areas posted: “Turn off two-way
radio.” Obey all signs and instructions.
Blasting
Areas
Turn your phone OFF when in any area with a potentially explosive
atmosphere, and obey all signs and instructions. Sparks in such
areas could cause an explosion or fire resulting in bodily injury or
even death.
Areas with a potentially explosive atmosphere are often, but not
always, clearly marked. They include fueling areas such as gasoline
stations; below deck on boats; fuel or chemical transfer or storage
facilities; areas where fuel odors are present, i.e. if a gas/propane
leak occurs in a car or home; areas where the air contains
chemicals or particles, such as grain, dust, or metal powders; and
any other area where you would normally be advised to turn off
your vehicle engine.
Potentially
Explosive
Atmospheres
An air bag inflates with great force. DO NOT place objects, including
both installed or portable wireless equipment, in the area over the
air bag or in the air bag deployment area. If in-vehicle wireless
equipment is improperly installed and the air bag inflates, serious
injury could result.
Vehicles
Equipped
with Air
Bags
Your wireless radiotelephone is designed for excellent durability
under normal use conditions. Protect your wireless telephone from
water damage that could result from spills or excessive exposure to
rain. Never submerge your wireless phone.
Equipment
Care
Cleaning of this product should only be done with a damp cloth.
The use of chemical cleaners may harm the finish and integrity of
the radio housing and is not recommended.
Cleaning
the Phone
9
Getting Started
The Digital StarTAC® phone comes equipped with a standard
battery and an AC Adapter to get you up and running. An
exciting line of accessory options, now smaller and lighter than
ever, can customize your wireless package for maximum
performance and portability. This chapter will show you how to
get started with your new wireless package.
In this chapter we will explain how to:
• Attach and charge batteries.
• Use chargers like the AC Adapter and Desktop Charger.
Package Content Options
Slim Main Battery
with Battery Cover
1 2 2 5
07/07/99
Ready
Digital
1 MENU
GHI
4 BATT
2 ABC
JKL
5 LOCK
VIB
7 PQRS
8 TUV
3 DEF
MNO
6 MUTE
9WXYZ
0 OPR
RCL
STO
PWR
FCN
CLR
SEND
END
Digital StarTAC Phone
10
Standard Main Battery
with Battery Cover
Package Content Options
Getting Started
AC Adapter
Cigarette Lighter
Adapter
Headset
Desktop Charger
(AC Adapter required)
Your phone and accessories may not look exactly as pictured.
11
Introduction to Batteries
Each battery is shipped in an uncharged state with a protective
clip on it. Before you can use your phone, you will need to
remove the clip from the battery and charge it.
Battery Clips
It is a good idea to save the protective clip to store and carry the
battery when not in use. The clip prevents objects from touching
the battery terminals, thereby reducing the risk of injury or
damage from a short circuit.
Removing the Main Battery Clip
1. Press In
Latch
Press in the release latch.
2. Remove
Battery
Rotate the battery upward and lift it out of
the protective clip.
2.
Release Latch
1.
Attaching the Main Battery Clip
1. Lower
Side
Lower the side opposite the release latch into
the clip.
2. Click
Latch
Drop the side with the release latch down
until the latch clicks.
1.
2.
12
Installing Batteries
Getting Started
Battery Installation
To install a battery:
1. Insert
Toe
Place the side of the battery opposite the
release latch into the compartment.
1.
2. Snap
Heel
Press the side with the release latch down
until you hear it click into place.
2.
Battery Removal
To remove a battery:
1. Turn OFF
Phone
If necessary, press and hold ¡ to turn your
phone OFF.
2. Remove
Battery
Pull the release latch back toward the battery
and lift the battery out.
Release Latch
13
Charging Batteries
Using the Internal Rapid Charger
Believe it or not, there is a battery charger built right into your
phone! To make use of the internal charger, you will need one of
the three available adapters, either a standard AC Adapter, a
rapid rate AC Adapter, or a cigarette lighter adapter.*
Keep in mind: When the internal charger is in use and the
phone is ON, you can still place and receive calls. However,
talking on the phone requires energy, so your phone may not
charge while the call is in progress.
1. Attach
Adapter
to Phone
Plug the AC or cigarette lighter adapter into
the accessory connector on the bottom of
your phone as shown, with the release tab
facing up.
2. Plug In
Adapter
Plug the adapter into the appropriate
power source.
7 PQRS
0 OP R
D
CLR
STO
RCL
R
SEN
END
FCN
PW
SH
PU
Keep in mind: In some cars, the ignition must be ON to use
the cigarette lighter.
*Check with your dealer for availability of the adapters.
14
Charging Batteries
Getting Started
The Battery Indicator
In the upper right corner of your phone’s display, there is a
battery indicator filled with three segments. The more segments
you see, the greater the charge.
• The border of the battery icon will flash during charging.
• When the battery is fully charged, the battery icon will stop
flashing and become solid.
High
Low
Battery Storage and Disposal
To prolong the life of batteries, avoid exposing them to
temperatures below -10°C (14°F) or above 45°C (113°F). It is a
good idea to take your phone with you when you leave your car.
Never dispose of batteries in fire.
Caution: To prevent injuries or burns, do not allow metal
objects to contact or short circuit the battery terminals.
Expert Performance (E•P®)Charging System
The E•P system enables your phone’s built-in charger to
communicate with installed batteries and tailor its charging
cycle to optimize performance. If you see Invalid Battery
when you power up the phone, the built-in charger is not able to
communicate with the battery and cannot charge it. There are
several possible reasons for this message. The most likely one is
that the battery is not a Motorola original and it does not have
the appropriate E•P technology. We recommend that you use
only Motorola original batteries and accessories and that you
store your batteries in their protective clips when not in use.
15
Charging Batteries
Using the Desktop Charger
The Desktop Charger’s front pocket can charge batteries while
they are attached to your phone, and the rear pocket can charge
batteries separately.
If you have a Desktop Charger:
1. Attach
Adapter
Plug the AC Adapter into the back of the
charger, with the release tab facing up.
2. Plug In
Adapter
Plug the other end of the AC Adapter into a
wall socket.
3. Insert
Phone
Insert the phone into the front pocket with a
battery attached.
& Insert
Battery
If you like, insert a battery into the rear
pocket.
HS
UP
Rear Pocket
Front Pocket
Rear LED
Front LED
Note: If two batteries are loaded in the charger, the batteries
will charge one at a time.
16
Charging Batteries
Getting Started
Desktop Charger Indicators
The LED indicators on the left front of the Desktop Charger let
you know the current state of any charging batteries.
The Front Pocket LED Indicator:
• Yellow means the phone with a battery is securely installed.
• Open the phone to see the charge status for the front pocket.
The Rear Pocket LED Indicator:
• Red means the battery is charging.
• Flashing yellow means the battery is waiting to be charged.
• Green means the battery is charged to 90% of its capacity.
Another hour of charging will bring it up to 100% capacity.
• Flashing red means the battery is damaged and cannot be
charged.
Desktop Charger Charging Times
The time it takes for your battery to obtain a full charge is
affected by a variety of factors, including:
• Temperature Batteries should be at or near room temperature when charging. To prolong battery life and charge
capacity, avoid exposing your batteries to temperatures below
-10°C (14°F) or above 45°C (113°F). It is a good idea to
take your phone with you when you leave your car.
• Inactivity New batteries, or batteries that have been stored
for long periods of time, may not rapid charge properly. In
these instances, the battery requires an overnight charge.
• Extended Usage Over extended periods of time, batteries
gradually wear down and require longer charging times.
This is normal. If you charge your battery regularly and
notice a decrease in talk-time or an increase in charging
time, then it is probably time to purchase a new battery.
17
Phone Overview
Function Keys
¡
Turns the phone ON and OFF.
ø
Opens messaging menus.
ƒ
Acts as a “shift” key to access the secondary
functions of other keys.
‰
Recalls phone numbers from memory and acts as
the left soft key for MiniBrowser navigation.
¬
Stores phone numbers into memory and acts as the
right soft key for MiniBrowser navigation.
Ç
Clears characters from the screen.
º
Ends phone calls and exits the menu.
ª
æ
Places or answers calls. Your phone will have one
of these two keys.
«
»
Can be used to scroll through memory entries
and menu features.
Alphanumeric Display Displays your input from the keypad,
information recalled from memory, and other messages.
Microphone Positioned for convenient conversation.
Retractable Antenna Extend for best performance.
Earpiece Ultra-compact phone speaker.
Headset Jack Connects an optional headset.
Accessory Connector Provides the connection for an
external power supply.
Volume Keys Located left of the display and represented in the
manual by q and Z, these keys adjust the volume and scroll
up and down through memory locations and menu features.
18
Using the Smart Button
Getting Started
When in doubt, press the Smart Button! Easily recognized in this
User’s Guide by A and in your phone’s display by § – the
handy Smart Button puts a variety of functions at your fingertip.
12 25
07/07/99
The Smart Button
Ready
Digital
1 menu
2
abc
3 def
Use the Smart Button’s fingertip convenience for:
Opening the Quick Menu
Press A when your phone is idle to display a menu containing
shortcuts to your phone’s most popular features. See page 32.
Opening Your Phone Book
Press A twice to open the Phone Book with your names and
numbers. Turn to page 38 in “Using Memory” to learn more.
Entering the Menu System
Press ƒ then press A to enter your phone’s menu system.
See page 58 for information on navigating the menu system.
Selecting Items in the Menu
The primary use of the Smart Button is to select. Whenever the
phone offers you a choice, such as setting a ringer style, press A
to select. You will see: Press § to Select.
Turning Features ON and OFF
Press A to toggle ON and OFF many menu features, like the call
timers (pg. 68). You will see: Press § to Toggle.
Placing and Ending Calls
Press & hold A to place a call when the number you want to
call is on the display. Press & hold A again to end a call. See
page 26 for information on placing and ending calls.
19
The Basics
The next few pages will introduce you to the basic features of
your phone. In the chapters that follow, we will explain every
one of your phone’s features, including storing names and
numbers, using the call timers, locking the phone, and more.
In this chapter we will explain how to:
• turn your phone ON.
• read the indicators.
• place, receive and end calls.
• adjust ringer and keypad volume, use shortcuts, and more.
Turning Your Phone On
Follow these steps to turn your phone ON:
1. Extend
Antenna
Extend the antenna completely for best
performance.
2. Open
Phone
Open the phone to expose the keypad.
3. Turn ON
Phone
Press ¡ once to turn the phone ON.
4. Turn OFF
Phone
When finished, press ¡ again to turn the
phone OFF.
0 OPR
RCL
Press ¡ to turn the
phone ON or OFF
20
PWR
STO
FCN
CLR
SEND
END
Turning Your Phone On
Activating Your Phone
The first time you turn your phone ON, you may see a message
on the display:
Press §
to Activate
Basics
Activation
Required
If you do not see the displays above, your phone was activated
at the time of purchase and there is no need to follow the
steps below.
If you do see the above, your service activation can be completed
with just a couple simple steps:
1. Place
Call
Press æ (or ª) to place the call.
or
Press and hold A until you hear a high tone.
You will see: Updating.
2. Follow
Steps
Once the connection is made, your phone will
begin activation. Contact your Service Provider for further assistance.
Power Up Display
Once activated, each time you turn your phone ON, your phone
performs a short self-test to make sure it is operational and then
it scans for service. While the phone scans, the display reads:
Searching..
NS
21
Turning Your Phone On
Dual Band Operation
To make the best use of available signals, your phone can
operate on both CDMA digital and analog systems. If your phone
finds a CDMA digital system, you will see the time and date and
the
icon. If your phone finds an analog system, you will see
the
icon.
12 25
07/07/99
Ready
Ready
Digital
Analog
Quad Number
Your phone can be activated with
12 25
up to four unique phone
Number 2
numbers. If more than one
312-555-1212
number is programmed, you will
see the currently active number
whenever you turn ON the phone. Turn to Feature Review on
page 95 if you want to change the active number.
Power Save Mode
If you travel outside the range of available networks, your phone
continues to search for a signal. To save power, it stops searching
every couple of minutes.When this is the case, you will see:
Power Save. Your phone will automatically begin searching
again in a minute or two – if you would like it to start searching
immediately, just press any key.
Tip:
If you like, you
can choose how
long the backlight remains
ON. See page
102.
22
Standby Mode
To conserve energy, your phone enters standby mode and turns
off the backlight when you have not touched a key for a few
seconds. The backlight will come back on as soon you press a
key or open the phone.
Reading the Indicators
Detailed Battery Level Reading
Press ƒ then press ›.
The bar graph in the display represents the battery level. The
higher the graph, the closer the battery is to full charge.
Basics
12 25
12 25
Battery
Battery
Low Charge
Full Charge
Note: When plugged in, the battery level is rounded to the
lowest bar for increased accuracy. When you first attach the AC
adapter, the level may fall.
Important: If the phone is being powered externally–from the
cigarette lighter adapter for example–you will see: Charging.
Service Light
The Service Light is on top of your phone and lights up when
your phone is ON. The color it flashes depends on your phone’s
current state of service.
Red & Green,
alternating
Incoming call or message
Green, flashing
In Service: home type system
Red, flashing
No Service
Yellow, flashing slow
Roaming: home type system
Yellow, flashing fast
Roaming: non-home type system
Service
Light
Tip:
If you would like
to increase your
phone’s standbytime, you can
turn the Service
Light OFF. See
page 101.
23
Reading the Indicators
1
2
3
12 25
07/07/99
4
10
IU Rm
5
6
NS
7
8
9
Signal Strength (1)
Strong
Displays the strength of the connection between your phone and
the wireless network.
1 2 2 5 Clock (2)
Weak
When your phone is on a CDMA digital network, the display
shows the current time and date. Wherever you are, you will
have the correct local time. You can set your clock for 12- or 24hour format. See page 101 for more information.
Battery Level (3)
High
Low
The three bar segments on the phone’s Battery Level Indicator
show the amount of charge remaining in your battery. The
more bar segments you see, the higher the charge.
Digital (4)
Indicates you are receiving a digital signal.
Analog (4)
Appears when you are on an analog channel.
24
Reading the Indicators
IU
In Use (5)
Appears when a call is in progress.
Rm
Roam (6)
NS
Basics
Lights up when your phone accesses a wireless service outside of
your home system. When you leave your wireless Service Area,
your phone roams (seeks another wireless system).
No Service (7)
Appears when calls cannot be placed or received from
your location.
Message (8)
Appears when you receive an alphanumeric message or
MiniBrowser Alert.* It will disappear after you have read the
message.
Voice Mail (9)
Indicates that you have received a Voice Mail message in your
Voice Mailbox. It will disappear after you have listened to the
message.
When you select one of the VibraCall® Alert combinations (see
page 77), the following indicators appear in the display:
VibraCall On (10)
Indicates that your phone’s ringer is turned OFF and the
VibraCall Alert is ON.
Silent Mode (10)
Indicates that all of your phone’s tones are silenced and the
VibraCall Alert is ON.
Vibrate Then Ring (10)
Indicates that both the ringer and VibraCall Alert are ON.
* Contact your Service Provider for availability.
25
Placing and Ending Calls
Placing a Call
1. Extend
Antenna
Extend the antenna completely for best
performance.
2. Open
Phone
Open the phone to expose the keypad.
If necessary, press ¡ to turn the phone ON.
3. Enter
Number
Enter the number you want to call,
for example: 555-1212.
Correct
Errors
Tip:
If you press
(or
) without entering a
number, your
phone will dial
the last number
entered.
ª
æ
4. Place
Call
Press Ç to erase one digit at a time if you
make a mistake. Press and hold Ç to erase
the entire entry and start again.
Press æ (or ª) to place the call.
or
Press and hold A until you hear a high tone.
You will see: Calling 555-1212.
You can dial phone numbers with up to 32 digits, but only the
last twenty-four digits will appear in the display.
Press ‰ to see the rest of the number.
Your phone will display the first 24 digits, then a second screen
will show the digits remaining in the phone number.
Ending a Call
There are three ways to end a call:
Close
Close the phone to end a call.
or Press Key Press
or Hold
Smart
Button
26
º.
Press and hold A until you hear a high tone.
You will see: Press § to End Call.
Press A again to end the call.
Redialing Numbers
Automatic Redial
Auto
Redial
Basics
The wireless system may at times be too busy to handle your
call. If this is the case, you may hear a fast busy signal and see
Call Failed and Press SND to Redial. With Automatic
Redial, your phone will repeat the call attempt over the next
four minutes. When the call succeeds, your phone will ring or
vibrate until the person you are calling answers.
Press æ (or ª) or press and hold A
until you hear a high tone.
You will see: Redialing.
To make this feature even easier, turn Instant Redial ON. Your
phone will instantly redial after a fast busy signal, and you will
not have to push a button. To find out more, see page 97.
Redial
If you hear an ordinary busy signal:
1. Hang Up
Press º to hang up.
2. Redial
Press æ (or ª) to redial.
or
Press and hold A. You will see: Calling.
Display Last Ten Numbers Dialed
Your phone keeps track of the last ten numbers you have dialed.
1. Enter
List
Press ‰ then press ‚, ‚. The display will show the last number you dialed.
2. Review
List
Press q or Z to scroll through the last calls
made, including the time, date, and number.
3. Call
Number
Press æ (or ª) or press and hold A to
call the number in your display.You will see:
Calling.
Tip:
Your phone
automatically
remembers the
last number
entered. See
page 45 to learn
more.
Tip:
This feature is
also available
through the
Quick Menu. See
page 32 to learn
more.
27
Receiving Calls
Your phone must be ON to receive calls.
When a call is incoming:
• an alert will sound and/or vibrate.
• the Service Light (pg. 23) will flash red and green.
You can choose your phone’s alert, selecting from nine ringer
styles or silent vibration mode. See page 77.
Answering a Call
To answer a call:
1. Extend
Antenna
Extend the antenna completely for best
performance.
2. Open
Phone
Open the phone to expose the keypad.
or
Press æ (or ª) if the phone
is already open.
Caller ID
If Caller ID* is active on your phone, you will be able to see who
is calling before you answer. The display will show either your
caller’s name (if in your Phone Book) or your caller’s number.
If you prefer to always see your caller’s number, see page 65 to
turn Number Preference ON.
12 25
12 25
Smith, Jane
312-555-1212
The Caller IDs for your last 16 callers will be saved. See page 52
to learn how to view your stored Caller IDs.
*Contact your Service Provider for availability.
28
Receiving Calls
Ringer/Vibrator Suppress
Basics
If an incoming call catches you by surprise, you can turn the
alert OFF using the upper or lower volume key. Your phone’s
ringer or vibrator will remain OFF while the current call lasts. The
caller will still hear ringing and you can still answer the call by
pressing æ (or ª).
Suppress When the phone rings or vibrates, press the
Alert
upper or lower volume key.
Note: This feature works the same with a headset. To answer
the call with a headset after you have turned the alert OFF, press
either volume key again or the Smart Button.
Unanswered Call Indicator
Even with the latest wireless technology, sometimes you are
unavailable to answer calls. If your phone is ON, it keeps a count
of unanswered calls. For example, if you miss two calls, your
display will show: 2 Calls Unanswered.
Clear
Display
Press Ç or press º to clear the display,
and you can begin placing calls again.
Tip:
If you subscribe
to Caller ID service, you can
easily return the
calls that you
missed. See
page 52 to learn
how.
Call Waiting
If you subscribe to Call Waiting through your Service Provider,
you may hear a tone while on a call, indicating that you are
receiving a second call.
Answer
Call
or End
Current
Call
Press æ (or ª) to answer the call and
automatically place the current call on hold.
Press º to end the current call. Your phone
will then ring and/or vibrate as usual. Press
æ (or ª) to answer the call.
29
Basic Tone Controls
Vibration Mode
In situations where ringing may not be appropriate, or in noisy
places where you may not hear your phone, select the
VibraCall® Alert. Ringing will be replaced by gentle vibrations.
Toggle
Alert
Press ƒ then press † to switch
between ringer and vibrator alerts.
VibraCall ON
Silent Mode
For complete discretion, turn Silent Mode ON. All tones will be
silenced. You can dial silently, and the ringer will be replaced by
gentle vibrations.
Silent
Mode ON
Activate
Silent
Mode
Press ƒ then press and hold † until you
see: Silent Mode On.
Turn OFF
Press ƒ then press † to turn Silent
Mode OFF.
Note: This shortcut allows you to activate Silent Mode quickly.
To learn how to turn Silent Mode OFF, see page 76.
Muting the Microphone
If you would like privacy while a call is in progress, you may
mute the microphone—you will be able to hear the party on the
other end, but they will not hear you.
30
Mute
Phone
Press ƒ then press fl during a call to
mute the microphone. You will see: Muted.
Unmute
Phone
Press ƒ then press fl again to
resume your conversation.
Basic Tone Controls
The upper and lower volume keys are left of the display and can
be used to adjust the earpiece, keypad, and ringer volume. As
you press these keys, the phone’s speaker will demonstrate the
new volume level.
Adjusting Earpiece and Keypad Volume
Basics
The audio feedback your phone gives you when you press a key
is called keypad tones. When your phone is idle, pressing the
volume keys adjusts the volume of these tones. To adjust the
volume of your conversation (the earpiece volume) use the
volume keys during a call.
Raise
Volume
Press q to raise the volume.
Lower
Volume
Press Z to lower the volume.
The bar graph in the display represents the volume level. The
higher the graph, the louder the volume is.
12 25
12 25
Keypad
Keypad
High Volume
Low Volume
Tip:
See page 79 if
you would like
to silence the
keypad tones.
Adjusting Ringer Volume
To adjust ringer volume:
Raise
Volume
Press ƒ then press q to raise the
ringer volume.
Lower
Volume
Press ƒ then press Z to lower the
ringer volume.
31
Your Phone & Its Shortcuts
Throughout this guide you will see shortcuts that point out
simple ways to reach some of your phone’s features. If you have
owned a Motorola phone before, some of these shortcuts will
already be familiar to you.
The Quick Menu
Press the Smart Button and the Quick Menu opens on the
display! The Quick Menu contains shortcuts to your phone’s
most popular features. Press the volume keys to scroll through
the options shown below and the Smart Button to choose one.
Press q to scroll up
12 25
Press a to open the
menu and select
Phone Book
Messaging
Launch Browser
Last 10 Dialed
Digital
Press Z to scroll down
1 MENU
2 ABC
3 DEF
Phone Book
The Phone Book is the place to find all your
personal names and numbers. See page 38.
Messaging*
If you subscribe to messaging, you can use this
shortcut or the one on page 50.
Launch
Browser*
If you subscribe to MiniBrowser service, use
this feature to launch it. See page 108.
Last 10
Dialed
Your phone remembers the last ten numbers
you dialed. Turn to page 27 to learn more.
Main
Menu
Select this option to access your phone’s menu
system. See page 58 to find out more.
Exit
Select this option or press º to exit the
Quick Menu at any time.
* Feature not available with some phones. Contact your Service Provider for availability.
32
Your Phone & Its Shortcuts
The Usual Shortcuts
The words “menu,” “batt,” “lock,” “mute,” and “vib” appear
on the ⁄, ›, fi, fl, and † buttons. Press the
ƒ key first, then any one of these buttons, and your phone
will perform that function.
Basics
Digital
1
MENU
2 ABC
3 DEF
4
BATT
GHI
LOCK
5 JKL
6 MUTE
MNO
VIB
9WXYZ
7 PQRS
8 TUV
0 OPR
Enter
Menu
Press ƒ then press ⁄ to enter the menu
system.
Display
Meter
Press ƒ then press › to display the
battery meter.
Lock
Phone
Press ƒ then press fi.
You will see: Lock? Press ¬ to lock.
Mute
Phone
Press ƒ then press fl to toggle mute ON
and OFF during a conversation.
Silence
Ringer
Press ƒ then press † to toggle your
phone’s VibraCall® Alert ON and OFF.
Silence
All Tones
Press ƒ then press and hold † to turn
ON Silent Mode.
33
Using Memory
Do you have places to go and people to see? Too many phone
numbers to remember? Let your phone remember them for you.
The internal Phone Book has 99 locations enabling you to store
hundreds of phone numbers for easy access on the go!
In this chapter we will explain how to:
• store names and numbers into the Phone Book.
• recall phone numbers from memory.
• dial in a flash with the Super Speed Dial and Turbo Dial®
functions.
• simplify automated calling systems and credit card calls.
Follow these symbols as a guide for using the keys on the side of
your phone.
Press q to scroll up
12 25
Press a to select
Press Z to scroll down
34
07/07/99
Ready
Digital
1 menu
2
abc
3 def
Making the Most of Memory
Numbered 01-99, each memory location allows you to store a
name and as many as four phone numbers. In one location, you
can store the home, mobile, work and fax numbers of a single
contact. To help you find the right number, when you store the
number you assign it an icon:
12 25
555-1212
Home
Mobile
Pager
Fax
Other
Once stored, when you view memory locations, you will see the
name, location and one icon for each number stored.
12 25
Name
Smith J.
Location
04
Using Memory
Work
Icons of numbers stored
To organize your Phone Book for convenient recall, try storing
related contacts in groups of ten. For example, store your ten
most frequently called numbers in locations 01-09, then you
can use the Turbo Dial® keys to call them with the push of a key.
You could store business contacts in locations 10-19, family in
20-29, friends in 30-39, and so on.
Tip:
If you purchase a
Motorola Data
Connectivity Kit,
you can easily
transfer contacts
between your
phone and computer. See your
Service
Provider for more
information.
When you feel ready for more, try the advanced storing features
at the end of the chapter. For instance, pages 46-47 describe how
the Phone Book can help you access automated calling systems
with only a few keystrokes.
35
Storing Names and Numbers
Each memory location can store up to four numbers. For a
single contact, you can store every number you need, like home,
mobile, fax, and more.
Keep in mind: Your Phone Book sorts alphabetically by the
first letter in the entry. If you store an entry without a name it
will be placed at the back of the Phone Book.
Tip:
‘XX’ is the number
of the lowest
available location.
Tip:
Always store
your Voice Mail
number in
location 98.
Tip:
The “ § ” symbol
in your display
represents the
Smart Button a.
36
1. Enter
Number
Enter the phone number you want to store.
2. Begin
Storing
Press ¬ to begin storing.
You will see: Location XX?
3. Accept
Location
Press ¬ or « to store the sequence in
the displayed location.
or Enter New Press Ç to erase the location number
and enter a new two-digit location number.
or Select
Range of
Ten
Enter a digit and press « to store the
sequence in the first available location beginning with that digit.
4. Choose
Label
Press q or z to scroll through the icons.
From left to right: Work, Home, Mobile,
Pager, Fax, or Other. Press a or ¬ to select
the highlighted icon.
5. Store
More
You will see: Enter Next Number. Enter up
to four numbers per location. Press ¬
when finished entering numbers.
6. Enter
Name
Enter a name to identify the phone number.
(See the next page for help.) Press a or ¬
when finished. Your phone will confirm by
displaying the information stored.
Entering Names
When the display shows Alpha or Press §, you can use the
keypad to produce any letter in the alphabet. Use the letters
printed on the key as a guide. For example, press ¤ to enter
the letters “A,” “B,” or “C” as shown:
2
press 1 time to insert an "A"
press 2 times to insert a "B"
press 3 times to insert a "C"
press 4 times to insert a "2"
1. Enter
Letter
Using Memory
To enter a name into the Phone Book:
Press a key as many times as necessary to
enter a letter. The next letter on the key will
appear with each press.
Toggle
Case
Press q or z to switch between upper and
lowercase.
2. Advance
Cursor
After each character, press » to advance
the cursor to the next space.
Clear
Letter
Press Ç to erase a letter if you make
a mistake.
Back
Space
Press « to move the cursor backward if
you would like to insert a letter earlier in the
sequence.
3. Enter
Marks
Press ⁄ to scroll through the available
punctuation marks: <space> 1 . @ / : '
, ? ! - _ # * " $ % & + ; =
\ ( ) < > [ ].
4. Finish
Storing
Enter up to 20 letters. Press a when you are
finished. Your phone will confirm the entry by
displaying the information stored.
37
Recalling from Memory
Recalling by Name
Once you have stored entries, you can recall them alphabetically
and immediately place calls.
Tip:
See page 37 for
details on
entering letters.
1. Enter
Press a twice to enter your name directory.
2. Scroll to
Name
Press q or
looking for.
z to scroll to the name you are
Enter the first letter of the name. The display
or Search
for Name will show the name and location of the first
entry beginning with that letter, and an icon
for each number stored in the entry (up to
four).
12 25
Smith J.
04
38
3. Select
Entry
Press a to select the entry for the displayed
name. You will see the first number stored in
the location.
4. Choose
Number
Press q or z to scroll through the numbers
stored in that location. The selected icon will
be highlighted.
5. Place
Call
Press and hold a or press æ (or ª) to
call the number. You will see: Calling.
6. End
Call
Press º or close the phone.
or
Press and hold a until you hear a high tone.
You will see: Press § to End Call.
then
Press a again.
Recalling from Memory
Recalling by Memory Location
Each entry you store is placed in a memory location numbered
01-99. Once you have stored entries, you can recall them by
memory location.
Press ‰ to begin recalling.
2. Enter
Location
Enter the two-digit memory location of the
entry you are looking for.
3. Select
Entry
Press a to select the displayed entry.
You will see the first number stored in the
location.
4. Choose
Number
Press q or z to scroll through the numbers
stored in that location. The selected icon will
be highlighted.
5. Place
Call
Press and hold a or press æ (or ª) to
call the number. You will see: Calling.
6. End
Call
Press º or close the phone.
or
Press and hold a until you hear a high tone.
You will see: Press § to End Call.
then
Press a again.
Using Memory
1. Begin
39
Editing Memory
Editing a Number
If you would like to change a number that you have already
stored, follow these steps.
1. Enter
Press a twice to enter your name directory.
2. Scroll to
Name
Press q or z to scroll to the name you are
looking for and press a to select.
3. Select
Number
Press q or z to scroll to the number you
would like to change and press ¬.
You will see: Edit Number?
Press ¬ to begin editing.
4. Edit Phone Enter digits. Press Ç to erase one digit at
Number a time, or press and hold Ç to erase the
entire number. Press « to move the
cursor backward.
40
5. Finish
Number
Press a or ¬ when you finish the phone
number.
6. Select
Icon
If you would like to change the icon, press q
or z to scroll through the icons. Press a to
select the highlighted icon. The display will
show the current location.
7. Change
Original
If you would like to save your changes in the
same location, then press a or ¬. You will
see the name associated with the entry.
or Copy
Entry
If you would like to move the entry to a new
location and keep the original entry, then
press and hold Ç to erase the location and
enter a new two-digit location. You will see
the name associated with the entry.
8. Edit
Name
Press Ç to erase one letter at a time, or
press and hold Ç to erase the entire name.
Press « to move the cursor backward.
(See page 37 for details on entering names.)
Skip this step to leave the name unchanged.
9. Confirm
Changes
Press a or ¬ when you finish editing the
name. You will see: ‘N’ Numbers Saved At
‘XXX’. (N is the total of numbers stored in the
location and XXX is the location number).
Using Memory
Adding a Number to an Entry;
If you would like to add a number to an entry, select the empty
cursor while viewing the entry.
1. Enter
Press a twice to enter your name directory.
2. Scroll to
Name
Press q or
looking for.
3. Select
Empty
Press q or z to scroll to Empty.
Press ¬ and continue with step 4 on the
previous page.
z to scroll to the name you are
41
Erasing Memory Entries
Clearing an Entire Entry
Erasing a memory entry will clear the name and all the
numbers from the location. To erase a memory entry:
1. Enter
Press a twice to enter your name directory.
2. Scroll to
Name
Press q or
looking for.
3. Clear
Entry
Press Ç to clear the entry.
You will see: To Delete Press STO.
4. Confirm
Erase
Press ¬ to confirm that you want to
erase the entry.
z to scroll to the name you are
Clearing a Single Number
If you would like to keep the entry but delete one number from
the entry, follow these steps:
42
1. Enter
Press a twice to enter your name directory.
2. Scroll to
Name
Press q or
looking for.
3. Choose
Number
Press a to select the entry, then press q or
z to scroll to the icon of the number you
would like to delete.
4. Clear
Entry
Press and hold Ç to clear the number.
You will see: To Delete Press STO.
5. Confirm
Erase
Press ¬ to confirm that you want to
erase the number.
z to scroll to the name you are
Recall Shortcuts
Super Speed Dial
If you know the memory location of the number you wish to
call, you can use the Super Speed Dial function.
Keep in mind: If more than one number is stored in the
location, your phone will dial the first. To change which
number is dialed with Super Speed Dial, see Changing Dialing
Shortcuts on the next page.
Enter the two-digit memory location, 01-99.
2. Place
Call
Press and hold a or press æ (or ª) to
call the number you selected. The number
stored in the memory location you entered
will be dialed. You will see: Calling.
Using Memory
1. Enter
Location
Turbo Dial
The Turbo Dial® keys let you dial numbers stored in locations
01-09 with the push of a button.
Keep in mind: If more than one number is stored in the
location, your phone will dial the first. To change which
number is dialed with Turbo Dial, see Changing Dialing
Shortcuts on the next page.
Turbo
Dial
Press and hold the memory location number
of the entry you want to call, ⁄ through
·, and your call is placed.
You will see: Calling.
Your phone’s Priority Call feature gives you unrestricted access
to any number stored in location 01, even if your phone is
locked. To learn how to activate this feature, see page 85.
43
Changing Dialing Shortcuts
If you have more than one number in a memory location, you
can choose which number you would like to use with the dialing
shortcuts, including the Turbo Dial® keys and Super Speed Dial.
1. Enter
Press a twice to enter your name directory.
2. Scroll to
Name
Press q or z to scroll to the name you are
looking for and press a to select.
3. Select
Number
Press q or z to scroll to the number you
want to make the dialing shortcut for that
location and press ¬ to select. You will
see: Edit Number.
4. Select Set Press Ç. You will see: Set Speed Dial.
Press ¬ to select.
5. Set
44
Press ¬ to set that number as the dialing
shortcut. You will see: Set.
Scratchpad
If you need to take a quick note, but you do not want to save the
number, use the Scratchpad. The Scratchpad is helpful if you are
on the phone and your party gives you another number to call.
Enter the number with the keypad. (The person on the line will hear tones as you dial.)
2. Store
Number
Press ¬ and continue with step 3 on
page 36.
or End
Call
Press º to end your current call
if necessary.
& Place
Call
Press æ (or ª) to call the number in the
Scratchpad.
Using Memory
1. Enter
Number
45
Pause Dialing
When you call automated systems like Voice Mail or bank
by phone, a recorded message prompts you for PIN numbers,
account numbers, etc. Pause Dialing can make using
automated systems easy by allowing you to store these numbers
in the same memory location as the automated system’s access
number. Separate each set of numbers with a “pause”– a
special character that tells your phone to wait before sending
additional numbers.
Storing a Number with Pause Dialing
The pause occupies a one-digit space in your phone’s memory.
Once you have entered a string of numbers and pauses, store the
string in the same way you store other entries.
Tip:
You can store up
to 32 digits,
including pauses.
Tip:
Store up to 20
characters for a
name.
46
1. Enter
Number
Enter the phone number you use to access
the automated system.
2. Insert
Pause
Press ƒ and press æ (or ª). You will
see: Insert Pause o. Press a. You will see
a pause circle o inserted into the number entry.
3. Enter
PIN
Enter the next group of numbers, for example,
your PIN number. If the automated system
requires a * or #, enter those symbols, too.
4. Insert
More
Pauses
Repeat steps 2 and 3 as many times as
necessary.
Press ¬. Enter a two-digit location, select
5. Store
Sequence an icon, enter a name if you like, and press
¬ or a when finished. Your phone will
confirm the entry by displaying the
information you stored.
Using Pause Dialing
Once stored, you may recall the entry and place the call. All of the
digits you have stored will be recalled, but your phone will only
send the tones for the set of numbers before the first pause.
Enter the two-digit memory location of the
Pause Dialing number and press and hold a
or press æ (or ª). Your phone will dial
the access number and wait for your input
when it reaches the first pause.
2. Send
More
Numbers
When the automated system prompts you
for information, press a or æ (or ª) to
send the next group of numbers. Repeat this
step to send each group of numbers that you
have stored.
3. End
Call
Press º, close the phone, or press &
hold a until you hear a high tone and
press a again.
Using Memory
1. Place
Call
Using Memory Linking
Each memory location holds up to 32 digits, including pauses.
Some automated systems, however, may require you to enter
more than 32 digits. If this is required, split the numbers into
two memory locations and recall the second set of digits as you
need them.
1. Recall 2nd Once you have sent the tones from the
Location 1st location, press ‰ and the two-digit
memory location where you stored the
second set of digits.
2. Send
Tones
Press ‰ and æ (or ª) to send the
tones in the 2nd location. If you have stored
a pause in the 2nd location, your phone will
pause as usual when it reaches the pause
character.
47
Using Calling Cards
Storing Calling Card Numbers
Number Characters are another way your phone can save you
time in dialing. The Number Character saves a place in the
memory sequence for whatever number you are calling when
you use your calling card. For best results, you may use the
Number Character along with Pause Dialing.
1. Enter
Access
Number
Enter the phone number you use to access
the calling card system, usually a 1-800
phone number. Skip this step if you only
dial 0.
2. Insert
Pause
Press ƒ then press æ (or ª). You will
see: Insert Pause o. Press a.
Press ƒ then press æ (or ª). Press q
3. Insert
Number
or Z to scroll to Insert Number ‘N. Press
Character a. You will see the number character ‘N
inserted into the sequence.This special character saves a place for the number you will
be calling when you use your calling card.
Tip:
You can protect
your calling card
information with
your phone’s call
restriction features. See page
88 for details.
48
4. Insert
Pause
Press ƒ then æ (or ª) then a as in
step 2.
5. Enter
Code
When you use your calling card, the system
prompts you for an access code, usually a PIN
code. Enter this number. Repeat steps 4 & 5 if
your card requires more access codes.
Press ¬. Enter a two-digit location, select
6. Store
Sequence an icon, enter a name if you like, and press
¬ or a when finished. Your phone will
confirm the entry by displaying the information you stored.
Placing a Calling Card Call
Once you have stored your calling card information, recall the
information and place the call whenever you want to use your
calling card. Before your phone begins dialing, it will prompt
you for the number you want to call. Once you have entered the
number, your phone will automatically insert the number in
place of the Number Character you stored.
Press ‰ then enter the location number
where your calling card sequence is stored.
2. Enter
Number
Press æ (or ª). You will see: Enter
Number. Enter the phone number you are calling. You may enter the number manually or
recall it by location.
3. Place
Call
Press and hold a to place the call. Your
phone will dial the number to access your
long distance provider, then wait for your
input when it reaches the first pause.
4. Send
More
Numbers
Press a or press æ (or ª) to send the
next group of numbers when the recording
prompts you. The phone will automatically
insert the number to call at the appropriate
spot in the sequence. Press a to send each
set of numbers until finished.
5. End
Call
Press º, close the phone, or press and hold
a until you hear a high tone, and press a
again to end the call.
Using Memory
1. Recall
Entry
49
Using Messaging*
ø
The dedicated Message Key provides access to your phone’s new
and easy Messaging Menu. Through this menu, you can check
your Voice Mail, read your pager-like alphanumeric Messages,
access MiniBrowser* alerts, and view the Caller IDs of your most
recent callers.
In this chapter we will explain how to:
• view your Caller IDs.
• check your Voice Mail.
• read your Messages.
• explore your options with the Function Menus.
Follow these symbols as a guide for using the keys on your phone.
Press q to scroll up
1 2 2 5
07/07/99
Press a to select
Ready
Digital
Press Z to scroll down
1 MENU
2 ABC
3 DEF
4 BATT
GHI
5 LOCK
JKL
6 MUTE
MNO
7 PQRS
VIB
8 TUV
9WXYZ
0 OPR
RCL
Press ø to open
messaging menus
*Contact your Service Provider for availability.
50
PWR
STO
FCN
CLR
SEND
END
Receiving Messages
If your phone is ON and you receive a Voice Mail, MiniBrowser
alert, or alphanumeric message:
• An alert sounds or vibrates:
Your phone will beep or vibrate three times.
See Ringer or Vibrator Selection on page 77 to set your phone’s
alert. See page 79 to learn about Reminder Tones.
• An indicator appears on the display:
Appears on the lower line of the display when you receive an
alphanumeric message. It will stay on the display until you have
read the message.
Tip:
See page 28
for information
on receiving
Caller IDs.
Tip:
For more information on MiniBrowser* alerts,
see page 108.
Msg Mem Low Appears when your phone’s message memory is
Msg Mem Full Appears in the main display when the message
memory is completely full and your phone is in idle mode.
Appears on the bottom line of the display when you receive a
Voice Mail message. It will stay on the display until you have
listened to the message. Your Service Provider will then signal
your phone to turn the indicator OFF.
• Press ø to open the Messaging Menu:
When you open the Messaging Menu, the icon of the message
type you received will be flashing.
Tip:
Your Service
Provider holds
your messages
and will forward
them after you
have made room.
See page 57
to learn how
to delete
messages.
12 25
*
Caller ID
Voice Mail
Messages
MiniBrowse Alrt
Voice Mail
Indicator
Message Indicator
* Feature not available with some phones. Contact your Service Provider for availability.
51
Messaging
almost full (at approximately 85% capacity).
Viewing Your Caller IDs*
Your phone supports Caller ID service, which lets you see who is
calling before you answer. The Caller IDs for the last 16 different
callers are stored so they can be viewed at any time.
Press ø to open the Messaging Menu.
1. Enter
Messaging
2. Select
Caller ID
Press q or Z to scroll to Caller ID and press
a to select.
You will see a Caller ID icon for each stored Caller ID.
Flashing icons represent Caller IDs that have not been viewed.
Below the icons you will see information for the latest Caller ID:
12 25
12:10pm 08/02/99
1-312-555-1212
3. Select
Caller
number
of times
they
called
selected Caller ID
time & date of call
your caller‘s
phone number
Press q or Z to highlight a Caller ID to
view and press a to view complete
information for that call:
12 25
mith J
02 S
Home
1-312-555-1212
your
caller’s
name
your caller’s
phone number
Keep in mind: You will see the caller’s name only if it is stored
in your Phone Book.
A check mark will appear in the corner if you have answered
or returned the call. Press æ (or ª) to return the call of the
displayed caller. Press ¬ to store the information.
*Contact your Service Provider for availability.
52
Caller ID Options
When viewing Caller IDs, press the Message Key to see the
options available for the highlighted Caller ID.
4. Access
Options
Press ø to open the Caller ID
Function Menu.
12 25
Exit
Go To
Messaging
Menu
Store To
Memory
Exit
Press q or Z to scroll to one of
the following:
To Msg
Menu
Press a to return your phone to the
Messaging Menu.
Exit
Press a to exit Messaging to idle mode.
Delete
Message
Delete
AllMsgs
Messaging
5. Choose
Function
Delete
Delete All Call Back
Message Messages
Press a to delete the currently selected
Caller ID. Press a again to confirm.
Press a to delete all your Caller IDs.
Press a again to confirm.
CallBack Press a to return the call.
Store
To Mem
Press a to begin storing the number. Enter
a two-digit location, select a label, enter a
name, and press ¬ again.
53
Checking Your Voice Mail*
When you receive Voice Mail, your Service Provider sends a
notification to your phone and your phone displays an
indicator. That way, you will be able to check for new Voice Mail
simply by glancing at your phone’s display.
Press ø to open the Messaging Menu.
1. Enter
Messaging
Press q or Z to scroll to Voice Mail and
2. Select
Voice Mail press a to select.
If you have one or more Voice Mail messages, you will see:
12 25
You Have
Voice Mail
To listen to your messages, dial your access number. Your phone will
do this automatically with one keypress.
Dial
Number
When viewing notifications, press æ (or
ª) or press & hold a to call your Voice
Mail box.
See the following page for more options.
Keep in mind: Some Service Providers send the Voice Mailbox
number to your phone automatically. If the number has not
been sent, then store it in location 98 of your Phone Book. To
learn how, see Pause Dialing on page 46.
If you have no new messages, you will see:
12 25
No
Voice Mail
*Contact your Service Provider for availability.
54
Voice Mail Options
When checking Voice Mail, press the Message Key to see options
for the highlighted Voice Mail notification.
3. Access
Options
Press ø to open the Voice Mail
Function Menu.
12 25
Exit
Go To
Exit
Messaging
Menu
Call Back
Messaging
4. Choose
Function
Delete
Message
Press q or Z to scroll to one of
the following:
To Msg
Menu
Press a to return your phone to the
Messaging Menu.
Exit
Press a to exit Messaging to idle mode.
Delete
Message
Press a to delete the currently selected
Voice Mail notification. Press a to confirm.
CallBack Press a to dial your Voice Mail box number.
55
Reading Your Messages*
Your phone can receive alphanumeric messages like a pager.
The message memory stores up to 60 messages, depending on
the size of each.
Press ø to open the Messaging Menu.
1. Enter
Messaging
Press q or Z to scroll to Messages and
2. Select
Messages press a to select.
Tip:
Flashing icons
represent messages that have
not been viewed.
more msgs
to left
locked msg
msg
12 25
12:34pm 07/07/99
1: F:8475551212
M: Happy B-day!
text of
msg
3. Select a
Message
selected
message
more msgs
to right
time & date
of msg
sender’s
number
more text
Press q or Z to highlight a message to
read and press a to select the message.
Once a message is selected, the following keys will help
you read through your messages:
4. Scroll
Tip:
If the Call Back
number matches
one in your Phone
Book, you will see
the name of the
caller when
you view the
message.
Press a or Z to scroll through the
selected message.
Previous
Message
Press q or « to go to the previous
message.
Next
Message
Press » to go to the next message.
If the message includes a number in parentheses (a Call
Back number) you can use the following shortcuts:
Call Back
Press æ (or ª) to dial the Call Back
number (in parentheses if included).
Store
Press ¬ to store the Call Back number (in
parentheses if included) in your Phone Book.
* Contact your Service Provider for availability.
56
Message Options
When reading your messages, press the Message Key to see the
options available for the highlighted message.
5. Access
Options
Press ø to open the Message
Function Menu.
12 25
Exit
Go To
Messaging
Menu
Store To
Memory
Exit Delete
Delete All
Message Messages
Press q or Z to scroll to one of
the following:
To Msg
Menu
Press a to return your phone to the
Messaging Menu.
Exit
Press a to exit Messaging to idle mode.
Delete
Message
Press a to delete the currently selected
message. Press a again to confirm.
Delete
AllMsgs
Press a to delete all messages.
Press a again to confirm.
Lock
Message
Press a to lock or unlock the message.
Lock important messages to protect them
from accidental deletion.
Unlock
Message
Messages must be unlocked before they can
be deleted.
Messaging
6. Choose
Function
Lock
Call Back
(Unlock)
If the message contains a Call Back number
(in parentheses), you will also see these options:
CallBack Press a to dial the sender’s number.
Store
To Mem
Press a to begin storing the number. Enter
a two-digit location, select a label, enter a
name, and press ¬ again.
57
The Works
Introducing the Menu Features
The Digital StarTAC® phone is loaded with features that can
help make life easier and more productive. The phone’s userfriendly menu will help you find what you need quickly and
easily. You will see the following icons as you scroll through
the menu and each represents a menu.
Phone Book
Lock/Secure
Timers
Phone Options
Tone Control
Navigating the Menu
You can navigate through the menu system using the three keys
located on the left side of the phone. Use the volume keys to
scroll up and down through the options available on one level,
and the Smart Button, in the middle, to select.
This manual uses these symbols to instruct you to use the
navigation keys.
Press q to scroll up
12 25
Press a to select
Press Z to scroll down
58
07/07/99
Ready
Digital
1 menu
2
abc
3 def
Road Maps
To help you navigate through the phone’s menu system, chapters
begin with an easy-to-follow visual “road map”—a quick
overview of what you will find in the chapter that follows.
To use the menu system:
1. Enter
Menu
Press ƒ then
press a.
2. Scroll
through
Menu
Press z or q to
scroll through the
menu’s top level,
shown on the right.
3. Exit
Menu
Press º to exit
the menu.
Phone
Book
pg. 60
Timers
pg. 68
Tone
Control
pg. 74
Lock
Secure
pg. 82
The Works
Phone
Options
pg. 90
Previous User Compatibility
If you are already familiar with previous Motorola phones, you
may prefer to use your phone’s « and » keys to scroll
through the menu system.
In the Works
In the chapters that follow, detailed instructions describe the
operation of each feature. We will explain everything you need to
know about your new phone, including how to access and use a
feature and what happens when you do.
59
Phone Book
In “Using Memory” you learned how to store and recall phone
numbers with the internal Phone Book. You can access the same
features, along with some other interesting features, using your
phone’s convenient menu system.
In this chapter we will explain how to:
• recall and store phone numbers using the menu system.
• edit your memory information.
• add numbers to existing entries.
• view your own phone number.
Follow these symbols as a guide for using the keys on the side of
your phone.
Press q to scroll up
12 25
Press a to select
Press Z to scroll down
60
07/07/99
Ready
Digital
1 menu
2
abc
3 def
Road Map
Press ƒ then press a to enter the menu system.
Start:
Recall By
Name
Phone
Book
pg. 62
pg. 60
Recall By
Location
pg. 63
Phone Book
Status
pg. 63
Store New
Number
pg. 64
Edit Memory
pg. 66
View My Number
pg. 65
Number
Prefer Off
pg. 65
Phone Book
To Main
Menu
61
Getting to Phone Book...
1. Enter Menu
Press ƒ then press a.
2. Enter
Phone Book
Press A to select to Phone Book.
Recall By
Name
Recalling By Name
Once you have stored entries, you can recall them alphabetically
with the Phone Book menu. Find the name, choose the number,
and instantly place a call.
3. Begin
Recalling
Press a to select Recall By Name.
You will see: Enter 1st Letter.
Press the appropriate digit key as many times
4. Enter
First Letter as necessary to enter the first letter of the
name. (See page 37 for help entering letters.)
You will see the first entry with that letter.
Tip:
Press a while
scrolling through
the icons to go to
another entry.
62
& Find
Name
If necessary, press q or Z to scroll to
the name you are looking for.
5. Select
Number
Press a to select the entry, then press q or
z to scroll through the numbers stored in
that location.
6. Place
Call
Press and hold a or press æ (or ª) to
call the number. You will see: Calling.
7. End
Call
Press º or close the phone.
or
Press and hold a until you hear a high tone.
You will see: Press § to End Call.
then
Press a again.
Recalling By Location
Each entry you store is placed in a memory location numbered
01-99. Once you have stored the entry, you can use this feature to
recall it by the number of the location.
Press q or Z to scroll to Recall By
Location and press a to select.
You will see Location——.
4. Enter
Location
Enter the two-digit memory location of the
number you are looking for. You will see the
name, location number, and an icon for each
number stored in the entry.
5. Select
Number
Press a to select the entry, then press q or
z to scroll through the numbers stored in
that location.
6. Place
Call
Press and hold a or press æ (or ª) to
call the number. You will see: Calling.
7. End
Call
Press º or close the phone.
or
Press and hold a until you hear a high tone.
You will see: Press § to End Call.
then
Press a again.
Phone Book Status
You can use this feature to see how many of your Phone Book’s
99 locations have been used.
3. Select
Feature
Press q or Z to scroll to Phone Book
Status and press a to select. You will see:
XX In Use XX Empty.
4. Exit
Menu
Press º to exit menu, or you may scroll to
other features.
Tip:
To place a quick
call just enter
the two-digit
location and
press
(or
).
ª
æ
Tip:
Press a while
scrolling through
the icons to go to
another entry.
Phone Book
3. Begin
Recalling
Recall By
Location
Phone Book
Status
63
Getting to Phone Book...
1. Enter Menu
Press ƒ then press a.
2. Enter
Phone Book
Press A to select to Phone Book.
Store New
Number
Storing a New Number
This feature allows you to create a new entry in the internal
Phone Book. To add a number to an existing entry, turn to
Editing a Memory Location on page 66.
3. Begin
Storing
Press q or Z to scroll to Store New
Number and press a to select.
You will see: Enter Number.
4. Enter
Number
Enter the number you want to store and
press a. You will see: Location XX?
5. Enter
Location
Press ¬ or « to store the number in the
displayed location or enter a new two-digit
location and press ¬.
or Select
Range of
Ten
Enter the first digit of the memory location
and press « to store it in the first available
location beginning with that digit.
6. Choose
Label
Tip:
If the name or
number is
already in your
Phone Book,
you will see:
Press q or z to scroll through the icons.
From left to right: Work, Home, Mobile,
Pager, Fax, or Other. Press a or ¬ to select
the highlighted icon.
7. Store
More
You will see: Enter Next Number. Enter up
to four numbers per location. Press ¬
when finished.
Duplicate
Name or
Number.
8. Enter
Name
Enter a name to identify the phone number(s)
or continue with step 9. See page 37 for
details on entering names.
Tip:
‘XX’ is the number
of the lowest
available
location.
Tip:
Always store
your Voice Mail
number in
location 98.
64
9. Store
Number
10. Exit
Menu
Press ¬ or a. Your phone will confirm the
entry by displaying: ‘N’ Numbers Saved At
‘XXX’.
Press º to exit menu, or you may scroll to
other features.
Viewing Your Number
Use this feature to view your phone’s currently active number.
3. View
Number
Press q or Z to scroll to View My
Number and press a to select. The display
will show the currently active number.
4. Exit
Menu
Press º to exit the menu, or you may scroll
to other features.
Number Preference
When Placing Calls:
View My Number
Shortcut:
Press ‰
».
Number
Prefer Off
If you prefer to see the number (Calling 555-1212) instead
of the name (Calling Jane Smith) when you place a call
from the internal Phone Book, turn Number Preference ON.
Phone Book
When Receiving Calls:
If you subscribe to Caller ID, your phone automatically looks up
callers in your Phone Book and displays the name stored in the
entry. If you prefer to see the caller’s number (555-1212), then
turn Number Preference ON.
3. Find
Feature
Press q or Z to scroll to Number Prefer.
4. Toggle
Feature
Press a to toggle the feature On or Off.
5. Exit
Menu
Press º to exit the menu, or you may scroll
to other features.
65
Getting to Phone Book...
1. Enter Menu
Press ƒ then press a.
2. Enter
Phone Book
Press A to select to Phone Book.
Edit Memory
Tip:
Store up to four
numbers per
entry. If four are
already stored, you
will not see the
empty cursor.
66
Editing a Memory Location
You can use this feature to add a number to an entry, change
an old number, or duplicate an entry to make a similar one in
a snap.
3. Begin
Editing
Press q or Z to scroll to Edit Memory and
press a to select.
4. Find by
Location
Press q or Z to scroll to Edit By
Location and press a to select. You will
see: Location——. Enter the two-digit memory location of the phone number you want to
edit. Press a or ¬ and continue with
Step 5.
or Find by
Name
Press q or Z to scroll to Edit By Name and
press a to select. You will see: Enter 1st
Letter. Enter the first letter of the name you
want to edit. (See page 37 for information on
entering letters.) You will see the first entry
beginning with that letter. Press q or Z to
scroll to the name you are looking for. Press
a or ¬ and continue with Step 5.
5. Select
Number
Press q or Z to scroll to the icon of the
number to be edited (if more than one). Press
¬ to select. You will see the number.
or Add
Number
Press q or Z to scroll to the empty cursor
and press ¬ to select. You will see: Enter
Number.
Enter digits. Press Ç to erase a digit at a
time, or press and hold Ç to erase the
entire number. Press « to move the cursor backward.
7. Finish
Number
Press a or ¬ when you finish the phone
number.
8. Select
Icon
Press q or z to scroll through the icons and
press a to select the highlighted icon. The
display will show the current location.
9. Change
Original
If you would like to save your changes in the
same location, then press a or ¬. You will
see the name associated with the entry.
or Copy
Entry
If you would like to move the entry to a new
location and keep the original entry, then
press and hold Ç to erase the location and
enter a new two-digit location. You will see
the name associated with the entry.
10. Edit
Name
Press Ç to erase one letter at a time, or
press and hold Ç to erase the entire name.
Press « to move the cursor backward.
(See page 37 for details on entering names.)
Skip this step to leave the name unchanged.
11. Confirm
Changes
Press a or ¬ when you finish editing the
name. You will see: ‘N’ Numbers Saved At
‘XXX’. (N is the total of numbers stored in the
location and XXX is the location number).
12. Exit
Menu
Press º to exit the menu, or you may scroll
to other features.
Phone Book
6. Edit /Add
Phone
Number
67
Call Timers
Your phone is equipped with three visual and three audible call
timers. You can monitor or record the length of individual calls,
set a timer to track monthly usage, or have the phone alert you
at intervals that you specify.
In this chapter we will explain how to:
• monitor the length of your calls.
• set and view the resettable timer for long-term monitoring.
• program audible timers for your individual needs.
Follow these symbols as a guide for using the keys on the side of
your phone.
Press q to scroll up
12 25
Press a to select
Press Z to scroll down
68
07/07/99
Ready
Digital
1 menu
2
abc
3 def
Road Map
Press ƒ then press a to enter the menu system.
Start:
Phone
Book
pg. 60
Individual
00:00:00
Timers
pg. 70
pg. 68
Resettable
Time 00000
pg. 70
Cumulative
Time 00000
pg. 71
Reset
Timer
pg. 71
Individual
Timer Off
pg. 72
One Minute
Timer Off
pg. 72
Repeating
Timer Off
pg. 73
Single
Timer Off
CallTimers
pg. 73
To Main
Menu
69
Getting to Call Timers...
1. Enter Menu
Press ƒ then press a.
2. Enter
Call Timers
Press q or Z to scroll to Timers
and press A to select.
Individual
00:00:00
Shortcut:
Press ‰ then
» twice.
Shortcut:
Press ƒ, a
then ›, fi.
Resettable
Time 00000
Viewing the Individual Timer
The individual timer records the air-time of your most recent
call in hours, minutes, and seconds. It resets before you place
the next call. You can have the timer display automatically
while calls are in progress. See Auto Display Individual Timer on
page 72.
3. View
Timer
When you enter the Call Timers menu,
you will see: Individual XX:XX:XX.
4. Exit
Menu
Press º to exit the menu, or you may scroll
to other features.
Viewing the Resettable Timer
You can track how much air-time you have accumulated during
any time period you choose. For example, reset this timer at the
beginning of each billing period to know where you stand at any
given moment. Use this feature to view the time elapsed, and
follow the instructions on page 71 to reset the timer.
Shortcut:
Press ‰ then
» three times.
3. View
Timer
Press q or Z to scroll to Resettable Time.
You will see the air-time in minutes since you
last reset the timer.
Shortcut:
Press ƒ, a
then ›, fl.
4. Exit
Menu
Press º to exit the menu, or you may scroll
to other features.
70
Viewing the Cumulative Timer
This is a non-resettable timer that keeps track of your phone’s
total air-time (in minutes) since your phone was activated.
3. View
Timer
Press q or Z to scroll to Cumulative Time.
You will see the total air-time in minutes.
4. Exit
Menu
Press º to exit the menu, or you may scroll
to other features.
Resetting the Timer
This feature allows you to monitor elapsed air-time over a period
of time that you choose. After you reset the timer, it will continue
to keep track of your air-time (in minutes) until you reset it
again.
3. Find
Feature
Press q or Z to scroll to Reset Timer.
4. Reset
Timer
Press a to reset. You will see: Resettable
Time 00000.
5. Exit
Menu
Press º to exit the menu, or you may scroll
to other features.
Cumulative
Time 00000
Shortcut:
Press ‰ then
» four times.
Shortcut:
Press ƒ, a
then ›, ‡.
Reset
Timer
Shortcut:
Press ƒ, a
then ›, ‹
and continue
with step 4.
Shortcut:
Press ƒ then
‚, ‡, Ç
to reset the
timer.
CallTimers
71
Getting to Call Timers...
1. Enter Menu
Press ƒ then press a.
2. Enter
Call Timers
Press q or Z to scroll to Timers
and press A to select.
Individual
Timer Off
Auto Display Individual Timer
When you turn this feature ON, your phone will automatically
display your air-time in minutes and seconds during and after
each call.
Note: Activating the Auto Display Timer may reduce standbytime and talk-time.
Shortcut:
Press ƒ, a
then ›,†
and continue
with step 4.
One Minute
Timer Off
Shortcut:
Press ƒ, a
then ›, ›
and continue
with step 4.
72
3. Find
Feature
Press q or Z to scroll to
Individual Timer.
4. Toggle
Display
Press a to toggle On or Off the automatic
display of the individual timer.
5. Exit
Menu
Press º to exit the menu, or you may scroll
to other features.
One Minute Audible Timer
Turn this feature ON to hear an audible beep 10 seconds before
the end of every minute during a call. The party on the other
end will not hear the beeps.
3. Find
Feature
Press q or Z to scroll to
One Minute Timer.
4. Toggle
Timer
Press a to toggle the timer On or Off.
5. Exit
Menu
Press º to exit the menu, or you may scroll
to other features.
Repeating Audible Timer
You can set this timer to beep during your calls at an interval
that you select—from 11-999 seconds. Like the One Minute
Timer, you will hear the beep 10 seconds before the end of each
interval, and the party on the other end will not hear the beeps.
3. Find
Feature
Press q or Z to scroll to Repeating Timer.
4. Toggle
Timer
Press a to toggle the timer On or Off.
5. Enter
Seconds
If you toggle the timer ON, you will see:
Enter Seconds. Enter the number of seconds
you would like between beeps and press a
to set the timer. You will see: Set At XXX Secs.
6. Exit
Menu
Press º to exit the menu, or you may scroll
to other features.
Single Audible Timer
You can set the Single Timer to beep during your calls at a time
that you select–from 11-999 seconds. It will beep once during
each call, 10 seconds before the end of the preset time. The party
on the other end will not hear the beeps.
Press q or Z to scroll to Single Timer.
4. Toggle
Timer
Press a to toggle the timer On or Off.
5. Enter
Seconds
If you toggle the timer ON, you will see:
Enter Seconds. Enter the number of seconds
you would like before the beep and press a
to set the timer. You will see: Set At XXX Secs.
6. Exit
Menu
Press º to exit the menu, or you may scroll
to other features.
Shortcut:
Press ƒ, a
then ›, ⁄
and continue
with step 4.
Single
Timer Off
Shortcut:
Press ƒ, a
then ›, ¤
and continue
with step 4.
73
CallTimers
3. Find
Feature
Repeating
Timer Off
Tone Controls
If you’ve been reading along diligently, this may be a good time
for a break–put your feet up and have some fun with these
features. Use the Tone Control features to select Silent Mode,
personalize your phone’s ringer styles, or set the phone to
remind you of new messages.
In this chapter we will explain how to:
• choose from nine different ringer styles.
• activate and deactivate the VibraCall® Alert.
• silence the keypad.
• silence all your phone’s tones with one convenient feature.
• set the Message Reminder.
Follow these symbols as a guide for using the keys on the side of
your phone.
Press q to scroll up
12 25
Press a to select
Press Z to scroll down
74
07/07/99
Ready
Digital
1 menu
2
abc
3 def
Road Map
Press ƒ then press A to enter the menu system.
Start:
Phone
Book
pg. 60
Timers
pg. 68
Silent
Mode Off
Tone
Control
pg. 76
pg. 74
Ring/Vib
Select
pg. 77
Ringer Style 1
pg. 77
Setup Msg
Tones
pg. 78
Reminder
TonesSetup
pg. 79
Keypad
Tones On
pg. 80
DTMF
Select
pg. 80
Service
Tones Off
pg. 81
Tone Controls
To Main
Menu
75
Getting to Tone Control...
1. Enter Menu
Press ƒ then press a.
2. Enter
Tone Control
Press q or Z to scroll to Tone Control
and press A to select.
Silent
Mode Off
Shortcut:
Press ƒ then
press & hold †.
76
Silent Mode
When you need to be discreet, just turn Silent Mode ON. All tones
will be silenced. The ringer and incoming message tones will be
replaced by vibrations.
3. Find
Feature
Press q or Z to scroll to Silent Mode.
4. Toggle
Feature
Press A to toggle the feature On or Off.
5. Exit
Menu
Press º to exit the menu, or you may scroll
to other features.
Ringer or Vibrator Selection
Motorola’s VibraCall® Alert is ideal for situations where ringing
may not be appropriate, or in noisy places where you might not
hear the ringer. When both the ringer and vibrator are ON, the
phone alerts you by vibrating for three ring cycles then ringing.
3. Enter
Feature
Press q or Z to scroll to Ring/Vib
Select and press A to select.
4. Select
Ringer/
Vibe
Press q or Z to scroll to Vibrate Only,
Ring Only, or Vibrate Then Ring and
press A to select the displayed option.
5. Exit
Menu
Press º to exit the menu, or you may scroll
to other features.
Selecting a Ringer Style
Your new phone offers nine different ringer styles. After you
choose a style, the phone will give you a brief sample of your new
alert sound, or vibrate if you have the VibraCall® Alert selected.
3. Enter
Feature
Press q or Z to scroll to Ringer Style and
press A to select.
4. Select
Ringer
Press q or Z to scroll through the ringer
styles. As you scroll, your phone will give an
audible sample of the currently displayed
style. Press A to select the displayed option.
5. Exit
Menu
Press º to exit the menu, or you may scroll
to other features.
Ring/Vib
Select
Shortcut:
Press ƒ
then press †
to toggle the
VibraCall® Alert
ON and OFF.
Shortcut:
Press ƒ, a
and ‹, ⁄
and continue with
step 4.
Ringer Style 1
Tone Controls
77
Getting to Tone Control...
1. Enter Menu
Press ƒ then press a.
2. Enter
Tone Control
Press q or Z to scroll to Tone Control
and press A to select.
Setup Msg
Tones
Tip:
To make new
messages easy to
recognize, try
making the
number of beeps
unique to each
message type.
78
Setup Message Tones
When you receive a new Voice Mail or alphanumeric message,
your phone beeps three times. To change the number of beeps or
to turn them OFF, use this feature.
3. Enter
Feature
Press q or Z to scroll to Setup Msg
Tones and press A to select.
4. Select
Msg Type
Press q or Z to scroll to Text Msg Tone
or Voicemail Tone.
5. Toggle
Tone
Press A to toggle between 3Beep, 1Beep,
or Off.
6. Exit
Menu
Press º to exit the menu, or you may
scroll to other features.
Reminder Tones Setup
If you subscribe to messaging services, this feature can help you
remember to check your messages. Turn Message Reminder
Tones ON and your phone will remind you of unread messages by
beeping and /or vibrating every two minutes. This feature is
especially helpful if you are busy or away from your phone.
3. Find
Feature
Press q or Z to scroll to Reminder
TonesSetup and press A to select. You will
see: CallRemind Tone.
4. Toggle
Feature
Press A to toggle the feature On or Off.
5. Exit
Menu
Press º to exit the menu, or you may scroll
to other features.
Keypad Tones
Keypad Tones are the sounds you hear when you press any key
on the phone. If you want to be discreet, use this feature to
silence the audio feedback from the keypad.
Reminder
TonesSetup
Keypad
Tones On
Keep in mind: Turning Keypad Tones OFF does not silence the
tones your phone sends across the line. See Transmit Tones on
page 80 for more information.
Press q or Z to scroll to Keypad Tones.
4. Toggle
Feature
Press A to toggle the feature On or Off.
5. Exit
Menu
Press º to exit the menu, or you may scroll
to other features.
Shortcut:
Press ƒ, a
and ‹, ¤
and continue
with step 4.
Tone Controls
3. Find
Feature
79
Getting to Tone Control...
1. Enter Menu
Press ƒ then press a.
2. Enter
Tone Control
Press q or Z to scroll to Tone Control
and press A to select.
DTMF
Select
Shortcut:
Press ƒ, a
then ‹, ‹
and continue
with step 4.
Transmit Tones
Your phone transmits tones to communicate with automated
calling systems like Voice Mail or bank by phone. These tones
are called DTMF tones (Dual Tone Multi-Frequency tones), and
this feature allows you to control the length of the tone your
phone sends. For most systems, you should use the default
setting of short tones, which sends the tones for a preset length
of time. If you choose long tones, your phone will transmit the
tones for as long as you press and hold the key. To silence the
tones during conversations, turn the tones OFF.
3. Enter
Feature
Press q or Z to scroll to DTMF Select and
press A to select.
4. Select
Setting
Press q or Z to scroll to Transmit DTMF
Long, Transmit DTMF Short, or
Transmit DTMF Off and press A to select.
5. Exit
Menu
Press º to exit the menu, or you may scroll
to other features.
Note: If you turned the DTMF tones OFF, but you want to access
a tone-activated system like Voice Mail, place your call, enter the
numbers you need to transmit and:
Send
Tones
80
Press ‰ then press æ (or ª) to send
the tones if DTMF tones are OFF.
Service Tones
When Service Tones are ON, you will be instantly alerted to any
change in your wireless service. You will hear two short beeps
when your phone (1) starts to roam, (2) returns to a home
system after roaming, (3) loses service, or (4) finds service.
3. Find
Feature
Press q or Z to scroll to Service Tones.
4. Toggle
Feature
Press A to toggle the feature On or Off.
5. Exit
Menu
Press º to exit the menu, or you may scroll
to other features.
Service
Tones Off
Keep in mind: Your phone will always beep if a call
is dropped.
Tone Controls
81
Lock/Security
While you probably would not want to leave your phone
unattended, your phone has a number of built-in
security features to prevent unauthorized use.
In this chapter we will explain how to:
• lock and unlock your phone.
• place emergency calls.
• view and change your lock code.
• restrict call placement and memory access.
• reset or clear your phone’s settings.
Follow these symbols as a guide for using the keys on the side of
your phone.
Press q to scroll up
12 25
Press a to select
Press Z to scroll down
82
07/07/99
Ready
Digital
1 menu
2
abc
3 def
Road Map
Lock/Security
Press ƒ then press a to enter the menu system.
Start:
Phone
Book
pg. 60
Timers
pg. 68
Tone
Control
pg. 74
Auto
Lock Off
Lock
Secure
pg. 82
pg. 84
Priority
Call On
pg. 85
Secure Options
Secure
Code______
pg. 86
pg. 86
To Main
Menu
View Lock Code
pg. 86
Change
Lock Code
pg. 87
Change
SecureCode
pg. 87
Service
Level 4
pg. 88
Master
Reset
pg. 89
Master
Clear
pg. 89
To Main
Menu
83
Getting to Lock Secure...
1. Enter Menu
Press ƒ then press a.
2. Enter
Lock Secure
Press q or Z to scroll to Lock Secure
and press A to select.
Auto
Lock Off
Auto Lock
Turn this feature ON and your phone will automatically lock
itself each time the phone is turned OFF.
3. Find Feature Press q or Z to scroll to Auto Lock.
4. Toggle Lock Press A to toggle the feature On or Off.
5. Exit
Menu
Press º to exit the menu, or you may
scroll to other features.
Locking the Phone
You can lock your phone manually at any time to help prevent
unwanted use. Once locked, you can leave the phone ON or turn
it OFF and the phone will remain locked.
1. Lock Phone Press ƒ then press fi.
You will see: Lock?
2. Confirm
Press A or ¬. You will see: Locked.
Unlocking the Phone
Unlocking your phone is quick and easy. Once your phone is
ON, just enter your three-digit code. Your factory programmed
lock code is 123. If you have changed this code and cannot
remember what it is, see Viewing the Lock Code on page 86.
Keep in mind: You can still receive calls when the phone is
locked. Follow these steps to answer an incoming call:
Unlock &
Answer
84
Enter your three-digit code and press a or
æ (or ª) to answer.
Priority Call
3. Find Feature Press q or Z to scroll to Priority Call.
4. Toggle
Press A to toggle the feature On or Off.
5. Exit
Menu
Press º to exit the menu, or you may
scroll to other features.
Priority
Call On
Shortcut:
Press ƒ, A
then ¤, ·
and continue
with step 4.
Keep in mind: Some wireless systems only allow access to
their own emergency numbers. Check with your Service
Provider for more information.
Storing a Priority Call Number
You should reserve memory location 01 for an emergency
number or the number of a family member or close friend. To
store your priority number, follow these steps:
1. Enter
Number
Enter your priority number.
2. Save
Number
Press ¬ and ‚, ⁄ to choose
location 01.
3. Enter
Name
Select a label, enter a name if you like, and
press A when finished. Your phone will confirm the entry by displaying the stored information.
Placing a Priority Call
Place
Call
When Priority Call is ON, press & hold ⁄
at any time.
Keep in mind: If call restriction Service Level 1 is enabled, the
Turbo Dial® Keys will not be active. To override the restriction
and place a priority call, press ‰, ⁄, æ (or ª). See
page 88 for information on your phone’s service levels.
85
Lock/Security
Your phone’s priority call feature allows you to instantly place a
call from location 01 – even when your phone is locked.
Getting to Lock/Security...
1. Enter Menu
Press ƒ then press a.
2. Enter
Lock/Secure
Press q or Z to scroll to Lock Secure
and press a to select.
3. Access
Secure
Options
Press q or Z to scroll to Secure Options
and press a. You will see: Secure Code——————.
Enter your six-digit secure code.
Secure Options
View
Lock Code
Shortcut:
Press ƒ, ‚,
enter six-digit
security code,
then ‰.
86
Secure Options Submenu
For your protection, you must enter a six-digit secure code in
order to access the features in the Secure Options submenu. The
factory programmed secure code is 000000.
Viewing the Lock Code
To view the three-digit lock code:
4. View
Code
Press A to select View Lock Code.
You will see: Lock Code XXX.
5. Exit
Menu
Press º to exit the menu, or you may
scroll to other features.
Changing the Lock Code
To change the three-digit lock code:
Press q or Z to scroll to Change Lock
Code and press a to select.
You will see: Enter New Code———.
5. Enter New
Code
Enter a new three-digit lock code.
You will see: New Lock Code XXX.
6. Exit
Menu
Press º to exit the menu, or you may
scroll to other features.
Changing the Secure Code
The Secure Code is a six-digit number factory set to 000000.
You will probably want to change it to something unique
and easy to remember.
4. Select
Feature
Press q or Z to scroll to Change Secure
Code and press A to select. You will see:
New Code ——————.
5. Enter New
Code
Enter a new six-digit Secure Code. Your
phone will briefly display the new code.
6. Exit
Menu
Press º to exit the menu, or you may
scroll to other features.
Shortcut:
Press ƒ,
‚, enter
your six-digit
secure code,
enter a new lock
code, then ¬.
Change
SecureCode
87
Lock/Security
4. Begin
Change
Change
Lock Code
Getting to Lock/Security...
1. Enter Menu
Press ƒ then press a.
2. Enter
Lock/Secure
Press q or Z to scroll to Lock Secure
and press a to select.
3. Access
Secure
Options
Press q or Z to scroll to Secure Options
and press a. You will see: Secure Code——————.
Enter your six-digit secure code.
Secure Options Submenu
Service
Level 4
Service Level
When loaning your phone to others, you may want to restrict
call placement or protect memory information. Your phone has
two service levels that allow you to control the types of outgoing
calls that can be made from your phone.
4. Select
Feature
Press q or Z to scroll to Service Level
and press A to select.
5. Choose
Level
Press q or Z to scroll through service level
settings and press A to select the setting.
(See the chart below for descriptions.)
6. Exit
Menu
Press º to exit the menu, or you may
scroll to other features.
Your phone has two service levels:
Level 1: Calls can be placed from
memory locations 1-10 only.
1 Memory
1-10 Only
• No dialing from keypad.
• No memory edit or storage.
• No access to name directory.
Level 4: This is the default setting.
• No restrictions.
88
4 Standard
Setting
Master Reset
Master
Reset
Lock/Security
Use this feature to reset all user-selectable options back to their
original factory settings.
Keep in mind: Once you select this feature, the reset process
cannot be canceled or reversed.
4. Reset
Features
Press q or Z to scroll to Master Reset
and press A to select. You will see: Reset?
5. Confirm
Reset
Press A to confirm.
You will see: Standard Setting.
or Exit
Press º to exit without resetting.
6. Exit
Menu
Press º to exit the menu, or you may
scroll to other features.
Master Clear
Use Master Clear to clear all user-selectable options, the
resettable timer, the Phone Book, and the Messaging memory.
Master
Clear
Keep in mind: Once you select this feature, the process cannot
be canceled or reversed.
4. Clear
Settings
Press q or Z to scroll to Master Clear
and press A to select. You will see: Clear?
5. Confirm
Clear
Press A to confirm. You will see: Busy.
It will take a few seconds to reset all of
your phone’s options back to their factory
settings.
or Exit
Press º to exit without resetting.
6. Exit
Menu
Press º to exit the menu, or you may
scroll to other features.
89
Phone Options
The Phone Options menu is your “command center” for
adjusting the way your phone sends and receives calls. You can
fine tune your phone for optimal performance, view
information about your phone’s settings, and much more.
In this chapter we will explain how to:
• switch between your active phone numbers.
• review your phone’s settings.
• select a variety of system specific settings.
Follow these symbols as a guide for using the keys on the side of
your phone.
Press q to scroll up
12 25
Press a to select
Press Z to scroll down
90
07/07/99
Ready
Digital
1 menu
2
abc
3 def
Road Map
Press ƒ then press a to enter the menu system.
Start:
PIN
Inactive
pg. 95
Multi Key
Answer Off
pg. 60
Timers
pg. 95
pg. 68
Tone
Control
Change
Number
Open To
Answer Off
pg. 93
pg. 74
Lock
Secure
pg. 96
Auto
Answer Off
Phone
Info
pg. 93
pg. 82
Phone
Options
pg. 97
Instant
Redial Off
Feature
Review
pg. 97
pg. 93
pg. 90
To Main
Menu
Call
Options
*
Quick Menu On
Phone Options
Phone
Book
pg. 98
Change
Language
pg. 99
Change
Banner
pg. 99
Backlight
Select
pg. 100
Auto
Hyphen On
pg. 101
pg. 94
24 Hour
Clock Off
pg. 98
Service
Light On
Display
Options
pg. 101
MiniBrowser
Options
pg. 104
System
Options
pg. 101
*
Display System ID
pg. 104
pg. 104
To Main
Menu
To Main
Menu
Select
SystemMode
Launch
MiniBrowse
pg. 105
Analog
Only Off
pg. 102
*
pg. 103
*
Power Up
Mode
pg. 106
Roam List Version
To Main
Menu
pg. 107
To Main
Menu
* Feature not available with some phones.
Contact your Service Provider for availability.
91
Getting to Phone Options...
1. Enter Menu
Press ƒ then press a.
2. Enter
Phone Options
Press q or Z to scroll to Phone Options
and press A to select.
Change
Number
Changing Your Number
Your phone can be activated with up to four unique phone
numbers. You could use one number for home and another for
a city you travel to frequently. This feature allows you to select
an appropriate number.
Keep in mind: Only one number can be active on your
phone at a time.
92
3. Begin
Change
Press a to enter Change Number. The
display will show your phone’s currently
active number.
4. Choose
Number
Press q or Z to scroll through the phone
numbers programmed into your phone.
Press a to select the desired number.
You will see: Set.
5. Exit
Menu
Press º to exit the menu, or you may
scroll to other features.
Displaying Phone Information
This feature allows you to view information about your
phone. If you require technical assistance, you may be asked to
check here.
Press q or Z to scroll to Phone Info then
press A to select.
4. Scroll
Press q or Z to scroll through the
information.
5. Exit
Menu
Press º to exit the menu, or you may
scroll to other features.
Feature Review
Phone Options
3. Find
Feature
Phone
Info
Feature
After you have spent some time adjusting your phone’s settings, Review
use this feature to review the changes you have made. When you
enter Feature Review, your phone will display any features that
you have changed from their default factory settings.
Keep in mind: Feature Review is simply an opportunity to
review – but not change – your current settings.
3. Begin
Review
Press q or Z to scroll to Feature Review
and press A to enter.
4. Browse
Features
Press q or Z to scroll through any features
you have changed from their default settings. If all features are set to their default
factory settings, the display will show:
Standard Setting.
5. Exit
Menu
Press º to exit the menu, or you may
scroll to other features.
Shortcut:
Press ƒ then
‚, ·, ‰.
93
Getting to Call Options...
1. Enter Menu
Press ƒ then press a.
2. Enter
Phone Options
Press q or Z to scroll to Phone Options
and press A to select.
3. Enter
Call Options
Press q or Z to scroll to Call Options
and press A to select.
Call
Options
PIN
Inactive
Call Options Submenu
This submenu gives you control over the way your phone places
and receives calls.
Activating PIN Code*
Your Service Provider may require a Personal Identification
Number (PIN) when placing calls. If so, you will probably want
to activate this feature, which allows you to send your PIN code
with one touch of a button.
Keep in mind: If you enter a service area that does not require
a PIN code, make sure PIN Inactive is set.
4. Toggle
PIN
Press q or Z to scroll to PIN Inactive
or Active and press A to toggle.
5. Exit
Menu
Press º to exit the menu, or you may
scroll to other features.
Storing PIN Code in Memory Location 07
When PIN Code is active, your phone automatically uses the
number stored in location 07 as your PIN Code. Once you have
activated the PIN, you should store the PIN code in location 07.
1. Enter PIN
Enter your PIN Code.
2. Store
PIN
Press ¬, press ‚, ‡, and then
press A.
* Contact your Service Provider for availability.
94
Placing a Call with PIN Code Active
When you place a call with PIN Code active, your phone will
queue the number stored in location 07 and then send it when
you press the Smart Button.
2. Send PIN
Phone Options
1. Place Call Enter the number to be called, or recall it
from memory and press æ (or ª) or
press & hold A.
After the call is placed, the system
will prompt you for your PIN code. Press
æ (or ª) or press & hold A to send the
PIN code.
Note: If you see Invalid PIN, the menu feature may be active
but your PIN code is not stored in location 07. The PIN code
must be less than seven digits.
Multiple Key Answer
With Multiple Key Answer ON, you can answer calls by pressing
A or any key in the center of the keypad, ⁄ through ».
4. Find
Feature
Press q or Z to scroll to Multi Key
Answer.
5. Toggle
Feature
Press A to toggle the feature On or Off.
6. Exit
Menu
Press º to exit the menu, or you may
scroll to other features.
Multi Key
Answer Off
Keep in mind: If there are any digits in your Scratchpad or if
your phone is locked, this feature will not work.
95
Getting to Call Options...
1. Enter Menu
Press ƒ then press a.
2. Enter
Phone Options
Press q or Z to scroll to Phone Options
and press A to select.
3. Enter
Call Options
Press q or Z to scroll to Call Options
and press A to select.
Call Options Submenu
Open To
Answer Off
Open to Answer
This feature allows you to set whether or not your phone
automatically answers when opened. If you subscribe to Caller
ID, you will probably want to set this feature OFF so you can
open the phone and check who is calling before you answer.
4. Find
Feature
Press q or Z to scroll to Open to
Answer.
5. Toggle
Feature
Press A to toggle the feature On or Off.
6. Exit
Menu
Press º to exit the menu, or you may
scroll to other features.
Note: To answer calls with Open to Answer OFF,
press æ (or ª).
96
Automatic Answer
Turn Auto Answer ON to have your phone automatically answer
incoming calls after two ring cycles.
Press q or Z to scroll to Auto Answer.
5. Toggle
Feature
Press A to toggle the feature On or Off.
6. Exit
Menu
Press º to exit the menu, or you may
scroll to other features.
Shortcut:
Press ƒ, A
then ¤, fl
and continue
with step 4.
Note: We recommend you use this feature only with vehicle
accessories and with your phone’s ringer active. See page 77.
Otherwise, your phone may answer a call in your absence.
Instant Redial
When placing calls, you may hear a fast busy signal and see
Press SND to Redial. This probably means the network is
temporarily busy. If you turn Instant Redial ON, your phone will
redial for the next four minutes or until the call goes through.
4. Find
Feature
Press q or Z to scroll to Instant
Redial.
5. Toggle
Feature
Press A to toggle the feature On or Off.
6. Exit
Menu
Press º to exit the menu, or you may
scroll to other features.
Instant
Redial Off
Tip:
See page 27 for
more redialing
options.
Keep in mind: This feature redials only when the network
is busy. If you hear a normal busy signal, this feature will
not work.
97
Phone Options
4. Find
Feature
Auto
Answer Off
Getting to Display Options...
1. Enter Menu
Press ƒ then press a.
2. Enter
Phone Options
Press q or Z to scroll to Phone Options
and press A to select.
3. Enter
Display Options
Press q or Z to scroll to Display Options
and press A to select.
Display
Options
Quick Menu On
98
Display Options Submenu
This submenu allows you to customize your phone’s display.
Activating the Quick Menu
Press the Smart Button once and the Quick Menu appears on the
display, offering shortcuts to the most popular features. This
feature turns the Quick Menu OFF if you would rather use the
Smart Button to go straight into the Phone Book. See page 32
for more information.
4. Toggle
Feature
When you enter Display Options, you will
see: Quick Menu. Press A to toggle the
feature On or Off.
5. Exit
Menu
Press º to exit the menu, or you may
scroll to other features.
Changing the Language
This feature allows you to select the language in the display.
Press q or Z to scroll to Change
Language and press a to select.
5. Choose
Option
Press q or Z to scroll through the available
languages and press a to select.
6. Exit
Menu
Press º to exit the menu, or you may
scroll to other features.
Changing the Banner
You may create your own message banner for the phone
to display when it is idle. Your banner can be up to 12
characters long.
4. Enter
Feature
Press q or Z to scroll to Change Banner
and press a to select. You will see the current banner or Alpha or Press §.
5. Enter
Message
Enter your message using the alphanumeric
keypad. Press A when your message is
complete.
6. Exit
Menu
Press º to exit the menu, or you may
scroll to other features.
Phone Options
4. Begin
Selection
Change
Language
Change
Banner
99
Getting to Display Options...
1. Enter Menu
Press ƒ then press a.
2. Enter
Phone Options
Press q or Z to scroll to Phone Options
and press A to select.
3. Enter
Display Options
Press q or Z to scroll to Display Options
and press A to select.
Display Options Submenu
Backlight
Select
Customizing the Backlight
Your phone’s backlight illuminates when you open the phone,
press a key, or your phone receives an incoming call signal. This
feature allows you to choose how long it remains ON.
4. Find
Feature
Press q or Z to scroll to Backlight
Select and press A to select.
5. Toggle
Feature
Press q or Z to scroll to Backlight 15
Seconds, Backlight 30 Seconds, or
Backlight Always On and press A to
select the displayed option.
6. Exit
Menu
Press º to exit the menu, or you may
scroll to other features.
Keep in mind: The backlight will always be illuminated when
your phone is connected to an external power supply, like a
charger or vehicle accessory.
100
Auto Hyphen
Just turn Auto Hyphen ON to have all phone numbers
automatically hyphenated on the display. This allows you to
easily distinguish between area codes, call prefixes, and other
numbers.
Press q or Z to scroll to Auto Hyphen.
5. Toggle
Feature
Press A to toggle the feature On or Off.
6. Exit
Menu
Press º to exit the menu, or you may
scroll to other features.
Displaying the 24-Hour Clock
Your phone can display the current time in 12-hour or 24-hour
format. Use this feature to turn the 24-hour clock On or Off.
4. Find
Feature
Press q or Z to scroll to 24 Hour Clock.
5. Toggle
Feature
Press A to toggle the feature On or Off.
6. Exit
Menu
Press º to exit the menu, or you may
scroll to other features.
Service Light
The Service Light can be useful to quickly check the current
state of your phone’s service. If you prefer to conserve standbytime, you can turn the Service Light OFF with this feature.
4. Find
Feature
Press q or Z to scroll to Service Light.
5. Toggle
Feature
Press A to toggle the feature On or Off.
6. Exit
Menu
Press º to exit the menu, or you may
scroll to other features.
Phone Options
4. Find
Feature
Auto
Hyphen On
24 Hour
Clock Off
Service
Light On
101
Getting to MiniBrowser
1. Enter Menu
Press ƒ then press a.
2. Enter
Phone Options
Press q or Z to scroll to Phone Options
and press A to select.
Press q or Z to scroll to MiniBrowser Options
3. Enter MiniBrowser Options and press A to select.
MiniBrowser
Options
Launch
MiniBrowse
Tip:
You can also
launch the MiniBrowser with
the Quick
Menu. See
page 32.
MiniBrowser Options*
This submenu offers several options for customizing the way
your phone accesses information with the MiniBrowser.
Launching the MiniBrowser
Select this feature to launch the MiniBrowser and access sports
scores, stock reports, weather reports, and more.
4. Find
Feature
Press q or Z to scroll to Launch
MiniBrowser.
5. Select
Press and hold A to select.
6. Exit
Menu
Press º to exit the menu, or you may
scroll to other features.
*Contact your Service Provider for availability.
102
Power Up Mode
When you turn ON your phone, you can begin with the
MiniBrowser or the regular phone features.
Press q or Z to scroll to Power Up Mode.
and press A to select.
5. Select
Option
Press q or Z to scroll to Power Up Phone
or Power Up MiniBrowse and press A
to select.
6. Exit
Menu
Press º to exit the menu, or you may
scroll to other features.
Phone Options
4. Find
Feature
Power Up
Mode
103
Getting to System Options...
1. Enter Menu
Press ƒ then press a.
2. Enter
Phone Options
Press q or Z to scroll to Phone Options
and press A to select.
3. Enter
System Options
Press q or Z to scroll to System Options
and press A to select.
System
Options
Display
System ID
104
System Options Submenu
The System Options submenu offers a couple features that will
help you use your phone and wireless network.
Displaying the System ID
Use this feature to determine the unique System ID for
your wireless phone.
4. View SID
Press A to select Display System ID.
You will see the System ID for your phone.
5. Exit
Menu
Press º to exit the menu, or you may
scroll to other features.
Selecting a System Mode
Your Service Provider configures Select System Mode when you
receive your phone. This feature allows you to select the type of
system your phone will attempt to access. See below for a chart of
available settings.
Press q or Z to scroll to Select
SystemMode and press a to enter.
The display will show your phone’s
current System Mode setting.
5. Choose
Mode
Press q or Z to scroll through the System
Mode settings (see chart on next page).
Press a to select the displayed setting.
6. Exit
Menu
Press º to exit the menu, or you may
scroll to other features.
Standard Mode:
Your phone first seeks a home type
system, then a non-home type system.
Standard Scan
Home Only Mode:
Phone will not operate outside its
home system.
Home
Only
Scan A Mode*:
Phone will operate only within
non-wireline (A) systems.
Scan A
Scan B Mode*:
Phone will operate only within
wireline (B) systems.
Scan B
Analog Only Mode*:
Phone will only operate on analog
networks. Some peripheral devices
require analog signals.
Shortcut:
Press ‰
then
and
continue with
step 5.
«
Analog Only
• Contact your Service Provider for availability.
105
Phone Options
4. Begin
Selection
Select
SystemMode
Getting to System Options...
1. Enter Menu
Press ƒ then press a.
2. Enter
Phone Options
Press q or Z to scroll to Phone Options
and press A to select.
3. Enter
System Options
Press q or Z to scroll to System Options
and press A to select.
System Options Submenu
Analog
Only Off
Analog Only*
Turning Analog Only ON tells your phone to select an analog
channel
for the next call. If you do not place a call, your
phone will revert to dual mode service after a few minutes.
Note: Some peripheral devices, like fax machines and modems,
require analog operation.
4. Find
Feature
Press q or Z to scroll to Analog Only.
5. Toggle
Feature
Press A to toggle the feature ON or OFF.
6. Exit
Menu
Press º to exit the menu, or you may
scroll to other features.
*Contact your Service Provider for availability.
106
Displaying the Roam List Version
This feature displays the Roam List Version used by your phone.
If you require technical assistance, you may be asked to check
this feature.
Roam List
Version
5. Exit
Menu
Phone Options
Press q or Z to scroll to Roam List
4. View
Roam List Version then press A to select.
You will see: Version XXXX.
Press º to exit the menu, or you may
scroll to other features.
107
Using the MiniBrowser*
Need information now? Your phone can give you instant access
to valuable resources on the go! With a subscription and wireless
service, you can retrieve sports scores, weather and traffic
reports, stock prices, and more.
In this chapter we will explain how to:
• launch the MiniBrowser.
• navigate using your phone.
• bookmark your favorite sites.
Follow these symbols as a guide for using the MiniBrowser.
Press q to scroll up
12 25
07/07/99
Ready
Press Z to scroll down
Press ‰ for Soft Key 1
Digital
1 MENU
2 ABC
3 DEF
4 BATT
GHI
5 LOCK
JKL
6 MUTE
MNO
7 PQRS
VIB
8 TUV
9WXYZ
Press ¬ for Soft Key 2
0 OPR
RCL
PWR
STO
FCN
CLR
SEND
END
Press Ç to go back or stop,
hold to return to home page
Press º to exit
Turn to page 110 for a detailed explanation of all the keys.
*Contact your Service Provider for availability.
108
Getting Started Browsing
To get started with you MiniBrowser, you will need an IP address
for your phone. The IP address is the location of a server
provided by your Service Provider, and it will be loaded into your
phone by your Service Provider when you subscribe to this
service. Contact your Service Provider for more information.
Launching the MiniBrowser
1. Open
Quick
Menu
MiniBrowser
If your IP address is already set, then you are ready to go.
Just follow these simple steps:
Press a to open the Quick Menu.
12 25
Phone Book
Messaging
Launch Browser
Last 10 Dialed
2. Select
Browser
Press q or Z to scroll to Launch
Browser and press a to select.
When you launch the MiniBrowser, you will
see the last page you accessed with the MiniBrowser. If this is your first time, you will see
your home page.
Tip:
For more setup
options and
another way to
launch the
MiniBrowser,
turn to page 102.
Turn the page to learn how to navigate with the MiniBrowser.
109
MiniBrowser Navigation
If you know the keys to navigate your phone’s other features,
then you already have a head start at navigating with the
MiniBrowser.
Scrolling and Selecting
When browsing, you will see a list of options on the phone’s
display. Each of the items on the list is assigned a number. Just
press the matching numeric key to select that item. Or you can
scroll to the item with the volume keys and use the Smart Button
to select.
12 25
Scroll bar
(more options
up and down)
6 Web Sites
7 EMail
8 To-Do List
Inbox
OK
Options
Select
Item
Press the key matching the number of the
list item. In the above example, press ‡
for Email.
Scroll
Press q or z to scroll up and down the page.
You can also use « or ». Above, press
z once to scroll to Email, twice to scroll to
To-Do List.
Select
Press a or the left soft key (see the next page)
to select the highlighted item. Above, press a
to select Web Sites.
Go Back While navigating, press Ç to return to the
One Page previous page.
110
Stop
When sending and receiving information,
press Ç to interrupt transmission.
Return to
Home
Press and hold Ç to return to your
home page.
MiniBrowser Navigation
Soft Keys
In addition to the familiar keys for scrolling and selecting, the
MiniBrowser makes uses of “soft keys.” Soft keys are keys that
change their function according to the screen. Read the lower
line of the display (above the indicators) to find out what the soft
keys can do on that screen.
You will see two functions, one on the left and one on the right,
each with an icon:
MiniBrowser
12 25
6 Web Sites
7 EMail
8 To-Do List
Inbox
OK
‰
Press
for left soft key
¬
Press
for right soft key
Left
Soft Key
Press ‰ to choose the option on the left. In
the above example, press ‰ to select OK
and accept the highlighted option: Features.
Right
Soft Key
Press ¬ to choose the option on the right. In
the above example, press ¬ to select
Inbox.
Tip:
You can also
press a to select
the left option.
Display Messages
While you navigate, the lower line of the display will show you
messages to let you know what your phone is doing. You will see:
Sending, Receiving, or Waiting...
Bookmarks
Bookmarks make it easy to quickly jump to the sites you use
most often. You can assign up to nine bookmarks, one for each
of the numeric keys on the keypad. See page 115 to learn how to
make a bookmark. Once you bookmark the site, press and hold
the key and you will automatically jump to the page.
Keep in mind: Bookmarks are only available while browsing.
111
MiniBrowser Alerts
To stay current with changing information, like stock prices or
sports scores, you can subscribe to MiniBrowser alerts through
your Service Provider.
If your phone is ON and you receive a MiniBrowser alert:
• An alert sounds or vibrates:
Tip:
See Ringer or
Vibrator Selection on page 77
to set your
phone’s alert.
See page 79 to
learn about
Reminder Tones.
Your phone will beep or vibrate three times.
• An indicator appears on the display:
Appears on the lower line of the display. It will stay on the
display until you have checked the alert.
1. Check
Message
Press ø to open the messaging menu.
The icon of the message type received will
be flashing.
2. Select
Alert
Press q or z to scroll to MiniBrowse Alrt
and press a to select.
Receiving Calls
Tip:
Look for the IU
indicator on the
lower line of the
display. If you see
it, your phone is
online and you
will not be able to
receive calls.
Most of the time, while browsing you will not be able to receive
calls (depending on your service, callers will probably get your
Voice Mail).
Occasionally, when you access a page that you have recently
visited and the information on the page has not changed, your
phone may use a version of the page stored in its memory. When
this is the case and you receive a call, your phone’s alerts will
sound/vibrate as usual and the display will show the Caller ID (if
available).
Answer
Call
112
Press æ (or ª) to answer the call. Your
browsing session will be put on hold while
the call lasts. Once the call is complete, your
phone will return to the same site.
Entering Words
At times you may need to enter information while browsing, like
a keyword for searching or a message. If you see a flashing
cursor, you can use the keypad to enter letters and punctuation
in the same way you do for the internal Phone Book. See page 37
for more information.
Security
Secure
MiniBrowser
To find out if the information you are sending is secure, just
look at the lower line of the display. A key icon denotes a secure
transmission. If the key has a slash through it, then the
transmission is not secure.
Non-Secure
113
The MiniBrowser Menu
At any time while you are browsing, you can open the
MiniBrowser Menu for a list of options. Through this menu, you
can set bookmarks, get help or information on selected pages,
and more.
Keep in mind: This menu is only available while browsing.
To open the MiniBrowser Menu while browsing:
Open
Menu
Press ƒ then press ⁄.
You will see:
12 25
Browser Menu
1 Help
2 Home
OK
Back
114
Scroll
Press the volume keys to scroll through the
options.
Select
Option
Press a, press ‰, or press the numeric key
matching the option.
Return
Press ¬ or Ç to return to the page you
were browsing before you opened the menu.
The MiniBrowser Menu
In the MiniBrowser Menu, you can choose one of the
following options:
If you need assistance while browsing,
select this option. Some sites do not have
help available.
Home
Select this option to return to the home
page set up by your Service Provider.
Mark Site
To add a page to your bookmark list, choose
this feature.
MiniBrowser
Help
Once bookmarked, press and hold the
corresponding key to jump to the bookmarked page.
Show URL
To see the address of the current page,
choose this option.
Reset UP
Select to relaunch the MiniBrowser.
About UP
This feature offers information on the company that helps to provide the web browsing
service.
Advanced
This submenu contains a couple features for
advanced users, like security and technical
settings.
115
Using Data Features*
Add the Motorola Data Connectivity Kit to your wireless package
and transform your Digital StarTAC® phone into a convenient
and portable fax modem. Use the data cable to connect your
CDMA phone to a compatible computer, and you can send faxes,
access the internet, send and check e-mail – you can transmit
and receive data wherever there is a wireless signal.
In this chapter we will explain how to:
• Place, end, and receive data calls.
• Read the data display.
• Set up Pre-arrangement.
Checking for Data Capability
To use the cable that came with your Data Solutions package,
first make sure that your CDMA phone is data capable. To do so,
just use your phone to perform the following simple test:
1. Select
Feature
Press ƒ then ⁄, ¤, fi.
You will see: Phone Info.
Press A to select.
2. Scroll
Press q or Z to scroll through the submenu.
If you see: TrueSync Capable and Modem/
Fax Capable, your CDMA phone is data
capable.
If you do not see the screens shown as you scroll, contact your
Service Provider for more information.
*Contact your Service Provider for availability.
116
Getting Started with
the Data Connectivity Kit
Attaching the Data Cable
Before you install the fax/modem software on your computer,
it is a good idea to attach the cable to the computer and phone.
1. Plug into
Phone
Plug the smaller end of the data cable, with
the release tab facing up, into the accessory
connector on your phone.
2. Plug into The other end of the data cable is a 9-pin plug
Computer Find the matching serial port on the back of
your computer and insert the 9-pin plug, then
tighten the screws by hand.
VIB
7 PQRS
8 TUV
9WXYZ
0 OPR
STO
PWR
FCN
CLR
Data Cable
RCL
SEND
END
2.
1.
To indicate the cable is attached on both ends, your phone will
beep once.
Keep in mind: To save power, some laptops deactivate unused
serial ports. If this happens, open an application that uses the
serial port, like a fax or dial-up application, and your computer
will automatically activate the port.
Installing the Software
To begin making wireless data calls, you will need to install
the software from the CD-ROM that came with the Data
Solutions package.
The software is designed to take you through the installation
process step by step. Please see the User’s Guide for the software
for more detailed information on software installation.
117
Placing a Data Call
Keep in mind: You will not be able to place a data or fax call
through your phone’s keypad, using Last 10 Dialed, or with
Caller ID. All data and fax calls must be placed through your
computer.
1. Connect
Make sure the cable is connected properly.
2. Place
Call
Open the application on your computer, like a
fax or dial-up application, and place the call
through the application on your computer.
The phone will display the number your computer is calling (or the name if in the internal
Phone Book). You will see: Connecting.
Your phone will automatically redial 3 times (or until it is
successful). If the call is not connected after 3 tries, the display
will return to idle.
Ending a Data Call
Keep in mind: Some of the normal ways to end a call, like
pressing the Smart Button or closing the phone, will not work.
Close
Always close the connection through the
application on your computer. See the software user’s guide for more help. Your phone
will return to the idle display.
Keep in mind: If you set pre-arrangement before the call, your
phone will remain in pre-arranged status when the data call is
ended. You will see either Fax Ready or Data Ready. See page
120 for more information.
Note: Disconnecting the cable or turning OFF your phone will
also end a data call, but they may disrupt your computer. See
page 131 for more information.
118
Reading the Display
Once the call is successfully connected, your phone’s display
shows transmission information.
Time elapsed
Connection speed
12 25
Type of call
Connection number
Rate for sending
Rate for receiving
Fax 14.4 0:12:11
847-555-1212
Tx
Rx
IU
During the Call
Data Cable
Accessing Features
While connected on a data call, you can still access most of your
phone’s features. You can navigate the phone’s menu system to
change or view your phone’s features or Phone Book entries or
read messages or Caller IDs that you received before placing
the call.
119
Setting up Pre-arrangement
Some networks require you to change a setting on your phone
before you can receive an incoming fax or data call. This is
called pre-arrangement. There is no need to worry about
placing data or fax calls – the pre-arrangement setting only
applies to receiving calls.
Keep in mind: In pre-arrangement mode, you will not be able
to receive incoming Voice Calls.
1. Enter
Menu
Press ƒ then A to enter the menu.
Press q or Z to scroll to Phone Options
2. Select
Submenu and press A to select.
3. Select
Feature
Press q or Z to scroll to Data Setup and
press A to select.
4. Select
Setting
Press q or Z to scroll to Voice Only,
Incoming Fax, Incoming Data or To Main
Menu and press A to select.
If you select a fax or data setting, you will
see: NoIncoming VoiceCalls.
5. Exit Menu Press º to exit the menu. You will see:
Data Ready or Fax Ready.
Your phone will automatically return to Voice Only mode if you
remove the cable, turn OFF the phone, or shut down your
computer.
Keep in mind: Data Setup is only available if your Service
Provider requires pre-arrangement and the data cable is
connected to your phone.
120
Receiving a Data Call
When you have an incoming data or fax call, your phone’s
display will show what kind of call you are receiving, along with
the number of the caller. (If the number matches an entry in
your Phone Book, you will see the name stored in the entry).
If you select Auto Answer mode, your phone will automatically
answer data or fax calls when the data cable is connected.
Your phone and computer must be turned ON
and the data cable connected.
2. Select
Mode
Select the pre-arrangement mode if needed.
3. Auto
Answer
Your phone will automatically answer.
or Select
Option
If necessary, select the menu option in the
application.
Data Cable
1. Turn ON
While the connection is being made,
your phone will display: Connecting . .
Keep in mind: All data and fax calls should be answered
through the software installed on your computer. If you press
æ you will probably lose the incoming call.
121
Introducing TrueSync
Wireless data calls are only the beginning. With the data cable
and TrueSync® Software, your phone can exchange select
information with a compatible computer.
You can use TrueSync to transfer and synchronize contact
information from your phone to your compatible desktop,
laptop or handheld computer, and vice versa.
That way, you only enter contact information once and you can
have the information everywhere you want it!
Keep in mind: TrueSync software is designed to synchronize
certain basic features of the initial releases of many popular
Personal Information Managers (PIM) hardware and software
products.
122
Using TrueSync® Software
Here are just a few ways TrueSync software helps make
communication easier than ever:
• Add a contact to your phone on the go. Update your contact
file at the home or office later.
• Transfer contacts into your phone’s internal Phone Book for
easy access and quick memory dialing.
• Customize many of your phone’s features, like ringer styles
and security settings, through TrueSync’s simple windows
interface.
• Synchronize with select Personal Information
Data Cable
Managers (PIMs). TrueSync software helps provide one-step,
multi-point synchronization with most popular PIM managers, devices and services.
Visit www.starfish.com for more information on TrueSync and
software product updates. TrueSync is a registered trademark of
Starfish Software, Inc.
123
Accessory Options
An exciting line of accessories can enhance and personalize your digital
wireless experience.
Lithium Ion Batteries
Motorola’s Lithium Ion (LiIon) batteries are high
energy-density batteries that offer increased capacity
and are lighter in weight than similar sized Nickel
Cadmium and Nickel Metal Hydride batteries.
Nickel Metal Hydride Batteries
Nickel Metal Hydride batteries (NiMH) are highcapacity batteries that offer up to 30% more talk-time
than comparable Nickel Cadmium batteries. To help
achieve maximum life and capacity for your NiMH battery, do not leave the battery
in the charger for more than 24 hours, and use only Motorola-approved chargers.
Cigarette Lighter Adapter
Lets you plug into a reliable power source on the road. Uses your car’s battery to power
your phone and rapid charge its battery at the same time. The Cigarette Lighter
Adapter will not overcharge your battery and contains circuitry to protect against
overvoltage and power surges in the vehicle. In some cars, the engine must be
running in order for the cigarette lighter to operate.
124
Accessory Options
Desktop Charger (AC Adapter Required)
This charger can be loaded with two batteries at once. Equipped with one LED
charging status indicator for each battery, the charger’s front pocket can charge a
battery attached to a phone, and the rear pocket can charge a battery by itself. For use
with Lithium Ion and Nickel Metal Hydride batteries.
Holsters
Your Digital StarTAC® phone is so small and light, it is positively wearable. Slip it in
one of the three available holsters and clip the holster on– for the ultimate in hightech fashion.
Reference
Headset
The convenient headset provides both an earphone and
microphone in one small piece for simple hands-free and
private telephone conversations. The headset plugs directly
into the jack on the top of your phone, so that you can wear
your phone and move freely. Place the foam cover on the
earpiece for a more comfortable fit. See pages 94-97 for Call
Options that make using a headset with your phone even
more convenient.
125
Accessory Options
Data Connectivity Kit
This exciting new accessory transforms your Digital
StarTAC® phone into a conveniently portable fax modem.
Use the data cable to connect your CDMA phone to a
computer, and you can fax*, access the Internet*, send and
check e-mail* – you can transmit and receive data
wherever there’s a wireless signal.
Wireless data calls are only the beginning. With the
TrueSync® Software found in the Connectivity Kit, your
phone can exchange select information with a compatible
computer. You can use TrueSync to transfer and synchronize contact information
from your phone to your compatible desktop, laptop or handheld computer, and vice
versa.
StarTAC clipOn Speakerphone
Compact, innovative, and truly portable, the
StarTAC clipOn Speakerphone offers a hands-free
solution for use just about anywhere – car, home,
office, or any place else on the go. Powered
through your phone’s battery, a cigarette lighter
adapter, or AC Adapter, you can enjoy the
convenience of conference calling wherever your
business takes you.
StarTAC clipOn Organizer
The StarTAC clipOn Organizer enables you to keep
track of thousands of contacts, appointments,
tasks and more – all in a space smaller than your
wallet. A powerful tool alone, attach it to your
Digital StarTAC phone and you can benefit from
the convenience of combined functionality.
*Contact your Service Provider for availability.
126
Accessory Options
Hands-Free Vehicle Kit
Optional Hands-Free Kits give you the convenience of hands-free, speaker phone
operation while in your car. Full duplex operation lets you simultaneously talk and
listen, so both parties can interrupt each other for a normal sounding conversation.
The Hands-Free Kit powers the phone and charges its battery whenever your car’s
engine is running.
Keep in mind: Motorola offers a 3-Watt Vehicular Kit, which includes a 3-watt
booster for analog signals. Since the Digital StarTAC® phone is a digital phone, it is
not compatible with the 3-Watt Kit.
Zero Install Car Kit
For the quickest and easiest mobile solution, use the Zero Install Car Kit. Just plug it
in, attach the microphone, and you are ready to go!
Reference
Important: We recommend you use genuine Motorola batteries and accessories.
Under its wireless telephone warranty, Motorola specifically disclaims any
responsibility for damage caused by the use of portable wireless telephone accessories
not manufactured by Motorola.
127
Troubleshooting
Q. I pressed the power button, but nothing happened. What’s
wrong with my phone?
A. Check that you have installed a battery and that the battery is charged. See
page 12 for information about installing your battery.
Q. The display says Locked. How do I unlock my phone?
A. Try entering the last three digits of your wireless number. If that does not
work, try using the factory preset lock code: 123. If this fails, call your
Service Provider (the company that sends you your monthly wireless bill) for
assistance. For more information on your phone’s security features, see the
Lock/Security chapter, page 82.
Q. My battery did not last as long as I expected. What can I do to
extend battery life?
A. To get the most from your battery, make sure it is fully charged. To charge
the battery to 100% of its capacity, leave it in the charger for an extra hour
after the charger’s light turns green.
Exposing your battery to extreme temperatures—below -10°C (14°F) or
above 45°C (113°F)—can shorten battery life. Batteries are especially
sensitive to high temperature extremes. It is a good idea to always take your
phone with you when you leave your car.
Q. I tried to place a call and received a fast busy signal.
A. This sound means that your call was not processed. For example, the
network may be temporarily busy. To redial the number, press the Smart
Button or press æ (or ª) before ending your call attempt, or press º
and try the call again later. See page 97 for more information on redialing.
128
Troubleshooting
Q. I tried to place a call but received an alternating
high/low tone. What does this mean?
A. This sound means your call did not connect to the network. Most likely, you
dialed the number too soon after turning the phone ON. Wait until the NS
indicator disappears before placing a call.
An alternating tone may also indicate that your phone’s signal is blocked.
Make sure the antenna is fully extended and move clear of any obstructions,
like bridges, parking garages, tall buildings, etc.
Q. My phone started beeping, and the display says: 1 Call
Unanswered. What happened?
A. Someone tried to call you while you were in an area where the signal was
weak. Press Ç to clear your display, extend your phone’s antenna, and
avoid obstructions like tunnels, parking garages and tall buildings
whenever possible.
129
Reference
Q. Whenever I turn the phone ON, the display says: Invalid
Battery. What does this mean and why am I not able to charge
the battery?
A. Your wireless phone uses the Motorola Expert Performance (E•P) Charging
System. The E•P system enables the built-in charger to communicate with
attached batteries and tailor its charging cycle to optimize performance.
If you see Invalid Battery when you power up the phone, the built-in
charger is not able to communicate with the battery and cannot charge it.
You could see this message for several reasons. The most likely one is that
the battery is not a Motorola original and it does not have the appropriate
E•P technology. We recommend that you use only Motorola original
batteries and accessories and that you store your batteries in their
protective covers when not in use.
Troubleshooting
Q. My phone was stolen. What should I report and to whom?
A. Report a stolen phone to the police and to your Service Provider (the
company that sends you your monthly wireless service bills).
Q. I plugged the data cable into my phone but my phone did not
beep. How do I know if the data cable is ready to go?
A. The beep is a sure sign that you are setup correctly. If you did not hear the
beep, the first thing to check is that your phone is data capable. To do so, see
page 116.
Next make sure that both ends of the data cable are connected, the smaller
end to your phone and larger to your computer. Also check the model
number of the cable to be sure you have the right one. Look for SYN7464
printed on the cable.
If all of the above checks out, your computer may have deactivated the port
to save power. Try opening an application that uses the port, like a fax or
dial-up application, and your computer will automatically activate the port.
Q. My phone beeped when I attached the data cable* but my fax
and data applications don’t work at all. What’s wrong?
A. Keep in mind that you must be in an area with digital coverage. Check your
phone’s display for
to be sure you’re in a digital coverage area.
Some wireless networks may not support data or fax transmission. If you see
the digital indicator but you are roaming on an unfamiliar network, this
may be the case.
Also remember that data and fax transmission usually requires a
subscription. Call your Service Provider for more information.
Q. When sending data* with the data cable, why does the
computer show a connection rate of 19200 Kbps?
A. 19200 is the rate of the connection between your computer and the phone.
The rate of the connection between your phone and the network is displayed
on your phone and will be either 14400 or 9600.
*Contact your Service Provider for availability.
130
Troubleshooting
Q. I can’t end my data call* by closing the application on my
computer. What can I do?
A. If necessary, try pressing º on the phone. You might also disconnect the
cable or turn OFF the phone. Remember, if possible always close the
connection through your computer. These alternative methods may disrupt
the application on your computer.
Q. I launched the MiniBrowser* but the display says: Service Not
Available. What is wrong?
A. You are in an area without service. If you have wireless service, look in the
display for the Digital indicator. If you don’t see it you may have only Analog
service or no service at all. If you do see the Digital indicator, you may be
connected to digital network that does not support Internet access.
Q. I launched the MiniBrowser* but the display says: Data Server
Unavailable. What is wrong?
A. Try again in a few minutes. The servers may be temporarily busy.
Reference
*Contact your Service Provider for availability.
131
Glossary
A
AC Adapter An accessory device that allows you to power and/or charge your phone from a wall
outlet. See page 14.
accessory connector A socket on the bottom of the phone where you can attach accessories
such as an AC Adapter or cigarette lighter adapter. To learn more, see page 14.
air-time The amount of time you spend using a wireless system, between the time you
successfully place a call and the termination of that call.
alkaline A battery technology used in personal wireless telephones.
antenna The device on your phone that sends and receives wireless signals.
Auto Answer When you activate this feature, your phone automatically answers after two rings.
See page 97.
Automatic Redial When your wireless network cannot handle your call, this feature enables
your phone to automatically redial with one button push. See page 27.
C
Call Back number A phone number in a text message, provided by the sender. See page 56.
Caller ID A network/subscription dependent service that allows you to view information on
incoming calls before answering. See page 52.
CDMA (Code Division Multiple Access) CDMA takes digitized voice and encodes it in a
unique scheme that is sent out over the air. CDMA digital reduces the probability of dropped
calls. Your phone is equipped to handle CDMA digital voice transmission.
cigarette lighter adapter An accessory device that allows you to power and/or charge your
phone from a car’s cigarette lighter.
D
dedicated Message Key See Message Key.
default A feature’s original setting as programmed in the factory.
digital See CDMA.
DTMF Dual Tone Multi-Frequency are the tones that your phone transmits to communicate with
tone activated phone systems like Voice Mail or bank-by-phone. See page 80. Keep in mind:
“DTMF Tones” does not refer to the sounds produced by your phone’s speaker. See Keypad
Tones for information on the sounds produced by your phone’s speaker.
132
Glossary
E
Emergency Call This feature allows you to place a call from memory location 01 even if the
phone is locked. See page 85.
F
fringe area The outermost range of a wireless system where wireless signals are weak.
function keys The non-numeric keys on your phone used to access and navigate menu features,
as well as perform memory functions. See page 18.
H
Home Only Mode When your phone is active in this System Mode setting and you are beyond the
range of your home Service Provider, your phone will not operate. See page 105.
I
icon One of the variety of symbols used to designate menu features and messages.
indicator A symbol on your phone that gives you information about your phone’s status.
See pages 23-24.
Instant Redial This feature enables your phone to redial when your wireless network is temporarily unable to handle your call. Your phone will automatically attempt the call for four minutes or until it is picked up by the network. See page 97.
Internal Rapid Charger A charger built into your phone for use with an AC Adapter or cigarette
lighter adapter. See page 14.
K
landline The telephone system used for conventional office and home phones.
Lithium Ion (LiIon) A battery technology used in personal wireless telephones. Lithium Ion
batteries generally provide more energy capacity than Nickel Metal Hydride batteries of the
same weight.
lock To prevent unauthorized access to the wireless telephone. See page 84.
lock code A three-digit code used to access your phone once it has been locked. The factory
programmed lock code is 123. To view or change your lock code, see page 87.
133
Reference
Keypad Tones The sounds produced through your phone’s speaker when you press the keys.
See page 79. Keep in mind: “Keypad Tones” does not refer to the tones sent by your phone to
communicate with automated phone systems. See Transmit Tones for information on the
tones used to access automated phone systems.
Glossary
M
memory location A space in the Phone Book where you can store a telephone number and a
name. Each of the Phone Book’s 99 memory locations (numbered 01-99) can hold 24 letters
and up to four numbers with as many as 32 digits.
menu This system contains five features: Phone Book, Timers, Tone Control, Lock/Secure, and
Phone Options.
menu feature Any feature that can be accessed through the menu system.
Message Key Located on the bottom row of the keypad, the dedicated Message Key offers
One-Touch Access to messages and messaging functions. See page 50. See also Caller ID,
Messages, and Voice Mail.
Messages A network/subscription dependent service that enables your phone to receive text
messages and numeric pages just like a pager. See page 56.
Messaging Function Menus While viewing your Caller IDs, reading your Messages, or
checking your Voice Mail, you can use these menus to manage your messages: lock or unlock a
text message, delete one or all of your Caller ID or text messages and numeric pages, or select a
different message type. See page 56.
MiniBrowser Software built into your phone that allows you to access information like stock
reports and sports scores with only your handset. See page 108.
Nickel Cadmium (NiCd) A battery technology used in personal wireless telephone batteries.
Nickel Metal Hydride (NiMH) A battery technology used in personal wireless
telephone batteries.
P
pause A special character that tells your phone to wait before sending the next set of numbers
stored in one memory location. See Pause Dialing.
Pause Dialing A method of storing Phone Book entries that allows you to store multiple strings of
numbers in one memory location; useful, for instance, in accessing automated phone systems.
See page 46.
Personal Identification Number (PIN) A private numeric password which protects personal
accounts such as bank-by-phone or Voice Mail.
Phone Book An alphabetical list of the names and telephone numbers you have stored into your
phone’s internal memory.
prompt A display message requesting input.
134
Glossary
R
road map The visual representation of your phone’s menu system provided in this manual.
roam To use a wireless system outside of your home system, usually when you travel beyond the
range of your home system.
S
Scratchpad A memory feature that automatically remembers the most recent number entered
into the keypad. See page 45.
Scratchpad tones See DTMF.
scroll To move backward or forward through a list; for example, to move backward or forward
through the menu system or the Phone Book using either the volume keys or the « and
» keys.
secure code A six-digit code used to access and change certain security features.
The factory programmed secure code is 000000.
Service Provider See Wireless Service Provider.
Service Tones Two short beeps used to alert you to changes in your wireless service. See page 81.
signal See wireless signal.
Silent Mode Select this feature and all your phone’s tones will be silenced and the VibraCall®
Alert activated. See page 76.
soft-handoff Unlike traditional analog technology where you are disconnected from one site
and then connected to another, CDMA digital technology connects you to a new site before
disconnecting you from the old site. This is known as a “soft-handoff.” With soft-handoff
technology, you could experience fewer dropped calls.
Standard Mode When your phone is active in this System Mode setting and you are beyond the
range of your home Service Provider, your phone will seek a home type system, then a nonhome type system. See page 105.
standby-time The total time your phone is ON but not used for talking.
Super Speed Dial A dialing shortcut that allows you to quickly dial any number in the Phone
Book. To use this feature, enter the two-digit location of the number, 01-99, then press and hold
Smart Button or press æ (or ª) and the call is placed. See page 43.
135
Reference
Smart Button The middle key on the side of your phone used to access the Phone Book,
place calls, end calls, select the Phone Book, enter the menu system, and toggle features
ON and OFF.
Glossary
System ID Every wireless system has a unique number to identify itself. See page 104.
System Mode A setting that determines the system type that your wireless phone will access. See
page 105 to select a System Mode.
T
talk-time The total time that you can talk on your phone before the battery is fully discharged.
toggle To switch between two possible options; for example: ON vs. OFF. Pressing the Smart Button
toggles features ON or OFF.
Transmit Tones See DTMF.
Turbo Dial® keys To use this feature, press and hold a number on the keypad, ⁄ through
·, and your call is placed.
U
unlock code See lock code.
V
VibraCall® Alert When activated, this feature alerts you silently of incoming calls by vibrating.
It can be used alone or in conjunction with the ringer. See page 77.
Voice Mail Contact your Service Provider for availability.
volume keys Located on the side of your phone, the upper and lower volume keys are used
to adjust ringer and keypad volume. They also scroll within the menu system and the
Phone Book.
W
wireless carrier One of multiple competing companies in a given geographic area that owns
and operates a wireless system.
Wireless Service Provider A company affiliated with a wireless carrier that provides wireless
service to its customers.
wireless signal The radio waves that carry information between your wireless phone and the
wireless system.
wireless system The wireless equipment in a given geographic area that relays signals to and
from individual wireless telephones and the landline telephone system.
wireline See system type.
136
Reference
137
138
Patent Information
Manufactured under one or more of the following U.S. patents:
4630305
4633141
4636593
4636741
D288432
4648125
4649543
D288683
4654655
D289156
4662691
4667333
4668917
4670747
4672502
4680787
4681476
4683585
4692726
4704588
D292578
4706036
D292920
4710724
4711361
4715063
4716319
4716391
4723305
D294257
4727306
4727583
4730195
4734635
4736277
4737976
4740794
4741018
4741034
4742562
D295627
4746242
D295973
D295975
4751737
D296187
4761621
4764737
D297734
D297735
4777564
Re.32768
D299136
4797929
4798975
4800348
4802236
4809356
4811377
4811404
4827226
4827507
4829274
4837534
D301476
4843621
4845772
D302015
4851966
4868576
4870686
D303656
4876552
4879533
D305427
4896124
4897873
D305717
4904549
4905288
4905301
D306293
D306441
D306594
4912602
4918732
4922178
4945570
4954796
4959851
4963812
4963843
4965537
4972355
4972432
4972455
4975808
4984290
D314173
D315330
D315346
D315543
D315559
D315565
5004992
D315907
5008925
D316417
D316859
5017856
5018188
5020091
5020092
5020093
5028083
5028859
5029044
5029233
5031028
5036532
5053924
5057762
D320780
5059885
5060294
D322783
D322955
5081674
5083304
D324024
D324388
5095503
D325028
D325583
5109536
D325915
5113436
5117450
5121047
5122480
5122722
D327061
5128834
D328302
5142551
5142696
5146620
5148471
5148473
5148961
5150359
5150384
5152006
5157693
5163159
5164652
5166596
5175759
5175874
D332261
5182749
D332785
5185566
5187809
5193223
5195106
5195108
5201069
5204977
5210793
5214675
5222104
5222251
D337332
5230007
5230093
5233633
5235492
5237257
5239127
5241545
5241548
5241650
5241693
5242767
D339582
5249302
5251331
D340710
5260988
5261119
5262710
5263052
5276707
5278994
D343173
5280637
D344087
5287553
5287555
5287556
D344511
5301365
5321847
D348880
5349588
5359696
5361400
5363071
5365549
D352497
5366826
D353131
D353361
5375143
5375258
5379324
D354055
D354062
5384825
D356084
5402447
5406146
5406562
D357224
D357457
5410741
D357680
D357681
5428836
D359734
D359735
D359959
5432017
D360632
5438684
D361070
5442680
5446763
5448763
5448771
5453997
D362840
5457744
5459640
5463646
5465412
5469177
5475752
D365094
D365817
5486843
5487184
5488335
5488649
D366872
5493198
5493714
5497126
5497382
D367640
5499394
5506490
D368696
5510693
5511235
D369162
5513078
D369359
5519303
5519346
5524276
5524278
D370463
5530922
5542116
5544250
D372481
5546275
5546380
D372896
5551078
5559471
D374424
D374872
5572193
5574976
5577268
D375732
D375733
D375734
D375932
D375952
D376127
5588041
5589796
5590177
5594778
5594951
D377792
D377934
5604050
5606730
D378366
5613229
5613863
5615233
5621763
Reference
4121218
4138681
4193036
4254382m
4302845
4312074
4327319
4329666
4369516
4369522
4378603
4390963
D269873
4398265
4400584
4400585
D270835
D271491
Re.31470
4431977
4434461
4455534
4462098
D275951
4484153
4485486
4486624
D276809
4491972
D277667
4504834
D278708
4523155
4546329
4550426
4551696
4564821
D282169
4571595
4573017
4574243
4585957
4602218
D284759
D285439
4616314
4617520
D286778
4626309
4628529
4629829
4630304
Other patents pending.
139
Index
A
AC adapter 14–16
accessory connector 18
Accessory Options 124–127
adjusting volume 31
alpha characters, entering 37
Analog Indicator 24
Analog Only 106
answering calls 28–29
automatic answer 97
multiple key answer 95
antenna 18
audible timers
one minute 72
repeating 73
single 73
Authentication Entry 88
auto display timer 72
auto lock 84
automated systems
calling 46–47
storing number 46–47
automatic answer 97
automatic redial 27
B
banner 99
batteries 12–15
chargers 14–17
charging 14–19
covers 12
installing 13–14
storage & disposal 15
varieties 124
battery level
indicator 24
shortcut 33
Bookmarks 111, 115
browsing the web 108–115
C
Call Back messages 56
Call Options 94–97
Call Timers 68–73
road map 69
Caller ID 28
deleting 53
140
number preference 65
options 53
viewing 52
calling cards
storing numbers 48
using 49
changing lock code 87
changing secure code 87
changing the banner 99
changing your number 92
chargers 14–17
desktop 16–17
Internal Rapid 14
charging batteries 14–17
checking your voice mail 54
cigarette lighter adapter 14, 124
clear key 18
Clear, Master 89
clearing
Caller ID 53
Messages 57
Phone Book entries 42
settings 87
Voice Mail notification 55
clock 24
display format 101
cumulative call timer 71
D
data 116–123
Data Cable
attaching 117
data calls
pre-arrangement 120
Data Capability 116
deleting
Caller ID 53
Messages 57
Phone Book entries 42
Voice Mail notification 55
desktop charger 16–17
times 17
dialing
priority call 85
restricting 88
Digital Indicator 24
display 18
individual call timer 70, 72
last ten numbers dialed 27
lock code 86
system ID 104
your number 65
Display Options 99–101
displaying
caller’s numbers 65
displaying phone information 93
displaying the 24-Hour Clock 101
DTMF tones 80
storing 46–49
Vibrate Then Ring 25
individual call timer 70
auto display 72
installing batteries 13–14
Instant Redial 97
Internal Rapid Charger 14
Internet 108–115
E
L
earpiece 18
editing memory 66–67
ending a call
data 118
entering names 37
entries, clearing 42
F
faxes 116–123
flip 18
function key 18
G
Getting Started 10–19
Glossary 132–136
H
Hands-Free Vehicle Kit 124
headset 125
headset jack 18
holster 125
Home Only Mode 105
I
keypad cover 18
Keypad Tones 79
last ten numbers dialed 27
letters, entering 37
Lithium Ion Batteries 124
lock
automatically 84
manually 84
messages 57
lock code
changing 87
viewing 86
Lock/Security 82–87
road map 83
M
Master Clear 89
Master Reset 87
memory 34–45
editing 66–67
Phone Book 60–65
recalling 38–39, 62–63
storing 36, 64
tips 35
menu features 58
Messages
Call Back 56
lock/unlock 57
options 57
reading 56
receiving 51, 108, 116, 126
Messaging Menu 50
microphone 18
MiniBrowser
In-Box 115
launching 102, 109
Menu 114–115
using 108–115
MiniBrowser Alerts 112
Index
In Use Indicator 25
incoming calls 28–29
indicators
Analog 24
battery level 23, 24
Digital 24
In Use 25
No Service 25
Roam 25
Signal Strength 24
Silent Mode 25
Unanswered Call 29
VibraCall® On 25
K
141
MiniBrowser Navigation 110–111
MiniBrowser Options 102–103
multiple key answer 95
mute the phone 30
N
names
clearing 42
entering 37
recalling 38, 62, 63
viewing 65
navigating the menu 58
navigating the web 108–115
Nickel Metal Hydride Batteries 124
No Service Indicator 25
number
changing yours 92
viewing others 65
viewing yours 65
number character 48–49
Number Preference 65
numbers
recalling 38–39
storing 36
O
one minute timer 72
outgoing calls
controlling 88
placing 26
P
Pause Dialing 46–47
personalizable banner 99
Phone Book 60–65
editing 66–67
memory 34–45
recalling 62–63
road map 61
status 63
storing 36, 64
phone information 93
phone lock
automatically 84
manually 84
phone number
changing yours 92
viewing others 65
viewing yours 65
Phone Options 90–107
142
road map 91
PIN code
activating 94
storing 94
using 95
placing calls 26
data 118
priority call 85
redial 27
power key 18, 21
Power Up Mode 103
pre-arrangement 120
priority call 85
R
reading the indicators 24–25
reading your messages 56
real time clock 24
recall key 18
recalling
by location 39
by name 38, 62, 63
shortcuts 43
receiving calls 28–29
automatic answer 97
data 121
data and faxes 116–123
multiple key answer 95
receiving messages 51
redial 27
automatic 27
Instant 97
last ten numbers dialed 27
repeating timer 73
Reset URL 115
Reset, Master 87
resettable call timer
resetting 71
viewing 70
ringer
silencing 76–77
style 77
volume 31
ringer/vibrator 76–77
road maps 59
Call Timers 69
Lock/Security 83
Phone Book 61
Phone Options 91
Tone Control 75
Roam Indicator 25
roam list version 107
S
Safety Information 6–9
Scratchpad 45
Scratchpad Tones 80
scroll keys 18
secure code, changing 87
Secure Options 86–87
security 82–87
selecting ringer style 77
send key 18
service level 88
Service Light 101
Service Tones 81
shortcuts 32
Show URL 115
signal strength 24
Silent Mode 76–77
Indicator 25
silent mode 30
single timer 73
Smart Button 19
Soft Keys 111
Standard Mode 105
store key 18
storing 36, 64
Call Back number 56
while on a call 45
Super Speed Dial 43
system ID, viewing 104
system mode 105
System Options 104–107
T
keypad 79
service 81
storing 46–49
Transmit Tones 80
storing 46–49
Troubleshooting 128–131
TrueSync® 122
Turbo Dial® keys 43
priority call 85
turning the phone ON
mode 103
Turning Your Phone On 21
U
unanswered call indicator 29
unlock/lock 84
Using Data Features 116–123
Using Messaging 50–57
Using the MiniBrowser 108–115
V
VibraCall® Alert 30, 76–77
VibraCall® On Indicator 25
Vibrate Then Ring Indicator 25
viewing
Caller IDs 52
cumulative call timer 71
individual call timer 70, 72
lock code 86
resettable call timer 70
your number 65
Voice Mail
calling 46–47
checking 54
deleting notification 55
options 55
storing number 46–47
volume keys 18
volume, adjusting 31
Index
Three-Watt Vehicular Kit 127
timers
audible 72–73
cumulative 71
individual 70, 72
one minute 72
repeating 73
resettable 70, 71
single 73
Tone Controls 74–80
Basic 30–31
road map 75
volume 31
tones
Y
Your Phone & Its Shortcuts 32
Z
Zero Install Car Kit 127
143