1
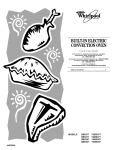
®
BUILT-IN ELECTRIC
CONVECTION OVEN
Use & Care Guide
In the U.S.A, for questions about features, operation,
performance, parts, accessories or service,
call: 1-800-253-1301.
In Canada, for product-related questions call: 1-800-461-5681,
for parts, accessories, installation and service
call: 1-800-807-6777.
or visit our website at...
www.whirlpool.com or www.whirlpool.com/canada
Table of Contents ............................................ 2
MODELS
8300609
GBD277
GBS277
GBD307
GBS307
YGBD277
YGBS277
YGBD307
YGBS307
TABLE OF CONTENTS
OVEN SAFETY ............................................................................ 3
PARTS AND FEATURES ............................................................ 5
ELECTRONIC OVEN CONTROL................................................ 6
Display..........................................................................................6
Start/Enter ....................................................................................6
Upper Off, Lower Off or Off/Cancel.............................................6
Clock ............................................................................................6
Tones............................................................................................6
Fahrenheit and Celsius.................................................................7
Timer.............................................................................................7
Control Lock.................................................................................7
Oven Temperature Control ..........................................................7
OVEN USE................................................................................... 8
Aluminum Foil...............................................................................8
Positioning Racks and Bakeware ................................................8
Bakeware......................................................................................8
Meat Thermometer.......................................................................8
Oven Vent.....................................................................................9
Baking and Roasting....................................................................9
Broiling and Custom Broiling .......................................................9
Convection Cooking...................................................................10
Convection Baking and Roasting ..............................................10
Timed Cooking ...........................................................................12
OVEN CARE .............................................................................. 12
Self-Cleaning Cycle....................................................................12
General Cleaning........................................................................13
Oven Lights ................................................................................14
Oven Door ..................................................................................14
TROUBLESHOOTING............................................................... 14
ASSISTANCE OR SERVICE ..................................................... 15
WARRANTY .............................................................................. 16
2
OVEN SAFETY
Your safety and the safety of others are very important.
We have provided many important safety messages in this manual and on your appliance. Always read and obey all
safety messages.
This is the safety alert symbol.
This symbol alerts you to potential hazards that can kill or hurt you and others.
All safety messages will follow the safety alert symbol and either the word “DANGER” or
“WARNING.” These words mean:
You can be killed or seriously injured if you don't
immediately follow instructions.
You can be killed or seriously injured if you don't
follow instructions.
All safety messages will tell you what the potential hazard is, tell you how to reduce the chance of injury, and tell you
what can happen if the instructions are not followed.
IMPORTANT SAFETY INSTRUCTIONS
WARNING: To reduce the risk of fire, electrical
shock, injury to persons, or damage when using the
oven, follow basic precautions, including the following:
■ Proper Installation – Be sure the oven is properly
installed and grounded by a qualified technician.
■ Never Use the Oven for Warming or Heating the
Room.
■ Do Not Leave Children Alone – Children should not
be left alone or unattended in area where oven is in
use. They should never be allowed to sit or stand
on any part of the oven.
■ Wear Proper Apparel – Loose-fitting or hanging
garments should never be worn while using the oven.
■ User Servicing – Do not repair or replace any part of
the oven unless specifically recommended in the
manual. All other servicing should be referred to a
qualified technician.
■ Storage in Oven – Flammable materials should not
be stored in an oven.
■ Do Not Use Water on Grease Fires – Smother fire or
flame or use dry chemical or foam-type extinguisher.
■ Use Only Dry Potholders – Moist or damp potholders
on hot surfaces may result in burns from steam. Do
not let potholder touch hot heating elements. Do not
use a towel or other bulky cloth.
■
■
■
■
■
Use Care When Opening Door – Let hot air or steam
escape before removing or replacing food.
Do Not Heat Unopened Food Containers – Build-up
of pressure may cause container to burst and result
in injury.
Keep Oven Vent Ducts Unobstructed.
Placement of Oven Racks – Always place oven racks
in desired location while oven is cool. If rack must be
moved while oven is hot, do not let potholder contact
hot heating element in oven.
DO NOT TOUCH HEATING ELEMENTS OR
INTERIOR SURFACES OF OVEN – Heating
elements may be hot even though they are dark in
color. Interior surfaces of an oven become hot
enough to cause burns. During and after use, do
not touch, or let clothing or other flammable materials
contact heating elements or interior surfaces of oven
until they have had sufficient time to cool. Other
surfaces of the oven may become hot enough to
cause burns – among these surfaces are oven vent
openings and surfaces near these openings, oven
doors, and windows of oven doors.
SAVE THESE INSTRUCTIONS
3
IMPORTANT SAFETY INSTRUCTIONS
For self-cleaning ovens:
Do Not Clean Door Gasket – The door gasket is
essential for a good seal. Care should be taken not
to rub, damage, or move the gasket.
■ Do Not Use Oven Cleaners – No commercial oven
cleaner or oven liner protective coating of any kind
should be used in or around any part of the oven.
■
■
■
Clean Only Parts Listed in Manual.
Before Self-Cleaning the Oven – Remove broiler pan
and other utensils.
SAVE THESE INSTRUCTIONS
The California Safe Drinking Water and Toxic Enforcement Act requires the Governor of California to publish a list
of substances known to the State of California to cause cancer, birth defects, or other reproductive harm, and
requires businesses to warn of potential exposure to such substances.
WARNING: This product contains a chemical known to the State of California to cause cancer, birth defects, or
other reproductive harm.
This appliance can cause low-level exposure to some of the substances listed, including benzene, formaldehyde,
carbon monoxide, and toluene.
4
PARTS AND FEATURES
This manual covers different models. The oven you have purchased may have some or all of the items listed. The locations and
appearances of the features shown here may not match your model. On I-enabled products, please consult the Use and Care Guide
and Installation Guide that have been provided with the Web Tablet and Integrated Home Management System.
1
2
7
8
3
9
4
10
5
6
1.
2.
3.
4.
5.
Electronic Oven Control
Oven Vent
Broil Element (not shown)
Bake Element
Oven Door Window
6.
7.
8.
9.
10.
Lower Oven
Automatic Oven Light Switch
Oven Lock Latch
Convection Fan
Model and Serial Number Plate
(on right mounting rail)
Parts and Features not shown
Oven Lights
Broiler Pan and Grid
Roasting Rack
5
ELECTRONIC OVEN CONTROL
1.
2.
3.
4.
5.
Upper Oven Temperature Display
Electronic Display
Lower Oven Temperature Display
Timer
Clock
6.
7.
8.
9.
10.
11.
12.
13.
14.
Oven Light
Oven Selector
Oven Settings
Temperature Setting
Timed Cooking
Display
When power is first supplied to the appliance, everything on both
displays will light up for 5 seconds. Then, the time of day and
“PF” will appear on the electronic oven display.
Any other time “PF” appears, a power failure occurred. To reset
the clock, press UPPER OFF or LOWER OFF on double oven
models. On single oven models, press OFF/CANCEL.
Electronic Display
When the oven(s) are in use, this display shows the oven
temperature. On double oven models, this display will also show
which oven is being set. The left cavity symbol represents the
upper oven and the right cavity symbol represents the lower
oven.
If “Err” appears on the oven display, an invalid pad was pressed.
Press UPPER OFF or LOWER OFF and retry entry. On single
oven models, press OFF/CANCEL.
When the ovens are not in use, the display will show the time day.
Start/Enter
The START/ENTER pad begins any oven function except the
Timer. If not pressed within 5 seconds after pressing a pad,
“START?” will appear on the oven display as a reminder. If not
pressed within 4 minutes after pressing a pad, the oven display
will return to the time of day mode and the programmed function
will be cancelled.
Upper Off, Lower Off or Off/Cancel
The UPPER OFF, LOWER OFF and OFF/CANCEL pads stop their
respective oven functions except for the Clock, Timer and
Control Lock.
The cooling fan may continue to operate even after an oven
function has been cancelled, depending on the oven
temperature.
6
Hour
Minute
Start/Enter [Control Lock]
Upper Off/Lower Off
Clock
This is a 12 hour clock and does not show a.m. or p.m.
To Set:
Before setting, make sure the ovens, Timer and Timed Cooking
are off.
1. Press CLOCK.
2. Press the HR or MIN “up” or “down” arrow pads to set the
time of day.
3. Press CLOCK or START/ENTER.
To remove the time of day from the display: Press and hold
CLOCK for 5 seconds. Repeat to return the time of day to the
display. The time should not have to be reset.
Tones
Tones are audible signals, indicating the following:
One tone
■
Valid pad press
■
Oven is preheated
■
Function has been entered
Three tones
■
Invalid pad press
Four tones
■
End-of-cycle
■
Reminder, repeating each minute after the end-of-cycle tones
All Tones
All of the above tones are preset on, but can be turned off.
To Turn Off/On: Press and hold STOP TIME for 5 seconds, and a
tone will sound. On double ovens only, “Snd OFF” and “Snd On”
will remain in the display. To remove, press UPPER OFF, LOWER
OFF or OFF/CANCEL.
Tone Volume
The volume is preset at high, but can be changed to low.
To Change: Press and hold the DELAY START TIME pad for 5
seconds. A tone will sound and “Snd Hi” and “Snd Lo” will
remain on the oven display. To remove, press UPPER OFF,
LOWER OFF or OFF/CANCEL. Repeat to change back to “Snd
HI.”
REMINDER TONES
The Timer and Timed Cooking reminder tones are preset on, but
can be turned off. Reminder tones do not include end-of-cycle
tones. If “All Tones” have been turned off, the reminder tones
cannot be independently turned on.
Control Lock
The Control Lock shuts down the control panel pads to prevent
unintended use of the ovens.
When the control is locked, only the CLOCK, TIMER SET and
TIMER OFF pads will function.
The Control Lock is preset unlocked, but can be locked.
To Lock/Unlock Control: Before locking, make sure the ovens,
Timer and Timed Cooking are off. Press and hold START/ENTER
until a single tone sounds and “Loc,” a picture of a lock and
“START?” will appear on the oven display, about 5 seconds.
Repeat to unlock and remove “Loc” from display.
Oven Temperature Control
Timer
To Turn Tones Off/On: Press and hold TIMER SET until a tone
sounds. The display will show “TIMER” and “NA9 On” or
“TIMER” and “NA9 OFF.” To remove from the display, press
UPPER OFF, LOWER OFF or OFF/CANCEL. Repeat to turn back
on.
Timed Cooking
To Turn Tones Off/On: Press and hold COOK TIME until a tone
sounds. The display will show “COOK TIME” and “NA9 OFF” or
“COOK TIME” and “NA9 On” to indicate the status of the cook
time tones. To remove from the display, press UPPER OFF,
LOWER OFF or OFF/CANCEL. Repeat to turn back on.
IMPORTANT: Do not use a thermometer to measure oven
temperature because opening the oven door and element or
burner cycling may give incorrect readings.
The oven provides accurate temperatures; however, it may cook
faster or slower than your previous oven, so the temperature
calibration can be adjusted. It can be changed in Fahrenheit or
Celsius.
A minus sign means the oven will be cooler by the displayed
amount. No sign means the oven will be warmer by the displayed
amount. Use the following chart as a guide.
ADJUSTMENT °F
(ADJUSTMENT °C)
COOKS FOOD
10°F (5°C)
...a little more
20°F (10°C)
...moderately more
30°F (15°C)
...much more
-10°F (-5°C)
...a little less
Timer
-20°F (-10°C)
...moderately less
The Timer can be set in hours and minutes and counts down the
set time. The Timer does not start or stop the oven.
-30°F (-15°C)
...much less
Fahrenheit and Celsius
The temperature is preset at Fahrenheit, but can be changed to
Celsius.
To Change: Press and hold CUSTOM BROIL for 5 seconds. A
tone will sound and “C” will appear on the display. Repeat to
change back to Fahrenheit. To remove, press UPPER OFF,
LOWER OFF or OFF/CANCEL.
To Set:
To Adjust Oven Temperature Calibration:
1. Press TIMER SET.
If no action is taken after 4 minutes, the electronic oven
display will return to the time of day mode.
1. Press and hold BAKE until the oven display shows the current
calibration, for example, “0° CAL.”
2. On double oven models only, press UPPER OVEN or LOWER
OVEN.
3. Press the TEMP “up” or “down” arrow pad to increase or to
decrease the temperature in 10°F (5°C) amounts. The
adjustment can be set between 30°F (15°C) and -30°F
(-15°C).
4. Press START/ENTER.
2. Press the HR or MIN “up” or “down” arrow pads to set length
of time.
3. Press TIMER SET or START/ENTER.
If not pressed within 4 minutes, the display will return to the
time of day mode and the programmed function will be
cancelled.
When the set time ends, if enabled, end-of-cycle tones will
sound, then reminder tones will sound every minute.
4. Press TIMER OFF anytime to cancel the Timer and/or stop
reminder tones.
Remember, do not press the Off/Cancel pads because the
respective oven will turn off.
The time can be reset during the countdown by repeating the
above steps.
7
OVEN USE
Aluminum Foil
Bakeware
The bakeware material affects cooking results. Follow
manufacturer’s recommendations and use the bakeware size
recommended in the recipe. Use the following chart as a guide.
BAKEWARE/
RESULTS
IMPORTANT: Do not line the oven bottom with any type of foil,
liners or cookware because permanent damage will occur to the
oven bottom finish.
■ Do not cover entire rack with foil because air must be able to
move freely for best cooking results.
Light colored
aluminum
■ Light golden
crusts
To catch spills, place foil on rack below dish. Make sure foil is
at least 1 in. (2.5 cm) larger than the dish and that it is turned
up at the edges.
■
■
Use temperature and time
recommended in recipe.
■
May need to reduce baking
temperatures 25°F (15°C).
■
Use suggested baking time.
■
For pies, breads and casseroles, use
temperature recommended in
recipe.
■
Place rack in center of oven.
Insulated cookie
sheets or baking
pans
■ Little or no
bottom
browning
■
Place in the bottom third of oven.
■
May need to increase baking time.
Stainless steel
■ Light, golden
crusts
■
May need to increase baking time.
Stoneware
■ Crisp crusts
■
Follow manufacturer’s instructions.
Ovenproof
glassware,
ceramic glass or
ceramic
■ Brown, crisp
crusts
■
May need to reduce baking
temperatures 25°F (15°C).
■
Positioning Racks and Bakeware
IMPORTANT: Never place food or bakeware directly on the oven
door or bottom. Permanent damage will occur to the porcelain
finish.
RACKS
Position racks before turning the oven on. Do not move racks
with bakeware on them. Make sure racks are level. To move a
rack, pull it out to the stop position, raise the front edge, then lift
out. Use the following illustration and chart as a guide.
■
FOOD
RACK POSITION
Frozen pies, large roasts, turkeys,
angel food cakes
1 or 2
Bundt cakes, most quick breads,
yeast breads, casseroles, meats
2
Cookies, biscuits, muffins, cakes,
non-frozen pies
2 or 3
BAKEWARE
To cook food evenly, hot air must be able to circulate. Allow 2 in.
(5 cm) of space around bakeware and oven walls. Use the
following chart as a guide.
8
NUMBER OF
PAN(S)
POSITION ON RACK
1
Center of rack.
2
Side by side or slightly staggered.
3 or 4
Opposite corners on each rack. Make sure
that no bakeware piece is directly over
another.
Even browning
Dark aluminum
and other
bakeware with
dark, dull and/or
non-stick finish
■ Brown, crisp
crusts
Do not cover food with aluminum foil when convection
cooking (on some models).
■
RECOMMENDATIONS
Uneven
browning
Meat Thermometer
On models without a temperature probe, always rely on a meat
thermometer to determine doneness of meat and poultry. The
internal temperature, not appearance, is what counts. A meat
thermometer is not supplied with this appliance.
■ Insert the thermometer into the center of the thickest portion
of the meat or inner thigh or breast of poultry. The tip of the
thermometer should not touch fat, bone or gristle.
■
After reading the thermometer once, push it into the meat
¹⁄₂ in. (1.25 cm) more and read again. If the temperature
drops, cook the meat or poultry longer.
■
Check all meat in two or three places.
Oven Vent
3. Press START/ENTER.
A preheat time will count down and “PrE” will appear on the
oven display if the actual oven temperature is under 170°F
(75°C).
1
2
When the actual oven temperature reaches 170°F (75°C), the
timer will continue counting down.The temperature setting
can be changed any time after pressing START/ENTER.
3
When the set temperature is reached, if enabled, one tone will
sound.
4. Press UPPER OFF, LOWER OFF or OFF/CANCEL when
finished cooking.
1. Upper oven
2. Oven vent
3. Lower oven
The oven vent should not be blocked or covered since it allows
the release of hot air and moisture from the oven. Doing so will
cause poor air circulation, affecting cooking and cleaning results.
Never set plastics, paper or other items that could melt or burn
near the oven vent.
Baking and Roasting
1
Preheating
After START is pressed, the oven will enter a timed preheat
conditioning. “PrE” and the time countdown will appear on the
display. When the preheat conditioning time ends, a tone will
sound and the selected temperature will appear on the display.
Preheat temperatures are affected by varying factors such as
room temperature and peak energy usage times. It is normal for
the temperature showing on the display and the actual oven
temperature to differ.
Waiting an additional ten minutes after the preheat conditioning
time ends to put food in the oven is suggested when baking
foods with leavening ingredients, such as yeast, baking powder,
baking soda and eggs.
Broiling and Custom Broiling
1
2
1. Broil element
2. Bake element
ACCUBAKE® Temperature Management System
(on some models)
The ACCUBAKE system electronically regulates the oven heat
levels during preheat and bake to maintain a precise temperature
range for optimal cooking results. The bake and broil elements
cycle on and off in intervals. The bake element will glow red when
cycling on, the broil element will not. This feature is automatically
activated when the oven is in use.
Before baking and roasting, position racks according to the
“Positioning Racks and Bakeware” section. When roasting, it is
not necessary to wait for the oven preheat conditioning time to
end before putting food in unless recommended in the recipe.
If the oven door is opened during baking and roasting, the bake
and broil elements will turn off immediately. They will come back
on once the door is closed.
To Bake or Roast:
1. On double oven models only, press UPPER OVEN or LOWER
OVEN.
Close oven door. The display will show “door” and the
heating elements will not heat if the door is open when baking
and roasting.
2. Press BAKE.
Press the TEMP “up” or “down” arrow pad to enter a
temperature other than 350°F (175°C). The bake range can be
set between 170°F and 500°F (75°C and 260°C).
1. Broil element
Broiling uses direct radiant heat from the broil element to cook
food. During broiling, the broil element cycles on and off in
intervals to maintain the oven temperature.
If the oven door is opened during broiling, the broil element will
turn off immediately and come back on once the door is closed.
■ Use only the broiler pan and grid provided with the appliance.
It is designed to drain juices and help prevent spatter and
smoke.
■
For proper draining, do not cover the grid with foil. The
bottom of the pan may be lined with aluminum foil for easier
cleaning.
■
Trim excess fat to reduce spattering. Slit the remaining fat on
the edges to prevent curling.
■
Pull out oven rack to stop position before turning or removing
food. Use tongs to turn food to avoid the loss of juices. Very
thin cuts of fish, poultry or meat may not need to be turned.
■
After broiling, remove the pan from the oven when removing
the food. Drippings will bake on the pan if left in the heated
oven, making cleaning more difficult.
9
To Broil:
Before broiling or custom broiling, position the rack according to
the Broiling Chart.
Position food on the grid in the broiler pan, then place it in the
center of the oven rack with the longest side parallel to the door.
It is not necessary to preheat the oven before putting food in,
unless recommended in the recipe.
Close the door.
1. On double oven models only, press UPPER OVEN or LOWER
OVEN.
2. Press CUSTOM BROIL.
3. Press START/ENTER.
The set oven temperature will appear on the oven display
until the oven is turned off.
FOOD
RACK
POSITION
COOK
TIME
minutes
SIDE 1
SIDE 2
Pork chops
1 in. (2.5 cm) thick
4
20-22
10-11
Steak
1 in. (2.5 cm) thick
medium rare
medium
well done
4
4
4
14-15
15-16
18-19
7-8
8-9
9-10
* Place up to 12 patties, equally spaced, on broiler grid.
4. Press UPPER OFF, LOWER OFF or OFF/CANCEL when
finished cooking.
Convection Cooking
To Custom Broil:
Changing the temperature when custom broiling allows more
precise control when cooking. The lower the temperature, the
slower the cooking. Thicker cuts and unevenly shaped pieces of
meat, fish and poultry may cook better at lower broiling
temperatures.
1. On double oven models only, press UPPER OVEN or LOWER
OVEN.
2. Press CUSTOM BROIL.
3. Press the TEMP “up” or “down” arrow pad to enter a
temperature other than 500°F (260°C). The broil range can be
set between 170°F and 500°F (75°C and 260°C).
4. Press START/ENTER.
The set oven temperature will appear on the oven display
until the oven is turned off.
5. Press UPPER OFF, LOWER OFF or OFF/CANCEL when
finished cooking.
BROILING CHART
For best results, place food 3 in. (7 cm) or more from the broil
element. Times are guidelines only and may need to be adjusted
for individual foods and tastes. Recommended rack positions are
numbered from the bottom (1) to the top (5). For diagram, see the
“Positioning Racks and Bakeware” section.
FOOD
RACK
POSITION
COOK
TIME
minutes
SIDE 1
SIDE 2
Chicken
bone-in pieces
boneless breasts
3
4
17-20
11-16
17-20
11-16
4
8-10
4-5
4
16-18
8-9
Fish
Fillets ¹|₄- ¹|₂ in.
(.6-1.25 cm) thick
Steaks ³|₄- 1 in.
(2-2.5 cm) thick
Frankfurters
4
5-7
3-4
*Ground meat patties
³|₄ in. (2 cm) thick
well done
4
13-14
7-8
Ham slice, precooked
¹|₂ in. (1.25 cm) thick
4
8-10
4-5
Lamb chops
1 in. (2.5 cm) thick
4
14-17
8-9
10
(on some models)
In a convection oven, the fan-circulated hot air continually
distributes heat more evenly than the natural movement of air in a
standard thermal oven. This movement of hot air maintains a
consistent temperature throughout the oven, cooking foods more
evenly, crisping surfaces while sealing in moisture and yielding
crustier breads.
Most foods can be cooked by lowering cooking temperatures
25°F to 50°F (14°C to 28°C) and cooking time can be shortened
by as much as 30 percent, especially for large turkeys and roasts.
■ It is important not to cover foods so that surface areas remain
exposed to the circulating air, allowing browning and crisping.
■ Keep heat loss to a minimum by only opening the oven door
when necessary.
■ Choose cookie sheets without sides and roasting pans with
lower sides to allow air to move freely around the food.
■ Test baked goods for doneness a few minutes before the
minimum cooking time with an alternative method such as a
toothpick.
■ Use a meat thermometer or the temperature probe to
determine the doneness of meats and poultry. Check the
temperature of pork and poultry in two or three places.
Convection Baking and Roasting
1
2
3
1. Broil element
2. Convection fan
3. Bake element
During convection baking or roasting, the bake and broil
elements cycle on and off in intervals to maintain the oven
temperature, while the fan constantly circulates the hot air.
If the oven door is opened during convection baking or roasting,
the bake and broil elements and fan will turn off immediately.
They will come back on once the door is closed.
■ For optimal cooking results, do not use aluminum foil.
■ Reduce recipe temperature 25°F (14°C). The cook time may
need to be reduced also. See the cookbook supplied with
this oven for more information.
To Convection Bake or Roast:
Before convection baking or roasting, position the racks
according to the “Positioning Racks and Bakeware” section.
When using two racks, place them on rack positions 2 and 4.
When roasting with CONVECT BAKE, use the roasting rack on
top of the broiler pan and grid. It is not necessary to wait for the
oven to preheat before putting food in, unless recommended in
the recipe.
Veal, Rack Position 2
Loin, Rib,
Rump
Roast
medium
well done
25-35
30-40
325°F (160°C)
160°F (70°C)
170°F (75°C)
30-40
325°F (160°C)
170°F (75°C)
35-40
325°F (160°C)
170°F (75°C)
25-35
300°F (145°C)
170°F (75°C)
15-20
300°F (145°C)
170°F (75°C)
300°F (145°C)
160°F (70°C)
170°F (75°C)
20-25
325°F (160°C)
185°F (85°C)
15-20
325°F (160°C)
185°F (85°C)
Pork, Rack Position 2
Loin Roast
(boneless)
Shoulder
Roast
Ham, Rack Position 2
Fresh
(uncooked)
Fully
Cooked
1. Roasting rack
2. Broiler grid
3. Broiler pan
1. Press CONVECT (UPPER).
Close oven door. The display will show “door” and the
heating elements will not heat if the door is open when baking
and roasting.
Press the TEMP “up” or “down” arrow pad to enter a
temperature other than 325°F (165°C). The bake range can be
set between 170°F and 500°F (75°C and 260°C).
2. Press START/ENTER.
A preheat time will count down and “PrE” will appear on the
oven display if the actual oven temperature is under 170°F
(75°C).
Lamb, Rack Position 2
Leg,
Shoulder
Roast
medium
well done
25-30
30-35
*Chicken, Rack Position 2
When the actual oven temperature reaches 170°F (75°C), the
timer will continue counting down.The temperature setting
can be changed any time after pressing START/ENTER.
Whole
3-5 lbs.
(1.5-2.2 kg)
5-7 lbs.
(2.2-3.1 kg)
When the set temperature is reached, if enabled, one tone will
sound.
*Turkey, Rack Positions 1 or 2
3. Press UPPER OFF, LOWER OFF or OFF/CANCEL when
finished cooking.
Use the following chart below when convection roasting meats
and poultry.
CONVECTION ROASTING CHART
Food/Rack
Position
Cook
Time
(minutes)
Oven Temp.
Internal
Food Temp.
13 lbs. and
under
(5.85 kg)
Over 13 lbs.
(5.85 kg)
10-15
300°F (145°C)
185°F (85°C)
10-12
300°F (145°C)
185°F (85°C)
*Cornish Game Hens, Rack Position 2 or 3
1-1.5 lbs.
(0.5-0.7 kg)
50-60
325°F (160°C)
185°F (85°C)
Beef, Rack Position 2
*Do not stuff poultry when convection roasting.
Rib Roast
rare
medium
well done
Rib Roast
(boneless)
rare
medium
well done
Rump,
Sirloin Tip
Roast
rare
medium
well done
Meatloaf
20-25
25-30
30-35
300°F (145°C)
140°F (60°C)
160°F (70°C)
170°F (75°C)
22-25
27-30
32-35
300°F (145°C)
140°F (60°C)
160°F (70°C)
170°F (75°C)
20-25
25-30
30-35
20-25
300°F (145°C)
325°F (160°C)
140°F (60°C)
160°F (70°C)
170°F (75°C)
170°F (75°C)
11
Timed Cooking
OVEN CARE
WARNING
Self-Cleaning Cycle
Food Poisoning Hazard
(on some models)
Do not let food sit in oven more than one hour
before or after cooking.
WARNING
Doing so can result in food poisoning or
sickness.
Timed Cooking allows the oven to be set to turn on at a certain
time of day, cook for a set length of time, and/or shut off
automatically. Delay start should not be used for food such as
breads and cakes because they may not bake properly.
To Set a Cook Time:
1. On double oven models only, press UPPER OVEN or LOWER
OVEN.
2. Press BAKE or CONVECT UPPER (on some models).
Press the number pads to enter a temperature other than the
one displayed.
3. Press COOK TIME.
4. Press the HR and MIN “up” or “down” arrow pads to enter
the length of time to cook.
5. Press START/ENTER.
The start time and stop time countdown will appear on the
oven display.
When the stop time is reached, the oven will shut off
automatically and “End” will appear on the oven display.
If enabled, end-of-cycle tones will sound, then reminder
tones will sound every minute.
6. Press UPPER OFF, LOWER OFF or OFF/CANCEL or open the
oven door to clear the display and/or stop reminder tones.
To Set a Cook Time and Stop Time [Delay Start]:
Before setting, make sure the clock is set to the correct time of
day. See “Clock” section.
1. On double oven models only, press UPPER OVEN or LOWER
OVEN.
2. Press BAKE or CONVECT UPPER (on some models).
Press the TEMP “up” or “down” arrow pad to enter a
temperature other than the one displayed.
3. Press COOK TIME.
4. Press the HR and MIN “up” or “down” arrow pads to enter
the length of time to cook.
5. Press DELAY START TIME
6. Press the HR and MIN “up” or “down” arrow pads to enter
the time of day to start.
7. Press START/ENTER.
The start time is automatically calculated and displayed.
Burn Hazard
Do not touch the oven during the
Self-Cleaning cycle.
Keep children away from oven during
Self-Cleaning cycle.
Failure to follow these instructions can result
in burns.
IMPORTANT: The health of some birds is extremely sensitive to
the fumes given off during the Self-Cleaning cycle. Exposure to
the fumes may result in death to certain birds. Always move birds
to another closed and well ventilated room.
Self-clean the oven before it becomes heavily soiled. Heavy soil
results in longer cleaning and more smoke.
Keep the kitchen well-ventilated during the Self-Cleaning cycle to
help get rid of heat, odors, and smoke.
Do not block the oven vent(s) during the Self-Cleaning cycle. Air
must be able to move freely. See “Oven Vent(s)” section.
Do not clean, rub, damage or move the oven door gasket. The
door gasket is essential for a good seal.
Prepare Oven:
■
Remove the broiler pan, grid, cookware and bakeware and,
on some models, the temperature probe from the oven.
■
Remove any foil from the oven because it may burn or melt,
damaging the oven.
■
Remove oven racks to keep them shiny and easy to slide.
See “General Cleaning” section for more information.
■
Hand clean inside door edge and the 1½ in. (3.8 cm) area
around the inside oven cavity frame, being careful not to
move or bend the gasket. This area does not get hot enough
during self-cleaning to remove soil. Do not let water, cleaner,
etc. enter slots on door frame. Use a damp cloth to clean this
area.
■
Wipe out any loose soil to reduce smoke and avoid damage.
At high temperatures, foods react with porcelain. Staining,
etching, pitting or faint white spots can result. This will not
affect cooking performance.
“DELAY” and the stop time will also appear on the oven
display.
When the start time is reached, the oven will automatically
turn on.
When the stop time is reached, the oven will shut off
automatically and “End” will appear on the oven display.
If enabled, end-of-cycle tones will sound, then reminder
tones will sound every minute.
8. Press UPPER OFF, LOWER OFF or OFF/CANCEL or open the
oven door to clear the display and/or stop reminder tones.
12
How the Cycle Works
IMPORTANT: The heating and cooling of porcelain on steel in the
oven may result in discoloring, loss of gloss, hairline cracks and
popping sounds.
The Self-Cleaning cycle uses very high temperatures, burning soil
to a powdery ash.
The oven is preset for a 3 hour 30 minute clean cycle, but the
time can be changed. Suggested clean times are 2 hours 30
minutes for light soil and between 3 hours 30 minutes to 4 hours
30 minutes for average to heavy soil.
Once the oven has completely cooled, remove ash with a damp
cloth. Do not wipe down any of the inside surfaces until the oven
has completely cooled down. Applying a cool damp cloth to the
inner door glass before it has completely cooled could result in
the glass breaking.
The oven light will not work during the Self-Cleaning cycle.
On combination oven models, the upper oven will not work
during the Self-Cleaning cycle.
To Self-Clean:
Before self-cleaning, make sure the door is closed completely or
it will not lock and the cycle will not begin.
1. On double oven models only, press UPPER OVEN or LOWER
OVEN.
2. Press AUTO CLEAN.
3. Press the HR “up” or “down” arrow pad to set a clean time
other than 3 hour 30 minutes. The clean time can be set
between 2 hours 30 minutes and 4 hours 30 minutes.
4. Press START/ENTER.
The oven door will automatically lock, and “LOCKED” will
appear on the oven display. The door will not unlock until the
oven cools.
When the cycle is complete and the oven cools, “End” will
appear on the oven display and “LOCKED” will disappear.
5. Press UPPER OFF, LOWER OFF or OFF/CANCEL or open the
oven door to clear the oven display.
General Cleaning
IMPORTANT: Before cleaning, make sure all controls are off and
the oven is cool. Always follow label instructions on cleaning
products.
Soap, water and a soft cloth or sponge are suggested first unless
otherwise noted.
STAINLESS STEEL (on some models)
Do not use soap-filled scouring pads, abrasive cleaners, Cooktop
Polishing Creme, steel-wool pads, gritty wash cloths or some
paper towels. Damage may occur.
Rub in direction of grain to avoid damaging.
■ Stainless Steel Cleaner & Polish (not included):
See “Assistance or Service” section to order.
■ Liquid detergent or all-purpose cleaner:
Rinse with clean water and dry with soft, lint-free cloth.
■ Vinegar for hard water spots
OVEN DOOR EXTERIOR
■
CONTROL PANEL
Do not use abrasive cleaners, steel-wool pads, gritty wash cloths
or some paper towels. Damage may occur.
■ Glass cleaner and soft cloth or sponge:
Apply glass cleaner to soft cloth or sponge, not directly on
panel.
OVEN CAVITY
To Delay Start Self-Clean:
Before delay starting Self-Clean, make sure the clock is set to the
correct time of day. See “Clock” section. Also, make sure the
door is closed completely or it will not lock and the cycle will not
begin.
1. On double oven models only, press UPPER OVEN or LOWER
OVEN.
2. Press AUTO CLEAN.
Press the HR “up” or “down” arrow pad to set a clean time
other than 3 hour 30 minutes. The clean time can be set
between 2 hours 30 minutes and 4 hours 30 minutes.
3. Press STOP TIME.
4. Press the HR and MIN “up” or “down” arrows pads to enter
the time of day to stop.
5. Press START/ENTER.
The start time is automatically calculated and displayed.
The door will automatically lock and “LOCKED” and “DELAY”
will appear on the display. The door will not unlock until the
oven cools.
When the start time is reached, the oven will automatically
turn on.
When the cycle is complete and the oven cools, “End” will
appear on the lower oven display and “LOCKED” will
disappear.
6. Press any pad or open the oven door to clear the oven
display.
To Stop Self-Clean any time:
Press UPPER OFF, LOWER OFF or OFF/CANCEL. If the oven
temperature is too high, the door will remain locked. It will not
unlock until the oven cools.
Glass cleaner and paper towels or non-abrasive plastic
scrubbing pad:
Apply glass cleaner to soft cloth or sponge, not directly on
panel.
Do not use oven cleaners.
Food spills should be cleaned when oven cools. At high
temperatures, foods react with porcelain and staining, etching,
pitting or faint white spots can result.
■ Self-Cleaning cycle:
See “Self-Cleaning Cycle” first.
OVEN AND ROASTING RACKS
■
■
Self-Cleaning cycle:
See “Self-Cleaning Cycle” first. Remove racks or they will
discolor and become harder to slide. If this happens, a light
coating of vegetable oil applied to the rack guides will help
them slide.
Steel wool pad
BROILER PAN AND GRID
Do not clean in the Self-Cleaning cycle.
■ Mildly abrasive cleanser:
Scrub with wet scouring pad.
■ Solution of ¹|₂ cup (125 mL) ammonia to 1 gallon (3.75 L)
water:
Soak for 20 minutes, then scrub with scouring or steel wool
pad.
■ Oven cleaner:
Follow product label instructions.
Porcelain enamel only, not chrome
■ Dishwasher
13
To Replace:
Oven Lights
1. Insert both hanger arms into the door.
The oven lights are standard 40-watt appliance bulbs. They will
come on when the oven door is opened. They will not work
during the Self-Cleaning cycle. When the oven door is closed,
press OVEN LIGHT to turn them on or off.
To Replace:
Before replacing, make sure the oven is off and cool.
1. Disconnect power.
2. Turn the glass bulb cover in the back of the oven
counterclockwise to remove.
3. Turn bulb counterclockwise to remove from socket.
4. Replace bulb and bulb cover by turning clockwise.
5. Reconnect power.
2. Open the oven door.
You should hear a “click” as the door is set into place.
3. Move the hinge levers back to the locked position. Ensure
that the door is free to open and close. If not, repeat the
removal and installation procedures.
Oven Door
For normal range use, it is not suggested to remove the oven
door. However, if necessary, follow these instructions. The oven
door is heavy.
TROUBLESHOOTING
Try the solutions suggested here first in order to avoid the
cost of an unnecessary service call.
To Remove:
1. Open oven door all the way.
2. Flip up the hinge latch on each side.
Nothing will operate
■
■
Has a household fuse been blown or has the circuit
breaker been tripped?
Replace the fuse or reset the circuit.
Is the appliance wired properly?
See Installation Instructions.
Oven will not operate
■
■
■
3. Close the oven door as far as it will shut.
4. While holding the oven door on each side with both hands, lift
the oven door up.
Continue to push the oven door closed and pull it away from
the oven door frame.
■
■
■
Is the electronic oven control set correctly?
See “Electronic Oven Control” section.
Has a delay start been set?
See “Timed Cooking” section.
On some models, is the Control Lock set?
See “Control Lock” section.
On some models, is the Sabbath Mode set?
See “Sabbath Mode” section.
On double oven models, is one oven self-cleaning?
When one oven is self-cleaning the other oven cannot be set
or turned on.
On double oven models, has the correct oven been
selected?
Choose UPPER OVEN or LOWER OVEN first.
Oven temperature too high or too low
■
Does the oven temperature calibration need adjustment?
See “Oven Temperature Control” section.
Display shows messages
■
■
14
Is the display showing “PF”, “PF id=27” or “PF id=30”?
There has been a power failure. Clear the display. See
“Display(s)” section. On some models, reset the clock, if
needed. See “Clock” section.
Is the display showing a letter followed by a number?
Clear the display. See “Display(s)” section. If it reappears, call
for service. See “Assistance or Service” section.
Self-Cleaning cycle will not operate
In the U.S.A.
■
Is the oven door open?
Close the oven door all the way.
■
Has the function been entered?
See “Self-Cleaning Cycle” section.
■
On some models, has a delay start Self-Clean cycle been
set?
See “Self-Cleaning Cycle” section.
■
Installation information.
■
Use and maintenance procedures.
Has a delay start been set?
See “Timed Cooking” section.
■
Accessory and repair parts sales.
■
Specialized customer assistance (Spanish speaking, hearing
impaired, limited vision, etc.).
■
Referrals to local dealers, repair parts distributors, and
service companies. Whirlpool designated service technicians
are trained to fulfill the product warranty and provide afterwarranty service, anywhere in the United States.
■
■
On double oven models, is one oven self-cleaning?
When one oven is self-cleaning, the other oven cannot be set
to self-clean.
Call the Whirlpool Customer Interaction Center
toll free: 1-800-253-1301.
Our consultants provide assistance with:
■ Features and specifications on our full line of appliances.
Oven cooking results not what expected
■
Is the appliance level?
Level the appliance. See the Installation Instructions.
■
Is the proper temperature set?
Double-check the recipe in a reliable cookbook.
■
Is the proper oven temperature calibration set?
See “Oven Temperature Control” section.
■
Was the oven preheated?
See “Baking and Roasting” section.
■
Is the proper bakeware being used?
See “Bakeware” section.
■
Are the racks positioned properly?
See “Positioning Racks and Bakeware” section.
■
Is there proper air circulation around bakeware?
See “Positioning Racks and Bakeware” section.
■
Is the batter evenly distributed in the pan?
Check to make sure batter is level in the pan.
■
Is the proper length of time being used?
Adjust cooking time.
■
Has the oven door been opened while cooking?
Oven peeking releases oven heat and can result in longer
cooking times.
■
Are baked items too brown on the bottom?
Move rack to higher position in the oven.
■
Are pie crust edges browning early?
Use aluminum foil to cover the edge of the crust.
ASSISTANCE OR SERVICE
Before calling for assistance or service, please check
“Troubleshooting.” It may save you the cost of a service call. If
you still need help, follow the instructions below.
When calling, please know the purchase date and the complete
model and serial number of your appliance. This information will
help us to better respond to your request.
If you need replacement parts
If you need to order replacement parts, we recommend that you
®
®
only use FSP replacement parts. FSP replacement parts will fit
right and work right because they are made with the same
®
precision used to build every new WHIRLPOOL appliance.
®
To locate FSP replacement parts in your area, call our Customer
Interaction Center telephone number or your nearest Whirlpool
designated service center.
To locate the Whirlpool designated service company in your
area, you can also look in your telephone directory Yellow
Pages.
For further assistance
If you need further assistance, you can write to Whirlpool
Corporation with any questions or concerns at:
Whirlpool Brand Home Appliances
Customer Interaction Center
553 Benson Road
Benton Harbor, MI 49022-2692
Please include a daytime phone number in your correspondence.
Accessories U.S.A
To order accessories, call the Whirlpool Customer Interaction
Center toll free at 1-800-442-9991 and follow the menu prompts.
Or visit our website at www.whirlpool.com and click on “Buy
Accessories Online.”
Stainless Steel Cleaner & Polish
(stainless steel models)
Order Part #4396095
In Canada
For product related questions, please call the Inglis Limited
Customer Interaction Center toll free:
1-800-461-5681 8:30 a.m. - 5:30 p.m. (EST)
Our consultants provide assistance with:
■ Features and specifications on our full line of appliances.
■
Referrals to local dealers.
For parts, accessories and service in Canada
Call 1-800-807-6777. Inglis Limited designated service
technicians are trained to fulfill the product warranty and provide
after-warranty service, anywhere in Canada.
For further assistance
If you need further assistance, you can write to Inglis Limited with
any questions or concerns at:
Customer Interaction Center
Inglis Limited
1901 Minnesota Court
Mississauga, Ontario L5N 3A7
Please include a daytime phone number in your correspondence.
15
WHIRLPOOL® COOKTOP, BUILT-IN OVEN AND RANGE WARRANTY
FULL ONE-YEAR WARRANTY
For one year from the date of purchase, when this appliance is operated and maintained according to instructions attached to or
furnished with the product, Whirlpool Corporation will pay for FSP® replacement parts and repair labor to correct defects in materials or
workmanship. Service must be provided by a Whirlpool designated service company.
SECOND THROUGH FIFTH YEAR LIMITED WARRANTY ON CLEANTOP® COOKTOP
On ceramic glass ranges and ceramic glass cooktops, in the second through fifth years from the date of purchase, when this
appliance is operated and maintained according to instructions attached to or furnished with the product, Whirlpool Corporation will
pay for FSP® replacement parts for the CLEANTOP® ceramic glass cooktop.
Whirlpool Corporation warrants that the ceramic glass cooktop will not discolor, the cooktop pattern will not wear off, the rubber seal
between the ceramic glass cooktop and porcelain edge will not crack, the ceramic glass cooktop will not crack due to thermal shock
and the surface unit elements will not burn out.
Whirlpool Corporation will not pay for:
1. Service calls to correct the installation of your appliance, to instruct you how to use your appliance, to replace house fuses or
correct house wiring, or to replace owner-accessible light bulbs.
2. Repairs when your appliance is used in other than normal, single-family household use.
3. Pickup and delivery. Your appliance is designed to be repaired in the home.
4. Damage resulting from accident, alteration, misuse, abuse, fire, flood, improper installation, acts of God or use of products not
approved by Whirlpool Corporation or Inglis Limited.
5. Repairs to CLEANTOP® ceramic glass cooktop if it has not been cared for as recommended in the Use & Care Guide.
6. Repairs to parts or systems resulting from unauthorized modifications made to the appliance.
7. Replacement parts or repair labor costs for units operated outside the United States or Canada.
8. In Canada, travel or transportation expenses for customers who reside in remote areas.
9. Any labor costs during the limited warranty period.
WHIRLPOOL CORPORATION AND INGLIS LIMITED SHALL NOT BE LIABLE FOR INCIDENTAL OR CONSEQUENTIAL
DAMAGES.
Some states or provinces do not allow the exclusion or limitation of incidental or consequential damages, so this exclusion or limitation
may not apply to you. This warranty gives you specific legal rights and you may also have other rights which may vary from state to
state or province to province.
Outside the 50 United States and Canada, this warranty does not apply. Contact your authorized Whirlpool dealer to determine
if another warranty applies.
If you need service, first see the “Troubleshooting” section of this book. After checking “Troubleshooting,” additional help can be found
by checking the “Assistance or Service” section or by calling the Whirlpool Customer Interaction Center, 1-800-253-1301 (toll-free),
from anywhere in the U.S.A. For parts and service in Canada, please call 1-800-807-6777. For product related questions in Canada,
please call 1-800-461-5681.
5/00
Keep this book and your sales slip together for future
reference. You must provide proof of purchase or installation
date for in-warranty service.
Dealer name____________________________________________________
Write down the following information about your appliance to
better help you obtain assistance or service if you ever need it.
You will need to know your complete model number and serial
number. You can find this information on the model and serial
number label/plate, located on your appliance as shown in the
“Parts and Features” section.
Phone number __________________________________________________
Address ________________________________________________________
Model number __________________________________________________
Serial number __________________________________________________
Purchase date __________________________________________________
8300609
© 2001 Whirlpool Corporation.
All rights reserved.
® Registered Trademark/TM Trademark of Whirlpool, U.S.A.
Inglis Limited licensee in Canada
5/01
Printed in U.S.A.