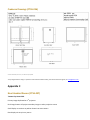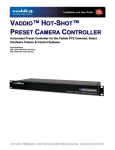
1
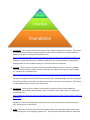
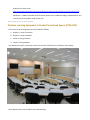
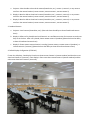
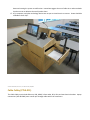
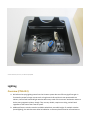
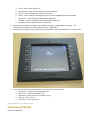
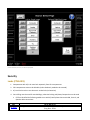
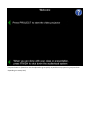
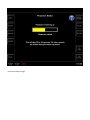
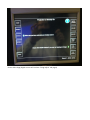
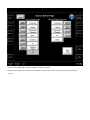
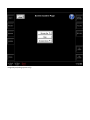
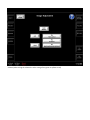
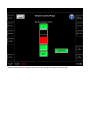
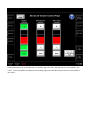
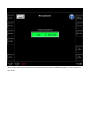
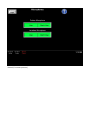
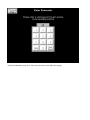
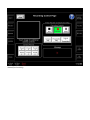
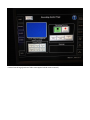
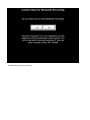
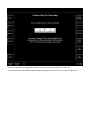
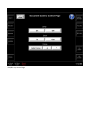
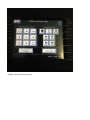
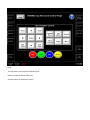
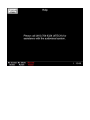
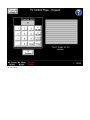
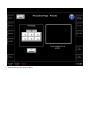
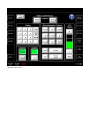
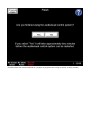
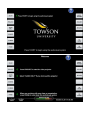
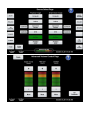
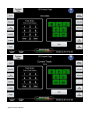
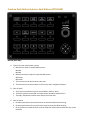
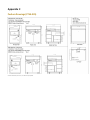
Classroom Technology Standards A Guide for Classroom Planning Produced by the Office of Technology Services Copyright © 2014 Towson University, All Rights Reserved Published: 12/20/2011 Last Updated: 4/15/2015 Table of Contents Classroom Taxonomy 1. 2. 3. 4. 5. 6. 7. Overview (CTSG-001) Classroom Audiovisual Architecture (CTSG-002) Smart Classroom Technology Tiers (CTSG-003) Add-ons (CTSG-004) Smart Classroom Computer Configuration Requirements (CTSG-005) Smart Classroom Standard Equipment (CTSG-006) STF Stickers (CTSG-007) Distance Learning & Lecture Capture 1. 2. Standard Equipment (CTSG -008) Distance Learning Equipment in Studio/Curriculized Spaces (CTSG -009) Instructor Stations 1. 2. Requirements (CTSG -010) Cable Cubby (CTSG -011) Lighting 1. 2. Overview (CTSG -012) Lighting and Switching Specifications (CTSG -013) Touch Panels 1. 2. 3. 4. 5. 6. 7. 8. 9. Overview (CTSG -014) Natural Flow Patterns When Moving Between Controls (CTSG -015) Status Bar (CTSG -016) Nesting Menus in Layers (Drilldown) (CTSG -017) Fonts and Colors (CTSG -018) Hard Buttons (CTSG -019) Soft Buttons (CTSG-020) Defaults on System Start (CTSG-021) Source Page (CTSG -022) Security 1. Locks (CTSG-023) 2. 3. 4. Sonic Shock (CTSG -024) Classroom (CTSG -025) A/V Rack (CTSG-026) Networking 1. 2. 3. 4. 5. Crestron Network Cables (CTSG-027) Information Needed (CTSG -028) Routers/Switches (CTSG -029) VLAN (CTSG-030) Wall Ports (CTSG-031) Appendix A 1. 2. Crestron Touch Panel: Soft Buttons TPS-6L (CTSG -032) Crestron Touch Panel: Soft Buttons TSW-750 (CTSG-033) Appendix B 3. Crestron Push-Button System: Hard Buttons (CTSG -034) Appendix C 1. 2. Podium Drawings (CTSG-035) Credenza Drawings (CTSG-036) Appendix D 1. 2. Non-Standard Rooms (CTSG-037) Lecture Capture Scenario for Cisco Codecs (CTSG-038) Classroom Taxonomy Overview (CTSG-001) The Office of Technology Services (OTS) works with stakeholders in the university community, vendors, manufacturers, and college/departmental technology staff to develop design standards for the audiovisual technology installed in Towson University’s nearly 400 smart classrooms that best meet the needs of the university. The goals of standardization aim to: • Provide a comfortable, modern, flexible, easy-to-use, and reliable teaching-learning environment that accommodates a variety of instructional methods • Design an active, engaging environment for today's generation of learners • Provide a consistent, intuitive interface for controlling audiovisual equipment throughout the campus for faculty, staff, and students • Ensure maximum reliability and up-time based on proven designs, components, and installation methods • Ensure ease of support and usage by installing standard computer models and audiovisual components • Keep the number of makes and models to a minimum so that an inventory of replacement parts such as projector lamps can be maintained Article CTSG-001; Version 1; Last Revised 5/21/2012 Classroom Audiovisual Architecture (CTSG-002) The audiovisual industry is currently transitioning from an analog to digital audiovisual architecture and OTS is adapting our standards to meet these changing demands. As part of the transition, known as the "analog sunset" in consumer and professional electronics, new devices are shipping with digital outputs only and older analog outputs are being disabled or severely limited by new content. The changes OTS is making will allow the University to take advantage of the latest technologies, provide better integration of digital devices brought on campus, streamline classroom design, and meet growing instructional needs. Article CTSG-002; Version 1; Last Revised 6/12/2014 Smart Classroom Technology Tiers (CTSG-003) A. Tier 1 • Widescreen Projector (Full HD 1920 x 1080) • Display screen (16 x 10 or 16 x 9 motorized) • In-Ceiling Speakers • Wall plate for auxiliary audiovisual input connections • Basic wall-mounted push button control system (optional) B. Tier 2 Everything included in Tier 1 plus: • Podium with built-in computer/monitor • Document camera • Media player (VCR/DVD* combo or Blu-ray) *VCRs are being retired as a primary solution and DVD drives installed in the computer as well as streaming solutions are replacing a separate media player C. Tier 3 Everything included in Tier 2 plus: • Crestron MPB/C series push button controller (retired as primary solution) D. Tier 4 Everything included in Tier 2 plus: • Crestron TSW-750 LCD touch panel controllers • Cable Cubby w/ Ethernet, USB, HDMI, 3.5mm audio, RCA, VGA, and power connections • Networked via Crestron Fusion RV (RoomView) • Dual Image multi-window processor E. Tier 5 Everything included in Tier 4 plus one or more of the significant additions listed below: • Video conferencing system (significant addition) • Lecture capture system (significant addition) • Enhanced sound system and/or microphones • Large-screen displays in addition to the projector (significant addition) • Multiple projectors (significant addition) F. Add Ons (Can be added to any tier) • Wireless Microphones • Multiple Screens • Student computers • Interactive board (SMART, Promethean, BrightLink, Infocus) • SMART Interactive Pen Display or comparable Article CTSG-003; Version 1; Last Revised 5/21/2012 Add-ons (CTSG-004) A. Crestron AM-100 (AirMedia Presentation Gateway) allows clients to wirelessly project material from Windows and Mac computers as well as iOS and Android mobile devices. The following settings must be in place for every AirMedia that is added to a TU system. In rooms with Crestron control systems, the programming must be updated to add a button must to the source list on the Crestron touch panel labeled “AirMedia”. The button must have the same size, color, and font size as all other sources. The network port must be on the Learning Spaces VLAN. On the management interface of the AirMedia device the following settings must be made: • Set Admin Password (See Instructional Services Engineer for password) • Code must be set to Random (Device Setup>Code>Random) • Host names must consist of the Collection Code with “-AirMedia” added to the end (i.e. CK0006AirMedia) (Network Setup> Host Name> Collection Code-AirMedia) • The TU logo must be set as the background (OSD Setup> Upload http://www.towson.edu/adminfinance/ots/support/facultystaff/documents/tulogo_c.jpg) • The display of the IP address must be turned off (Network Setup>Display of IP address> Off) Disable the built-in DHCP server • Right click and save the configuration file to your desktop: am-100_dhcp_server_off.conf (55 bytes) • Load the downloaded configuration file to the AirMedia via the 'System Configuration' section of the AM-100 web interface. • Once completed, the DHCP server will no longer be running on the AM-100. B. Apple TV allows clients to wirelessly project from Apple devices such as MacBooks, iPhones, and iPads. In rooms with Creston control systems, the programming must be updated to add a button to the source list on the Crestron touch panel labeled “Apple TV”. The button must have the same size, color, and font size as all other sources. Controls must also be added (see image in Appendix A). The Apple TV must be plugged into a network port on the Learning Spaces VLAN On the menu interface (accessed by pressing the menu button on the remote) the following settings must be made: 1. The device name must be changed to follow the standard naming convention: Collection CodeAppleTV (i.e. HH0313-AppleTV) (Settings>General>Name>Custom) 2. The time zone must be set correctly (Settings>General>Time Zone) 3. The serial number must be collected and entered into the TechInfo database (Settings>General>About) 4. Set Sleep time to “Never” (Settings>General>Sleep) 5. Set Screen Saver to “Never” (Settings>Screen Saver>Start After) 6. Set AirPlay security to “Onscreen Code” (Settings>AirPlay>Security) 7. Turn on Conference room Display (Settings>AirPlay>Conference Room Display) 8. Turn on Restrictions (Settings>General>Restrictions) o Passcode (set to standard) o AirPlay Settings (set to “Ask”) Article CTSG-004; Version 1; Last Revised 4/13/2015 Smart Classroom Computer Configuration Requirements (CTSG-005) A. Overview A Smart Classroom computer is primarily used to present information to classes by using a projector and is shared by multiple faculty. Smart classroom computers are critical to instruction and are configured with security settings and file management measures to preserve system integrity and assure that the computer runs consistently at an optimum level of performance. Because many people share the computer, it is different than a personal computer in an office or home. Personal files must not be stored on this computer but stored on H:\ drives (recommended) or portable media (less reliable). Installation of special software is managed with several options (listed below) to accommodate faculty needs. Software installed on the computer will be upgraded regularly in a timely manner that does not disrupt instruction. Windows-based PCs will be the primary solution, with SMART Podium monitors in new venues where budget permits. B. Smart classroom computer standards 1. Configuration is adapted from the existing OTS standard image 2. Computers follow smart classroom Active Directory guidelines 3. Users logon as Users (not Administrators) 4. Classroom-specific group policy is applied 5. Smart Classroom PCs are exempt from Verdiem power management software 6. Smart Classroom PCs are part of their own Configuration Manager collection for managing installation packages, etc. 7. Remote Desktop is enabled 8. BIOS is set to have the computer automatically power on at night 9. The computer is configured with standard university software (below). If special software is needed, several options are available: 10. Install software on an office computer and use Remote Desktop to access the software on that computer (recommended) 11. Virtual Workspace access 12. If software is not available in Run Advertised Programs, please discuss software needs with your department head or technology coordinator. 13. Shutdown must be disabled 14. PC must be set to automatically restart at night 15. Group Policy is set so that the PC never sleeps. 16. Group Policy is set so the monitor doesn’t sleep until after 90 min. 16. Group Policy is set so screen saver doesn’t start until 60 min. 17. Group Policy is set not to show last logged on user: Computer Configuration\Windows Settings\Security Settings\Local Policies\Security Options Do not display last user name in logon screen = Enabled C. Software Included on Standard Configuration • Microsoft Windows 7 Enterprise and Updates • Microsoft Office 2013 Enterprise (Includes Word, Excel, Access, Outlook, Power Point, & Publisher) and Updates • Microsoft Internet Explorer and Updates • Firefox • Microsoft System Center Endpoint Protection • .Net Framework • Microsoft System Center Configuration Manager Client • Towson System Information – Allows you to quickly get information about your computer • Citrix XenApp web client for Virtual Workspace • Roxio Creator • Cyberlink Power DVD • PowerTerm (with link to TOA) • TU Fonts • RealPlayer Enterprise • Adobe Reader • Windows Media Player • Adobe Flash Player • Adobe Shockwave Player • Apple QuickTime Player • Filezilla Client • Microsoft Silverlight • Verdiem Surveyor Client • Microsoft VisioViewer • OTS Alerts Gadget for Windows Sidebar • Java D. Smart Classroom Organizational Unit (OU) 1. A Smart Classrooms OU exists at: towson.edu/Smart Classrooms 2. Under the \Smart Classrooms OU, there are separate OUs for each university building; each building OU will contain the smart classroom computer accounts, groups, group policy, etc. 3. The plan is to move existing smart classroom computers into their appropriate Smart Classroom/Building OUs; create new computer accounts with the standard naming convention below. 4. Managers of the Smart Classroom OU that can create computer accounts, etc. are in the Smart Classroom Administrators group. E. Standard Smart Classroom Computer Naming Convention To identify smart classroom computers, a standard naming convention was established as follows: CLSBuildingRoomNumber-01, 02, etc. IMPORTANT: room numbers need to use the 4-digit number, used by Facilities. Some of the early CLScomputer accounts did not use the standard 4-digit room number; these computer accounts must be renamed when time permits) Example: two computers installed in the Cook-404A smart classroom would have the following names: CLS-CK0404A-01 CLS-CK0404A-02 F. Lab - Smart Classroom Computers Some smart classrooms are also computer labs that have their own Lab OU and computer naming convention. In order to preserve the lab OU structure, the instructor computers in the lab – smart classrooms keep their lab computer name. Additionally, a smart classroom computer account is also created for these computers, the account is placed in the appropriate /Smart Classroom OU and disabled; in the \Smart Classroom computer account description in Active Directory a note is written describing that this computer name has been changed and to <lab computer account name> and what OU the computer is located in. An example of a lab – smart classroom computer account is: CLS-ES0107-01 G. InFocus MondoPad The PC appliance must be treated similarly to a regular classroom PC. There is currently a standard image available that will configure most settings (other than adding a maildrop) please contact Instructional Services Engineer for details. The following items must be done for each: 1. Join to domain 2. Install SCCM 3. Install endpoint protection 4. Name properly (CLS-CollectionCode-MOND) 5. Add WKST Admin group 6. Change Mondopad logo to TU logo 7. Enable minimize button for non-admin accounts under Settings>General 8. Set browser homepage to www.towson.edu 9. Install Microsoft Office 10. Install Microsoft Lync, Skype, Flash, Adobe Reader, Citrix, Shockwave, Java, VLC, Firefox, Chrome (with Remote Desktop plugin), Panopto, Quicktime, and Visio Viewer 11. Set up maildrop ([email protected]). The password must be set not to expire and stored in KeePass. 12. 13. 14. 15. 16. 17. Printers can be added by the department like a regular Windows PC Set passcodes (4-pin Admin) SSID must match computer name Add Athena local admin account with same password as the regular image Add short cuts for Lync, Skype, and Office Follow campus standards for BIOS settings (except for SATA operation): https://www.towson.edu/knowledgecenter/admin/adminarticle.aspx?article=763&searchtype=IT Article CTSG-005; Version 1; Last Revised 8/18/2014 Smart Classroom Standard Equipment (CTSG-006) Please see the link below for a list of standard components that are recommended as part of a standard smart classroom: http://www.towson.edu/adminfinance/ots/support/facultystaff/StandardEquipment.asp Article CTSG-006; Version 1; Last Revised 1/17/2011 STF Stickers (CTSG-007) A. Sticker must be straight. B. Stickers must not be in the way of any function, but must be conspicuous to the general observer C. Items that must be stickered 1. Projectors a. Will be stickered on side facing down if ceiling mounted, must not cover any other labeling or buttons b. In future, stickers must be applied prior to mounting for easy access 2. Document cameras a. Sticker must be placed on (WV VZ-3 specific) i. On the back of the arm ii. On the plate that connects the base to the arm. 1. Stickers must not be placed on the white base 3. Computer – computers include class and lab computers as well as iPad’s purchased with STF a. Stickers must be placed on i. The front 1. Stickers placed on the front must not cover any buttons or lights ii. The top near the TU tag 4. Processor in rack a. Sticker must be placed on the front of the DMPS-300C - this is to identify the entire rack 5. Podium, wedge/TPS-6L in particular a. Sticker must be placed on i. Front base ii. Side iii. Back 6. Cameras D. Stickers must be affixed during QA before photos are taken so they show in the Virtual Tour. E. After a room is tagged it will be marked as such in COLLECTIONS in the Virtual Tour. Article CTSG-007; Version 1; Last Revised 6/12/2014 Distance Learning & Lecture Capture Standard Equipment (CTSG-008) Towson University has been moving towards a software based distance learning & lecture capture model. Depending on the room this will either include USB cameras/microphones or a bridge to convert standard camera/microphones to a format that can be connected to the computer in the room. Cameras must be mounted roughly 96” above finished floor. Flat panel displays must be mounted roughly 7’ above finished floor. Basic Setup Basic/portable recording can be accomplished in any room with a webcam plugged into the instructor’s PC, TU recommended models can be found here: http://www.towson.edu/adminfinance/ots/hardwaresoftware/facultystaff/hwrecommended.asp#Webcams A Revo Labs wireless USB mic can be added to this setup for more flexible instructor micing. To capture omnidirectional sound, products are available from Blue and Acoustic Magic to capture the entire room audio. Permanent Setup 1) Foundation – This is used to describe the majority of our standard classrooms on campus. These rooms are used for general lectures and would need basic video and mic capabilities to facilitate softwarebased lecture capture. (Example of Foundation room: http://wwwnew.towson.edu/classroomtechnology/virtualtour/Linthicum%20Hall/LI0107/LI0107.htm) Equipment: Vaddio PTZ USB camera, Vaddio EasyUSB Mixer, and 2 Vaddio EasyMic Ceiling MicPods. Vaddio Pro Mic I/O can be added if existing non-USB mics need to be integrated. 2) Extended – These are rooms that have needs that go above and beyond what is found in a standard room, this could include the need for distance learning, more advanced micing, more camera angles, etc. (Example of an extended room: http://wwwnew.towson.edu/classroomtechnology/virtualtour/Linthicum%20Hall/LI0206/LI0206.htm) Equipment: 2 Vaddio ClearView HD PTZ Cameras, Biamp mixer, Vaddio AV Bridge, Clear One ceiling Mic Arrays, Shure Podium mic & Lavalier mic (All cameras and mics connect to the computer). Two displays are also added to allow for dual monitor functionality. 3) Curriculized - These rooms are used for course-specific instruction and may require additional components not included in standard rooms and not needed for other types of courses. (Example of Curriculized room: http://wwwnew.towson.edu/classroomtechnology/virtualtour/Center%20for%20the%20Arts/CA2077/C A2077.htm ) Equipment: This will vary depending on the courses the room is being used for, please contact your CCLT coordinator for a consultation. 4) Studio: These are rooms that must contain the highest quality video and audio quality possible with consideration given to room lighting, acoustics, etc. They represent the fewest number of classrooms (Example of a Studio room: http://wwwnew.towson.edu/classroomtechnology/virtualtour/Liberal%20Arts/LA2317/LA2317.htm) Equipment: 2 Vaddio ClearView HD PTZ Cameras, Biamp mixer, Vaddio AV Bridge, individual Shure mics at each seat, Shure podium mic & Lavalier mic. Article CTSG-008; Version 1; Last Revised 4/30/2014 Distance Learning Equipment in Studio/Curriculized Spaces (CTSG-009) 1. The minimum set of equipment must be installed as follows: a. Display 1 in view of instructor b. Display 2 in view of students c. Camera 1 facing instructor d. Camera 2 facing students * Any display mounted in a classroom must be at least 60” off the floor to the bottom of the display. 2. Each display device must be able to show the following: a. Projector: Must be able to show local content (PowerPoint, etc.), camera 1, camera 2, or any content sent from the remote location (remote content, remote camera 1, remote camera 2). b. Display 1: Must be able to show local content (PowerPoint, etc.), camera 1, camera 2, or any content sent from the remote location (remote content, remote camera 1, remote camera 2). c. Display 2: Must be able to show local content (PowerPoint, etc.), camera 1, camera 2, or any content sent from the remote location (remote content, remote camera 1, remote camera 2). 3. Standard Scenario a. Projector: Local content (PowerPoint, etc.) (Must also have the ability to show all media and camera shots) b. Display 1: Before call is placed shows local Camera 1 as a confidence monitor for instructor to make sure they are in the shot. After call is placed, shows remote camera 2 (students) (Must also have the ability to show all media and camera shots) c. Display 2: Shows content remote location is sending [remote content, remote camera 2 (students), or remote camera 1 (instructor)] (Must also have the ability to show all media and camera shots) 4. Default Display Configuration (CTSG-012) If room has 4 displays: One display in back must show remote Camera 2 (remote students) and the other must show local Camera 1 (instructor). One display in front must show remote Camera 2 (remote students) and the other must show local Camera 1 (instructor). Article CTSG-009; Version 1; Last Revised 6/12/2014 Instructor Stations Requirements (CTSG-010) We believe the workstation must not be overpowering in size but large enough to be very functional without feeling cramped. The visible technology must be minimal but utilitarian. Too many lights, annunciators, clocks, switches will intimidate, confuse, and be hard to troubleshoot. Each podium must contain the following: 1. Articulating arms must be used for the monitors (or SMART Podium) 2. Dual Monitors must be installed in any room used for instructional recording. 3. Podium casters must be lockable 4. No doors must be over the keyboard compartment 5. At least one (quiet) fan must be present in the cabinet 6. Grommet positions for whip 7. Core drilling must be used for new buildings, in addition to the conduit for a quad electric outlet and 4 network drops, each floor box must have separate conduit for A/V signal and speaker, mic, camera cabling. 3 1” conduits or 2” and a 1” conduit. Otherwise locking wall plates/receptacles must be used [see Locks (CTSG-016)] 8. In large venues where high power projectors are used, a dedicated circuit must be provided to prevent the projector from shutting down if too much power is drawn. 9. If no core drilling is present, AV cables (whip) must be tightly secured to avoid a tripping hazard. If cables must, as a last resort, be run across floors the ADA compliant Legrand OFR Series Overfloor Raceway System must be used. Temporarily, yellow tape provided by OTS is acceptable but only if there is a confirmed date when permanent raceway/core drilling will be completed and the use has been approved by OTS. 10. Gooseneck microphones must be present for all Distance Learning rooms and Lecture Halls 11. Four network ports must be run to the instructor stations (1 PC, 1Laptop, 1 Crestron, 1 Extra). Six for Distance Learning Rooms. 12. Wire diagram must be affixed to the inside of the podium 13. All cables must be labeled 14. Document cameras must have one dry erase overlay at time of install 15. Document cameras must be connected to the podium computer via USB 16. Equipment mounted behind displays and cameras (i.e. power strips, power supplies, USB extenders, DM receivers, etc.) not use velcro to secure it in place. We have had multiple reports of these devices failing down and causing the system to malfunction. Instead we suggest the use of cable ties or other methods that do not use an adhesive that easily breaks down. 17. A/V, computers, and other technology devices are not put on timed circuits or sensors. Power should be available to them 24/7. Article CTSG-010; Version 1; Last Revised 12/19/2014 Cable Cubby (CTSG-011) The Cable Cubby must include Ethernet, USB, HDMI, 3.5mm audio, RCA, VGA, and two electrical outlets. Laptop connections (VGA & HDMI) must contain pull-through cables with male connectors. Article CTSG-011; Version 1; Last Revised 5/18/2012 Lighting Overview (CTSG-012) A. We believe that tying lighting control into the Crestron system does not offer any significant gain in functionality except for larger venues such as large lecture halls and that is even questionable. An obvious, intuitive wall-mounted light switches within easy reach of the instructor workstation seems to be the more pragmatic solution, though. They are very reliable, require no training, and will work regardless of the state of the Crestron system. B. Additional factors: switches must be installed at wheelchair-accessible height; for multiple switches (zoned lighting), the switches must either be labeled or a reference placard must be mounted next to the switch bank; redundant switches must be located on the wall as close as possible to each entry door to the room. Article CTSG-012; Version 1; Last Revised 5/18/2012 Lighting and Switching Specifications (CTSG-013) A. Soft Lights directly in front of projection screen must be able to be turned off (including turning off any motion sensor so they do not come back on inadvertently). B. Lights in the student seating area of the room must be dimmable to allow for low-level illumination (for note-taking) or completely off (for watching videos, etc., where no note-taking is needed). C. The "master" bank of light switches that control the entire room must be installed on the wall behind or next to the podium for easy access (unobstructed) when lecturing; the instructor must not have to walk more than two steps to manage the lights during the class. D. At least one light switch must be placed near the entrance of the room. This will let room users turn on at least a portion of the room lights so you can safely enter the room (and turn off the light when leaving). E. Any occupancy sensors must have the ability to be overridden using the light switches at the instructor podium so the entire room can be darkened or illuminated during a class, under control of the instructor. F. Light switches must be labeled, ideally with pocket inserts, so the instructor knows what the switch turns on/off. You mustn't have to use trial and error. G. A motorized screen switch must also be placed near the podium, and labeled. The switch must have up/down/stop (three buttons). Primary control of the screen will be under Crestron touch-panel control, but the manual wall switch must be able to override the Crestron system to allow for manual control. H. Sight lines – lighting should be flush to the ceiling – or dropped in a way as to not obstruct projector throw to screen. Article CTSG-013; Version 1; Last Revised 12/19/2014 Touch Panel Screen shots must be submitted to Towson University for review prior to project competition *Note: We are currently transitioning to the new Crestron TSW-750 panel which will eliminate the hard buttons. The options will still be present in the same locations but as “soft” buttons instead. Overview (CTSG-014) The Crestron TPS-6L combines 12 "hard" switches on the left and right sides of the device with a touch panel "inner core" that allows the programmer to include other interface components: display messages, selection menus, submenus, status indicators, etc. Hard buttons are permanently etched into the control unit bezel; they cannot be changed once the final design is chosen. When a hard button is clicked, the text in the touch panel area describes the functionality ("behavior") that must follow. Article CTSG-014; Version 1; Last Revised 5/18/2012 Natural Flow Patterns When Moving Between Controls (CTSG-015) A. The user begins the experience with the Start button and works their way through the left panel of hard buttons. The Start button doesn't do much except tell the user what to do next: step through the other buttons on the left-hand panel and turn on the projector, select their audiovisual source, and lower the screen. When class is done, they'd press the Finish to shutdown the system. This kind of natural flow pattern helps guide the movement of a user through a class session. B. When deciding on what goes on the left-hand panel of hard buttons vs. the right, we followed people's natural reading style for a two-column presentation: you start at the left-most column, read your way from top to bottom, then move on to the next column, doing the same: top to bottom. C. Secondary controls, menus, and submenus then appear "on demand" in the touch panel based on choices made by pressing a hard button. This follows people's natural skimming style: periphery first (the left and right hard-button panels), followed by the content in the central field (the touch panel). Article CTSG-015; Version 1; Last Revised 5/18/2012 Status Bar (CTSG-016) The status bar will be always visible at the bottom of the touch panel. It will include the current time of day (12 hour time); current sound level; currently active audiovisual source(s) on the dual-image projector; projector on or off (it won't be obvious if it's in No Show); and annunciators to show whether No Show or No Sound is selected. Since it's a status bar and non-interactive, small but clear icons are acceptable. Example: the sound volume in Windows has a little speaker icon in the System Tray; when muted, there's a red line through the speaker. Article CTSG-015; Version 1; Last Revised 5/18/2012 Nesting Menus in Layers (Drilldown) (CTSG-017) Generally, anything more than one layer deep must be avoided; forcing the user to drill down tends to create confusion in how to get back out. Where possible, a flatter approach is better—provided the interface isn't too cluttered. When a need to nest is believed to be warranted, we will explore other options. If used, there must be a clearly labeled "Back" or "Cancel" button, and other things would need to be locked out while the submenu is active. Article CTSG-017; Version 1; Last Revised 5/18/2012 Fonts and Colors (CTSG-018) A. Colors that carry intuitive meaning for people in other contexts must be used in lieu of trying to showcase the university colors. Examples: for status indicators, red = off/stopped/extreme, green = on/within allowable limits/etc., yellow= borderline/cautionary range. InfoComm provides additional guidance on color usage. It is not absolute, but it is a valuable guide. B. For multiple button selections with only one permissible choice (e.g., selecting the primary audiovisual source), the button the user selects must appear depressed to be very clear the choice has been made. When one is selected, the non-selected buttons must be raised. Any buttons that are not appropriate for the context or not an allowable option must be grayed out. C. Flashing text must be used sparingly for imperatives, emphasis, in-transit states, or vital messages. D. When raising the volume the color must go from green to yellow to red E. TU Standard Settings: a. Font – Arial b. Main Titles – 14 Bold c. Button Column Titles – 14 d. Button Text – 11 e. Other Text – 11 f. Alias setting: Anti-Aliased Article CTSG-018; Version 1; Last Revised 5/18/2012 Hard Buttons (CTSG-019) A. The following hard buttons must be present: a. Start – Press to begin using the system, wakes up screen. Must be the only button that can be pressed when at the splash screen. b. Project – Press to lower screen and turn on the projector c. Source – Displays list of sources to select from d. Screen – Displays manual screen controls e. Finish – Press to turn system off f. Microphones – Press to select whether to use microphones g. Volume – Press to change the volume of the system h. Record – Press to begin a recording session if the room is equipped with lecture capture i. Video Conf. – Press to bring up Video Conferencing Page j. No Show – Press to temporary stop sending image to projector k. No Sound – Press to temporarily mute the system B. Hard buttons must display a “feature not available” message if not applicable to the room. See “Recording Control Page” for rooms without cameras in Appendix A. C. Pressing any hard button (or the screen itself) must wake the screen if the touch panel is in sleep mode D. For the TSW-750 Touch Panel, the hard buttons must control the following functions: a. Power Button = emulate the START/FINISH buttons b. Home Button = Emulate the SOURCE button c. Light Button = Display “feature not available” message d. Arrow Up = Main volume up e. Arrow Down = Main volume down Article CTSG-019; Version 1; Last Revised 1/29/2014 Soft Buttons (CTSG-020) Please see Appendix A Article CTSG-020; Version 1; Last Revised 5/18/2012 Defaults on System Start (CTSG-021) No Sound active during system start-up and shut down Mute microphone (“Don’t Use” position) and MP3 by default Volume at default level (Approximately 55-60 decibels when measured from the center of the room) Podium computer must be selected as the source (or laptop if no podium computer) TV must be tuned to CNN unless stated otherwise All buttons (Hard and soft) must be locked out during the startup and shut down of the system. Date and time in lower right hand corner must be in the following format on all pages: July 18, 2012 12:00 (make sure text box is large enough to accommodate September). Time must be synced with the network. Crestron Touch Panel screen must not go to sleep while system is on Article CTSG-021; Version 1; Last Revised 11/12/2012 Source Page (CTSG-022) The Source Page must be laid out like the example below in the exact order pictured. If the podium computer had dual monitors, a “Secondary Monitor” Button must be placed directly below the “Computer” button to allow either image to be shown to any display in the room. There must always be an “Auxiliary HDMI” Button separate from the “Laptop” (VGA) button. All other sources must be hidden unless present in the system. This includes dual display options if dual image is not available. Image Adjust side button must be hidden on digital sources where no adjustments are possible (i.e. HDMI, DVI, other fully digital sources). Fully digital systems (i.e. Crestron DMP- 300) will not have image adjust options available on any source. Left and right image source list must mirror each other (button must be blacked out on opposite source list when selected). On rooms with single source display, “Clear” button must be removed. Left and right image must be stage left and stage right, meaning the instructor’s left and right while facing the students. (http://plays.about.com/od/basics/ss/stageright.htm) Article CTSG-022; Version 1; Last Revised 5/18/2012 Security Locks (CTSG-023) 1. Compartment with A/V rack must lock separately from CPU compartment 2. CPU compartment must not be lockable (unless absolutely needed to be secured) 3. A/V rack lock must be a non-electronic combo lock (no-batteries) 4. Core drilling must be used for new buildings, otherwise locking wall plates/receptacles must be used OTS has identified the following model to use with A/V wall plates that contain DM, Control, and Speaker cable connections: SKU AI-DBP2 DESCRIPTION Arlington Industries Medium-Sized, Vertical Mount Dri-Box Adapter w/ Non-Metallic Dual Gang Base- White Red Crestron network cables must be secured to the networking wall ports using this model of lock: SKU DESCRIPTION PAN-PSL-DCPLRD Panduit-"Package of 10" Flush Mount RJ45 Plug Lock-in Devices and One Installation/Removal Tool Article CTSG-023; Version 1; Last Revised 11/05/2013 Sonic Shock (CTSG-024) A. Sonic Shock alarms must be attached to the following equipment items, unless otherwise specified in a statement of work: projectors, large screen displays, and all podium equipment (document cameras, media players, Crestron processors). B. The Sonic Shock must be mounted in document camera drawer. C. DVD/Blu-ray need not be alarmed IF it is rack mounted with security screws. D. Sonic Shocks must be attached to SMART podiums and all-in-one PCs/Macs. E. If there is a reason to locate the Sonic Shock elsewhere (e.g. not in the drawer), an exception must be requested through the Instructional Services Engineer. F. Sonic Shock Stickers must be affixed to projector. G. Sonic Shock keys must all be keyed to the TU master. H. BULLETIN 14-1: Regarding Sonic Shock Inclusion for VSI Installations and Replacements Issued by Michael Bachman 7/30/2013 Background There has been confusion on when and if Sonic Shock alarm units are to be included in installations. This usually comes into play when TU staff inspect work at the conclusion of a job. This bulletin must clarify the Sonic Shock expectations for both VSI and TU. Pertinent Contract Language 1. The terms and conditions of the On-Call Contract call for the following in the Security section: A. One or more Secure-It Sonic Shock SSA-100 unites shall be used to secure the following components in the instruction workstation: computer, monitor(s), visual presenter, Extron or Crestron controller, and Blu-ray/DVD player 2. One or more Secure-It Sonic Shock SSA-100 units shall be used to secure the projector(s), audience flat panel, and other major pieces of equipment not permanently housed in the instructor workstation. Intention The intention of the language in the contract, as I wrote it, was that it would apply primarily to these types of jobs: 1. Installation of a new complete system 2. Substantial renewal of an existing system, such as refresh of the AV core 3. New or replacement installations of individual pieces of equipment which would normally be equipped with a Sonic Shock as defined in Security sections A and B. Example Scenarios 1. TU requests a new classroom system to be designed and installed in a classroom that has no existing system. A Sonic Shock would be expected to be provided in accordance with contract terms in Security, Sections A and B. 2. TU requests a projector replacement; the projector is obsolete and a newer model is desired. A Sonic Shock would be expected to be provided in accordance with contract terms in Security, Section B. The work requested is directly tied to a piece of equipment that requires a Sonic Shock. 3. TU requests a projector replacement as above; when the room is inspected, the TU staff member notices a missing Sonic Shock alarm on another piece of equipment which would be normally alarmed, such as a document camera. A Sonic Shock would still expected for the projector; however, TU would not expect contractor to provide or install a Sonic Shock for the document camera. 4. Visual Sound’s sole due-diligence expectation would be to report the omission with the document camera if the installer happened to notice it in the course of the projector work; to be clear, a formal inspection of the room is not expected in this case to determine whether all equipment specified in the On-Call Contract has Sonic Shock alarm(s). That is the duty and responsibility of TU staff in this case—except for the projector. Basis of Interpretation 1. The contract terms and conditions supersede all other interpretations. We expect that products, services, and standards stated in the contract will be applied, whether explicitly quoted or not, to all jobs under the contract. 2. Variances between the contract terms and conditions and TU’s published standards must be worked out and addressed prior to issuance of a quote. 3. If TU or VSI waives something in the preliminary discussions leading up to a quote, it must be specified in the SOW as part of the quote submission. This will prevent surprises and misunderstandings for both parties. 4. Although TUs published standards provide additional guidance, if there is a collision between the standards and the contract, the contract prevails absent prior agreement. 5. The director is the sole person who will interpret the contract within the OTS Classroom and Computer Lab Technologies group. 6. If Visual Sound feels the interpretation is incorrect, the appeal path is TU Procurement. Additional Notes 1. Since the contract’s inception, TU has waived the requirement for Sonic-Shock devices on the Crestron controller (touch panels), and the Blu-ray/DVD player, provided the player is secured in a rack with security screws or otherwise protected in a manner that TU would agree to. 2. TU has rescinded the engraving requirement. The potential damage to equipment and the difficulties it creates in executing warranty returns and replacements outweighed the potential security benefits. 3. TU will publish a bulletin to contractors whenever our published standards change in a substantive way. 4. Bulletins will not be issued for minor things such as correction of typos or grammatical errors, unless they are substantive (e.g., touch panel verbiage) and could affect contractor work or services. Article CTSG-024; Version 1; Last Revised 11/04/2013 Classroom (CTSG-025) A. Swipe Locks must be installed on main classroom entrance B. All keys (i.e. podium) must be turned over to Manager of Classroom Technology. C. All equipment must be engraved with “Towson University” D. It is recommended that classrooms that feature computer labs have an alarm code for access. Article CTSG-025; Version 1; Last Revised 1/11/2013 A/V Rack (CTSG-026) A. Use security screws to rack-mount equipment B. Racks that are outside of podiums must have their own keyed locks C. All rack equipment that is capable of having a password must have one (Crestron controllers, routers, etc.) Article CTSG-026; Version 1; Last Revised 1/11/2013 Networking Crestron Network Cables (CTSG-027) All Crestron processors must be connected to network ports using RED network cables. This will help quickly identify which cable runs to the Crestron for installation and troubleshooting purposes. Article CTSG-027; Version 1; Last Revised 6/1/2012 Information Needed (CTSG-028) A. Please see Crestron Worksheet for information needed to add Crestron equipment on the TU Network: Crestron Worksheet B. Once a port is configured the red Crestron network cable must remain plugged into the same port and port must be labeled with a “C”. Article CTSG-028; Version 1; Last Revised 10/4/2012 Routers/Switches (CTSG-029) A. Any switches being used in the podium must first be approved by Towson University’s network group. B. Items such as computers and Crestron equipment cannot be plugged into the same switch since they use different VLANs. Only one VLAN can be assigned to a switch/router so all devices must match this VLAN. C. Red network cables must be used to connect the router/switch to the wall port if a Crestron device is connected to the router/switch. D. Routers/Switches must not be plugged into any other port besides the one that was specifically configured for it or it could pose a security threat to the TU network. Article CTSG-029; Version 1; Last Revised 10/4/2012 VLAN (CTSG-030) A. All Crestron processors must be on VLAN 541 B. All video conference equipment (i.e. Cisco C40) must be on VLAN 540 Article CTSG-031; Version 1; Last Revised 10/4/2012 Wall Ports (CTSG-031) A. All Network ports must be installed with non-user accessible wall plates so that cables cannot be unplugged B. All DM cables that have RJ-45 style connectors must also have non-user accessible wall plates so that cables cannot be unplugged Article CTSG-031; Version 1; Last Revised 4/22/2013 Appendix A Crestron Touch Panel: Soft Buttons (CTSG-032) Splash Screen This screen must appear if a hard button other than START is pressed. The extra arrow must disappear 10 seconds later if no further action is taken. Start (If the START button is pressed and the user does not press PROJECT to continue with startup it must return to the splash screen in 30 seconds.) Projector Power on (Status bar must be adjusted to go as quickly as possible on a projector by projector basis depending on startup time) Projector already on page Source Select Page (Digital sources will not have “image adjust” sub-pages) Screen Control Page (Must not be available if no electric screen) Buttons must turn green when depressed for feedback. All must return to their normal white color when not being pressed. Image Adjust (Analog systems only) Volume (when raising the volume the color must go from green to yellow to red) Advanced Volume (when raising the volume the color must go from green to yellow to red) Podium Microphone (If no Microphones are installed, page must read: "Microphones are not available in this room". If non-controllable microphones are installed, page must read “Microphone control is not available in this room") Wireless Microphone (must add third set of identical buttons titled “Handheld Microphone” if one is present in the room) Record (if no camera present) Record Password (see Instructional Services Engineer for code) Record (For Mediasite only) Note: Titles must be bold to match DVD control page Record (For Cisco Only) Camera Control Page (preview of video must appear behind camera controls) Stop Recording (For Mediasite Only) Stop Recording (For other solutions) Document Camera Control Page (Only include if doc camera can be controlled by the Crestron) *A rotate button must be added to accommodate using the document camera as a student facing camera. DVD/Blu-ray Control Page DVD/Blu-ray Advanced Control Page Help The Help button must display the following text: Please call (410) 704-8324 (4TECH) for Assistance with the audiovisual system. Fusion RV (Roomview Message) TV TV Full Screen TV Presets Video Conference (For Polycom Only) VTC Camera Controls Video Conference (For Cisco Only) Monitor Control Tab Finish (Note: “Yes” must automatically be selected after 1 minute of inactivity) Goodbye (Status bar must be adjusted on a projector by projector basis and go as quickly as safely possible) Article CTSG-032; Version 1; Last Revised 5/21/2012 Crestron Touch Panel: Soft Buttons TSW-750 (CTSG-033) TSW-750 Panels must generally follow the same guidelines as the TPS-6L above Source Select page for rooms with two displays (i.e. projector and LCD). “Computer Secondary” enables extended desktop so windows can move from one screen to another (i.e. dual monitors). Screen Control Page Display Select Page (appears when pressing START>PROJECT or “Display Select” on the source page) Light Bulb Hard Button Title: “Lighting Control Page” Text: “Lighting control is not available in this room” For rooms that require an “Audio Only” Option Apple TV Source button Apple TV Controls AirMedia Source Selection Button Article CTSG-033; Version 1; Last Revised 4/13/2015 Appendix B Crestron Push-Button Systems: Hard Buttons (CTSG-034) MP-B20 (MPC-M20) A. Types of Crestron push-button systems a. MP-M series require a separate MPS system: MP-B10 MP-B20 b. MPC-M series do not require a separate MPS system: MPC-M10 MPC-M20 c. The 10 series has 10 select buttons, two rows d. The 20 series has 15 select buttons on three rows and 5 navigational buttons B. Color of panel a. The Crestron push-button systems are available in black or white. b. The black system must be used in all cases unless otherwise specified by TU c. The body, faceplate and mount must all be of the same color C. Color of inserts a. On black push-buttons the printed inserts must be black with white lettering b. On white push-buttons the printed inserts must be white with black lettering c. On any buttons not used the insert must be filled with a blank that matches the color of the faceplate D. Style of inserts a. The lettering on the inserts must be in all caps and be centered on space b. Two lines may be used but only if required by the length of text E. Screws on faceplate a. The screws on the push-button faceplate must be the screws designed for the system and must match in color F. Which panel to use a. The Crestron MP-B20 is the standard that must be used for most installations b. The MPC-M20 must only be used when it is not feasible to also install a MPS c. MPC-M10, or MP-B10 must only be used in Tier 1 installations where there is only a wall port and no DVD/VCR to be controlled G. Standard buttons First Row a. SYSTEM ON/OFF – Turns the system and projector on and defaults to PC as the main source, press again to turn system and projector off. If system is equipped with an electric screen this button must also raise and lower it. b. AUX – Switches to the analog composite video source c. AUTO IMAGE – Automatically adjusts image on analog sources must be turned into an HDMI source button on digital systems d. No Sound – Press to temporarily mute the system e. No Show – Press to temporary stop sending image to projector Second Row f. PC – Switches to the computer source g. DOC CAMERA – Switches to the document camera h. LAPTOP – Switches to the laptop connection i. DVD – Switches to the DVD player j. VCR – Switches to the VCR Third Row k. Play symbol – Press to start playing a DVD or VHS tape, press again to stop l. Pause symbol – Press to pause a DVD or VHS tape m. Rewind symbol – Press to skip rewind VHS tape or skip backwards on a DVD n. Fast Forward symbol – Press to skip forward on a VHS tape or DVD o. MENU – Brings up the DVD menu p. Directional buttons control DVD navigation functions Article CTSG-034; Version 1; Last Revised 5/21/2012 Appendix C Podium Drawings (CTSG-035) Article CTSG-035; Version 1; Last Revised 5/21/2012 Credenza Drawings (CTSG-036) Article CTSG-036; Version 1; Last Revised 5/21/2012 *Any changes from this design or questions must be directed to Brian Raley, Instructional Services Engineer, at [email protected]. Appendix C Non-Standard Rooms (CTSG-037) Towson City Center 209: Primary image duplicated on 2nd projector. Dual image button will project secondary image on other projection screen Small display on monitor on podium shows instructor camera Rear display mirrors primary source Rear display shows distance learning location during video conference. Article CTSG-037; Version 1; Last Revised 5/21/2012 Lecture Capture Scenario for Cisco Codecs (CTSG-038) 1. The "Record" hard button will be pressed on the touch panel 2. Client will be prompted for a pass code 3. A screen with a Qwerty keyboad will come up asking the client to "Enter your NetID to start recording:" (the crestron will need to be programmed to add "@video.towson.edu" to the end of whatever is typed). Paul will follow up with exact command. The command for number 3 will be "xCommand Dial Number:[email protected] Protocol:Sip CallRate:4000<LF>" where netid will replace by keyboard entry. 4. A back button must be present to go back to keyboard screen if something is miss typed. 5. A stop recording button must be available to hang up the call. There must be a confirm dialog box before actually stopping the recording. The confirmation must use the general design of the message presented to the user when they press Finish to shut down the system. Use “Are you sure you want to stop recording?” for the verbiage and include Yes/No buttons, as with the Finish confirmation. Article CTSG-038; Version 1; Last Revised 6/12/2014