1
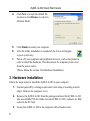
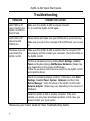
ZyXEL G-302
(Hardware Revision v2)
802.11b/g Wireless PCI Adapter
Quick Start Guide
Version 1.0
May 2005
ZyXEL G-302 Quick Start Guide
Important Note
Federal Communications Commission (FCC) Interference Statement
FCC Certification
The United States Federal Communication (FCC) and the Canadian Department of
Communications have established certain rules governing the use of electronic
equipment.
Part 15, Class B
The device complies with Part 15 of FCC rules. Operation is subject to the following
two conditions:
•
•
This device may not cause harmful interference.
This device must accept any interference received, including interference that
may cause undesired operations.
This equipment has been tested and found to comply with the limits for a Class B
digital device pursuant to Part 15 of the FCC Rules. These limits are designed to
provide reasonable protection against harmful interference in a commercial
environment. This equipment generates, uses, and can radiate radio frequency
energy, and if not installed and used in accordance with the instructions, may cause
harmful interference to radio communications.
If this equipment does cause harmful interference to radio/television reception,
which can be determined by turning the equipment off and on, the user is
encouraged to try to correct the interference by one or more of the following
measures:
1. Reorient or relocate the receiving antenna.
2. Increase the separation between the equipment and the receiver.
1
ZyXEL G-302 Quick Start Guide
3.
Connect the equipment into an outlet on a circuit different from that to
which the receiver is connected.
Caution
1. To comply with FCC RF exposure compliance requirements, a separation
distance of at least 20 cm must be maintained between the antenna of this
device and all persons.
2. This Transmitter must not be co-located or operating in conjunction with
any other antenna or transmitter.
2
ZyXEL G-302 Quick Start Guide
About Your ZyXEL G-302
Thank you for purchasing ZyXEL G-302! The ZyXEL G-302 is an IEEE 802.11g
compliant wireless LAN PCI Adapter that fits into any PCI slot. With the G-302,
you can enjoy the benefits of wireless networking with data rates up to 54Mbps.
1. Installation Requirements
Before installation, you must have a computer with the following:
3
•
Pentium II 300MHz or faster
•
A minimum of 6 MB available hard disk space
•
A minimum of 32 MB RAM
•
A CD-ROM drive
•
A 32-bit (v2.2) PCI slot
•
Windows 98 SE/Me/2000/XP
•
Windows 98 SE users may need the Windows 98 SE CD
ZyXEL G-302 Quick Start Guide
2. ZyXEL Wireless LAN Utility Installation
The installation procedures are similar for all supported Windows versions.
Windows XP screen shots are shown unless otherwise specified.
DO NOT install the ZyXEL G-302 at this point.
The G-302 Utility should be installed first.
4
1.
Insert the support CD into the CD-ROM drive on your computer. The CD
automatically runs. Otherwise, locate and double-click setup.exe.
2.
Click Install Utility to start
installation.
3.
A welcome screen displays. Click Next.
ZyXEL G-302 Quick Start Guide
4.
Click Next to accept the default file
location or click Browse to select an
alternate folder.
5.
Click Finish to restart your computer.
6.
After the utility installation is completed, the Z icon will appear
in your system tray.
7.
Power off your computer and peripheral device(s), such as the printer in
order to install the hardware. Then disconnect the computer power cord
from the power source.
(Please follow the section 3 for Hardware Installation)
3. Hardware Installation
Follow the steps below to install the ZyXEL G-302 in your computer.
1. Ground yourself by wearing an anti-static wrist strap or touching a metal
object. Remove the computer cover.
2. Remove the ZyXEL G-302 from the package and insert the ZyXEL G-302
into an available PCI slot. Make sure the ZyXEL G-302’s contacts are fully
seated in the PCI slot.
3. Secure the ZyXEL G-302 to the computer with a bracket screw.
5
ZyXEL G-302 Quick Start Guide
4. Attach the included antenna to the ZyXEL G-302. The antenna should be
perpendicular to the ground.
5. Replace the computer cover and power on your computer.
6. Double click the Z icon to configure your wireless adapter.
If the ZyXEL Z icon displays, the ZyXEL G-302 is installed
properly. Refer to the User’s Guide to configure the ZyXEL
G-302.
Important Notice:
For users who need enhanced security settings for WPA, WPA-PSK
and 802.1x as well as connecting from the wireless client to the
corporate RADIUS server, you need to install Funk Odyssey Client
software as well.
LED Display
The following table describes the LEDs on the ZyXEL G-302.
LED
COLOR
PWR
Green
LINK
6
Green
STATUS
DESCRIPTION
On
The ZyXEL G-302 is powered.
Off
The ZyXEL G-302 is not powered.
Blinking
The ZyXEL G-302 is receiving or sending data.
Off
The ZyXEL G-302 is not receiving or sending data.
ZyXEL G-302 Quick Start Guide
Troubleshooting
PROBLEM
CORRECTIVE ACTION
LED PWR is off
when inserting the
ZyXEL G-302 into
the PCI slot.
Make sure the ZyXEL G-302 is properly inserted.
Try to Insert the ZyXEL G-302 again.
LED LINK is off
when the LED
PWR is on.
Please check and make sure your AP/Router is up and running.
Make sure you are in the coverage of the AP/Router you connect
to.
Windows does not
auto-detect the
ZyXEL G-302.
Make sure the ZyXEL G-302 is inserted into the computer PCI
slot properly and then restart your computer. Check the LEDs on
the ZyXEL G-302.
Perform a hardware scan by clicking Start, Settings, Control
Panel and double-clicking Add/Remove Hardware. (Steps may
vary depending on the version of Windows).
Follow the on-screen instructions to search for the ZyXEL G-302
and install the driver.
Check for possible hardware conflicts. In Windows, click Start,
Settings, Control Panel, System, Hardware and then click
Device Manager. Verify the status of the ZyXEL G-302 under
Network Adapter. (Steps may vary depending on the version of
Windows).
Install the ZyXEL G-302 in another computer. If the error
persists, you may have a hardware problem. In this case, you
should contact your local vendor.
Please see your User’s Guide for more Troubleshooting details.
7