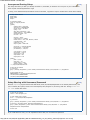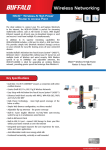
1
Buffalo WZR-HP-G300NH - DD-WRT Wiki
Log in / create account
Main Page
Donations
Community portal
Go
Current events
Recent changes
Random page
Help
Buffalo WZR-HP-G300NH
Contents [hide]
1 Specifications: Buffalo WZR-HP-G300NH
2 DD-WRT on Buffalo WZR-HP-G300NH
3 DD-WRT on Buffalo WZR-HP-G301NH (Japanese version)
4 Old install procedure (now obsolete)
4.1 Installing DD-WRT
4.1.1 Installing using Linux (Ubuntu)
4.1.1.1 Setting Up
4.1.1.2 Uploading DD-WRT to the router
4.1.1.3 Final Notes
4.2 Working / Not Working Features
5 Samba Configuration
5.1 Pre Requirements
5.2 Anonymous Sharing Setup
5.3 Setup Sharing with Username/Password
5.4 Configuration Share Folder
5.5 Setup DD-WRT as Windows Name Server
Specifications: Buffalo WZR-HP-G300NH
[edit]
CPU Model: Atheros AR9132 rev 2 (0xb9) CPU Clock: 400 MHz RAM: 64 MB FLASH: 32 MB
DD-WRT on Buffalo WZR-HP-G300NH
[edit]
Buffalo provides a re-branded version of DD-WRT specifically for this router. It can be flashed from the GUI and is
available on the Buffalo website:
http://www.buffalotech.com/support/getfile/wzrhpg300nh-pro-v24sp2-14998.zip
Read Me Documentation for Buffalo delivered DD-WRT firmware:
http://www.buffalotech.com/support/getfile/wzrhpg300nh-pro-v24sp2-14998.txt
As of Feb 2010, the WZR-HP-G300NH can be flashed with DD-WRT directly from the Buffalo web GUI. To do this, go
to http://www.dd-wrt.com/site/support/router-database , look up Buffalo WZR-HP-G300NH, and download the
firmware file you need (just one file).
The buffalo to ddwrt webflash file is a full build. It's for flashing from the original Buffalo firmware to DD-WRT.
The webupgrade file is to upgrade from an older version of DD-WRT. Use this to upgrade from an old version of
DD-WRT.
To revert from DD-WRT back to stock firmware, go to http://www.dd-wrt.com/phpBB2/download.php?
id=13418 , and download the file. Flash using upgrade on the DD-WRT web GUI. This is the 1.6 stock firmware.
You can then upgrade to the latest Buffalo firmware.
See the forums for details. Register and log in to see and download files.
http://www.dd-wrt.com/phpBB2/viewtopic.php?
t=63820&postdays=0&postorder=asc&highlight=13977&start=90
.
http://www.dd-wrt.com/phpBB2/viewtopic.php?t=66494&postdays=0&postorder=asc&start=30
. Details on
http://dd-wrt.com/wiki/index.php/Buffalo_WZR-HP-G300NH#Working_.2F_Not_Working_Features[10/25/2010 1:00:10 PM]
Buffalo WZR-HP-G300NH - DD-WRT Wiki
reverting the firmware.
DD-WRT on Buffalo WZR-HP-G301NH (Japanese version)
[edit]
The official DD-WRT release cannot be pushed by web upload onto the Japanese WZR-HP-G301NH original Buffalo
firmware. Buffalo Japan added a "safeguard" that checks for Japanese firmware and rejects western firmware. For
people with a Japanese router, see the following two sites for details.
http://www.dd-wrt.com/phpBB2/viewtopic.php?
t=63820&postdays=0&postorder=asc&highlight=13977&start=90
http://www.dd-wrt.com/phpBB2/viewtopic.php?t=66494&postdays=0&postorder=asc&start=30
Old install procedure (now obsolete)
[edit]
Installing DD-WRT
[edit]
Installing using Linux (Ubuntu)
[edit]
Original post by ERamseth. Read it here
Some commands and notes edited and optimized by Chalkos.
Setting Up
[edit]
To do this you can use Ubuntu 9.04 Desktop Live CD
1. Get the DD-WRT here
(this is v24-sp2 (02/03/10) std - build 13832).
You'll want the file ending in ".tftp"
2. Get TFTP app
1. On ubuntu enable Universe repositories
2. Update repositories using
sudo apt-get update
3. Use
sudo apt-get install tftp
3. Do the Hard reset or 30/30/30 on your router.
4. Unplug all ethernet cables and the power cable.
5. Connect your computer through ethernet directly to your router but leave the router turned off.
6. Disable NetworkManager. In Ubuntu 9.10, run
sudo service networking stop
Or, in Ubuntu 10.04, run
sudo service network-manager stop
7. Set IP of ethernet interface to "192.168.11.2". In Ubuntu, run
sudo ifconfig eth0 192.168.11.2
(assuming eth0 is your ethernet interface)
8. set netmask to "255.255.255.0" I think this is default but just to be safe, run
sudo ifconfig eth0 netmask 255.255.255.0
9. Make entry in the ARP table corresponding to the router. run
http://dd-wrt.com/wiki/index.php/Buffalo_WZR-HP-G300NH#Working_.2F_Not_Working_Features[10/25/2010 1:00:10 PM]
Buffalo WZR-HP-G300NH - DD-WRT Wiki
sudo arp -s 192.168.11.1 [MAC ADDRESS OF ROUTER]
The MAC address of router is the SSID printed on the sticker, but every second digit/letter is followed by a
":", so you end up with something like "00:1D:73:8C:8D:D5" (THIS IS AN EXAMPLE DO NOT USE THIS
NUMBER... I ACTUALLY JUST MADE IT UP)
what this really does is tell the network that 192.168.11.1 (the IP address that the router will take for
itself) corresponds with the MAC address of the router.
I'm not sure the arp table business is entirely necessary but it cannot hurt... also this is the one step i
have absolutely no idea how to do in windows...
At this point you basically have a 1 computer network set up and your computer will be expecting the router (defined
by its MAC address) to show up on 192.168.11.1 (which is the address the router will ask for/respond on when it is
turned on)
Uploading DD-WRT to the router
[edit]
Important: Before starting TFTP navigate (on the shell) to the folder where you downloaded the firmware (otherwise
you can not upload it using TFTP)
run tftp
tftp
Set verbose mode on (so we know what's going on);
Binary mode on (because we are uploading a binary file);
Trace on (so we get feedback on our commands);
Rexmt 1 (to retry the upload on failure every 1 second);
And timeout to 60 (repeatedly retry the upload for 60 seconds before giving up)
To do this on the regular tftp client, enter the following commands (in the text below, "tftp>" is just the prompt that
tftp gives you, not something you need to type)
tftp> verbose
Verbose mode on.
tftp> binary
mode set to octet
tftp> trace
Packet tracing on.
tftp> rexmt 1
tftp> timeout 60
1. in tftp connect to 192.168.11.1 (does not matter that router is still turned off)
tftp> connect 192.168.11.1
At this point you aren't really "connected" in the sense that your computer requires any feedback from the
router. tftp is basically just prepped to send the correct file to the correct address, as long as all the other
pieces of the equation (the router) end up in the right place at the right time.
now get ready to plug in your router, but don't do it yet. Also, make sure your computer is connected to
one of the LAN ports of the router, not the WAN port (the WAN port is outlined in blue)
2. In tftp put [firmware]
tftp> put wzrg300nh-firmware.tftp
At this point tftp will keep trying to send the firmware to the router and when it fails (because the router
isn't yet on or hasn't yet brought up it's tftp interface) it will wait 1 second and retry, up to 60 times
(because that's how we set up the tftp client)
3. Plug in the power cord to the router
The router will start up and now and you will see some lights blinking (possibly)
About 10-20 seconds in, you should notice that tftp is sending the file. instead of the retry message over
and over you will see some progress scrolling down the screen and at the end it will tell you how many
blocks or bytes were transferred in how many seconds
4. After the transfer is complete, wait about 5-10 minutes (more like 6 minutes I think) during this wait the red
light on front of the router will blink and then go off, eventually the wireless led comes on. (wireless led looks
http://dd-wrt.com/wiki/index.php/Buffalo_WZR-HP-G300NH#Working_.2F_Not_Working_Features[10/25/2010 1:00:10 PM]
Buffalo WZR-HP-G300NH - DD-WRT Wiki
like a radar thing... don't know how to describe it really)
5. When the wireless led is on, you are ready to go.
Final Notes
[edit]
At this point, in linux, you want to just re-enable network manager with
sudo service networking start
or
sudo service network-manager start
You will see a notification icon that says you are connected. You should click it, disconnect, then re-connect. You
should receieve an IP of something like 192.168.1.105.
NOTE that this is not in the 192.168.11.X subnet. If you get something like 192.168.11.2 or 192.168.11.100 then
something didn't work. Also, if you don't get an IP address assigned, something didn't work. As a last ditch effort, you
could restart your computer to see if it works.
Also, per DD-WRT defaults, your router should now be broadcasting a WI-FI network on the SSID of "dd-wrt".
If you get an IP on the 192.168.1.X network, then congratulations, you are good to go. open up a web browser (see
to begin setting up your router.
below) and get to http://192.168.1.1/
NOTE: for some reason chrome/chromium isn't working on the web interface. I had to use firefox. Use Firefox for
the web interface!
Working / Not Working Features
[edit]
Feature
Working
Notes
Wireless
OK - tested with V24preSP2 build 13832
Wireless
802.11n mode
OK - tested with V24preSP2 build 13832
If you want security enabled you must use WPA2 + AES
USB
OK - tested with V24preSP2 build 13832
Tested FAT32 flash drive. more info: USB_storage ... also tested ext3
automount to /opt ... it works
it seems that ipkg update doesn't work. and ipkg install do not fully work. "sort" command missing. "netstat"
command missing. ipkg-opt could not be installed. so the optware could not work.
Samba Configuration
[edit]
The DD-WRT already included a build-in samba, but missing ui configuration, while waiting the ui configuration, I
write a simple instruction to setup samba.
The instructions here is base on http://g300nh.blogspot.com/2010/06/samba-sharing-in-dd-wrt.html , but have
some modify to easy setup with user not family with linux, all setup can be done with dd-wrt interface, and don't
need to use shell of dd-wrt.
Pre Requirements
DD-WRT don't have any tools to format you hdd, so you must have a hdd in the format dd-wrt can understand
(fat32, ext3...)
Goto Services/USB section in dd-wrt, Change the setting as below:
Core USB Support: Enable
USB 2.0 Support: Enable
USB Storage Support: Enable
ext2 / ext3 File System Support: Enable
FAT File System Support: Enable
Automatic Drive Mount: Enable
Disk Mount Point: /mnt
After apply the change, if you already plugin you hdd, you should see the information of hdd in dd-wrt
http://dd-wrt.com/wiki/index.php/Buffalo_WZR-HP-G300NH#Working_.2F_Not_Working_Features[10/25/2010 1:00:10 PM]
[edit]
Buffalo WZR-HP-G300NH - DD-WRT Wiki
Anonymous Sharing Setup
[edit]
This setup will share you disk you already mounted to /mnt folder, It will share for everyone on your network and
don't request username/password to login
To setup, Goto Administrators/Commands section in DD-WRT, copy below script to textbox then choose Save Startup
# Stop samba service
killall smbd
killall nmbd
sleep 2
# Configure samba
mkdir -p /tmp/etc/samba
echo "
[global]
netbios name = DD-WRT
workgroup = WORKGROUP
server string = DD-WRT
syslog = 10
obey pam restrictions = yes
socket options = TCP_NODELAY
preferred master = no
os level = 20
security = share
guest account = nobody
invalid users = root, mail, deamon, reboot
null passwords = yes
guest only = yes
map to guest = Bad User
private dir = /tmp/etc/samba/
lock directory = /var/lock/
pid directory = /var/run/
unix charset = UTF-8
dos charset = UTF-8
map archive = No
map hidden = No
map system = No
[Share]
path = /mnt/
read only = no
create mask = 0700
directory mask = 0700
" > /tmp/etc/samba/smb.conf
# Add user for samba
# guest user
grep -q nobody /etc/passwd || echo 'nobody:x:65534:65534:nobody:/mnt:/bin/false' >> /etc/passwd
# Start samba service
SMBOPTIONS="-s /tmp/etc/samba/smb.conf"
/usr/sbin/smbd $SMBOPTIONS
/usr/sbin/nmbd $SMBOPTIONS
Setup Sharing with Username/Password
[edit]
Because smbpasswd program build-in DD-WRT alway treat /etc/samba/smbpasswd as the samba password file, and
/etc is readonly file system, should we must temporary bind /tmp/etc to /etc during add user. Change # Add user
for samba section like below:
# Add user for samba
mount -o bind /tmp/etc /etc
# clear samba user if exists
echo "" > /tmp/etc/samba/smbpasswd
# guest user
grep -q nobody /etc/passwd || echo 'nobody:x:65534:65534:nobody:/mnt:/bin/false' >> /etc/passwd
# add user: username=share, password=sharepassword
grep -q share /etc/passwd || echo 'share:x:65534:65534:nobody:/mnt/:/bin/false' >> /etc/passwd
smbpasswd share sharepassword
umount /etc
If you need add more user, you can repeat these lines with your username and password
http://dd-wrt.com/wiki/index.php/Buffalo_WZR-HP-G300NH#Working_.2F_Not_Working_Features[10/25/2010 1:00:10 PM]
Buffalo WZR-HP-G300NH - DD-WRT Wiki
# add user: username=share, password=sharepassword
grep -q share /etc/passwd || echo 'share:x:65534:65534:nobody:/mnt/:/bin/false' >> /etc/passwd
smbpasswd share sharepassword
In [global] section of samba configuration, change some config value as below (add if the config does not exists
before):
encrypt passwords = true
passdb backend = smbpasswd
security = user
null passwords = no
guest only = no
smb passwd file = /tmp/etc/samba/smbpasswd
Configuration Share Folder
[edit]
add later
Setup DD-WRT as Windows Name Server
[edit]
If your network has more than subnet, you might need to setup a Windows Name Server (WINS server), You can
make you router become a WINS server even if you don't have a usb hdd or you don't need a sharing setup. Just
user script like Anonymous Sharing Setup but change some setting in [global] section:
wins support = yes
Goto Setup/Basic section in dd-wrt and set WINS server in DHCP group to your lan ip address (ex: 192.168.11.1)
If in your network have any device use static IP, find the Wins section and point to dd-wrt lan ip address (If you use
windows, choose properties of you adapter, click Advance, goto WINS tag, If your use linux, add wins server =
xxx.xxx.xxx.xxx in [global] section of samba)
Category: Buffalo guides
Article | Discussion | Edit | History
What links here | Related changes | Upload file | Special pages | Permanent link Print as PDF
This page was last modified 09:27, 23 October 2010. This page has been accessed 71,817 times.
About DD- WRT Wiki | Disclaimers | Powered by MediaWiki | Design by Paul Gu
http://dd-wrt.com/wiki/index.php/Buffalo_WZR-HP-G300NH#Working_.2F_Not_Working_Features[10/25/2010 1:00:10 PM]