1
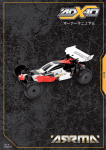
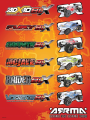
380038 Contents Page Page WARNINGS 3 FACTORY CHASSIS SETTINGS 17 KIT OVERIVIEW 3 CHASSIS TUNING 19 REQUIRED 4 Ride Height 19 BATTERY CHARGING 4 Camber Link Length 19 5 Steering Arm Length (Toe In/Out) 19 CHASSIS OVERVIEW Safety Instructions for Batteries 5 Camber Link Position 19 RADIOGEAR 6 Shock Position 19 Overview 6 Shock Removal 20 Steering Trim 6 Springs 20 Throttle Trim 6 Shock Oil 20 Binding 6 Dual Rate 7 Gear Chart 21 Battery Status 7 Spur/Pinion Gear Removal 21 Factory Defaults 7 Motor Removal 22 FCC Details 7 Differential Tuning 22 7 Differential Removal 23 7 Differential Exploded View 24 ELECTRONIC SPEED CONTROL (ESC) Specifications DRIVETRAIN TUNING 21 Overview RADIO-GEAR MAINTENANCE 7 Throttle Setup 7 ESC Status LED 8 Temperature Protection 8 Steering Access 25 ESC Tuning & Factory Defaults 8 Servo Removal 26 Receiver Access 25 25 STEERING MAINTENANCE 25 BATTERY FITTING 9 EXPLODED VIEWS 27 RUNNING 9 OPTION PARTS AND UPGRADES 37 DRIVING FUNDAMENTALS 9 BLANK CHASSIS SETUP SHEETS 38 POST-DRIVE CHECKS 9 MAINTENANCE 10 Recommended Tools 10 Trouble Shooting Matrix 10 Maintenance Schedule 11 Chassis Maintenance 12 Wheel and Tyre Maintenance 12 Slipper Clutch Adjustment 13 Spur/Pinion Mesh Adjustment 13 Slipper Pad Replacement 14 Driveshaft Maintenance 15 Rear Axle Maintenance 15 Wheel Bearing Replacement 16 DESIGNED FAST. DESIGNED TOUGH. 2 © 2013 ARRMA Durango Ltd. A subsidiary of Hobbico, Inc. Battery Mode Batteriemodus Mode de Batterie Modo de batería ክአኣዙዙኦ 䟄㻯㲰㆞ If using LiPo batteries you must set the correct battery mode on the ESC (electronic speed controller) to prevent battery damage. Wenn Sie LiPo-Akkus verwenden, muss der entsprechende Batteriemodus am Fahrtregler angewählt sein, um Schäden an der Batterie durch Tiefentladung zu verhindern. Pour l’utilisation de batteries LiPo, vous devez définir le mode batterie correcte sur le ESC (contrôleur de vitesse électronique) pour prévenir les dommages de la batterie. Si utiliza baterías LiPo deberá seleccionar el modo de batería correcto en el ESC (controlador electrónico de velocidad) para prevenir daños en las baterías. /L3R ክአኣዙትሷ∎䞷ቑ⫃⚗ቒᇬክአኣዙቑ㚜⍆ት棁ሳቂቤᇬ(6& ት拸⒖ቍክአኣዙዙኦ岼⸩ሺሲቃሸሧᇭ Ⱁ㨫∎䞷枑勩⚗䓸䟄㻯㌷㉔權幍函⺈ (6&᧤䟄庒抮⣷᧥᧨㷲䫽䤓䟄㻯㲰㆞᧨ⅴ棁㷱䟄㻯㗮⧞ᇭ Warning Achtung Avertissement Precaución巵⛙巵⛙ This is not a toy. This is a high performance RC model and must be treated with care and respect. It is the user's (your) responsibility to operate this product safely. It is necessary to be above 14 years of age to operate this model. It is the parents or guardians responsibility to ensure minors receive appropriate guidance. For further safety information and guidance please refer to your welcome pack online at ARRMA-RC.com/GO Dieses komplexe rc-modell ist kein spielzeug und muss mit umsicht benutzt werden. Es obliegt dem benutzer (ihnen) dieses produkt ordnungsgemäss und sicher zu bedienen. Nicht für Kinder unter 14 Jahren geeignet. Es obliegt den erziehungsberechtigten, kinder bei der benutzung dieses produktes zu beaufsichtigen oder sie korrekt einzuweisen. Für weitere Sicherheitshinweise und Hilfestellung sehen Sie sich bitte unser W illkommenspaket unter A RRM A-RC.com/GO an. Ce n'est pas un jouet. C'est un modèle radiocommande complexe, de haute performance qui doit être traitée avec soin et respect. C'est a l'utilisateur (vous) qu’incombe d’exploiter ce produit en toute sécurité. Ne convient pas pour les enfants âgés de moins de 14 sans la surveillance d'un adulte. Il est de la responsabilité des parents ou des tuteurs de s’assurer que les mineurs reçoivent les conseils appropriés ou les directives lors de l'utilisation ou des interventions sur ce produit. Pour plus d’informations sur la sécurité et l’utilisation veuillez consulter votre pack de bienvenue en ligne sur le site ARRMA-RC. com/GO Este producto no es un juguete. Este producto es un complejo modelo de radiocontrol de altas prestaciones y debe ser utilizado con precaución. Es responsabilidad del usuario (usted) el utilizar este producto en condiciones de seguridad apropiadas. No se recomienda para niños menores de 14 años sin la supervisión por parte de un adulto. En caso de menores de edad, es responsabilidad de los padres o tutores proporcionar la ayuda y/o supervisión apropiadas al utilizar o trabajar con este producto. Para más información y consejos de seguridad, por favor consulte su pack de bienvenida online en ARRMARC.com/GO 㦻完❐ቒርብቄቦቊቒሥቭቡሾቶᇭ㦻完❐ቒ浧㊶厌ንኇነዐእዊዙወኤወኈዙቊሼᇭ♥㔀ሧቒ◐⒕ቍ㽷㎞ሯ㉔尐ቊሼᇭ完❐ት⸘⏷ሷ∎䞷ሧቂቃሲℚቒር⸱㱧ቑ弻↊ቊሼᇭኊአእ ቊሥቮ䍉ᇬ 㸂㦹䄏ቑር㱧ሯ∎䞷ሸቯቮ⫃⚗ቒ㉔ሽ≬帆劔ቑ䥲䧲ቑₚ∎䞷ሺሲቃሸሧᇭ㦻完❐ትር㱧ሯ∎䞷ሸቯቮ椪ቒ㉔ሽ≬帆劔ቑ䥲尥ₚቊ忿嫛ᇬኾዐኣኧዐኖት嫛ቆ ሲቃሸሧᇭ⸘⏷ሷ∎䞷ሧቂቃሲ䍉ኇዐኁዐ$550$5&FRP*2␔ቑኃኄወኈኽኮአኌኁኝዐኖትሷ䭉崜ሲቃሸሧᇭ 㦻ℶ❐ₜ㢾䘸␆ᇭ扨㢾₹兢㨓⮜㧑₣浧㻃䤓拴㘶㲰⨚᧨∎䞷ₙ㉔權⺞㉒ᇭ⸘⏷⦿㝜⇫㦻ℶ❐㢾∎䞷劔 ㌷ 䤓徲↊ᇭ榏尐䅰 ⼐ⅴₙ㓜厌㝜⇫㷳㲰⨚ᇭ㇢∎䞷㒥兓孔㦻ℶ❐㢅᧨ 䫽≬㦹㒟∎䞷劔㈦Ⓙ抑㇢䤓㖖⺋ⅴ♙䥠䧲᧨㢾䓅㹜㒥㢾䥠㔳ⅉ䤓徲↊ᇭ庆ₙ几 $550$5&FRP*2 㚫⺊㦃⮩䦇␂䤓⸘⏷≰㋾ⅴ♙㖖⺋ᇭ Warranty Garantie Garantie Garantía≬峋ቇሧቑ≬⦉ To guarantee you have the best experience ARRMA offer a 2 year warranty covering defects in materials, workmanship and assembly on all our products. To ensure you understand the full terms of the warranty and its limitations please refer to your welcome pack online at ARRMA-RC.com/GO. Für maximale Freude an Ihrem Produkt bietet ARRMA eine Zweijahres-Garantie, die Materialdefekte und Fertigungsfehler einschliesst. Um sicherzustellen, dass Sie alle Garantiebedingungen kennen, schauen Sie sich bitte das Willkommenspaket auf ARRMA-RC.com/GO an. Afin de vous assurer, la meilleure expérience, ARRMA offre une garantie de 2 ans, couvrant les défauts des matériaux, de fabrication et d’assemblage sur tous nos produits. Afin de vous assurer que vous comprenez les termes complets de la garantie et ses limites veuillez consulter votre pack de bienvenue en ligne sur le site ARRMA-RC.com/GO. Para asegurarle la mejor experiencia posible, ARRMA le ofrece 2 años de garantía cubriendo defectos de materiales, producción o montaje en todos nuestros productos. Para asegurarse de que comprende todos los términos de la garantía y sus limitaciones, por favor consulte su pack de bienvenida online en ARRMA-RC.com/GO ⸘㉒ሺሷ∎䞷ሧቂቃሲ䍉 $550$ ቒ㦻完❐⺍ሺᇬ 栢ቑ完❐❐役ₜ哾♙ቖぴ⫃ቊቑ俓䵚ₜ哾⺍ሼቮ≬峋ት㙟∪ሧቂሺቡሼᇭ≬峋㧰ↅ䷘ቑ崂便ቇሰቡሺቒኇዐኁዐ$550$5&FRP*2 ␔ቑኃኄ ወኈኽኮአኌ岧憘ሸቯርቭቡሼቑቊ完❐ቑሷ∎䞷ⓜሷ䭉崜ሲቃሸሧᇭ ℕ≬幐㌷㕴㦘㦏㭡䤓⇢洛᧨$550$ 㙟∪㓏㦘ℶ❐ 䤓≬⦉᧨▔⚺㧟㠨ⅴ♙兓孔ₙ䤓䛤䡄ᇭℕ䫽≬㌷ℕ屲≬⦉㦮棟ⅴ♙棟Ⓟ㧰ↅ᧨庆ₙ几 $550$5&FRP*2 㩴幱ᇭ Support Hilfestellung Support Soporteኒኺዙእ㞾㚃 At ARRMA we want you to love running your kit and make owning a high performance RC car as simple as possible. If you have any questions about running, maintaining, tuning or repairing your ARRMA product there are three options for you to use to get help and advice. Visit ARRMA-RC.com for support, parts and upgrades for your kit. 'GO FOR IT' is the worldwide owner's forum for ARRMA. Here you will find other ARRMA owners, get help and advice on how to get the best from your ARRMA product. If you can't find what you're looking for then you can always email us at supportUSA@ARRMA-RC (USA) or [email protected] (ROW) 24hrs a day and we will do our best to help you with your query. Bei ARRMA möchten wir, dass Sie lange Freude an Ihrem High-Performance-RC-Modell haben. Sollten Sie Fragen zu Betrieb, Wartung, Tuning oder Reparatur haben, dann bieten wir eine Fülle von Möglichkeiten. Gehen Sie auf arrma-rc.com, um mehr über Hilfestellung, Teile oder Tuningteile zu erfahren "GO FOR IT" ist ein weltweites Forum für die Benutzer und Eigner von ARRMA-Produkten. Hier finden Sie andere ARRMA-Nutzer, erhalten Hilfestellung und vieles mehr. Sollten Sie einmal keine Antworten finden, dann kontaktieren Sie uns über supportUSA@ARRMA-RC (USA) oder [email protected] (ROW) und wir werden alles tun, um Ihnen helfen zu können. Chez ARRMA notre volonté est que vous appréciez faire évoluer votre voiture et vous faire posséder une modèle RC de haute performance aussi simple que possible. Si vous avez des questions concernant le fonctionnement, la maintenance, le réglage ou la réparation de votre produit ARRMA, il y a trois possibilité que vous pouvez utilisez pour obtenir l'aide et des conseils. Visitez ARRMA-RC.com pour la prise en charge, des pièces et des mises à niveau de votre kit. « GO FOR IT » est un forum de propriétaires de produit ARRMA dans le monde entier. Vous y retrouverez les autres propriétaires ARRMA, obtiendrez de l'aide et des conseils sur la façon de tirer le meilleur de votre produit ARRMA. Si vous ne trouvez pas ce que vous recherchez, vous pouvez toujours nous contacter par courriel à supportUSA@ARRMA-RC (USA) ou [email protected] (ROW) 24h par jour et nous ferons de notre mieux pour vous aider dansvotre requête. En ARRMA queremos que disfrute al utilizar su coche y que poseer un modelo de radiocontrol de altas prestaciones sea lo más fácil posible. Si tiene cualquier pregunta sobre utilización, mantenimiento, ajuste o reparación de su producto ARRMA dispone de tres opciones para obtener ayuda y consejo. Visite ARRMA-RC.com para obtener soporte técnico, recambios y mejoras para su modelo. ‘GO FOR IT’ es el foro internacional de usuarios de ARRMA. En él encontrará otros usuarios de ARRMA y podrá obtener ayuda y consejos para aprovechar al máximo su producto ARRMA. Si no no encuentra lo que busca siempre podrá contactarnos por correo electrónico a supportUSA@ARRMA-RC (USA) o [email protected] (ROW) donde haremos todo lo posible por ayudarle las 24 horas del día. ር⸱㱧ቒ㦻完❐ቑ忿嫛ትር㰌ሺቢ檑ሰᇬቊሰቮ棟ቭ亰◧浧㊶厌 5& ቿአኴኍዉዙኦሺ檑ሰቂሧቋ㊬ሧቡሼᇭ$550$ 完❐ቑ忿嫛ᇬኾዐኣኧዐኖᇬኞዂዙከዐኍᇬ≽䚕ቊሷ役⟞ሯሥቮ⫃⚗ᇬ㇢䯍ቊቒⅴₚቑ ቇቑ㡈㽤ቊቿኦክኁኖትሷ㙟∪ሺርቭቡሼᇭኊአእቑኒኺዙእቧኮዙኡᇬቿአኴኍዉዙኦቇሧቒኸዙኽዙን᧤$550$5&FRP᧥ትሷ尶ሲቃሸሧᇭ*2)25,7 ቒ₥䟛₼ቑ $550$ ዃዙናዙቑቂቤቑኲኆዙ ኽቊᇬⅥቑ $550$ ዃዙናዙቑ㍔⫀ሯ㙁憘ሸቯርቭᇬ$550$ 完❐ቇሧቑቿኦክኁኖሯ㈦ቬቯቡሼᇭኸዙኽዙንቧኲኆዙኽቊር㘱ሺቑ㍔⫀ሯ尚ቇሮቬቍሧ⫃⚗ቒ㇢䯍ቡቊ ( ኾዙወቊር⟞ሧ⚗ቲሾሲቃሸ ሧ᧤VXSSRUW86$#$550$5&FRP86$VXSSRUW#$550$5&FRP52:᧥ᇭ ⦷ $550$₥䟛摛㒠ⅻ゛㦪㌷厌⮮⠫䓀㝜㘶䘸⃟㌷䤓懵ⅴ♙厌⮮戊㨍㕴㦘♿浧㻃䤓拴㘶㲰⨚ᇭⰑ㨫㌷㦘↊⇤␂㡋㝜㘶ᇬ≬␊ᇬ㈽庒㒥≽⮜㌷䤓 $550$ℶ❐䤓桽欧᧨㒠ⅻ㙟∪㌷ₘ₹折欈㧴ソ┸㌷ⅴ♙全㌷ ㆉ帽ᇭ庆ₙ⸧几 $550$5&FRP㩴幱䦇␂榅ↅ✛◖儶䤓忓帾ᇭರ*2)25,7ರ㢾⏷䚒 $550$䘸⹅䤓幉⧪ᇭ⦷扨摛㌷♾ⅴ㔍Ⓙ␅Ⅵ $550$ 䘸⹅᧨ㄅ⺊㻑ソ┸♙ㆉ帽㧴常㌷䤓 $550$ ℶ❐⛗䘿㦃Ⰼ䤓䕅㊐ᇭⰑ 㨫㌷㔍ₜⒿ㌷㎂幱桽䤓桽欧᧨㌷♾ⅴ⦷↊⇤㢅⊨≰Ⓙ VXSSRUW86$#$550$5&FRP86$VXSSRUW#$550$5&FRP52:᧨㒠ⅻ⺕↩⻌⏷┪ソ┸㌷屲⑂㌷䤓䠠壠ᇭ [email protected] (USA) © 2013 ARRMA Durango Ltd. A subsidiary of Hobbico, Inc. 3 [email protected] (ROW) WWW.ARRMA-RC.COM Kit Overview ARRMA ADX-10 BLX ARRMA Fury BLX ARRMA Granite BLX ARRMA Mojave BLX 1.3mm 1.5mm 2.0mm 2.5mm Hex Wrenches Shock pre-load spacers ARRMA Raider BLX ARRMA Vorteks BLX Cross wrench US Design Patent application no. 29/392 417 Community Design No: 001275770-0001 Receiver Bind Plug Kit # 102540 > 102559 _ATY/CTY/GTY/ITY Kit # 102540 > 102549 _TY A R R M A AT X 2 . 4 . G h z Transmitter Kit # 102550 > 102559 _ATN/CTN/GTN/ITN 7.2V Battery and Charger Kit # 102540 > 102549 _ATN/CTN/GTN/ITN 7.4V Battery and Charger Required Kit # 102540 > 102549 _TN Kit # 102540 > 102549 _TY 7.2/7.4V/11.1V Battery and Charger Kit # 102540 > 102559 _ATN Radiogear AA batteries x4 PC with Internet access Battery Charging E.G 7.2V NiMH 5000mah @700ma = 7.1 hours. E.G 7.4V LiPo 4000mah @800ma = 5 hours. DESIGNED FAST. DESIGNED TOUGH. 4 © 2013 ARRMA Durango Ltd. A subsidiary of Hobbico, Inc. Safety Instructions for Batteries 1. Use only four(4) AA alkaline batteries in your ATX100 transmitter. 2. Do not dispose of the battery in a fire as it may explode. Check with local codes for possible special disposal instructions. 3. Do not open or mutilate the battery. Released electrolyte is corrosive and may cause damage to the eyes and skin. It may be toxic if swallowed. 4. Exercise care in handling batteries in order not to short the battery with conducting materials such as rings, bracelets and keys. The battery or conduction material may overheat and cause burns. Caution: Risk of explosion if battery is replaced by an incorrect type. Dispose of used batteries according to the instructions. Chassis Overview aEW N.B. Vorteks chassis shown as an example - information applies to all variants. Rear Wishbone Driveshaft Front Upper Wishbone Front Shock absorber and Spring Pinion & Spur Gear Cover Receiver Box ESC (Electronic Speed Controller) Front Lower Wishbone Motor Rear Shock Absorber and Spring Steering Rod Camber-link Rear Wheel and Tyre Front Wheel and Tyre Front Rear Front Upright Ball-cup Ball-cup Rear Hub Carrier Hex Hub Axle Axle Wheel-Nut Hinge-pins Wheel-Nut Steering Block © 2013 ARRMA Durango Ltd. A subsidiary of Hobbico, Inc. Hex Hub 5 Hinge-pin WWW.ARRMA-RC.COM Radio Gear ARRMA ATX100 2.4Ghz Aerial Control Panel Steering reverse Throttle reverse Power LED Battery Status LED Control panel Steer wheel (CH1) Steering trim Throttle trim Bind button Steering dual rate Power switch Throttle trigger (CH2) Status LED BAT socket (not used) Bind/CH3 socket Throttle socket (CH2) Battery compartment Steering (CH1) socket Aerial Steering Trim Throttle Trim Throttle Trim: factory default zero, adjustment is not necessary. Binding Remove receiver box lid Fit battery and connect ESC Hold down bind button and turn transmitter on DESIGNED FAST. DESIGNED TOUGH. Insert bind plug in CH3 Socket Status LED stops blinking Turn ESC and Transmitter off 6 Switch on ESC Remove bind plug Receiver status LED will blink Replace receiver box lid © 2013 ARRMA Durango Ltd. A subsidiary of Hobbico, Inc. Dual Rate Battery Status If battery status LED is flashing, the batteries need to be replaced. Contains FCC ID: ZL4-KST-HXGT2 Factory Defaults Steering/throttle channels switches set to ‘N’, Steering and Throttle trim set to middle/zero adjustment. Steering Dual Rate at 100%/fully right. This device complies with Part 15 of the FCC Rules. Operation is subject to the following conditions: (1) this device may not cause harmful interference, and (2) this device must accept any interference received; including interference that may cause undesired operation. Electronic Speed Controller (ESC) If using LiPo batteries you must set the correct battery mode on the ESC (electronic speed controller) to prevent battery damage. ESC Specifications Input Voltage 6-8 NiMh (7.2-9.6v) / 2S/3S LiPo (7.4-11.1v) BEC Output 6.0v/2A Max Receiver Plug (CH2) Deans® battery connector Motor wires x3 Power Switch & Set button Power capacitor Heat-sink and Fan HEAT-SINK MAY BE HOT AFTER USE Throttle Setup Do not move the throttle when switching the model on and the ESC will automatically set the throttle neutral. A long beep will sound to confirm setup. © 2013 ARRMA Durango Ltd. A subsidiary of Hobbico, Inc. 7 WWW.ARRMA-RC.COM ESC Status LED Temperature Protection If the ESC temperature exceeds 95 degrees C e ls iu s , t h e E S C w ill e n t e r t e m p e r a t ur e protection mode and the red status LED will blink. Once the ESC has cooled down it will resume normal operation. Solid Blue and Red LED: Reverse active Solid Red LED: Reverse locked Blinking Blue LED: Low Voltage Protection Blinking Red LED: Temperature Protection v ESC Tuning The ARRMA BLX brushless ESC is setup for use straight from the factory, if you want to alter the settings for your track or driving style please see the table and steps below: v Variable Battery Mode Setting > 1 LiPo @ 3.2v per Cell 2 NiMH @ 65% initial Voltage 3 No Cut-off (5v Min) 4 Running Mode Forward/Brake/Reverse Forward/Brake Brake Setting 20% 40% 60% 80% Drag-Brake 0% 5% 10% 20% Throttle Sensitivity 1 2 3 4 Factory Reset No Yes 5 30% Factory Defaults ii To tune the BLX ESC, connect a battery, hold the ‘set’ button and switch the ESC on. A beep will sound, release the ‘set’ button. i Press the ‘set’ button to cycle the tuning variables, the blue LED will flash with short beeps to show the variable selected. To enter the selected variable, hold the ‘set’ button, a long beep will acknowledge the selection. Release the ‘set’ button. Using the tuning chart, press the ‘set’ button until the number of red LED flashes and short beeps equals the required value. To save the setting, either hold the ‘set’ button to go back to tuning variable selection or switch the ESC off. DESIGNED FAST. DESIGNED TOUGH. 8 © 2013 ARRMA Durango Ltd. A subsidiary of Hobbico, Inc. Battery Fitting AA x4 ii i Running i i ii ii Driving Fundamentals We design all ARRMA cars to be fun and quick to get used to. However, it is important to be comfortable with the handling before exploring the upper reaches of your car's performance. For the first run we recommend taking your kit to an open, flat area (such as a park) ensuring you are away from potential hazards, people or animals. Start by simply driving round in a large loop, slowly building up speed to get used to the handling. Alter the size of the loop and your speed. Watch out for the rear-end of the car breaking loose. If the car does slide try to counter-steer into the skid and accelerate out or let-off the throttle and let it come to a stop. To take a corner you need to slow down before the corner, hold your speed through the curve and, once you see an exit line, accelerate out of the corner. Once you have practiced the basic driving techniques and you are comfortable with the performance of the car you can start to open-up the full performance potential of your car. Post-Drive Checks i ii Inspect car for wear or damage adjust or replace as necessary. © 2013 ARRMA Durango Ltd. A subsidiary of Hobbico, Inc. 9 WWW.ARRMA-RC.COM Maintenance Recommended Tools Supplied Allen Keys Not Supplied Hex Drivers Nut Drivers 1.3mm (0.050") 5.5mm 1.5mm 7mm 1.3 (0.050"), 1.5, 2, 2.5mm Turnbuckle Wrench 2mm 4mm Cross wrench 2.5mm Grease Thread-lock HAZARDOUS/FLAMMABLE: Adult supervision required, use only in a well ventilated area and away from sources of ignition. Long Nose Pliers Cloth Basic Trouble Shooting Brush Oil Spray Tyre Glue Automotive Brake Cleaner or Nitro Car Cleaner - need help? Visit the support area and forums at ARRMA-RC.COM Trouble Shooting Matrix Problem Possible Cause Solution VEHICLE DOES NOT MOVE Batteries are incorrectly installed in transmitter Weak, damaged or no drive battery in model Frayed or broken motor or electronic speed control (ESC) wires Electronic speed control (ESC) has shut down due to overheating Electric motor is damaged Check transmitter batteries and refit. Install fresh, charged battery Check condition, reconnect and insulate. Visit the GO FOR IT! forum for advice Stop driving and allow electronic speed control (ESC) or motor to cool down Replace with new unit - visit ARRMA-RC.com for advice and upgrades! Replace with new unit - visit ARRMA-RC.com for advice and upgrades! Check components and replace - visit ARRMARC.com for advice Remove drive battery, leave to cool down if necessary, and re-charge Adjust reverse on electronic speed control (ESC) Replace with new unit - visit ARRMA-RC.com for advice and upgrades! Throttle trim needs to be set to zero/neutral. El e c t r o n i c s p e e d c o n t r o l ( E S C ) i s damaged Possible damage to transmission/driveline Electronic speed control (ESC) low voltage cutoff has activated. V E H I C L E D O E S N O T Electronic speed control (ESC) reverse REVERSE mode switched off El e c t r o n i c s p e e d c o n t r o l ( E S C ) i s damaged VEHICLE DRIVES WITHOUT Transmitter throttle trim incorrectly set INPUT Neutral throttle position of Electronic Set throttle trim to zero and switch electronic Speed Control (ESC) incorrect. speed control (ESC) off and then on again, a chime to indicate the new neutral position has been set SHORT RUNTIME Battery damaged or not fully charged Check condition, replace or recharge Electric motor dirty or damaged Clean, check condition and/or replace - visit ARRMA-RC.com for more information Incorrect electronic speed control (ESC) Adjust the battery mode of the electronic battery mode. speed control (ESC) SLUGGISH PERFORMANCE Battery damaged or not fully charged Check condition, replace or recharge Transmitter throttle trim incorrectly set Throttle trim needs to be set to zero/neutral. DESIGNED FAST. DESIGNED TOUGH. 10 © 2013 ARRMA Durango Ltd. A subsidiary of Hobbico, Inc. Trouble Shooting Matrix (cont.) Problem Possible Cause Solution Neutral throttle position of electronic Set throttle trim to zero and switch electronic speed control (ESC) incorrect. speed control (ESC) off and then on again, a chime to indicate the new neutral position has been set SLUGGISH PERFORMANCE Slipper clutch adjustment too loose Check slipper is set to factory setting or your (continued) prefered setting. Electric motor dirty or damaged Clean, check condition and/or replace - visit ARRMA-RC.com for more information Drivetrain dirty or damaged Clean, check condition and/or replace - visit ARRMA-RC.com for more information FRONT WHEELS LIFT WHEN Slipper clutch adjustment too tight Check slipper is set to factory setting. ACCELERATING NO CONTROL OF VEHICLE Transmitter batteries are weak or fitted Check transmitter batteries and refit. OR SHORT RANGE incorrectly Servo and ESC signal wires to receiver Reinstall signal wires to receiver loose or connected incorrectly Transmitter and receiver are not 'bound' correctly S T E E R I N G / T H R O T T L E Electronic speed control (ESC) has shut OPERATION INTERMITTENT down due to overheating Transmitter and receiver are not bound fully or are suffering interference VEHICLE WANDERS LEFT/ Transmitter steering trim setting out RIGHT WITHOUT STEERING INPUT Damaged steering components Transmitter and receiver need to be bound. Stop driving and allow electronic speed control (ESC) or motor to cool down Check for sources of interference and re-bind transmitter/receiver. Adjust steering trim on transmitter. Check components and replace - visit ARRMA-RC.com for advice Drivetrain dirty or damaged Clean, check condition and/or replace - visit ARRMA-RC.com for more information STEERING OR THROTTLE Re l e v a n t c h a n n e l o n t r a n s m i t t e r i s Reverse relevant channel on transmitter. FUNCTION REVERSED reversed Check that the wires from the electronic Reconnect in the correct orientation, ensuring speed controller (ESC) to the motor are fit is tight; if not pinch female connector with connected correctly pliers LIMITED STEERING ANGLE Tr a n s m i t t e r s t e e r i n g d u a l - r a t e s e t Adjust transmitter dual-rate. incorrectly Damaged steering components Check components and replace - visit ARRMA-RC.com for advice El e c t r o n i c s p e e d c o n t r o i ( E S C ) i s Replace with new unit - visit ARRMA-RC.com damaged for advice and upgrades! Maintenance Schedule This chart is just a guide. Running in dusty, sandy or wet conditions will mean certain maintenance tasks will need to be performed more frequently. Check for wear or damage after every run. Do not wait until the recommended time for maintenance if parts appear badly worn or need renewing. Maintenance Task Chassis Maintenance Wheel and Tyre Maintenance Slipper clutch Adjustment Spur/Pinion Mesh Adjustment Slipper Pad Replacement Driveshaft Maintenance Rear Axle Maintenance Wheel Bearing Replacement Shock Oil Replacement Differential Oil Replacement © 2013 ARRMA Durango Ltd. A subsidiary of Hobbico, Inc. Page Runs 12 12 13 13 14 15 15 16 20 22 11 WWW.ARRMA-RC.COM Chassis Maintenance Online videos when you see this icon >> Tools Required Cloth ARRMA-RC.COM/ SUPPORT/ Automotive Brake Cleaner or Nitro Car Cleaner Brush AFTER RUNNING: Ensure that drivetrain, suspension and steering are clean, free and lubricated Check that all the screws are tight Check tyre/wheel condition DO NOT RUN THE CAR IF ANY PARTS ARE DAMAGED Please contact your local distributor to order replacement parts. N.B. Raider chassis shown as an example - information applies to all variants. Wheel and Tyre Maintenance N.B. Fury shown as an example - information applies to all variants. Tools Required 2 1 ARRMA-RC.COM/ SUPPORT/ 7mm Nut Driver or Cross Wrench Tyre Glue Ensure model is switched off and drive battery is removed; then remove wheel with 7mm nut driver or crosswrench. 3 If the tyre needs re-glueing, gently pull tyre away from the wheel rim, apply a small amount of tyre glue, re-seat the tyre and hold until glue has set. DESIGNED FAST. DESIGNED TOUGH. Visually inspect the tyre sidewalls and tread for damage or heavy wear. Replace wheel and tyre if either is found to be worn. Check that tyre bead is securely glued to the rim. 4 Refit the wheel with a 7mm nut driver or cross wrench 'finger-tight', then tighten a further 1/4 turn. Do NOT over tighten the wheel nut or damage to the wheel bearings may occur. 12 © 2013 ARRMA Durango Ltd. A subsidiary of Hobbico, Inc. Slipper Clutch Adjustment ARRMA-RC.COM/ SUPPORT/ Tools Required The function of the slipper clutch is to protect the gearbox, differential and motor from shocks and also to allow you to tune how the torque from the motor 'comes-in' when you accelerate to suit different surface conditions. To adjust the slipper clutch do the following: 2mm Hex Driver 5.5 & 7mm Nut Driver or Cross Wrench 2 1 Ensure model is switched off and drive battery is removed then remove rear-right wheel with 7mm nut driver or crosswrench. Remove spur gear cover with 2mm hex driver. Hold spur gear with fingers. Use a 5.5mm nut driver or crosswrench to loosen or tighten slipper nut a 1/4 of a turn at a time. Refit spur gear cover and rear-right wheel. Surface Type Slipper Clutch Characteristics Factory Setting Slippery Loosen Smoother power delivery, easier to control. 1. Fully tighten locknut clockwise. High Grip Tighten Quicker throttle response. If the car wheelies too much, loosen the Slipper Clutch 2. Loosen 4.5 turns. AFTER RUNNING: WARNING: A loose slipper will damage the friction pads. If the slipper is too tight it may damage the transmission. If slipper clutch is too loose, tighten 1/4 turn. Spur/Pinion Mesh Adjustment ARRMA-RC.COM/ SUPPORT/ Tools Required Gear mesh should not need to be adjusted regularly, however it is worth checking every 10 runs or so that the gears are still correctly meshed to prevent damage to the spur gear. 1 2mm Hex Driver 2 Ensure model is switched off and drive battery is removed then remove rear-right wheel with 7mm nut driver or cross-wrench. Remove spur gear cover with 2mm hex driver. 5.5 & 7mm Nut Driver or Cross Wrench 3 Check the gears run smoothly and that there are no tight spots and the gears mesh as shown above. To set the gear mesh, undo the two motor screws with a 2mm hex driver then place a strip of printer paper between the gears, press on the pinion and re-tighten the motor screws. Remove paper, refit the spur gear cover and rear wheel. If the spur and/or pinion gear need to be replaced please see page 21 for removal and replacement. © 2013 ARRMA Durango Ltd. A subsidiary of Hobbico, Inc. 13 WWW.ARRMA-RC.COM Slipper Pad Replacement ARRMA-RC.COM/ SUPPORT/ Tools Required Every 20 runs or so it may be necessary to replace your slipper clutch 'pads'. This depends on how the slipper is setup and your driving style. If you find that it is hard to get the setting you want from your slipper clutch then it is likely that the pads need to be replaced. 2mm Hex Driver 5.5 & 7mm Nut Driver or Cross Wrench 2 1 Ensure model is switched off and drive battery is removed then remove rear-right wheel with 7mm nut driver or cross-wrench. Remove spur gear cover with 2mm hex driver. Hold the spur gear with your fingers. Use a 5.5mm nut driver or cross-wrench to remove the slipper clutch adjustment nut. 3 4 Slipper Pads PN: 310018 Remove the slipper clutch adjustment mechanism, slipper plates and spur gear. Remove old slipper pads from spur gear and discard. Affix the new slipper pads to the spur gear. 6 5 Refit the slipper clutch & adjustment mechanism. Tighten the adjustment nut fully. DESIGNED FAST. DESIGNED TOUGH. 14 Loosen the adjustment nut 4.5 turns. Refit spur gear cover and rear wheel. © 2013 ARRMA Durango Ltd. A subsidiary of Hobbico, Inc. Driveshaft Maintenance ARRMA-RC.COM/ SUPPORT/ Every 20 runs or so it may be necessary to clean and re-grease the drive-shafts as well as check for wear and/or damage. Running in dusty, sandy or wet conditions will mean that this will need to be performed more frequently. Tools Required Cloth 7mm Nut Driver or Cross Wrench Grease Long-nose Pliers 2 1 Remove rear wheel with 7mm nut-driver/cross wrench. Separate camber-link from balljoint with pliers. Remove driveshaft. Clean driveshaft ends and axle inputs and differential out-drives. 4 3 Refit camber-link ball-joint with long nose pliers and refit rear wheel with 7mm nut driver or cross wrench. Visually check driveshaft is not twisted or bent. If necessary, replace. Re-grease driveshaft ends and refit. Rear Axle Maintenance ARRMA-RC.COM/ Tools Required SUPPORT/ Ev e r y 2 0 r u n s o r s o i t m ay be necessary to inspect the rear axle for wear. Running the model in dusty, sandy or wet conditions will mean that this will need to be performed more frequently. 7mm Nut Driver or Cross Wrench Long-nose Pliers 2 1 Remove rear wheel with 7mm nut driver/cross wrench. Remove rear hex hub and drive pin from axle. © 2013 ARRMA Durango Ltd. A subsidiary of Hobbico, Inc. 15 Separate camber-link from ball joint with long-nose pliers. WWW.ARRMA-RC.COM Rear Axle Maintenance (cont.) 3 4 Rotate rear hub carrier to allow better access and push axle up through bearings. 5 Clean and check condition of rear axle. If worn as shown above, replace axle. Refit driveshaft, camber-link, drive pin, rear hex hub and rear wheel. Wheel Bearing Replacement ARRMA-RC.COM/ SUPPORT/ Ev er y 50 r uns or so it may be necessary to inspect the wheel bearings for wear. Running the model in dusty, sandy or wet conditions will mean that this will need to be performed more frequently. Tools Required 7mm Nut Driver or Cross Wrench Long-nose Pliers 2 1 Remove front and rear wheels with 7mm nut driver/cross wrench. Remove hex hub and drive pin from axles. 3 4 Turn steering and push axle through front bearings. 6 Rotate rear hub carrier and push axle through bearings. DESIGNED FAST. DESIGNED TOUGH. Separate rear camber-link from ball joint with long-nose pliers. 5 Refit front axles, hex hubs, drive pins and front wheels. Remove bearings from steering block. Inspect, clean and replace if necessary. 7 8 Remove bearings from hub carrier. Inspect, clean and replace if necessary. 16 Re f i t r e a r a x l e , c a m b e r - l i n k balljoint, rear hex hubs, drive pins and rear wheels. © 2013 ARRMA Durango Ltd. A subsidiary of Hobbico, Inc. Factory Settings Front Shocks 26mm 1.5mm Front Ride Height 27.5 mm -1.0 2 x 1.3mm ° 350 cst 350 cst ° Spring 45mm 63.5gf/mm 70mm 40gf/mm Toe Angle 0 (Zero) 2 x 1.3mm Oil wt. Camber Lower shock position Rear Piston Rear Differential Camber Link position 28 mm Camber -0 24.5mm 10000 cst Oil wt. Ride Height ° Motor/Gears Motor Spur Gear BLX 3600kV 54t 0.8M ESC Pinion Gear BLX80 17t 0.8M Lower shock position Factory Settings Front Shocks 26mm Front 1.5mm 27.5 mm -1.0 2 x 1.3mm ° 350 cst 350 cst ° Spring 45mm 63.5gf/mm 70mm 40gf/mm Toe Angle 0 (Zero) 2 x 1.3mm Oil wt. Camber Lower shock position Rear Piston Ride Height Rear Differential Camber Link position 28 mm Camber -0 24.5mm 10000 cst Oil wt. Ride Height ° Motor/Gears Motor Spur Gear BLX 3600kV 54t 0.8M ESC Pinion Gear BLX80 17t 0.8M Lower shock position Factory Settings Front Shocks 41.5mm Front 0.75mm 38.5 mm Lower shock position Rear Camber Link position 350 cst 350 cst ° Spring 50mm 73.5gf/mm 72mm 47gf/mm Differential mm Camber -0 Lower shock position © 2013 ARRMA Durango Ltd. A subsidiary of Hobbico, Inc. 17 10000 cst Oil wt. Ride Height 39 46.5mm 2 x 1.3mm ° Toe Angle 0 (Zero) 2 x 1.3mm Oil wt. Camber -1.0 Rear Piston Ride Height ° Motor/Gears Motor Spur Gear BLX 3600kV 57t 0.8M ESC Pinion Gear BLX80 15t 0.8M WWW.ARRMA-RC.COM Factory Settings Front Shocks 41.5mm Front 0.75mm 38.5 mm 0 (Zero) 2 x 1.3mm ° 350 cst 350 cst ° Spring 50mm 73.5gf/mm 72mm 47gf/mm Toe Angle Lower shock position 2 x 1.3mm Oil wt. Camber -1.0 Rear Piston Ride Height Rear Differential Camber Link position 39 mm Camber -0 46.5mm 10000 cst Oil wt. Ride Height ° Lower shock position Motor/Gears Motor Spur Gear BLX 3600kV 57t 0.8M ESC Pinion Gear BLX80 15t 0.8M Factory Settings Front Shocks 41.5mm Front 0.75mm 38.5 mm Lower shock position 2 x 1.3mm ° 350 cst 350 cst ° Spring 50mm 73.5gf/mm 72mm 47gf/mm Toe Angle 0 (Zero) 2 x 1.3mm Oil wt. Camber -1.0 Rear Piston Ride Height Rear Differential Camber Link position 39 mm Camber -0 46.5mm 10000 cst Oil wt. Ride Height ° Lower shock position Motor/Gears Motor Spur Gear BLX 3600kV 57t 0.8M ESC Pinion Gear BLX80 15t 0.8M Factory Settings Front Shocks 41.5mm Front 0.75mm Ride Height 48.5 mm Camber -1.0 Lower shock position 2 x 1.3mm ° 350 cst 350 cst ° Spring 50mm 73.5gf/mm 72mm 47gf/mm Rear Differential Camber Link position Oil wt. Ride Height 49 mm Camber 46.5mm -0 Lower shock position DESIGNED FAST. DESIGNED TOUGH. 2 x 1.3mm Oil wt. Toe Angle 0 (Zero) Rear Piston 18 ° 10000 cst Motor/Gears Motor Spur Gear BLX 3600kV 57t 0.8M ESC Pinion Gear BLX80 13t 0.8M © 2013 ARRMA Durango Ltd. A subsidiary of Hobbico, Inc. Chassis Tuning N . B . Ra i d e r s h o w n a s a n exa m p l e - i n f o r m a t i o n a p p l i e s t o a l l v a r i a n t s . Ride Height 1mm 3mm 7mm The ride height is set using preload spacers between the top of the shock and the top of the suspension springs. These plastic clips are included in the kit in 1mm, 3mm and 7mm versions. Raising the ride height not only gives you greater ground clearance when running on more uneven surfaces but it can also affect the chassis balance of the car. Experiment by raising the height of the front and rear at the same time or independently and see how it affects the handling of your car. Ride Height Ride Height Camber Link Length The camber links are the arms that link the top of hubs to the chassis. The length can be adjusted to alter the camber of the front and rear wheels. The adjustments and their effects are listed below: Length Characteristic Front Shorter Longer Rear Shorter Longer More negative camber, more stability, smoother steering, slower response. Less negative camber, more direct steering, quicker response. More negative camber, less forward traction, smoother cornering, use for high grip surfaces. Less negative camber, more forward traction, less smooth cornering, good for low grip surfaces. Steering Arm Length (Toe-In/Out) The steering arm links are the connection between the front hubs and the steering mechanism in the chassis. The length of these can adjust the front toe-in/-out. Adjusting the toe can create either toe-in, which is where the wheels point inwards towards a centreline in front of the vehicle, or toe-out where the wheels point towards a centreline behind the vehicle. The effect of these adjustments is below: Length Characteristic Standard Shorter Longer Zero toe, standard setting, neutral handling. Toe-Out, increasing cornering abilty, less stability on straights. Toe-In, more stability on straights. Camber Link Position The camber links are the arms that link the top of hubs to the chassis. The length can be adjusted to alter the camber of the front and rear wheels. The adjustments and their effects are listed below: Position Characteristic Inner Standard position, Less chassis roll, lower overall grip, quicker to respond to inputs. (Adjust camber link turbuckle to return camber to correct angle) More chassis roll, more overall grip, slower to respond to inputs. Outer Shock Position The shock mounting position is where the bottom of the shock mounts to the lower wishbone of the suspension. Adjusting the angle of the shock can change the way the suspension reacts to bumps and also cornering forces. The effect of these adjustments is below: Angle Characteristic Inner position Softer damping, better over bumps, slower response, more overall grip. Stiffer damping, better on smooth surfaces, faster response, slightly less grip. Outer postion © 2013 ARRMA Durango Ltd. A subsidiary of Hobbico, Inc. 19 WWW.ARRMA-RC.COM Shock Removal ARRMA-RC.COM/ Tools Required SUPPORT/ Ever y 50 runs or so it may be necessary to change the shock oil because over time it will become thinner meaning kit handling could be affected. You can also use this as an opportunity to upgrade the springs or shock oil. 2mm Hex Driver Front 5.5 & 7mm Nut Driver or Cross Wrench Rear Remove lower shock bolt with 2mm hex driver. Remove upper shock nut with 5.5 nut driver or crosswrench. Remove shock absorber. Remove lower shock bolt with 2mm hex driver. Remove upper shock nut with 5.5 nut driver or crosswrench. Remove shock absorber. Springs Your kit’s standard springs are quite soft to give the best compromise between handling and performance. Swapping the springs for either softer or stiffer springs can alter the handling characteristic of the car significantly. To change the springs remove the lower spring support and slide the spring over the shock body. Strength Characteristic Softer More traction More chassis roll More chance of 'bottoming out' Better on bumpy surfaces Stiffer Less traction Car quicker to react Less chassis roll Less chance of 'bottoming out' Better on smooth surfaces To find out what spring options there are for your kit please visit ARRMA-RC.com or speak to your local distributor. Shock Oil The standard shock oil in your kit’s shocks is intended to provide forgiving, fun handling and allow the shocks to soak-up any punishment you choose to give them. How to change your shock oil 1. 2. 3. 4. Hold the shock body carefully in a pair of pliers, place an allen key through the shock cap and turn anticlockwise to loosen. Remove the cap and turn the shock upside down over a cloth and push the piston to remove the shock oil. Leave to drain. Stand the shock upright and extend the shaft fully. Fill the shock body to the top with the new oil and leave for a few minutes to settle. Carefully screw the cap back onto the shock body and tighten c l o c kw i s e until the seals compress. Clean up any excess oil. Changing the oil within the shock absorber can significantly change the handling and performance of the car. Weight Characteristic Thinner (lower CST) Softer damping More traction Quicker chassis weight transfer Car reacts more quickly More chassis roll More chance of 'bottoming out' Stiffer damping Slower chassis weight transfer Car slower to react Less chassis roll Less chance of 'bottoming out' Heavier (higher CST) DESIGNED FAST. DESIGNED TOUGH. 20 © 2013 ARRMA Durango Ltd. A subsidiary of Hobbico, Inc. Drivetrain Tuning Gear Chart Your ARRMA kit has one gear ratio and this can be altered by changing the pinion or spur gear in the transmission. The standard gearing of your kit is designed to give the best compromise between speed and acceleration. Increasing the top speed will reduce acceleration and vice versa. Too low or high a gear will put strain on the motor/ESC, and potentially damage them. Pinion Gear (T=Tooth) 54T 0.8M Spur Gear 57T 0.8M 9T 6.33 10T 5.7 11T 5.18 12T 13T 14T 15T 16T 17T 18T 19T 20T 4.5 4.15 4.38*³ 3.86 3.6 3.8*² 3.38 3.18*¹ 3 2.84 2.7 3.56 3.35 4.75 4.07 Standard Gear Ratios *1 = Raider/ADX-10 *2 = Fury/Mojave/Vorteks *3 = Granite The numbers shown in chart is the number of times the spur gear is larger than the pinion, or the ‘gear ratio’. Essentially this is number of rotations the motor/pinion gear has to rotate the larger spur gear once. The lower the ‘gear ratio’ the greater the potential top speed, the higher the ‘gear ratio’ the greater the potential acceleration. Upgraded motors/ESCs and non-standard wheels may require different gear ratios. Try to find the best balance between speed/ acceleration and handling/performance. For help selecting the correct gear ratio for your upgrades visit the GO FOR IT forums at GOFORIT-RC.com. Spur/Pinion Gear Removal and Replacement ARRMA-RC.COM/ SUPPORT/ 1 2 Tools Required 1.5 & 2mm Hex Drivers 5.5 & 7mm Nut Driver or Cross Wrench Remove rear right wheel with 7mm nut driver/cross wrench. Pinion Gear Removal Remove spur gear cover with 2mm hex driver Spur Gear Removal Slipper Pads PN: 310018 Loosen motor bolts with 2mm hex driver. Undo slipper nut with 5.5mm nut driver or cross-wrench. Remove slipper clutch mechanism and spur gear. Fit new spur gear, set gear mesh and adjust slipper (page 13). Refit spur cover and wheel. Loosen motor bolts with 2mm hex driver and loosen pinion gear grub screw with 1.5mm hex driver. Remove pinion. Fit new pinion and set gear mesh (page 13). Refit spur gear cover and wheel. Once you replaced the pinion or spur gear ensure you have set the gear mesh correctly - see page 13 for details. © 2013 ARRMA Durango Ltd. A subsidiary of Hobbico, Inc. 21 WWW.ARRMA-RC.COM Motor Removal ARRMA-RC.COM/ SUPPORT/ Tools Required Removing the motor is useful for cleaning the motor and also if choosing to upgrade to either a different specification brushed motor or the awesome power of an ARRMA GIGA brushless system! To see what motor upgrades are available for your car please visit ARRMA-RC.com or your local ARRMA distributor. 2mm Hex Driver 7mm Nut Driver or Cross Wrench 2 1 Remove rear right wheel with 7mm nut driver/cross wrench. Remove spur gear cover with 2mm hex driver and disconnect motor wires. 4 3 Remove motor bolts with 2mm hex driver. Loosen pinion gear grub screw with 1.5mm hex driver and remove. Remove motor andt clean if necessary. Fit new electric motor (if required), fit pinion gear to motor then set gear mesh (page 13). Replace spur gear cover and rear wheel. Differential Tuning When turning a corner the inside wheel travels a shorter distance than the outside wheel. A differential allows the wheels to turn at different speeds and take a corner more quickly. Without a differential, on a high grip surface, the inside wheel will lose traction and cause you to spin-out. This effect is less noticeable on loose surfaces, however a well setup differential will make the car easier to drive and give more predictable handling at speed. Oil Weight Characteristic Thinner (Lower CST) Looser differential action Less stable under braking (into corners) Faster steering into corner More steering in corner Greater chance of oversteer More chance of wheelspin Less forward drive out of corner (in low grip conditions) Generally better for low traction surfaces Thicker (Higher CST) The differential is filled with silicone oil and the thickness of this alters the operation of the differential unit. As standard, your differential is designed to provide safe, fun handling for advice on which oil to use please visit the forums at GOFORIT-RC.com DESIGNED FAST. DESIGNED TOUGH. 22 Tighter differential action More stable braking (into corner) Slower steering into corner Less steering in corner Greater chance of understeer Less chance of wheelspin More forward drive out of corner Generally better for high traction surfaces © 2013 ARRMA Durango Ltd. A subsidiary of Hobbico, Inc. Differential Removal and Replacement ARRMA-RC.COM/ Tools Required SUPPORT/ 1.3mm Hex Driver 2mm Hex Driver 2.5mm Hex Driver 7mm Nut Driver or Cross Wrench Long-nose Pliers 2 1 Remove rear wheels with 7mm nut driver/cross wrench. Disconnect motor wires. Separate both rear camber-link ball joints with long-nose pliers. 4 3 Remove driveshafts on both sides. Use this opportunity to inspect axles and driveshafts for wear (Page 15). Remove long motor guard bolt with 2.5mm hex driver. Remove two short motor guard bolts and four gearbox/chassis bolts with 2mm hex driver. 6 5 Remove two rear shock tower screws and two motor guard screws with 2mm hex driver. © 2013 ARRMA Durango Ltd. A subsidiary of Hobbico, Inc. 23 Hinge motor guard up and remove gearbox. WWW.ARRMA-RC.COM Differential Removal and Replacement (cont.) 8 7 Undo seven screws holding gearbox halves together. Notice that one screw is longer than the others. 9 Remove differential unit from gearbox. 11 10 Remove four screws holding differential together with 1.3mm (0.050”) hex driver. Remove top half of differential case, turn lower case upside down over a cloth and allow old silicone oil to drain. Refill differential with silicone oil to the level shown. Reinstallation is the reverse the removal process. Differential Exploded View Maintenance kits available: Differential Bearings - 610001 2013 Differential Gear/Idler Gear Set - 310003 2013 Differential Output Shafts - 310399 2013 Differential Gear Maintenance Set - 310416 DESIGNED FAST. DESIGNED TOUGH. 24 © 2013 ARRMA Durango Ltd. A subsidiary of Hobbico, Inc. Radio-gear Maintenance Receiver Access ARRMA-RC.COM/ SUPPORT/ Tools Required If you want to replace or upgrade the steering servo, ESC (electronic speed controller) or re-bind the transmitter, you will need to access the receiver. 2mm Hex Driver 2 1 Remove four bolts securing receiver box lid with 2mm hex key, remove lid. Reinstallation is the reverse the removal process. (Raider only) Remove four roof bolts with 2mm hex driver, remove roof. Steering Maintenance Steering Access Tools Required ARRMA-RC.COM/ SUPPORT/ If you find your car’s steering feels loose it may mean you have to adjust the servo saver. To do this you will have to get access to the steering mechanism. 2mm Hex Driver 7mm Nut Driver or Cross Wrench Long-nose Pliers 2 1 Re m o v e f o u r b u t t o n s c r e w s a b o v e a n d f o u r countersunk screws below servo box with 2mm hex driver. Disconnect steering link ball-joints on both sides with long nose pliers. 4 3 Remove two bolts holding steering assembly to chassis with 2mm hex key. Separate front sub assembly from rest of chassis. © 2013 ARRMA Durango Ltd. A subsidiary of Hobbico, Inc. 25 WWW.ARRMA-RC.COM Steering Access (cont.) 6 5 4mm Inspect servo saver, ensuring that it is set to the factory setting above. Set with 7mm hex driver. Reassembly is the reverse the removal process. Disconnect servo arm ball-joint and remove steering assembly from servo box. Servo Removal Tools Required ARRMA-RC.COM/ 2mm Hex Driver SUPPORT/ Upgrading your servo will give quicker and more powerful steering. 2 1 Throttle (CH2) Steering (CH1) Access the receiver (page 25); unplug the steering servo wire (CH1) and remove the wire from the receiver box. 3 Remove the two servo box cover bolts with a 2mm hex key and remove the cover. 4 Disconnect the steering ball joint and lift the servo assembly from the chassis. DESIGNED FAST. DESIGNED TOUGH. Note mount spacing and servo arm position. Remove mount and arm bolts with a 2mm hex key. 26 © 2013 ARRMA Durango Ltd. A subsidiary of Hobbico, Inc. © 2013 ARRMA Durango Ltd. A subsidiary of Hobbico, Inc. 27 722310 320004 722310 722310 320004 722310 320004 721310 715001 721310 721310 330004 330001 330144 340059 340059 340006 340059 722308 320006 340059 721310 721308 320078 (ADX-10) 722308 340059 340059 340059 330001 715008 721305 330145 721315 742300 330142 330142 340001 330010 330169 330171 320184 390070 709003 610002 310375 310002 330010 721315 310002 610002 310002 310004 715008 330169 330013 330169 715001 330169 330169 330007 330011 710001 330007 710001 330022 330007 330169 340059 320184 340059 330144 709003 721308 721310 721310 330001 715001 340059 330171 340059 708001 721310 721310 340059 (25T) 330169 742300 330169 709003 721308 330171 721310 320005 340059 (24T) 340059 330145 721305 340059 (23T) 715001 330004 330142 340001 715008 715008 330168 330004 330142 310002 310002 330001 330171 721310 721305 320183 (Raider) 721328 ኲዊዐእⓜ 721325 330169 330010 330169 742300 330169 330013 715001 Delantero 330010 721315 310317 610002 330168 721325 721310 721308 310002 721325 713001 310375 610002 310002 708003 330010 330169 709003 721315 Front Vorne Avant Raider/ADX-10 310002 708003 713001 330010 721325 721328 330169 330169 330007 330022 330007 330022 330020 330169 Exploded View Explosionszeichnungen Vues Éclatées Plano De Despiece⻤栚⦂䒕䍇⦍ WWW.ARRMA-RC.COM DESIGNED FAST. DESIGNED TOUGH. 28 320005 320004 722310 320004 320005 722310 320073 722310 721325 320005 721310 715008 330168 330004 330142 721310 721310 330004 330057 330142 340001 715008 715001 722308 320006 340059 340006 340059 340059 340059 330145 722308 340059 340059 340059 330144 715008 721305 330010 330142 340001 330142 721315 330171 310002 610002 310002 310004 715008 709003 330179 310375 310002 330010 721315 330065 330169 715001 330169 330061 330063 710001 330061 710001 330022 330061 330169 330169 330169 320184 390070 340059 320184 340059 742300 330057 330145 330057 715001 340059 330171 340059 708001 721310 721310 709003 721308 721310 721310 330169 742300 330169 709003 721308 330171 340059 (25T) 721308 340059 (24T) 340059 721310 721305 340059 (23T) 330144 320056 330057 330171 330169 721325 721328 ኲዊዐእⓜ 715001 330010 742300 330169 310002 310002 310317 610002 330010 330065 715001 330169 Delantero 721315 330010 330169 330168 721325 320005 722310 320073 310002 721315 709003 713001 310375 610002 330179 708003 320073 320005 713005 713005 320005 320073 (Vorteks) 320156 (Granite) Front Vorne Avant Granite/Vorteks 310179 713001 708003 330010 721325 721328 330169 330169 330061 330022 330061 330022 330066 330169 Exploded View Explosionszeichnungen Vues Éclatées Plano De Despiece⻤栚⦂䒕䍇⦍ © 2013 ARRMA Durango Ltd. A subsidiary of Hobbico, Inc. © 2013 ARRMA Durango Ltd. A subsidiary of Hobbico, Inc. 29 721310 721308 721308 320056 320056 320005 713005 713005 320005 721308 721310 721325 721310 330168 721325 320005 320070 330168 330004 721310 721310 330004 330057 330142 715001 722308 320006 340059 340006 340059 340059 340059 330145 722308 340059 340059 340059 330144 715008 721305 330010 330142 340001 330142 721315 330171 310002 610002 310002 310004 715008 709003 610002 310375 310002 330010 721315 330065 330169 715001 330169 330061 330063 710001 330061 710001 330022 330061 330169 330169 330169 320184 390070 340059 320184 340059 742300 330057 330145 330057 715001 340059 330171 340059 708001 721310 721310 709003 721308 721310 721310 330169 742300 330169 709003 721308 330171 340059 (25T) 721308 340059 (24T) 340059 721310 721305 340059 (23T) 330144 320056 330057 330171 330169 721325 721328 ኲዊዐእⓜ 715001 340001 715008 715008 310002 330142 310317 610002 330010 742300 330169 330065 330010 310002 721315 330010 715001 330169 Delantero 330169 320005 310002 721310 722310 320073 713001 310375 721315 709003 320005 Avant 610002 330179 721310 721310 320073 320070 708003 320005 Front Vorne Fury/Mojave 330179 713001 708003 330010 721325 721328 330169 330169 330061 330022 330061 330022 330066 330169 Exploded View Explosionszeichnungen Vues Éclatées Plano De Despiece⻤栚⦂䒕䍇⦍ WWW.ARRMA-RC.COM DESIGNED FAST. DESIGNED TOUGH. 10022X (ADX-10) 722308 320183 320078 (ADX-10) 30 721308 Raider 10032X (Raider) 320183 721312 721312 721310 320183 510005 (ADX-10) 530009 (Brushless) 530025 (Brushed) 721310 721310 320183 320183 320183 320017 721310 722308 721308 721312 Centre Center Centre Centro ኘዐኜዙ₼㉒ Raider/ADX-10 320178 320178 510026 (Black Chrome Raider) 510001 (Chrome Raider) 320008 721310 721310 721310 721310 (ADX-10) 721310 721310 320005 721312 721312 721312 402002 722310 402002 320183 402002 722310 721310 (ADX-10) 320169 722306 320169 320169 320169 721308 721308 742300 722306 390064 320169 320169 721308 320008 721308 390001 390001 721310 721310 721310 320178 721310 721310 721310 721310 320078 (ADX-10) 721310 721310 721310 330170 ADX-10 AR402077 (Black) AR402078 (Clear) 721310 320078 320005 721310 330170 330170 721310 (ADX-10) 721310 721310 721310 (ADX-10) 320178 320183 320078 721310 721310 320078 320005 Exploded View Explosionszeichnungen Vues Éclatées Plano De Despiece⻤栚⦂䒕䍇⦍ © 2013 ARRMA Durango Ltd. A subsidiary of Hobbico, Inc. © 2013 ARRMA Durango Ltd. A subsidiary of Hobbico, Inc. 1010AX (Granite) 10092X (Vorteks) 31 721310 721310 721310 721310 320008 320005 320178 320178 721310 721310 510011 (Chrome Vorteks) 510032 (Black Chrome Vorteks) 530015 (Vorteks Brushless) 721310 721310 530016 (Granite Brushless) 530028 (Granite Brushed) 530027 (Vorteks Brushed) 320017 721310 320078 (Vorteks) Centre Center Centre Centro ኘዐኜዙ₼㉒ Granite/Vorteks 721310 721310 721308 320169 722306 320169 320169 320169 721308 721308 510012 (Chrome Granite) 510033 (Black Chrome Granite) 320008 320156 320156 721310 721310 721310 721310 320178 721310 721310 330170 330170 320156 320078 (Vorteks) 721310 721310 721310 330170 Granite 320005 721310 721310 320156 721310 320156 721310 721310 320005 721310 721310 721310 721310 320183 320178 721310 742300 722306 390064 320169 320169 721308 390001 390001 Exploded View Explosionszeichnungen Vues Éclatées Plano De Despiece⻤栚⦂䒕䍇⦍ WWW.ARRMA-RC.COM DESIGNED FAST. DESIGNED TOUGH. SC05AX (Fury) SC07AX (Mojave) 32 530029 (Brushed) 721310 320017 721310 530013 (Brushless Fury) 721310 320065 320065 721310 320005 721310 320179 320179 721310 721310 721310 721310 721310 320065 709003 721312 320055 721308 320055 320169 722306 320169 320169 320169 721308 721308 510009 (Chrome Mojave) 510031 (Black Chrome Mojave) 510004 (Chrome Fury) 510030 (Black Chrome Fury) 721310 721310 709003 721312 530014 (Brushless Mojave) 530029 (Brushed) Centre Center Centre Centro ኘዐኜዙ₼㉒ Fury/Mojave 721310 721310 721310 721310 721310 721312 320061 320061 721310 721310 721310 320179 721312 721310 721310 721310 721310 320061 709003 721312 320065 320065 709003 721312 320065 320005 320005 320061 721310 721310 721310 320061 320005 320005 721310 330170 320179 721310 330170 721310 320003 721310 330170 721310 320179 722306 742300 721310 390064 320169 320169 721308 390001 390001 Exploded View Explosionszeichnungen Vues Éclatées Plano De Despiece⻤栚⦂䒕䍇⦍ © 2013 ARRMA Durango Ltd. A subsidiary of Hobbico, Inc. © 2013 ARRMA Durango Ltd. A subsidiary of Hobbico, Inc. 1002RX (ADX-10) 330169 330007 330012 530010 710001 330007 710001 330022 330007 330169 330169 330007 330022 330007 330022 330021 330169 330169 33 530010 713001 330013 330010 722310 722310 330178 310400 721312 722310 330009 330143 610003 310006 310002 709003 510027 (Raider) 330169 715008 610003 330169 310132 510006 (ADX-10) 1003RX (Raider) 330171 708003 721335 721310 722310 722310 721305 330009 330169 320181 721305 722310 330168 330146 320183 330013 330178 330169 330171 330143 310006 310132 610003 715001 721315 723365 708003 713001 330010 310002 721312 709003 330169 330169 721335 610003 310400 320181 721310 330169 Trasero ቿ⚝ Raider/ADX-10 722312 330146 715008 310402 721310 709003 320183 330169 320183 Arrière 721310 330056 709003 320183 Hinten 715001 310402 330169 Rear Exploded View Explosionszeichnungen Vues Éclatées Plano De Despiece⻤栚⦂䒕䍇⦍ WWW.ARRMA-RC.COM DESIGNED FAST. DESIGNED TOUGH. 330169 330061 330064 710001 330061 710001 330022 330061 Rear 34 1009RX (Vorteks) 330169 330169 330061 330022 330061 330022 330067 330169 330169 330171 310132 530015 (Vorteks) 330065 330169 708003 510032 (Vorteks) 330169 715008 722310 722310 330179 722310 330009 330143 610003 310401 722310 320181 330009 330056 709003 Vorteks 320183 330065 330169 715008 330171 330143 310006 310132 610003 715001 721315 723365 721335 320165 320165 708003 713001 330010 310002 721312 709003 330169 330169 721335 721335 330169 721320 320165 721325 320165 320165 320165 610003 310400 320181 721310 721315 721320 320165 320165 722312 330179 330146 310401 721310 709003 320183 721325 721335 330169 320183 320073 721308 721308 721310 320005 320183 330169 722310 722310 330168 330146 330010 330169 715001 721310 ቿ⚝ 310400 721312 709003 310006 310002 721335 Trasero 713001 610003 Hinten Arrière Granite/Vorteks Exploded View Explosionszeichnungen Vues Éclatées Plano De Despiece⻤栚⦂䒕䍇⦍ © 2013 ARRMA Durango Ltd. A subsidiary of Hobbico, Inc. © 2013 ARRMA Durango Ltd. A subsidiary of Hobbico, Inc. 330171 310132 35 330065 330169 708003 330169 715008 610003 713001 Rear Hinten Fury/Mojave 722310 722310 330179 722310 330009 330143 610003 330009 722310 722310 722310 330169 320181 320183 330169 715008 330171 330143 310006 610003 310400 330010 310132 610003 310002 721312 709003 708003 713001 723365 721310 320061 721315 721308 320061 320061 320061 320076 715001 721315 721310 330169 330169 721315 721335 330169 320181 721310 722312 330179 330146 310401 721310 709003 330065 320183 330169 320183 ቿ⚝ 721310 330056 709003 330168 330146 320183 715001 310401 330169 721310 Trasero 330010 310400 721312 709003 310006 310002 721335 Arrière 330169 330061 330064 710001 330061 710001 330022 330061 320061 721312 721312 721308 330169 330169 330061 330022 330061 330022 330067 330169 330169 320076 320061 721312 721312 Exploded View Explosionszeichnungen Vues Éclatées Plano De Despiece⻤栚⦂䒕䍇⦍ WWW.ARRMA-RC.COM DESIGNED FAST. DESIGNED TOUGH. 330022 610001 36 310378 310399 310378 310378 310378 310378 310378 310378 310416 722308 722308 704306 310378 310378 310378 310378 310378 310378 320007 721305 320009 310378 310378 610002 310003 310001 721305 310378 310416 610001 310418 310399 310001 310376 310416 310416 721312 330022 610002 310418 310376 310018 310418 709003 310376 310418 310001 610002 709003 715001 320009 721312 310420 (17T 32dp Raider/ADX-10) 721315 310001 310018 310422 (13T 32dp Granite) 390060 310421 (15T 32dp Fury/Mojave/Vorteks) 310376 310404 (54T 32dp Raider/ADX-10) 310405 (57T 32dp Granite/Vorteks/Fury/Mojave) Gearbox Getriebe Boîte de vitesse Caja de cambios ኋቿኹአኌኖ爎懽乀 Exploded View Explosionszeichnungen Vues Éclatées Plano De Despiece⻤栚⦂䒕䍇⦍ © 2013 ARRMA Durango Ltd. A subsidiary of Hobbico, Inc. Option Parts and Upgrades AR220014 (Raider/ADX-10) AR310394 AR320186 AR340055 (23T) AR340057 (25T) Alloy Servo Arms Option Shocks Short Alloy Heatsink Motor Plate Alloy Wheelie Bar Axles AR220015 Option Shocks Long (Fury/Mojave/Granite/Vorteks) AR320157 Alloy Front Hingepin Brace AR320174 (SWB) Red Chassis TVPs AR320165 Wheelie Bar Set AR330148 (Front) Alloy Shock Tower Braces AR320162 (Rear) AR320175 (LWB) AR320176 Red Front Chassis Plate AR340056 (24T) © 2013 ARRMA Durango Ltd. A subsidiary of Hobbico, Inc. 37 WWW.ARRMA-RC.COM Settings Shocks Front Front Ride Height Rear Piston mm Oil wt. Camber Lower shock position ° Spring Toe Angle ° Rear Differential Camber Link position Oil wt. Ride Height mm Camber ° Motor/Gears Motor Spur Gear ESC Pinion Gear Lower shock position Settings Shocks Front Front Rear Piston Ride Height mm Oil wt. Camber ° Lower shock position Spring Toe Angle ° Rear Differential Camber Link position Oil wt. Ride Height mm Camber ° Motor/Gears Motor Spur Gear ESC Pinion Gear Lower shock position Settings Shocks Front Front Rear Piston Ride Height mm Oil wt. Camber ° Spring Toe Angle ° Lower shock position Rear Camber Link position Differential Oil wt. Ride Height mm Camber ° Motor/Gears Motor Spur Gear ESC Pinion Gear Lower shock position DESIGNED FAST. DESIGNED TOUGH. 38 © 2013 ARRMA Durango Ltd. A subsidiary of Hobbico, Inc. Settings Shocks Front Front Rear Piston Ride Height mm Oil wt. Camber ° Spring Toe Angle ° Lower shock position Rear Differential Camber Link position Oil wt. Ride Height mm Camber ° Motor/Gears Motor Spur Gear ESC Pinion Gear Lower shock position Settings Shocks Front Front Rear Piston Ride Height mm Oil wt. Camber ° Spring Toe Angle ° Lower shock position Rear Differential Camber Link position Oil wt. Ride Height mm Camber ° Motor/Gears Motor Spur Gear ESC Pinion Gear Lower shock position Settings Shocks Front Front Ride Height Rear Piston mm Camber Oil wt. ° Toe Angle Spring ° Lower shock position Rear Differential Camber Link position Oil wt. Ride Height mm Camber ° Motor/Gears Motor Spur Gear ESC Pinion Gear Lower shock position © 2013 ARRMA Durango Ltd. A subsidiary of Hobbico, Inc. 39 WWW.ARRMA-RC.COM