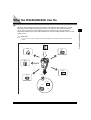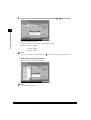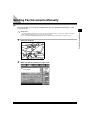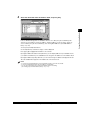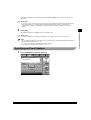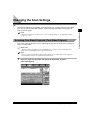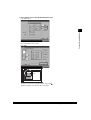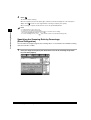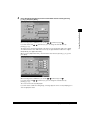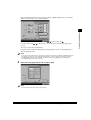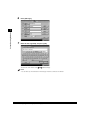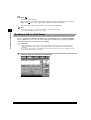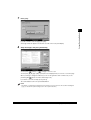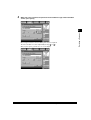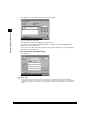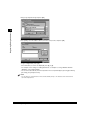
1
Canon
iR3320i/iR2220i
Sending and
Facsimile Guide
Manuals for the Machine
The manuals for this machine are divided as follows. Please refer to them for detailed information.
The manuals supplied with optional equipment are included in the list below. Depending on the system
configuration and product purchased, some manuals may not be needed.
Guides with this symbol are printed manuals.
• Basic Operations
• Troubleshooting
Guides with this symbol are PDF manuals included on the
accompanying CD-ROM.
Reference Guide
• Copying Instructions
Copying Guide
• Mail Box Instructions
Mail Box Guide
• Sending and Fax Instructions
(iR3320i/iR2220i)
• Fax Instructions
(iR3320N)
• Setting Up the Network Connection and
Installing the CD-ROM Software
• Remote User Interface Instructions
• Network Connectivity and Setup Instructions
• Network ScanGear Installation and
Instructions
• PS/PCL Printer Instructions
• PCL Printer Driver Installation and
Instructions
• PCL Printer Driver Installation and
Instructions
Sending and Facsimile Guide
(This Document)
Facsimile Guide
Network Quick Start Guide
Remote UI Guide
Network Guide
Network ScanGear
User’s Guide
PS/PCL Printer Guide
PCL Driver Guide
PS Driver Guide
• Fax Driver Installation and Instructions
• Installing MEAP Applications and
Using the Login Service
Fax Driver Guide
MEAP SMS Administrator
Guide
How This Manual Is Organised
Chapter 1 Various Sending Methods
Chapter 2 Receiving a Document
Chapter 3 Setting/Storing the Communications Settings
Chapter 4 Registering/Editing the Address
Chapter 5 Troubleshooting
Chapter 6 Appendix
• A considerable effort has been made to make sure that this manual is free of inaccuracies and omissions.
• However, as we are constantly improving our products, if you need an exact specification, please contact Canon.
Contents
Preface . . . . . . . . . . . . . . . . . . . . . . . . . . . . . . . . . . . . . . . . . . . . . . . . . . . . . . . . . . . . . . . . . . . . . ix
How to Use This Manual . . . . . . . . . . . . . . . . . . . . . . . . . . . . . . . . . . . . . . . . . . . . . . . . . . . . . . . ix
Symbols Used in This Manual . . . . . . . . . . . . . . . . . . . . . . . . . . . . . . . . . . . . . . . . . . . . . . . . . . ix
Keys Used in This Manual . . . . . . . . . . . . . . . . . . . . . . . . . . . . . . . . . . . . . . . . . . . . . . . . . . . . . ix
Displays Used in This Manual . . . . . . . . . . . . . . . . . . . . . . . . . . . . . . . . . . . . . . . . . . . . . . . . . . .x
Illustrations Used in This Manual . . . . . . . . . . . . . . . . . . . . . . . . . . . . . . . . . . . . . . . . . . . . . . . .x
Abbreviations Used in This Guide . . . . . . . . . . . . . . . . . . . . . . . . . . . . . . . . . . . . . . . . . . . . . . . xi
R&TTE Directive . . . . . . . . . . . . . . . . . . . . . . . . . . . . . . . . . . . . . . . . . . . . . . . . . . . . . . . . . . . . . xii
SUPER G3 . . . . . . . . . . . . . . . . . . . . . . . . . . . . . . . . . . . . . . . . . . . . . . . . . . . . . . . . . . . . . . . . . . xii
About Trademarks . . . . . . . . . . . . . . . . . . . . . . . . . . . . . . . . . . . . . . . . . . . . . . . . . . . . . . . . . . . xiii
Chapter 1
Various Sending Methods
What the iR3320i/iR2220i Can Do . . . . . . . . . . . . . . . . . . . . . . . . . . . . . . . . . . . . . . . . . . . . . . . 1-3
Things You Must Do Before Using This Machine . . . . . . . . . . . . . . . . . . . . . . . . . . . . . . . . . . 1-9
Selecting the Type of Telephone Line (Tel Line Type) . . . . . . . . . . . . . . . . . . . . . . . . . . . . . 1-10
Setting the Current Date and Time (Date & Time Settings) . . . . . . . . . . . . . . . . . . . . . . . . . 1-11
Registering This Machine’s Telephone Number (Unit Telephone #) . . . . . . . . . . . . . . . . . . . 1-15
Registering the Name of the Company and Department (Unit Name) . . . . . . . . . . . . . . . . . 1-16
Registering Sender’s Names (Sender’s Names (TTI)) . . . . . . . . . . . . . . . . . . . . . . . . . . . . . 1-18
Flow of Job Sending Operations . . . . . . . . . . . . . . . . . . . . . . . . . . . . . . . . . . . . . . . . . . . . . . 1-21
Sending Fax Documents Manually . . . . . . . . . . . . . . . . . . . . . . . . . . . . . . . . . . . . . . . . . . . . . 1-31
Specifying a Destination Using the Address Book (Address Book) . . . . . . . . . . . . . . . . . . 1-34
Specifying a Destination not Registered in the Address Book (New Address) . . . . . . . . . 1-36
Specifying a Fax Number . . . . . . . . . . . . . . . . . . . . . . . . . . . . . . . . . . . . . . . . . . . . . . . . . . . 1-36
Specifying an E-mail Address . . . . . . . . . . . . . . . . . . . . . . . . . . . . . . . . . . . . . . . . . . . . . . . . 1-39
Specifying an I-Fax Address . . . . . . . . . . . . . . . . . . . . . . . . . . . . . . . . . . . . . . . . . . . . . . . . . 1-41
Specifying a File Server . . . . . . . . . . . . . . . . . . . . . . . . . . . . . . . . . . . . . . . . . . . . . . . . . . . . 1-46
Storing a Scanned Document in an Inbox . . . . . . . . . . . . . . . . . . . . . . . . . . . . . . . . . . . . . . . 1-55
Specifying a Destination Using One-Touch Buttons (One-Touch Buttons) . . . . . . . . . . . . 1-57
Configuring the Favorites Buttons (Favorites Buttons) . . . . . . . . . . . . . . . . . . . . . . . . . . . . 1-59
Searching a Destination via a Server (Search on Server) . . . . . . . . . . . . . . . . . . . . . . . . . . 1-61
Checking and Changing a Destination’s Detailed Information (Details) . . . . . . . . . . . . . . . 1-72
Erasing a Specified Destination (Erase) . . . . . . . . . . . . . . . . . . . . . . . . . . . . . . . . . . . . . . . . 1-75
Selecting a Scanning Mode . . . . . . . . . . . . . . . . . . . . . . . . . . . . . . . . . . . . . . . . . . . . . . . . . . . 1-76
Contents
v
Changing the Scan Settings . . . . . . . . . . . . . . . . . . . . . . . . . . . . . . . . . . . . . . . . . . . . . . . . . . 1-79
Scanning Two-Sided Originals (Two-Sided Original) . . . . . . . . . . . . . . . . . . . . . . . . . . . . . . 1-79
Specifying the Document Size (Document Size Select) . . . . . . . . . . . . . . . . . . . . . . . . . . . . 1-81
Specifying the Document Size . . . . . . . . . . . . . . . . . . . . . . . . . . . . . . . . . . . . . . . . . . . . . 1-81
Registering the Specified Document Size . . . . . . . . . . . . . . . . . . . . . . . . . . . . . . . . . . . . 1-86
Changing the Resolution . . . . . . . . . . . . . . . . . . . . . . . . . . . . . . . . . . . . . . . . . . . . . . . . . . . . 1-89
Adjusting the Exposure and Image Quality Before Scanning the Originals
(Scanning Exposure) . . . . . . . . . . . . . . . . . . . . . . . . . . . . . . . . . . . . . . . . . . . . . . . . . . . . . . . 1-91
Manual Adjustment of the Scanning Exposure . . . . . . . . . . . . . . . . . . . . . . . . . . . . . . . . 1-91
Selecting Image Quality . . . . . . . . . . . . . . . . . . . . . . . . . . . . . . . . . . . . . . . . . . . . . . . . . . 1-93
Automatic Adjustment of Exposure and Image Quality . . . . . . . . . . . . . . . . . . . . . . . . . . 1-96
Changing the Scanning Ratio (Copy Ratio) . . . . . . . . . . . . . . . . . . . . . . . . . . . . . . . . . . . . . 1-98
Scanning Originals After Enlarging/Reducing Them to a Standard Record Size
(Preset Zoom) . . . . . . . . . . . . . . . . . . . . . . . . . . . . . . . . . . . . . . . . . . . . . . . . . . . . . . . . . 1-98
Specifying the Scanning Ratio by Percentage (Zoom Designation) . . . . . . . . . . . . . . . 1-100
Scanning Facing Pages in a Book onto Two Separate Sheets in One Step
(Two-Page Separation) . . . . . . . . . . . . . . . . . . . . . . . . . . . . . . . . . . . . . . . . . . . . . . . . . . . . 1-102
Scanning Different-Sized Originals Together in the Feeder (Different Size Originals) . . . . 1-104
Scanning Originals Separately Set as One Document (Job Build) . . . . . . . . . . . . . . . . . . . 1-107
Erasing Shadows and Frame Lines (Frame Erase) . . . . . . . . . . . . . . . . . . . . . . . . . . . . . . 1-111
Erasing Frame Lines and Scanning the Original (Original Frame Erase) . . . . . . . . . . . 1-112
Erasing Shadows and Frame Lines and Scanning the Original
(Book Frame Erase) . . . . . . . . . . . . . . . . . . . . . . . . . . . . . . . . . . . . . . . . . . . . . . . . . . . . 1-115
Erasing the Shadows of Binding Holes and Scanning the Original (Binding Erase) . . . 1-118
Scanning Originals After Making Them Sharply Contrasted (Sharpness) . . . . . . . . . . . . . 1-121
Storing/Erasing Scanning Mode . . . . . . . . . . . . . . . . . . . . . . . . . . . . . . . . . . . . . . . . . . . . . 1-124
Storing a Scanning Mode . . . . . . . . . . . . . . . . . . . . . . . . . . . . . . . . . . . . . . . . . . . . . . . . 1-124
Storing a Scanning Mode Name . . . . . . . . . . . . . . . . . . . . . . . . . . . . . . . . . . . . . . . . . . 1-127
Erasing Scanning Mode . . . . . . . . . . . . . . . . . . . . . . . . . . . . . . . . . . . . . . . . . . . . . . . . . 1-129
Configuring Send Settings (Send Settings) . . . . . . . . . . . . . . . . . . . . . . . . . . . . . . . . . . . . 1-132
Specifying the Time to Send a Job (Delayed Send) . . . . . . . . . . . . . . . . . . . . . . . . . . . . . . 1-132
E-mail Notification at the End of a Send Job (Job Done Notice) . . . . . . . . . . . . . . . . . . . . . 1-135
Stamping Scanned Originals (Stamping Original) . . . . . . . . . . . . . . . . . . . . . . . . . . . . . . . . 1-138
Sending a Job to a Fax . . . . . . . . . . . . . . . . . . . . . . . . . . . . . . . . . . . . . . . . . . . . . . . . . . . . 1-140
Sending a Job to an E-mail Address . . . . . . . . . . . . . . . . . . . . . . . . . . . . . . . . . . . . . . . . . . 1-144
Sending a Job to Another I-Fax . . . . . . . . . . . . . . . . . . . . . . . . . . . . . . . . . . . . . . . . . . . . . 1-153
Sending a Job to a File Server . . . . . . . . . . . . . . . . . . . . . . . . . . . . . . . . . . . . . . . . . . . . . . 1-160
Sending a Job to a User Inbox . . . . . . . . . . . . . . . . . . . . . . . . . . . . . . . . . . . . . . . . . . . . . . 1-164
Previewing Originals (Preview) . . . . . . . . . . . . . . . . . . . . . . . . . . . . . . . . . . . . . . . . . . . . . . . 1-168
Recalling the Stored Settings and Sending a Job (Recall) . . . . . . . . . . . . . . . . . . . . . . . . 1-174
Special Dialling . . . . . . . . . . . . . . . . . . . . . . . . . . . . . . . . . . . . . . . . . . . . . . . . . . . . . . . . . . . . 1-176
Calling from an Extension . . . . . . . . . . . . . . . . . . . . . . . . . . . . . . . . . . . . . . . . . . . . . . . . . . 1-176
Storing International Telephone Numbers . . . . . . . . . . . . . . . . . . . . . . . . . . . . . . . . . . . . . 1-179
vi
Contents
Chapter 2
Receiving a Document
Various Receiving Functions . . . . . . . . . . . . . . . . . . . . . . . . . . . . . . . . . . . . . . . . . . . . . . . . . . 2-2
Receiving Documents . . . . . . . . . . . . . . . . . . . . . . . . . . . . . . . . . . . . . . . . . . . . . . . . . . . . . . . 2-3
Setting the Memory Lock Mode . . . . . . . . . . . . . . . . . . . . . . . . . . . . . . . . . . . . . . . . . . . . . . . 2-4
Forwarding Received Documents . . . . . . . . . . . . . . . . . . . . . . . . . . . . . . . . . . . . . . . . . . . . . . 2-4
Received Documents Processing . . . . . . . . . . . . . . . . . . . . . . . . . . . . . . . . . . . . . . . . . . . . . . 2-5
Paper for Printing Received I-Fax/Fax Documents . . . . . . . . . . . . . . . . . . . . . . . . . . . . . . . . . 2-7
Using Fax Information Services . . . . . . . . . . . . . . . . . . . . . . . . . . . . . . . . . . . . . . . . . . . . . . . . 2-8
Chapter 3
Setting/Storing the Communications Settings
Communications Settings Table . . . . . . . . . . . . . . . . . . . . . . . . . . . . . . . . . . . . . . . . . . . . . . . 3-2
Setting Automatic Document Deletion (Erase Failed TX) . . . . . . . . . . . . . . . . . . . . . . . . . . . . 3-4
Handling Documents That Fail to Be Forwarded
(Handle Documents with Forwarding Errors) . . . . . . . . . . . . . . . . . . . . . . . . . . . . . . . . . . . . . 3-5
Setting the Photo Mode (Photo Mode) . . . . . . . . . . . . . . . . . . . . . . . . . . . . . . . . . . . . . . . . . . . 3-7
Setting the Number of Retry Attempts (Retry Times) . . . . . . . . . . . . . . . . . . . . . . . . . . . . . . . 3-8
Setting the Standard Send Settings (Edit Standard Send Settings) . . . . . . . . . . . . . . . . . . . 3-9
Registering Favorites Buttons (Store Favorites Button) . . . . . . . . . . . . . . . . . . . . . . . . . . . 3-12
Registering a Favorites Button . . . . . . . . . . . . . . . . . . . . . . . . . . . . . . . . . . . . . . . . . . . . . . . 3-12
Storing a Favorites Button Name . . . . . . . . . . . . . . . . . . . . . . . . . . . . . . . . . . . . . . . . . . . . . 3-15
Erasing a Favorites Button Name . . . . . . . . . . . . . . . . . . . . . . . . . . . . . . . . . . . . . . . . . . . . . 3-17
Setting the Initial Display of the Send Screen (Default Screen for Send) . . . . . . . . . . . . . . 3-19
Attaching a Transmission Terminal ID to the Document Being Sent (TX Terminal ID) . . . 3-22
Initialising TX Settings (Initialise TX Settings) . . . . . . . . . . . . . . . . . . . . . . . . . . . . . . . . . . . 3-25
Two-Sided Printing of Received Documents (Two-Sided Print) . . . . . . . . . . . . . . . . . . . . . 3-26
Specifying the Method of Printing Received Documents (Select Cassette) . . . . . . . . . . . . 3-27
Printing Received Documents in Reduced Form (Receive Reduction) . . . . . . . . . . . . . . . 3-29
Specifying Whether to Print Information on Received Documents
(Received Page Footer) . . . . . . . . . . . . . . . . . . . . . . . . . . . . . . . . . . . . . . . . . . . . . . . . . . . . . . 3-32
Setting 2 On 1 Log (2 On 1 Log) . . . . . . . . . . . . . . . . . . . . . . . . . . . . . . . . . . . . . . . . . . . . . . . 3-34
Adjusting the Alarm Volume and Monitor Volume (Volume Control) . . . . . . . . . . . . . . . . . 3-36
Specifying Whether to Use ECM Transmission (ECM TX) . . . . . . . . . . . . . . . . . . . . . . . . . . 3-37
Setting the Pause Time (Pause Time) . . . . . . . . . . . . . . . . . . . . . . . . . . . . . . . . . . . . . . . . . . 3-38
Setting Auto Redial (Auto Redial) . . . . . . . . . . . . . . . . . . . . . . . . . . . . . . . . . . . . . . . . . . . . . . 3-39
Specifying Whether to Use ECM Reception (ECM RX) . . . . . . . . . . . . . . . . . . . . . . . . . . . . . 3-42
Contents
vii
Chapter 4
Registering/Editing the Address
Address Book Settings Table . . . . . . . . . . . . . . . . . . . . . . . . . . . . . . . . . . . . . . . . . . . . . . . . . . 4-2
About the Address Book . . . . . . . . . . . . . . . . . . . . . . . . . . . . . . . . . . . . . . . . . . . . . . . . . . . . . . 4-3
Storing New Addresses (Store/Edit Address Book) . . . . . . . . . . . . . . . . . . . . . . . . . . . . . . . . 4-5
Storing Fax Numbers . . . . . . . . . . . . . . . . . . . . . . . . . . . . . . . . . . . . . . . . . . . . . . . . . . . . . . . 4-5
Storing E-mail Addresses . . . . . . . . . . . . . . . . . . . . . . . . . . . . . . . . . . . . . . . . . . . . . . . . . . . 4-13
Storing I-Fax Addresses . . . . . . . . . . . . . . . . . . . . . . . . . . . . . . . . . . . . . . . . . . . . . . . . . . . . 4-18
Storing File Server Addresses . . . . . . . . . . . . . . . . . . . . . . . . . . . . . . . . . . . . . . . . . . . . . . . 4-25
Storing Group Addresses . . . . . . . . . . . . . . . . . . . . . . . . . . . . . . . . . . . . . . . . . . . . . . . . . . . 4-36
Storing Addresses Searched via a Server . . . . . . . . . . . . . . . . . . . . . . . . . . . . . . . . . . . . . . 4-43
Changing Address Details . . . . . . . . . . . . . . . . . . . . . . . . . . . . . . . . . . . . . . . . . . . . . . . . . . . 4-58
Erasing Addresses . . . . . . . . . . . . . . . . . . . . . . . . . . . . . . . . . . . . . . . . . . . . . . . . . . . . . . . . . . 4-61
Registering a Name for an Address Book (Store Address Book Name) . . . . . . . . . . . . . . . 4-63
Registering the One-Touch Buttons (One-touch Buttons) . . . . . . . . . . . . . . . . . . . . . . . . . . 4-65
Storing/Editing a One-Touch Button . . . . . . . . . . . . . . . . . . . . . . . . . . . . . . . . . . . . . . . . . . . 4-65
Erasing a One-Touch Button . . . . . . . . . . . . . . . . . . . . . . . . . . . . . . . . . . . . . . . . . . . . . . . . . 4-99
Chapter 5
Troubleshooting
When Problems Occur . . . . . . . . . . . . . . . . . . . . . . . . . . . . . . . . . . . . . . . . . . . . . . . . . . . . . . . . 5-2
Problems Sending Documents . . . . . . . . . . . . . . . . . . . . . . . . . . . . . . . . . . . . . . . . . . . . . . . . 5-2
Problems Receiving Documents . . . . . . . . . . . . . . . . . . . . . . . . . . . . . . . . . . . . . . . . . . . . . . . 5-4
Other Problems . . . . . . . . . . . . . . . . . . . . . . . . . . . . . . . . . . . . . . . . . . . . . . . . . . . . . . . . . . . . 5-5
Questions & Answers . . . . . . . . . . . . . . . . . . . . . . . . . . . . . . . . . . . . . . . . . . . . . . . . . . . . . . . . 5-7
Chapter 6
Appendix
Index . . . . . . . . . . . . . . . . . . . . . . . . . . . . . . . . . . . . . . . . . . . . . . . . . . . . . . . . . . . . . . . . . . . . . . 6-2
viii
Contents
Preface
Thank you for purchasing the Canon iR3320i/iR2220i.
Please read this manual thoroughly before operating the product in order to familiarise yourself
with its capabilities, and to make the most of its many functions. After reading this manual, store
it in a safe place for future reference.
How to Use This Manual
Symbols Used in This Manual
The following symbols are used in this manual to explain procedures, restrictions, handling
cautions, and it also contains instructions that should be observed for safety.
WARNING
CAUTION
Indicates a warning concerning operations that may lead to death or
injury to persons if not performed correctly. In order to use the
machine safely, always pay attention to these warnings.
Indicates a caution concerning operations that may lead to injury to
persons or damage to property if not performed correctly. In order
to use the machine safely, always pay attention to these cautions.
IMPORTANT
Indicates operational requirements and restrictions. Be sure to read
these items carefully in order to operate the machine correctly, and to
avoid damage to the machine.
NOTE
Indicates a clarification of operations or contains additional explanations
for a procedure. Reading these is highly recommended.
Keys Used in This Manual
The symbols and key names used in this manual are expressed in the following way:
• Control Panel Keys..................... <Key icon>
Example:
• Touch Panel display Keys........... [Key Name]
Example:
[Cancel]
[Done]
How to Use This Manual
ix
Displays Used in This Manual
Screenshots of the touch panel display used in this manual are those taken when the Image Reader-B1,
Fax Board, Finisher-J1, and Cassette Feeding Unit-W1 are attached to the iR3320i. Note that functions that
cannot be used depending on the model or options, are not displayed on the touch panel display.
The keys which you should press are marked with
, as shown below.
When multiple keys can be pressed on the touch panel display, all keys are marked. Select the keys
which suit your needs.
1
Place your original, and press [Special Features].
Press this key for operation
Illustrations Used in This Manual
Illustrations used in this manual are those displayed when the Image Reader-B1, Finisher-J1, and
Cassette Feeding Unit-W1 are attached to the iR3320i.
x
How to Use This Manual
Abbreviations Used in This Guide
In this guide:
Microsoft® Windows® 95 is referred to as Windows 95.
Microsoft® Windows® 98 is referred to as Windows 98.
Microsoft® Windows® Millennium Edition is referred to as Windows Me.
Microsoft® Windows NT® is referred to as Windows NT.
Microsoft® Windows® 2000 is referred to as Windows 2000.
Microsoft® Windows XP® Home/Professional Edition is referred to as Windows XP.
Microsoft® Windows® Operating system is referred to as Windows.
Novell NetWare® is referred to as NetWare.
How to Use This Manual
xi
R&TTE Directive
This equipment (F140102) conforms with the essential requirements of EC
Directive 1999/5/EC.
We declare that this product conforms with the EMC requirements of EC
Directive 1999/5/EC at nominal mains input 230V, 50Hz although the rated input
of the product is 220V-240V, 50Hz.
Use of shielded cable is necessary to comply with the technical requirements of
EMC Directive.
If you move to another EU country and are experiencing trouble please call the
Canon Help Desk.
(For Europe Only)
Canon Inc./Canon Europa N. V.
SUPER G3
Super G3 is a phrase used to describe the new generation of fax machines that
use ITU-T V. 34 standard 33.6Kbps* modems. Super G3 High Speed Fax
machines allow transmission time of approximately 3 seconds* per page which
results in reduced telephone line charges.
* Approximately 3 seconds per page fax data transmission time based on Canon
FAX Standard Chart No.1, (JBIG, Standard Mode) at 33.6kbps modem speed to
similarly specified machines, depending on telephone line conditions.
xii
R&TTE Directive
About Trademarks
Canon, the Canon logo, iR, MEAP, MEAP logo, and NetSpot Accountant are trademarks of Canon Inc.
Adobe, and Acrobat are trademarks of Adobe Systems Incorporated.
Macintosh and Mac OS are trademarks of Apple Computer, Inc.
NetWare®, and Novell are registered trademarks of Novell, Inc. IPX/SPX, and NDS are trademarks of
Novell, Inc. ©1996 Novell, Inc., all rights reserved.
Solaris, and Sun are trademarks of Sun Microsystems, Inc. in the United States and/or other countries.
UNIX is a registered trademark exclusively licensed to X/Open Company, Ltd. in the United States and/or
other countries.
Windows and Active Directory are registered trademarks of Microsoft Corporation in the United States and/
or other countries.
Other products and company names herein may be the trademarks of their respective owners.
Copyright 2003 by Canon Inc. All rights reserved.
No part of this publication may be reproduced or transmitted in any form or by any means, electronic or
mechanical, including photocopying and recording, or by any information storage or retrieval system without
the prior written permission of Canon Inc.
About Trademarks
xiii
xiv
About Trademarks
Various Sending Methods
1
CHAPTER
This chapter describes the sending function.
What the iR3320i/iR2220i Can Do . . . . . . . . . . . . . . . . . . . . . . . . . . . . . . . . . . . . . . . . . . . . . . . . . . . . . . . . . 1-3
Things You Must Do Before Using This Machine . . . . . . . . . . . . . . . . . . . . . . . . . . . . . . . . . . . . . . . . . . . . 1-9
Selecting the Type of Telephone Line (Tel Line Type) . . . . . . . . . . . . . . . . . . . . . . . . . . . . . . . . . . . . . . . . 1-10
Setting the Current Date and Time (Date & Time Settings) . . . . . . . . . . . . . . . . . . . . . . . . . . . . . . . . . . . 1-11
Registering This Machine’s Telephone Number (Unit Telephone #) . . . . . . . . . . . . . . . . . . . . . . . . . . . . . 1-15
Registering the Name of the Company and Department (Unit Name) . . . . . . . . . . . . . . . . . . . . . . . . . . . 1-16
Registering Sender’s Names (Sender’s Names (TTI)) . . . . . . . . . . . . . . . . . . . . . . . . . . . . . . . . . . . . . . . 1-18
Flow of Job Sending Operations . . . . . . . . . . . . . . . . . . . . . . . . . . . . . . . . . . . . . . . . . . . . . . . . . . . . . . . . 1-21
Sending Fax Documents Manually . . . . . . . . . . . . . . . . . . . . . . . . . . . . . . . . . . . . . . . . . . . . . . . . . . . . . . . 1-31
Specifying a Destination Using the Address Book (Address Book) . . . . . . . . . . . . . . . . . . . . . . . . . . . . 1-34
Specifying a Destination not Registered in the Address Book (New Address) . . . . . . . . . . . . . . . . . . . 1-36
Specifying a Fax Number . . . . . . . . . . . . . . . . . . . . . . . . . . . . . . . . . . . . . . . . . . . . . . . . . . . . . . . . . . . . . 1-36
Specifying an E-mail Address . . . . . . . . . . . . . . . . . . . . . . . . . . . . . . . . . . . . . . . . . . . . . . . . . . . . . . . . . . 1-39
Specifying an I-Fax Address . . . . . . . . . . . . . . . . . . . . . . . . . . . . . . . . . . . . . . . . . . . . . . . . . . . . . . . . . . . 1-41
Specifying a File Server . . . . . . . . . . . . . . . . . . . . . . . . . . . . . . . . . . . . . . . . . . . . . . . . . . . . . . . . . . . . . . 1-46
Storing a Scanned Document in an Inbox . . . . . . . . . . . . . . . . . . . . . . . . . . . . . . . . . . . . . . . . . . . . . . . . . 1-55
Specifying a Destination Using One-Touch Buttons (One-Touch Buttons) . . . . . . . . . . . . . . . . . . . . . . 1-57
Configuring the Favorites Buttons (Favorites Buttons) . . . . . . . . . . . . . . . . . . . . . . . . . . . . . . . . . . . . . . 1-59
Searching a Destination via a Server (Search on Server). . . . . . . . . . . . . . . . . . . . . . . . . . . . . . . . . . . . . 1-61
Checking and Changing a Destination’s Detailed Information (Details) . . . . . . . . . . . . . . . . . . . . . . . . . 1-72
Erasing a Specified Destination (Erase). . . . . . . . . . . . . . . . . . . . . . . . . . . . . . . . . . . . . . . . . . . . . . . . . . . 1-75
Selecting a Scanning Mode . . . . . . . . . . . . . . . . . . . . . . . . . . . . . . . . . . . . . . . . . . . . . . . . . . . . . . . . . . . . . 1-76
Changing the Scan Settings . . . . . . . . . . . . . . . . . . . . . . . . . . . . . . . . . . . . . . . . . . . . . . . . . . . . . . . . . . . . 1-79
Scanning Two-Sided Originals (Two-Sided Original) . . . . . . . . . . . . . . . . . . . . . . . . . . . . . . . . . . . . . . . . . 1-79
Specifying the Document Size (Document Size Select) . . . . . . . . . . . . . . . . . . . . . . . . . . . . . . . . . . . . . . 1-81
Changing the Resolution . . . . . . . . . . . . . . . . . . . . . . . . . . . . . . . . . . . . . . . . . . . . . . . . . . . . . . . . . . . . . . 1-89
Adjusting the Exposure and Image Quality Before Scanning the Originals (Scanning Exposure) . . . . . . 1-91
Changing the Scanning Ratio (Copy Ratio). . . . . . . . . . . . . . . . . . . . . . . . . . . . . . . . . . . . . . . . . . . . . . . . 1-98
Scanning Facing Pages in a Book onto Two Separate Sheets in One Step (Two-Page Separation) . . . 1-102
1-1
1. Various Sending Methods
Scanning Different-Sized Originals Together in the Feeder (Different Size Originals) . . . . . . . . . . . . . . 1-104
Scanning Originals Separately Set as One Document (Job Build) . . . . . . . . . . . . . . . . . . . . . . . . . . . . . 1-107
Erasing Shadows and Frame Lines (Frame Erase). . . . . . . . . . . . . . . . . . . . . . . . . . . . . . . . . . . . . . . . . 1-111
Scanning Originals After Making Them Sharply Contrasted (Sharpness) . . . . . . . . . . . . . . . . . . . . . . . 1-121
Storing/Erasing Scanning Mode . . . . . . . . . . . . . . . . . . . . . . . . . . . . . . . . . . . . . . . . . . . . . . . . . . . . . . . 1-124
Configuring Send Settings (Send Settings). . . . . . . . . . . . . . . . . . . . . . . . . . . . . . . . . . . . . . . . . . . . . . . 1-132
Specifying the Time to Send a Job (Delayed Send) . . . . . . . . . . . . . . . . . . . . . . . . . . . . . . . . . . . . . . . . 1-132
E-mail Notification at the End of a Send Job (Job Done Notice) . . . . . . . . . . . . . . . . . . . . . . . . . . . . . . . 1-135
Stamping Scanned Originals (Stamping Original). . . . . . . . . . . . . . . . . . . . . . . . . . . . . . . . . . . . . . . . . . 1-138
Sending a Job to a Fax . . . . . . . . . . . . . . . . . . . . . . . . . . . . . . . . . . . . . . . . . . . . . . . . . . . . . . . . . . . . . . 1-140
Sending a Job to an E-mail Address . . . . . . . . . . . . . . . . . . . . . . . . . . . . . . . . . . . . . . . . . . . . . . . . . . . . 1-144
Sending a Job to Another I-Fax. . . . . . . . . . . . . . . . . . . . . . . . . . . . . . . . . . . . . . . . . . . . . . . . . . . . . . . . 1-153
Sending a Job to a File Server . . . . . . . . . . . . . . . . . . . . . . . . . . . . . . . . . . . . . . . . . . . . . . . . . . . . . . . . 1-160
Sending a Job to a User Inbox . . . . . . . . . . . . . . . . . . . . . . . . . . . . . . . . . . . . . . . . . . . . . . . . . . . . . . . . 1-164
Previewing Originals (Preview) . . . . . . . . . . . . . . . . . . . . . . . . . . . . . . . . . . . . . . . . . . . . . . . . . . . . . . . . . 1-168
Recalling the Stored Settings and Sending a Job (Recall). . . . . . . . . . . . . . . . . . . . . . . . . . . . . . . . . . . 1-174
Special Dialling . . . . . . . . . . . . . . . . . . . . . . . . . . . . . . . . . . . . . . . . . . . . . . . . . . . . . . . . . . . . . . . . . . . . . . 1-176
Calling from an Extension . . . . . . . . . . . . . . . . . . . . . . . . . . . . . . . . . . . . . . . . . . . . . . . . . . . . . . . . . . . . 1-176
Storing International Telephone Numbers . . . . . . . . . . . . . . . . . . . . . . . . . . . . . . . . . . . . . . . . . . . . . . . . 1-179
Various Sending Methods
1
1-2
What the iR3320i/iR2220i Can Do
When you press [Send], the Send screen appears. This Send function enables you to send
documents scanned with this machine by e-mail, I-Fax, and Fax, and save them in the file
server. They can also be saved in inboxes to be processed later. You can also send the
documents simultaneously to the mail destinations of various sending methods, such as e-mail
and file server.
Various Sending Methods
1
IMPORTANT
• If you use the Canon Super G3 Fax Board-J1 with this machine, use this manual instead of the Fax Board’s
manual.
Original
Box
I-Fax
Scanning
File
E-mail
Fax
Group
E-mail
I-Fax
etc
What the iR3320i/iR2220i Can Do
1-3
Place your originals
1
Various Sending Methods
Specify New
Address: p. 1-36
●
●
●
●
Sending to an
e-mail address
Sending to an
I-Fax
Sending to a
file server
Sending to a
User Inbox
Specify the destinations registered.
You can store destinations from the
Additional Functions screen.
When the destination is registered in the Address
Book: p. 1-34
When the address is
registered in the Favorites
Buttons: p. 1-59
When the address is
registered in the One-touch
Buttons: p. 1-57
[Option]
Scan Settings
[Send Settings]
Send Settings
1-4
What the iR3320i/iR2220i Can Do
Specify the destinations
via a server: p. 1-61
You can store servers from the
Additional Functions screen.
IMPORTANT
• Without the Image Reader-B1 being attached, you cannot use the sending function with the iR3320i/iR2220i.
In this case, this guide is not necessary.
• You can use the sending function with the iR3320i/iR2220i only when the Image Reader-B1 is attached.
• You need to make network settings if you want to send to an E-mail address, I-Fax, and file server.
(See the Network Guide.)
NOTE
• To send documents to another fax machine, it is necessary for the Fax Board (optional) to be installed.
1
Send Screen
Various Sending Methods
The screen on the left, which appears when the
sending operation is selected, is called the Send
screen.
Displays current scan settings.
Address List
Displays a list of sending addresses.
➔ p. 1-76
Press to enter scan settings.
➔ p. 1-34
Press to select a destination from the address book and search through the directory listing on an
LDAP (Lightweight Directory Access Protocol) server to specify a destination.
➔ p. 1-72
Press to check and change the destination information selected from the Address List.
➔ p. 1-75
Press to erase the destination displayed in the Address List.
What the iR3320i/iR2220i Can Do
1-5
➔ p. 1-174
Press to recall the set destination, scan settings, or send settings.
➔ p. 1-79
Press to scan both sides of the document.
Various Sending Methods
1
Press to select the file type (TIFF, MTIFF, PDF) of the document to be sent.
Press to divide a document into separate pages.
➔ p. 1-168
Press to preview the images on documents before sending.
➔ p. 1-132
Press to set send settings. You can set to send at a specified time and specify settings such as
e-mail and I-Fax subject lines.
➔ p. 1-59
Press to recall the destination and settings registered with the [Favorites Buttons].
➔ p. 1-57
Press to select the destinations registered at the [One-touch Buttons].
➔ p. 1-36
Press to specify addresses not registered in the Address Book.
1-6
What the iR3320i/iR2220i Can Do
Scan Settings Screen
The screen shown on the left, which appears when you
press [Option] in the scan settings drop-down list is
called the Scan Settings screen.
Display this screen to set the scan settings for sending
originals.
Various Sending Methods
1
➔ p. 1-98
Press to scan originals at a different scanning (zoom) ratio.
➔ p. 1-81
Press to select the size of the original you want to scan.
➔ p. 1-76
Press to set the stored scanning mode.
➔ p. 1-124
Press to store or erase the scanning mode.
➔ p. 1-89
Press to select the resolution.
➔ p. 1-91
Press [ ] or [ ] to manually control the scan exposure. Press [A] to select or cancel Auto Exposure
control.
➔ p. 1-93
Press to scan originals specifying the image quality (text only, text and photo, photo only). You can
also select the type of photo (printed image/photo) when you set the photo mode from the Additional
Functions screen.
What the iR3320i/iR2220i Can Do
1-7
Press to select the Special Features mode.
Various Sending Methods
1
1-8
What the iR3320i/iR2220i Can Do
Things You Must Do Before Using This Machine
The following registrations must be set before the machine is used.
1
IMPORTANT
Various Sending Methods
• If you attempt to use the machine without performing the necessary registrations correctly, the machine may
not function properly.
• You need to make network settings if you want to send to an E-mail address, I-Fax, and file server.
(See the Network Guide.)
NOTE
• To send documents to another fax machine, it is necessary for the Fax Board (optional) to be installed.
■ Setting the Fax Line Type
To set the type of telephone line connected to the machine, check whether it is a rotary dial (rotary
pulse) or a touch-tone type and make the correct setting. (See “Selecting the Type of Telephone Line
(Tel Line Type),” on p. 1-10.)
■ Registering the Sending Record
Register a sending record that is printed at the top of the recording paper in the receiving machine when
you use Fax or I-Fax functions.
The registered information is printed, as shown below. Depending upon the model of machine at the
receiving side, this information may appear on the display while communication is taking place.
Date
Time
I-Fax Address
or Telephone no.
Sender’s name Destination name Page number
Sender information
• Date and Time
- The date and time that the document was sent is recorded.
• I-Fax Address or Telephone Number
- Your machine’s I-Fax address or telephone number is recorded.
Things You Must Do Before Using This Machine
1-9
• Sender’s Name (TTI)
- The name registered as the user’s name is recorded for Fax documents.
• Destination Name (See “Storing New Addresses (Store/Edit Address Book),” on p. 4-5.)
- If you send an original using the address book, and a name is registered as the sending
destination, that name will be recorded.
• Page Number
- The total number of pages of the original is recorded.
NOTE
Various Sending Methods
1
• You can set the machine so that the sending record is not printed, even if each item has been registered.
(See “Attaching a Transmission Terminal ID to the Document Being Sent (TX Terminal ID),” on p. 3-22.)
• If the machine is set so that the sending record is printed at the top of the recording paper on the receiving side,
and not all items are registered, only the registered items and the number of original pages are printed.
Selecting the Type of Telephone Line (Tel Line Type)
Set the type of telephone line connected to the machine.
If this setting is incorrect, you will be unable to communicate with another machine, so be sure
to check the type of telephone line you are using and make the correct setting.
NOTE
• To set these settings, it is necessary for a Fax Board (optional) to be installed.
• The default setting is ‘Tone.’
1
Call up the desired screen as follows:
➔ [Communications Settings] ➔ (Fax Settings) [User Settings] ➔ [Tel Line Type]
1-10
Things You Must Do Before Using This Machine
2
Select the type of telephone line, and press [OK].
Various Sending Methods
1
The specified mode is set.
3
Press [Done] repeatedly until the Basic Features screen appears.
Setting the Current Date and Time (Date & Time Settings)
This enables you to set the current date and time. The set date and time also act as a guide to
set functions which require a timer.
GMT:
The time at the Greenwich Observatory in England is referred to as Greenwich Mean
Time (GMT).
Time Zone:
The standard time zones of the world are expressed globally in terms of the difference
in hours (± up to 12 hours) from GMT (± 0 hours). A time zone is a region throughout
which the time difference is the same.
Daylight Saving Time: In some countries, time is advanced throughout the summer season. The period in
which this is applied is called Daylight Saving Time.
1
Call up the desired screen as follows:
➔ [Timer Settings] ➔ [Date & Time Settings]
Things You Must Do Before Using This Machine
1-11
2
Enter the current date (day, month, year) and time with
-
(numeric keys).
Various Sending Methods
1
Enter all four digits for the year.
Enter the time in 24-hour notation as four digits without a space.
Examples: May 06
➔ 0605
7:05 a.m. ➔ 0705
11:18 p.m. ➔ 2318
NOTE
• If you make a mistake when entering values, press
●
When Setting the Time Zone Settings:
Select the time zone from the drop-down list.
NOTE
• The default setting is ‘GMT 00:00.’
1-12
Things You Must Do Before Using This Machine
, and enter the values again, starting with the day.
When Selecting the Daylight Saving Time Settings:
Press [On], and press [Start Date].
1
Various Sending Methods
●
Select the Month and Day from the drop-down list as shown below.
Press [–] or [+] to set the time.
When all the settings are complete, press [OK].
Things You Must Do Before Using This Machine
1-13
Press [End Date], and make the settings in the same way as [Start Date], and press [OK].
Various Sending Methods
1
NOTE
• When you set the Daylight Saving Time, the machine automatically sets the standard time of the machine
one-hour forward on the specified date and time.
• You can also set the time by pressing
(numeric keys).
• The Time settings can be set in one-hour increments from 0 to 23 hours.
• The default setting is ‘On.’ Between 2:00 a.m. on the last Sunday of March and 3:00 a.m. on the last Sunday
of October.
3
Press [OK].
The specified mode is set.
4
1-14
Press [Done] repeatedly until the Basic Features screen appears.
Things You Must Do Before Using This Machine
Registering This Machine’s Telephone Number
(Unit Telephone #)
You can register the telephone number that you use for Fax functions with this machine. When
you fax a document, the receiving fax machine includes this telephone number in the sender
information on the recording paper.
Some fax models also display sender information on the touch panel display during transmission.
Various Sending Methods
NOTE
• To set these settings, it is necessary for a Fax Board (optional) to be installed.
1
Call up the desired screen as follows:
➔ [Communications Settings] ➔ (Fax Settings) [User Settings] ➔ [Unit Telephone #]
2
Enter the telephone number you want to store, using
press [OK].
-
(numeric keys), and
[Space]: Used to insert a space between the area code and the local telephone number.
[+]: Used to insert a country code. Press after the country code, and before the telephone number.
[ ] [ ]: Used to move the cursor.
[Backspace]: Used to delete the character immediately in front of the cursor.
The telephone number can have up to 20 digits.
To delete the number you entered, press
.
The specified mode is set.
Things You Must Do Before Using This Machine
1
1-15
3
Press [Done] repeatedly until the Basic Features screen appears.
Registering the Name of the Company and Department
(Unit Name)
Your name or company name must be registered as the unit name (a department name is
optional).
For example:
1
Various Sending Methods
- Your name: John Doe
- Company name: Canon
- Company name and department: Canon-Accounting Dept.
When you send a document, the receiving machine will display/print your name or company
name (and department name if available) in the sender information on the recording paper.
Some models also display sender information on the touch panel display during transmission.
IMPORTANT
• If SDL is set as login service:
- The login user name and e-mail address that you registered for SDL are displayed on the From field on the
e-mail recipient’s machine, instead of the unit name and e-mail address that you registered in Device
Information settings for this machine. (See “Sending a Job to an E-mail Address,” on p. 1-144.)
- The unit name and e-mail address that you registered in Device Information settings for this machine are
displayed on the From field, and the login user name and e-mail address that you registered for SDL are
displayed on the Sender field on the I-fax recipient’s machine.
(See “Sending a Job to Another I-Fax,” on p. 1-153.)
• If SSO is set as login service:
- The login user’s Full name and e-mail address that you registered for Active Directory or NetSpot Accountant
are displayed on the From field on the e-mail recipient’s machine, instead of the unit name and e-mail
address that you registered in Device Information settings for this machine.
(See “Sending a Job to an E-mail Address,” on p. 1-144.)
- The unit name and e-mail address that you registered in Device Information settings for this machine are
displayed on the From field, and the login user’s User login name (pre-Windows 2000) and e-mail address
that you registered for Active Directory or NetSpot Accountant are displayed on the Sender field on the I-fax
recipient’s machine.(See “Sending a Job to Another I-Fax,” on p. 1-153.)
1-16
Things You Must Do Before Using This Machine
1
Call up the desired screen as follows:
➔ [Communications Settings] ➔ (Common Settings) [TX Settings] ➔ [Unit Name]
2
Enter the name, and press [OK].
Various Sending Methods
1
The specified mode is set.
NOTE
• For details on how to enter characters on the touch panel display, see Chapter 1, “Before You Start Using This
Machine,” in the Reference Guide.
• You can enter up to 24 characters for the unit name.
3
Press [Done] repeatedly until the Basic Features screen appears.
Things You Must Do Before Using This Machine
1-17
Registering Sender’s Names (Sender’s Names (TTI))
You can register an individual name as the sender’s name. Register the sender’s name when
you want to display/print a name other than the unit’s name as the sender’s record on the
recording paper.
IMPORTANT
• If SDL is set as login service:
- The login user name and e-mail address that you registered for SDL are displayed on the From field on
the e-mail recipient’s machine, instead of the sender’s name and e-mail address that you registered in
Device Information settings for this machine. (See “Sending a Job to an E-mail Address,” on p. 1-144.)
- The sender’s name and e-mail address that you registered in Device Information settings for this machine
are displayed on the From field, and the login user name and e-mail address that you registered for SDL
are displayed on the Sender field on the I-fax recipient’s machine.
(See “Sending a Job to Another I-Fax,” on p. 1-153.)
• If SSO is set as login service:
- The login user’s Full name and e-mail address that you registered for Active Directory or NetSpot Accountant
are displayed on the From field on the e-mail recipient’s machine, instead of the sender’s name and e-mail
address that you registered in Device Information settings for this machine.
(See “Sending a Job to an E-mail Address,” on p. 1-144.)
- The unit name and e-mail address that you registered in Device Information settings for this machine are
displayed on the From field, and the login user’s User login name (pre-Windows 2000) and e-mail address
that you registered for Active Directory or NetSpot Accountant are displayed on the Sender field on the I-fax
recipient’s machine. (See “Sending a Job to Another I-Fax,” on p. 1-153.)
Various Sending Methods
1
NOTE
• Displaying/printing the sender’s name, instead of the unit’s name, on the sender’s record can be set using
the Sender’s Names mode from the Send Settings screen. (See “Sending a Job to a Fax,” on p. 1-140,
“Sending a Job to an E-mail Address,” on p. 1-144, “Sending a Job to Another I-Fax,” on p. 1-153.)
1
Call up the desired screen as follows:
➔ [Communications Settings] ➔ (Common Settings) [TX Settings] ➔ [Sender’s Names (TTI)]
1-18
Things You Must Do Before Using This Machine
2
Select a number (item) under which you want to register the sender’s name, and
press [Store/Edit].
Various Sending Methods
1
You can store up to 99 Sender’s Names (01 to 99).
If the number you want is not displayed, press [▼] or [▲].
You can also enter and specify the number of the sender’s name using
When doing so, make sure you enter a two-digit number only.
-
(numeric keys).
To delete stored sender’s names, select the numbers under which the names are registered, and
press [Erase].
3
Enter the sender’s name, and press [OK].
The specified mode is set.
NOTE
• For details on how to enter characters on the touch panel display, see Chapter 1, “Before You Start Using This
Machine,” in the Reference Guide.
• You can enter up to 24 characters for the sender’s name.
Things You Must Do Before Using This Machine
1-19
4
Press [Done] repeatedly until the Basic Features screen appears.
Various Sending Methods
1
1-20
Things You Must Do Before Using This Machine
Flow of Job Sending Operations
This section describes the flow of the basic job sending operations.
1
NOTE
1
Various Sending Methods
• For details on the following items, see the Reference Guide.
- Main Power and Control Panel Power. (See Chapter 1, “Before You Start Using This Machine,” in the
Reference Guide.)
- Routine Maintenance. (See Chapter 5, “Routine Maintenance,” in the Reference Guide.)
• The maximum number of Send jobs the machine can accumulate is 120 (including error jobs). However,
depending on sending conditions the actual number may be less than 120. The following two conditions are
typical examples.
- Sending multiple documents at the same time
- Sending large documents
• You can print a report of the results of the Send jobs. (See Chapter 3, “Selecting and Storing Settings to Suit
Your Needs,” in the Reference Guide.)
Press [Send].
Flow of Job Sending Operations
1-21
If the message <You must insert a control card.> appears, insert a Control Card.
(See Chapter 7, “Handling Optional Equipment,” in the Reference Guide.)
Various Sending Methods
1
If the message <Enter the Dept. ID and Password using the numeric keys.> appears, enter the
Department ID and password, and press . (See Chapter 1, “Before You Start Using This Machine,”
in the Reference Guide.)
1-22
Flow of Job Sending Operations
2
Place your originals.
NOTE
• For instructions on placing originals, see Chapter 1, “Before You Start Using This Machine,” in the Reference
Guide.
3
Specify the destinations.
NOTE
• A maximum of 256 destinations can be specified at the same time. (Out of the 256 destinations, 16 new
addresses, including those obtained via a server, can be specified.) If you specify a group address, which is made
up of several destinations, the whole group is counted as one address.
• A maximum number of 512 destinations can be specified for fax jobs (including reserved fax jobs).
●
When the destination is stored in the Address Book:
Specify the destination using the Address Book. (See “Specifying a Destination Using the Address
Book (Address Book),” on p. 1-34.)
Flow of Job Sending Operations
1-23
Various Sending Methods
1
●
When the destination is not stored in the Address Book:
Enter the new address using the New Address. (See “Specifying a Destination not Registered in the
Address Book (New Address),” on p. 1-36.)
Various Sending Methods
1
NOTE
• A maximum of 16 new addresses and addresses obtained via a server (User Inboxes are not included in this
count) can be specified at the same time.
• A maximum number of 512 destinations can be specified for fax jobs (including reserved fax jobs).
●
When the destination is stored in the One-touch Buttons:
Specify the address using the One-touch Buttons. (See “Specifying a Destination Using One-Touch
Buttons (One-Touch Buttons),” on p. 1-57.)
1-24
Flow of Job Sending Operations
When the destination is stored in the Favorites Buttons:
Specify the destination using the Favorites Buttons. (See “Configuring the Favorites Buttons
(Favorites Buttons),” on p. 1-59.)
1
Various Sending Methods
●
NOTE
• The icons below displayed on the screen have the following meanings.
Fax
-
E-mail
-
I-Fax
-
File
-
Mail Box
• To display enlarged favorites buttons, press
.
Flow of Job Sending Operations
1-25
●
If you want to specify a destination using a server:
Press [Address Book/Server] ➔ search through the directory listing on the server (LDAP) to specify the
destination. (See “Searching a Destination via a Server (Search on Server),” on p. 1-61.)
Various Sending Methods
1
NOTE
• A maximum of 16 new addresses and addresses obtained via a server (User Inboxes are not included in this
count) can be specified at the same time.
• A maximum number of 512 destinations can be specified for fax jobs (including reserved fax jobs).
4
Press the Scan Settings drop-down list, and select the scanning mode.
To change the details of the scanning mode set, select [Option].
(See “Changing the Scan Settings,” on p. 1-79.)
1-26
Flow of Job Sending Operations
Various Sending Methods
1
For the details on how to set the Scanning Mode, see “Selecting a Scanning Mode,” on p. 1-76.
5
Press [Send Settings], and enter the send settings.
For send setting instructions, see “Configuring Send Settings (Send Settings),” on p. 1-132.
Flow of Job Sending Operations
1-27
6
Press [Job Done Notice], and select the address to which to send the notification
message.
Various Sending Methods
1
Set the notification message as required.
NOTE
• For the details on how to set the Job Done Notice, see “E-mail Notification at the End of a Send Job
(Job Done Notice),” on p. 1-135.
7
1-28
Press [Done].
Flow of Job Sending Operations
Press
.
1
Various Sending Methods
8
The machine starts scanning.
When scanning is complete, remove the original.
NOTE
• If the Card Reader-C1 (optional) is attached, remove the Control Card. (See Chapter 7, “Handling Optional
Equipment,” in the Reference Guide.)
• If you have set up Department ID Management, press
Machine,” in the Reference Guide.)
. (See Chapter 1, “Before You Start Using This
Flow of Job Sending Operations
1-29
●
If the following screen is displayed:
Follow the instructions on the touch panel display, press
complete, press [Done].
once for each original. When scanning is
Various Sending Methods
1
When scanning is complete, the scanned data is sent to the specified destination.
NOTE
• If the Preview key is lit, the Preview display setting is turned on, and you can verify the images from the Preview
screen before sending your documents. (See “Previewing Originals (Preview),” on p. 1-168.)
1-30
Flow of Job Sending Operations
Sending Fax Documents Manually
This mode enables you to manually send documents after checking that the destination is ready
to receive the fax.
1
• To send documents consisting of two or more sheets, a feeder is necessary. If you place an original on the platen
glass for Manual sending, you can only send one sheet at a time.
• If you cancel Manual Sending during transmission, the originals that have already been scanned are sent.
1
Place your originals.
2
Make sure that the machine is ready to send.
Sending Fax Documents Manually
1-31
Various Sending Methods
IMPORTANT
3
Press [New Address], and press [Fax].
4
Press [On-hook].
Various Sending Methods
1
You should hear the dial tone (a continuous high-pitched sound).
5
1-32
Specify the destination.
Sending Fax Documents Manually
The telephone number can have up to 120 digits.
When you hear the other party or carrier signal (a high-pitched tone), press
.
Clear
Stop
Start
1
Various Sending Methods
6
Power
The level of the dial tone can be adjusted by pressing [ ] or [
].
You can also enter an extension number.
Scanning starts and the document is sent.
During transmission, the transaction number, destination's telephone number, and page number are
displayed.
NOTE
• If you want to cancel Manual Sending, press [End].
Sending Fax Documents Manually
1-33
Specifying a Destination Using the Address
Book (Address Book)
You need to specify the destination (such as an E-mail address, I-Fax, or file server) to send a
document. If you store addresses in the Address Book in the Address Book Settings of the
Additional Functions, you can specify the destination immediately. (See “Storing New Addresses
(Store/Edit Address Book),” on p. 4-5.)
Various Sending Methods
1
NOTE
• A maximum of 256 destinations can be specified at the same time. (Out of the 256 destinations, 16 new
addresses, including those obtained via a server, can be specified.) If you specify a group address, which is made
up of several destinations, the whole group is counted as one address.
• A maximum number of 512 destinations can be specified for fax jobs (including reserved fax jobs).
• Address books can be saved, stored, and transferred to/from other computers using Remote UI.
(See Chapter 2, “Functions of the Remote UI,” in the Remote UI Guide.)
1
1-34
Press [Address Book/Server].
Specifying a Destination Using the Address Book (Address Book)
Select the destination from the Address Book, and press [OK].
1
Various Sending Methods
2
If Access Number Management for an Address Book is set to ‘On,’ press [Access Number] and
enter the access number to specify the address, and press [OK]. If you do not want to specify an
access number, press [No Access Number]. (See “Storing New Addresses (Store/Edit Address
Book),” on p. 4-5.)
You can specify multiple destinations.
Use the alphabet keys to define the range of entries displayed.
Press [▼] or [▲] to highlight the destination to be selected.
By using the Address Book/Server drop-down list, you can display addresses by a subaddress book,
(1 to 10, One-touch Buttons). The subaddress book categorizes the addresses of the Address Book.
By using the Address Type drop-down list, you can restrict the type of addresses displayed in the list.
The selected destination appears in the address list on the Send screen.
NOTE
• To cancel the specified destination, select the destination again to cancel the check mark.
• To view more detailed information about an address, press [Details].
• You can erase the destinations specified in the address list before scanning.
(See “Erasing a Specified Destination (Erase),” on p. 1-75.)
Specifying a Destination Using the Address Book (Address Book)
1-35
Specifying a Destination not Registered in the
Address Book (New Address)
You need to specify the destination (such as a Fax, E-mail address, I-Fax, and file server) to
which to send a document. The procedure of sending to an address not listed in the address
book is explained below.
Various Sending Methods
1
NOTE
• If you send to the same destinations more than once, it is useful to enter them in the address book beforehand.
(See “Storing New Addresses (Store/Edit Address Book),” on p. 4-5.)
• A maximum of 16 new addresses and addresses obtained via a server (User Inboxes are not included in this
count) can be specified at the same time.
• A maximum number of 512 destinations can be specified for fax jobs (including reserved fax jobs).
• When character entry is required, a keyboard appears in the touch panel display for you to enter characters.
For details on how to enter characters on the touch panel display, see Chapter 1, “Before You Start Using This
Machine,” in the Reference Guide.
Specifying a Fax Number
Dial the number of the other party using
- , , and
(numeric keys) on the control panel.
You can also dial several numbers in succession and send the original to several destinations
in a single operation.
NOTE
• To send documents to another fax machine, it is necessary for the Fax Board (optional) to be installed.
1-36
Specifying a Destination not Registered in the Address Book (New Address)
1
Press [New Address], and press [Fax].
Various Sending Methods
1
NOTE
• When the send screen is displayed and no address is specified, if you press
,
, and
(numeric keys) without pressing [Fax], the screen at Step 2 is displayed and you can enter the fax
number.
2
Enter a fax number using
-
,
, and
(numeric keys).
[Pause]: Press to insert a pause of several seconds in the telephone number that you are dialling.
If you insert a pause, the letter <p> is displayed between the numbers, and also the letter <P>
appears at the end of the number. When dialling an overseas number, insert a pause after the
access number, and also at the end of the telephone number. (See “Setting the Pause Time
(Pause Time),” on p. 3-38.)
[Tone]: Press when directly calling an extension line connected to a Private Branch Exchange
(PBX) that accepts only push signals from a dial line. (See “Using Fax Information Services,” on
p. 2-8.)
[ ] [ ]: Use to move the cursor.
Specifying a Destination not Registered in the Address Book (New Address)
1-37
[Backspace]: Press when a wrong number is entered. The last number entered is deleted, enabling
you to enter the correct number.
[DT]: Press this key to confirm the dial tone in the middle of the facsimile number before dialling the
rest of the number. A dot will be displayed.
[R]: Press to use the R-key. (See “Special Dialling,” on p. 1-176.)
[Direct]: Press to send documents directly. If you do not select Direct Sending, Memory Sending is
selected. (See “Sending a Job to a Fax,” on p. 1-140.)
1
[Next]: Press to specify another destination after specifying the first destination using the numeric keys.
Various Sending Methods
[Sub-address]: Use to enter subaddress or password settings. Use this as necessary.
[On-hook]: Press to use fax information services. (See “Using Fax Information Services,” on p. 2-8.)
To delete the number you entered, press
.
IMPORTANT
• Pauses cannot be entered before telephone numbers.
NOTE
• The telephone number can have up to 120 digits.
• Pauses entered at the end of dialled telephone numbers are always 10 seconds long.
●
To specify the subaddress and password:
Press [Subaddress] and [Password], enter the subaddress and password using
(numeric keys), and press [OK].
To delete the number you entered, press .
You can store a [Subaddress] and [Password] of up to 20 digits each.
To enter a space, press [Space].
To delete the last character, press [Backspace].
1-38
Specifying a Destination not Registered in the Address Book (New Address)
-
,
, and
If the other party did not set an RX password in the target subaddress, you do not need to enter a
password.
IMPORTANT
• To send or receive documents to and from a fax machine using subaddresses and RX passwords defined in the
ITU-T standard (ITU-T is a committee within the International Communications Union, established to set
communications standards), the subaddresses and passwords must be dialled in addition to the telephone
numbers.
1
Press [OK].
The address appears in the address list on the Send screen.
IMPORTANT
• Information entered here is not added to the address book. It will be deleted once the document is sent.
NOTE
• You can change the addresses in the address list before scanning. (See “Checking and Changing a Destination’s
Detailed Information (Details),” on p. 1-72.)
• You can erase the addresses in the address list before scanning.
(See “Erasing a Specified Destination (Erase),” on p. 1-75.)
Specifying an E-mail Address
1
Press [New Address], and press [E-mail].
Specifying a Destination not Registered in the Address Book (New Address)
1-39
Various Sending Methods
3
2
Press [E-mail Address].
3
Enter the e-mail address, and press [OK].
Various Sending Methods
1
You can also enter values using
-
(numeric keys).
NOTE
• For details on how to enter characters on the touch panel display, see Chapter 1, “Before You Start Using This
Machine,” in the Reference Guide.
• You can enter up to 128 characters for the e-mail address.
1-40
Specifying a Destination not Registered in the Address Book (New Address)
4
Press [OK].
The address appears in the address list on the Send screen.
IMPORTANT
• Information entered here is not added to the address book. It will be deleted once the document is sent.
NOTE
Specifying an I-Fax Address
1
Press [New Address], and press [I-Fax].
Specifying a Destination not Registered in the Address Book (New Address)
1
Various Sending Methods
• You can change the addresses in the address list before scanning. (See “Checking and Changing a Destination’s
Detailed Information (Details),” on p. 1-72.)
• You can erase the addresses in the address list before scanning. (See “Erasing a Specified Destination (Erase),”
on p. 1-75.)
1-41
2
Press the Mode drop-down list to select [Simple] or [Full].
Various Sending Methods
1
In order to send documents in the Full mode, the recipient’s machine must be compatible with the
Full mode to receive the documents. If you send documents in the Full mode, you can confirm that
the recipient’s machine received the I-Fax documents.
[Simple]: Sends scanned data as an image using the Internet.
[Full]:
3
1-42
In addition to the sending functions of Simple mode, confirms whether data was sent.
Press [I-Fax Address].
Specifying a Destination not Registered in the Address Book (New Address)
4
Enter the I-Fax address, and press [OK].
You can also enter values using
-
(numeric keys).
NOTE
• For details on how to enter characters on the touch panel display, see Chapter 1, “Before You Start Using This
Machine,” in the Reference Guide.
• You can enter up to 128 characters for the I-Fax address.
• If you do not send documents via a server, and if the recipient’s IP address is not registered in a DNS server, enter
an I-Fax address in the form of ‘user@[the recipient’s IP address].’
5
Press [Destination Conditions].
Specifying a Destination not Registered in the Address Book (New Address)
1-43
Various Sending Methods
1
6
Set the receive conditions for the recipient, and press [OK].
Various Sending Methods
1
The following conditions should always be selected:
• Paper Size: A4/LTR
• Compression Method: MH
• Resolution: 200 x 100 dpi, 200 x 200 dpi
A5 is recognised as [A4/LTR].
IMPORTANT
• Set the destination conditions according to the specification of the recipient’s machine. An error may occur if you
set conditions that the recipient cannot use.
1-44
Specifying a Destination not Registered in the Address Book (New Address)
7
Select whether to send documents via a server by pressing [On] or [Off].
[On]:
Sends documents via a server. You can send documents to destinations via the internet in
the same way as e-mail.
[Off]:
Sends documents other than via a server. You can send large amounts of data to a recipient
in the same LAN environment without placing a burden on the mail server. This enables you
to send documents directly. It is necessary to set an MX (Mail eXchange) record of the DNS
server beforehand to use this function. Ask your System Manager whether this type of
sending is possible before you use this function.
IMPORTANT
• If you want to set the Send Via Server setting to ‘Off,’ it is necessary to first set the Use Send Via Server setting in
Additional Functions to ‘On’ beforehand. If the Use Send Via Server setting is set to ‘Off,’ the key next to Send Via
Server are greyed out and any changes made to the Send Via Server setting in the I-Fax screen will not be valid.
In this case, the machine will always send documents via a server. (See Chapter 4, “System Manager Settings,” in
the Reference Guide.)
8
Press [OK].
The address appears in the address list on the Send screen.
IMPORTANT
• Information entered here is not added to the address book. It will be deleted once the document is sent.
NOTE
• You can change the addresses in the address list before scanning. (See “Checking and Changing a Destination’s
Detailed Information (Details),” on p. 1-72.)
• You can erase the addresses in the address list before scanning.
(See “Erasing a Specified Destination (Erase),” on p. 1-75.)
Specifying a Destination not Registered in the Address Book (New Address)
1-45
Various Sending Methods
1
Specifying a File Server
You can send documents to a file server on the network.
IMPORTANT
• Windows NT/2000/XP restricts the number of users or clients that can be accessed. Once the number of users
or clients is exceeded, it is not possible to send to a file sever on Windows NT/2000/XP.
• If Language Switch in Common Settings (from the Additional Functions screen) is set to ’On’, the Host Name
and File Path of the file server destination may not be displayed correctly, so you may not be able to refer to
them.
Various Sending Methods
1
NOTE
• Set the following items when sending to a file server.
- Protocol
- Host Name
- File Path
- User
- Password
• For examples of the settings needed to send to a file server, see the Network Guide.
• For details on how to enter characters, see Chapter 1, “Before You Start Using This Machine,” in the Reference
Guide.
• You can also enter values using
(numeric keys).
• To send documents to CanoBureau Workgroup or iW Document Manager, set the FTP server that you
registered for the iW Gateway series as a destination. If you use CanoBureau Workgroup or iW Document
Manager and the sending functions of the iR machine in combination, you can manage electronic documents
and data using a PC on a network.
1
1-46
Press [New Address], and press [File].
Specifying a Destination not Registered in the Address Book (New Address)
Press the Protocol drop-down list, and select the protocol of the server.
1
Various Sending Methods
2
Available protocols are:
• FTP: Select this protocol if you are sending to a computer running Sun Solaris 2.6 or later, Mac
OS Χ or later, Internet Information Server 4.0 under Windows NT Server 4.0, Internet
Information Services 5.0 under Windows 2000 Server, or Internet Information Services 5.1
under Windows XP Professional.
• Windows (SMB): Select this protocol if you are sending to a computer using Windows NT, or
Windows 95/98/Me/2000/XP.
• NetWare (IPX): Select this protocol if you are sending to a computer using Novell NetWare V.3.2
or later.
Specifying a Destination not Registered in the Address Book (New Address)
1-47
3
Set [Host Name], [File Path], [User], and [Password].
●
Using the keyboard:
Press [Host Name], and enter the host name.
Various Sending Methods
1
When FTP is selected as the server protocol, you can specify a port number by entering a colon (:)
and the port number after the host name.
Example 192.168.100.50: 21000
When FTP is selected as the server protocol, make sure to enter the same port number for the Host
Name as the one specified for the FTP server to which you are sending your documents.
If you do not specify a port number, it is automatically set to ‘21’.
You can enter up to 128 characters for the host name.
Press [File Path], and enter the file path.
To send documents to CanoBureau Workgroup or iW Document Manager, enter the folder name that
you registered for the iW Gateway series.
You can enter up to 128 characters for the file path.
1-48
Specifying a Destination not Registered in the Address Book (New Address)
Press [User], and enter the user name.
To send documents to CanoBureau Workgroup or iW Document Manager, enter the user name that
you registered for the iW Gateway series.
You can enter up to 24 characters when FTP or NetWare (IPX) is selected as the server protocol for
the user name.
If ‘Windows (SMB)’ is selected as the server protocol, enter the required user name information in the
manner shown below:
- To enter the user name only
Example: user_name
Maximum 20 characters
- To enter the user name and the domain name
Example: domain_name\user_name
Domain name: Maximum 15 characters
User name: Maximum 20 characters
- To enter a UPN (User Principal Name)
Example: user_name@domain_name.com
Maximum 128 characters
NOTE
• UPN (User Principal Name) can be used only if you are sending to a computer belonging to a domain operated
with Windows 2000 Active Directory.
Specifying a Destination not Registered in the Address Book (New Address)
1-49
Various Sending Methods
1
Press [Password], and enter the password.
Various Sending Methods
1
Please set the password when it is necessary.
To send documents to CanoBureau Workgroup or iW Document Manager, enter the password that
you registered for the iW Gateway series.
You can enter up to 24 characters (14 characters when Windows (SMB) is selected as the server
protocol) for the password.
The password appears as asterisks (*****) on the file settings screen.
●
Using the Browse Key (Windows (SMB)):
Press [Browse].
IMPORTANT
• After turning the main power ON, you must wait for the time set in [Startup Time Settings] in the Additional
Functions mode to elapse, and press [Browse]. Transmission to computers on the network is not possible until this
startup time has elapsed. (See Chapter 3, “Using a TCP/IP Network (Windows/UNIX/Macintosh),” in the Network
Guide.)
1-50
Specifying a Destination not Registered in the Address Book (New Address)
Select the name of the workgroup, and press [Down].
Various Sending Methods
1
If the destination you want is not displayed, press [▼] or [▲].
Select the file server, and press [Down].
To go to a higher level, press [Up].
If the destination you want is not displayed, press [▼] or [▲].
When the log-in screen is displayed, enter the user name and password, and press [OK].
Specifying a Destination not Registered in the Address Book (New Address)
1-51
Press [Down], select the folder to which you want to send your file, and press [OK].
Various Sending Methods
1
To go to a higher level, press [Up].
If the destination you want is not displayed, press [▼] or [▲].
For examples of the settings of sending destinations, see Chapter 5, “Using a NetBIOS Network
(Windows),” in the Network Guide.
You can enter values directly from the keyboard on the touch panel display by pressing [Host Name],
[File Path], [User] and [Password].
●
Using the Browse Key (NetWare (IPX)):
Press [Browse].
IMPORTANT
• After turning the main power ON, you must wait for the time set in [Startup Time Settings] in the Additional
Functions mode to elapse, and press [Browse]. Transmission to computers on the network is not possible until this
startup time has elapsed. (See Chapter 3, “Using a TCP/IP Network (Windows/UNIX/Macintosh),” in the Network
Guide.)
1-52
Specifying a Destination not Registered in the Address Book (New Address)
Select [NDS], or [Bindery], from the drop-down list.
In the case of Bindery, follow the steps you followed after specifying a file server for Windows (SMB).
The following steps explain operations for NDS.
Press [Down], select the Log On destination, and press [Log On].
To go to a higher level, press [Up].
If the destination you want is not displayed, press [▼] or [▲].
The entry screen for Network password is displayed.
Specifying a Destination not Registered in the Address Book (New Address)
1-53
Various Sending Methods
1
Enter [User] and [Password], and press [OK].
Various Sending Methods
1
Press [Down], select the folder to which you want to send your file, and press [OK].
To go to a higher level, press [Up].
If the destination you want is not displayed, press [▼] or [▲].
For examples of the settings of sending destinations, see Chapter 4, “Using a NetWare Network
(Windows),” in the Network Guide.
You can enter values directly from the keyboard on the touch panel display by pressing [Host Name],
[File Path], [User] and [Password].
1-54
Specifying a Destination not Registered in the Address Book (New Address)
4
Press [OK].
Various Sending Methods
1
The destination appears in the address list in the Send screen.
IMPORTANT
• Information entered here is not added to the address book. It will be erased once the document is sent.
NOTE
• You can change the addresses in the address list before scanning. (See “Checking and Changing a Destination’s
Detailed Information (Details),” on p. 1-72.)
• You can erase the address specified in the address list before scanning.
(See “Erasing a Specified Destination (Erase),” on p. 1-75.)
Storing a Scanned Document in an Inbox
You can store the scanned documents in a User Inbox. The documents stored in a User Inbox
can be sent and printed.
IMPORTANT
• You cannot store documents into inboxes if they have been scanned using the Document Size Select (Other Size,
Long Strip Original) mode.
• Documents stored in a User Inbox are set so that they are automatically erased 3 days later. You can set the time
for automatic erasure from the Additional Functions screen. (See Chapter 5, “Setting/Storing the Mail Box
Settings,” in the Mail Box Guide.)
Specifying a Destination not Registered in the Address Book (New Address)
1-55
1
Press [New Address], and press [Store In Usr Inbox].
2
Select the desired inbox, and press [OK].
Various Sending Methods
1
The display returns to the Send screen, and the specified inbox appears in the address list.
NOTE
• You can erase the inbox in the address list before scanning. (See “Erasing a Specified Destination (Erase),”
on p. 1-75.)
• Only one inbox can be specified to store the document.
1-56
Specifying a Destination not Registered in the Address Book (New Address)
Specifying a Destination Using
One-Touch Buttons (One-Touch Buttons)
You can specify a destination stored in a one-touch button.
• A maximum of 256 destinations can be specified at the same time. (Out of the 256 destinations, 16 new
addresses, including those obtained via a server, can be specified.) If you specify a group address, which is made
up of several destinations, the whole group is counted as one address.
• A maximum number of 512 destinations can be specified for fax jobs (including reserved fax jobs).
• You need to register destinations with the One-touch Buttons before using this function.
(See “Registering the One-Touch Buttons (One-touch Buttons),” on p. 4-65.)
1
Press [One-touch Buttons].
Specifying a Destination Using One-Touch Buttons (One-Touch Buttons)
1-57
1
Various Sending Methods
NOTE
2
Select the desired one-touch button.
Various Sending Methods
1
If you want to enter values using
(numeric keys), press
enter the 3-digit number for the one-touch button.
(One-touch Button codes) and
The specified destination appears in the address list in the Send screen.
NOTE
• You can erase the addresses in the specified address list before scanning.
(See “Erasing a Specified Destination (Erase),” on p. 1-75.)
• You can select multiple one-touch buttons.
• You can cancel the specified one-touch button, by pressing the button again.
1-58
Specifying a Destination Using One-Touch Buttons (One-Touch Buttons)
Configuring the Favorites Buttons
(Favorites Buttons)
You can recall the destinations stored in the Favorites Buttons and other settings. This is
convenient when sending documents of a fixed format to the same address frequently.
• A maximum of 256 destinations can be specified at the same time. (Out of the 256 destinations, 16 new
addresses, including those obtained via a server, can be specified.) If you specify a group address, which is made
up of several destinations, the whole group is counted as one address.
• A maximum number of 512 destinations can be specified for fax jobs (including reserved fax jobs).
• You need to register addresses with the Favorites Buttons before using this function.
(See “Registering a Favorites Button,” on p. 3-12.)
1
Press [Favorites Buttons].
Configuring the Favorites Buttons (Favorites Buttons)
1-59
Various Sending Methods
1
NOTE
2
Select the desired Favorites Button.
Various Sending Methods
1
To display enlarged Favorites Buttons, press
.
The specified destination appears in the address list in the Send screen, and the registered settings
are recalled.
NOTE
• You can erase the addresses in the address list before scanning.
(See “Erasing a Specified Destination (Erase),” on p. 1-75.)
• The setting of the favorites button that you have recalled can be changed manually before sending.
• If you press another favorites button, the setting registered in that button is recalled.
• To cancel all settings at once, press
. (The machine returns to the Standard Scanning mode.)
• If there are multiple destinations stored in the favorites button, the order of the destinations shown in the list may
not correspond to the order of making their settings.
1-60
Configuring the Favorites Buttons (Favorites Buttons)
Searching a Destination via a Server
(Search on Server)
You can specify a destination by searching the directory listings on the network using LDAP
(Lightweight Directory Access Protocol) servers. LDAP servers are for looking up a particular
piece of information, such as a user name, e-mail address, or other contact information.
NOTE
• You may have to set up the LDAP servers beforehand, depending on the network environment.
• For details on server settings, see Chapter 4, “System Manager Settings,” in the Reference Guide.
• You can send to a maximum of 16 destinations at the same time, including destinations that are specified through
a server.
• Only names, e-mail addresses, and fax numbers are displayed as the search results from the LDAP server.
• You cannot directly specify a destination that is obtained through a server as a forwarding destination.
To specify the destination as a forwarding destination, you must first store it in the Address Book.
(See “Storing Addresses Searched via a Server,” on p. 4-43.)
1
Press [Address Book/Server].
Searching a Destination via a Server (Search on Server)
1-61
Various Sending Methods
1
2
Press the Address Book/Server drop-down list, and press [Search on Server].
3
Press the Server to Search drop-down list, and select the desired server to search.
4
Specify the search criteria.
Various Sending Methods
1
NOTE
• For instructions on how to enter characters on the touch panel display, see Chapter 1, “Before You Start Using
This Machine,” in the Reference Guide.
• If you want to search for a destination that is registered with an e-mail address and a fax number, you can search
for the e-mail address by entering the fax number as the search criterion.
1-62
Searching a Destination via a Server (Search on Server)
●
To use Simple Search:
Press [Name], [E-mail], or [Fax] ➔ enter the name, e-mail address, or fax number for which to search
➔ press [OK].
Various Sending Methods
1
You can enter up to 128 characters for the name, e-mail address, or fax number.
You can also use
-
(numeric keys) to enter numbers, and
to clear your entry.
The search criteria boxes that you do not fill out are not searched.
If you press [Start Searching] without specifying any search criteria, all the addresses stored on the
LDAP server are displayed.
To make a more detailed search with multiple criteria, press [Detailed Search], and follow the
directions below. The search criteria you entered for Simple Search are continuously used in Detailed
Search.
●
To use Detailed Search:
Press [Detailed Search].
Searching a Destination via a Server (Search on Server)
1-63
Press the search category drop-down list ➔ select the desired search category.
Search Category
Various Sending Methods
1
The available search categories are:
[Name]:
Search by name.
[E-mail]:
Search by e-mail address.
[Fax]:
Search by fax number.
[Organization]:
Search by organisation name.
[OrgnztionUnit]:
Search by organisational unit (e.g., departments in an organisation).
Example: If cn=user1, ou=salesdept, o=canon, c=jp is the distinguished name in the Directory, enter
the organisation/organizationUnit of the user as follows:
organizationUnit=salesdept
organisation=canon
NOTE
• The organisation/organizationUnit can be used as search categories only if the information has been registered on
the LDAP Server.
• Detailed Search by organisation/organizationUnit may not be performed depending on whether the attribute types
have been registered on the LDAP server, and the type of application on the server, such as Windows 2000
Server with Active Directory.
1-64
Searching a Destination via a Server (Search on Server)
Press the search condition drop-down list ➔ select the desired search condition ➔ press [Settings].
Search Condition
Various Sending Methods
1
The available search conditions are:
[contains]:
The result must contain the entered name, e-mail address, fax number,
organisation, or organisational unit.
[does not contain]: The result must not contain the entered name, e-mail address, fax number,
organisation, or organisational unit.
[equals]:
The result must be exactly the same as the entered name, e-mail address, fax
number, organisation, or organisational unit.
[differs from]:
The result must be different from the name, e-mail address, fax number,
organisation, or organisational unit that you entered.
[begins with]:
The result must begin with the same first few letters that you entered for the
name, e-mail address, fax number, organisation, or organisational unit.
[ends with]:
The result must end with the same last few letters that you entered for the name,
e-mail address, fax number, organisation, or organisational unit.
Searching a Destination via a Server (Search on Server)
1-65
Enter the search criteria ➔ press [OK].
Various Sending Methods
1
You can enter up to 128 characters for the search criteria.
You can also use
-
(numeric keys) to enter numbers, and
to clear your entry.
Press [Add].
To continue adding more search criteria, press [or] or [and] ➔ repeat step 4.
[or]:
The machine searches and returns a result for either of the specified search criteria.
[and]:
The machine searches and returns a result for all of the specified search criteria.
To edit the search criteria, select the criterion that you want to edit ➔ press [Edit] ➔ [Settings].
To delete search criteria, select the criterion that you want to erase ➔ press [Erase].
1-66
Searching a Destination via a Server (Search on Server)
NOTE
• You can specify up to four different search criteria at a time.
• If you specify three or more search criteria, you cannot use both [or] and [and] together.
• If you press [Simple Search] after specifying search criteria on the Detailed Search screen, the display changes to
the Simple Search screen, and the specified detailed search criteria are deleted.
Press [Start Searching].
1
Various Sending Methods
5
To cancel searching, press [Cancel].
To cancel searching while the machine is searching for your criteria, press [Cancel]. If the machine
finds some results before you press [Cancel], these search results are displayed.
The search results are displayed.
IMPORTANT
• The number of search results displayed will not exceed the maximum limit set in Register LDAP Server in System
Settings (from the Additional Functions screen). If the desired destination is not displayed, either increase the
maximum number of addresses to search or change the search criteria. (See Chapter 4, “System Manager
Settings,” in the Reference Guide.)
NOTE
• If you press [Start Searching] without specifying any search criteria, all the addresses stored on the LDAP server
are displayed.
Searching a Destination via a Server (Search on Server)
1-67
●
If the screen below is displayed:
Press [User] ➔ enter the user name ➔ press [OK].
Various Sending Methods
1
You can enter up to 128 characters for the user name.
The Enter Network Password screen is displayed if either one of the following is true:
- If Login Information in Register LDAP Server in System Settings (from the Additional Functions
screen) is set to ‘Use’, and <Display authentication dialogue when searching> is set to ‘On’.
- If the user name, password, and domain name specified in Register LDAP Server in System Settings
(from the Additional Functions screen) are incorrect.
Press [Password] ➔ enter the password ➔ press [OK].
You can enter up to 24 characters for the password.
NOTE
• For instructions on how to enter characters on the touch panel display, see Chapter 1, “Before You Start Using
This Machine,” in the Reference Guide.
• You can also use
(numeric keys) to enter numbers, and
to clear your entry.
• After pressing [OK], the password that you entered appears as asterisks (*****) on the Enter Network Password
screen.
1-68
Searching a Destination via a Server (Search on Server)
Verify the settings ➔ press [OK].
Various Sending Methods
1
The search results are displayed.
6
Select the desired destination from the search results, and press [OK].
To continue searching, press [Back].
You can specify multiple destinations.
If the desired destination is not displayed, press [▼] or [▲] to scroll to the desired destination.
If [Select e-mail for I-Fax] is lit, the setting is turned on, and the selected e-mail address can be
specified as an I-fax destination.
Searching a Destination via a Server (Search on Server)
1-69
By using the Address Type drop-down list, you can restrict the type of addresses displayed in the list.
Various Sending Methods
1
NOTE
• To cancel a selected destination, select the destination again to clear the check mark.
• If you specify an e-mail address as an I-fax destination, the only information that can be retrieved from the server
is the I-fax address. To specify settings to match the recipient’s receiving conditions, press [Details] on the Send
Basic Features screen.
• If you select only one destination, press
to send from the Search Results screen.
7
Read the displayed message ➔ press [OK].
If you select [E-mail], this screen is not displayed.
The selected destinations appear in the destination list on the Send Basic Features screen.
1-70
Searching a Destination via a Server (Search on Server)
NOTE
• To view the detailed information of a selected destination, select the destination ➔ press [Details].
• You can edit a destination from the Details screen before you scan your documents. (See “Checking and
Changing a Destination’s Detailed Information (Details),” on p. 1-72.)
• You can erase the specified destinations from the destination list before you scan your documents.
(See “Erasing a Specified Destination (Erase),” on p. 1-75.)
Various Sending Methods
1
Searching a Destination via a Server (Search on Server)
1-71
Checking and Changing a Destination’s
Detailed Information (Details)
You can check and change the specified destination information before scanning.
1
NOTE
Various Sending Methods
• Only the addresses specified using the New Address can be changed.
• To change the specified address after scanning, see Chapter 2, “Checking Various Job Operations and Device
Status,” in the Reference Guide.
• You cannot change multiple destinations simultaneously.
1
Select the destination, and press [Details].
If the destination to be changed is not displayed in the address list, press [▼] or [▲].
1-72
Checking and Changing a Destination’s Detailed Information (Details)
2
Check and change as necessary the destination’s information.
●
When the following screen is displayed:
Check the destination’s information, and press [Done].
●
Various Sending Methods
1
When the destination is specified using the New Address:
Check or change the destination’s information, and press [OK].
To change the address, perform the same procedure by which you entered the information.
(See “Specifying a Destination not Registered in the Address Book (New Address),” on p. 1-36.)
Checking and Changing a Destination’s Detailed Information (Details)
1-73
●
If the destination is obtained via a server:
Check or change the destination’s information ➔ press [OK].
Various Sending Methods
1
To change the address, perform the same procedure that you used to specify a new address.
(See “Specifying a Destination not Registered in the Address Book (New Address),” on p. 1-36.)
●
For a Group:
To check the information of destinations registered in the group address, select a destination and press
[Details]. After checking the information, press [Done] ➔ [Done] in this order.
1-74
Checking and Changing a Destination’s Detailed Information (Details)
Erasing a Specified Destination (Erase)
You can erase the specified destination before scanning.
1
Select the destination to be erased.
Various Sending Methods
1
When the desired destination is not displayed in the address list, press [▼] or [▲].
2
Press [Erase].
The selected destination is erased from the address list.
Erasing a Specified Destination (Erase)
1-75
Selecting a Scanning Mode
You can set how a document is to be scanned. The machine has four preset scan modes
(Black 200dpi, Black 300dpi, Black 600dpi, Black 400dpi).
1
Various Sending Methods
Select the desired mode from the preset scanning modes or user-defined scanning modes
according to the type of the original you are sending.
NOTE
• If you want to use less memory and make the sending time shorter, use a low resolution mode.
• You can adjust the preset scan modes and create new scan settings. However, since new
settings can be used only once, it is useful to register the new scan setting if you use it frequently.
(See “Storing/Erasing Scanning Mode,” on p. 1-124.)
• The default setting is ‘Black 200dpi.’ You can change the initial setting in the Communications Settings of the
Additional Functions. (See “Setting the Standard Send Settings (Edit Standard Send Settings),” on p. 3-9.)
• You can change currently registered settings and register the new ones.
• In addition to the scanning mode, you can register addresses and send settings in the Favorite Buttons.
(See “Registering a Favorites Button,” on p. 3-12.)
1
1-76
Place your originals, and select the destination.
Selecting a Scanning Mode
Press the Scan Settings drop-down list and select a scanning mode.
1
If more than four scanning modes are listed, you can use [▼] and [▲] to scroll the list.
After pressing [Option], you can also select a scanning mode in the Scan Settings screen. Select the
Scanning Mode, and press [OK]. In this case, the setting you select is only effective once.
NOTE
• Specifying the scanning mode again cancels the scanning mode and other scanning features previously set.
Selecting a Scanning Mode
1-77
Various Sending Methods
2
3
Press
.
The machine starts scanning.
When the original is placed on the platen glass, follow the instructions that appear on the touch panel
display. Press
one time for each original. When scanning is complete, press [Done].
When scanning is complete, the document is sent to the specified destination.
NOTE
• To change the settings of the scanning mode, select [Option]. (See “Selecting a Scanning Mode,” on p. 1-76.)
• You can register the changed settings. (See “Storing/Erasing Scanning Mode,” on p. 1-124.)
• If the Preview key is lit, the Preview display setting is turned on, and you can verify the images from the Preview
screen before sending your documents. (See “Previewing Originals (Preview),” on p. 1-168.)
• To cancel all settings at once, press
. (The machine returns to the Standard Scanning mode.)
Various Sending Methods
1
1-78
Selecting a Scanning Mode
Changing the Scan Settings
NOTE
• Changed scan settings are not saved. For how to save the changed settings, see “Storing/Erasing Scanning
Mode,” on p. 1-124.
Scanning Two-Sided Originals (Two-Sided Original)
This feature automatically turns over two-sided originals placed in the feeder after scanning one
side to scan both sides.
IMPORTANT
• When the machine is operating in the Two-sided Original mode, you cannot use the Document Size Select
(Other Size, Long Strip Original) and Two-page Separation mode.
NOTE
• Place the original horizontally when scanning originals with sizes such as A4R and A5R. If these originals are
placed vertically, both sides of the original will be sent upside down.
1
Place your original in the feeder and specify the destination, and press
[Two-sided Original].
Changing the Scan Settings
1-79
1
Various Sending Methods
To match the original you are sending, set the document size, resolution, exposure and original
type. You can also enter detailed settings to send a document consisting of facing pages as
pairs of separate pages.
2
Select the type of the original, and press [OK].
Various Sending Methods
1
The specified mode is set, and the display returns to the Send screen.
3
Press
.
The machine starts scanning.
When the original is placed on the platen glass, follow the instructions that appear on the touch panel
display. Press
one time for each original. When scanning is complete, press [Done].
When scanning is complete, the document is sent to the specified destination.
NOTE
• To cancel the setting, press [Two-sided Original] ➔ [Cancel] in this order.
• If Preview is set to ‘On’, you can preview the images of documents before sending. (See “Previewing Originals
(Preview),” on p. 1-168.)
• To cancel all settings at once, press
. (The machine returns to the Standard Scanning mode.)
1-80
Changing the Scan Settings
Specifying the Document Size (Document Size Select)
Use this function to specify the document size when scanning transparencies, etc.
You can also store the specified document size.
IMPORTANT
NOTE
• The default setting is ‘Auto.’
Specifying the Document Size
1
Place your original and specify the destination. Press the Scan Settings drop-down
list, and select [Option].
Changing the Scan Settings
1-81
1
Various Sending Methods
• You cannot select [Auto] when scanning the following types of originals. Specify the size of the document
manually.
- Non-standard size originals
- Highly transparent originals such as transparencies
- Originals with an extremely dark background
- Originals smaller than A5 in size
• When using Direct Sending for sending a fax, if you place the originals in the feeder, the Document Size Select
setting you specified becomes invalid.
• If the original is placed in the feeder, you cannot scan by selecting [Other Size] in Document Size select.
• If you select [Long Strip Original], place your originals in the feeder. You cannot set the size of originals placed on
the platen glass.
• If you select other than [Auto] and [Long Strip Original], you cannot select [Stamp].
2
Press [Document Size Select].
3
Select the document size.
Various Sending Methods
1
●
If you want to scan a standard document size:
Select the desired document size.
NOTE
• To select an inch series paper size, press [inch-size].
• If you want to scan originals longer than ‘432 mm’, press [Long Strip Original]. The maximum length of originals
that you can scan is ‘630 mm’.
1-82
Changing the Scan Settings
If you want to scan a nonstandard document size:
Press [Other Size].
1
Various Sending Methods
●
Press [X] (width) ➔ enter a value.
Press [Y] (length) ➔ enter a value.
Press [OK].
Scanning
area
You can also enter values using 0-9 (numeric keys), and
.
To delete a mistake, press [C] enter the correct value.
Changing the Scan Settings
1-83
NOTE
• If you want to enter values in inches, press [Inch]. Set the inch entry function to ‘On’ in the Additional Functions
beforehand. (See Chapter 3, “Selecting and storing Settings to Suit Your Needs,” in the Reference Guide.)
• For details on how to enter the values in inches, see Chapter 1, “Before You Start Using This Machine,” in the
Reference Guide.
●
If you want to scan a registered document size:
Press [Other Size].
Various Sending Methods
1
Press [Registered Size 1] or [Registered Size 2] press [OK].
NOTE
• To select a registered size, you need to register the document size beforehand.
(See “Specifying the Document Size (Document Size Select),” on p. 1-81.)
• The registered document size is displayed on top of the key in which it is registered.
1-84
Changing the Scan Settings
4
Press [Done] and press [OK].
Various Sending Methods
1
The selected size is set, and the display returns to the Send Basic Features screen.
5
Press
.
The machine starts scanning.
When the original is placed on the platen glass, follow the instructions that appear on the touch panel
display. Press
one time for each original. When scanning is complete, press [Done].
When scanning is complete, the document is sent to the specified destination.
NOTE
• To cancel the scan setting, press [Cancel].
• If Preview is set to ‘On’, you can preview the images of documents before sending.
(See “Previewing Originals (Preview),” on p. 1-168.)
• To cancel all settings at once, press
. (The machine returns to the Standard Scanning mode.)
Changing the Scan Settings
1-85
Registering the Specified Document Size
1
Press the Scan Settings drop-down list, and press [Option].
2
Press [Document Size Select].
Various Sending Methods
1
1-86
Changing the Scan Settings
3
Press [Other Size].
4
Various Sending Methods
1
Press [Store Size].
Changing the Scan Settings
1-87
5
Press [Registered Size 1] or [Registered Size 2], and enter the document size using
the numeric keys on the touch panel display.
Press [X] (width) ➔ enter a value.
Press [Y] (length) ➔ enter a value.
Press [OK].
Various Sending Methods
1
You can also enter values using 0-9 (numeric keys), and
.
To delete a mistake, press [C] enter the correct value.
If you enter a value outside the setting range, a message prompting you to enter an appropriate value
appears on the screen.
The selected size is set, and the display returns to the Other Size screen.
The registered document size is displayed on top of the key in which it is registered.
NOTE
• If you register a new document size into a key that has already been registered with a document size, the new
document size overwrites the registered document size.
• If you want to enter values in inches, press [Inch]. Set the inch entry function to ‘On’ in the Additional Functions
beforehand. (See Chapter 3, “Selecting and storing Settings to Suit Your Needs,” in the Reference Guide.)
• For details on how to enter the values in inches, see Chapter 1, “Before You Start Using This Machine,” in the
Reference Guide.
6
Press [Cancel], and press [Done] ➔ [Cancel].
The display returns to the Send Basic Features screen.
1-88
Changing the Scan Settings
NOTE
Pressing [Cancel] ➔ [Done] ➔ [Cancel] only stores the new document sizes in the selected key ([Registered Size 1]
or [Registered Size 2]), but does not activate them. If you press [OK] ➔ [Done] ➔ [OK], the new document sizes are
stored in the selected key ([Registered Size 1] or [Registered Size 2]), and activated at the same time.
Changing the Resolution
Before scanning, you can specify the resolution of the document to be sent.
IMPORTANT
• The maximum pixels of an image you can send set with a 600 x 600 dpi resolution, is up to A3. If the image
exceeds this number of pixels in either the horizontal or vertical direction, it may be cropped.
• To send jobs by fax, the resolution of 200 x 100 dpi, 200 x 200 dpi, 200 x 400 dpi, or 400 x 400 dpi is
recommended. If you select a resolution other than these, it may cause deterioration of image quality when you
send the documents.
NOTE
• The default setting for the resolution is ‘200 x 200dpi (Fine).’
1
Place your original and specify the destination. Press the Scan Settings drop-down
list, and select [Option].
Changing the Scan Settings
1-89
Various Sending Methods
1
2
Press the Resolution drop-down list and select a resolution, and press [OK].
Various Sending Methods
1
The specified mode is set, and the display returns to the Send screen.
3
Press
.
The machine starts scanning.
When the original is placed on the platen glass, follow the instructions that appear on the touch panel
display. Press
one time for each original. When scanning is complete, press [Done].
When scanning is complete, the document is sent to the specified destination.
NOTE
• To cancel the scan setting, press [Cancel].
• If Preview is set to ‘On’, you can preview the images of documents before sending.
(See “Previewing Originals (Preview),” on p. 1-168.)
• To cancel all settings at once, press
. (The machine returns to the Standard Scanning mode.)
1-90
Changing the Scan Settings
Adjusting the Exposure and Image Quality Before
Scanning the Originals (Scanning Exposure)
You can adjust the exposure and image quality before scanning the original.
Manual Adjustment of the Scanning Exposure
1
1
Place your original and specify the destination. Press the Scan Settings drop-down
list, and select [Option].
Changing the Scan Settings
1-91
Various Sending Methods
Use this procedure to adjust the scanning exposure to the most appropriate level for the original.
2
Press [ ] or [ ] to adjust the scanning exposure, and press [OK].
Various Sending Methods
1
Press [ ] and [ ] to move the indicator to the left to make the exposure lighter, or to the right to make
the exposure darker.
The specified mode is set, and the display returns to the Send screen.
3
Press
.
The machine starts scanning.
When the original is placed on the platen glass, follow the instructions that appear on the touch panel
display. Press
one time for each original. When scanning is complete, press [Done].
When scanning is complete, the document is sent to the specified destination.
NOTE
• To cancel the scan setting, press [Cancel].
• If Preview is set to ‘On’, you can preview the images of documents before sending.
(See “Previewing Originals (Preview),” on p. 1-168.)
• To cancel all settings at once, press
. (The machine returns to the Standard Scanning mode.)
1-92
Changing the Scan Settings
Selecting Image Quality
You can manually adjust image quality to the level best suited for the quality of text or photo
originals. The following three modes are available for adjusting image quality.
IMPORTANT
• You can select only one of these modes. You cannot use a combination of these modes at one time.
• If you scan an original containing half-tones, such as a printed photograph using the Photo mode,
moiré may occur. If this happens, you can soften this moiré effect by using the Sharpness mode.
(See “Scanning Originals After Making Them Sharply Contrasted (Sharpness),” on p. 1-121.)
NOTE
• When you select the Text, Text/Photo or Photo mode, the scanning exposure can be adjusted only by Manual
Exposure Control. Automatic Exposure Control cannot be set.
• When the Photo mode in Communications Settings is set to ‘On,’ you can select [Printed Image] and [Photo] after
pressing the drop-down list. (See “Setting the Photo Mode (Photo Mode),” on p. 3-7.)
• If the original is a transparency, select the Text, Text/Photo or Photo mode, and adjust the exposure to the most
appropriate level.
■ Text Mode
This mode is best suited for sending text originals. Blueprints or penciled originals can be sent clearly.
■ Text/Photo Mode
This mode is best suited for sending originals containing both text and photos.
■ Photo Mode
This mode is best suited for sending photos printed on photographic paper, or photo originals containing
half-tones (i.e., printed photos).
Changing the Scan Settings
1-93
Various Sending Methods
1
1
Place your original and specify the destination. Press the Scan Settings
drop-down list, and select [Option].
Various Sending Methods
1
2
1-94
Press the text drop-down list and select the type of originals ([Text], [Text/Photo],
or [Photo]).
Changing the Scan Settings
NOTE
• When the Photo mode in Communications Settings is set to ‘On,’ you can select [Printed Image] and [Photo].
(See “Setting the Photo Mode (Photo Mode),” on p. 3-7.)
3
Various Sending Methods
1
Press [ ] or [ ] to adjust the scanning exposure, and press [OK].
Press [ ] and [ ] to move the indicator to the left to make the exposure lighter, or to the right to make
the exposure darker.
The specified mode is set, and the display returns to the Send screen.
Changing the Scan Settings
1-95
4
Press
.
The machine starts scanning.
When the original is placed on the platen glass, follow the instructions that appear on the touch panel
display. Press
one time for each original. When scanning is complete, press [Done].
When scanning is complete, the document is sent to the specified destination.
NOTE
• To cancel the scanning exposure adjustment, press [A] (Automatic) located between [ ] and [ ].
• To cancel the scan setting, press [Cancel].
• If Preview is set to ‘On’, you can preview the images of documents before sending.
(See “Previewing Originals (Preview),” on p. 1-168.)
• To cancel all settings at once, press
. (The machine returns to the Standard Scanning mode.)
Various Sending Methods
1
Automatic Adjustment of Exposure and Image Quality
1
1-96
Place your original and specify the destination. Press the Scan Settings drop-down
list, and select [Option].
Changing the Scan Settings
2
Select [A], and press [OK].
The scanning exposure is automatically adjusted to the level best suited to the quality of the original.
The specified mode is set, and the display returns to the Send screen.
3
Press
.
The machine starts scanning.
When the original is placed on the platen glass, follow the instructions that appear on the touch panel
display. Press
one time for each original. When scanning is complete, press [Done].
When scanning is complete, the document is sent to the specified destination.
NOTE
• If the original is a transparency, you may not be able to use Automatic Exposure Control. If so, adjust the scanning
exposure using Manual Exposure Control.
• To cancel the scan setting, press [Cancel].
• If Preview is set to ‘On’, you can preview the images of documents before sending.
(See “Previewing Originals (Preview),” on p. 1-168.)
• To cancel all settings at once, press
. (The machine returns to the Standard Scanning mode.)
Changing the Scan Settings
1-97
Various Sending Methods
1
Changing the Scanning Ratio (Copy Ratio)
You can scan originals by specifying the scanning ratio manually or automatically.
IMPORTANT
• The maximum pixels of an image you can send set with a 600 x 600 dpi resolution, is up to A3. If the image
exceeds this number of pixels in either the horizontal or vertical direction, it may be cropped.
1
Various Sending Methods
Scanning Originals After Enlarging/Reducing Them to a
Standard Record Size (Preset Zoom)
You can scan the originals after enlarging/reducing them to a standard record size.
■ Reduce
The preset scanning ratio when reducing scanned documents are as follows:
• A3 ➔ A4 (70%)
• A3 ➔ A5 (50%)
■ Enlarge
The preset scanning ratio when enlarging scanned documents are as follows:
• A5 ➔ A3 (200%)
• A4 ➔ A3 (141%)
1
1-98
Place your original and specify the destination, and press the Scan Settings
drop-down list, and select [Option].
Changing the Scan Settings
2
Press [Copy Ratio].
3
Various Sending Methods
1
To reduce, select a preset reduction ratio. To enlarge, select a preset enlargement
ratio. Then, press [Done] ➔ [OK] in this order.
The display returns to the Send screen and the copy ratio appears.
Changing the Scan Settings
1-99
4
Press
.
The machine starts scanning.
When the original is placed on the platen glass, follow the instructions that appear on the touch panel
display. Press
one time for each original. When scanning is complete, press [Done].
When scanning is complete, the document is sent to the specified destination.
NOTE
• To return the ratio to 100%, press [1:1].
• To cancel the scan setting, press [Cancel].
• If Preview is set to ‘On’, you can preview the images of documents before sending.
(See “Previewing Originals (Preview),” on p. 1-168.)
• To cancel all settings at once, press
. (The machine returns to the Standard Scanning mode.)
Various Sending Methods
1
Specifying the Scanning Ratio by Percentage
(Zoom Designation)
You can reduce or enlarge images by any scanning ratio, in 1% increments. The available scanning
ratios are from 50% to 200%.
1
1-100
Place your original and specify the destination. Press the Scan Settings drop-down
list, and select [Option].
Changing the Scan Settings
2
Press [Copy Ratio].
3
Various Sending Methods
1
Set a ratio by pressing [–] or [+], and press [Done] ➔ [OK].
You can also enter values using
If you enter values using
[–] or [+].
-
-
(numeric keys).
(numeric keys), you can change the entered values by pressing
The display returns to the Send screen and the copy ratio appears.
If you enter a value outside the setting range, a message prompting you to enter the appropriate
value appears on the screen.
NOTE
• If you make a mistake when entering values, press
, and enter the correct value.
Changing the Scan Settings
1-101
4
Press
.
The machine starts scanning.
When the original is placed on the platen glass, follow the instructions that appear on the touch panel
display. Press
one time for each original. When scanning is complete, press [Done].
When scanning is complete, the document is sent to the specified destination.
NOTE
• To return the copy ratio to 100%, press [1:1].
• To cancel the scan setting, press [Cancel].
• If Preview is set to ‘On’, you can preview the images of documents before sending.
(See “Previewing Originals (Preview),” on p. 1-168.)
• To cancel all settings at once, press
. (The machine returns to the Standard Scanning mode.)
Various Sending Methods
1
Scanning Facing Pages in a Book onto Two Separate
Sheets in One Step (Two-Page Separation)
This feature enables you to scan facing pages in a book or a magazine onto separate sheets of
paper.
IMPORTANT
• When the machine is operating in the Two-Page Separation mode, you cannot use the Document Size Select
(Other Size, Long Strip Original), Two-Sided Original, Different Size Originals, and Binding Erase modes.
• When the machine is operating in the Two-Page Separation mode, you cannot use Direct Sending for Fax.
• Place the originals onto the platen glass. The Two-Page Separation mode cannot be used when the original is
placed in the feeder.
1-102
Changing the Scan Settings
1
Place your original on the platen glass and specify the destination. Press the Scan
Settings drop-down list, and select [Option].
2
Various Sending Methods
1
Press [Special Features], and press [Two-page Separation].
To scan in page order, begin scanning from the first page to the last.
Place the original face down with the original’s top edge aligned with the back edge of the platen
glass.
3
Press [Done], and press [OK].
The specified mode is set, and the display returns to the Send screen.
Changing the Scan Settings
1-103
4
Press
.
The machine starts scanning.
When the original is placed on the platen glass, follow the instructions that appear on the touch panel
display. Press
one time for each original. When scanning is complete, press [Done].
When scanning is complete, the document is sent to the specified destination.
NOTE
• To cancel the setting, press [Special Features] ➔ [Two-page Separation].
• To cancel the scan setting, press [Cancel].
• If Preview is set to ‘On’, you can preview the images of documents before sending.
(See “Previewing Originals (Preview),” on p. 1-168.)
• To cancel all settings at once, press
. (The machine returns to the Standard Scanning mode.)
Various Sending Methods
1
Scanning Different-Sized Originals Together in the Feeder
(Different Size Originals)
This function enables you to scan different-sized originals with the same width, such as A3 and
A4, together in one group by setting them in the feeder.
IMPORTANT
• When the machine is operating in the Different Size Originals mode, you cannot use the Manual Document Size
Select, Document Size Select (Other Size, Long Strip Original), Stamping Original, Two-Page Separation, Original
Frame Erase, and Book Frame Erase modes.
• When the machine is operating in the Different Size Originals mode, you cannot use Direct Sending for Fax.
• All originals placed together in the feeder must be the same weight (paper type).
• However the length (vertical direction) of the different paper sizes must be the same. For example, A4 and A3, or
A5 and A4R paper sizes can be scanned together.
1-104
Changing the Scan Settings
1
Place your original in the feeder and specify the destination. Press the Scan
Settings drop-down list, and select [Option].
2
Various Sending Methods
1
Press [Special Features].
Changing the Scan Settings
1-105
3
Press [Different Size Originals], and press [Done] ➔ [OK] in this order.
Various Sending Methods
1
The specified mode is set, and the display returns to the Send screen.
4
Press
.
The machine starts scanning.
When the original is placed on the platen glass, follow the instructions that appear on the touch panel
display. Press
one time for each original. When scanning is complete, press [Done].
When scanning is complete, the document is sent to the specified destination.
NOTE
• To cancel this setting, press [Special Features] ➔ [Different Size Originals] ➔ [Cancel] in this order.
• To cancel the scan setting, press [Cancel].
• If Preview is set to ‘On’, you can preview the images of documents before sending.
(See “Previewing Originals (Preview),” on p. 1-168.)
• To cancel all settings at once, press
. (The machine returns to the Standard Scanning mode.)
1-106
Changing the Scan Settings
Scanning Originals Separately Set as One Document
(Job Build)
This mode enables you to scan originals that have too many pages to set at once, by dividing
them into multiple batches. You can use both the feeder and the platen glass for scanning. The
originals are stored as one document, after all the batches have been scanned.
• When the machine is operating in the Job Build mode, you cannot use the Document Size Select
(Other Size, Long Strip Original) mode.
• When the machine is operating in the Job Build mode, you cannot use Direct Sending for Fax.
• You cannot change Scanning Mode settings while scanning originals in the Job Build mode, except for the
Document Size Select (Auto), Manual Document Size Select, Type of Original, or Scanning Exposure. You must
make the necessary settings beforehand, according to the type of original and desired scanning mode.
• If you place the originals in the feeder, remove each original from the original output area when scanning is
complete.
• The maximum number of pages that can be sent at one time is 500.
NOTE
• If you place different-sized originals in the feeder, set the Different Size Originals mode.
• To scan one-sided and two-sided originals as two-sided, set the Two-Sided Original mode before scanning if the
first sheet is two-sided. To scan the next batch of originals, set or cancel the Two-Sided Original mode according
to the type of original.
1
Place your original and specify the destination. Press the Scan Settings drop-down
list, and select [Option].
Changing the Scan Settings
1-107
Various Sending Methods
1
IMPORTANT
2
Press [Special Features] and [Job Build], and press [Done] ➔ [OK] in this order.
Various Sending Methods
1
The specified mode is set, and the display returns to the Send screen.
3
Press
.
The machine starts scanning.
NOTE
•
•
•
•
1-108
To cancel scanning, press [Cancel] or
.
To cancel this setting, press [Special Features] ➔ [Job Build] in this order.
To cancel the scan setting, press [Cancel].
To cancel all settings at once, press
. (The machine returns to the Standard Scanning mode.)
Changing the Scan Settings
When scanning is complete, place the next original, and press
If you want to change the scan settings, make the changes before pressing
.
.
1
• You can select Document Size. (See “Specifying the Document Size (Document Size Select),”
on p. 1-81.)
• You can adjust Exposure and Image Quality. (See “Adjusting the Exposure and Image Quality
Before Scanning the Originals (Scanning Exposure),” on p. 1-91.)
• You can change the setting of the original type (One-sided/Two-sided). (See “Scanning Two-Sided
Originals (Two-Sided Original),” on p. 1-79.)
If you are scanning both sides of the original, press [2-Sided Original].
Changing the Scan Settings
1-109
Various Sending Methods
4
Select the type of 2-sided original, and press [OK].
Various Sending Methods
1
• Do not forget to set or cancel the 2-Sided Original mode according to the type of original you
place next.
Repeat this procedure as often as necessary.
5
After the last original is scanned, press [Done].
The document is sent to the specified destination.
NOTE
• If Preview is set to ‘On’, you can preview the images of documents before sending.
(See “Previewing Originals (Preview),” on p. 1-168.)
1-110
Changing the Scan Settings
Erasing Shadows and Frame Lines (Frame Erase)
This mode erases shadows and lines that appear when scanning some types of originals.
The following three Frame Erase features are available.
IMPORTANT
• A combination of the following three modes cannot be set. If you select one of these modes, the previously set
mode is cancelled.
• When the machine is operating in the Frame Erase mode, you cannot use Direct Sending for Fax.
1
Various Sending Methods
■ Original Frame Erase
Erases the dark borders and frame lines that appear around the scanned image when the original is
smaller than the selected document size.
IMPORTANT
• When the machine is operating in the Original Frame Erase mode, you cannot use the Document Size Select
(Auto, Other Size, Long Strip Original), Different Size Originals, and Stamping Original modes.
■ Book Frame Erase
Erases the dark borders, as well as, the centre and frame lines that appear when scanning the facing
pages in a book.
IMPORTANT
• When the machine is operating in the Book Frame Erase mode, you cannot use the Document Size Select
(Auto, Other Size, Long Strip Original), Different Size Originals, and Stamping Original modes.
■ Binding Erase
Erases the shadows that appear on a scanned image from binding holes on the original.
IMPORTANT
• When the machine is operating in the Binding Erase mode, you cannot use the Document Size Select
(Other Size, Long Strip Original) and Two-page Separation mode.
• Do not place originals with binding holes into the feeder, as this may damage the originals.
Changing the Scan Settings
1-111
Erasing Frame Lines and Scanning the Original
(Original Frame Erase)
1
Place your original and specify the destination. Press the Scan Settings drop-down
list, and select [Option].
Various Sending Methods
1
2
1-112
Press [Special Features], and press [Frame Erase].
Changing the Scan Settings
Press [Original Frame Erase] to set the frame width area to erase by pressing
[–] or [+], and press [Next].
1
When entering values in millimetres, you can use
If you enter values with
pressing [–] or [+].
-
-
(numeric keys) and
Various Sending Methods
3
.
(numeric keys), you can change the entered values by
The frame area is erased evenly (based on the value you set) around each edge of the original.
To set different frame erase width values for the top, left, right and bottom sides of the original
independently, press [Adjust Each Dim.].
When you press [Adjust Each Dim.], select the frame erase values by pressing [–] or [+], and
press [Next].
When entering values in millimetres, you can use
If you enter values with
pressing [–] or [+].
-
-
(numeric keys) and
.
(numeric keys), you can change the entered values by
The screen for the next step is displayed.
If you enter values outside the setting range, a message appears on the screen prompting you to
enter an appropriate value.
Changing the Scan Settings
1-113
NOTE
• If you want to enter values in inches, press [Inch]. Set the inch entry function to [On] in the Additional Functions
beforehand. (See Chapter 3, “Selecting and Storing Settings to Suit Your Needs,” in the Reference Guide.)
• The default setting is ‘4 mm’ for each side. The maximum Frame Erase value is ‘50 mm.’
4
Select the original size, and press [OK].
Various Sending Methods
1
IMPORTANT
• You can set the Original Frame Erase mode only for the original paper sizes shown on the touch panel display.
NOTE
• To select an inch series paper size, press [Inch-size].
5
Press [Done], and press [OK].
The specified mode is set, and the display returns to the Send screen.
1-114
Changing the Scan Settings
6
Press
.
The machine starts scanning.
When the original is placed on the platen glass, follow the instructions that appear on the touch panel
display. Press
one time for each original. When scanning is complete, press [Done].
When scanning is complete, the document is sent to the specified destination.
NOTE
• To cancel this setting, press [Special Features] ➔ [Frame Erase] ➔ [Cancel] in this order.
• To cancel the scan setting, press [Cancel].
• If Preview is set to ‘On’, you can preview the images of documents before sending.
(See “Previewing Originals (Preview),” on p. 1-168.)
• To cancel all settings at once, press
. (The machine returns to the Standard Scanning mode.)
Erasing Shadows and Frame Lines and Scanning the Original
(Book Frame Erase)
1
Place your original and specify the destination. Press the Scan Settings drop-down
list, and select [Option].
Changing the Scan Settings
1-115
Various Sending Methods
1
2
Press [Special Features], and press [Frame Erase].
Various Sending Methods
1
3
Press [Book Frame Erase], and press [Center] and [Sides], and use [–] or [+] to
set the frame width to erase, and press [Next].
When entering values in millimetres, you can use
If you enter values with
pressing [–] or [+].
-
-
(numeric keys) and
.
(numeric keys), you can change the entered values by
The frame area to be erased is uniformly set for all sides of the original. To set the value
independently for all sides of the original, press [Adjust Each Dim.].
1-116
Changing the Scan Settings
If you select [Adjust Each Dim.], press [Top], [Left], [Center], [Right], and [Bottom] to set the frame
width to erase by using [–] or [+], and press [Next].
When entering values in millimetres, you can use
If you enter values with
[–] or [+].
-
-
(numeric keys) and
Various Sending Methods
1
.
(numeric keys), you can change the entered values by pressing
The screen for the next step is displayed.
If you enter values outside the setting range, a message appears on the screen prompting you to
enter an appropriate value.
NOTE
• If you want to enter values in inches, press [Inch]. Set the inch entry function to [On] in the Additional Functions
beforehand. (See Chapter 3, “Selecting and Storing Settings to Suit Your Needs,” in the Reference Guide.)
• The default settings are ‘10 mm’ for [Center], and ‘4 mm’ for [Top], [Left], [Right], [Bottom], and [Sides].
The maximum Frame Erase value is ‘50 mm.’
4
Select the facing-page original size, and press [OK].
NOTE
• To select an inch series paper size, press [Inch-size].
Changing the Scan Settings
1-117
5
Press [Done], and press [OK].
The specified mode is set, and the display returns to the Send screen.
6
Press
.
The machine starts scanning.
When the original is placed on the platen glass, follow the instructions that appear on the touch panel
display. Press
one time for each original. When scanning is complete, press [Done].
1
Various Sending Methods
When scanning is complete, the document is sent to the specified destination.
NOTE
• To cancel this setting, press [Special Features] ➔ [Frame Erase] ➔ [Cancel] in this order.
• To cancel the scan setting, press [Cancel].
• If Preview is set to ‘On’, you can preview the images of documents before sending.
(See “Previewing Originals (Preview),” on p. 1-168.)
• To cancel all settings at once, press
. (The machine returns to the Standard Scanning mode.)
Erasing the Shadows of Binding Holes and Scanning the
Original (Binding Erase)
1
1-118
Place your original on the platen glass and specify the destination. Press the Scan
Settings drop-down list, and select [Option].
Changing the Scan Settings
IMPORTANT
• Do not place originals with binding holes in the feeder, as this may damage the originals.
2
Press [Special Features], and press [Frame Erase].
3
Various Sending Methods
1
Press [Binding Erase] and designate the area of the punch holes on the original.
The position of the binding holes refers not to the position in which the original is placed on the platen
glass, but to the position of the binding holes when the surface of the original that you want to scan is
viewed as face up, with the top edge at the top.
Changing the Scan Settings
1-119
4
Set the width of Binding Erase by pressing [–] or [+], and press [OK].
Various Sending Methods
1
When entering values in millimetres, you can use
If you enter values with
pressing [–] or [+].
-
-
(numeric keys) and
.
(numeric keys), you can change the entered values by
The specified mode is set, and the display returns to the Send screen.
If you enter values outside the setting range, a message appears on the screen prompting you to
enter an appropriate value.
NOTE
• If you want to enter values in inches, press [Inch]. Set the inch entry function to [On] in the Additional Functions
beforehand. (See Chapter 3, “Selecting and Storing Settings to Suit Your Needs,” in the Reference Guide.)
• The default setting is ‘18 mm’ for the binding erase width. The maximum Frame Erase value is ‘20 mm.’
5
Press [Done], and press [OK].
The specified mode is set, and the display returns to the Send screen.
6
Press
.
The machine starts scanning.
When the original is placed on the platen glass, follow the instructions that appear on the touch panel
display. Press
one time for each original. When scanning is complete, press [Done].
When scanning is complete, the document is sent to the specified destination.
1-120
Changing the Scan Settings
NOTE
• To cancel this setting, press [Special Features] ➔ [Frame Erase] ➔ [Cancel] in this order.
• To cancel the scan setting, press [Cancel].
• If Preview is set to ‘On’, you can preview the images of documents before sending.
(See “Previewing Originals (Preview),” on p. 1-168.)
• To cancel all settings at once, press
. (The machine returns to the Standard Scanning mode.)
This mode enables you to scan original images with a sharper or softer contrast. To scan
originals with text or lines with a sharper contrast, use [High] as the setting. To scan originals
with photographs or other half-tones with a softer contrast, use [Low] as the setting.
■ Low
If you want to scan an original containing half-tones such as a printed photograph using the Photo
mode, moiré may occur. However, by using [Low] as the setting, you can soften this moiré effect so that
the print is easier on the eyes.
■ High
This feature enhances the edges of the original images so that faint or fine text is reproduced with a
sharper contrast. This feature is particularly suited for blueprints or faint pencil-drawn originals.
Changing the Scan Settings
1-121
1
Various Sending Methods
Scanning Originals After Making Them Sharply Contrasted
(Sharpness)
1
Place your original and specify the destination. Press the Scan Settings drop-down
list, and select [Option].
Various Sending Methods
1
2
1-122
Press [Special Features], and press [Sharpness].
Changing the Scan Settings
3
Adjust the sharpness by pressing [Low] or [High], and press [OK] ➔ [Done] ➔ [OK]
in this order.
Various Sending Methods
1
To scan text and lines clearly, the setting should be towards [High]. To scan photographs etc., the
setting should be towards [Low].
The specified mode is set, and the display returns to the Send screen.
4
Press
.
The machine starts scanning.
When the original is placed on the platen glass, follow the instructions that appear on the touch panel
display. Press
one time for each original. When scanning is complete, press [Done].
When scanning is complete, the document is sent to the specified destination.
NOTE
• To cancel this setting, press [Special Features] ➔ [Sharpness] ➔ [Cancel] in this order.
• To cancel the scan setting, press [Cancel].
• If Preview is set to ‘On’, you can preview the images of documents before sending.
(See “Previewing Originals (Preview),” on p. 1-168.)
• To cancel all settings at once, press
. (The machine returns to the Standard Scanning mode.)
Changing the Scan Settings
1-123
Storing/Erasing Scanning Mode
Stored scanning modes are displayed in the Scan Settings drop-down list, and can be selected
in the same way as the four scanning modes (Black 200dpi, Black 300dpi, Black 600dpi, and
Black 400dpi) already stored. You can also name the stored scanning modes.
NOTE
• The scanning modes stored in memory are not erased even if you turn the power OFF.
• You can change currently registered settings and register the new ones.
Various Sending Methods
1
Storing a Scanning Mode
1
Select [Option] from the Scan Settings drop-down list.
2
Set the scanning mode to be stored.
NOTE
• In this example, the Copy Ratio and Job Build modes are set.
1-124
Changing the Scan Settings
3
Press [Store/Erase].
4
Various Sending Methods
1
Select one of the user preset keys, and press [Store].
The displayed icons indicate the following contents:
•
: Scanning Modes of 100 x 100 dpi, 200 x 100 dpi, and 200 x 200 dpi
•
•
: Scanning Modes of 200 x 400 dpi, 300 x 300 dpi, 400 x 400 dpi, and 600 x 600 dpi
: Not registered
NOTE
• A user preset key already storing a scanning mode is indicated by a coloured triangle ( ) in the lower right
corner of the key.
• If you selected a user preset key in which a scanning mode has already been stored, the current settings of that
key are displayed.
• If there are more scanning modes stored than are currently displayed, scroll through the list by using [ ▼] or [▲].
Changing the Scan Settings
1-125
●
If you select an empty user preset key (no settings have been stored):
Press [Yes], when the confirmation message appears asking whether you want to store the setting.
Various Sending Methods
1
Press [No], if you do not want to store the mode.
When storing is complete, the message <Stored in memory.> appears for about two seconds on the
touch panel display.
The colour of the user preset key storing the scanning mode changes and the stored modes are
displayed.
●
If you select an occupied user preset key (settings have already been stored):
Press [Yes], when the confirmation message appears asking whether you want to overwrite the setting.
Press [No], if you do not want to overwrite the current mode.
When storing is complete, the message <Stored in memory.> appears for about two seconds on the
touch panel display.
The stored modes are displayed.
1-126
Changing the Scan Settings
5
Press [Done], and press [OK].
The display returns to the Send screen.
Storing a Scanning Mode Name
You can name a Scanning Mode you have stored.
Select [Option] from the Scan Settings drop-down list.
2
Press [Store/Erase].
1
Various Sending Methods
1
Changing the Scan Settings
1-127
3
Select the user preset key to which you want to store a name, and press
[Store Name].
Various Sending Methods
1
NOTE
• A user preset key already storing a scanning mode is indicated by a coloured triangle ( ) in the lower right corner
of the key.
• If you selected a user preset key in which a scanning mode has already been stored, the current settings of that
key are displayed.
• If there are more scanning modes stored than are currently displayed, scroll through the list by using [ ▼] or [▲].
4
Enter the new name, and press [OK].
The name stored in the user preset key appears on the screen.
NOTE
• For details on how to enter characters on the touch panel display, see Chapter 1, “Before You Start Using This
Machine,” in the Reference Guide.
• You can enter up to eight characters per line. Two lines can be entered for a user preset key name.
• If you press [OK] without entering any characters, the name of the user preset key reverts to its current name
(default P1 to P8).
1-128
Changing the Scan Settings
5
Press [Done], and press [OK].
The display returns to the Send screen.
Erasing Scanning Mode
You can erase the Scanning Modes that have been stored in a User Preset key.
Select [Option] from the Scan Settings drop-down list.
2
Press [Store/Erase].
1
Various Sending Methods
1
Changing the Scan Settings
1-129
3
Select the user preset key of the scan setting you want to erase, and press [Erase].
Various Sending Methods
1
A message appears to confirm that you want to erase the scan setting.
IMPORTANT
• Check the scan settings before erasing them.
NOTE
• A user preset key already storing a scanning mode is indicated by a coloured triangle ( ) in the lower right corner
of the key.
• If there are more scanning modes stored than are currently displayed, scroll through the list by using [ ▼] or [▲].
4
Press [Yes].
If you do not want to erase the setting, press [No].
A message <Erased.> appears for about two seconds on the touch panel display.
The stored scanning mode is erased.
1-130
Changing the Scan Settings
NOTE
• The name of the user preset key is not erased. For details on how to change the name,
see “Storing a Scanning Mode Name,” on p. 1-127.
Press [Done], and press [OK].
The display returns to the Send screen.
1
Various Sending Methods
5
Changing the Scan Settings
1-131
Configuring Send Settings (Send Settings)
You can set a Send operation such as when to send a document.
You can also enter a subject line, message body, and a reply-to address to documents to be
sent. You also can send documents without making any of the settings, or configure them as
needed.
Various Sending Methods
1
NOTE
• To send documents to another fax machine, it is necessary for the Fax Board (optional) to be installed.
Specifying the Time to Send a Job (Delayed Send)
Delayed Send enables you to set a job beforehand, and send it later at a specified time.
NOTE
• Delayed Send can reserve up to 120 jobs (Among these, 64 Fax jobs can be accumulated.). However depending
on sending conditions, the actual number may be less than 120. The following two conditions are typical
examples.
- Sending multiple documents at the same time
- Sending large documents
• This number could be reduced if there are other jobs without Delayed Send settings, or depending on the
specified destinations.
• When Delayed Send is completed, the documents in memory are automatically deleted.
• You can check the status of, cancel, or change the destinations of documents for which Delayed Send Time has
been set. (See Chapter 2, “Checking Various Job Operations and Device Status,” in the Reference Guide.)
1-132
Configuring Send Settings (Send Settings)
1
Place your originals, and specify the destination.
NOTE
• For details on specifying addresses using the Address Book, see “Specifying a Destination Using the Address
Book (Address Book),” on p. 1-34.
• For details on specifying addresses not registered in the Address Book, see “Specifying a Destination not
Registered in the Address Book (New Address),” on p. 1-36.
• For details on specifying addresses using the One-touch Buttons, see “Specifying a Destination Using One-Touch
Buttons (One-Touch Buttons),” on p. 1-57.
• For details on specifying addresses and settings using the Favorites Buttons, see “Configuring the Favorites
Buttons (Favorites Buttons),” on p. 1-59.
• For details on specifying addresses using the directory listing on the server (LDAP), see “Searching a Destination
via a Server (Search on Server),” on p. 1-61.
• For details on scan settings, see “Selecting a Scanning Mode,” on p. 1-76.
2
Press [Send Settings], and press [Delayed Send].
Configuring Send Settings (Send Settings)
1-133
Various Sending Methods
1
3
Enter the sending time using
-
(numeric keys).
Various Sending Methods
1
Enter the time in four digits.
Examples: 7:05 am ➔ 0705
11:18 pm ➔ 2318
If you set the time before the current time, the document will be sent at that time on the next day.
NOTE
• If you enter incorrectly, press
4
and enter the correct time.
Press [OK], and press [Done].
The display returns to the Send screen.
NOTE
• If you want to set Delayed Send with other settings, you can set other settings sequentially.
1-134
Configuring Send Settings (Send Settings)
5
Press
.
The machine starts scanning.
When the original is placed on the platen glass, follow the instructions that appear on the touch panel
display. Press
one time for each original. When scanning is complete, press [Done].
When scanning is complete, the document will be sent to the specified destination at the specified
time.
1
NOTE
Various Sending Methods
• To cancel this setting, press [Send Settings] ➔ [Delayed Send] ➔ [Cancel] in this order.
• If Preview is set to ‘On’, you can preview the images of documents before sending.
(See “Previewing Originals (Preview),” on p. 1-168.)
• To cancel all settings at once, press
. (The machine returns to the Standard Scanning mode.)
• If you want to cancel a delayed send job, do so from the System Monitor screen. (See Chapter 2,
“Checking Various Job Operations and Device Status,” in the Reference Guide.)
E-mail Notification at the End of a Send Job
(Job Done Notice)
This feature enables you to send a Job Done notification to a specified e-mail address when
a send job is complete. To send a Job Done Notice, you need to store e-mail addresses in
an address book beforehand. (See “Storing New Addresses (Store/Edit Address Book),” on
p. 4-5.)
1
Place your originals, and specify the destination.
Configuring Send Settings (Send Settings)
1-135
NOTE
• For details on specifying addresses using the Address Book, see “Specifying a Destination Using the Address
Book (Address Book),” on p. 1-34.
• For details on specifying addresses not registered in the Address Book, see “Specifying a Destination not
Registered in the Address Book (New Address),” on p. 1-36.
• For details on specifying addresses using the One-touch Buttons, see “Specifying a Destination Using One-Touch
Buttons (One-Touch Buttons),” on p. 1-57.
• For details on specifying addresses and settings using the Favorites Buttons, see “Configuring the Favorites
Buttons (Favorites Buttons),” on p. 1-59.
• For details on specifying addresses using the directory listing on the server (LDAP), see “Searching a Destination
via a Server (Search on Server),” on p. 1-61.
• For details on scan settings, see “Selecting a Scanning Mode,” on p. 1-76.
Various Sending Methods
1
1-136
2
Press [Send Settings], and press [Job Done Notice].
3
Select the destination where the job done notice is to be sent, and press [OK].
Configuring Send Settings (Send Settings)
If Access Number Management for an Address Book is set to ‘On,’ press [Access Number] and
enter the access number to specify the address, and press [OK]. If you do not want to specify an
access number, press [No Access Number]. (See “Storing New Addresses (Store/Edit Address
Book),” on p. 4-5.)
The specified mode is set, and the display returns to the Send screen.
NOTE
• For recipient’s settings, see “Specifying a Destination Using the Address Book (Address Book),” on p. 1-34.
• You cannot select multiple destinations.
Press
.
The machine starts scanning.
When the original is placed on the platen glass, follow the instructions that appear on the touch panel
display. Press
one time for each original. When scanning is complete, press [Done].
When scanning is complete, the document is sent to the specified destination.
When the sending job is complete, a <Job Done> notification is sent to the specified e-mail address.
NOTE
• To cancel the settings, press [Job Done Notice] ➔ [Cancel] in this order.
• If Preview is set to ‘On’, you can preview the images of documents before sending.
(See “Previewing Originals (Preview),” on p. 1-168.)
• To cancel all settings at once, press
. (The machine returns to the Standard Scanning mode.)
Configuring Send Settings (Send Settings)
1-137
Various Sending Methods
4
1
Stamping Scanned Originals (Stamping Original)
The machine can print a stamp about ‘3mm’ in diametre on the front side of scanned originals.
You can set the Stamp mode to differentiate scanned originals.
Various Sending Methods
1
Position at which
stamp is applied
Vertical placement
Position at which
stamp is applied
Horizontal placement
IMPORTANT
• When the machine is operating in the Stamping Original mode, you cannot use the Document Size Select
(other than Auto and Long Strip Original), Original Frame Erase, and Book Frame Erase modes.
NOTE
• Stamping can be performed on originals scanned from the feeder.
1
1-138
Place your originals in the feeder, and specify the destination.
Configuring Send Settings (Send Settings)
NOTE
2
Press [Send Settings], and press [Stamp].
NOTE
• To cancel the Stamp mode, press [Stamp] again.
3
Press
.
The machine starts scanning.
A<
> mark (stamp) appears on the output original.
NOTE
• When the stamp is not marked clearly, see Chapter 7, “Handing Optional Equipment,” in the Reference Guide.
• If Preview is set to ‘On’, you can preview the images of documents before sending.
(See “Previewing Originals (Preview),” on p. 1-168.)
Configuring Send Settings (Send Settings)
1-139
1
Various Sending Methods
• For details on specifying addresses using the Address Book, see “Specifying a Destination Using the Address
Book (Address Book),” on p. 1-34.
• For details on specifying addresses not registered in the Address Book, see “Specifying a Destination not
Registered in the Address Book (New Address),” on p. 1-36.
• For details on specifying addresses using the One-touch Buttons, see “Specifying a Destination Using One-Touch
Buttons (One-Touch Buttons),” on p. 1-57.
• For details on specifying addresses and settings using the Favorites Buttons, see “Configuring the Favorites
Buttons (Favorites Buttons),” on p. 1-59.
• For details on specifying addresses using the directory listing on the server (LDAP), see “Searching a Destination
via a Server (Search on Server),” on p. 1-61.
• For details on scan settings, see “Selecting a Scanning Mode,” on p. 1-76.
• You can also set the Stamp mode by pressing
➔ [Communications Settings] ➔ [TX Settings] ➔
[Edit Standard Send Settings].
Sending a Job to a Fax
You can select Memory Sending or Direct Sending to send scanned documents. You can set
the sender’s name and type of sending in the fax.
NOTE
• To send documents to another fax machine, it is necessary for the Fax Board (optional) to be installed.
1
Various Sending Methods
■ Memory Sending
All of the originals to be sent are first scanned and read into memory, then sent. This means that you do
not need to stay near the machine once the originals have been scanned.
NOTE
• The memory can hold a total of about 3,700 pages for sending and received documents.
■ Direct Sending
The scanning of the originals begins when the machine is ready for fax sending. You can send directly if
you do not scan the originals into memory.
IMPORTANT
• You can directly send an original of two or more sheets only when using the feeder. When placing an original on
the platen glass and sending it directly, you can send only one original at a time.
• You can specify only one destination at a time for direct sending.
• Memory sending is automatically selected when Delayed Send or sending to multiple destinations is specified.
• If you cancel Direct Sending during transmission, the originals that have already been scanned are sent.
1-140
Configuring Send Settings (Send Settings)
1
Place your originals, and specify the destination.
NOTE
• For details on specifying addresses using the Address Book, see “Specifying a Destination Using the Address
Book (Address Book),” on p. 1-34.
• For details on specifying addresses not registered in the Address Book, see “Specifying a Destination not
Registered in the Address Book (New Address),” on p. 1-36.
• For details on specifying addresses using the One-touch Buttons, see “Specifying a Destination Using One-Touch
Buttons (One-Touch Buttons),” on p. 1-57.
• For details on specifying addresses and settings using the Favorites Buttons, see “Configuring the Favorites
Buttons (Favorites Buttons),” on p. 1-59.
• For details on specifying addresses using the directory listing on the server (LDAP), see “Searching a Destination
via a Server (Search on Server),” on p. 1-61.
• For details on scan settings, see “Selecting a Scanning Mode,” on p. 1-76.
2
Press [Send Settings], and press [Sender’s Names (TTI)].
Configuring Send Settings (Send Settings)
1-141
Various Sending Methods
1
3
Select the sender’s name, and press [OK].
Various Sending Methods
1
‘00’ is set in the Sender’s Names list beforehand.
If the desired sender’s name is not displayed, press [▼] or [▲].
You can also enter and specify the number of the sender’s name using
-
(numeric keys).
IMPORTANT
• If you set the TX Terminal ID to ‘Off,’ the sender’s name is not printed on the recording paper of the receiving
machine, even when you have registered the sender’s name. If you want to print the sender’s name, you must
first set the TX Terminal ID to ‘On’ from
➔ [Communications Settings] ➔ (Common Settings) [TX Settings] ➔
[ ▼] ➔ [TX Terminal ID]. (See “Attaching a Transmission Terminal ID to the Document Being Sent
(TX Terminal ID),” on p. 3-22.)
NOTE
• To select the name of the sender, it is necessary to register the name of the sender beforehand.
(See “Registering Sender’s Names (Sender’s Names (TTI)),” on p. 1-18.)
• If you select ‘00’ in the Sender’s Names list, the name registered in the Unit Name screen is displayed.
(See “Registering the Name of the Company and Department (Unit Name),” on p. 1-16.)
1-142
Configuring Send Settings (Send Settings)
4
Press [Direct], and set how to send documents.
Various Sending Methods
1
To set Direct Sending, set [Direct] to ‘On’.
To set Memory Lock, set [Direct] to ‘Off’.
You can also specify Direct Sending in the screen to specify a new destination for fax sending.
(See “Specifying a Fax Number,” on p. 1-36.)
5
Press [Done].
The display returns to the Send screen.
Configuring Send Settings (Send Settings)
1-143
6
Press
.
Scanning begins and simultaneously the document is sent.
During transmission, the transaction number, destination telephone number, and page number
currently being sent are displayed in the message area.
If Direct Sending is set to ‘On,’ Direct Sending is cancelled automatically after sending is completed.
NOTE
Various Sending Methods
1
• If Direct Sending is not set and Preview is set to ‘On’, you can preview the images of documents before sending.
(See “Previewing Originals (Preview),” on p. 1-168.)
Sending a Job to an E-mail Address
You can scan a document and send it by e-mail as an attached file. You can add a document
name, subject line, message body, reply-to address, and sender’s name (TTI) to the e-mail.
The scanned image can be sent as a TIFF, MTIFF (Multi-page TIFF), or PDF file.
1
1-144
Place your originals, and specify the destination.
Configuring Send Settings (Send Settings)
NOTE
2
Press [Send Settings], and press [Send Doc. Name].
3
Enter the name of the sending document to be sent, and press [OK].
You can also enter values using
-
(numeric keys).
Configuring Send Settings (Send Settings)
1
Various Sending Methods
• For details on specifying addresses using the Address Book, see “Specifying a Destination Using the Address
Book (Address Book),” on p. 1-34.
• For details on specifying addresses not registered in the Address Book, see “Specifying a Destination not
Registered in the Address Book (New Address),” on p. 1-36.
• For details on specifying addresses using the One-touch Buttons, see “Specifying a Destination Using One-Touch
Buttons (One-Touch Buttons),” on p. 1-57.
• For details on specifying addresses and settings using the Favorites Buttons, see “Configuring the Favorites
Buttons (Favorites Buttons),” on p. 1-59.
• For details on specifying addresses using the directory listing on the server (LDAP), see “Searching a Destination
via a Server (Search on Server),” on p. 1-61.
• For details on scan settings, see “Selecting a Scanning Mode,” on p. 1-76.
1-145
NOTE
• For details on how to enter characters on the touch panel display, see Chapter 1, “Before You Start Using This
Machine,” in the Reference Guide.
• You can enter up to 24 characters for the send doc. name.
• The file name of the image attached to the e-mail can be assigned as follows.
When setting the name of the document sent.
Example: ******_PPP .TIF (If TIFF is selected)
******: Document name
PPP : Page number
When not setting the name of the document sent.
Example: SSSS_PPP .TIF (If TIFF is selected)
SSSS: Job number (0001-4999)
PPP : Page number
Various Sending Methods
1
4
Press [Subject].
5
Enter the subject line, and press [OK].
You can also enter values using
1-146
-
(numeric keys).
Configuring Send Settings (Send Settings)
NOTE
• You can enter up to 40 characters for the subject.
• If a subject is not entered, the message will be sent with the text set in the System Settings in Additional
Functions. (See Chapter 4, “System Manager Settings,” in the Reference Guide.)
6
Press [Message].
Various Sending Methods
1
7
Enter the message body, and press [OK].
You can also enter values using
-
(numeric keys).
NOTE
• You can enter up to 140 characters for the message. A return is counted as one character.
Configuring Send Settings (Send Settings)
1-147
8
Press [Reply-to].
9
Select a reply-to address, and press [OK].
Various Sending Methods
1
If Access Number Management for an Address Book is set to ‘On,’ press [Access Number] and
enter the access number to specify the address, and press [OK]. If you do not want to specify an
access number, press [No Access Number]. (See “Storing New Addresses (Store/Edit Address
Book),” on p. 4-5.)
The address specified here will be set as the address of the e-mail when the recipient of the e-mail
replies.
Store reply-to addresses in the address book beforehand.
(See “Storing E-mail Addresses,” on p. 4-13.)
NOTE
• For Recipient settings, see “Specifying a Destination Using the Address Book (Address Book),” on p. 1-34.
• You cannot select multiple destinations.
1-148
Configuring Send Settings (Send Settings)
10
Press [Sender’s Names (TTI)].
11
Various Sending Methods
1
Select the sender’s name and press [OK].
The name registered under ‘00’ is selected by default.
If the desired sender’s name is not displayed, press [▼] or [▲].
You can also enter and specify the two digit number of the sender’s name using
-
(numeric keys).
NOTE
• To select the name of the sender, it is necessary to register the name of the sender beforehand.
(See “Registering Sender’s Names (Sender’s Names (TTI)),” on p. 1-18.)
• If you select ‘00’ in the Sender’s Names list, the name registered in the Unit Name screen is displayed.
(See “Registering the Name of the Company and Department (Unit Name),” on p. 1-16.)
• If SDL is set as the login service, the login user name and e-mail address that you registered for SDL are
displayed on the From field on the e-mail recipient’s machine.
Configuring Send Settings (Send Settings)
1-149
•
•
1
Various Sending Methods
•
•
12
1-150
- If SDL or SSO is not set as the login service:
sender’s name <e-mail address registered in Device Information settings for this machine>
- If SDL is set as the login service:
login user’s name <the login user’s e-mail address>
If SDL is set as login service, you can send jobs only if the e-mail address of the user who logged on to the
machine is registered. For details of the registration, see the MEAP SMS Administrator Guide.
If SSO is set as the login service, the login user’s Full name and e-mail address that you registered for Active
Directory or NetSpot Accountant are displayed on the From field on the e-mail recipient’s machine.
- If SDL or SSO is not set as the login service:
sender’s name <e-mail address registered in Device Information settings for this machine>
- If SSO is set as the login service:
login user’s Full name <the login user’s e-mail address>
If SSO is set as login service, you can send jobs only if the e-mail address of the user who logged on to the
machine through Active Directory or NetSpot Accountant is registered. For details on the registration, consult your
administrator of Active Directory or NetSpot Accountant.
For instructions on storing an e-mail address of this machine, see the Network Guide.
Press the E-mail Priority drop-down list select a priority for your e-mail message.
Configuring Send Settings (Send Settings)
13
Press [Done].
The display returns to the Send screen.
14
Press the File Type drop-down list, and select the file type of the image to be sent.
Types of files:
• TIFF: Sends images in TIFF format.
• PDF: Sends images in PDF format.
NOTE
• To view a TIFF file, an application that supports TIFF (such as Imaging for Windows) is required.
• To view a PDF file, Acrobat Reader is required.
Configuring Send Settings (Send Settings)
1-151
Various Sending Methods
1
15
Select whether to divide a sending document into pages.
Various Sending Methods
1
If you want to separate multiple images for each page and forward them as separate files, set Divide
into Pages to ‘On’.
If you want to forward multiple images as a single file without dividing them, set Divide into Pages to
‘Off’.
16
Press
.
The machine starts scanning.
When the original is placed on the platen glass, follow the instructions that appear on the touch panel
display. Press
one time for each original. When scanning is complete, press [Done].
When scanning is complete, the document is sent to the specified destination.
NOTE
• If Preview is set to ‘On’, you can preview the images of documents before sending.
(See “Previewing Originals (Preview),” on p. 1-168.)
1-152
Configuring Send Settings (Send Settings)
Sending a Job to Another I-Fax
You can scan a document and send it by I-Fax via the Internet. I-Fax can send only to machines
that conform to I-Fax specifications. You can add a document name, subject line, message body,
reply-to address, and sender’s name (TTI) to an I-Fax.
1
Place your original, and specify the destination.
Various Sending Methods
1
NOTE
• For details on specifying addresses using the Address Book, see “Specifying a Destination Using the Address
Book (Address Book),” on p. 1-34.
• For details on specifying addresses not registered in the Address Book, see “Specifying a Destination not
Registered in the Address Book (New Address),” on p. 1-36.
• For details on specifying addresses using the One-touch Buttons, see “Specifying a Destination Using One-Touch
Buttons (One-Touch Buttons),” on p. 1-57.
• For details on specifying addresses and settings using the Favorites Buttons, see “Configuring the Favorites
Buttons (Favorites Buttons),” on p. 1-59.
• For details on scan settings, see “Selecting a Scanning Mode,” on p. 1-76.
Configuring Send Settings (Send Settings)
1-153
2
Press [Send Settings], and press [Send Doc. Name].
3
Enter the name of the document, and press [OK].
Various Sending Methods
1
You can also enter values using
-
(numeric keys).
NOTE
• For details on how to enter characters on the touch panel display, see Chapter 1, “Before You Start Using This
Machine,” in the Reference Guide.
• You can enter up to 24 characters for the send doc. name.
• The file name of the image attached to the I-Fax can be assigned as follows.
When setting the name of the document sent.
Example: ******_001 .TIF (If TIFF is selected)
******: Document name
When not setting the name of the document sent.
Example: SSSS_001 .TIF (If TIFF is selected)
SSSS: Job number (0001-4999)
1-154
Configuring Send Settings (Send Settings)
4
Press [Subject].
5
Various Sending Methods
1
Enter the subject line, and press [OK].
You can also enter values using
-
(numeric keys).
NOTE
• You can enter up to 40 characters for the subject.
• If a subject is not entered, the message will be sent with the text set in the System Settings in Additional
Functions. (See Chapter 4, “System Manager Settings,” in the Reference Guide.)
Configuring Send Settings (Send Settings)
1-155
6
Press [Message].
7
Enter the message body, and press [OK].
Various Sending Methods
1
You can also enter values using
-
(numeric keys).
NOTE
• You can enter up to 140 characters for the message. A return is counted as one character.
1-156
Configuring Send Settings (Send Settings)
8
Press [Reply-to].
9
Various Sending Methods
1
Select a reply-to address, and press [OK].
If Access Number Management for an Address Book is set to ‘On,’ press [Access Number] and
enter the access number to specify the address, and press [OK]. If you do not want to specify an
access number, press [No Access Number]. (See “Storing New Addresses (Store/Edit Address
Book),” on p. 4-5.)
The address specified here will be set as the I-Fax address when the recipient of the I-Fax replies.
If you send I-Fax documents to another iR series machine, a confirmation mail that the machine
received them in Full mode will also be sent to the address specified here.
Store reply-to addresses in the address book beforehand.
(See “Storing I-Fax Addresses,” on p. 4-18.)
NOTE
• For Recipient settings, see “Specifying a Destination Using the Address Book (Address Book),” on p. 1-34.
• You cannot select multiple destinations.
Configuring Send Settings (Send Settings)
1-157
10
Press [Sender’s Names (TTI)].
11
Select the name of the sender, and press [OK].
Various Sending Methods
1
The name registered under ‘00’ is selected by default.
If the desired sender’s name is not displayed, press [▼] or [▲].
You can also enter and specify the two digit number of the sender’s name using
-
(numeric keys).
NOTE
• To select the name of the sender, it is necessary to register the name of the sender beforehand.
(See “Registering Sender’s Names (Sender’s Names (TTI)),” on p. 1-18.)
• If you select ‘00’ in the Sender’s Names list, the name registered in the Unit Name screen is displayed.
(See “Registering the Name of the Company and Department (Unit Name),” on p. 1-16.)
• If SDL is set as the login service, the sender’s name and e-mail address that you registered in Device Information
settings for this machine are displayed on the From field, and the login user name and e-mail address that you
registered for SDL are displayed on the Sender field on the I-fax recipient’s machine.
1-158
Configuring Send Settings (Send Settings)
•
•
•
12
Press [Done].
The display returns to the Send screen.
Configuring Send Settings (Send Settings)
1-159
1
Various Sending Methods
•
- If SDL or SSO is not set as the login service:
sender’s name <e-mail address registered in Device Information settings for this machine>
- If SDL is set as the login service:
sender’s name <e-mail address registered in Device Information settings for this machine> (From field)
login user’s name <the login user’s e-mail address> (Sender field)
If SDL is set as login service, you can send jobs only if the e-mail address of the user who logged on to the
machine is registered. For details of the registration, see the MEAP SMS Administrator Guide.
If SSO is set as the login service, the sender’s name and e-mail address that you registered in Device Information
settings for this machine are displayed on the From field, and the login user’s User login name (pre-Windows
2000) and e-mail address that you registered for Active Directory or NetSpot Accountant are displayed on the
Sender field on the I-fax recipient’s machine.
- If SDL or SSO is not set as the login service:
sender’s name <e-mail address registered in Device Information settings for this machine>
- If SSO is set as the login service:
sender’s name <e-mail address registered in Device Information settings for this machine> (From field)
login user’s User login name <the login user’s e-mail address> (Sender field)
If SSO is set as login service, you can send jobs only if the e-mail address of the user who logged on to the
machine through Active Directory or NetSpot Accountant is registered. For details on the registration, consult your
administrator of Active Directory or NetSpot Accountant.
For instructions on storing an e-mail address of this machine, see the Network Guide.
13
Press
.
The machine starts scanning.
When the original is placed on the platen glass, follow the instructions that appear on the touch panel
display. Press
once for each original. When scanning is complete, press [Done].
When scanning is complete, the document is sent to the specified destination.
NOTE
• If Preview is set to ‘On’, you can preview the images of documents before sending.
(See “Previewing Originals (Preview),” on p. 1-168.)
Various Sending Methods
1
Sending a Job to a File Server
You can send a job to a Windows 95/98/Me server, a Windows NT server, a Windows 2000/XP
server, a NetWare server, or an FTP server. This feature enables you to specify the document
name and the file type of the image you are sending.
IMPORTANT
• When you send a job to an FTP server, be sure to enter characters in ASCII code. If you enter characters in a
code other than ASCII code, the name of the sending document cannot be displayed correctly at the sending
destination.
• If you enter the characters not recognisable by the operation system of the file server you are sending to, you may
not be able to send your image or document.
1
1-160
Place your originals, and specify the destination.
Configuring Send Settings (Send Settings)
NOTE
2
Press [Send Settings], and press [Send Doc. Name].
3
Enter the name of the document, and press [OK].
You can also enter values using
-
(numeric keys).
Configuring Send Settings (Send Settings)
1
Various Sending Methods
• For details on specifying addresses using the Address Book, see “Specifying a Destination Using the Address
Book (Address Book),” on p. 1-34.
• For details on specifying addresses not registered in the Address Book, see “Specifying a Destination not
Registered in the Address Book (New Address),” on p. 1-36.
• For details on specifying addresses using the One-touch Buttons, see “Specifying a Destination Using One-Touch
Buttons (One-Touch Buttons),” on p. 1-57.
• For details on specifying addresses and settings using the Favorites Buttons, see “Configuring the Favorites
Buttons (Favorites Buttons),” on p. 1-59.
• For details on scan settings, see “Selecting a Scanning Mode,” on p. 1-76.
1-161
NOTE
• For details on how to enter characters on the touch panel display, see Chapter 1, “Before You Start Using This
Machine,” in the Reference Guide.
• You can enter up to 24 characters for the send doc. name.
• The file name of the image attached to the file server is assigned as follows.
To set the name of the document to be sent (TIF)
Example: ******_YYYYMMDDhhmmss .TIF
******: Document name
YYYYMMDD: Year, month, day of time sent
hhmmss: Hour, minute, second of time sent
PPPPP: Page number
To set the name of the document to be sent (PDF)
Example: ******_YYYYMMDDhhmmss .PDF
******: Document name
YYYYMMDD: Year, month, day of time sent
hhmmss: Hour, minute, second of time sent
File names for attached images are appended automatically. (TIF)
Example: YYYYMMDDhhmmss_PPPPP .TIF
YYYYMMDD: Year, month, day of time sent
hhmmss: Hour, minute, second of time sent
PPPPP: Page number
File names for attached images are appended automatically. (PDF)
Example: YYYYMMDDhhmmss .PDF
YYYYMMDD: Year, month, day of time sent
hhmmss: Hour, minute, second of time sent
Various Sending Methods
1
4
Press [Done].
The display returns to the Send screen.
1-162
Configuring Send Settings (Send Settings)
5
Press the File Type drop-down list and select the file type of the image to be sent.
Various Sending Methods
1
Types of files:
• TIFF: Sends images in TIFF format.
• PDF: Sends images in PDF format.
NOTE
• To view a TIFF file, an application that supports TIFF (such as Imaging for Windows) is required.
• To view a PDF file, Acrobat Reader is required.
6
Select whether to divide a sending document into pages.
If you want to separate multiple images for each page and forward them as separate files, set Divide
into Pages to ‘On’.
If you want to forward multiple images as a single file without dividing them, set Divide into Pages to ‘Off’.
Configuring Send Settings (Send Settings)
1-163
7
Press
.
The machine starts scanning.
When the original is placed on the platen glass, follow the instructions that appear on the touch panel
display. Press
one time for each original. When scanning is complete, press [Done].
When scanning is complete, the document is sent to the specified destination.
NOTE
• If Preview is set to ‘On’, you can preview the images of documents before sending.
(See “Previewing Originals (Preview),” on p. 1-168.)
Various Sending Methods
1
Sending a Job to a User Inbox
You can store a scanned document to a User Inbox. This feature enables you to specify the
document name.
IMPORTANT
• Documents stored in a User Inbox are set so that they are automatically erased 3 days later. You can set the time
for automatic erasure from the Additional Functions screen. (See Chapter 5, “Setting/Storing the Mail Box
Settings,” in the Mail Box Guide.)
• Documents cannot be stored in inboxes in the following cases:
(The accuracy of the following values depends on the remaining capacity of the hard disk).
- When 100 items consisting of documents are already stored in a specified user inbox.
- When the inboxes being used collectively already contain 1,000 items consisting of documents.
- When the inboxes being used collectively already contain 3,700 pages of documents or image data
(using an A4-size Canon Standard Chart and Standard Mode.)
NOTE
• It is important to delete unwanted documents or image data from your inbox to make space available to store new
documents.
1-164
Configuring Send Settings (Send Settings)
1
Place your originals, and specify the destination.
NOTE
• For details on storing scanned documents in inboxes, see “Storing a Scanned Document in an Inbox,” on p. 1-55.
• For details on specifying addresses and settings using the Favorites Buttons, see “Configuring the Favorites
Buttons (Favorites Buttons),” on p. 1-59.
• For details on scan settings, see “Selecting a Scanning Mode,” on p. 1-76.
2
Press [Send Settings], and press [Send Doc. Name].
Configuring Send Settings (Send Settings)
1-165
Various Sending Methods
1
3
Enter the name of the document, and press [OK].
Various Sending Methods
1
You can also enter values using
-
(numeric keys).
NOTE
• For details on how to enter characters on the touch panel display, see Chapter 1, “Before You Start Using This
Machine,” in the Reference Guide.
• You can enter up to 24 characters for the send doc. name.
• The send document name you entered here becomes the document name stored in the User Inbox.
4
Press [Done].
The display returns to the Send screen.
5
Press
.
The machine starts scanning.
1-166
Configuring Send Settings (Send Settings)
When the original is placed on the platen glass, follow the instructions that appear on the touch panel
display. Press
once for each original. When scanning is complete, press [Done].
The documents are stored in the specified inbox when scanning concludes.
NOTE
• If Preview is set to ‘On’, you can preview the images of documents before sending.
(See “Previewing Originals (Preview),” on p. 1-168.)
Various Sending Methods
1
Configuring Send Settings (Send Settings)
1-167
Previewing Originals (Preview)
This feature enables you to preview the scanned data of your originals before sending it. You
can verify the scanned data of your originals on the Preview screen, as well as erase pages
from the scanned data.
1
Various Sending Methods
NOTE
• The Preview screen is not displayed when using Direct Sending for sending a fax.
1
Place your originals, and specify the destination, and press [Preview].
[Preview] is lit when it is ‘On’.
[Preview] is not lit when it is ‘Off’.
The specified mode is set.
1-168
Previewing Originals (Preview)
NOTE
2
Press
.
If the original is placed on the platen glass, follow the instructions that appear on the touch panel
display ➔ press
once for each original. When scanning is complete, press [Done].
Scanning starts.
The Preview screen is displayed when scanning is complete.
NOTE
• If Preview is set to ‘Off’, the Preview screen is not displayed. When scanning is complete, the scanned data is sent
to the specified destination.
▲
Press [ ] or [ ] to specify the page that you want to verify.
▲
3
Previewing Originals (Preview)
1-169
1
Various Sending Methods
• For details on specifying addresses using the Address Book, see “Specifying a Destination Using the Address
Book (Address Book),” on p. 1-34.
• For details on specifying addresses not registered in the Address Book, see “Specifying a Destination not
Registered in the Address Book (New Address),” on p. 1-36.
• For details on specifying addresses using the one-touch buttons, see “Specifying a Destination Using One-Touch
Buttons (One-Touch Buttons),” on p. 1-57.
• For details on specifying addresses and settings using the favorites buttons, see “Configuring the Favorites
Buttons (Favorites Buttons),” on p. 1-59.
• For details on specifying addresses using the directory listing on the server (LDAP), see “Searching a Destination
via a Server (Search on Server),” on p. 1-61.
• For details on scan settings, see “Selecting a Scanning Mode,” on p. 1-76.
To preview a specific page number, enter the page number using
-
(numeric keys) ➔ press [OK].
▲
You can also press [
document.
] or [ ] to scroll through and preview the previous and next pages of your
▲
Various Sending Methods
1
The image of the selected page is displayed on the Preview screen.
4
Select whether to erase the page.
To erase the page, press [Page Erase].
If you do not want to erase the page, proceed to step 8.
1-170
Previewing Originals (Preview)
5
Press [Erase Single Page] or [Erase Pages Consecutively], and select the page you
want to erase.
If you select [Erase Single Page]:
Select the page you want to erase by pressing [–] or [+].
1
You can also enter values using
If you enter the value with
[–] or [+].
-
-
Various Sending Methods
●
(numeric keys).
(numeric keys), you can change the entered value by pressing
If you enter a value outside the setting range, a message prompting you to enter the appropriate
value appears on the screen.
Previewing Originals (Preview)
1-171
●
If you select [Erase Pages Consecutively]:
Press [First Page] ➔ select the first page you want to erase by pressing [–] or [+].
Press [Last Page] ➔ select the last page you want to erase by pressing [–] or [+].
Various Sending Methods
1
You can also enter values using
If you enter the value with
[–] or [+].
-
-
(numeric keys).
(numeric keys), you can change the entered value by pressing
If you enter a value outside the setting range, a message prompting you to enter the appropriate
value appears on the screen.
6
1-172
Press [Start].
Previewing Originals (Preview)
7
Press [Yes].
Various Sending Methods
1
If you do not want to erase the page, press [No].
A message <Erased.> appears for about two seconds on the touch panel display.
Verify the images, and press [Start Send].
You can press [
] (reduce) or [
] (enlarge) to zoom in or out.
▲
You can press [ ], [ ], [▼], or [▲] to specify the area to display when you zoom in or out on the page.
▲
8
When your image is enlarged or reduced, you can see the general location of which area you are
previewing with
(above the reduce and enlarge icons).
If you want to cancel the send job, press [Cancel].
The scanned data is sent to the specified destination.
NOTE
• The number of scanned pages is displayed on the Send Process screen. (However, the document excluding the
pages you erased in the preview setting is sent to the recipient's machine.)
Previewing Originals (Preview)
1-173
Recalling the Stored Settings and
Sending a Job (Recall)
This function allows you to recall up to the last three addresses, Scan settings, and Send
settings which have been set and then send the documents.
1
Various Sending Methods
IMPORTANT
• One Send setting is defined by specifying the address, Scan setting, Send setting, etc., and by pressing
or
, or allowing the Auto Clear function to activate. If
or
is not pressed, or the Auto Clear function has not
been activated, the Send Setting you have made cannot be stored into memory. So you cannot call up the Send
setting by pressing [Recall].
• The three settings that were stored in memory will not be erased even when the power is turned OFF.
• The Standard mode cannot be stored in memory.
• Identical settings that are stored, are counted as one setting.
• If Access Number Management for an Address Book is set to ‘On,’ you cannot use the Recall mode.
1
1-174
Place your original, and press [Recall].
Recalling the Stored Settings and Sending a Job (Recall)
2
Select [1 Before], [2 Before], or [3 Before] and confirm the settings, and press [OK].
The display returns to the Send screen.
NOTE
• You can also check which send jobs are stored in memory other than the currently displayed send job by pressing
[ ▼] or [▲].
• If there are multiple destinations stored in the Recall function, the order of the destinations shown in the list may
not correspond to the order of making their settings.
3
Press
.
The machine starts scanning.
When the original is placed on the platen glass, follow the instructions that appear on the display.
Press
one time for each original. When scanning is complete, press [Done].
When scanning is complete, the document is sent to the specified destination.
NOTE
• If Preview is set to ‘On’, you can preview the images of documents before sending.
(See “Previewing Originals (Preview),” on p. 1-168.)
Recalling the Stored Settings and Sending a Job (Recall)
1-175
Various Sending Methods
1
Special Dialing
Enter telephone numbers as described below when the iR3320i/iR2220i is connected to an
extension, when you want to store international telephone numbers.
1
Various Sending Methods
■ Calling from an Extension
When calling an outside line from an extension, the outside line access number (such as 0) is normally
dialled before the telephone number of the destination. In the same manner, when the iR3320i/iR2220i is
connected to an extension, the outside line access number is stored before telephone numbers. A pause
time (i.e., the amount of time the unit waits after dialling the outside line access number when calling from
an extension) can also be stored together with these numbers.
■ International Dialling
A pause time (i.e., the amount of time the unit waits after dialling the international telephone number)
can be stored together with an international telephone number.
NOTE
• This chapter describes how to register the R-key from the New Address button.
Calling from an Extension
Only the procedure for entering telephone numbers is described here.
For setting the R-key, see Chapter 4, “System Manager Settings,” in the Reference Guide.
1-176
Special Dialing
1
Press your originals, and press [New Address], and press [Fax].
2
Various Sending Methods
1
Press the [R].
Special Dialing
1-177
3
Enter the pause time between the outside line access number and the telephone
number.
Various Sending Methods
1
e.g.:
Outside line access number: R
Telephone number: 516 328 5841
R [Pause] 516 328 5841
Press [Pause] after entering the outside line access number and before entering the telephone number.
Enter the pause time equivalent in length to the time required for the outside line dial tone to be heard
after the outside line access number is called.
[Backspace]: Press when a wrong number is entered. The last number entered is deleted, enabling
you to enter the correct number.
NOTE
• The difference between the pause time entered in the middle of a telephone number and at the end of a telephone
number is as follows.
- The pause time entered in the middle of a telephone number (lower-case p) is 4 seconds long.
- The pause time entered at the end of a telephone number (upper-case P) is 10 seconds long.
(This length cannot be changed.)
- Two or more pauses can be entered consecutively.
• The length of pause time entered in the middle of a telephone number is preset to 4 seconds for each time
you press [Pause]. However, this length can be changed to any whole number between 1 and 15 seconds.
(See “Setting the Pause Time (Pause Time),” on p. 3-38.)
1-178
Special Dialing
Storing International Telephone Numbers
The procedure for entering pauses with international telephone numbers that you want to store
is described here.
1
Press your originals, and press [New Address], and press [Fax].
2
Enter the international telephone number and the pause time.
Various Sending Methods
1
Special Dialing
1-179
●
If using an international telephone service:
e.g.
01015164806700
International Dialling Code: 010
Country code: 1
Area code: 516
1
Telephone number: 480-6700
Various Sending Methods
[Pause]
Enter a pause time equal to the time required for the dial tone to be heard after dialling is completed.
A pause entered at the end of a telephone number is 10 seconds long.
[Backspace]: Press when a wrong number is entered. The last number entered is deleted, enabling
you to enter the correct number.
NOTE
• The pause time differs in length, depending on whether it is entered in the middle or end of a telephone number.
- The pause time entered in the middle of a telephone number (lower-case p) is 4 seconds long.
- The pause time entered at the end of a telephone number (upper-case P) is 10 seconds long.
(This length cannot be changed.)
- Two or more pauses can be entered consecutively.
• The length of the pause time entered in the middle of a telephone number is preset to 4 seconds for each
time you press [Pause]. However, this length can be changed to any whole number between 1 and 15 sec.
(See “Setting the Pause Time (Pause Time),” on p. 3-38.)
• The location of a pause and the actual pause time may differ depending on the telephone system. Contact your
Service representative or your local telephone company for further details.
1-180
Special Dialing
Receiving a Document
2
CHAPTER
This chapter describes how this machine functions when receiving documents.
Various Receiving Functions . . . . . . . . . . . . . . . . . . . . . . . . . . . . . . . . . . . . . . . . . . . . . . . . . . . . . . . . . . . . 2-2
Receiving Documents . . . . . . . . . . . . . . . . . . . . . . . . . . . . . . . . . . . . . . . . . . . . . . . . . . . . . . . . . . . . . . . . . 2-3
Setting the Memory Lock Mode. . . . . . . . . . . . . . . . . . . . . . . . . . . . . . . . . . . . . . . . . . . . . . . . . . . . . . . . . . 2-4
Forwarding Received Documents . . . . . . . . . . . . . . . . . . . . . . . . . . . . . . . . . . . . . . . . . . . . . . . . . . . . . . . . 2-4
Received Documents Processing . . . . . . . . . . . . . . . . . . . . . . . . . . . . . . . . . . . . . . . . . . . . . . . . . . . . . . . . 2-5
Paper for Printing Received I-Fax/Fax Documents . . . . . . . . . . . . . . . . . . . . . . . . . . . . . . . . . . . . . . . . . . . 2-7
Using Fax Information Services . . . . . . . . . . . . . . . . . . . . . . . . . . . . . . . . . . . . . . . . . . . . . . . . . . . . . . . . . . 2-8
2-1
Various Receiving Functions
■ Receiving Remote Copy Jobs
Receives and prints copy jobs sent to this machine from another remote copy printer. For details on how
to set Remote Copy settings, see Chapter 1, “Basic Copying,” in the Copying Guide.
Receiving a Document
2
■ Receiving Print Jobs
Receives and prints print jobs sent to this machine from a PC.
■ Receiving I-Fax and Fax Documents
The I-Fax function is similar to e-mail. You can send and receive scanned document images, instead of
sending and receiving texts via the Internet. To receive documents by I-Fax, it is necessary for the Image
Reader-B1 (optional) to be installed.
Super G3 fax is a supported fax function. To send and receive documents to another fax machine, it is
necessary for the Image Reader-B1 (optional) and the Fax Board (optional) to be installed. You can forward
received I-Fax/Fax documents to specified addresses automatically when the forwarding settings are set to
‘On’. For details on how to set forwarding settings, see Chapter 4, “System Manager Settings,” in the
Reference Guide.
NOTE
• If files (images) that are not compatible with this machine are attached to received I-Fax documents, operations
(printing, forwarding and storing in Memory RX Inbox) are not performed on the attached files, and the files are
erased. Information about the erased files is printed out with the text of the received I-Fax.
2-2
Various Receiving Functions
Receiving Documents
1
When documents are being received, the Processing/Data indicator on the control
panel flashes.
Receiving a Document
2
During reception, the transaction number and other information relating to the sending party are
displayed.
2
When the document reception is complete, the Processing/Data indicator on the
control panel stays illuminated. This indicates that documents are stored in memory.
NOTE
• The Processing/Data indicator will flash/stay illuminated even when the power to the control panel is cut off.
(Sleep Mode)
• The Error indicator flashes when either the available memory is low or there is no paper in the paper drawer.
Various Receiving Functions
2-3
3
The document is printed.
The Processing/Data indicator goes out when the documents in memory are printed.
NOTE
• When there is no paper on which the received documents can be printed, the received documents are stored in
memory.
• The memory can hold a total of about 3,700 pages for sending originals and receiving documents.
(This figure is based on the A4-size Canon Standard Chart, using the standard setting.)
• Documents stored in memory due to lack of paper are automatically printed when paper is loaded in a drawer.
• If a printing error occurs, the Error indicator flashes.
Receiving a Document
2
Setting the Memory Lock Mode
After you have set the I-Fax/Fax Memory Lock to ‘On’ in Additional Functions, the I-Fax Memory
Lock setting and Fax Memory Lock setting in the Memory RX Inbox can be set to ‘On’ or ‘Off’ as
necessary. If the I-Fax Memory Lock and Fax Memory Lock are set to ‘On,’ received documents
are stored in the Memory RX Inbox in the machine without being printed. (See, Chapter 3, “Storing
Received Documents in Inboxes,” in the Mail Box Guide)
NOTE
• To receive documents into memory, set Use Fax Memory Lock and Use I-Fax Memory Lock to ‘On’ from the
Communications Settings of System Settings in Additional Functions beforehand.
(See Chapter 4, “System Manager Settings,” in the Reference Guide.)
Forwarding Received Documents
If the Forward setting is set to ‘On,’ the received documents are forwarded to registered
destinations if the received documents match the forwarding conditions.
NOTE
• It is necessary to set Validate/Invalidate to ‘On’ in Additional Functions beforehand to set forwarding.
(See Chapter 4, “System Manager Settings,” in the Reference Guide.)
2-4
Various Receiving Functions
Received Documents Processing
The following illustration shows how received I-Fax/Fax documents are processed.
: Flows of default settings
or normal operation
: Flows with conditions
2
ON
Forwarding
Settings
Reception
rejected
Forward w/o
Conditions
OFF
Confidential Fax Inbox
Confirming Details
Erase, Print of received
documents
Destinations
Not Stored
Destination(s)
Stored
Store
Memory Lock
Setting
ON
Handle Documents
with Forwarding
Errors
Print Queue
Print Queue
Memory RX Inbox
Confirming Details, Erase,
Print, Sending of received
documents
Prints
Forward to
specified
destination
Forwarding
Error
OFF/
Does Not Meet
the Conditions
Receiving a Document
Receive
Store in the
Status Screen
Confirming Details,
Resend, Change
Destinations, Erase
of documents with
transmission error
Prints
Forwarding
Done Notice
*1 If Store/Print Received Doc. in Forwarding Settings in System Settings (from the Additional Functions screen) is set to
‘On’, forwarded documents are either printed or stored in the Memory RX Inbox.
*2 If a document sent from another machine has a subaddress or password attached, reception is rejected if the
forwarding conditions set in the System Manager setting from Additional Functions screen are not met.
*3 If you have set the machine to forward documents that do not match the forwarding conditions in Forwarding Settings in
System Settings (from the Additional Functions screen), all received documents that do not match the specified
forwarding conditions are forwarded to the specified destination.
*4 If documents are received when the machine is out of paper or toner, or when there is a paper jam, they are printed
after paper or the toner cartridge is replaced, or after the paper jam is cleared.
*5 If Erase Failed TX is set to ‘Off’ in TX Settings under <Common Settings> in Communications Settings (from the
Additional Functions screen), the status of any job with a forwarding error will be saved in the System Monitor screen.
*6 Documents with forwarding errors are handled as follows, depending on the settings for Handle Documents with
Forwarding Errors in TX Settings under <Common Settings> in Communications Settings (from the Additional
Functions screen):
[Always Print]: All documents with forwarding errors are printed.
[Store/Print]:
Documents with forwarding errors are stored in the Memory RX Inbox when Memory Lock is turned
‘On’. If Memory Lock is turned ‘Off’, the documents are printed.
*7 If Forwarding Done Notice is specified in Forwarding Settings in System Settings (from the Additional Functions
screen), a notification e-mail is sent when the forwarding job completes successfully.
*8 If Forwarding Done Notice is specified in Forwarding Settings in System Settings (from the Additional Functions
screen), a notification e-mail is sent when the forwarding job completes successfully. However, if [Notice Only for Errors]
is also specified, a notification e-mail is sent only when the document is not forwarded successfully.
Various Receiving Functions
2-5
NOTE
• If the memory is full, no additional jobs can be processed.
• For the following settings, see the relevant documents:
- I-Fax Memory Lock, Fax Memory Lock (See Chapter 4, “System Manager Settings,” in the Reference Guide.)
- Forwarding Settings (See Chapter 4, “System Manager Settings,” in the Reference Guide.)
Receiving a Document
2
2-6
Various Receiving Functions
Paper for Printing Received I-Fax/Fax
Documents
Received documents are printed on paper from the paper drawer that has the same size paper
as the received document.
2
Receiving a Document
If paper of the correct size for the received document is not available, the machine automatically
selects a different size of paper in the following order.
The size of paper is automatically selected in the same order, even if paper runs out during
printing.
■ Available Paper Sizes for Received Documents
A3 size originals
A3 ➔ A4* ➔ A4R*
A4 size originals
A4 ➔ A4R ➔ A3 ➔ A5 x 3 ➔ A5R x 3
A5 size originals
A5 ➔ A5R ➔ A4 ➔ A4R ➔ A3
*Received documents are automatically reduced before being printed on the paper size indicated.
IMPORTANT
• You can print a received document on A3, A4, A4R, A5, or A5R size plain, recycled, or colour paper.
NOTE
• You can specify whether to use a paper drawer for the I-Fax/Fax function. The default setting is ‘On,’ except for
the stack bypass. (See Chapter 3, “Selecting and Storing Settings to Suit Your Needs,” in the Reference
Guide.)
• You can set the machine to reduce received documents to 75%, 90%, 95%, or 97% if the document is larger
than any of the available paper sizes. (See “Printing Received Documents in Reduced Form (Receive
Reduction),” on p. 3-29.)
• You can change the order of the paper selection. (See “Specifying the Method of Printing Received Documents
(Select Cassette),” on p. 3-27.)
• You can set the machine to print received documents on both sides of the paper. (See “Two-Sided Printing of
Received Documents (Two-Sided Print),” on p. 3-26.)
• Received documents are printed and delivered face down, in the order in which the pages are received.
Paper for Printing Received I-Fax/Fax Documents
2-7
Using Fax Information Services
Many fax information services for banks, airline reservations, hotel reservations, etc., require tone
dialling for their services. If your fax is connected to a rotary pulse line, follow this procedure to set
the fax temporarily for tone dialling.
2
Receiving a Document
NOTE
• To use this function, it is necessary for the Fax Board (optional) to be installed.
• If you can fax information services, you cannot use the Address Book and Recall mode.
2-8
1
Press [New Address], and press [Fax].
2
Press [On-hook], and dial the number of the information service you need.
Using Fax Information Services
When your call is answered and you hear the recorded message of the information
service, press [Tone].
2
Receiving a Document
3
When using this machine with tone dialling, this step is not required.
The level of the dial tone can be adjusted by pressing [
] or [
].
After you press [Tone], you will see a <T> on the display.
Using Fax Information Services
2-9
4
Use
,
, and
information service.
(numeric keys) to enter the numbers requested by the
Receiving a Document
2
NOTE
• If you require more information about the service and the numbers to enter using
(numeric keys), contact the company providing the service.
5
Press [RX Start] if you require a faxed copy of the information.
Press [End] if you do not require a faxed copy of the information.
2-10
Using Fax Information Services
-
,
, and
Setting/Storing the
Communications Settings
3
CHAPTER
This chapter describes how to store and change the default settings of the Communications Functions
to suit your needs.
Communications Settings Table . . . . . . . . . . . . . . . . . . . . . . . . . . . . . . . . . . . . . . . . . . . . . . . . . . . . . . . . . . 3-2
Setting Automatic Document Deletion (Erase Failed TX) . . . . . . . . . . . . . . . . . . . . . . . . . . . . . . . . . . . . . . 3-4
Handling Documents That Fail to Be Forwarded (Handle Documents with Forwarding Errors) . . . . . . 3-5
Setting the Photo Mode (Photo Mode) . . . . . . . . . . . . . . . . . . . . . . . . . . . . . . . . . . . . . . . . . . . . . . . . . . . . . 3-7
Setting the Number of Retry Attempts (Retry Times) . . . . . . . . . . . . . . . . . . . . . . . . . . . . . . . . . . . . . . . . . 3-8
Setting the Standard Send Settings (Edit Standard Send Settings) . . . . . . . . . . . . . . . . . . . . . . . . . . . . . 3-9
Registering Favorites Buttons (Store Favorites Button) . . . . . . . . . . . . . . . . . . . . . . . . . . . . . . . . . . . . . 3-12
Registering a Favorites Button . . . . . . . . . . . . . . . . . . . . . . . . . . . . . . . . . . . . . . . . . . . . . . . . . . . . . . . . . 3-12
Storing a Favorites Button Name . . . . . . . . . . . . . . . . . . . . . . . . . . . . . . . . . . . . . . . . . . . . . . . . . . . . . . . 3-15
Erasing a Favorites Button Name . . . . . . . . . . . . . . . . . . . . . . . . . . . . . . . . . . . . . . . . . . . . . . . . . . . . . . . 3-17
Setting the Initial Display of the Send Screen (Default Screen for Send) . . . . . . . . . . . . . . . . . . . . . . . . 3-19
Attaching a Transmission Terminal ID to the Document Being Sent (TX Terminal ID) . . . . . . . . . . . . . 3-22
Initialising TX Settings (Initialise TX Settings) . . . . . . . . . . . . . . . . . . . . . . . . . . . . . . . . . . . . . . . . . . . . . 3-25
Two-Sided Printing of Received Documents (Two-Sided Print). . . . . . . . . . . . . . . . . . . . . . . . . . . . . . . . 3-26
Specifying the Method of Printing Received Documents (Select Cassette). . . . . . . . . . . . . . . . . . . . . . 3-27
Printing Received Documents in Reduced Form (Receive Reduction). . . . . . . . . . . . . . . . . . . . . . . . . . 3-29
Specifying Whether to Print Information on Received Documents (Received Page Footer) . . . . . . . . 3-32
Setting 2 On 1 Log (2 On 1 Log) . . . . . . . . . . . . . . . . . . . . . . . . . . . . . . . . . . . . . . . . . . . . . . . . . . . . . . . . . 3-34
Adjusting the Alarm Volume and Monitor Volume (Volume Control). . . . . . . . . . . . . . . . . . . . . . . . . . . . 3-36
Specifying Whether to Use ECM Transmission (ECM TX) . . . . . . . . . . . . . . . . . . . . . . . . . . . . . . . . . . . . 3-37
Setting the Pause Time (Pause Time). . . . . . . . . . . . . . . . . . . . . . . . . . . . . . . . . . . . . . . . . . . . . . . . . . . . . 3-38
Setting Auto Redial (Auto Redial) . . . . . . . . . . . . . . . . . . . . . . . . . . . . . . . . . . . . . . . . . . . . . . . . . . . . . . . . 3-39
Specifying Whether to Use ECM Reception (ECM RX) . . . . . . . . . . . . . . . . . . . . . . . . . . . . . . . . . . . . . . . 3-42
3-1
Communications Settings Table
The following items can be stored or set in the Communications Settings from the Additional
Functions screen.
Setting/Storing the Communications Settings
3
Additional Functions
Available Settings
Applicable
Page
Common Settings: TX Settings
Sender’s Names (TTI)
01 to 99: Store/Edit (24 characters max.), Erase
p. 1-18
Unit Name
24 characters
p. 1-16
Erase Failed TX
On*/Off
p. 3-4
Handle Documents with
Forwarding Errors
On/Off*
p. 3-5
Photo Mode
On/Off*
p. 3-7
Retry Times
0 to 5 times, 3 times*
p. 3-8
Edit Standard Send
Settings
Scanning Mode, File Type, Stamp, Divide into Pages
p. 3-9
Store Favorites Button
Store, Edit, Erase (9 combinations)
p. 3-12
Default Screen for Send
Favorites Buttons, One-touch Buttons, New Address*
p. 3-19
TX Terminal ID
On*/Off
p. 3-22
Initialise TX Settings
Initialise
p. 3-25
Common Settings: RX Settings
3-2
Two-sided Print
On/ Off*
p. 3-26
Select Cassette
Switch A – D; each On*/Off
p. 3-27
Receive Reduction
On*/Off
p. 3-29
Received Page Footer
On/Off*
p. 3-32
2 On 1 Log
On/Off*
p. 3-34
Communications Settings Table
Additional Functions
Available Settings
Applicable
Page
Fax Settings: User Settings
20 digit number max.
p. 1-15
Tel Line Type
Pulse/Tone*
p. 1-10
Volume Control
Alarm Volume: 0 to 8, 4*
Monitor Volume: 0 to 8, 4*
p. 3-36
3
Setting/Storing the Communications Settings
Unit Telephone #
Fax Settings: TX Settings
ECM TX
On*/Off
p. 3-37
Pause Time
1 to 15 seconds, 4 seconds*
p. 3-38
Auto Redial
On*/Off
p. 3-39
Fax Settings: RX Settings
ECM RX
On*/Off
p. 3-42
NOTE
• An asterisk (*) indicates the factory default setting.
• For how to set the modes not described in this manual, refer to the appropriate Operation Manual listed in the front
of this Sending and Facsimile Guide. (See “Manuals for the Machine,” on p. ii.)
• Communications Settings are divided into several items. Press [ ▼] or [▲] to select the desired setting.
• Depending on the types of optional equipment attached, some items may not be displayed.
Communications Settings Table
3-3
Setting Automatic Document Deletion
(Erase Failed TX)
When transmission of a document has failed, this function automatically erases that document
from memory.
3
NOTE
Setting/Storing the Communications Settings
• The default setting is ‘On.’
1
Call up the desired screen as follows:
➔ [Communications Settings] ➔ (Common Settings) [TX Settings] ➔ [Erase Failed TX]
2
Select [On] or [Off], and press [OK].
[On]: Erases jobs after sending, whether transmission ends normally or with an error.
[Off]: Stores a job in memory if transmission ends in an error.
The specified mode is set.
IMPORTANT
• Even if the Erase Failed TX is set to ‘Off’, the documents sent with Direct Sending for fax or the ones sent from the
fax driver do not remain in memory when the transmission ends in an error.
3
3-4
Press [Done] repeatedly until the Basic Features screen appears.
Setting Automatic Document Deletion (Erase Failed TX)
Handling Documents That Fail to Be Forwarded
(Handle Documents with Forwarding Errors)
You can set how the machine handles the documents that fail to be forwarded.
3
NOTE
1
Setting/Storing the Communications Settings
• If Erase Failed TX is set to ‘Off’ in TX Settings under <Common Settings> in Communications Settings (from the
Additional Functions screen), the status of any job with a forwarding error will be saved on the System Monitor
screen. The document will not be processed according to the settings you make for Handle Documents with
Forwarding Errors. (See “Setting Automatic Document Deletion (Erase Failed TX),” on p. 3-4.)
• The default setting is ‘Off’.
Call up the desired screen as follows:
➔ [Communications Settings] ➔ (Common Settings) [TX Settings] ➔
[Handle Documents with Forwarding Errors]
2
Select [Always Print], [Store/Print], or [Off], and press [OK].
[Always Print]: Documents that fail to be forwarded are printed.
[Store/Print]: Documents that fail to be forwarded are stored in the Memory RX Inbox. The machine
automatically prints out the documents that fail to be forwarded if Use I-Fax Memory Lock is set to
➔ [System Settings] ➔ [Communications settings]
‘Off’. To access Use I-Fax Memory Lock, press
➔ [Memory RX Inbox Settings] ➔ [Use I-Fax Memory Lock].
[Off]: Documents that fail to be forwarded are not printed.
The specified mode is set.
Handling Documents That Fail to Be Forwarded (Handle Documents with Forwarding Errors)
3-5
3
Press [Done] repeatedly until the Send Basic Features screen appears.
Setting/Storing the Communications Settings
3
3-6
Handling Documents That Fail to Be Forwarded (Handle Documents with Forwarding Errors)
Setting the Photo Mode (Photo Mode)
This function enables you to set whether to use the Photo mode. When the Photo Mode is ‘On,’
you can select [Printed Image] or [Photo] for scanning the original.
3
NOTE
1
Setting/Storing the Communications Settings
• The default setting is ‘Off.’
Call up the desired screen as follows:
➔ [Communications Settings] ➔ (Common Settings) [TX Settings] ➔ [Photo Mode]
2
Select [On] or [Off], and press [OK].
The specified mode is set.
3
Press [Done] repeatedly until the Basic Features screen appears.
Setting the Photo Mode (Photo Mode)
3-7
Setting the Number of Retry Attempts
(Retry Times)
Retry is the function which automatically resends data when the data cannot be sent because
the receiver is sending or receiving, or when an error occurs. This setting determines the
number of retry attempts. You can set from one to five retry attempts, or select 0 to turn the
Retry Times function off.
Setting/Storing the Communications Settings
3
NOTE
• The default setting is ‘3 times.’
1
Call up the desired screen as follows:
➔ [Communications Settings] ➔ (Common Settings) [TX Settings] ➔ [▼] ➔ [Retry Times]
2
Set the retry times by pressing [–] or [+], and press [OK].
You can also enter values using
-
(numeric keys).
When set to 0, retry is not performed.
The specified mode is set.
3
3-8
Press [Done] repeatedly until the Basic Features screen appears.
Setting the Number of Retry Attempts (Retry Times)
Setting the Standard Send Settings
(Edit Standard Send Settings)
You can change the standard settings for the Send function including the Scanning Mode and
the File Type. (See “Selecting a Scanning Mode,” on p. 1-76. See “Configuring Send Settings
(Send Settings),” on p. 1-132.)
3
Setting/Storing the Communications Settings
NOTE
• The default settings are as follows:
- Scanning Mode: ‘Black 200dpi’
- File Type: ‘TIFF’
- Stamp: ‘Do not press’
- Divide into Pages: ‘On’
1
Call up the desired screen as follows:
➔ [Communications Settings] ➔ (Common Settings) [TX Settings] ➔ [▼] ➔
[Edit Standard Send Settings]
2
From the Scanning Mode drop-down list, select the mode you want to set as
Standard Settings.
When the desired scan mode is not displayed, press [▼] or [▲].
You can also set a scanning mode you have stored.
(See “Storing/Erasing Scanning Mode,” on p. 1-124.)
Setting the Standard Send Settings (Edit Standard Send Settings)
3-9
3
Press the File Type drop-down list, and select the file type you want to use.
Setting/Storing the Communications Settings
3
Types of files:
TIFF: Sends images in TIFF format.
PDF: Sends images in PDF format.
NOTE
• To view a TIFF file, an application that supports TIFF (such as Imaging for Windows) is required.
• To view a PDF file, Acrobat Reader is required.
4
Select whether to divide a sending document into pages.
If you want to separate multiple images for each page and forward them as separate files, set Divide
into Pages to ‘On’.
If you want to forward multiple images as a single file without dividing them, set Divide into Pages to
‘Off’.
3-10
Setting the Standard Send Settings (Edit Standard Send Settings)
5
Press [Stamp], and press [OK].
Setting/Storing the Communications Settings
3
To cancel the stamp mode, press [Stamp] again.
The specified mode is set.
6
Press [Done] repeatedly until the Send Basic Features screen appears.
NOTE
• To cancel al settings and return to the Standard mode immediately, press
.
Setting the Standard Send Settings (Edit Standard Send Settings)
3-11
Registering Favorites Buttons
(Store Favorites Button)
You can name and store up to nine combinations of the settings, such as specified addresses
and Send settings. It is useful to store the combinations which you use frequently.
Setting/Storing the Communications Settings
3
NOTE
• Once stored, the settings will not be erased even when the power is turned OFF.
Registering a Favorites Button
1
Set the send settings that you want to register.
NOTE
• In this example, the destination is specified and [Two-sided Original] and [Divide into Pages] are set.
2
Call up the desired screen as follows:
➔ [Communications Settings] ➔ (Common Settings) [TX Settings] ➔ [▼] ➔ [Store Favorites Button]
3-12
Registering Favorites Buttons (Store Favorites Button)
3
Select the favorites button ([M1] to [M9]) to store a desired setting, and press
[Store/Edit].
Setting/Storing the Communications Settings
3
NOTE
• A favorites button already storing any setting is indicated by a coloured triangle (
of the key.
4
) in the lower right corner
Press [Store].
NOTE
• If you select a favorites button in which any setting has already been set, the current settings of that key are
displayed.
• If there are more settings stored than are currently displayed, scroll through the list by using [ ▼] or [▲].
Registering Favorites Buttons (Store Favorites Button)
3-13
●
If you select an empty favorites button (no settings have been stored):
Press [Yes] when the confirmation message appears asking whether you want to store the setting.
Setting/Storing the Communications Settings
3
Press [No], if you do not want to store the setting.
The message <Stored in memory.> appears for about two seconds on the touch panel display.
The settings stored in the favorites button are displayed.
●
If you select an occupied favorites button (settings have already been stored):
Press [Yes] when the confirmation message appears asking whether you want to overwrite the setting.
Press [No], if you do not want to overwrite the setting.
The message <Stored in memory.> appears for about two seconds on the touch panel display.
The settings stored in the favorites button are displayed.
5
3-14
Press [Done] repeatedly until the Basic Features screen appears.
Registering Favorites Buttons (Store Favorites Button)
Storing a Favorites Button Name
1
Call up the desired screen as follows:
➔ [Communications Settings] ➔ (Common Settings) [TX Settings] ➔ [▼] ➔ [Store Favorites Button]
Select a favorites button ([M1] to [M9]) to which you want to store a name, and
press [Store/Edit].
3
NOTE
• A favorites button already storing a scan setting is indicated by a coloured triangle (
the key.
3
) in the lower right corner of
Press [Name].
Registering Favorites Buttons (Store Favorites Button)
3-15
Setting/Storing the Communications Settings
2
NOTE
• If you select a favorites button in which a scan setting has already been set, the current settings of that key are
displayed.
• If there are more scan settings stored than are currently displayed, scroll through the list by using [ ▼] or [▲].
4
Enter the new name, and press [OK].
Setting/Storing the Communications Settings
3
The name appears on the favorites button.
NOTE
• For details on how to enter characters on the touch panel display, see Chapter 1, “Before You Start Using This
Machine,” in the Reference Guide.
• You can enter up to 10 characters per line. Two lines can be entered for the name.
• If you press [OK] without entering any characters, the name of the favorites button will revert to its default setting.
5
3-16
Press [Done] repeatedly until the Basic Features screen appears.
Registering Favorites Buttons (Store Favorites Button)
Erasing a Favorites Button Name
1
Call up the desired screen as follows:
➔ [Communications Settings] ➔ (Common Settings) [TX Settings] ➔ [▼] ➔ [Store Favorites Button]
Select the favorites button to be erased, and press [Erase].
3
Setting/Storing the Communications Settings
2
The confirmation message appears asking whether you want to erase the settings.
IMPORTANT
• Be sure to check the settings before erasing them.
NOTE
• A favorites button already storing any setting is indicated by a coloured triangle (
of the key.
) in the lower right corner
Registering Favorites Buttons (Store Favorites Button)
3-17
3
Press [Yes].
Setting/Storing the Communications Settings
3
If you do not want to erase the setting press [No].
The message <Erased.> is displayed for about two seconds on the touch panel display.
The stored Scan setting is erased.
NOTE
• The name of the favorites button is not erased. If you want to change the name, see “Storing a Favorites Button
Name,” on p. 3-15.
4
3-18
Press [Done] repeatedly until the Basic Features screen appears.
Registering Favorites Buttons (Store Favorites Button)
Setting the Initial Display of the Send Screen
(Default Screen for Send)
You can set the functions that will be displayed in the initial Send screen when the power is
turned ON or the Auto Clear function is activated. You can also switch the screen to the Basic
Features screen, which displays enlarged the Favorites Buttons.
NOTE
• The default setting is ‘New Address.’
1
Call up the desired screen as follows:
➔ [Communications Settings] ➔ (Common Settings) [TX Settings] ➔ [▼] ➔
[Default Screen for Send]
2
Select [Favorites Buttons], [One-touch Buttons], or [New Address], and press [OK].
Setting the Initial Display of the Send Screen (Default Screen for Send)
3-19
Setting/Storing the Communications Settings
3
●
If you select [Favorites Buttons]:
Select [On] or [Off].
Setting/Storing the Communications Settings
3
[On]: Switches the screen to the Basic Features screen, displays enlarged favorites buttons.
[Off]: Switches the screen to the Basic Features screen, displays regular-size favorites buttons.
The specified mode is set.
3-20
Setting the Initial Display of the Send Screen (Default Screen for Send)
Press [Done] repeatedly until the Basic Features screen appears.
3
Setting/Storing the Communications Settings
3
Setting the Initial Display of the Send Screen (Default Screen for Send)
3-21
Attaching a Transmission Terminal ID to the
Document Being Sent (TX Terminal ID)
You can specify whether to attach a transmission terminal ID when sending a document.
The transmission terminal ID is printed at the top of the sent document.
Your telephone number, name, time, day, and date are printed, enabling the receiving party to
know who sent the document.
Setting/Storing the Communications Settings
3
NOTE
• If you set the transmission terminal ID to ‘On,’ you can set the position that the transmission terminal ID appears on
the recording paper, and also set a telephone number mark.
• If you send I-Fax documents, <IFAX> is printed on the recording paper regardless of the telephone number mark
set.
• The default settings are as follows:
- TX terminal ID: ‘On’
- Printing Position: ‘Outside’
- Telephone number mark: ‘FAX’
1
Call up the desired screen as follows:
➔ [Communications Settings] ➔ (Common Settings) [TX Settings] ➔ [▼] ➔ [TX Terminal ID]
2
3-22
Select [On] or [Off].
Attaching a Transmission Terminal ID to the Document Being Sent (TX Terminal ID)
When you select [On]:
Press [Option].
3
Specify the transmission terminal ID printing position and the telephone number mark, and press [OK]
➔ [OK] in this order.
Printing position:
- [Inside]: This prints the transmission terminal ID inside the image area on the recording paper.
- [Outside]: This prints the transmission terminal ID outside the image area on the recording paper.
Telephone number mark:
- [FAX]: This prints the letters <FAX> before the telephone number for sending fax documents.
- [TEL]: This prints the letters <TEL> before the telephone number for sending fax documents.
Attaching a Transmission Terminal ID to the Document Being Sent (TX Terminal ID)
3-23
Setting/Storing the Communications Settings
●
Example: If you select to print a transmission terminal ID, the transmission terminal ID is printed on
the recording paper in the destination machine, as shown below.
Outside
Original
area
3
Setting/Storing the Communications Settings
FAX / TEL
Inside
●
When you select [Off]:
Press [OK].
The specified mode is set.
3
3-24
Press [Done] repeatedly until the Basic Features screen appears.
Attaching a Transmission Terminal ID to the Document Being Sent (TX Terminal ID)
Initialising TX Settings (Initialise TX Settings)
This function reverts TX settings to the default settings.
NOTE
• If you initialise the TX Settings, the settings stored in the Favorites Buttons will also revert to the default settings.
1
Call up the desired screen as follows:
➔ [Communications Settings] ➔ (Common Settings) [TX Settings] ➔ [▼] ➔ [Initialize TX Settings]
2
Press [Yes].
To cancel the initialisation, press [No].
3
Press [Done] repeatedly until the Basic Features screen appears.
Initialising TX Settings (Initialise TX Settings)
3-25
Setting/Storing the Communications Settings
3
IMPORTANT
• You cannot initialise the Sender’s Name (TTI), Unit Name, Handle Documents with Forwarding Errors,
and the TX Terminal ID settings.
Two-Sided Printing of Received Documents
(Two-Sided Print)
You can print received documents on both sides of the recording paper. This enables you to
save paper.
3
NOTE
Setting/Storing the Communications Settings
• The default setting for two-sided printing is ‘Off.’
1
Call up the desired screen as follows:
➔ [Communications Settings] ➔ (Common Settings) [RX Settings] ➔ [Two-sided Print]
2
Select [On] or [Off], and press [OK].
If you do not want to make two-sided prints, press [Off].
The specified mode is set.
3
3-26
Press [Done] repeatedly until the Basic Features screen appears.
Two-Sided Printing of Received Documents (Two-Sided Print)
Specifying the Method of Printing Received
Documents (Select Cassette)
This setting controls how printing is performed when the machine has no paper matching the
size of the received document.
3
Setting/Storing the Communications Settings
There are four printing methods (switches A, B, C, and D):
• Switch A: The image is printed on two sheets of paper that have the same combined size as
the received document.
Output
Received Data (Original)
A3
A4
A4
• Switch B: The image is printed with an added blank space on paper that has the same width
as the received document.
Received Data (Original)
A4
Output
A3
• Switch C: The image is reduced and printed on paper that differs in width from the received
document.
Received Data (Original)
Output
A4R
A3
Specifying the Method of Printing Received Documents (Select Cassette)
3-27
• Switch D: The image is printed on paper that is larger in size than the received document.
Received Data (Original)
Output
3
Setting/Storing the Communications Settings
A4R
A3
NOTE
• For details regarding selecting a paper drawer when printing received documents, see Chapter 3, “Selecting and
Storing Settings to Suit Your Needs,” in the Reference Guide.
• The default setting of all switches is ‘On.’
1
Call up the desired screen as follows:
➔ [Communications Settings] ➔ (Common Settings) [RX Settings] ➔ [Select Cassette]
2
Select [On] or [Off] for each switch, and press [OK].
The specified mode is set.
3
3-28
Press [Done] repeatedly until the Basic Features screen appears.
Specifying the Method of Printing Received Documents (Select Cassette)
Printing Received Documents in Reduced
Form (Receive Reduction)
You can automatically print received documents in reduced form so that the image of each
document is within the printable range of the recording paper.
3
NOTE
1
Setting/Storing the Communications Settings
• The default settings are as follows:
- Receive Reduction: ‘On’
- RX Reduction: ‘Auto’
- Reduce %: ‘90%’
- Reduction Direction: ‘Vertical Only’
Call up the desired screen as follows:
➔ [Communications Settings] ➔ (Common Settings) [RX Settings] ➔ [Receive Reduction]
2
Select [On] or [Off].
If you do not want to select [Receive Reduction], press [Off].
IMPORTANT
• If ‘Off’ is selected, the received document will not be automatically reduced to fit the size of the paper if it exceeds
the printable area, it is divided into equal sections and printed onto separate copy sheets. However, if the received
document exceeds the recording paper slightly (12 mm or less), the part of the image that does not fit on the paper
is not printed.
Printing Received Documents in Reduced Form (Receive Reduction)
3-29
●
When you select [On]:
Select [Auto] or [Fixed Reduction].
Setting/Storing the Communications Settings
3
[Auto]: The image is automatically reduced within a range from the value set in the Reduce % screen
up to 100% of the size of the original.
[Fixed Reduction]: The image is reduced by a fixed reduction ratio set in the Reduce % screen.
Select a reduction ratio ([97%], [95%], [90%], or [75%]) from the Reduce % drop-down list.
3-30
Printing Received Documents in Reduced Form (Receive Reduction)
Select [Vertical & Horizontal] or [Vertical Only], and press [OK].
Setting/Storing the Communications Settings
3
[Vertical & Horizontal]: The image is reduced in the vertical and horizontal directions.
[Vertical Only]: The image is reduced in the vertical direction only.
●
When you select [Off]:
Press [OK].
The specified mode is set.
3
Press [Done] repeatedly until the Basic Features screen appears.
Printing Received Documents in Reduced Form (Receive Reduction)
3-31
Specifying Whether to Print Information on
Received Documents (Received Page Footer)
You can select whether or not to print the date, day, and time received, transaction number, and
page numbers on received documents.
The reception information (date received, day received, time received, transaction number, and
page number) is printed at the bottom of the received document.
Setting/Storing the Communications Settings
3
Page number
Transaction number
Time Received
Day Received
Date Received
NOTE
• The default setting is ‘Off.’
1
Call up the desired screen as follows:
➔ [Communications Settings] ➔ (Common Settings) [RX Settings] ➔ [Received Page Footer]
3-32
Specifying Whether to Print Information on Received Documents (Received Page Footer)
2
Select [On] or [Off], and press [OK].
Setting/Storing the Communications Settings
3
When selecting not to print the received information, press [Off].
The specified mode is set.
3
Press [Done] repeatedly until the Basic Features screen appears.
Specifying Whether to Print Information on Received Documents (Received Page Footer)
3-33
Setting 2 On 1 Log (2 On 1 Log)
This feature enables you to print two received documents of the same paper size onto a single
sheet of paper.
3
Setting/Storing the Communications Settings
This function operates only under the following conditions:
• The same paper drawer must be used for printing two or three consecutive pages of a
received document.
• The paper in the selected paper drawer must be large enough for two consecutive pages to be
printed on it.
- Example: If the A4 drawer is empty, and the A3 drawer has paper, you can print two A4
documents onto a single sheet of A3 size paper. If the A3 drawer is empty, and the A4 drawer
has paper, you can print A3 documents onto two sheets of A4 size paper.
NOTE
• When 2 On 1 is set to ‘On,’ documents printed using 2 On 1 are typed with a broken line in the middle.
When a document is received with reception information, a broken line is printed between the two pages.
• The default setting is ‘Off.’
1
Call up the desired screen as follows:
➔ [Communications Settings] ➔ (Common Settings) [RX Settings] ➔ [2 On 1 Log]
3-34
Setting 2 On 1 Log (2 On 1 Log)
2
Select [On] or [Off], and press [OK].
Setting/Storing the Communications Settings
3
When you do not want to set 2 On 1 Log, press [Off].
The specified mode is set.
3
Press [Done] repeatedly until the Basic Features screen appears.
Setting 2 On 1 Log (2 On 1 Log)
3-35
Adjusting the Alarm Volume and
Monitor Volume (Volume Control)
You can set the alarm and monitor volume for sending/receiving a fax.
3
NOTE
Setting/Storing the Communications Settings
• The alarm volume is the tone that is emitted when an original has been successfully sent/received using a fax, or
when a send/receive error has occurred.
• The monitor volume is the tone that is emitted when this machine makes a connection to the other party’s fax
machine.
• The default settings are as follows:
- Alarm volume: ‘4’
- Monitor volume: ‘4’
1
Call up the desired screen as follows:
➔ [Communications Settings] ➔ (Fax Settings) [User Settings] ➔ [Volume Control]
2
Press [
] or [
] to set the alarm volume and monitor volume, and press [OK].
The volume can be set from 0 to 8.
If you set the volume to 0, no tone sounds.
The specified mode is set.
3
3-36
Press [Done] repeatedly until the Basic Features screen appears.
Adjusting the Alarm Volume and Monitor Volume (Volume Control)
Specifying Whether to Use ECM Transmission
(ECM TX)
You can send fax documents using the Error Correction Mode (ECM).
ECM is a function which automatically corrects errors in an image while it is being sent.
• When you want to communicate using ECM, it is necessary that the ECM function be set in both the other party’s
machine and this machine. (Unless ECM is set in both machines, this function will not operate.)
• Even when you set the ECM function, errors can sometimes occur due to a poor telephone line.
• If trouble occurs in the telephone line, it will take some time for the documents to be sent.
NOTE
• The default setting is ‘On.’
1
Call up the desired screen as follows:
➔ [Communications Settings] ➔ (Fax Settings) [TX Settings] ➔ [ECM TX]
2
Select [On] or [Off], and press [OK].
If you do not want to use ECM transmission, press [Off].
The specified mode is set.
3
Press [Done] repeatedly until the Basic Features screen appears.
Specifying Whether to Use ECM Transmission (ECM TX)
3-37
Setting/Storing the Communications Settings
3
IMPORTANT
Setting the Pause Time (Pause Time)
This section describes how to set the pause time (in seconds) for fax sending.
Some overseas dialling may not be successful due to the distance or complex route for
connections when you dial the international access code, country code, and the destination
number all together. In such cases, insert a pause after the international access code. Then the
machine dials the number with a short waiting time where the pause is inserted, which helps
improve the connection.
Setting/Storing the Communications Settings
3
NOTE
• You can insert a pause on the screen in which you enter a fax number. (See “Specifying a Fax Number,”
on p. 1-36.)
• Pauses entered at the end of dialled telephone numbers are always 10 seconds long.
• The default setting is ‘4 (sec).’
1
Call up the desired screen as follows:
➔ [Communications Settings] ➔ (Fax Settings) [TX Settings] ➔ [Pause Time]
2
Set the pause time using [–] or [+], and press [OK].
The pause time must be from 1 to 15 seconds in one-second increments.
You can also input the value using
-
(numeric keys).
The specified mode is set.
3
3-38
Press [Done] repeatedly until the Basic Features screen appears.
Setting the Pause Time (Pause Time)
Setting Auto Redial (Auto Redial)
Auto Redial is a function that automatically dials the other party again if the other party cannot
be dialled due to a busy line, for example, or if a sending error occurs when you send fax
documents.
If you set Auto Redial, you can set redial times, redial interval, and transmission error redial.
Setting/Storing the Communications Settings
3
NOTE
• The default settings are:
- Auto Redial: ‘On’
- Redial Times: ‘2 times’
- Redial Interval: ‘2 minutes’
- TX Error Resend: ‘Error and 1st page.’
1
Call up the desired screen as follows:
➔ [Communications Settings] ➔ (Fax Settings) [TX Settings] ➔ [Auto Redial]
2
Select [On] or [Off].
Setting Auto Redial (Auto Redial)
3-39
●
When you select [On]:
Press [Option].
Setting/Storing the Communications Settings
3
Press [–] or [+] to specify the redial times.
The machine can redial from 1 to 10 times.
Press [–] or [+] to specify the redial interval.
The redial interval must be from 2 to 99 minutes in one-minute increments.
3-40
Setting Auto Redial (Auto Redial)
If a sending error occurs, select the desired action from TX Error Resend drop down list, and press [OK]
➔ [OK] in this order.
[Error and 1st page]: Auto Redial takes place if a sending error occurs. The first page of the document
and also the error page and subsequent pages are resent.
[All pages]: Auto Redial takes place if a sending error occurs. All pages of the document are resent.
[Off]: Redialling does not take place if a sending error occurs.
●
When you select [Off]:
Press [OK].
The specified mode is set.
3
Press [Done] repeatedly until the Basic Features screen appears.
Setting Auto Redial (Auto Redial)
3-41
Setting/Storing the Communications Settings
3
Specifying Whether to Use ECM Reception
(ECM RX)
You can receive incoming fax documents using the Error Correction Mode (ECM).
ECM is a function which automatically corrects errors in an image while it is being received.
3
Setting/Storing the Communications Settings
IMPORTANT
• If you want to communicate using ECM, it is necessary that the ECM function be set in both the other party’s
machine and this machine. (Unless ECM is set in both machines, this function will not operate).
• Even when you specify the ECM function, errors can sometimes occur due to a poor telephone line.
• If you are experiencing trouble with your telephone line, it may take some time for documents to be received.
NOTE
• The default setting is ‘On.’
1
Call up the desired screen as follows:
➔ [Communications Settings] ➔ (Fax Settings) [RX Settings] ➔ [ECM RX]
2
Select [On] or [Off], and press [OK].
If you do not want to use ECM for received documents, press [Off].
The specified mode is set.
3-42
Specifying Whether to Use ECM Reception (ECM RX)
Press [Done] repeatedly until the Basic Features screen appears.
3
Setting/Storing the Communications Settings
3
Specifying Whether to Use ECM Reception (ECM RX)
3-43
Setting/Storing the Communications Settings
3
3-44
Specifying Whether to Use ECM Reception (ECM RX)
Registering/Editing the Address
4
CHAPTER
This chapter describes how to register various addresses in the Address Book and how to edit and
erase registered information.
Address Book Settings Table . . . . . . . . . . . . . . . . . . . . . . . . . . . . . . . . . . . . . . . . . . . . . . . . . . . . . . . . . . . . 4-2
About the Address Book . . . . . . . . . . . . . . . . . . . . . . . . . . . . . . . . . . . . . . . . . . . . . . . . . . . . . . . . . . . . . . . . 4-3
Storing New Addresses (Store/Edit Address Book) . . . . . . . . . . . . . . . . . . . . . . . . . . . . . . . . . . . . . . . . . . 4-5
Storing Fax Numbers. . . . . . . . . . . . . . . . . . . . . . . . . . . . . . . . . . . . . . . . . . . . . . . . . . . . . . . . . . . . . . . . . . 4-5
Storing E-mail Addresses . . . . . . . . . . . . . . . . . . . . . . . . . . . . . . . . . . . . . . . . . . . . . . . . . . . . . . . . . . . . . 4-13
Storing I-Fax Addresses . . . . . . . . . . . . . . . . . . . . . . . . . . . . . . . . . . . . . . . . . . . . . . . . . . . . . . . . . . . . . . 4-18
Storing File Server Addresses. . . . . . . . . . . . . . . . . . . . . . . . . . . . . . . . . . . . . . . . . . . . . . . . . . . . . . . . . . 4-25
Storing Group Addresses . . . . . . . . . . . . . . . . . . . . . . . . . . . . . . . . . . . . . . . . . . . . . . . . . . . . . . . . . . . . . 4-36
Storing Addresses Searched via a Server . . . . . . . . . . . . . . . . . . . . . . . . . . . . . . . . . . . . . . . . . . . . . . . . 4-43
Changing Address Details. . . . . . . . . . . . . . . . . . . . . . . . . . . . . . . . . . . . . . . . . . . . . . . . . . . . . . . . . . . . . . 4-58
Erasing Addresses . . . . . . . . . . . . . . . . . . . . . . . . . . . . . . . . . . . . . . . . . . . . . . . . . . . . . . . . . . . . . . . . . . . . 4-61
Registering a Name for an Address Book (Store Address Book Name) . . . . . . . . . . . . . . . . . . . . . . . . . 4-63
Registering the One-Touch Buttons (One-touch Buttons) . . . . . . . . . . . . . . . . . . . . . . . . . . . . . . . . . . . . 4-65
Storing/Editing a One-Touch Button . . . . . . . . . . . . . . . . . . . . . . . . . . . . . . . . . . . . . . . . . . . . . . . . . . . . . 4-65
Erasing a One-Touch Button . . . . . . . . . . . . . . . . . . . . . . . . . . . . . . . . . . . . . . . . . . . . . . . . . . . . . . . . . . . 4-99
4-1
Address Book Settings Table
The following items can be stored or set in the Address Book Settings from the Additional
Functions screen.
Registering/Editing the Address
4
Additional Functions
Available Settings
Applicable
Page
Address Book Settings
4-2
Store/Edit Address Book
Store New Address
Edit
Erase
p. 4-5
p. 4-58
p. 4-61
Store Address Book Name
Store Name
p. 4-63
One-touch Buttons
Store/Edit, Erase
p. 4-65
Address Book Settings Table
About the Address Book
The Address Book is a feature used for storing the destinations of fax, e-mail, I-fax, and file
servers. The Address Book is divided into ten subaddress books, and one-touch buttons are
located here as well. You can store up to 1,800 destinations, including 1,600 destinations in the
Address Book and 200 destinations in the one-touch buttons. Registering a destination in the
Address Book saves you the effort of entering that destination’s address each time you send a
job. By storing your own e-mail address, you can specify a reply e-mail address and use the Job
Done Notice function.
Registering/Editing the Address
4
NOTE
• Since each address entry is treated as a single entry, if an e-mail address is registered in a Group Address, that
e-mail address and the Group address are counted as two entries.
The following types of destinations can be registered in the Address Book:
■ Fax:
You can register fax numbers, subaddresses and R-Key.
A fax number obtained by searching through the directory listing (LDAP) on the network can also be
stored.
NOTE
• To use these functions, it is necessary for a Fax Board (optional) to be installed.
■ E-mail:
You can register e-mail addresses.
An e-mail address obtained by searching through the directory listing (LDAP) on the network can also be
stored.
■ I-Fax:
You can register I-Fax addresses, mode selections, and recipient’s conditions.
An e-mail address obtained by searching through the directory listings on a server using LDAP can also
be stored.
■ File:
You can register a protocol and host name, file path, etc. for storing scanned documents in a file server.
NOTE
• For examples of the settings needed to send to a file server, see the Network Guide.
About the Address Book
4-3
■ Group:
You can register multiple destinations of various types in a Group Address. You can group and use these
registered destinations according to your needs.
NOTE
• You cannot register new addresses.
• You cannot register an address in a different subaddress book as a group address.
Registering/Editing the Address
4
4-4
About the Address Book
Storing New Addresses (Store/Edit Address Book)
When you register a destination in the Address Book, you can save yourself the effort of
entering the address every time it is used. That destination can also be selected from the
Address Book for use in any other customised setting.
Storing Fax Numbers
NOTE
• To use these functions, it is necessary for a Fax Board (optional) to be installed.
1
Call up the desired screen as follows:
➔
[Address Book Settings] ➔ [Store/Edit Address Book]
If a password is set for the address book, press [Address Book Settings], enter the password, and press
[OK]. (See Chapter 4, “System Manager Settings,” in the Reference Guide.)
2
Press [Store New Address].
Storing New Addresses (Store/Edit Address Book)
4-5
Registering/Editing the Address
4
3
Press [Fax].
4
Press [Name].
Registering/Editing the Address
4
4-6
Storing New Addresses (Store/Edit Address Book)
5
Enter a name for the fax number, and press [OK].
Registering/Editing the Address
4
NOTE
• For details on how to enter characters on the touch panel display, see Chapter 1, “Before You Start Using This
Machine,” in the Reference Guide.
• You can enter up to 24 characters for the name.
6
From the Address Book drop-down list, select one of the Address Books
numbered 1 to 10.
Address Books 1 to 10 are used to divide the Address Book into ten parts. This is a convenient way to
classify addresses.
The fax number is stored in the subaddress book (Address Book 1 to 10) selected here.
Storing New Addresses (Store/Edit Address Book)
4-7
7
Enter a fax number using
-
,
, and
(numeric keys).
Registering/Editing the Address
4
[Pause]: Press to insert a pause of several seconds in the telephone number that you are dialling.
If you insert a pause, the letter <p> is displayed between the numbers, and also the letter <P>
appears at the end of the number. When dialling an overseas number, insert a pause after the
access number, and also at the end of the telephone number. (See “Setting the Pause Time
(Pause Time),” on p. 3-38.)
[Tone]: Press when directly calling an extension line connected to a Private Branch Exchange (PBX)
that accepts only push tone signals from a dial line. (See “Using Fax Information Services,” on p. 2-8.)
[ ] [ ]: Use to move the cursor.
[Backspace]: Press when a wrong number is entered. The last number entered is deleted, enabling
you to enter the correct number.
[Space]: Press to insert a space between the area code and the local telephone number.
[+]: Press to insert a country code in front of the telephone number.
[Option]: Press to specify a subaddress, password, ECM transmission, sending speed, and long
distance. Specify these settings to suit your needs.
[DT]: Press this key to confirm the dial tone in the middle of the facsimile dialling the rest of the
number. A dot will be displayed.
[R]: Press to use the R-key. (See “Special Dialling,” on p. 1-176.)
To delete the number you entered, press
.
IMPORTANT
• Pauses and Spaces cannot be entered before telephone numbers.
NOTE
• The telephone number can have up to 120 digits.
• Pauses entered at the end of dialled telephone numbers are always 10 seconds long.
4-8
Storing New Addresses (Store/Edit Address Book)
If you press [Option]:
Press [Subaddress] and [Password], enter the subaddress and password using
(numeric keys).
-
,
, and
4
- To delete the number you entered, press
Registering/Editing the Address
●
.
- You can store a [Subaddress] and [Password] of up to 20 digits each.
- To enter a space, press [Space].
- To delete the last character, press [Backspace].
- If the other party did not set an RX password in the target subaddress, you do not need to enter a
password.
IMPORTANT
• To send or receive documents to and from a fax machine using subaddresses and RX passwords defined in the
ITU-T standard (ITU-T is a committee within the International Communications Union, established to set
communications standards), the subaddresses and passwords must be dialled in addition to the telephone
numbers.
Press [On] or [Off] to set ECM Transmission.
Storing New Addresses (Store/Edit Address Book)
4-9
Press the Sending Speed drop-down list and select the sending speed.
Registering/Editing the Address
4
Select the Sending Speed from [33600bps], [14400bps], [9600bps], and [4800bps].
Press the Long Distance drop-down list, select the desired subject, and press [OK].
Long Distance: If errors occur when sending faxes overseas, use the [Long Distance (1)] setting.
If transmission conditions do not improve, use [Long Distance (2)], then [Long Distance (3)].
4-10
Storing New Addresses (Store/Edit Address Book)
Press [OK].
4
Registering/Editing the Address
8
If Access Number Management for an Address Book is set to ‘On,’ press [Next].
Storing New Addresses (Store/Edit Address Book)
4-11
Enter the access number using
-
(numeric keys), press [OK].
Registering/Editing the Address
4
• If you do not want to specify an access number, leave it blank and press [OK].
• The maximum number of digits you can store for an Access Number is seven. If you store an
Access Number with less than seven digits, the machine stores them as follows:
- Example: If <321> is entered, it is stored as <0000321>.
- You cannot store an access number with only zeros as the number, such as <0000000>.
The display returns to the Store New Address screen.
NOTE
• If there is a required item which has not yet been entered, enter the necessary item.
9
4-12
Press [Done] repeatedly until the Basic Features screen appears.
Storing New Addresses (Store/Edit Address Book)
Storing E-mail Addresses
1
Call up the desired screen as follows:
➔ [Address Book Settings] ➔ [Store/Edit Address Book]
If a password is set for the address book, press [Address Book Settings], enter the password, and
press [OK]. (See Chapter 4, “System Manager Settings,” in the Reference Guide.)
4
Press [Store New Address].
3
Press [E-mail].
Registering/Editing the Address
2
Storing New Addresses (Store/Edit Address Book)
4-13
4
Press [Name].
5
Enter a name for the e-mail address, and press [OK].
Registering/Editing the Address
4
NOTE
• For details on how to enter characters on the touch panel display, see Chapter 1, “Before You Start Using This
Machine,” in the Reference Guide.
• You can enter up to 24 characters for the name.
4-14
Storing New Addresses (Store/Edit Address Book)
6
From the Address Book drop-down list, select one of the Address Books
numbered 1 to 10.
Registering/Editing the Address
4
Address Books 1 to 10 are used to divide the Address Book into ten parts. This is a convenient way
to classify addresses.
The e-mail address is stored in the subaddress book (Address Book 1 to 10) selected here.
7
Press [E-mail Address], enter the address, and press [OK].
NOTE
• You can enter up to 128 characters for the e-mail address.
Storing New Addresses (Store/Edit Address Book)
4-15
8
Press [OK].
Registering/Editing the Address
4
If Access Number Management for an Address Book is set to ‘On,’ press [Next].
4-16
Storing New Addresses (Store/Edit Address Book)
Enter the access number using
-
(numeric keys), press [OK].
Registering/Editing the Address
4
• If you do not want to specify an access number, leave it blank and press [OK].
• The maximum number of digits you can store for an Access Number is seven. If you store an
Access Number with less than seven digits, the machine stores them as follows:
- Example: If <321> is entered, it is stored as <0000321>.
- You cannot store an access number with only zeros as the number, such as <0000000>.
The display returns to the Store New Address screen.
NOTE
• If there is a required item which has not yet been entered, enter the necessary item.
9
Press [Done] repeatedly until the Basic Features screen appears.
Storing New Addresses (Store/Edit Address Book)
4-17
Storing I-Fax Addresses
1
Call up the desired screen as follows:
➔ [Address Book Settings] ➔ [Store/Edit Address Book]
If a password is set for the address book, press [Address Book Settings], enter the password, and
press [OK]. (See Chapter 4, “System Manager Settings,” in the Reference Guide.)
Registering/Editing the Address
4
4-18
2
Press [Store New Address].
3
Press [I-Fax].
Storing New Addresses (Store/Edit Address Book)
4
Press [Name].
5
Registering/Editing the Address
4
Enter a name for the I-Fax address, and press [OK].
NOTE
• For details on how to enter characters on the touch panel display, see Chapter 1, “Before You Start Using This
Machine,” in the Reference Guide.
• You can enter up to 24 characters for the name.
Storing New Addresses (Store/Edit Address Book)
4-19
6
From the Address Book drop-down list, select one of the Address Books
numbered 1 to 10.
Registering/Editing the Address
4
Address Books 1 to 10 are used to divide the Address Book into ten parts. This is a convenient way to
classify addresses.
The I-Fax address is stored in the subaddress book (Address Book 1 to 10) selected here.
7
Press Mode drop-down list to select [Simple] or [Full].
In order to send documents in the Full mode, the recipient’s machine must be compatible with the Full
mode to receive the documents. If you send documents in the Full mode, you can confirm that the
recipient’s machine received the I-Fax documents .
[Simple]: Sends scanned data as an image using Internet.
[Full]: In addition to the sending functions of the Simple mode, this confirms whether data was sent.
4-20
Storing New Addresses (Store/Edit Address Book)
8
Press [I-Fax Address], enter the address, and press [OK].
Registering/Editing the Address
4
NOTE
• You can enter up to 128 characters for the I-Fax address.
• If you do not send documents via a server, and if the recipient’s IP address is not registered in a DNS server,
enter an I-Fax address in the form of ‘user@[the recipient’s IP address].’
9
Press [Standard Field 1] and [Standard Field 2], enter the standard field, and
press [OK].
Use Standard Field 1 and 2 if it is necessary to enter the same standard field all the time.
This setting is unnecessary if you do not use this service.
NOTE
• You can enter up to 40 characters for Standard Field 1.
• You can enter up to 16 characters for Standard Field 2.
• After pressing [OK], the standard field is displayed as “********.”
Storing New Addresses (Store/Edit Address Book)
4-21
10
Select whether to send the I-Fax via a server.
Registering/Editing the Address
4
[On]: Sends documents via a server. You can send documents to destinations via the internet in the
same way as e-mail.
[Off]: Sends documents other than via a server. You can send large amounts of data to a recipient in
the same LAN environment without placing a burden on the mail server. This enables you to
send documents directly. It is necessary to set an MX (Mail eXchange) record of the DNS
server beforehand to use this function. Ask your System Manager whether this type of sending
is possible before you use this function.
If you store the standard field, set Send via Server to ‘On.’
IMPORTANT
• If you want to set the Send Via Server setting to ‘Off,’ it is necessary to first set the Use Send Via Server setting in
Additional Functions to ‘On’ beforehand. If the Use Send Via Server setting is set to ‘Off,’ the key next to Send Via
Server are greyed out and any changes made to the Send Via Server setting in the I-Fax screen will not be valid. In
this case, the machine will always send documents via a server. (See Chapter 4, “System Manager Settings,” in the
Reference Guide.)
4-22
Storing New Addresses (Store/Edit Address Book)
11
Press [Destination Conditions], set the reception conditions of the recipient, and
press [OK].
Registering/Editing the Address
4
The following conditions should always be selected:
• Paper Size:
A4/LTR
• Compression Method: MH
• Resolution:
200 x 100 dpi, 200 x 200 dpi
A5 is recognised as [A4/LTR].
IMPORTANT
• Set the destination conditions according to the specification of the recipient’s machine. An error may occur if
you set conditions that the recipient cannot use.
12
Press [OK].
Storing New Addresses (Store/Edit Address Book)
4-23
If Access Number Management for an Address Book is set to ‘On,’ press [Next].
Registering/Editing the Address
4
Enter the access number using
-
(numeric keys), press [OK].
• If you do not want to specify an access number, leave it blank and press [OK].
• The maximum number of digits you can store for an Access Number is seven. If you store an
Access Number with less than seven digits, the machine stores them as follows:
- Example: If <321> is entered, it is stored as <0000321>.
- You cannot store an access number with only zeros as the number, such as <0000000>.
The display returns to the Store New Address screen.
NOTE
• If there is a required item which has not yet been entered, enter the necessary item.
13
4-24
Press [Done] repeatedly until the display returns to the Basic Features screen.
Storing New Addresses (Store/Edit Address Book)
Storing File Server Addresses
IMPORTANT
• If Language Switch in Common Settings (from the Additional Functions screen) is set to ‘On’, the Host Name
and File Path of the file server destination may not be displayed correctly, so you may not be able to refer to
them.
NOTE
4
1
Registering/Editing the Address
• For examples of the settings needed to send to a file server, see the Network Guide.
• For details on how to enter characters on the touch panel display, see Chapter 1, “Before You Start Using This
Machine,” in the Reference Guide.
Call up the desired screen as follows:
➔ [Address Book Settings] ➔ [Store/Edit Address Book]
If a password is set for the address book, press [Address Book Settings], enter the password, and
press [OK]. (See Chapter 4, “System Manager Settings,” in the Reference Guide.)
2
Press [Store New Address].
Storing New Addresses (Store/Edit Address Book)
4-25
3
Press [File].
4
Press [Name].
5
Enter a name for the file server, and press [OK].
Registering/Editing the Address
4
4-26
Storing New Addresses (Store/Edit Address Book)
6
From the Address Book drop-down list, select one of the Address Books
numbered 1 to 10.
Registering/Editing the Address
4
Address Books 1 to 10 are used to divide the Address Book into ten parts. This is a convenient way
to classify addresses.
The file server address is stored in the subaddress book (Address Book 1 to 10) selected here.
7
Select the protocol from the Protocol drop-down list.
The following protocols may be used:
• FTP:
Select this protocol if you are sending to a computer running Sun Solaris 2.6
or later, Mac OS Χ or later, Internet Information Server 4.0 under Windows
NT Server 4.0, Internet Information Services 5.0 under Windows 2000
Server, or Internet Information Services 5.1 under Windows XP Professional.
• Windows (SMB):
Select this protocol if you are sending to a computer using Windows NT 4.0,
or Windows 95/98/Me/2000/XP.
• NetWare (IPX):
Select this protocol if you are sending to a computer using Novell NetWare
V.3.2 or later.
Storing New Addresses (Store/Edit Address Book)
4-27
8
Set [Host Name], [File Path], [User], and [Password].
●
Directly from the Keyboard:
Press [Host Name], and enter the host name.
Registering/Editing the Address
4
If you select FTP for the protocol, you can specify a port number by entering : after the host name.
- Example 192.168.100.50: 21000
To specify a port number, set the same port number with the FTP server setting.
If you do not specify a port number, it is automatically set to ‘21’.
You can enter up to 128 characters for the host name.
Press [File Path], and enter the file path.
To send documents to CanoBureau Workgroup or iW Document Manager, enter the folder name that
you registered for the iW Gateway series.
You can enter up to 128 characters for the file path.
4-28
Storing New Addresses (Store/Edit Address Book)
Press [User], and enter the user name.
To send documents to CanoBureau Workgroup or iW Document Manager, enter the user name that you
registered for the iW Gateway series.
You can enter up to 24 characters when FTP or NetWare (IPX) is selected as the server protocol for the
user name.
If ‘Windows (SMB)’ is selected as the server protocol, enter the required user name information in the
manner shown below:
- To enter the user name only
Example: user_name
Maximum 20 characters
- To enter the user name and the domain name
Example: domain_name\user_name
Domain name: Maximum 15 characters
User name: Maximum 20 characters
- To enter a UPN (User Principal Name)
Example: user_name@domain_name.com
Maximum 128 characters
Press [Password], and enter the password.
Please set the password when it is necessary.
Storing New Addresses (Store/Edit Address Book)
4-29
Registering/Editing the Address
4
To send documents to CanoBureau Workgroup or iW Document Manager, enter the password that you
registered for the iW Gateway series.
You can enter up to 24 characters (14 characters when Windows (SMB) is selected as the server
protocol) for the password.
The password appears as asterisks (*****) on the file settings screen.
●
Using the Browse Key (Windows (SMB)):
Press [Browse].
Registering/Editing the Address
4
IMPORTANT
• After turning the main power ON, you must wait for the time set in [Startup Time Settings] in the Additional
Functions mode to elapse, and press [Browse]. Transmission to computers on the network is not possible until
this startup time has elapsed. (See Chapter 3, “Using a TCP/IP Network (Windows/UNIX/Macintosh),” in the
Network Guide.)
Select the name of the workgroup, and press [Down].
If the destination you want is not displayed, press [▼] or [▲].
4-30
Storing New Addresses (Store/Edit Address Book)
Select the file server, and press [Down].
Registering/Editing the Address
4
To go to a higher level, press [Up].
If the destination you want is not displayed, press [▼] or [▲].
When the log-in screen is displayed, enter the user name and password, and press [OK].
Storing New Addresses (Store/Edit Address Book)
4-31
Press [Down], select the folder you want to send, and press [OK].
Registering/Editing the Address
4
To go to a higher level, press [Up].
If the destination you want is not displayed, press [▼] or [▲].
For examples of the settings of sending destinations, see Chapter 5, “Using a NetBIOS Network
(Windows),” in the Network Guide.
You can enter values directly from the keyboard on the touch panel display by pressing [Host Name],
[File Path], [User] and [Password].
●
Using the Browse Key (NetWare (IPX)):
Press [Browse].
IMPORTANT
• After turning the main power ON, you must wait for the time set in [Startup Time Settings] in the Additional
Functions mode to elapse, and press [Browse]. Transmission to computers on the network is not possible until this
startup time has elapsed. (See Chapter 3, “Using a TCP/IP Network (Windows/UNIX/Macintosh),” in the Network
Guide.)
4-32
Storing New Addresses (Store/Edit Address Book)
Select [NDS] or [Bindery] from the drop-down list.
In the case of Bindery, follow the steps you followed after specifying a file server for Windows (SMB).
The following steps explain operations for NDS.
Press [Down], select the Log On destination, and press [Log On].
To go to a higher level, press [Up].
If the destination you want is not displayed, press [▼] or [▲].
The entry screen for Network password is displayed.
Storing New Addresses (Store/Edit Address Book)
4-33
Registering/Editing the Address
4
Enter [User] and [Password], and press [OK].
Registering/Editing the Address
4
Press [Down], select the folder to which you want to send your file, and press [OK].
To go to a higher level, press [Up].
If the destination you want is not displayed, press [▼] or [▲].
For examples of the settings of sending destinations, see Chapter 4, “Using a NetWare Network
(Windows),” in the Network Guide.
You can enter values directly from the keyboard on the touch panel display by pressing [Host Name],
[File Path], [User] and [Password].
4-34
Storing New Addresses (Store/Edit Address Book)
Press [OK].
4
Registering/Editing the Address
9
If Access Number Management for an Address Book is set to ‘On,’ press [Next].
Enter the access number using
-
(numeric keys), press [OK].
• If you do not want to specify an access number, leave it blank and press [OK].
Storing New Addresses (Store/Edit Address Book)
4-35
• The maximum number of digits you can store for an Access Number is seven. If you store an
Access Number with less than seven digits, the machine stores them as follows:
- Example: If <321> is entered, it is stored as <0000321>.
- You cannot store an access number with only zeros as the number, such as <0000000>.
The display returns to the Store New Address screen.
NOTE
• If there is a required item which has not yet been entered, enter the necessary item.
Registering/Editing the Address
4
10
Press [Done] repeatedly until the Basic Features screen appears.
Storing Group Addresses
The Group Address function enables you to create a group of up to 256 stored destinations to
register the group as a single address.
NOTE
• Before storing the group addresses, register the addresses to be stored (such as e-mails and file servers).
• You cannot register an address in a different subaddress book as a group address.
1
Call up the desired screen as follows:
➔ [Address Book Settings] ➔ [Store/Edit Address Book]
If a password is set for the address book, press [Address Book Settings], enter the password, and
press [OK]. (See Chapter 4, “System Manager Settings,” in the Reference Guide.)
4-36
Storing New Addresses (Store/Edit Address Book)
2
Press [Store New Address].
3
Press [Group].
4
Press [Name].
Registering/Editing the Address
4
Storing New Addresses (Store/Edit Address Book)
4-37
5
Enter a name for the group, and press [OK].
Registering/Editing the Address
4
NOTE
• For details on how to enter characters on the touch panel display, see Chapter 1, “Before You Start Using This
Machine,” in the Reference Guide.
• You can enter up to 24 characters for the name.
6
From the Address Book drop-down list, select one of the Address Books
numbered 1 to 10.
Address Books 1 to 10 are used to divide the Address Book into ten parts. This is a convenient way to
classify addresses.
The group addresses are stored in the subaddress books (Address Book 1 to 10) selected here.
4-38
Storing New Addresses (Store/Edit Address Book)
7
Select [Address Book] or [Store In Usr Inbox].
Only the addresses stored in the same subaddress book can be stored in a group address.
You cannot store addresses from different sub-address books. For example, you cannot store e-mail
addresses from Address Book 1 and file server addresses from Address Book 2.
●
If selecting [Address Book]:
Select the addresses to be stored from the address book, and press [OK].
If Access Number Management for an Address Book is set to ‘On,’ press [Access Number] and enter the
access number to specify the address, and press [OK]. If you do not want to specify an access number,
press [No Access Number]. (See “Storing New Addresses (Store/Edit Address Book),” on p. 4-5.)
If you select the address again, the check mark disappears and your selection is cancelled.
Use the alphabet keys to define the range of entries displayed.
If the address to be selected is not displayed, press [▼] or [▲].
Storing New Addresses (Store/Edit Address Book)
4-39
Registering/Editing the Address
4
By using the Address Type drop-down list, you can restrict the type of addresses displayed in the list.
Registering/Editing the Address
4
You can select an address and press [Details] to display the screen shown below. This enables you to
confirm the detailed information related to the selected address. Press [Done] to return to the previous
screen.
The address you have stored is listed.
- Repeat step 7 to add other types of addresses.
4-40
Storing New Addresses (Store/Edit Address Book)
If selecting [Store In Usr Inbox]:
Select the inbox to store the document from the Store in User Inbox screen, and press [OK].
4
Registering/Editing the Address
●
If the inbox to be selected is not displayed, press [▼] or [▲].
The stored inbox is displayed.
Repeat step 7 to add other types of addresses.
NOTE
• Only one inbox can be assigned to one group address.
Storing New Addresses (Store/Edit Address Book)
4-41
●
To erase an address:
Select an address in the group, and press [Erase].
Registering/Editing the Address
4
8
Press [OK].
If Access Number Management for an Address Book is set to ‘On,’ press [Next].
4-42
Storing New Addresses (Store/Edit Address Book)
Enter the access number using
-
(numeric keys), press [OK].
Registering/Editing the Address
4
• If you do not want to specify a number, leave it blank and press [OK].
• The maximum number of digits you can store for an Access Number is seven. If you store an
Access Number with less than seven digits, the machine stores them as follows:
- Example: If <321> is entered, it is stored as <0000321>.
- You cannot store an access number with only zeros as the number, such as <0000000>.
The display returns to the Store New Address screen.
NOTE
• If there is a required item which has not yet been entered, enter the necessary item.
9
Press [Done] repeatedly until the Basic Features screen appears.
Storing Addresses Searched via a Server
You can store an address that is obtained by searching the directory listings on the network
using LDAP (Lightweight Directory Access Protocol) servers.
NOTE
• You may have to set up the LDAP servers beforehand, depending on the network environment.
• Only names and e-mail addresses can be obtained from the LDAP server. (If the optional Super G3 Fax Board is
installed, fax numbers also can be obtained.)
• For details on server settings, see Chapter 4, “System Manager Settings,” in the Reference Guide.
Storing New Addresses (Store/Edit Address Book)
4-43
1
Call up the desired screen as follows:
➔ [Address Book Settings] ➔ [Store/Edit Address Book]
If a password is set for the address book, press [Address Book Settings], enter the password, and
press [OK]. (See Chapter 4, “System Manager Settings,” in the Reference Guide.)
2
Press [Store New Address].
3
Press [Search on Server].
Registering/Editing the Address
4
4-44
Storing New Addresses (Store/Edit Address Book)
4
Press the Server to Search drop-down list, and press select the desired server
to search.
5
Registering/Editing the Address
4
Specify the search criteria.
NOTE
• For instructions on how to enter characters on the touch panel display, see Chapter 1, “Before You Start Using
This Machine,” in the Reference Guide.
• If you want to search a destination that is registered with an e-mail address and a fax number, you can search the
e-mail address by entering the fax number as the search criterion.
●
To use Simple Search:
Press [Name], [E-mail], or [Fax] ➔ enter the name, e-mail address, or fax number for which to search
➔ press [OK].
You can enter up to 128 characters for the name, e-mail address, or fax number.
You can also use
-
(numeric keys) to enter numbers, and
to clear your entry.
Storing New Addresses (Store/Edit Address Book)
4-45
The search criteria boxes that you do not fill out are not searched.
If you press [Start Searching] without specifying any search criteria, all the addresses stored on the
LDAP server are displayed.
To make a more detailed search with multiple search conditions, press [Detailed Search], and follow
the directions below. The search criteria you entered for Simple Search are continuously used in
Detailed Search.
●
4
To use Detailed Search:
Registering/Editing the Address
Press [Detailed Search].
Press the search category drop-down list ➔ select the desired search category.
Search Category
The available search categories are:
[Name]:
Search by name.
[E-mail]:
Search by e-mail address.
[Fax]:
Search by fax number.
[Organization]:
Search by organisation name.
[OrgnztionUnit]:
Search by unit (e.g., departments in an organisation).
Example: If cn=user1, ou=salesdept, o=canon, c=jp is the distinguished name in the Directory, enter
the organisation/organizationUnit of the user as follows:
4-46
Storing New Addresses (Store/Edit Address Book)
organizationUnit=salesdept
organisation=canon
NOTE
• The organisation/organizationUnit can be used as search categories only if the information has been registered
on the LDAP Server.
• Detailed Search by organisation/organizationUnit may not be performed depending on whether the attribute
types have been registered on the LDAP server, and the type of application on the server, such as Windows
2000 Server with Active Directory.
4
Registering/Editing the Address
Press the search condition drop-down list ➔ select the desired search condition ➔ press [Settings].
Search Condition
The available search conditions are:
[contains]:
The result must contain the entered name, e-mail address, fax number,
organisation, or organisational unit.
[does not contain]:
The result must not contain the entered name, e-mail address, fax number,
organisation, or organisational unit.
[equals]:
The result must be exactly the same as the entered name, e-mail address,
fax number, organisation, or organisational unit.
[differs from]:
The result must be different from the name, e-mail address, fax number,
organisation, or organisational unit that you entered.
[begins with]:
The result must begin with the same first few letters that you entered for the
name, e-mail address, fax number, organisation, or organisational unit.
[ends with]:
The result must end with the same last few letters that you entered for the
name, e-mail address, fax number, organisation, or organisational unit.
Storing New Addresses (Store/Edit Address Book)
4-47
Enter the search criteria ➔ press [OK].
Registering/Editing the Address
4
You can enter up to 128 characters for the search criteria.
You can also use
-
(numeric keys) to enter number, and
to clear your entry.
Press [Add].
To continue adding more search criteria, press [or] or [and] ➔ repeat step 5.
[or]:
The machine searches and returns a result for either of the specified search criteria.
[and]:
The machine searches and returns a result for all of the specified search criteria.
To edit the contents of search criteria, select the criterion that you want to edit ➔ press [Edit] ➔
[Settings]. To delete search criteria, select the criterion that you want to erase ➔ press [Erase].
4-48
Storing New Addresses (Store/Edit Address Book)
NOTE
• You can specify up to four different search criteria at a time.
• If you specify three or more search criteria, you cannot use both [or] and [and] together.
• If you press [Simple Search] after specifying search criteria on the Detailed Search screen, the display changes
to the Simple Search screen, and the specified detailed search criteria are deleted.
Press [Start Searching].
4
Registering/Editing the Address
6
To cancel searching, press [Cancel].
To cancel searching while the machine is searching for your criteria, press [Cancel]. If the machine
finds some results before you press [Cancel], these search results are displayed.
IMPORTANT
• The number of search results displayed will not exceed the maximum limit set in Register LDAP Server in
System Settings (from the Additional Functions screen). If the desired destination is not displayed, either
increase the maximum number of addresses to search or change the search criteria.
(See Chapter 4, “System Manager Settings,” in the Reference Guide.)
NOTE
• If you press [Start Searching] without specifying any search criteria, all the addresses stored on the LDAP
server are displayed.
Storing New Addresses (Store/Edit Address Book)
4-49
●
If the screen below is displayed:
Press [User Name] ➔ enter the user name ➔ press [OK].
Registering/Editing the Address
4
You can enter up to 128 characters for the user name.
The Network Password Entry screen is displayed if either one of the following is true:
If Login Information in Register LDAP Server in System Settings (from the Additional Functions
screen) is set to ‘Use’, and <Display authentication dialogue when searching> is set to ‘On’.
If the user name, password, and domain name specified in Register LDAP Server in System
Settings (from the Additional Functions screen) are incorrect.
Press [Password] ➔ enter the password ➔ press [OK].
You can enter up to 24 characters for the password.
You can also use
-
(numeric keys) to enter numbers, and
to clear your entry.
NOTE
• For instructions on how to enter characters on the touch panel display, see Chapter 1, “Before You Start Using This
Machine,” in the Reference Guide.
• After pressing [OK], the password that you entered appears as asterisks (*****) on the Enter Network Password
screen.
4-50
Storing New Addresses (Store/Edit Address Book)
Verify the settings ➔ press [OK].
Registering/Editing the Address
4
The search results are displayed.
7
Select the destination that you want to store in the Address Book from the search
results, and press [Next].
To continue searching, press [Back].
You can specify multiple destinations.
If the desired destination is not displayed, press [▼] or [▲] to scroll to the desired destination.
You can register the selected e-mail address for an I-fax address by pressing [Register e-mail
address for I-Fax]. To register e-mail addresses for I-fax addresses, register one e-mail address at
a time.
If you want to select the first 16 destinations, press [Select All (Max 16 destinations)].
(If a destination is selected, the key changes to [Clear Selection].)
Storing New Addresses (Store/Edit Address Book)
4-51
By using the Address Type drop-down list, you can restrict the type of addresses displayed in
the list.
Registering/Editing the Address
4
NOTE
• To cancel a selected destination, select the destination again to clear the check mark.
8
Store the selected destination.
IMPORTANT
• Only names and e-mail addresses can be obtained from the LDAP server.
●
If only one destination is selected:
Verify the address ➔ press [OK].
If necessary, edit the contents of the address.
4-52
Storing New Addresses (Store/Edit Address Book)
If you want to store the destination with an access number, and the Access
Number Management setting is set to ‘On’:
Press [Next].
4
Enter the access number using
-
Registering/Editing the Address
●
(numeric keys) ➔ press [OK].
The access number can be the number of an existing private address book, or you can assign access
numbers to individual addresses within the address book.
If you do not want to specify an access number, leave it blank and press [OK].
The maximum number of digits you can store for the Access Number is seven. If you enter fewer than
seven digits, the machine stores the access number with leading zeros, as follows:
Example: If <321> is entered, it is stored as <0000321>.
You cannot store an access number with only zeros as the number, such as <0000000>.
The display returns to the Store New Address screen.
Storing New Addresses (Store/Edit Address Book)
4-53
NOTE
• To display [Access Number], set Access Number Management to ‘On’. To access the Access Number
Management setting, press
➔ [System Settings] ➔ [Manage/Access to Address Book] ➔ [Access Number
Management]. (See Chapter 4, “System Manager Settings,” in the Reference Guide.)
●
If multiple destinations are selected:
Select the subaddress book to store the addresses in ➔ press [OK].
Registering/Editing the Address
4
If the subaddress book is stored with an access number, and the Access Number Management
setting is set to ‘On’, enter the access number using
(numeric keys) ➔ press [OK].
The access number can be the number of an existing private address book, or you can assign access
numbers to individual addresses within the address book.
If you do not want to specify an access number, leave it blank and press [OK].
The maximum number of digits you can store for the Access Number is seven. If you enter fewer than
seven digits, the machine stores the access number with leading zeros, as follows:
Example: If <321> is entered, it is stored as <0000321>.
4-54
Storing New Addresses (Store/Edit Address Book)
You cannot store an access number with only zeros as the number, such as <0000000>.
Read the displayed message ➔ press [OK].
Registering/Editing the Address
4
The display returns to the Store New Address screen.
NOTE
• The maximum number of destinations that can be selected at one time is 16.
• To display [Access Number], set the Access Number Management to ‘On’. To access the Access Number
Management setting, press
➔ [System Settings] ➔ [Manage/Access to Address Book] ➔ [Access Number
Management]. (See Chapter 4, “System Manager Settings,” in the Reference Guide.)
●
If you want to store the selected destination for an I-fax address:
Verify the address ➔ press [OK].
If necessary, edit the contents of the address.
Storing New Addresses (Store/Edit Address Book)
4-55
●
If you want to store the destination with an access number, and the Access
Number Management setting is set to ‘On’:
Press [Next].
Registering/Editing the Address
4
Enter the access number using
-
(numeric keys) ➔ press [OK].
The access number can be the number of an existing private address book, or you can assign access
numbers to individual addresses within the address book.
If you do not want to specify an access number, leave it blank and press [OK].
The maximum number of digits you can store for the Access Number is seven. If you enter fewer than
seven digits, the machine stores the access number with leading zeros, as follows:
Example: If <321> is entered, it is stored as <0000321>.
You cannot store an access number with only zeros as the number, such as <0000000>.
The display returns to the Store New Address screen.
4-56
Storing New Addresses (Store/Edit Address Book)
NOTE
• To display [Access Number], set Access Number Management to ‘On’. To access the Access Number
Management setting, press
➔ [System Settings] ➔ [Manage/Access to Address Book] ➔ [Access Number
Management]. (See Chapter 4, “System Manager Settings,” in the Reference Guide.)
Press [Done] repeatedly until the Send Basic Features screen appears.
4
Registering/Editing the Address
9
Storing New Addresses (Store/Edit Address Book)
4-57
Changing Address Details
You can change address details as necessary.
4
Registering/Editing the Address
1
Call up the desired screen as follows:
➔ [Address Book Settings] ➔ [Store/Edit Address Book]
If a password is set for the address book, press [Address Book Settings], enter the password, and
press [OK]. (See Chapter 4, “System Manager Settings,” in the Reference Guide.)
2
Select the address to be changed, and press [Edit].
If Access Number Management for an Address Book is set to ‘On,’ press [Access Number] and
enter the access number to specify the address, and press [OK]. If you do not want to specify an
access number, press [No Access Number]. (See “Storing New Addresses (Store/Edit Address
Book),” on p. 4-5.)
In this example, [E-mail] is selected.
Use the alphabet keys to define the range of entries displayed.
If the address to be selected is not displayed, press [▼] or [▲].
By using the Address Book drop-down list, you can display addresses by subaddress book (1 to 10).
The subaddress books categorize the address book into groups.
By using the Address Type drop-down list, you can restrict the type of addresses displayed in the list.
4-58
Changing Address Details
You cannot select an one-touch button stored in the subaddress book.
If you select [All] in the Address Book drop-down list, the addresses stored in the One-touch buttons
will be displayed. However, you cannot edit these addresses. For details on how to store and edit
One-touch buttons, see “Registering the One-Touch Buttons (One-touch Buttons),” on p. 4-65.
The current settings for the address appear. Edit the address details, and press
[OK].
4
The screen differs depending on the Address Type you select in step 2.
You cannot change the address book of a group address, or change an address registered as a group
address.
If Access Number Management for an Address Book is set to ‘On,’ press [Next].
Changing Address Details
4-59
Registering/Editing the Address
3
Enter the access number using
-
(numeric keys), press [OK].
Registering/Editing the Address
4
• If you do not want to specify an access number, leave it blank and press [OK].
• The maximum number of digits you can store for an Access Number is seven. If you store an
Access Number with less than seven digits, the machine stores them as follows:
- Example: If <321> is entered, it is stored as <0000321>.
- You cannot store an access number with only zeros as the number, such as <0000000>.
The display returns to the Store New Address screen.
NOTE
•
•
•
•
•
•
4
4-60
To specify the fax settings, see “Storing Fax Numbers,” on p. 4-5.
For details on setting E-mail addresses, see “Storing E-mail Addresses,” on p. 4-13.
For details on setting I-Fax addresses, see “Storing I-Fax Addresses,” on p. 4-18.
For details on setting file server, see “Storing File Server Addresses,” on p. 4-25.
For details on setting group addresses, see “Storing Group Addresses,” on p. 4-36.
If there is a required item which has not yet been entered, enter the necessary item.
Press [Done] repeatedly until the Basic Features screen appears.
Changing Address Details
Erasing Addresses
You can erase addresses stored in the address book.
4
Call up the desired screen as follows:
Registering/Editing the Address
1
➔ [Address Book Settings] ➔ [Store/Edit Address Book]
If a password is set for the address book, press [Address Book Settings], enter the password, and
press [OK]. (See Chapter 4, “System Manager Settings,” in the Reference Guide.)
2
Select the address to erase, and press [Erase].
If Access Number Management for an Address Book is set to ‘On,’ press [Access Number] and
enter the access number to specify the address, and press [OK]. If you do not want to specify an
access number, press [No Access Number]. (See “Storing New Addresses (Store/Edit Address
Book),” on p. 4-5.)
You cannot erase multiple addresses at one time.
Use the alphabet keys to define the range of entries displayed.
If the address to be selected is not displayed, press [▼] or [▲].
By using the Address Book drop-down list, you can display addresses by subaddress book (1 to 10).
The subaddress books categorize the address book into groups.
By using the Address Type drop-down list, you can restrict the type of addresses displayed in the list.
You cannot select the One-touch button stored in the subaddress book.
Erasing Addresses
4-61
If you select [All] in the Address Book drop-down list, the addresses stored in the One-touch
buttons will be displayed. However, you cannot erase these addresses. For details on how to erase
One-touch buttons, see “Erasing a One-Touch Button,” on p. 4-99.
3
Press [Yes].
Registering/Editing the Address
4
To cancel erasing, press [No].
4
4-62
Press [Done] repeatedly until the Basic Features screen appears.
Erasing Addresses
Registering a Name for an Address Book
(Store Address Book Name)
You can give a name to any address book.
4
Call up the desired screen as follows:
Registering/Editing the Address
1
➔ [Address Book Settings] ➔ [Store Address Book Name]
If a password is set for the address book, press [Address Book Settings], enter the password, and
press [OK]. (See Chapter 4, “System Manager Settings,” in the Reference Guide.)
2
Select an address book to name, and press [Store Name].
In this example, [Address Book 1] is selected.
Registering a Name for an Address Book (Store Address Book Name)
4-63
3
Enter the name, and press [OK].
Registering/Editing the Address
4
NOTE
• For details on how to enter characters on the touch panel display, see Chapter 1, “Before You Start Using This
Machine,” in the Reference Guide.
• You can enter up to 16 characters for a name.
• If you press [OK] without entering any characters, the name of the Address Book returns to the default setting.
4-64
4
Press [OK].
5
Press [Done] repeatedly until the Basic Features screen appears.
Registering a Name for an Address Book (Store Address Book Name)
Registering the One-Touch Buttons
(One-touch Buttons)
You can register up to 200 addresses in the one-touch buttons. This section describes how to
store/edit and erase the addresses in the one-touch buttons.
• To send documents to another fax machine, it is necessary for the Fax Board (optional) to be installed.
• If you register an address as a one-touch button, it is also displayed on the Address Book.
• For details on how to enter characters on the touch panel display, see Chapter 1, “Before You Start Using This
Machine,” in the Reference Guide.
Storing/Editing a One-Touch Button
1
Call up the desired screen as follows:
➔ [Address Book Settings] ➔ [One-touch Buttons]
If a password is set for the address book, press [Address Book Settings], enter the password, and press
[OK]. (See Chapter 4, “System Manager Settings,” in the Reference Guide.)
2
Select a one-touch button to add or change, and press [Store/Edit].
Registering the One-Touch Buttons (One-touch Buttons)
4-65
Registering/Editing the Address
4
NOTE
If you want to enter values using
(numeric keys), press
the three digit number for the one-touch button.
(One-touch Button codes) and enter
Registering/Editing the Address
4
If you select a one-touch button already storing the address, proceed to Step 4.
NOTE
• A one-touch button already storing addresses is indicated by a coloured triangle ( ) in the lower right corner of
the key.
• If you select a one-touch button in which addresses have already been stored, the current addresses of the
one-touch button are displayed.
• If you register multiple destinations using Group Address, the number you have registered is displayed.
3
4-66
Select [Fax], [E-mail], [I-Fax], [File], [Group], or [Search on Server].
Registering the One-Touch Buttons (One-touch Buttons)
If Selecting [Fax]:
Press [Name].
4
Registering/Editing the Address
●
Enter a name for the fax number, and press [OK].
NOTE
• You can enter up to 24 characters for the name.
Press [One-touch Button Name].
Registering the One-Touch Buttons (One-touch Buttons)
4-67
Enter a name for the one-touch button, and press [OK].
Registering/Editing the Address
4
NOTE
• You can enter up to 12 characters for the one-touch button name.
Enter a fax number using
-
,
, and
(numeric keys).
[Pause]: Press to insert a pause of several seconds in the telephone number that you are dialling.
If you insert a pause, the letter <p> is displayed between the numbers, and also the letter <P>
appears at the end of the number. When dialling an overseas number, insert a pause after the
access number, and also at the end of the telephone number. (See “Setting the Pause Time
(Pause Time),” on p. 3-38.)
[Tone]: Press when directly calling an extension line connected to a Private Branch Exchange (PBX)
that accepts only push signals from a dial line. (See “Using Fax Information Services,” on p. 2-8.)
[ ] [ ]: Use to move the cursor.
[Backspace]: Press when a wrong number is entered. The last number entered is deleted,
enabling you to enter the correct number.
[Space]: Press to insert a space between the area code and the local telephone number.
4-68
Registering the One-Touch Buttons (One-touch Buttons)
[+]: Press to insert a country code in front of the telephone number.
[Option]: Press to specify a subaddress, password, ECM transmission, sending speed, and long
distance. Specify these settings to suit your needs.
[DT]: Press this key to confirm the dial tone in the middle of the facsimile dialling the rest of the
number. A dot will be displayed.
[R]: Press to use the R-key. (See “Special Dialling,” on p. 1-176.)
To delete the number you entered, press
.
4
IMPORTANT
Registering/Editing the Address
• Pauses and Spaces cannot be entered before telephone numbers.
NOTE
• The telephone number can have up to 120 digits.
• Pauses entered at the end of dialled telephone numbers are always 10 seconds long.
If you press [Option]:
Press [Subaddress] and [Password], enter the subaddress and password using
(numeric keys).
- To delete the number you entered, press
-
,
, and
.
- You can store a subaddress and password of up to 20 digits each.
- To enter a space, press [Space].
- To delete the last character, press [Backspace].
- If the other party did not set an RX password in the target subaddress, you do not need to enter a
password.
IMPORTANT
• To send or receive documents to and from a fax machine using subaddresses and RX passwords defined in the
ITU-T standard (ITU-T is a committee within the International Communications Union, established to set
communications standards), the subaddresses and passwords must be dialled in addition to the telephone
numbers.
Registering the One-Touch Buttons (One-touch Buttons)
4-69
- Press [On] or [Off] to set ECM Transmission.
Registering/Editing the Address
4
- Press the Sending Speed drop-down list and select the sending speed.
- Select the Sending Speed from [33600bps], [14400bps], [9600bps], and [4800bps].
- Press the Long Distance drop-down list, select the desired subject, and press [OK].
- Long Distance: If errors occur when sending faxes overseas, use the [Long Distance (1)] setting.
If transmission conditions do not improve, use [Long Distance (2)], then [Long Distance (3)].
4-70
Registering the One-Touch Buttons (One-touch Buttons)
If Selecting [E-mail]:
Press [Name].
4
Registering/Editing the Address
●
Enter a name for the e-mail address, and press [OK].
NOTE
• You can enter up to 24 characters for the name.
Press [One-touch Button Name].
Registering the One-Touch Buttons (One-touch Buttons)
4-71
Enter a name for the one-touch button, and press [OK].
Registering/Editing the Address
4
NOTE
• You can enter up to 12 characters for the one-touch button name.
Press [E-mail Address], enter the address, and press [OK].
NOTE
• You can enter up to 128 characters for the e-mail address.
4-72
Registering the One-Touch Buttons (One-touch Buttons)
If Selecting [I-Fax]:
Press [Name].
4
Registering/Editing the Address
●
Enter a name for the I-Fax address, and press [OK].
NOTE
• You can enter up to 24 characters for the name.
Press [One-touch Button Name].
Registering the One-Touch Buttons (One-touch Buttons)
4-73
Enter a name for the one-touch button, and press [OK].
Registering/Editing the Address
4
NOTE
• You can enter up to 12 characters for the one-touch button name.
Press the Mode Selection drop-down list to select [Simple] or [Full].
In order to send documents in the Full mode, the recipient’s machine must be compatible with the
Full mode to receive the documents. If you send documents in the Full mode, you can confirm that
the recipient’s machine received the I-Fax documents.
[Simple]: Sends scanned data as an image using Internet.
[Full]: In addition to the sending functions of the Simple mode, this confirms whether data was sent.
4-74
Registering the One-Touch Buttons (One-touch Buttons)
Press [I-Fax Address], enter the address, and press [OK].
Registering/Editing the Address
4
NOTE
• You can enter up to 128 characters for the I-Fax address.
• If you do not send documents via a server, and if the recipient’s IP address is not registered in a DNS server,
enter an I-Fax address in the form of ‘user@[the recipient’s IP address].’
Press [Standard Field 1] and [Standard Field 2], enter the standard field, and press [OK].
Use Standard Field 1 and 2 if it is necessary to enter the same standard field all the time.
This setting is unnecessary if you do not use this service.
NOTE
• You can enter up to 40 characters for Standard Field 1.
• You can enter up to 16 characters for Standard Field 2.
• After pressing [OK], the standard field is displayed as “********.”
Registering the One-Touch Buttons (One-touch Buttons)
4-75
Select whether to send documents via a server by pressing [On] or [Off].
Registering/Editing the Address
4
[On]: Sends documents via a server. You can send documents to destinations via the internet in the
same way as e-mail.
[Off]: Sends documents other than via a server. You can send large amounts of data to a recipient in
the same LAN environment without placing a burden on the mail server. This enables you to
send documents directly. It is necessary to set an MX (Mail eXchange) record of the DNS
server beforehand to use this function. Ask your System Manager whether this type of sending
is possible before you use this function.
If you store the standard field, set Send via Server to ‘On.’
IMPORTANT
• If you want to set the Send Via Server setting to ‘Off,’ it is necessary to first set the Use Send Via Server setting in
Additional Functions to ‘On’ beforehand. If the Use Send Via Server setting is set to ‘Off,’ the key next to Send Via
Server are greyed out and any changes made to the Send Via Server setting in the I-Fax screen will not be valid.
In this case, the machine will always send documents via a server. (See Chapter 4, “System Manager Settings,” in
the Reference Guide.)
4-76
Registering the One-Touch Buttons (One-touch Buttons)
Press [Destination Conditions], set the conditions of the recipient, and press [OK].
The following conditions should always be selected:
Paper Size:
A4/LTR
Compression Method:
MH
Resolution:
200 x 100 dpi, 200 x 200 dpi
A5 is recognised as [A4/LTR].
IMPORTANT
• Set the destination conditions according to the specification of the recipient’s machine. An error may occur if you
set conditions that the recipient cannot use.
●
If Selecting [File]:
Press [Name].
Registering the One-Touch Buttons (One-touch Buttons)
4-77
Registering/Editing the Address
4
Enter a name for the file server, and press [OK].
Registering/Editing the Address
4
NOTE
• You can enter up to 24 characters for the name.
Press [One-touch Button Name].
4-78
Registering the One-Touch Buttons (One-touch Buttons)
Enter a name for the one-touch button, and press [OK].
Registering/Editing the Address
4
NOTE
• You can enter up to 12 characters for the one-touch button name.
Select the protocol from the Protocol drop-down list.
The following protocols may be used:
- FTP: Select this protocol if you are sending to a computer running Sun Solaris 2.6 or later, Mac
OS Χ or later, Internet Information Server 4.0 under Windows NT Server 4.0, Internet Information
Services 5.0 under Windows 2000 Server, or Internet Information Services 5.1 under Windows
XP Professional.
- Windows (SMB): Select this protocol if you are sending to a computer using Windows NT 4.0, or
Windows 95/98/Me/2000/XP.
- NetWare (IPX): Select this protocol if you are sending to a computer using Novell NetWare V.3.2
or later.
Registering the One-Touch Buttons (One-touch Buttons)
4-79
Set [Host Name], [File Path], [User], and [Password].
From the keyboard:
Press [Host Name], and enter the host name.
Registering/Editing the Address
4
If you select FTP for the protocol, you can specify a port number entering : (colon) after the host name.
Example 192.168.100.50: 21000
To specify a port number, set the same port number with the FTP server setting.
If you do not specify a port number, it is automatically set to ‘21’.
IMPORTANT
• If Language Switch in Common Settings (from the Additional Functions screen) is set to ‘On’, the Host Name
and File Path of the file server destination may not be displayed correctly, so you may not be able to refer to
them.
NOTE
• You can enter up to 128 characters for the host name.
Press [File Path], and enter the file path.
4-80
Registering the One-Touch Buttons (One-touch Buttons)
- To send documents to CanoBureau Workgroup or iW Document Manager, enter the folder name that
you registered for the iW Gateway series.
NOTE
• You can enter up to 128 characters for the file path.
Press [User], and enter the user name.
Registering/Editing the Address
4
- To send documents to CanoBureau Workgroup or iW Document Manager, enter the user name
that you registered for the iW Gateway series.
NOTE
• You can enter up to 24 characters for the user name.
Press [Password], and enter the password.
- Please set the password when it is necessary.
- To send documents to CanoBureau Workgroup or iW Document Manager, enter the password
that you registered for the iW Gateway series.
NOTE
• You can enter up to 24 characters for the password.
Registering the One-Touch Buttons (One-touch Buttons)
4-81
Using the Browse Key (Windows (SMB)):
Press [Browse].
Registering/Editing the Address
4
IMPORTANT
• After turning the main power ON, you must wait for the time set in [Startup Time Settings] in the Additional
Functions mode to elapse, and press [Browse]. Transmission to computers on the network is not possible until
this startup time has elapsed. (See Chapter 3, “Using a TCP/IP Network (Windows/UNIX/Macintosh),” in the
Network Guide.)
Select the name of the workgroup, and press [Down].
- If the destination you want is not displayed, press [▼] or [▲].
4-82
Registering the One-Touch Buttons (One-touch Buttons)
Select the file server, and press [Down].
Registering/Editing the Address
4
- To go to a higher level, press [Up].
- If the destination you want is not displayed, press [▼] or [▲].
When the log-in screen displayed, enter the user name and password, and press [OK].
Registering the One-Touch Buttons (One-touch Buttons)
4-83
Press [Down], select the folder to which you want to send, and press [OK].
Registering/Editing the Address
4
- To go to a higher level, press [Up].
- If the destination you want is not displayed, press [▼] or [▲].
- For examples of the settings of sending destinations, see Chapter 5, “Using a NetBIOS Network
(Windows),” in the Network Guide.
- You can enter values directly from the keyboard on the touch panel display by pressing [Host Name],
[File Path], [User] and [Password].
NOTE
• You can enter up to 128 characters for the host name and file path. Up to 15 characters for the user name and
14 characters for the password can be entered.
Using the Browse Key (NetWare (IPX)):
Press [Browse].
IMPORTANT
• After turning the main power ON, you must wait for the time set in [Startup Time Settings] in the Additional
Functions mode to elapse, and press [Browse]. Transmission to computers on the network is not possible until
this startup time has elapsed. (See Chapter 3, “Using a TCP/IP Network (Windows/UNIX/Macintosh),” in the
Network Guide.)
4-84
Registering the One-Touch Buttons (One-touch Buttons)
Select [NDS] or [Bindery] from the drop-down list.
- In the case of Bindery, follow the steps you followed after specifying a file server for Windows (SMB).
(See “Specifying a File Server,” on p. 1-46.)
-The following steps explain operations for NDS.
Press [Down], select the Log On destination, and press [Log On].
- To go to a higher level, press [Up].
- If the destination you want is not displayed, press [▼] or [▲].
- The entry screen for Network password is displayed.
Registering the One-Touch Buttons (One-touch Buttons)
4-85
Registering/Editing the Address
4
Enter [User] and [Password], and press [OK].
Registering/Editing the Address
4
Press [Down], select the folder to which you want to send your file, and press [OK].
- To go to a higher level, press [Up].
- If the destination you want is not displayed, press [▼] or [▲].
- For examples of the settings of sending destinations, see Chapter 4, “Using a NetWare Network
(Windows),” in the Network Guide.
- You can enter values directly from the keyboard on the touch panel display by pressing [Host Name],
[File Path], [User] and [Password].
NOTE
• You can enter up to 128 characters for the host name and file path. Up to 24 characters can be entered for the
user name and password.
4-86
Registering the One-Touch Buttons (One-touch Buttons)
If Selecting [Group]:
Press [Name].
4
Registering/Editing the Address
●
Enter a name for the group, and press [OK].
NOTE
• You can enter up to 24 characters for the name.
Press [One-touch Button Name].
Registering the One-Touch Buttons (One-touch Buttons)
4-87
Enter a name for the one-touch button, and press [OK].
Registering/Editing the Address
4
NOTE
• You can enter up to 12 characters for the one-touch button name.
Press [Specifying Destinations].
Select the address from [Address Book], one-touch buttons, or [Store in Usr Inbox] to store in the
group address, and press [OK].
4-88
Registering the One-Touch Buttons (One-touch Buttons)
If you want to enter values using
(numeric keys), press
the three digit number for the One-touch button.
(One-touch Button codes) and enter
●
Registering/Editing the Address
4
If you select [Search on Server]:
Press the Server to Search drop-down list ➔ select the desired server to search.
Registering the One-Touch Buttons (One-touch Buttons)
4-89
Specify the search criteria.
To use Simple Search:
• Press [Name], [E-mail], or [Fax] ➔ enter the name, e-mail address, or fax number for which to search
➔ press [OK].
Registering/Editing the Address
4
You can also use
-
(numeric keys) to enter numbers, and
to clear your entry.
The search criteria boxes that you do not fill out are not searched.
To make a more detailed search with multiple criteria, press [Detailed Search], and follow the directions
below. The search criteria you entered for Simple Search are continuously used in Detailed Search.
You can enter up to 128 characters for the name, e-mail address, or fax number.
To use Detailed Search:
• Press [Detailed Search].
4-90
Registering the One-Touch Buttons (One-touch Buttons)
• Press the search category drop-down list ➔ select the desired search category.
Search Category
The available search categories are:
[Name]:
Search by name.
[E-mail]:
Search by e-mail address.
[Fax]:
Search by fax number.
[Organization]:
Search by organisation name.
[OrgnztionUnit]:
Search by unit (e.g., departments in an organisation).
Example: If cn=user1, ou=salesdept, o=canon, c=jp is the distinguished name in the Directory, enter the
organisation/organizationUnit of the user as follows:
organizationUnit=salesdept
organisation=canon
• Press the search condition drop-down list ➔ select the desired search condition ➔ press [Settings].
Search Condition
The available search conditions are:
Registering the One-Touch Buttons (One-touch Buttons)
4-91
Registering/Editing the Address
4
[contains]:
The result must contain the entered name, e-mail address, fax number,
organisation, or organisational unit.
[does not contain]: The result must not contain the entered name, e-mail address, fax number,
organisation, or organisational unit.
Registering/Editing the Address
4
[equals]:
The result must be exactly the same as the entered name, fax number,
organisation, or organisational unit.
[differs from]:
The result must be different from the name, e-mail address, fax number,
organisation, or organisational unit that you entered.
[begins with]:
The result must begin with the same first few letters that you entered for the
name, e-mail address, fax number, organisation, or organisational unit.
[ends with]:
The result must end with the same last few letters that you entered for the name,
e-mail address, fax number, organisation, or organisational unit.
• Enter the search criteria ➔ press [OK].
You can also use
-
(numeric keys) to enter numbers, and
You can enter up to 128 characters for the search criteria.
4-92
Registering the One-Touch Buttons (One-touch Buttons)
to clear your entry.
• Press [Add].
To continue adding more search criteria, press [or] or [and] ➔ repeat the “Specify the search criteria,”
step on p. 4-90.
[or]:
The machine searches and returns a result for either of the specified search criteria.
[and]:
The machine searches and returns a result for all of the specified search criteria.
To edit the search criteria, select the criterion that you want to edit ➔ press [Edit] ➔ [Settings]. To delete
search criteria, select the criterion that you want to erase ➔ press [Erase].
NOTE
• You can specify up to four different search criteria at a time.
• If you specify three or more search criteria, you cannot use both [or] and [and] together.
• If you press [Simple Search] after specifying search criteria on the Detailed Search screen, the display changes
to the Simple Search screen, and the specified detailed search criteria are deleted.
• Only names and e-mail addresses can be obtained from the LDAP server.
• If you want to search a destination that is registered with an e-mail address and a fax number, you can search the
e-mail address by entering the fax number as the search criterion.
• The organisation/organizationUnit can be used as search categories only if the information has been registered
on the LDAP Server.
• Detailed Search by organisation/organizationUnit may not be performed depending on whether the attribute
types have been registered on the LDAP server, and the type of application on the server, such as Windows
2000 Server with Active Directory.
Registering the One-Touch Buttons (One-touch Buttons)
4-93
Registering/Editing the Address
4
Press [Start Searching].
Registering/Editing the Address
4
To cancel searching, press [Cancel].
To cancel searching while the machine is searching for your criteria, press [Cancel]. If the machine
finds some results before you press [Cancel], these search results are displayed.
NOTE
• If you press [Start Searching] without specifying any search criteria, all the addresses stored on the LDAP server
are displayed.
If the screen below is displayed:
• Press [User Name] ➔ enter the user name ➔ press [OK].
The Network Password Entry screen is displayed if either one of the following is true:
- If Login Information in Register LDAP Server in System Settings (from the Additional Functions
screen) is set to ‘Use’, and <Display authentication dialogue when searching> is set to ‘On’.
- If the user name, password, and domain name specified in Register LDAP Server in System
Settings (from the Additional Functions screen) are incorrect.
4-94
Registering the One-Touch Buttons (One-touch Buttons)
You can enter up to 128 characters for the user name.
• Press [Password] ➔ enter the password ➔ press [OK].
You can also use
-
(numeric keys) to enter numbers, and
to clear your entry.
You can enter up to 24 characters for the password.
NOTE
• For instructions on how to enter characters on the touch panel display, see Chapter 1, “Before You Start Using This
Machine,” in the Reference Guide.
After pressing [OK], the password that you entered appears as asterisks (*****) on the Enter Network
Password screen.
• Verify the settings ➔ press [OK].
The search results are displayed.
Registering the One-Touch Buttons (One-touch Buttons)
4-95
Registering/Editing the Address
4
IMPORTANT
• The number of search results displayed will not exceed the maximum limit set in Register LDAP Server in System
Settings (from the Additional Functions screen). If the desired destination is not displayed, either increase the
maximum number of addresses to search or change the search conditions. (See Chapter 4, “System Manager
Settings,” in the Reference Guide.)
Select the destination that you want to store in the one-touch button from the search results ➔
press [Next].
Registering/Editing the Address
4
To continue searching, press [Back].
You cannot specify multiple destinations.
If the desired destination is not displayed, press [▼] or [▲] to scroll to the desired destination.
By using the Address Type drop-down list, you can restrict the type of addresses displayed in the list.
If [Register e-mail address for I-fax] is lit, the setting is enabled, and the selected e-mail address can be
specified as an I-fax destination.
4-96
Registering the One-Touch Buttons (One-touch Buttons)
NOTE
• You can register the selected e-mail address for an I-fax address by pressing [Register e-mail address for I-Fax].
To register e-mail addresses for I-fax addresses, register one e-mail address at a time.
• To cancel a selected destination, select the destination again.
Store the selected destination.
If you want to store the selected address as an e-mail address:
• Verify the destination.
Registering/Editing the Address
4
If necessary, edit the contents of the address.
• Press [One-touch Button Name] ➔ enter a name for the one-touch button ➔ press [OK].
If you want to register the selected address for an I-fax address:
Registering the One-Touch Buttons (One-touch Buttons)
4-97
• Verify the address.
Registering/Editing the Address
4
If necessary, edit the contents of the address.
• Press [One-touch Button Name] ➔ enter a name for the one-touch button ➔ press [OK].
You can enter up to 12 characters for the name.
IMPORTANT
• The information that can be obtained from the LDAP server consists of only names and e-mail addresses.
4-98
Registering the One-Touch Buttons (One-touch Buttons)
4
Press [OK].
Registering/Editing the Address
4
In this example, E-mail is selected.
The contents you stored appear on the display.
5
Press [Done] repeatedly until the Basic Features screen appears.
Erasing a One-Touch Button
1
Call up the desired screen as follows:
➔
[Address Book Settings] ➔ [One-touch Buttons]
If a password is set for the address book, press [Address Book Settings], enter the password, and press
[OK]. (See Chapter 4, “System Manager Settings,” in the Reference Guide.)
Registering the One-Touch Buttons (One-touch Buttons)
4-99
2
Select the one-touch button to be erased, and press [Erase].
Registering/Editing the Address
4
If you want to enter values using
(numeric keys), press
the three digit number for the one-touch button.
(One-touch Button codes) and enter
IMPORTANT
• Make sure that you verify the settings first before you erase them.
NOTE
• A one-touch button already storing addresses is indicated by a coloured triangle ( ) in the lower right corner of
the key.
• If you select a one-touch button in which addresses have already been stored, the current addresses of the
one-touch button are displayed.
4-100
Registering the One-Touch Buttons (One-touch Buttons)
3
Press [Yes].
Registering/Editing the Address
4
To cancel erasing, press [No].
4
Press [Done] repeatedly until the Basic Features screen appears.
Registering the One-Touch Buttons (One-touch Buttons)
4-101
Registering/Editing the Address
4
4-102
Registering the One-Touch Buttons (One-touch Buttons)
Troubleshooting
5
CHAPTER
This chapter describes procedures for taking corrective action in the event that trouble occurs.
When Problems Occur . . . . . . . . . . . . . . . . . . . . . . . . . . . . . . . . . . . . . . . . . . . . . . . . . . . . . . . . . . . . . . . . . . 5-2
Problems Sending Documents . . . . . . . . . . . . . . . . . . . . . . . . . . . . . . . . . . . . . . . . . . . . . . . . . . . . . . . . . . 5-2
Problems Receiving Documents . . . . . . . . . . . . . . . . . . . . . . . . . . . . . . . . . . . . . . . . . . . . . . . . . . . . . . . . . 5-4
Other Problems . . . . . . . . . . . . . . . . . . . . . . . . . . . . . . . . . . . . . . . . . . . . . . . . . . . . . . . . . . . . . . . . . . . . . . 5-5
Questions & Answers . . . . . . . . . . . . . . . . . . . . . . . . . . . . . . . . . . . . . . . . . . . . . . . . . . . . . . . . . . . . . . . . . . 5-7
5-1
When Problems Occur
Problems Sending Documents
Troubleshooting
5
To cancel transmissions.
Cause1
: Do you want to cancel while the document to be sent is being scanned?
Remedy
: Press
Cause2
: Do you want to cancel after the document to be sent has been scanned?
Remedy1
: If you scanned the document for sending by fax, press [System Monitor] ➔ [Fax] ➔
[Send Job Status] in this order. Select the document whose sending is to be
cancelled ➔ press [Cancel] ➔ [Yes] in this order.
Remedy2
: If you scanned the document for other than sending by fax, press [System Monitor] ➔
[Send] ➔ [Status] in this order. Select the document whose sending is to be
cancelled ➔ press [Cancel] ➔ [Yes] in this order. However, even if you press [Cancel],
the job may already have been sent. (See Chapter 2, “Checking Various Job
Operations and Device Status,” in the Reference Guide.)
Cause3
: Do you want to cancel during direct sending by fax?
Remedy
: Press
from the control panel, or press [Cancel] on the touch panel display.
from the control panel, or press [Cancel] on the touch panel display.
Document cannot be sent.
5-2
Cause1
: Are the destination settings correct?
Remedy
: Check the destination of the recipient.
Cause2
: Is the destination registered in the Address Book correct?
Remedy
: Check the destination registered in the Address Book. (See “Changing Address
Details,” on p. 4-58.)
Cause3
: If you are sending an e-mail or I-Fax, are the SMTP server or DNS server settings
correct?
Remedy
: Check the settings of the SMTP server or DNS server.
When Problems Occur
: If you are sending a file, are the user name and password correct?
Remedy
: Check the user name and password, and send the file again.
Cause5
: For sending documents by fax, is the type of telephone line set correctly?
Remedy
: Check the type of telephone line that is set. (See “Selecting the Type of Telephone
Line (Tel Line Type),” on p. 1-10.)
Cause6
: If you send documents by fax using a subaddress, did you set the selected
subaddress and password correctly?
Remedy
: Check the subaddress and password.
Cause7
: Has trouble occurred in the recipient’s machine?
Remedy
: Check to ensure that the recipient’s machine can receive documents. If it cannot,
check to see if it is switched OFF, is out of recording paper, or has insufficient
available memory.
5
Troubleshooting
Cause4
Memory is full.
Cause
: Are unwanted documents stored in memory?
Remedy
: Check the TX Document and RX Document memory, and erase unwanted
documents or error documents from memory.
There are vertical lines in the documents printed by the recipient’s machine.
Cause
: Is the platen glass clean?
Remedy
: Use the Copy Function to make a copy of the document, and check for streaks. If streaks
appear, clean the platen glass. (See Chapter 5, “Routine Maintenance,” in the Reference
Guide.)
The density of the documents received in the recipient’s machine is too light.
Cause
: Did you send the documents with the Scanning Exposure set too lighter and the
Image Quality set to [Photo]?
Remedy
: Make the Scanning Exposure darker and set the Image Quality to [Text] before
sending the document. (See “Adjusting the Exposure and Image Quality Before
Scanning the Originals (Scanning Exposure),” on p. 1-91.)
When Problems Occur
5-3
The recipient’s fax machine is slow to switch over to the receiving mode, and errors always occur.
: Is a pause inserted in the telephone number?
Remedy
: When sending to a machine that takes time to switch over for fax receiving, insert a
pause after the other party’s telephone number.
Problems Receiving Documents
Troubleshooting
5
Cause
The machine will not receive documents.
Cause1
: Does the machine have sufficient memory?
Remedy
: Erase unwanted documents in the inboxes in order to increase the amount of
available memory. (See Chapter 4, “Using/Arranging Documents Stored in an Inbox,”
in the Mail Box Guide.)
Cause2
: Are the Network Settings set?
Remedy
: You cannot receive documents without Network Settings. Consult your System
Manager.
Cause3
: Is the receive password set for receiving by fax in the Fax Settings in Communication
Settings in System Settings?
Remedy
: If a receive password is set, documents can be received only from senders that use
the correct password. Consult your System Manager.
Memory Lock cannot take place.
5-4
Cause
: Dose the machine have sufficient available memory?
Remedy1
: Erase unwanted documents in the inboxes in order to increase the amount of
available memory. (See Chapter 4, “Using/Arranging Documents Stored in an Inbox,”
in the Mail Box Guide.)
Remedy2
: Erase unwanted documents in the Memory RX Inbox. (See Chapter 4, “Using/
Arranging Documents Stored in an Inbox,” in the Mail Box Guide.)
When Problems Occur
Quality of printed originals is uneven.
Cause
: Is the platen glass of the other party’s machine clean?
Remedy
: Make a few copies using your machine. If the copies are not streaked, the problem is
in the other party’s machine. Contact the other party and ask them to clean their
machine’s platen glass, and send the document to them again.
5
Cause1
: Did you set the Forwarding Conditions in Forwarding Settings correctly?
Remedy
: Check the current Forwarding Conditions and inform the sender. (See Chapter 4,
“System Manager Settings,” in the Reference Guide.)
Cause2
: Are the Forwarding Conditions set to ‘On’?
Remedy
: The Forwarding Settings are not valid if you do not set the Forwarding Conditions to
‘On.’ (See Chapter 4, “System Manager Settings,” in the Reference Guide.)
Cause3
: Does the machine have sufficient memory?
Remedy1
: Erase unwanted documents in the inboxes in order to increase the amount of
available memory. (See Chapter 4, “Using/Arranging Documents Stored in an Inbox,”
in the Mail Box Guide.)
Remedy2
: Erase unwanted documents in the Confidential Fax Inboxes. (See Chapter 4, “Using/
Arranging Documents Stored in an Inbox,” in the Mail Box Guide.)
Troubleshooting
The machine will not receive documents in the Confidential Fax Inboxes.
Other Problems
Transmissions are slow.
Cause1
: Are you sending high resolution documents?
Remedy
: Low resolution is recommended for sending documents containing text only.
Cause2
: Is [ECM TX] or [ECM RX] active for sending by fax in the TX Settings/RX Settings
(Fax Settings) in Communication Settings?
Remedy
: Check the [ECM TX] and [ECM RX] in the TX Settings/RX Settings (Fax Settings) in
Communication Settings. (See “Specifying Whether to Use ECM Transmission (ECM TX),”
on p. 3-37, and “Specifying Whether to Use ECM Reception (ECM RX),” on p. 3-42.)
When Problems Occur
5-5
Cause1
: Is the type of telephone line set to [Tone] even if you are using a pulse type of
telephone line?
Remedy
: If you are using a pulse type of telephone line, it is necessary to press [Tone] to use
fax information services. (See “Using Fax Information Services,” on p. 2-8.)
5
Cause2
: Were you asked to make the machine ready to receive the services?
Troubleshooting
The machine cannot use fax information services.
Remedy
: Press [RX Start]. (See “Using Fax Information Services,” on p. 2-8.)
Documents cannot be sent overseas by fax (error code #018).
5-6
Cause
: Is a pause inserted in the fax telephone number?
Remedy1
: Insert a pause after the access number of the telephone company that you want to use to
perform international communication, or after the fax telephone number of the recipient,
then send the documents again. (See “Specifying a Fax Number,” on p. 1-36.)
Remedy2
: Change the Long Distance setting on the Option screen if you are sending
documents using the Address Book. (See “Changing Address Details,” on p. 4-58.)
When Problems Occur
Questions & Answers
I want my machine to automatically reconnect to the recipient party if it cannot make a connection the
first time.
A
Set the Auto Redial to ‘On’ in the TX Settings (Fax Settings) in Communications Settings for sending by
fax. You can also perform detailed settings such as redial times and redial interval.
(See “Setting Auto Redial (Auto Redial),” on p. 3-39.)
Set the Retry Times in the Common Settings in Communications Settings for other than sending by fax.
(See “Setting the Number of Retry Attempts (Retry Times),” on p. 3-8.)
Q
What happens to documents that are sent to my machine while the power switch on the control panel is
OFF?
A
These documents are automatically received and printed when all documents have been received.
Q
A
What happens if a Fax/I-Fax document arrives while my machine is copying?
Q
I frequently send documents with the same settings. I want my machine to automatically return to the
settings when the switch is turned ON or a transaction is complete.
A
You can register desired settings as a Favorites Button and recall it whenever you want. Also, you can
register scanning modes and file types as Standard Settings so that the machine returns to the
registered settings automatically when the switch is turned ON or a transaction is complete.
Q
A
What happens to received documents if a paper jam occurs while they are printing?
You need not do anything special. While you are making copies, the document is automatically received
and stored in the machine’s memory, and will print automatically when you finish copying. You can
change the order in which these documents print. (See Chapter 3, “Selecting and Storing Settings to
Suit Your Needs,” in the Reference Guide.)
If documents are not printed correctly, they are held in memory. When the paper jam is cleared, printing
resumes from the page at which the paper jam occurred.
Questions & Answers
5-7
5
Troubleshooting
Q
Q
A
What happens to a document has not been completely received when a blackout occurs?
Q
A
What happens to documents in memory and the memory settings if power is interrupted?
Q
A
How can I save paper?
Q
A
Can I turn the power OFF even after setting timer transmission?
Q
A
Can I change the data size when sending an e-mail and I-Fax?
Q
A
I cannot tell if the document was successfully sent because the result in the Activity Report shows ‘--’.
Troubleshooting
5
5-8
The document, up to the page that was successfully received, is printed.
Documents remain in memory if the power is interrupted. Stored destination details also remain in
memory. However, note that if power is interrupted while a document is being received, that document
is not stored in memory.
This machine enables you to print received documents on both sides of the paper. (See “Two-Sided
Printing of Received Documents (Two-Sided Print),” on p. 3-26.)
You can forward received documents using e-mail, and receive documents in memory and send them
to specified destinations. (See Chapter 4, “System Manager Settings,” in the Reference Guide and
Chapter 4, “Using/Arranging Documents Stored in an Inbox,” in the Mail Box Guide.)
When you are not using the machine, you may turn OFF the control panel power switch on the control
panel, but leave the main power switch turned ON. Documents for which timer transmission has been
set are automatically sent from the memory of this machine when the specified time is reached.
You can set a Maximum Data Size for Sending from the E-mail/I-Fax Settings in Communications
Settings of System Settings. For e-mail, the send job is divided before being sent so that the data in
each send job does not exceed the set limit. You cannot send an I-Fax if the data exceeds the set limit.
‘--’ is displayed when sending is successful, but it is not confirmed whether the e-mail or I-fax that you
sent was actually delivered or not. Contact the recipient to check whether the document was received.
Questions & Answers
Appendix
6
CHAPTER
Index . . . . . . . . . . . . . . . . . . . . . . . . . . . . . . . . . . . . . . . . . . . . . . . . . . . . . . . . . . . . . . . . . . . . . . . . . . . . . . . . 6-2
6-1
Index
Numerics
Appendix
6
2 On 1 Log.................................................................................................................................. 3-34
A
A ................................................................................................................................................. 1-97
Address Book ..................................................................................................................... 1-34, 4-3
B
Binding Erase ........................................................................................................................... 1-118
Book Frame Erase.................................................................................................................... 1-115
C
Communications Settings.............................................................................................................3-2
Copy Ratio.................................................................................................................................. 1-98
D
Date & Time Settings ................................................................................................................. 1-11
Date and Time..............................................................................................................................1-9
Default Screen for Send ............................................................................................................. 3-19
Delayed Send ........................................................................................................................... 1-132
Destination Name....................................................................................................................... 1-10
Details ........................................................................................................................................ 1-72
Different Size Originals............................................................................................................. 1-104
Direct Sending.......................................................................................................................... 1-140
Document Size Select ................................................................................................................ 1-81
6-2
Index
E
Edit Standard Send Settings ........................................................................................................3-9
E-mail ................................................................................................................... 1-39, 1-144, 4-13
E-mail Priority........................................................................................................................... 1-150
Erase .......................................................................................................................................... 1-75
Erase Failed TX............................................................................................................................3-4
6
Appendix
F
Favorites Buttons.............................................................................................................. 1-59, 3-12
File Server ............................................................................................................ 1-46, 1-160, 4-25
Frame Erase............................................................................................................................. 1-111
FTP......................................................................................................................... 1-48, 4-28, 4-80
G
Group ......................................................................................................................................... 4-36
H
Handle Documents with Forwarding Errors..................................................................................3-5
I
I-Fax ..................................................................................................................... 1-41, 1-153, 4-18
I-Fax Address or Telephone Number............................................................................................1-9
Initialise TX Settings................................................................................................................... 3-25
J
Job Build................................................................................................................................... 1-107
Job Done Notice....................................................................................................................... 1-135
Index
6-3
L
LDAP server ............................................................................................................................... 1-61
M
Manual Sending ......................................................................................................................... 1-31
Memory Sending ...................................................................................................................... 1-140
Appendix
6
N
NetWare (IPX) ........................................................................................................ 1-52, 4-32, 4-84
New Address .............................................................................................................................. 1-36
O
One-touch Buttons ........................................................................................................... 1-57, 4-65
On-hook........................................................................................................................................ 2-8
Original Frame Erase ............................................................................................................... 1-112
P
Page Number ............................................................................................................................. 1-10
Photo Mode ........................................................................................................................ 1-93, 3-7
Preset Zoom............................................................................................................................... 1-98
Preview..................................................................................................................................... 1-168
Processing/Data indicator ............................................................................................................2-3
6-4
Index
R
Recall ....................................................................................................................................... 1-174
Receive Reduction ..................................................................................................................... 3-29
Received Page Footer ................................................................................................................ 3-32
Registering the Sending Record ..................................................................................................1-9
Resolution .................................................................................................................................. 1-89
Retry Times..................................................................................................................................3-8
6
Appendix
S
Scan Settings Screen...................................................................................................................1-7
Scanning Exposure .................................................................................................................... 1-91
Scanning Mode .......................................................................................................................... 1-76
Search on Server ............................................................................................................. 1-61, 4-43
Select Cassette .......................................................................................................................... 3-28
Send Screen................................................................................................................................. 1-5
Send Settings ........................................................................................................................... 1-132
Sender’s Name........................................................................................................................... 1-10
Setting the Fax Line Type .............................................................................................................1-9
Sharpness ................................................................................................................................ 1-121
Store Address Book Name......................................................................................................... 4-63
Store In Usr Inbox ...................................................................................................................... 1-56
Store/Edit Address Book .................................................................................................... 4-5, 4-13
Store/Erase .............................................................................................................................. 1-124
Subaddress .............................................................................................................. 1-38, 4-9, 4-69
T
Text Mode ................................................................................................................................... 1-93
Text/Photo Mode ........................................................................................................................ 1-93
Two-page Separation ............................................................................................................... 1-102
Two-sided Original...................................................................................................................... 1-79
Two-sided Print........................................................................................................................... 3-26
TX Terminal ID............................................................................................................................ 3-22
Index
6-5
U
User Inbox ................................................................................................................................ 1-164
W
Windows (SMB)................................................................................................................ 4-30, 4-82
Appendix
6
Z
Zoom Designation .................................................................................................................... 1-100
6-6
Index