1
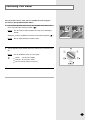
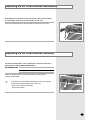
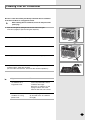
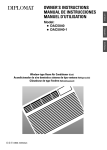
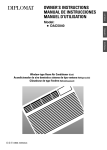
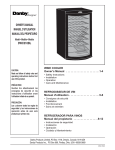
OWNER'S
INSTRUCTIONS
Model:
AAC5040
AAC5040-1
Window-type Room Air Conditioner
(Cool)
E F DB98-16356A(2)
DB98-15112A
Safety Precautions
The following safety precautions must be taken when installing
and using your air conditioner.
1 The air conditioner must be plugged into its own specific power source, which must be
installed in compliance with national wiring, earthing and safety regulations.
Depending on national regulations and your specific installation, you may need to install:
◆ A circuit breaker
For further information on electrical requirements, contact a professional electrician.
This device must be installed according to the national electrical rules.
2 Make sure that the unit is correctly ventilated at all times;
do NOT place clothing or other materials over it.
3 NEVER spill liquids of any kind into the unit.
Should this happen, unplug the unit and contact your installation specialist.
4 Do NOT insert anything between the air outlet blades, as it may damage the inner fan
and you may get hurt. Keep children away from the unit.
5 If the supply cord is damaged, it must be replaced by the manufacturer, its service agent
or similarly qualified persons in order to avoid a hazard.
6 Do NOT attempt to repair the unit yourself. If it is damaged in any way, contact:
◆ An authorized service center
◆ The dealer from whom you purchased the air conditioner.
7 Do NOT place any blocking objects in front of the unit.
8 If the remote control will not be used for a long time, remove the batteries.
9 Before throwing out the device, it is necessary to pull back the battery cells
and get rid of them safely.
10 The appliance is not intended for use by young children or infirm person without supervision;
young children should be supervised to ensure that they do not play with the appliance.
11 Do NOT use an extension cord with this product.
CAUTION
The manufacturer does not assume responsibility for accidents or injury
caused by an incorrectly installed air conditioner. If you are unsure about
installation, contact an installation specialist.
E-2
Contents
◆ PREPARING YOUR AIR CONDITIONER
■
■
■
Safety Precautions .........................................................................................
Description of Each Component ....................................................................
Getting Started ...............................................................................................
2
4
5
◆ OPERATING YOUR AIR CONDITIONER
■
■
■
■
■
Cooling Your Room ........................................................................................
Ventilating Your Room ....................................................................................
Switching the Air Conditioner Off ....................................................................
Adjusting the Air Flow Direction Horizontally ..................................................
Adjusting the Air Flow Direction Vertically ......................................................
6
7
8
9
9
◆ RECOMMENDATIONS FOR USE
■
■
■
■
■
Power Failure .................................................................................................
Temperature and Humidity Ranges ................................................................
Cleaning Your Air Conditioner ........................................................................
Solving Common Problems ............................................................................
Technical Specifications .................................................................................
10
10
11
12
13
E-3
Description of Each Component
Design and shape are subject to
change.
Air outlet
Outer air flow blades
(up/down orientation)
- Except AAC5040/AAC5040-1
Inner air flow
blades (right/left
orientation)
Air outlet
Ventilation lever
- Except AAC5040/AAC5040-1
Air inlet (Inside)
Air inlet (Outside)
Air filter (Inside)
Power plug
(The type of power plug
may differ, depending on
the local power supply.)
Operating mode
selection dial
Thermostat
control
Selector
E-4
Thermostat
Getting Started
Your Owner's Instructions contain much valuable information on using your air conditioner.
Please take the time to read them as they will help you take full advantage of the unit's
features.
The illustrations in the step-by-step procedures use four different symbols:
PRESS
PUSH
☛
➢
IMPORTANT
NOTE
E-5
Cooling Your Room
You must select the COOL mode if you wish to adjust the:
Cooling temperature
Fan speed when Cooling
1
Turn the operating mode selection dial and set it to " Hi Cool " ,
" Med Cool " or " Low Cool ".
Result:
The air conditioner starts up in cool mode.
You can change modes at any time.
2
Turn the THERMOSTAT control to the desired position.
Possible temperatures: Can be set between 18 C and 29 C.
Result:
3
E-6
The air conditioner starts cooling if the room temperature is
higher than the selected temperature.
To control the direction of the air flow, refer to page 9.
Ventilating Your Room
If the air in your room is stale, you can ventilate the room using the
Fan feature. (Except AAC5040/AAC5040-1)
1
If you wish to discharge stale air, push the ventilation lever on the front
of the unit to the right and open position (
).
Result:
The air inside the room circulates and stale air is discharged
outside.
Otherwise, push the ventilation lever to the left and closed position (
Result:
2
).
The air simply circulates inside the room.
Turn the operating mode selection dial and set it to "Hi Fan" or "Low Fan" position.
Result:
The air conditioner starts up in fan mode.
Hi Fan : The fan turns rapidly.
Low Fan : The fan turns slowly.
You can change modes at any time.
3
To control the direction of the air flow, refer to page 9.
E-7
Switching the Air Conditioner Off
You can switch the air conditioner off whenever you want.
1
To switch the unit off, simply set the operating mode selection dial to the
" OFF " position.
Result:
E-8
The air conditioner stops operating.
Adjusting the Air Flow Direction Horizontally
Depending on the position of the unit in your room, you can adjust
the orientation of the inner air flow blades on the unit.
Adjust the air flow blades to the desired position by sliding them side to side.
Adjusting the Air Flow Direction Vertically
The outer air flow blades can be adjusted to control the vertical air
flow direction. (Except AAC5040/AAC5040-1)
RECOMMENDATION
When...
Adjust the blades to face...
Cooling
Upwards.
Adjust the air flow blades to the desired position, by pushing them
upwards or downwards.
If you orient the air flow blades downwards and the unit operates
in Cool mode for long periods of time, dew may:
- Form on the surface of the blades
- Drip from the blades
E-9
Power Failure
If a power failure occurs, the air conditioner is switched off.
When the power comes back on, the air conditioner starts up again
automatically.
Temperature and Humidity Ranges
The follow ing table indicates the temperature and humidity ranges
w ithin w hich the air conditioner can be used.
E-10
Mode
Indoor
Temperature
Outdoor
Temperature
Indoor Humidity
Cooling
21 C to 32 C approx.
21 C to 43 C approx.
80% or less
If the air conditioner is used at...
Higher temperature
Then...
The automatic protection feature may be triggered
and the air conditioner stopped.
Lower temperature
A water leakage or some other malfunction may happen
if the heat exchanger freezes.
Higher humidity levels
Water may condense on and drip from the surface of the unit
if it is used for long periods.
Cleaning Your Air Conditioner
Be sure to clean the air filter periodically to maintain the air conditioner
in the best condition for a long period of time.
When cleaning the air conditioner, turn it off and pull out the
power plug.
1
Open the front grille by pulling the tabs on both sides of the grille.
Then lift it up slightly to open the front grille completely.
2
Grab the tabs on the filter and pull it up and out.
3
Remove all dust on the air filter with a vacuum cleaner or brush.
4
When you have finished, insert the air filter back into its original position.
5
Wipe the surface of the unit with a neutral detergent
and then wipe it again with dry cloth.
(Be sure not to use benzene, solvent or other chemical products.)
If you...
Will not be using the
air conditioner for a
long period of time
Have not used the air
conditioner for a long
period of time
Then...
Set the fan going for a few
hours to dry the inside of the air
conditioner thoroughly.
Switch the air conditioner off and
unplug it from the wall socket.
Clean the filter and outer surfaces.
Set the fan going for a few hours to
dry the inside of the air conditioner
thoroughly.
E-11
Solving Common Problems
Before contacting an authorized service center, perform the following simple checks.
They may save you the time and the expense of an unnecessary call.
E-12
Problem
Explanation / Solution
The air conditioner
does not operate at all.
◆ Check for a power failure.
◆ Check the voltage.
(See the technical specifications)
◆ Check the power plug for disconnection.
◆ Check to see whether the operating mode selection dial is placed in the
" Off " position. (Set it to the desired position.)
◆ Check to see whether the room temperature is too low.
- Refer to page 10 for details about temperature condition.
The air comes out smoothly,
but cooling is not effective.
◆ Set the THERMOSTAT control to the desired position.
- When the number on the THERMOSTAT control is too high,
the room temperature may be too warm.
◆ Check to see whether there is an open window or leakage of cool
air to the outside.
- Close the window, and fill the gap.
◆ Check to see whether there is any obstacle adversely affecting
the flow of the air inside and outside the room.
- Remove the obstacle or change the position of the air conditioner.
◆ Check to see whether the air filter is clogged with dust or
contaminated with foreign substances.
- Clean the air filter.
◆ Check to see whether there is any direct sunlight facing the air conditioner.
- Block the sunlight with a sunshade.
◆ Check to see whether there is any electric device generating heat.
- Do not use the air conditioner together with any heating device.
Odors are permeating the
room during air conditioning.
◆ Ventilate the room.
Technical Specifications
Design and specifications are subject to change without notice.
Model
AAC5040/AAC5040-1
Power Supply
115V~, 60Hz
E-13
LIMITED AIR CONDITIONER WARRANTY
This quality product is warranted to be free from manufacturer’s defects in material and workmanship, provided that the unit is used under the normal operating
conditions intended by the manufacturer.
This warranty is available only to the person to whom the unit was originally sold by Danby or by an authorized distributor of Danby, and is non-transferable.
TERMS OF WARRANTY
First 2 Years
Third Through
Fifth Year
To obtain
Service
During the first 2 year (2), any electrical parts of this product found to be defective, including any sealed system units, will be repaired or
replaced, at warrantor’s option, at no charge to the ORIGINALpurchaser.
During the next three years (3) any part of the sealed system found to be defective (consisting of compressor, condenser, evaporator,
dryer and all related tubing) will be repaired without charge.
Contact your dealer from whom your unit was purchased, or contact your nearest authorized Danby service depot, where service
must be performed by a qualified service technician. If service is performed on the units by anyone other than an authorized service
depot, or the unit is used for commercial application, all obligations of Danby under this warranty shall be at an end.
EXCLUSIONS
Save as herein provided, Danby Products Limited (Canada) or Danby Products Inc. (U.S.A.), there are no other warranties, conditions, representations or guarantees, express or implied, made or intended by Danby Products Limited or its authorized distributors and all other warranties, conditions, representations or
guarantees, including any warranties, conditions, representations or guarantees under any Sale of Goods Act or like legislation or statue is hereby expressly
excluded. Save as herein provided, Danby Products Limited (Canada) or Danby Products Inc. (U.S.A), shall not be responsible for any damages to persons or
property, including the unit itself, howsoever caused or any consequential damages arising from the malfunction of the unit and by the purchase of the unit, the
purchaser does hereby agree to indemnify and save harmless Danby Products Limited from any claim for damages to persons or property caused by the unit.
GENERAL PROVISIONS
No warranty or insurance herein contained or set out shall apply when damage or repair is caused by any of the following:
1) Power Failure.
2) Damage in transit or when moving the appliance.
3) Improper power supply such as low voltage, defective house wiring or inadequate fuses.
4) Accident, alteration, abuse or misuse of the appliance such as inadequate air circulation in the room or abnormal operating conditions,
(extremely high or low room temperature).
5) Use for commercial or industrial purposes.
6) Fire, water damage, theft, war, riot, hostility, acts of God such as hurricanes, floods etc.
7) Service calls resulting in customer education.
Proof of purchase date will be required for warranty claims; so, please retain bills of sale. In the event warranty service is required, present this document to our
AUTHORIZED SERVICE DEPOT.
Warranty Service
Air Conditioners With-In Canada With-In United States
In Home
In Home
Danby Products Limited
PO Box 1778, 5070 Whitelaw RD, Guelph, Ontario, Canada N1H 6Z9
Telephone: (519) 837-0920 FAX: (519) 837-0449
Danby Products Inc.
PO Box 669, 101 Bentley Court, Findlay, Ohio, U.S.A. 45840
Telephone: (419) 425-8627 FAX: (419) 425-8629
11/03