1
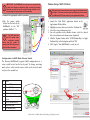
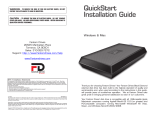
RAIDBank5 Quick Install Guide
Volume Setup- Microsoft Windows
1. Open the disk management console. A list of the attached
drives and their respective volumes will appear. Select the
RAIDBank5 Volume.
!
The Disk Management Console can be accessed by right-clicking on
the “My Computer” icon (
) and selecting “Manage” from
the drop down menu. Disk Management is found under “Storage” in
the resultant window. For an illustrated guide, please see http://www.fantomdrives.com/support/faqs
2. Right-click on the drive letter and select Format in the pop-up
menu. The Format dialog box will appear.
!
If the hard disk is not signed for use, the New Partition option
is unavailable (superimposed no-entry icon). In this case a
signature can be written on the hard drive by right clicking on
the disk description window and selecting “Initialize Disk”.
3. Under Capacity, verify the drive capacity. It should be close to
the stated capacity of your drive in gigabytes.
4. In the File System pop-up menu, select NTFS. The default
formatting option is full format. A full format will fully verify the
disk media. A Quick format is quick, but will do less verifying of
the drive than a full format. Click Start. Once the format process
is complete, your external hard drive is ready to use.
Inspect Your RAIDBank5.
Please unpack your RAIDBank5 in
a static free environment, carefully
making sure not to damage or
discard any of the packing material.
Please verify that all contents are
present. If the RAID subsystem
appears damaged, or if any items
of the contents listed are missing or
damaged, please contact your dealer
or distributor immediately.
Connect Your RAIDBank5
Connecting the RAIDBank5 requires
an available power socket, and a
host with one of the following interfaces:
• An available USB 3.0, USB 2.0, or FireWire 800/400 port
• An external SATA (eSATA) host bus connector with large LUN
and port multiplier support
•Management Software requires Windows XP or Newer, or Mac
OS 10.5.8 or newer.
If a host bus adapter was provided
with the RAIDBank5, make sure to
install it before proceeding. Refer
to the host bus adapter installation
manual for installation instructions.
1.Plug the AC power cord into the
power port on the back of the
drive. The plug should not require
much effort to insert. Plug the
3 pronged power connector into
power outlet, preferably on
uninterruptible power supply (UPS.)
2
3
Package Contents:
1 RAIDBank5 unit
5 Disk Modules
1 eSATA cable
1 USB 3.0 cable
1 Power Cord
1 FireWire 800 Cable
1 FireWire 400 Cable
1 RAIDBank5 CD
1 Encryption Key
1Quick Install Guide
(This document)
a
an
!
IMPORTANT: The RAIDBank5 can only use one connection at
a time. Host plugs are shaped so they can only be properly
inserted one way; be sure to insert the plugs properly or you
may damage the system and void the warranty.
Volume Setup- MAC OS Hosts
!
2. Connect the appropriate cable to your host.
3.Flip the power switch
located on the back of the
RAIDBank5 to the “ON”
position (labelled “-”.)
e
HIGH SPEED
USB
SATA
M
mac
win
If Any LED glows red
and the system emits
a continuous beeping
sound, then the system is
reporting fault. Refer to your user
guide for further information.
!
Configuration via RAID Mode Selector Switch
The Micronet RAIDBank5 supports RAID configuration via a
rotary switch located on the back panel. To change operating
mode, please select turn the rotary switch to the desired mode
and press the commit key.
Pos
Mode
0
Stripe (RAID 0)
1
Mirror (RAID 10)
2
Cloned Mirror (N Way RAID 1)
3
RAID 3 (Fixed Parity)
4
Graphic User Interface (GUI)
Control
5
RAID 5 (Distributed Parity)
6
Large Mode (Span)
7
Port Multiplier (JBOD)
Before you begin, please make sure you are logged in with administrative
privileges. If you are unsure about your privilege level, please consult
your Macintosh OS-X user manual or your system administrator.
1 Launch the “Disk Utility” application located in the
Applications/Utilities folder.
2 Highlight your new drive and select the “Partition” tab
3 Select the new partition map type.
4 For each partition in the volume scheme, select the desired
file system format and volume name (optional)
5 Click the “Options” button. Select “GUID Partition Map” or “Apple
Partition Map” in the dialog box and click “OK”.
6 Click “Apply.” Your RAIDBank5 is ready to use!
3
3
4
2
commit RAID Mode
8-16-2010 Rev 1.0. ©2010 MicroNet Technology. All rights reserved.
5
6