1
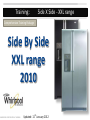
Training: Side X Side - XXL range Comprehensive Training Package Side By Side XXL range 2010 WHIRLPOOL CORPORATION TRAINING Updated: 11th January 2012 CONTENTS Sales Current Trends Product Range Line-Up Features & Benefits Features Summary Product Comparison Model & Serial Number Location The Sales Pitch Component Locations Quick Quiz Product Labels How To Use The Product Video Links Quick Quiz Customer Service 3. APPENDIX WHIRLPOOL CORPORATION TRAINING Safety Advice Installation Guide Other material 3 Training: Side X Side - XXL range Training Module Sales Sales Current Trends Product Range Line-Up Features & Benefits Features Summary Product Comparison The Sales Pitch Quick Quiz WHIRLPOOL CORPORATION TRAINING Updated: 11th January 2012 Current Situation Current Situation WHIRLPOOL CORPORATION TRAINING 5 The market today...... We see some important trends developing... Quality Issues! Competitors from Asia Product recalls etc... More litres for the same space / standard size dimensions Slow turnover Price sensitive Quality Surface Finish! Anti Fingerprint becoming popular, Stainless Steel still strong WHIRLPOOL CORPORATION TRAINING 6 Side By Side - In The Market Today There is also a growing trend for environmentally friendly products with energy efficiency and water saving features, with options like “Eco” cycle etc.. Minimalistic stream-line design Flat doors, integration, flush design etc... Flexible interiors & removable shelves etc. WHIRLPOOL CORPORATION TRAINING 7 Current Whirlpool Range - Side by Side - Full Depth Entry Non Ice & Water Mid Range Ice & Water 6ED2FHKXVA 6ED2FHGXVA 640L Satina WHIRLPOOL CORPORATION TRAINING 640L Satina 8 Introducing the Whirlpool Side By Side XXL range Launch: Q4, 2010 6WSC21N4XD Non Dispenser Universal Silver 6WSC21N4XY Non Dispenser Stainless Steel 6WSC20C6XB Dispenser Black 6WSC20C6XY Dispenser Stainless Steel WHIRLPOOL CORPORATION TRAINING 9 Introducing the Whirlpool Side By Side Launch: Q1, 2012 6WSC21N4YY Non Dispenser Stainless Steel 6WSC20C6YB Dispenser Black 6WSC20C6YY Dispenser Stainless Steel N E W H A N D L E XXL range N E W H A N D L E N E W H A N D L E New handle design WHIRLPOOL CORPORATION TRAINING 10 Product Range Product Line-Up & Specifications WHIRLPOOL CORPORATION TRAINING 11 SxS XXL Model Number Nomenclature 6 W S C 2 1 N 4 X Y 2 1 N 4 X D 2 0 C 6 X Y 2 0 C 6 X B AU Whirlpool SxS Counter Depth Capacity heirarchy Ice Maker: N = Non Dispense; C = In-Door Ice Features: 4 = Medium; 6 = Premium Launch Year: X=2010, Y=2011 Colour: Y = Monochromatic SS; D = Silver; B = Black WHIRLPOOL CORPORATION TRAINING 12 Side By Side “XXL” Range during 2010/2011 623 litres 6WSC21N4XD Universal Silver WHIRLPOOL CORPORATION TRAINING 6WSC21N4XY Stainless Steel 608 litres 6WSC20C6XB Black 6WSC20C6XY Stainless Steel 13 Side By Side “XXL” Range Launched Q1, 2012 623 litres 608 litres N E W N E W N E W H A N D L E H A N D L E H A N D L E 6WSC21N4YY Stainless Steel New handle design Anti FingerPrint Coating WHIRLPOOL CORPORATION TRAINING 6WSC20C6YB Black 6WSC20C6YY Stainless Steel See next few slide for updated images of new door handle design 14 Door Handle Design Comparison (New vs Old) 2012 New Handle Design 2010 Previous Handle Design 2012 Antifinger print coating surface!! 6WSC20C6YY Stainless Steel WHIRLPOOL CORPORATION TRAINING 6WSC20C6XB Black 15 Door Handle Design Comparison (New vs Old) 2012 New Handle Design 2010 Previous Handle Design WHIRLPOOL CORPORATION TRAINING 16 385 Litre Fridge / 238 Litre Freezer 910mm Hidden Hinges Frost Free LED User Interface Electronic Controls Strong Sturdy Handles 1750mm Modern Flat Door Design Door Alarm 698mm Depth Incl Handle 600mm Depth Excl Handle 6WSC21N4XD Non Dispenser Universal Silver 6WSC21N4XY Non Dispenser Stainless Steel 6WSC21N4YY Non Dispenser Stainless Steel WHIRLPOOL CORPORATION TRAINING 17 385 Litre Fridge / 238 Litre Freezer 6WSC21N4XD Non Dispenser Universal Silver 6WSC21N4XY Non Dispenser Stainless Steel 6WSC21N4YY Non Dispenser Stainless Steel 4 Adjustable Large Freezer Baskets Dairy Compartment 4 Adjustable Fridge Baskets Sliding Dual Twist Ice 3 Spill Proof Adjustable Freezer Shelves 2 Freezer Bins 4 Spill Proof Shelves Fruit / Vegetable Bin Meat Cabinet WHIRLPOOL CORPORATION TRAINING 18 385 Litre Fridge / 223 Litre Freezer 910mm Hidden Hinges Frost Free LED User Interface Electronic Controls Strong Sturdy Handles 1750mm Modern Flat Door Design Ice & Water Dispenser Child Dispenser Lock Vacation Mode Door Alarm 6WSC20C6XB Dispenser Black 6WSC20C6XY Dispenser Stainless Steel 6WSC20C6YB Dispenser Black 6WSC20C6YY Dispenser WHIRLPOOL CORPORATION TRAINING Stainless Steel 698mm Depth Incl Handle 600mm Depth Excl Handle 19 385 Litre Fridge / 223 Litre Freezer Indoor Ice (IDI) saves 34% space!! 6WSC20C6XB 6WSC20C6XY 6WSC20C6YB 6WSC20C6YY Dispenser Black Dispenser Stainless Steel Dispenser Black Dispenser Stainless Steel Dairy Compartment Quick Bottle Chill IDI (in door ice) Wine Rack 4 Adjustable Door Baskets 3 Spill Proof Adjustable Freezer Shelves 3 Micro Etch Spill Proof Shelves 2 Freezer Bins 2 Adjustable Large Freezer Baskets Snack Drawer Humidity Controlled Fruit / Vegetable Bin Meat Drawer WHIRLPOOL CORPORATION TRAINING 20 Specifications Dimensions WHIRLPOOL CORPORATION TRAINING 21 W10332634A - Product Dimensions TOP VIEW WHIRLPOOL CORPORATION TRAINING 22 W10332634A - Product Dimensions WHIRLPOOL CORPORATION TRAINING 23 W10332634A - Side View WHIRLPOOL CORPORATION TRAINING 24 W10332634A - Opening Dimensions WHIRLPOOL CORPORATION TRAINING 25 W10332634A - Door Swing Dimensions WHIRLPOOL CORPORATION TRAINING 26 Bringing XXL Home for installation • The handles of the XXL Side By Side fridges are not attached to the product. • This has been done to minimise damage during transportation and maximise container loadings. • Hence, this means that they need to be attached. • Handles will be located inside the refrigerator door in the EPS. • Consumers will have to unwrap the entire product and open the fridge doors to locate these. • Consumers might choose to have a trade person to install these or they can do it themselves with the supplied allen key. • The allen key will be located in the crisper bin. • This pack will also come with extra screws as emergency. WHIRLPOOL CORPORATION TRAINING 27 Control Panels Model with dispenser Model without dispenser WHIRLPOOL CORPORATION TRAINING 28 Control Panels Model with dispenser Model without dispenser WHIRLPOOL CORPORATION TRAINING 29 Control Panel (with dispenser) 6WSC20C6XY 6WSC20C6XB WHIRLPOOL CORPORATION TRAINING Home Screen 30 Control Panel (without dispenser) 6WSC21N4XY 6WSC21N4XD WHIRLPOOL CORPORATION TRAINING Home Screen 31 Features & Benefits FEATURES & Benefits WHIRLPOOL CORPORATION TRAINING 32 Key features of Whirlpool compared to others.. Micro-etch shelving Bigger litre age Extra large fruit crisper (holds 84 apples!) (dispenser model only) Removable door bins (fridge to table feature) Snack drawer Dairy case Consumer replaceable filters (not necessary to have it installed by service technician) Eco Mode / Holiday Mode on all XXL range The crisper converts to a meat storage deli area! Dispenser model: 3 Non-Dispenser model: 2 Door lock and alarm WHIRLPOOL CORPORATION TRAINING Anti-Finger Print Coating! 33 Anti Finger-Print Coating!! Quality Surface Finish with Anti Fingerprint Coating!! Available only on new models (Launch: Q1, 2012) 6WSC21N4YY Non Dispenser Stainless Steel 6WSC20C6YB Dispenser Black 6WSC20C6YY Dispenser Stainless Steel No More Finger Print Marks!! WHIRLPOOL CORPORATION TRAINING 34 SPACE THAT SATISFITES HUNGRY SHOPPERS! Our New 608 Litre Side By Side Holds... And the 623 Litre Side By Side Holds Even More! WHIRLPOOL CORPORATION TRAINING • 2 Pepperoni Pizzas • 1 Deep Dish Pizza • 1 Thai Rice Dish • 2 Macaroni & Cheese • 4 Pies • 1 Shrimp Platter • 1 X 2 Litre Of Ice Cream • 1 X 1 Litre Of Ice Cream • 1 Container Of Vegetable Stock • 24 Ice Creams Bars • 1 Loaf Of Raisin Bread • 1 Bag Of Bagels • 6 Packs Of Frozen Vegetables • 2 Rolls Of Cookie Dough • 2 Bags Oven Fries • 4 Frozen Dinners • 2 Beef Burritos • 2 Packs Of Frozen Ravioli • 1 Box Of Sausage Rolls • 1 Box Party Pies 35 SPACE THAT SATISFITES HUNGRY SHOPPERS! Our New 608 Litre Side By Side Holds... And the 623 Litre Side By Side Holds Even More! WHIRLPOOL CORPORATION TRAINING • 4 Fruit Cups • 6 Pudding Cups • 5 Yogurt Cups • 1 Large Bowl Of Spaghetti • 1 Medium Bowl Of Tomatoes • 1 Small Bowl Of Marinara Sauce • 1 Large 2 Litre Bottle Of Club Soda • 2 Soup Containers • 1 Large Yogurt • 12 Eggs • 2 Containers Of Vegetable Spreads • 1 Take-out Sandwich Container • 1 Take-out Salad Container • 6 Stubbies Of Beer • 6 Bottles Of Tonic Water • 1 Full Size 20cm (8”) Cake • 1 Large Bowl Of Grapes • 2 Small Bowls Of Sauces • 1 Bag Of Mini, Round Cheeses • 2 Medium Rounds Of Brie Cheese • 1 Medium Wedge Of Cheese • 1 Pouch Of Soft Cheese • 5 Green & Yellow Peppers • 2 Bunches Of Asparagus • 5 Large Tomatoes • 1 Head Of Cauliflower • 12 Medium Apples • 1 Carton Of Mushrooms • 1 Small Watermelon • 4 Sticks Of 250gm Butter • 2 Litres Of Milk • 500ml Cream • 2 1.25 Litre Bottles Of Mineral Water • 1 X 2-liter Bottle Of Soda Pop • 1 Litre Of Chocolate Milk • 2 Litre Of Orange Juice • 1 Large Mayonnaise • 1 Ketchup Bottle • 1 Mustard Bottle • 1 Chocolate Syrup • 2 Salad Dressings • 1 Medium Jar Of Hot Peppers • 1 Medium Jar Of Dill Pickles • 1 Small Jar Of Hot Peppers • 1 Jar Of Garlic • 1 Bottle Of White Wine 36 6th Sense Temperature Management Temperature Management • The temperature management system enabled by 6th Sense™ technology uses built-in sensors to automatically adjust cooling and return existing food to the desired temperature in half the time. • No matter how long or how frequently your customer searches for food in the refrigerator, it keeps foods cool in the most efficient way possible. Sensors • New placement of temperature sensors closer to the front of the refrigerator helps ensure that food stays cold, no matter where it’s placed. Smart technology • Microprocessors gather information tracking the number of door openings and how long the door has been open to take the guesswork out of temperature management. • Even if the door is ajar, temperature adjusts automatically! WHIRLPOOL CORPORATION TRAINING 37 Easy-to-use controls Easy-to-use controls • Easily adjust refrigerator and freezer temperatures and multiple other functions with a series of light touches on the external console. WHIRLPOOL CORPORATION TRAINING 38 Air Return evaporator Air Return evaporator • Increased air return size creates better circulation within the refrigerator so groceries are evenly cooled to help reduce premature spoiling. WHIRLPOOL CORPORATION TRAINING 39 Baffle & Ventilation Baffle • When the refrigerator warms, our larger baffle opens and cold air from the freezer enters. • The compressor kicks on only when the freezer warms. Ventilation • Six evenly distributed vents create better circulation so customers won’t have to worry about blocking airflow with groceries. WHIRLPOOL CORPORATION TRAINING 40 Eco Energy Mode Eco Energy Mode • Sets To Warmest Mode Of Temperature To Be Most Energy Efficient. WHIRLPOOL CORPORATION TRAINING 41 Large Crisper Large Crisper • Our new Crisper is so spacious it can hold 85 apples! And still maintain their freshness! WHIRLPOOL CORPORATION TRAINING 42 Specific Sell-Up Opportunities On Dispenser Models (20C6XY & 20C6XB) Water and Ice dispenser • Water is not super chilled, it’s at a respectable cool temperature! • Control panel and dispenser design is elegant! • Ice can be in cubes or crushed • Every 2hrs a harvest is made, and around 36hrs will produce a full bucket! More Freezer Space • By placing the ice maker and removable ice bin in the door, the In-Door-Ice® Plus system creates 30% more usable space in the freezer. • The ice bucket tilts out or can be removed with one hand and placed on the counter, making it easy to fill glasses, pitchers and coolers. WHIRLPOOL CORPORATION TRAINING 43 Specific Sell-Up Opportunities On Dispenser Models (20C6XY & 20C6XB) Fast Freeze • Chill compartment for fast freezing! • Very useful when you need to go shopping for frozen foods, turn it on before you go shopping! LED Theatre Lighting • Multipoint white LED lights are energy efficient and cast a clear light that is more natural than the blue hues found in other lighting systems. • They also illuminate from the front to reduce shadows. Anti Bacterial Water Filter • Customers can change water filters themselves without calling a tradesperson. • Alarm will sound on fridge when this is required. • Alarm can also be muted. WHIRLPOOL CORPORATION TRAINING 44 Specific Sell-Up Opportunities On Dispenser Models (20C6XY & 20C6XB) • Industry-exclusive MicroEtch™ spill control shelves manage leaks while giving you the most side-by-side shelf space in the industry. http://www.youtube.com/watch?v =yqOmDjGjhGs Whirlpool® MicroEtch™ Spill Control Shelves WHIRLPOOL CORPORATION TRAINING • These sturdy shelves hold over 34kg while offering wall-to-wall storage. • They deliver 25% more shelf space,* enough for almost 12 more soda cans per shelf. 45 Product Comparisons Product Comparison Charts WHIRLPOOL CORPORATION TRAINING 46 Whirlpool LG Samsung 6WSC21N4XD LG GC-B196AF 1499 N/A N/A 1424 1586 1653 SRS 600HNP 1398 cat $1,390 $1,420 $1,379 N/A N/A N/A 129 74 47 570 684 652 623 385 238 581 600 363 237 1758 908 1750 725 1789 912 782 665 672 Mono Silver Metal Look Metal Look Electronic controls Electronic controls Electronic 3 tempered shelves 5 glass shelves Yes Yes 2 Moisture balance 2 crispers, Whirlpool Westinghouse Samsung 6WSC21N4XD WSE 6100SA SRS 628HNSS 1599 N/A N/A 1654 1670 1673 $1,556 $1,606 $1,570 N/A N/A N/A 1083 1142 1048 53 46 44 623 285 238 610L 357 249 628 380 248 1758 908 1754 898 1789 912 Comparison Model GfK ASPs Jun-10 May-10 Apr-10 GfK vol Jun-10 May-10 Apr-10 Capacity Total Capacity (L) Fridge (L) Freezer (L) Externals Height (mm) Width (mm) Depth (mm) inc Door/Handle Colour / Finish Controls Sliding Shelves (w/ stops) Crisper Bin Deli Compartment Dairy Compartment Bottle Separators Snack Tray / Utility Draw Door Bins Airflow Light Other Features 4 adjustibke spillsafe shelves Yes 2 crisper bins Yes Yes Yes No 4 Multi zone Yes No Yes No No 4 Yes Meat tray, Antibacterial filter, 6th sense technology, lock wine rack, door alarm out system, vacation mode , door alarm No Yes No No 4 Twin Cool Yes egg container, door alarm Freezer Baskets Door Bins Other Features Light Performance Energy Rating Colour / Finish Controls Internals - Fridge Sliding Shelves (w/ stops) Crisper Bin 782 741 764 Stainless Electronic controls Stainless Electronic controls Stainless Electronic controls 4 adjustibke spillsafe shelves 3 spillsafe shelves 5 glass shelves Yes Yes Yes 2 crisper bins 2 cripsers 2 crispers Deli Compartment Dairy Compartment Yes Yes Yes (full width) Yes (full width) No Yes Bottle Separators Yes Yes No No 4 Multi Yes No 4 full width bins Multi Yes No 4 full width door bins Twin Yes Snack Tray / Utility Draw Door Bins Airflow Light Other Features Meat tray, Antibacterial filter, 6th sense technology, lock out Storesafe drawer with child system, vacation mode, door lock alarm door alarm, egg tray Internals - Freezer Internals - Freezer Shelf Material Depth (mm) inc Door/Handle Shelf Material Internals - Fridge Shelf Material Model GfK ASPs Jun-10 May-10 Apr-10 GfK vol Jun-10 May-10 Apr-10 Capacity Total Capacity (L) Fridge (L) Freezer (L) Externals Height (mm) Width (mm) Last Updated: July 2010 4 spillproof glass shelves 2 baskets 4 full width door bins Fast Freeze, Moving Twist Ice Yes 2 WHIRLPOOL CORPORATION TRAINING 3 tempered glass shelves 3 glass shelves 2 baskets 2 baksets 5 door bins 4 full depth door bins Shelf Material Freezer Baskets Door Bins Other Features Yes 2 Yes 2 Light Performance Energy Rating 4 spillproof glass shelves 4 spill safe glass shelves 2 baskets 2 baskets 3 spillproof glass shelves 2 baksets 4 full width door bins 5 door bins 4 full depth door bins Fast Freeze - Xtra space feature Yes Yes Yes 2 2 2 47 Whirlpool Samsung Whirlpool Westinghouse Samsung 6WSC2OC6XBXY WSE6070SB SRS585HDSS 1999 N/A N/A S $2,302 S $2,319 S $2,302 $1,753 $1,752 $1,745 N/A N/A N/A 181 251 196 103 137 133 Comparison Closed Door Closed Door Model GfK ASPs Jun-10 May-10 Apr-10 GfK vol Jun-10 May-10 Apr-10 Capacity Total Capacity (L) Fridge (L) Freezer (L) Externals Height (mm) Width (mm) 6WSC2OC6XBXD SRS585HDB 1710 $1,670 2099 rrp N/A N/A N/A 196 251 181 608 385 223 585 221 364 1750 900 Depth (mm) inc Door/Handle 608 597 585 Fridge (L) 385 360 366 223 237 219 1789 912 Freezer (L) Externals Height (mm) Width (mm) 1750 900 1754 898 1789 912 698 734 Depth (mm) inc Door/Handle Black Colour / Finish LED Electronic controls LED Display Internals - Fridge Shelf Material Model GfK ASPs Jun-10 May-10 Apr-10 GfK vol Jun-10 May-10 Apr-10 Capacity Total Capacity (L) Black Colour / Finish Controls Controls 4 adjustable shevles Yes Yes 2 cripser bins 2 crspers Yes Yes Yes Yes No Yes No No 4 full width door bins 4 Multizone Twin cooling system, multi flow LED Yes Antibacterial filter, 6th sense technology, lock out system, vacation mode, wine rack door alarm, egg tray Yes Yes 3 adjustible spill safe glass 3 adjustibleglass Shelf Material Freezer Baskets Door Bins 2 freezer baskets 4 door bins 2 freezer baskets 3 door bins Other Features Door alarm, fast feeze Light Performance Energy Rating Yes 2 1.5 Sliding Shelves (w/ stops) Crisper Bin Deli Compartment Dairy Compartment Bottle Separators Snack Tray / Utility Draw Airflow Light Other Features Internals - Freezer Ice Dispenser Shelf Material 698 741 734 Stainless Steel Stainless Steel Stainless Steel LED Electronic controls Electronic controls LED Display 3 Adjustible spillsafe shelves 5 adjustable shevles Internals - Fridge 4 Adjustible spillsafe shelves Door Bins Last Updated: July 2010 WHIRLPOOL CORPORATION TRAINING Shelf Material Sliding Shelves (w/ stops) Crisper Bin Deli Compartment Dairy Compartment Bottle Separators Snack Tray / Utility Draw Door Bins Airflow Light Other Features Internals - Freezer Ice Dispenser 3 Adjustible spillsafe shelves Yes Yes Yes 2 cripser bins 2 cripsers 2 crispers Yes Yes Yes Yes Yes (full width) Yes (full width) Yes No No Yes No No 4 full width door bins 4 full width bins 4 full width bins Multi Multi Twin cooling system, multi flow LED Yes Yes Antibacterial filter, 6th sense technology, lock out system, vacation mode, wine rack door alarm, egg train, blue lighting, vacation mode Silver Nano Health System, Cool Zone draw Yes Yes Yes 3 adjustible spill safe glass 3 adjustible spill safe glass 3 adjustible spill safe glass Freezer Baskets Door Bins 4 door bins 2 door bins 2 freezer baskets 3 door bins 2 freezer baskets 3 door bins - Other Features Door alarm, fast feeze Yes Light Performance Energy Rating Yes Yes Yes 2 2 2 - 48 Sales Pitch Sales Pitch WHIRLPOOL CORPORATION TRAINING 49 Summary of Key Features! “If you’ve got 5 minutes, let me show you something a little bit better.....” • Bigger litreage • Micro-etch shelving • Removable door bins (fridge to table feature) WHIRLPOOL CORPORATION TRAINING • Second crisper converts to meat storage deli area • Consumer replaceable filters (not necessary to have it installed by service technician) • Eco Mode / Holiday Mode on all XXL range 50 Summary of Key Features! “If you’ve got 5 minutes, let me show you something a little bit better.....” Bigger litreage Removable door bins (fridge to table feature) WHIRLPOOL CORPORATION TRAINING Micro-Etch shelving Consumer replaceable filters not necessary to have it installed by service technician! Extra crisper converts to meat storage deli area Eco Mode / Holiday Mode on all XXL range In Door Ice design 6th Sense computer control 51 Quick Quiz Quick Quiz WHIRLPOOL CORPORATION TRAINING 52 Quick Quiz How many litres is the dispenser model? 608 Litres How many litres is the nondispenser model? 623 Litres Name 4 Top Features of the Dispenser models? Bigger litreage Micro-Etch shelving Removable door bins (fridge to table feature) Consumer replaceable filters not necessary to have it installed by service technician! Extra crisper converts to meat storage deli area Eco Mode / Holiday Mode on all XXL range In Door Ice design 6th Sense computer control WHIRLPOOL CORPORATION TRAINING 53 Question and Answer Session Question & Answer WHIRLPOOL CORPORATION TRAINING 54 Training: Side X Side - XXL range Training Module Customer Service Customer Service Product Labels How To Use The Product Video Links Quick Quiz WHIRLPOOL CORPORATION TRAINING Updated: 26 October 2011 Product Labels Product Labels WHIRLPOOL CORPORATION TRAINING 56 Rating Plates 6WSC20C6XY 6WSC20C6XB 6WSC21N4XY 6WSC21N4XD WHIRLPOOL CORPORATION TRAINING 57 Energy Labels 6WSC20C6XY 6WSC20C6XB With Dispenser WHIRLPOOL CORPORATION TRAINING 6WSC21N4XY 6WSC21N4XD Without Dispenser 58 Video Collection Video Collection Recommended videos available on internet WHIRLPOOL CORPORATION TRAINING Customer Support 59 Videos http://www.youtube.com/user/WhirlpoolCorpCare#p/search/0/C_RBfawcyJ4 How to Replace Interior Refrigerator (Filter1) Water Filter From: WhirlpoolCorpCare | Oct 25, 2010 | How to replace a Whirlpool Filter1 W10295370 push button refrigerator water filter. This filter works on Side by Side, French Door, and Top-Mount (Top-Freezer) refrigerator models. Remember to replace your water filter every 6 months depending on your usage. http://www.youtube.com/user/WhirlpoolCorpCare#p/search/0/QcSr0S_SiGs How to Install Whirlpool Refrigerator Door Handles From: WhirlpoolCorpCare | Sep 30, 2010 This video shows you how to install your refrigerator door handles. Learn how to do it yourself now! WHIRLPOOL CORPORATION TRAINING Customer Support 60 Videos http://www.youtube.com/watch?v=yqOmDjGjhGs Whirlpool® MicroEtch™ Spill Control Shelves Whirlpool brand's newest side-by-side refrigerator saves consumers time and energy when it's needed most. In fact, new MicroEtch™ Spill Control shelves offer the most shelf space1 and the largest crisper in the industry stores it all -- from last night's casserole to tomorrow's school lunches. To view Multimedia News Release, go to http://multivu.prnewswire.com/mnr/whirlpool/46009/ Whirlpool Appliance Care Whirlpool Corporation Appliance Care can help you find answers... by WhirlpoolCorpCare | 65 videos WHIRLPOOL CORPORATION TRAINING Customer Support 61 How To Use The Product How To Use The Product WHIRLPOOL CORPORATION TRAINING Customer Support 62 Using The Controls • IMPORTANT - Sleep Mode activation • Display screen will dim and enter “sleep” mode when: • both doors have been closed and; • control buttons and (on some models) the dispenser pad have not been used for >2 minutes • “Sleep” mode deactivation: • the first press of a control button will only reactivate the display screen, without changing any settings • After reactivation, changes to settings can be made • If no changes made within 2 minutes, display will re-enter “sleep” mode again • The refrigerator and freezer controls are located on the panel on the front of the freezer door. • ■ Open either door or touch any button on the control panel to activate the display screen. The home screen will appear (see next slide) WHIRLPOOL CORPORATION TRAINING 63 Control Panels Model with dispenser Model without dispenser WHIRLPOOL CORPORATION TRAINING 64 Control Panel (with dispenser) 6WSC20C6XY 6WSC20C6XB WHIRLPOOL CORPORATION TRAINING Home Screen 65 Control Panel (without dispenser) 6WSC21N4XY 6WSC21N4XD WHIRLPOOL CORPORATION TRAINING Home Screen 66 Adjusting Controls: Factory Default Settings • Refrigerator and freezer controls are PRESET at factory. • When installing refrigerator, ensure controls are still set to the default settings. • The factory recommended set points are: • 4°C for the refrigerator • -18°C for the freezer. • IMPORTANT: • ■ Wait 24 hours before you put food into the refrigerator. • If before the refrigerator has cooled completely, food may spoil. • NOTE: Adjusting the set points to a colder setting will not cool the compartments any faster. • ■ If the temperature is too warm or too cold in the refrigerator or freezer, first check the air vents to be sure they are not blocked before adjusting the controls. • The preset settings should be correct for normal household usage. • To know when controls have been set correctly, check that: • milk or juice is as cold as you like • ice cream is firm • ■ Wait at least 24 hours between any adjustments made • Recheck the temperatures before other adjustments are made. • NOTE: There is no FACTORY RESET method available on XXL WHIRLPOOL CORPORATION TRAINING 67 To Adjust The Set Points To Adjust the Set Points: The temperature set points appear on the display screen. • To adjust the freezer set point, press FREEZER TEMP. • The set point range for the freezer is -24°C to -18°C. WHIRLPOOL CORPORATION TRAINING • To adjust the refrigerator set point, press FRIDGE TEMP. • The set point range for the refrigerator is 2°C to 6°C. 68 To Adjust The Set Points • NOTE: Each button press advances the temperature setting 1-2° higher. • After reaching the highest possible set point, the next button press reverts the setting to the lowest possible set point, and then each additional press raises the setting 1-2° higher. When adjusting temperature set points, use the following chart as a guide CONDITION: TEMPERATURE ADJUSTMENT: REFRIGERATOR too cold FRIDGE 1-2° higher (eg. From 3 to 4 or 5) REFRIGERATOR too warm FRIDGE 1-2° lower FREEZER too cold FREEZER 1-2° higher FREEZER too warm / Too little ice FREEZER 1-2° lower After adjusting the temperature, please allow at least 24hrs for the settings to take full effect on the product! WHIRLPOOL CORPORATION TRAINING 69 Cooling ON / OFF The refrigerator and freezer will NOT COOL when cooling is turned OFF. ■ To turn cooling OFF, press and hold VACATION MODE for 3 seconds. OFF When cooling is off, “-” will appear on the display screen in both of the temperature displays. Also, the interior lights turn off. ■ Press and hold VACATION MODE for 3 seconds AGAIN to turn cooling ON back ON. The temperature set points reset to the previous settings (4°C for the refrigerator and -18°C for the freezer) when cooling has been turned back on. WHIRLPOOL CORPORATION TRAINING 70 Eco Energy Eco Energy When the most economic and energyefficient temperature setting (6°C for the refrigerator or -18°C for the freezer) is selected, the Eco Energy icon appears on the display screen. There is one icon for each compartment. Model with dispenser WHIRLPOOL CORPORATION TRAINING (ECO icon) NOTE: On models without a dispenser, you can automatically select the Eco Energy settings by pressing the ECO ENERGY button on the control panel. Pressing the button a second time will restore the previous temperature set points. Model without dispenser 71 Vacation Mode Vacation Mode is designed to help save energy when the refrigerator will not be used for a few days. (vacation icon) IMPORTANT: Do not use Vacation Mode if PERISHABLE foods are stored in the refrigerator compartment. (Note: this can include dairy products as well) Such items will likely spoil if Vacation Mode is active for more than a few hours. In Vacation Mode, the refrigerator temperature set point is changed to 12°C and the interior lights turn off. Also, on models with a dispenser, the dispenser light turns off and the dispenser is disabled. ON Press VACATION MODE to turn ON Vacation Mode. The refrigerator temperature display changes to “-” and the Vacation Mode icon appears on the display screen. OFF To turn OFF the Vacation Mode feature, press VACATION MODE again OR press FRIDGE TEMP. (A single press of FRIDGE TEMP will simply restore the previous refrigerator set point; additional presses will adjust the setting.) The Vacation Mode icon will disappear when the feature is OFF. REMOVE any PERISHABLE items to avoid spoilage during VACATION MODE WHIRLPOOL CORPORATION TRAINING 72 Lock the Control Panel The control panel can be turned off for easy cleaning or to avoid unintentional changes by small children and pets. (lock icon) NOTE: The lock feature does not shut off power to the refrigerator or to the ice maker. It simply deactivates the control buttons and dispenser pad, and turns off the dispenser light. To turn off the ice maker, see “Ice Maker and Storage Bin.” The display screen indicates when the control panel is locked (lock icon) Model with dispenser ON Model without dispenser ■ Press and hold ICE SELECTION and RESET ALARM for 3 seconds to lock the control panel and dispenser. ■ Press and hold ECO ENERGY and RESET ALARM for 3 seconds to lock the control panel. IMPORTANT: To avoid unintentionally changing other settings, be sure to press both buttons at exactly the same time. OFF ■ Press and hold ICE SELECTION and RESET ALARM a second time to unlock the control panel and dispenser. WHIRLPOOL CORPORATION TRAINING ■ Press and hold ECO ENERGY and RESET ALARM a second time to unlock the control panel. See next slide for control panel location... 73 Lock the Control Panel ON ■ Press and hold 2 centre buttons for 3 seconds to LOCK the control panel and dispenser. OFF Model with dispenser WHIRLPOOL CORPORATION TRAINING ■ Press and hold 2 centre buttons AGAIN for 3 seconds to UNLOCK the control panel and dispenser. Model without dispenser 74 Air Filter Status Indicator The air filter status indicator, located on the control panel’s display screen, will help you know when to change your air filter. ■ When the air filter is in GOOD CONDITION, the air filter status indicator icon does not appear on the control panel. ■ When the control panel’s air filter status indicator ICON appears in (Air Filter icon) ORANGE, it means it is almost time to change the AIR FILTER It is recommended to order a replacement filter when the orange icon appears. ■ Replace the air filter when the air filter status indicator icon changes from ORANGE to RED. The filter should be replaced at least every 6 months. Note: You cannot RESET the indicator when the icon is ORANGE! You must wait until it is RED. See “Install Air Filter” for replacing instructions. ■ After changing the air filter, reset the status indicator by pressing and holding the RESET ALARM button for 3 seconds. Note: Reset can only be performed when the icon is RED (not orange). When the system is reset, the air filter status indicator icon will disappear from the display screen. WHIRLPOOL CORPORATION TRAINING Customers should purchase extra AIR filters at point of sale if possible. Also available via the Whirlpool Contact Centre. 75 Fast Freezing: ON The Fast Freezing feature assists with temporary periods of heavy ice use by increasing ice production over a 24-hour period. It is very useful when coming back from SHOPPING: 1/ Before going shopping, activate the Fast Freezing 2/ When you arrive home ensure to place all the new frozen food items inside the freezer asap. IMPORTANT: This feature only works if the ice maker is turned on. See “Ice Maker and Storage Bin.” (Fast Freeze icon) ■ Press FAST FREEZING to turn on the Fast Freezing feature. When the feature is on, the displayed freezer set point will change to -24°C and the Fast Freezing icon will appear on the dispenser display screen. Smart move here is to activate the FAST FREEZE function BEFORE leaving for the supermarket!! WHIRLPOOL CORPORATION TRAINING 76 Fast Freezing: OFF (Fast Freeze icon) Automatic OFF in 24hrs Manual Off OFF The Fast Freezing setting will remain on for 24 hours (unless manually turned OFF) Manual OFF: Press FAST FREEZING again or press FREEZER TEMP. (A single press of FREEZER TEMP will simply restore the previous freezer set point; additional presses will adjust the setting.) The Fast Freezing icon will disappear when the feature is OFF. NOTE: If increased ice production is desired at all times, change the freezer set point to a lower setting. Setting the freezer to a colder temperature may make some foods, such as ice cream, harder. WHIRLPOOL CORPORATION TRAINING 77 6th Sense Temperature Management 6th Sense feature assists with regulating the temperature inside the refrigerator. If a large quantity of warm food is placed in the refrigerator or warm air enters the refrigerator while the door is held open, the 6th Sense system activates to quickly restore the temperature to the set point. (6th Sense icon) NOTE: The 6th Sense system is ALWAYS ON when your refrigerator is operating. You do not need to press any buttons to activate it. The 6th Sense icon on the dispenser display screen indicates that the feature is functioning properly. WHIRLPOOL CORPORATION TRAINING 78 Door Ajar Alarm The Door Ajar Alarm feature sounds an alarm when either the refrigerator or freezer door is open for 2 minutes and the product cooling is turned on. The alarm will repeat every 2 minutes. Close both doors to turn it off. OFF The feature then resets and will reactivate when either door is left open again for 2 minutes. NOTE: To mute the audible alarm while keeping the doors open, such as while cleaning the inside of the refrigerator, press RESET ALARM on the control panel. WHIRLPOOL CORPORATION TRAINING 79 Door Ajar Alarm The alarm sound will be turned off for 2 minutes, but the red Alarm icon will still be displayed on the control panel. (Red Alarm iconl) When using ice function, if the fridge door is opened, the dispenser will stop working and the alarm will sound, until the door is closed again. WHIRLPOOL CORPORATION TRAINING 80 Power Outage Indicator The power outage indicator lets you know if the power supply to your refrigerator has been cut off. When power is restored, the RED Power Outage icon will appear on the display screen. (Red Power Outage icon) When the indicator is ON, the freezer temperature display will FLASH, showing the ACTUAL temperature inside the freezer compartment. OFF ■ To turn off the indicator, press RESET ALARM on the control panel. The Power Outage icon will disappear, and the freezer temperature display will return to showing the set point. WHIRLPOOL CORPORATION TRAINING 81 Crisper Humidity Control On some models! You can control the amount of humidity in the moisture-sealed crisper. Adjust the control to any setting between LOW and HIGH LOW (open) HIGH (closed) WHIRLPOOL CORPORATION TRAINING LOW (open) for best storage of fruits and vegetables with skins HIGH (closed) for best storage of fresh, leafy vegetables 82 Product Operation Special Options WHIRLPOOL CORPORATION TRAINING 83 Water and Ice Dispensers On some models! IMPORTANT STEPS 1 2 3 4 5 6 • After connecting the refrigerator to a water source or replacing the water filter • Flush the water system. • Use a sturdy container to depress and hold the water dispenser pad for 5 seconds • Then release it for 5 seconds. • Repeat until water begins to flow. • Once water begins to flow, continue depressing and releasing the dispenser pad • (5 seconds on, 5 seconds off) • Until a total of 12 litres has been dispensed. • This will flush air from the filter and water dispensing system, and prepare the water filter for use. • Additional flushing may be required in some households. • As air is cleared from the system, water may spurt out of the dispenser. WHIRLPOOL CORPORATION TRAINING 84 Water and Ice Dispensers On some models! Notes The dispensing system will not operate when the freezer door is open. Allow 24 hours for the refrigerator to cool down and cool water. Water Temperature will be around 10*C (If it is any cooler it is considered CHILLED which is not recommended, and if chilled is required then ICE can be added) Allow 24 hours to produce the first batch of ice. Discard the first three batches of ice produced. The display screen on the control panel will automatically dim and enter “sleep” mode when both doors have been closed and the control buttons and dispenser pad have not been used for 2 minutes or more. While in “sleep” mode, the first press of a control button will only reactivate the display screen, without changing any settings. After reactivation, changes to any settings can then be made. If no changes are made within 2 minutes, the display will re-enter “sleep” mode. WHIRLPOOL CORPORATION TRAINING 85 The Water Dispenser On some models! IMPORTANT: Dispense enough water every week to maintain a fresh supply. To Dispense Water: 1. Press ICE SELECTION on the control panel until the Water icon appears on the display screen. 2. Press a sturdy glass against the dispenser pad. 3. Remove the glass to stop dispensing. (Water icon) IMPORTANT: Limit water dispensing time to a maximum of 2 minutes at a time. WHIRLPOOL CORPORATION TRAINING 86 The Ice Dispenser On some models! Ice dispenses from the ice maker storage bin in the freezer when the dispenser lever is pressed. To turn off the ice maker, see “Ice Maker and Storage Bin.” Your ice maker can produce both crushed and cubed ice. Before dispensing ice, select which type of ice you prefer by pressing the ICE SELECTION button. The display screen indicates which type of ice is selected. To Dispense Water: (Ice icons)1 WHIRLPOOL CORPORATION TRAINING For crushed ice, cubes are crushed before being dispensed. This may cause a slight delay when dispensing crushed ice. Noise from the ice crusher is normal, and pieces of ice may vary in size. When changing from crushed to cubed, a few ounces of crushed ice will be dispensed along with the first cubes. 87 The Ice Dispenser 1 2 3 To Dispense Ice: 1. Make sure the desired type of ice is selected. To switch between cubed and crushed, press ICE SELECTION. 2. Press a sturdy glass against the dispenser pad. Hold the glass close to the dispenser opening so ice does not fall outside of the glass. IMPORTANT: You do not need to apply a lot of pressure to the pad in order to activate the ice dispenser. Pressing hard will not make the ice dispense faster or in greater quantities. 3. Remove the glass to stop dispensing. NOTE: Ice may continue to dispense for up to 10 seconds after removing the glass from the pad. The dispenser may continue to make noise for a few seconds after dispensing. IMPORTANT: Limit ice dispensing time to a maximum of 2 minutes at a time. WHIRLPOOL CORPORATION TRAINING 88 Dispenser Light When you use the dispenser, the light will automatically turn on. When you stop using the dispenser, the light will automatically fade to a lower intensity. NOTE: The dispenser light will turn off when Vacation Mode is active or when the Control Lock is turned on. The dispenser lights are LEDs that cannot be changed. WHIRLPOOL CORPORATION TRAINING 89 The Dispenser Lock The dispenser can be turned off for easy cleaning or to avoid unintentional dispensing by small children and pets. See “The Control Lock” in the “Using the Controls” section. Ice Maker and Storage Bin Allow 24 hours to produce the first batch of ice. Discard the first three batches of ice produced. ■ The quality of your ice will be only as good as the quality of the water supplied to your ice maker. Avoid connecting the ice maker to a softened water supply. Water softener chemicals (such as salt) can damage parts of the ice maker and lead to poor quality ice. If a softened water supply cannot be avoided, make sure the water softener is operating properly and is well maintained. ■ Do not use anything sharp to break up the ice in the storage bin. This can cause damage to the ice container and the dispenser mechanism. ■ Do not store anything on top of or in the ice maker or storage bin. WHIRLPOOL CORPORATION TRAINING 90 Turning the Ice Maker On/Off The On/Off switch can only be accessed when the ice storage bin has been removed. The switch is located on the freezer door, on the left side of the wall that surrounds the ice storage bin. To turn ON the ice maker, slide the control to the ON (left) position. To manually turn off the ice maker, slide the control to the OFF (right) position. NOTE: The ice maker has an automatic shutoff to keep the storage bin from overfilling during normal operation. The ice maker sensors will automatically stop ice production, but the control will remain in the ON (left) position. WHIRLPOOL CORPORATION TRAINING 91 Removing and Replacing Ice Storage Bin 1. Press down the release lever and tilt the bucket outward. Use both hands to hold the base of the storage bin, then lift it up and out. NOTE: The ice maker has an automatic shutoff to keep the storage bin from overfilling during normal operation. The ice maker sensors will automatically stop ice production, but the control will remain in the ON (left) position. WHIRLPOOL CORPORATION TRAINING 92 Water Filtration System Do not use with water that is microbiologically unsafe or of unknown quality without adequate disinfection before or after the system. Systems certified for cyst reduction may be used on disinfected waters that may contain filterable cysts. Water Filter Status Indicator The water filter status indicator, located on the control panel’s display screen, will help you know when to change your water filter. When the water filter is in good condition, the water filter status indicator icon does not appear on the control panel. When the control panel’s water filter status indicator icon appears in orange, this tells you that it is almost time to change the water filter. It is recommended that you order a replacement filter when the orange icon appears. Replace the water filter when the water filter status indicator icon changes from ORANGE to RED. If water flow to your water dispenser or ice maker decreases noticeably, change the filter sooner. The filter should be replaced at least every 6 months, depending on your water quality and usage. After changing the water filter, reset the status indicator by pressing and holding the RESET ALARM button for 3 seconds. The RESET will only work when the ALARM ICON is RED. If it is orange, you will need to wait for it to turn RED before you can perform the reset. When the system is reset, the water filter status indicator icon will disappear from the display screen. WHIRLPOOL CORPORATION TRAINING 93 Changing the Water Filter 1. Locate the water filter in the top-right corner of the refrigerator compartment. 2. Lift open the filter cover door. The filter will be released and then eject as the door is opened. 3. When the door is completely open, pull the filter straight out..” NOTE: There may be some water in the filter. Some spilling may occur. Use a towel to wipe up any spills. 4. Take the new filter out of its packaging and remove the covers from the O-rings. Be sure the O-rings are still in place after the covers are removed. 5. With the arrow pointing up, align the new filter with the filter housing and slide it into place. The filter cover door will automatically begin to close as the new filter is inserted. 6. Close the filter cover door completely in order to snap the filter into place. You may need to press hard. 7. Flush the water system until a total of 3 gal. (12 L) has been dispensed. See “Water and Ice Dispensers.” WHIRLPOOL CORPORATION TRAINING 94 REFRIGERATOR CARE Both the refrigerator and freezer sections defrost automatically. However, clean both sections about once a month to avoid buildup of odours. Wipe up spills immediately. IMPORTANT: Because air circulates between both sections, any odours formed in one section will transfer to the other. You must thoroughly clean both sections to eliminate odours. To avoid odour transfer and drying out of food, wrap or cover foods tightly. To Clean Your Refrigerator NOTE: Do not use abrasive or harsh cleaners such as window sprays, scouring cleansers, flammable fluids, cleaning waxes, concentrated detergents, bleaches or cleansers containing petroleum products on plastic parts, interior and door liners or gaskets. Do not use paper towels, scouring pads, or other harsh cleaning tools. 1. Unplug refrigerator or disconnect power. 2. Hand wash, rinse, and dry removable parts and interior surfaces thoroughly. Use a clean sponge or soft cloth and a mild detergent in warm water. 3. Wash stainless steel and painted metal exteriors with a clean sponge or soft cloth and a mild detergent in warm water. WHIRLPOOL CORPORATION TRAINING 95 ...To Clean Your Refrigerator 4. On some models, wash glass door panels with a clean sponge or soft cloth and a mild detergent in warm water. NOTE: Do not hit the glass with pots, pans, furniture, toys, or other objects. Scratching, hitting, jarring or stressing the glass may weaken its structure, causing an increased likelihood of breakage at a later date. 5. There is no need for routine condenser cleaning in normal home operating environments. If the environment is particularly greasy or dusty, or there is significant pet traffic in the home, the condenser should be cleaned every 2 to 3 months to ensure maximum efficiency. If you need to clean the condenser: ■ Remove the base grille. See the “Door Removal” instructions, either in the User Instructions or the separate instruction sheet provided with your refrigerator. ■ Use a vacuum cleaner with a soft brush to clean the grille, the open areas behind the grille and the front surface area of the condenser. ■ Replace the base grille when finished. 6. Plug in refrigerator or reconnect power. WHIRLPOOL CORPORATION TRAINING 96 How To Clean The Outside Of Your Refrigerator To help keeping the outside of your fridge looking new, use the following: Materials • Damp Sponge damped with warm water • Some Silicone wax based detergent (eg. Turtle car wax) Method • Damp cloth in warm water / silicone wax detergent solution • Wipe in UP and DOWN strokes as much as possible (avoid side-to-side or swirling action with wiping to avoid streaks) NOTE: Do not use abrasive or harsh cleaners such as window sprays, scouring cleansers, flammable fluids, cleaning waxes, concentrated detergents, bleaches or cleansers containing petroleum products on plastic parts, interior and door liners or gaskets. Do not use paper towels, scouring pads, or other harsh cleaning tools. WHIRLPOOL CORPORATION TRAINING 97 Changing the Light Bulbs NOTE: Not all bulbs will fit your refrigerator. Be sure to replace the bulb with one of the same size, shape and wattage. Replacement bulbs are available from your dealer. ■ The dispenser lights are LEDs that cannot be changed. ■ On some models, the interior lights are LEDs that cannot be changed. ■ On some models, the interior lights require a 40-watt (maximum) bulb. 1. Unplug refrigerator or disconnect power. 2. Remove light shield when applicable. NOTE: To clean the light shield, wash it with warm water and liquid detergent. Rinse and dry the shield well. 3. Remove light bulb and replace with one of the same size, shape and wattage (40 watts maximum). 4. Replace light shield when applicable. 5. Plug in refrigerator or reconnect power. WHIRLPOOL CORPORATION TRAINING 98 Question and Answer Session Question & Answer WHIRLPOOL CORPORATION TRAINING 99 Consumer Safety Advice Consumer Safety Advice The following extracts are taken directly from the User Care Guide and are presented here to show exactly what has been written and communicated already to the customer via the product’s documentation. WHIRLPOOL CORPORATION TRAINING 100 Consumer Safety Advice WHIRLPOOL CORPORATION TRAINING 101 Consumer Safety Advice WHIRLPOOL CORPORATION TRAINING 102 Installation Guide Installation Guide The following extracts are taken directly from the User Care Guide and are presented here to show exactly what has been written and communicated already to the customer via the product’s documentation. WHIRLPOOL CORPORATION TRAINING 103 W10332634A - Installation Instructions WHIRLPOOL CORPORATION TRAINING 104 W10332634A - Door Removal, Levelling, Alignment WHIRLPOOL CORPORATION TRAINING 105 W10332634A - Door Removal, Levelling, Alignment WHIRLPOOL CORPORATION TRAINING 106 W10332634A - Door Removal, Levelling, Alignment WHIRLPOOL CORPORATION TRAINING 107 W10332634A - Remove the Doors WHIRLPOOL CORPORATION TRAINING 108 W10332634A - Replace the Doors WHIRLPOOL CORPORATION TRAINING 109 W10332634A - Levelling and Door Closing WHIRLPOOL CORPORATION TRAINING 110 W10332634A - Levelling and Door Closing Make it really clear, since problems explaining to customers how to get LEVEL door. CALL AVOIDANCE issue! WHIRLPOOL CORPORATION TRAINING 111 W10332634A - Handle Installation Video link WHIRLPOOL CORPORATION TRAINING 112 Location Requirements WHIRLPOOL CORPORATION TRAINING 113 Electrical Requirements WHIRLPOOL CORPORATION TRAINING 114 Water Supply Requirements (some models) WHIRLPOOL CORPORATION TRAINING 115 Water Pressure Water Pressure Range requirement is 30psi to 87psi (207 to 600 kPa) To run water dispenser and ice maker WHIRLPOOL CORPORATION TRAINING 116 Connect Water Supply (some models) Use the Whirlpool water supply line which comes with the product and check for leaks. Connect to Water Line WHIRLPOOL CORPORATION TRAINING 117 Appendix SW-3 Door Removal Door removal for models with IDI Ice Maker on the door WHIRLPOOL CORPORATION TRAINING 118 SW-3 Door Removal SW-3 Door Wire Routing WHIRLPOOL CORPORATION TRAINING SW-3 Door Wiring – Wire Routing LOW-VOLTAGE WIRES STRAIN RELIEF •Comes out of the dualie •Attached to the first hole on the front rail •Requires the plastic wire cover •No P-Clamp or Wire Routing Plate •Low voltage wire should have some play when the door is fully opened – should not be tight HIGH-VOLTAGE WIRES •Runs straight from hinge to the strain relief WHIRLPOOL CORPORATION TRAINING Basic Instructions – Removing the Door – SW-3 Remove the base grille – same as before Water Dispenser Tubing Connection – same as before STEP 5 - Wiring Connection • Disconnect the wiring, located behind the base grille on the freezer door side. See Graphic 3. Remove the wiring clip using a ¼” hex-head socket wrench. Disconnect the wiring plugs from the housing. STEP 6 – Close both doors… STEP 7 – Remove top hinge…. STEP 8 – Remove the freezer door by removing the screws from the bottom hinge. Using either a T30 Torx bit or a 3/8” hex drive, remove the bottom hinge screws − TWO PEOPLE SHOULD BE REQUIRED TO DO THIS – we warn against it, but we need to reinforce this − NOTE: The bottom hinge should remain attached to the freezer door after the door is removed from the product. The tubes and wiring would NOT be removed from the bottom hinge. − Note that the leveler bracket fits between the bottom hinge and the cabinet. It is very important that the customer re-assemble the leveler bracket when the hinge is assembled. WHIRLPOOL CORPORATION TRAINING Basic Instructions – Re-Assembling the Door – SW-3 1. Re-assemble hinge to the cabinet. Make sure leveler bracket is in place. 1. May require a deep drive to reach the screws 2. Requires door to be held while one person assembles hinge to cabinet 3. Hold door around 90-degrees so that the screws can be accessed 2. Replace the top hinge… 3. Reconnect water tubes and wiring 1. Do not intertwine…. 2. Reconnect electrical connections…. 3. Re-assemble bracket to the crossbar…. 4. Strain relief…same as SN34 4. Add top hinge…. WHIRLPOOL CORPORATION TRAINING Basic Instructions – Re-Assembling the Door – SW-3 Differences Between SW-3 and Other Models: High voltage wires run through the hinge – the routing of the high voltage and low voltage wires are switched. Wire Routing Plate and P-Clamp Are Not Used. To remove the door, the bottom hinge will need to be removed High voltage harness will not be able to be removed through the hinge once it has been assembled in the factory. This is because the connector is too large to fit through the hinge. WHIRLPOOL CORPORATION TRAINING Appendix APPENDIX WHIRLPOOL CORPORATION TRAINING 124 Appendix: Other Material Other Material WHIRLPOOL CORPORATION TRAINING 125