1
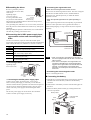
HM-60051-2
OPERATING MANUAL
Thank you for purchasing an Oriental Motor product.
Tuning-free AC servo motor unit
This Operating Manual describes product handling procedures and
safety precautions.
• Please read it thoroughly to ensure safe operation.
NX Series Driver
• Always keep the manual where it is readily available.
• For Low Voltage Directive
Introduction
• NX Series Driver OPERATING MANUAL (this document)
• The product is a type with machinery incorporated, so it should be
installed within an enclosure.
• This product cannot be used with cables normally used for IT
equipment.
• Install the product within the enclosure in order to avoid contact
with hands.
• Be sure to maintain a protective ground in case hands should make
contact with the product.
Be sure to connect the protective earth lead of the cable for motor
to the protective earth terminal on the driver, and ground the
driver’s protective earth terminal.
• To protect against electric shock using an earth leakage breaker
(RCD), connect a type B earth leakage breaker to the primary side
of the driver.
• When using a circuit breaker (MCCB), use a unit conforming to
the EN or IEC standard.
• Isolate the motor cable, power-supply cable and other drive cables
from the signal cables (CN1, CN4 to CN7) by means of double
insulation.
This manual explains the driver functions and how to install the
driver, among others.
• EMC Directive
Before use
Only qualified personnel should work with the product. Use the
product correctly after thoroughly reading the section “Safety
precautions”.
The product described in this manual has been designed and
manufactured for use in general industrial machinery, and must not
be used for any other purpose. Oriental Motor Co., Ltd. is not
responsible for any damage caused through failure to observe this
warning.
Structure of the manual
The NX series comes with the manuals specified below.
• NX Series Motor OPERATING MANUAL
This manual explains the motor functions and how to install the
motor, among others.
• NX Series USER MANUAL (CD-ROM)
This manual explains the motor and driver functions as well as how
to install/connect and troubleshooting, among others.
Standards and CE Marking
This product is recognized by UL and certified by CSA.
A certification by TÜV Rheinland has been obtained to confirm
compliance with the EN standards.
• Applicable Standards
Applicable Standards
∗
UL 508C
∗
CSA C22.2 No.14
EN 50178
Certification Body
Standards File No.
UL
E171462
Conforming to the respective standards.
∗
EN 61800-5-1
∗ Excluding NXD75-S.
TÜV
R 50124205
• For UL standard (UL 508C), the product is recognized for the
condition of Maximum Surrounding Air Temperature 50 °C
(122 °F).
• Connect a Class 2 power supply (UL-certified) to the 24 VDC
power supply.
• The short-circuit testing has been conducted by UL with the
effective current value of 5000 A at 240 V.
• Installation conditions (EN Standard)
Driver is to be used as a component within other equipment.
Overvoltage category: II
Pollution degree: 2
Protection against electric shock: Class I
EMC of this product has been measured according to the
configuration illustrated in “Example of installation and wiring” the
USER MANUAL. The compliance of the final machinery with the
EMC Directive will depend on such factors as the configuration,
wiring, layout and risk involved in the control-system equipment and
electrical parts. It therefore must be verified through EMC measures
by the customer of the machinery.
• Applicable standards
EMI
Emission Tests
Radiated Emission Test
Conducted Emission Test
Harmonics Current Test
Voltage Fluctuations Test
EN 61000-6-4, EN 61800-3 C3
EN 55011 group 1 class A
EN 55011 group 1 class A
EN 61000-3-2
EN 61000-3-3
EMS
Immunity Tests
Radiation Field Immunity Test
Electrostatic Discharge Immunity Test
Fast Transient / Burst Immunity Test
Conductive Noise Immunity Test
Surge Immunity Test
Voltage Dip Immunity Test
Voltage Interruption Immunity Test
EN 61000-6-2
EN 61800-3 C3
IEC 61000-4-3
IEC 61000-4-2
IEC 61000-4-4
IEC 61000-4-6
IEC 61000-4-5
IEC 61000-4-11
IEC 61000-4-11
WARNING FOR UL MARKING ON DRIVER
Solid state motor overload protection is provided in each model.
Hazardous substances
RoHS (Directive
2002/95/EC
27Jan.2003) compliant
1
Checking the product
• PS geared type
Verify that the items listed below are included. Report any missing
or damaged items to the branch or sales office from which you
purchased the product.
•
•
•
•
•
•
•
•
Driver.............................................................................. 1 unit
CN1 connector (6 pins)................................................... 1 pc.
CN2 connector (3 pins)................................................... 1 pc.
CN3 connector (7 pins)................................................... 1 pc.
CN7 connector (36 pins) ................................................. 1 pc.
Connector wiring lever (for CN2, CN3) ......................... 1 pc.
Driver OPERATING MANUAL (this document) .......... 1 copy
Driver USER MANUAL (CD-ROM) ............................. 1 pc.
NX65AC-PS NX610AA-PS NX610AC-PS NX920AA-PS NX920AC-PS NX940AS-PS -
Unit model
NX65MA-PS NX65MC-PS -
indicates the cable length.
NX610MA-PS -
indicates the gear ratio.
Unit model
NX610MC-PS -
NX45AANX45ACNX410AANX410ACNX620AANX620ACNX640ASNX975AS-
NX920MA-PS Motor model
NXM45A
NXM410A
NXM620A
NXM640A
NXM975A
Driver model
NXD20-A
NXD20-C
NXD20-A
NXD20-C
Unit model
NX45MCNX410MANX410MCNX620MANX620MC-
Motor model
NXM45M
NXM410M
NXM620M
NX640MS-
NXM640M
NX975MS-
NXM975M
NX940MS-PS -
Unit model
NXD20-C
NX810AC-J -
Driver model
NXD20-A
NX820AA-J NX820AC-J -
NXM610A-PS
NXM920A-PS
NXM940A-PS
Motor model
NXM65M-PS
NXM610M-PS
NXM920M-PS
NXM940M-PS
Motor model
NXM810A-J
NXM820A-J
NX1040AS-J -
NXM1040A-J
NX1075AS-J -
NXM1075A-J
NXD20-C
NXD20-A
NXD20-C
NXD20-A
NXD20-C
NXD75-S
Driver model
NXD20-A
NXD20-C
NXD20-A
NXD20-C
NXD20-A
NXD20-C
NXD75-S
Driver model
NXD20-A
NXD20-C
NXD20-A
NXD20-C
NXD75-S
• PJ geared type with electromagnetic brake
NXD20-C
Unit model
NXD20-A
NX810MA-J -
NXD20-C
NX810MC-J -
NXD20-A
NX820MA-J -
NXD20-C
NX820MC-J -
NXD75-S
NXM65A-PS
Driver model
NXD20-A
• PJ geared type
NX810AA-J -
• Standard type with electromagnetic brake
NX45MA-
NX920MC-PS -
NXD20-A
NXD75-S
Motor model
• PS geared type with electromagnetic brake
Combinations of motors and drivers
• Standard type
2
Unit model
NX65AA-PS -
Motor model
NXM810M-J
NXM820M-J
NX1040MS-J -
NXM1040M-J
NX1075MS-J -
NXM1075M-J
Driver model
NXD20-A
NXD20-C
NXD20-A
NXD20-C
NXD75-S
I/O ratings
• indicates A (single shaft) or M (with electromagnetic brake).
•
indicates the cable length.
•
indicates the gear ratio.
• The model names of motors (UL recognized) apply to the condition before a gearhead is assembled.
Unit model
Motor model
Motor model
(UL recognized)
Driver
model
Input
Voltage
Frequency
Output
Current
NXD20-A
Single-phase
100-115 V
1.9 A
NX45 C-
NXD20-C
Single-phase/
Three-phase
200-230 V
1.2 A/
0.7 A
NX410 A-
NXD20-A
Single-phase
100-115 V
2.9 A
NX410 C-
NXD20-C
Single-phase/
Three-phase
200-230 V
1.8 A/
1.0 A
NX65 A-PS -
NXD20-A
Single-phase
100-115 V
1.9 A
NX65 C-PS -
NXD20-C
Single-phase/
Three-phase
200-230 V
1.2 A/
0.7 A
NX610 A-PS -
NXD20-A
Single-phase
100-115 V
2.9 A
NX610 C-PS -
NXD20-C
Single-phase/
Three-phase
200-230 V
1.8 A/
1.0 A
NX620 A-
NXD20-A
Single-phase
100-115 V
4.6 A
NXD20-C
Single-phase/
Three-phase
200-230 V
2.8 A/
1.6 A
NXD75-S
Three-phase
200-230 V
NXD20-A
Single-phase
100-115 V
2.8 A
NX810 C-J -
NXD20-C
Single-phase/
Three-phase
200-230 V
1.8 A/
1.0 A
NX820 A-J -
NXD20-A
Single-phase
100-115 V
4.6 A
NX820 C-J -
NXD20-C
Single-phase/
Three-phase
200-230 V
2.8 A/
1.6 A
NX920 A-PS -
NXD20-A
Single-phase
100-115 V
4.6 A
NXD20-C
Single-phase/
Three-phase
200-230 V
2.8 A/
1.6 A
NX45 ANXM45
NXM410
NXM65 -PS
NXM610 -PS
NXM620
−
−
−
−
NXM620
NX620 C-
NX640 S-
NXM640
−
NX810 A-J NXM810 -J
NXM820 -J○
NXM610 -J
NXM620 -J
NXM920 -PS○ NXM620
NX920 C-PS -
NX940 S-PS -
NXM940 -PS○
−
NX975 S-
NXM975
−
NXD75-S
NX1040 S-J -
NXM1040 -J○
−
NX1075 S-J -
NXM1075 -J○
−
Three-phase
200-230 V
Voltage
Frequency Current Output
Three-phase
0-119 V
0.91 A
50 W
Three-phase
0-144 V
1.12 A
100 W
Three-phase
0-119 V
0.91 A
50 W
Three-phase
0-144 V
1.12 A
100 W
Three-phase
0-152 V
1.8 A
200 W
Three-phase
0-162 V
3.2 A
400 W
Three-phase
0-141 V
1.1 A
100 W
1.8 A
200 W
Three-phase
0-152 V
1.8 A
200 W
2.8 A
Three-phase
0-162 V
3.2 A
400 W
4.7 A
Three-phase
0-160 V
5.9 A
750 W
2.9 A
Three-phase
0-127 V
5.1 A
400 W
4.7 A
Three-phase
0-160 V
5.9 A
750 W
0-150 Hz
50/60 Hz
2.8 A
Three-phase
0-152 V
0-300 Hz
3
Names and functions of parts
Name
Example: NXD20-C
SW1
Control mode setting
switches (SW1-1, 1-2)
Absolute system setting
switch (SW1-3)
Mechanical rigidity
setting switch (SW2)
Pulse input mode selector
switch (SW1-4)
24 VDC power supply
input terminal (CN1)
LED
Regeneration register
thermal input terminal
(CN1)
Mechanical rigidity
setting switch (SW2)
Electromagnetic brake
terminal (CN1)
CHARGE LED
Motor connector (CN2)
Regeneration resistor
terminal (CN3)
Power supply input
terminal (CN3)
Data edit connector (CN4)
Encoder connector (CN5)
Internal potentiometers
(VR1, VR2)
I/O signals connector
(CN7)
Battery connector (bottom)
Description
Control mode setting
switches (SW1-1, 1-2)
These switches are used to set the
control mode of the driver (position
control, speed control, torque control or
tension control).
Absolute system setting
switch (SW1-3)
This switch is effective in the position
control mode. Set the switch when the
absolute function of the driver is used by
connecting the optional battery BAT01A
(sold separately).
ON: Enable the absolute function.
OFF: Disable the absolute function.
The factory setting is “OFF.”
Pulse input mode
selector switch (SW1-4)
In the position control mode, this switch
toggles the driver between the 1-pulse
input mode and 2-pulse input mode
according to the pulse output mode of the
controller.
ON: 1-pulse input mode, negative logic.
OFF: 2-pulse input mode, negative logic.
LED
These LED indicate the status of the
driver.
POWER (green):This LED is lit while the
main power or 24 VDC is input.
ALARM (red):This LED will blink when an
alarm generates (a protective function is
triggered). You can check the generated
alarm (triggered protective function) by
counting the number of times the LED
blinks.
POS (green):This LED is lit in the position
control mode.
SPD (green):This LED is lit in the speed
control mode.
TRQ (green):This LED is lit in the torque
control mode.
TEN (green):This LED is lit in the tension
control mode.
4
• Tension control mode
The switch sets the minimum speed in
the simple mode. The factory setting is
“6.” The switch is not used in high
function modeⅠor high function mode
Ⅱ.
• Speed control mode
VR1: This switch sets the speed
command value.
VR2: This switch sets the
acceleration/deceleration time.
• Torque control mode
VR1: This switch sets the torque
command value.
VR2: This switch sets the speed limit.
• Tension control mode
VR1: This switch sets the tension
command value.
VR2: This switch sets the speed limit.
Protective earth
terminal
Name
• Torque control mode
Not used.
• Position control mode
VR1: This switch sets the damping
control frequency.
VR2: Not used.
Internal potentiometers
(VR1, VR2)
Analog I/O signals
connector (CN6)
Description
• Position control mode or speed control
mode
The switch sets the gain adjustment
level according to the mechanical
rigidity. The factory setting is “6.”
Data edit connector
(CN4)
Connect a PC in which the data setting
software MEXE02 has been installed, or
the data setter OPX-2A.
Encoder connector
(CN5)
Connect the motor encoder via a cable
for encoder.
Analog I/O signals
connector (CN6)
Connect the analog I/O signals.
I/O signals connector
(CN7)
Connect the I/O signals of the controller.
24 VDC power supply
input terminal
(CN1) [24V]
Connect 24 VDC. Once a 24 VDC power
supply is connected, you can check the
contents of alarms that have generated
even when the main power is cut off. If a
motor with an electromagnetic brake is
used, be sure to connect a 24 VDC power
supply for the electromagnetic brake
power.
Regeneration resistor
thermal input terminal
(CN1) [TH1, TH2]
Connect the optional regeneration unit
(sold separately). If no regeneration unit
is connected, plug in the CN1 connector
to short the TH1 and TH2 terminals.
Electromagnetic brake
terminal
(CN1) [MB1, MB2]
Connect the lead wires from the cable for
electromagnetic brake (24 VDC).
MB1: Electromagnetic brake − (black)
MB2: Electromagnetic brake + (white)
CHARGE LED (red)
This LED is lit while the main power is
input. After the main power has been
turned off, the LED will turn off once the
residual voltage in the driver drops to a
safe level.
Motor connector (CN2)
Connect the cable for motor or cable for
flexible motor to connect the motor.
Phase U: Red
Phase V: White
Phase W: Black
Name
Regeneration resistor
terminal
(CN3) [RG1, RG3]
Description
When using the internal regeneration
resistor, short the RG2 and RG3
terminals using a jumper wire supplied
with the CN3 connector.
If the optional regeneration unit (sold
separately) is used, remove the jumper
wire which has shorted the RG2 and RG3
terminals, and connect the lead wires to
the RG1 and RG3 terminals.
• Single-phase 100-115 VAC
L, N:
Connect single-phase 100-115 VAC.
Power supply input
terminal (CN3)
• Single-phase 200-230 VAC
L1, L2:
Connect single-phase 200-230 VAC.
L3: Not used.
• Three-phase 200-230 VAC
L1, L2, L3:
Connect a three-phase 200-230 VAC.
• NC: Not used.
Protective earth
terminal
Ground this terminal using a grounding
2
wire of AWG16 (1.25 mm ) or larger.
Battery connector
Connect the optional battery BAT01A
(sold separately) when using the absolute
function of the driver in the position
control mode.
Safety precautions
Warning
Handling the product without observing the instructions that
accompany a “Warning” symbol may result in serious injury or
death.
Installation
• The driver is a Class I equipment. When installing the driver, do
not touch the driver or ground the driver first. Failure to do so may
cause electric shock.
• Install the driver in an enclosure in order to prevent electric shock
or injury.
Connection
• Keep the driver’s input-power voltage within the specified range
to avoid fire and electric shock.
• Connect the cables securely according to the wiring diagram in
order to prevent fire and electric shock.
• Do not forcibly bend, pull or pinch the cable. Doing so may fire
and electric shock.
Operation
• Turn off the driver power in the event of a power failure, or the
motor may suddenly start when the power is restored and may
cause injury or damage to equipment.
• Do not turn the FREE input to ON while the motor is operating.
The motor will stop and lose its holding ability, which may result
in injury or damage to equipment.
Maintenance and inspection
• Do not touch the connection terminals on the driver while the
power is supplied or for at least 10 minutes after turning off the
power. Before making wiring connections or carrying out checks,
also wait for the CHARGE LED to turn off and check the voltage
with a tester, etc. Failure to do so may result in electric shock.
Repair, disassembly and modification
• Do not disassemble or modify the driver. This may cause electric
shock or injury. Refer all such internal inspections and repairs to
the branch or sales office from which you purchased the product.
Caution
General
• Do not use the product in explosive or corrosive environments, in
the presence of flammable gases, locations subjected to splashing
water, or near combustibles. Doing so may result in fire, electric
shock or injury.
• Assign qualified personnel the task of installing, wiring,
operating/controlling, inspecting and troubleshooting the product.
Failure to do so may result in fire, electric shock or injury.
• Do not transport, install the product, perform connections or
inspections when the power is on. Always turn the power off
before carrying out these operations. Failure to do so may result in
electric shock.
• The terminals on the driver’s front panel marked with
symbol indicate the presence of high voltage. Do not touch these
terminals while the power is on to avoid the risk of fire or electric
shock.
• When the driver generates an alarm (= any of the driver’s
protective functions is triggered), the motor will stop and lose its
holding torque. Accordingly, provide measures to hold the moving
part in place in the event of an alarm. Failure to do so may result
in injury or equipment damage.
• When the driver’s protection function is triggered, first remove the
cause and then clear the protection function. Continuing the
operation without removing the cause of the problem may cause
malfunction of the motor and driver, leading to injury or damage
to equipment.
Handling the product without observing the instructions that
accompany a “Caution” symbol may result in injury or property
damage.
General
• Do not use the driver beyond its specifications, or electric shock,
injury or damage to equipment may result.
• Keep your fingers and objects out of the openings in the driver, or
fire, electric shock or injury may result.
• Do not touch the driver during operation or immediately after
stopping. The surface is hot and may cause a skin burn(s).
Installation
• To prevent the risk of damage to equipment, leave nothing around
the driver that would obstruct ventilation.
Connection
• The driver’s data edit connector (CN4) and analog I/O signals
connector (CN6) are not insulated. When grounding the positive
terminal of the power supply, do not connect any equipment (PC,
etc.) whose negative terminal is grounded. Doing so may cause
the driver and these equipment to short, damaging both.
Operation
• Provide an emergency-stop device or emergency-stop circuit
external to the equipment so that the entire equipment will operate
safely in the event of a system failure or malfunction. Failure to do
so may result in injury.
5
• Before supplying power to the driver, turn all input signals to the
driver to OFF. Otherwise, the motor may start suddenly and cause
injury or damage to equipment.
• When moving the motor output shaft by hand while the motor is at
standstill, confirm first that the FREE input of the driver is turned
ON. If the FREE input is not ON, an attempt to move the motor
output shaft by hand may result in injury.
• Use a 24 VDC power supply that has been given reinforced
insulation between the primary side and secondary side. Failure to
do so may cause electric shock.
• Immediately when trouble has occurred, stop running and turn off
the driver power. Failure to do so may result in fire, electric shock
or injury.
• To prevent electric shock, use only an insulated screwdriver to
adjust the driver’s switches.
Maintenance and inspection
• To prevent the risk of electric shock, do not touch the terminals
while measuring the insulation resistance or conducting a
voltage-resistance test.
Disposal
• To dispose of the driver, disassemble it into parts and components
as much as possible and dispose of individual parts/components as
industrial waste.
Precautions for use
• Use the supplied cable to connect the motor and driver.
Always use the supplied cable to connect the motor and driver.
If a flexible cable or cable longer than 3 m (9.8 ft.) is to be used, an
appropriate cable must be purchased separately. Refer to the USER
MANUAL.
• Conduct the insulation resistance measurement or
withstand voltage test separately on the motor and the
driver.
Conducting the insulation resistance measurement or withstand
voltage test with the motor and driver connected may result in injury
or damage to equipment.
• Preventing leakage current
Stray capacitance exists between the driver’s current-carrying line
and other current-carrying lines, the earth and the motor,
respectively. A high-frequency current may leak out through such
capacitance, having a detrimental effect on the surrounding
equipment. The actual leakage current depends on the driver’s
switching frequency, the length of wiring between the driver and
motor, and so on.
When providing a leakage current breaker, use the following
products, for instance, which have high-frequency signal protection:
Mitsubishi Electric Corporation: NV series
Fuji Electric FA Components & Systems Co., Ltd.: EG and SG
series
• Preventing electrical noise
See the USER MANUAL for measures with regard to noise.
• Saving data to the NV memory
Do not turn off the main power supply or 24 VDC power supply
while data is being written to the NV memory and 5 seconds after
the completion of data write. Doing so may abort the data write and
cause an EEPROM error alarm to generate.
The NV memory can be rewritten approx. 100,000 times.
6
• Motor excitation at power ON
When the driver has been set to lock the servo after the motor stops
in the position control mode or speed control mode: Turning on the
power supply will not excite the motor. To excite the motor, you
must turn the S-ON input ON.
You can set the motor to be excited automatically after the power
has been turned on, by changing the applicable driver parameter
using the data setter OPX-2A or the data setting software MEXE02.
• Use the optional regeneration unit (sold separately) if
gravitational operation or other operation involving up/down
movement, or sudden starting/stopping of a large inertial
load, will be repeated frequently.
The factory setting is to use the internal regeneration resistor. Note,
however, that the internal regeneration resistor does not support
continuous regenerative operation, gravitational operation or other
operations involving up/down movements, or frequent repeating of
sudden starting/stopping of a large inertial load. If any of these
operations must be performed, use the optional regeneration unit
(sold separately).
• Note on connecting a power supply whose positive terminal
is grounded
The data edit connector (CN4) and analog I/O signals connector
(CN6) are not insulated. When grounding the positive terminal of the
power supply, do not connect any equipment (PC, etc.) whose
negative terminal is grounded. Doing so may cause the driver and
these equipment to short, damaging both. Use the data setter
OPX-2A to set data, etc.
Installation
Location for installation
The driver is designed and manufactured for installation in
equipment.
Install it in a well-ventilated location that provides easy access for
inspection. The location must also satisfy the following conditions:
• Inside an enclosure that is installed indoors (provide vent holes)
• Operating ambient temperature 0 to +50 °C (+32 to +122 °F)
(non-freezing)
• Operating ambient humidity 85% or less (non-condensing)
• Area that is free of explosive atmosphere or toxic gas (such as
sulfuric gas) or liquid
• Area not exposed to direct sun
• Area free of excessive amount of dust, iron particles or the like
• Area not subject to splashing water (rain, water droplets), oil (oil
droplets) or other liquids
• Area free of excessive salt
• Area not subject to continuous vibration or excessive shocks
• Area free of excessive electromagnetic noise (from welders,
power machinery, etc.)
• Area free of radioactive materials, magnetic fields or vacuum
• Up to 1000 m (3300 ft.) above sea level
Installation direction
Connection
The driver is designed so that heat is dissipated via air convection
and conduction through the enclosure. When two or more drivers are
to be installed side by side, provide 20 mm (0.79 in.) and 50 mm
(1.97 in.) clearances in the horizontal and vertical directions,
respectively. When installing the driver in an enclosure, use two
screws (three screws for NXD75-S) to secure the driver through the
mounting holes.
Screws (M4) are not supplied. Please provide separately.
Note
• Install the driver in an enclosure whose pollution
degree is 2 or above or protection class is IP54 or
better.
• Do not install any equipment that generates a large
amount of heat or noise near the driver.
• Do not install the driver underneath the controller or
other equipment vulnerable to heat.
• Check ventilation if the ambient temperature of the
driver exceeds 50 °C (122 °F).
• Be sure to install (position) the driver vertically.
35 mm
(1.38 in.)
20 mm (0.79 in.)
or more
60 mm
(2.36 in.)
• Wiring the CN1 connector
1. Strip the insulation cover of
2.
the lead wire by 7 mm (0.28 in.)
Insert each lead wire into the CN1
connector and tighten the screw
using a screwdriver
7 mm (0.28 in.)
Connector screw size:
M2.
Tightening torque:
0.22 to 0.25 N·m
(31 to 35 oz-in)
CN1 connector
Lead wire
• Wiring the CN2/CN3 connectors
2. Push the connector wiring
1. Strip off the cable sheath
lever in the direction of the
arrow.
based on the strip gauge.
• NXD75-S
• NXD20-A㪃㩷NXD20-C
Connection method for connectors
20 mm (0.79 in.)
or more
3. Insert the cable.
150 mm (5.91 in.)
150 mm (5.91 in.)
50 mm (1.97 in.) or more
50 mm (1.97 in.) or more
You can also use a flat-tip screwdriver.
Insert the screwdriver here.
Tip of 3.0 to 3.5 mm
(0.12 to 0.14 in.) in width.
Insert the cable
while pushing down
the screwdriver.
• Wiring the CN6/CN7 connectors
Screw (M2)
Connector
Screw (M2.5)
Tightening torque:
0.5 to 0.55 N·m
(71 to 78 oz-in)
Cable clamp
I/O signal cable
Case
Place the spring
washer outside
the case.
Screw (M2.5)
Align the washer in the
depression in the case.
7
Connecting the motor
Connecting the I/O signals
Solder the I/O signal cable (AWG28 to 26: 0.08 to 0.14 mm2) to the
CN7 connector (36 pins). Use a shielded cable for I/O signals.
• Connection example
(The electromagnetic brake motor)
CN1 connector
䋫
䋭
Connector pin
assignment
(viewed from soldering
side)
24 V+
24 V-
Black
White
18 16 14 12 10 8 6 4 2
17 15 13 11 9 7 5 3 1
36 34 32 30 28 26 24 22 20
35 33 31 29 27 25 23 21 19
MB1
MB2
• Connecting the connector (CN7)
24 VDC power supply
Tightening torque:
0.3 to 0.35 N·m
(42 to 49 oz-in)
24 VDC±10%
0.8 A or more
Cable for electromagnetic brake
CN7
Screw
Connect to CN1
Connect to CN5
Cable for encoder
Cable for motor Connect to CN2
CN2 connector
Phase
Red
U
White
V
Black
W
Electromagnetic
brake cable
Encoder cable
Motor cable
• The lead wires of the cable for electromagnetic brake
have polarities, so connect them in the correct
polarity. If the lead wires are connected with their
polarities reversed, the electromagnetic brake will not
operate properly.
• Have the connector plugged in securely. Insecure
connector connection may cause malfunction or
damage to the motor or driver.
• When plugging/unplugging the connector of the motor
cable, turn off the power and wait for the CHARGE
LED to turn off. The residual voltage may cause
electric shock.
• When installing the motor to a moving part, use an
optional flexible cable offering excellent flexibility.
Be certain the I/O signals cable is as short as possible.
The maximum input frequency will decrease as the
cable length increases.
• Connector function table (Position control mode)
Pin
No.
Tightening torque:
1.2 N·m (170 oz-in.)
Note
Note
Signal name
1
−
2
GND
3
ASG+
4
ASG−
5
BSG+
6
BSG−
7
ZSG1+
8
ZSG1−
Name
−
Ground connection
A-phase pulse line-driver output
B-phase pulse line-driver output
Z-phase pulse line-driver output
9
ALM+
10
ALM−
11
WNG+/MOVE+ /
∗
MBC+
12
WNG−/MOVE− /
∗
MBC−
Alarm output
∗
∗
13
END+
14
END−
15
READY+/AL0+ /
P-OUTR+
Warning output/
∗
Motor moving output /
Electromagnetic brake control signal
∗
output
Positioning complete output
∗
∗
16
READY−/AL0− /
P-OUTR−
17
TLC+/AL1+ /
P-OUT0+
Operation ready complete output/
∗
Alarm code output bit 0 /
Position data output ready output
∗
Torque limit output/
∗
Alarm code output bit 1 /
Position data output bit 0
∗
18
TLC−/AL1− /
P-OUT0−
19
ZSG2+/NEAR+ /
∗
AL2+ /P-OUT1+
20
ZSG2−/NEAR− /
∗
AL2− /P-OUT1−
∗
∗
Z-phase pulse open-collector output/
∗
Near position output /
∗
Alarm code output bit 2 /
Position data output bit 1
21
GND
22
IN-COM
Ground connection
Input common
23
S-ON
Servo on input
24
CLR/ALM-RST/
P-CK
25
P-REQ
Deviation clear input/Alarm reset input/
Position data transmission clock input
Position data request input
26
TL
Torque limit enable input
∗ The signal will become effective if the applicable setting has been changed
using the data setter OPX-2A or the data setting software MEXE02.
8
Pin
No.
Signal name
27
M0
28
M1
29
P-PRESET
Data selection input
Signal
name
FREE
Shaft free input
31
CW+/PLS+
32
CW−/PLS−
CW pulse input/
Pulse input
33
CW+24 V/
PLS+24 V
CW pulse/
pulse input for 24 V
34
CCW+24 V/
DIR+24 V
CCW pulse input/
direction input for 24 V
35
CCW+/DIR+
36
CCW−/DIR−
CCW pulse input/
Direction input
Connecting the analog I/O signals
Use the connector (20 pins) included in the optional accessory set
AS-SV2 or AS-SD1 (sold separately) as the analog I/O connector
(CN6).
Solder the analog I/O cable (AWG28 to 26: 0.08 to 0.14 mm2) to the
CN6 connector. Use a shielded cable for analog I/O signals.
10
8
9
6
7
4
5
V-MON
8
SG
Signal ground
Ground for analog I/Os.
9
T-MON
Analog torque
monitor output
Voltage corresponding to
the monitored analog
torque is output from
here.
10
SG
Signal ground
Ground for analog I/Os.
−
Note
Connector pin assignment
(viewed from soldering side)
20 18 16 14 12
19 17 15 13 11
Tightening torque:
0.3 to 0.35 N·m
(42 to 49 oz-in)
1
Signal
name
V-REF
• Do not wire the power supply cable of the driver in the
same cable duct with other power line or motor cable.
Doing so may cause malfunction due to noise.
• Before plugging/unplugging the CN3 connector, turn
off the power and wait for the CHARGE LED to turn
off. Failure to do so may cause electric shock due to
residual voltage.
• The current capacity for the power supply as shown
below is the value when operating the motor in the
continuous duty region. When operating in the limited
duty region, the current will flow maximum three times
as much as the continuous region. Refer to the USER
MANUAL for the continuous duty region and limited
duty region.
• The current capacity for the power supply
CN6
Current capacity
Screw
• Connector function table
Pin
No.
Name
Description
Analog speed
(command/limit) input
Terminal used to input an
analog speed
(command/limit).
2
SG
Signal ground
3
Reference voltage
output for analog
P-VREF
speed
(command/limit) input
−
Connecting the power supply
1
• Connecting the connector (CN6)
−
Use the CN3 connector (7 pins) to connect the power supply cable
(AWG16 to 14: 1.25 to 2.0 mm2) to the main power supply
connector (CN3) on the driver.
2
3
Description
7
11
to
20
Functions of the connector vary depending on the
control mode. Check the USER MANUAL for other
control modes except position control mode.
Name
Voltage corresponding to
Analog speed monitor the monitored analog
output
speed is output from
here.
Position preset input
30
Note
Pin
No.
Name
Ground for analog I/Os.
A power supply output
used to connect a
variable resistor to the
analog speed
(command/limit) input.
Power supply output used
to connect a variable
resistor to the analog
torque (command/limit)
input.
4
P-TREF
Reference voltage
output for analog
torque
(command/limit) input
5
T-REF
Analog torque
(command / limit)
input
Terminal used to input an
analog torque
(command/limit).
6
SG
Signal ground
Ground for analog I/Os.
Unit model
Single-phase
100-115 V
Single-phase
200-230 V
Three-phase
200-230 V
NX45
1.9 A or more
1.2 A or more
0.7 A or more
NX410
2.9 A or more
1.8 A or more
1.0 A or more
NX65
1.9 A or more
1.2 A or more
0.7 A or more
NX610
2.9 A or more
1.8 A or more
1.0 A or more
NX620
4.6 A or more
2.8 A or more
1.6 A or more
NX640
−
−
2.8 A or more
NX810
2.8 A or more
1.8 A or more
1.0 A or more
NX820
NX920
4.6 A or more
2.8 A or more
1.6 A or more
NX940
2.8 A or more
NX975
−
NX1040
−
NX1075
2.9 A or more
4.7 A or more
• Single-phase
100-115 V
100-115 V
50/60 Hz
4.7 A or more
• Three-phase
200-230 V
• Single-phase
200-230 V
200-230 V
50/60 Hz
L
N
L1
L2
200-230 V
50/60 Hz
R
S
T
9
• Connecting the regeneration unit
Grounding the driver
Be sure to ground the protective
earth terminal (screw size: M4)
of the driver.
Tightening torque:
Protective earth
1.2 N·m (170 oz-in)
terminal
You can ground either of the
(Ground one of
two protective earth terminals.
these terminals.)
The terminal not grounded should be connected to the protective
earth lead of the motor cable.
Use a grounding wire (AWG16 to 14: 1.25 to 2.0 mm2), and do not
share the protective earth terminal with a welder or any other power
equipment.
When grounding the protective earth terminal, use a round terminal
and affix the grounding point near the driver.
• When the internal regeneration resistor is used
The driver has an internal regeneration resistor. The driver is shipped
with the TH1 and TH2 terminals of CN1, and RG2 and RG3
terminals of CN3, shorted respectively to enable the internal
regeneration resistor.
• When the optional regeneration unit (sold separately) is
used
Use the optional regeneration unit (sold separately) if gravitational
operation or other operation involving up/down movement, or
sudden starting/stopping of a large inertia load, will be repeated
frequently.
Regeneration
unit
R
Connecting the 24 VDC power supply input,
regeneration resistor and electromagnetic
brake
AWG22
(AWG20 for RGB200)
Use the CN1 connector (6 pins) to connect the 24 VDC power
supply input, regeneration resistor thermal input and electromagnetic
brake. Connect the lead wire (AWG28 to 16: 0.08 to 1.25 mm2).
Display
Description
24V+
24 VDC power supply input (Be sure to connect this pin
when an electromagnetic brake is used.)
24V−
TH1
TH2
To TH1 and TH2
terminals on CN1
AWG18
To RG1 and RG2
terminals on CN3
Regeneration resistor thermal input (If this pin is not
used, short it using a jumper wire.)
MB1
Electromagnetic brake − (Connect the black lead wire of
the electromagnetic brake.)
MB2
Electromagnetic brake + (Connect the white lead wire of
the electromagnetic brake.)
• Connecting method
Tightening torque:
0.4 N·m (56 oz-in)
Note
• When connecting the regeneration unit, be sure to
remove the jumper wires from the CN1 connector and
CN3 connector.
• If the current consumption of the regeneration unit
exceeds the allowable level, the thermostat will be
triggered and a regeneration unit overheat alarm will
generate. If a regeneration unit overheat alarm
generates, turn off the power and check the content
of the error.
• Connecting the electromagnetic brake
Connector
screw size:
M2.5
• Connecting the 24 VDC power supply input
Connect a power supply of 24±10% VDC, 0.8 A or more.
Once a 24 VDC power supply is connected, you can check the
contents of alarms that have generated even when the main power is
cut off. If a motor with electromagnetic brake is used, be sure to
connect a 24 VDC power supply as the electromagnetic brake
power.
The 24 VDC power supply will not be used to drive the motor.
Connect a 24 VDC power supply as necessary.
Refer to “Connecting the motor”.
Connecting the battery
1. Hold the driver with its bottom facing up and plug the connector
attached at the end of the battery lead wires into the battery
connector.
2. Hook the tabs on the battery connector onto the mating parts on
the driver.
3. Push in the battery holder carefully by ensuring that the lead
wires are not pinched.
Battery holder
Hook
Lead wires with
connector
Step 2
Step 3
Step 1
10
Note
• Installing or removing the battery must be performed
by qualified personnel with expert knowledge of the
handling of the driver and battery.
• Remove the battery if the driver is not turned on for
an extended period exceeding the data retention
period. Failure to do so may cause the battery fluid to
leak or battery performance to drop.
• When installing or removing the battery, cut off the
main power supply and 24 VDC power supply of the
driver.
• Once the battery is disconnected, the absolute motor
position stored in the driver will be lost. After the
battery has been installed, be sure to set the absolute
motor position again.
Connecting the data setter
Connect the cable of the data setter OPX-2A or cable supplied with
the data setting software MEXE02, to CN4 on the driver.
Data setter OPX-2A cable
or cable that comes with
the data setting software
MEXE02
Absolute system (SW1-3)
Install the optional battery BAT01A (sold separately). When the
battery is connected, the current position will be retained even in the
event of power outage or after the driver power is cut off.
ON: Enable the absolute function
OFF: Disable the absolute function (factory setting)
The pulse input mode (SW1-4)
ON: 1-pulse input mode, negative logic
OFF: 2-pulse input mode, negative logic
Each mode can only be set with a negative logic using
the pulse input mode selector switch. To select a
positive logic, set the applicable parameter using the
OPX-2A or MEXE02.
Mechanical rigidity setting switch (SW2)
What is set with this switch varies depending on the control mode.
Control mode
Description
Position control mode
Caution
The driver’s data edit connector (CN4) and
analog I/O signals connector (CN6) are not
insulated. When grounding the positive terminal
of the power supply, do not connect any
equipment (PC, etc.) whose negative terminal is
grounded. Doing so may cause the driver and
these equipment to short, damaging both.
Setting
Speed control mode
The switch sets the gain adjustment level
according to the mechanical rigidity.
Torque control mode
Not used.
Tension control mode
The switch sets the minimum speed in the
simple mode. The switch is not used in high
function modeⅠor high function modeⅡ.
Internal potentiometers (VR1, VR2)
What is set with this switch varies depending on the control mode.
Control mode
This switch sets the damping
control frequency.
VR2
Not used.
VR1
This switch sets the speed
command value.
VR2
This switch sets the
acceleration/deceleration time.
Torque control
mode
VR1
This switch sets the torque
command value.
VR2
This switch sets the speed limit.
Tension control
mode
VR1
This switch sets the tension
command value.
VR2
This switch sets the speed limit.
Control mode setting switches (SW1-1, 1-2)
Absolute system setting switch (SW1-3)
Pulse input mode selector switch (SW1-4)
Speed control
mode
Mechanical rigidity setting switch (SW2)
Internal potentiometers (VR1, VR2)
Note
The new setting of the absolute system setting switch
(SW1-3) and the pulse input mode selector switch
(SW1-4) will become effective after the power is cycled.
If a 24 VDC power supply is used, also cycle the 24
VDC power supply.
Description
VR1
Position control
mode
SW1
Internal
potentiometers
Control mode setting switches (SW1-1, 1-2)
These switches are used to set the control mode of the driver
(position control, speed control, torque control or tension control).
Position control
mode
Speed control
mode
Torque control
mode
Tension control
mode
11
Operation
environment
Storage
environment
Shipping
environment
Note
Degree of
protection
IP20
Ambient
temperature
0 to +50 °C (+32 to +122 °F)
(non-freezing)
Humidity
85% or less (non-condensing)
Altitude
Up to 1000 m (3300 ft.) above sea
level
Surrounding
atmosphere
No corrosive gas, dust, water or oil
Ambient
temperature
−20 to +60 °C (−4 to +140 °F)
(non-freezing)
Humidity
85% or less (non-condensing)
Altitude
Up to 3000 m (10,000 ft.) above sea
level
Surrounding
atmosphere
No corrosive gas, dust, water or oil
Ambient
temperature
−20 to +60 °C (−4 to +140 °F)
(non-freezing)
Humidity
85% or less (non-condensing)
Altitude
Up to 3000 m (10,000 ft.) above sea
level
Surrounding
atmosphere
No corrosive gas, dust, water or oil
Continuous motor output [W]
• Derating curve for continuous motor output
Rated output: 750 W
Driver specifications
750
600
450
300
150
0
10
20
30
40
Ambient temperature [°C]
50
If the ambient temperature of the driver exceeds 40 °C
(104 °F) while the driver is in use, keep the continuous
output of the motor to or below the derating curve
shown below. For your information, there is no need for
derating for the models whose rated output is 50 W or
400 W.
Continuous motor output [W]
• Derating curve for continuous motor output
Rated output: 100 W
100
80
60
40
20
0
10
20
30
40
Ambient temperature [°C]
50
• Derating curve for continuous motor output
Rated output: 200 W
• Unauthorized reproduction or copying of all or part of this
manual is prohibited.
• Oriental Motor shall not be liable whatsoever for any problems
relating to industrial property rights arising from use of any
information, circuit, equipment or device provided or
referenced in this manual.
• Characteristics, specifications and dimensions are subject to
change without notice.
• While we make every effort to offer accurate information in the
manual, we welcome your input. Should you find unclear
descriptions, errors or omissions, please contact the nearest
office.
•
is a registered trademark or trademark of
Oriental Motor Co., Ltd., in Japan and other countries.
© Copyright ORIENTAL MOTOR CO., LTD. 2011
Continuous motor output [W]
• Please contact your nearest Oriental Motor office for further information.
200
175
Technical Support Tel:(800)468-3982
8:30 A.M. to 5:00 P.M., P.S.T. (M-F)
7:30 A.M. to 5:00 P.M., C.S.T. (M-F)
E-mail: [email protected]
www.orientalmotor.com
150
125
100
Headquarters and Düsseldorf Office
Munich Office
Hamburg Office
75
50
Tel:0211-52067-00
Tel:089-3181225-00
Tel:040-76910443
Fax:0211-52067-099
Fax:089-3181225-25
Fax:040-76910445
25
0
10
20
30
40
Ambient temperature [°C]
Tel:01256-347090
Fax:01256-347099
Tel:01 47 86 97 50
Fax:01 47 82 45 16
Tel:02-93906346
Fax:02-93906348
Tel:400-820-6516
Fax:021-6278-0269
Tel:+65-6745-7344
Fax:+65-6745-9405
Tel:(02)8228-0707
Fax:(02)8228-0708
Tel:(03)22875778
Fax:(03)22875528
Tel:+66-2-251-1871
Fax:+66-2-251-1872
KOREA
Tel:080-777-2042
Fax:02-2026-5495
50
Headquarters Tokyo, Japan
Tel:03-6744-0361
Fax:03-5826-2576
Printed on Recycled Paper
12