1
I ENGLISH I
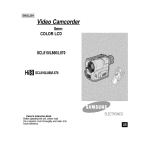
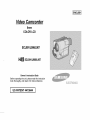
Video Camcorder
8mm
COLOR
LCD
SCL901/L906/L907
HiW SCL901/L906/L907
Owner's
Instruction
Book
Before operating the unit, please read this instruction
book thoroughly, and retain it for future reference.
I
US PATENT 4415844
E/,,ECTRONCS
I ENGLISH
I
Notices
and
Safety
Instructions
_oY_,Tuj/[o_
/_
RISK
DO
OF
SHOCK
ELECTRIC
NOT
OPEN
//_
,_
uninsulated
thetoproduct's
This symboldangerous
is intendedvoltage
to alertwithin
the user
the presence of
enclosurethat may be of sufficient magnitudeto constitute
a risk of fire or electric shock.
///_
This symbol is intended to alert the user to the presence of
CAUTION:
TO REDUCE
THE
RISK
OF
ELECTRIC
REMOVE
COVER(OR
BACK).
NO
PARTS
INSIDE,
REFER
SERVICING
SERVICE
PERSONNEL.
USER
TO
SHOCK,
DO
NOT
SERVICEABLE
QUALIFIED
important operating and maintenance instructions in the
literature accompanying this product.
To prevent electric shock, match wide blade of plug
to wide slot and fully insert.
1. READ INSTRUCTIONS:
All the safety and operating instructionsshould be read
beforethe CAMCORDERis operated.
2. RETAININSTRUCTIONS:
The safety and operating instructionsshouldbe retained for
future reference.
3. HEEDWARNINGS:
All warnings on the CAMCORDERand in the operating
instructionsshould be adhered to.
4. FOLLOW INSTRUCTIONS:
All operating and maintenanceinstructionsshould be
followed.
5. CLEANING:
Unplug this CAMCORDERfrom the wall outlet before
cleaning.
Do not use liquidor aerosol cleaners.
Usea dry cloth used for dusting cabinets.
6. ATTACHMENTS:
Do not use attachments not recommendedby the
CAMCORDERproductmanufactureras they may be
hazardous.
7. WATERAND MOISTURE:
Do not use this CAMCORDER near water;
for example, near a bathtub,wash bowl, kitchen sink, laundry
tub, in a wet basement,near a swimming pool or lake.
8. ACCESSORIES:
Do not place this CAMCORDERon an unstablecart, stand,
tripod, bracket or table. The CAMCORDER may fall, causing
serious injury to a child or adult, and serious damage to the
unit.
Useonly with a cart, stand, tripod, bracket, or table
recommended bythe manufactureror sold with the
CAMCORDER.Any mountingof the unit shouldfollow the
manufacturer's instructions
and should use a mounting
accessory recommendedby the manufacturer.
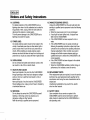
A. An appliance and cart combinationshould be moved with
care.
Quick stops, excessiveforce and unevensurfaces may
cause the appliance and cart combinationto overturn.
PORTABLECART WARNING
(Symbolprovided by RETAC)
I ENGLISH I
Notices and Safety
9,
Instructions
VENTILATION:
Slotsand openingsin the cabinet are providedfor
ventilationto ensure reliableoperation of the
CAMCORDERand to protectit from overheating.These
openingsmust not be blocked or covered. Never place
your CAMCORDERon a bed, sofa, rug, or other similar
surface:on or near a radiatoror heat register.
This CAMCORDERshould not be placed in a built-in
installationsuch as a bookcase or rack unless proper
ventilationis providedor the manufacturer's instructions
have been adhered to.
10. POWERSOURCES:
The CAMCORDERshould be operatedonly from the
type of power source indicated on the label.
If you are not sure of the type of power supply at your
home,consult your appliance dealer or local power
company.
A CAMCORDERis intendedto be operated from battery
power,or other sources, referto the operating
instructions.
11. GROUNDINGOR POLARIZATION:
This CAMCORDER may be equippedwith either a
polarized2-wireAC line plug (a plug havingone blade
widerthan the other) or a 3-wire grounding type plug, a
plug having a third (grounding)pin.
If you are unable to insert the plug fully into the outlet, try
reversingthe plug. If the plug still fails to fit, contact your
electricianto replace your outlet. Do not defeatthe safety
purpose of the polarizedplug.
12. POWER-CORDPROTECTION:
Power-supplycords should be routed so that they are not
likely to be walked on or pinched by items placedupon or
againstthem, paying particularattention to cords or plugs,
convenientreceptacles, and the point where they exit
from the unit.
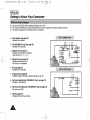
13. OUTDOORANTENNA GROUNDING:
If an outside antenna or cable system is connected to the
CAMCORDER,be surethe antenna or cable system is
groundedto provide some protection againstvoltage
surges and built-up staticcharges, Section 810 of the
National ElectricalCode,ANSI/NFPANo. 70-1984,
provides informationwith respect to proper grounding of
the mast and supportingstructure, grounding of the
lead-in wire and supportingstructure, grounding of the
mast and supportingstructure, groundingof the lead-in
wire to an antenna dischargeunit, size of grounding to
conductors, locationof antenna-dischargeunit,
connectionto grounding electrodesand requirementsfor
the grounding electrode.
See figure below.
[ENGLISH]
Notices
and Safety
Instructions
14. LIGHTNING:
Foradded protectionof this CAMCORDERduring a
lightningstorm when it is left unattendedand unusedfor
long periods of time, unplug it from the wall outlet and
disconnectthe antenna or cable system.
This will prevent damage to the CAMCORDERdue to
lightningand power-line surges.
15. POWERLINES:
An outside antenna system should not be located in the
vicinity of overhead power lines or other electric light or
power circuitswhere it can fall into such power linesor
circuits. When installingan outsideantenna system,
extreme careshould be taken to keep from touching such
power linesor circuits as contact withthem might be fatal.
16. OVERLOADING:
Do not overload wall outlets and extension cords as this
can result in a risk of fire or electric shock.
19. DAMAGE REQUIRINGSERVICE:
Unplug this CAMCORDERfrom the wall outlet and refer
servicingto qualified service personnelunder the following
conditions:
a. When the power-supplycord or plug is damaged.
b. If any liquid has beenspilled onto, or objects have
fallen into the CAMCORDER.
c. If the CAMCORDERhas been exposedto rain or
water.
d. If the CAMCORDERdoes not operate normallyby
followingthe operating instructions,adjust only those
controlsthat are covered by the operating instructions.
Improperadjustment of other controlsmay result in
damage and will often require extensivework by a
qualifiedtechnicianto restore the CAMCORDERto its
normaloperation.
e. If the CAMCORDERhas been droppedor the cabinet
has beendamaged.
f. When the CAMCORDERexhibitsa distinct change in
performance,this indicatesa needfor service.
17. OBJECTS AND LIQUIDS:
Never push objects of any kind into this CAMCORDER
through openingsas they may touch dangerous voltage
pointsor short out a part that could result in a fire or
electric shock.
Neverspill liquidsof any kind onto the CAMCORDER.
Should spillage occur, unplug unit and have it checked by
a technicianbefore use.
20. REPLACEMENTPARTS:
When replacementparts are required,be sure the service
technician has used replacementparts specifiedby the
manufacturerand having the same characteristicsas the
originalpart.
Unauthorizedsubstitutions may result infire, electric
shock or other hazards.
18. SERVICING:
Do not attemptto service this CAMCORDERyourself.
Opening or removingcovers may expose you to
dangerous voltage or other hazards.
Refer all servicing to qualified service personnel.
21. SAFETYCHECK:
Upon completionof any service or repairsto this
CAMCORDER,ask the service technicianto perform
safetychecks to determine that the CAMCORDERis in
safe operating order.
I ENGLISH I
Notices and Safety
Instructions
22. To prevent damage which may result in fire or shock
hazard,do not expose this appliance to rain or moisture.
23. If this power supply is used at 240Vac, a suitable plug
adapter should be use.
NOTE TO CATV SYSTEM INSTALLER:
This reminderis providedto call the CATVsystem installer's
attention to Article820-40 of the NEC that providesguidelines
for proper grounding and, in particular,specifies that the cable
ground shall be connected to the grounding system of the
building as close to the point of cable entry as practical.
USER INSTALLER CAUTION:
Your authorityto operatethis FCC certifiedequipmentcould be
voided if you make changes or modificationsnot expressly
approved by this party responsiblefor complianceto part 15
FCC rules.
NOTE:
"Hg LAMP(S) INSIDE THIS PRODUCT CONTAIN
MERCURY AND MUST BE RECYCLED OR
DISPOSED OF ACCORDING TO LOCAL, STATE
OR FEDERAL LAWS"
00732M
SCL901
SEA
(1-19)
12/26/03
10:39
AM
¢7e
2
I ENGLISH I
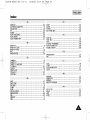
Contents
Features .........................................................................................................................................................................................................................
Descriptions
• Front View/Side
View/Rear
View ...............................................................................................................................................................
8
9, 10, 11
• OSD (On Screen Display) ..................................................................................................................................................................................
Accessories Supplied with the Camcorder ..................................................................................................................................................................
Remote Control (SCL906/L907
only) ..........................................................................................................................................................................
• Self Timer Recording ...........................................................................................................................................................................................
12
14
15
15
Adjusting the Hand Strap and Shoulder Strap ............................................................................................................................................................
Attaching the Lens Cover ............................................................................................................................................................................................
Lithium Battery Installation ..........................................................................................................................................................................................
Connecting the Power Source .....................................................................................................................................................................................
• To use the AC Power Adapter .............................................................................................................................................................................
• To use the Battery Pack ......................................................................................................................................................................................
Using the Battery Pack ................................................................................................................................................................................................
• Continuous Recording time table ........................................................................................................................................................................
• Battery Level Display ...........................................................................................................................................................................................
Inserting and Ejecting a Cassette
..............................................................................................................................................................................
16
17
17
18
18
19
20
20
21
22
..... .....
_:
Making your First Recording .......................................................................................................................................................................................
Hints for Stable Image Recording
..............................................................................................................................................................................
• Recording with LCD Screen ................................................................................................................................................................................
• Recording with Viewfinder ...................................................................................................................................................................................
Adjusting the LCD ........................................................................................................................................................................................................
Adjusting Focus of the VIEWFINDER
.........................................................................................................................................................................
Playing back a tape on the LCD .................................................................................................................................................................................
• Adjusting the LCD during PLAY ..........................................................................................................................................................................
• Controlling the Sound from the Speaker .............................................................................................................................................................
• Viewing a Still Picture ..........................................................................................................................................................................................
• Picture Search .....................................................................................................................................................................................................
23
25
25
25
26
27
28
29
29
29
29
Zooming In and Out .....................................................................................................................................................................................................
Digital Zoom ................................................................................................................................................................................................................
EASY mode (for Beginners) ........................................................................................................................................................................................
CUSTOM-Creating
your own customized recording settings ......................................................................................................................................
DIS (Digital Image Stabilizer, SCL906/L907 only) .......................................................................................................................................................
MF/AF (Manual Focus/Auto Focus) ............................................................................................................................................................................
BLC
30
31
33
34
35
36
37
00732M
SCL901
SEA
(1-19)
12/26/03
10:39
AM
¢7e
3
I ENGLISH I
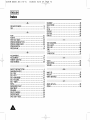
Contents
(continued)
Program AE (Automatic Exposure) .............................................................................................................................................................................
DSE (Digital Special Effects) in CAMERA mode .........................................................................................................................................................
Setting and Recording DATE/TIME .............................................................................................................................................................................
Selecting and Recording a Title ...................................................................................................................................................................................
Fade In and Out ..........................................................................................................................................................................................................
38
40
42
44
46
Snap Shot (SCL906/L907
only) ...................................................................................................................................................................................
White Balance .............................................................................................................................................................................................................
47
48
Selecting OSD Language ............................................................................................................................................................................................
Demonstration
.............................................................................................................................................................................................................
49
50
Setting the Date/Title Color .........................................................................................................................................................................................
Lighting Techniques .....................................................................................................................................................................................................
51
52
To watch with LCD ......................................................................................................................................................................................................
53
To watch with TV ........................................................................................................................................................................................................
Various Functions in PLAYER mode ...........................................................................................................................................................................
53
55
Adjusting the LCD ........................................................................................................................................................................................................
Setting the Speaker ON/OFF ......................................................................................................................................................................................
DSE in PLAYER mode ................................................................................................................................................................................................
56
56
56
Multi Playback
57
Transferring
Installing
(Using a PAL60 System) .....................................................................................................................................................................
a Digital Image
USB Media
through
2.0 Program
a USB Connection
............................................................................................................................................
..............................................................................................................................................................................
58
59
Cleaning and Takingcare of the Camcorder ...............................................................................................................................................
• Cleaning the Viewinder ......................................................................................................................................................................
• Cleaning the LCD Panel .......................................................................................................................................................................
• Cleaning the Video Heads ..................................................................................................................................................................
• Storing the Camcorder .........................................................................................................................................................................
62
62
62
62
62
Self Diagnosis
Display
................................................................................................................................................................................
Checking ......................................................................................................................................................................................................
Moisture
Condensation
................................................................................................................................................................................
64
65
67
00732M
SCL901
I ENGLISH
Notices
SEA
(1-19)
12/26/03
10:39
AM
¢7e
4
I
and
Safety
Instructions
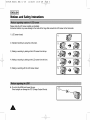
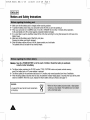
Please rotate the LCD screen carefully as illustrated•
Unintended rotation may cause damage to the inside of the hinge that connects the LCD screen to the Camcorder.
1) LCD screen closed•
1)
2) Standard recording by using the LCD screen•
2)
10 o
3) Making a recording by looking at the LCD screen from the top.
4) Making a recording by looking at the LCD screen from the front.
4)
5) Making a recording with the LCD screen closed.
5)
90°
•_ Do not let the LENS point toward the sun.
Direct sunlight can damage the CCD (Charge Coupled Device)•
00732M
SCL901
SEA
(1-19)
12/26/03
10:39
AM
¢7e
5
I ENGLISH I
Notices and
Safety
Instructions
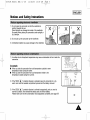
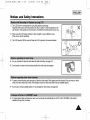
1) Do not place the camcorder so that the viewfinder is
pointing towards the sun.
Direct sunlight can damage the inside of the viewfinder.
Be careful when placing the camcorder under sunlight or
by a window.
r
|1
X
X
X
2) Do not pick up the camcorder by the viewfinder.
3) Unintended rotation may cause damage to the viewfinder.
for
example:
1) Asudde_ise
in atmospheric temperature may cause condensation to form inside the
• When you take the camcorder from cold temperature outside to warm
temperature inside during the winter.
• When you take the camcorder from cool temperature inside to hot
temperature outside during the summer.
__k__]
2) If the "DEW([]_ )" protectionfeature is activated, leave the camcorder in a dry,
warm room with the cassette compartment opened and the battery removed.
3) If the "DEW( []_ )" protectionfeature is activated unexpectedly,and you want to
override it, detach, then reinstall the battery pack and lithium battery.
Please make sure that the condensation has disappeared completely.(see page 67)
[
]
00732M
SCL901
SEA
(1-19)
12/26/03
10:39
AM
¢7
e
6
I ENGLISH I
Notices
and Safety
Instructions
÷ Make sure that the battery pack is charged before recording outdoors.
÷ To preserve battery power, keep your camcorder turned off when you are not operating it.
÷ When your camcorder is in CAMERA mode, if it is left in STANDBY for more than 5 minutes without operation,
it will automatically turn off to protectagainst unexpected battery discharge.
÷ It is a good idea to use the viewfinder instead of the LCD when recording for a long time because the LCD uses more
battery power.
÷ Make sure that the battery pack is fitted firmly into place.
Dropping the battery pack might damage it.
÷ When the battery reaches the end of its life, please contact your local dealer.
The batteries have to be dealt with as chemical waste.
Keep the LITHIUM BATTERYout of the reach of children. Should the battery be swallowed,
consult a doctor immediately.
÷ The lithium battery maintains the CLOCK function, TITLE, CUSTOMfunction and preset contents memory;
even if the battery pack or AC power adapter is removed.
÷ The lithium battery for the camcorder lasts about 8~10 months under normal operation from time of installation.
÷ When the lithium battery becomesweak or dead, the date/time indicatorflashes about 5 seconds when you set the power
switch to CAMERA. When this occurs, replace the lithium battery with type CR2025. (see page 17)
WARNING:
LITHIUM BATTERY MUST BE RECYCLED OR DISPOSED
OF PROPERLY.
Y
00732M
SCL901
SEA
(1-19)
12/26/03
10:39
AM
¢7e
7
I ENGLISH I
Notices and
_
•
_
•_
, •
Safety
_
_ ,
Instructions
'
_<
_
'_I_• _
!__
_i__!_!_!_!_!_!_!_!_!_!_!_!_
1) The LCD Screen is manufacturedbyusing high precisiontechnology.
However,there may be some tinyspecks(red, blueor green incolor)that appearon the
LCD Screen.Thesespecksare normaland do not affectthe recordedpicturein any way.
2) view.if
When
this occurs,use
usingthe LCD
the Screenoutdoors
viewfinder.
indirect sunlght, it may be difficultto
i
,,_
"'~_
___
3) The LCD Screen'sOSD is turned offwhen the LCD is placedin the forwarddirection.
_
_r
,_
_
÷ It is very importantto adjustthe handstrapfor betterrecording.(see page16)
÷ Do notinsert yourhand inthe handstrapforcibly,the bucklemay bedamaged.
÷ To ensurenormalrecordingand clearpicture,cleanthe video heads.When playingback the pictures,ifthey are noisyor hardly
visible,the video headsmay be dirty. If this happens,cleanthe video headswitha dry type cassettecleaner.
÷ Do notuse a wet type cassettecleaner.It may damagethe video heads.(seepage62)
÷ To protectagainsttapeand head-drumwear, yourcamcorderwill automaticallyturn off if it is leftin STANDBYmodewithout
operationfor more than5 minutes.
00732M
SCL901
SEA
(1-19)
12/26/03
10:39
AM
¢7e
8
ENGLISH]
Getting
to Know
Your
Camcorder
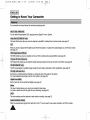
Your camcorderhas many featuresfor recordingand playingback.
Youcan selectthe appropriateOSD LanguageamongEnglish,French,Spanish.
The SnapShotfunctionletsyou recordan objectat a standstillfor a limitedtime inCameramode.(see page47)
When you recorda subjectwiththe lightsource behindthe subjector a subjectwitha light background,use the BLCfunction.
(seepage37)
The DSEenablesyou to give a creativelookto your filmsby addingvariousspecialeffects.(seepage40)
The ProgramAE enablesyou to adaptthe shutterspeed and apertureto the type of sceneto be filmed.(see page38)
The DIScompensatesfor unstableimagescausedby handshake,particularlyat high magnification.(see page35)
Zooming is a recordingtechniquethat lets you changethe sizeof the subject inthe picture.
Formore professionalrecordings,use the zoom function.(see page30)
Zooms morethan22x are performeddigitally.(seepage 31)
The macrofunctionallowsyou to recordyour subjectat closerange.
You haveto adjustthe zoom fullywide for macrorecording.(see page30)
This modeenableseven the beginnerto easily make a recording.(seepage33)
PAL60is a specialoutputsignal formatwithwhicha PALTV can be usedto view a tape recordedbyan NTSCrecorder.
00732M
SCL901
SEA
(1-19)
12/26/03
10:39
AM
¢7e
9
I ENGLISH
Getting
to Know
Your Camcorder
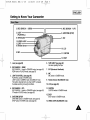
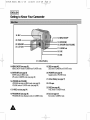
2. REC SEARCH _ (REW)
4. REC SEARCH _ (FF)
3. LIGHT
(PLAY/STILL)
6.
5. DAT_TIME(STOP)
7. EVF
13. VIDEO LIGHT
1. LENS
9. Remote Senso_
10. LCD
8. MIC
11. CUSTOM
12. EASY
1.
Lens (see page 68)
2. REC SEARCH_ (REW)
REC SEARCH _ works inSTANDBYmode.(see page24)
REWworks in PLAYERmode.(see page55)
3.
LIGHT (PLAY/STILL)(see page 54)
PLAY/STILLworksin PLAYERmode.
LIGHTworks in CAMERAmode.(SCL906/L907only)
The built-invideolightturns onwhen LIGHTis pressed.
It enablesrecordinginlow-lightconditions.
4.
REC SEARCH_ (FF)
REC SEARCH _ worksinSTANDBYmode.(see page24)
FF worksin PLAYERmode.(seepage55)
5.
DATE/TIME(STOP)
DATEFIIMEworksin CAMERAmode.(seepage42)
STOPworksinPLAYERmode.(see page54)
6. TAPE EJECT (see page 22)
Use whenejectingthe tape.
7. EVF (Electronic Viewfinder)
8. MIC
MIC works in CAMERAmode.
9. Remote Sensor(SCL906/Lg07only)
10.LCD (see page26)
11.CUSTOM
CUSTOMworks inCAMERAmode.
12.EASY
EASYworks inCAMERAmode.
13.VIDEO LIGHT(SCL9061L907only)
I
/
00732M
SCL901
SEA
(1-19)
12/26/03
10:39
AM
_e
I0
IENGLISHI
Getting
to Know
Your
Camcorder
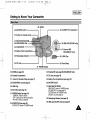
24. BLC
MENU ON/OFF
23. FADE
20. SPEAKER
15. ENTER (MF)
16. UP/DOWN Dial (VOLUME)
_
22. LCD Open _
17. S-VIDEO out
18. P.AE
19. DSE
21, Lithium Battery
14.MENU ONIOFF(see page26)
MENU ON/OFFworks in CAMERAand PLAYERmode.
19. DSE (see page 40)
DSE works in CAMERA and PLAYER mode.
15.ENTER(MF) (see page26)
ENTERworksin MENUmode.
MF works inCAMERAmode.(seepage 36)
20. SPEAKER (see page 56)
Speaker works in PLAYER mode.
21. Lithium Battery (see page 17)
16. UP/DOWN dial (VOLUME)
UP/DOWN dial works in MENU mode. (see page 26)
VOLUME works in PLAYER mode. (see page 56)
22. LCD open
17.S-VIDEOout (see page54)
23. FADE (see page 46)
FADE works in CAMERA mode.
18.PROGRAMAE (see page38)
PROGRAMAE (AutoExposure)works in CAMERAmode.
24. BLC (see page 37)
BLC works in CAMERA mode.
00732M
SCL901
SEA
(1-19)
12/26/03
10:39
AM
_e
II
I ENGLISH I
Getting
to Know
Your Camcorder
25. ZOOM
36. BATTERYEJECT
26. CASSETTE Compartment
27. Hooksforshoulderstrap_
28. AUDIONIDEO
Out
(SCL907only)
32. START/STOP
MIC
35. Battery
(SCL906/L907 only)
38. Recharging Indicator
P
34. DC Jack
30. Hand Strap
31. POWER Switch
25. ZOOM (see page30)
33. External MIC (see page 68) (SCL906/L907 only)
26. CassetteCompartment
34. DC Jack (see page 18)
27. Hooksfor ShoulderStrap(see page 17)
35. Battery Pack Compartment (see page 19)
28. AUDIONIDEOout (see page53)
36. BATTERY EJECT
29. LENSCap
37. SNAP SHOT/D.ZOOM
SNAP SHOT works in CAMERA mode.
(SCL906/L907 only, see page 47)
D.ZOOM works in CAMERA mode.
(SCL901 only, see page 32)
30. HandStrap (see page16)
31. POWERSwitch(see page18)
- CAMERA: Selectto record.
- OFF : Selectto turn off the camcorder.
- PLAYER: Selectto playback.
32. STARTISTOP(see page23)
START/STOPworks in CAMERAmode.
38. Recharging
Indicator (see page 19)
39. USB Jack (SCL907 only) (see page 61)
00732M
SCL901
SEA
(1-19)
I ENGLISH
I
Getting
to Know
12/26/03
Your
10:39
AM
_e
12
Camcorder
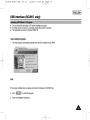
÷ Youcan turn the OSD on/offby settingthe Displaymenuon/off.
÷ The TITLE, DATE/TIME,EASYand CUSTOMfunctionscan be operatedeven after the OSD is turnedoff.
÷ The OSD is displayedin the viewf]nderand the LCD Screen.
a.
Zoom position(see page30)
Indicateszoom position.
ba
b. DIS (SCLg06/Lg07only) (see page 35)
IndicatesDIS is activated.
C.
Battery level (see page21)
Indicatesthe power leftinthe battery.
d.
Manual Focus (see page 36)
Indicates manual focus is on.
Auto Focus is not displayed.
e.
BLC (see page 37)
IndicatesBLC is activated.
f. ProgramAE (see page38)
IndicatesProgramAE modeis activated.(_],_,
_, _:_,_)
g. Self recordwaitingtimer.(SCL906/L907only) (see page15)
Indicates10 secondtimer.
h. Self record recordingtimer.(SCL9061L907only) (seepage 15)
(30 secondsor END).
i. Date (see page42)
Indicatesthe dateof the recording.
t
sq
00732M
SCL901
SEA
(1-19)
12/26/03
10:39
AM
_e
13
I ENGLISH I
Getting
j.
k.
I.
m.
n.
o.
p.
q.
r.
s.
t.
u.
v.
w.
x.
y.
z.
to Know
Your Camcorder
Time(see page42)
Indicatesthe time you are recording.
Title (see page 44)
Indicatesthe recordedtitleyou have set. It is superimposedon the scene.
Self diagnosis(see page64)
(TAPE!,TAPEEND!,PROTECTION!)Checkstheoperation
ofthe Camcorder.
DSE (DigitalSpecialEffect)(see page40)
Indicatesthe DSEmodeisactivated.
Theoperationmodesare STROBE,SEPIA,B&W,NEG., MIRROR,ART,MOSAIC,16:9(WIDE)and CINEMA.
White Balancemode(see page48)
IndicatestheWhiteBalancemodeisactivated.
The White Balancemodesare AUTO,INDOOR(-_:) andOUTDOOR(-:.o:).
Tape counter
Indicatesamountof the tape used.
Operation mode
Indicatesthe operationmode is activated.
The operationmodesare STBY,RECe, STOP,PLAY( I_ ), FF(_),
REW(<< ), EJECT.
Hi8 (see page 54)
Indicatesyou are using Hi8tapewhen recordingor playingback.
DEW ([_) condensation(see page 67)
Monitorsthe moisturecondensation.
Digital zoom (see page 31)
Indicatesdigitalzoom is activated.
Snap Shot(SCL906/L907only) (see page 47)
Indicatesthe time leftduringSnapShotRecording.
Zero return (SCLg061Lg07only) (see page 55)
Indicatesthat the zero returnis activated.
PB DSE (see page56)
Showsthat the PB DSEmodeis active.
VOLUME (see page 56)
EASY & CUSTOM
Showswhen theeasyor custommodeis active.
LIGHT (SCL9061L907only)
Showswhen the Light is switchedon.
Remocon ( ((<_ OFF)(SCLg06/Lg07only)
Indicatesthe remoconoffmode isactivated.
/
00732M
SCL901
SEA
(1-19)
12/26/03
10:40 AM
_e
14
IENGLISHI
Getting
to Know
Your
Camcorder
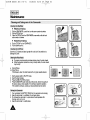
Makesurethatthefollowingbasicaccessoriesare suppliedwithyourcamcorde_.
1. AC Power
1. AC PowerAdapter.(AA-E8TYPE)(see page18)
2. AC cord. (seepage 18)
3. Battery Pack.(seepage 19)
4. AudioNideo Cable. (seepage53)
5. Shoulderstrap.(seepage 17)
6. InstructionBook.
(AA-E8
3, Battery
Adapter
Pack
TYPE)
AD44-00090A
4. AUDIONIDEO
AD39-00076A
Cable
5. Shoulder
AD43-00065A
Strap
6, Instruction
Book
7. RemoteControl.(see page 15)(SCL906/L907only)
8. LithiumBatteryfor RemoteControl.(seepage 15)
(SCL906/L907only)
LithiumBatteryfor Clock.(TYPE:CR2025,see page 17)
9. SoftwareCD (SCL907only)
10.USB Cable (SCL907only)
AD39-40200A
7. Remote
Control
AD72-00054A
< Lithium
Batteries
11.USBAUDIO Cable (SCL907only)
12.Lens Cover
AD43-10130H
AD59-00062A
10. USB
Cable
'H.
USB
AUDIO
Cable
AD46-00060A
12
Lens
Cover
13.S-VIDEOcable.(see page54)
AD39-00073A
Note: Optionalaccessoriesmay be includedwiththe camcorder,depending
on the countryinwhich it is purchased.
AC39-42001Z
AD39-0009SA
AD97-08362A
00732M
SCL901
SEA
(1-19)
12/26/03
10:40
AM
_Te
15
I ENGLISH
GeRing
1.
2.
3.
4.
5.
6.
7.
8.
9.
10.
11.
12.
to Know
Your
Camcorder
Start/Stop (see page 23)
Self Timer
Still (see page 55)
WIDE (see page 30)
TELE (see page 30)
Display (see page 12)
I_ (Play) (see page 54)
_ (FF) (see page 55)
<.,I (REW) (see page 55)
• (Stop) (see page 54)
Counter Reset (see page 55)
Zero Return (see page 55)
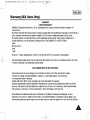
Remote Control Battery I_stallati_
÷ Youmust insert or replace this batterywhen:
- Youpurchasethecamcorder.
- The remotecontrol doesn't work.
÷ Insert LithiumBattery,following the + and - markings.
÷ Be careful not to reversethe polarityof the battery.
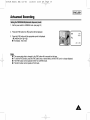
S_!f _im_ Recording;
÷ The Self Timerfunction on the remotecontrol allowsyou to start and stop recording automatically.
Example: Recordingyourself
÷ Two options are available
WAIT-10S/SELF-30S:wait 10 seconds,followed by 30 seconds of recording.
WAIT-10S/SELF-END:wait 10 seconds, followed by recording untilyou press the START/STOPbutton again.
I
00732M
SCL901
I ENGLISH
SEA
(1-19)
12/26/03
10:40
AM
_e
16
I
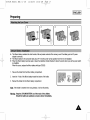
Preparing
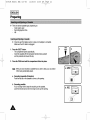
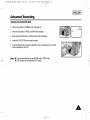
1. Set powerswitchto CAMERAmode.
2. Press Self Timer button until the appropriate indicator is displayed on the LCD:
• WAIT-10S/SELF-30S
• WAIT-10S/SELF-END
3. Press START/STOPbuttonto startthe timer.
:Afterwaitingfor 10 seconds,recordingstarts.
: If you haveselected SELF-30S,recordingstopsautomaticallyafter 30 seconds.
: If you haveselected SELF-END,pressSTART/STOPagain whenyou wish to
stop recording.
Note: When recordingwith the timer,you can press START/STOPbuttonagain to
cancelthe function.
3
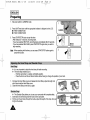
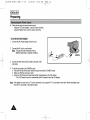
÷ It is very importantto adjustthe handstrap for betterrecording.
÷ The handstrapenablesyou to:
- Holdthe camcorderin a stable,comfortableposition.
- Press theZoom and the red Recordbuttonwithout havingto changethe positionof your hand.
1. Pullopenthe HandStrapcover and releasethe HandStrap,adjustits length and
stick it backontothe Hand Strapcover.
2. Closethe Hand Strapcover backup again.
÷ The ShoulderStrapallowsyou to carryyour camcorderwithcompletesafety.
1. Inserteach endof the strap into the hookson the camcorder.
2. Putthe end of each strapthroughthe buckle,adjustthe lengthof thestrap,then pull
it tight inthe buckle.
00732M
SCL901
SEA
(1-19)
12/26/03
10:40
AM
_e
17
I ENGLISH
I
Preparing
l
J_
. "3
_._4
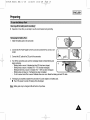
4, The lithium batterymaintainsthe clock function,titleand presetcontentsof the memory;even if the batterypackor AC power
adapteris removed.
4, The lithium batteryfor the camcorderlastsabout8-10 monthsunder normaloperationfrom the time of installation.
4, When the lithiumbatterybecomesweakor dead,the date/timeindicatorflashesfor about5 secondswhenyou setthe power switch
to CAMERA.
When this occurs,replacethe lithium batterywithtype CR2025.
1. Takeoutthe holderfrom the lithiumbatterycompartment.
2. Insertthe _ side of the lithiumbatterytowardthe bottomof the holder.
3. Reinsertthe holderintothe lithiumbatterycompartment.
Note: If the holderis insertedinthe wrong direction,itwill not fit correctly.
Warningl Keep the LITHIUM BATTERYout of the reach of the children.
Shouldthe battery be swallowed, consulta doctor immediately.
00732M
SCL901
SEA
I ENGLISH
(1-19)
12/26/03
10:40
AM
_e
18
I
Preparing
÷ There are two ways to connectpowersource.
Usingthe AC PowerAdapter: used for indoorrecording.
Usingthe BatteryPack:usedfor outdoorrecording.
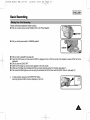
1. Connectthe AC PowerAdapterto the AC cord.
2. Connectthe AC cordto a wall socket,
Note: The plug andwall socket type may be
differentdependingon regionalconditions,
CAMERA
3. Connectthe other endof the DC cableto DCjack of the
camcorder.
4. To setthe camcorderto the CAMERAmode.
a. Holddown thetab ofthe powerswitchand pushthe switchto CAMERAmode.
b. Make surethat the Lens Cap is open,
c, Open the LCD Screenand make surethat the imageappears inthe LCD Screen.
The LCD Screen is turnedon automaticallywhen it'sopenedmore than30 degrees,
Note: If the adapteris used next to a -IV or thecamcorder,itmay cause theTV or camcorderto emit noise,Move the adapteraway
fromthe TV, camcorderor the antennacable.
00732M
SCL901
SEA
(1-19)
12/26/03
10:40
AM
_e
19
I ENGLISH I
Preparing
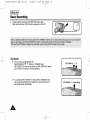
1. Attachthe batterypackto the camcorder.
2. ConnecttheAC PowerAdapterto the AC cordand connectthe AC cordto a wall
socket.
3. Connectthe DC cable to the DC jackof the camcorder.
4. Turnoff the camcorderpower,and the rechargingindicatorwillstart blinkingand
begin recharging.
Blinkingonce a second: Indicateslessthan50% has beencharged.
Blinkingtwice a second: Indicates50% ~ 75% has been recharged.
Blinkingthree timesa second : Indicates75% - 100%has been recharged.
Blinkingstopsand stayson : Recharginghas beencompleted.
Onfor a secondand offfor a second:Indicatesthere is an error.Resetthe batterypackand DC cable.
5. If rechargingis completed,separatethe camcorder,AC power adapter,and batterypack.
• Even ifthe power is turned off,batterywill be discharged.
Note: Batterypack may be chargeda littleat the time of purchase.
00732M
SCL901
I ENGLISH
SEA
(20-45)
12/26/03
10:45
AM
_P_ge
20
I
Preparing
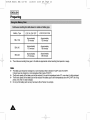
÷
Battery Type
LCD ON, EVF OFF
LCD OFF, EVF ON
SB-L110A
Approximately
90 minutes
Approximately
120 minutes
SB-L160
Approximately
130 minutes
Approximately
180 minutes
SB-L320
Approximately
270 minutes
Approximately
360 minutes
The continuousrecordingtimesgiven inthe table are approximate.Actualrecordingtime dependson usage.
Notes."
÷
÷
÷
÷
The batterypackshouldbe rechargedin a roomtemperaturethat is between0°C(32°F)and 40°C(104°F).
It shouldneverbe charged in a room temperaturethat is below0°C(32°F).
The life and capacityof the batterypackwill be reduced ifit is used intemperaturesbelow0°C, even whenit is fully recharged.
The life and capacityof the batterypackwill be reduced ifthe batterypackis leftintemperaturesabove40°C(104°F)for a long
period,even when it is fully recharged.
Do not put the batterypack near any heatsource (fireor flames,for example).
00732M
SCL901
SEA
(20-45)
12/26/03
10:45
AM
_P_ge
21
I ENGLISH I
Preparing
÷
The batteryleveldisplayindicatesthe amountof powerremaininginthe batterypack,
...............
1.
2.
Fullycharged
10-40% consumed
3.
40-60% consumed
4.
60~80%consumed(preparea chargedone)
5.
6.
80~95%consumed(changethe battery)
100% consumed
(camcorderwill turn off soon, changethe batteryas soon as possible)
1
I
............... 2
_
............... 3
t
...............
_
4
............... 5
t
[Lo21_............... 6
÷
Pleasereferto the table on page20 for approximatecontinuousrecordingtime.
÷
The recordingtime is affectedby environmentaltemperatureand conditions,
The recordingtime becomesvery shortina cold environment.
The continuousrecordingtime inthe operatinginstructionsis measuredunderthe conditionof using a fullycharged
batterypackat 25°C(77°F).As the environmentaltemperatureand conditionsmay be differentwhen you actuallyuse the
camcorder,the remainingbatterytime may not be the same asthe approximatecontinuousrecordingtimes givenin these
instructions,
A chargemark is providedon the batterypackto help you rememberwhether it has beencharged
or not,
Two colorsare provided(redand black)you may choosewhichone indicateschargedand which
indicatesdischarged,
Note: The chargemarkdoes not affectthe battery'schargestatus,
00732M
SCL901
I ENGLISH
SEA
(20-45)
12/26/03
10:45
AM
_P_ge
22
I
Preparing
÷ There are severalcassettetypes,dependingon:
Color systemused
Recording/playbacktime.
Hi8
4, Checkto see if the batterypackis in placeor AC adapteris connected.
Make surethe AN cable is unplugged.
1. Pressthe EJECTbutton.
The compartmentopens automatically.
Insertthe cassettewiththe transparentwindowfacingoutward
and the protectiontab towardthe top.
EJECT
TAPE
[2
2. Pressthe PUSHmark untilthe compartmentclicksinto place.
Note: When you have recordeda cassettethatyou wishto keep,you can protect
itfrom beingaccidentallyerased.
SAVE
a. RecordingImpossible(Protection):
Push the red tab on the cassetteto cover up the opening.
b. Recordingpossible:
If you no longerwishto keep the recordingon the cassette,
push the red tab back sothat it no longercoversup the opening.
REC
00732M
SCL901
SEA
(20-45)
12/26/03
10:45
AM
_P_ge
23
I ENGLISH
Basic
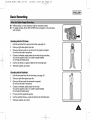
Recording
Please make these preparations before recording.
• Did you connect a power source? (Battery Pack orAC PowerAdapter)
•
Did you set the powerswitchto CAMERAposition?
•
•
Did you insert a cassette?(seepage22)
Open the LCD Screenand make surethat STBY is displayedon the LCD (if the red tab of the cassetteis opened,STBY will not be
displayed)
Did you openthe LENS CAP?
Make surethe imageyou want to recordappears inthe LCD monitor.
Make surethe batterylevelindicatesthatthere is enoughremainingpowerfor recording.(seepage21)
We recommendthat beginners,who are usingthe camcorderfor the first time, switchthe EASYmodeon. (see page33)
•
•
•
•
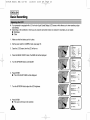
a. To startrecording,pressthe red START/STOPbutton.
Recordingstartsand RECshould bedisplayedon the LCD.
I
I
24
00732M
SCL901
SEA
(20-45)
12/26/03
10:45 AM _ge
IENGLISHI
Basic Recording
b. To stop recording,pressthe red START/STOPbuttonagain.
When Recordingstops,STBY shouldbe displayedon the LCD.
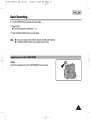
÷ Youcan view a recordedpicturewith
the REC SEARCH (_, E) functionin STANDBYmode.
REC SEARCH (_)allowsyou to reverseand RECSEARCH_ allows
you to forward,for as long as you keep pressing.
÷
If you press the RECSEARCHO buttonbrieflyinSTANDBYmode,
your camcorderwill play backin reversefor 3 secondsand returnto
the originalpositionautomatically.
REC SEARCH _,
REC SEARCH_
(_
00732M
SCL901
SEA
(20-45)
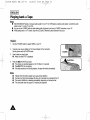
12/26/03
10:45
AM
_P_ge
25
I ENGLISH I
Basic Recording
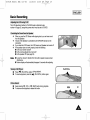
•
•
Whilerecording,it is very importantto hold the camcordercorrectly.
For stablerecording,fix the LENS COVERfirmlyby clippingiton the handstrap.
(referto figure)
1.
Holdthe camcorderfirmly usingthe handstrap.(seepage 16)
2.
Placeyourright elbowagainstyour side.
3.
Placeyour lefthandunderor next to the LCD to supportand adjustit.
Do not touchthe built-inmicrophone.
4.
Choosea comfortable,stablepositionfor the shotsthat you are taking.
Youcan lean againsta wall or on a table for greaterstability.
Do not forgetto breathegently.
5.
Usethe LCDframe asa guideto determinethe horizontalplane.
6.
Wheneverpossible,use a tripod.
1.
Holdthe camcorderfirmlywith the handstrap.(see page16)
2.
Placeyourright elbowagainstyour side.
3.
Placeyour lefthandunderthe camcorderto supportit.
Do not touchthe built-inmicrophone.
4.
Choosea comfortable,stablepositionfor the shots.
Youcan lean againsta wall or on a table for greaterstability.
Do not forgetto breathegently.
5.
Put youreye firmlyagainstthe eyecap.
6.
7.
Usethe viewfinderframe asa guideto determinethe horizontalplane.
Wheneverpossible,use a tripod.
{
i!i!!i!7
_!Ti!i!ii!_!;;i!ii!_!;;i!ii!_!;; _ii!ii!_!;;i!ii!_!;;i!ii!_!;;i!ii!_!;;i!ii!_!;;i!ii!_!;;
00732M
SCL901
I ENGLISH
SEA
(20-45)
12/26/03
10:45
AM
_P_ge
26
I
Basic Recording
_,_,_®_,I,_,_,,_:_,_,-,,,_
_¸¸_,_,_,,_,_,_
_,,_,_,_}_,_,,_,__
_,
_
_,_ _ _,9,,_,
_:_,_,_,_,_ _,
_,_m_:
_,_,_,_,, __,_®_,,_,_,,,_,_,_
_,__
_,
_
_
_ _, __,,_,
÷ Yourcamcorderis equippedwitha 2.5 inchcolor LiquidCrystalDisplay(LCD)screen,whichallowsyou to view recordingor playbackdirectly.
÷ Dependingon the conditionsinwhich you are usingthe camcorder(indoorsor outdoorsfor example),you can adjust:
• Brightness
• Color
1. Makesure thatthe batterypack is in place.
2. Setthe powerswitchto CAMERAmode.(see page18)
3. Open the LCDScreen,then the LCDwill turn on.
4. Pressthe MENUON/OFFbutton,the MENU listwill be displayed.
5. Turnthe UP/DOWNdial to LCDADJUST.
DiS
..............
OFF
OZOOM...................OFF
WHITEBAL.................
AUTO
OISPLAY
................. ON
LANGUAGE
................
ENGL(SH
MENU
]
WE REMOCON
............
ON
NEXT:MENU
[....)
ms ...................... OFF
OZOOM ...................OFF
WHITE_AL................AUTO
mSPLAY ..................ON
LANGUAGE............. ENGL(SH
NEXT:MENU
6. PressENTER.
• The LCDADJUSTMENUwill be displayed.
_6LgR
[171
EXIT: MENU
7. Turnthe UP/DOWNdial to adjustthe LCD brightness.
EXIT: MENU
8. PressENTER.
• The cursorwill moveto the next item.
_LOR
.....
EXIT: MENU
[19I
00732M
SCL901
SEA
(20-45)
12/26/03
10:45
AM
_P_ge
27
I ENGLISH I
Basic Recording
9. Tum the UP/DOWNdialto adjustthe LCD colorsetting.
10.Press ENTER.
• For furtheradjustment,repeatsteps7, 8, 9.
11.Pressthe MENUON/OFFbuttonto end the setting.
Note:
•
•
If you do not pressa buttonwithin 30 seconds,the settingwill disappear.
The MENUON/OFFfunctionwill not operatein EASYmode.
00732M
SCL901
I ENGLISH
Basic
SEA
(20-45)
12/26/03
10:45
AM
_P_ge
28
I
Recording
÷
÷
Youcan monitorthe playbackpictureon the LCD Screen.
Make surethat the batterypackis inplace.
1.
Holddown the tab of the powerswitchand push the switchto PLAYERmode.
1
2.
Insertthe tapeyou havejust recorded.
3.
Open the LCD Screenand make surethat STOP is displayedon the OSD.
Adjustthe angle of the LCD Screenand setthe brightnessor the color if necessary.
PLAYER
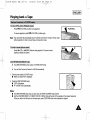
Press the _ (REW)buttonto rewindthe tapeto the beginning.
•
Tostop REWIND,pressthe • (STOP)button.
•
Camcorderstopsautomaticallyafter rewinding.
Press the IHI (PLAY/STILL)buttonto startplayback.
•
Youcan see the videoyou recordedon the LCD.
•
Tostop the PLAYBACKoperation,pressthe • (STOP)button.
PLAY/
Note." Youcan also monitorthe pictureon a TV screen,after connectingthe camcorderto a -IV or VCR. (see page53)
STOP
00732M
SCL901
SEA
(20-45)
12/26/03
10:45
AM
_P_ge
29
I ENGLISH I
Basic Recording
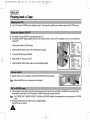
The LCDadjustmentmethodin PLAYERmodeis identicalto step
number4 of page26, exceptthe power switchmust beset to PLAYER.
÷
÷
÷
÷
When you usethe LCD Screenwhile playingback,you can hear sound
from the Speaker.
Volumeof the Speakeris controlledby the UP/DOWNdial tab on the
camcorder.
If you closethe LCD Screen,the LCD Screenand Speakerare turnedoff.
If the speakerdoes notwork properly,check the following:
• Is the LCD Screenclosed?
• Is thevolumeadjustedto a lowlevel?
• Is thespeakeroff?.(see page56)
Notes." • Lowerthe volumeif vibrationfrom the built-inspeakercausesscreen
disturbance.
• Volumedisplaywill automaticallydisappear2 secondsafter adjusting.
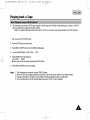
PLAY/STILL
•
•
Press IHI (PLAY/STILL)buttonduringplayback.
To resumeplayback,pressthe IHI (PLAY/STILL)buttonagain.
•
•
KeeppressingMP- (FF) or _,9 (REW)buttonduringplayback.
To resumenormalplayback,releasethe button.
REW
FF
00732M
SCL901
I ENGLISH
SEA
(20-45)
12/26/03
10:45
AM
_P_ge
30
I
Advanced
Recording
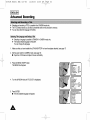
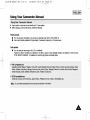
÷ Zoom works in CAMERAmodeonly.
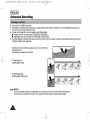
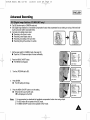
÷ Zooming is a recordingtechniquethat letsyou changethe sizeof the subject inthe picture.For more professionallookingrecordings,do not use the zoom functiontoo often.
÷ Youcan alsochoosefrom two zoom speedsto suit differentneeds:
• Gradualzoom (9~12 secondsfromTELENVIDEto WIDE/TELE)
• High-Speedzoom (34 secondsfrom TELE/WIDEto WIDEFIELE)
÷ Usethese featuresfor differentshots;pleasenotethat overuseof the zoomfeaturecan lead to unprofessionallookingresultsanda
reductionof batterypackusage time.
1. Movethe zoom lever a littlefor a gradualzoom, move it furtherfor a
high-speedzoom.
Yourzoomingis monitoredon the OSD.
w
2. T (Telephoto)side:
Subjectappearscloser.
3. W (Wide angle)side:
Subjectappearsfurther away.
Note: MACRO
If you cannotobtain sharpfocusin telephotozoom, movethe leverto the "W"side until thefocus sharpens.
Youcan recorda subjectthat is at least1 mmaway fromthe lens surfacein thewide angle position.
00732M
SCL901
SEA
(20-45)
12/26/03
10:45
AM
_P_ge
31
I ENGLISH I
Advanced
÷
÷
÷
÷
Recording
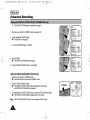
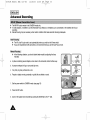
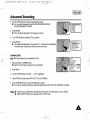
DigitalZoomworks inCAMERAmodeonly.
Zoomsmore than22x are performeddigitally.
The picturequalitydeterioratesas you go towardsthe "T" side.
We recommendthat you use the DIS (SCL906/L907)featurewiththe DIGITALZOOM for picturestability.(seepage35)
rMENU ]
LCD ADJUST
WHITE BAL .......... AUTO
_
DISPLAY .............. ON
LANGUAGE .......... ENGLISH
WL REMOCON ....ON
_,.
_"
NEX]_ MENU
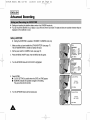
1. Set the powerswitchto CAMERAmode.(seepage 18)
• Open the LCD Screenand adjustthe LCD Screenso asto see comfortably.
2. Make surethat the DIGITALZOOM featureis on. (see page32)
When you movethe ZOOM lever to the "F' side,the picturewill be enlargedwithin22x
minimumto 880x maximumZOOM.
This is the DIGITALZOOM boundary.
i..-...[.sBo.
I
l
:hhoOW:tthh: doigliitacal
iZ:2marer: a
4. If you do not wantto use the DIGITALZOOM, setthe D.ZOOMfunctionto OFF inthe MENU list.(seepage 32)
[]
00732M
SCL901
I ENGLISH
SEA
NG_
_
12/26/03
10:45
AM
_P_ge
32
I
Advanced
i_'•;_;_
(20-45)
Recording
i_'•_ _,_ i,_ _
;_ ,,_i_
__,_,,,_
_ _ _•
_,_i_ _,
_ _!_
%_,,_
_
_
_ _ _:_ _::!:_
_
1. Set the power switch to CAMERAmode• (see page 18)
D.ZOOM
..............
OFF
WHITE BAL
..........AUTO
DISPLAY .............. ON
LANGUAGE .......... ENGLISH
['MENU_e_eS.rDIS
........................
OFF ]
WLREMOCON....ON
NEX_
MENU
÷ The DIGITALZOOMfeature is explainedon page31.
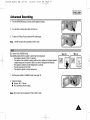
2. Pressthe MENUON/OFFbutton.
• The MENUlistwill appear.
3. Turnthe UP/DOWNdial to D. ZOOM.
LCD ADJUST
Ii DIS........................
ENU
OFF
DISPLAY .............. ON
LANGUAGE .......... ENGUS
WL REMOCON ....ON
_HtTE BAL ..........AUTO
EX_ MENU
4. PressENTER.
• The DIGITALZOOMsettingwill change.
LCD ADJUST
Ii DIS........................
ENU
OFF
5. Pressthe MENUON/OFFbuttonto endsetting.
DISPLAY .............. ON
LANGUAGE .......... ENGUS
WL REMOCON ....ON
_HiTE BAL ..........AUTO
EX_ MENU
1. Setthe powerswitchto CAMERAmode.
• Powerswitchwill be changedto CAMERAmode.
2. PressD. ZOOM ON/OFFbutton.
• The DIGITALZOOM indicatorswill bedisplayedon thescreen,
and DIGITALZOOM functionwill operate.
3. To deactivatethe DIGITALZOOMfunction,pressthe D.ZOOMbuttonagain.
• The DIGITALZOOM indicatorsdisappearfrom the screen.
Note: The DZOOM ON/OFFfunctionwill not operateinEASYmode.
D.ZOOM
00732M
SCL901
SEA
(20-45)
12/26/03
10:45
AM
q_ge
33
I ENGLISH
Advanced
+
Recording
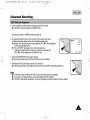
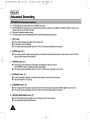
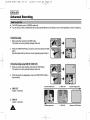
Even a beginner can easily make a recording using the EASYmode.
• The EASY mode onlyoperates in CAMERAmode.
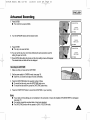
1. Set the powerswitchto CAMERAmode(see page18).
2. By pressingthe EASYbutton,allthe functionsof the camerawillbe setto
off and the recordingsettingswill be setto thefollowing basicmode.
• Battery level,recordingmode,counter,date/time,DIS ( _'_] ) will be displayed
as thecamcorderstartsto run.
• The word "EASY"willappearon the LCDat the same time.
However,the Date/Timewill only be seen if it has beenpreviouslyset.
(DIS ( _] ) will be displayedon SCL906/L907only)
3. Pressthe START/STOPbuttonto startrecording.
• Recordingwill begin usingthe basicautomaticenvironmentsettings.
4
Pressingthe EASY buttonagain turnsthe EASYmodeoff.
• The camerawill return to the settingsthatwere set priorto the EASYmodebeing switchedon.
Notes."
• In the EASYmode,the MENU,ME DSE,EAE and BLC functionsare notavailable.
• If you wantto use thesefunctions,you must first switchthe EASYmodeoff.
• The EASYmode settingsare storedinthe camera(provideda good lithiumbatteryhas beeninstalled).
D
E_3
STBY
X:XX:XX
EASY
JAN.
[
31, 2004
I
00732M
SCL901
I ENGLISH
SEA
(20-45)
12/26/03
10:45
AM
_P_ge
34
I
Advanced
Recording
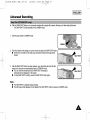
÷ Youcan customizethesettingsand save themfor future use.
• The CUSTOMfunctiononly operatesin CAMERAmode.
1. Setthe powerswitchto CAMERAmode.(see page18)
2. Pressthe MENUON/OFFbutton,to bringupthe MENUlist,
3. Turnthe UP/DOWNdial untilCUSTOMSETis highlighted,
4. Pressthe ENTERbutton,the CUSTOMmenuwillappear.
• Set the statusof each item to what you want.
5. To exit the menu,pressthe MENUON/OFFbuttontwice.
6. By pressingthe CUSTOMbutton,the customsettingswill come up,
• Date/rime andTitle will onlyappear ifthese have beenset in advance,
• The word "CUSTOM"will be displayedon the LCDat the sametime.
Example: When the CUSTOMSET is set as follows;
7. Pressthe START/STOPbuttonto startrecording,
• Recordingwill begin usingthe new CUSTOMsettings,
8. To switchCustomoff, pressthe CUSTOMbuttononce,
• The camerawill revertto the settingsthatwere set priorto
the CUSTOMmodebeingswitchedon,
Note:
• The CUSTOMsettingswill be storedin the camera
(providinga goodlithium batteryhas beeninstalled).
"CUSTOM
SETTING
STBY
D_S......................ON
1
•
Presslngthe
_880x
DATE/TiME
/ _II,£TC_M
_,'_'_'s,,L
::::::::_oo=-_-,
TITLE
..................
CONTINUE
_OG_M_E_,
|
......
buffon
dis_la.s
i=..........
'
/.n
i_
|_.
]
-0:00:o3
.
CONGRATULATIONS
/
|
o,
..................
j ., ..... j
EXIT:
MENU
ONTINUE
JAN 1,2OO4
00732M
SCL901
SEA
(20-45)
12/26/03
10:45
AM
_P_ge
35
I ENGLISH I
Advanced
Recording
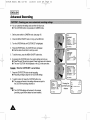
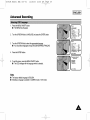
÷ The DISfunctionworks in CAMERAmodeonly.
÷ DIS (DigitalImageStabilizer)is a handshakecompensationfunctionthat compensatesfor any shakingor movingof the hand holding the camcorder(withinreasonablelimits).
•
•
Recordinginthe Zoom In mode
Recordinga smallobjectclose-up
÷ •It providesmorestable
pictureswhen:
windowof
a vehicle
• Recordingthroughthe
Recordingand walkingat
thesame
time
?{"<_"¢_<
_{(P2_ [t.L
]_[
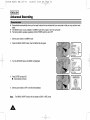
1. Set the powerswitchto CAMERAmode.(See page18)
• Open the LCD Screenand adjustit to see comfortably.
2. Pressthe MENUON/OFFbutton.
• The MENU listwill appear.
J
IS........................ OFF /
D.ZOOM .............. OFF
WHITE 8AL ..........AUTO
DISPLAY .............. ON
LANGUAGE ..........ENGLISH
WL REMOCON ....ON
EX_ MENU
•
I
LCDADJUST
3.
Turnthe UP/DOWNdial to DIS.
WL
4.
Press ENTER.
•
The DISsettingwill change.
J
J
D.zooM .............. OFF |
WHITE 8AL ..........AUTO
DISPLAY .............. ON
LANGUAGE ..........ENGLISH
REMOCON
NEX_
....ON
MENU
•
I
|
5.
Pressthe MENU ON/OFFbuttonto end the setting.
•
When the DISis set, the DISmark
(_) willdisplayedon the OSD.
D.ZOOM .............. OFF |
WHITE 8AL ..........AUTO
DISPLAY .............. ON
LANGUAGE ..........ENGLISH
WL
REMOCON
NEX_
Notes: 1. It is recommendedyou deactivatethe handshakecompensationfunctionwhen usinga tripod.
2. The DISfunctionwill not operateinthe DSEmode.
3. The MENUON/OFFfunctionwillnot operatein EASYmode.
MENU
....ON
00732M
SCL901
I ENGLISH
SEA
(20-45)
12/26/03
10:45
AM
_P_ge
36
I
Advanced
Recording
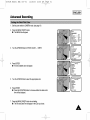
÷ The MF/AFfunctionworks in the CAMERAmodeonly.
÷ In most situations,it is betterto use the AutomaticFocusfeature,as itenablesyou to concentrateon the creativeside of your
recording.
÷ Manualfocusingmay be necessaryunder certainconditionsthat make automaticfocusing inadequate.
÷ The AF (Auto Focus)mode is setautomaticallywhenyou switchon the Power switch.
÷ If you are inexperiencedwith camcorders,we recommendthat you use the Auto Focusmode.
÷
Inthe followingsituations,you shouldobtain betterresultsbyadjustingthefocus
manually.
a. A picturecontainingseveralobjects,some closeto the camcorder,othersfurther away.
b. A personenvelopedinfog or surroundedbysnow.
c. Veryshinyor glossysurfaceslike a car.
d. Peopleor objects movingconstantlyor quicklylikean athleteor crowd.
1. Setthe powerswitchto CAMERAmode.(see page18)
2. Pressthe MF button.
3. Zoom in the subjectto be recordedby pushingthe ZOOMtab to the "T"side.
00732M
SCL901
SEA
(20-45)
12/26/03
10:45
AM
_P_ge
37
I ENGLISH I
Advanced
Recording
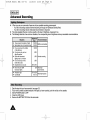
4. Turnthe UP/DOWNdial up or down untilthe objectis focused.
5. Youwill obtaina sharppictureafterzoomingout.
6. To return toAF(AutoFocus),pressthe MF buttonagain.
Note: The MF functionwill not operatein EASYmode.
BLC works inthe CAMERAmode.
Back lightingexistswhenthe subject is darkerthan the background:
The subjectis placedinfront of a window.
The personto be recordedis wearingwhiteor shinyclothesand is placedagainst
a brightbackground;the person'sface is too darkto distinguishtheir features.
The subjectis outdoorsandthe backgroundis overcast.
The lightsourcesare too bright.
The subjectis againsta snowybackground.
1. Set the powerswitchto CAMERAmode.(seepage 18)
2. Press BLC button.
• Normal- BLC - Normal
• BLC enhances only the subject.
Note: BLCfunctionwill not operatein EAE or EASY mode.
* BLCoff
* BLCon
00732M
SCL901
I ENGLISH
SEA
(20-45)
12/26/03
10:45
AM
_P_ge
38
I
Advanced
Recording
÷ The PROGRAMAE functionworks in the CAMERAmodeonly.
÷ The PROGRAMAE modesallow you to adjustshutterspeedsandapertureto suitdifferentrecordingconditions.Theygive you
creativecontroloverthe depthof the field.
÷ There are 6 automaticexposuremodes.
÷ The flicker appearswhen photographingfrom the interiorfluorescentlamp lower part.
1.
AUTO mode
•
•
•
Auto balancebetweenthe subjectand the background.
To be used in normalconditions.
The shutterspeedautomaticallyvariesfrom 1/60to 1/250second,dependingon the picture.
2. SPORTSmode ( _
•
3.
)
For recordingpeopleorobjectsmovingquickly;youshouldable to play backthe pictureinslow motionon an 8 mm VCR or
stop on a given imagewithverylittleblur.
PORTRAITmode( _
•
•
)
For focusingonthe backgroundof thesubject,thebackgroundbeing outoffocus.
The PORTRAITmodeis most effectivewhenusedoutdoors.
Theshutterspeedautomatically
variesfrom 1/60to 1/1000second,dependingonthepicture.
4. SPOTLIGHTmode( _
•
•
5. SANDISNOWmode ( _
•
•
)
Torecordcorrectly
whenthere isonlylight onthe subjectand notthe rest ofthepicture.
Theshutterspeed is1/60second.
)
For recordingwhenthe peopleor objectsaredarkerthanthe backgroundbecauseofreflectedlightfrom sand orsnow.
Theshutterspeedautomatically
variesfrom 1/60to 1/250second,dependingonthepicture.
6. HSS(High SpeedShutter)mode( _ )
•
•
For recordingfast-movingsubjectssuch asthe playersin golf or tennisgames.
Youmay needto lightthe recordingarea.
00732M
SCL901
SEA
(20-45)
12/26/03
10:45
AM
_P_ge
39
I ENGLISH I
Advanced
Recording
1. Set the powerswitchto CAMERAmode.(seepage 18)
2. Press the EAE button, the (_)
symbol will be displayed.
3. Pressthe EAE buttonuntilthe appropriatesymbolis displayed.
•
No Display:Auto mode.
Notes:
• The screenstatusthat is changedby the EAE buttonwill be recordedonthe tape.
• To endthe P.AEfunction,press the P.AEbuttononce or severaltimes, untilthe PAE Icon is no longerdisplayed.
• The P.AEfunctionwill not operatein EASYor CUSTOMmode.
• The BLCfunctionwill notoperatein P.AEmode.
0:00:00
STBY]
JAN. 31,2004
00732M
SCL901
SEA
I ENGLISH
(20-45)
12/26/03
10:45
AM
_P_ge
40
I
Advanced
Recording
÷ The digitaleffectsenableyou to givea creativelookto your recordingby addingvariousspecialeffects.
÷ Selectthe appropriatedigitaleffectfor the type of picturethatyou wish to record.
÷ There are severalDSE modes.(SCL901:8 modes,SCL906/L907:9modes)
1. Normalpicture.
2. STROBE:This modeworks by insertinga cuttingeffect onthe image.
There are 50 fieldsina normalrecordedpicture.(SCL906/L907only)
3. SEPIA:This modegivesthe imagea SEPIAeffect.
4. B&W(Black& White):This modeallowsthe imageto berecordedin blackandwhite.
5. NEG.(Negative):This modeallowsimagesto be recordedby reflectingthe colorof the
image.
6. MIRROR:This modecuts the imagein half, usingthe mirroreffect.
7. ART:Adds a paint-likeeffect,called solarization,to the image.
8. MOSAIC:This modegivesthe imagea checkereddesign.
9. 16:9(WIDE):This modeprovidesa 16:9(WIDE)televisiondisplay.
10. CINEMA:This modecoversthe upper/lowerportionof thescreen to give a movie-like
effect.
Notes: •
•
DIS functionwill notoperatein DSEmode.(SCL906/L907only)
DSEfunctionwill notoperatein EASYmode.
\
I
/
00732M
SCL901
SEA
(20-45)
12/26/03
10:45
AM
_P_ge
41
I ENGLISH I
Advanced
_l_ii_
Recording
_ _6rdi_g
DSE effe_
1. Set the powerswitchto CAMERAmode.(seepage 18)
2. Pressthe DSEbutton,STROBEor SEPIAwill be displayed.
EPIA
3. Keeppressingthe DSEbutton,until the desiredmodeis displayed.
4. Pressthe START/STOPbuttonto startrecording.
5. To exit the DSEfunctions,pressthe DSEbuttononce or severaltimesuntil no DSE
mode is displayedon the LCD.
Notes: •
__
•
It is recommendedthatyou setthe DSEmode inSTBY mode.
DSEfunctionswill not operatein EASYmode.
00732M
SCL901
I ENGLISH
SEA
(20-45)
12/26/03
10:45
AM
_ge
42
I
Advanced
Recording
÷ Settingand recordingthe date/timefeatureworks inthe CAMERAmodeonly.
÷ Youcan recordthe date/timeon yourtapes, so you will knowwhen itwas made.The dateand time are recordedwheneverthey are
displayedon theviewfinderor LCD.
÷
Settingthe DATE/TIMEis possiblein STANDBYof CAMERAmodeonly.
1. Makesure thatyou have installedthe LITHIUMBATTERY.(see page17)
The LITHIUMBATTERYis neededto maintainthe clock.
2. Setthe powerswitchto CAMERAmode.(see page18)
3. Pressthe MENUON/OFFbutton,then the MENUlistwill appear.
'_ NU
_DJ_ST
:
EX_ MENU
4. Turnthe UP/DOWNdial untilCLOCK SET is highlighted.
MENU
U_IQ_
_ET
TITLE .................... OFF
D/T$TLE COLOR ..WHITE
C.RESET .............. 0:00:00
DEMO .................. OFF
![TLE SET
EX_ MENU
PressENTER.
• CLOCKSETTINGis possiblewhenthe DATEand TIMEappear.
• BLINKINGindicatesthe possiblechangesfor the setting.
The year will be thefirst to blink.
12:00 AM
:LOCK
ETTING
EXIT: MENU
6. Turnthe UP/DOWNdial to setthe desiredyear.
]
D.ZOOM .............. OFF
WHITE 8AL .......... AUTO
DISPLAY .............. ON
LANGUAGE .......... ENGUSH
WL REMOCON ....ON
00732M
SCL901
SEA
(20-45)
12/26/03
10:45
AM
_P_ge
43
I ENGLISH I
Advanced
Recording
7. Press ENTER.
• The monthtoberesetwillblink.
8. Turnthe UP/DOWNdialto setthe desiredmonth.
]
"CLOCK SETTING
12:00 AM
_F_, 2005
EX$_ MENU
9. Press ENTER.
• The day to be resetwill blink.
10.Youcan set the day,hour and minutefollowingthe same procedureusedfor
settingthe yearand month.
rCLOCK SETTING
12:00 AM
EX$_ MENU
11.PressENTERafter settingthe minuteand theclocksettingscreenwilt disappear.
The selecteddateand timewilt thenbe displayed.
1. Make surethat you haveset the DATE/TIME.
2. Set the powerswitchto CAMERAmode.(seepage 18)
• Open the LCD Screenand adjustit to see comfortably.
3. Pressthe DATE/TIMEbuttonthe requirednumberof times.
• To recordthe dateonly,press the DATE/TIMEbuttononce.
• To recordthe dateand time, pressthe DATE/TIMEbuttontwice.
4. Pressthe START/STOPbuttonto recordthe DATE/TIMEon yourrecording.
Notes:
•
•
•
If your dateand time settingsare notmaintainedinthe camcorder,it meansthe installedLITHIUMBATTERYis discharged.
(see page17)
Youcannotconcealthe recordeddateor time duringplayback.
The DATE/TIMEfunctionwill notoperatein EASYor CUSTOMmode.
00732M
SCL901
I ENGLISH
SEA
(20-45)
12/26/03
10:45
AM
_P_ge
44
I
Advanced
Recording
+ Selecting and recording a TITLEis possible in the CAMERAmode onl7.
÷ The TITLEfeature allows you to select a preset title stored inthe camcorder's memory.
+ You can also select the language of the titles.
÷ Selectinga languageis possiblein STANDBYin CAMERAmodeonly.
÷ The factory defaultlanguageis ENGLISH.
Youcan change the language.
1. Makesure thatyou have installedthe LITHIUMBATTERYor havethe adapterattached.(seepage 17)
2. Setthe powerswitchto CAMERAmode.(see page18)
• Open the LCD Screen andadjustit to see comfortably.
3. Pressthe MENUON/OFFbutton.
The MENUlistwill appear.
MENU 1
D.ZOOM .............. OFF
WHITE
BAL
.......... AUTO
DISPLAY .............. ON
LANGUAGE ..........ENGLISH
WL REMOCON ....ON
EXIT: MENU
4. Turnthe UP/DOWNdial untilTITLE SET is highlighted.
CUSTOM SET
MENU
D/TITLE COLOR ..WHITE
C.RESET .............. 0:00:00
DEMO .................. OFF
TITLE .................... OFF
EXIT: MENU
•
5. PressENTER.
• A listof availablelanguageswillappear.
LANGUAGE SELECT
•
/FRAN?AIS
ITALIANO
ESPA_OL
PYCCKI4_I
DEUTSCH
EXI_ MENU
•
00732M
SCL901
SEA
(20-45)
12/26/03
10:45
AM
_P_ge
45
I ENGLISH I
Advanced
Recording
6. Turnthe UP/DOWNdialto selectthe appropriatelanguage.
• Youmay select languagesamongENGLISH/FRAN(_AIS/DEUTSCH/
ITALIANO/ESPANOL/PYCCKHH.
/OEO4C. /
/EsPA O /
FRAN A_S
_TAL(ANO
7. Press ENTER.
• Then,the title listwill appearin the languageyou chose.
I P¥CCK._
)
HAPPY B(RTHDAY
HAPPY NEW YEAR
fL ANN(VERSARY
GRADUATION
HAVING FUN
]
8. TurnUP/DOWNdialto whicheverTITLEyou desire.
9. Press ENTER.
• The selectedtitlewill appearon the screenfor 2 ~ 3 seconds andwill disappear.
At the sametime, the camcorderwill returnto the menu mode.
Note: •
Makesure thatyou have selecteda TITLE.
1. Set powerswitchto CAMERAmode.
• Open the LCD Screenand adjustit to see comfortably.
2. Press MENU.
3. Turnthe UP/DOWNdial untilTITLE...........OFF is highlighted.
4. Press ENTERto chooseamongOFF,AUTO-10S,and CONTINUE.
5. Press START/STOPbuttonto recordthe titlewithyour picture.
• If you wantto changerecordingtime, select titlerecordingtime (OFF,AUTO-10S,CONTINUE)on MENU.
Notes: • The titlemoves horizontallyfrom the rightside to the leftside 10secondsafter you turn on the title.
• MENUON/OFFfunctionwill not operatein EASYor RECmode.
CUSTOM SET
CLOCK SET
MENU SET
TITLE
I
C.RESET .............. 0:00:00
DEMO .................. OFF
[ D/T(TLE
COLOR ..WHITE _
EX)_ MENU
/
00732M
SCL901
SEA
(46-71)
12/26/03
10:46
AM
_ge
46
IENGLISHI
Advanced
÷
Recording
The FADE function works in CAMERA mode only.
4, Youcan give your filmsa professionallook byusingspecialeffectssuchas fading inand out at the beginningor end of a sequence.
1. Beforerecording,hold downthe FADEbutton.
The pictureandsound graduallydisappear(fade out).
2. Press the START/STOPbuttonand at the same time releasethe FADE
button.
Recordingstartsand the pictureand soundgraduallyappear(fade in).
_g FADE iNi FADEOUT)
3. When you wish to stop recording,hold down the FADEbutton.
The pictureandsound graduallydisappear(fade out).
4. When the picturehas disappeared,pressthe START/STOPbuttonto
stop recording.
Hold
the FADE
button
a. FADE
OUT
Gradual
disappearance
a. FADE OUT
(Approx.4 seconds)
b. FADE IN
(Approx.4 seconds)
Gradual
appearance
b. FADE
IN
Release
the
FADE
button
00732M
SCL901
SEA
(46-71)
12/26/03
10:46
AM
_P_ge
47
I ENGLISH
Advanced
Recording
N
÷
With the SNAP SHOT feature, your came,order functions likea regular filmcamera, allowingyou to take single stillpictures.
The SNAP SHOT functionoperates in the CAMERAmode.
1. Set the powerswitchto CAMERAmode.
CAMERA
2. Pointthe Cameraat the imageyou want to recordand press the SNAPSHOT button.
• At thistime, becareful notto shakeyourcamcorderbecausethe imagewill be
blurred.
3. Afterthe SNAP SHOTbuttonhas been pressed,your camcorderwill recordthe still
imagefor 6 seconds,then automaticallyreturnto STANDBYmode.
• Youcan check the remainingtime for SNAP SHOTrecordingby
lookingat the time displayedon the screen.
• Tostop SNAPSHOTrecording,pressthe SNAP SHOTbuttonagain.
Notes:
•
•
The SNAP SHOT is activated during shooting.
The still image will be displayed on the display if the SNAP SHOT button is pressed in CAMERA mode.
I
00732M
SCL901
I ENGLISH
SEA
(46-71)
12/26/03
10:46
AM
_P_ge
48
I
Advanced
Recording
•t, WHITE BALANCEis a recordingfunctionthatpreservesthe unique colorof the object inany recordingcondition.
÷ Youmay select the appropriateWHITEBALANCEmodeto obtain goodcolor qualityof the image.
AUTO:This modeis generallyusedto controltheWHITE BALANCEautomatically.
INDOOR(-._:): ControlsWHITE BALANCEaccordingto the indoorambience.
OUTDOOR('÷:-):ControlsWHITEBALANCEaccordingto the outdoorambience.
1. Set the powerswitchto CAMERAmode.
2. Press the MENUON/OFFbutton,the MENUlistwill be displayed.
3. Turnthe UP/DOWNdial untilWHITEBAL.........AUTOis highlighted.
MENU
D.ZOOM .............. OFF
WHITE BAL .......... AUTO
DISPLAY .............. ON
LANGUAGE .......... ENGLISH
WL
REMOCON ....ON
DIS........................
OFF
EXIT: MENU
4. Press ENTER.
• Youcan set it to INDOORor OUTDOORby pressingthe ENTERbutton.
LCD ADJUST
DIS........................ OFF
MENU
D.ZOOM
.............. OFF
LANGUAGE .......... ENGLISH
WL REMOCON ....ON
DISPLAY
.............. ON
EXIT: MENU
5. Press the MENU ON/OFF button to exit the WHITE BALANCE setting.
LCD ADJUST
DIS........................ OFF
MENU
D.ZOOM
.............. OFF
LANGUAGE .......... ENGLISH
WL REMOCON ....ON
L DISPLAY
.............. ON
EXIT: MENU
Note:
The MENUON/OFFfunctionwill notoperatein EASYor REC mode.
00732M
SCL901
SEA
(46-71)
12/26/03
10:46
AM
_P_ge
49
I ENGLISH I
Advanced
1.
Recording
MENU listON/OFF
button.
•PressThetheMENU
will appear.
2. Turnthe UP/DOWNdial to LANGUAGEand pressthe ENTERbutton.
Mr:ENU
]
........
ot
D.ZOOM..............
OFF
WHITEBAL..........AUTO
DISPLAY..............
ON
LANGUAG_
..........
E_GUS_
WL_MOCO_
....ON
XlT:MENU
3. Turnthe UP/DOWNdial to select the appropriatelanguage.
• Youmay select languagesamongENGLISH/ESPA_IOL/FRANQAIS.
4. Pressthe ENTERbutton.
LCDADJUST
DIS........................
OFF
D.ZOOM..............
OFF
WHITEBAL..........AUTO
DISPLAY..............
ON
_UAGE :
_LI_
[_LR_MOCON....ON
XlT:MENU
J
[ENGLISH]
To exitthe menu, pressthe MENUON/OFFbutton.
• The OSD changeswith the languagewhich is selected.
FRANOAIS
r LANGUAGE
SELECT
_EXIT:MENU
Notes:
•
•
The factory default language is ENGLISH.
Selecting a language is possible in CAMERA mode or VCR mode.
]
00732M
SCL901
SEA
(46-71)
12/26/03
10:46
AM
_P_ge
50
I ENGLISH I
Advanced
÷
÷
÷
Recording
Demonstration automati_ly
shows you the major functions that are included with your _mcorder
easily.
The DEMO function is only available in CAMERA mode when a tape is not in the camcorder.
The Demonstration operates repeatedly until the POWER switch is set to OFE
so that you may use them more
1. Set the power switch to CAMERA mode.
2. Press the MENU ON/OFF button, then the MENU list will appear.
Mf: NOI
llill,ll_;
is.........
o.l
D.ZOOM .............. OFF
WHITE BAL .......... AUTO
DISPLAY .............. ON
LANGUAGE .......... ENGLISH
WL REMOCON ....ON
XFE MENU
3. Turnthe UP/DOWNdial sothat DEMO is highlighted.
CUSTOM SET
CLOCK SET
TITLE SET
TITLE .................... OFF
D/T_TLE
COLOR ..WHITE
MENU
C.RESET .............. 0:00:00
_. EX_ MENU
4. Press ENTERto select ON.
• Demonstrationwill start.
5. Set the powerswitchto OFF to end the Demonstration.
Note:
The MENUON/OFFfunctionwill notoperatein EASYor REC mode.
SAMSUNG
DEMONSTRATION
00732M
SCL901
SEA
(46-71)
12/26/03
10:46
AM
_P_ge
51
I ENGLISH
Advanced
Recording
i
1. Set the power switch to CAMERAmode. (see page 18)
2. Press the MENU ON/OFF button.
• The MENU list will appear.
3. Tum the UP/DOWN dial to D/TITLE COLOR__...WHITE.
CUSTOM SET
CLOCK SET
TITLE SET
MENU .................... OFF
TITLE
D!Ti LE COLO_ .WHIT_
DEMO .................. OFF
C.RESET .............. 0:00:00
EXl_ MENU
Press ENTER.
• A listof availablecolorswill appear.
5. Turnthe UP/DOWNdial to select the appropriatecolor.
6. Press ENTER.
• Pressthe DATE/TIMEbuttonto choosewhetherthe dateand/or
time will be displayed.
7. Pressthe MENU ON/OFFbuttonto end setting.
• TheTitle andDate/Timewillappearin theColoryou chose.
I
00732M
SCL901
SEA
(46-71)
12/26/03
10:46
AM
_P_ge
52
I ENGLISH I
Advanced
÷
Recording
there are onlytwo possiblerecordingenvironments.
recordingoutdoors(Normalrecordingor throughan ND(NeutralDensity)filter).
You will be recordingindoors(Videolight recommended
or required).
single greatestinfluence on picturequalityis the level of brightness,measured in lux.
followingtable lists a few common situations,the correspondinglevel of brightnessand any
When
you use your camcorder,
You will be
÷
The
÷
The
•
•
Snow-covered mountains or fields.
Sandy beach on a hot summer's day
100,000
100,000
•
On a sunny day in the middle
of the afternoon.
•
On a gloomy day, an hour
after the sunrise.
2,000
•
Office with fluorescent
1,000
•
lighting near to a window.
On a sunny day, an hour
before the sunset.
1,000
•
Department store counter.
•
Room lit by two 30W
fluorescent lights,
•
•
Arcade at night.
Candle light.
associated
ND filter recommended.
35,000
Normal recording.
500 to 700
300
Video light
recommended.
150 to 200 Video light required.
10to 15
1. Ejectthe tape thatyou have recorded.(seepage 22)
2.
3.
If you want to protect accidental
Set the POWER switch to OFE
4.
Close
5.
Remove
erasure
of the tape you have
the LENS cover.
the
BATTERY
PACK
from
the camcorder.
recorded,
push the
red tab on the
cassette.
recommendations.
00732M
SCL901
SEA
(46-71)
12/26/03
10:46
AM
_P_ge
53
I ENGLISH I
Playing
back a Tape
÷ To view a tapethat you haverecorded.
÷ Playbackfunctionworks inPLAYERmode only.
÷ There are two ways to see a tape;
• Towatch with LCD:recommendedfor outdooruse.
• Towatch with-IV monitor:recommendedfor indooruse.
+
It is practical to view a tape using the LCD Screen in a car or the outdoors. (see page 28)
÷ It is practicalto use a TV monitorto view tapes indoors.
÷ To playa tape back,theTV mustfeature a compatiblecolor system.(see page63)
has an Audi
÷ Usethe Audio/Videocable suppliedwith yourcamcorder.
• The yellowplug:Video
• The whiteplug:Audio(L)-Mono
÷
You can connect your camcorder to a TV through a VCR.
• Set the input selector on the VCR to LINE.
• The yellow plug: Video
• The white plug: Audio(L)-Mono
Note: To view the cassetteon the televisionscreen,select the channelreservedfor your VCR on the television.
(Referto your VCR or televisioninstructionbook)
00732M
SCL901
I ENGLISH
Playing
SEA
(46-71)
12/26/03
10:46
AM
_P_ge
54
I
back a Tape
Notes:
• SCL901/L906/L907featurea monauralaudio system.If yourTV or VCR featuresa stereoaudio system,connectthe audio
cableto input"L" of your TV or VCR.
• Youcan use an S-VIDEOcable to obtain betterqualityof picturesifyou have a S-VIDEOconnectoron yourTV.
• Whileplaying backon a TV screen,closethe LCD panel.Otherwise,picturedistortionmay occur.
1.
Usethe TV/VIDEObuttonto select VIDEOon yourTV.
2.
Connectpowersource (batteryor AC PowerAdapter)to the camcorder.
Setthe powerswitchto PLAYERmode.
3.
Inserta tape you want to see.
•
Makesure thatSTOP is displayed.
Pressthe I_11(PLAY/STILL)button.
•
The pictureyou recordedappears on theTV after2 to 3 seconds.
•
Press• (STOP)to stop playing.
•
If thetape reachesits end duringplayback,thetape will rewindautomatically.
Notes:
Vibrationfrom the built-inspeakercan causepicturedistortion.
It is bestto turn the built-inspeakeroffwhen yourcamcorderis connectedto the -IV.
The system(Hi8/8mm)is selectedautomatically,dependingon the tapeformat.
This camcarderdoes not supportLPrecordingand playback.
00732M
SCL901
SEA
(46-71)
12/26/03
10:46
AM
_P_ge
55
I ENGLISH
Playing
back
a Tape
Press I1_11(PLAY/STILL)buttonduringplayback.
To resumeplayback,press IHI (PLAY/STILL)buttonagain.
Note: Yourcamcorderwillautomaticallystop if it is leftfor more than5 minutesin STILLmode
without operationinorderto preventtapeand head-drumwear.
ToI_
__
(pi_ _arc_)
FF
Press _'_(FF) or -<'<(REW) buttonsduringplayback.To resumenormal
playback,releasethe buttons.
Zero RETURN(S_906iL907 o61y)
÷ The ZERORETURNfunctionworks in PLAYERSTOPmode.
÷ Youcan Fast Forwardor Rewindto 0:00:00automatically.
1. Set the powerswitchto PLAYERmode.
• Make surethat STOPis displayed.
2. Press the ZERO RETURN button.
• Z.RTN is displayed.
• FF or REW works automatically.
Notes."
• The ZERORETURNbuttondoes not workwhen theTAPE COUNTERreads0:00:00.
• Setthe COUNTERRESETto "C.RESET0:00:00"in MENUmodeat the startof the cassetteor the requiredsequence.
When you wish to find this point on the tapeagain, pressZ.RETURNbuttonwhen playbackis stopped.
I
00732M
SCL901
I ENGLISH
Playing
SEA
(46-71)
12/26/03
10:46
AM
_P_ge
56
I
back
a Tape
÷ The LCDcontrol in PLAYERmodeis identicalto step 3 of the page26, exceptthe powerswitchmust be setto PLAYERmode.
÷ The speaker is turnedON/OFFbyopening/closingthe LCD.
÷ The speakerON/OFFsettingoperateswhenthe LCD is opened.When it is setto OFF,the speakerwon't turn on even after opening the LCD.
MENU
1. Set the powerswitchto PLAYERmode.
2. Press the MENUON/OFFbutton,thenthe MENU listwill appear.
3. Turnthe UP/DOWNdialto SPEAKER.
4. Press ENTER to chooseON or OFE
5. Press the MENUON/OFFbuttonagain to end the SPEAKERsetting.
÷ Speakervolumecan be controlledbyturningthe UP/DOWNdial duringplayback.
]
Note: When the MENUlist is on, volumewill not be changed.
÷ The procedurefor usingDSE inPLAYERmode is the same asthe procedurefor usingDSE inCAMERAmode,exceptthatthe
power switchmust be setto PLAYERinsteadof CAMERA.Pleasereferto pages40 and41.
Note: The STROBE,NEG., MIRROR,MOSAIC,CINEMAand 16:9(WIDE)effectswill not operatewhen yourcamcorderis in PLAYER
mode.
÷ Pressingthe DSE buttonwill scrollthroughthe availablesettings.
Stop at the oneyou require.
00732M
SCL901
SEA
(46-71)
12/26/03
10:46
AM
_P_ge
57
I ENGLISH I
Playing
back
a Tape
÷ This Camcordercan convertan NTSCtape recordedin the SPmodeto the "PAL60"format,allowingyou to view it on a PAL-IV
which hasVerticalsync adjustmentcircuitryfor 60Hz.
"PAL60"is a specialoutputsignal formatwithwhich a PALTV can be used to view a tape recordedby an NTSC recorder.
1. Set powerswitchto PLAYERmode.
2. Insertan NTSC tapeyou want to see.
3. Press MENUON/OFFbutton,thenthe MENU listwill appear.
4. Turnthe UP/DOWNdial to "PALCONV.......OFF".
5. Press ENTER,then it willchangeto
"PALCONV.......PAL60".
• Now you can see the pictureby pressingthe PLAYbutton.
6. Press MENUON/OFFbuttonto end setting.
Notes:
__
1. This Camcordercan notrecord usingthe "PAL60"system.
2. When an NTSCtape is being playedback,the pictureon the monitorscreenshrinks inthe Verticaldirection.
3. If the signal recordedon the tape is in bad condition,the PAL60playbacksystem may malfunction.
4. A PAL recordedtapecan not be normallyplayedbackwhen "PAL60" is set or displayed.
/
00732M
SCL901
SEA
(46-71)
12/26/03
10:46 AM _ge
58
ENGLISH]
USB interface
(SCL907
only)
÷ Youcan easilytransfera still imagefrom a camera, tape,memorytoa PC withoutadditionaladd-oncardsvia a USBconnection.
÷ If you transferdata to a PC,you needto installthe software(Driver,Editingsoftware)suppliedwith thecamcorder.
•
CPU : Intel®PentiumII_ processorcompatibleor better
•
•
Operatingsystem : Windows®98/98SE/ME/2000/XP
RAM : 64 MBor more
•
CD-ROM:4x CD-ROMdrive
•
VIDEO : 65,000-coloror bettervideo displaycard
•
AvailableUSB port
•
Hard Disc: 4GB (8GBrecommended)
Notes:
•
•
•
Intel®PentiumIITMis a trademarkof the IntelCorporation.
Windows®is a registeredtrademarkof the Microso_ Corporation.
All other brandsand names are propertyof their respectiveowners.
I
]
00732M
SCL901
SEA
(46-71)
12/26/03
10:46
AM
_P_ge
59
I ENGLISH I
USB interface
(SCL907
only)
÷ Do notconnectthecamcorderto PC before installingthe program.
÷ If anothercameraor scanneris connected,pleasedisconnectit inadvance.
÷ This explanationis based on Windows®98SEOS.
1. The installprogramautomaticallyoperateswhen the CD is insertedinto CD-ROM.
Note:
Ifthe program installeddoes notoperate,doubleclick Install.exein CD-ROMDrive.
2. Click
to installthe program.
3. Followthe installationinstructions.
00732M
SCL901
I ENGLISH
SEA
(46-71)
12/26/03
10:46
AM
_P_ge
I
USB interface
(SCL907
only)
4. The windowbelow displaysthe folderto installthe program.
• The programis installedin thefollowingfolder.
C:\Programfiles\Samsung\USB
Media2.0
•
Click
60
4.
to change the folder.
5. Connectthe camcorderto PC.
6. PC finds the new hardwareand installsthe driverautomatically.
7. Ifthe driver is installed,the installationis completed.
6.
8. Execute USBMedia2.0 player on the Windowswall paper.
Note:
•
USB Media2.0 User'sManualis includedon theaccompanyingCD inAdobe'sPortableDocumentFormat(PDF).
The user'smanualcan be viewedusingAcrobatReadersoftware,which is also includedon the CD.
(TheAcrobatReader is a freewareproductofAdobe Systems,Inc.)
61
00732M
SCLg01
SEA
(46-71)
12/26/03
10:46
_v[
_ge
I ENGLISH I
USB interface
(SCL907
only)
1. Conned a USBcableto the USBport onthe PC.
2. Conned the otherend of the USB cableinto the propertarminalon the camcorder.(USBjack)
3. Connectthe audiocable ta the Line inputjack of the PC.
If the PC has no Line inputjack, connectthe audio cableto the MIC inputjack.
This connection,however,may producenoisedependingonthe PC.
Notes:
•
•
If you disconnectthe USB cablefromthe PC or the
camcorderwhile transferring,the datatransmissionwill stop andthe datamay be damaged.
If you connectthe USBcable ta a PCvia a USB HUBor simultaneouslyconnectthe USBcablealong withother USBdevices,the
camcordermay notwork properly.
If this occurs,removethe other USBdevicesfrom the PCand reconnectthe camcorder.
USB Cable
USB AUDIO Cable
00732M
SCLg01
SEA
(46-71)
12/26/03
10:46
_v[
_ge
62
ENGLISH]
Maintenance
_!i_i_!_i_!i_i_!_!_:i_!_!iiii_t_!!i_i_i!__i!_!_i!!i_!_!ii_i_!_!i_ii_!!_!!i!_!!i_
¸¸iiii!!_!!i!i!!il
¸¸iiii!!_!!i!i!!il
¸¸iiii!!_!!i!i!!il
¸¸iiii!!_!!i!i!!il
¸¸iiii!!_!!i!i!!il
¸¸iiii!!_!!i!i!!il
¸¸iiii!!_!!i!i!!il
¸¸iiii!!_!!i!i!!il
¸¸iiii!!_!!i!i!!il
¸¸iiii!!_!!i!i!!il
¸¸iiii!!_!!i!i!!il
¸¸iiii!!_!!i!i!!il
¸¸iiii!!_!!i!i!!il
¸¸iiii!!_!!i!i!!il
¸¸iiii!!_!!i!i!!il
¸¸iiii!!_!!i!i!!il
¸¸iiii!!_!!i!i!!il
¸¸iiii!!_!!i!i!!il
¸¸iiii!!_!!i!i!!il
¸¸iiii!!_!!i!i!!il
¸¸iiii!!_!!i!i!!il
¸¸iiii!!_!!i!i!!il
¸¸iiii!!_!!i!i!!il
¸¸iiii!!_!!i!i!!il
¸¸iiii!!_!!i!i!!il
¸¸iiii!!_!!i!i!!il
¸¸iiii!!_!!i!i!!il
¸¸iiii!!_!!i!i!!il
¸¸iiii!!_!!i!i!!il
¸¸iiii!!_!!i!i!!il
¸¸iiii!!_!!i!i!!il
¸¸iiii!!_!!i!i!!il
¸¸iiii!!_!!i!i!!il
¸¸iiii!!_!!i!i!!il
¸¸iiii!!_!!i!i!!il
¸¸iiii!i!i!iil
•
Releasing the Eyecap
1. Pull theVIEW;INDER up and then turn thescrew counter-clockwise.
2. Pull the EYECAP out.
3. Clean the EYECAP and the VIEWFINDER screen with a sof_cloth and
cotton swab or a blower.
• Reattaching the Eyecap
4. Put the EYECAP on the VIEWFINDER.
5. Put the screw back on.
Cleani
Panel
Open the LCD Screen and wipe it gently with a soft cloth. Be careful not to
damage the panel.
_ieaning the Videa H_ads
• To ensure normal reoording and dear pictures, dean the video heads.
• When the playback pictures are noisy or hardly visible, the video heads
may be dirty.
a. Normal Picture
b,c.Noisy Picture
If this happens, dean the video heads with a dry typecassette deaner.
1.
2.
3.
4.
Set the power switch to PLAYER mode.
Insert the deaning tape.
Press the MI (PLAY/STILL) button.
Press the • (STOP) button after about 30 seconds. Check the quality of
the picture using a video cassette. If it is still bad, repeat the operation.
If the problem continues, oontact your local authonzed service center.
Camcorde
1. You must detach the BATTERY PACK from the camcorder when s_ofing.
2. Keep the camcorder in a ventilated, dry and warm place.
3. Do not keep the camcorder in a place where the temperature often
changes, such as in a car.
4. Keep the camcorder in a stable place.
[ °l
00732M
SCLg01
SEA
(46-71)
12/26/03
10:46
_v[
_ge
63
I ENGLISH I
Using Your
Camcorder
Abroad
ii_i!i!!ii:ii_!i!!ii(_!i!i_
'¸i!_i!i_i!_i!i_i!il
¸i!i!!ii!!il
¸¸iiii!!_!!i!i!!il
¸¸iiii!!_!!i!i!!il
¸¸iiii!!_!!i!i!!il
¸¸iiii!!_!!i!i!!il
¸¸iiii!!_!!i!i!!il
¸¸iiii!!_!!i!i!!il
¸¸iiii!!_!!i!i!!il
¸¸iiii!!_!!i!i!!il
¸¸iiii!!_!!i!i!!il
¸¸iiii!!_!!i!i!!il
¸¸iiii!!_!!i!i!!il
¸¸iiii!!_!!i!i!!il
¸¸iiii!!_!!i!i!!il
¸¸iiii!!_!!i!i!!il
¸¸iiii!!_!!i!i!!il
¸¸iiii!!_!!i!i!!il
¸¸iiii!!_!!i!i!!il
¸¸iiii!!_!!i!i!!il
¸¸iiii!!_!!i!i!!il
¸¸iiii!!_!!i!i!!il
¸¸iiii!!_!!i!i!!il
¸¸iiii!!_!!i!i!!il
¸¸iiii!!_!!i!i!!il
¸¸iiii!!_!!i!i!!il
¸¸iiii!!_!!i!i!!il
¸¸iiii!!_!!i!i!!il
¸¸iiii!!_!!i!i!!il
¸¸iiii!!_!!i!i!!il
¸¸iiii!!_!!i!i!!il
¸¸iiii!!_!!i!i!!il
¸¸if!i!
Each countryor area has its ownelectric andTV color system.
Beforeusingyour camcorderabroad,check thefollowing:
•
•
Youcan use your camcorderinany county or area that uses100Vto 240V, 50/60Hz.
Usea commerciallyavailableAC plug adapter,if necessary,dependingon the power used.
•
Youcan view yourrecordingon the LCD or viewfinder.
However,to view a recordingon a televisionor to make a copy to a video cassetterecorder,the televisionor VCR must be
NTSC:SCLg0'I/Lg06/Lg07- compatibleand have the appropriateaudio/videojacks.
i
00732M
SCLg01
SEA
(46-71)
12/26/03
10:46 _3v[ _ge
64
IENGUS"I
Troubleshooting
Troub
#
_ing
;;;
Beforecontactinga servicecenter,performthefollowingsimplechecks.They mightsave you thetimeand expenseof an unnecessary call.
[_=
slow
thebatterypack is
almostdischarged
Changeitto a chargedone.
[_=
fast
thebatterypack is
fully discharged,
Changeitto a
chargedbattery.
TAPE END!
slow
thetape has almost
reachedits end.
Preparea new one.
TAPE END!
no
thetape reachedits end
Changeto a new one.
TAPE!
slow
thereis notape in
thecamcorder.
Inserta tape.
PROTECTION!
slow
thetape isprotected
from recording,
If you want to record,
releasethe protectiontab.
D.EMG
C.EMG
slow
the camcorderhas
some mechanicalfault.
1. Ejectthe tape.
2. Setto OFF
R.EMG
LEMG
3. Detachthe battery.
4. Reattachthe battery.
* Pleasecontactyour
localservice centerif
the problemcontinues.
slow
moisturecondensationhas
formed inthe camcorder.
see page67.
00732M
SCLg01
SEA
(46-71)
12/26/03
10:46
_v[
_ge
65
I ENGLISH I
Troubleshooting
i_i_
!iiiiii_iiii!!!!!iiii_!ii!!_iii_!!!!_iii!
_!!!!_iii!
_!!!!_iii!
_i!iiii!i_ii
!i_i_!_ii!!iiii_:_i!iii_i_iiiii!!_i!_i_ii!ili
iiiii!!_ii!ii!_)iiii_iiii_ii_!i_ill
_iii!
i_!!!!_iii!
_i!iiii!i_ii
!_:_:_:_
_!!!!_iii!
_i!iiii!i_ii
!i_i_!!i_!_!:ii!i!i_!_!_,_,ii:ii!_:ii_i_ii:!iiii!
i_!!!_iii!
_i_ili_ii!i!i!!i!i_!!ii_i_!_i:!_ii::ii_!_ii!_
_iii!
_i:_iiiiiiiiii_!_ii!!
_!!!_iii!
_!!!_iii!
_!!!_iii!
_!!!_iii!
_!!!_iii!
_!!!_iii!
_!!!_iii!
_!!!_iii!
_!!!_iii!
_!!!_iii!
_!!!_iii!
_!!!_iii!
_!!!_iii!
_i_
i!!i
,_ If you run into any problemusingthe camcerder,usethe followingtableto troubleshootthe problem.
,_ If these instructionsdo not allowyou to solvethe problem,take a noteof:
• The modeland serialnumbermarkedon the bottomof thecamcerder.
• Yourwarranty,if applicable.
,_ ThencontactyournearestSamsungauthorizedservicecenter.
Youcannotswitchthe
camccrderon.
_1, Checkthe batterypack(see page'lg) or the AC poweradapter.
(seepage '18)
Start!Stepdoes notoperate
while shooting.
_1, Checkthe POWER,set it to CAMERA.
_1,You have reachedthe endof the cassette.
_1, Checkthe recordprotectiontab on the cassette.(see page22)
Thecamcordergoes off
automatically.
_1,You have lef[thecamcordersetto STANDBYfor more than
5 minuteswithout usingit. (seepage 24)
_1,The batterypack is fully usedup. (see page2'1)
The batteryback is quickly
exhausted.
_1,The atmospherictemperatureis too low.(seepage21)
_1,The batterypack has not beenchargedfully.(seepage 19)
_1,The batteryback is completelydead,andcannot be recharged.
Useanotherbatteryback.
Youcannoteject the cas_1,The batterypack is fully usedup.
sette from the combari]T_ent _1,A mechanicalfault might have occurred.(see page64)
The DATE/TIMEindicator
flashes morethan 2 times
when you setthe camccrder
to CAMERA.
_1,The lithiumbatteryis not installedor is fullyused up.
(seepage '17)
The playbackpictureis poor.
_1,The video heads mightbe dirty. (seepage62)
Youcannotoperateany
functionson the camccrder.
_1,A mechanicalfault might have occurred.(see page64)
00732M
SCLg01
SEA
(46-71)
12/26/03
10:46
_v[
_ge
66
I ENGLISH I
Troubleshooting
,
A vertical stripeappears
when you record a bright
subjectagainsta dark
background(candleflame,
for example).
41, The contrastbetweenthe subjectand the backgroundis toe
greatfor the cam(orderto operatenormally.Makethe
backgroundbrightto reducethe con_'astor use the
BLCfunctionwhileyou are recording.(seepage37)
The imagequality on the
LCD is poor.
41, The use of VIEWFINDERis recommendedwhen recording
undersunlight.(see page7)
Adjustthe LCD.(see page26)
The image inthe viewllnder
is blurred.
41, The viewfinderlens has net beenadjusted.
Turnthe viewfinderfocus ring untilthe screencomesinto sharp
focus.(see page27)
The tapedoes not move
when you pressthe Play,
FastForwardor Rewind
buttons.
41, Setthe POWERswitchto PLAYER.
41, Youhave reachedthe beginningor end of the cassette.
The picturedoes not appear
inthe viewllnder.
41, The LCD Screen is opened.
There is no soundfrom the
SPEAKERwhen playing
backthe tape.
41, Make surethe SPEAKERis ON. (see page56)
The Data/]]meor Title
disappearedeven though
you had it set.
41, The lithium batteryis notinstalledor is fully used up.
(see page17)
00732M
SCLg01
SEA
(46-71)
12/26/03
10:46
_v[
_ge
67
I ENGLISH I
Troubleshooting
!ii_i!ii_it.rei!_i!!i_
t_"_:_:_!_!_ii_)_!_!_i_i_!_i!!i!!i_i_!_:_:_:_i!!i!_!i_i_!_i!!i!_i_i_i!_!!i!_!!!_i!_ii_i_:!_iii_i!ii_i!:i
¸_i_!!i!!_ii_i_i_i_!i_!i_ii_i_i!_i
4, If the camcerderis broughtdirectlyfrom a cold placeto a warm place,moisturemay condenseinsidethe camcorder,
on the surfaceof the tape,or on the lens.In this condition,the tape may stickto the headdrum and be damagedor the unit may net
operatecorrectly.
To preventpossibledamageunderthese circumstances,the camcerderhas a built-inmoisturesensor.
If there is moistureinsidethe camcorder,"DEW( [_ )" isdisplayed.
If this happens,noneof the functionsexceptcassetteejectionwill work.
Open the cassettecompartmentand removethe batteryfor at leasttwo heuls
in a warm dry room.
DEW
Pleasefollow this procedurewhen the DEW protectionfeatureis unexpectedlyactivated
and you want to overrideit:
(Pleasemake surethatthe condensationhas disappearedcompletely.)
1. Takethe batterypack out.
¥
2. Takethe lithiumbatteryout.
3. Put the lithiumbatteryback.
4. Put the batteryback back.
[
]
00732M
SCLg01
SEA
(46-71)
12/26/03
10:46
_v[
_ge
68
I ENGLISHI
Specifications
The design and technical specifications may be changed without notice.
Recordingsystem
Video signal
Usable cassette
Tapespeed
Speed mode
Recordingtime
FF or REW time
Image device
Opticalzoom ratio
Focal length: f
F
Filterdiameter
Focus system
Macro
Min. Illumination
LCD S_re
Size/Picturecell
Method
Video: 2 rotary heads Helical scanning FM
Audio: FM monaural system
NTSC color, EIA standard
Hi8 or 8ram
SP: 14.345mm/sec
Record:SP only Playback:SP only
P6-120:120 rain.
P6-120:approx.6.5 rain.
CCD (Charge Coupled Device)
22x
3.6~79.2 mm
1.6
46 mm
Inner
Auto wide macro
0.3 lux (visible)
I
2.5 inch/112k
TFT
Video out
Audio out
Minijack, 1 Vp-p, 75 ohms, Unbalanced
Minijack, 7.7 dBs, imp.: lessthan 820 ohms
Power requirement
Power consumption
*Recording,LCD ON
Built-inmic
Built-inspeaker
Operatingtemperature
Dimension (WxHxO)
Weight
OC8.4 V (1.5 A)
4.8 W
Condensermic, emni-directional
Dynamic,0.5 W standard
0°C to 40°C (32°F to 104°F)
101x104x169mm (3.98x4.09x6.65inches)
790 g (1.471bs)
00732M
SCLg01
SEA
(46-71)
12/26/03
10:46
_v[
_9e
69
I ENGLISH I
Index
ABROAD
........................................................................................ 63
AC POWER ADAPTER ................................................................ '18
ADJUSTING .................................................................................... 26
AF
....................................................................................................
AUDIO
AUTO
AUTO
AUTO
............................................................................................
FOCUSING ........................................................................
MODE ..................................................................................
POWER OFF ......................................................................
3_
53
36
38
24
EASY ..............................................................................................
EJECT ............................................................................................
ENTER ............................................................................................
EXTERNAL MIC ............................................................................
iii¸!_
ii!i:_
ii_!!:!i
_<;_!_!_:!_:!_:!_:!_:!_:!_:!_:!_:!_:!_:!_:!_:!_:!_:!_:!_:!_:!_:!_:!_:!_:!
¸_:!!!_!_:_!_:!_:!_:!_:!_:!_:!_:!_:!_:!_:!_:!_:!_
¸¸_iiii
FADE IN .......................................................................................... 46
FADE OUT ...................................................................................... 46
i!ii!
¸)i)ii:!
ii!(i
ili!!¸¸¸iii¸¸¸¸¸¸!
!iiiii!i(ii)
i!!i i:::::::::::::::::::::::::::::::
!!_!)(
Bi_!i!i!(:::::::::::::::::::::::::::::::::::::::::::::::::::
ii!ill FAR ..................................................................................................
BATTERY ........................................................................................
BATTERY LEVEL ..........................................................................
BAI-I-E RY PACK ............................................................................
BLC ..................................................................................................
BRIGHTNESS ................................................................................
'19
2'1
'19
37
26
ii!i
ii¸(i¸!ii!
(il¸il)i
i¸()!ilil i:i::::::::::::::::::::::::::::::::::::::::::::::::::::::::::::::::::
_i_!
iC!!_i!
_i!il
(!!i
¸_i
CAMERA ........................................................................................ '18
CASSETTE .................................................................................... 22
CASSETTE HOLDER .................................................................... '1'1
CLEANING ...................................................................................... 62
COLOR .......................................................................................... 26
CONTENTS ...................................................................................... 2
COUNTER ...................................................................................... 55
CUSTOM ........................................................................................ 34
DATE ..............................................................................................
DATE/TIME ....................................................................................
DC CABLE ......................................................................................
DEMO ............................................................................................
DEW ................................................................................................
DIGITAL ZOOM ..............................................................................
DIMENSIONS ................................................................................
DIS ..................................................................................................
DISPLAY ..........................................................................................
DSE ................................................................................................
42
42
'18
50
67
3'1
68
35
'12
40
33
22
26
68
36
FF--(IFASTFORWARD) .................................................................. 55
FILTER DIAMETER ........................................................................ 68
FOCAL LENGTH ............................................................................ 68
iiii_iiii
!iii_
_(!:i¸¸i::i)ii_i!
¸I i!!ii:!ii:i(ii!
iiiiiiiilliiilliilliiilliiilli!i_iH_!iii¸(il
i¸i_!
iiiiiIiiilliiilliiilliiilliiilliiilliiilliiilliiilliiilliiilliiilli
HAND STRAP ................................................................................ 16
Hi8 .................................................................................................... 54
ii_ii
il!i!
i:!i_!iiillilifill
iifill
iifill
iifill
iifill
iifill
iifill
iifill
iifill
iifill
iifill
ii(_>
L!ii
_ii¸i_!iiilfill
i¸¸I
fill
i¸¸I
fill
i¸¸I
fill
i¸¸I
fill
i¸¸I
fill
i¸¸I
fill
i¸¸I
fill
i¸¸I
fill
i¸¸I
fill
i¸¸I
fill
i¸¸I
fill
i¸¸I
fill
i¸¸I
i¸¸I
¸
LCD .................................................................................................. 26
LENS ................................................................................................ 9
LITHIUM BATTERY ........................................................................ 17
LOCK .............................................................................................. 18
MIRROR ..........................................................................................
MOISTURE ....................................................................................
MOSAIC ..........................................................................................
MULTY PLAYBACK ........................................................................
40
64
40
57
iiii!!!i!
!i:iii¸¸!iil
!!i:((il
¸¸¸::
:ii_:i!
i_¸¸¸¸¸
:i¸¸:
:i¸::¸¸:¸
i:i¸:
:i¸¸:¸
:i¸::¸¸:¸
i:i¸::¸¸:¸
i:i¸::¸¸:¸
i:i¸:
:i¸¸:¸
:i¸::¸¸:¸
ii_i¸I"1;
;_i(i
(¸¸¸¸¸¸
ii¸:i!:
¸:¸¸:¸
i:i¸::¸¸:¸
i:i¸::i¸¸:¸
:i¸:
:i¸¸:¸
:i¸::¸¸:¸
i:i¸::¸¸:¸
i:i¸::i¸¸:¸
:i¸:
:i¸¸:¸
:i¸::¸¸:¸
i:i¸::¸¸:¸
i:i¸::i¸¸:¸
:i¸:
:i¸¸:¸
:i¸::¸¸:¸
i:i¸::¸¸:¸
i
ND FILTER ...................................................................................... 52
NEAR..............................................................................................
36
NEG................................................................................................ 40
NTSC..............................................................................................
63
SCLg01
SEA
(46-7Z)
12/26/03
10:46
_lv[ _9e
70
I ENGLISH I
Index
START/STOP .................................................................................. 23
OPERATIONMODE......................................................................
13
STILL ............................................................................................... 55
OSD.................................................................................................
12 STOP .............................................................................................. 54
PLAY ................................................................................................
PLAYER ...........................................................................................
PORTRAIT MODE ..........................................................................
POWER CONSUMPTION .............................................................
POWER REQUIREMENT .............................................................
POWER SWITCH ...........................................................................
PROGRAM AE ...............................................................................
54
54
38
68
68
18
38
STROBE .......................................................................................... 40
SYSTEM .......................................................................................... 68
S-VIDEO ......................................................................................... 54
TAPE
TAPE
TAPE
TIME
COUNTER ............................................................................
EJECT ..................................................................................
END ......................................................................................
................................................................................................
13
22
64
42
il_iili:!i!!i:i!iii
iii!!i!iii
i _iiililliiiiii_i!i_iii!ii
:ii:ii!i!
_ii!ii
:ii:ii!i_
_i:____i:__ :_:i_
_ :_:i_
_ :_:i_
_ :_:i_
_ :_i TITLE...............................................................................................
44
....
TV MONITOR.................................................................................
53
RECHARGING...............................................................................
19
RECSEARCH ...............................................................................
24
REMOTECONTROL.....................................................................
15
REW(REWlNDI ............................................................................
55 VIDEO .............................................................................................
53
VIDEO HEAD
62
..................................................................................
00732M
VOLUME.........................................................................................
56
SAFETY INSTRUCTIONS; ............................................................... 4
SAND/SNOW MODE ..................................................................... 38
SELF-30S ........................................................................................ 15
SELF-END ..................................................................................... 15
SELF DIAGNOSIS ........................................................................ 64
SELF RECORD .............................................................................. 15
SELF TIMER ................................................................................... 15
SEPIA .............................................................................................. 40
SHOULDER STRAP ...................................................................... 17
SNAP SHOT ................................................................................... 47
SPEAKER ....................................................................................... 56
SPECIFICATIONS .......................................................................... 68
SPORTS MODE ............................................................................. 38
SPOTLIGHT MODE ....................................................................... 38
ii!!!iii !!i! il_iii;!:ii:i::::::::::::::::::::::::::::::::::::
i_iW i_¸!ii¸!I
I!_
!!:i::
:::::::::::::::::::::::::::::::::::::::::::::::::_
WAIT-10S........................................................................................
15
WEIGHT..........................................................................................
68
WHITEBALANCE..........................................................................
48
ZERO RETURN..............................................................................
55
ZOOM..............................................................................................
30
00732M
SCLg01
SEA
(46-71)
12/26/03
10:46
_v[
_ge
71
I ENGLISH I
Warranty
(SEA Users Only)
SAMSUNG
LIMITED WARRANTY
SAMSUNG Electronics America Inc. (SEA), warrants that this product is free from defectivematerial and
workmanship.
SEA further warrants that if product fails to operate properly within the specified warranty period and the failure is
due to improper workmanship or defective material, SEAwill repair or replace the product at it's option.
All warranty repairs must be performed by a SEA authorized service center. The name and address of the
location nearest you can be obtained by calling toll free: 1-800 SAMSUNG (1-800-726-7864).
Labor
90 days carry-in
Parts
1 year
On carry-in models, transportation to and from the service center is the customer's responsibility.
The original dated sales receipt must be retained by the customer and is the only acceptable proof of purchase.
It must be presented to the authorized service center.
EXCLUSIONS (WHAT IS NOT COVERED)
This warranty does not cover damage due to accident, fire, flood and/or other acts of God; misuse,
incorrect line voltage, improper installation, improper or unauthorized repairs, commercial use,
or damage that occurs in shipping.
Exterior and interior finish, lamps, and glass are not covered under this warranty.
Customer adjustments which are explained in the instruction manual are not covered under the terms of this
warranty. This warranty will automatically be voided for any unit found with a missing or altered serial number.
This warranty is valid only on products purchased in the United States and Puerto Rico.
Some States do not allow the exclusions or limitations of incidentalor consequential damages, or allow
limitations on how long an implied warranty lasts, so the above limitations or exclusions may not apply to you.
This warranty gives you specific legal rights, and you may also have other rights which vary from State to State.
12/26/o3
(1-19)
00732M
SCLg01
10:39
SEA
Nv[
¢_e
I00
IENGL=SHI
THIS CAMCORDER
IS MANUFACTURED
BY:
i_iii_iii_iii_iii_iii_iii_iii_iii_iii_iii_iii_iii_iii_iii_iii_iii_iii_iii_iii_iii_iii_iii_iii_iii_iii_iii_iii_iii_iii_iii_iii_iii_iii_iii_iii_iii
............
......
_ii_iiiiiiiiiiiiiiiiiiiiiiiiiiiiiiiiiiiiiiiiiiiiiiiiiii
,',
,,
T
SERVICE
T+::
,II
• 4:,,,
DIVISION
400 Valley Road, Suite 201, Mr. Arlington
Tel: 1-800-SAMSUNG
(1-800-726-7864)
*Samsung
Electronics'
http:iiwww.samsu
+:::
N.J. 07856
Internet Home Page
ng usa.corn
AD68-00732M