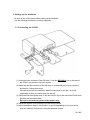
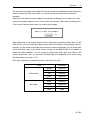
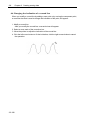
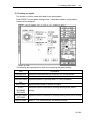
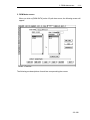
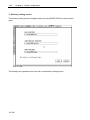
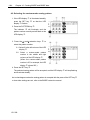
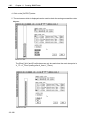
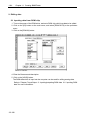
1
BAS-PC/300
INSTRUCTION MANUAL
Programming Software
For Electronic Pattern Sewer
Please read this manual before using the machine.
Please keep this manual within easy reach for quick reference.
Before you begin
Thank you for purchasing the BAS-PC/300 Ver. 5.00E, Programming Software for
Electronic Pattern Sewer.
Be sure to read this instruction manual carefully before using the BAS-PC/300.
Precautions
·Unauthorized commercial or industrial use of trademarks or copyrighted materials (such
as paintings, drawings, photos, logos, etc.) owned by other companies or persons is
illegal. The use of such materials without the permission of their owner may result in
criminal or civil liability.
·No part of this publication may be reproduced, stored in a retrieval system, or transmitted
in any form or by any means, mechanical, photographic, electronic, or otherwise, without
the prior written consent of Brother Industries, Ltd. (You can copy this software by
backing it up as many times as you want.)
·When you want to use the BAS-PC/300 for several machines simultaneously, you need as
many BAS-PC/300 as the number of machines.
·The BAS-PC/300 software may be revised without notice for the purpose of improvement.
·No patent liability is assumed with respect to the use of the information contained herein.
While every precaution has been taken in the preparation of this manual, Brother
Industries, Ltd. assumes no responsibility for errors or omissions, nor for any damage
resulting from the use of the information contained herein.
·IBM-DOS and IBM-PC/AT are registered trademarks of International Business Machines
Corporation in the U.S.
MS-DOS and Windows95/98 are registered trademark of Microsoft Corporation in the U.S.
Pentium and Celeron are trademarks of Intel Corporation in the U.S.
Other company names and product names mentioned in this manual are trademarks,
registered trademarks or products of each company.
151-390
1. Main functions
Function
Description
CREATE The following different programming features are available: STITCH, BASTE, FEED,
CODE, LINE, CURVE, CIRCLE, ARC, ELLIPSE and PATTERN.
Copying (parallel,mirror,rotation,magnification/reduction,offset,multiple)
EDIT
Moving (parallel,mirror,rotation,magnification/reduction,offset)
Deleting (range,all,1 item)
Point modifying (add,move,delete)
CHANGE Conversion from outline data to stitch data, and changing of settings for sewing
attributes, sewing order, sewing direction, feed attributes, code attributes, and data
conversion.
SET
Machine model, frame position, maximum pitch, tracing margin, zigzag deviation,
connection method between data can be set.
FILE
Data you create can be saved to, read from, or deleted from floppy disks for use with
the BAS-300 series.
I/O
Outputs data you create to each respective machine, and inputs each machine's or
embroidery data or CAD data into the BAS-PC/300.
CONFIG System configuration, directory, digitizer, and scale can be set.
151-390
2. Specifications
BAS-PC/300
BAS-304,BAS-311,BAS-314,BAS-326,
BAS-326L,BAS-341
BAS-304A,BAS-311A,BAS-314A,BAS-315A,
Applicable models
BAS-326A,BAS-326LA,BAS-341A,BAS-342A,
BAS-364,BAS-366,BAS-370,BAS-375
BAS-311E,BAS-311EL,BAS-326E,BAS-326EL
BAS-341E,BAS-342E,BAS-343E
BAS-705
BAS-752,BAS-753,BAS-754,BAS-755,
BAS-760,BAS-761
B430E,B431E,B432E,B433E,B434E
B438E,B448E
B430E MarkII, B431E MarkII
B432E MarkII,B433E MarkII,B434E MarkII
B438E MarkII,B448E MarkII
B800E
B855E (B856E)
B981
Maximum number of stitches
30,000 stitches
Maximum setting area
1600 × 1600 mm
Pitch interval
0.1 mm
Minimum pitch
0.1 mm
Maximum pitch
100.0 mm
Zigzag width
0.1-100.0 mm
Zigzag pitch
0.1-100.0 mm
Zigzag deviation
Equal/unequal
Maximum number of plot points
1,000 points
on curved line
Magnification/reduction method
Fixed pitch / Fixed no. of stitches
Magnification/reduction ratio
0.1-1,000%
151-390
FD 300
Dimensions
75 × 280 × 180 mm
Mass
2.5 kg
Power source
Single-phase 100-240 V 50/60 Hz
151-390
3. Contents of the BAS-PC/300 package
Your BAS-PC/300 package should contain the following items:
Items enclosed in a dotted rectangle are different according to the machine specification.
Instruction manual
System disk
FD300
Security device
Power cord
PRW-1
RS cable
151-390
4. System requirements
(a) Computer
IBM PC/AT compatible personal computer with the following requirements:
·For CPU, Pentium, Celeron, or the other processor which has a compatibility with
them is necessary.
·640 KB main memory min. (at least 600 KB free space)
·3.5 high-density floppy disk drive
·Hard disk (at least 10 MB free space)
·VGA graphic adapter (640 × 480 dots)
·Serial interface (2-channel serial interface if you use digitizer)
(b) Operating system
·IBM-DOS ver.5.00 or later
or MS-DOS ver.5.00 or later
or Microsoft Windows95 or 98
(c) Associated equipment
·Bus mouse
·CRT (VGA equivalent 640 × 480 dots)
·Digitizer
·ROM Writer
151-390
5. Recommended model
The following are list of models that are available on the BAS-PC/300 as a result of testing
operation.
Digitizer
Manufacturer
HITACHI
GRAPHTEC
Model
HDG-1212G
KD-5500,KD-4320
KD-4300,KW-4610
ROM Writer
Manufacturer
Model
BROTHER
PRW-1
151-390
Setting Up the System
1. Setting up the hardware
Be sure to turn off the power before setting up the hardware.
Use the following procedure to connect equipment.
1-1 Connecting the FD300
(1) Insert the male connector of the RS cable • into the RS-232C-2 port on the rear of
the FD300, and secure it using the screws.
(2) Attach the female connector of the RS cable • to the serial port of your computer,
and secure it using the screws.
If the serial port has two channels, attach the connector to port No.1 or port A
(depending on how your serial ports are named).
(3) Insert the end of the power cord ‚ into the inlet (AC IN) on the rear of the FD300, and
the other into a power socket.
Be sure to connect the ground of the power cord.
(4) Install the digitizer while referring to its instruction manual.
(5) Insert the digitizer cable ƒ into port No.2 or port B (depending on how your serial
ports are named), and secure it using the attached screws.
151-390
-2-
1. Setting up the hardware
ž he digitizer requires a serial port with two channels.
ž Refer to the following table for the settings of the digitizer:
Digitizer
Baud
Data
Parity
rate
length
HITACHI-2
9600
8
None
GRAPHTEC(1)
9600
8
GRAPHTEC(2)
9600
NUMONICS
Stop Bit
Output
Output
Resolution
mode
format
(mm)
2
Point
Binary
0.1
None
2
Point
Binary(8)
0.1
8
None
2
Point
Binary(5)
0.1
9600
8
None
2
Stream
Binary
0.025
BIT PAD
9600
7
Even
2
Point
Binary
0.1
MM
9600
8
None
1
-
Binary
0.1
A ROM writer is required for a machine which stores data on a ROM chip (e.g.
B430E); it is preferable to use Brother specified PRW-1 ROM writer.
(6) Insert the female connector of the RS cable „ (which is supplied with the PRW-1),
into the conversion plug …, and that into the RS-232C-1 socket at the rear of the
FD300. Tighten the screws.
(7) Insert the male connector of the RS cable „ into the female connector on the rear of
the ROM writer. Tighten the screws.
(8) Connect the power supply cable † to the ROM writer.
The Brother's original ROM writer (PRW-1) can be substituted for one of another
manufacturer.
It must be an RS232C ROM writer, connected to the FD300 in the same way as the
PRW-1, using an RS cross patch cable.
If you use a commercially available ROM writer, set according to the following:
Baud rate
Data length
Parity
Stop bit
Xon/Xoff
Data format
9600
8
None
1
None
Binary
151-390
1. Setting up the hardware
-3-
1-2 When the FD300 is not used
This system can be used without the FD300 by directly connecting the ROM writer to the
personal computer. In such a case, a security device that will prevent illegal use of the
BAS-PC/300 is required.
(1) Connect the security device • to the printer port of the personal computer.
(2) Insert the RS cable ‚ of the digitizer into the serial port of the personal computer
while referring to 1-1 4.
(3) Insert the female connector of the RS cable ƒ for the ROM writer (PRW-1) into port
No.1 or port A (depending on how your serial ports are named), and secure it using
the attached screws.
(4) Insert the male connector of the RS cable ƒ into the female connector of the rear of
the ROM writer (PRW-1), and secure it using the attached screws.
(5) Attach the power cable „ to the ROM writer (PRW-1).
The Brother's original ROM writer (PRW-1) can be substituted for one of another
manufacturer.
Set the ROM writer while referring to the table at the end of 1-1.
151-390
-4-
2. Installing the BAS-PC/300
2. Installing the BAS-PC/300
Before installing the BAS-PC/300, IBM-DOS or MS-DOS and a mouse driver (or
Windows95/98) should be installed on your computer.
Refer to the IBM-DOS or MS-DOS manual as to its installation.
(1) Turn on your computer.
(2) Insert the BAS-PC/300 System Disk1 into drive A.
(3) For Windows95/98, click on the [START] button and select [RUN].
(4) Type the following command:
a: install
When the following message appears, insert the floppy disk marked “System Disk 2”
into drive A and then press any key.
Insert the BAS-PC/300 system disk No.2 into drive A.
BAS-PC/300 install program Ver.X.XXE
Copyright(c) XXXX-XXXX
BROTHER INDUSTRIES,LTD. ALL RIGHT RESERVED.
Installing...
Insert the BAS-PC/300 system disk No.2 into drive A.
Press any key to continue...
Installing...
BASPC300 directory has been made in drive c:
Finished
When the above procedure is completed, the directory for the BAS-PC/300 will be created,
then the BAS-PC/300 will be installed.
The system disk is necessary for re-installation. Take care not to lose it.
151-390
3. Starting the BAS-PC/300
-5-
3. Starting the BAS-PC/300
Use the procedure below to start the BAS-PC/300.
When you use IBM-DOS (MS-DOS)
(1) Turn on your computer system.
Turn on the computer first, then the FD300, and the digitizer.
(2) Type the following command:
cd
baspc300
(3) Type
baspc300
The BAS-PC/300 will start.
(4) Press the left mouse button to display the initial screen.
When you use Windows95
(1) Turn on your computer system.
Turn on the computer first, then the FD300, and the digitizer.
(2) Double-click on [My computer].
(3) Double-click on [Drive (C)].
(4) Double-click on the [BASPC300] folder
(5) Double-click on the BAS-PC/300 start icon
.
.
When the BAS-PC/300 start icon is registered on the desktop, it will always be on the
screen.
NOTE:
Before starting the BAS-PC/300, make sure that all other programs should be over.
151-390
-6-
4. Exiting the BAS-PC/300
4. Exiting the BAS-PC/300
Use the procedure below to exit the BAS-PC/300.
(1) Click the [EXIT] button on the main menu.
The following dialogue box will appear:
(2) Select YES.
If you have edited data, the following dialogue box will appear:
Select YES; the system will exit without renewing data.
Select NO; the system will return to the edit screen. Save the data, and quit the BASPC/300.
(3) Turn off your computer system.
When DOS prompt appears, turn off the digitizer, the FD300, and the computer, in
this order.
151-390
5. Setting the system configuration
-7-
5. Setting the system configuration
Use the procedure below to set the system configuration.
(1) Start the BAS-PC/300.
(2) Set the size for CRT.
(Refer to chapter 8 System configuration.)
If you use digitizer, you should set the following items referring to chapter 8:
ž Set the pointing device to digitizer.
ž Select the type of the digitizer, and the ratio of data to be inputted.
ž Exit the BAS-PC/300, and restart it. The digitizer can be used.
ž Set the operation range of the digitizer.
If you use a ROM writer, select its type. (Refer to chapter 8.)
The BAS-PC/300 will start under this condition.
151-390
-8-
7. When the BAS-PC/300 does not start
6. Optional start commands
When starting the BAS-PC/300, entering optional character(s) following command
“baspc300” enables the change of the setting of the BAS-PC/300.
The optional start commands are as follows:
For Windows95, click on the [START] button on the task bar, position the pointer over
[PROGRAM], and select [MS-DOS PROMPT]. Type "cd
Optional
baspc300".
Function
character(s)
m
Start the BAS-PC/300 using mouse.
d
Start the BAS-PC/300 using digitizer.
com 0
Changes the setting of the serial port for the FD300 on personal
computer.
com 1
Changes the setting of the serial port for the digitizer on the
personal computer.
This setting is stored until you specify another optional start command. There is no need
to respecify start conditions unless you wish to change them.
(Examples)
ž When you want to start the system using the mouse
Type
baspc300 m
ž When serial port for the FD300 on the personal computer is changed from 0 to 1
Type
baspc300 com0 1
The number you input after command com0 or com1 is valid from 0 to the number of
serial ports on your computer minus 1.
(Prohibition)
Do not allocate the same number to the FD300 serial port and the digitizer serial
port; it may lead to misoperation.
(Note)
If the setting of the serial port is changed, connections of the FD300, the digitizer,
and the ROM writer should be changed accordingly.
151-390
7. When the BAS-PC/300 does not start
-9-
7. When the BAS-PC/300 does not start
When the BAS-PC/300 does not start correctly, check the following:
(1) Is the power to each device turned on?
(2) Are devices connected correctly?
(3) Is IBM-DOS (MS-DOS) installed?
(4) Is the mouse driver installed?
(5) Have you completely installed the BAS-PC/300?
(6) Did you type the start command correctly?
If the system does not start even after the above items have been checked, use the
diagnosis program (DIAG.EXE) to find a problem.
Start the diagnosis program as follows:
For Windows95, click on the [START] button on the task bar, position the pointer over
[PROGRAM], and select [MS-DOS PROMPT] to start MS-DOS.
(1) Type the following command:
cd
baspc300
(2) Type
diag
(3) A message, “Running...” will appear and the program will start.
(4) If there is something wrong, an error message will appear. Find the cause of the error
and remedy it.
151-390
Using the BAS-PC/300
CONTENTS
-I-
CONTENTS
CHAPTER 1 SCREEN AND ICONS ................................................................................................ 1
1. SCREEN .................................................................................................................................. 1
2. TERMINOLOGY .......................................................................................................................... 4
3. ICONS ..................................................................................................................................... 6
3-1 Magnify icon...................................................................................................................... 7
3-2 Reduce icon...................................................................................................................... 7
3-3 All image icon ................................................................................................................... 8
3-4 Actual size icon ................................................................................................................ 9
3-5 Scroll icon ...................................................................................................................... 10
3-6 Redisplay icon................................................................................................................. 11
3-7 Data display icon............................................................................................................. 11
3-8 Color icon ....................................................................................................................... 12
3-9 Grid icon......................................................................................................................... 13
3-10 Measure icon................................................................................................................. 15
3-11 Report icon ................................................................................................................... 16
3-12 Search icon................................................................................................................... 17
3-13 Help icon ...................................................................................................................... 18
CHAPTER 2 CREATING SEWING DATA ..................................................................................... 19
1. DATA CREATION SCREEN........................................................................................................... 19
1-1 Button menu (upper part of the submenu).......................................................................... 22
1-2 Sheet menu .................................................................................................................... 23
1-3 Information window .......................................................................................................... 26
2. CREATING STITCH DATA ............................................................................................................ 27
2-1 Creating stitch point......................................................................................................... 27
2-2 Creating basting data....................................................................................................... 28
2-3 Creating a feed stitch point............................................................................................... 28
2-4 Creating code.................................................................................................................. 28
3. CREATING OUTLINE DATA .......................................................................................................... 29
3-1 Changing sewing attributes............................................................................................... 29
3-2 Drawing a straight line...................................................................................................... 32
3-3 Creating a circle .............................................................................................................. 32
3-4 Creating a curved line ...................................................................................................... 33
3-5 Creating an ellipse........................................................................................................... 33
3-6 Creating an arc................................................................................................................ 34
4. MODIFYING AN OUTLINE ............................................................................................................ 36
151-390
-II-
CONTENTS
4-1 Adding a new point........................................................................................................... 36
4-2 Moving a point ................................................................................................................. 37
4-3 Deleting a point ............................................................................................................... 37
4-4 Changing the inclination of a curved line ............................................................................ 38
5. CREATING PATTERN DATA.......................................................................................................... 39
5-1 Creating bartack pattern................................................................................................... 40
5-2 Creating an eyelet ............................................................................................................ 43
CHAPTER 3 EDITING SEWING DATA ......................................................................................... 45
1. EDIT SCREEN .......................................................................................................................... 47
2. COPY /MOVE METHODS ............................................................................................................. 48
2-1 Parallel copy ................................................................................................................... 49
2-2 Mirror copy ...................................................................................................................... 51
2-3 Rotation copy .................................................................................................................. 53
2-4 Magnify/Reduce copy ....................................................................................................... 55
2-5 Offset copy ..................................................................................................................... 58
2-6 Multiply copy ................................................................................................................... 60
3. DELETING DATA....................................................................................................................... 62
3-1 Deleting data you specified............................................................................................... 62
3-2 Deleting all data............................................................................................................... 63
3-3 Deleting an item of data ................................................................................................... 63
4. MODIFYING DATA .................................................................................................................... 64
4-1 Adding a new point........................................................................................................... 64
4-2 Moving a point ................................................................................................................. 66
4-3 Deleting a point ............................................................................................................... 68
5. DIVIDING AN OUTLINE ................................................................................................................ 69
CHAPTER 4 CHANGING SEWING DATA..................................................................................... 71
1. CHANGE PULL-DOWN MENU ..................................................................................................... 72
2. STITCH CONVERSION ................................................................................................................ 73
2-1 Selecting outline data to be converted to stitch data........................................................... 74
2-2 Converting all outline data on the screen to stitch data........................................................ 76
3. CHANGING SEWING ATTRIBUTES .................................................................................................. 77
3-1 Selecting the range for which to change sewing attributes ................................................... 77
3-2 Selecting all outline data ................................................................................................ 78
4. CHANGING SEWING ORDER......................................................................................................... 79
4-1 Manually changing sewing data order ................................................................................. 79
4-2 Automatically changing sewing data order .......................................................................... 80
5. CHANGING SEWING DIRECTION..................................................................................................... 83
5-1 Reversing sewing direction of data you want ....................................................................... 83
151-390
CONTENTS
-III-
5-2 Reversing sewing direction of all data at one time............................................................... 84
6. CHANGING FEED ATTRIBUTES...................................................................................................... 85
7. CHANGING CODE ATTRIBUTES ..................................................................................................... 86
7-1 Changing attribute for speed code..................................................................................... 86
7-2 Changing attribute for optional output code ........................................................................ 88
8. USING THE DATA CONVERT FUNCTION...................................................................................... 89
8-1 Changing feed data to stitch data...................................................................................... 89
8-2 Changing stitch data to feed data...................................................................................... 90
CHAPTER 5 SETTING INFORMATION CONCERNING DATA CREATION ...................................... 91
1. SET SCREEN........................................................................................................................... 91
1-1 Model menu .................................................................................................................... 92
1-2 Maximum pitch sheet menu.............................................................................................. 92
1-3 Trace margin sheet menu................................................................................................. 92
1-4 Frame reference position selection menu........................................................................... 93
1-5 Zigzag shape selection menu ........................................................................................... 93
1-6 Data connection selection menu ....................................................................................... 93
1-7 Maximum connection length sheet menu ........................................................................... 94
1-8 Button menu ................................................................................................................... 94
2. SPECIFYING THE FRAME POSITION ................................................................................................ 95
CHAPTER 6 FILE....................................................................................................................... 97
1. FILE SCREEN........................................................................................................................... 97
1-1 NOW EDITING window .................................................................................................... 98
1-2 Directory sheet menu....................................................................................................... 98
1-3 File sheet menu .............................................................................................................. 98
1-4 File scroll menu............................................................................................................... 98
1-5 Contents window.............................................................................................................. 99
1-6 Button menu ................................................................................................................... 99
2. FILE IMAGE SCREEN.................................................................................................................100
3. MERGING DATA INTO THE DATA YOU ARE CURRENTLY EDITING...........................................................101
CHAPTER 7 INPUT/OUTPUT.....................................................................................................103
1. I/O PULL-DOWN MENU..............................................................................................................103
2. STITCH DATA INPUT/OUTPUT SCREEN ...........................................................................................106
2-1 NOW EDITING window ...................................................................................................107
2-2 End code selection menu................................................................................................107
2-3 Model menu ...................................................................................................................107
2-4 Program number menu ...................................................................................................108
2-5 Program image screen....................................................................................................108
151-390
-IV-
CONTENTS
2-6 Program contents display window.................................................................................... 109
2-7 Frame reference position selection menu......................................................................... 109
2-8 Button menu ................................................................................................................. 110
3. ROM DATA SCREEN............................................................................................................... 111
3-1 Model menu .................................................................................................................. 112
3-2 Directory sheet menu ..................................................................................................... 112
3-3 ROM file sheet menu ..................................................................................................... 112
3-4 ROM file scroll menu...................................................................................................... 113
3-5 ROM data image screen................................................................................................. 114
3-6 Button menu ................................................................................................................. 115
3-7 Copy button menu ......................................................................................................... 116
4. EMBROIDERY/CAD DATA INPUT SCREEN................................................................................. 117
4-1 Directory sheet menu ..................................................................................................... 117
4-2 File name sheet menu.................................................................................................... 118
4-3 File scroll menu............................................................................................................. 118
4-4 Data type selection menu ............................................................................................... 118
4-5 Thread trimming selection menu ..................................................................................... 118
4-6 DXF unit selection menu ................................................................................................ 119
4-7 Button menu ................................................................................................................. 119
5. DATA MANIPULATION .............................................................................................................. 120
5-1 Inputting data................................................................................................................ 120
5-2 Outputting data.............................................................................................................. 121
5-3 Deleting data................................................................................................................. 124
6. INPUTTING/OUTPUTTING ROM DATA ........................................................................................... 125
6-1 Setting the ROM chip..................................................................................................... 126
6-2 Inputting ROM data........................................................................................................ 127
6-3 Outputting ROM data ..................................................................................................... 130
6-4 Copying the data on the ROM chip .................................................................................. 131
6-5 Addition to and overwriting of ROM data........................................................................... 133
6-6 Errors in input/output of ROM chip data ........................................................................... 136
7. INPUTTING EMBROIDERY DATA OR CAD DATA ............................................................................... 137
CHAPTER 8 SYSTEM CONFIGURATION................................................................................... 139
1. CONFIG PULL-DOWN MENU..................................................................................................... 139
2. SYSTEM CONFIGURATION SCREEN.............................................................................................. 140
2-1 Pointing device selection menu....................................................................................... 140
2-2 Pointer shape menu....................................................................................................... 140
2-3 CRT size selection menu ............................................................................................... 141
2-4 ROM writer type selection menu ...................................................................................... 141
151-390
CONTENTS
-V-
2-5 Data area selection menu................................................................................................141
2-6 Button menu ..................................................................................................................143
3. DIRECTORY SETTING SCREEN.....................................................................................................144
3-1 Data directory sheet menu...............................................................................................145
3-2 Configuration directory sheet menu ..................................................................................145
3-3 Work directory sheet menu .............................................................................................145
3-4 Button menu ..................................................................................................................146
4. DIGITIZER SETTING SCREEN........................................................................................................147
4-1 Digitizer type selection menu...........................................................................................148
4-2 MAG/RED ratio menu .....................................................................................................148
4-3 Pointer speed bar...........................................................................................................148
4-4 Button menu ..................................................................................................................149
4-5 Setting the operation range of the digitizer ........................................................................150
5. SETTING THE SCALE................................................................................................................151
CHAPTER 9 CREATING B981 DATA ..........................................................................................153
1. CREATING B981 DATA ............................................................................................................153
1-1 Setting model.................................................................................................................153
1-2 Creating data .................................................................................................................154
1-3 Outputting data to a ROM file ..........................................................................................159
1-4 Saving ROM file .............................................................................................................161
1-5 Outputting ROM file to ROM chip .....................................................................................163
1-6 Assembling ROM chip into B981 .....................................................................................163
2. EDITING DATA........................................................................................................................164
2-1 Inputting data from ROM chip ..........................................................................................164
2-2 Changing name of ROM file to be edited...........................................................................165
2-3 Inputting data from ROM file............................................................................................165
2-4 Editing data ...................................................................................................................166
2-5 Outputting data ..............................................................................................................166
3. SAVING DATA INTO FILE OR LOADING DATA FROM FILE.....................................................................167
3-1 Saving data....................................................................................................................167
3-2 Loading data..................................................................................................................167
4. MANIPULATION ON B981..........................................................................................................168
4-1 Attaching data ROM chip ................................................................................................168
4-2 Selecting program ..........................................................................................................169
CHAPTER 10 CREATING B855E AND B856E DATA ....................................................................171
1. CREATING B856E DATA ..........................................................................................................171
1-1 Setting model.................................................................................................................171
1-2 Creating data .................................................................................................................172
151-390
-VI-
CONTENTS
1-3 Outputting data to a ROM file.......................................................................................... 174
1-4 Saving ROM file............................................................................................................. 176
1-5 Outputting ROM file to ROM chip .................................................................................... 178
1-6 Assembling ROM chip into B856E .................................................................................. 178
2. EDITING DATA ....................................................................................................................... 179
2-1 Inputting data from ROM chip ......................................................................................... 179
2-2 Changing name of ROM file to be edited.......................................................................... 180
2-3 Inputting data from ROM file ........................................................................................... 180
2-4 Editing data................................................................................................................... 181
2-5 Outputting data.............................................................................................................. 181
3. SAVING DATA INTO FILE OR LOADING DATA FROM FILE.................................................................... 182
3-1 Saving data................................................................................................................... 182
3-2 Loading data ................................................................................................................. 182
4. MANIPULATION ON B856E....................................................................................................... 183
4-1 Replacing the data ROM chip.......................................................................................... 183
4-2 Selecting the custom-made sewing pattern ...................................................................... 184
CHAPTER 11 CREATING B800E DATA...................................................................................... 185
1. CREATING B800E DATA ......................................................................................................... 185
1-1 Setting model................................................................................................................ 185
1-2 Creating data................................................................................................................. 186
1-3 Outputting data to a ROM file.......................................................................................... 189
1-4 Saving ROM file............................................................................................................. 192
1-5 Outputting ROM file to ROM chip .................................................................................... 193
1-6 Assembling ROM chip into B800E .................................................................................. 193
2. EDITING DATA ....................................................................................................................... 194
2-1 Inputting data from ROM chip ......................................................................................... 194
2-2 Changing name of ROM file to be edited.......................................................................... 195
2-3 Inputting data from ROM file ........................................................................................... 195
2-4 Editing data................................................................................................................... 195
2-5 Outputting data.............................................................................................................. 196
3. SAVING DATA INTO FILE OR LOADING DATA FROM FILE.................................................................... 197
3-1 Saving data................................................................................................................... 197
3-2 Loading data ................................................................................................................. 197
4. MANIPULATION ON B800E....................................................................................................... 198
4-1 Replacing the ROM chip................................................................................................. 198
4-2 Selecting program.......................................................................................................... 199
APPENDIX 1
DIGITIZER TYPE ....................................................................................................... 201
APPENDIX 2 P-ROM CHIPS ABLE TO BE USED WITH THE PRW-1 .............................................. 202
151-390
Chapter 1 Screen and icons
1. Screen
When you start the BAS-PC/300, the screen below will appear on your CRT (it will take a long
time to display it completely). This is called the title screen. Version number will be displayed
on this screen.
151-390
-2-
Chapter 1 Screen and icons
Press the left mouse button with the title screen on the CRT. (It can be pressed even before
the title screen is completely displayed, to skip to the initial screen.)
The screen will change as follows:
This is the initial screen.
The arrow in the center of the screen is called the pointer.
The eight buttons that are arranged horizontally at the top of the screen, such as CREATE,
EDIT, etc., are called the main menu. These buttons' functions are allotted to function keys f 1
to f 8 on the keyboard. You can select a main menu function by either clicking the mouse or
pressing a function key on the keyboard. Each function of the buttons comprising the main
menu will be described later in chapter 2.
The buttons (with pictures) arranged vertically on the left of the screen are called icons. The
line on the bottom of the screen is the status line; notes and instructions will appear here.
The majority of the screen represented with the grid is the data display area.
151-390
1. Screen
-3-
The sub menu will appear on the right of the screen to offer you detailed information when you
select a function from the main menu. It is used to select and set the items required for
operation.
Ordinarily, notes and instructions related to operations are displayed on the status line, while
important messages appear in a box in the center of the screen. This is called a dialogue box.
Click on the [Continue] button after you confirm the message.
Stitch data used on the sewing machine will be created by processing outline data. On the
BAS-PC/300, you can create stitch data directly without the creation of outline data, however,
basically, you will create outline data, then process it to derive stitch data. You will create both
outline and stitch data on the same screen, though on the BAS-PC/300 it is available to
display the data separately. You can recognize outline data, stitch data, and codes on the
screen, respectively. Also, you can select the data type to be displayed on the screen using
the Data display icon (refer to 3-7).
Each type of data will be indicated by either of two lines or a mark:
Data
Outline data
Stitch data
Indicated by
Straight
Solid line
Curve
Solid line
Arc
Solid line
Circle
Solid line
Ellipse
Solid line
Stitch
Solid line
Feed
Dotted line
Basting
Dotted line
Code
Mark
151-390
-4-
Chapter 1 Screen and icons
2. Terminology
Word
Indication
Meaning
Using the mouse, move the pointer onto the desired
Click
object, press the left mouse button once and release it
quickly.
Using the mouse, move the pointer onto the desired
Drag
object, keep the left mouse button pressed, and move the
mouse.
Appears when a main menu button is clicked on. This is
Pull-down menu
a list of functions of the main menu button you selected.
Move the pointer to select the desired item, then click the
left mouse button; press the right mouse button to cancel.
Indicates function on it.
The selected button is indicated as being depressed.
Button
Click the button to select the respective function.
Indicates settings of contents, such as for options,
Sheet menu
values, and so on. If you change the setting, click on the
sheet menu.
Lists items for methods or set values. The current
Selection menu
setting is indicated in the check box on the left of the item.
If you change a setting, click on the check box on the left
of the desired item.
151-390
2. Terminology
Word
Indication
-5-
Meaning
Lists items for filenames, model names, or program
numbers which you can select.
When there are too many items to be displayed at
Scroll menu
one time, click either scroll arrow,
or
, or drag
the scroll bar that is the rectangular box on the right
of the scroll menu, in order to display the desired
option on the screen.
Select an option by clicking the mouse on it.
Appears when you input characters and numbers for
the item you select on the sheet menu. Type a value
on the keyboard, then press the Enter key or click the
left mouse button.
Use the Back Space key to delete the character just
before the cursor.
If you want to cancel, press the Esc (escape) key, or
Input box
click the right mouse button.
When you input characters or numbers with some
already appearing in the input box, you will overwrite
the latter.
When you press the space bar in the same situation,
you can input characters or numbers following those
appearing. When you press the Back Space key at
this time, the character just before the cursor will be
deleted, and you can continue input.
151-390
-6-
Chapter 1 Screen and icons
3. Icons
This section explains the functions of the 13 icons on the left of the screen. Most of these
icons can be used at any time.
Magnify
Reduce
All image
Actual size
Scroll icon
Redisplay
Data display
Color
Grid
Measure
Report
Search
Help
151-390
3. Icons
-7-
3-1 Magnify icon
This is used to view a portion of the sewing data in the data display area at an increased
magnification. When you select this icon, a rectangle indicating the range of
magnification will appear on the screen, and you will be asked to specify the area to be
magnified. Specify the area by dragging the mouse.
It is possible to magnify the contents of the data display area up to 10 times full size.
3-2 Reduce icon
This is used to reduce the size of the current indication by half so that the screen can
display more data.
Reduction can be made up to 1/10 of full size.
151-390
-8-
Chapter 1 Screen and icons
3-3 All image icon
This is used to display all the data during its creation on the screen.
When you select this icon, the screen magnification is adjusted automatically so that all
the data can be seen on one screen.
151-390
3. Icons
-9-
3-4 Actual size icon
The current data appears on the screen in actual size.
151-390
-10-
Chapter 1 Screen and icons
3-5 Scroll icon
When you select this icon, a frame which will be equal to the screen after scrolling, will
appear. You can move this frame to scroll the screen.
When you press an arrow key on the keyboard, the indication on the screen will be
moved in the respective direction of the arrow key you press.
Click the right mouse button to finish using the frame.
151-390
3. Icons
-11-
3-6 Redisplay icon
In order to increase the system's processing speed, this system does not always
redisplay the contents of the screen even if a part of the screen has been erased or
disfigured by operations.
This is used to redisplay the contents of the data screen so that you can understand the
current screen.
3-7 Data display icon
This is used to specify the type of data you want to display on the screen.
There are four options for this button: outline data, stitch data, code, and point. You can
select more than one.
OUTLINE DATA: Displays only outline data you have created on the screen. Usually
set OUTLINE DATA to on.
STITCH DATA: Displays only stitch data you have created on the screen. It is good to
set STITCH DATA to off when modifying or selecting outline data.
CODE: Displays codes representing speed reduction, optional output, and tacking.
POINT: Displays component points of sewing data.
FRAME: Displays the image of the frame whose model is currently set.
Click on the check box on the left of the item(s) you want to select, then click the left
mouse button again at any position other than the check box to fix the setting. The
screen will indicate what you have selected.
NOTE: The sewing data you can select when the EDIT or CHANGE function is selected is
restricted to the data set for this icon.
151-390
-12-
Chapter 1 Screen and icons
3-8 Color icon
This is used to change the colors assigned to thread colors, the background of the data
display area, and that of the menu area. When you press this icon, the color setting
window will appear. Color 0 is used to represent the background of the display; colors no.
1-15 are used to represent thread colors on the screen.
The color setting is determined by a combination of the three primary colors, red, green,
and blue. You can adjust the colors since you want to display colors as close to the
actual ones as possible by matching each color level for red, green, and blue on this
window. If you change colors no. 7-15, the colors used for the background, menu, etc.,
will be changed.
You can move this window to any desired position by moving the pointer after selecting
the blue bar at the top of the color setting window.
When you change colors on the display, move the window to see the changes to the
displayed colors.
151-390
3. Icons
-13-
3-9 Grid icon
Using this icon helps you to understand the size of the currently displayed data. When
you select this icon, the Grid menu will appear.
[SPACING] is used to adjust the size of the grid. When you create a small piece of
sewing data, it is recommended to set the spacing to 1 mm or 5 mm. When you create
a large piece of sewing data, 10 mm or greater spacing is recommended.
[SPECIFY] is used to specify the size of the grid freely, ranging from 0.1 mm to 100 mm
in 0.1 mm increments.
[COLOR] is used to change the grid color.
[DISPLAY] is used to select whether a grid is displayed or not.
151-390
-14-
Chapter 1 Screen and icons
[REFERENCE] is used to set the home position to an intersection of the grid, or to set
a specified point of the data to an intersection of the grid.
[ADJUSTMENT] is used to easily place a point at an intersection on the grid or on
previously input sewing data to adjust positioning precisely when you create or modify
sewing data. When you select [GRID], the point will be forcibly put on the nearest
intersection of the grid. When you select [SNAP POINT], [x2] or [x3], a point will be put
on a point on the sewing data.
If you select [x2] or [x3], you can put a point on a point more easily by moving the
pointer near the desired position.
NOTE:The grid may not be displayed due to the magnification of the image on the
screen even when [DISPLAY] is set to [ON].
151-390
3. Icons
-15-
3-10 Measure icon
This is used to measure the length of the desired object. Press this icon, then specify
two points; the length of the line connecting the two points you specify will be displayed
on the status line. It will be displayed while you specify the second point after being
specified the first.
When you are finished, click the right mouse button to quit.
151-390
-16-
Chapter 1 Screen and icons
3-11 Report icon
This is used to provide the following information. Just click on this icon.
Item
VERSION
MODEL
FRAME SIZE
DATA SIZE
NO. OF
Explanation
Version number of BAS-PC/300 software
Model name currently set
Sewing area on the set model
Outside dimensions of currently created pattern(s)
Total number of stitches for created pattern(s)
STITCHES
REMAIN
Remaining number of stitches available for pattern(s)
STITCHES
WORK DISK SIZE Remaining disk space
TIME
Present time
When there is no data, the data size and the number of stitches will be indicated as 0.
When the frame is not set, the frame size will be indicated as 0.
151-390
3. Icons
-17-
3-12 Search icon
This is used to search for the position of the object you want to find.
Select the start position of the data to be searched, and specify the type of data you want
to search for. When you select [Forward from the specified position] or [Backward from
the specified position] on the selection menu, specify a point included in the data to start
searching from. When you press the left mouse button, the next position will be
searched for. If the position you want to search for is not seen on the screen, the screen
will be scrolled to display it. When you want to search the object backward, hold down
the SHIFT key, and click the left mouse button. Click the right mouse button to quit. The
screen will return to the status it was in before searching was started.
Convenient
If outline data is complicated or partially overlapped, it is difficult to select the desired
object on the data using the pointer. When you create, edit, or modify outline data, or
change the sewing order, you can select the desired object easily using the search
function.
Pressing the CTRL key on the keyboard, click the left mouse button. The object will be
selected each time you click the left mouse button.
Sewing data that the system can search for depends on the settings of the Data display
icon.
151-390
-18-
Chapter 1 Screen and icons
3-13 Help icon
This icon assists you by giving directions on how to operate the current function when
you need help. When you click this icon, the Help window will appear. Select the lower
triangle to see further contents; select the upper triangle to see previous contents. Click
[EXIT] to close the help window. The screen will return to the status held before opening
the help window.
151-390
Chapter 2 Creating sewing data
This chapter describes the fundamental functions concerning creating sewing data (stitch
data and outline data).
For outline data, stitch conversion is necessary. See “2. Stitch conversion” in chapter 4,
“Changing sewing data.”
The basic operation to create sewing data is: (1) set the sewing attributes, (2) select the type
of sewing data, and (3) create the sewing data by clicking the mouse button at appropriate
positions. You can change the attributes and type of sewing data in the middle of an operation
if necessary.
1. Data creation screen
When you click on the [CREATE] button on the main menu at the top of the screen, the data
creation screen will appear.
On the right of the screen is the submenu that is divided into two menu areas: button menu
and sheet menu. Each menu will be described later. You should specify the settings of data
type, creation method, and attributes before creating data.
151-390
-20-
Chapter 2 Creating sewing data
The basic rules of creating sewing data are as follows:
Click the left mouse button to fix a component point of sewing data.
While you are creating outline data, click the right mouse button to return to the previous
point until you press the [SAVE] button.
The data being created will be indicated in blue.
Click on the [SAVE] button to register currently created sewing data.
Click on the [CANCEL] button on the submenu to delete currently created sewing data.
ADJUSTMENT function in the Grid icon is available.
Press the CTRL (control) key to display the input box.
You can specify the following point by inputting the relative distance or angle from the
previous point.
Distance is shown in millimeters. The
+
right side in horizontal direction is positive,
the left negative; the upper part in the
0 to -360 °
vertical direction is positive, the lower
negative.
As for angles, the horizontal line (the X
+
-
axis) indicates 0°, angles in the clockwise
direction are 0 to -360°, and angles in the
0 to 360 °
counterclockwise direction are 0 to 360°.
-
Specify the distance or angle with a letter
prior to entering value.
Letter
151-390
Meaning (unit)
X
Distance in horizontal direction (mm)
Y
Distance in vertical direction (mm)
L
Length (mm)
A
Angle (°)
1. Data creation screen
-21-
Example 1
When you want to put a point at the position
30mm
where it is moved 50 mm to the right in the X
direction and 30 mm up in the Y direction, type
"50, 30" or "X50, Y30."
Example 2
50mm
-30.5°
When you want to put a point at the position 30.5° and 60 mm, type "A-30.5, L60."
60mm
Example 3
When you want to put a point at the position 120° and
50.2 mm to the left from the previous point, type "A120,
X50.2".
120°
50.2mm
Example 4
When you want to put a point at the position -80° and
-80°
60.5 mm down in the Y direction, type "A-80, Y60.5".
60.5mm
Press the SHIFT key when the frame is set; the input box will appear.
You can create another point by inputting the value for the distance from the frame home
position.
The input method is the same as in example 1 on the previous page.
151-390
-22-
Chapter 2 Creating sewing data
1-1 Button menu (upper part of the submenu)
The upper part of the submenu is called the button menu. This is
used in two ways: to specify the settings for data to be created,
and to save or cancel data you create.
Each function of the button menu can be allotted on keyboard
keys as described in the table below. You can use a function by
clicking on it on the button menu, or by pressing the allotted key.
The following are descriptions of each button function:
Button
Key
Function
STITCH
/
Creates stitch data whose component points have commands so that the
needle drops at those specified points.
BASTE
*
Creates basting stitch data so that the needle drops at specified points.
FEED
8
Creates a feed stitch point at a specified point. The needle will travel from
the specified point to the next point sequentially without making a stitch at
the specified point.
CODE
9
Puts a code at the end of stitch data currently being created.
STRAIGH
5
Creates a straight line connecting component points which are regarded
T
as vertexes.
CIRCLE
6
Creates a circle, passing through three specified points.
CURVE
2
Creates a curve, connecting the specified points.
ELLIPSE
3
Creates an ellipse passing through three specified points. The points
form major diameter and minor diameter of an ellipse.
ARC
0
Creates an arc passing through three specified points.
ATTRIBUT Not set Sets or changes attributes related to outline data.
PATTERN Not set Creates fixed pattern data by specifying numerical value.
ADD Adds a new point at any place on currently created data.
MODIFY Not set MOVE Move a component point on currently created data to any position.
DELE Deletes a component point from currently created data.
TE
SAVE
+
Saves currently created data.
CANCEL Not set Erases currently created data.
Convenient
When you select a function from the keyboard, press the Num Lock key, and use the 10
keys attached to the right of the keyboard.
151-390
1. Data creation screen
-23-
1-2 Sheet menu
The sheet menu is on the lower part of the submenu. This is
used to select the method of creating data, and specify data
attributes.
Using the mouse, move the pointer on the right of the sheet
menu. The item the pointer is on will be inversely displayed.
Click the left mouse button with this indication when you change
setting.
The following are explanations for each function:
151-390
-24-
Chapter 2 Creating sewing data
Item
Contents
ADD/INSER
ADD
Explanation
Adds sewing data at the end.
T
INSERT
CONTINUE
PITCH
YES
Creates continuous sewing data.
NO
Creates sewing data starting from any position.
PITCH
COLOR
Inserts sewing data in the specified position.
COLOR
Set the pitch for stitch data or outline data.
Assigns color for the sewing data you create to be
displayed
SPEED DECELTN Sets code for speed deceleration level on sewing data.
CODE
OPTIONAL
Sets code for optional output on sewing data.
OUTPUT
TACK
Sets codes for the start and end of tack sewing on
sewing data. A part of line enclosed by these codes will
be sewn with tack sewing.
THREAD
Sets thread trimming. CUT will appear when it is set.
TRIMMING
FEED
SPLIT
Sets splitting position. SP will appear when it is set.
PRESSER
Sets presser foot height. Any of codes H1 - H17 will
ATTRIB
HORI/VERT
HEIGHT
appear when it is set.
NORMAL
Puts a point as any position you want.
HORI/VERT
Creates a point so that it is positioned horizontally or
vertically to the position of the previous point.
HORIZONTAL
Puts a point so that it is positioned horizontally to the
previous point.
VERTICAL
Puts a point so that it is positioned vertically to the
previous point.
ARC
SMOOTH
Creates an arc connected to the previous sewing data.
NORMAL
Creates an arc outline by specifying the three points.
CONNCT
NOTE: When you use the ADJUSTMENT function of the Grid icon, set HORI/VERT to
NORMAL.
151-390
1. Data creation screen
-25-
The following explanations are descriptions of submenus for each function on the sheet
menu:
(1) PITCH
When you select PITCH on the sheet menu, the input box will
appear. Enter the pitch value through the keyboard.
If you make a mistake, you can erase it using the BS (back space)
key.
If you cancel the operation, press the Esc (escape) key on the keyboard, or click the
right mouse button.
(2) COLOR
The color selection menu will appear on the center of the screen. Select a number to
represent the sewing data to be created.
(3) CODE
This is used to select type of code you want to create.
There are three types of codes; Speed deceleration,
optional output, and tack sewing.
a) Speed deceleration
There are four levels of deceleration.
The higher number indicates its speed is slower.
When you reset the speed level, select NONE (default setting).
b) Optional output
Click on the check box of the desired item to select it, then
click on the [SET] button.
Click on the [CANCEL] button to cancel the operation.
You can use optional output whose check box is black.
151-390
-26-
Chapter 2 Creating sewing data
(4) Feed attribute
This is used to set attributes related to the feed data to be
created.
a) Thread trimming
When you select YES, the machine will trim the thread after
a feed point.
When you select NO, the machine does not trim the thread
after a feed point.
b) Split
When you select YES, the machine will stop stitching after a
feed point.
When you select NO, the machine will continue stitching
after a feed point.
c) Presser height
Specify presser foot height level.
This setting is available only for machines with a mechanism to change the presser
foot height.
1-3 Information window
Information window shows the direct length from the end point
of the currently created data to the pointer, the pointer position
in the X direction, the pointer position in the Y direction, and the
angle of the line.
151-390
2. Creating stitch data
-27-
2. Creating stitch data
Stitch data is the general term for the stitch point and basting point that the needle drops at
the position you specify using the pointer, the feed point that the needle travels from the feed
point (the dummy stitch point) to the next point without making a stitch, and the code point that
controls information you specify.
This section describes you how to create stitch data.
2-1 Creating stitch point
Click on the [STITCH] button on the button menu, or press the slash (/) key on the
keyboard.
Using the mouse, move the pointer to the position where you want to make a stitch, then
click the left mouse button.
Stitch data can be made connecting the previous data and the currently set point.
When you drag the pointer (move the pointer while pressing the left mouse button), stitch
data can be traced with the pitch you specify on the sheet menu, as the pointer moves.
This is useful when you want to create stitch data with the same pitch successively. In
this case, however, stitches exceeding the maximum pitch cannot be made. You can
distinguish the data as to whether its stitches are larger than the maximum pitch by the
color representing the data or by the pointer position in the Y direction in the information
window.
Line color
Stitch creation
Light blue
Allowable
Red
Not allowable
151-390
-28-
Chapter 2 Creating sewing data
2-2 Creating basting data
Click on the [BASTE] button on the main menu, or press the * key on the keyboard.
Using the mouse, move the pointer to the desired position, and click the left mouse
button.
Basting data connecting the previous point and the desired position will be made.
2-3 Creating a feed stitch point
Click on the [FEED ATTRB] button on the sheet menu to set the feed attributes.
Click on the [FEED] button on the main menu, or press the 8 key on the keyboard to
make a feed stitch point.
Using the mouse, move the pointer to the desired position, and click the left mouse
button.
A line connecting the previous data and the desired position will be feed data. The
splitting setting is returned to the default (no splitting) when each feed data is created.
2-4 Creating code
Select a code type on the sheet menu.
Click on the [CODE] button on the button menu, or press the 9 key on the keyboard.
The code you select will be put at the end of the currently created data.
151-390
3. Creating outline data
-29-
3. Creating outline data
Outline data is general name of pattern which serves as the basis for the creation of stitch
data. The BAS-PC/300 is able to create various types of outlines: straight lines, circles,
curved lines, ellipses, and arcs.
After you create an outline, you can also process the outline to stitch data simply by setting
necessary attributes, such as stitch conversion (running stitch or zigzag stitch), and stitch
pitch.
3-1 Changing sewing attributes
Before you create outline data, you need to set sewing attributes for stitch data which is
converted from outline data.
Click on the [ATTRIB] button on the sheet menu to set or change sewing attributes
information of the data you start to create.
If you create outline data successively, sewing attributes of the previous data are
automatically used as those of the next data.
The following are descriptions of each item on the sewing attribute menu.
151-390
-30-
Chapter 2 Creating sewing data
(1) STITCH
Select stitch type you use before converting outline data into stitch data.
STITCH
Function
RUNNING Creates stitch data whose outline is sewn with running stitching.
ZIGZAG
Creates stitch data required to stitch the outline with zigzag stitching of the
specified width.
(2) PITCH
You should set the pitch (interval of needle drop locations) of the stitch data before
processing the outline for stitch data.
Click on the PITCH sheet menu to input a value through the keyboard. You can enter a
value anywhere from 0.1 mm to the maximum in 0.1 mm increments.
(3) DIVISION
When the outline data is converted to stitch data, the length of outline may not be
divided perfectly with the specified pitch. In this case, you can set dividing the outline
in two ways: EQUAL or PITCH. EQUAL is that the outline can be divided perfectly by
changing the pitch (to an adjacent smaller pitch you set) so that nothing is left over;
PITCH is the outline can be divided by the specified pitch with a remainder.
Click on the check box of either EQUAL or PITCH to select the pitch division method.
Division
Explanation
EQUAL Creates running data so that the line between component points whose
angles are smaller than specified vertex angle can be divided equally with
specified pitch or less without a remainder.
PITCH
Creates running data so that the line between component points whose
angles are smaller than the vertex angle, can be divided with the specified
pitch, with a remainder.
(4) VERTEX ANGLE
This is used to specify the value for the angle of the component point at which you want
to make the needle drop. When the angle of the data is smaller than the vertex angle,
the needle will drop at the point regardless of the pitch setting.
Click on the VERTEX ANGLE sheet menu to input a value through the keyboard. You
can enter a value anywhere from 1° to 180° in 1° increments.
(5) ZIGZAG DEV (zigzag deviation)
151-390
3. Creating outline data
-31-
This is used to set the position of zigzag stitching. You should select ZIGZAG on the
STITCH selection menu.
Zigzag deviation
EQUAL
LEFT
Explanation
Sets zigzag width in the center of the outline.
Sets the zigzag stitch to the left side of the outline
data.
RIGHT
Sets the zigzag stitch to the right side of the outline
data.
UNEQUAL
Sets zigzag width to one side of the outline.
(6) ZIGZAG PITCH
This is used to set interval of zigzag peaks (as
shown in figure 2-1, part a.)
Click on the ZIGZAG PITCH sheet menu to input a
value through the keyboard. You can enter a value
anywhere from 0.1 mm to the maximum in 0.1 mm
figure 2-1
increments.
(7) STITCH WIDTH
This is used to set zigzag stitch width (as shown in figure 2-1, part b).
Click on the STITCH WIDTH sheet menu to input a value through the keyboard. You
can enter a value anywhere from 1.0 mm to 100.0 mm in 0.1 mm increments.
(8) ZIGZAG POINT
Sets the number of stitches from one zigzag peak to the next zigzag peak.
2 - 4 can be set in intervals of 1.
NOTE: Zigzag point could increase more than preset number depending on a shape of
the outline.
(9) UNEQUAL ZIGZAG RIGHT DEV (unequal zigzag right deviation)
This is used to set the right width of the zigzag stitch width (as shown in figure 2-1, part
c) when the ZIGZAG DEV is set to UNEQUAL. Click on the UNEQUAL ZIGZAG RIGHT
DEV sheet menu to input a value through the keyboard. You can enter a value
anywhere from 1.0 mm to the specified zigzag stitch width in 0.1 mm increments.
(10) COMPENSATION (Zigzag compensation angle)
151-390
-32-
Chapter 2 Creating sewing data
Ordinarily, zigzag stitching at the component point is
performed as shown in figure a, however, if the angle of
the component point is smaller than the zigzag
compensation angle, zigzag stitching is performed as
shown in figure b.
Click on the COMPENSATION sheet menu to input a
figure 2-2
value through the keyboard. You can enter a value
anywhere from 1° to 90° in 1° increments.
3-2 Drawing a straight line
Click on the [STRAIGHT] button on the button menu, or press the 5 key on the keyboard to
draw a straight line.
Using the mouse, move the pointer to the desired position, and click the left mouse button.
A line connecting the previous data and the specified point will be created.
3-3 Creating a circle
Click on the [CIRCLE] button on the button menu, or press the 6 key on the keyboard to
create a circle.
There are three methods for creating a circle.
(Method 1) Specifying three points
2nd point
Using the mouse, move the pointer to the desired position,
then specify the three points. A circle passing through the
three specified points will be created. If you specify the
1st point
second and third points at the same place, a circle will be
created with diameter connecting the first and second points.
3rd point
When you create another circle successively, the last point
will be the first point of a new circle. Specify the other two points.
(Method 2) Specifying radius and angle
Using the mouse, move the pointer to the desired position, then specify
the first point, then press the CTRL (control) key to display the input box.
Input the values for radius and angle.
A circle passing through the first point with the specified radius and
R
A
angle to be made between the line passing through the first point,
horizontal to the diameter, and the line passing through the first point
151-390
1st point
3. Creating outline data
-33-
and the center point of the circle, will be created.
When you want to create a circle with a 30 mm radius and 40° angle between the two
lines, type "R30, A40".
(Method 3) Specifying two points and radius
Using the mouse, move the pointer to the desired position, specify two points, then press
the CTRL key to display the input box.
Input the value for the radius. Using the mouse,
specify the side of the line connecting the two
2nd point
points that is to have the major part of the circle.
R
A circle passing through the two points will be
created with the specified radius and the majority
1st point
of the circle on the side of the line connecting two
points.
When you want to create a circle whose radius is 30 mm, type "R30", and specify the
side of the line that is to have the major part of the circle.
3-4 Creating a curved line
Click on the [CURVE] button on the button menu, or press the 2 key to create a curved
line.
Using the mouse, move the pointer to the desired position, then click the left mouse button.
A curved line passing through the specified points will be created.
3-5 Creating an ellipse
Click on the [ELLIPSE] button on the button menu, or press the 3 key on the keyboard to
create an ellipse.
There are three methods to create an ellipse.
(Method 1) Specifying three
points
3rd
Using the mouse, move the pointer
to the desired position, then specify
1st point
2nd
the three points. An ellipse will be
created with the major diameter (or
minor diameter) connecting the first and second points, and the height from the third
point to the diameter. When you create another ellipse successively, the third point will
be the first point of the new ellipse. Specify the other two points.
151-390
-34-
Chapter 2 Creating sewing data
(Method 2) Inputting values for major and minor diameters, and angle
Using the mouse, move the pointer to the desired position, then
specify the first point, and press the CTRL (control) key to display the
input box.
L
Input the values for major and minor diameters, and the angle between
S
the major diameter and a horizontal line. An ellipse passing through
the first point will be created with specified major and minor diameters,
and the angle between major diameter and horizontal line.
A
When you want to create an ellipse with a 50 mm major diameter, 30
1st point
mm minor diameter, and 90° between the two lines, type "L50, S30,
A90."
(Method 3) Specifying two points and inputting
S
value for opposing diameter
Using the mouse, move the pointer to the desired
position, specify two points, then press the CTRL key
to display the input box.
1st point
2nd point
Input the value for the opposing diameter. An ellipse
will be created with the major diameter connecting the two points, and the opposing
diameter of the value you input.
When you want to create an ellipse with a 30 mm opposing diameter, type "S30".
3-6 Creating an arc
Click on the [ARC] button on the button menu, or press the 0 key on the keyboard to
create an arc.
There are three methods to create an arc.
(Method 1) Specifying three points
Using the mouse, move the pointer to the desired position, then specify the three points.
An arc connecting the three specified points will be created.
If you specify the second and third points at the same position, a half circle with diameter
connecting the first and second points will be created in the direction you specify using
the mouse.
151-390
3. Creating outline data
-35-
1st point
When you create another arc successively, the
third point will be the first point of the new arc.
2nd point
Specify the other two points.
3rd
(Method 2) Setting ARC CONNCT to
SMOOTH in the sheet menu
previous data
If you want to create a smooth arc following
the previous data, set ARC CONNCT to
SMOOTH in the sheet menu, and specify
1st point
one point. An arc will be created smoothly
off the tangent.
This method is not available when the previous data is a circle or ellipse.
(Method 3) Specifying radius
Using the mouse, move the pointer to the
2nd point
desired position, specify two points, then press
the CTRL (control) key to display the input box.
Input the value for the radius. Using the mouse,
specify the direction that arc to be created is
convex for the line connecting the first and
R
1st point
second points. An arc passing through the first
and second points will be created with the specified radius, and convex in the direction
you specify.
If you want to create an arc with a 30 mm radius, type "R30", and specify the direction
the arc will be convex.
151-390
-36-
Chapter 2 Creating sewing data
4. Modifying an outline
The shape of an outline can be changed by moving or deleting the points that make up the
outline, or by adding new points to the outline. Such changes are made using the [MODIFY]
button on the button menu.
While you create an outline, you can delete the previous point until you press the [SAVE]
button, by clicking the right mouse button.
Click on the [MODIFY] button on the button menu to display the point
modification selection menu. Select the desired item on the modification
selection menu. Click the right mouse button to cancel the operation and to
return to the previous status.
If the stitch length exceeds the maximum pitch after stitch data modification, the latter will be
converted to feed data. And well, if the feed length does not reach the maximum pitch after
feed data modification, the latter will be converted to stitch data.
4-1 Adding a new point
1. Click on the [MODIFY] button on the button menu, and the ADD check box on the
modification selection menu.
The component points will appear.
2. If you add a new point to data, click on a segment of the data.
A new point will be added to the data.
3. Decide the position of the point to be added, and click the left mouse button.
Click the right mouse button to cancel the operation.
A new point cannot be added to a circle or an ellipse.
4. Click the right mouse button to finish the adding operation.
151-390
4. Modifying an outline
-37-
4-2 Moving a point
1. Click on the MOVE check box on the modification selection menu.
The component points will appear.
2. Select a point to be moved.
3. Specify a position to put the point, and click the left mouse button.
You can cancel the moving operation by clicking the right mouse button until you click
the left mouse to specify the position.
4. Click the right mouse button to finish the moving operation.
4-3 Deleting a point
1. Click on the DELETE check box on the modification selection menu.
The component points will appear.
2. Select a point to be deleted.
The point will be deleted.
A point cannot be deleted from a circle or an ellipse.
3. Click the right mouse button to finish the deletion operation.
151-390
-38-
Chapter 2 Creating sewing data
4-4 Changing the inclination of a curved line
When you modify a curved line by adding a new point or by moving the component point,
a correction bar that is used to change the inclination of the point, will appear.
1. Modify a curved line.
After you modify the curved line, a correction bar will appear.
2. Select a cross mark of the correction bar.
3. Move the pointer to adjust the inclination of the curved line.
4. Click the left mouse button to fix the inclination; click the right mouse button to cancel
the operation.
151-390
5. Creating pattern data
-39-
5. Creating pattern data
This function is used to create fixed pattern data by specifying its length, width, number of
stitches, and so on.
Click the [PATTERN] button on the button menu to display the pattern selection menu.
Select the desired pattern from the scroll menu.
Click the [SET] button to display a pattern setting screen.
If you want to cancel the operation, press the ESC (escape) key on the keyboard, or click the
[CANCEL] button or right mouse button.
151-390
-40-
Chapter 2 Creating sewing data
5-1 Creating bartack pattern
This function is used to create a bartack pattern in which zigzag stitching is performed
after straight stitching.
Select BARTACK on the pattern setting screen. Information related to bartack pattern
creation will be displayed.
The following are explanations for each item comprising the pattern setting screen.
Item
Explanation
TACK LENGTH Specifies bartack length (a) in 0.1 mm increments.
TACK WIDTH
RUNNING
Specifies bartack width (b) in 0.1 mm increments.
Specifies running stitch length (c) in 0.1 mm increments.
LENGTH
RUNNING
Specifies running stitch pitch (d) in 0.1 mm increments.
PITCH
SPEC METH
When PITCH is selected, bartack data will be created by specifying the
zigzag pitch. When #STITCHES is selected, bartack data will be
created by specifying the total number of stitches.
151-390
5. Creating pattern data
-41-
ZIGZAG PITCH Available only when #STITCHES is selected for SPEC METH. The
pitch between zigzag tops (e) will be specified in 0.1 mm increments.
Accordingly, the number of stitches will be automatically changed.
When ZIGZAG PITCH input box shows ******, zigzag stitching is not
performed.
#STITCHES
Available only when #STITCHES is selected for SPEC METH. Zigzag
pitch will be automatically changed by specifying the total number of
stitches.
151-390
-42-
Chapter 2 Creating sewing data
Set each item, and click the [SET] button. The image of data will be displayed. When
the size of the data image is reduced, select
icon to magnify it.
Using the mouse, move the pointer to adjust the data image to the desired position, and
click the left mouse button to confirm it.
The pointer movement depends on the setting of the Grid icon (positioned on the vertical
bar at the left of the screen).
The pointer will change to the confirmation mark
.
Click the left mouse button to confirm the data image position.
When you want to reset the position, click the right mouse button.
151-390
5. Creating pattern data
-43-
5-2 Creating an eyelet
This function is used to create stitch data for an eyelet pattern.
Select EYELET on the pattern setting screen. Information related to eyelet pattern
creation will be displayed.
The following are explanations for each item comprising the pattern setting:
Item
OUTSIDE DIA.
INSIDE DIA.
Explanation
Specifies outside diameter (a) of eyelet in 0.1 mm increments.
Specifies inside diameter (b) of eyelet in 0.1 mm increments.
PUNCHED HOLE Specifies diameter of punched hole in 0.1 mm increments.
DIA.
#STITCHES
START
SECURING
Specifies total number of stitches for eyelet.
Specifies number of stitches for securing stitching at the start of
sewing.
STITCHES
END SECURING
Specifies number of stitches for securing stitching at the end of sewing.
STITCHES
#ROTATIONS
Select 1 , 2 or 3 times around for stitching of eyelet.
151-390
-44-
Chapter 2 Creating sewing data
Set each item, and click the [SET] button. The image of data will be displayed. When
the size of the data image is reduced, select
icon to magnify it.
Using the mouse, move the pointer to adjust the data image to the desired position, and
click the left mouse button to confirm it.
The pointer movement depends on the setting of the Grid icon (positioned on the vertical
bar at the left of the screen).
The pointer will change to the confirmation mark
.
Click the left mouse button to confirm the data image position.
When you want to reset the position, click the right mouse button.
151-390
Chapter 3 Editing sewing data
This chapter explains the fundamental functions concerning editing sewing data (stitch data
and outline data).
The basic rules of editing are as follows:
ž The selected data is indicated in blue.
ž The temporarily decided data is indicated in green.
However, when data size is too large, it will be indicated by a rectangle passing through the
external edges of the data.
ž Click the right mouse button to return to the previous step.
ž Click on the [CANCEL] button to cancel current process and to return to the initial edit
screen.
ž It is necessary to use the first and last segments when you specify a range of data to be
copied, moved, or deleted.
A segment means a unit you can select to edit. An outline is not always formed by a single
segment. For outline data, segments are divided by the number of times of clicking the
SAVE button during creation. For stitch data, segments are divided by points comprising
data.
ž The data you can select for the first and last segments depends on the type of data currently
being displayed. For example, when only the STITCH DATA is set in the menu which is
displayed after clicking on the Data display icon, you cannot select outline data as the first
segment of the range to be edited.
ž All existing data in the range specified between and including the first and last segments can
be edited regardless of the setting for the Data display icon (regardless of the fact that some
segments are missing on the screen).
ž When you copy, move, or delete an outline for which stitch data has already been created,
its stitch data will be copied, moved, or deleted, as well as the outline.
However, if you use magnify/reduce copy, offset copy, or multiply copy, the stitch data will
not be copied. Also, if you use magnification/reduction movement, offset movement, the
stitch data created from the outline will be deleted.
ž If you modify an outline for which stitch data has already been created, the stitch data will be
deleted.
ž After editing data, the interval between the data will be connected with feed or running
stitching. However, if the following data is outline data, it will not be connected.
ž When copying or moving sewing data with the setting of ADJUSTMENT available in the Grid
icon, the sewing start point of data or end point of data you select will be used as the
connecting point.
151-390
-46-
Chapter 3 Editing sewing data
1. Edit screen
When you click on the [EDIT] button on the main menu, the edit menu will appear on the right
of the screen. There are five edit functions; COPY, MOVE, DELETE, MODIFY, and DIVIDE.
When you edit sewing data, click the desired function on the menu.
Button
Function
COPY
Copies data to new location.
MOVE
Changes the position of data.
DELETE Removes data from a pattern.
MODIFY Changes the shape of data by adding a new point, moving or deleting the
component point.
DIVIDE
151-390
Divides outline data at specified position.
2. Copy/Move
-47-
2. Copy/Move methods
When you click on the [COPY] button on the button menu, the copy method selection menu
will appear.
There are six methods for copying data; PARALLEL, MIRROR, ROTATION, MAG/RED
(magnify/reduce), and MULTIPLY.
COPY
Explanation
methods
PARALLEL
MIRROR
Copies data without changing its shape or orientation.
Copies data by reflecting it symmetrically across a specified mirror axis.
ROTATION
Copies data by rotating it.
MAG/RED
Copies data by changing its size.
OFFSET
Copies data by offsetting it.
MULTIPLY
Copies data specified number of times between specified two pieces of data.
(Restricted to outline data.)
When you click on the [MOVE] button on the button menu, the move method selection menu
will appear.
There are five methods for moving data; PARALLEL, MIRROR, ROTATION, MAG/RED
(magnify/reduce), and OFFSET.
MOVE
Explanation
methods
PARALLEL
MIRROR
Moves data without changing its shape or orientation.
Moves data by reflecting it symmetrically across a specified mirror axis.
ROTATION
Moves data by rotating it.
MAG/RED
Moves data by changing its size.
OFFSET
Moves data by offsetting it.
When you edit sewing data, click on the desired check box on the selection menu.
The COPY function is used the same way as the MOVE function, with the exception that the
copied data is not removed from its original position in the pattern.
The following describes the copying operation.
151-390
-48-
Chapter 3 Editing sewing data
2-1 Parallel copy
1. Click on the PARALLEL check box on the copy method selection menu.
The check box will turn black.
2. Select the first segment of the range to be copied.
The segment you select will be indicated in blue.
3. Select the last segment to be copied.
All data in the range specified between and including the first and last segments will be
indicated in blue.
4. Specify the position data is to be copied to.
The temporarily decided data will be indicated in green, and the confirmation mark
will appear.
You can specify the position by either of the following ways:
Specification method
Explanation
For specifying position by moving pointer.
POINTER
When you select ADJUSTMENT from the Grid menu, the
ADJUSTMENT menu will appear. You can change the
connecting point to the beginning or end of the segment(s).
For specifying position by entering relative values for X and Y
VALUE
coordinates through the keyboard.
Use a comma (,) between X and Y values.
Available range to specify position is from -999.9 mm to
999.9 mm for both axes.
NOTE: You must change the specification method before you select the last segment.
5. Click the left mouse button to set the position.
If you do not want to set it, click the right mouse button to cancel the operation.
151-390
2. Copy/Move
-49-
151-390
-50-
Chapter 3 Editing sewing data
2-2 Mirror copy
1. Click on the MIRROR check box on the copy method selection menu.
The check box will turn black.
2. Select the first segment of the range to be copied.
The segment you select will be indicated in blue.
3. Select the last segment to be copied.
All data in the range specified between and including the first and last segments will be
indicated in blue.
4. Select the start point for the mirror axis.
The mirror axis will be indicated in yellow, and the data indicating in green reflected
symmetrically across the mirror axis will be copied temporarily.
5. Select the end point for the mirror axis.
When you select it, the confirmation mark
will appear.
When you select it while pressing the CTRL (control) key, you can easily set the
position of data by rotating it 90 degrees at a time.
6. Click the left mouse button to set the position.
If you do not want to set it, click the right mouse button to cancel the operation.
When you use the mirror copy function, the attributes of the data will also be copied.
You can change the sewing order and direction in consideration of sewability.
DIRECTION
Function
Normal
Sewing order of the copied data does not change.
Reverse
Sewing order of the copied data changes to the opposite to the original
data.
NOTE: You must decide sewing direction before you set the position of the reflected
data.
151-390
2. Copy/Move
-51-
151-390
-52-
Chapter 3 Editing sewing data
2-3 Rotation copy
1. Click on the ROTATION check box on the copy method selection menu.
The check box will turn black.
2. Select the first segment of the range to be copied.
The segment you select will be indicated in blue.
3. Select the last segment of the range to be copied.
All data in the range specified between and including the first and last segments will be
indicated in blue.
4. Specify a reference point for rotation.
The point you specify will be indicated by a cross (+). This is the reference point of
rotation.
When clicking the left mouse button with the Shift key pressed, the reference point will
be changed to the center of the whole image formed by the data.
When clicking the left mouse button with the Ctrl key pressed, the reference point
previously specified can be used. This is useful for repetition of rotation copying
(moving).
The usage of the reference point is the same as for magnify/reduce copy functions.
5. Specify the rotation amount.
The data indicated in green will be copied temporarily, and the confirmation mark
will appear.
You can specify the rotation amount by either of the following ways:
Specification method
POINTER
Explanation
When you move the pointer while pressing the CTRL
(control) key, you can specify the rotation amount in 90°
increments.
VALUE
For specifying rotation amount by entering angle. You
can specify an angle anywhere from -179.9° to 180°.
NOTE: You must change the specification method before you select the last segment.
6. Click the left mouse button to set the position.
If you do not want to set it, click the right mouse button to cancel the operation.
151-390
2. Copy/Move
-53-
151-390
-54-
Chapter 3 Editing sewing data
2-4 Magnify/Reduce copy
1. Click on the MAG/RED check box on the copy method selection menu.
The check box will turn black.
2. Select the first segment of the range to be copied.
The segment you select will be indicated in blue.
3. Select the last segment to be copied.
All data in the range specified between and including the first and last segments will be
indicated in blue.
4. Specify a reference point to magnify or reduce the ratio of data.
The point you specify will be indicated by a cross (+). This is the reference point of
magnification or reduction.
When clicking the left mouse button with the Shift key pressed, the reference point will
be changed to the center of the whole images formed by the data.
When clicking the left mouse button with the Ctrl key pressed, the reference point
previously specified can be used. This is useful for repetition of magnify/reduce
copying (moving).
The usage of the reference point for the same as for rotation copy functions.
5. Input a value for magnification/reduction ratio.
The data indicated in green will be copied temporarily, and the confirmation mark
will appear.
You can specify a magnification/reduction ratio by either of the following ways:
Specification method
POINTER
Explanation
For specifying magnification/reduction ratio.
Magnification/reduction ratio for horizontal or vertical
direction depends on pointer’s position.
When the Ctrl key is pressed, the same
magnification/reduction ratio is allotted for vertical and
horizontal directions.
Mag/red ratio = L1/L2
L1: The length from the reference point to the current
pointer position.
L2: The length from the reference point to the position of
the pointer after the end point is selected.
VALUE
Is in percentage (%) terms when compared to the original
pattern. You can specify the magnification/reduction ratio
151-390
2. Copy/Move
-55-
separately for X and Y directions.
Use a comma (,) between X and Y direction
magnification/reduction ratios.
If “,” is not used, the same magnification/reduction ratio is
allotted for both directions.
e.g. When setting magnification/reduction ratio to 150% for
X direction and 200% for Y direction, type 150, 200.
When setting the magnification/reduction ratio to 80% for
both directions, type 80.
You can input 0.1 to 1000%.
NOTE: You must change the specification method before selecting the reference point.
6. Click the left mouse button to set the position.
If you do not want to set it, click the right mouse button to cancel the operation.
When you magnify or reduce stitch data, you should select either #STITCH or PITCH
on the MAG/RED method menu.
MAG/RED method
#STITCH
Explanation
Does not change the number of stitches when stitch data is
magnified or reduced. (Stitch pitch will be changed.)
PITCH
Does not change stitch pitch when stitch data is magnified or
reduced. (The number of stitches will be changed.)
When you select PITCH on the MAG/RED method menu, you
should set sewing attributes for stitch data, such as the vertex
angle, pitch division, and stitch pitch. Refer to Chapter 2 3-1.
NOTE: You must change the MAG/RED method before the copying operation is
finished.
151-390
-56-
Chapter 3 Editing sewing data
NOTE: Even when you specify a different magnification/reduction ratio for X and Y
directions, outline data will not change.
151-390
2. Copy/Move
-57-
2-5 Offset copy
1. Click on the OFFSET check box on the copy method selection menu.
The check box will turn black.
2. Select the first segment of the range to be copied.
The segment you select will be indicated in blue.
3. Select the last segment to be copied.
All data in the range specified between and including the first and last segments will be
indicated in blue, and an input box for specifying the offset value will appear.
4. Specify the offset value.
The offset value can be entered from 0.1 mm to 500 mm in 0.1 mm increments.
The data indicated in green will be copied temporarily, and the confirmation mark
will appear.
Press the [Esc] key to cancel the operation.
5. Click the left mouse button to set the position.
If you do not want to set it, click the right mouse button to cancel the operation.
Item
METHOD
Explanation
Usually select [A TYPE]. Use [B TYPE] only when segments cross
or offset copy fails with [A TYPE].
DIRECTION When [LEFT/OUT] is selected, the outline is offset to the left (outside).
When [RIGHT/IN] is selected, the outline is offset to the right (inside).
ACCURACY Shows the accuracy of the copied data because it will be straight
outline data after offset copy.
NOTE: If you set accuracy to lower value, shape of data will be like the
original data, however, data size will be enormous. Do not set
lower value if not necessary.
When you offset stitch data, you should select either #STITCH or PITCH on the
CONVERT method menu.
CONVERT
Explanation
method
#STITCH
Does not change the number of stitches when stitch data is
copied. (Stitch pitch will be changed.)
PITCH
Does not change stitch pitch when stitch data is copied. (The
number of stitches will be changed.)
When you select PITCH on the CONVERT method menu, you
151-390
-58-
Chapter 3 Editing sewing data
should set sewing attributes for stitch data, such as the vertex
angle, pitch division, and stitch pitch. Refer to Chapter 2 3-1.
NOTE: You must change the CONVERT method before the copying operation is
finished.
151-390
2. Copy/Move
-59-
2-6 Multiply copy
This function is available for outline data only.
1. Click on the MULTIPLY check box on the copy method selection menu.
The check box will turn black.
2. Select the first segment of the first pattern to be copied.
The segment of the first pattern you select will be indicated in blue.
3. Select the last segment of the first pattern.
All segments in the range specified between and including the first and last segments
for the first pattern will be indicated in blue.
4. Select the first segment of the second pattern to be copied.
The segment of the second pattern will be indicated in blue.
5. Select the last segment of the second pattern.
All segments in the range specified between and including the first and last segments
for the second pattern will be indicated in blue.
6. Input the number of lines to be copied.
You can enter a value anywhere from 1 to 99. When you enter the value, the
specified number of lines will be inserted between the first and second patterns, being
progressive transformations of them, and the confirmation mark
will appear.
Set the vertex angle referring to Chapter 2 3-1 (4).
7. Click the left mouse button to perform the copy operation.
If you do not want to perform it, click the right mouse button to cancel the operation.
151-390
-60-
151-390
Chapter 3 Editing sewing data
3. Deleting data
-61-
3. Deleting data
You will be given a choice of three deletion operations: PART, ALL, or
1 ITEM.
When you click on the [DELETE] button on the button menu, the delete
method selection menu will appear.
DELETE
Explanation
methods
PART
ALL
1 ITEM
Partially deletes data you specify.
Deletes all data at one time.
Deletes 1 item of data. It is also possible to specify only code.
As well, you can specify the kind of data to delete, outline data or stitch data, on the selection
menu.
TARGET data
Explanation
OUTLINE
Deletes outline data.
STITCH
Deletes stitch data.
3-1 Deleting data you specified
1. Click on the PART check box on the delete method selection menu.
The check box will turn black.
2. Select the first segment of the range to be deleted.
The segment you select will turn blue.
3. Select the last segment to be deleted.
All data in the range specified between and including the first and last segments will be
indicated in green, and the confirmation mark
will appear.
4. Click the left mouse button to delete data you have specified.
If you change your mind, click the right mouse button to cancel the operation.
151-390
-62-
Chapter 3 Editing sewing data
3-2 Deleting all data
1. Click on the ALL check box on the delete method selection menu.
The check box will turn black, and the system will display a dialogue box
asking you to confirm your selection.
2. Select [YES] if you are sure you want to delete all the data at one time.
All data you specified will be completely deleted.
If you change your mind, select [NO] to cancel the operation.
3-3 Deleting an item of data
1. Click on the 1 ITEM check box on the delete method selection menu.
The check box will turn black.
2. Select an item of data to be deleted.
The item of data you select will be displayed in green, and the
confirmation mark
will appear.
3. Click the left mouse button to delete the item you have specified.
If you change your mind, click the right mouse button to cancel the operation.
151-390
4. Modifying data
-63-
4. Modifying data
The shape of a pattern can be changed by moving or deleting the points that make up the
pattern, or by adding new points to the pattern, even if you have saved it in the memory. You
can modify both stitch and outline data saved in the memory.
When you click on the [MODIFY] button on the button menu, the modify method selection
menu will appear.
MODIFY
Explanation
methods
ADD
Inserts a new point into the data.
MOVE
Moves a selected point to a new position.
DELETE
Deletes a point.
If the stitch length exceeds the maximum pitch after stitch data modification, the latter will be
converted to feed data. As well, if the feed length does not reach the maximum pitch after
feed data modification, the latter will be converted to stitch data.
4-1 Adding a new point
1. Click on the ADD check box on the modify method selection menu.
The check box will turn black.
2. Select the position for a new point to be added.
Select one of segments of the data.
3. Specify the destination of the new point.
A new point indicated in green will be added to the data temporarily, and the
confirmation mark
will appear.
If you add a new point to a curved line, a correction bar that is used to change the
inclination of the point will appear after adding the new point. You can change the
inclination by selecting a cross mark on the correction bar and moving the pointer.
4. Click the left mouse button to set the position.
If you change your mind, click the right mouse button to cancel the operation.
151-390
-64-
151-390
Chapter 3 Editing sewing data
4. Modifying data
-65-
4-2 Moving a point
1. Click on the MOVE check box on the modify method selection menu.
The check box will turn black.
2. Select a point.
3. Select a new position for the point.
The point you select indicated in green will be moved temporarily, and the confirmation
mark
will appear.
If you modify a curved line, a correction bar that is used to change the inclination of the
point will appear after moving it. You can change the inclination by selecting a cross
mark on the correction bar and moving the pointer.
4. Click the left mouse button to set the position.
If you want to cancel the operation, click the right mouse button.
151-390
-66-
151-390
Chapter 3 Editing sewing data
4. Modifying data
-67-
4-3 Deleting a point
1. Click on the DELETE check box on the modify method selection menu.
The check box will turn black.
2. Select a point to be deleted.
The point you select will be indicated in green, and the confirmation mark
will
appear.
3. Click the left mouse button to delete the point you have selected.
If you change your mind, click the right mouse button to cancel the operation.
151-390
-68-
Chapter 3 Editing sewing data
5. Dividing an outline
An outline can be divided at a specified position.
1. Click on the [DIVIDE] button on the button menu.
2. Specify a position to divide the outline.
A cross mark (+) will appear at the position you specify, and the confirmation mark
will appear.
3. Click the left mouse button to decide the position you have specified.
If you do not want to divide the outline, click the right mouse button to cancel the
operation.
151-390
5. Dividing an outline
-69-
151-390
Chapter 4 Changing sewing data
This chapter explains the fundamental functions concerning changing sewing data (stitch
data and outline data).
The basic rules of changing sewing data are as follows:
· The selected data is indicated in blue.
· The temporarily decided data or currently being processed data is indicated in green.
· Click the right mouse button to return to the previous step.
· Click on the [CANCEL] button to cancel current process and to return to the initial display of
the change screen.
· It is necessary to use the first and last segments when you specify a range of data you want
to change.
A segment means a unit you can select to change data. An outline is not always formed by
a single segment. For outline data, segments are divided by the number of times of clicking
the [SAVE] button during creation. For stitch data, segments are divided by points
comprising data.
· The data that you can select as the first segment or the last segment depends on the type of
data displayed on the screen. For example, when the only STITCH DATA is set on the
menu which is displayed after selecting the Data display icon, you cannot select any outline
data as either the first or last segment when you specify the range to change data.
· You can select desired data using the Search icon.
151-390
-72-
Chapter 4 Changing sewing data
1. CHANGE pull-down menu
When you select the [CHANGE] button on the main menu, the list of items related to changing
sewing data will appear on the pull-down menu. There are seven functions of CHANGE
menu: STITCH CONVERT, ATTRIUBTE, SEWING ORDER, SEWING DIRECTION, FEED
ATTRIBUTE, CODE ATTRIBUTE, and DATA CONVERT.
CHANGE menu
STITCH
Explanation
Converts outline data for stitch data.
CONVERT
ATTRIBUTE
Changes attributes for outline or sewing data.
SEWING ORDER Changes sewing order according to your selection.
SEWING
Changes sewing direction.
DIRECTION
FEED
Changes feed attributes.
ATTRIBUTE
CODE
Changes code attributes.
ATTRIBUTE
DATA CONVERT Changes stitch data to feed data, and vice versa.
151-390
2. Stitch conversion
-73-
2. Stitch conversion
This is used to process outline data to derive stitch data that enables
sewing on the machine.
Outlines for which stitch data has not been created cannot be sewn by the
machine. Stitch conversion is necessary to use outlines you create on
the sewing machine. When converting outline data to stitch data, you will
be given a choice of three methods: ALL, INDV, and SAME.
Conversion
Function
method
ALL
Converts all outline data you select to stitch data, without confirmation or
changing sewing attributes.
INDV
Converts individual pieces of outline data you select to stitch data after
you confirm it to be correct.
SAME
Sets attributes for stitch data to the same as those for the first outline
when converting other outline data to stitch data.
You are required to specify the range of data to be converted to stitch data as well as the
conversion method.
There are two specification methods to convert outline data to stitch data: by converting
outline data you select, or all outline data on the screen at one time.
When you click on STITCH CONVERT on the CHANGE menu, the STITCH CONVERT menu
will appear.
NOTE: Zigzag point could increase more than preset number depending on a shape of the
outline.
Before stitch conversion, you can set the securing stitching method at the
beginning and end of the range you specify.
Select a desired securing stitching method on the selection menu, and specify
the number of stitches both for the start and end of sewing.
151-390
-74-
Chapter 4 Changing sewing data
TACK METHOD
NONE
OVERLAP
Explanation
No setting for securing stitching.
Creates overlap stitching in a closed pattern such as a square,
rectangle, circle or ellipse.
NOTE: Select outline data one piece at a time. If more than one piece
of outline data is selected at one time, overlap stitching may not be
performed as you expect.
N BACK
Creates N-shaped backtack stitching.
V BACK
Creates V-shaped backtack stitching.
2-1 Selecting outline data to be converted to stitch data
1. Select either [ALL], [INDV], or [SAME] on the conversion selection menu by clicking on
the respective check box.
The check box of the item you select will turn black.
As for the specification method menu, the default setting is PART. Skip this menu.
2. Specify the first segment of outline data to be converted.
The segment you select will be indicated in blue.
3. Specify the last segment.
All data in the range specified between and including the first and last segments will be
indicated in blue.
4. Confirm the range you have specified is correct.
The confirmation mark
will appear.
5. Confirm your selection on the conversion method selection menu, and click the left
mouse button to convert outline data to stitch data.
· When you select ALL on the conversion method selection menu, the outline data you
specify will be converted to stitch data along with each outline's attributes without
your confirmation.
· When you select INDV or SAME on the conversion method selection menu, the
outline data of the range you specify will be converted to stitch data after you check
the sewing attributes and change them if necessary.
· When you select INDV or SAME on the conversion method selection menu, the
sewing attribute setting window will appear.
· When you click on the [SET] button, the outline data will be converted to stitch data.
· When you click on the [QUIT] button, the attributes for the next piece of outline data
will appear.
· When you click on the [CANCEL] button, the operation procedure will be returned to
step 1.
· Press the [Esc] key to cancel the current operation.
151-390
2. Stitch conversion
-75-
151-390
-76-
Chapter 4 Changing sewing data
2-2 Converting all outline data on the screen to stitch data
1. Select either [ALL], [INDV], or [SAME] on the conversion method selection menu by
clicking on the respective check box.
The check box of the item you select will turn black.
2. Click on the ALL check box on the specification method menu.
The check box will turn black.
3. Confirm the specified range is correct.
All data will be indicated in blue, and the confirmation mark
will appear.
4. Confirm your selection is correct on the conversion method selection menu.
· When you select ALL on the menu, all outline data will be converted to stitch data
along with each outline's attributes, without your confirmation.
· When you select INDV or SAME on the conversion method selection menu, the
outline data you select will be converted to stitch data after you check the sewing
attributes and change them if necessary.
· When you select INDV or SAME on the conversion method selection menu, the
sewing attribute setting window will appear.
· When you click on the [SET] button, the outline data will be converted to the stitch
data.
· When you click on the [QUIT] button, the attributes for the next outline data will
appear.
· When you click on the [CANCEL] button, the operation procedure will be returned to
step 1.
· Press the [Esc] key to cancel the current operation.
151-390
3. Changing sewing attributes
-77-
3. Changing sewing attributes
When you change the sewing attributes, you should specify the range of
data. There are two specification methods: PART and ALL.
When the data is outline data, you can change stitching attributes, such as
stitch type, pitch, and so on.
When the data is stitch data, you can
change the display color representing the stitch data you select.
3-1 Selecting the range for which to change sewing attributes
If you select outline data for stitch data that has been created, you will change the
attributes for both.
1. Specify the first segment of the sewing data whose attributes you want to change.
The segment you select will be indicated in blue.
2. Specify the last segment.
All data in the range specified between and including the first and last segments will be
indicated in blue.
3. Confirm the range you have specified is correct.
The confirmation mark
will appear.
4. Change the sewing attributes.
· When you change outline data, its stitch attribute setting menu will appear.
Click on the [SET] button on the stitch attribute setting menu to change the settings
of sewing attributes.
· When you change the sewing attributes for outline data whose stitch data has been
created, you can change sewing attributes for both at the same time.
151-390
-78-
Chapter 4 Changing sewing data
· When you change stitch data attributes, the color bar will appear:
3-2 Selecting all outline data
If you select outline data for stitch data that has been created, you will change the
attributes for both.
1. Click on the ALL check box on the specification method selection menu.
The check box will turn black.
2. Confirm your selection is correct.
All data will be indicated in blue, and the confirmation mark
will appear.
3. Change sewing attributes.
4. Click on the [SET] button on the stitch attribute setting menu to change the setting of
the sewing attributes.
151-390
4. Changing sewing order
-79-
4. Changing sewing order
The sewing order for segments of data you create can be changed either
manually with your selection or automatically.
4-1 Manually changing sewing data order
1. Click on either [<<], [<], [>], or [>>] until the number you want to change the sewing
order to is displayed on the status line.
[<<]: Subtracts 10 from the currently displayed sewing number.
[<]: Subtracts 1 from the currently displayed sewing number.
[>]: Adds 1 to the currently displayed sewing number.
[>>]: Adds 10 to the currently displayed sewing number.
When you click on the [CANCEL] button, the sewing number will become one.
2. Specify the segment you want to allot the number to.
The segment will have the number displayed on the status line.
151-390
-80-
Chapter 4 Changing sewing data
4-2 Automatically changing sewing data order
Sewing order for all segments can be automatically changed to increase efficiency.
1. Click the [AUTO CHANGE] button.
The specification method menu and the MIN FEED DIST menu will appear.
2. Select one item in each menu.
When you select PART in the specification method menu, you can change the
sewing order for segments in the specified range. When you select ALL, the
sewing order for all segments will be changed automatically.
When you select YES in the MIN FEED DIST menu, sewing directions will be
changed to make sewing efficient; when you select NO, sewing directions are not
changed.
The check box of the item you select will turn black.
3. Specify the range of sewing data whose order is to be changed.
All data in the rage specified between and including the first and last segments will be
indicated in blue, and the confirmation mark
151-390
will appear.
4. Changing sewing order
-81-
4. Confirm the range you have specified is correct, and click the right mouse button to
change all sewing order.
Sewing order for all segments of the specified range will be changed.
Press the [Esc] key to cancel the current operation.
151-390
-82-
Chapter 4 Changing sewing data
5. Changing sewing direction
This function is used to reverse the current sewing direction (including sewing
order) of the data you specify. You can change the sewing direction of either all
data or the data you specify.
5-1 Reversing sewing direction of data you want
If you select outline data for stitch data that has been created, you will change the
attributes for both.
The default setting of the specification method selection menu is PART.
1. Specify the first segment of the range you want to change the sewing direction for.
The segment you specify will be indicated in blue.
2. Select the last segment.
All data in the range specified between and including the first and last segments will be
indicated in blue.
3. Confirm the range you have specified is correct.
The range you specify will be indicated in blue, and the confirmation mark
appear.
4. Confirm the sewing direction is correct.
The current sewing direction will be reversed.
151-390
will
5. Changing sewing direction
-83-
5-2 Reversing sewing direction of all data at one time
If you select outline data for stitch data has been created, you will change the attributes
for both.
1. Click on the ALL check box on the specification method selection menu.
The check box will turn black.
2. Make sure that you will reverse the sewing direction of all data.
The range you specify will be indicated in blue, and the confirmation mark
will
appear.
3. Confirm the sewing direction.
The current sewing direction will be reversed.
151-390
-84-
Chapter 4 Changing sewing data
6. Changing feed attributes
A feed stitch has attributes for thread trimming, splitting, and presser foot height.
The FEED ATTRIBUTE function is used to set thread trimming and splitting after feed stitch,
and to change the presser foot height.
1. Specify the feed data whose attributes you want to change.
The feed data you select will be indicated in blue.
The currently set feed attributes will appear on the right of the screen, and the confirmation
mark
will appear.
2. Click the left mouse button to confirm the feed data you have specified is correct.
3. Set each attribute by clicking on the desired check box.
4. Click on the [SET] button to set the feed attributes.
If you do not want to set the feed attributes, click on the [CANCEL] button to cancel the
operation.
151-390
7. Changing code attributes
-85-
7. Changing code attributes
When you select CODE ATTRIBUTE on the CHANGE menu, the
code attribute menu will appear as shown in the right figure.
The CODE ATTRIBUTE function is used to change attributes for the
speed and optional output codes.
Before you change code attributes, you should set CODE to on in the menu which is
displayed after clicking on the Data display icon to display code data on the screen.
However, no tack codes can be changed.
7-1 Changing attribute for speed code
1. Select SPEED DECELTN on the selection menu, and specify the speed code whose
attribute you want to change.
The speed deceleration code you specify will be indicated in green.
The setting of the attribute for the code will be displayed.
2. Click the left mouse button to confirm the speed deceleration code you have specified
is correct.
3. Change the attribute for the code on the selection menu.
See Chapter 2 1. 1-2 (3) (a).
4. Click on the [SET] button to fix the setting of the attribute.
If you want to change the setting, click on the [CANCEL] button to cancel the operation.
151-390
-86-
Chapter 4 Changing sewing data
7-2 Changing attribute for optional output code
1. Select an optional output code whose attribute you want to change.
The code you select will be indicated in green.
The setting of the attribute for the code will appear on the right of the screen.
2. Click the left mouse button to confirm the optional output code you have selected is
correct.
3. Change the attribute for the code on the selection menu.
See Chapter 2 1-2 (3) (b).
4. Click on the [SET] button to fix the setting of the attribute.
If you want to change the setting, click on the [CANCEL] button to cancel the operation.
151-390
8. Using the DATA CONVERT function
-87-
8. Using the DATA CONVERT function
The DATA CONVERT function is used to change feed data to stitch data,
and vice versa. You can change any feed data to stitch data, and any
stitch data to feed data with any existing data.
8-1 Changing feed data to stitch data
1. Click on the FEED->STITCH check box on the selection menu.
You can select only feed data to be converted to stitch data.
2. Specify the feed data you want to convert to stitch data.
3. Click the left mouse button to confirm the feed data you have specified is correct.
The stitch attribute setting window will appear.
4. Change stitch attribute and its associate setting referring to Chapter 2 3. 3-1 and later.
5. Click on the [SET] button to convert feed data to stitch data.
If you want to cancel the operation, click on the [CANCEL] button.
151-390
-88-
Chapter 4 Changing sewing data
8-2 Changing stitch data to feed data
1. Click on the STITCH->FEED check box on the selection menu.
You can specify only stitch data to be converted to feed data.
2. Specify stitch data you want to convert to feed data.
The stitch data you specify will be indicated in blue, and the confirmation mark
appear.
3. Click the left mouse button to confirm the stitch data you have specified is correct.
The stitch data will be converted to feed data.
151-390
will
Chapter 5 Setting information concerning data creation
This chapter explains how to set information concerning data creation.
1. Set screen
When you click on the [SET] button on the main menu, the set screen will appear.
The following are explanations for each item on the set screen.
151-390
-92-
Chapter 5 Setting information concerning data creation
1-1 Model menu
The model menu shows the list of model names for sewing
machines that are applicable to the BAS-PC/300.
The selected model is displayed inversely.
If there are too many model names to be displayed on the menu at
one time, the model name you want may not appear in the menu
area. You can scroll the menu to display the model name you
want by clicking the
or
, or by dragging the scroll bar.
1-2 Maximum pitch sheet menu
This is used to set the maximum stitch pitch of the sewing data.
Click on the MAX PITCH sheet menu to enter a value for the pitch through
the keyboard. You can enter the pitch in 0.1 mm increments.
If you want to cancel the operation, press the ESC key on the keyboard,
or click the right mouse button.
When you change the setting of the machine model, the maximum pitch will be replaced
with that of the model you specify.
1-3 Trace margin sheet menu
Trace margin is used when you create stitch data by tracing it. When the pointer
comes within the range of the set pitch plus/minus the trace margin, a stitch will be
created.
Click on the TRACE MARGIN sheet menu to input the value for trace
margin through the keyboard. You can enter the value in 0.1 mm
increments.
If you want to cancel the operation, press the ESC key on the keyboard, or click the right
mouse button.
A large trace margin value can make the tracing speed faster, however, it may adversely
affect the stitching direction. Try various values to find the optimum one.
1-4 Frame reference position selection menu
This is used to set the pointer position of the frame when adjusting
the frame position.
There are three options on this menu:
HOME POSITION: Displays the pointer at the home position of the frame.
151-390
1. Set screen
-93-
CENTER: Displays the pointer at the center of the frame.
UPPER LEFT: Displays the pointer in the upper left corner of the frame.
1-5 Zigzag shape selection menu
This function is available when outline data is converted to zigzag stitch
data. You can specify zigzag shape on this selection menu.
ZIGZAG
Explanation
Image after conversion
SHAPE
N SHAPE
Makes zigzag stitching like letter N.
V SHAPE
Makes zigzag stitching like letter V.
1-6 Data connection selection menu
When stitch data is created or edited, or its attributes are changed, the connection
between data may not be appropriate. You can specify how to connect data using feed
or running stitching.
Click on the FEED check box to connect data using feed.
When you select STITCH on the selection menu:
When the interval between data is less than the maximum length you set in
the maximum connection length sheet menu (described next), data will be connected
using running stitching; if not, data will be connected using feed.
The attributes of this feed are set with thread trimming, no splitting, and no set presser
foot height.
151-390
-94-
Chapter 5 Setting information concerning data creation
1-7 Maximum connection length sheet menu
This is available when you select STITCH on the connection selection
menu. You will specify the maximum length of the interval between data
to be connected using running stitching.
Click on the MAX. LENGTH sheet menu to input a value through the keyboard.
You can enter the value in 0.1 mm increments. In addition, the maximum length will
change when you change the machine model or maximum pitch.
If you cancel the operation, press the ESC key or click the right mouse button.
1-8 Button menu
This screen has three buttons.
Button
FRAME
Explanation
Specifies the position of the frame of the model you specify.
POSITION
151-390
SET
Stores selection in the computer's memory, and exits the set screen.
EXIT
Returns selections to the previous ones, and exits the set screen.
2. specifying the frame position
-95-
2. Specifying the frame position
Select the model name on the model scroll menu, decide the pointer position of the frame
using the reference position selection menu, and click on the [FRAME POSITION] button on
the button menu.
If the frame does not appear, click on the Reduce icon
a few times, then move the pointer
to check whether or not the frame appears.
The following example is when you set the pointer position to the center of the frame:
Using the mouse, move the pointer to the desired position, and then click the left mouse
button to fix the frame position.
When you specify the frame position, the pointer movement depends on the setting of the
Grid icon (positioned on the vertical bar on the left of the screen).
If you press the SHIFT key, the frame reference position will be shifted to the center of the
data you are currently editing.
The confirmation mark
will appear.
When you press the CTRL key on the keyboard at this time, the input box will appear as
follows:
151-390
-96-
Chapter 5 Setting information concerning data creation
You can specify the length from the specified position to the desired destination by entering
values for X and Y directions in 0.1 mm increments.
For example, when you want to set the home position of the frame to the position where it is 5
mm to the right of and 5 mm below the sewing start point, set the frame reference position to
HOME POSITION on the selection menu, set SNAP POINT to ON in the Grid icon, move the
pointer to the sewing start point until the home position of the frame precisely matches the
sewing start point, and click the left mouse button. When the pointer changes to the
confirmation mark
, press the CTRL key to enter the coordinates, "5, -5" in the input box.
Click the left mouse button to confirm your specification. If you want to reset the position,
click the right mouse button.
If the data exceeds the frame dimensions, the following dialogue window will appear:
When you click on the [SET] button, the frame position will be decided. However, if you click
on the [SET] button with data exceeding the frame dimensions, the sewing data will not be
output as you expect. Change the frame position, or edit data so that it fits in the frame.
When you click on the [RESET] button, you can specify the frame position again.
After you set the position of the frame, the set screen will appear. Click on the [SET] button
to register the set value on this screen into the BAS-PC/300.
151-390
Chapter 6 File
This chapter describes functions related to file management.
1. File screen
When you click on the [FILE] button on the main menu, the file screen will appear.
The following are descriptions of each item comprising the file screen.
151-390
-98-
Chapter 6 File
1-1 NOW EDITING window
The NOW EDITING window shows the image of the data currently being
edited.
1-2 Directory sheet menu
This is used to specify the directory that stores data you want to load, save, delete ,or
display.
Click on the directory sheet menu, and input the desired directory path using the
keyboard.
If you cancel the operation, press the ESC key on the keyboard, or click the right mouse
button.
1-3 File sheet menu
This is used to specify the filename of data you want to load, save,
or delete.
Click on the file sheet menu to input the desired filename, or select it from the filename
list.
If you want to cancel the operation, press the ESC key on the keyboard, or click the right
mouse button.
1-4 File scroll menu
This shows the list of filenames which are included in the directory
you specify.
If there are too many filenames to be displayed on the menu at one
time, the name of the file you want may not appear in the menu
window. You can scroll the menu to display the name of the file you
want by clicking on either scrolling arrow,
or
, or by dragging
the scroll bar.
When you select a filename from the filename list, its image will be
displayed in the CONTENTS window.
151-390
1. File screen
-99-
The selected filename will appear in the file sheet menu.
1-5 Contents window
This window shows the contents (image) of the file you specify on the file
sheet menu, or you select on the file scroll menu.
1-6 Button menu
Button menu is used to execute operations for the data of a filename you enter or specify
on the file sheet menu.
The following are explanations of each button:
Button
NEW FILE
LOAD
MERGE
Explanation
Creates a new file.
Loads the specified file into the BAS-PC/300.
Loads the specified file into the BAS-PC/300 by adding it into the file you are
currently editing.
SAVE
Saves a file created using the BAS-PC/300 with specified filename. If a file
with the same filename exists, the data will be replaced.
DELETE
Deletes data from the specified directory. Be careful as the deleted data
cannot be retrieved.
DISPLAY ALL Displays all images of files in the directory which is shown in the directory
sheet menu.
EXIT
Exits file screen.
151-390
-100-
Chapter 6 File
2. File image screen
When you click the [DISPLAY ALL] button, the file image screen will appear.
The image of file which has been specified in the file scroll menu will be displayed in a red
frame.
When you click on an image, the screen switches to the file screen and the file that stores
the image you have specified will be selected.
Click on the
button or press the [Enter] key on the keyboard to show the next screen.
Click on the
button or press the space bar on the keyboard to show the previous
screen.
Click on the [EXIT] button or click the right mouse button, or press the [Esc] key on the
keyboard to exit the file image screen.
151-390
3. Merging data
-101-
3. Merging data into the data you are currently editing
Select the filename of the data you want to merge into the data you are currently editing by
clicking on it on the file scroll menu or by typing it into the file sheet menu through the
keyboard.
Click on the [MERGE] button on the button menu.
A rectangle representing the file to be merged will appear.
If the rectangle does not appear, click on the Reduction icon
a few times, then move the
pointer to any position to check whether the rectangle appears.
Move the pointer to any position to fix the position of the rectangle, and click the left mouse
button.
When you specify the position of the rectangle, the pointer movement depends on the setting
of the Grid icon (positioned on the vertical bar at the left of the screen).
If you press the SHIFT key, the center of the data you are currently editing will be aligned with
that of the rectangle.
The confirmation mark
will appear. When you press the CTRL key on the keyboard at
this time, the input box will appear as follows:
You can specify the length from the specified position to the desired destination by entering
values for X and Y directions in 0.1 mm increments.
For example, when you want to set the center of the rectangle to the position where it is 5 mm
to the right of and 5 mm below the sewing end point, set ADJUSTMENT to SNAP POINT in
the Grid icon, move the pointer to the sewing end point until they match, and click the left
mouse button. When the pointer changes to the confirmation mark
, press the CTRL key
to enter the coordinates, "5, -5" in the input box.
151-390
-102-
Chapter 6 File
Click the left mouse button to decide your specification. The data will be merged into the
data currently displayed at the specified position.
If you have not decided the position of the rectangle, click the right mouse button. You can
reset positioning of the rectangle.
151-390
Chapter 7 Input/Output
This chapter describes functions to input data from each machine series into the
BAS-PC/300, to output data created by the BAS-PC/300 as data for each machine
series, and to input embroidery data or CAD data into the BAS-PC/300.
1. I/O pull-down menu
When you click on the [I/O] button on the main menu, the I/O pull-down menu will
appear.
151-390
-104-
Chapter 7 Input/Output
This menu has the following three options: STITCH DATA, ROM DATA and
EMBROIDERY/CAD DATA.
(1) Stitch data
This function is used to input data stored on a disk inserted in the FD300 or on a
ROM chip, into the BAS-PC/300, to output data created on the BAS-PC/300 to each
machine series, and to delete data.
The media for data storage depends on the machine series; refer to the following
table:
Machine series
Media
Format
Floppy disk
3.5 2DD
Floppy disk
3.5 2HD 1.44MB
BAS-300 series
BAS-300A series
BAS-750 series
BAS-300E series
BAS-761
(2) ROM data
This is used to input data stored on the ROM chip set in the ROM writer (hereinafter
called ROM data) into the BAS-PC/300; to save the ROM data into the file on the
personal computer (hereinafter called ROM file); to load and delete the ROM file; and
to output ROM data stored in the ROM file onto the ROM chip set in the ROM writer.
The media for data storage depends on the machine model; refer to the following
table:
Machine series
Manufacturer
B430E series
P-ROM chip SGS-THOMSON
BAS-705
TI
B981
B855E,B856E
151-390
Media
P-ROM chip TI
Format
M27C512
TMS27C512
TMS27C010A
1. I/O pull-down menu
-105-
(3) Embroidery/CAD data
This function is used to input embroidery data used on an embroidery sewing
machine, or data created by a CAD system into the BAS-PC/300.
The formats the BAS-PC/300 can accept are the Tajima TFD format BROTHER
format, and DXF data.
Data formats understood by this function
Data type
File extension
DST
Tajima TFD format
DSB
DSZ
BROTHER format
HAS
DXF format
DXF
NOTE: Embroidery data will be converted to stitch data; CAD data will be converted
to outline data. As to the DXF versions, the system can deal with up to
release 12.
151-390
-106-
Chapter 7 Input/Output
2. Stitch data input/output screen
When you click on STITCH DATA on the I/O pull-down menu, the following screen
will appear:
The following are explanations for each item comprising the stitch data input/output
screen.
151-390
2. Stitch data input/output screen
-107-
2-1 NOW EDITING window
This window displays the image you are currently editing.
2-2 End code selection menu
This is a list of end codes that are used when the data created by the
BAS-PC/300 is output as BAS-300 series data.
Refer to the BAS-300 series instruction manual for each end code
function.
Click on the check box of the desired end code and resultantly that
box will turn black. If you make a mistake or wish to change your
selection, clicking on the black box again will cause it to be deselected.
2-3 Model menu
The model menu shows the list of names of models you want
to input stitch data to or output it from.
Select the desired model by clicking on its name.
The selected model name will be inversely displayed.
If there are too many models to be displayed on the menu at
one time, the name of the model you want may not appear on
the menu. You can scroll the menu to display the name of the
desired model by clicking on the scrolling arrows,
or
, or
by dragging on the scroll bar.
151-390
-108-
Chapter 7 Input/Output
2-4 Program number menu
The program number menu offers a list of program numbers for
data you input or output.
If there are too many program numbers to be displayed on the
menu at one time, the number of the program you want may not
appear on the menu. You can scroll the menu to display the
name of the desired model by clicking on the scrolling arrows,
or
, or by dragging on the scroll bar.
When the [DISPLAY ALL] button is clicked on, the program
image screen that indicates all images of each program in the
specified model format will appear.
2-5 Program image screen
When you click on the [DISPLAY ALL] button on the stitch data input/output screen, the
program image screen will appear.
The image of the file which has been specified in the program number scroll menu
will be displayed in a red frame.
When you click on an image, the screen switches to the stitch data input/output
screen and the file that stores the image you have specified will be selected.
151-390
2. Stitch data input/output screen
Click on the
-109-
button or press the [Enter] key on the keyboard to show the next
screen.
Click on the
button or press the space bar on the keyboard to show the previous
screen.
Click on the [EXIT] button or press the [Esc] key on the keyboard to exit the program
image screen.
Press the [Esc] key on the keyboard to cancel the indication of the images.
2-6 Program contents display window
After you specify a model and a program number on each menu, click on
the [DISPLAY] button. The image of the data you specified will be
displayed.
2-7 Frame reference position selection menu
When you output data, you can specify the pointer position
(frame reference position) for moving the frame.
Select [HOME POSITION] to set the pointer at the home
position of the frame.
Select [CENTER] to set the pointer at the center of the frame.
Select [UPPER LEFT] to set the pointer in the upper left corner of the frame.
151-390
-110-
Chapter 7 Input/Output
2-8 Button menu
The above buttons are used to perform the operation for the data allotted to each
respective program number.
The following are explanations of each button:
Button
INPUT
Explanation
Inputs data allotted to program number of the specified model, into the BASPC/300.
MERGE
Inserts the data of the program number set in the specified model, into the data
you are currently editing. Refer to chapter 6.
OUTPUT
Outputs the data you are currently editing, using the program number of the
model you specify as its title.
DELETE
Deletes the data you specify.
DELETE
Deletes all data.
ALL
EXIT
151-390
Exits the stitch data input/output screen.
3. ROM data screen
-111-
3. ROM data screen
When you click on [ROM DATA] on the I/O pull-down menu, the following screen will
appear:
The following are descriptions of each item compromising the screen:
151-390
-112-
Chapter 7 Input/Output
3-1 Model menu
The model menu shows the list of names of models you want
to input stitch data to or output it from.
Select the desired model by clicking on its name.
The selected model name will be inversely displayed.
If there are too many models to be displayed on the menu at
one time, the name of the model you want may not appear on
the menu. You can scroll the menu to display the name of
the desired model by clicking on the scrolling arrows,
or
, or by dragging on the scroll bar.
3-2 Directory sheet menu
This is used to specify the path of the directory that stores the ROM file you want to load,
save, or delete.
Click on the directory sheet menu to input the desired directory path through the
keyboard.
If you want to cancel the operation, press the ESC key on the keyboard, or click the right
mouse button.
3-3 ROM file sheet menu
This is used to specify the ROM filename you want to load,
save, or delete.
Click on the file sheet menu to input the desired filename, or select it on the file scroll
menu.
If you cancel the operation, press the [Esc] key on the keyboard, or click the right mouse
button.
151-390
3. ROM data screen
-113-
3-4 ROM file scroll menu
This shows the list of ROM filenames which are included in
the directory you specify.
If there are too many ROM filenames to be displayed on the
menu at one time, the name of the file you want may not
appear in the menu window. You can scroll the menu to
display the name of the file you want by clicking on the
scrolling arrows,
or
, or by dragging on the scroll bar.
When you select a ROM filename from the filename list, its
image will be displayed in the CONTENTS window.
The selected filename will appear in the file sheet menu.
When you specify the name of the ROM file, the machine model corresponding to it will
appear along with the indication of its program number and description.
When you click on the [DISPLAY ALL] button, all ROM data images stored in the ROM
file will appear.
151-390
-114-
Chapter 7 Input/Output
3-5 ROM data image screen
When you click on the [DISPLAY ALL] button, the following will appear.
Images of ROM data in the specified ROM file will appear.
Click on the
button or press the [Enter] key to show the next screen.
Click on the
button or press the space bar on the keyboard to show the previous
screen.
Click on the [EXIT] button or click the right mouse button, or press the [Esc] key on the
keyboard to exit this screen.
Press the [Esc] key on the keyboard to cancel the indication of the images.
151-390
3. ROM data screen
-115-
3-6 Button menu
The following are explanations of each button:
Button
ROM IN
Explanation
Inputs data stored on the ROM chip set in the ROM writer, into the BASPC/300.
ROM OUT
Outputs data created on the BAS-PC/300 to a ROM chip set in the ROM
writer.
LOAD
Loads the ROM data stored in the ROM file for editing.
After loading, the stitch data input/output screen will appear. Select the
desired program number and click on the [INPUT] button to show the
contents (image) of the ROM data on the computer screen.
SAVE
Saves the edited ROM data in the specified directory with a desired ROM
filename. You can add a description to the data. If you do not wish to add
one, press the [Enter] key on the keyboard.
DELETE
EXIT
Deletes the ROM file you specify.
Exits the ROM data screen.
NOTE: The ROM writer that can be used with [ROM IN] and [ROM OUT] functions should
be the Brother specified original ROM writer, PRW-1, or a commercially available
ROM writer that is equipped to perform communication using an RS cable.
151-390
-116-
Chapter 7 Input/Output
3-7 Copy button menu
These buttons are used to copy the ROM data in the ROM chips, to
add ROM data to the ROM file, and to overwrite the ROM data
stored in the chip or file.
Button
ROM COPY
Explanation
Copies the data stored on the ROM chip set in the ROM writer, to a new
ROM chip.
ADD
Adds the ROM data stored in the ROM chip or ROM file in the computer to
another ROM chip or ROM file.
OVERWRITE Overwrites the ROM data stored in the ROM chip or ROM file in the
computer, to another ROM chip or ROM file.
NOTE: The ROM writer that can be used with these functions should be the PRW-1 or a
commercially available ROM writer that is equipped to perform communication
using an RS cable.
151-390
4. EMBROIDERY/CAD data input screen
-117-
4. EMBROIDERY/CAD data input screen
When you click [EMBROIDERY/CAD DATA] on the I/O pull-down menu, the following
screen will appear:
The following are descriptions of each item comprising the screen:
4-1 Directory sheet menu
This is used to specify the path of the directory that stores the embroidery data or CAD
data file you want to input.
Click on the directory sheet menu to input the desired directory path through the
keyboard.
If you want to cancel the operation, press the ESC key on the keyboard, or click the right
mouse button.
151-390
-118-
Chapter 7 Input/Output
4-2 File name sheet menu
This is used to specify the filename of embroidery data or
CAD data you want to input.
Click on the file sheet menu to input the desired filename, or select it on the file scroll
menu.
If you want to cancel the operation, press the ESC key on the keyboard, or click the right
mouse button.
4-3 File scroll menu
The file scroll menu shows the list of filenames which are
included in the directory you specify.
If there are too many files to be displayed on the menu at one
time, the name of the file you want may not appear on the
menu. You can scroll the menu to display the name of the file
you want by clicking the
or
, or by dragging on the scroll
bar.
When you select a filename on the file scroll menu, the
selected filename will appear on the filename sheet menu.
4-4 Data type selection menu
This is used to select the type of data you want to input.
4-5 Thread trimming selection menu
Since Tajima TFD formatted data does not include thread trimming data,
the number of feed stitches is substituted for thread trimming setting.
For example, select 3 on the thread trimming selection menu; when
inputting Tajima data, if there are three successive feed stitches in the
embroidery data you input, the BAS-PC/300 will input the embroidery
data after converting the first of the three feed stitches into the thread
trimming code.
151-390
4. EMBROIDERY/CAD data input screen
-119-
4-6 DXF unit selection menu
This is used to specify the measurement unit of CAD data (DXF
format) to be input.
4-7 Button menu
The following are explanations for each respective button function:
Button
INPUT
Explanation
Inputs embroidery or CAD data you specify in the filename sheet menu, into the
BAS-PC/300. The color representing the input data depends on the setting of the
Color icon.
MERGE
Adds embroidery or CAD data you specify in the filename sheet menu, into the
data you are currently editing. Refer to chapter 6.
EXIT
Exits EMBROIDERY/CAD data input screen.
151-390
-120-
Chapter 7 Input/Output
5. Data manipulation
5-1 Inputting data
1. For BAS-300 or 750 series machines, insert a disk storing BAS-300 or 750 series
data file(s) into the FD300.
For BAS-300E series machines, insert a disk containing data into the FD drive (drive
A) of your PC.
For B430E series or B981 machines, click the [ROM IN] button to input data on the
ROM chip into the BAS-PC/300. (Refer to 6-2.)
2. Click on the [I/O] button on the main menu, and select STITCH DATA on the pull-down
menu to display the stitch data input/output screen.
3. Select the model applicable to the data on the disk, on the model menu.
4. Select the program number of the data to be input on the program scroll menu.
For B430E series machines, if "None" appears on the program number menu, input
data on the ROM chip into the BAS-PC/300. (Refer to 6-2.)
5. Click on the [INPUT] button. The system will start to input the data.
If the current data being created or edited exists though it is not visible on the screen,
the following message will appear:
When [YES] is selected, all the data you are editing will be deleted, and the new data
will be input instead.
When [NO] is selected, the operation will be canceled.
NOTE: The input data will overwrite the previous data on the screen. If you are editing
sewing data to be used in the future, you should save it before inputting data.
151-390
5. Data manipulation
-121-
5-2 Outputting data
1. For BAS-300 or 750 series machines, insert a disk storing BAS-300 or 750 series
data file(s) into the FD300.
For BAS-300E series machines, insert a disk containing data into the FD drive (drive
A) of your PC.
For B430E series or B981 machines, click the [ROM IN] button to input data on the
ROM chip that is to be output into the BAS-PC/300. (Refer to 6-2.)
2. Click on the [I/O] button on the main menu, and select STITCH DATA on the pull-down
menu to display the stitch data input/output screen.
3. Select a model to output the data on the model menu.
4. Select the program number of the data to be output on the program scroll menu.
For B430E series machines
When "NEW" is selected, data will be output after being added after the previously
last data. The program number of this data will be the last existing number plus one.
For example, when there are 60 programs so numbered and "NEW" is selected,
data to be output will be No.61.
If "None" appears on the program number menu, input data stored on the ROM chip
into the BAS-PC/300. (Refer to 6-2.)
5. Set the frame reference position on the frame reference position menu.
6. Click on the [OUTPUT] button.
When the frame has already been set or your machine is the B981, proceed to step
7.
The following example is when the frame reference position is set to CENTER.
When you click on the [OUTPUT] button, the stitch data screen will be closed, and
the frame will appear on the screen instead.
If the frame does not appear, click on the Reduce icon
a few times, then move
the pointer to check whether or not the frame appears.
151-390
-122-
Chapter 7 Input/Output
Using the mouse, move the pointer to adjust the frame to the desired position, and click
the left mouse button to decide the frame position.
When you specify the frame position, the pointer movement depends on the setting of
the Grid icon (positioned on the vertical bar on the left of the screen).
If you press the SHIFT key, the center of the frame reference position will match the
one of the data you are currently editing.
The pointer will change to the confirmation mark
.
Click the left mouse button to confirm the frame position.
When you press the CTRL key on the keyboard at this time, the input box will appear.
You can specify the length from the specified position to the desired destination by
entering values for X and Y directions through the keyboard. (Refer to chapter 5 2.)
When you want to reset the frame position, click the right mouse button.
If the data exceeds the frame dimensions, the following dialogue window will appear:
151-390
5. Data manipulation
-123-
When you click the [SET] button, the frame position will be fixed. However, if you
click the [SET] button with data exceeding the frame dimensions, the sewing data will
not be output as you expect. Change the frame position, or edit data so that it fits in
the frame.
When you click the [RESET] button, you can specify the frame position again.
7. The system will ask you whether you want to output data indicating message on the
status line. The pointer will change to the confirmation mark
.
Click the left mouse button to output data.
Click the right mouse button if you want to cancel outputting data.
When you press the CTRL key after clicking on the [OUTPUT] button, you can
specify the length from the specified position to the desired destination by entering
values for X and Y directions through the keyboard.
NOTES: Data will be overwritten when it is output. Be sure to press the DISPLAY button to
check the contents of the program you specify before outputting data.
For the B430E series or B981 machines, the above operation is only for renewing
the ROM data in the computer’s memory.
Click on the [ROM OUT] button to output sewing data to the ROM chip. (Refer to 63.)
151-390
-124-
Chapter 7 Input/Output
5-3 Deleting data
1. For BAS-300 or 750 series machines, insert a disk storing BAS-300 or 750 series
data file(s) into the FD300.
For BAS-300E series machines, insert a disk containing data into the FD drive (drive
A) of your PC.
For B430E series or B981 machines, click the [ROM IN] button to input data on the
ROM chip that is to be deleted, into the BAS-PC/300. (Refer to 6-2.)
2. Click the [I/O] button on the main menu, and select STITCH DATA on the pull-down
menu to display the stitch data input/output screen.
3. Select the model of the data to be deleted on the model scroll menu.
4. Select the program number of the data to be deleted on the program menu.
For B430E series machines, if "None" appears on the program number menu, input
data stored on ROM chip into the BAS-PC/300. (Refer to 6-2.)
5. Click the [DELETE] button. The dialogue box will appear as follows:
Select [YES] to delete the data. The data you specify will be deleted from the disk
set in the FD300 or the computer’s memory.
For B430E series machines, one of programs is deleted, and the following program
numbers are advanced one by one. For example, when program No.60 is deleted,
No.61 is advanced to No.60, and following numbers are respectively advanced one
by one.
Select [NO] to cancel the operation.
NOTE: Be careful as data cannot be retrieved after you execute the deletion operation.
For the B430E series or B981 machines, the above procedure is only for deleting the
ROM data from the computer's memory. Click on the [ROM OUT] button to output
sewing data to the ROM chip.
151-390
6. Inputting/outputting ROM data
-125-
6. Inputting/outputting ROM data
For the machines that store data on ROM chips (e.g. B430E series machines), the BASPC/300 can input and output the ROM data via the ROM writer. Prepare a ROM writer,
preferably Brother specified ROM writer PRW-1. Commercially available ones can also
be used. See “1-3 Connecting the ROM writer” in “Setting Up the System” or “2. System
configuration screen” in chapter 8, “System configuration.”
The following illustrates the input and output flow of ROM data.
• ROM IN
50
‚ LOAD
51
ƒ INPUT
51
52
… SAVE
† ROM OUT
50
52
„ OUTPUT
ROM
ROM file
ROM data
BAS-PC/300
ROM WRITER
ROM data screen
Stitch data input/output screen
• When the data in the ROM chip is input to the BAS-PC/300, it is stored in the ROM file in
the computer’s memory.
‚ When the ROM file is loaded, the ROM data is also loaded and the stitch data
input/output screen appears.
ƒ When you specify the program number of the ROM data, and input it into the system, the
ROM data will appear on the screen.
„ When the ROM data being displayed is output, it is renewed.
… The ROM data is saved in the ROM file.
† When you specify the ROM file and click on the [ROM OUT] button, it is output to the
ROM chip.
‡ The ROM file can be saved with its filename and description.
151-390
-126-
Chapter 7 Input/Output
6-1 Setting the ROM chip
Attach the ROM chip to or remove it from the ROM writer as follows:
(Attaching the ROM chip to the ROM writer)
• Raise the lever of the ROM writer.
‚ With the notch on the ROM chip facing toward the rear, align the front pins of the
ROM chip and the front holes of the socket on the ROM writer, and insert the ROM
chip into the socket.
ƒ Lower the lever of the ROM writer.
(Removing the ROM chip from the ROM writer)
• Raise the lever of the ROM writer.
‚ Remove the ROM chip from the socket on the ROM writer.
ƒ Lower the lever of the ROM writer.
151-390
6. Inputting/outputting ROM data
-127-
6-2 Inputting ROM data
1. Put the ROM chip in the ROM writer.
2. Click on the [I/O] button on the main menu, and select [ROM DATA] on the pull-down
menu to display the ROM data input/output screen.
3. Click on the [ROM IN] button to input data stored on the ROM chip into the BASPC/300.
Press the [Esc] key to cancel the current operation.
When the ROM data input is completed, the machine model corresponding the ROM
chip will appear, and an input box for specifying the ROM filename will appear.
Enter the name of the ROM file in which the ROM data on the computer’s memory is
to be saved in.
Press the [Esc] key to cancel the operation. The following dialogue box will appear:
When [YES] is selected, the input ROM data will be deleted.
When [NO]is selected, the system will return to the ROM filename input screen.
If the same ROM filename already exists, the following dialogue box will appear:
When [OVERWRITE] is selected, the ROM file will overwrite on the existing one.
When [CANCEL] is selected, the save operation will be canceled, and the system
will return to the ROM filename input screen.
4. When the ROM filename input is completed, an input box for a description will
appear.
Enter a description if necessary. If not necessary, press the [Enter] key on the
keyboard.
151-390
-128-
Chapter 7 Input/Output
5. When the ROM file is made, specify the name of the ROM file and click on the
[LOAD] button.
The stitch data input/output screen will appear. Input or output data referring to “5.
Data manipulation”.
NOTES:
ž For ROM data that needs to be saved, output it to a ROM chip.
If the ROM data is to be used in this system in the future, you should save it in the
system.
ž When using a commercially available ROM writer, confirm the message, “Transmit
data from ROM Writer,” is displayed on the status line, and then send data from the
ROM writer.
ž When the process is canceled or an error occurs, turn off the power of the ROM
writer, and then turn it on again.
<Reference>
The contents of the ROM file which is created using the [ROM IN] function are divided in
the two files whose names are ROM file names with the extensions BIN or ROM.
An extension is the letters following the file name and a period. For example, ROM file,
B430E is composed of two files, B430E.BIN and B430E.ROM. A file whose extension
is BIN maintains the contents of the ROM chip in the binary system. A file whose
extension is ROM maintains attached information of the ROM chip. These files are
created in a directory specified on the directory sheet menu. (They are not seen in the
BAS-PC/300.)
When there is a file whose ROM chip contents are saved in the binary system, you can
skip the ROM INPUT operation and start LOAD operation.
Follow the procedure below.
(1) Save the contents of the ROM chip in a file with the extension (binary file) BIN.
(2) Start the BAS-PC/300.
(3) Specify the directory that the above binary file is stored in, on the directory sheet
menu.
(4) Select the name of the above binary file, and click on the [LOAD] button.
151-390
6. Inputting/outputting ROM data
-129-
6-3 Outputting ROM data
1. Set an empty ROM chip which is applicable to the machine, in the ROM writer.
2. Click on the [I/O] button on the main menu, and select [ROM DATA] on the pull-down
menu to display the ROM data input/output screen.
3. Select the machine model on the model scroll menu.
4. Specify the name of the ROM file to be output from the ROM filename sheet menu or
the ROM file scroll menu.
5. Click on the [ROM OUT] button.
The ROM data saved in the specified ROM file will be output to the ROM chip.
Press the [Esc] key to cancel the output.
When the ROM data being edited is output, the following dialogue box will appear:
Be sure to save the ROM data in the ROM file before output.
NOTE:
When using a commercially available ROM writer, set it to on (means ROM writer
can receive data), and then click on the [ROM OUT] button.
When the output is completed, the ROM writer may show a time-out error, but it will
have completed the reception of the data. Write the data on the ROM chip.
When the process is canceled or an error occurs, turn off the power of the ROM
writer, and then turn it on again.
<Reference>
When the ROM data is modified and saved in the ROM file, the binary file (ROM file
with the extension BIN) will be renewed.
151-390
-130-
Chapter 7 Input/Output
6-4 Copying the data on the ROM chip
When using Brother specified ROM writer PRW-1 or a commercially available ROM
writer which is equipped to perform communication through an RS cable, the data on the
ROM chip can be copied.
Follow the procedure below.
1. Click on the [I/O] button on the main menu, and select ROM data on the pull-down
menu to display the ROM data input/output screen.
2. Click on the [ROM COPY] button.
The following dialogue box will appear:
Set the ROM chip that has data to be copied in the ROM writer, and then select
[INSERTED].
Press the [CANCEL] button to cancel the operation.
When using a commercially available ROM writer, confirm the message, “Transmit
data from ROM Writer,” is displayed on the status line, and then send data from the
ROM writer.
Press the [Esc] key to cancel the operation.
3. After the dialogue box below appears, insert the ROM chip that does not contain data
into the ROM writer, and then select the [INSERTED].
Press the [CANCEL] button to cancel the operation.
The ROM data that has been copied to the computer will be written to the empty
ROM chip.
When using a commercially available ROM writer, confirm the message, “Transmit
data from ROM Writer,” is displayed on the status line, and then send data from the
ROM writer.
Press the [Esc] key to cancel the process.
151-390
6. Inputting/outputting ROM data
-131-
NOTE: When the process is canceled or an error occurs, turn off the power of the ROM
writer, and then turn it on again.
151-390
-132-
Chapter 7 Input/Output
6-5 Addition to and overwriting of ROM data
The ROM data that is stored in the ROM chip or the ROM file can be added to or
overwritten.
Addition means the ROM data to be copied is added to the end of the ROM data to be
copied.
Overwrite means the ROM data to be copied will replace the ROM data already written
1. Click on the [I/O] button on the main menu, and select ROM DATA on the I/O pulldown menu to indicate the ROM data input/output screen.
2. Click on the [ADD] or [OVERWRITE] button.
The following dialogue box will appear.
Specify where you wish to copy ROM data from.
3. When the ROM data to be copied is on the ROM chip, insert the ROM chip in the
ROM writer. The following dialogue box will appear. Select [INSERTED].
When the ROM data to be copied is in the ROM file in the computer’s memory,
select FILE in the dialogue box, specify the name of the ROM file on the ROM
filename sheet menu or scroll menu. Click the right mouse button to cancel the
operation.
4. The following dialogue box will appear. Specify the place where the ROM data is to
be copied to.
151-390
6. Inputting/outputting ROM data
-133-
5. When the ROM data is copied to the ROM chip, set the ROM chip in the ROM writer.
The following dialogue box will appear. Select [INSERTED] if the ROM chip has
been inserted in the ROM writer. Press the [CANCEL] button to cancel the
operation.
When the ROM data is copied to the ROM file, select [FILE], and specify the name
of the ROM file from the ROM filename sheet menu or scroll menu. Click the right
mouse button to cancel the operation.
6. The following dialogue box will appear. Specify the place where the ROM data is to
be stored.
7. When the place to store the ROM data is a ROM chip, insert a ROM chip that does
not contain data in the ROM writer. Select [INSERTED] once the ROM chip has been
inserted in the ROM writer.
Press the [CANCEL] button to cancel the operation.
When the place to store the ROM data is a file in the computer, select [FILE], and
151-390
-134-
Chapter 7 Input/Output
specify the name of the ROM file on the ROM filename sheet menu or scroll menu.
Click the right mouse button to cancel the operation.
8. The result of copy function will appear as follows:
The above indication means that data is used on the B430E sewing machine, and
ROM file A which has 3 pieces of data has been added to the ROM chip inserted in
the ROM writer, and they have been saved as ROM file B.
NOTES:
The number of pieces of data that can be copied using ADD function depends on the
number of programs in the ROM file or the capacity of the ROM chip.
When the process is discontinued or an error occurs, turn off the power of the ROM
writer, and then turn it on again.
151-390
6. Inputting/outputting ROM data
-135-
6-6 Errors in input/output of ROM chip data
When data in the ROM chip is input or output, an error may occur.
Check the following items:
1. Is the ROM chip properly inserted in the ROM writer?
2. Is the ROM chip corresponding to the machine model used?
3. Is the power of the ROM writer turned on?
4. Is the ROM writer correctly connected?
5. Are the settings of the ROM writer correct?
6. Is the specified cable for the ROM writer used?
PRW-1 requires a straight cable; others require a cross patch cable.
The following are errors and their causes relevant to the ROM data input and output:
Errors
DEVICE ERROR
Causes
ROM chip is not properly inserted.
ROM chip type is not correct.
COMMUNICATION
RS cable is not properly connected.
ERROR
READ ERROR
Data in the ROM chip is not read correctly.
WRITE ERROR
Data in the ROM chip was not written correctly.
VERIFY ERROR
The contents of the data in the ROM chip was not correct.
BLANK CHECK
Data of the ROM chip was not deleted.
ERROR
USER BREAK
[Esc] key was pressed during ROM data input/output.
151-390
-136-
Chapter 7 Input/Output
7. Inputting embroidery data or CAD data
1. Click on the [I/O] button on the main menu, and select [EMBROIDERY/CAD DATA]
on the pull-down menu.
2. Specify the path of the directory that stores embroidery data or CAD data, in the
directory sheet menu.
3. Select data type, and the number of successive stitches for which thread trimming
is performed, and the unit for DXF data if you input CAD data.
4. Input the filename of the embroidery data or CAD data you want to input on the
filename sheet menu, or select it on the file scroll menu.
5. Click on the [INPUT] button to execute the input operation.
If the data currently being created or edited exists though it is not visible on the
screen, the following message will appear:
When [YES] is selected, all the data you are editing will be deleted, and the new
data will be input instead.
When [NO] is selected, the operation will be canceled.
NOTE: When inputting DXF data, be sure to check the sewing order, and change it if
necessary.
151-390
7. Inputting embroidery data
-137-
151-390
Chapter 8 System configuration
This chapter describes how to set the system configuration.
1. CONFIG pull-down menu
When you click on the [CONFIG] button on the main menu, the CONFIG pull-down menu will
appear.
151-390
-140-
Chapter 8 System configuration
2. System configuration screen
The system configuration screen will appear when you select [SYSTEM] on the CONFIG pulldown menu.
The following are explanations for each item on the system configuration screen.
2-1 Pointing device selection menu
This is used to set the pointing device as either a mouse or digitizer.
2-2 Pointer shape menu
This is used to set the pointer shape in the data display area.
151-390
2. System configuration
-141-
2-3 CRT size selection menu
This is used to set the size of the data displayed on the CRT, the same as
that of the actual pattern when you click on the Actual size icon.
When you click on the check box, the following message and the currently set value will
appear:
Clear the input box using the back space key, and you can enter the desired value
through the keyboard in 1 mm increments.
2-4 ROM writer type selection menu
This is used to select the type of the ROM writer you use with
the BAS-PC/300.
When using the Brother-specified ROM writer, select PRW-1;
when using one from another manufacturer, select OTHER.
2-5 Data area selection menu
This is used to select the size of data area where patterns are to be
created and edited.
Usually set this menu to L (large). When it is set to M (medium) or S
(small), the data area becomes smaller, but the magnification rate of
indication is increased. It is easy to edit only small patterns, not suitable
for larger pattern creation.
As to data currently being edited, its data area can not be changed.
When you change the setting of this menu, it should be validated before starting data
creation or the system. Click the [SET] button to exit the system configuration screen,
and then click on the [FILE] button on the main menu to select the [NEW FILE] button, or
exit the BAS-PC/300 and restart it.
NOTE: When you set the data area to M or S, some machine models may not be able to
input and output data. Refer to the following table:
151-390
-142-
Chapter 8 System configuration
Data area
Size (mm × mm)
L
1600 × 1600
M
800 × 800
BAS-370, BAS-375
S
320 × 320
BAS-364, BAS-366, BAS-370, BAS-375
151-390
Models that cannot accept data input/output
None
2. System configuration
-143-
2-6 Button menu
Button menu has two buttons: the [SET] button and the [EXIT] button.
Button
SET
Explanation
Stores selection in the computer's memory, and exits the system
configuration screen.
EXIT
Returns selections to the previous ones, and exits the system
configuration screen.
151-390
-144-
Chapter 8 System configuration
3. Directory setting screen
The directory setting screen will appear when you select [DIRECTORY] on the pull-down
menu.
The following are explanations for each item on the directory setting screen.
151-390
3. Directory setting
-145-
3-1 Data directory sheet menu
This is used to set the drive or the path of the directory that stores data you want to save
or load.
Click on the DATA DIRECTORY sheet menu to input a directory path through the
keyboard.
If you cancel the operation, press the [Esc] key or click the right mouse button.
3-2 Configuration directory sheet menu
This is used to set the drive or the path of the directory that stores the configuration file
used for this system.
The input method is the same as that for the data directory sheet menu.
3-3 Work directory sheet menu
This is used to set the drive or directory path as to where the work files used on this
system will be created.
The operation speed may be faster when the work directory is set on the RAM disk.
A minimum of 5 MB free is required on the work directory to operate this system
normally.
The input method is the same as that for the data directory sheet menu.
151-390
-146-
Chapter 8 System configuration
3-4 Button menu
Button menu has two buttons: the [SET] button and the [EXIT] button.
Button
SET
Explanation
Stores selection in the computer's memory, and exits the system
configuration screen.
EXIT
Returns selections to the previous ones, and exits the system configuration
screen.
The contents you specify on the directory setting screen will be valid when you turn on
the system the next time.
151-390
4. Digitizer setting
-147-
4. Digitizer setting screen
The digitizer setting screen will appear when you select [DIGITIZER] on the pull-down menu.
The following are explanations for each item on the digitizer setting screen.
151-390
-148-
Chapter 8 System configuration
4-1 Digitizer type selection menu
This is used to select the type of digitizer you use.
Refer to appendix 1 at the end of this manual.
4-2 MAG/RED ratio menu
This is used to specify the magnification/reduction ratio for the original
pattern to be input.
If the pattern has been created one-forth the actual size, set the ratio to
1/4.
4-3 Pointer speed bar
This is used to specify the speed for the pointer when you use the
digitizer.
Move the pointer onto the box of the speed bar, then drag it to adjust
the speed.
151-390
4. Digitizer setting
-149-
4-4 Button menu
Button
RANGE
Explanation
Sets the operation range of the digitizer. Set the range in accordance with the
instructions displayed on the screen. A space must be left around the specified
range so that you can select menus; if you set the range to completely fill the data
display area on the screen, you may not be able to select the menus.
SET
Stores selection in the computer's memory, and exits the digitizer setting display.
EXIT
Returns selections to the previous ones, and exits the digitizer setting display.
NOTE: If the digitizer is not set properly, you may not be able to use the digitizer with the
system.
In this case, press the [F8] key and the [Enter] key through the keyboard to exit the
system. Restart the system by typing “baspc300 m” (optional start command m) so
that you can use the mouse. Then set the digitizer correctly again.
151-390
-150-
Chapter 8 System configuration
4-5 Setting the operation range of the digitizer
You can set the range of the digitizer only when you turn on the system after setting the
pointing device to the digitizer.
Use the following procedure to set the operation range of the digitizer.
(1) Click on the [RANGE] button.
(2) Indicate the lower left corner (point "a" in the figure below) of the operation range you
want to specify.
(3) Indicate the lower right corner (point "b" in the figure below) of the operation range you
want to specify.
Click point "b" so that the line connecting points "a" and "b" is parallel to the pattern.
(4) Indicate the upper left corner (point "c" in the figure below) of the operation range you
want to specify.
The height of the range will be decided.
(5) Click on the [SET] button to register the set value for the operation range.
NOTE: If you set the operation range of the digitizer almost equal to the size of the digitizer,
you may not be able to select a menu. It is recommended that a space is left around
the range.
151-390
5.Setting the scale
-151-
5. Setting the scale
This is used to adjust the size of the finished pattern.
You can specify the size of the finished pattern by clicking on two points and setting the length
between the two points.
Specify the two points anywhere.
The message, "Enter line length." will appear on the status line.
Enter the value for the length through the keyboard.
151-390
-152-
151-390
Chapter 8 System configuration
Chapter 9 Creating B981 data
This chapter describes the fundamental functions concerning creating, editing, and outputting
of the B981 data.
To operate correctly, read the B981 instruction manual.
1. Creating B981 data
1-1 Setting model
1. Click on the [SET] button on the main menu.
The set screen will appear.
2. Click on “B981” on the model menu.
3. Click on the [SET] button.
Refer to "Chapter 5 Setting information concerning data creation" for more information.
151-390
-154-
Chapter 9 Creating B981 data
1-2 Creating data
1. Click on the [CREATE] button on the main menu.
The pattern selection screen will appear.
2. Select a pattern from the list.
3. Click on the [SET] button.
The pattern set screen will appear. Set each item.
It has the following settings:
151-390
1. Creating B981 data
-155-
[TAPER]
Item
PRESSER
Description
Select from L1 to L7.
Select a presser that applies to your sewing machine’s specification.
CUTTING
Select either BEFORE or AFTER (sewing).
TIMING
The motion of the knife is set on the B981.
ZIGZAG WIDTH
Set the zigzag width from 1.5 - 3.2 mm (0.1 mm increments).
This is an imaginary zigzag width, intended only to display data image on the
screen. The actual zigzag width is determined by the mechanical adjustment on
the machine.
# BUTTON
HOLES
Select the number of button holes from 1 to 9.
When a number greater than 2 is selected, the system will automatically
recognize the machine with the fly indexer.
EYELET
PATTERN
LENGTH
Select an eyelet pattern from 1 to 5.
For dimensions, refer to the following figures and table.
The range of the selection is different according to the presser specification.
Refer to the B981 instruction manual or the message indicated when setting this
item.
This length must cover the following:
LENGTH ≥ TACKING LENGTH + 7 mm.
151-390
-156-
Chapter 9 Creating B981 data
TACKING
Set the tacking length to 0 or 3 mm to 33 mm (1 mm increment).
LENGTH
This tacking length must cover the following:
TACKING
LENGTHLENGTH
- 7 mm.
OFFSET
STITCH PITCH
# STITCHES
CUTTING
SPACE
Set the offset to 0.5 mm - 2.0 mm (0.1 mm increments).
Set the stitch pitch to 0.5 mm - 2.0 mm (0.1 mm increments).
Set the number of stitches to 4 - 20 (1 stitch increment).
Set the cutting space to -0.3 mm to 0.5 mm (0.1 mm increments).
This cutting space must cover the following:
CUTTING SPACE
KNIFE POSITION + 0.7 mm
KNIFE POSITION Set the movement of the knife position for correction to -0.7 mm - 0.7 mm (0.1 mm
increments).
This movement of the knife position must cover the following:
KNIFE
CUTTING
POSITION
SPACE - 0.7 mm
When moving the knife backward from the stitches, set it as a positive number;
when moving the knife forward from the stitches, set it as a negative number.
X CORRECTION Set the number indicating fine adjustment of the sewing data to -1 to 6.
If you want to move the stitches around the eyelet to the right (when viewed from
the finish side), set a greater number.
Y CORRECTION Set the number indicating fine adjustment of the sewing data to -1 to 6.
If you want to move the stitches on the right of the straight portion toward the front
(when viewed from the finish side), set a greater number.
THETA1
CORRECTION
Set the number indicating fine adjustment of the sewing data to -3 to 3.
If you want to move the stitches clockwise (when viewed from the finish side)
around the straight portion except for the eyelet , set a greater number.
THETA2
CORRECTION
Set the number indicating fine adjustment of the sewing data to -3 to 3.
If you want to move the stitches clockwise (when viewed from the finish side)
around the eyelet, set a greater number.
151-390
1. Creating B981 data
Knife shape a × b
-157-
Eyelet shape c × d
Eyelet shape c × d
Knife shape
When the cutting
When the cutting
a×b
timing is before
timing is after
sewing or the knife
sewing
Knife NO.
is not used
1
2.1 × 3.2
1.7 × 2.7
2.5 × 3.8
2
2.8 × 4.3
2.4 × 3.9
3.2 × 4.9
3
3.0 × 4.6
2.6 × 4.1
3.4 × 5.2
4
3.2 × 5.4
2.8 × 4.7
3.6 × 6.1
5
Straight
Straight
Straight
151-390
-158-
Chapter 9 Creating B981 data
4. Click on the [SET] button.
The sewing image as viewed from the finish side will appear on the screen.
151-390
1. Creating B981 data
-159-
1-3 Outputting data to a ROM file
1. Click on the [I/O] button on the main menu, and then select [STITCH DATA] on the
pull-down menu.
2. Select a program number from the program menu.
3. Click on the [OUTPUT] button.
151-390
-160-
Chapter 9 Creating B981 data
The system will ask you whether you want to output data with a message on the
status line, and the pointer changes to the confirmation mark
. Click the left mouse
button if it is OK to output.
Data will be output with the specified program number.
Refer to "Chapter 7 Input/Output 5. Data manipulation 5-2. Outputting data" for
more information.
151-390
1. Creating B981 data
-161-
1-4 Saving ROM file
1. Click on the [I/O] button on the main menu, and select [ROM DATA] on the pull-down
menu.
2. Click on the [ROM filename] sheet menu to enter the ROM filename.
3. Click on the [SAVE] button.
151-390
-162-
Chapter 9 Creating B981 data
4. Enter a description.
The ROM file being edited will be saved with the filename you specified.
151-390
1. Creating B981 data
-163-
1-5 Outputting ROM file to ROM chip
1. Turn on the power of the ROM writer, and set an empty ROM chip on it which is
applicable to the machine.
2. Click on the [I/O] button on the main menu, and select [ROM DATA] on the pull-down
menu.
3. Specify the name of the ROM file to be output on the ROM filename sheet menu, and
click on the [ROM OUT] button.
Refer to "Chapter 7 Input/Output 6. Inputting/outputting ROM data 6-3. Outputting
ROM data" for more information.
1-6 Assembling ROM chip into B981
Refer to this chapter, "4. Manipulation on B981" to attach the ROM chip to the B981.
151-390
-164-
Chapter 9 Creating B981 data
2. Editing data
2-1 Inputting data from ROM chip
1. Turn on the power of the ROM writer, and set a ROM chip which has data to be edited.
2. Click on the [I/O] button on the main menu, and select [ROM DATA] on the pull-down
menu.
3. Click on the [ROM IN] button.
4. Enter the filename and description.
5. Click on the [LOAD] button.
The ROM data which is input into the computer can be used for editing sewing data.
Refer to “Chapter 7 Input/Output 6. INPUTTING/OUTPUTTING ROM DATA 6-2.
Inputting ROM data” for more information.
151-390
2. Editing data
-165-
2-2 Changing name of ROM file to be edited
1. Click on the [I/O] button on the main menu, and select [ROM DATA] on the pull-down
menu.
2. Select a ROM file to be edited.
3. Click on the [LOAD] button.
Specify the name of the ROM file. It can be edited.
2-3 Inputting data from ROM file
1. Click on the [I/O] button on the main menu, and select [STITCH DATA] on the pull-down
menu.
2. Click on the desired program number on the program number menu.
3. Click on the [INPUT] button.
The specified data will be input.
Refer to "Chapter 7 Input/Output 5. DATA MANIPULATION 5-1. Inputting data" for
more information.
151-390
-166-
Chapter 9 Creating B981 data
2-4 Editing data
1. Click on the [EDIT] button on the main menu.
The set screen will appear.
2. Select an item to change its setting, and click on the [SET] button.
The data whose setting is changed will appear.
2-5 Outputting data
Refer to descriptions on and after "1. Creating B981 data 1-3 Outputting data to a ROM
file" in this chapter to output data to a ROM file.
151-390
3. Saving data into file or loading data from file
-167-
3. Saving data into file or loading data from file
Refer to "Chapter 6. File" for more information.
3-1 Saving data
1. Click on the [FILE] button on the main menu.
2. Click on the file sheet menu to input the desired filename.
3. Click on the [SAVE] button.
The data will be saved with the specified filename.
3-2 Loading data
1. Click on the [FILE] button on the main menu.
2. Click on the file scroll menu or file sheet menu to input or select the filename.
3. Click on the [LOAD] button.
The specified data will appear on the screen.
151-390
-168-
Chapter 9 Creating B981 data
4. Manipulation on B981
4-1 Attaching data ROM chip
1. Turn off the power.
Before replacing the data ROM chip, be sure to turn off the power.
To avoid shock hazards, turn off the power and wait 5 minutes at least, and then
open the control box.
2. Attach the data ROM chip to position • on the panel circuit board.
Be careful as to the orientation of the ROM chip.
If it is attached wrongly, it may be damaged.
151-390
4. Manipulation on B981
-169-
4-2 Selecting program
1. Turn on the power in the automatic mode.
2. Press the start button.
The feed bracket will move to the cloth setting position.
3. Normally, the length will be indicated on the number
display window.
Press the "Up" • or "Down" ‚ switch to change the
length or program number.
<Example>
18à19à20à21à22àP0àP1àP2àP3àP4àP5àP6àP7àP8àP9
* There are 10 selectable programs whose numbers are assigned from P0 to P9.
The program number which is not programmed on the ROM chip will not be
indicated; it will be skipped.
NOTES:
As to the specification harness (presser or fly indexer), the setting on the machine has
priority over that of the ROM chip. For items other than the specification harness, the
setting of the ROM chip takes priority. Since the contents of the program can not be
verified on the machine, it is recommended that a note be taken when data is created.
If a program which differs from the specifications of the machine is selected, a buzzer will
beep and error code 31 will appear. In this case, press the reset button to cancel the
error. The next program will appear.
151-390
-170-
Chapter 9 Creating B981 data
151-390
Chapter 10 Creating B855E and B856E data
This chapter describes the fundamental functions concerning creating, editing, and outputting
of B855E and B856E data.
This system does not discriminate between the B855E and B856E. This manual indicates
everything based on the B856E, representative of both models.
To operate correctly, read the B856E instruction manual as well as this manual.
1. Creating B856E data
1-1 Setting model
1. Click on the [SET] button on the main menu.
The set screen will appear.
2. Click on “B856E” on the model menu.
3. Click on the [SET] button.
Refer to "Chapter 5 Setting information concerning data creation" for more information.
151-390
-172-
Chapter 10 Creating B855E and B856E data
1-2 Creating data
For example, create data based on the below baseline on which stitches will be generated.
A
B (1.0,-0.5)
C (-1.0,-0.5)
D(3.0,-0.5)
E (-1.0,-0.5)
F(1.0,-0.5)
1. Click on the [CREATE] button on the main menu.
2. Click on the [STITCH] button.
3. Click around the center of the drawing area to specify the start point
(point A).
151-390
1. Creating B855E and B856E data
-173-
4. Data is created by specifying a relative length from the previous point.
Press the Ctrl key. The edit boxes to input values will appear.
5. Determine point B for the baseline.
Input 1.0, -0.5 from the keyboard.
6. Repeat the procedure until point F (end point).
7. After inputting all points, press the Esc key to finish data creation using the keyboard.
8. Click on the [SAVE] button to save the data.
If it is difficult to see data because it is small, click
.
151-390
-174-
Chapter 10 Creating B855E and B856E data
1-3 Outputting data to a ROM file
1. If there is no ROM files, refer to "Chapter 7 Input/Output 6. Inputting/outputting ROM
data 6-2. Inputting ROM data" to create a ROM file.
2. Click on the [I/O] button on the main menu, and then select [STITCH DATA] on the
pull-down menu.
3. Select a program number from the program menu.
If there is no data, click on "NEW".
151-390
1. Creating B855E and B856E data
-175-
4. Click on the [OUTPUT] button.
The stitching image will appear along with each item to be set for reconfirmation.
Determine each item along with the machine’s settings.
In some cases, according to the set values, the image may appear different to the
created data.
5. Click on the [OUTPUT] button.
Data will be output with the specified program number.
151-390
-176-
Chapter 10 Creating B855E and B856E data
1-4 Saving ROM file
1. Click on the [I/O] button on the main menu, and select [ROM DATA] on the pull-down
menu.
2. Click on the [ROM filename] sheet menu to enter the ROM filename.
3. Click on the [SAVE] button.
151-390
1. Creating B855E and B856E data
-177-
4. Enter a description.
The ROM file being edited will be saved with the filename you specified.
151-390
-178-
Chapter 10 Creating B855E and B856E data
1-5 Outputting ROM file to ROM chip
1. Turn on the power of the ROM writer, and set an empty ROM chip on it which is
applicable to the machine.
2. Click on the [I/O] button on the main menu, and select [ROM DATA] on the pull-down
menu.
3. Specify the name of the ROM file to be output on the ROM filename sheet menu, and
click on the [ROM OUT] button.
Refer to "Chapter 7 Input/Output 6. Inputting/outputting ROM data 6-3. Outputting
ROM data" for more information.
1-6 Assembling ROM chip into B856E
Refer to this chapter, "4. Manipulation on B856E" to attach the ROM chip to the B856E.
151-390
2. Editing data
-179-
2. Editing data
2-1 Inputting data from ROM chip
1. Turn on the power of the ROM writer, and set a ROM chip which has data to be edited.
2. Click on the [I/O] button on the main menu, and select [ROM DATA] on the pull-down
menu.
3. Click on the [ROM IN] button.
4. Enter the filename and description.
5. Click on the [LOAD] button.
The ROM data which is input into the computer can be used for editing sewing data.
Refer to "Chapter 7 Input/Output 6. Inputting/outputting ROM data 6-2. Inputting
ROM data" for more information.
151-390
-180-
Chapter 10 Creating B855E and B856E data
2-2 Changing name of ROM file to be edited
1. Click on the [I/O] button on the main menu, and select [ROM DATA] on the pull-down
menu.
2. Select a ROM file to be edited.
3. Click on the [LOAD] button.
Specify the name of the ROM file. It can be edited.
2-3 Inputting data from ROM file
1. Click on the [I/O] button on the main menu, and select [STITCH DATA] on the pull-down
menu.
2. Click on the desired program number on the program number menu.
3. Click on the [INPUT] button.
The stitching image will appear for reconfirmation.
151-390
2. Editing data
-181-
4. Click on the [INPUT] button.
The specified data will be input.
Refer to "Chapter 7 Input/Output 5. Data manipulation 5-1. Inputting data" for more
information.
2-4 Editing data
Refer to chapter 3 to edit data.
2-5 Outputting data
Refer to descriptions on and after "1. Creating B856E data 1-3 Outputting data to a ROM
file" in this chapter to output data to a ROM file.
151-390
-182-
Chapter 10 Creating B855E and B856E data
3. Saving data into file or loading data from file
Refer to "Chapter 6 File" for more information.
3-1 Saving data
1. Click on the [FILE] button on the main menu.
2. Click on the file sheet menu to input the desired filename.
3. Click on the [SAVE] button.
The data will be saved with the specified filename.
3-2 Loading data
1. Click on the [FILE] button on the main menu.
2. Click on the file scroll menu or file sheet menu to input or select the filename.
3. Click on the [LOAD] button.
The specified data will appear on the screen.
151-390
4. Manipulation on B855E and B856E
-183-
4. Manipulation on B856E
4-1 Replacing the data ROM chip
Before replacing the data ROM chip, be sure to turn off the power.
To avoid shock hazards, turn off the power and wait 5 minutes at least, and then
open the control box.
When creating a custom-made sewing pattern, remove the ROM chip from the main
circuit board inside the control box, and have the system read data.
After the
custom-made pattern is created, write the data on a ROM chip whose data has been
already deleted, and attach the ROM chip to the main circuit board.
The ROM chip is in the position •.
Be careful as to the orientation of the ROM chip.
If it is attached wrongly, it may be damaged.
After the ROM chip is replaced, the custom pattern number may change.
Be sure to check the pattern number before starting sewing.
151-390
-184-
Chapter 10 Creating B855E and B856E data
4-2 Selecting the custom-made sewing pattern
1. If the LED display • is illuminated steadily,
press the SET key
‚
so that the LED
display • flashes.
2. Press the PATTERN key ƒ.
The indicator
„
will illuminate, and the
pattern number currently set will flash on the
LED display •.
3. Press the
and
selection keys
…
to
select the pattern number.
3-1. Select 9 in the left column of the LED
display •.
3-2. Select a custom-made pattern
number in the middle and right
columns of the LED display •.
(When the custom-made pattern
number is 35, for example, the LED
display • shows 935.)
4. Press the SET key ‚.
The selected sewing pattern will be accepted, and the LED display • will stop flashing
and illuminate steadily.
As to what happens when the sewing pattern is accepted with the press of the SET key ‚
or how other settings are set, refer to the B856E instruction manual.
151-390
Chapter 11 Creating B800E data
This chapter describes the fundamental functions concerning creating, editing, and outputting
of B800E data.
To operate correctly, read the B800E instruction manual as well as this manual.
(NOTE) PROM version available for BAS-PC/300 is B800E MN-C or later.
(MN-A and MN-B can not be used.)
1. Creating B800E data
1-1 Setting model
1. Click on the [SET] button on the main menu.
The set screen will appear.
2. Click on “B800E” on the model menu.
3. Click on the [SET] button.
Refer to "Chapter 5 Setting information concerning data creation" for more information.
151-390
-186-
Chapter 11 Creating B800E data
1-2 Creating data
1. Click on the [CREATE] button on the main menu.
2. Click on the [PATTERN] button.
The pattern selection screen will appear.
3. Select a pattern from the list.
4. Click on the [SET] button.
The pattern set screen will appear. Set each item.
The item (pattern) numbers apply to this machine.
151-390
1. Creating B800E data
-187-
Following is an explanation of the pattern setting items.
The procedure is explained using an "eyelet-rectangle" shape (eyelet shape for rear tack
and rectangular shape for front tack) as an example.
[Eyelet – rectangle]
5. If any of the buttons at the lower-left corner of the screen are pressed, the pattern and the
display at the top-left of the screen will change.
6. The input range and the input step will appear in the Guidance window.
If you enter data which is outside the input range, or if you enter "5.03" when the input
step is 0.1 mm, the buzzer will sound and the display will return to the previous value.
For parameters 44 and 55, if the limit conditions are not satisfied when switching
between ON and OFF, the buzzer will sound and the display will return to the previous
value.
Refer to the Instruction Manual for this unit to change the entry to a value which satisfies
the limit conditions, and then change the ON/OFF setting.
7. If a parameter is locked (displayed in reverse video), it can be unlocked by changing other
related parameters to valid values.
Refer to the Instruction Manual for this unit for details on each parameter.
8. When all parameters have been entered, press the SET button. The data will then be
provisionally displayed on the screen.
Move the pointer to determine the data position, and then press the left mouse button.
The pointer display will change to
. If this data position is okay, press the left mouse
button once more. The data will then be set.
151-390
-188-
Chapter 11 Creating B800E data
If you would like to change the data position, press the right mouse button. You can then
specify a new data position.
9. The following option codes indicate the operation timing for the cutter and sub-tension
discs.
Operation timing
Option output code
Cutter on
Option output 1
Sub-tension discs
Option output 2
open
Sub-tension discs
Option output 3
closed
Speed data is indicated by the following speed deceleration codes.
Speed data
Speed deceleration
code
151-390
Zigzag
No deceleration
Rear tack
Deceleration 1
Front tack
Deceleration 2
Basting
Deceleration 3
Feeding
Deceleration 4
Slow start
Deceleration 5
1. Creating B800E data
-189-
1-3 Outputting data to a ROM file
1. If there is no ROM files, refer to "Chapter 7 Input/Output 6. Inputting/outputting ROM data
6-2. Inputting ROM data" to create a ROM file.
2. Click on the [I/O] button on the main menu, and then select [STITCH DATA] on the pulldown menu.
3. Select a program number from the program menu.
If there is no data, click on "NEW".
151-390
-190-
Chapter 11 Creating B800E data
4. Click on the [OUTPUT] button.
5. The next screen which is displayed can be used to check the sewing area and the cutter
diagram.
The [Rear], [ALL] and [Front] buttons can only be used when the work clamp size is
X_7.3 x Y_75mm (sewing area X_6mm-Y_70mm).
151-390
1. Creating B800E data
-191-
The functions of each button are described below.
Button
Function
Rear
Displays an enlarged view of the area 40 mm
from the rear.
ALL
Front
Displays the whole pattern
Displays an enlarged view of the area 40 mm
from the front.
The [Needle plate size], [Work clamp size] and [Cutter size] values and this unit's
values should always be set to the same values.
6. Click on the [SET] button.
Data will be output with the selected program number.
If you do not want to output the data, click on the [QUIT] button, or press the right mouse
button.
Errors during data output
Error
Explanation
Y coordinate error for first The first cutter operating position for the B800E must be 8 mm or
cutter operating position
more from the sewing start position in the vertical direction (Y
direction).
The error will not occur if the vertical direction exceeds 8 mm at least
once.
Do not create feeding With the B800E, feeding steps can only be created at the sewing
steps between stitches
start and at the sewing end.
Therefore, an error will occur if there are feeding steps in between
stitches.
151-390
-192-
Chapter 11 Creating B800E data
1-4 Saving ROM file
1. Click on the [I/O] button on the main menu, and select [ROM DATA] on the pull-down
menu.
2. Click on the [ROM filename] sheet menu to enter the ROM filename.
3. Click on the [SAVE] button.
4. Enter a description.
The ROM file being edited will be saved with the filename you specified.
151-390
1. Creating B800E data
-193-
1-5 Outputting ROM file to ROM chip
1. Turn on the power of the ROM writer, and set an empty ROM chip on it which is
applicable to the machine.
2. Click on the [I/O] button on the main menu, and select [ROM DATA] on the pull-down
menu.
3. Specify the name of the ROM file to be output on the ROM filename sheet menu, and
click on the [ROM OUT] button.
Refer to "Chapter 7 Input/Output 6. Inputting/outputting ROM data 6-3. Outputting
ROM data" for more information.
1-6 Assembling ROM chip into B800E
Refer to this chapter, "4. Manipulation on B800E" to attach the ROM chip to the B800E.
151-390
-194-
Chapter 11 Creating B800E data
2. Editing data
2-1 Inputting data from ROM chip
1. Turn on the power of the ROM writer, and set a ROM chip which has data to be edited.
2. Click on the [I/O] button on the main menu, and select [ROM DATA] on the pull-down
menu.
3. Click on the [ROM IN] button.
4. Enter the filename and description.
5. Click on the [LOAD] button.
The ROM data which is input into the computer can be used for editing sewing data.
Refer to "Chapter 7 Input/Output 6. Inputting/outputting ROM data 6-2. Inputting ROM
data" for more information.
151-390
2. Editing data
-195-
2-2 Changing name of ROM file to be edited
1. Click on the [I/O] button on the main menu, and select [ROM DATA] on the pull-down
menu.
2. Select a ROM file to be edited.
3. Click on the [LOAD] button.
Specify the name of the ROM file. It can be edited.
2-3 Inputting data from ROM file
1. Click on the [I/O] button on the main menu, and select [STITCH DATA] on the pull-down
menu.
2. Click on the desired program number on the program number menu.
3. Click on the [INPUT] button.
The specified data will be input.
Refer to "Chapter 7 Input/Output 5. Data manipulation 5-1. Inputting data" for more
information.
2-4 Editing data
Refer to chapter 3 to edit data.
151-390
-196-
Chapter 11 Creating B800E data
2-5 Outputting data
Refer to descriptions on and after "1. Creating B800E data 1-3 Outputting data to a ROM
file" in this chapter to output data to a ROM file.
151-390
3. Saving data into file or loading data from file
-197-
3. Saving data into file or loading data from file
Refer to "Chapter 6 File" for more information.
3-1 Saving data
1. Click on the [FILE] button on the main menu.
2. Click on the file sheet menu to input the desired filename.
3. Click on the [SAVE] button.
The data will be saved with the specified filename.
3-2 Loading data
1. Click on the [FILE] button on the main menu.
2. Click on the file scroll menu or file sheet menu to input or select the filename.
3. Click on the [LOAD] button.
The specified data will appear on the screen.
151-390
-198-
Chapter 11 Creating B800E data
4. Manipulation on B800E
4-1 Replacing the ROM chip
1. Turn off the power.
Before replacing the ROM chip, be sure to turn off the power.
To avoid shock hazards, turn off the power and wait 5 minutes at least, and then
open the control box.
2. Attach the ROM chip to position • on the circuit board.
Be careful as to the orientation of the ROM chip.
If it is attached wrongly, it may be damaged.
151-390
4. Manipulation on B800E
-199-
4-2 Selecting program
1. Turn on the power switch.
2. Press the SELECT key (13) until the AUTO LED illuminates.
3. Press the start switch.
4. Press the UP key ‡ or DOWN key ˆ to change the program number.
<Example>
1à2àŸŸŸŸŸŸŸŸŸà97à98à99àP1àP2àP3àP4àP5àP6àP7àP8àP9
* The program numbers can be selected from 9 types of program (from P1 to P9).
Programs from P1 to P9 are displayed in †.
For further details, refer to the Instruction Manual for this unit.
151-390
-200-
151-390
Chapter 11 Creating B800E data
Appendix 1
-201-
Appendix 1 Digitizer type
Refer to the following table to set the type of digitizer.
Digitizer type
Manufacturer
Model name
HITACHI-2
HITACHI
HDG-1212G
GRAPHTEC(1)
GRAPHTEC
KD-5500,KD-4320,KW-4610
GRAPHTEC(2)
GRAPHTEC
KD-4300
NUMONICS
BIT PAD
MM
151-390
-202-
Appendix 2
Appendix 2 P-ROM chips able to be used with the PRW-1
The following list the P-ROM chips that can be used on the Brother specified ROM writer,
PRW-1.
Size
Manufactuer
Model
2MB
SGS-THOMSON
M27C2001
1MB
TI
TMS27C010A
INTEL
D27512
INTEL
D27C512
AMD
Am27C512
ATMEL
AT27C512
FUJITSU
MBM27C512
HITACHI
HN27512G
HITACHI
HN27C512AG
MACRONIX
MX27C512
MITSUBISHI
M5L27512K
MITSUBISHI
M5L27C512AK
NEC
µPD27C512D
NS
NM27C512
SGS-THOMSON
M27C512
TI
TMS27C512
TOSHIBA
TC57512AD
TOSHIBA
TM27512AD
INTEL
D27C256
INTEL
D27C256A
AMD
Am27C256
ATMEL
AT27C256R
FUJITSU
MBM27256
FUJITSU
MBM27C256A
HITACHI
HN27256G
HITACHI
HN27C256G
HITACHI
HN27C256HG
MACRONIX
MX27C256
MITSUBISHI
M5M27C256AK
MITSUBISHI
M5L27256K
NEC
µPD27256
NEC
µPD27C256AD
512KB
256KB
Appendix 2
NS
NM27C256
NS
NM27LC256
SGS-THOMSON
M27C256B
TI
TMS27C256
TOSHIBA
TC5727256AD
TOSHIBA
TMM27256D
TOSHIBA
TMM27256AD
TOSHIBA
TC57H256D
-203-
151-390
-204-
Appendix 2
INDEX
-i-
INDEX
A
Creating a curved line.................................. 33
Creating a feed stitch point .......................... 28
Actual size icon ............................................9
ADD....................................................24, 116
Adding a new point ...................................... 36
Addition to and overwriting of ROM data ...... 133
All image icon...............................................8
ARC CONNCT ...................................... 24, 35
ATTRIB ...................................................... 29
ATTRIBUT .................................................. 22
AUTO CHANGE.......................................... 80
B
B800E...................................................... 185
BIN .......................................................... 128
binary....................................................... 128
Button..........................................................4
Creating an arc ........................................... 34
Creating an ellipse...................................... 33
Creating an eyelet....................................... 43
Creating B800E data..................................185
Creating B855E and B856E data.................171
Creating B981 data....................................153
Creating bartack pattern .............................. 40
Creating basting data.................................. 28
Creating code............................................. 28
Creating outline data................................... 29
Creating pattern data................................... 39
Creating sewing data................................... 19
Creating stitch data..................................... 27
Creating stitch point .................................... 27
CRT size...................................................141
C
D
Changing code attributes ............................. 86
Changing feed attributes .............................. 85
Changing sewing attributes .................... 29, 77
Changing sewing data.................................. 71
Changing sewing direction............................ 83
Changing sewing order................................. 79
Changing the inclination of a curved line ........ 38
Click ............................................................4
CODE ........................................................ 25
COLOR ...................................................... 25
Color icon................................................... 12
COMPENSATION ....................................... 31
CONFIG ................................................... 139
Configuration directory ............................... 145
CONTINUE ................................................. 24
Copy .......................................................... 48
Copying the data on the ROM chip ............. 131
correction bar.............................................. 38
Creating a circle.......................................... 32
151-390
Data area..................................................141
Data connection ......................................... 93
Data directory............................................145
data display area .......................................... 2
Data display icon........................................ 11
Data manipulation......................................120
DELETE ...................................... 99, 110, 115
DELETE ALL.............................................110
Deleting a point .......................................... 37
Deleting data....................................... 62, 124
dialogue box................................................. 3
DIGITIZER.................................................147
Digitizer setting .........................................147
Digitizer type..................................... 148, 201
DIRECTORY .............................................144
Directory setting ........................................144
directory sheet menu ......................... 112, 117
DISPLAY ..................................................109
-ii-
INDEX
DISPLAY ALL ................99, 100, 108, 113, 114
Inputting embroidery data or CAD data........ 137
Dividing an outline........................................69
Inputting ROM data................................... 127
DIVISION....................................................30
Inputting/outputting ROM data.................... 125
drag ...........................................................27
INSERT...................................................... 24
Drag............................................................ 4
INSIDE DIA. ............................................... 43
Drawing a straight line..................................32
L
DXF data .................................................. 105
DXF unit ................................................... 119
E
EMBROIDERY/CAD DATA......................... 117
End code.................................................. 107
END SECURING STITCHES.........................43
EQUAL.......................................................30
Errors in input/output of ROM chip data....... 136
eyelet .........................................................43
LOAD ................................................. 99, 115
M
MAG/RED ratio......................................... 148
Magnify/Reduce copy (move) ....................... 55
Magnify icon................................................. 7
main menu ................................................... 2
maximum length......................................... 94
maximum stitch pitch.................................. 92
Measure icon.............................................. 15
F
MERGE .......................................99, 110, 119
Feed attribute..............................................26
Merging data ............................................ 101
File ............................................................97
MIN FEED DIST.......................................... 80
FILE ...........................................................97
Mirror copy (move) ...................................... 51
File image screen...................................... 100
model ..........................................92, 107, 112
frame position .............................................93
Modifying an outline .................................... 36
frame reference position ............................. 109
Modifying data............................................ 64
G
Move.......................................................... 48
Moving a point ............................................ 37
Grid icon.....................................................13
H
Help icon ....................................................18
HORI/VERT ................................................24
Multiply copy .............................................. 60
N
N BACK ..................................................... 74
NEW FILE.................................................. 99
HORIZONTAL..............................................24
I
O
Offset copy................................................. 58
I/O ........................................................... 103
icons ........................................................... 2
Information window ......................................26
Input......................................................... 103
INPUT ...............................................110, 119
Input box ..................................................... 5
Inputting data............................................ 120
151-390
Optional output ........................................... 25
outline data ............................................ 3, 19
Outline data................................................ 29
Output ..................................................... 103
OUTPUT .................................................. 110
Outputting data......................................... 121
INDEX
Outputting ROM data................................. 130
OUTSIDE DIA. ............................................ 43
OVERLAP.................................................. 73
OVERWRITE ............................................ 116
P
Parallel copy (move) .................................... 49
PATTERN................................................... 22
PITCH .................................................. 25, 30
pointer..........................................................2
Pointer shape ........................................... 140
Pointer speed ........................................... 148
Pointing device.......................................... 140
Presser height ............................................ 26
Program image screen............................... 108
program number........................................ 108
P-ROM chips ............................................ 202
Pull-down menu ............................................4
PUNCHED HOLE DIA.................................. 43
-iii-
S
SAVE ................................................. 99, 115
Screen and icons.......................................... 1
scroll bar...................................................... 5
Scroll icon.................................................. 10
Scroll menu.................................................. 5
Search icon................................................ 17
securing stitching ....................................... 73
Selection menu ............................................ 4
Setting information concerning data creation . 91
Setting the ROM chip.................................126
Setting the scale .......................................151
Sheet menu ................................................. 4
SMOOTH .............................................. 24, 35
SPEC METH .............................................. 40
Specifying the frame position ....................... 95
Speed deceleration ..................................... 25
Split .......................................................... 26
START SECURING STITCHES .................... 43
R
status line.................................................... 2
RANGE............................................. 149, 150
STITCH...................................................... 30
range of the digitizer .................................. 150
Stitch conversion ........................................ 73
Redisplay icon ............................................ 11
stitch data...............................................3, 19
Magnify/Reduce copy (move)........................ 55
Stitch data................................................. 27
Reduce icon .................................................7
STITCH WIDTH........................................... 31
Report icon................................................. 16
STITCHES ............................................ 41, 43
ROM COPY.............................................. 116
sub menu..................................................... 3
ROM data................................................. 125
SYSTEM ..................................................140
ROM data image screen ............................ 114
System configuration ......................... 139, 140
ROM data screen...................................... 111
T
ROM file................................................... 125
ROM IN............................................. 115, 127
ROM OUT ......................................... 115, 130
ROM writer type........................................ 141
Rotation copy (move)................................... 53
ROTATIONS ............................................... 43
RUNNING................................................... 30
RUNNING LENGTH ..................................... 40
RUNNING PITCH......................................... 40
151-390
TACK ........................................................ 24
TACK LENGTH........................................... 40
TACK WIDTH ............................................. 40
Tajima TFD format ............................. 105, 118
Terminology ................................................. 4
Thread trimming................................... 26, 118
trace.......................................................... 27
Trace margin .............................................. 92
-iv-
INDEX
tracing........................................................92
VERTICAL.................................................. 24
U
W
UNEQUAL ZIGZAG RIGHT DEV ...................31
Work directory .......................................... 145
Using the DATA CONVERT function..............89
Z
V
ZIGZAG...................................................... 30
V BACK .....................................................74
ZIGZAG DEV.............................................. 31
Version number............................................ 1
ZIGZAG PITCH ......................................31, 41
VERTEX ANGLE .........................................30
zigzag shape.............................................. 93
151-390
INSTRUCTION MANUAL
BROTHER INDUSTRIES,LTD.
Printed in Japan
NAGOYA,JAPAN
151-390
S36373-501
1999.03.(1)