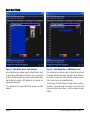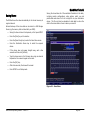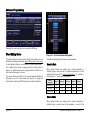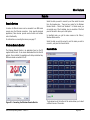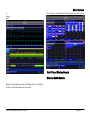
1
ORB SERIES OPERATING MANUAL ORB SERIES OPERATING MANUAL If a portable or temporary three phase mains supply is used to power this desk, we recommend that the desk mains plug is removed before connecting or disconnecting the supply. Serious damage will occur if the desk is connected across two phases. This equipment is designed for use as a lighting control desk only, and is unsuitable for any other purpose. It should only be used by, or under the supervision of, an appropriately qualified or trained person. Zero 88 reserves the right to make changes to the equipment described in this manual without prior notice. E & OE. Federal Communications Commission IM 8755 Issue 2.0 – November 2010 This equipment has been tested and found to comply with the limits for a Class A digital device, pursuant to part 15 of the FCC rules. These limits are designed to provide reasonable protection against harmful interference when the equipment is operated in a commercial environment. This equipment generates, uses, and can radiate radio frequency energy and, if not installed and used in accordance with the instruction manual, may cause harmful interference to radio communications. Operation of this equipment in a residential area is likely to cause unacceptable interference in which case the user will be required to correct the interference at the operators expense. Software Version 6.0 © Zero 88 2010 Cooper Controls t/a Zero 88 Usk House Llantarnam Park Cwmbran NP44 3HD United Kingdom Tel: Fax: e-mail: Web: +44 (0)1633 838088 * +44 (0)1633 867880 [email protected] www.zero88.com * 24 hour answerphone Setup ................................................ 37 What are Groups? ............................ 93 Patch ............................................. 38 Automatic Groups ............................ 93 Table of Contents .............................. 3 What is a fixture? ............................ 38 User Defined Groups ........................ 93 Introduction ......................................... 6 Deleting Fixtures ............................. 38 Naming Groups ............................... 93 This Manual ...................................... 6 Adding Fixtures ............................... 38 Copying Groups ............................... 93 The ORB Series ................................. 6 Add Fixtures ................................... 39 Moving Groups ................................ 94 Front Panel Controls .......................... 9 Patching Fixtures ............................. 40 Deleting Groups .............................. 94 ORB .............................................. 15 Patch Views .................................... 44 Group Window ................................ 94 ORB XF .......................................... 15 Patch Wizard .................................. 46 Group Submasters ........................... 94 Quick Start Tutorial ............................ 20 Editing Fixtures ............................... 48 Palettes ............................................. 95 Getting Started ............................... 20 Auto Menus .................................... 54 What are Palettes? ........................... 95 Setting Up the Desk ........................ 20 Desk Setup ..................................... 56 Recording Palettes ........................... 95 Adding Fixtures ............................... 20 Peripheral ....................................... 59 Naming Palettes .............................. 95 Exiting Setup .................................. 23 Files .............................................. 67 Outputting Palettes .......................... 95 The main user interface ................... 24 Clear Options .................................. 71 Updating Palettes ............................ 96 Controlling Dimmers ........................ 25 Network ......................................... 72 Copying Palettes.............................. 96 Controlling Fixtures ......................... 26 The Output Window ............................ 83 Moving Palettes ............................... 96 Cues .............................................. 27 Programming ..................................... 86 Deleting Palettes ............................. 96 Palettes ......................................... 29 Tagging Parameters ......................... 88 Palette Windows .............................. 97 User Definable Keys (UDK) ............... 31 Smart Tags..................................... 89 Cues, Stacks and Pages ....................... 99 Groups .......................................... 31 The Command Line .......................... 89 Cues .............................................. 99 Group Window ................................ 32 Basic Record Commands .................. 89 Programming Cues .......................... 99 Multi Function Faders (ORBxf only) .... 33 Clear ............................................. 90 Naming Cues ................................ 100 Submasters .................................... 34 Updating ........................................... 91 Editing Cue Output Levels ............... 100 Saving Shows ................................. 35 Update Options Window ................... 91 Editing Cue Fade and Delay Times ... 101 Loading Shows................................ 36 Groups .............................................. 93 Editing Cue Triggers....................... 101 Table of Contents Changing the Next Cue ................... 102 Macro UDK ................................... 116 Recording Effects ........................... 126 Adding Macros to Cues .................... 102 View UDK ..................................... 116 Naming Effects .............................. 126 The Cue Stack Window ................... 103 Changing UDK Page ....................... 116 Applying Effects............................. 126 Playing Back Cues .......................... 105 The UDK Window........................... 116 Copying Effects ............................. 126 Copying Cues ................................ 106 Editing User Definable Keys ............ 117 Moving Effects ............................... 127 Moving Cues .................................. 106 Deleting User Definable Keys .......... 117 Deleting Effects ............................. 127 Deleting Cues ................................ 107 Submasters ..................................... 118 Macros ............................................ 128 Cue Stacks .................................... 107 Location of Submasters .................. 118 The Macro Window ........................ 128 Cue Stack Directory Window ............ 107 The Submasters Window ................ 119 Recording a Macro ......................... 129 Naming Cue Stacks ........................ 107 Recording Submasters ................... 119 Naming a Macro ............................ 129 Copying Cue Stacks ........................ 108 Fade times on Submasters ............. 119 Running a Macro ........................... 129 Moving Cue Stacks ......................... 108 Playing Back Submasters ............... 119 Copying a Macro ............................ 129 Deleting Cue Stacks ....................... 108 The Submaster Setup Window ........ 120 Moving a Macro ............................. 129 Cue Stack Setup Window ................ 108 Changing Submaster Page .............. 121 Deleting a Macro ........................... 129 Chases.......................................... 110 Editing Submasters ....................... 121 Auto Macros .................................. 130 Pages ........................................... 113 Previewing Submasters .................. 121 Advanced Programming ..................... 131 Loading a Page onto the Playbacks ... 113 Copying Submasters ...................... 122 Record Options Window .................. 131 Page Window ................................. 113 Moving Submasters ....................... 122 Wheel Editing Modes ...................... 134 User Definable Keys (UDKs) ................ 114 Deleting Submasters...................... 122 Colour Edit Modes .......................... 136 Channel Data UDK.......................... 114 Special Submaster Types ............... 122 Knockout Function ......................... 136 Cue UDK ....................................... 114 Effects ............................................. 124 Park Function ................................ 136 The UDK Setup Window .................. 114 The Effects Palette Window ............. 124 Rem Dim Function ......................... 136 Naming UDKs ................................ 115 Auto Effects .................................. 124 Fade and Delay Times .................... 137 Group UDK .................................... 115 Effect Parameters on the Wheels ..... 125 Fade Time Commands .................... 137 Fixture UDK ................................... 116 Applying Effects ............................ 125 Try Cue Function ........................... 137 Palette UDK ................................... 116 The Effects Window ....................... 125 Highlight Function.......................... 137 Page 4 ORB Series Operating Manual – Issue 2.0 Home Function .............................. 138 Remote Input ............................... 156 Fixture Types supported by ORB ...... 163 Remote ............................................ 139 SMPTE ......................................... 157 Index .............................................. 178 Remote Devices ............................. 139 MIDI ............................................ 157 Windows Remote Monitor ................ 139 Video Output ................................ 157 iPad Remote Monitor ...................... 142 CAN Port ...................................... 157 iPod / iPhone Wireless Remote ......... 143 Ethernet ....................................... 157 Windows Mobile Remote ................. 143 USB Ports ..................................... 157 Other Features .................................. 144 Keyboard & Mouse......................... 157 Windows ....................................... 144 Touchscreens ................................ 157 Screen Navigation Keys .................. 145 External Storage Devices................ 157 Mouse Operation on Windows .......... 145 AV Port ........................................ 157 Trackball ....................................... 146 Desk Light .................................... 158 Preview Cue Window ...................... 146 DMX Input .................................... 158 Preview Palette Windows ................. 147 DMX Output .................................. 158 Preview Group Window ................... 148 Kensington Lock ............................ 158 Preview UDK Window ...................... 148 Operating Environment .................. 158 Preview Macro Window ................... 149 Troubleshooting................................ 159 Active Playback Window .................. 149 No DMX Output? ........................... 159 DMX Output Window....................... 149 Fixtures Not Responding? ............... 159 User Views .................................... 150 No Intensity Output ? .................... 159 Spare Button ................................. 151 Desk Does Not Boot ....................... 159 Software Updates ........................... 151 Software Installation Problems ........ 159 Glossary ........................................... 152 Front Panel not responding? ........... 159 Technical Specification ....................... 156 Reporting a problem ...................... 160 Mains Inlet .................................... 156 Basic Maintenance ............................ 160 Audio............................................ 156 Quick Reference Sheet ...................... 161 Introduction Introduction This Manual The ORB Series This manual describes the operation of the ORB lighting desks. This chapter contains an overview of the capabilities and controls of the ORB series. The ORB series of lighting control desks come from a heritage of control system development which spans almost 15 years. The software base, ZerOS, is also featured on the Frog 2 and Leap Frog 48 & 96 ranges. The hardware combines the latest in high tech embedded processing with powerful, ergonomic control interfaces. The Quick Start Tutorial chapter is designed to get you up and running with the desk, but is not a substitute for the whole manual. For more detail on each function, this manual is divided into chapters, one for each major area of control. As the ORB is a powerful lighting desk which can be set up in many different ways, experience is the best way of fully learning the desk. Through time you will develop your own operating style. Throughout this manual the following conventions are used: References to front panel controls, buttons and lights appear in capital letters, for example: GRAND MASTER, COLOUR, <UDK3>. Soft buttons which appear on the monitor are displayed as follows: [Desk Setup], [Values]. Syntax keys which appear on the LCD screen above the main keypad are displayed as follows: {Knockout}, {Close}, {Merge}. The ORB features a traditional theatrical layout, including ten playback faders capable of functioning as playbacks or submasters. This console is ideal for users who wish to playback in a traditional theatrical format, with a pre-built cue stack. The ORB XF replaces these ten playback faders with 60 Multi Function Faders which can function as Channels, Submasters or Playbacks. This console is more suited to users who require flexibility in playback and a simpler programming approach. The following section is a summary of the main functions of the ORB series of lighting desks. Graphical Interface The desk operates a graphical interface which is provided by up to two external monitors. All the setup, programming, playback and output information is displayed graphically on the monitor screens. The desk provides two XGA outputs on the rear panel of the desk. The monitors are used extensively to display information and shortcut buttons. Two touch screens can be connected to the desk via VGA and USB ports as an option to provide you with easier input facilities. Page 6 ORB Series Operating Manual – Issue 2.0 Introduction Keys on the front panel enable quick and direct access to the various monitor screens. Fixtures can be given a user defined name and number, for ease of reference. Cursor keys and an internal trackball on the front panel allow you to move around the monitor. These functions can optionally be mimicked using a USB keyboard and mouse. Fixtures can be patched to any of the DMX output channels (1 – 512) on any of the DMX universes (1 – 4). Command Line The primary method of programming the ORB series is via a command line, which is displayed on the monitors. Commands can be entered using the front panel keys, control wheels, external keyboard or by clicking on objects with the mouse or trackball. Each command must be actioned by the ENTER key. Above the command line is a Suggested Commands bar which indicates the next available keys in your command syntax. Control Channels The desks have 2048 channels of control. These can be assigned and patched as any number of Fixtures, across the 4 DMX universes on the desk. Fixtures Every device controlled by ORB is known as a Fixture. Fixtures can be a simple generic dimmer channel, or a complex DMX device such as a colour scroller, moving mirror or moving head (eg VL3000, MAC 700). Any item controllable via a DMX signal can be assigned as a fixture on the ORB series. In the ORB series, dimmer channels are a simple fixture with one parameter. Moving heads, moving mirrors, LED and Video systems controlled by DMX are fixtures with multiple parameters. Within the Fixture Library, the ORB series is told which channels control which parameters of the fixture. These are then grouped into Position, Colour and Beamshape. ORB Series Operating Manual – Issue 2.0 Fixture parameters can be manipulated from within the Output Window, from where they can be added to cues, palettes, submasters, User Defined Keys, or macros. Cues, Cue Stacks and Playbacks The desk allows you to record cues, for use in any of the 1000 user programmable cue stacks. Each cue can have a number, name, trigger, a wait time (auto cues) and a set of delay and fade times. It is possible to give each parameter of each fixture their own individual fade and delay times in each cue. The desk provides 10 playbacks, which can be switched between 100 pages. Groups The desks provide 1000 user definable groups. Automatic groups for each fixture type in the schedule can be generated from the Setup area, if required. Palettes The desks provide 1000 user programmable palettes for each of the four attributes (Colour, Beamshape, Position and Effects). User Definable Keys (UDKs) The desks provide 20 pages of 10 User Definable Keys. The User Definable Keys may be assigned to Groups, Fixtures, Palettes, Effects, Cues, or channel data. Page 7 Introduction Multi Function Faders (MFFs) Output Processing on the ORB Series The ORB XF is equipped with 60 Multi Function Faders. These can be used in one of three ways – The ORB series has two distinct channel types: Intensity channels and Attribute channels (Colour, Beam and Position). Faders 1 – 40 can be used as Channels or Submasters Faders 41-60 can be used as Channels, Submasters or Playbacks The main difference is that Intensity channels can be flashed, are mixed with their source's Master Fader and the GRAND MASTER, and can have distinct Fade Up and Down times. In each of these modes there are various settings to define the behaviour of these faders. These functions are detailed later in this manual. When you play back a cue, park a channel, or manually manipulate a channel in the programmer, you give ownership of the channel to that specific area of the desk. Submasters Submasters are scenes stored onto faders. These are played back by raising the fader, and are removed from the output by lowering the fader. The ORB provides 20 pages of upto 60 Submasters. The submasters may be played back via DMX In or by converting the Playback Masters into Submaster mode. The ORB XF provides 20 pages of upto 60 Submasters which are mapped to the Multi Function Faders. Page 8 When a channel is owned, the programmed value (or series of values, if it is defined as a chase or effect) is output. However, the previous owner(s) are not forgotten, and go into in a history list. When an item is released, it loses it's places in the history, whether it currently owns them or not. The most recent owner in the history will then regain ownership, and hence control the output of that channel. If a channel is not owned by any source, then it will output zero for an Intensity channel, or it's default value for an Attribute channel. You can toggle a Source View for the Output Window by using the syntax VIEW {Source}. This will show you where the values are coming from. ORB Series Operating Manual – Issue 2.0 Introduction Front Panel Controls ORB This section of the manual describes the controls and displays on the front panel of the ORB desk. The front panel controls have been divided into the following sections: ORB Series Operating Manual – Issue 2.0 Page 9 Introduction User Definable Keys (UDKs) (Page 18) Playbacks (Page 13) Master Playbacks (Page 15) Function Keypad (Page 16) Keypad & Syntax Keys (Page 17) Grand Master and Blackout (Page 11) Control Wheels (Page 19) Figure 1 - Front Panel Controls ORB XF This section of the manual describes the controls and displays on the front panel of the ORB XF desk. The front panel controls have been divided into the following sections: Page 10 ORB Series Operating Manual – Issue 2.0 Introduction Multi Function (Page 14) User Definable Keys (UDKs) (Page 18) Faders Master Playbacks (Page 15) Function Keypad (Page 16) Keypad & Syntax Keys (Page 17) Grand Master and Blackout (Page 11) Control Wheels (Page 19) Figure 2 - Front Panel Controls Grand Master and Blackout ORB Series Operating Manual – Issue 2.0 Page 11 Introduction The GRAND MASTER fader allows you to temporarily limit the output values of all dimmer channels. The Grand Master level is displayed on the monitor screen task bar. In normal operation the Grand Master should be at 100%. The BLACKOUT key enables you to lock the dimmer outputs from the desk at 0%, regardless of the level of the Grand Master fader. Pressing the BLACKOUT key toggles between enabled and disabled. The red LED in the BLACKOUT key flashes when blackout is enabled and BLK is displayed on the monitor screen. Figure 3 - Grand Master & Blackout Page 12 ORB Series Operating Manual – Issue 2.0 Introduction Playbacks - ORB Playbacks are used as the main programming and playback area of ORB. These playbacks can function in one of two ways – as Cue Lists (also known as Cue Stacks), or as Submasters. The ORB has 10 playbacks, which can be paged between Page 1 and Page 100. Each page contains a new set of 10 playbacks, giving a total of 1000 playbacks available for programming. Each playback has a number of controls available: A select key allows you to select the playback for programming or manipulation on the Master Playbacks. The currently active page is indicated on the LCD screen above each playback, together with the stack name, current and next cue information. The Master Fader allows you to override the programmed dimmer level. The STACK PAGE key is used to select the required page of playbacks, by entering the required number in syntax (eg STACK PAGE 5 ENTER). A PAUSE key temporarily stops a fade whilst in progress. Double pressing the PAUSE key acts as a BACK function. The GO key advances to the next programmed cue on that stack. Figure 4 - Playbacks A number of additional controls are available for releasing cue stacks and activating cue stacks on the Master Playback. These are detailed in later sections. ORB Series Operating Manual – Issue 2.0 Page 13 Introduction Multi Function Faders – ORB XF Multi Function Faders are used as the main programming and playback area of the ORBxf. These faders can function in one of three ways – as Channels (Dimmers), Submasters (Scenes) or Cue Stacks (Playbacks). The ORB XF has 60 MFFs, which can be paged to access all the channels, submasters and cue stacks on the desk. Each MFF has a number of controls available: Each Multi Function Fader in the top two banks offers two possible functions – Channel or Submaster Below each MFF is a flash button which can be used to flash, select, solo or otherwise modify a channel. The exact behaviour of this button is defined by the type of fader assigned. The bottom bank of MFFs can be used as Playbacks. In this mode, the flash button is used as GO button. Figure 5 - MFFs Page 14 ORB Series Operating Manual – Issue 2.0 Introduction Master Playbacks The master playbacks allow you to control a selected playback using more advanced playback control.: The Fader Func. button is used to switch the function of the MFFs ORB The Release key can be used to release any of the Playbacks. ORB XF The Page Key is used to change page of the selected element (eg STACK PAGE n ENTER) The (Select) Stack button can be used for selecting a particular cue stack for editing. Two playback faders can be assigned as A/B crossfade masters, or as an intensity master and override fader for the stack. Large GO and PAUSE keys to run and stop cues on the selected stack. Figure 6 - Master Playbacks ORB Series Operating Manual – Issue 2.0 Page 15 Introduction Function Keypad CUE ONLY is used when programming to prevent the changes in a cue applying to later cues. SETUP is used to enter and exit SETUP, and to configure programmed items. UPDATE allows you to merge new information into existing data DELETE is used to remove programmed items. COPY TO & MOVE TO are used to relocate and copy data from one place to another. The CLEAR key is used to clear out data from the programmer, releasing those channels from control. NAME is used to set a name on any programmed item. TIME and DELAY are used to adjust the fade and delay times. VIEW allows you to alter the monitor screen layouts and recall programmed views. BLIND allows you to enter and leave BLIND mode, which can be used for adjusting cues without affecting the output of the desk. SMART TAG allows you to engage the Smart Tags function to automatically tag required channels. RECORD is used to store an item. TRACK allows you to record cues tracking forwards from that point. CUE & SUB allow you to specify a particular cue or submaster to record or alter. GROUP specifies a range of channels to be controlled together. TRY CUE lets you try out a crossfade before programming the cue. LOAD allows you to bring back a programmed item into the programmer for alteration. Figure 7 - Function Keypad Page 16 ORB Series Operating Manual – Issue 2.0 Introduction Keypads & Syntax Keys The / key is used for separating cue & stack numbers, or fade up/down times. The + and – keys are used for relative adjustment of levels (@+10 ENTER) The syntax keys (and LCD) follow syntax and provide additional functions according to what you‟ve entered. The AND key is used for adding items to a list. The THRU key is used for selecting a range of items. The numeric keys (0 - 9) are used for entering numeric data (eg group no, palette no, cue no, channel levels, DMX addresses etc.) The FULL key is used to set the intensity of the selected fixture(s) to FULL (ie 100%). The UNDO key undoes the last command entered. The MACRO key allows you to record and run macros to speed up programming. The EXCEPT key is used for removing items from a list. The SHIFT key alters the function of most keys on the desk. The backspace key () removes the last instruction entered on the command line. The AT (@) key is used when setting intensity levels or DMX addresses. The . key is used to indicate decimal points in cue names and in syntax for setting 0% intensity The ENTER key is used for confirming or completing commands. Figure 8 - Keypads & Syntax Keys ORB Series Operating Manual – Issue 2.0 Page 17 Introduction User Definable Keys (UDKs) In addition to playbacks, the ORB Series features 10 User Definable Keys (UDKs) which can be assigned to many different functions. The UDK page (ORB) can be changed by pressing the UDK PAGE button and entering the required number in syntax (eg UDK PAGE 4 ENTER). On ORB XF this function uses the PAGE key and a {UDK} softkey. The HELP key (ORB XF) can be used to access the online help on ORB XF. On ORB, the ? in the top right hand corner of the monitor screens opens the Help system. The current contents of the UDK are displayed on the LCD display, together with the current page number. Pressing SHIFT and a UDK opens the UDK Window on the monitor to display the contents of the UDKs. Each key can be assigned a different function (Macro, Palette, Scene, etc) and action (Flash, Latch, Solo, etc) Figure 9 – User Defineable Keys (UDKs) Page 18 ORB Series Operating Manual – Issue 2.0 Introduction Attribute & Cursor Keys and Control Wheels The three control wheels are used for setting and adjusting fixture parameter and other data levels. The parameters that are currently assigned to the control wheels are shown on the LCD, together with their current value. The Intensity wheel is used for adjusting the intensity of the currently selected fixture(s). The intensity level is displayed on the LCD screen above the wheel. The MORE key pages the SYNTAX KEYS to display more options. The attribute keys (POSITION, COLOUR, BEAM and EFFECTS) are used when adjusting fixture parameters and also when recording, referencing and outputting palettes and effects. Each of these keys contains a yellow light, which is lit when the attribute is selected. The trackball and three trackball buttons are used for manipulating the mouse on the monitor screens, and also for Position control of moving lights. See page 146 for more information. The arrow keys are used to move around fields on the active monitor screen. Figure 10 – Attribute & Cursor Keys & Control Wheels ORB Series Operating Manual – Issue 2.0 Page 19 Quick Start Tutorial Quick Start Tutorial Getting Started Prior to powering up the desk, it is essential to attach all the peripherals you require. The desk has support for a USB Keyboard and Mouse, two XGA monitors (or touch screens) and a desk light on 3 pin XLR. These should be connected before powering up, as subsequent connection could result in software or hardware malfunctions. Once you've connected all the peripherals you require, power on the desk using the switch on the rear panel. If you see no immediate response, check you have the power switch set to ON, and that the IEC lead is firmly attached to the power inlet. so during programming you may wish to enter Setup occasionally to take a backup. Adding Fixtures Once in the Setup screen, the first task you need to perform is to assign the fixtures in your rig to the desk‟s fixture schedule. Press the [Patch Wizard] button on the monitor using the trackball, using the left click button above the ball. The Patch Wizard will appear and guide you through adding some fixtures. When you power on the desk, the desk will run through its power up routine and after a short while you will be presented with the desk software in its default configuration. Setting Up the Desk Before you start programming cues etc, you will need to set up the desk. The desk comes with a default patch of channels - on ORB, 1 to 96 are assigned to DMX addresses 1 to 96 on DMX universe 1 as standard Dimmer fixtures. On ORB XF, 1 to 240 are assigned to 1 to 240 on DMX universe 1. If this situation matches (or surpasses) your installation then you can skip ahead from this section. Press the SETUP key to display the Setup Window on Monitor 1. Setup is intended to give you access to the core settings for the ORB. As such, you shouldn't need to enter the Setup area during a show. It is, however also used for saving and loading of show files, Page 20 ORB Series Operating Manual – Issue 2.0 Quick Start Tutorial Figure 11 – Patch Wizard (Step 1 – Manufacturer Selection) Figure 12 – Patch Wizard (Step 2 – Fixture Selection) First the wizard allows you to select the fixture manufacturer. Scroll down or use the cursor keys to select the required fixture type (eg MAC 700 Profile). Scroll down or use the cursor keys to select the required manufacturer (eg MARTIN). If you have a keyboard connected, you can press the M key to jump straight to manufacturers beginning with M. Press the [Next] button (or ENTER on the keypad) to move to the next step. ORB Series Operating Manual – Issue 2.0 Note – Fixture Types If the fixture type you require is not in the fixture library stored on the desk you can import the fixture type – see Setup chapter for full details. Press the [Next] button to select the fixture Mode. It is important that the mode set here matches the mode set on the fixture itself – if in doubt, consult the fixture operating manual for full details. Page 21 Quick Start Tutorial Figure 13 – Patch Wizard (Step 3 – Mode Selection) Figure 14 – Patch Wizard (Step 4 – DMX Address entry) Once the Mode has been selected, press the [Next] button to move on and enter the DMX address for the fixture. If you have not yet set this on the fixtures themselves, press the [Next Address] button and the desk will calculate a DMX address for you based on the existing patch information. Once the address is configured, press the [Next] button and enter the quantity of the fixture required. The monitor screen will tell you the number of fixtures and control channels remaining within its limits, to ensure you do not exceed these limits. It is important here to ensure that the DMX universe is correctly selected. Page 22 The final step in the Patch Wizard is to assign a fixture number to the fixtures. The fixture number is the number you will refer to the fixture as within the desk software. Enter the number and press [Finish]. ORB Series Operating Manual – Issue 2.0 Quick Start Tutorial Figure 15 – Patch Wizard (Step 4 – Quantity) The Patch Wizard is now complete and your fixtures have been assigned. If everything has gone according to plan, the fixtures should now have moved to their Home positions. You can repeat the Patch Wizard for every group of fixtures you have. Exiting Setup Once you have finished making changes to the setup, press the [SETUP] button leave Setup. The indicator light will go out to inform you that you have exited Setup mode. ORB Series Operating Manual – Issue 2.0 Page 23 Quick Start Tutorial The main user interface The Output Window is central to the operation of the ORB series. It is recommended that the Output Window is displayed on one of the monitor screens when programming cues, palettes, UDKs etc. The colour coding also helps to see what direction a channel has faded. The cue stack window shows the selected cue stack and all the cues which that stack contains. The palette windows show the various recorded palettes and can be clicked to access a palette. The command line shows the commands you‟ve entered on both monitors. The group window shows groups of all your fixtures. Figure 16 - Main User Interface Page 24 ORB Series Operating Manual – Issue 2.0 Quick Start Tutorial Using the MFFs (ORB XF only) Controlling Dimmers The intensity parameter of fixture(s) can be controlled by entering commands directly via the numeric keypad or by using the corresponding control wheel. Intensity levels can be set for a single fixture or a number of fixtures using the following syntax: The Intensity channel of a fixture can also be adjusted by using the MFFs on ORB XF. First ensure that the MFFs are running in Channel mode – this is indicated by the LED in Fader Func. being lit Green. If the MFFs aren‟t in Channel mode, press Fader Func., then select {Channels} {1-60} on the Syntax LCD. With the MFFs in the correct mode, channels can be adjusted by moving the appropriate fader. If a channel already has a level, for example set through syntax, then you must „grab‟ the level by moving the fader up to the present value. Once that value is grabbed, the MFF gains control. 1 @ N ENTER This sets the intensity output of fixture 1 to N %. 1 FULL ENTER This sets the intensity output of fixture 1 to 100 %. 2 AND 3 @ N ENTER This sets the intensity output of fixtures 2 and 3 to N %. 2 AND 3 FULL ENTER This sets the intensity output of fixtures 2 and 3 to 100 %. 5 THRU 10 @ N ENTER This sets the intensity output of fixtures 5 to 10 to N %. 5 THRU 10 EXCEPT 7 @ {wheel} This sets the intensity of fixtures 5,6,8,9,10 to the level on the wheel Tip – No Intensity Output ? If the intensity output levels do not change when you send any of the above commands to a fixture, or adjust the intensity level using the wheel, check that the GRAND MASTER fader is at full and the BLACKOUT button is off. If the selected fixture(s) have a Shutter parameter, check that the shutter is open. Check that Highlight is not active by holding SHIFT and pressing HOME. For more troubleshooting tips, see page 159. 5 THRU 10 FULL ENTER sets the intensity output of fixtures 5 to 10 to 100 %. Using the Control Wheel The Intensity channel of a fixture can also be adjusted by control wheel. First select the fixture(s) required as described above and then use the intensity wheel to adjust the level. The output value is shown corresponding control wheel. on the LCD ORB Series Operating Manual – Issue 2.0 screen above the Page 25 Quick Start Tutorial Controlling Fixtures Controlling Colour, Beamshape and Position Parameters Fixtures on the ORB series are considered to be any multi-channel device, such as a moving light, LED, lamp with a scroller, etc. These must be patched before they can be controlled. The colour, beamshape and position parameters of the selected fixture(s) are controlled using the control wheels. First select the required fixture(s) and then press one of the attribute keys (POSITION, COLOUR or BEAM). Selecting Fixtures The corresponding parameters for the fixture are assigned to the control wheels and are indicated on the LCD above the wheels. Fixtures are selected numerically using the number assigned to them during the Patch Wizard. Type the fixture number(s) followed by ENTER to select those fixtures. Fixtures are also selected if an intensity command (above) is entered. In the example below, COLOUR has been selected and the fixture parameters Cyan, Magenta and Yellow are assigned to the three control wheels. Homing the Fixtures If you are unsure which fixture is which, the easiest way to see which fixtures in the rig you are controlling is to „home‟ them. This will set their position (Pan and Tilt) to 50%, the dimmer to 100% with an open white beam (no gobos or effects). The home values can be customised in the Edit Fixtures menu in Setup. If the fixture has more than three controllable parameters for the selected attribute, pressing the attribute key selects the next group of parameters. Tagging Parameters On the ORB series, fixture parameters must be „tagged‟ for them to be recorded when programming cues, palettes and UDK‟s. After selecting a fixture, press the HOME key. This will send the fixtures to its „home‟ values and automatically tags the fixture parameters for programming. The tag status of each fixture parameter is indicated on the LCD screen and in the Output Window by its background colour – dark background indicates that the parameter is untagged; bright background indicates that the parameter is tagged. Controlling Fixture Parameters If a parameter‟s value is changed by a command (moving the control wheel or directly in the Output Window) it will be tagged automatically. Each fixture type has its own set of parameters (intensity, color, gobo, pan, tilt etc. as defined in the fixture library) which are classified or grouped together in different attributes (Position, Colour, Beam). Once a fixture, or group of fixtures has been selected, the attribute buttons and control wheels can be used to adjust the parameter output levels as required. Page 26 ORB Series Operating Manual – Issue 2.0 Quick Start Tutorial Cues Once you have set up a scene that you like you can then record that into a cue. Selecting a Cue Stack Tagged Untagged Cues can be programmed into any of the 1000 user programmable cue stacks. On an ORB, press the SELECT button above the cue stack you wish to program in. The LED in the SELECT button illuminates to indicate that it is the active cue stack. On an ORB XF, enter the syntax STACK n ENTER. Recording a Cue Figure 17 – Output Window (Tagged & Untagged channels) It is also possible to tag and untag fixture parameters manually by holding down CLEAR and moving a fixture wheel, then releasing CLEAR. Only tagged channels will be recorded when storing a cue, palette, UDK, etc. This gives the capability of separating your programming between multiple UDKs, cue stacks, submasters, etc. To record a cue, simply enter the command: RECORD CUE n ENTER Where N is the number of the cue you wish to record. As you have not specified any fade times or names, the desk will enter the default values for the cue, and the cue will be recorded. After recording a cue, the command line is cleared, the fixtures remain selected but the parameters are untagged. Subsequent cues can then be set up and recorded using the same method. As you become more experienced with the desk, you will find the most efficient way of programming your cues – for more methods, see Page 99). Note – Record Options Window When you press the RECORD key the Record Options Window is displayed. This window allows you to adjust what data is recorded, ORB Series Operating Manual – Issue 2.0 Page 27 Quick Start Tutorial as required – see the Programming chapter (Page 89) for further details. Adjusting Fade and Delay Times As well as the actual output levels recorded in the cue, each fixture parameter also has it‟s own fade and delay times. Default fade and delay times for Intensity, Colour, Beamshape and Position are defined in Desk Setup, and can be adjusted if required, prior to programming cues. Once a cue has been programmed, its times can be adjusted by using syntax: CUE n TIME x DELAY y {Fade} COLOUR z ENTER Any adjusted fade times display on the monitor in the Cue Stack window, which can also be manipulated using the cursor keys and ENTER button in a similar format to a spreadsheet on a computer. Naming Cues Pressing the GO button will trigger the start of fades on all parameters, but the intensity channels are mixed with the master fader. To output the next memory in the stack, simply press the GO button again. The desk will continue down the cue list, one cue at a time. Once the end of the cue stack is reached, the first cue will be selected as the next memory, resulting in a loop. Once you have finished playing back cues, it is important to release the cue stack. This returns all of the affected fixtures to their default values, or to the value they were at before the cue stack was executed. Select the cue stack, using the SELECT button, then press the RELEASE key. Updating Cues In order to update a cue, the first thing to do is to ensure that the cue is outputting. If it is not outputting, enter the syntax: CUE n GO Each cue can have a name stored alongside the cue data. Enter the following syntax command : Once the cue is outputting, make any changes using command syntax, fixture wheels and palettes as required. CUE n NAME {your name} ENTER To record the changes to the cue, press the UPDATE key. The Update Options window will appear. Playing Back Cues Before playing back the programmed cues in a cue stack, it is important to clear the programmer by pressing the CLEAR button. This removes any unrecorded commands and sends fixtures to their default values, with the exception of the intensity, which is kept at 0%. To play back the cues in a cue stack in sequence first select the required page of playbacks. Press the GO button for the selected playback, and raise the master fader to full. These commands can be executed in either order, as sometimes a manual fade is desirable. Page 28 Select the cue number you wish to update in that window and press OK. The cue will inherit the new information and the update will be complete. Tracking There are two operating modes that the ORB series supports – Tracking or Non Tracking mode. In Tracking Mode, every cue programmed behaves in a Tracking methodology. This means that each cue only programs the changes between two states – channels are told to fade up, fade down, or if no instructions are programmed, the channel will stay the same. This is a powerful ORB Series Operating Manual – Issue 2.0 Quick Start Tutorial programming method as it allows advanced manipulation of the cue stack and updates can be filtered through entire sequences without having to update each cue individually. Palettes When updating a cue, there are four tracking options available – Track Forward, Track Backward, Track Both or Cue Only. For a full explanation of each of these options, see page 131). A palette is a programming tool which allows you to define the values required in a fixture or group of fixtures to create a particular affect on stage. For example, a palette can be stored for the colour Red which details the DMX values required for each moving light to create a Red colour. Likewise a palette can be stored for a position on the stage, with the relevant Pan & Tilt information for each fixture in the rig. Selecting Cue Only forces the update only to affect the cue you are updating. Choosing Track Forwards allows the update to follow through into the following cues. If you choose to update with Track Forwards enabled, remember to „undo‟ the change you made in one scene when you move to the next – particularly if the next cue is a blackout. The ORB series has four sets of 1000 palettes. Non Tracking mode eliminates these choices making programming simpler but restricts the flexibility of your programming capabilities. Figure 19 – Palette Windows Figure 18 – Update Options Window ORB Series Operating Manual – Issue 2.0 Page 29 Quick Start Tutorial Recording Palettes Enter the command COLOUR n ENTER Programming a palette is simple and very similar to recording a cue. The fixture(s) will change to the colour they were in when the palette was stored. Set up the fixture outputs as required, ensuring that the correct parameters are tagged. To record the data as a colour palette, enter the following command: RECORD COLOUR n ENTER To record the data as a beamshape, position or effects palette, simply replace the COLOUR part of the above command with BEAM, POSITION or EFFECTS. Palette Windows Each set of palettes has it‟s own palette window. These palette windows are displayed on Monitor 2 by default. The palette window contains a soft button for each of the 1000 palettes. These buttons can be clicked to access a palette. Unprogrammed palettes are indicated by a * next to the number. Naming Palettes If any of the selected fixtures are not actually programmed in the applied palette, but there are one or more fixtures of the same type that are programmed, the fixture will use the values programmed for the first fixture of the same type. If the fixture data in the programmer is then recorded into a cue, submaster or UDK, the desk will record the palette reference rather than the actual parameter value. This is especially useful for touring shows when using positions, to save updating each cue individually. Automatic Palettes In Setup, there is an option to generate a set of automatic palettes based on the fixture types in the schedule. The desk generates palettes for a range of useful things based upon your current patch. To create the automatic groups, first enter SETUP, press the [Auto Menus] soft key on the monitor, select the [Create Auto Palettes] option, then exit Setup. As well as containing channel data, a palette can have a name associated with it. To assign a name to a palette enter the command: COLOUR n NAME {your name} ENTER These names are displayed in the palette windows and in the command line when a palette is accessed. Outputting Palettes The act of outputting a palette causes the selected fixtures to move to the value stored within that palette. To apply or output a palette, first select a fixture or group of fixtures Page 30 ORB Series Operating Manual – Issue 2.0 Quick Start Tutorial User Definable Keys (UDK) Groups The desk provides 10 user definable keys, which can be paged 20 times to give 200 programmable locations. As well as palettes, the ORB provides 1000 user definable Groups. The user definable keys may be assigned to Groups, Individual Fixtures, Palettes, Cues, or channel data. Groups are most commonly used when selecting fixtures and programming data to be recorded in cues, palettes etc. Groups can also be assigned to User Definable Keys (UDKs). Assigning User Definable Keys Automatic Groups In this quick start guide we will just look at recording channel data to a UDK. For details of all the other items that can be assigned to UDK‟s see the UDK chapter (Page 114). In Setup, there is an option to generate a set of automatic groups based on the fixture types in the schedule. The desk generates a group for each of the types of fixtures you have, plus „odd‟ and „even‟ groups for each different fixture type in the schedule. Set up the fixture outputs as required, ensuring that the correct parameters are tagged. To record the data to a User Defined Key, enter the following command: RECORD <UDK> Outputting User Definable Keys The data assigned to a UDK is output by pressing the UDK on the front panel or by clicking on the soft button in the User Defined Keys Window on the monitor. The action of the UDK can be set to either Flash or Latch in the User Definable Keys Setup Window – see UDK section of manual (Page 114) for more information. ORB Series Operating Manual – Issue 2.0 To create the automatic groups, first enter SETUP, press the [Auto Menus] soft key on the touch screen, select the [Create Auto Groups] option, then exit Setup. User Defined Groups You can create your own groups of fixtures, eg Floor MAC 700‟s, FOH MAC 700‟s etc. Simply select the fixtures that you wish to be in the group and then enter the command: RECORD GROUP n ENTER Page 31 Quick Start Tutorial Group Window The Group Window is displayed by default in the bottom right hand corner of Monitor 2 on ORB. To display it on ORB XF, hold down SHIFT and press GROUP. This window allows you to click and select any of the programmed groups automatically. Figure 20 – Group Window (bottom right) Page 32 ORB Series Operating Manual – Issue 2.0 Quick Start Tutorial Multi Function Faders (ORBxf only) The ORBxf features 60 Multi Function Faders, which operate in three modes. MFFs can be switched by using the Fader Func. key. In Channel Mode, all 60 faders function as controls for the dimmers of patched fixtures. This is indicated by the MFF window being dark blue. Figure 21 - MFF Window (Channel Mode) In Submaster Mode, all 60 faders function as submasters. This is indicated by the MFF window being light red: In Playback Mode, the bottom 20 faders convert into playbacks (cue stacks). In this mode the flash button acts as a GO button. This is indicated by these twenty faders turning green. It is possible to mix Playback mode with either Channel Mode or Submaster Mode – simply switch to the preferred mode first, then change to Playbacks. Figure 22 - MFF Window (Submaster Mode) Figure 23 - MFF Window (Playback Mode) ORB Series Operating Manual – Issue 2.0 Page 33 Quick Start Tutorial To change mode, simply use the syntax: To record to a specific page, enter: FADER FUNC. {Channels} {1-60} RECORD SUB m / n ENTER FADER FUNC {Submasters} It is also possible to record a submaster by pressing the FLASH or GO key underneath it – eg: Or FADER FUNC. {Playbacks} RECORD <FLASH> (on ORBxf, when the MFFs are in Submaster mode) Submasters RECORD <GO> (on ORB, when the playback is in Submaster mode) The ORB series supports upto 60 submasters, which can be paged 20 times to give upto 1200 programmable locations for scenes stored onto faders. On ORB, submasters can be accessed either by altering the mode of the playbacks, or by using another DMX enabled desk and using DMX-In. On ORBxf, the submasters can be activated on the MFFs. To convert a playback into a submaster on ORB: Hold SETUP and press the SELECT key above the playback. In the popup window, select <Submaster> Press OK. To activate submasters on MFFs on ORBxf, enter the syntax: FADER FUNC. {SUBMASTERS} ENTER Recording Submasters Before recording a submaster, ensure that you have the number of submasters per page defined as you require it. This setting is found in Desk Setup / Inputs. To record a submaster, first set up the fixture outputs as required, ensuring that the correct parameters are tagged. To record the data to a submaster, enter the following command: RECORD SUB n ENTER Page 34 You can view programmed submasters in the Submasters window, by holding SHIFT and pressing SUB. Replaying Submasters In this quick start guide we will just look at using the on-board controls. For details relating to DMX In submasters, see the Submasters chapter of the full manual (page 118). Ensure you have converted the Playback into a Submaster (ORB) or activated the MFF Submasters function (ORBxf). Raising the submaster fader will activate the submaster controls – the intensity will be relative to the level of the fader and the attributes will trigger at 5%. Lowering the submaster will remove the submaster from the outputs, and release any attributes. Paging Submasters To change the page of the submasters, enter the syntax: SUB {Page} n ENTER When you change page, the submasters which are currently active stay active on the previous page until you take the fader down. Once released from a previous page, the submasters become available on the new page. This is known as Page Holdover. ORB Series Operating Manual – Issue 2.0 Quick Start Tutorial Saving Shows The ORB will save the show automatically to its internal memory at regular intervals. Saving the show takes all of the available information in the desk, including monitor configurations, setup options, patch, cue and palette data and stores it all into a single file on your destination device. This file can then be reloaded at a later date to return the desk to the same state as it was in when you saved it. External backups of the show data can be made to a USB Storage Device (eg the memory stick included with your ORB). Saving the show is done in Setup mode, so first press SETUP Press the [Files] key on the monitor. Press the [Save Show] key to enter the Save Show screen. Press the Destination Device key to select the required device. If the device does not appear straight away, wait a few seconds and then click [Refresh]. Type the show name in the Filename box using an external keyboard or the numeric keypad on the desk. Press the [OK] key. After a few seconds, the show will be saved. Press SETUP to exit Setup mode. Figure 24 – Save Show ORB Series Operating Manual – Issue 2.0 Page 35 Quick Start Tutorial Loading Shows Shows can be loaded onto the ORB from a USB Storage Device. Loading shows is done from within SETUP, so first press SETUP to enter Setup. Insert or connect the storage medium containing the show. Press the [Files] key on the monitor. Press the [Load Show] key to enter the Load Show screen. Press the Source Device key to select the required device. A list of show files on the currently selected storage device appears on the touch screen. Select the show file you wish to load using the cursor keys. Press [OK] key to load the show. The desk will load the show into its memory and you will be returned to the home screen. Loading a show brings back the desk to the same settings that were defined when the show was stored – Patch information, Cue Information, UDKs, Submasters, Palettes, Groups, Macros, Desk Setup and Network settings will all be restored. Figure 25 - Load Show This ends the quick start tutorial. Please take time to experiment with the desk, as the best way of learning the power of the console is through exploring. In the next section of the manual, we will go into a lot more detail about each section of the desk. Consider this a reference section, which can be referred to when needed whilst learning and programming the consoles. Page 36 ORB Series Operating Manual – Issue 2.0 Setup Setup In Setup the ORB provides functions for configuring the desk - assigning, patching and editing fixtures, saving and loading shows, clearing show data, resetting the desk etc. Press the SETUP key to display the Setup Window on the monitor. The following Setup options are displayed: Files – this allows you to load and save shows, update fixture libraries and view desk information. (Page 67) Clear Options allows you to delete parts of the programming from a single button. (Page 71) Desk Setup – this allows you to configure behaviour, default times and other hardware settings. (Page 56) Network enables the various Ethernet protocols through which ORB can communicate with other pieces of equipment. (Page 72) Patch – this allows you to configure which fixtures are assigned to the desk. (Page 38) Figure 26 - Setup Tabs To select any of the other Setup options, click on the corresponding button in the Setup Window on the monitor. To exit Setup from any of the various Setup options, close the screen that is currently displayed using the [Close] button in the top right hand corner of the screen. ORB Series Operating Manual – Issue 2.0 Page 37 Setup Patch patch on the desk, as incorrectly entered data can result in the rig being unusable. The purpose of the Patch area of Setup is to configure the dimmers (channels) and fixtures which are connected to the desk, which allows ZerOS to provide optimum controls for these devices. Deleting Fixtures The default state of the console gives you a quantity of dimmer channels patched 1:1 on DMX universe 1. This means that if your rig contains 96 dimmers (ORB) or 240 dimmers (ORB XF) or less and no other fixtures (moving lights, LED fittings, colour scrollers, etc) then the desk is ready to go and you can skip this section of the manual. What is a fixture? As the default patch of the ORB series takes up 96 or 240 dimmer channels, it may be desirable to first delete the default patch. To do this, enter the syntax 1 THRU 96 DELETE ZerOS will ask if you are sure you want to delete the fixtures, and then once confirmed, the fixtures will be deleted from the desk. This removes any existing programming for these fixtures, so please double check that you are sure before continuing. Generally speaking a fixture is any DMX controlled device which requires more than one DMX channel to control all the functions available. For example, a haze machine which offers control over pump and fan functions separately would be considered a fixture, as would a moving light which has pan, tilt, colour and gobo controls. In order to provide optimum control of these fixtures and any additional dimmers, the desk must know several pieces of information about the fixture, namely: The Manufacturer of each fixture type (eg Martin) The Model name for each type (eg Mac 250 Entour) The Mode of the fixture (eg Enhanced Mode) The DMX universe the fixture is connected to (eg 1) The DMX address the fixture is set to (eg 101) From this information the console will be able to link the fixture to one from it‟s internal library, and provide you the controls required on-screen and on the fixture wheels to control all the functions of this device. It may be useful to collate this information into a spreadsheet (or more likely, scribbled onto the lighting plan) before commencing the Page 38 If you choose not to delete fixtures, you may end up with duplicate fixtures using the same fixture number. This is undesirable, as it can cause confusion when programming. Adding Fixtures Once this information is collated, you can use one of two methods to add fixtures onto the desk. It is possible to add fixtures using the Patch Wizard, or via Add Fixtures. Using Add Fixtures provides maximum control of the patch process, whereas the Patch Wizard is ideal for getting up and running quickly. Either process has the same end result, however you may find that one method is preferable to your operating style. ORB Series Operating Manual – Issue 2.0 Setup Add Fixtures Press the right arrow key to move the cursor to the fixture list in the right hand column. The first method of adding fixtures is through Add Fixtures. This allows you to detail to the desk how many of each type of fixture are contained within the rig. Scroll down or use the cursor keys to select the required fixture type (eg Mac 250 Entour). Press the [Add Fixtures] button on the monitor. The Fixture Schedule Window will appear. The left hand column in this window allows you to select the fixture manufacturer from those contained within the internal fixture library. Scroll down or use the cursor keys to select the required manufacturer (eg Martin). It is possible to press the “M” key on an external keyboard to automatically jump to manufacturers beginning with M. Here we are detailing the quantity of fixtures found within the whole rig, so press the ENTER key, enter the quantity of the fixture required using the numeric keypad (eg 4), then press ENTER. The desk then loads that number of fixtures into its memory and the remaining control channel count will be reduced to indicate that these channels are now allocated. If required, you can repeat the above procedure for all the other types of fixtures in your rig. When you have finished adding all the fixtures you require to the schedule, press the [OK] button in the top right.. The monitor returns to the Patch screen. User Fixture Types If during the Add Fixtures process you discover that the manufacturer or fixture type you are looking for isn‟t listed, you will require a User Fixture Type. User Fixture Types can be created using the Fixture Tools utility which is located on the Utilities CD provided with the desk. A guide to creating User Fixture Types is also located on the CD. Once a User Fixture Type has been obtained or created, to load it into ORB you should press the [User Fixture] button in the Fixture Schedule window. The desk will offer you a drop down menu listing all the storage devices detected on the USB ports. Select the drive which corresponds to the device you have stored the fixture type on. Figure 27 – Add Fixtures ORB Series Operating Manual – Issue 2.0 A list of user fixture type files found on the drive will then be displayed and you can select the required file using the cursor keys or trackball. Page 39 Setup Once the file you want is highlighted, press the [OK] button to load it into the desk. All the fixture types contained in the selected fixture type file will be loaded and added to the fixture library on the desk. Selecting a user fixture type and specifying the number of that type in the fixture schedule is carried out in the same way as for any of the normal fixture types already present in the fixture library on the desk. User Fixture Types which have been loaded onto the desk are displayed in the Fixture Schedule Window in the same way as normal fixture types in the fixture library. They are displayed in the correct place based on the alphabetical sorting of manufacturer and fixture type and are distinguished by having a green background, for example: Patching Fixtures After adding the fixtures into the desk, the next step is to patch the fixtures to the DMX outputs. Patching a fixture is the act of defining on the desk which DMX channels the fixture has been set to. Fixtures can be patched individually or in groups. Until a fixture is patched, it will be impossible to control it on ORB, as the desk has no information as to where within the 2048 possible channels the data is to be sent. DMX addresses The DMX signal transmitted from your desk carries 512 channels of information down each „universe‟. Fixtures plugged into this universe must have a DMX address set on them in order for the desk to be able to control them. A DMX address is the range of channels which a fixture has been configured to respond to. This can be a single channel (for example, a dimmer or colour scroller) or a large range (for example a moving light). Depending on the particular equipment you are connecting, the DMX address may be configured using DIP switches, on-screen menus or remotely using various configuration tools. For information on addressing your fixtures, please consult the user manual of the fixtures. If a fixture is using a range of DMX addreses then no other fixture in the rig should be set to use these addresses as this will cause problems configuring the desk to communicate with the fixtures effectively. A typical DMX addressing system may work like this: 1 – 96 – Dimmers 1 – 96 97 – 100 – Empty 101 – 115 – Fixture 1 (14 channels) 116 – 129 – Fixture 2 (14 channels) Figure 28 – User Fixture Types Page 40 ORB Series Operating Manual – Issue 2.0 Setup 129 – 143 – Fixture 3 (14 channels) 144 – 157 – Fixture 4 (14 channels) etc DMX universes The ORB series have four „universes‟ of DMX output, numbered 1 to 4. Each of these universes carries a different set of 512 channels of data, giving a total of 2048 possible channels outputting from the desk. There is a 5 pin XLR output for each universe, located on the rear of the desk. Each DMX universe can also be output over Ethernet, using various communication methods. Using the Desk Setup / Outputs settings (Page 61) it is possible to configure which DMX universe is transmitted from each of the DMX outputs, so if the behaviour of your fixtures isn‟t as you would expect, please check these settings. It is critical that you patch the fixtures to the correct DMX universe to correspond with the cable which they are connected to. Patching Fixtures To patch fixtures at a specified DMX start address, enter the fixture number, press the @ key, enter the DMX start address and then press the ENTER key. For example: 1 @ 274 ENTER This will result in the specified fixture being patched to the first DMX universe at address 274. Note: If you have more than one fixture with a number of 1, this patch will patch all of these fixtures together starting with the first alphabetically by manufacturer (eg Dimmer #1 at 274, then AlphaSpot 300 HPE #1 at 275, then Mac 700 #1 at 307, etc). To prevent this confusion, it is recommended to first edit the fixture number using the Edit Fixtures screen before commencing patching using this method. For how to do this, see page 49. Patching Fixtures to a Specified Universe Fixtures can also be patched to a specified universe by including the universe number in the command. For example, to patch the fixtures to universe 3 starting at DMX address 101, enter the following command: n @ 3/101 ENTER If you are carrying out a lot of patching onto a specified DMX universe, you can select it using the buttons above the patch data in the Patch Screen – the currently selected universe is indicated with a red indicator. Once a universe has been selected, all patch commands which do not specify a universe will be direct to the selected universe. By default, Universe 1 is selected. ORB Series Operating Manual – Issue 2.0 Page 41 Setup This will patch the intensities of the six fixtures to DMX channels 101-106 on the currently selected DMX universe. The intensity parameter requires a single DMX channel. Type in the command: 1 THRU 6 {Fixture Part} 107 ENTER This will patch the remaining parameters of the six fixtures to the current DMX universe starting at address 107 on the currently selected universe.. Unpatching Fixtures Unpatching a fixture removes that fixtures information from the DMX output, effectively disabling that fixture (although it may still be manipulated, programmed and adjusted on the desk, no data will be output to it). Figure 29 – Patch Screen, Output View The {Unpatch} key appears on the syntax keys when in Patch mode. The behaviour of the Unpatch function is dependant upon which Patch View is active at the time. For full information on Patch Views, see page 44. Patching Composite Fixtures To unpatch a selection of fixtures from a specified universe (Outputs or Channels view) or all universes (Fixtures view): Certain fixture types are composite fixtures and have to be patched twice, once for the intensity parameter, and once for the remaining parameters. An example of this would be the Varilite VL5, which has an external dimmer channel in addition to the main control channels. Another example would be a Lamp + 1 Channel Scroller fixture which is used for patching colour scrollers. The {Fixture Part} button on the syntax keys is used when patching the non intensity part of the composite fixture. This syntax key only appears where it is possible to be used, so if {Fixture Part} does not appear then your fixture will not require composite patching. If the fixture does require composite patching, follow these steps: Type in the command: 1 THRU 6 @ 101 ENTER Page 42 1 THRU 5 {Unpatch} To unpatch an instance of a fixture from a specified universe (Outputs or Channels view) or all universes (Fixtures view): 1 @ <address> {Unpatch} To unpatch an instance of a fixture from a specified universe and address (all views): 1 @ <universe>/<address> {Unpatch} To unpatch a fixture at a specified address: {Unpatch} <universe>/<address> To unpatch all fixtures in a universe: {Unpatch} <universe> ENTER ORB Series Operating Manual – Issue 2.0 Setup Deleting Fixtures As well as unpatching fixtures, it is possible to Delete Fixtures from the desk instead. Deleting fixtures is a permanent change to the show file and should not be carried out without intention. There is no UNDO function so exercise caution when using this function. To delete a fixture, use the syntax: n DELETE Or m THRU n DELETE The desk will ask you to confirm the deletion and then remove the fixtures from the show file. This includes modifying all cues, submasters, groups, UDKs and palettes to remove all references to this fixture. This action cannot be undone. Patching a Group of Fixtures Once programming on ORB has begun, it is possible to patch whole groups of fixtures to DMX outputs as well. This is great for touring productions which may have to repatch an entire part of their rig to fit into a house rig. Group Patching is performed sequentially from a given start address. This results in all of the fixtures of this type being assigned one after another starting at the address you define: Press the GROUP key, then select the group numerically. Press the @ key, enter the DMX start address and then press the ENTER key. For example: GROUP n @ 1 ENTER This will patch the entire group starting at DMX address 1 on the selected DMX universe and increasing sequentially until the whole group has been patched or the universe is full. Direct DMX Control When patching it is often a requirement to be able to directly control the DMX outputs from the console, to test a lantern before you patch it for example. To do this, use the {DMX} softkey, for example: {DMX} xyz @ nnn ENTER Figure 30 - Deleting Fixtures If you wish to start with a clean show file in order to patch a completely custom rig into the console, you may wish to initially delete the default patch using this method. ORB Series Operating Manual – Issue 2.0 This provides direct control over the DMX output, and can be used across all 4 DMX universes by specifying the universe like this: {DMX} u / xyz @ nnn ENTER To undo these changes and revert back to the outputting data, press the CLEAR key. Page 43 Setup Fixtures View Patch Views This patch view lists all the fixtures in the schedule together with their alignment data and DMX patch address(es). The Patch Window can display the patch data in three different views on the monitor (Outputs, Fixtures and Channels). The default view is the Outputs view (see below). The fixtures are listed in group order. Alignment data is only displayed if it has been changed from the defaults. Patch addresses are displayed in the format universe/address in normal addressing mode or simply the address in absolute addressing mode. Press the [Patch View] key in the Patch Window and then select [Outputs], [Fixtures] or [Channels] from the drop down menu. The different patch views are described in the sections below. Outputs View This is the default patch view and displays the DMX start address for each fixture for each DMX universe. The 4 universes are displayed vertically with each fixture listed according to its outputs. Figure 32 – Fixtures View Figure 31 – Outputs View Page 44 ORB Series Operating Manual – Issue 2.0 Setup Channel View 16-bit channels This patch view shows the fixture type, fixture number and parameter (eg Gobo1<>) patched to each DMX address in each of the DMX universes, for example: The DMX protocol defines each of the 512 channels as an 8-bit level between 0 and 255. This is sufficient for the majority of parameters (for example, a gobo wheel may only have 7 or 8 different gobos to select from, so 256 possible values is plenty) however in more advanced control equipment, 256 values is not enough so two channels are linked together to create a 16-bit channel. These channels are paired together internally and processed as a signal control channel. When output, the Least Significant Byte (Fine channel) is faded between 0 and 255, then returned to 0 as the Most Significant Byte (Course) is increased by 1, then the pattern continues. This process gives 65536 possible values for a channel instead of the 256 possible using 8-bit control. In Channel View, the acronyms MSB and LSB are used to describe Most Significant Byte (Course) and Least Significant Byte (Fine) channels of 16-bit parameters. Figure 33 – Channel View ORB Series Operating Manual – Issue 2.0 Page 45 Setup Patch Wizard The Patch Wizard guides you through the entire patching process, and is a faster way of getting a simple patch up and running than using Add Fixtures and Patching through syntax. However, the Patch Wizard makes the assumption that your rig has been patched sequentially and can be slower for complicated patch entry. To use the Patch Wizard, press the [Patch Wizard] button on the monitor. The Patch Wizard will appear and guide you through adding some fixtures. Scroll down or use the cursor keys to select the required manufacturer (eg MARTIN). If you have a keyboard connected, you can press the M key to jump straight to manufacturers beginning with M. Standard Dimmers can be patched using the <Standard Fixtures> type, which is also where you will find fixtures such as RGB Dimmers (for LEDs), Scrollers and Relays. Press the [Next] button to move to the next step. Figure 35 – Patch Wizard (Step 2 – Fixture Selection) Figure 34 – Patch Wizard (Step 1 – Manufacturer Selection) Scroll down or use the cursor keys to select the required fixture type (eg MAC 700 Profile). First the wizard allows you to select the fixture manufacturer. Page 46 ORB Series Operating Manual – Issue 2.0 Setup Press the [Next] button to select the fixture Mode. It is important that the mode set here matches the mode set on the fixture itself – if in doubt, consult the fixture operating manual for full details. It is important here to ensure that the DMX universe is correctly selected. Figure 37 – Patch Wizard (Step 4 – DMX Address entry) Figure 36 – Patch Wizard (Step 3 – Mode Selection) Once the Mode has been selected, press the [Next] button to move on and enter the DMX address for the fixture. If you have not yet set this on the fixtures themselves, press the [Next Address] button and the desk will calculate a DMX address for you based on the existing patch information. ORB Series Operating Manual – Issue 2.0 Once the address is configured, press the [Next] button and enter the quantity of the fixture required. The monitor screen will tell you the number of fixtures and control channels remaining within its limits, to ensure you do not exceed these limits. Page 47 Setup Editing Fixtures Edit Fixtures allows you to carry out various functions relating to the fixtures assigned to the desk, including : Name individual fixtures Assign user fixture numbers Edit fixture parameter Default (release) values Edit fixture parameter Home values Edit fixture parameter Topset values Adjust the Pan and Tilt alignment of fixtures Patch Functions The behaviour of each of these functions is described in this chapter. To enter Edit Fixtures, press the [Edit Fixtures] button on the monitor. The Edit Fixtures screen is then displayed. Figure 38 – Patch Wizard (Step 4 – Quantity) The final step in the Patch Wizard is to assign a fixture number to the fixtures. The fixture number is the number you will refer to the fixture as within the desk software. It is recommended that you take some time thinking about numbering your fixtures. Enter the number and press [Finish]. The Patch Wizard is now complete and your fixtures have been assigned. If everything has gone according to plan, the fixtures should now have moved to their Home positions. To make changes to a particular fixture or a group of fixtures, first select the fixture group by pressing the GROUP button repeatedly until the required group is displayed in the title bar. All the fixtures in this group are now displayed in the Edit Fixtures window. Press the [Default], [Home], [Topset] etc button to display the required data. Use the cursor keys to move to the individual field to edit or use the ALL row to select the value for all fixtures in the group. Press ENTER to enter the field, adjust the value as required, then press the ENTER key. You can repeat the Patch Wizard for every group of fixtures you have. Page 48 ORB Series Operating Manual – Issue 2.0 Setup Fixture Numbers Each fixture on the desk has its own fixture number, which is the number it will be referred to during programming and on-screen. Initially, these fixture numbers are set to increase sequentially starting from 1 within the their type, eg Dimmers 1 - 48, MAC 700s 1 - 20, MAC 2000s 1 - 20, etc. If you have used the Patch Wizard then you will have already altered these numbers as part of the process. If, however, you have used Add Fixtures then you can alter these numbers if required. It is recommended that you take some time thinking about numbering your fixtures. It is useful to renumber your fixtures to something logical and unique, as this will be how each fixture will then be referenced during programming and playback. A fairly common numbering system is to prefix each fixture type with a unique number, so for example: Dimmers 1 - 48 remain as fixture numbers 1 – 48. MAC 700‟s 1 - 20 become fixture numbers 701 – 720. MAC 2000‟s 1 - 20 become fixture numbers 201 – 220. Figure 39 - Edit Fixtures Once all changes have been made, press the [OK] key to return to the Patch screen. If you make a mistake in Edit Fixtures, or simply wish to revert to the original values from the fixture library then press the [Reset All] key. If you wish to cancel all editing of the fixtures, press the [Cancel] key. ORB Series Operating Manual – Issue 2.0 To renumber a complete group of fixtures, the ALL row can be used. Use the arrow keys to move the cursor to the ALL row and No column and then press the ENTER key. Enter the fixture number for the first fixture in the group and press ENTER. Example: Select the MAC 700 group and enter 501 in the ALL row and No column. The MAC 700 fixtures will be renumbered 701, 702, 703 etc. Page 49 Setup Notes – Fixture Numbers If a fixture number is not globally unique, ie another fixture exists with the same fixture number in a different type, then a „*‟ is displayed after the fixture number. If you have patched using the Patch Wizard then the Fixture Numbers will automatically have been set as part of the patch process. If you have used Add Fixtures then you will need to define a unique number for the fixture. Naming Fixtures Now, use the arrow keys to move to the required column of the selected fixture and then press the ENTER key. Enter the required value using the external keyboard or numeric keypad on the front panel of the desk, then press ENTER. Aligning Fixtures The ORB desk is capable of making adjustments to your fixtures to take into account their rigging position. Inverting Pan and Tilt The Fixture name defaults to the fixture type (eg MAC 700). Fixtures can be renamed by the user, if required (eg Stage Left MAC 700, Centre Stage MAC 700, Stage Right MAC 700). It is possible to invert Pan and Tilt independently for each fixture. This can be particularly useful if you‟ve rigged Front of House fixtures the opposite way around to those onstage. Use the arrow keys to move the cursor to Name column and then press the ENTER key. Enter the name of the fixture using the external keyboard, then press ENTER. Use the arrow keys to move the cursor to the Invert P or Invert T column of the required fixture and then press the ENTER key. Use the left and right arrow keys to toggle between the values Yes and No. Select the required value and then press the ENTER key Editing Default, Home & Topset Values The Default values for fixture parameters are the values that are output when the fixture is released. The Home values for fixture parameters are the values that are output when the fixture is homed or highlighted. Now any adjustments you make to the parameter you changed will be inverted in the DMX outputs, making all your fixtures move in the same direction relative to the wheels. Swapping Pan and Tilt The Topset value for each parameter is the maximum value which can be reached when adjusting the fixture using the wheels, command line, etc. This is set to a default value of 100%. If a fixture is rigged on its side, you may also wish to Swap the Pan and Tilt parameters. In this function, any values defined for Pan will be output on the Tilt channel(s), and any values defined for Tilt will be output on the Pan channel(s). The initial values for all of these settings are initially taken from the fixture profile data stored in the fixture library in the desk. They are set to values that will produce an open white beam (no gobos or effects) at a central position (Pan and Tilt at 50%). Use the arrow keys to move the cursor to the P/T Swap column of the required fixture and then press the ENTER key. Use the left and right arrow keys to toggle between the values Yes and No. Select the required value and then press the ENTER key. These values can be edited on an individual fixture or group basis as required. First, select the required tab (Default, Home or Topset). Page 50 ORB Series Operating Manual – Issue 2.0 Setup Patch Functions The Patch functions under Edit Fixtures allow you to patch, repatch and unpatch selected fixtures. This functionality is provided in addition to the command line patching detailed elsewhere in this chapter. Using this window, it is possible to patch a fixture to more than one DMX address in one or more universes. These additional patch addresses are known as duplicates. Select the fixture(s) to be edited. Click on the [Patch] button in the Edit Fixtures Window. The patch table shows the DMX-In assignment (if assigned) and the DMX address(es) that each of the selected fixtures are currently patched to. If a fixture has not yet been patched to the DMX output then the corresponding DMX column will show „Add‟. In the example above – Fixture numbers 101 to 105 are patched to DMX universe 2 address 1, 13, 25, 37 and 49 respectively. Patching Fixtures Move the cursor to the DMX column for the required fixture and press the ENTER key. A Patch Fixture(s) popup window is displayed on the monitor screen, for example: Figure 41 - Edit Fixtures (Repatching) Select the required Universe by clicking on the [Universe] button and selecting the universe from the drop down menu. Enter the required DMX address in the Address field provided or press the [Next Address] button to automatically pick up the next available patch address in the selected universe. Figure 40 - Edit Fixtures (Patch) ORB Series Operating Manual – Issue 2.0 Press the [OK] button to complete the patching operation or the [Cancel] button to cancel. Page 51 Setup Repatching Fixtures Move the cursor to the DMX or Duplicate n column for the required fixture and press the ENTER key. The Patch Fixture popup window is displayed on the monitor screen with the current patch address in the DMX Address field Select the required Universe by clicking on the [Universe] button and selecting the universe from the drop down menu. To patch further duplicates for the selected fixture move the cursor to the Duplicate 2 Column, Duplicate 3 column etc and repeat the above procedure. When duplicates are patched for the selected fixture(s) additional columns are added to the Edit Fixtures table (one column per duplicate address) as shown in the following example: Enter the required DMX address in the Address field provided or press the [Next Address] button to automatically pick up the next available patch address in the selected universe. Press the [OK] button to complete the patching operation or the [Cancel] button to cancel. Unpatching Fixtures Move the cursor to the DMX or Duplicate n column for the required fixture and press the ENTER key. The Patch Fixture(s) popup window will be displayed on the monitor screen with the current patch address in the DMX Address field. Press the [Unpatch] button. A confirmation popup window will be displayed. Select the [Yes] button to confirm the operation. Adding Duplicates Move the cursor to the Duplicate 1 column for the required fixture and press the ENTER key. The Patch Fixture popup window is displayed on the monitor screen. Select the required Universe by clicking on the [Universe] button and selecting the universe from the drop down menu. Enter the required DMX address in the Address field provided or press the [Next Address] button to automatically pick up the next available patch address in the selected universe. Press the [OK] button to complete the patching operation or the [Cancel] button to cancel. Page 52 Figure 42 - Edit Fixtures (Duplicates) Multi-Part Fixtures For multi-part fixtures (eg Lamp + Scroller) the different parts of the fixture are displayed on separate lines in the Edit Fixtures patch table. ORB Series Operating Manual – Issue 2.0 Setup There is an additional column (Part) which shows the part name of the multi-part fixture and a [Fixture Part] button that selects which part of the fixture is displayed on the screen (eg All Parts, Lamp, Scroll). Clicking on an entry in the DMX In column allows you to change the DMX In address assigned to the corresponding fixture. Figure 44 - Entering a DMX In Address Changing Fixture Type (Fixture Swapout) This patch function allows you to swap one fixture type for another. This function allows for a complete swap-out of fixtures from one type to another. The desk will attempt to clone the programmed data for the swapped fixture(s) in Cues, UDKs, Submasters and Palettes as far as possible. Parameters in the new fixture type that were not present in the original fixture type are left unprogrammed. Select the fixture(s) to be changed. Go to the [Type] column in the window. Select the [Change] button for the required fixture or the [Change] button in the ALL row to change the type of all the selected fixtures. Figure 43 - Edit Fixtures (Multi Part fixtures) DMX In Field Select the Manufacturer, Fixture Type and Mode (if applicable) using the popup window on the monitor and confirm the change type operation. It is possible to assign a DMX-In address to any fixture on ORB. The DMX-In field in the patch table shows the DMX In address which is currently assigned to the fixture. The DMX In channel is used to control the brightness (intensity) parameter of the fixture, and is mixed LTP with the level on the desk so you can grab and alter the level of a channel in such a way as you would expect on a generic fader based desk. ORB Series Operating Manual – Issue 2.0 Page 53 Setup Auto Menus Auto Palettes This Setup option generates automatic items based on the fixture schedule. When the [Create Auto Palettes] option is confirmed the desk generates a number of colour, beamshape and position palettes for each moving fixture type in the fixture schedule and a number of standard effects palettes, as described below. Auto Groups This function generates a group for each of the types of fixture, plus „odd‟ and „even‟ groups for each different fixture type in the desk. Press the [Auto Menus] key on monitor in the Patch tab. Select the [Create Auto Groups] option from the drop down menu. Colour Palettes The desk provides the following standard colour palettes: White, Red, Orange, Yellow, Green, Blue, Violet, Cyan, Magenta and Pink. Fixtures with colour wheel(s) - The desk compares the RGB values specified for each colour on the colour wheel of the fixture with the RGB values of the standard colours listed above. The desk generates an auto palette for those which are within a certain tolerance of the standard colour. In addition to the above, the desk generates an auto palette for each colour available on every colour wheel in the fixture. These palettes are labelled with the stock colour names as supplied by the manufacturer. Fixtures with CMY or RGB colour mixing – The desk generates auto palettes for all of the standard colours listed above. Beamshape Palettes The beamshape auto palettes generated by the desk are based on the gobo wheel and shutter parameters of the fixture in the schedule as follows: Gobo Wheel(s) – An auto palette for each Gobo present on each gobo wheel in the fixture. Naming syntax is Gobo 1/1 … Gobo 1/N (first gobo wheel), Gobo 2/1 .. Gobo 2/N (second gobo wheel etc. Figure 45- Creating Auto Groups Page 54 No Gobo – This auto palette sends all the „Gobo‟ parameters to their default values. Shutter - Two auto palettes (Shutter Open and Shutter Closed). ORB Series Operating Manual – Issue 2.0 Setup Position Palettes The desk generates a single Home Position palette which sets the Pan and Tilt parameters to a value of 50%. Effects Palettes The desk generates a number of standard effects (see Effects chapter for details). Auto Macros When the [Create Auto Macros] option is confirmed the desk generates a number macros based upon the fixture types patched. These macros often include Lamp On, Lamp Off and Reset commands. ORB Series Operating Manual – Issue 2.0 Page 55 Setup Desk Setup The Desk Setup function allows you to configure or customise the settings on the desk to your own requirements. The Desk Setup function is divided into a number of different sections which are accessed by pressing the corresponding soft button on the monitor. Displays - Indicate which monitors are connected; adjust the screen timeout, brightness and contrast; calibrate touch screens; adjust desk lamp brightness. Lock – Lock the console to prevent changes happening. Event Monitor – Let‟s you monitor front panel events, for debugging. Peripheral – Adjust the sensitivity of the wheels on the desk Inputs – Set up SMPTE and MIDI Timecode; CAN; Set Time; Set Date. Assign Remote Switches & DMX Inputs Outputs – Configure DMX universes to DMX output sockets. Defaults – Set up the default behaviour of each programmable area, including delay and fade times for each attribute (Intensity, Colour, Beamshape, Position). Behaviour – Keep parameters separate options; Confirm Overwrites. Figure 46 - Desk Setup Page 56 ORB Series Operating Manual – Issue 2.0 Setup Displays Press the [Displays] button on the monitor, and then choose the required option from the monitor. The options are detailed below: Screen Timeout – Sets the time till the monitors and LCDs go into power save mode. Monitor Display 1 Enabled - Yes or No. Monitor Display 2 Enabled - Yes or No. Colour Scheme – allows you to pick which colour scheme to use. Monitor Calibration – Activates touchscreen calibration for each monitor. LCD Brightness & Contrast – Sets the brightness and contrast for the LCDs on the front panel. This can also be set by holding down SETUP and moving the wheels. LCD Font Size – Sets the font size the LCD displays use. Figure 47 - Desk Setup / Displays ORB Series Operating Manual – Issue 2.0 Page 57 Setup Touchscreens A number of external touchscreens are supported by the ORB. These screens connect into the desk using the USB connection. Screens with a serial connection will not work via a USB-Serial converter. The screen needs to have a direct USB connection. It is recommended only to purchase one of the known working screens from the list below, for use with your ORB. Currently known working Currently assumed working (tested and confirmed) (driver support provided, no reports) Not yet working ZerOS version 5.4.0 3M Microtouch M150 3M Microtouch M170 ELO ET1746L LG L1730SF LG L1530SF iPure Solarism LM1731BT Iiyama T1531SR ELO Touch (most) 3M PCT touch screens Cando dual touch panel eGalax dual-touch panel MosArt dual-touch panels N-Trig touch screen Quanta Optical Touch dualtouch panels Stantum multitouch panel eGalax, eTurboTouch CT410/510/700 PanJit 3M/Microtouch EX II series ITM eTurboTouch (non-eGalax compatible) Gunze AHL61 DMC TSC-10/25 IRTOUCHSYSTEMS/UNITOP IdealTEK URTC1000 GeneralTouch Touchscreen GoTop Super_Q2/GogoPen/PenPower tablet JASTEC/DigiTech DTR-02U USB touch controller e2i Touchscreen controller (e.g. from Mimo 740) Zytronic controller ET&T TC5UH touchscreen controller NEXIO/iNexio device Sahara TouchIT-213 touchscreen TSC2007 based touchscreens TPS6507x based touchscreens Solarism LM1730S ELO Touch Acoustic Pulse Recognition (APR) screens Firebox Displays Although we will endeavour to add support for other screens where possible, we make no guarantees about this since the drivers may not be available in the correct format for the desk operating system. If you want us to add support for a different screen, then we may ask you to loan us the screen (including the drivers CD that came with it) for a short time for testing. Please contact Zero 88 for details. Page 58 ORB Series Operating Manual – Issue 2.0 Setup Peripheral Press the [Peripheral] key on the monitor. The various options are shown on the monitor. Wheel Sensitivity – Adjusts the sensitivity of the control wheels. 0% is least sensitive, 100% is most. Trackball Pan/Tilt Sensitivity – Adjusts the sensitivity of the pan and tilt controls when using the trackball. 0% is least sensitive, 100% is most. Figure 48 - Desk Setup / Peripheral ORB Series Operating Manual – Issue 2.0 Page 59 Setup Inputs Press the [Inputs] key on the monitor. The various options are shown on the monitor. SMPTE Timecode – The frame rate of the SMPTE timecode being fed to the desk, in fps. CAN – Not yet implemented in software Remote Switches - Each of the six remote switches can be configured to Disabled, Go to Cue or Macro. MIDI Timecode – The frame rate of the MIDI timecode being fed to the desk, in fps. If the action field is set to Go to Cue or Macro, then an additional field is displayed allowing you to enter the stack/cue or macro number as appropriate. Set Time - Press the [Set Time] key on the monitor. The Set Time Window is displayed. Enter the correct time in the field provided and then confirm by selecting the [OK] button. Set Date - Press the [Set Date] key on the monitor. The Set Date Window is displayed. Enter the correct Day, Month and Year in the fields provided and then confirm by selecting the [OK] button. Submaster DMX Address – The DMX –IN address you will use to control each submaster. Submasters Per Page – The number of submasters you require on each page. Defaults to 10. Figure 49 - Desk Setup / Inputs Page 60 ORB Series Operating Manual – Issue 2.0 Setup Outputs Press the [Outputs] key on the monitor. The various options are shown on the monitor: DMX Output 1 DMX Output 2 DMX Output 3 DMX Output 4 Each DMX Output Universe can be mapped to a different Data Universe. The default setting is a 1:1 mapping. Figure 50 - Desk Setup / Outputs ORB Series Operating Manual – Issue 2.0 Page 61 Setup Behaviour Press the [Behaviour] button on the monitor. The various options are shown: Confirm Overwrites When this option is set to „Yes‟ a confirmation window will appear on the monitor when overwriting a cue, palette, effect, macro etc. Recovery Mode – This setting defines how the desk behaves when powered up – Restart from Last State or Blackout. Tracking – This option defines the behaviour of the desk when recording cues. With Tracking set to Yes, cues are programmed to contain the changes required. With Tracking set to no, cues are programmed with full captures of the stage output. Keep Parameters Separate – If the options above are set to „Yes‟ then each individual parameter in that attribute will be tagged separately (eg in a CMY fixture, if Cyan is adjusted, only Cyan will be tagged). If the attribute is set to „No‟ then as soon as one parameter in that attribute is adjusted, all the parameters in that attribute will be tagged automatically (eg in a CMY fixture, if Cyan is adjusted, then Cyan, Magenta, Yellow and any other colour parameter for the fixture will be tagged automatically). Figure 51 - Desk Setup / Behaviour Page 62 ORB Series Operating Manual – Issue 2.0 Setup Default Times Press the [Default Times] key on the monitor. The various options are shown: Intensity Fade / Delay – Separate times for channels fading Up and those fading Down. Channel – Individual channel timing, used in creating complex cues Cue – Default fade time used for a simple cue Colour Fade / Delay – The times that colour channels use when programmed into cues or UDKs Beamshape Fade / Delay – The times that beamshape channels use when programmed into cues or UDKs Submaster – Default fade time used for a simple submaster. Submasters do not support delay times. Channel – Individual channel timing, used in creating complex cues Position Fade / Delay – The times that position channels use when programmed into cues or UDKs Figure 52 - Desk Setup / Default Times ORB Series Operating Manual – Issue 2.0 Page 63 Setup Cue Stack Defaults Press the [Cue Stack Defaults] button. The various options are shown on the monitor under four main sections (General, Chase, Trigger and Move on Dark): General Options: Timecode – Default Timecode setting Master Fader – Default Master Fader mode Trigger Options: Trigger on Raise – Default Trigger on Raise setting Trigger Level – Default Level Move on Dark Options: Chase Options: Move on Dark – Default Enabled or Disabled Chase Drive – Default Drive for a stack turned into a chase Delay time Chase Direction – Default Direction for a stack turned into a chase Fade – Default fade time – Default Delay Chase Speed – Default Speed Chase Fade – Default Fade % Chase Shots – Default # of Shots Figure 53 - Desk Setup / Cue Stack Defaults Page 64 ORB Series Operating Manual – Issue 2.0 Setup Submaster Options Flash Mode The action of the flash button beneath the submaster. Mix Mode The behaviour of the fader – HTP is Highest Takes Precedence, LTP is Latest Takes Precedence. Trigger Level This sets the point at which the submaster triggers off the change to any attributes, in % or DMX. Release This option defines whether a submaster releases control of its channels when the fader reaches zero. Submaster Controls... This option sets what the physical movement of the submaster fader controls – each attribute can be enabled or disabled. When disabled the attributes will trigger at the trigger level. When enabled, the attributes will crossfade relative to the fader movement. Figure 54 - Desk Setup / Submaster Options ORB Series Operating Manual – Issue 2.0 Page 65 Setup Lock Functions Press the [Lock] key on the touch screen. A drop down menu is displayed on the touch screen. The menu options are summarised below: Lock All – This option locks all the functionality on the desk. It will not be possible to do anything on the desk until it is unlocked using the current lock code. Change PIN – This option allows the user to change the lock code (PIN) for the desk. The lock code (PIN) is a four digit number (0000 – 9999). The lock code can be entered via the numeric keypad on the front panel, or external keyboard. The default lock code for the desk is 0000. Cancel – Closes the menu. If you forget the lock code for your ORB, please contact Zero 88 Technical Support for assistance and have the desk‟s serial number to hand. You may be asked some questions to verify your identity and ensure that you have a genuine reason to unlock a desk without knowing its lock code. Page 66 ORB Series Operating Manual – Issue 2.0 Setup Files Select the desired storage device by pressing the [Destination Device] key. This cycles through all the available devices; select the one you require. If the drive doesn‟t appear in the list, press [Refresh] after a couple of seconds. Select the Filename field and enter a name for the show file. This name will be used as the file name on the destination device, so ensure it is unique and easily identifiable. Select the [Save Complete Show] box and toggle it until it displays the option you require. The ORB allows you to save just the Setup, the Setup and Palettes, or the Complete show. Press the [OK] button to save the show. This section of Setup allows you to save and load show files and to load or clear User Fixtures (UFTs). Each section of the Files menu is accessed through a button on the monitor. Saving Shows To save a copy of your show, you first need a storage media. The ORB is supplied with a 1GB USB flash memory stick, although other storage media may be used with the console. Connect your media to the USB port on the desk (any port will do). If using an external floppy drive, remember to insert a floppy disk into the drive. Press the [Files] button on the monitor. Press the [Save Show] button on the monitor. window is displayed: The Save Show Figure 55 - Save Show ORB Series Operating Manual – Issue 2.0 Page 67 Setup Select the storage device by pressing on the [Source Device] toggle box. This will cycle through all the available devices, so select the one you require. Loading Shows To load a show, connect the storage media to the USB port on the desk (any port). If you‟re using an external floppy drive, remember to insert the floppy disk into the drive. Press the [Files], then [Load Show]. displayed: The Load Show Window is Select the required show from the list of available shows displayed. Select the [Load Complete Show] box and toggle it until it displays the option you require. The ORB allows you to load just the Setup, the Setup and Palettes, or the Complete show. Press the [OK] button to load the show. Note – Loading Shows Loading a show file will clear any existing show data from the desk so ensure that you have backed up your previous show before you load another one onto the desk. Figure 56 - Load Show Page 68 ORB Series Operating Manual – Issue 2.0 Setup Loading User Fixture Types The desk provides a method for loading fixture types which are not in the fixture library stored on the desk, ie user fixture types which are stored on a memory stick. Press the [Load User Fixtures] key in files. Select the Source Device (Removable Device) as required. A list of UFT files found on the source device is displayed on screen. Select the required file using the cursor keys or using the trackball and clicking. All the fixture types contained in the selected UFT file are loaded and effectively added to the fixture library on the desk. Selecting a user fixture type and setting the number of that type in the fixture schedule is performed in the same way as for any of the normal fixture types already present in the fixture library on the desk. User Fixture Types which have been loaded onto the desk are displayed in the Fixture Schedule Window in the same way as fixture types in the fixture library. They appear in the schedule based on the alphabetical sorting of manufacturer and fixture type and are distinguished by having a green background, for example: Select the [OK] button. Figure 58 – User Fixture Types in Add Fixtures Figure 57 - Loading a user fixture ORB Series Operating Manual – Issue 2.0 Page 69 Setup Clearing User Fixture Types Desk Information The desk provides a method for clearing all the user fixture types which have been loaded onto the desk. When the [Desk Information] key is selected a screen is displayed containing information on the various software, firmware and BIOS installed in the desk as follows: Press the [Clear User Fixtures] button on the monitor. confirmation window is displayed. A Press the [Yes] button to clear the user fixtures which have been loaded on the desk. Update Fixture File The desk software includes the latest fixture library release at the time the software was released. From time to time a new software release is made. This option allows you to update the Fixture Library file on the desk. Insert a memory stick containing the Fixture Library file into one of the USB ports on the desk. Hardware Platform Slave 1 Bootloader Slave 1 Firmware Slave 2 Bootloader Slave 2 Firmware Motherboard BIOS NVR Location OS Version Software Version Serial Number Press SETUP Fixture Library Press the [Files] button Current Show Press the [Update Fixture File] button. Flash Size The desk searches for the update file on the memory stick. Follow the instructions shown on the monitor to complete the update. If any versions are displayed in RED in the Desk Information screen, this indicates that the versions are out of date. Please contact a Zero 88 service agent for advice on updating these software versions. When reporting any problems to Zero 88, please include all of the information displayed within the Desk Information screen. Page 70 ORB Series Operating Manual – Issue 2.0 Setup Clear Options This option allows the user to clear (delete) various components of a show (eg palettes), the whole show, or reset the desk back to factory defaults. Press the [Clear Options] key on the Setup screen. The various clear options and other functions are displayed on the monitor as shown below: Clear Colour Palettes … Clear User Defined Keys - Clears the specified items only from the show data in the desk. Reset Desk – Performs the Clear All operation, clears the Patch and resets all the Setup options to factory defaults. Clear All – Clears all of the above items from the show in the desk, but does not clear the Patch or change any of the Setup options. Figure 59 - Clear Options ORB Series Operating Manual – Issue 2.0 Page 71 Setup Network The ORB supports various Ethernet communication protocols, for connecting to visualisation tools, PDA remote controls, etc. Details of these protocols are found in this section: IP Addresses Ethernet Basics Unlike DMX, Ethernet operates in a different topology. DMX is daisy chained from fixture to fixture, whereas Ethernet data is connected using a Star topology. IP Addresses are a devices identity on an Ethernet network. The address indicates where the device is located and in combination with the Subnet Mask, indicates what the desk can see, and vice-versa. The number is made up from 4 blocks of data, between 0 and 255 – eg 192.168.0.1 Subnet Masks The Subnet Mask indicates what a network device can see on the network – the standard subnet mask for an Ethernet network is 255.255.255.0, indicating that a device with an IP address of 192.168.0.1 can see any device whose IP starts with 192.168.0.x, but cannot see anything starting 192.168.1.x Ethernet Switch Page 72 ORB Series Operating Manual – Issue 2.0 Setup Changing an IP Address O n Find the connection for the Network Adaptor you want to use (usually “Local Area Connection”) and right click on it, selecting “Properties”. Select the “Internet Protocol (TCP/IP)” and press Properties W i n d o w s Enter the required IP address settings in the popup window and select OK. X P , t o c o n f i g u r e t h e IP address of a PC, first select Start, Connect To, Show All Connections… ORB Series Operating Manual – Issue 2.0 Page 73 Setup In Mac OS X, to set an IP address, first click the Apple (top left hand corner) and then select System Preferences. Choose Network, and then click Advanced. Switch vs Crossover There are two ways of making an Ethernet connection with a ZerOS console Via a standard Ethernet Switch – the desk is connected to one connector on the switch, and other devices are connected to another port Via a crossover cable – the desk and connected device are connected together directly via a crossed network cable. This system is ideal for visualisation PCs as it negates the need for an additional box in the middle, however this system has its drawbacks – it is not possible to use DHCP configuration, and it is not possible to connect more than one device in this manner. DHCP DHCP is a protocol used by Ethernet enabled devices to dynamically allocate an IP address to devices on the network. In order to use this system, a DHCP host must exist on the network. Some Ethernet Switches offer DHCP capabilities, as do Wireless Routers. It is important that you ensure that there is only ONE DHCP host on a network – multiple DHCP hosts can cause malfunctioning of the system. Page 74 ORB Series Operating Manual – Issue 2.0 Setup Art-Net Art-Net is a lighting protocol which sends DMX data over Ethernet. The standard allows for multiple DMX universes to be sent over a single Ethernet cable. The ZerOS consoles can output upto 4 universes of DMX data via Art-Net. Each Art-Net device needs an IP address starting with a 2.x.x.x or a 10.x.x.x, and this setting must match on the desk itself. Each DMX universe must then be allocated to a Port – Art-Net Ports numerate from 0-15, so it is generally accepted that desk universe 1 will become Art-Net universe 0, however this is user definable. Art-Net enabled devices include Media Servers, Moving Lights and also dedicated DMX output boxes such as the “1 Universe Ethernet Box” by Cooper Controls. The system will look something like this: ORB Series Operating Manual – Issue 2.0 Page 75 Setup Transmit Art-Net - Enables or Disables ArtNet transmission. Network Switch - 2 or 10. ArtNet allows two separate network IP ranges. Subnet - The y number in the 2.x.y.z IP range. Used for multiple Art-Net networks on a single network. Most people use 2.0.0.x Each port can be allocated a separate port, or be disabled. This port must be matched with the Art-Net receiving device (Light Converse, etc). Page 76 Light Converse Integration Allows additional functionality to be used with Light Converse (eg bi-directional patching, fixture selection etc.) ORB Series Operating Manual – Issue 2.0 Setup sACN (ANSI-E1.31) All ZerOS consoles running version 5.4.0 or higher can now output the new Streaming ACN standard for DMX over Ethernet transport. This standard is approved by ANSI and ESTA as the new DMX over Ethernet standard and allows ZerOS to communicate with a multitude of sACN enabled devices already out there. In Setup, choose the Network tab and then select sACN: Each sACN universe can be either “Live” or “Preview” output – the Preview output option although configurable is not implemented in ZerOS as of version 5.4.0. sACN allocates a universe number to each DMX universe, which must be set the same on the transmitting device (ZerOS console) and the receiving device (the DMX output box, or fixture, etc). In addition, each universe can be defined a Priority level (0-200) – sACN receptive devices will automatically listen for the highest priority number received and respond to that signal. In this way, multiple consoles can be running on a network at the same time and can automatically take over from one another – a function used in our tracking backup software. Each sACN universe can also have a unique name associated with it, which can be entered from a USB keyboard. This functionality allows you to identify which universe is coming from which console on a larger networked system. Each DMX universe is offered as a line item with configuration options for each universe. By default all universes are disabled, so enable only the universes you require in order to reduce the network overhead. ORB Series Operating Manual – Issue 2.0 Page 77 Setup Remote ZerOS Remote offers the ability to remotely control various areas of the desk. The remote device can be a PC (running Microsoft Windows), a Windows Mobile, or an Apple iPhone / iPad / iPod Touch to enable remote control of the console via a wireless network. The ideal setup for this system is as follows: Figure 60 - Netgear Router Configuration At this point you will be prompted for a user name and password, which will be detailed in the user manual for the router. The console is connected to a Wireless Router via an Ethernet connection. If a handheld device is to be used, the Wireless Router is then configured to enable wireless communication via a standard wireless network connection, and the Palmtop Computer (PDA) connects to this wirelessly. As long as the console IP address and the PDA IP address are able to see each other, the system should automatically setup and configure. With a PC connected to the network with the desk and the PDA, load up an internet browser and type in http://192.168.0.1/ (or the configuration IP address of the router, if different) into the address bar and hit GO. Page 78 Once connected to the router, look for settings which relate to the wireless connection and to DHCP. Ensure that DHCP is enabled and that the wireless is active. Setup a name for the wireless network which you'll recognise (we use "Zero 88") and choose a wireless channel. If required, security can be added. Once settings have been changed, click the Save Option and then the Reboot Router option to ensure that the settings are stored. Ensure that the remote device has activated the wireless connection (this is normally done through some sort of connection manager). The first time you enable wireless in an area, the PDA will search for ORB Series Operating Manual – Issue 2.0 Setup all available wireless networks and will ask you if you want to connect to any it finds. At this stage, you should see the Zero 88 network listed. Select it and choose connect (if you added security, you'll need to enter these details here). Once the PDA is connected and the desk is connected, on the desk go to Setup / Network / Remote. Choose Enabled Remote - Yes, and Use DHCP Address - Yes. Again, enable security if you like (this security is simply a password the remote will prompt you for before connecting). At the bottom of the remote setup screen, a message should appear - "Remote Active". If "Remote Not Active - No DHCP Address" is displayed, ensure that DHCP is enabled on the router and reboot the desk. Assuming "Remote Active" is displayed and the PDA connected to the wireless network, you should be able to start the ZerOS Remote program on the device and the desk should be detected. Press on the Desk name and click the connect button. Tracking Backup It is possible to connect ZerOS consoles together, or a console and an offline editor, to create a master and backup system. This tracking backup option is ideal for show-critical scenarios where a backup solution must be provided. For this purpose Phantom ZerOS can be considered to be a fully functioning console, with the presence of a ZerOS Unlock Dongle. The two consoles are connected together via an Ethernet network. Each console is assigned an IP address and a master or backup status. If the console is set to be the backup device, it will go into a suspended status where you will not be able to operate the controls on the front panel, until such a time as the master console disconnects or fails in any way. At this time, the show file will have automatically transferred to the backup console and the backup console will take over control of the show. For full information on the Remote, see the Remote chapter in this manual (Page 131). ORB Series Operating Manual – Issue 2.0 Page 79 Setup Light Converse (http://www.lightconverse.net) The Light Converse visualiser uses Art-Net to communicate with the desk software, hence the presence of the visualisation configuration settings in the Art-Net tab of Network Setup. The rules of Art-Net (above) apply when configuring a Light Converse setup. Light Converse integration requires a Zero 88 Light Converse USB dongle. Once active, the system allows bidirectional control of fixtures, selection and patching via the Ethernet connection. Page 80 Capture (CITP) (http://www.capturesweden.com) Capture 2005 visualising software communicates with the desk via a protocol known as CITP. This protocol allows for any standard PC network between the desk and the visualising PC. The console allows you to configure either a fixed IP address or one allocated via DHCP. As long as the two devices can see each other, the system should function correctly. ORB Series Operating Manual – Issue 2.0 Setup WYSIWYG Usage WYSIWYG (http://www.castlighting.com) WYSIWYG Requirements A current (Release 21 or greater) installation of WYSIWYG Perform The Zero 88 consoles file (provided on the Cast website) The Zero 88 WYSIWYG Driver (provided on the Zero 88 website, or on the CD with the desk) An Ethernet connection to your Zero 88 console Start WYSIWYG & load your show file Patch your fixtures to Universes in WYSIWYG In the LIVE tab, select LIVE, Device Manager In Device Manager, select New and locate the Zero 88 console you are connecting to Select the console and click Properties, then enter the IP address of the desk in the Address. Select each Port on the desk and Bind these to a Universe on WYSIWYG. WYSIWYG Installation First install WYSIWYG Release 22 or greater, following the standard procedure (if you‟re using Release 21, you‟ll need the Zero 88 Consoles CFB file) Run the Zero 88 WYSIWYG Driver installation tool Once the driver is installed, run the tool Select the network interface you wish to connect WYSIWYG with (the IP address is shown) Choose OK ORB Series Operating Manual – Issue 2.0 Page 81 Setup In the Device Manager, click CONNECT and the console should connect. You can now use WYSIWYG to visualise your show. When you have finished using it, click DISCONNECT in the Device Manager. Zero Wire Zero Wire DMX is a wireless DMX transmission system from Zero 88. The system can be output directly from the console via the [Network] options in Setup, and can then be routed via a Wireless Access Point to Zero Wire DMX boxes which decode the signal to DMX for linking to fixtures and dimmers, etc. In the Zero Wire setup page there are a host of options, which enable each DMX Universe on the desk to be routed to an IP address with a unique Universe number (see below). For more information, see the Zero Wire DMX user manual, which can be found on the Zero 88 website. Page 82 ORB Series Operating Manual – Issue 2.0 The Output Window The Output Window The Output Window is central to the programming functionality on the ORB desk. It is recommended (but not mandatory) that the Output Window is displayed on one of the monitor screens when programming cues, palettes etc. To display the Output Window, press the {Show Output Window} syntax key. The Output Window displays the outputs which are coming from all areas of the desk (Programmer, Cue Stacks or UDK‟s). The outputs can be viewed as DMX values, Percentage values or are tagged have a bright background, untagged parameters have a dark background. This is the Normal view of the Output Window. Channel information – colour coded Values – allows you to select between values, fade, delay and source views Blue – Fading Up Green – Fading Down Red – In Programmer Orange – In Programmer but untagged Yellow Background – Selected Red Background - Parked White – From a Cue Yellow – From a UDK / Sub Window Setup – allows you to customise the window to your requirements. Selected Channels Selected fixture information. One row for each fixture, one column for each parameter. Fixture names Gobo previews appear here. parameter Details, and can show Values, Fade or Delay times per channel. Output Window – Values View In the Output Window, when the [Values] option is selected, the fixtures and their parameter values are shown. The currently selected fixtures are highlighted in yellow. Fixture parameters which ORB Series Operating Manual – Issue 2.0 Output Window - Fade View When the [Fade] option is selected, the fade times of the fixture parameters are displayed in the Output Window, and the fixture wheels can be used to adjust the fade time of their relevant parameters. Page 83 The Output Window Output Window - Delay View Output Window – Window Setup When the [Delay] option is selected, the delay times of the fixture parameters are displayed in the Output Window. Like Fade view, the fixture wheels can be used to adjust the timing of a parameter. Pressing the Window Setup button opens a popup window which allows you to adjust the Output Window configuration. Figure 62 - Output Window Setup Details (%) When the [Details (%)] soft button is selected a drop down menu is displayed with the following options: Figure 61 - Output Window Fade View Percent – When this option is selected all the fixture parameter values are displayed as percentages (ie 0 – 100% for both 8 bit and 16 bit parameters). DMX - When this option is selected all the fixture parameter values are displayed as DMX values (ie 0 - 255 for 8 bit parameters or 0 - 65535 for 16 bit parameters). Details (%) – When this option is selected the fixture parameter values will be displayed as the parameter detail names (eg Red, Gobo 1) where they are defined in the fixture data. If parameter details are not defined, the window will show the actual numerical values in %. Details (DMX) – When this option is selected the fixture parameter values will be displayed as the parameter detail names (eg Red, Gobo 1) where they are defined in the fixture data. If parameter details are not defined, the window will show the actual numerical values in DMX (0-255 or 0 – 65535). Output Window – Source View When the [Source] option is selected, the Output Window displays the source of the output data rather than the actual output values as follows: o P o C S/C Cue (Stack Number / Cue Number) o SX/Y Submaster (Page Number / Submaster) o UDK p/n User Defined Key (Page / Number) o PARKED o D Page 84 Programmer The fixture has been parked Default value of the parameter ORB Series Operating Manual – Issue 2.0 The Output Window Hide Unpatched The Hide Unpatched option allows you to hide any non-outputting channels. This cleans up the output view but may hide information you require if you are offline programming a show before patching the desk. Gaps in numbers are indicated by a vertical line between their channel numbers. Figure 63 - Output Window (Hide Unpatched) Channel / Fixture / Intensity Views There are three different views of the Output Window (Channel, Fixture and Intensity). Click on the [Channel] button and select the required view from the drop down menu. Fixture view is useful for moving light heavy rigs as it details all of the moving light parameters all of the time, whereas Channel View only shows the selected fixtures parameters. ORB Series Operating Manual – Issue 2.0 Page 85 Programming Programming This section of the manual covers the basic functionality of programming which involves selecting fixtures, adjusting one or more of their parameters to the required values, and then recording the information into a cue, palette, effect or UDK. Selecting Fixtures Controlling Intensity Parameters Before fixtures can be controlled by the desk they need to be selected. Selected fixtures are shown with Yellow backgrounds in the Output window. To select an individual fixture or a number of fixtures, type in their fixture numbers followed by ENTER, for example: 1 ENTER (selects fixture 1) 2 AND 3 ENTER (selects fixtures 2 and 3) 5 THRU 10 ENTER (selects fixtures 5,6,7,8,9, and 10) For example, if the MAC 700‟s have been given fixture numbers 701 – 720, then the following commands could be used: 701 ENTER (selects the first MAC 700 fixture) 702 AND 703 ENTER (selects the second and third MAC 700) 711 THRU 720 ENTER (selects the last 10 MAC 700 fixtures) Alternatively, you can use the syntax keys to select the next or previous fixture respectively. On the ORB XF, channels can also be selected by using the SHIFT key with the flash button below the Multi Function Faders – in Channel Mode this will result in the fixtures from those faders being selected. The intensity (or brightness) parameter of the selected fixture(s) can be controlled by entering commands directly via the numeric keypad or by using the control wheel. Intensity levels can be set for a complete group of fixtures using the following commands: GROUP n @ m ENTER (sets the intensity output to m %) Intensity levels can also be set for a single fixture or a number of fixtures within a group. First select the group and then use any of the following commands: 1 @ N ENTER (sets the intensity output of fixture 1 to N %) 1 FULL ENTER (sets the intensity output of fixture 1 to 100 %) 1 @. (sets the intensity output of fixture 1 to 0%) 2 AND 3 @ N ENTER (sets the intensity output of fixtures 2 and 3 to N %) 2 AND 3 FULL ENTER (sets the intensity output of fixtures 2 and 3 to 100 %) 5 THRU 10 @ N ENTER (sets the intensity output of fixtures 5 to 10 to N %) 5 THRU 10 FULL ENTER (sets the intensity output of fixtures 5 to 10 to 100 %) Page 86 ORB Series Operating Manual – Issue 2.0 Programming On the ORB XF, channels can also be displayed and manipulated on the Multi Function Faders. Use the syntax: FADER FUNC. {Channels} {1-60} ENTER (this will select channels 1-60 on faders 1-60) Once channels are displayed on the faders, moving the faders to the channels current value will „grab‟ the channel, and then subsequent movement will adjust the channels level in the program window. Once a fixture, or group of fixtures has been selected, the attribute buttons and control wheels can be used to adjust the parameter output levels as required. Controlling Colour Parameters The colour parameters of the selected fixture(s) are controlled using the control wheels. The Intensity channel of a fixture can also be controlled using the intensity wheel. First select the required fixture(s) and then press the COLOUR key. Use the control wheel to adjust the intensity level as required. The output value is shown on the LCD sceren above the wheel. Note that intensity adjustment on the wheel is relative by default which means that if a range of fixtures are selected with different original values, the movement of the wheel will be applied to each fixture individually (eg each fixture will increase or decrease by a percentage from its original value). If the fixture has more than three controllable parameters for the selected attribute, pressing the COLOUR key again will select the next group of parameters. The colour parameters for the fixture are assigned to the control wheels and are indicated on the LCD screen above the wheels. Wherever possible the desk will group similar parameters together (eg Cyan, Magenta and Yellow will appear together on the wheels). Note – Intensity on the Wheel Adjustment of colour is by default an Absolute adjustment. The Intensity wheel will always control the selected fixtures intensity. Controlling Beamshape Parameters Note – No Intensity Output ? If the intensity output levels do not change when you send one of the above commands to a fixture, or adjust the intensity level using the wheel, check that the GRAND MASTER fader is at full and the BLACKOUT button is off. If the selected fixture(s) have a Shutter parameter, check that the shutter is open. Some fixtures also have control of the lamp remotely – try sending the Lamp On macro command to the fixture, if supported. Controlling Fixture Parameters Each fixture type has it‟s own set of parameters (intensity, colour, gobo, pan, tilt etc.) which are classified or grouped together in different attributes (Position, Colour, Beam). This information is defined in the fixture library. ORB Series Operating Manual – Issue 2.0 The beamshape parameters of the selected fixture(s) are controlled using the control wheels. First select the required fixture(s) and then press the BEAM key. The beamshape parameters for the fixture are assigned to the control wheels and are indicated on the LCD screen above the wheels. If the fixture has more than three controllable parameters for the selected attribute, pressing the BEAM key will select the next group of parameters. Adjustment of beamshape is by default an Absolute adjustment. Page 87 Programming Controlling Position Parameters The position parameters of the selected fixture(s) are controlled using the control wheels. First select the required fixture(s) and then press the POS key. The position parameters for the fixture are assigned to the control wheels and are indicated on the LCD screen above the wheels. If the fixture has more than three controllable parameters for the selected attribute, pressing the POS key will select the next group of parameters. Adjustment of position is by default an Absolute adjustment. Tagging Parameters On the ORB desk, fixture parameters must be „tagged‟ for them to be recorded when programming cues, submasters, palettes and UDK‟s. The tag status of each fixture parameter is indicated on the LCD screen and in the Output Window by it‟s background colour as follows: dark background = untagged; bright background = tagged. Page 88 Figure 64 - Output Window showing tagged channels If a parameter‟s value is changed by a command, moving the control wheel or directly in the Output Window, it will be tagged automatically. You can also tag and untag fixture parameters manually by holding down CLEAR and moving a wheel. ORB Series Operating Manual – Issue 2.0 Programming The Command Line Smart Tags There is a [Smart Tag] button displayed in the Output Window and on the front panel of the desk: All commands (selection commands, intensity commands, wheel movements, manual tagging etc) are recorded and displayed on the command line, found at the bottom of the monitor. The commands may be undone, one at a time using the backspace key () on the numeric keypad. Each press of the backspace key undoes one command until you reach the original group selection command. Figure 66 - Command Line Figure 65 - Smart Tag button In normal desk operation, only those channels which are tagged in the programmer will be recorded into the cue, submaster, UDK or palette. Smart Tags remove the need for you to work out which channels should or shouldn't be tagged in a state. As such, they can be used to build states using submasters and other playback elements. When the RECORD key is pressed the state on stage is what will be recorded, regardless of whether or not a dimmer channel or fixture parameter is tagged in the programmer. Put simply, with Smart Tags enabled, you no longer have to think about Tracking. The desk will insert whatever tracking is required to make your show work - including ignoring fixtures whose intensity is set to 0% to enable Move on Dark to fully function. Above the Command Line on the monitor is the Suggested Commands bar, which follows your syntax commands and shows you the buttons which can be pressed next in your syntax. These command buttons either exist on the front panel or syntax keys, or are hidden shortcut commands (eg Rem Dim, which is SHIFT and FULL) Basic Record Commands Once a scene is set up in the programmer as you require it, it can be recorded to a cue using the following syntax: RECORD CUE n ENTER (Records cue N in the selected cue stack) RECORD SUB n ENTER (Records submaster N on the current page) To switch on Smart Tags – click on the [Smart Tag] button in the Output Window, or press the SMART TAG button on the front panel. RECORD x/y ENTER (Records cue Y on cue stack x) Use Smart Tags in combination with Cue Only to create inserted cues that don't affect the rest of the cue stack, for example an added blackout in the middle of a scene. RECORD SUB x/y ENTER (Records submaster Y on page X) ORB Series Operating Manual – Issue 2.0 By following this simple record logic, you can program most simple items. The syntax also follows through for palettes and groups: Page 89 Programming RECORD COLOUR n ENTER (Records the colour parameters to the specified palette) RECORD GROUP n ENTER (Records the selected channels into a group) RECORD <UDK> (Records the outputting data onto a UDK) RECORD <MFF FLASH> (Records the outputting data onto a MFF submaster) For full details about recording and playback of each programmable element, see the relevant pages later in the manual. After Programming After programming it is critical that you CLEAR the programmer before playback. Any remaining parameters trapped into the programmer will affect your outputs and what you see will not be as you programmed it until such a time as you clear the programmer. Double press the CLEAR button and then replay your cues or submasters as required. Clear As soon as any changes are made to the outputs in the programmer, the LED in the CLEAR key is lit, to indicate that fixture parameters have been changed. Pressing the CLEAR key once clears all the commands in the command line except for the fixture selection. Pressing the CLEAR key a second time clears the fixture selection from the programmer. It is important to clear your programmer before playing back your show to ensure that what you have programmed is what you see on the outputs. Page 90 ORB Series Operating Manual – Issue 2.0 Updating Updating Update Options Window After setting up data in the programmer and pressing the UPDATE key, or after loading an item (cue, palette, submaster or UDK) into the programmer, adjusting parameter values or times and pressing the UPDATE key, the Update Options Window is displayed on the touch screen and both monitor screens. The Update Options Window contains a number of soft keys that allow you to select what, how and where the information will be updated. This window is very similar in both style and operation to the Record Options Window. Example: Source Options The top section of the window contains one or more source option buttons. There is a soft button for each source that may be updated by the user. Each source may be independently selected or deselected by pressing the soft button. When a source is not selected the button is grey. When a source is selected the button is green. In the case where an item (cue, palette, submaster or UDK) has been loaded into the programmer, parameter values or times adjusted and the UPDATE key pressed, the Update Options Window contains the loaded item as the only source option. This option is automatically selected. Show All Button By default, the source options displayed in the Update Options Window are restricted to those items that have channels affected by the changes made in the programmer. If the [Show All] button is selected, all the currently outputting sources, regardless of channel ownership will be displayed, allowing you to update items that did not previously have control of the updated channels in the programmer. Tracking Options Figure 67 - Update Options Below the source options section there is a row of buttons containing the tracking options [Track Forward], [Track Backward], [Track Both] and [Cue Only]. These options are only applicable and accessible when a cue (or cues) are selected. These four options are mutually exclusive, with the default option being [Track Forward]. When an option is selected the button turns ORB Series Operating Manual – Issue 2.0 Page 91 Updating green. The tracking options work in the same way as they do in the Record Options Window (page 132). Grey = No Parameters; = All Parameters. Merge and Remove Options OK and Cancel Buttons These two buttons allow you to merge or remove the specified data in the programmer from existing cues, palettes or UDKs. These two buttons are mutually exclusive. Press the [OK] button to update the selected source options. If [Merge] is active, the data will be merged into the selected cue, palette, submaster or UDK. If [Remove] is active, the data will be removed from the selected cue, palette, submaster or UDK. Clear Tagging This button determines what happens to the parameters in the programmer after the update operation is performed. Green = Tagged Parameters; Red Press the [Cancel] button to close the Update Options Window without updating any items. Syntax It is possible to control the update options window using syntax – by entering syntax the window will automatically select the options you specify. For example: UPDATE CUE 2 ENTER – will update cue 2 with the relevant data UPDATE COLOUR 6 ENTER – will update colour 6 with modified colour data If the [Clear Tagging] button is active then the parameters will be untagged after the update operation. If the [Clear Tagging] button is inactive then the parameters will remain tagged after the update operation. Attribute Selection Bar The Attribute Selection Bar indicates which parameters will be recorded for each of the different attributes (Intensity, Position, Colour, Beamshape and Effects). When the Update Options Window is displayed - the attribute selection bar initially shows red (tagged) for each attribute in which one or more parameters of that attribute are tagged in the programmer and grey (none) for those attributes where no parameters are tagged. Pressing each of the soft buttons cycles round the three options for that attribute. The current option is indicated by the background colour of the button as follows: Page 92 ORB Series Operating Manual – Issue 2.0 Groups Groups The ORB provides 1000 user definable Groups. Groups are most commonly used when selecting fixtures and programming data to be recorded in cues, palettes etc. Groups can also be assigned to User Definable Keys (UDK). defined groups can be all of the same fixture type or any combination of fixture types. What are Groups? RECORD GROUP n ENTER Groups on ORB are lists of channels which are similar in some way, and are commonly used for speeding up programming. For example, groups may be created for the Warm generic wash, all Front of House moving lights, all On Stage Moving Lights, etc. Having groups created before commencing programming of cues speeds up the creation of the cues as instead of having to remember a list of channels, you only have to remember one group number. Automatic Groups In Setup, there is an option to generate a set of automatic groups based on the fixture types in the schedule. The desk generates a group for each of the Master Groups, plus „odd‟ and „even‟ groups for each different fixture type in the schedule. To create the automatic groups, first enter SETUP, then press the [Auto Menus] button and select the [Create Autogroups] option, then exit Setup. Automatic Groups are referenced by Group Number and appear in the Group Window. User Defined Groups In addition to the Automatic Groups, you can also create your own groups of fixtures, eg Floor MACs, Left Stage Movers etc. User ORB Series Operating Manual – Issue 2.0 Simply select the fixtures that you wish to be in the group and then enter the command: RECORD {click on a group in the Group Window} The specified group will then be stored. Naming Groups Each group can have a name associated with it – this name is then displayed in the Group window and command line when accessing groups. To set the name of a user defined group, select the required group from the Group Window and press the NAME key or enter one of the following commands: GROUP n NAME {your name} ENTER NAME GROUP n ENTER Type in the name of the group using the external keyboard and then press ENTER. Copying Groups To create a copy of a group, enter the following command: GROUP n COPY TO p ENTER This will create a copy of the original group (n) at location (p) which you can use or modify as required. Page 93 Programming Moving Groups If you need to re-order your groups, you can Move a group from one location to another. Enter the following command: GROUP n MOVE TO p ENTER Deleting Groups To delete a group, enter one of the following commands: GROUP n DELETE DELETE GROUP n ENTER The desk will ask you to confirm this action before the command is executed. Once deleted, a group cannot be recovered but can be recreated manually if required. Group Window The Group Window appears on Monitor 2 in the bottom right by default. To display the Group Window on the monitor, hold down the SHIFT key and then press the GROUP key: Figure 68 – Group Window The Group Window contains a soft button for each of the 1000 groups. Each soft button contains the following data: Group Number (1-1000) and name, if defined. Unprogrammed groups are indicated by a „*‟ next to the group number. Group Submasters Group Submasters are groups stored onto a submsater. They can be used to program scenes, as moving a group submaster triggers its contents to go into the program window. For more information on Group Submasters, see page 122. Page 94 ORB Series Operating Manual – Issue 2.0 Palettes Palettes The ORB desk provides you with four sets of 1000 palettes. The palettes are stored under the nominal headings of Position, Beam, Colour and Effects. Palettes may contain any combination of Intensity, Colour, Beamshape, Position or Effects parameters. For example, a colour palette may include intensity and colour, a beamshape palette could include beamshape and position etc. What are Palettes? Palettes on ORB are small pieces of information which define to the desk how to create a particular look on stage. For example, palettes may be created for colours Blue, Red and Yellow, positions Downstage Left, Centre Stage and Upstage Right, and beamshapes Gobo 3, Prism In, Rotation, etc. Having palettes created before commencing programming of cues speeds up the creation of the cues as instead of having to continuously move the fixture wheels to adjust parameters, you only have to enter the palette reference. on the Record Options Window on the monitor before pressing the ENTER key. When creating Position palettes, use Highlight (SHIFT + HOME) key to grab a fixture in open white. Set the position as required, then turn the Highlight off before recording the palette. This way you won‟t have to untag the intensity of each fixture. Naming Palettes Palettes can be named, either as a separate operation or as part of the recording process, by entering one of the following commands: COLOUR n NAME {your name} ENTER NAME COLOUR n ENTER {your name} ENTER RECORD COLOUR n NAME {your name} ENTER Outputting Palettes Recording Palettes Select a fixture or group of fixtures and then enter one of the following commands: Programming a palette is simple and similar to recording a cue. Set up the fixture outputs as required, ensuring that the correct fixture parameters are tagged, and then enter the following command: COLOUR n ENTER Snaps the outputs to the programmed palette values. RECORD COLOUR n ENTER To record the fixture data as a beamshape, position or effects palette, simply replace the COLOUR part of the command with BEAM, POSITION or EFFECTS respectively. Hints on Recording Palettes If you wish to record attributes, other than the default one for the type of palette being recorded, then select the required attributes ORB Series Operating Manual – Issue 2.0 COLOUR n TIME x ENTER Fades the outputs in X seconds. If any of the selected fixtures are not actually programmed in the applied palette, but there are one or more fixtures of the same type that are programmed, the fixture will use the values programmed for the first fixture of the same type. If the fixture data in the programmer is then recorded into a cue or UDK, the desk will record the palette reference number rather than the actual parameter values. Page 95 Palettes Updating Palettes It is possible to update palettes in several ways. The first option is to load that palette back into the programmer. Enter the syntax: LOAD COLOUR n ENTER Now make the changes to the palette as required (by adjusting parameters as required) and then press UPDATE. The Update Options window will appear: COLOUR n COPY TO p ENTER BEAM n COPY TO p ENTER POSITION n COPY TO p ENTER EFFECTS n COPY TO p ENTER As all palettes have the same data structure and may contain fixture parameter data from any combination of attributes, it is also possible to copy a palette from one attribute to another, for example: COLOUR 2 COPY TO BEAM 5 ENTER Moving Palettes To Move a palette from one location to another, enter one of the following commands: COLOUR n MOVE TO p ENTER BEAM n MOVE TO p ENTER POSITION n MOVE TO p ENTER EFFECTS n MOVE TO p ENTER When a palette is moved to a new location, any cues that referenced the original palette will now reference the new location of the palette. Figure 69 - Update Options The palette you loaded will automatically be selected, so you just need to press OK to complete the edit. The other option for updating palettes is to do the update without first loading the palette. When you press UPDATE you will be offered a number of sources – select the one you wish to update and press OK. Copying Palettes To copy a palette from one location to another, enter one of the following commands: As all palettes have the same data structure and may contain fixture parameter data from any combination of attributes, it is also possible to move a palette from one attribute to another, for example: COLOUR 2 MOVE TO BEAM 5 ENTER Deleting Palettes To delete a palette, enter one of the following commands: COLOUR n DELETE DELETE COLOUR n ENTER BEAM n DELETE Page 96 ORB Series Operating Manual – Issue 2.0 Palettes DELETE BEAM n ENTER POSITION n DELETE DELETE POSITION n ENTER To delete a range of palettes, enter the following command: DELETE COLOUR a THRU b ENTER When a palette is deleted, any cues that previously referenced the palette are updated to contain the actual values that were stored in the palette. Palette Windows Each set of palettes has it‟s own palette window. To display one of the palette windows on the monitor, hold down the SHIFT key and then press the appropriate attribute key (POSITION, COLOUR, BEAM or EFFECTS). The palette window contains a soft button for each of the 1000 palettes. Each soft button contains the following information: Palette Number, content flags that indicate the attributes that are programmed in the palette and a name. Figure 70 –Palette Windows (Monitor 2) The Palette Windows appear on Monitor 2 by default, with the exception of the EFFECTS Palettes window which must be opened if required. Pan/Tilt Grid ORB Series Operating Manual – Issue 2.0 The Position Palettes window doubles as the Pan/Tilt grid for adjusting position of moving lights on screen. Press the Pan/Tilt Grid button to show the grid. Page 97 Palettes Figure 71 - Pan/Tilt Grid The + in the grid represents the current Pan/Tilt values for the fixture selected. If multiple fixtures are selected, multiple +s can be shown. Clicking in the Colour Picker (or touching on a touchscreen/remote monitor) will set the Colour of the selected fixture to the value pressed, Moving the on-screen sliders will adjust their levels accordingly. Clicking (or touching on a touchscreen/remote monitor) will set the Pan and Tilt of the selected fixture to the value pressed. Colour Picker The Colour Palettes window doubles as a colour picker, allowing you to select a colour from the on-screen display for use in colour mixing (CMY/RGB) fixtures. Press the Colour Picker button in the Colour Palettes window to select the colour picker. Once displayed, the + indicates the current colour values for the selected fixture. If multiple fixtures are selected, multiple +s will be displayed. Page 98 ORB Series Operating Manual – Issue 2.0 Cues, Stacks & Pages Cues, Stacks and Pages The ORB provides a total of 1000 user programmable Cue Stacks. Each of these 1000 cue stacks, can be programmed with up to 999 cues. An entire Cue Stack can be converted to run as a Chase, if required. There are 100 pages of playbacks available. Each page contains 10 playbacks. The 100 pages of playbacks are automatically assigned to the 1000 cue stacks in numerical order (ie Page 1 contains cue stacks 1 – 10, Page 2 has cue stacks 11 – 20, up to Page 100 which has cue stacks 991 – 1000). Cues Cues may contain macros which are run automatically when the cue is triggered. Cues may also be named, edited, copied, removed and deleted. Programming Cues Once you have set up a look that you like, by selecting fixtures and adjusting their parameters as described in the previous chapters, you can then record that state into a cue. To see the cues being recorded it is recommended that the Cue Stack Window is displayed on one of the monitor screens. See page 102 for more information. Selecting a Cue Stack The Cue is the basic element for storing fixture parameter levels and times, which can then be played back via a number of different mechanisms. Cues on the ORB can be programmed into any of the 1000 cue stacks. Cues are recorded into memory stacks (or stacks) and may also be assigned to User Defined Keys (UDK) as required. Select the required page using the STACK PAGE button, eg STACK PAGE 1 ENTER. A cue may be numbered from 1 – 999. You can also insert up to 99 cues between each whole cue number (eg 1.1, 1.2, 1.3 … 1.99 may be inserted between cues 1 and 2). Press the Stack SELECT button (1-10) above the cue stack you wish to program. The LED in the SELECT button is lit to indicate that it is the active cue stack, and the Cue Stack Window changes to show the cues programmed in that stack. Cues are referenced by their stack number and cue number separated by a „/‟ (eg 1/1 is stack 1 cue 1, 2/3 is stack 2 cue 3, 23/12 is stack 23 cue 12). Cues can be triggered by a number of different methods (GO button, automatically after a specified wait time, Real Time, SMPTE Time, MIDI Time, CD Time or macro). ORB Series Operating Manual – Issue 2.0 Recording a Cue Having selected a cue stack into which to program your cues, as described above, ensure that your stage look is correct and all the required fixture parameters have been tagged. Page 99 Cues, Stacks & Pages To record the tagged parameters into the next available cue on the selected cue stack, simply enter the following command: Naming Cues RECORD ENTER Enter the command CUE n NAME or NAME CUE s/c ENTER. The Edit Cue Name popup is displayed on the touch screen (see below). Type in the required name using the external or on-screen keyboard and then press the [OK] button to complete. To name the cue at the time of recording simply enter the command: RECORD SET <enter name of cue> ENTER If you wish to record the fixture data to a particular cue in the selected stack, rather than the next available cue, then enter the following command: RECORD (CUE) N ENTER (N = Cue Number, CUE is optional) If you wish to record the fixture data to a particular cue stack and cue number, rather than the next available cue on the selected stack, then enter the following command: RECORD S/C ENTER (S = Stack No, C = Cue Number) After recording a cue, the command line is cleared, the fixture parameters are automatically untagged, but the fixtures remain selected. Subsequent cues can then be set up and recorded in a similar way. As you become more experienced with the desk, you will find the most efficient way of programming cues into cue stacks. Note – Programming Cues The ORB desk operates primarily as a tracking console. This means that if a parameter is programmed in one cue, it will track through all subsequent cues until it is programmed to do something else. If you program cue stacks sequentially, you shouldn‟t have to worry too much about tracking, as long as you ensure that you tag any parameters you wish to be recorded in the cue you are working on. For more information on Tracking, see page 132. Page 100 Figure 72 - Naming Cues It is also possible to name a cue at the same time as it is being recorded by entering the following command: RECORD CUE n NAME Editing Cue Output Levels In order to edit a cue you first need to load it into the programmer, by entering the following command: LOAD CUE n ENTER This loads the cue into the programmer and outputs the programmed DMX values. You can then select fixtures and make changes to the parameter output levels as necessary, in the same way as when recording the cue initially (see earlier). ORB Series Operating Manual – Issue 2.0 Cues, Stacks & Pages To record the changes to the same cue press the UPDATE key. The Update Options Window is displayed – see page 91 for more details. Editing Cue Fade and Delay Times Editing fade times and delay times is carried out in the same way as editing the cue output levels, ie load the cue into the programmer, adjust the times as necessary, then record the data back into the cue using the UPDATE key – see previous section. The fade and delay times can also be globally edited from the Cue Stack Window. Select the fade up, fade down, or attribute fade field in the window, press the ENTER key, enter the required time(s) and then press ENTER to complete. Fade Time Commands – Recording Cues When recording a cue - fade times can be specified in the command syntax for all fixture parameters, individual attributes or combinations of attributes as follows: Fade Time Commands – Editing Cues The following commands can be used to globally edit the fade times of parameters in existing cues: S/C TIME X ENTER Sets the fade times for all fixture parameters to X seconds. S/C TIME U/D ENTER Sets the intensity fade up and fade down times to U and D seconds respectively. S/C TIME COLOUR X ENTER Sets the fade times for all colour parameters to X seconds S/C TIME BEAM X ENTER Sets the fade times for all beamshape parameters to X seconds. S/C TIME POSITION X ENTER Sets the fade times for all position parameters to X seconds. S/C TIME U/D COLOUR X BEAM Y POSITION Z ENTER Sets the intensity fade up and fade down times to U and D, the colour fade times to X, the beamshape fade times to Y and the position fade times to Z. Note – Fade and Delay Times The fade and delay times for all parameters programmed in a cue can also be globally edited from the Cue Stack Window. RECORD (CUE) S/C TIME X ENTER Sets the fade times for all fixture parameters to X seconds. Delay times can be entered into the above syntaxes after the word TIME. RECORD (CUE) S/C TIME U/D ENTER Sets the intensity fade up and fade down times to U and D seconds respectively. Editing Cue Triggers RECORD (CUE) S/C TIME COLOUR X ENTER Sets the fade times for all colour parameters to X seconds. RECORD (CUE) S/C TIME BEAM X ENTER Sets the fade times for all beamshape parameters to X seconds. RECORD (CUE) S/C TIME POSITION X ENTER Sets the fade times for all position parameters to X seconds. RECORD (CUE) S/C TIME U/D COLOUR X BEAM Y POSITION Z ENTER Sets the intensity fade up and fade down times to U and D, the colour fade times to X, the beamshape fade times to Y and the position fade times to Z. By default, programmed cues have a GO button trigger. Cues can also be triggered automatically or at a specified start time (Real Time, SMPTE, or MIDI time). The cue trigger and the wait time or start time, as appropriate, are displayed in the Comments column in the Cue Stack Window. Cue Triggers can be set either through command syntax, or through the Cue Setup Window. With command syntax, enter: CUE n TIME {TRIGGER} {SMPTE} 00.00.00.00 ENTER ORB Series Operating Manual – Issue 2.0 Page 101 Cues, Stacks & Pages CUE n TIME {TRIGGER} {MIDI} 00.00.00.00 ENTER CUE n TIME {TRIGGER} {AUTO} 5 ENTER CUE n TIME {TRIGGER} {RealTime} 12:34:56 ENTER CUE n TIME {TRIGGER} {GO} ENTER Through the Cue Setup window, navigate to the comments column of the Cue Stack window and select the cue required, then press ENTER or double click the field. The Cue Setup window appears: Figure 74 - Next Cue Adding Macros to Cues The desk provides a number of in-built macros relating to the control of cues and cue stacks. These macros are used as commands to allow a cue to trigger another event elsewhere on the console (see Macros chapter, page 128, for full details). Macro commands are entered as a text string in the Macro column of the Cue Stack Window as follows: Figure 73 - Cue Setup Window The Trigger can then be selected from the dropdown box, and the Trigger Timecode specified below. Changing the Next Cue In the Cue Setup Window it is possible to define the Next cue. This is the cue number which gets selected after that cue is executed. This functionality is very useful if a scene is „cut‟ from the show – you can tell the ORB to skip the cues in that sceen and jump straight to the next cue. Move the cursor to the Comments column of the required cue and press the ENTER key (or double click in the column). Press the [MACROS…] softkey and in the popup window, enter any required trigger macros. The syntax for the various in-built macros is defined in the Macros section of the manual. Multiple macro commands can be entered using the colon as a delimiter, for example, G2:S3:C4. Open the Cue Setup Window (by clicking in the Comments column of the Cue Stack Window) and set the “Next” memory to the required number. Page 102 ORB Series Operating Manual – Issue 2.0 Cues, Stacks & Pages The Cue Stack Window The Cue Stack Window appears on Monitor 1 by default, however it can be opened manually by pressing SHIFT and CUE: For each cue in the stack the following information is displayed: Cue Number Name (if defined) Fade Up – The fade up (and delay up) intensity times for the cue. Fade Down - The fade down (and delay down) intensity times for the cue. Colour/Beamshape/Position Fade – The fade (and delay) times for each of the attributes (only the last selected attribute is displayed) Comments – any special settings about the cue (triggers, macros, etc) Once the Cue Stack Window is displayed on the monitor screen, selecting a different cue stack using the stack SELECT keys on the front panel. An information bar at the bottom of the Cue Stack Window shows the Current, Next and Last cue numbers, and the Timecode, framerate (if applicable) and the move on dark settings, eg: Figure 75 - Cue Stack Window The Cue Stack Window shows the contents of an individual Cue Stack. The cue stack number and name (if defined) are displayed in the header. The cues programmed in the cue stack are listed in numerical order. ORB Series Operating Manual – Issue 2.0 It is possible to open multiple copies of the cue stack window by using the syntax VIEW STACK n ENTER. Cue Details Button Pressing the Cue Details button displays the Preview Cue Window for the selected cue on the monitor screen: Page 103 Cues, Stacks & Pages Figure 77 - Stack Setup Window Figure 76 - Preview Cue Window The Preview Cue Window shows what is programmed into the specified cue on a fixture by fixture basis. It is the same format as the Output Window and shows the parameter values, fade and delay times for each fixture parameter that is recorded in the cue. Stack Setup Button Pressing this soft button is the equivalent of entering the command SELECT STACK N SETUP and displays the Cue Stack Setup Window on the monitor. The Cue Stack Setup Window shows the control parameters for the individual cue stack: Learn Button Pressing the [Learn] button in the Cue Stack Window sets the cue stack into learn mode. When the desk is in learn mode the text “LEARN” on a light blue background is displayed in the LIVE/BLIND/MACRO box on the touch screen and monitor screens. The GO button for the playback is used to set the timings for each of the cues in the cue stack as follows: The first press of the GO button sets the first memory to a „GO‟ trigger. Each subsequent press of the GO button sets the time from the last GO as the wait time for the cue. Once the stack has been completed, learn mode is disabled. To stop the stack from learning at a time other than after the last cue, simply press the [Learn] button. Page 104 ORB Series Operating Manual – Issue 2.0 Cues, Stacks & Pages Playing Back Cues Before playing back the programmed cues in a cue stack, it is important to clear the programmer by pressing the CLEAR button. This clears out any unrecorded commands and sends the fixtures to their default values, with the exception of the intensity parameters, which are kept at 0%. Selecting the Cue Stack Select the required page of playbacks using the STACK PAGE button in syntax (eg STACK PAGE 1 ENTER), then press the Stack SELECT button above the cue stack you wish to play back. The LED in the SELECT button is lit to indicate that it is the active cue stack. On ORB XF, cue stacks are selected using syntax – STACK n ENTER. The selected cue stack is indicated in the cue stack window (SHIFT+CUE). Selecting Cues Use the cursor keys to select a cue or enter one of the following commands: CUE N ENTER selects cue N as the next cue on all stacks that are selected and running. CUE S/C ENTER selects cue C on stack S provided that stack S is running. To output a specific cue in the cue stack, use the cursor keys to select the next cue in the Cue Stack Window (indicated with the yellow highlight bar), then press the GO button or enter the following command: S/C ENTER. Other commands to trigger a specific cue are as follows: CUE N GO triggers cue N on the stack associated with the local GO button pressed. CUE N MASTER GO triggers cue N on the selected stack(s) and so can be used to trigger off multiple cues if you select multiple stacks (using SHIFT and the SELECT keys). To snap to the next cue in the cue stack (ie ignore all timing information in the cue) hold down the SHIFT key and press the GO button. The red LED in the GO button is on when the stack is outputting and flashes when the outputs are fading between cues. Using the Pause Key If at any time you wish to pause the cue stack when it is running, press the PAUSE key below the playback master fader. After the initial press of the PAUSE key, subsequent presses will step backwards through the cue stack using the current cue fade times. To continue running the cue stack, press the GO key. Outputting Cues Holding down SHIFT and pressing the PAUSE key will snap to the previous cue. To play back the cues in a cue stack in sequence: Playing Back Several Cue Stacks Raise the stack master fader to full. Press the GO button for the selected playback. To output the next cue in the cue stack, simply press the GO button again. ORB Series Operating Manual – Issue 2.0 To play back more that one cue stack at the same time - select the required cue stacks by holding down the SHIFT key and pressing the Stack SELECT buttons above all the stacks you wish to play back. The red lights in the SELECT keys indicate the selected stacks. Page 105 Cues, Stacks & Pages To play back all the selected stacks at the same time, press the MASTER GO key. Copying Cues To snap to the next cue in each of the selected the cue stacks (ie ignore all timing information in the cue) hold down the SHIFT key and press the MASTER GO button. To copy a cue to another cue in the same cue stack or a different cue stack enter the following command: Releasing the Cue Stack Once you‟ve finished playing back cues, it is important to release the cue stack(s). This returns all of the affected fixture parameters to their default values, or to the value they were at before the cue stack was executed. Select the cue stack, using the Stack SELECT button, then press the RELEASE key. s1/c1 COPY TO s2/c2 ENTER S2 cue C2). (copies stack S1 cue C1 to stack To copy a range of cues to another location enter the following command: s1/c1 THRU c2 COPY S2/c3 (copies stack S1 cues C1 through to C2 to stack S2). When copying bear in mind that only the tracking changes stored within that cue will be copied. To copy the outputting state of a cue, do the following: If you wish to release several stacks at the same time, select them by holding down the SHIFT key and pressing the Stack SELECT button above all the stacks you wish to release, then press the RELEASE key. Output the cue (using normal playback methods) Turn ON the SMART TAGS function RECORD the cue using normal record syntax To release all cue stacks – hold down the SHIFT key and press the RELEASE key. Turn OFF the SMART TAGS function Master Playback Functions To place a cue stack on the master playback so that it can be triggered using the PLAYBACK MASTER controls on the front panel enter the command: SELECT STACK N ENTER, or press SELECT STACK and the SELECT button you wish to select. The stack(s) on the master playback can be released by specifying the stack number(s) in the release command, eg SELECT STACK 2 RELEASE.. The command SHIFT RELEASE releases all cue stacks on the virtual playbacks as well as those on the physical playbacks. Using this method the Smart Tags function will copy the outputting values into the cue required, setting any tags required at the output stage. Moving Cues To Move a cue to another cue in the same cue stack or a different cue stack enter the following command: s1/c1 MOVE TO s2/c2 ENTER (Moves stack S1 cue C1 to stack S2 cue C2). To move a range of cues to another location enter the following command: s1/c1 THRU c2 MOVE TO s2/c3 (Moves stack S1 cues C1 through to C2 to stack S2). Page 106 ORB Series Operating Manual – Issue 2.0 Cues, Stacks & Pages Deleting Cues To delete a single cue enter the command: S/C DELETE or DELETE S/C ENTER. To delete a range of cues enter the following command: DELETE S/C1 THRU C2 ENTER. Note – Deleting Cues Since the ORB desk is a tracking based console, deleting a cue from a cue stack could possibly affect other cues in that stack. Think carefully about whether you need to make any changes to subsequent cues in order to maintain the state(s) required. Cue Stacks Figure 78 – Cue Stack Directory The ORB desk provides 1000 user programmable cue stacks. A programmed cue stack contains one or more programmed cues. The 1000 cue stacks are assigned to the 100 pages of playbacks. Cue stacks can be setup, named, copied, moved and deleted. Cue Stack Directory Window To display the Cue Stack Directory Window on the monitor hold down the SHIFT key and press the SELECT STACK key: Each of the 1000 cue stacks has a soft button in the window. Each of these buttons shows the cue stack number, program status (* = unprogrammed), playback page and fader reference (eg Pg 2 Pb 3) and name, if defined. The window is colour coded to make identification of programmed stacks and chases easier. A cue stack can be selected by clicking on the soft button with the mouse or by selecting it using the cursor keys and pressing ENTER. The Playback changes to the appropriate page and the LED in the corresponding stack SELECT button is lit. Naming Cue Stacks To assign a name to a cue stack enter either of the following commands: SELECT STACK N NAME NAME SELECT STACK N ENTER ORB Series Operating Manual – Issue 2.0 Page 107 Cues, Stacks & Pages NAME <STACK SELECT BUTTON>. Type in the required name using the external keyboard and then press the ENTER button to complete. Copying Cue Stacks To copy a cue stack from one location to another enter the following command: STACK N COPY TO P ENTER Cue Stack Setup Window The control parameters for an individual cue stack are adjusted via the Cue Stack Setup Window. To display the Cue Stack Setup Window, press the [Stack Setup] key in the Cue Stack Window or enter the command: SELECT STACK N SETUP. (copies stack N to stack P). Moving Cue Stacks To move a cue stack to another location enter the following command: STACK n MOVE TO p ENTER (Moves stack n to stack p). Deleting Cue Stacks To delete a single cue stack enter either of the following commands: STACK N DELETE or DELETE STACK N ENTER. To delete several cue stacks or a range of cue stacks enter the following commands: DELETE STACK A AND B ENTER Figure 79 - Cue Stack Setup Window DELETE STACK A THRU N ENTER General Options Select the [General] button in the Cue Stack Setup Window. various options are described below: Page 108 The ORB Series Operating Manual – Issue 2.0 Cues, Stacks & Pages Timecode Mode Block Select the Timecode field. Use the left or right arrow keys or the soft key on the touch screen to select the required Timecode (Real Time, SMPTE, MIDI or CD) as required. Renumber This option allows the user to renumber all the programmed cues in the cue stack. Press the [Renumber] soft key. This brings up the Renumber Cues dialogue box When this option is selected, all the cues in the cue stack are changed into block cues, ie programs and tags all the parameters at the values they would normally be output at when the cue is played back. For example: Block Cue 1 Cue 2 Cue 3 Cue 4 Cue 5 Cue 6 Cue 7 Cue 8 Before Red * * Green * Blue * * After Red Red Red Green Green Blue Blue Blue Unblock When this option is selected, any parameters that are recorded at the same value as in the previous cue are untagged, ie turns block cues into tracked cues. For example: Figure 80 - Renumber Cues . Enter the required Start Number and Increment in the fields provided and then select the [OK] button in the window. Unblock Cue 1 Cue 2 Cue 3 Cue 4 Cue 5 Cue 6 Cue 7 Cue 8 Before Red Red Red Green Green Blue Blue Blue After Red * * Green * Blue * * Intensity Mixing This option determines whether the intensity parameters programmed in the cues are mixed HTP (highest takes precedence) or LTP (latest takes precedence). Blank Cue It is possible to insert a Blank Cue at the beginning of a cue stack by setting the Blank Cue option to Enabled in the Cue Stack Setup Window. A Blank Cue is the same as the first programmed cue in the cue stack, but with all the fixture intensity parameters set to zero. A blank cue is referred to as Cue 0 (zero). ORB Series Operating Manual – Issue 2.0 Page 109 Cues, Stacks & Pages Master Fader The operation of the playback fader for a cue stack is defined in the Cue Stack Setup Window and may be one of the following options: HTP Master – Simply controls the maximum level of the programmed HTP channels. Cues are triggered via the GO key. This is the default option. Manual Fader (2 Way) – Press the GO button to activate the playback. The next cue in the cue stack is automatically loaded when the fader reaches either end of it‟s travel (0% or 100%). Moving the fader creates a dipless cross-fade between the two cues. The fader controls the HTP levels; the LTP channels are triggered when the fader is moved from the end stop and then fade according to the times in the incoming cue. Manual Fader (1 Way) - Press the GO button to activate the playback. The next cue in the cue stack is automatically loaded when the fader reaches zero. The fader controls the HTP levels; the LTP channels are triggered when the fader is moved from zero and then fade according to the times defined in the incoming cue. Chases It is possible to convert a whole cue stack into a chase, which makes the stack run automatically in sequence. Once converted to a chase, cue stacks can be linked together using macros. For more information on the use of macros to link cue stacks, see page 128. Chase Options Select the [Chase] button in the Stack Setup Window. Turn Into Chase To turn the cue stack into a chase - select [Turn into Chase]. Additional buttons and fields are then displayed in the window to allow you to adjust the Chase modifiers . The modifiers determine how the chase is output, what drives the chase, it‟s direction, speed, how it fades between steps and how many times it runs. Figure 81 - Chase Options Page 110 ORB Series Operating Manual – Issue 2.0 Cues, Stacks & Pages To adjust the chase modifiers, select the required field, then choose an option or enter a numeric value, as appropriate. Press the [OK] button to complete the cue stack setup. When the Speed is set to zero, the chase runs according to the delay and fade times that are programmed into each step (cue) in the chase. Drive When the Speed is set to a value between 1 and 200, the chase runs at the corresponding number of beats per minute (bpm). All the fade and delay times that are programmed in the steps (cues) are ignored and the transition between each step (cue) is determined by the Fade modifier (see below). This modifier determines what triggers each step (cue) of the chase when it is running: Fade Auto – The chase runs automatically at the defined Speed. Bass – Each step is triggered by a bass beat on the audio input on the desk. The Fade modifier determines how the outputs „fade‟ between the steps (cues) when the speed is set between 1 – 200 bpm. Manual – Each step is triggered by pressing the GO button on the front panel. When the Fade is set to 0% the outputs snap between each step of the chase. Beat - Use the GO button to set or modify the beat when playing back the chase. When the fade is set to 100% the outputs fade continuously between each step. Direction This modifier determines which order the steps (cues) are output when the chase is run: Forward – The steps are output in increasing numerical order (eg 1,2,3,4,5). Backward – The steps are output in reverse order (eg 5,4,3,2,1). Bounce – Alternates between forwards and backwards (eg 1,2,3,4,5,4,3,2,1). Random – The steps are output in a random order. Speed The Speed modifier determines how fast the chase runs (range 0 – 200 bpm). ORB Series Operating Manual – Issue 2.0 When the fade is set between 0 - 100% the outputs will spend that percentage of the time fading, and the rest of the time at the programmed level for the step. The Fade modifier affects all fixture parameters programmed in the cues. Shots The Shots modifier determines how many times the chase will run after being triggered. When Shots is set to zero, the chase runs continuously. When Shots is set to a value between 1 and 255, the chase runs the specified number of times and then stops on the last step. Note – If the Direction modifier is set to Random, then one „shot‟ is defined as outputting N steps, where N is the total number of steps (cues) in the cue stack. Page 111 Cues, Stacks & Pages Revert From Chase To return a cue stack from a chase to a normal cue stack, press the [Revert From Chase] button in the Stack Setup Window. Trigger Options Select the [Trigger] button in the Cue Stack Setup Window: The various options are described below: It will then output those values shortly after the fixture has gone black (according to the delay and fade times set in the window). When the fixture comes back on again in a later cue, the colour, gobo, position etc. will already be at their correct values and just the intensity will fade up or the shutter open. The various options are described below: Trigger on Raise – When the playback fader is raised, the first cue is activated. Trigger Level – The level at which the cue is triggered, in % Release on Lower – When the playback fader is lowered, the stack is released. Move on Dark - When this function is enabled for the cue stack – whenever a fixture goes black (ie it‟s intensity falls to zero, or the shutter is closed), the desk software will look ahead in the cue stack to see what values the colour, beamshape and position parameters are next programmed at for that fixture. Delay Time – The time the ORB waits after a fixture reaches blackout before move on dark kicks in. Fade Time – The time with which ORB fades the attributes that move on dark. Move on Dark Options Select the [Move on Dark] button in the Cue Stack Setup Window. Page 112 ORB Series Operating Manual – Issue 2.0 Cues, Stacks & Pages Pages The ORB desk provides 100 pages of playbacks; each page containing 10 playbacks. Loading a Page onto the Playbacks To load a page of cue stacks onto the physical playback faders do one of the following: Use the mouse to click on the required page in the Page Window. Select the required page in the Page Window with the cursor keys and press ENTER. Enter the command STACK PAGE N ENTER. Once a page is loaded onto the playbacks, the relevant cue stacks will be available using the front panel controls. Page Window To display the Page Window on the monitor hold down the SHIFT key and press the STACK PAGE key: Figure 82 - Page Window Each of the 100 pages has a soft button in the window. Each of these buttons shows the page number, program status (* = unprogrammed) and name, if defined. A playback page can be selected by clicking on the soft button with the mouse or by selecting it using the cursor keys and pressing ENTER, or by entering the command PAGE N ENTER. The desk software automatically assigns the 1000 programmable cue stacks to the 100 pages of playbacks (ie page 1 has cue stacks 1 - 10, page 2 has cue stacks 11 - 20 … page 100 has cue stacks 991 – 1000). ORB Series Operating Manual – Issue 2.0 Page 113 User Definable Keys (UDKs) User Definable Keys (UDKs) The ORB desk provides 20 pages of 10 User Definable Keys (UDKs). These keys are located above the syntax keys and can be assigned to any one of the following items: Group (Automatic Group or User Defined Group) Individual Fixture Palette (Colour, Beamshape, Position or Effects) Macro Cue Channel Data User Defined View Type in the required name using the external keyboard and then press ENTER to complete. Note that only channel data UDKs can be named – all the other UDKs obtain their names directly from the item assigned to them. The channel data is output by pressing the UDK. The channel data is released when the UDK is released. If the UDK action is set to Latch, then the outputs will fade according to the fade times programmed in the channel data. Cue UDK The Cue UDK is used to output the fixture data programmed in an individual cue. The contents of each UDK is displayed on the LCD screen above the keys, together with the current page number and any name associated with the item. To assign an individual cue from a cue stack to a UDK enter the following command: Channel Data UDK CUE n RECORD <UDK> The Channel Data UDK allows you to record fixture parameter (channel) data, with associated fade times, set up in the programmer directly onto a UDK. The fixture data programmed in the cue is output by pressing the UDK. The fixture data is released when the UDK is released. If the UDK action is set to Latch, then the outputs will fade according to the fade times programmed in the cue. To assign channel data to a UDK, first set up the fixture parameter data in the programmer, in the same way as programming a cue, ensuring that all the required fixture parameters are tagged. Then enter the following command: RECORD <UDK> Where <UDK> represents pressing the UDK on the front panel. UDK‟s which have been assigned to channel data can also be named if required by entering the following command: NAME <UDK> {your name} ENTER Page 114 (CUE) s/c RECORD <UDK> The UDK Setup Window To display the UDK Setup Window on the monitor, hold down the SETUP key and then press one of the User Defined Keys. This window allows the user to adjust a number of parameters for the selected User Definable Key (UDK). Only UDKs defined as Cues or Channel Data can have their settings altered in the UDK Setup Window. ORB Series Operating Manual – Issue 2.0 User Definable Keys (UDKs) Release If the Release option is set to Yes then the fixtures will be released when the UDK is released and the intensity (brightness) data has faded to zero. If the Release option is set to No then the fixtures will NOT be released when the UDK is released. Figure 83 – UDK Setup Window The fixtures being controlled by the UDK can be released by setting their values in the programmer or by triggering another LTP command from elsewhere on the console or by holding down the RELEASE key and pressing the UDK on the front panel. Flash Mode Naming UDKs If the Flash Mode is set to Flash - the corresponding data assigned to the UDK is output instantly on pressing the key and faded out or released instantly on releasing the key. UDKs defined as channel data can have a name associated with them – press NAME, then press the UDK you want to name. A popup window appears where you can enter the name, and then press OK to confirm the name. If the Flash Mode is set to Latch - The first press results in the „on‟ action. The second press results in the „off‟ action. Subsequent button presses will then toggle between the two states. The light in the UDK indicates the state of the key (on or off). When the outputs are fading up or down, the LED in the UDK flashes. Palettes are output instantly on pressing the UDK. A Cue or Channel Data UDK uses the fade times programmed in the cue data (or from the programmer at the time of programming). The times for the cue data can be displayed and edited as required via the Preview UDK Window or by loading the UDK into the programmer. Note – if you edit the fade times for the cue, this will also affect the output of the cue in the relevant cue stack on the playbacks. The name of the UDK appears on the LCD screen above the key. Other types of UDK (Cues, Macros, Groups, Palettes, etc) inherit the name associated with the source item. Group UDK The Group UDK is used for selecting a group. To assign a Group to a UDK, enter either of the following commands: GROUP n RECORD <UDK> When the UDK is pressed, the group assigned to the UDK is selected – this is equivalent to entering the syntax GROUP n ENTER in the command line. Mix Mode The intensity channels in the data are mixed either HTP or LTP. ORB Series Operating Manual – Issue 2.0 Page 115 User Definable Keys (UDKs) Fixture UDK View UDK The Fixture UDK is used for selecting an individual fixture. To assign a fixture to a UDK, enter either of the following commands: The View UDK is used to activate the user view assigned to the UDK, providing a quick way of changing the view on screen. n RECORD <UDK> To assign a view to a UDK enter the following command: When the UDK is pressed, the fixture assigned to the UDK is selected. VIEW n RECORD <UDK> Palette UDK The Palette UDK can be used as an alternative method of outputting a palette for the currently selected fixtures. To assign a palette to a UDK, enter one of the following commands: COLOUR n RECORD <UDK> BEAM n RECORD <UDK> POSITION n RECORD <UDK> EFFECTS n RECORD <UDK> The palette assigned to the UDK is applied to the selected fixtures when the UDK is pressed. The view is actviated by pressing the UDK. Changing UDK Page The UDK Page number can be changed by using the UDK PAGE key. Enter the syntax: UDK PAGE n ENTER The UDKs will change to the requested page. The UDK Window To display the User Definable Keys Window on one of the monitor displays, hold down the SHIFT key and press one of the User Definable Keys: Macro UDK The Macro UDK is used to run the user defined macro assigned to the UDK. To assign a user defined macro to a UDK enter the following command: MACRO n RECORD <UDK> The macro is run by pressing the UDK. Page 116 ORB Series Operating Manual – Issue 2.0 User Definable Keys (UDKs) required and then save the data back into the original UDK by pressing the UPDATE key. Note - This function only applies to UDKs which have been assigned to channel data or a cue. In the case of a cue, you effectively load the cue into the programmer, modify it and update it. Alternatively you can use the UPDATE functionality to UPDATE a UDK through the Update Options Window. See page 91 for more information. Deleting User Definable Keys Individual UDK‟s can be deleted (cleared) by entering the following command: DELETE <UDK> Figure 84 – UDK Window This window shows information on the current page of User Definable Keys. Each of the 10 UDK‟s has a button in the window. Each of these buttons shows the UDK number and information on the item assigned to the UDK (if any). The buttons in the UDK window can be used in the same way as the front panel controls, which makes them ideal for placing on a touchscreen for fast playback. Editing User Definable Keys To edit a UDK enter the following command: LOAD <UDK>. This allows you to load the contents of the UDK into the programmer, adjust the programmed channel levels and times as ORB Series Operating Manual – Issue 2.0 Page 117 Submasters Submasters The ORB series provides 20 pages of upto 60 Submasters. The number of Submasters per page is configured in the Desk Setup / Inputs area of Setup (see page 60 for more information). Location of Submasters ORB The default location of a submaster is on the DMX-Input. The DMXIn socket on the rear of the desk enables you to input a full universe of DMX (512 channels) and capture these for use in controlling elements of the desk. In the Desk Setup / Inputs (Page 60) screen you can configure a DMX-In address for each Submaster, as well as configuring the number of submasters required per page (from 0 to 30). It is important to check these settings are set correctly before commencing work on submasters. Figure 85 - Playback Setup ORB XF The Multi Function Faders can be switched into Submasters mode by using the syntax FADER FUNC. {Submasters} – the MFF window will indicate submasters by showing red boxes. Using Playbacks as Submasters It is possible to convert the playbacks on the front panel of ORB to be used as submasters, on a per-fader basis. To do this: Hold SETUP and press the SELECT key above a playback. Select the Playback Mode option. Select SUBMASTER. Press OK. Now the playback will act as a submaster. Figure 86 - MFF Window (Submasters) Page 118 ORB Series Operating Manual – Issue 2.0 Submasters Submaster function is also indicated by the Fader Func. button LED being lit in orange. The Submasters Window To assign channel data to a SUB, first set up the fixture parameter data in the programmer, in the same way as programming a cue, ensuring that all the required fixture parameters are tagged. Then enter the following command: RECORD SUB n ENTER To display the Submasters Window on one of the monitor displays, hold down the SHIFT key and press SUB. Submasters can also be named if required by entering the following command: SUB n NAME {your name} ENTER This window shows information on the current page of Submasters. Each of the subs has a row in the window. Each of these rows shows the submaster number and information on the data stored on the Sub (if any), together with fade times and any special settings. It is also possible to record a submaster by using the syntax RECORD <FLASH> on ORB XF or RECORD <GO> on ORB. Fade times on Submasters Submasters follow the default fade time set in Desk Setup / Defaults. To change the fade time, you can use syntax: SUB n TIME x ENTER SUB n TIME x/y ENTER SUB n TIME COLOUR x ENTER It is also possible to modify the fade time by double-clicking in teh fade time column of the Submasters window and typing in a new value, similar to the function of a spreadsheet program on a computer. The third way to adjust fade times is through the submaster setup window – hold down SETUP and press the submaster flash key (or GO, on ORB). The fade times will be displayed in this window, and can be adjusted using the arrow keys and numeric keypad. Fade times are stored as soon as they are modified, so there is no need to update or re-record submasters to store these changes. Figure 87 – Submasters Window Recording Submasters The Channel Data SUB allows you to record fixture parameter (channel) data, with associated fade times, set up in the programmer directly onto a SUB. ORB Series Operating Manual – Issue 2.0 Playing Back Submasters Submasters are played back using the front panel or DMX-Input. Raising the fader will activate the contents, and lowering it will release and deactivate the contents. Page 119 Submasters Submasters page-hold over which means that when you change the page, any active submasters will stay active until they are released or lowered. The Submaster Setup Window To display the Submaster Setup Window on the monitor, type the syntax SUB n SETUP This window allows the user to adjust a number of parameters for the selected submaster. If the Flash Mode is set to Latch - The first press results in the „on‟ action. The second press results in the „off‟ action. Subsequent button presses will then toggle between the two states. A Cue or Channel Data SUB uses the fade times programmed in the cue data (or from the programmer at the time of programming). The times for the cue data can be displayed and edited as required via the Preview Submaster Window or by loading the SUB into the programmer. Note – if you edit the fade times for the cue, this will also affect the output of the cue in the relevant cue stack on the playbacks. LTP Trigger Level The LTP Trigger Level is the level at which any moving light parameters will begin to be altered. This is set in percent and defaults to 5%. Note that the LTP Trigger Level is ignored if Submaster Controls… is set for a parameter. Release If the Release option is set to Yes then the fixtures will be released when the submaster is released and the intensity (brightness) data has faded to zero. Figure 88 – Submaster Setup Window This window can also be displayed by clicking in the Comments column on a programmed submaster. Flash Button Action Note: Submaster Flash Buttons functionality only work completely when using the internal playbacks as submasters. Using DMX-input relies on the desk which is generating the incoming DMX and so certain flash type functions may not behave as expected. If the Flash Mode is set to Flash - the corresponding data assigned to the SUB is output instantly on pressing the key and faded out or released instantly on releasing the key. Page 120 If the Release option is set to No then the fixtures will NOT be released when the SUB is released. The fixtures being controlled by the Submaster can be released by setting their values in the programmer or by triggering another LTP command from elsewhere on the console or by holding down the RELEASE key and pressing the submaster flash button. Submaster Controls… Submaster Controls… allows you to force a parameter to follow the movement of the fader for its crossfade, rather than triggering at specified level and fading automatically. This is great for building submasters which move fixtures out into the audience – as the fader moves up, the fixtures move up. Another application ORB Series Operating Manual – Issue 2.0 Submasters commonly used is to create three submasters – one for Cyan, one for Magenta and one for Yellow. Press the Submaster Controls… button, then select the attributes required using the on-screen buttons. Once finished the Comments column will show SC:ICBPE where ICBPE is the list of attributes the fader is controlling. The Submasters will change to the requested page. Editing Submasters To edit a SUB enter the following command: LOAD SUB n ENTER This allows you to load the contents of the submaster back into the programmer, adjust the programmed channel levels and times as required and then save the data back into the original submaster by pressing the UPDATE key. Alternatively you can use the UPDATE functionality to UPDATE a Sub through the Update Options Window – see Page 91 for full details. Figure 89 - Submaster Controls... Macros… It is possible to associate a user programmed macro with a submaster, so that when the submaster is activated (through flashing or raising the fader) the macro is triggered. Press the Macros button and then enter the macro number(s) using commas to separate the macro numbers if required. Figure 90 - Macros Changing Submaster Page The Submaster Page number can be changed by using the SUB PAGE key. Enter the syntax: SUB {Page} n ENTER ORB Series Operating Manual – Issue 2.0 Figure 91 - Submaster Preview Window Previewing Submasters It is possible to preview the contents of a submaster on the monitor. To do this, enter the syntax: Page 121 Submasters VIEW SUB n ENTER Time Fader Copying Submasters A submaster can be copied to another location by entering: The time fader is used to set the internal fade time on ORB and ORB XF. This fade time can then be applied to each command line action, ideal for „busking‟ shows. SUB x COPY TO y ENTER To configure a Time fader, use the syntax: The submaster will be copied together with any names, fade times and special settings. The new copy can then be manipulated as required. TIME RECORD <FLASH> / <GO> Moving Submasters Once configured, the time fader will allow you to set any value between 0.0 (snap) and 11:30.0. This time is displayed in the bottom right hand corner of the monitor screen, adjacent to the Grand Master Level. SUB x MOVE TO y ENTER To latch the time crossfade function on and off, press the flash (or GO) button under the fader. This will enable the time lock, and the LED will light. You can also see time lock indicated by the background of the on-screen time display changing to a light blue. The submaster will change location automatically. To disengage this function, press the flash (or GO) button again. Deleting Submasters Override Fader Individual submasters can be deleted (cleared) by entering one of the following commands: DELETE SUB n ENTER The Override fader is used to create a global speed override of all crossfades occurring on the desk. This includes cues, chases and effects. This fader can be useful to synchronise multiple playback methods in time with music. DELETE SUB x / y ENTER To define an override fader, use the syntax: SUB n DELETE SHIFT+TIME (the word Override will appear in the command line) RECORD <FLASH> / <GO> A submaster can be moved from one location to another by entering: DELETE <FLASH> Special Submaster Types There are three types of Special Submaster that can also be assigned to submaster faders. These special types do not contain channel data, but instead contain functions. Page 122 Once defined, the override fader must be set to 50% to give „normal‟ crossfades. Deviating the level above 50% will increase the crossfade speed proportionally, and reducing the level below 50% will slow down these fades proportionally. ORB Series Operating Manual – Issue 2.0 Submasters Group Fader Group Faders can be used to manually control a group of lights, either as LTP, LTP Mix or Inhibitive behaviour. These faders are generally used when programming, as they negate the need to use smart tag to record the contents of that submaster into a cue (moving a group fader tags the channels in that group). To store a group fader, use the syntax: GROUP n RECORD <FLASH> / <GO> The behaviour of the group fader can be defined by holding down SETUP and pushing the <FLASH> / <GO> buttons for the fader. Figure 92- Submaster Setup (Group Fader) The three Mix Modes for the fader function as follows: LTP Mode – moving the fader instantly sets the group to that level and tags the channels. LTP Mix Mode – moving the fader through the currently outputting level, grabs the channel and then adjusts it and tags the level. Inhibitor Mode – this sets a top level for the group, above which the channels will not go. ORB Series Operating Manual – Issue 2.0 Page 123 Effects Effects The ORB desk provides a powerful effects generator with a number of standard effects. By applying various mathematical functions (sine, cosine, ramp etc) to the outputs of different fixture parameters and adjusting the size, speed and offset values, a wide range of movement and other effects can be generated quickly and easily. The Effects Palette Window To display the Effects Palette Window on the monitor, hold down the SHIFT key and then press the EFFECTS key. The Effects Palette Window contains a soft button for each of the 1000 effects palettes. Each soft button contains the following information: Effect Number, a set of content flags indicating which attributes are programmed in the effect palette (I = Intensity, C = Colour, B = Beamshape, P = Position, E = Effects) and name, if defined. Auto Effects The desk is capable of creating automatic effects. The Effects Palette Window contains these standard effects which are generated by selecting the [Create Auto Palettes] option from the [Auto Menus] option in Setup. Page 124 Figure 93 – Effects Palette Window ORB Series Operating Manual – Issue 2.0 Effects Effect Parameters on the Wheels When the effect wheel groups are active (ie the EFFECTS LED is lit), the effect parameters are assigned to the control wheels. If you apply different effects to different parameters of the fixtures (e.g. Rainbow and Circle) you can use the Speed wheel to control the speed of all the effects in one go. The Effects Window The Effects Window displays the Effect Parameters for each parameter of the selected fixture(s). To display the Effects Window on the monitor screen press the [Effects Window] soft key on the monitor when the Effects Palette Window is open. Adjusting any of the effect parameters using the control wheels is reflected in the Effects Window. At any time you can reload the cue into the programmer and modify the speed of all the effects in that cue by selecting the effects wheel group and moving the Speed wheel. Note – Rotation Rotation cannot be performed on a per parameter basis, and can only be applied to the Pan and Tilt parameters together. Therefore the Rotation parameter can be adjusted via the control wheel, but is not displayed in the Effects Window. Applying Effects When applying one of the standard Intensity, Colour, Iris or Focus effects, the base value of the parameter is automatically changed to 50% to allow the effect to work correctly. For these effects the size parameter is set to 100% as the default. Apart from the effects specified above the default values of the effect parameters for the standard effects are Speed = 25, Size = 20, Offset = 0, Rotation = 0. Figure 94 – Effects Window Automatic fanning of offset or any other effect parameter across fixtures is not done. Should fanning of an effect parameter be required, hold down the SHIFT key and use the control wheel to apply the selected fan function onto the wheels in the same manner as fanning any other parameter value. The Effects Window also allows you to edit the effect parameters of individual fixture parameters directly. The fixture parameters (eg Pan, Tilt, Cyan, Magenta, Yellow etc) are listed down the left hand side of the table and the effect parameters (Function, Speed, Size and Offset) across the top of the table. Pressing the BLIND key twice synchronises the effects while programming. To adjust an effect parameter, select the required field using the mouse or cursor keys and press the ENTER key. Use the cursor keys ORB Series Operating Manual – Issue 2.0 Page 125 Effects to select the required Function, or enter the required numerical value for Speed, Size or Offset, then press the ENTER key. Function – This parameter determines the mathematical function that is applied to the output value of the fixture parameter. See earlier for full list of available functions. only tagged, effect parameters only tagged and both tagged. This allows you to record an effect with or without a base value for the corresponding fixture parameter. Naming Effects Speed – This parameter determines the speed of the effect and also the „direction‟ of movement effects (eg Circle), where -100 is the fastest speed anticlockwise, 0 is stop, and +100 is the fastest speed clockwise. Effects can be named, either as a separate operation or as part of the recording process by entering one of the following commands: Size – This parameter defines the magnitude of the effect (range 0 – 100). NAME EFFECTS n ENTER {your name} ENTER Offset – This parameter determines the offset into the effect when it is triggered. Recording Effects Programming an effect palette is similar to recording other palettes. EFFECTS n NAME {your name} ENTER RECORD EFFECTS n NAME {your name} ENTER Applying Effects To apply an effect (either a standard effect or a user defined effect) select a fixture or group of fixtures and then enter the following command: Set up the fixture outputs as required, ensuring that the correct fixture parameters and/or effect parameters are tagged (see note). A common method of recording an effect is to apply one of the standard effects, adjust the affect parameters as required using the wheels or Effect Window and then record this as a new effect palette. EFFECTS n ENTER Enter the following command: Copying Effects RECORD EFFECTS n ENTER If you wish to record other attributes (eg Colour), these should be selected on the Record Options Window on the monitor before pressing the ENTER key. Note - Tagging – Values and Effects For each fixture parameter there are two tag states that are recorded - one for the parameter value, and one for the set of effects parameters. Therefore, a single fixture parameter may have none, one or both tag states set allowing for nothing tagged, value Page 126 If any of the selected fixtures are not actually programmed in the applied effect palette, but there are one or more fixtures of the same type that are programmed, the fixture will use the values programmed for the first fixture of the same type. To copy an effect palette from one location to another, enter the following command: EFFECTS n COPY TO p ENTER As all palettes (including effects) have the same data structure and may contain fixture parameter data from any combination of attributes, it is also possible to copy palettes from one attribute to another, for example: EFFECTS 2 COPY TO BEAM 5 ENTER ORB Series Operating Manual – Issue 2.0 Effects Moving Effects To move an effect from one location to another, enter one of the following commands: EFFECTS n MOVE TO p ENTER When an effect is moved to a new location, any cues that referenced the original effect palette will now reference the new location of the palette. Deleting Effects To delete an effect, enter one of the following commands: EFFECTS n DELETE DELETE EFFECTS n ENTER To delete a range of effect palettes, enter the following command: DELETE EFFECTS a THRU b ENTER When an effect is deleted, any cues that previously referenced the effect are updated to contain the actual values that were stored in the effect palette. ORB Series Operating Manual – Issue 2.0 Page 127 Macros Macros The ORB desk provides a number of in-built macros, auto macros and 1000 user programmable macros. The user interface provides mechanisms for recording, naming, running and deleting user definable macros. In Built Macros In Built Macros can be associated with cues and used to trigger various behaviours when altering cue stacks. Playback Macros These macros are used as commands in cue stacks to allow a cue to trigger an event elsewhere on the console: Don’t Move on Dark Macros These macros are used to prevent parameters moving on dark for a particular cue; DM Don‟t Move on dark - All Parameters DMB Don‟t Move on dark – Beamshape Parameters DMC Don‟t Move on dark – Colour Parameters DMP Don‟t Move on dark – Position Parameters DMBC Parameters Don‟t Don‟t Move on dark – Beamshape and Position Don‟t Move on dark – Colour and Position Parameters Move on dark – Beamshape and Colour Gx Go playback x on the current page. DMBP Parameters Gp/f Go playback f on Page p. DMCP Sx Pause playback X on the current page. Rx Release playback X on the current page. Note - Setting and Editing the In-built Macros PX Change the current page to X. Ts/c Trigger (Go) Stack S Cue C. Move the cursor onto the Comments field in the Cue Stack Window and press the ENTER key, then select Macros… Cx Choose playback X (turn the select LED on for playback X). Nc the cue). Go to Cue C in the same cue stack (does NOT trigger Ns/c cue). Go to Cue C in cue stack S (does NOT trigger the Mx Triggers User Macro x. Page 128 A window appears on the monitor allowing macros to be set or edited. They may also be entered via an external keyboard. Macro commands are entered as a text string, and multiple commands can be concatenated using the colon as a delimiter, for example, “G2:S3:C4:T3/4”. The Macro Window To display the Macro Window on the monitor, hold down the SHIFT key and then press the MACRO key. ORB Series Operating Manual – Issue 2.0 Macros The Macro Window contains a soft button for each of the 1000 user programmable macros. Each soft button contains the following information: Macro number (1 – 1000), program status (* = unprogrammed) and name (if defined). Note: The live/blind box on the monitors displays "MACRO" on a light background while the macro is being recorded and reverts back to it's normal live/blind indication on completion of the macro recording. Naming a Macro Each macro can have its own name associated with it. To name a macro enter one of the following commands: MACRO n NAME {your name} ENTER NAME MACRO n ENTER Running a Macro To run a macro click on the macro in the Macro Window or use the cursor keys to select a macro in the Macro Window and press the ENTER key. Macros may also be run by entering the command: MACRO n ENTER. Copying a Macro To copy a macro from one location to another enter the command: Figure 95 – Macro Window MACRO n COPY TO p ENTER. Recording a Macro Moving a Macro To record a macro enter the command: To Move a macro from one location to another enter the command: RECORD MACRO n ENTER. MACRO n MOVE TO TO p ENTER. Type in the series of key commands from the front panel (Note the MACRO key cannot be recorded as part of the macro). Deleting a Macro Press the MACRO key to complete the recording. To delete a macro enter either of the following commands: ORB Series Operating Manual – Issue 2.0 Page 129 Macros MACRO n DELETE DELETE MACRO n ENTER To delete a range of macros enter the following command: DELETE MACRO a THRU b ENTER Auto Macros The ORB provides the facility to remotely control fixture parameters using automatic macros. The Macros are stored within the fixture library and allow control of fixture parameters such as Lamp On, Lamp Off, Reset, etc, without needing to find the relevant DMX values on the control channels. Auto Macros are created in SETUP mode under [Auto Menus], [Create Auto Macros] in the [Patch] screen. Once created, Auto Macros appear in the Macro Window in the same way as User Macros and can be activated in the same way. Page 130 ORB Series Operating Manual – Issue 2.0 Advanced Programming Advanced Programming Record Options Window After setting up the required data in the programmer and pressing the RECORD key the Record Options Window is displayed, and the Record Options Syntax Keys appear. This window contains a number of soft keys to allow you to select what and how the information will be recorded: The top row of buttons are the data selection buttons. The default setting for these buttons is [Tagged Fixtures] and [Tagged Parameters] selected. By using various combinations of these buttons as described below you can determine what data will be recorded. Snapshot These two buttons are mutually exclusive and providing that [Snapshot] has not been selected they determine which parameters are recorded. The relevant fixtures will be determined by the [Tagged Fixtures] and [Selected Fixtures] buttons. If [Tagged Parameters] is selected (as shown above), only the tagged parameters of the relevant fixtures in the programmer will be recorded. A snapshot record is a capture of all outputting values from the desk and is a great way of getting a „block‟ cue recorded. When [Snapshot] is selected – the [Snapshot] button is highlighted and the remaining buttons on the top row are „greyed out‟ and no longer accessible. All the attribute selection buttons on the bottom row turn red and are no longer available. All parameters of all fixtures will be recorded. Pressing [Snapshot] again will return the data selection and attribute selection buttons to their previous states. Tagged Parameters / All Parameters If [All Parameters] is selected, all parameters of the relevant fixtures in the programmer will be recorded. All the attribute selection buttons on the bottom row will turn red and not be editable. Tagged Fixtures / Selected Fixtures These two buttons are mutually exclusive and providing that [Snapshot] has not been selected they determine which fixtures will be recorded. If [Tagged Fixtures] is selected (as shown above), all the fixtures in the programmer will be recorded. If [Selected Fixtures] is chosen, only the selected fixtures in the programmer will be recorded. Figure 96 - Record Options Window ORB Series Operating Manual – Issue 2.0 Page 131 Advanced Programming Tracking Options The second row of buttons are the tracking options [Track Forward], [Track Backward], [Track Both] and [Cue Only]. These options are only applicable and accessible when the data is being recorded into a cue. These four options are mutually exclusive, with the default option being [Track Forward] as shown above. The first row of data shows the program state of the colour parameter (* = untagged parameters). The second row of data shows the output when the cue is played back. CUE 1 CUE 2 CUE 3 CUE 4 CUE 5 CUE 6 CUE 7 CUE 8 CUE 9 CUE 10 Red * * * * * * * * Blue Red Red Red Red Red Red Red Red Red Blue If Cue 6 is edited and the colour changed to Green, the results of the different tracking options are as follows: Cue Only – The changed values are only output in the edited cue; the outputs of previous and later cues are not affected. The cue after the edited one has to be reprogrammed to ensure this: Track Forwards – The edited cue only affects later cues in the stack. This is the default action. CUE 1 CUE 2 CUE 3 CUE 4 CUE 5 CUE 6 CUE 7 CUE 8 CUE 9 CUE 10 Red * * * * Green * * * Blue Red Red Red Red Red Green Green Green Green Blue CUE 1 Track Backwards – The edited cue affects earlier cues in the stack, where the change is tracked back to the last time the colour parameter was programmed. The outputs of cues after the edited cue are not affected (the cue after the edited one is changed to ensure this). CUE 1 CUE 2 CUE 3 CUE 4 CUE 5 CUE 6 CUE 7 CUE 8 CUE 9 CUE 10 Green * * * * * Red * * Blue Green Green Green Green Green Green Red Red Red Blue CUE 2 CUE 3 CUE 4 CUE 5 CUE 6 CUE 7 CUE 8 CUE 9 CUE 10 Red * * * * Green Red * * Blue Red Red Red Red Red Green Red Red Red Blue Track Both – The edited cue affects both earlier and later cues. The change is tracked back to the last time the colour parameter was programmed: CUE 1 CUE 2 CUE 3 CUE 4 CUE 5 CUE 6 CUE 7 CUE 8 CUE 9 CUE 10 Green * * * * * * * * Blue Green Green Green Green Green Green Green Green Green Blue programmer will be recorded. Page 132 ORB Series Operating Manual – Issue 2.0 Advanced Programming Merge and Remove Options These two buttons allow the user to merge or remove the specified data from existing cues, palettes, UDKs as opposed to the default action of overwriting the existing data. These two buttons are mutually exclusive, with the default state of both being „off‟. If [Merge] is selected the button turns green and the data will be merged into the destination cue, palette or UDK. If [Remove] is selected the button turns green and the data will be removed from the destination cue, palette or UDK. Default Times This button determines what happens to the parameter fade and delay times after the specified data has been recorded. The default state of this button is „off‟. When [Snapshot] or [All Parameters] are selected – all the attribute buttons are forced to red and are no longer editable. When recording data to cues, submasters or UDK‟s - the attribute selection bar initially shows green (tagged) for each attribute in which one or more parameters of that attribute are tagged and grey (none) for those attributes where no parameters are tagged. When recording data to palettes - the attribute selection bar shows green (tagged) for the attribute being recorded and none (grey) for all the other attributes. You can change this selection as required before saving the data to the palette. For example – Select some moving fixtures and set the intensity to full, the colour wheel to blue and the gobo wheel to the desired gobo. To save the intensity, colour and gobo data to a Beamshape palette enter the command RECORD BEAM N .. the Attribute Selection Bar shows the following: If [Default Times] is selected the button turns green and after the data has been recorded the fade and delay times are reset to their default values as defined in Desk Setup. If [Default Times] is not selected the fade and delay times will be kept at their current values as displayed in the Fade and Delay views of the Output Window. Attribute Selection Bar The fourth row of buttons is the Attribute Selection Bar and indicates which parameters will be recorded for each of the different attributes (Intensity, Position, Colour, Beamshape and Effects). Pressing each of the soft buttons on the touch screen cycles round the three options for that attribute, except when they are forced to red (see below). The options are indicated by the background colour as follows: Grey Green Red No Parameters Tagged Parameters All Parameters ORB Series Operating Manual – Issue 2.0 Press the [Intensity] and [Colour] buttons to change their state to tagged: Page 133 Advanced Programming Complete the record operation by pressing the ENTER key. Wheel Editing Modes The desk provides a number of wheel editing modes which are user selectable and apply when editing several fixtures at the same time. For each attribute there is an unshifted and a shifted wheel mode. The unshifted wheel mode is applied when the control wheel is moved. The shifted wheel mode is applied when the SHIFT key is held down and the wheel is moved. The current wheel edit mode for the currently selected attribute is displayed on the LCD screen above the wheels. To change the editing mode, hold down SETUP and press the relevant attribute. Figure 97 - Set Colour Wheel Editing Mode The different wheel editing modes are described below: Absolute Mode When several fixtures are selected and a fixture parameter is adjusted using a control wheel, the adjusted parameter for all the selected fixtures goes to the same absolute value. For example – Select fixtures 1 – 5 and adjust a parameter: Fixture Parameter Fixture 1 Fixture 2 Fixture 3 Fixture 4 Fixture 5 Original Value 30 20 40 10 50 New Value 15 15 15 15 15 Change in Value -15 -5 -25 +5 -35 Relative Mode When several fixtures are selected and a fixture parameter is adjusted using a control wheel, that parameter on each of the Page 134 ORB Series Operating Manual – Issue 2.0 Advanced Programming selected fixtures will increase or decrease by the same amount from its original value. This mode is most often used for adjusting position parameters (pan and tilt) For example: Fixture Parameter Fixture 1 Fixture 2 Fixture 3 Fixture 4 Fixture 5 Original Value 10 20 30 40 50 New Value 15 25 35 45 55 Change in Value +5 +5 +5 +5 +5 Fan First Mode When several fixtures are selected and a fixture parameter is adjusted using a control wheel, that parameter on each of the selected fixtures will increase or decrease by a different amount from their original values, depending on the fixture number. The value of the first selected fixture will be locked. Example – Fan-First Mode (Fixture 1 locked): Fixture Parameter Fixture 1 Fixture 2 Fixture 3 Fixture 4 Fixture 5 Original Value 10 10 10 10 10 New Value 10 15 20 25 30 Change in Value 0 +5 +10 +15 +20 Change in Value -10 -5 0 +5 +10 Fan Last Mode When several fixtures are selected and a fixture parameter is adjusted using a control wheel, that parameter on each of the selected fixtures will increase or decrease by a different amount from their original values, depending on the fixture number. The value of the last selected fixture will be locked. Example – Fan-Last Mode (Fixture 5 locked): Fixture Parameter Fixture 1 Fixture 2 Fixture 3 Fixture 4 Fixture 5 Original Value 50 50 50 50 50 New Value 30 35 40 45 50 Change in Value -20 -15 -10 -5 0 Fan V Mode When several fixtures are selected and a fixture parameter is adjusted using a control wheel, that parameter on each of the selected fixtures will increase or decrease by a different amount from their original values, depending on the fixture number. The value of the middle selected fixture will be locked. The fixtures either side of the middle fixture will be set to the same values to create a „V‟. Example – Fan V Mode (Fixture 3 locked): Fan Middle Mode When several fixtures are selected and a fixture parameter is adjusted using a control wheel, that parameter on each of the selected fixtures will increase or decrease by a different amount from their original values, depending on the fixture number. The value of the middle selected fixture will be locked. Example – FanMiddle Mode (Fixture 3 locked): Fixture Parameter Fixture 1 Fixture 2 Fixture 3 Fixture 4 Fixture 5 Original Value 50 50 50 50 50 New Value 40 45 50 55 60 ORB Series Operating Manual – Issue 2.0 Fixture Parameter Fixture 1 Fixture 2 Fixture 3 Fixture 4 Fixture 5 Original Value 50 50 50 50 50 New Value 70 60 50 60 70 Change in Value +20 +10 0 +10 +20 Page 135 Advanced Programming Colour Edit Modes As there are two main methods of colour mixing supported on the ORBs – CMY and RGB mixing, remembering which parameter you need to adjust to create a particular colour can sometimes be challenging. In order to combat this, ZerOS treats all colour mixing fixtures in the same way, presenting just a single colour „space‟ on both the wheels and on-screen. This allows you to adjust a mixed lighting rig of additive (RGB) and subtractive (CMY) fixtures as one entity. To change the mode displayed on the wheels, hold down SETUP and press COLOUR, then select the COLOUR EDIT MODE from the onscreen menu. Knockout Function The {Knockout} syntax key releases the selected fixtures completely from any running cue stacks, submasters, UDK‟s or the programmer. To knockout a fixture, select the fixture(s) and press the [Knockout] key on the touch screen. Park Function A „parked‟ fixture is one for which all it‟s DMX output values are frozen, and cannot be adjusted, until such a time as the fixture is unparked. In the Output Window a parked fixture is indicated by having the text [PK] displayed in front of the fixture name, for example [PK] MAC 700 [701], and a red background in „Channel‟ view. To Park a fixture, select the fixture and press the {Park} syntax key. Whilst a fixture is parked, it is still possible to modify the values associated with the fixture in cues, palettes etc but the output values from the desk will not change. To unpark a fixture select it and press the {Unpark} syntax key The unparked fixture will jump to its currently defined parameter levels. Rem Dim Function A Rem Dim (Remainder Dim) function which is often helpful when focussing lamps and fixtures is provided on the desk. The function works as follows: Figure 98 - Colour Edit Mode All cue data is stored as CMY values, regardless of what colour edit mode is selected, so switching the mode will not change the output data, only the display of this data. Page 136 Select the fixture(s) required. Hold down the SHIFT key and press the FULL key. If the selected fixture(s) intensity level is 0%, it is set to 100% and tagged. ORB Series Operating Manual – Issue 2.0 Advanced Programming If the selected fixture(s) intensity level is > 0%, it is tagged and remains at that level. All unselected fixtures have their intensity level tagged and set to 0%. Fade and Delay Times As well as the actual output levels, each fixture parameter also has it‟s own fade and delay times which are recorded when the channel data is recorded into a cue or directly as channel data onto a submaster or UDK. The default fade and delay times for Intensity, Colour, Beamshape and Position are defined in Desk Setup, and can be adjusted if required, prior to programming cues. The parameter fade and delay times are displayed in the Fade and Delay views of the Output Window. After selecting the required fixtures, the parameter fade times can be adjusted using the control wheels, in the same way as the output values, or they can be edited directly in the Output Window. Use the cursor keys to select a field in the table. Press the ENTER key, enter the fade time using the numeric keypad or external keyboard, then press ENTER. Delay times are edited in the same way as fade times. Fade Time Commands The following commands can be used to set the fade times for the selected fixtures in the programmer: TIME X ENTER Sets the fade times for all fixture parameters to X seconds TIME U/D ENTER Sets the intensity fade up and fade down times to U and D seconds respectively TIME X DELAY Y ENTER Sets the fade time for all parameters to X and the delay to Y ORB Series Operating Manual – Issue 2.0 TIME COLOUR X ENTER Sets the fade times for all colour parameters to X seconds TIME BEAM X ENTER Sets the fade times for all beamshape parameters to X seconds TIME POSITION X ENTER Sets the fade times for all position parameters to X seconds. TIME U/D COLOUR X BEAM Y POSITION Z ENTER Sets the intensity fade up and fade down times to U and D, the colour fade times to X, the beamshape fade times to Y and the position fade times to Z. Try Cue Function Whenever a cue is recorded or loaded into the programmer, the current state of the outputs is stored as a reference. If you change the scene in the programmer, pressing the TRY CUE key once will take the outputs back to the previous recorded output state. The LED in the key is lit. Pressing the TRY CUE key again plays back the new look back over the corresponding times (default or recorded times depending on what data was in the programmer). While the outputs are fading the LED in the TRY CUE key flashes, and when the fade is complete the LED goes out. This gives a great way of previewing the timing on cues prior to programming them into a cue. Try Cue can be used as many times as required before the scene is finally programmed. Highlight Function The Highlight function provides a quick method of locating a fixture (or fixtures) and then allowing the position to be adjusted without tagging any of the other parameters. This can be particularly useful when creating position palettes (see page 95). Select the required fixture(s) and then press the SHIFT and HOME keys. This will set all the outputs of the currently selected fixtures, except for Pan and Tilt to their home values (defined in Edit Fixtures). Page 137 Advanced Programming While a fixture is highlighted only the Pan and Tilt parameters can be edited using the wheels. Adjust the pan and Tilt values as required, and then press SHIFT and HOME again to un-highlight the selected fixture(s). The other fixture parameters will return to their previous output level. Home Function The Home function provides a quick method of setting fixture parameters to their „home‟ position, ie brightness to full, colour to white, no gobo, no prisms, shutter open, pan/tilt to mid-position etc. The homed parameters are automatically tagged. Select the fixture(s) required, then enter one of the following commands: Copying Fixture Data You can copy fixture data from a programmed cue or from another fixture in the programmer. The data for all fixture parameters can be copied, or just those for a particular attribute by using the following commands: 1 @ CUE C ENTER Copies all the fixture parameter values from the cue C to fixture 1. 1 @ S/C ENTER Copies all the fixture parameter values from the cue S/C to fixture 1. 1 COLOUR @ S/C ENTER Copies the colour fixture parameter values from cue S/C to fixture 1. 1 COPY TO 2 ENTER Copies all the fixture parameter values from fixture 1 to fixture 2. 1 BEAM COPY TO 2 ENTER Copies the beamshape parameter values from fixture 1 to fixture 2. 1 COPY TO 2 THRU 10 ENTER Copies all fixture parameter values from fixture 1 to fixtures 2 to 10. 1 COPY TO GROUP N ENTER Copies all fixture parameter values from fixture 1 to the fixtures in group N. HOME (homes all fixture parameters; removes all effects) COLOUR 0 ENTER (homes colour parameters; removes colour effects) BEAM 0 ENTER (homes beamshape parameters; removes beamshape effects) POSITION 0 ENTER (homes position parameters; removes position effects) EFFECTS 0 ENTER (removes all effects) Page 138 ORB Series Operating Manual – Issue 2.0 Other Features Remote Remote Devices A number of different devices can be connected to an ORB series console using the Ethernet connection. Using specially designed applications, these devices provide remote monitor and remote control functionality. For information on connecting the devices, see page 77. Windows Remote Monitor The Windows Remote Monitor is an application found on the CD supplied with the desk. It can also be downloaded from the Zero 88 website. Once installed, the application will startup and detect any ORB series desks connected to the PC Figure 99 - Connecting the Windows Remote Monitor ORB Series Operating Manual – Issue 2.0 Select the desk you want to connect to, and then select the mode from the dropdown box. There are two modes for the Windows Remote Monitor – „Monitor‟ and „Handheld‟. In Monitor mode, you can emulate any of the 5 desktops, plus an emulation of the front panel of the desk to allow you to enter syntax. In Handheld mode, you get the same screens as the iPhone / Windows Mobile remote. Select the desk you wish to connect to, and the mode you wish to connect in, and press the Connect button. Handheld Mode The dropdown box at the bottom of the window allows you to select a different screen of the remote. Page 139 Remote There are various different options including the Palettes windows, Output Window and Wheels view. Each view has the dropdown box at the bottom to select a new view. Page 140 The coloured LED at the bottom of the window indicates the connection status – should the connection fail for whatever reason, this will first turn yellow and then red. After 20 seconds, the screen will change to show that the connection has failed: ORB Series Operating Manual – Issue 2.0 Other Features In this situation, Disconnect the remote by pressing Disconnect and then try connecting again. Monitor Mode When you connect using Monitor mode, the desk first asks you which Desktop you would like to view. There are 7 choices – Desktop 1 to 5, Panel and Wheels. After selection your choice, the desk will connect and display your chosen screen. Each Desktop displays the windows contained within it, so setting the Remote Monitor to Desktop 3 will give you a third monitor on which to display windows (likewise Desktop 4 and 5). Using Desktop 1 and 2 will show the outputs from the two VGA connectors on the back of the console, assuming these have been left as Desktop 1 and 2. ORB Series Operating Manual – Issue 2.0 Page 141 Remote iPad Remote Monitor The iPad app is available from the iTunes Store and can be purchased in the same way as any other iPad application. Once installed, the iPad must be connected to a wireless network, shared with the desk. Start the iPad app using the shortcut icon The app will start and ask you to select a desk to connect to - Once a desktop has been selected, the remote application will connect and display the monitor screen selected. Rotating the iPad will rescale the monitor window as required. Select your desk and the connection will be made. Just like the Windows Remote Monitor, the iPad connects and emulates the monitor screens from the ORB. Again, you must select the Desktop you wish to view. Page 142 ORB Series Operating Manual – Issue 2.0 Other Features To change which Once the screen is selected, the iPad will redraw the monitor screen iPod / iPhone Wireless Remote Windows Mobile Remote desktop is being displayed, press the Desktop button in the bottom left of the screen and select a new view screen. ORB Series Operating Manual – Issue 2.0 Page 143 Remote Other Features Windows The ORB allows you to display a number of different windows on the touch screen and monitor screen(s) and to open, select, move, resize and delete windows, as required. A window displayed on a monitor can be full-size, half-size or quarter-size, and can be displayed in a number of different positions, as illustrated below: 1. Full Screen 2. Half Screen (Left) 6. Quarter Screen (Top Left) 7. Quarter Screen (Top Right) Page 144 3. Half Screen (Right) 8. Quarter Screen (Bottom Left) 4. Half Screen (Top) 5. Half Screen (Bottom) 9. Quarter Screen (Bottom Right) ORB Series Operating Manual – Issue 2.0 Other Features Screen Navigation Keys The screen navigation syntax keys are used for selecting, moving, sizing and closing windows on the monitor displays as follows: VIEW - Used in the command syntax for user view functionality and also for displaying the screen navigation syntax keys {CLOSE} - Closes the selected (active) window. {SCREEN} - moves the selected (active) window to the other monitor display or touch screen. {SIZE} - Resizes the selected (active) window by cycling through the display options. {SELECT} - Selects a window by cycling through the windows on the monitor displays. Once a view has been defined, it is possible to store and recall this view using syntax. See page 150 for details. Mouse Operation on Windows Figure 100 - Monitor Display with 4 windows You can also use a mouse to navigate around the various windows on the monitors. At the bottom of the monitor display is a bar where shortcut buttons appear for all the windows on that screen. Click on these buttons to force the windows to come to the front of the view. Right clicking with the mouse switches the mouse pointer between the monitor outputs. ORB Series Operating Manual – Issue 2.0 Page 145 Other Features Trackball Preview Cue Window The Trackball on ORB can be used for two key functions – on-screen navigation, and Pan/Tilt manipulation. The contents of a programmed cue can be seen by displaying the Preview Cue Window on the monitor. Click on the [Cue Details] soft key in the Cue Stack Window or enter the following command: The default mode for the trackball is for On-Screen navigation and in this mode the two outer buttons above the trackball have their LEDs lit to indicate this mode. Moving the trackball moves the on-screen mouse. Pressing the LEFT trackball button „clicks‟ an on-screen object, such as a button, to allow manipulation of the monitors and data fields. Pressing the RIGHT trackball button moves the on-screen mouse pointer from Monitor 1 to Monitor 2 and back. This behaviour mimics that of an external mouse. Pressing the MIDDLE trackball button puts the trackball into „Pan/Tilt‟ mode. In Pan/Tilt mode moving the trackball moves the selected fixtures position according to the direction of travel. This also puts the fixture wheels into Position mode so that the adjusted position can be read on the LCD screens above. When the trackball is in Pan/Tilt mode, holding the middle button and pressing either LEFT or RIGHT trackball buttons locks the Pan or Tilt respectively. This gives finer control of positioning. Pressing the middle button again unlocks Pan or Tilt. Pressing the LEFT or RIGHT trackball button in Pan/Tilt mode switches back to mouse mode. VIEW S/C ENTER (S = stack number, C = Cue number) VIEW CUE n ENTER (N = cue number) The Preview Cue Window is the same format as the Output Window and shows what is programmed in the specified cue on a fixture by fixture basis. As with the Output Window there are three different views allowing the user to see the parameter values, fade times or delay times. The [Previous] and [Next] buttons can be used to view the cues in sequence., and the [Current Cue]/[Next Cue] buttons allow you to lock the preview window onto a particular cue. When you enter the syntax VIEW S/C ENTER, or VIEW CUE N ENTER, the ORB automatically goes into Blind Mode to aid blind programming. This is a special mode where pressing UPDATE will automatically update the cue you are previewing with the contents of your blind programmer. The fixture parameter data in the window is colour coded to identify level changes between previous cues and the cue you are viewing. For the first cue in the stack, the values are coded relative to the highlight values of the fixture parameters: Blue Green Red Magenta Page 146 The parameter is programmed and it‟s value has increased. The parameter is programmed and it‟s value has decreased. The parameter is programmed at the same value as previous (blocked). The parameter is not programmed in this cue and it‟s value has tracked from a cue earlier in the cue stack. ORB Series Operating Manual – Issue 2.0 Other Features Preview Palette Windows The contents of a palette can be seen by displaying the Preview Colour Palette Window, Preview Beamshape Palette, Preview Position Palette or Preview Effects Palette on the monitor by entering the following command: VIEW <attribute> N ENTER POSITION or EFFECTS) (<attribute> = COLOUR, BEAM, The Preview Palette Windows are the same format as the Output Window and show what output levels are programmed in the specified palette on a fixture by fixture basis. The [Previous] and [Next] buttons can be used to view the palettes in sequence. Figure 101 - Preview Cue Window Figure 102 - Preview Palette Window ORB Series Operating Manual – Issue 2.0 Page 147 Other Features Preview Group Window The contents of a group can be seen by displaying the Preview Group Window on the monitor by entering the following command: VIEW GROUP N ENTER. The Preview Group Window lists all the fixtures that are contained in the selected group in the form of a table, displaying the fixture name, user fixture number, Manufacturer and Fixture Type. Preview UDK Window The contents of a channel data UDK can be seen by displaying the Preview UDK Window by entering the following commands: VIEW <UDK> The [Previous] and [Next] buttons can be used to view the groups in sequence. Figure 104 – Preview UDK Window The Preview UDK Window shows what is programmed in the specified UDK on a fixture by fixture basis. The [Previous] and [Next] buttons can be used to view the UDKs in sequence. Figure 103 - Preview Group Window Page 148 ORB Series Operating Manual – Issue 2.0 Other Features Preview Macro Window The commands programmed into a user defined macro can be seen by displaying the Preview Macro Window on the monitor by entering the following command: VIEW MACRO n ENTER The [Previous] and [Next] buttons can be used to view the macros in sequence. Active Playback Window The Active Playback Window is displayed on the monitor by pressing the [Active Playback Window] soft key in the Output Window. This window shows all the currently active playbacks (Page Number, Playback Number, Stack Number, Master Fader Level, Current and Next cues). DMX Output Window The DMX Output Window displays the outputs of all 512 channels from one of the four DMX universes. Soft keys are provided in the window to select which universe to view. To display the DMX Output Window on the monitor press the [DMX Window] soft key in the Output Window. Figure 105 - Preview Macro Window ORB Series Operating Manual – Issue 2.0 Figure 106 - DMX Output Window Page 149 Other Features User Views The ORB desk provides the facility to save up to 999 user defined views. A User View defines the configuration of the windows displayed on the two monitors, for example: Recalling a User View Any of the recorded user views can be recalled by entering the command: VIEW N ENTER Deleting a User View To delete a user view enter either of the following commands: VIEW n DELETE DELETE VIEW n ENTER Storing a User View onto a UDK Figure 107 - User Views To store a user view onto a UDK, enter the syntax: VIEW n RECORD <UDK> Recording a User View Pressing this UDK will activate the selected view. Set up the monitor displays with the required windows. RECORD VIEW n ENTER A popup will ask you to choose whether you want to Record All windows or just the visible ones. Select the [Record All] or [Record Visible] option as required. If the selected view contains a recorded view an overwrite warning message is displayed allowing you to confirm the overwrite or cancel the operation. Page 150 ORB Series Operating Manual – Issue 2.0 Other Features Spare Button or a suggestion for a feature which is not currently included in the ORB or any of our other range of consoles, visit the Zero 88 Product Support Forum and make a post. Both the ORB and ORB XF offer a user assignable, blank, „spare button‟ within the keypad. This button can be used to as a shortcut key to any function not already assigned to a hardware button on the desk. For example, you may wish to assign it as a REM DIM button to speed up rig checks. By holding SHIFT and pressing the button, a further secondary function can also be assigned to the key. To assign the function, hold down SETUP and press the blank key. Figure 109 - Zero 88 website Figure 108 - Spare Button Configuration Select the drop down menu for the mode you wish to modify (normal or shifted) and select the function you wish to assign to the button. Software Updates When software updates become available for the ORB, announcements will be posted on the Zero 88 Product Support Forum which can be accessed via the Zero 88 website. Zero 88 consoles have a long history of user-inspired development. If you have any questions on the operation of the desk, bug reports ORB Series Operating Manual – Issue 2.0 Page 151 Glossary Glossary This section of the manual contains a list of terms used with the ORB desk: number of modifiers which determine how it runs. 802.11b The wireless standard which most Wireless Enabled devices can communicate with. 802.11b uses the 2.4GHz radio spectrum. Wireless DMX systems often use 802.11b for communication. Command Line The area of the touch screen which displays commands as they are entered by the user. Commands can be entered using front panel keys, soft keys, control wheels, external keyboard or mouse. Alignment A function in Setup which allows the user to invert pan and/or tilt or swap pan/tilt parameters for individual fixtures. Control Wheel ArtNet™ Artistic License network protocol. This is the Artistic License DMX over Ethernet protocol. The three control wheels on the desk are used to adjust fixture parameter and other data levels. The parameters assigned to the control wheels are shown on the touch screen. Cue The basic element for storing fixture parameter levels and times. Cues can be played back via manual or master playbacks or they can be assigned to UDK’s. Cue Stack See Stack. Details An option on the Preview and Output Windows which allows the user to see fixture parameter values as text descriptions rather than percentage or DMX values. DHCP Dynamic Host Configuration Protocol. Generally DMX over Ethernet systems should not use DHCP, but should be manually configured. Dimmer One discretely controlled device or parameter of a device out of 512 possible in the DMX512 protocol. Sometimes also referred to as “Address”, “DMX Channel” or “Output Channel” Attribute A group of fixture Parameters. On the ORB these are Colour, Beam, Position and Effects. Auto Group A group that is automatically created by the desk. Auto Palette A colour, beamshape, position or effect palette that is automatically created by the desk. Blind Modifying the program data within the desk without affecting the outputs. Blackout This key sets the outputs of all fixture intensity channels to 0%. Brightness See Intensity. Chase A complete cue stack can be turned into a chase. A chase is a series of cues which are played back automatically. A Chase has a Page 152 ORB Series Operating Manual – Issue 2.0 Glossary Direction The Chase modifier which determines which order the steps are output when a Chase is run. DMX Digital MultiPlex. The equipment responds to. DMX-512 Standard communications protocol for moving heads and dimmers. 512 channels of control are digitally multiplexed and sent down a cable to fixtures, which listen for their specific data, according to their start address. protocol most The Chase modifier which determines what triggers each step. Effect A mathematical function (sine, cosine, ramp etc) which can be applied to one or more fixture parameters. The ORB desk provides a number of standard effects. Ethernet Many modern lighting consoles use Ethernet as a medium for transmitting DMX lighting control data using protocols such as Art-Net. This allows lighting data to be carried over existing wiring infrastructure. When controlling multiple fixtures, the ability to spread the data relative to a start point, so that some fixtures values change upwards, whilst others change downwards. This can be used to create visual effects such as rainbows or arches with a line of fixtures. Fixture A parameter or combination of parameters all found within the same unit, for example a Mac 500 or a Parcan. Flash Pressing the flash button results in a temporary increase in brightness of the output. The intensity channels are sent to their programmed value when the Flash button is pressed. This is a temporary action which is removed when the button is released. Flash ORB Series Operating Manual – Issue 2.0 Flashdisk A USB device with storage capabilities. The ORB is supplied with a 32mb USB Flashdisk. Full Key that sets the Intensity of the selected fixture(s) to 100%. Grand Master This fader on the front panel controls the final output values of all fixture intensity channels. Group A collection of fixtures. Groups can be Master Groups, Auto Groups or User Defined Groups. Highlight A function which automatically puts a fixture into Open White, No Gobo, Shutter Open and the Dimmer at 100%. This function can be turned on or off via the HIGHLIGHT key. Parameters which are Highlighted are not tagged. Highlight is most often used for editing the position of a fixture. Home Fixtures are said to be at “Home” when their pan and tilt are at 50% with an open white beam at full intensity. The shortcut for Home is SHIFT + HIGHLIGHT. Homed parameters are tagged automatically. Intensity How bright a fixture is. Brightness or Dimmer. IP Internet Protocol. IP Address The unique identifier for a device communicating on an IP Network Jump An instruction in a cue memory which tells the cue stack to select another cue as the next one. This is used to bypass cues without deleting them. lighting Drive Fan Modes buttons can also be set to operate in Latch mode. Also known as Page 153 Glossary Knockout A syntax key that releases the selected fixtures from any running cue stack, submaster, UDK or from the programmer. LAN Local Area Network – a network between devices which are contained within an area Latch A function of UDKs, which enables them to have a two stage action. The first press to activate (on), a second press to deactivate (off). Macro Master Group A series of commands, triggered from a single button press or activated when a cue is triggered. A Group of fixtures that is automatically generated by the desk based on the fixture schedule. Master Groups are displayed in a toolbar on the touch screen when the GROUP key is pressed. Palette Programmed fixture data, normally of a single Attribute which is used in programming Cues, submasters and UDKs. Palettes are nominally grouped into the attributes Colour, Beamshape, Position and Effects. Parameter An individual function within a fixture, controlled by one or more DMX channels (Dimmer, Colour, Gobo, Focus, Pan, Tilt etc). PDA Personal Desktop Assistant – a palm sized pocket computer, capable of connecting to a ZerOS console via a wireless system Playback An area within the desk for in sequence. The ORB desk which can be on any of playback has its own Go, buttons, as well as a master Pause A method of temporarily halting a cue stack that is running. Release Remove control of parameters from a playback, submaster or UDK to allow another area of the desk to regain control of the parameters. playing back cues has 10 playbacks, 100 pages. Each Pause and Flash level fader. MFF A Multi Function Fader – one that can be assigned to a number of functions. ORB XF has 60 of these. Modifiers A number of parameters which determine how a Chase is output. Chase modifiers are Drive, Direction, Speed, Fade and Shots. RJ45 Registered Jack 45 – the connector used for Ethernet, and occasionally DMX. Node An area of the desk which can have possession over the parameters of fixtures. sACN Streaming ACN – a DMX over Ethernet standard, also known as ESTA Standard E1.31. Page A set of 10 Playbacks. The ORB has 100 pages of playbacks. Shift Park The function that freezes a fixture‟s DMX output values. Patch The fixture schedule which shows what fixtures are assigned and what DMX output addresses they are patched to. A key on the front panel which is used in conjunction with a number of other front panel keys to provide a wide range of additional functions, for example, opening windows on the monitor screens. Shots The Chase modifier which determines how many times a Chase will run after being triggered. Page 154 ORB Series Operating Manual – Issue 2.0 Glossary Speed The Chase modifier which determines how fast a Chase runs. Stack A stack (or cue stack) is a group of cues in sequence. On the ORB desk, there are 1000 user programmable Cue Stacks. SubNet A group of 16 consecutive DMX universes is referred to as a sub-net when speaking about an Art-Net system. Not to be confused with the subnet mask. Switch A device which takes the Ethernet data from multiple devices and sends it to other such devices. Tagging Trigger Try Cue The method of marking parameters to be programmed. Only Tagged parameters are recorded. Tagged parameters are shown in the Output Window. The method by which a Cue is output. Triggers can be set to GO button, automatic, Real Time, SMPTE Time, MIDI Time or CD Time. A function that allows you to see the transition from a previous state to the current state before recording the data into a cue. ORB Series Operating Manual – Issue 2.0 UDK User Defined Key. The bank of buttons top right of the control surface which can be assigned as a number of different functions. Universe 512 addresses or slots of control information as conveyed by DMX512 protocol. As a lighting system may have more than 512 discrete things to control, multiple universes may be required. When this is the case, the Universe number is expressed as a subnet (0-15) and universe number (0-15), giving 256 possible Universes on a network Unpark The function that unfreezes a fixture‟s DMX output values. USB Universal Serial Bus. A standard transfer and storage of information. VGA Video Graphics Array. The monitor outputs on the back of the ORB output as XGA. ZerOS The operating system running on Zero 88s top range consoles Zero 88 The manufacturer of the ORB desk. for Page 155 the Technical Specification Technical Specification Mains Inlet Connections The desk is fitted with an IEC320-C14 Mains Inlet and power on/off switch on the back panel. 90-264V AC ONLY 47-63Hz, 200VA (2A) INTERNALLY FUSED. A GOOD EARTH CONNECTION IS ESSENTIAL The internal fuse is not user replaceable, contact an authorised service agent if the desk does not power up and you suspect that the fuse has failed. The ORB is supplied with a bare ended mains lead, which should be connected as follows: Brown: Live (Hot) Blue: Neutral Tip Left Channel Ring Right Channel Sleeve 0V Signal Ground Remote Input An 8 pin DIN connector providing 6 remote switches (common ground). Short pin to 0v to simulate a button push. Warning – Do NOT connect anything to the undefined pin. Pin Remote Switch Green/Yellow: Earth 1 Switch 6 The supply cord must be protected to a maximum current of 10A. If in doubt consult a qualified electrician. 2 Switch 1 3 Switch 2 4 Switch 3 5 Switch 4 6 Switch 5 7 Not Used 8 0V Common Ground Audio The desk has three audio ports on the rear panel (line in, line out and sound to light input) as stereo ¼ inch jack sockets. The line in and out functions are not currently implemented in software. Page 156 Socket ORB Series Operating Manual – Issue 2.0 Technical Specification SMPTE CAN Port 3 pin XLR input and output. Output 0dBm. Input 0dBm +/- 10dBm. 47 kOhm input impedance. Maximum 50V RMS. The desk also has a CAN port and is capable of supporting iCAN or ChilliNet messages. Connector Pin Description 1 Signal Ground 2 Output Ethernet The desk is fitted with an RJ45 Ethernet port and is capable of supporting various Ethernet protocols. USB Ports 3 Input MIDI Four external USB ports are fitted on the desk. One located on the front panel and three on the rear panel. These support the USB 1.1 standard. Keyboard & Mouse 2 x 5 pin DIN connectors providing MIDI input and MIDI thru. Connector Pin MIDI Input MIDI Thru 1 Not Used Not Used 2 Not Used Signal Ground 3 Not Used Not Used 4 Opto Isolated Input Output 5 Opto Isolated Input Output Video Output 2 x 15 pin D connector, XGA resolution output. ORB Series Operating Manual – Issue 2.0 Can be added via USB 1.1. An internal trackball (IP65 rated) is supplied to aid with on-screen navigation. Touchscreens Can be connected via USB ports. Please see page 58 for information on connecting and supported touchscreens. External Storage Devices The primary method of storage for the ORB is via USB Memory Sticks (also known as Flash Disks or Mass Storage Devices). These can be connected via the USB 1.1 ports. AV Port The desk also has a 9 pin D-type RS232 – for future use. Page 157 Technical Specification Desk Light DMX Output 3 pin XLR socket, 12V dimmable under processor control, maximum 5W. Before connecting a lamp, check the polarity matches the desk, especially when using LED based desk lamps which are sensitive to incorrect connectivity and can cause damage to both the lamp and the desk. Four DMX universes each consisting of 5 pin XLR, isolated, with voltage protection and data output indicator. Data on channels 1 – 512 only. RDM Ready. Connector Connector Pin Number DMX Output Pin Description 1 Signal Ground (0V) 1 Not Connected 2 DMX Drive Complement (1-) 2 0V 3 DMX Drive True (1+) 4 Not Connected 3 +12V 5 Not Connected Kensington Lock DMX Input A Kensington style Lock slot is provided on ORB for securing the desk to an operating location, using a standard laptop lock cable. 5 pin XLR isolated, with voltage protection. Data on channels 1 512 only. Connector Page 158 Pin Number DMX Output 1 Signal Ground (0V) 2 DMX Drive Complement (1-) 3 DMX Drive True (1+) 4 5 Operating Environment Physical Dimensions : 201mm(H) x 1000mm(W) x 462mm(D) At least 100mm should be left clear each side of the air vents on ORB in order to ensure optimum cooling Not Connected Weight : 20kg Not Connected Operating Temperature Range : +5 to +40 °C Humidity : 5% to 95% Non condensing ORB Series Operating Manual – Issue 2.0 Troubleshooting Troubleshooting No DMX Output? If the selected fixture(s) have a Shutter parameter, check that the shutter is open. If your fixtures and dimmers indicate that there is no DMX output, check the following: Some fixtures also have control of the lamp remotely – try sending the Lamp On Macro command (see page 130) to the fixture, if supported. The DMX Output port green LEDs should be flickering The dimmers and fixtures are patched correctly on the desk and that the DMX address and mode on the fixture itself match the settings on the desk Desk Setup / Outputs have been configured to output data Check the DMX cabling for cable faults, and ensure that a DMX terminator is present at the end of the chain Fixtures Not Responding? If your fixtures and dimmers are not responding to the desk, check: The dimmers and fixtures are patched correctly on the desk The fixtures are not Parked (select the fixtures and use {Unpark} softkey to unpark them.) The DMX Output port green LEDs should be flickering Desk Setup / Outputs and Network / Art-Net have been configured to output data correctly for your system No Intensity Output ? If the intensity output levels do not change when you adjust it (via a cue, submaster, UDK or the programmer), check: The GRAND MASTER fader is at full The BLACKOUT button is off Do you have the desk in Blind mode (press BLIND to exit)? ORB Series Operating Manual – Issue 2.0 Desk Does Not Boot Remove all USB storage devices from the desk Check Monitor 1 for information Hold SHIFT on a USB keyboard to get to diagnostic mode. Perform a Backup Desk State and email this to Zero 88 Hold SHIFT on a USB keyboard then clear show data If all else fails, reinstall the software as a last resort any error messages or warning Software Installation Problems Only the Zero88 memory stick supplied with the desk is guaranteed to work for software updates – other manufacturers of memory sticks may cause boot problems. Use the USB connector next to the Ethernet connector on the rear of the desk Unplug any other USB devices whilst installing software Front Panel not responding? If the front panel does not appear to be working correctly, check the following: Page 159 Basic Maintenance Is the desk fully booted (check monitor 1 for any errors which may have halted the boot)? Do you have the desk in Blind mode (press BLIND to exit)? Are the LEDs and LCD screens responding correctly? Power on the desk with SETUP held down to enter panel test mode. Hold F9 on an external USB keyboard if holding SETUP on the panel does not work. slave processor firmware is up to date (check in the Desk Information screen – anything highlighted in RED is out of date). Basic Maintenance The ORB is designed to be relatively maintenance free, however a few simple steps can prolong the life of your hardware. The internal backup battery requires replacing every 2-3 years. The console should give you a warning at startup when this battery is running low, however it is good practice to replace it after a couple of years anyway. Please contact a Zero 88 support agent for details on servicing the desk. Every month or so, gently wipe down the front panel with a non abrasive, non corrosive surface cleaner applied with a soft cloth. Always exercise care when cleaning over the LCD windows as these are particularly sensitive to abuse and the lacquer which covers these can be damaged through misuse. A can of compressed air can be used to clear our dust from the fader tracks and track ball. Do NOT use an oil based lubricant (such as WD-40) on faders as this will cause irreparable damage to your ORB. To keep your ORB in optimum condition, after every use, refit the Dust Cover supplied. Replacement dust covers are available from your Zero 88 distributor. Care should be taken when transporting ORB. Zero 88 are able to supply flight cases for the transportation of their consoles – the shipping crate which ORB is supplied in is intended only for one or two journeys, and should not be relied upon to keep the console safe for prolonged use. Always observe the operating environment information in the Technical Specification. If this environment is exceeded, it is likely that damage will occur to your ORB. Reporting a problem Before reporting a problem to Zero 88, please obtain as many of the following pieces of information as possible: All version info shown in Desk Information Showfile debug.dat file if the desk crashed. The desk will prompt you to save this to a USB memory stick on the next boot following a crash. Details of what you were doing at the time memory/sub/palette etc is affected which Support requests can be submitted through our support forum at http://support.zero88.com/forum/ or via email to [email protected] For more urgent requests, please contact Zero 88 by telephone on +44 (0)1633 838088 – 24 hour answer service available. If you have reported a problem by email or on the forum, please bear with us as our response may take a few days if your problem is complex. It is also worth checking other posts on the forum to see if the fault is already reported/fixed before contacting Zero 88. If you suspect that your problem is software related, please always check that you are running the latest software version and that all Page 160 ORB Series Operating Manual – Issue 2.0 Quick Reference Sheet Quick Reference Sheet Saving / Loading Patching Reset Desk SETUP [CLEAR OPTIONS] [RESET DESK] Add Fixture Save Show SETUP [FILES] [SAVE SHOW] Load Show SETUP [FILES] [LOAD SHOW] Leave Setup SETUP SETUP [PATCH] [PATCH WIZARD] <follow wizard> Edit Fixture Patch SETUP [PATCH] [EDIT FIXTURES] [PATCH] <edit as required> Delete Fixture SETUP [PATCH] [ADD FIXTURES] <select fixtures> <change quantity> Monitor Windows Palettes Output Window {SHOW OUTPUT WINDOW} Cue Stack Window SHIFT + CUE Create Auto SETUP [PATCH] [AUTO MENUS] Submasters Window SHIFT + SUB Palettes [CREATE AUTO PALETTES] Palette Windows SHIFT + COLOUR Access a colour COLOUR <enter colour palette no.> Or SHIFT + BEAMSHAPE etc palette ENTER SHIFT + MACRO Access Colour SHIFT + COLOUR <select colour picker Picker button> ENTER Store a colour palette <setup fixtures as required> RECORD COLOUR <enter colour palette number > ENTER Name a Colour COLOUR <enter number> NAME Palette <select name> ENTER Macro Window Group Window SHIFT + GROUPS Resize Window {VIEW} {SIZE} Close Window {VIEW} {CLOSE} Select Window {VIEW} {SELECT} Record View RECORD VIEW <number> ENTER Recall View VIEW <number> ENTER Calibrate Monitor SETUP [DESK [CALIBRATE] SETUP] [DISPLAYS] Effects – auto created first Apply an effect Dimmer Control Store an effect <fixture no.> FULL Channel at level <fixture no.> @ <level> ENTER Range of channels <fixture no.> THRU <fixture no.> @ Relative adjustment <fixture no.> @ + 10 ENTER CLEAR CLEAR REM DIM SHIFT + FULL # (fixture no.) ENTER Home Fixture HOME Dimmer control <Intensity Wheel> Position control POSITION <wheels> Colour control COLOUR <wheels> Beamshape control BEAMSHAPE <wheels> Home just Position POSITION 0 ENTER CLEAR + <move wheel> Untag a parameter CLEAR + <attribute> Fan a parameter SHIFT + <move wheel> Change Fan mode SETUP + COLOUR <Shifted Mode> <select> <OK> <setup an effect> REC EFFECT <enter EFFECT <enter number> NAME <enter <select fixture> EFFECT <effect number> HOME Cues Record a Cue <select stack> REC CUE <enter cue no> ENTER Playback a Cue CUE < enter memory no.> GO Delete a Cue <select stack> DEL CUE <enter cue no> ENTER [YES] Name a Cue <select stack> CUE<enter cue no> NAME <name> ENTER Set Fade Times <select stack> CUE <enter cue no> TIME <enter time> ENTER Set Delay Times CUE<enter cue no> TIME <enter time> ENTER (also COLOUR 0 ENTER, etc) Untag an attribute <select fixture> EFFECT <effect name> / ENTER Stop an effect Fixture Control Select Fixture be number> ENTER Name an effect <fixture no.> @ - 30 ENTER Clear selected fixtures must number> ENTER Channel at 100% Level palettes Wheel ORB Series Operating Manual – Issue 2.0 Release Stack <select stack> RELEASE Release all stacks SHIFT + RELEASE Quick Reference Sheet Submasters Groups Record a Create Auto SETUP [PATCH] [AUTO MENUS] Groups [CREATE AUTO GROUPS] Select a Group GROUPS <enter group no.> ENTER Store a Group <setup fixtures as required> REC REC SUB <enter sub no.> ENTER Submaster Playback Submaster a <via DMX In fader> or SETUP + <select stack> <choose Submaster mode> Delete Submaster a DELETE SUB <enter sub no.> ENTER ENTER Name Submaster a SUB <enter sub no.> NAME <enter name> ENTER Fade SUB <enter sub no.> TIME <enter time> ENTER UDKs SETUP [Desk Setup] [Inputs] <Submasters> Fixture UDK <fixture number> RECORD <UDK> Cue UDK CUE <number> RECORD <UDK> Set Times Configure DMX In Macros GROUP <enter number> ENTER Name a GROUP name> ENTER Channel UDK Create Auto Macros SETUP [PATCH] [AUTO [CREATE AUTO MACROS] MENUS] View Macros SHIFT + MACRO Lamp On Macro <select fixtures> MACRO macro number – normally 2> <enter Lamp Off Macro <select fixtures> MACRO macro number – normally 3> <enter Reset Macro <select fixtures> MACRO macro number – normally 1> <enter Record a Macro REC MACRO <enter macro number> ENTER <perform task> MACRO Play a Macro MACRO <enter macro no.> ENTER Link a Macro to a Cue <select cue> <highlight „Comments‟ cell> ENTER [MACROS..] <enter macro number> OK OK Link a Macro to a SHIFT + SUB <select sub> <highlight Submaster „Comments‟ cell> ENTER [MACROS..] GROUP <enter number> NAME <enter Data <setup scene> RECORD <UDK> Macro UDK MACRO <number> RECORD <UDK> Palette UDK COLOUR <number> RECORD <UDK> BEAMSHAPE <number> RECORD <UDK> POSITION <number> RECORD <UDK> EFFECTS <number> RECORD <UDK> Group UDK GROUP <number> RECORD <UDK> Setup UDK SETUP + <UDK> <enter macro number> OK OK Page 162 ORB Series Operating Manual – Issue 2.0 Appendices Fixture Types supported by ORB Fixture Library Release 21 <CONVENTIONALS> Dimmer Ellipsoidal Flood Fresnel Houselight Parcan Pebble Convex Profile RGB Dimmer Softlight <RELAY> 1 Channel 6 Channel <SCROLLERS> 1 Chan Scroller 2 Chan Scroller 3 Chan Scroller 4 Chan Scroller 6 Chan Scroller Lamp+1Ch Scroller Lamp+2Ch Scroller Lamp+3Ch Scroller ABSTRACT Club Colour Club Revolution Club Scan Colour Flood Colourchanger CED Futurescan 1 CE Futurescan II CE Futurescan III CE Futurescan III CED Galactic Moon IICE Galactic Star Gladiator CED Gladiator Revn Moon Ray Moon Scan Twister 4 VR8 (CE MODE) VR8 (VR MODE) VR8R (CE MODE) VR8R (VR MODE) VRX Colour VR VRX Scan (CE) VRX Scan (VR) AC LIGHTING Tour Spot (M1) Tour Spot (M2) Tour Spot (M3) Tour Spot (M4) Tour Wash (M1) Tour Wash (M2) Tour Wash (M3) Tour Wash (M4) ACME iColor 3000 3ch iColor 3000 4ch iMove 250 Magic Gobo Rover Spot Knight Spot Queen (Full) Spot Queen (Split) Super Scimitar Supermodel Winner ORB Series Operating Manual – Issue 2.0 ADB Warp/M Warp/M+Scroller ADLITE Intellite 1 Intellite 2 Intellite Prof Litebounce II ALKALITE Octopod 30 Tracpod TP-81 3ch Tracpod TP-81 6ch AMERICAN DJ Accu Color 250 Accu Roller 250 Accu Spot 250 Accu Spot 575 Accu Wash 250 Active Scan 250 Active Wave 250 Auto Spot 150 Full Auto Spot 150Split Color 150 DMX Color 250 D Concept 1 Concept 2 Concept Color Deco 250 DJ Scan 250 DJ Scan/RG DJ Spot 250 Fab 4 Fascinator Fire Burst DMX Marvel Max Mighty Scan Orbitron Par 64 LED Pocket Scan Rainbow 250 RollerTron 250 Scan 250 Scan Tron Tri Fecta Ultra Scan 250 XP-3 AMP TOWN ACC Posi Spot ControlLitePML ControlLitePML(12) Washlight WL-HP (8 Bit) WL-HP (16 Bit) WL-HP Squarcle ANOLIS PowerArc 36 M1 PowerArc 36 M4 PowerArc 144 M1 PowerArc 144 M2 APOGEE Evo 1200 Spot Hi Evo 1200 Spot Lo Locohead 150 Virtual Scan 575 VirtuanScan 1200 VirtuanScan 1200Hi APOLLO UK Page 163 Appendices Climax Megatron Neutron Paradox Vortex APOLLO US Right Arm 8b+Sp+D Right Arm 8bit Right Arm 8bit +Sp Right Arm 8bit+Dim Right Arm 16b+Sp+D Right Arm 16bit+Sp Roto Q Smart Move INmode Smart Move RTmode Smart Move SMmode ARKAOS ArKaos Full ArKaos Maxi ArKaos Tiny Media Master LFull Media Master LMini Media Master LTiny Media Master MFull MediaMaster MSmall ARTICULITE HyperChroma MovingSpot 250 MovingSpot 575 MovingWash 250 MovingWash 575 8b MovingWash 575 16b ARTISTIC LICENCE Pixi Power SB (0) Pixi Power SB (1) Pixi Power SB (2) Pixi Power SB (3) AVR Page 164 Ledion AYRTON EasyColor (8) EasyColor (16) EyeColor2 (8) EyeColor2 (16) Moduled 3 Moduled 6 Moduled 9 Moduled 12 B+K Varytec Varytec 575 Pro BROTHER BROTHER EvenLED CAMELEON Telescan mark I Telescan mark III Telescan mark IV Telescan mark V CAPTURE Camera CAST WYSIWYG Camera CHAUVET 3D Magic Aurora DMX Color Tube Colorado 3 Colortrack 3 DJ Squeeze DMX Abyss DMX MegaStrobe DMX Mushroom DMX-3F Fascination Imagination Insignia Intimidator Kinta Lazer Scan LED Par 200B Legend 150R Legend 250RX Legend 2000 8bit Legend 2000 16bit Legend 3000 8bit Legend 3000 16bit Legend 5000 8bit Legend 5000 16bit Legend 6000 Wash 8 Legend 6000 Wash16 Legend 6500 Advanc Legend 6500 Basic Mini Legend Mini Legend Wash Mushroom DMX Omega 250 C Omega I Omega II Orbiter RG Patriot PhotonGeneratorDMX Q Mix Q Spot 200 Advance Q Spot 200 Basic Q Spot 250 Q Spot 575 Q Spot M1-N Q Spot M1-Y Q Spot M2-Y Q Spot M3-Y Q Wash 575 Sensation Stage Mover Technoscan 250R Trackscan 250R CHROMA Q Cascade (Creative) Cascade (Library) ColourBlock DB4 M1 ColourBlock DB4 M2 ColourBlock DB4 M3 ColourBlock DB4 M4 ColourBlock DB4 M5 ColourBlock DB4 M6 ColourBlock DB4 M7 ColourBlock DB4 M8 ColourBlock DB4 M9 Rotator 1ch Rotator 2ch CITY THEATRICAL Autoyoke 8-bit Autoyoke 16-bit Autoyoke 16-bit +S DMX Iris EFX Plus2 EFX Plus2 + Dimmer CLAY PAKY Alpha Beam 300 Std Alpha Beam 300 Vec Alpha Spot 300 Std Alpha Spot 300 Vec Alpha Spot 575 16b Alpha Spot 575 Ext Alpha Spot 575 Std Alpha Spot 700 16b Alpha Spot 700 Ext Alpha Spot 700 Std Alpha Wash 300 Std Alpha Wash 300 Vec Alpha Wash 575 16b Alpha Wash 575 Ext Alpha Wash 575 Std ORB Series Operating Manual – Issue 2.0 Appendices AlphaProfi1200 16V AlphaProfi1200 ExV AlphaProfi1200 StV AlphaProfil1200 16 AlphaProfil1200 Ex AlphaProfil1200 St AlphaSpot HPE 300S AlphaSpot HPE 300V AlphaSpot575HPE16 AlphaSpot575HPEExt AlphaSpot575HPEStd AlphaSpot1200 16b AlphaSpot1200 16bV AlphaSpot1200 Ext AlphaSpot1200 ExtV AlphaSpot1200 Std AlphaSpot1200 StdV AlphaSpot1200HPE16 AlphaSpot1200HPEst AlphaSpot1200HPExt AlphaWash TH 16b AlphaWash TH Extn AlphaWash TH Std AlphaWash1200 16b AlphaWash1200 16bV AlphaWash1200 Ext AlphaWash1200 ExtV AlphaWash1200 Std AlphaWash1200 StdV AlpSpot1200HPE16bV AlpSpot1200HPEExtV AlpSpot1200HPEStdV AlpSpotEasy1200Ext AlpSpotEasy1200Std AlpSpotEasy120016b AlpWashEasy1200Ext AlpWashEasy1200Std AlpWashEasy120016b ORB Series Operating Manual – Issue 2.0 AlpWashHalo1000 16 AlpWashHalo1000 Ex AlpWashHalo1000 Sd AlpWashHalo1200Ex AlpWashHalo1200ExV AlpWashHalo1200Sd AlpWashHalo1200SdV AlpWashHalo120016 AlpWashHalo120016V Astroscan (9) Astroscan (14) Atlas Bazooka 4C Bazooka 6C ColorWave 300 CP Color 150E CMY CP Color 150E RGB CP Color 400 CMY CP Color 400 RGB CP Color 575 CMY CP Color 575 RGB Golden Spot 1200 GoldenColor1200CMY GoldenColor1200RGB Goldenscan 1 Goldenscan 2 Goldenscan 3 Goldenscan 3 Exp Goldenscan 4 Goldenscan HPE Miniscan Miniscan 150 Miniscan 300 Miniscan HP3 8 Miniscan HP3 16 Miniscan HPE Pinscan Point Point In Point MH (8bit) Point MH (16bit) Polycolor Rain Spot Silverado Silverado Alt Stage Profile 1200 Stage Profile SV Stage Scan StageCol1000 CMY8 StageCol1000 CMY16 StageCol1000 RGB8 StageCol1000 RGB16 StageCol1200 CMY8 StageCol1200 CMY16 StageCol1200 RGB8 StageCol1200 RGB16 StageColor 300CMY8 StageColor 300RGB8 StageColor300CMY16 StageColor300RGB16 StageColor575 8CMY StageColor575 8RGB StageLight300 8bit StageLight300 16bt StageZoom1200 CMY8 StageZoom1200 RGB8 StageZoom1200CMY16 StageZoom1200RGB16 StgColor575 16CMY StgColor575 16RGB Superscan Superscan Zoom 12 Superscan Zoom 16 Tiger MRG Tiger Multicolor Tiger Scan COEF Color Disco Color Show 200 Mini 250 MP 150 MP 300 MP 700 Wash EB MP 700 Wash MB MP 700 Zoom EB MP 700 Zoom MB MP250 Fresnel(8CH) MP250 Fresnel(9CH) MP250 Zoom (8CH) MP250 Zoom (9CH) Perform 200 Disco Perform 200 Show Perform 1200 Disco Performance250 6ch Performance250 8ch Performance250 9ch Sirio Sirio 150 Sirio 1800 6ch Sirio 1800 7ch Sirio 2500 6ch Sirio 2500 7ch Sirio Ray 6ch Sirio Ray 7ch COEMAR Broadway Cyc 2K CF 1200 Hard Edge CF 1200 Spot CF7 Hard Edge M1 CF7 Hard Edge M2 CF7 Hard Edge X M1 CF7 Hard Edge X M2 CF7 Wash Zoom CF7 Wash Zoom X Page 165 Appendices Colour Cyc 250 LX Comet Cyc Lite LED Digiscan Fiera 575 Fiera 575 EB Fiera 1200 Fiera 1200 EB iCyc 250 Infinity ACL S 8 Infinity ACL S 16 Infinity Spot S 8 Infinity Spot S 16 Infinity Wash S iProfile Flex iSpot 150 iSpot 575 iSpot 575 EB iSpot 1200 (8) iSpot 1200 (16) iSpot Flex iSpot1200 Extreme8 iSpot1200Extreme16 iWash 575 EB iWash Flex iWash Halo iWash LED KP 12 Microscan 2 575MSR Microscan 2 1000AL Microscan 3 575MSR Microscan 400 Microscan 400MSR Microscan 575 Microscan 650AL MiniUltraII 200MSD MiniUltraScan250AL MM DX Prism 8bit Page 166 MM DX Prism 16bit NAT MM 1200 DX NAT MM 1200/2500 NAT MM1200/2500DBL NAT PC 1000 NAT PC 1200/2500 NAT TM 1200 DX NAT TM 1200 HMI NAT TM 2500 Panorama Beam BBI Panorama Cyc 250 Panorama Cyc Power Panorama LED RGB ParLED Pro Spot 150 LX Pro Spot 250 Evo8 Pro Spot 250 Evo16 Pro Spot 250 LX Pro Spot 575 LX Pro Wash 250 LX Pro Wash 575 LX ProSpot 575 MB RegoLED Samurai StripLite LED RGBW Super Cyc TM DX Prism COLOR KINETICS ColorBlaze 48 M1 ColorBlaze 48 M2 ColorBlaze 48 M4 ColorBlaze 48 MA ColorBlaze 72 M1 ColorBlaze 72 M2 ColorBlaze 72 M3 ColorBlaze 72 M4 ColorBlaze 72 M6 ColorBlaze 72 MA iColor CONTEST Scn 320 COOLUX Pandora Camera Pandora Gradients Pandora Layers CYBERTECH Festoon Dimmer Festoon Time D TEK D-Mix D-Mix Pro D-Switch D-Switch Pro DHA DBL 6ch DBL 10ch DMX 2 LightTalk DTS Arc 250 Arc 400 Arc 575 (4ch) Arc 575 (8ch) Colour Changer Delta R (15ch) EasyScan Strobe M1 Strobe M2 Strobe M3 Titan Solo FC 6ch Titan Solo FC 9ch Titan Solo RGB10ch Titan Solo Wh 10ch X Image 575 XM1200 Spot XR4 Spot (13ch) XR4 Spot (17ch) XR5 Spot (15ch) XR5 Spot (21ch) XR5 Wash (16ch) XR7 Spot (8ch) XR7 Spot (10ch) XR7 Spot (16ch) XR7 Wash (8ch-8) XR7 Wash (10ch-8) XR7 Wash (10ch-16) XR7 Wash (14ch-8) XR7 Wash (16ch-16) XR8 Spot (16ch) XR8 Spot (20ch) XR8 Wash (16ch) XR9 Spot (18ch) XR9 Spot (26ch) XR250 Spot(8chan) XR250 Spot(10chan) XR250 Spot(14chan) XR250 Wash(8chan) XR250 Wash(10chan) XR250 Wash(16chan) XR700 Spot CMY 22c XR700 Spot CMY 31c XR1200 Wash XRLaserGreen(18ch) XScan 575 (9ch) XScan 575 (12ch) XScan 575 (15ch) Z1 (5ch) Z1 (6ch) Z1 (9ch) E CUE Calypso EFFECTS COMPANY CO2Jet ELATION Active Scan 250 ORB Series Operating Manual – Issue 2.0 Appendices Active Wave 250 CMY Zoom 250 Colour Spot 250 Design LED 36MH 10 Design LED 36MH 12 Design Spot 250 Design Spot 575E Design Wash 250 DesignLED12 Brick6 DesignLED12Brick15 Easy Color 8bit Easy Color 16bit Focus Spot 250 HZ-400 Joy 150 (Normal) Joy 150 (Program) Joy 300 (Normal) Joy 300 (Program) Krypton81 3ch Krypton81 6ch Mini Patend Pixel Drive Power Spot 250 Power Spot 575 Power Spot 575i Power Wash 250 PowerWash250 Basic Pro Color Proton Color Proton Star Stage Color C Stage Color CB Stage Color RGB Vision Color 250 Vision Scan 250 Vision Scan 575 Waterfall 250 X Fogger Xcelon 575 ELEKTRALITE Elektrik Eye mb150 mm150 my150 my250 my250w my575-2 my575w PaintCan ELEMENT LABS VersaDrive ELITE ServoColor250 (8) ServoColor250 (16) ServoColor575 (8) ServoColor575 (16) ServoSpot 250 (8) ServoSpot 250 (16) ServoSpot 575 (8) ServoSpot 575(16) ETC S4 Revolution EUROLITE LED ML 56 LED Par LED Par 64 LED Par 64 UV LED RGB Mix RGB Par (C+B Mode) RGB Par (Col Mode) RGB Par (RGB Mode) SuperStrobe TB-5 TC-5 TC-150 TC-200 ORB Series Operating Manual – Issue 2.0 TC-250 TC-300 TF-5 TG-5 TMH-155 TR-5 TS-2 TS-5 TS-7 TS-150 TS-155 TS-255 TW-150 EVL Colour Pack 250 Mini Spot 150 SA Mini Spot 150/250 Pro Color Pro Scan 150/250 Pro Spot 250 Pro Spot 575 Pro Strobe TB1500D Pro Wash 250 Pro Wash 575 Spin Viva 250S EXPOLITE ELP 60 Mode5 ELP 60 Mode6 FAL 360 4 Zoom 360 Colour 360 Laser Day Light 1200 EB DMX Colour Changer FAL 1000 8bit FAL 1000 16bit FAL 2000 Gyro 2 Nebula575/1200 OFF Nebula575/1200 ON Nocturno 2500 PF3603 (8 bit) PF3603 (16 bit) Primoscan Promo 2 Proscan 2 Proscan X Roulette 575 Roulette 1200 S-IMAGO 2500 Scan 575 Scan 1200 Starlight Supercleverscan Three Sixty FINE ART Fine 400 Spot Fine 400 Wash Fine 500 Spot Fine 500 Wash Fine 700 Spot Fine 700 Wash Fine 1500 Spot 16b Fine 1500 Spot Ext Fine 1500 Spot Std Fine 1500 Wash 16b Fine 1500 Wash Ext Fine 1500 Wash Std Fine 2000 Spot Pro Fine 4000 Fine 8000 Fine2000 4lite Fine2000 Spot Fine2000 Spot Enh Fine2000 Video Page 167 Appendices Fine2000 Wash Fine3000 Spot Hanging LED Moving Head LED Project LED V2000 HPE V2001 V2003 V2005 V2008 V2009 V2014 V2018 V2021 V2023 V2024 V2025 - FS V2028 - FS V2029 - FS V2031 V2032 V2033 V2042 V2048 V2049 V2080 V2081 V2082 V2083 V2088 V2088P FIVE STAR Spica 250M 8bit Spica 250M 16bit FLASH BUTRYM FL-575 Spot 8Bit FL-575 Spot 16bit FLY Page 168 FOS 1/2/3/4 FOS AF PHS-700 (8 bit) PHS-700 (16 bit) PHS-710 PHW 250 (16 Bit) PS/D-200PR (8) PS/D-200PR (16) PSC-575 PSC-1200 PSX-575 RT-150 RT-240 SC-240 SC-250 SC-370 SC-375 SC-380 SC-530 (8 bit) SC-530 (16 bit) SC-740 (8 bit) SC-740 (16 bit) SC-780 (16 bit) SC-980 (16 bit) ScanMSD200/H250MK FUNKY Daddy-O FUTURELIGHT Brilliant Flower CC-150 CC-200 Circle Cross Beam DF-250 DJ Color 200 DJ Head 575 Wash 8 DJ Head 575 Wash16 DJ Scan 200 DJ Scan 250 DJ Scan 600 Duke 1200 Eye-18 Eye-36 FX-150 Genesis H-150 MH-640 (8 bit) MH-640 (16 bit) MH-660 (8 bit) MH-660 (16 bit) MH-840 (8 bit) MH-840 (16 bit) MH-860 (8 bit) MH-860 (16 bit) Miracle PCC 1200 PCC-250 CMY PCC-250 Pro PHS-200 PHS-250 Pro PHS-260 S Spider TML-7 Voyager Wall Light G LEC G-Lec GENI Mizar 12 Mojo Spin Master I OBY 600 Wash (8) OBY 600 Wash (16) Oby 2000 Outline OBY-3 OBY-5 SA-5X Shiva (4 Channel) Shiva (6 Channel) GENIUS Micromega Motor Show Next Scan Next Scan RG Nexus Nexus 2 Nexus 3 Quasar Super Quark Super Quark MSD250 Topscan GLITES 300S 8bit 300S 16bit Lumiled 8bit Lumiled 16bit GLP Impression Compres Impression HiRes Impression Normal Joy 150 Joy 300 Junior Scan 1 Junior Scan 2 MAX Mighty Scan MiniPatend MiniStartTec II Patend Light 575 Patend Light 1200 Patend Light Basic PatendLight1200HMI Pocket Scan Startec 575/1200 ORB Series Operating Manual – Issue 2.0 Appendices Startec 2000 Ext Startec 2000 ExtII Startube 4 YPOC 250 YPOC 250 Basic YPOC 250 Color YPOC 250 Color Bas YPOC 250 L YPOC 250 Pro YPOC 575 Color YPOC 575 Pro YPOC 700 YPOC Color GREEN HIPPO Hippotizer DMXClub Hippotizer V2 Layr Hippotizer V2 Mast Hippotizer v3 Layr Hippotizer v3 Mast Hippotizer v3 PMas HippotizerStage M1 HippotizerStage M2 HippotizerStage M3 HStage Layer 1 M1 HStage Layer 1 M2 HStage Layer 1 M3 HStage Layer 2 M1 HStage Layer 2 M2 HStage Layer 3 M1 GRIVEN Acrobat 250FE (Hi) Acrobat 250FE (Lo) Acrobat 250PE (Hi) Acrobat 250PE (Lo) Acrobat 1200 PE Acrobat PE 575 (8) Acrobat PE575 (16) Colorway 3ch 1DMX Colorway 3ch 2DMX Colorway 5ch 1DMX Colorway 5ch 2DMX Compass Daisy In Daisy On Daisy Out Danube Dawn Daze Deck Dice Dive Dune Kaleido 3ch 1DMX Kaleido 3ch 2DMX Kaleido 5ch 1DMX Kaleido 5ch 2DMX Kolorado 2 KolorClip 150w KolorJet CMY KolorJet FixedCols Kolorstream (CMY) Kolorstream (F/C) Parade PopScan 8 PopScan 16 Scanvision Scanvision 2(8) Scanvision 2(16) Super Marine Bronz HIGH END SYSTEMS Catalyst DL.1 Catalyst DL.1 +Eye Catalyst Pro 3.2 Color Command Color Command +Dim Color Merge ORB Series Operating Manual – Issue 2.0 Color Power Color Pro Color Pro Enhanced Cyberlight Mode 1 Cyberlight Mode 2 Cyberlight Mode 3 DataFlash AF1000 DL.2 Global DL.2 Head DL.2 Layer IBeam V2 Set 000 IBeam V2 Set 010 Intellabeam 700(7) Intellabeam 700(8) Nebula SHOWGUN Studio Beam (Flat) Studio Beam (Full) Studio Color 250 Studio Color 575 Studio Command Studio Command H Studio Spot 250 Studio Spot 575 Studio Spot 575 Z Studio Spot 575CMY StudioSpot 575CMYZ Technobeam (Full) Technobeam (Red) Technobeam Iris Technopro (Full) Technoray (Full) Technoray (Red) Trackspot Trackspot 2 (8) Trackspot 2 (9) x.Spot x.Spot Reduced HUBBELL HX Spot HX Wash ISOLUTION iColor3 iColor4 iMove 5w iMove 250S 8ch iMove 250S 16ch iMove 250W 8ch iMove 250W 16ch iMove 575S 8ch iMove 575S 16ch iMove 575SP 8ch iMove 575SP 16ch iMove 575W 8ch iMove 575W 16ch iRock 4C iRock 7B JAMES THOMAS PixelBrick 22 3 PixelBrick 22 4 PixelBrick 22 4+E PixelBrick 22 12 PixelBrick 22 24 PixelBrick 22 24+E PixelEight 3 PixelEight 3 Mint PixelEight 3+E PixelEight 6 Mint PixelEight 6ch PixelEight 12 Mint PixelEight 12ch PixelEight 24ch +E PixelEight DMX PixelEight DMXMint PixelLine110 4+E PixelLine110 20+E Page 169 Appendices PixelLine522 Ef D PixelLine522 Ex35 PixelLine522 Max1 PixelLine522 Max2 PixelLine1044 9 PixelLine1044 27 PixelLine1044 Ef D PixelLine1044 Ex61 PixelLine1044 Max1 PixelLine1044 Max2 PixelPar 87 6xRGB PixelPar90 FX E1 PixelPar90 FX E1+ PixelPar90 FX E1E1 PixelPar90 FX E1E2 PixelPar90 FX E2 PixelPar90 FX E2+ PixelPar90 FX E2E2 PixelPar90 FXE1E1+ PixelPar90 FXE1E2+ PixelPar90 FXE2E2+ PixelPar90 Hi RGB6 PixelPar90 Lo RGB3 PixelPar90RGB3+M PixelPar9016bRGB6M JB LIGHTING Cartoon Laser JBLED A7 Comp8bt JBLED A7 Comp16bt JBLED A7 St8bt JBLED A7 St16bt Space Color Laser Twinbeam Laser Vary Color P3 Hog Vary Color P3 JB Varycol Stg1200HMI Varycolor 2000 New VaryColor7 Hg Mode Page 170 VaryColor7 JB Mode VaryLED3/84 HOG C VaryLED3/84 HOG S VaryLED3/84 JB C VaryLED3/84 JB S Varyscan 3 SP + 8C Varyscan 6 Varyscan P6 Varyscan Special Varyscan4 1200HMI Varyscan4 CP575HMI Varyscan4EV1200HMI Varyscan5MV1200HMI VaryScan7 VaryScanP3 VaryscanSpec Plus VScan 3 250MSD (6) VScan 3 250MSD (8) Winner II JEM AF-1 AF-2 Glaciator Hot 2000 Roadie ZR 22 DMX ZR 24/7 KINOFLO Koloris LAMPO Columbus 650 Columbus MSR 400RG Domingo Gemini Ghost Sintesi Swift (8 bit) Swift (16 bit) Vortex LASER SIM Laser LDDE SpectraWow+ LE MAITRE MVS Stadium Hazer LEADER LIGHT ProNeo Tour RGB ProNeo Tour RGB+D ProNeo Tour RGBW ProNeo Tour RGBW+D LED 3 Channels - RGB RGB PAR 575 Scarabeo 575 LEDJ Blockbuster 8 Color Burst Sound LED RGB 252 LED-56 LIGHT CONVERSE Camera LIGHTING INNOVATIO CXI Inno 4 Follow Spot Inno Four 36 Inno Four EFX Inno Four Par Motoryoke ADB 2kW MotoryokeP360 S4 Par LR S4 Profile TecLumen LIGHTING TECH Caterpillar LITEBEAM Swing II LOOK SOLUTIONS Unique Viper LYTE QUEST Motorhead MAC MA MAC MA MAD LIGHTING Imp Itm MAD Colour 211AP MAD Colour 211HP MAD Scan 411AP MAD Scan 411HP MAD Scan 611ARP MAD Star 311AP MAD Star 311HP MAD Star 511ARP Q Colour A/M Q Scan A/M Q Star A/M Scan 611A Star 511A MARTIN Acrobat Acrobat (Extended) Atomic 3000 (1 Ch) Atomic 3000 (3 Ch) Atomic 3000 (4 Ch) Atomic Colors (1) Atomic Colors (2) CX-2 (1 Channel) CX-2 (4 Channel) CX-4 (1 Channel) CX-4 (6 Channel) CX-10 Cyclo 03 ORB Series Operating Manual – Issue 2.0 Appendices Cyclo 04 DestroyerX250(1Ch) DestroyerX250(5Ch) Ego X4 Ego X5 Ego X6 Ext 600 Compact M1 Ext 600 Compact M2 Exterior 200 Exterior 600 (M1) Exterior 600 (M2) Exterior200 LEDHSI Exterior200 LEDRGB Exterior200LDRGBAW Exterior200LEDHSIC FiberSource CMY150 FiberSource QFX150 Imager01 M1 Imager01 M2 Imager01 Mirror M1 Imager01 Mirror M2 Imager04 M1 Imager04 M2 Imager04 Mirror M1 Imager04 Mirror M2 Imagescan (Mode 1) Imagescan (Mode 2) MAC 250 (Mode 1) MAC 250 (Mode 2) MAC 250 (Mode 3) MAC 250 (Mode 4) MAC 250 Entour MAC 250 Entour Enh MAC 250 Krypton MAC 250 Krypton En MAC 250 Wash MAC 250 Wash Ex MAC 250+ (Mode 1) ORB Series Operating Manual – Issue 2.0 MAC 250+ (Mode 2) MAC 250+ (Mode 3) MAC 250+ (Mode 4) MAC 300 (Mode 1) MAC 300 (Mode 2) MAC 300 (Mode 3) MAC 300 (Mode 4) MAC 500 (Mode 1) MAC 500 (Mode 2) MAC 500 (Mode 3) MAC 500 (Mode 4) MAC 550 (Basic) MAC 550 (Enhanced) Mac 575 Krypton Ba Mac 575 Krypton Ex MAC 600 (Mode 1) MAC 600 (Mode 2) MAC 600 (Mode 3) MAC 600 (Mode 4) MAC 600NT (Mode 1) MAC 600NT (Mode 2) MAC 600NT (Mode 3) MAC 600NT (Mode 4) Mac 700 Wash Mac 700 Wash Ext MAC 700Profile Bas MAC 700Profile Enh MAC 1200 (Mode 1) MAC 1200 (Mode 2) MAC 1200 (Mode 3) MAC 1200 (Mode 4) MAC 2000 Perf (8) MAC 2000 Perf (16) MAC 2000 Prof (8) MAC 2000 Prof (16) MAC 2000 Wash (8) MAC 2000 Wash (16) Mac III Basic Mac III Extended Mac TW1 - Basic Mac TW1 - Enhanced Magnum Mania EFX500 M1 Mania EFX500 M2 Mania EFX600 M1 Mania EFX600 M2 Mania EFX700 M1 Mania EFX700 M2 Mania EFX800 M1 Mania EFX800 M2 Mania SCX500 (6) Mania SCX500 (8) Mania SCX600 M1 Mania SCX600 M2 Mania SCX700 M1 Mania SCX700 M2 Matrix Controler Maxedia Base Maxedia Layer Maxedia Output MiniMac Prof (M1) MiniMac Prof (M2) MiniMac Prof (M3) MiniMac Prof (M4) MiniMac Wash (M1) MiniMac Wash (M2) MiniMac Wash (M3) MiniMac Wash (M4) MiniMacMaestro(M1) MiniMacMaestro(M2) MiniMacMaestro(M3) MiniMacMaestro(M4) MX-1 (1 Channel) MX-1 (6 Channel) MX-1 (7 Channel) MX-4 (1 Channel) MX-4 (6 Channel) MX-4 (7 Channel) MX-10 PAL 1200 (Mode 1) PAL 1200 (Mode 2) PAL 1200 (Mode 3) PAL 1200 (Mode 4) PAL 1200E (Mode 1) PAL 1200E (Mode 2) PAL 1200E (Mode 3) PAL 1200E (Mode 4) Pro 218 (Mode 1) Pro 218 (Mode 2) Pro 218 (Mode 3) Pro 218 Mk1 Pro 400 (Mode 1) Pro 400 (Mode 2) Pro 400 (Mode 3) Pro 518 (Mode 1) Pro 518 (Mode 2) Pro 518 (Mode 3) Pro 918 (Mode 1) Pro 918 (Mode 2) Pro 918 (Mode 3) Pro 918 (Mode 4) Pro 1220 XR Mode 1 Pro 1220 XR Mode 2 Pro 1220 XR Mode 3 Pro 1220 XR Mode 4 Pro1220 II Full Pro1220 II Reduced Pro1220 IIR Full Pro1220 IIR Reduce Pro1220CMYR Mode 1 Pro1220CMYR Mode 2 Pro1220CMYR Mode 3 Pro1220CMYR Mode 4 Pro1220RPR Mode 1 Page 171 Appendices Pro1220RPR Mode 2 Pro1220RPR Mode 3 Pro1220RPR Mode 4 Punisher X250(1Ch) Punisher X250(6Ch) RGB Laser 1.6 Robocolor II (M1) Robocolor II (M2) Robocolor III (M1) Robocolor III (M2) Roboscan 805 Roboscan 812 Roboscan 812 (Ext) Roboscan 1020 RoboZap smartMac 8bit smartMac 16bit Stage Cyclo StageBar54 HSI StageBar54 HSIC StageBar54 RGB StageBar54 RGBAW Wizard (6 ch) Wizard (8 ch) Wizard Extreme8 ch Wizard Extreme11ch MAX Max 1000 8bit Max 1000 16bit MDG Atmosphere Ice Fog Max 3000 Max 5000 METEOR XL MICROH LED Bar 2 Page 172 MILTEC MT 250 Scan MOJO Mojo Scan 1 Mojo Scan 2 MORPHEUS ColorFader ColorFader + Dim PanaBeam XR2 MOVING LED Moving LED MOVITEC SL250 (16 Bit) WL250 8 WL250 16 MUSHROOM Moving LED Max Moving LED Min NJD Chroma HX Datamoon JL10 (Mode 1) JL10 (Mode 2) Microbeam 100 Mirage LED (3ch) Mirage LED (MX90) MX90 Mode Predator HX Predator MX Quasar HX 4ch Quasar HX 8ch Raptor HX 4ch Spectre (3 Chan) Spectre (MX90) Super Blitzer NOVA LIGHT High Ground OCEAN OPTICS SeaChanger/CTC SeaChanger/Dimmer SeaChanger/Green SeaChanger/Magenta OSIRIS Isis 575 Spot Isis 575 Wash Neftis 575 Orus 1200 Spot Seth 250 PAN COMMAND Colorfader Mode D PR LIGHTING Chameleon M Design 150 Laser 100 Moon Nova Orland Follow Orland Scan Pilot 150 (8 bit) Pilot 150 (16 bit) Pilot 150 GP Pilot 250 Pilot 250 Wash Pilot 300 (8 bit) Pilot 300 (16 bit) Pilot 575 Pilot 575 Wash Pilot 1200 Pilot 1200 Wash Pilot Wash(8 bit) Pilot Wash(16 bit) Planet Solo 250 Solo 575 Solo 575P Solo 1200 Theatre Colour Theatre Colour LT Theatre Master Theatre Wash Tornado XL 250 Extended XL 250 Short XL 250 Standard XL 575 Extended XL 575 Short XL 575 Standard XL 700 Extended XL 700 Short XL 700 Standard XL 1200 Spot Exten XL 1200 Spot Short XL 1200 Spot Stand XL Framing 1200 Ex XL Framing 1200 Sh XL Framing 1200 St XL Wash 700 Ext XL Wash 700 Short XL Wash 700 Std XL Wash 1200 Ext XL Wash 1200 Short XL Wash 1200 Std PRG EX1 EX1 EX1 EX1 EX1 EX1 EX1 Ambient Background Camera Keystone Object Object Texture Spot PROEL 575 CN Tarkus 575 SE Dream Light 575 Wash ORB Series Operating Manual – Issue 2.0 Appendices PROSOUND Smart Scan II PULSAR ChromaZone/Bank 6 ChromaZone/Bank 9 ChromaZone/Bank 36 ChromaZone/Bank 42 ChromaZone/Bank 46 Demon Strobe QMAXZ Q1500S Q1500W QM575S QM575W QM700S QM700W QME575S QME575W QME700P QME700P Ext.Mode QME700P Std.Mode QME700S QME700W QS250S QS250W QSE400S QSE400W QSE575S QSE575W RADLITE RLcanvas RLgraphics RLmask RLpixel RLsurface RLtext RLwave ROBE ORB Series Operating Manual – Issue 2.0 Beam 250 XT ClrWash575ATZoom 1 ClrWash575ATZoom 2 ClrWash575ATZoom 3 ClrWash575ATZoom 4 Club Roller 150CT Club Roller 250CT Club Scan 150 Club Scan 250 Club Spot 150CT M2 Club Spot 300CT 8b Club Spot 300CT M1 Club Spot 300CT M2 Club Spot CT (8) Club Spot CT (16) Club Wash CT (8) Club Wash CT (16) ColorMix 240AT(M1) ColorMix 240AT(M2) ColorMix 250AT(M1) ColorMix 250AT(M2) ColorMix150AT Prof ColorMix150AT Wash ColorMix550AT (M1) ColorMix550AT (M2) ColorMix575AT (M1) ColorMix575AT (M2) ColorSpot 170AT M1 ColorSpot 170AT M2 ColorSpot 170AT M3 ColorSpot 170AT M4 ColorSpot 250AT M1 ColorSpot 250AT M2 ColorSpot 250AT M3 ColorSpot 250AT M4 ColorSpot 575AT M1 ColorSpot 575AT M2 ColorSpot 575AT M3 ColorSpot 575AT M4 ColorSpot575EAT M1 ColorSpot575EAT M2 ColorSpot575EAT M3 ColorSpot575EAT M4 ColorSpot700EAT M1 ColorSpot700EAT M2 ColorSpot1200AT M1 ColorSpot1200AT M2 ColorSpot2500EATM1 ColorSpot2500EATM2 ColorSpot2500EATM3 ColorWash 700AT M1 ColorWash 700AT M2 ColorWash 700AT M3 ColorWash 700AT M4 ColorWash 700AT M5 ColorWash 700AT M6 ColorWash 750AT T1 ColorWash 750AT T2 ColorWash 750AT T3 ColorWash 750AT T4 ColorWash250AT(M1) ColorWash250AT(M2) ColorWash250AT(M3) ColorWash250AT(M4) ColorWash575AT(M1) ColorWash575AT(M2) ColorWash575AT(M3) ColorWash575AT(M4) ColorWash575EATM1 ColorWash575EATM2 ColorWash575EATM3 ColorWash575EATM4 ColorWash1200EATM1 ColorWash1200EATM2 ColorWash1200EATM3 ColorWash1200EATM4 ColorWash2500EATM1 ColorWash2500EATM2 ColorWash2500EATM3 ColorWash2500EATM4 ColorWash2500EATM5 DigiSpot 5000DT 4 DigiSpot 5000DT 32 DigiSpot 5000DT 51 Digital Spot3000DT DigitalSpot3kDTLay DigitalSpot3kDTMas DJ Roller 150 XT DJ Roller 250 XT DJ Scan 150 XT DJ Scan 250 XT Dominator 1200 XT Ecolor 250 XT Funky Fusion Hip Hop ImageSpot250 AT 8 ImageSpot250 AT 16 LED Blinder 96 M1 LED Blinder 96 M2 LED Blinder148 M1 LED Blinder148 M2 LED Blinder148 M3 LED Blinder148 M4 LED Blinder196 M1 LED Blinder196 M2 LED Blinder196 M3 LED Blinder196 M4 LED Wash 136LT M1 LED Wash 136LT M2 MediaFusion LayerF MediaFusion LayerM MediaFusion LayerT MediaFusionMasterF Page 173 Appendices MediaFusionMasterS MSZoom 250 XT(8) MSZoom 250 XT(M1) MSZoom 250 XT(M2) RecessedSpot170 M1 RecessedSpot170 M2 RecessedSpot170 M3 RecessedSpot170 M4 RecessedWash150 M1 RecessedWash150 M2 RecessedWash150 M3 RecessedWash150 M4 REDWash3-192 M1 REDWash3-192 M2 REDWash3-192 M3 REDWash3-192 M4 RMix3.192 (M1) Scan250 XT (8 bit) Scan250 XT (Mode1) Scan250 XT (Mode2) Scan575 XT (8 bit) Scan575 XT (Mode1) Scan575 XT (Mode2) Scan1200XT (8 bit) Scan1200XT (Mode1) Scan1200XT (Mode2) Spot150XT (Mode1) Spot150XT (Mode2) Spot150XT (Mode3) Spot150XT (Mode4) Spot160XT (Mode1) Spot160XT (Mode2) Spot160XT (Mode3) Spot160XT (Mode4) Spot250XT (8 bit) Spot250XT (Mode 1) Spot250XT (Mode 2) Spot575XT (8 bit) Page 174 Spot575XT (Mode 1) Spot575XT (Mode 2) Stage Banner 10 AT Wash150XT (Mode 1) Wash150XT (Mode 2) Wash150XT (Mode 3) Wash150XT (Mode 4) Wash250XT (8 bit) Wash250XT (Mode 1) Wash250XT (Mode 2) Wash575XT (8 bit) Wash575XT (Mode 1) Wash575XT (Mode 2) ROSCO I-Cue 8bit I-Cue 16bit Indexer M1 Indexer M2 Indexer M3 SAGITTER Active Color 250 Flexo (Mode 1) Flexo (Mode 2) Flexo (Mode 3) Flexo (Mode 4) Flexo CDM 150 (M1) Flexo CDM 150 (M2) Flexo CDM 150 (M3) Flexo CDM 150 (M4) HyperColor 575 Infinity Club 1200 Infinity Live 1200 InfinityMSZ1200/10 InfinityMSZ1200/12 InfinityMSZ1200/14 InfinitySL1200(10) InfinitySL1200(12) Mask Color Zoom Miniscan 2001 MSD Moving FX 2002 Moving Spot 575MSZ Moving Spot MSD250 Moving Wash MSD250 MovingWashZoom 575 Prince Shop 150 Shop 250 SuperPrince575(6) SuperPrince575(10) Tracer1200 SAJEM Copernic SELADOR X7 SGM Colorlab 250 Colorlab 575 Colorlab HP 575 Colorlab HP 1200 Galileo II HP(SGM) Galileo II HP(STD) Galileo III (SGM) Galileo III (STD) Galileo IV (SGM) Galileo IV (STD) Genio Mobile Giotto Profile 400 Giotto Spot 250 Giotto Spot 400 Giotto Spot 400CMY Giotto Spot 1200 Giotto Wash 400 Giotto Wash 1200 GiottoWash1200 1.4 Idea Spot 250 Idea Spot 575 Idea Wash 250 Newton 1200 Palco Palco Mobile Ribalta Synthesis 700 HRNT Synthesis 700 HRT Synthesis 700 LRNT Synthesis 700 LRT Victory (HiRes) Victory (LoRes) Victory II (HiRes) Victory II (LoRes) SHOW PRO Accubeam400AB-400 Accubeam500AB-500 AccucolorPowerAB60 AccustarPowerAB20 Cyberscan (Mode 1) Cyberscan (Mode 2) SHOWLED Chameleon (Mode10) Chameleon (Mode24) ShowLED Mode9 SHOWTEC Arc-Bar 3 Arc1 Arc-Bar 3 Arc1+D Arc-Bar 3 S1 Arc-Bar 3 S2 City Painter 575 Club Colour Wash Club Spot 575 Explorer 250 Pro Explorer 250 Sp Ba Explorer 250 Spot Explorer 250 Wash Explorer 575 Spot Explorer 575 Wash ORB Series Operating Manual – Issue 2.0 Appendices LED Dancefloor LED Par LED Pixel Track LED PowerBrick 3ch LED PowerBrick 4ch LED PowerBrick 5ch LED Powerbrick Ctr LED Wash Ultra Bri MiniMax 250 Moving Studiobeam Phantom 250 Spot Sunstrip Active 1 Sunstrip Active 5 Sunstrip Active 10 Typhoon SILVER STAR LED110 Mx Color Show Spot 1200 ShowProIIRGY Laser Spot 150 Spot 250 Advanced Spot 250 Basic Spot 250 V 2006 Spot 575 Advanced Spot 575 Basic Wash 575 Advanced Wash 575 Basic SKYTRONIC 150.320 8bit SLS HELLAS PanScan 4 (8) PanScan 4 (16) SPACE CANNON Athena Easy Touring S Easy Touring VHT Focus 1200 Helecopter Helyos Heos Ireos Pro Luxor Olympus Pegasus Poseidon STAGE LINE Twist 252 STAIRVILLE LED Par MH575 S 1off16off MH575 S 1off16on MH575 S 1on16off MH575 S 1on16on MV250H SC250H SC250Pro WS250H WS250Pro STARLITE MK5 STRAND Pirouette Pirouette + Scroll STRONG Big Scan STUDIO DUE Archiled C CityBeam (6) CityBeam (7) CityColor (6) CityColor (7) CityColor 300 CityColor 400 Crown CS1 CS1+Scroller ORB Series Operating Manual – Issue 2.0 CS4 minus dimmers Excess 700 (8bit) Excess 700 (16bit) Excess 1200(16bit) Giant (8 Bit) Giant (16 bit) Giant Color (8) Giant Color (16) Hercules 600m Hercules 800e Light Deflector 8 Light Deflector 16 Live 1200 Live Pro 1200 Mini Beam MiniCity 100 MiniCity 150 MiniCity 250 (6) MiniCity 250 (7) Nano LED C PhotoWall 1200e Predator Shark 150 (8 Bit) Shark 150 (16 Bit) Shark 250 (10 Ch) Shark 250 (11 Ch) Shark 250 (13 Ch) Space Flower Stratos Color (12) Stratos Color (14) Stratos HiRes (12) Stratos HiRes (14) XS 700 Wash/C 16bt XS-700 (8bit) XS-700 (16bit) XS-1200 (16ch) XS-1200 (20ch) SUMMA Summa HTI SUREPRO SP880 9chan SP880 13chan SYNCROLITE Syncrolite MX/SX Syncrolite ST/SX TAS Acrobat CF 6 Colore Colore at Colore Fresnel Colour Beam Compact Scan (8) Compact Scan (16) HT Scan (8) HT Scan (16) Mini Ultra Scan Pro Spot (8) Pro Spot (16) Pro Spot 575 (8) Pro Spot 575 (16) Pro Wash (8) Pro Wash (16) Pro Wash 575 (16) Saetta Symbol 700 TX 360B Ultra Scan 700 Versi Colore TEC LUMEN KTM 5.4 (8 Bit) KTM 5.4 (16 Bit) KTM 5.5 (8 Bit) KTM 5.5 (16 Bit) Par-Color (2 Chan) Par-Color (3 Chan) Page 175 Appendices Scan 3D Evoluzione Scan 4D2 Scan 4D3 Spot575TM(8ch) Spot575TM(10ch) Spot575TM(16ch) Vari-Color (2 Ch) Vari-Color (3 Ch) Wash575TM(8ch) Wash575TM(10chM1) Wash575TM(10chM2) Wash575TM(14ch) Wash575TM(16ch) TECHNILUX Techni Scan DX Techni Scan DXi TecniScan 150 TecniScan S TecniScan SX Pro THEATRE PROJECTS Sky Art TOPLITE Merlin-C TRITON BLUE CC 250 LED 36 Fixed LED 36 Moving Head MF-3 MF-5 MF-7 Mini Spot 250 Spin 250 Spot Pro 575 1 SY 250 TT-4000 V1200 Spot V1200 Wash Viva 250 SP Page 176 Viva 575 Wash Pro 575 VARILITE VL 500A 16-ext VL 500T 16-ext VL 1000 A VL 1000 AS VL 1000 T VL 1000 TS VL 2000 Spot (E 8) VL 2000 Spot (E16) VL 2000 Spot (S 8) VL 2000 Spot (S16) VL 2000 Wash (E 8) VL 2000 Wash (E16) VL 2000 Wash (S 8) VL 2000 Wash (S16) VL 2416 Wash (E 8) VL 2416 Wash (E16) VL 2416 Wash (S 8) VL 2416 Wash (S16) VL 2500 Spot VL 2500 Wash VL 3000 Spot VL 3000 Wash VL 3500 Spot VL 3500 Wash VL1 VL5 Arc (Mode 1) VL5 Arc (Mode 2) VL5 Arc (Mode 3) VL5 Arc (Mode 4) VL5 Arc (Mode 5) VL5 Arc (Mode 6) VL5 Arc (Mode 7) VL5 Arc (Mode 8) VL5 Arc (Mode 9) VL5 Arc (Mode 10) VL5 Wash (Mode 1) VL5 Wash (Mode 2) VL5 Wash (Mode 3) VL5 Wash (Mode 4) VL5 Wash (Mode 5) VL5 Wash (Mode 6) VL5 Wash (Mode 7) VL5 Wash (Mode 8) VL5 Wash (Mode 9) VL5 Wash (Mode 10) VL6 Spot (Mode 1) VL6 Spot (Mode 2) VL6 Spot (Mode 3) VL6 Spot (Mode 4) VL6 Spot (Mode 5) VL6 Spot (Mode 6) VL6 Spot (Mode 7) VL6 Spot (Mode 8) VL6 Spot (Mode 9) VL6 Spot (Mode 10) VL6B (Mode 5) VL6B (Mode 6) VL6B (Mode 7) VL6B (Mode 8) VL6B (Mode 9) VL6B (Mode 10) VL7 Spot (Mode 7) VL7 Spot (Mode 8) VL7 Spot (Mode 9) VL7 Spot (Mode 10) VL7B (Mode 9) VL7B (Mode 10) VLM Mirror (M 1) VLM Mirror (M 2) VLM Mirror (M 3) VLM Mirror (M 4) VLM Mirror (M 5) VLM Mirror (M 6) VLM Mirror (M 7) VLM Mirror (M 8) VLM Mirror (M 9) VLM Mirror (M 10) VELLE MAN 250 14/2 Snark 250 VDP 250 MHS VDP150 CC4 VDP150MH6 VDP250 MH14/2 VDP250 MHS16 VDP250 SC6 VDPLW1028 VISUAL PRODUCTIONS Canvix Large Canvix Normal Canvix Small Canvix Tiny VISUALIES ScumBox WYBRON CXI Index SpdOff CXI Index SpdOn CXI Mix SpeedOff CXI Mix SpeedOn Light Wand 2+Spin Light Wand 2ch Light Wand 4+Spin Light Wand 4ch NeXera NeXera CDM XILVER Droplet HSI Droplet HSI Comp Droplet RGB Droplet RGB Comp Droplet Stat HSI ORB Series Operating Manual – Issue 2.0 Appendices Droplet Stat HSI C Droplet Stat RGB Droplet Stat RGB C YING WEI D+RGB Spot Wash 1200 M1 Spot Wash 1200 M2 Spot Wash 1200 M3 ZAP TECHNOLOGY BigLite 4.5 ZOOM Par 64 LED Showlight Pro Stage Colour CB Stage Colour RGB 1982 Fixture types in 144 Manufacturers ORB Series Operating Manual – Issue 2.0 Page 177 Index Index - 16 . Key ................................................. 16 / 16 @ 84 . 84 + 16 16-bit ............................................... 44 8-bit ................................................. 44 Absolute Wheel Adjustment ........................... 85 Wheel Mode .................................. 132 Active Playback Window ..................... 147 Adding Fixtures ............................. 37, 38 All Clearing ......................................... 70 And .................................................. 16 Arrow Keys ........................................ 18 Art-Net.............................................. 74 Subnet........................................... 74 At Key ............................................... 16 Attribute Keys .................................... 18 Attributes .......................................... 85 Audio Ports ....................................... 154 Auto Chase Drive ................................... 109 Follow On ...................................... 100 Auto Groups ...................................... 53 Auto Macros ................................ 54, 128 Auto Menus ........ 29, 30, 53, 91, 122, 128 Auto Palettes ................... 29, 53, 54, 122 AV Port ............................................ 155 Back ................................................ 103 Page 178 Backspace ......................................... 16 Backward Chase Direction ............................. 109 Track ........................................... 130 Bass Chase Drive .................................. 109 Battery ............................................ 158 Beam Key .......................................... 18 Beamshape Parameters ..................................... 85 Beat Chase Drive .................................. 109 Behaviour ..................................... 55, 61 Blackout Key ...................................... 11 Blank Button .................................... 149 Blank Cue ........................................ 107 Blind ................................................. 15 Blind Mode ....................................... 144 Block Cue ............................................. 129 Cue Stack ..................................... 107 Both Track ........................................... 130 Bounce Chase Direction ............................. 109 bpm Chase Speed................................. 109 CAN .................................................. 59 CAN Port ......................................... 155 Capture ............................................. 78 CD Timecode ..................................... 107 Channel Faders.............................................. 6 Channel Data UDK ............................................. 112 Channels 16-bit ............................................ 44 DMX ................................................ 7 Chase .............................................. 108 Chase Modifiers ................................ 108 Direction ...................................... 109 Drive ........................................... 109 Fade ............................................ 109 Shots ........................................... 109 Speed .......................................... 109 CITP .................................................. 78 Clear ...................................... 15, 27, 88 Clear Options ..................................... 70 CMY ........................................... 96, 134 Colour Parameters ..................................... 85 Picker ............................................ 96 Colour Edit Modes ............................. 134 Colour Key ......................................... 18 Command Line ............................. 23, 87 Suggested Commands...................... 87 Commands Fade Time .................................... 135 Confirm Overwrites ............................. 61 Control Channels .................................. 7 Control Wheels ................................... 18 Conventions ......................................... 6 Copy ................................................. 15 ORB Series Operating Manual – Issue 2.0 Index Cue Stack ..................................... 106 Cues ............................................. 104 Effects .......................................... 124 Fixture Data .................................. 136 Group ............................................ 91 Macro ........................................... 127 Palette ........................................... 94 Smart Tags ................................... 104 Submasters ................................... 120 Course .............................................. 44 Cue Only .................................... 15, 130 Smart Tags .................................... 87 Cue Setup window ............................. 100 Cue Stack Directory Window ............... 105 Cue Stack Setup Window .................... 106 Blank Cue ..................................... 107 Block ............................................ 107 Chase Options ............................... 108 Intensity Mixing ............................. 107 Master Fader ................................. 108 Move on Dark Options .................... 110 Renumbering Cues ......................... 107 Timecode ...................................... 107 Trigger Options .............................. 110 Unblock ........................................ 107 Cue Stack Window .............................. 23 Cue Details.................................... 101 Learn Mode ................................... 102 Stack Setup ................................... 102 Cue Stacks ................................... 7, 105 Clearing ......................................... 70 Copying a Cue Stack ...................... 106 Deleting a Cue Stack ...................... 106 Moving a Cue Stack ........................ 106 Naming a Cue Stack ....................... 105 Releasing a Stack ........................... 104 Selecting a Stack ............................ 97 Turning into a Chase ...................... 108 ORB Series Operating Manual – Issue 2.0 Cue Stack Window ............................ 101 Cues ........................................ 7, 15, 97 Adding Macros .............................. 100 Back ............................................ 103 Copying a Cue .............................. 104 Deleting a Cue .............................. 105 Editing Delay Times ......................... 99 Editing Fade Times .......................... 99 Editing Output Levels ....................... 98 Editing Triggers ............................... 99 Loading .......................................... 98 Moving a Cue ................................ 104 Naming a Cue ................................. 98 Next ............................................ 100 Outputting .................................... 103 Pausing ........................................ 103 Playing Back Cues ......................... 103 Programming Cues .......................... 97 Recording ....................................... 26 Recording a Cue .............................. 97 Running ....................................... 103 UDK............................................. 112 Cursor Keys ....................................... 18 Date ................................................. 59 Defaults ............................................ 55 Delay ................................................ 15 Times ....................................... 27, 82 Delete ............................................... 15 Cue Stack ..................................... 106 Cues ............................................ 105 Effect ........................................... 125 Fixtures.......................................... 42 Group ............................................ 92 Macro .......................................... 127 Palette ........................................... 94 Submasters .................................. 120 UDK............................................. 115 Desk Information ................................ 69 Desk Light ....................................... 156 Desk Setup ........................................ 55 Behaviour ....................................... 61 Cue Stack Defaults .......................... 63 Default Times.................................. 62 Inputs ............................................ 59 Lock Functions ................................ 65 Outputs .......................................... 60 Peripherals ..................................... 58 Details ............................................... 82 DHCP .......................................... 73, 78 Dimensions ...................................... 156 Dimmer Control Wheel ................................. 24 Dimmers Controlling ...................................... 24 Syntax ........................................... 24 Direct DMX Control ............................. 42 Direction .......................................... 109 Displays............................................. 55 DMX .................................................. 82 Softkey .......................................... 42 universes.......................................... 7 Universes ....................................... 40 DMX In Channels ........................................ 52 DMX Input ....................................... 156 DMX Output ..................................... 156 Window ........................................ 147 DMX Outputs ...................................... 60 DMX-In Submasters .................................... 33 Drive ............................................... 109 Edit UDK ............................................. 115 Edit Fixtures Fixture Swapout .............................. 52 Editing Fixtures .................................. 47 Page 179 Index Alignment ...................................... 49 Change Type .................................. 52 Default Values ................................ 49 Fixture Names ................................ 49 Fixture Numbers ............................. 48 Patch Functions............................... 50 Effects ............................................. 122 Applying an Effect .......................... 124 Copying an Effect ........................... 124 Deleting an Effect ........................... 125 Effects Palette Window .................... 122 Effects Window .............................. 123 Moving an Effect ............................ 125 Naming an Effect ........................... 124 Recording an Effect ........................ 124 Standard Effects ............................ 122 Using Control Wheels ...................... 123 Effects Key ........................................ 18 Effects Palette Window ....................... 122 Effects Window ................................. 123 Enter Key .......................................... 16 Ethernet ................................40, 71, 155 Art-Net .......................................... 74 Crossover ....................................... 73 DMX .............................................. 74 Switch ........................................... 73 Event Monitor .................................... 55 Except .............................................. 16 External Storage Devices .................... 155 Factory Defaults ................................. 70 Fade Chase Modifier ............................... 109 Times ....................................... 27, 81 Fade Time Commands .................................... 135 Fade Time Commands Editing Cues ................................... 99 Recording Cues ............................... 99 Page 180 Fader Func. ............................. 14, 24, 33 Fan Wheel Modes ................................ 133 Files .................................................. 66 Clearing User Fixture Types .............. 69 Loading Shows ................................ 67 Loading User Fixture Types ............... 68 Saving Shows ................................. 66 Fine .................................................. 44 Fixture Library .................................... 69 Updating ........................................ 69 Fixture Parameters Controlling...................................... 25 Fixture Types User .............................................. 68 Fixtures ............................................... 7 Deleting ......................................... 42 Selecting ........................................ 84 UDK............................................. 114 Unpatching ..................................... 41 Flash Size ............................................... 69 Flash Button MFF ............................................... 13 Follow On ........................................ 100 Forward Chase Direction ............................. 109 Track ........................................... 130 Front Panel Controls ........................ 9, 10 Full ................................................... 84 Full Key ............................................. 16 Glossary .......................................... 150 Go Button ........................................... 14 Trigger ......................................... 100 Go Button MFF ............................................... 13 Grand Master ..................................... 11 Graphical Interface ............................... 6 Group Window .............................. 23, 92 Groups .......................................... 7, 91 Automatic Groups ............................ 91 Clearing ......................................... 70 Copying Groups ............................... 91 Deleting Groups .............................. 92 Group Window ................................ 92 Moving Groups ................................ 92 Naming Groups ............................... 91 UDK ............................................. 113 User Defined Groups ........................ 91 What are ........................................ 91 Hardware Information .................................... 69 Hide Unpatched .................................. 83 Highlight ..................................... 93, 135 Home .............................................. 136 Key .............................................. 135 HTP ................................................. 107 Master ......................................... 108 Inhibit ............................................. 121 Inputs ............................................... 55 Intensity Output Problems ............................. 24 Wheel ............................................ 18 IP Address .............................. 71, 72, 74 Kensington Lock ............................... 156 Knockout ......................................... 134 LCD Syntax ........................................... 24 Least Significant Byte .......................... 44 Light Converse ................................... 78 Load .................................................. 15 Cues .............................................. 98 Palettes .......................................... 94 Submasters .................................. 119 UDK ............................................. 115 ORB Series Operating Manual – Issue 2.0 Index Loading Shows ................................... 67 Lock ................................................. 55 Lock Functions ................................... 65 LSB ................. See Least Significant Byte LTP .................................................. 107 Macro UDK ............................................. 114 Macro Window................................... 126 Macros ............................................. 126 Clearing ......................................... 70 Copying a Macro ............................ 127 Deleting a Macro ............................ 127 Don‟t Move on Dark Macros ............. 126 Macro Window ............................... 126 Moving a Macro .............................. 127 Naming a Macro ............................. 127 Playback Macros ............................ 126 Recording a Macro .......................... 127 Running a Macro ............................ 127 Submasters ................................... 119 Mains Inlet ....................................... 154 Manual Chase Drive ................................... 109 Fader ............................................ 108 Playbacks ....................................... 12 Master Playbacks ......................... 14, 104 Merge .............................................. 131 MFF .................................................... 8 Channel ......................................... 13 Cue Stack ...................................... 13 Dimmer ......................................... 13 Flash Button ................................... 13 Playback ........................................ 13 Scene ............................................ 13 Submaster ..................................... 13 window .......................................... 32 MFFs ................................................. 14 Using ............................................. 24 ORB Series Operating Manual – Issue 2.0 MFFs ................................................. 13 MIDI ............................................... 155 Timecode ......................... 59, 100, 107 Most Significant Byte........................... 44 Mouse ............................................. 155 Mode ........................................... 144 Move ................................................. 15 Cue Stack ..................................... 106 Cues ............................................ 104 Effect ........................................... 125 Group ............................................ 92 Macro .......................................... 127 Palette ........................................... 94 Submasters .................................. 120 Move on Dark ................................... 110 MSB .................. See Most Significant Byte Multi Function Faders ................... 6, 8, 13 Channel Mode ................................. 32 Playback Mode ................................ 32 Selecting Channels .......................... 84 Submaster Mode ............................. 32 Name ................................................ 15 Cue Stack ..................................... 105 Cues .............................................. 27 Effect ........................................... 124 Group ............................................ 91 Macro .......................................... 127 Palette ........................................... 93 Palettes .......................................... 29 UDK............................................. 113 Network ............................................ 71 Remote ........................................ 137 Zero Wire ....................................... 80 Non Tracking Mode ............................. 28 Numeric Keys ..................................... 16 Operating Environment ..................... 156 Output Window .................................. 23 Delay View ..................................... 82 Fade View ....................................... 81 Source View .................................... 82 Tagging .......................................... 86 Values View .................................... 81 Window Setup ................................. 82 Outputs ....................................... 55, 60 Overwrite Confirm .......................................... 61 Page Submaster ...................................... 33 Page Holdover Submaster ...................................... 33 Page Window.................................... 111 Pages .............................................. 111 Clearing ......................................... 70 Loading a Page onto Playbacks ........ 111 Page Window ................................ 111 Palette Window ................................... 95 Palettes .................................... 7, 28, 93 Clearing ......................................... 70 Copying a Palette ............................ 94 Deleting a Palette ............................ 94 Moving a Palette .............................. 94 Naming a Palette ............................. 93 Outputting a Palette ......................... 93 Palette Windows .............................. 95 Recording a Palette .......................... 93 UDK ............................................. 114 Updating ........................................ 94 What are ........................................ 93 Pan/Tilt Grid ............................................... 95 Mode ........................................... 144 Sensitivity ...................................... 58 Parameters ........................................ 85 Keep Separate ................................ 61 Park Function ................................... 134 Patch................................................. 37 Page 181 Index Patch Views ....................................... 43 Channel View .................................. 44 Fixtures View .................................. 43 Outputs View .................................. 43 Patching Fixtures ................................ 39 Pause ............................................... 103 PDA Remote .......................................... 76 Percent ............................................ 82 Peripheral ..................................... 55, 58 Picker Colour ........................................... 96 Playbacks ................................... 6, 7, 12 Master .................................... 14, 104 Submasters ................................... 116 Position Parameters..................................... 86 Position Key ....................................... 18 Preview Cue Window .................................. 144 Group Window ............................... 146 Macro Window ............................... 147 Palette Windows ............................ 145 Submaster .................................... 119 UDK ............................................. 113 UDK Window ................................. 146 Programming Beamshape Parameters ................... 85 Clear ............................................. 88 Colour Edit Modes .......................... 134 Colour Parameters........................... 85 Controlling Fixture Parameters ......... 85 Copying Fixture Data ...................... 136 Fade and Delay Times..................... 135 Highlight ....................................... 135 Home Function .............................. 136 Intensity Parameters ....................... 84 Knockout Function .......................... 134 Page 182 Output Window ............................... 81 Park Function ................................ 134 Position Parameters ......................... 86 Record Options Window ................. 129 Rem Dim Function ......................... 134 Selecting Fixtures ............................ 84 Tagging Parameters ......................... 86 Try Cue ........................................ 135 Wheel Editing Modes ...................... 132 Quick Start Tutorial ............................. 19 Adding Fixtures ............................... 19 Controlling Fixtures ......................... 25 Cues .............................................. 26 Getting Started ............................... 19 Groups ........................................... 30 Loading Shows ................................ 35 Multi Function Faders ....................... 32 Palettes .......................................... 28 Saving Shows ................................. 34 Setting up the Desk ......................... 19 Submasters .................................... 33 User Definable Keys ......................... 30 Random Chase Direction ............................. 109 Real Time Triggers ................................ 100, 107 Record .............................................. 15 Commands, Basic ............................ 87 Cue ............................................... 26 Group ............................................ 91 Macro .......................................... 127 Palette ........................................... 93 Palettes .......................................... 29 Submasters ............................. 33, 117 UDK............................................. 112 User Views ................................... 148 View ............................................ 148 View onto UDK .............................. 148 Record Options Window ..................... 129 All Parameters............................... 129 Attribute Selection ......................... 131 Default Times................................ 131 Merge .......................................... 131 Remove ........................................ 131 Selected Fixtures ........................... 129 Snapshot ...................................... 129 Tagged Fixtures............................. 129 Tagged Parameters ........................ 129 Tracking Options ........................... 130 Recovery Mode ............................................. 61 Relative Wheel Adjustment ..................... 85, 86 Wheel Mode .................................. 132 Release ...................................... 14, 104 UDK ............................................. 113 Rem Dim .................................... 87, 134 Remote ...................................... 76, 137 PDA ............................................... 76 Switches......................................... 59 Remote Input ................................... 154 Remove ........................................... 131 Renumber Cue Stack ..................................... 107 Reset Desk......................................... 70 RGB ........................................... 96, 134 Saving Shows ..................................... 66 Screen Navigation Keys ..................... 143 Close Key ..................................... 143 Screen Key ................................... 143 Select Key .................................... 143 Size Key ....................................... 143 View Key ...................................... 143 Select Stack ....................................... 14 Sensitivity .......................................... 58 Serial Number .................................... 69 ORB Series Operating Manual – Issue 2.0 Index Setup ........................................... 15, 36 Setup Window .................................... 36 Shift Selecting Channels .......................... 84 Shots ............................................... 109 Smart Tags ............................15, 87, 104 SMPTE ............................................. 155 Timecode ...........................59, 99, 107 Snapshot .......................................... 129 Software Updates .............................. 149 Software Version ................................ 69 Source .............................................. 82 Spare Button .................................... 149 Speed .............................................. 109 Submaster MFF ............................................... 13 Page .............................................. 33 Page Holdover ................................ 33 Submasters .........................6, 8, 15, 116 Clearing ......................................... 70 Copying ........................................ 120 Deleting ........................................ 120 DMX Address .................................. 59 Editing .......................................... 119 Flash Button Action ........................ 118 Group ............................................ 92 LTP Trigger Level ........................... 118 Macros .......................................... 119 Moving.......................................... 120 Page ............................................. 119 Playbacks ...................................... 116 Previewing .................................... 119 Recording...................................... 117 Release Mode ................................ 118 Setup Window ............................... 118 Submaster Controls… ..................... 118 Window ........................................ 117 Submasters Setup Window ................. 118 ORB Series Operating Manual – Issue 2.0 Subnet .............................................. 71 Art-Net .......................................... 74 Suggested Commands ......................... 87 Swap Out Fixture ........................................... 52 Switches Remote ........................................ 154 Syntax .............................................. 24 Syntax Keys .................................. 16, 18 Next & Last .................................... 84 Record Options ............................. 129 Syntax LCD ........................................ 24 Tag Smart ............................................ 87 status ............................................ 86 Tagging ............................................. 25 Technical Specification ...................... 154 Temperature .................................... 156 Thru ............................................. 16, 84 Key ............................................... 16 Time ............................................ 15, 59 Touchscreen Calibration ...................................... 56 support .......................................... 57 Track ................................................ 15 Backward ..................................... 130 Both ............................................ 130 Cue Only ...................................... 130 Forward ....................................... 130 Trackball ............................. 18, 144, 155 Sensitivity ...................................... 58 Tracking ............................................ 27 Non ............................................... 28 Smart Tags..................................... 87 Trigger .............................................. 99 Try Cue ...................................... 15, 135 UDK Setup Window ........................... 112 Flash Mode ................................... 113 Mixing Mode ................................. 113 Release Mode ................................ 113 UDKs View ............................................ 148 Unblock Cue Stack ..................................... 107 Undo ................................................. 16 Unpatch ............................................. 41 Unpatched Hide ............................................... 83 Update .............................................. 15 Fixture File ..................................... 69 Software ........................................ 69 Submasters .................................. 119 UDK ............................................. 115 Update Key ........................................ 89 Update Options Window ....................... 89 Updating Fixture Library ...................... 69 USB Ports ........................................ 155 User Definable Keys .......... 7, 17, 112, 116 Channel Data UDK ......................... 112 Clearing ......................................... 70 Cue UDK ...................................... 112 Deleting a UDK.............................. 115 Editing a UDK................................ 115 Fixture UDK .................................. 114 Group UDK ................................... 113 Macro UDK ................................... 114 Naming ........................................ 113 Page ....................................... 17, 114 Palette UDK .................................. 114 View UDK ..................................... 114 Window ........................................ 114 User Defined Keys ................................. 7 User Fixture Types .............................. 38 Loading .......................................... 68 User Views ....................................... 148 Deleting a User View ...................... 148 Page 183 Index Recalling a User View ..................... 148 Recording a User View .................... 148 UDK ............................................. 148 Video Output .................................... 155 View ................................................. 15 UDK ............................................. 114 Weight ............................................. 156 Wheel Page 184 Sensitivity ...................................... 58 Wheel Editing Modes ......................... 132 Absolute Mode .............................. 132 Fan First Mode .............................. 133 Fan Last Mode............................... 133 Fan Middle Mode ........................... 133 Fan V Mode .................................. 133 Relative Mode ............................... 132 Windows .......................................... 142 Mouse Operation ........................... 143 Wireless Access Point.............................. 76, 80 DMX .............................................. 80 Remote .......................................... 76 WYSIWYG .......................................... 79 Zero Wire .......................................... 80 ORB Series Operating Manual – Issue 2.0 For news, views and the latest software visit the ORB website at: www.orbdesk.com IM8755 Issue 2.0 Cooper Controls t/a Zero 88 Usk House Llantarnam Park Cwmbran NP44 3HD Tel: +44 (0)1633 838088 Fax: +44 (0)1633 867880 email: [email protected] Web: www.zero88.com