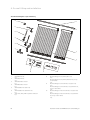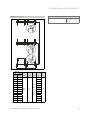
1
Installation manual
For the competent person
Installation manual
auroTHERM exclusive
VTK 570/2; VTK 1140/2
GB, IE
Legal information
Document type:
Installation manual
Product:
Target group:
auroTHERM exclusive
– VTK 570/2
– VTK 1140/2
Authorised competent person
Language:
EN
Document_number_version:
0020077994_02
Created on:
16.05.2012
Publisher/manufacturer
Vaillant GmbH
Berghauser Str. 40 D-42859 Remscheid
Telefon +49 21 91 18‑0 Telefax +49 21 91 18‑28 10
[email protected] www.vaillant.de
© Vaillant GmbH 2012
These instructions, or extracts thereof, may only be printed with the written consent of Vaillant GmbH.
All designations of products in these instructions are brand names/trade marks of the companies in question.
We reserve the right to make technical changes.
Contents
Contents
2.5
Regulations (directives, laws, standards) ............... 8
2.5.1
Installation regulations................................................ 8
1
Notes on the documentation .............................. 5
2.5.2
Regulations for the prevention of accidents ......... 8
1.1
Symbols used................................................................. 5
2.6
CE label............................................................................ 9
1.2
Observing other applicable documents .................. 5
3
Description of the unit ....................................... 10
1.3
Document storage ........................................................ 5
3.1
Type overview .............................................................. 10
1.4
Applicability of the instructions ................................ 5
3.2
Information on the identification plate .................. 10
1.5
Name................................................................................ 5
3.3
Purpose of the unit...................................................... 10
2
Safety .................................................................... 6
4
On-roof fitting and installation .......................... 11
2.1
Action-related warnings.............................................. 6
4.1
Preparing for fitting and installation ....................... 11
2.2
Required personnel qualifications............................ 6
2.2.1
Authorised competent person................................... 6
2.3
General safety information ........................................ 6
2.3.1
Danger due to improper use ...................................... 6
2.3.2
Risk of death due to improper fastening
systems ........................................................................... 6
2.3.3
Risk of death due to inadequate load-bearing
capacity of the roof...................................................... 6
2.3.4
Risk of death due to falling parts.............................. 6
2.3.5
Risk of injury and material damage due to
incorrect maintenance and repairs .......................... 6
2.3.6
Risk of death due to inadequate fastening of
the collectors ................................................................. 7
2.3.7
Risk of burns due to hot collector surfaces ........... 7
2.3.8
Risk of injury due to breaking glass ......................... 7
2.3.9
Material damage caused by a high-pressure
cleaner............................................................................. 7
2.3.10
Material damage due to lightning............................. 7
2.3.11
Frost damage due to water in the solar circuit ..... 7
2.3.12
Material damage due to an unsuitable tool............ 7
2.3.13
Risk of death from electric shock ............................. 7
2.3.14
4.1.1
Delivery, transport and positioning.......................... 11
4.1.2
Complying with clearances and installation
clearances...................................................................... 14
4.1.3
Selecting suitable connection................................... 14
4.1.4
Preparing the roof duct.............................................. 15
4.1.5
Putting together components .................................. 16
4.1.6
Determining the number of required roof
brackets.......................................................................... 19
4.1.7
Defining the edge clearances of the roof
brackets.......................................................................... 19
4.1.8
Defining the roof bracket clearances ..................... 19
4.2
Carrying out the installation .................................... 22
4.2.1
Installing roof brackets ............................................. 22
4.2.2
Installing collectors .................................................... 26
4.2.3
Installing hydraulic connections ............................. 29
4.3
Completing and checking the installation ............. 31
4.3.1
Checking installation................................................... 31
4.3.2
Disposing of the packaging ...................................... 32
5
Flat roof fitting and installation ...................... 33
Material damage due to overvoltage....................... 7
5.1
Preparing for fitting and installation ..................... 33
2.3.15
Risk of death and material damage due to
contact corrosion.......................................................... 7
5.1.1
Delivery, transport and positioning........................ 33
5.1.2
2.3.16
Material damage due to snow falling from
roofs................................................................................. 7
Complying with clearances and installation
clearances..................................................................... 35
5.1.3
Selecting suitable connection.................................. 35
5.1.4
Preparing the roof duct............................................. 36
5.1.5
Selecting the installation variant............................ 36
5.1.6
Putting together components ................................. 37
5.1.7
Determining the ballast load (floating
installation) .................................................................. 37
5.1.8
Defining the rack clearances .................................. 45
2.4
Intended use .................................................................. 8
2.4.1
Intended use .................................................................. 8
2.4.2
Suitability of the equipment....................................... 8
2.4.3
Improper use.................................................................. 8
2.4.4
Other applicable documents ...................................... 8
0020077994_02 auroTHERM exclusive Installation manual
3
Contents
5.2
Carrying out the installation .................................... 47
5.2.1
Installing racks ............................................................ 47
5.2.2
Installing collectors ..................................................... 51
5.2.3
Installing hydraulic connections ............................ 54
8
Decommissioning ................................................ 61
8.1
Temporary decommissioning ................................... 61
8.2
Permanently decommissioning ................................ 61
8.2.1
Removing collectors ................................................... 61
8.2.2
Recycling and disposal .............................................. 62
5.3
Completing and checking the installation ........... 55
5.3.1
Checking installation................................................. 55
5.3.2
Disposing of the packaging ..................................... 56
9
Customer service............................................... 63
6
Inspection and maintenance............................. 57
10
Technical data .................................................... 64
6.1
Maintenance plan........................................................ 57
10.1
Technical data table.................................................. 64
6.1.1
Calendar-based maintenance intervals................. 57
10.2
Dimensions .................................................................. 65
6.2
Observing inspection and maintenance
intervals ........................................................................ 57
10.3
Efficiency and pressure loss ................................... 66
6.3
General inspection and maintenance
instructions .................................................................. 57
6.4
Preparing for inspection and maintenance.......... 57
6.4.1
Spare parts for maintenance................................... 57
6.4.2
Preparing for maintenance ...................................... 57
6.5
Checking collectors and connections for
damage, dirt and lack of tightness ........................ 58
6.6
Cleaning collectors .................................................... 58
6.7
Checking brackets and collector components
for firm seating........................................................... 58
6.8
Check the pipe insulations for damage ................ 58
6.9
Replacing damaged pipe insulations..................... 58
6.10
Disposing of damaged pipe insulations................ 58
7
Troubleshooting ................................................. 59
7.1
Spare parts for repair............................................... 59
7.2
Carrying out repairs.................................................. 59
7.2.1
Replace leaking collectors....................................... 59
7.2.2
Disposing of defective collectors........................... 59
7.2.3
Sealing leaking connections.................................... 59
7.2.4
Replacing defective pipe insulations .................... 59
7.2.5
Disposing of defective pipe insulations................ 59
7.2.6
Replacing defective tubes ....................................... 59
7.2.7
Disposing of defective tubes................................... 60
4
Index ....................................................................................68
Installation manual auroTHERM exclusive 0020077994_02
Notes on the documentation 1
1
Notes on the documentation
1.1
Symbols used
1.3
Document handover
▶
Symbols
The following symbols may appear:
Document storage
Pass this installation manual and all other applicable
documents and, if necessary, any required tools to the
system operator.
Availability of documents
Warning symbol (→ Page 6)
The system operator is responsible for storing the documents so that they are available whenever required.
Information symbol
1.4
Symbol for a required action
Symbol for the result of an action
Applicability of the instructions
These instructions apply for the following only:
Collector types and article numbers
Symbol for the completion of records and checklists
VTK 570/2
0010002225
VTK 1140/2
0010002226
1.5
Symbol for a required qualification
Name
In this manual, tube collectors are referred to as collectors.
Symbol for a required tool
Symbol for the specification of a technical value
n
u
1.2
▶
Symbol for adjacent array configuration
Symbol for array configuration on top of each
other
Observing other applicable documents
All installation instructions for the component parts and
components of the solar plant must be observed when
installing the collectors.
These installation instructions are enclosed with the various system parts and supplementary components.
0020077994_02 auroTHERM exclusive Installation manual
5
2 Safety
2
2.1
Safety
Action-related warnings
Classification of action-related warnings
The action-related warnings are classified in accordance
with the severity of the possible danger using the following
warning signs and signal words:
Warning symbols and signal words
Danger!
Imminent danger to life or risk of severe personal injury
Danger!
Risk of death from electric shock
Warning.
Risk of minor personal injury
Caution.
Risk of material or environmental damage
2.2
Required personnel qualifications
This manual is intended for persons with the following qualifications
2.2.1
Authorised competent person
The installation, assembly and removal, start-up, maintenance, repair and decommissioning of Vaillant products and
accessories must only be carried out by authorised competent persons.
Note
Each competent person is qualified for specific
activities on the basis of their training. They
must only work on units if they have the required qualification.
When working on the units, the competent persons must
observe all applicable directives, standards, laws and other
regulations.
2.3
General safety information
2.3.1
Danger due to improper use
Vaillant auroTHERM VTK tube collectors are constructed
using state-of-the-art technology in accordance with the recognised safety rules and regulations. Nevertheless, there
is still a risk of injury or death to the user or others or of
damage to the unit and other property in the event of improper use or use for which it is not intended.
2.3.2 Risk of death due to improper fastening
systems
The collectors may fall due to improper fastening systems.
Only the combination of Vailllant collectors and Vaillant
fastening systems has been tested. This combination can
withstand the forces caused by additional wind and snow
loads.
▶
Only use the collector fastening systems that are approved by Vaillant.
2.3.3 Risk of death due to inadequate loadbearing capacity of the roof
A roof with an insufficient load-bearing capacity may collapse due to the additional load of the collectors.
Above all, additional wind and snow loads may result in
higher forces which could cause the roof to collapse.
▶
▶
Ensure that a structural engineer has confirmed the roof
as suitable for collector installation.
Only install the collectors on a roof that has adequate
load-bearing capacity.
2.3.4 Risk of death due to falling parts
Unsecured collectors can fall from the roof and present a
danger to persons.
▶
▶
Block off the areas in the fall area below the place of
work to a sufficient extent so that persons cannot be
injured by falling objects.
Indicate the working area, e.g. with information signs, in
accordance with the applicable regulations.
2.3.5 Risk of injury and material damage due to
incorrect maintenance and repairs
If maintenance or repair work is not carried out, or is carried out incorrectly, this may result in injuries or in damage
to the solar plant.
▶
6
Ensure that only an approved competent person carries
out maintenance and repair work.
Installation manual auroTHERM exclusive 0020077994_02
Safety 2
2.3.6 Risk of death due to inadequate fastening
of the collectors
▶
Collectors can fall from their anchors if they are not properly fastened on the roof. Collectors falling from the roof
could cause life-threatening accidents.
2.3.12 Material damage due to an unsuitable tool
▶
▶
▶
▶
▶
Perform all work steps as described in this manual.
Observe all safety precautions described in this manual.
In addition, comply with all safety regulations that specifically apply in your region.
Check the solar fluid regularly with an antifreeze tester.
An unsuitable tool may damage the solar plant.
Only use a suitable tool.
In particular, only use the tool specified in the work steps
of this manual.
2.3.13 Risk of death from electric shock
2.3.7 Risk of burns due to hot collector surfaces
In the event of solar radiation inside the units, collectors
can reach 300 °C. If you touch the collectors without protection, you could burn yourself.
▶
▶
▶
▶
▶
Remove the sun protection film installed at the factory
only after the solar plant has been started up.
Avoid performing installation and maintenance work
under direct sunlight.
Cover the collectors before starting work.
You should preferably perform the work in the morning.
Wear suitable safety gloves.
2.3.8 Risk of injury due to breaking glass
Incorrect installation or a faulty power cable can result in a
supply voltage on the pipes, which can cause life-threatening injuries.
▶
▶
2.3.14 Material damage due to overvoltage
Overvoltage may damage the solar plant.
▶
▶
▶
The glass of the collectors may break due to mechanical
destruction or torsion.
▶
▶
Wear suitable safety gloves.
Wear suitable protective goggles.
2.3.9 Material damage caused by a high-pressure
cleaner
High-pressure cleaners may damage the collectors due to
the extremely high pressure.
▶
Earth the solar circuit to provide equipotential bonding
and overvoltage protection.
Secure earthing pipe clamps to the pipes.
Bond the earthing pipe clamps to a busbar using 16 mm²
copper cable.
2.3.15 Risk of death and material damage due to
contact corrosion
For roofs or façade sections made of metals more precious
than aluminium (e.g. copper roof), contact corrosion may
occur on the brackets. Collectors could fall and put persons
at risk.
▶
Use suitable underlays to separate the metals.
Never clean the collectors with a high-pressure cleaner.
2.3.10 Material damage due to lightning
Lightning can damage the collector system.
▶
Secure earthing pipe clamps to the pipes.
Connect the earthing pipe clamps to a busbar using 16
mm² copper cable.
Connect the collector system to a lightning protection
device in accordance with applicable regulations.
2.3.16 Material damage due to snow falling from
roofs
If the collector field is installed below a sloping roof, then
snow falling from the roof may damage the collectors.
▶
Install snow fences above the collectors as protection
against falling snow.
2.3.11 Frost damage due to water in the solar
circuit
Water residue in the collector may freeze in frosty conditions and damage the collector.
▶
▶
Never fill or flush the collector with water.
Only fill and flush the collector with Vaillant ready-mixed
solar fluid.
0020077994_02 auroTHERM exclusive Installation manual
7
2 Safety
2.4
Intended use
2.5
Regulations (directives, laws, standards)
2.4.1
Intended use
2.5.1
Installation regulations
Vaillant auroTHERM VTK tube collectors are used for solar
heating support and for solar-supported hot water generation.
Regulations
Applies to: Great Britain
Technical Guidance
2.4.2 Suitability of the equipment
The collectors must only be operated with Vaillant readymixed solar fluid. Passing heating water or hot water directly through the collectors constitutes improper use.
2.4.3 Improper use
Any use which is not explicitly mentioned in the chapter
"Intended use" (→ Page 8) is deemed improper.
Any other or additional use does not comply with the intended use. Any direct commercial or industrial use is also
deemed to be improper. The manufacturer/supplier is not
liable for any damage resulting from such use. The user
alone bears the risk.
2.4.3.1 Combination with other components
Vaillant auroTHERM VTK tube collectors must only be
combined with components (fastenings, connections, etc.)
and system parts that are supplied by Vaillant. The use of
other components or system parts shall be considered as
improper use.
2.4.3.2 Installation in or on vehicles
Installation of the Vaillant auroTHERM VTK tube collector
in or on a vehicle is not permissible and is considered improper use. Units that are not classed as vehicles are those
that are installed in a fixed and permanent location (known
as "fixed installation").
2.4.4 Other applicable documents
Intended use includes the following:
– observance of accompanying operating, installation and
servicing instructions for Vaillant products as well as for
other parts and components of the system,
– installing and fitting the unit in accordance with the
boiler and system approval,
– compliance with all inspection and maintenance conditions listed in the instructions.
The system must be installed in accordance with all relevant and applicable national regulations, and must be installed to suit site conditions. Observe all national regulations, including:
–
–
–
–
–
–
Working at Heights Regulations 2005
Health and Safety at Work Act 1974
Electricity at Work Regulations 1989
IEE Wiring Regulations BS 7671
Lightning protection requirements
Equipotential bonding of electrical installations.
Related documents
The installation of the solar system must be in accordance
with the relevant requirements of Health and Safety Document No. 635 (The Electricity at Work Regulations 1989),
BS7671 (IEE Wiring Regulations) and the Water Supply (Water Fitting) Regulations 1999, or The Water Bylaws 2000
(Scotland). It should also be in accordance with the relevant
requirements of the Local Authority, Building Regulations,
The Building Regulations (Scotland), The Building Regulations (Northern Ireland) and the relevant recommendations
of the following British Standards:
– BS EN 806: Specification for installations inside buildings
conveying water for human consumption
– BS 6700: Services supplying water for domestic use
within buildings and their curtilages
– BS 5449 Forced circulation hot water central heating
systems for domestic premises. Note: only up to 45 kW
– BS. 6880 Low temperature hot water heating systems of
output greater than 45 kW
– Part 1 Fundamental and design considerations.
– Part 2 Selection of equipment
– Part 3 Installation, commissioning and maintenance
– BS 6114: Expansion vessels using an internal diaphragm
for unvented hot water supply systems
– BS. 4814 Specification for: Expansion vessels using an internal diaphragm, for sealed hot water heating systems
– Unvented hot water systems must comply with building
regulation G section 3
2.5.2 Regulations for the prevention of accidents
Applies to: Great Britain
When carrying out works such as solar installation work it is
necessary to do so in a safe and workman like manner, taking due care of any aspects of the works that could result in
8
Installation manual auroTHERM exclusive 0020077994_02
Safety 2
injuries to person in or about the building as well as workers, passers by and the general public at large. To that end
these works must conform, but not be limited to, the current regulations in force such as the following:
–
–
–
–
Health and Safety at Work act 1974
Work at Height Regulations 2005
Electricity at Work Regulations 1989
All necessary Building Regulations
Work should be preceded by a risk assessment covering all
aspects of health and safety risks, or training requirements
that can reasonably be foreseen to be associated with the
work. All scaffolding in the UK, other than prefabricated
(zip-up) scaffold towers, must be designed and constructed by a vetted contractor, and have suitable kick boards,
hand rails and where appropriate netting. Areas around
the scaffolding should be zoned off and marked with suitable warning signs to a suitable distance to protect persons from falling objects. Workers should have available
and use personal protective equipment as necessary. This
would include equipment such as fall protection systems,
safety gloves, goggles, dust masks as well as any specialised equipment that may be in use such as lifting and handling equipment.
The completed works shall comply with all necessary BS EN
Standards and Codes of practice as well as Building control
or planning requirements and be confirmed where necessary by notification to building control or the appropriate
competence based notification body.
2.6
CE label
The CE label documents that the appliances as
described in the type overview satisfy the basic requirements of the following directives:
– Directive 97/23/EC of the European Parliament and
Council on the approximation of the laws of the member states regarding pressure equipment
0020077994_02 auroTHERM exclusive Installation manual
9
3 Description of the unit
3
Description of the unit
3.1
3.3
Purpose of the unit
The collectors are used for solar heating support as well as
for solar-supported hot water generation.
Type overview
– VTK 570/2
– VTK 1140/2
3.2
Information on the identification plate
Information on the identification plate
Meaning
CE label:
The collectors comply with
the relevant product-specific
European guidelines.
Solar Keymark:
The collectors have been
successfully tested according
to the rules and requirements
for the Solar Keymark.
Read the installation manual.
VTK 570/2
VTK 1140/2
Type designation
VTK
Vaillant tube collector
570, (1140)
Collector output
/2
Unit generation
auroTHERM exclusive
Unit type
Vacuum tube collector
Tube collector
AG
Gross area
VF
Liquid volume
m
Weight
l
Dimensions
Qmax
Max. output
tstgf
Stagnation temperature
Pmax
Max. permissible operating
pressure
Serial-No.
10
Bar code with serial number
The 7th to 16th digits of the
serial number form the article
number
Installation manual auroTHERM exclusive 0020077994_02
On-roof fitting and installation 4
4
▶
On-roof fitting and installation
When fitting and installing the collectors, you must observe the chapter "Safety".
4.1
Preparing for fitting and installation
4.1.1
Delivery, transport and positioning
4.1.1.1 Storing collectors
▶
To prevent moisture from penetrating into the collector,
always store the collectors dry and in a weatherproof
area.
0020077994_02 auroTHERM exclusive Installation manual
11
4 On-roof fitting and installation
4.1.1.2 Checking the scope of delivery
12
1
11
2
10
9
8
7
3
4
6
List of materials for on-roof installation
1
VTK 1140/2 rail set
2 pc.
2
VTK 570/2 rail set
2 pc.
3
VTK 570/2 tube collector
1 pc.
4
VTK 1140/2 tube collector
1 pc.
5
VTK installation set (basic set)
1 pc.
6
VTK installation set (extension set)
1 pc.
7
Stop valve, 2-way VTK for parallel connection
1 pc.
12
5
8
9
10
Roof bracket type P (for pantile) (basic set)
4 pc.
Roof bracket type P (for pantile) (extension set, on top
of each other)
2 pc.
Roof bracket type S (for beaver tail, etc.) (basic set)
4 pc.
Roof bracket type S (for beaver tail, etc.) (extension set,
on top of each other)
2 pc.
Roof bracket type S flat (for beaver tail, etc.) (basic set)
4 pc.
Roof bracket type S flat (for beaver tail, etc.) (extension
set, on top of each other)
2 pc.
Installation manual auroTHERM exclusive 0020077994_02
On-roof fitting and installation 4
11
▶
Hanger bolt fastening set (basic set)
4 pc.
Hanger bolt fastening set (extension set, on top of each
other)
2 pc.
12
Long base, hook type P
4 pc.
Use the image to check that the installation sets are complete.
0020077994_02 auroTHERM exclusive Installation manual
13
4 On-roof fitting and installation
4.1.1.3 Transporting collectors
Conditions: Parallel connection, aperture surface area: ≤ 7 m²
1.
To protect the collectors against damage, always transport them when they are standing horizontally.
2. Transport the collectors to the roof using suitable aids.
4.1.2
Complying with clearances and installation
clearances
In order to fit the collectors correctly, the specified clearances and installation clearances must be observed.
▶
For the necessary edge clearances, see chapter "Defining edge clearances of the roof brackets".
4.1.3
▶
Selecting suitable connection
▶
Select the appropriate connection for the collectors.
Always connect as many collectors as possible in series,
even when several collector rows are arranged on top of
each other.
Note
Up to an aperture surface area of 7 m²
(accordingly for 3 pcs VTK 1140/2 + 1 pc
VTK 570/2), you must switch the collectors
in series.
Conditions: Parallel connection, aperture surface area: ≥ 14 m²
▶
Ensure that the solar fluid flows through the collectors
either from left to right or from right to left.
Conditions: Number of VTK 1140/2 collectors: 1 … 7
▶
▶
Set up several parallel collector rows and connect these
hydraulically in parallel.
Always connect as many collectors (at least 7 m²) as
possible in series.
max. 7 x VTK 1140/2
▶
14
Switch up to 7 VTK 1140/2 units in series (according to
the 14 m² aperture surface area).
Installation manual auroTHERM exclusive 0020077994_02
On-roof fitting and installation 4
Conditions: Parallel connection
▶
▶
3. Fix the roofing felt membrane tight to the roof batten,
so that any moisture runs off to the side.
To avoid pressure losses in the sub-collector fields, only
use parallel connection for collector rows with the same
number of collectors.
Ensure that each sub-collector field has the same total
tube length in the flow and return (Tichelmann system),
in order to avoid pressure losses in the connection tubes.
4.1.4
Preparing the roof duct
Caution.
Building damage due to penetrating water.
If the roof duct is not prepared properly,
water may penetrate the building interior.
▶ Ensure that the roof duct is prepared
properly.
1. Make a v-shaped cut in the roofing felt membrane.
2. Fold the upper, wider flap onto the roof batten above,
and fold the lower, narrower flap onto the roof batten
below.
0020077994_02 auroTHERM exclusive Installation manual
15
4 On-roof fitting and installation
4.1.5
Putting together components
Note
In the case of roof batten clearances greater than 460 mm, the 2-row and 3-row installations are not possible.
In this case, you can install the 2 or 3 rows individually (without using the same central roof anchor).
Conditions: Collector rows: 1
▶
Use the following table to put together the components for installation.
Number of VTK 1140/2 collectors
1
2
3
Components
4
5
6
7
Required sets
VTK installation set (basic set)
VTK installation set (extension set)
11
−
1
2
3
4
5
6
12
22
32
42
52
62
72
1
2
3
4
5
6
7
Roof bracket set type P (pantile)
Roof bracket set type S (slate)
Roof bracket set type S, flat (slate)
Roof anchor set, hanger bolt
Rail set (2 pcs), VTK 1140/2
1
1 set for connecting to the pipelines; the collectors are connected together using the extension set
2
valid up to 700 m above sea level
Number of VTK 1140/2 collectors
1
2
3
4
5
6
Number of VTK 570/2 collectors
1
1
1
1
1
1
Components
Required sets
VTK installation set (basic set)
VTK installation set (extension set)
11
1
2
3
4
5
6
22
32
42
52
62
72
1
2
3
4
5
6
Roof bracket set type P (pantile)
Roof bracket set type S (slate)
Roof bracket set type S, flat (slate)
Roof anchor set, hanger bolt
VTK 1140/2 rail set
VTK 570/2 rail set
16
1
Installation manual auroTHERM exclusive 0020077994_02
On-roof fitting and installation 4
Number of VTK 1140/2 collectors
1
2
3
4
5
6
Number of VTK 570/2 collectors
1
1
1
1
1
1
Components
1
2
Required sets
1 set per row for connecting to the pipelines; the collectors are connected together using the extension set
Valid up to 700 m above sea level
Conditions: Collector rows: 2
A
B
A
▶
Use the following table to put together the components for installation.
Number of VTK 1140/2 collectors per row
1
2
3
Components
4
5
6
7
Required sets
VTK installation set (basic set)
21
−
2
4
6
8
10
12
A
12
22
32
42
52
62
72
B
12
22
32
42
52
62
72
2
4
5
6
10
12
14
VTK installation set (extension set)
Roof bracket set type P (pantile)
Roof bracket set type S (slate)
Roof bracket set type S, flat (slate)
Roof anchor set, hanger bolt
Roof bracket set type P (pantile)
Roof bracket set type S (slate)
Roof bracket set type S, flat (slate)
Roof anchor set, hanger bolt
Rail set (2 pcs), VTK 1140/2
1 set per row for connecting to the pipelines; the collectors are connected together using the extension set – if the rows are
also connected together so that they are flat-sealed.
2
Valid up to 700 m above sea level
1
0020077994_02 auroTHERM exclusive Installation manual
17
4 On-roof fitting and installation
Conditions: Collector rows: 3
A
B
B
A
▶
Use the following table to put together the components for installation.
Number of VTK 1140/2 collectors per row
1
2
3
Components
4
5
6
7
Required sets
VTK installation set (basic set)
31
−
3
6
9
12
15
18
A
12
22
32
42
52
62
72
B
22
42
62
82
10 2
12 2
14 2
3
6
9
12
15
18
21
VTK installation set (extension set)
Roof bracket set type P (pantile)
Roof bracket set type S (slate)
Roof bracket set type S, flat (slate)
Roof bracket set type P (pantile)
Roof bracket set type S (slate)
Roof bracket set type S, flat (slate)
Rail set (2), VTK 1140/2
1 set per row; the collectors are connected together using the extension set – if the rows are also connected together so that
they are flat-sealed.
2
Valid up to 700 m above sea level
1
18
Installation manual auroTHERM exclusive 0020077994_02
On-roof fitting and installation 4
4.1.6
1.
Determining the number of required roof
brackets
▶
b
[m]
Ask the local building authority for the regional maximum snow load sk.
Conditions: Maximum snow load: ≤ 3 kN/m²
▶
The values for the edge clearances to be observed, eshort
and elong can be found in the following tables.
Install 4 roof brackets per collector.
H [m]
5
6
7
8
9
10
8
1.0
9
1.0
11
11
1.0
1.1
▶
12
1.0
1.2
13
1.0
1.2
1.3
14
1.0
1.2
1.4
Compile statistics for the individual case.
Ensure that the maximum permissible snow load per
collector is 5.4 kN/m².
15
1.0
1.2
1.4
16
1.0
1.2
1.4
17
1.0
1.2
1.4
1.6
1.7
Note
The maximum permissible load per roof
bracket type S/type P is: Fmax = 1.875 kN.
18
1.0
1.2
1.4
1.6
1.8
l
[m]
5
6
7
8
Conditions: Maximum snow load: > 4.5 kN/m²
▶
▶
4.1.7
Defining the edge clearances of the roof
brackets
Maximum lift points caused by wind loads can occur at
the cut-away edges of wall and roof areas (e.g. verge and
eaves). These maximum lift points result in high loads on
the collectors and installation systems.
Areas in which lift points occur are called edge areas.
Corner areas are zones in which edge areas overlap and
especially high pull forces occur.
Edge and corner areas must not be used as installation
areas.
▶
elang
h
15
13
14
15
1.6
h [m]
9
10
11
12
1.0
11
1.0
1.1
12
1.0
1.2
13
1.0
1.2
14
1.0
1.2
15
1.0
1.2
1.4
1.5
16
1.0
1.2
1.4
1.6
1.3
1.4
17
1.0
1.2
1.4
1.6
1.7
18
1.0
1.2
1.4
1.6
1.8
19
1.0
1.2
1.4
1.6
1.8
1.9
20
1.0
1.2
1.4
1.6
1.8
2.0
When installing the roof brackets, observe the calculated
edge clearances.
4.1.8
ekurz
14
1.5
10
2. If you are using extension sets, ensure that the roof
bracket is positioned centrally with equal clearances.
13
1.0
10
Conditions: Maximum snow load: 3 < × ≤ 4.5 kN/m²
Install 6 roof brackets per collector.
12
Defining the roof bracket clearances
The roof brackets have different clearances depending on
the array configuration of the collectors (adjacent or on top
of each other).
b
l
b
Building width
l
Building length
h
Building height
▶
Calculate the building width w, building height h and
building length l.
0020077994_02 auroTHERM exclusive Installation manual
19
4 On-roof fitting and installation
nAdjacent array configuration
4.1.8.1
Specifications/technical data
Pre-installation dimension (*)
4.1.8.2
A
A
= Finished installation
dimension (**) + 2025 mm
u
Array configuration on top of each
other
Note
In the case of roof batten clearances greater
than 460 mm, the 2-row and 3-row installations
are not possible. In this case, you can install the
2 or 3 rows individually (without using the same
central roof anchor).
C
A
B
B B
B
D
1.
Define the clearances of the roof brackets.
Quantity
VTK
570/2
VTK
1140/2
‑
1
1397
‑
2
2794
A
B
C
D
‑
3
4191
‑
4
5588
‑
5
‑
6
‑
7
1
1
1
2
1
3
1
4
1663 * /
1638 **
100 200
VTK1140
997 1197
‑‑‑‑‑
VTK570
507 607
6985
8382
9779
2104
3501
4898
6295
1
5
7692
1
6
8382
2. Ensure that there is sufficient play for the anchors.
20
Installation manual auroTHERM exclusive 0020077994_02
On-roof fitting and installation 4
Conditions: Collector rows: 2
Specifications/technical data
Pre-installation dimension (*)
= Finished installation
dimension (**) + 2025 mm
E
E
A
A
C
B
▶
A
E
B B
D
B
Define the clearances of the roof brackets.
Quantity
VTK
570/2
▶
VTK
1140/2
A
B
C
D
‑
1
1397
‑
2
2794
‑
3
4191
‑
4
‑
5
‑
6
‑
7
1
1
1
2
E
5588
1663 * /
1638 **
100 200
VTK1140
997 1197
‑‑‑‑‑
VTK570
507 607
6985
8382
9779
3322
2104
3501
1
3
1
4
6295
1
5
7692
1
6
8382
4898
Ensure that there is sufficient play for the anchors.
0020077994_02 auroTHERM exclusive Installation manual
21
4 On-roof fitting and installation
Conditions: Collector rows: 3
Quantity
VTK
570/2
E
▶
VTK
1140/2
A
B
C
D
‑
1
1397
‑
2
2794
‑
3
4191
‑
4
‑
5
‑
6
‑
7
1
1
1
2
1
3
1
4
6295
1
5
7692
1
6
8382
E
5588
1663 * /
1638 **
100 200
VTK1140
997 1197
‑‑‑‑‑
VTK570
507 607
6985
8382
9779
5006
2104
3501
4898
Ensure that there is sufficient play for the anchors.
Specifications/technical data
Pre-installation dimension (*)
= Finished installation
dimension (**) + 2025 mm
E
4.2
Carrying out the installation
The installation steps and notes in these instructions apply
for both array configurations. Any different installation
steps are clearly indicated in individual cases.
4.2.1
Installing roof brackets
4.2.1.1 Installing type P (for pantile)
A
A
1
A
C
B
▶
22
B B
D
3
E
2
B
Define the clearances of the roof brackets.
1
Lower roof bracket
2
Top roof bracket
3
Middle roof bracket
Installation manual auroTHERM exclusive 0020077994_02
On-roof fitting and installation 4
1.
Use the top, middle and lower type P roof brackets
shown.
3
4
A
B
▶
5 mm
Undo the top bolt until the height of the roof bracket
can be adjusted (3).
Working materials
2
1
2. Secure the type P roof bracket either to the rafters (A)
or to the roof batten (B).
3. To do this, loosen the bolt (1) on the base of the roof
bracket with the enclosed bit and unscrew the bolt by
approx. 5 mm.
4. If you wish to secure the roof bracket onto the rafters,
turn the base (2) outwards (A).
5. If you wish to secure the roof bracket onto the roof
batten, turn the base (2) inwards (B).
SW 13 spanner
▶
▶
Adjust the roof bracket to the height of the pantiles, so
that the top part of the roof bracket lies on the roofing
(4).
Tighten the top bolt.
Working materials
SW 13 spanner
5
Conditions: Fastening type: To rafters
A
6
B
2
1
▶
▶
▶
▶
▶
▶
Define the clearances of the roof brackets. (→ Page 20)
Expose the rafters at the corresponding position (1).
Position the roof bracket (2). Ensure the correct position of the top, middle and lower roof brackets.
0020077994_02 auroTHERM exclusive Installation manual
Screw the roof bracket onto the rafters using the three
bolts supplied (5).
Slide the pantiles into their original position again (6).
To ensure that the tiles lie tightly together, notch guttering onto the underside (A) or the top side (B) of the
pantile using a hammer, if necessary.
Note
For some roof types, it may be necessary to
offset the roof bracket laterally opposite the
rafters.
To do this, use the accessory "long base"
article number 0020080177 (not available
in all countries).
23
4 On-roof fitting and installation
Conditions: Fastening type: To roof batten
2
A
5
6
3
1
▶
▶
▶
▶
Define the clearances of the roof brackets. (→ Page 20)
Slide one to two pantiles upwards at the corresponding
position above the roof batten (1).
Undo the top bolt until the height of the roof bracket
can be adjusted (2).
Working materials
Tighten the top bolt (5).
Working materials
SW 13 spanner
▶
▶
Slide the pantiles into their original position again (6).
To ensure that the tiles lie tightly together, notch guttering onto the underside of the pantiles (A) using a
hammer, if necessary.
SW 13 spanner
▶
Hang the roof bracket on the roof batten (3). Ensure
that the top, middle and lower roof brackets are positioned correctly.
4.2.1.2 Installing type S (for slate)
1
2
4
▶
▶
24
Adjust the roof bracket to the height of the pantiles, so
that the top part lies on the roofing and the bottom part
is pushed tight against the roof batten from the bottom
(4).
Ensure that the roof bracket fits securely around the
roof batten and pantile when it engages.
1. Define the clearances of the roof brackets. (→ Page 20)
2. At the appropriate position, expose the rafters or roof
batten (1).
3. Position the roof bracket. Ensure the correct position of
the top, middle and lower roof brackets (2).
Installation manual auroTHERM exclusive 0020077994_02
On-roof fitting and installation 4
4.2.1.4 Installing the hanger bolt type
3
4
1
2
4. Screw the roof bracket onto the roof batten or rafters
using the three screws supplied (3).
5. Slide the pantiles into their original position again (4).
4.2.1.3 Installing type S flat (for slate)
1. Define the clearances of the roof brackets. (→ Page 20)
2. At the corresponding position, drill a hole in the pantile
(1).
3. Tighten the hanger bolt onto the rafters through the
pantile(2).
1
2
3
1. Define the clearances of the roof brackets. (→ Page 20)
2. At the appropriate position, expose the rafters or roof
batten (1).
3. Position the roof bracket. Ensure that the top, middle
and lower roof brackets (2) are positioned correctly.
4. Position the central nut so that, after inserting the upper part of the roof bracket, the front contact area lies
on the roofing (3). Ensure the correct positioning of the
top, middle and lower roof brackets.
3
6
4
4. Screw the roof bracket onto the roof batten or rafters
using the three screws supplied (3).
5. Slide the pantiles into their original position again (4).
5
4
5. Position the roof bracket on the central nut (4).
6. Screw the second nut on and tighten (5).
Working materials
SW 17 spanner
0020077994_02 auroTHERM exclusive Installation manual
25
4 On-roof fitting and installation
7. Disconnect the threaded rod directly above the nut (6).
8. Deburr the interface.
Connecting mounting rails
4.2.2 Installing collectors
Danger!
Personal injury and material damage due
to a falling collector.
Improper fastening may cause a collector
to fall.
▶ Tighten the clamping elements.
▶ Check for proper tensioning by shaking
the clamping blocks.
▶ If a clamping block is mobile, tighten the
nut again.
1.
Install the collectors on the roof as specified in the following sections.
4. Insert the connecting elements laterally into the mounting rails until you feel them engage .
5. Connect the mounting rails underneath each other.
6. Secure the mounting rails with the clamping elements
to the roof anchors.
Taring mounting rails
Note
Mounting rails and clamping elements cannot be moved at the same time.
Installing mounting rails
2
1
7. Secure the mounting rails horizontally.
8. Compensate for any height differences by moving the
clamping elements.
9. To do this, pull the clamping element upwards (1), move
it (2) and release it so that it engages.
2. Secure the mounting rails with the clamping elements
to the roof anchors.
3. Position the lower rail as far as possible downwards on
the roof bracket.
26
Installation manual auroTHERM exclusive 0020077994_02
On-roof fitting and installation 4
Laying and hooking collectors
Removing the carrying strap
1
15. Remove the carrying strap.
Danger!
Risk of burns and scalding!
Installing additional collectors
In the event of solar radiation inside the
units, collectors can reach 300 °C.
▶ Avoid working in direct sunlight.
▶ Cover the collectors before starting
work.
1
▶ You should preferably perform the work
in the morning.
▶ Wear suitable safety gloves.
10. Position the collector on the lower mounting rail (top
collector).
11. Hook the collector in on the clamping elements.
12. Ensure that the top clamping block (1) of the clamping
element is above the rail of the collector.
13. Tighten the clamping elements of the lower mounting
rail.
16. Position the next collector on the lower mounting rail.
17. Ensure that the upper clamping block (1) of the clamping element is above the rail of the collector.
Fitting connectors
Working materials
SW 13 spanner
A
Loosening the sun protection film
1
B
2
1
14. To ensure that the sun protection film can be easily removed after starting up the unit, loosen the sun protection film from the edges of the collector.
0020077994_02 auroTHERM exclusive Installation manual
18. Screw the double nipple (A) (from installation set VTK
extension set, article number 0020076779) in the
thread of the second collector (B) with the cap nut (2)
of the first collector.
19. Push the collectors together.
27
4 On-roof fitting and installation
27. Tighten the clamping elements of the top mounting
rails.
Tightening the clamping ring connection
Working materials
SW 13 spanner
Positioning the central mounting rail
Conditions: Collector rows: 2 … 3
1
2
Caution.
Risk of damage to the collectors as a
result of improper installation.
If the hydraulic connections are not installed properly, the stainless steel tubes
inside the collector may become damaged.
▶ When tightening the clamping ring connection, hold a second spanner against
it.
3
▶
▶
▶
20. Screw the two cap nuts securely onto the double nipple.
21. Tighten the clamping elements of the lower mounting
rail.
Slide the central mounting rail until it is flush with the
lower collector (3).
Ensure that the top clamping block of the clamping element (2) is above the edge of the collector.
Secure the mounting rail (1) for the next collector row
to the clamping element.
Working materials
SW 13 spanner
Completing collector rows
22. Install an additional collector. (→ Page 27)
23. Fit the connectors. (→ Page 27)
24. Tighten the clamping ring on the connection for both
collectors. (→ Page 28)
Positioning the top mounting rails
1
25. Slide the upper mounting rails until they are flush with
the collectors.
26. Ensure that the clamping block (1) of the clamping elements lies over the collector rails.
28
Installation manual auroTHERM exclusive 0020077994_02
On-roof fitting and installation 4
4.2.3 Installing hydraulic connections
Installing the upper collectors
Conditions: Collector rows: 2 … 3
1
3
Caution.
Lack of tightness due to incorrect accessories.
2
Incorrect accessories may result in lack
of tightness of the solar circuit and cause
material damage.
▶ Only work in the solar circuit with hard
▶
▶
soldered connections, flat seals, compression fittings or press fittings which
have been approved by the manufacturer for use in solar circuits and at correspondingly high temperatures.
Place the upper collector (1) into the central mounting
rail (2).
Tightly screw in the clamping elements (3) of the central rail.
Working materials
SW 13 spanner
▶
▶
▶
Caution.
Risk of damage to the collectors as a
result of improper installation.
Install the collector row in the same way as for the first
collector row.
Complete the collector row. (→ Page 28)
Position the top mounting rails. (→ Page 28)
If the hydraulic connections are not installed properly, the stainless steel tubes
inside the collector may become damaged.
▶ When tightening the clamping ring connection, hold a second spanner against
it.
1.
Connect the collector flow and return to the system
with the connection tubes.
Conditions: System with collector sensor
▶
Insert the collector sensor into the opening provided on
the collector flow side ("hot side").
Note
In general, the collector sensor can be attached to the right or left side of the collector field because the collectors on both
sides have a corresponding opening.
0020077994_02 auroTHERM exclusive Installation manual
29
4 On-roof fitting and installation
Conditions: Collector rows: 2 … 3
▶
▶
▶
▶
▶
Connect the collectors in accordance with the connection regulations (→ Page 14).
Connect the collector flow and return to the system
with the connection tubes.
To do this, connect the clamping ring connection (from
the installation set VTK basic set, article number
0020076776) to the collector.
Connect the clamping ring connection with the connection pipework.
Check the connections for tightness.
Insulating hydraulic connections
Conditions: Start-up carried out
3
1
2
▶
▶
▶
30
Insulate the hydraulic connections using the insulation
(1) (from installation set VTK extension set, article number 0020076779).
Cover the insulation with the cover plate (3) (from
installation set VTK extension set, article number
0020076779).
Insulate the hydraulic system connections using the
insulation (2) (from installation set VTK extension set,
article number 0020076779).
Installation manual auroTHERM exclusive 0020077994_02
On-roof fitting and installation 4
4.3
Completing and checking the installation
4.3.1
Checking installation
Use the following checklist to ensure that all work steps have been performed.
Operations
Yes
No
All hydraulic connections tightened
☐
☐
Hydraulic connections routed correctly
☐
☐
☐
☐
☐
☐
Collectors connected to lightning protection device
(Optionally for lightning protection device)
☐
☐
Pressure testing performed
(Ideally with compressed air)
☐
☐
☐
☐
VR 11 collector sensor connected
(Only for systems WITH a collector sensor)
All clamping elements tightened
All connections tight
Date
All installation work has been
performed correctly.
Comments
Signature
ˍˍ.ˍˍ.ˍˍˍˍ
0020077994_02 auroTHERM exclusive Installation manual
31
4 On-roof fitting and installation
4.3.2 Disposing of the packaging
The transport packaging consists largely of recyclable materials.
▶
▶
32
Observe the applicable regulations.
Dispose of the transport packaging properly.
Installation manual auroTHERM exclusive 0020077994_02
Flat roof fitting and installation 5
5
▶
Flat roof fitting and installation
When fitting and installing the collectors, you must observe the chapter "Safety".
5.1
Preparing for fitting and installation
5.1.1
Delivery, transport and positioning
5.1.1.1 Storing collectors
▶
To prevent moisture from penetrating into the collector,
always store the collectors dry and in a weatherproof
area.
0020077994_02 auroTHERM exclusive Installation manual
33
5 Flat roof fitting and installation
5.1.1.2 Checking the scope of delivery
1
10
2
9
3
8
4
5
6
7
List of materials for flat roof installation
1
VTK 1140/2 rail set
2 pc.
2
VTK 570/2 rail set
2 pc.
3
Frame set
1 pc.
4
Load plates from load plate set
4 pc.
5
Hammer-head bolt and nut from load plate set
2 pc.
▶
6
7
8
9
10
VTK 570/2 tube collector
1 pc.
VTK 1140/2 tube collector
1 pc.
Stop valve, 2-way VTK for parallel connection
1 pc.
VTK installation set (basic set)
1 pc.
VTK installation set (extension set)
1 pc.
Use the image to check that the installation sets are complete.
34
Installation manual auroTHERM exclusive 0020077994_02
Flat roof fitting and installation 5
5.1.1.3 Transporting collectors
Conditions: Parallel connection, aperture surface area: ≤ 7 m²
1.
To protect the collectors against damage, always transport them when they are standing horizontally.
2. Transport the collectors to the roof using suitable aids.
5.1.2
Complying with clearances and installation
clearances
During storms, strong wind forces occur along the edges of
flat roofs.
▶
When defining the installation position, maintain an edge
clearance of at least 1 m from the roof edge.
5.1.3
▶
Selecting suitable connection
▶
Select the appropriate connection for the collectors.
Always connect as many collectors as possible in series,
even when several collector rows are arranged on top of
each other.
Note
Up to an aperture surface area of 7 m²
(accordingly for 3 pcs VTK 1140/2 + 1 pc
VTK 570/2), you must switch the collectors
in series.
Conditions: Parallel connection, aperture surface area: ≥ 14 m²
▶
Ensure that the solar fluid flows through the collectors
either from left to right or from right to left.
Conditions: Number of VTK 1140/2 collectors: 1 … 7
▶
▶
Set up several parallel collector rows and connect these
hydraulically in parallel.
Always connect as many collectors (at least 7 m²) as
possible in series.
max. 7 x VTK 1140/2
▶
Switch up to 7 VTK 1140/2 units in series (according to
the 14 m² aperture surface area).
0020077994_02 auroTHERM exclusive Installation manual
35
5 Flat roof fitting and installation
Conditions: Parallel connection
5.1.5
Selecting the installation variant
C
B
A
▶
▶
▶
To avoid pressure losses in the sub-collector fields, only
use parallel connection for collector rows with the same
number of collectors.
Ensure that each sub-collector field has the same total
tube length in the flow and return (Tichelmann system),
in order to avoid pressure losses in the connection tubes.
5.1.4
Preparing the roof duct
Make a selection from the three available installation
variants:
Installation
variants
Meaning
A
Floating installation with load plates
and load weights.
B
Floating installation without load
plates. The rack must be screwed onto
suitable load weights.
C
Rack screwed directly onto the roof.
Caution.
Lack of tightness due to destruction of
the roof skin.
In the event of destruction of the roof skin,
water may penetrate the building.
▶ Ensure adequate protection of the roof
▶
▶
▶
skin during installation on roof sealing
surfaces.
Place large-area building protection
mats underneath the installation system.
After installation, check the tightness
of the building shell where there are
directly connected racks.
Commission a roofer to prepare the roof duct.
36
Installation manual auroTHERM exclusive 0020077994_02
Flat roof fitting and installation 5
5.1.6
▶
Putting together components
Use the following table to put together the components for installation.
Number of VTK 1140/2 collectors
1
2
3
Components
4
5
6
7
Required sets/quantity
VTK installation set (basic set)
1 1)
VTK installation set (basic set)
−
1
2
3
4
5
6
Installation set for open-air/flat-roof installation
2
3
4
5
6
7
8
Required rack
2
3
4
5
6
7
8
Rail set (2 pcs), VTK 1140/2
1
2
3
4
5
6
7
1)
1 set each per collector field for connecting to the pipelines; the collectors are connected together using the extension set
Number of VTK 1140/2 collectors
1
2
3
4
5
6
Number of VTK 570/2 collectors
1
1
1
1
1
1
Components
Required sets/quantity
VTK installation set (basic set)
1 1)
VTK installation set (extension set)
1
2
3
4
5
6
Installation set for open-air/flat-roof installation
3
4
5
6
7
8
Required rack
3
4
5
6
7
8
Rail set (2 pcs), VTK 1140/2
1
2
3
4
5
6
Rail set (2 pcs), VTK 570/2
1)
5.1.7
1
1 set each per collector field for connecting to the pipelines; the collectors are connected together using the extension set
Determining the ballast load (floating installation)
Danger!
Risk of death and material damage due to excessive basic wind speeds!
The racks are designed for basic wind speeds of up to 108 km/h. If the basic wind speed at the site is
greater than 108 km/h, then there can be no guarantee claim for the system.
▶ Only install the rack in locations where the basic wind speed is a maximum of 108 km/h.
1.
Please note the following for floating installation:
Installation
variants
Please note
Weights that are firmly screwed onto
the rack must consist of material capable of screw connections.
B
A and B
All weights must be weatherproof.
2. For detailed determination of the basic wind speed at the site and the required weights for the rack, use the Vaillant
tool for dimensioning the wind and snow loads.
3. For quick determination of the basic wind speed at the site, use the following map.
4. For quick dimensioning of the required weights, use the following tables.
Note
The map and tables are used for quick dimensioning of the ballast loads. Detailed dimensioning of the ballast loads is only possible using the Vaillant tool for dimensioning the wind and snow loads. If you have any
questions on this subject, please contact your responsible Vaillant sales partner.
0020077994_02 auroTHERM exclusive Installation manual
37
GR
AL
MK
ME
BA
IT
SI
AT
> 108 km/h
< 108 km/h
< 99 km/h
< 90 km/h
< 81 km/h
< 72 km/h
PT
ES
IE
IS
AD
GB
FR
BE
NL
CH
LU
DE
DK
NO
CZ
HR
SE
HU
SK
PL
RS
LT
RO
BG
LV
FI
EE
BY
MD
UA
RU
TR
5 Flat roof fitting and installation
5. Use the map to determine the basic wind speed at the site.
38
Installation manual auroTHERM exclusive 0020077994_02
Flat roof fitting and installation 5
L2
L1
6. Use the tables to determine the required weights.
Horizontal collector position
Installation angle 30°
Weights/rack [kg]
To secure against sliding and
lifting
To secure only against lifting
(if secured/anchored against
sliding)
Building height
Building height
L2
L1
Basic wind speed [km/h]
Position
up to 10
m
10-18 m
18-25 m
up to 10
m
10-18 m
18-25 m
up to 72
Inland
L₁
L₂
286
184
359
235
407
269
30
184
38
235
45
269
up to 72
Coast and islands
L₁
L₂
392
259
461
307
505
345
43
259
53
307
59
338
up to 81
Inland
L₁
L₂
339
221
445
296
515
345
35
221
50
296
61
345
up to 81
Coast and islands
L₁
L₂
499
334
588
396
643
435
58
334
71
396
79
435
up to 90
Inland
L₁
L₂
445
296
550
370
621
419
50
296
66
370
76
419
up to 90
Coast and islands
L₁
L₂
586
395
691
469
762
518
71
395
86
469
96
518
up to 99
Inland
L₁
L₂
550
370
656
444
762
518
66
370
81
444
96
518
up to 99
Coast and islands
L₁
L₂
727
494
833
568
903
617
91
494
107
568
117
617
up to 108
Inland
L₁
L₂
656
444
797
543
903
617
81
444
101
543
117
617
up to 108
Coast and islands
L₁
L₂
868
593
974
667
1079
741
112
593
127
667
142
741
0020077994_02 auroTHERM exclusive Installation manual
39
5 Flat roof fitting and installation
Horizontal collector position
Installation angle 45°
Weights/rack [kg]
To secure against sliding and
lifting
To secure only against lifting
(if secured/anchored against
sliding)
Building height
Building height
L2
L1
Basic wind speed [km/h]
40
Position
up to 10
m
10-18 m
18-25 m
up to 10
m
18-25 m
18-25 m
up to 72
Inland
L₁
L₂
299
213
372
274
421
314
30
191
30
242
30
276
up to 72
Coast and islands
L₁
L₂
406
301
476
359
521
396
30
265
30
315
30
346
up to 81
Inland
L₁
L₂
352
257
495
345
531
404
30
228
30
303
30
352
up to 81
Coast and islands
L₁
L₂
515
391
604
464
661
510
30
341
30
404
30
443
up to 90
Inland
L₁
L₂
459
345
566
433
638
492
30
303
30
377
30
427
up to 90
Coast and islands
L₁
L₂
602
462
709
550
781
609
30
402
30
477
30
526
up to 99
Inland
L₁
L₂
566
433
673
521
781
609
30
377
30
452
30
526
up to 99
Coast and islands
L₁
L₂
745
579
852
667
923
726
30
502
30
576
30
626
up to 108
Inland
L₁
L₂
673
521
816
638
923
726
30
452
30
551
30
626
up to 108
Coast and islands
L₁
L₂
888
697
995
785
1102
873
30
601
30
675
30
750
Installation manual auroTHERM exclusive 0020077994_02
Flat roof fitting and installation 5
Horizontal collector position
Installation angle 60°
Weights/rack [kg]
To secure against sliding and
lifting
To secure only against lifting
(if secured/anchored against
sliding)
Building height
Building height
L2
L1
Basic wind speed [km/h]
Position
up to 10
m
10-18 m
18-25 m
up to 10
m
10-18 m
18-25 m
up to 72
Inland
L₁
L₂
268
297
334
377
378
430
30
196
37
247
45
281
up to 72
Coast and islands
L₁
L₂
365
414
430
491
474
539
43
271
54
320
62
351
up to 81
Inland
L₁
L₂
316
355
413
472
484
550
33
233
52
308
64
357
up to 81
Coast and islands
L₁
L₂
468
532
557
630
613
691
61
346
76
408
85
448
up to 90
Inland
L₁
L₂
413
472
519
589
590
667
52
308
70
382
82
432
up to 90
Coast and islands
L₁
L₂
555
628
661
744
731
822
76
407
94
481
106
531
up to 99
Inland
L₁
L₂
519
589
625
705
731
822
70
382
88
456
106
531
up to 99
Coast and islands
L₁
L₂
696
783
802
900
873
978
100
506
118
580
130
630
up to 108
Inland
L₁
L₂
625
705
767
861
873
978
88
456
112
556
130
630
up to 108
Coast and islands
L₁
L₂
838
939
944
1056
1050
1172
124
605
142
680
160
754
0020077994_02 auroTHERM exclusive Installation manual
41
5 Flat roof fitting and installation
Vertical collector position
Installation angle 30°
Weights/rack [kg]
To secure against sliding and
lifting
To secure only against lifting
(if secured/anchored against
sliding)
Building height
Building height
L2
L1
Basic wind speed [km/h]
42
Position
up to 10
m
10-18 m
18-25 m
up to 10
m
10-18 m
18-25 m
up to 72
Inland
L₁
L₂
301
167
378
213
429
244
44
167
40
213
70
244
up to 72
Coast and islands
L₁
L₂
413
234
487
279
534
307
67
234
81
279
90
307
up to 81
Inland
L₁
L₂
357
201
469
268
544
313
56
201
78
268
92
313
up to 81
Coast and islands
L₁
L₂
527
303
621
359
680
395
89
303
108
359
119
395
up to 90
Inland
L₁
L₂
469
268
581
335
656
380
78
268
100
335
115
380
up to 90
Coast and islands
L₁
L₂
619
358
731
425
806
470
107
358
129
425
144
470
up to 99
Inland
L₁
L₂
581
335
694
403
806
470
100
335
122
403
144
470
up to 99
Coast and islands
L₁
L₂
768
448
881
515
955
560
137
448
159
515
174
560
up to 108
Inland
L₁
L₂
694
403
843
492
955
560
122
403
152
492
174
560
up to 108
Coast and islands
L₁
L₂
918
537
1030
605
1143
672
166
537
188
605
211
672
Installation manual auroTHERM exclusive 0020077994_02
Flat roof fitting and installation 5
Vertical collector position
Installation angle 45°
Weights/rack [kg]
To secure against sliding and
lifting
To secure only against lifting
(if secured/anchored against
sliding)
Building height
Building height
L2
L1
Basic wind speed [km/h]
Position
up to 10
m
10-18 m
18-25 m
up to 10
m
10-18 m
18-25 m
up to 72
Inland
L₁
L₂
321
191
401
245
454
281
30
173
30
220
30
251
up to 72
Coast and islands
L₁
L₂
437
270
513
321
562
354
30
241
30
286
30
314
up to 81
Inland
L₁
L₂
379
230
495
309
572
361
30
207
30
275
30
320
up to 81
Coast and islands
L₁
L₂
555
350
652
415
713
4547
30
310
30
366
30
402
up to 90
Inland
L₁
L₂
495
309
611
388
688
440
30
275
30
342
30
388
up to 90
Coast and islands
L₁
L₂
650
414
766
493
843
545
30
365
30
433
30
478
up to 99
Inland
L₁
L₂
611
388
727
466
843
545
30
342
30
410
30
478
up to 99
Coast and islands
L₁
L₂
804
519
920
598
998
650
30
455
30
523
30
568
up to 108
Inland
L₁
L₂
727
466
882
571
998
650
30
410
30
500
30
568
up to 108
Coast and islands
L₁
L₂
959
624
1075
703
1191
781
30
546
30
613
34
681
0020077994_02 auroTHERM exclusive Installation manual
43
5 Flat roof fitting and installation
Vertical collector position
Installation angle 60°
Weights/rack [kg]
To secure against sliding and
lifting
To secure only against lifting
(if secured/anchored against
sliding)
Building height
Building height
L2
L1
Basic wind speed [km/h]
44
Position
up to 10
m
10-18 m
18-25 m
up to 10
m
10-18 m
18-25 m
up to 72
Inland
L₁
L₂
297
267
372
339
421
387
30
179
30
225
37
256
up to 72
Coast and islands
L₁
L₂
406
372
477
441
522
485
30
246
30
291
35
325
up to 81
Inland
L₁
L₂
352
319
460
424
532
494
30
212
30
280
37
325
up to 81
Coast and islands
L₁
L₂
516
479
607
566
664
621
35
315
45
372
52
407
up to 90
Inland
L₁
L₂
460
424
568
529
641
599
30
280
41
348
49
393
up to 90
Coast and islands
L₁
L₂
604
564
713
669
785
739
45
370
58
438
67
483
up to 99
Inland
L₁
L₂
568
529
677
634
785
739
41
348
54
415
67
483
up to 99
Coast and islands
L₁
L₂
749
704
857
809
930
879
62
461
75
528
84
573
up to 108
Inland
L₁
L₂
677
634
821
774
930
879
54
415
71
506
84
573
up to 108
Coast and islands
L₁
L₂
893
844
1002
949
1110
1054
80
551
92
619
105
686
Installation manual auroTHERM exclusive 0020077994_02
Flat roof fitting and installation 5
5.1.8
Defining the rack clearances
B
Conditions: Installed collectors: VTK 1140/2
C
A
F
E
C
D
▶
Define the rack clearances.
30°
Quantity
A
1
1088
2
2466
3
3863
4
5260
5
6657
6
8054
7
9451
1)
B
45°
F
1106
60°
B
1)
2420
F
1476
B
1)
3001
F
1749
C
1)
3267
1684
D
E
−
−
1233
1397
Sun elevation of 20° (winter sun)
B
Conditions: Installed collectors: VTK 570/2 and VTK 1140/2 in combination
C
G
F
A
E
D
▶
C
Define the rack clearances.
Quantity
30°
VTK
570/2
VTK
1140/2
A
1
1
1776
1
2
3173
1
3
4570
1
4
5967
B
1106
45°
F
1)
2420
B
1476
0020077994_02 auroTHERM exclusive Installation manual
60°
F
1)
3001
B
1749
F
1)
3267
C
D
E
G
1684
543
1397
1233
45
5 Flat roof fitting and installation
Quantity
VTK
570/2
1)
46
30°
VTK
1140/2
A
1
5
7364
1
6
8761
B
1106
45°
F
1)
2420
B
1476
60°
F
1)
3001
B
1749
F
1)
3267
C
D
E
G
1684
543
1397
1233
Sun elevation of 20° (winter sun)
Installation manual auroTHERM exclusive 0020077994_02
Flat roof fitting and installation 5
5.2
Carrying out the installation
Specifications/technical data
5.2.1
Installing racks
Installation angle
– 30°
– 45°
– 60°
Danger!
Risk of death due to falling collectors!
Unsecured collectors may fall from the flat
roof due to the wind and present a danger
to persons.
1
▶ Perform the following safety precau-
tions according to the installation type.
▶ For direct connection, screw the rack
▶
▶
1.
properly onto the base.
Only use suitable load weights.
Observe the required ballast load of the
load weights.
Determine the required number of racks.
Specifications/technical data
For the first collector
Two racks
For each additional collector
One additional rack
2
4. Push the locking button (1) on the telescopic rail.
5. Pull the telescopic rail (2) into the desired installation
angle and allow the locking button to engage again.
2
3
1
1
2. Fold out the first rack.
60°
45°
30°
6. Position the crossbeams (1) such that their fastening
holes lie between the corresponding threaded holes in
the telescopic rail.
7. To secure the rack, insert the fixing screw (2) through
all rails.
8. Secure the fixing screw (2) with the self-locking nuts
(3).
9. Tighten the nuts.
3. Select the required installation angle.
0020077994_02 auroTHERM exclusive Installation manual
47
5 Flat roof fitting and installation
Conditions: Type of installation: Direct mounting
Conditions: Type of installation: Floating installation (with load plates)
Screwing on the rack
Preparing load plates
Caution.
Lack of tightness due to destruction of
the roof skin.
In the event of destruction of the roof skin,
water can penetrate the building.
▶ Check the tightness of the roof skin
after tightening screw connections.
▶ Restore the tightness of the roof skin if
necessary.
▶
▶
▶
▶
Define the required rack clearances as described in the
chapter "Defining rack clearances".
Drill the required holes at the defined positions.
Secure the rack with fastenings appropriate to the base
(diameter: at least 10 mm).
Mount as many racks as you need to hold the collectors.
Caution.
Lack of tightness due to destruction of
the roof skin.
In the event of destruction of the roof skin,
water may penetrate the building.
▶ Ensure adequate protection of the roof
skin during installation on roof sealing
surfaces.
▶ Place large-area, non-slip building protection mats underneath the installation
system.
▶
If the roof is covered with gravel, remove the gravel at
the places where you wish to position the load plates,
and use non-slip building protection mats to protect the
roof skin.
▶
▶
Connect two load plates as shown in the illustration.
Connect two additional load plates as shown in the illustration.
Note
For each rack, you will need four load plates:
one pair each for the front and rear rack
feet.
48
Installation manual auroTHERM exclusive 0020077994_02
Flat roof fitting and installation 5
▶
Align the load plates approximately in their final position on the flat roof.
▶
▶
▶
▶
▶
Insert the first hammer-head bolt centrally in the
groove between the first two load plates.
To secure the hammer-head bolt, turn it by 90° in a
clockwise direction.
Secure the second hammer-head bolt in the same way
between the other two load plates.
3
Install the second rack on the load plates as described
above.
Mount as many racks and load plates as you need to
hold the collectors.
Note
For one collector, you will need two racks.
For each additional adjacent collector, you
will need an additional rack.
1
2
Screwing the rack onto load plates and aligning
▶
▶
▶
▶
▶
▶
If you install the VTK 570/2 collectors, turn the load
plates by 90° so that the load plates do not overlap.
Take hold of the first rack that is already secured in the
installation angle.
Position the front rack feet above the hammer-head
bolt (1).
When positioning the rack feet, ensure that the antirotation lock (2) engages.
Secure the rack feet with the self-locking nut (3).
Secure the rear rack feet in the same way on the other
two load plates.
◁
▶
▶
Align all racks with the load plates in their final position
on the flat roof.
The rack clearances can be found in the chapter "Defining rack clearances".
The first rack is installed so that it is stable.
0020077994_02 auroTHERM exclusive Installation manual
49
5 Flat roof fitting and installation
Placing load weights on load plates
▶
▶
▶
Transport the required number of loading weights to
the flat roof.
Place the load weights on the load plates as shown
above.
Ensure that the distance between the loading weights
and the racks is as small as possible.
Danger!
Risk of death due to inadequate fastening of the load weights onto the load
plates!
If the load weights are inadequately secured on the load plates, collectors could
fall from the roof and cause life-threatening accidents.
▶ Secure all load weights on the load
plates adequately against slipping and
tilting.
▶
▶
Define the required rack clearances as described in the
chapter "Defining rack clearances".
Note
For each rack, you need two equal weights.
For the first collector, you therefore need
four weights. For each additional collector,
you will need an additional rack.
▶
▶
Transport the required number of weights to the flat
roof.
Lay the weights in the final positions of the installation
site.
Note
The four weights for holding two racks for
a collector are very heavy. Therefore, it is
advisable to determine the final position and
orientation of the weights before screwing
on the rack and laying the weights there.
Distribute the load weights evenly over the load plates.
Conditions: Type of installation: Floating installation (without load plates)
Preparing weights
▶
▶
Select a suitable fastening material for the weights used
(diameter: at least 10 mm).
Drill a hole into the centre of each weight.
Caution.
Lack of tightness due to destruction of
the roof skin.
In the event of destruction of the roof skin,
water may penetrate the building.
▶ Ensure adequate protection of the roof
skin during installation on roof sealing
surfaces.
▶ Place large-area, non-slip building protection mats underneath the installation
system.
▶
50
If the roof is covered with gravel, remove the gravel at
the places where you wish to position the weights, and
use non-slip building protection mats to protect the roof
skin.
Installation manual auroTHERM exclusive 0020077994_02
Flat roof fitting and installation 5
Sliding on mounting rails
1
2
3
Screwing the rack onto weights
▶
▶
▶
Take hold of the first rack that is already secured in the
installation angle.
Screw the front rack feet onto the first weight.
Screw the rear rack feet onto the second weight.
◁
The first rack is installed so that it is stable.
2. Slide the two mounting rails (top and bottom) onto the
brackets, as shown in the image.
3. Ensure that the open side of the bottom mounting rail
is facing upwards and that the open side of the top
mounting rail is facing downwards.
4. First slide the mounting rail onto one bracket (1).
5. Slide the mounting rail a little outwards (2).
6. Then slide the mounting rail back to the other bracket
(3).
7. Perform these steps one after the other for all racks.
Fitting mounting rails to several racks
A
B
2
▶
▶
Install the second rack on the next two weights as described above.
Fit as many racks as you need to hold the collectors.
5.2.2 Installing collectors
Danger!
Personal injury and material damage due
to a falling collector.
50
-
20
0
1
8. When installing several collectors next to each other, allow the mounting rails to end in the centre of the brackets (A).
9. Allow the mounting rails on the first and last rack to
protrude 50-200 mm over the edge (B).
Improper fastening may cause a collector
to fall.
▶ Tighten the clamping elements.
▶ Check for proper tensioning by shaking
▶
1.
the clamping blocks.
If a clamping block is mobile, tighten the
nut again.
Install the collectors on the roof as specified in the following sections.
0020077994_02 auroTHERM exclusive Installation manual
51
5 Flat roof fitting and installation
Connecting mounting rails
Hooking the collector in at the bottom
1
1
10. Clamp the rail connector (1) into the mounting rails.
11. Ensure that the rail connector (1) engages in the holes
of the mounting rails.
Danger!
Risk of burns and scalding!
In the event of solar radiation inside the
units, collectors can reach 300 °C.
Note
After installation, the rail connectors are no
longer accessible.
▶ Avoid working in direct sunlight.
▶ Cover the collectors before starting
work.
Securing the mounting rails at the bottom
▶ You should preferably perform the work
in the morning.
▶ Wear suitable safety gloves.
13. Place the collector so that its lower edge is in the profile of the mounting rail (1) (upper collector). Ensure
that the mounting rail (1) surrounds the lower edge of
the collector.
Securing the collector at the top
1
2
12. Screw the brackets tightly onto the lower mounting
rails.
Working materials
5 mm Allen key
14. Slide the left side of the top mounting rail (1) until it is
flush with the collector.
15. Ensure that the mounting rail (1) surrounds the top
edge of the collector.
16. Screw the bracket securely on the top left (2).
Working materials
5 mm Allen key
17. Ensure that the mounting rail does not slip while you
are tightening the screw.
52
Installation manual auroTHERM exclusive 0020077994_02
Flat roof fitting and installation 5
Removing the carrying strap
Fitting connectors
A
18. Remove the carrying strap.
1
B
2
21. Screw the double nipple (A) (from installation set VTK
extension set, article number 0020076779) in the
thread of the second collector (B) with the cap nut of
the first collector ((1) and (2)).
22. Push the collectors together.
Loosening the sun protection film
Tightening the clamping ring connection
1
19. To ensure that the sun protection film can be easily removed after starting up the unit, loosen the sun protection film from the edges of the collector (1).
Installing additional collectors
Caution.
Risk of damage to the collectors as a
result of improper installation.
If the hydraulic connections are not installed properly, the stainless steel tubes
inside the collector may become damaged.
▶ When tightening the clamping ring connection, hold a second spanner against
it.
23. Screw the two cap nuts securely onto the double nipple.
20. Position the next collector on the lower mounting rail so
that there is a clearance of approx. 10 cm from the first
collector.
Completing the installation of the collector
24. Slide the second top mounting rail until it is flush with
the collector.
25. Screw the second top mounting rail tightly onto the
mounting rail of the first collector using the corresponding bracket.
Working materials
5 mm Allen key
0020077994_02 auroTHERM exclusive Installation manual
53
5 Flat roof fitting and installation
26. Remove the carrying strap. (→ Page 53)
27. Loosen the sun protection film from the edges of the
collector. (→ Page 53)
2. To do this, connect the clamping ring connection (from
the installation set VTK basic set, article number
0020076776) to the collector.
Completing collector rows
3. Connect the clamping ring connection with the connection pipework.
4. Check the connections for tightness.
Conditions: Not all collectors in a row have been installed yet.
▶
▶
▶
Install an additional collector. (→ Page 53)
Fit the connectors. (→ Page 53)
Tighten the clamping ring connection. (→ Page 53)
Conditions: System with collector sensor
▶
Insert the collector sensor into the opening provided on
the collector flow side ("hot side").
5.2.3 Installing hydraulic connections
Note
In general, the collector sensor can be attached to the right or left side of the collector field because the collectors on both
sides have a corresponding opening.
Insulating hydraulic connections
Conditions: Start-up carried out
3
Caution.
Lack of tightness due to incorrect accessories.
1
2
Incorrect accessories may result in lack
of tightness of the solar circuit and cause
material damage.
▶ Only work in the solar circuit with hard
soldered connections, flat seals, compression fittings or press fittings which
have been approved by the manufacturer for use in solar circuits and at correspondingly high temperatures.
▶
▶
▶
Caution.
Risk of damage to the collectors as a
result of improper installation.
Insulate the hydraulic connections using the insulation
(1) (from installation set VTK extension set, article number 0020076779).
Cover the insulation with the cover plate (3) (from
installation set VTK extension set, article number
0020076779).
Insulate the hydraulic system connections using the
insulation (2) (from installation set VTK extension set,
article number 0020076779).
If the hydraulic connections are not installed properly, the stainless steel tubes
inside the collector may become damaged.
▶ When tightening the clamping ring connection, hold a second spanner against
it.
1.
54
Connect the collector flow and return to the system
with the connection tubes.
Installation manual auroTHERM exclusive 0020077994_02
Flat roof fitting and installation 5
5.3
Completing and checking the installation
5.3.1
Checking installation
Use the following checklist to ensure that all work steps have been performed.
Operations
Yes
No
Building statics taken into account during installation of
the system
☐
☐
Clearances from the roof edge complied with in accordance with the specifications
☐
☐
Rack positioned in accordance with the dimensions specifications
☐
☐
All bolts securely tightened
(Installation and telescopic rail)
☐
☐
Adequate ballast weights used
(Only for floating installation)
☐
☐
Load weights adequately secured against slipping and
tilting
(Only for floating installation)
☐
☐
Rack anchored and bolts tightened
(Only for direct connection)
☐
☐
All hydraulic connections tightened
☐
☐
Hydraulic connections routed correctly
☐
☐
VR 11 collector sensor connected
(Only for systems WITH a collector sensor)
☐
☐
Collectors connected to lightning protection device
(Optionally for lightning protection device)
☐
☐
Pressure testing performed
(Ideally with compressed air)
☐
☐
☐
☐
All connections tight
Date
All installation work has been
performed correctly.
Comments
Signature
ˍˍ.ˍˍ.ˍˍˍˍ
0020077994_02 auroTHERM exclusive Installation manual
55
5 Flat roof fitting and installation
5.3.2 Disposing of the packaging
The transport packaging consists largely of recyclable materials.
▶
▶
Observe the applicable regulations.
Dispose of the transport packaging properly.
56
Installation manual auroTHERM exclusive 0020077994_02
Inspection and maintenance 6
6
6.1
Inspection and maintenance
6.3
Maintenance plan
Danger!
Risk of death, injury and material damage due to improper maintenance and
repairs!
The following table shows the inspection and maintenance
work that must be carried out at specific intervals.
6.1.1
General inspection and maintenance
instructions
Improper maintenance work or repairs can
impair the operating safety of the unit and
result in material damage and personal
injury.
Calendar-based maintenance intervals
Calendar-based maintenance intervals
Interval
Maintenance work
Page
Annually
Checking collectors and connections
for damage, dirt and lack of tightness
58
Cleaning collectors
58
▶ Only perform maintenance work and
repairs on the collectors if you are a
qualified competent person.
Checking brackets and collector components for firm seating
58
Check the pipe insulations for damage
58
6.4
Preparing for inspection and maintenance
Replacing damaged pipe insulations
58
Disposing of damaged pipe insulations
6.4.1
Spare parts for maintenance
58
Procuring spare parts
6.2
Observing inspection and maintenance
intervals
Regular inspection/maintenance of the entire solar plant
by a competent person is a prerequisite for ensuring that
the system is constantly ready for operation, reliable and
has a long service life. Vaillant recommends that you sign a
maintenance contract.
Danger!
Risk of death, injury and material damage due to failure to perform maintenance and repairs work!
Failure to perform maintenance or repair
work, or failure to comply with the specified maintenance intervals, may impair
the operating safety of the unit and cause
material damage and personal injury.
▶ Instruct the operator to observe the
▶
specified maintenance intervals strictly.
Perform maintenance work on the collectors in accordance with the maintenance plan.
0020077994_02 auroTHERM exclusive Installation manual
If you require spare parts for servicing or repair work, use
only Vaillant genuine spare parts.
The original components of the unit were also certified as
part of the CE declaration of conformity. If you do not use
certified Vaillant genuine spare parts, this voids the CE conformity of the unit. We therefore strongly recommend that
you fit Vaillant genuine spare parts.
Replacement parts
Applies to: Great Britain
An overview of the available genuine Vaillant spare parts
can be obtained:
– From your parts wholesaler
– Alternatively contact Spares Technical
Enquiries on 01773 596615 or via email: [email protected]
6.4.2 Preparing for maintenance
▶
Put together all the tools and materials required for the
maintenance work.
57
6 Inspection and maintenance
6.5
Checking collectors and connections for
damage, dirt and lack of tightness
1.
Check the collectors for damage.
If the collectors are damaged:
▶ Replace the collectors.
2. Check the collectors for dirt.
If the collectors are dirty:
▶ Clean the collectors. (→ Page 58)
3. Check the connections for lack of tightness.
If the connections are not tight:
▶ Seal the leaking connections. (→ Page 59)
6.6
6.7
▶
Check the firm seating of all threaded connections.
If threaded connections are loose:
▶ Tighten the threaded connections.
6.8
▶
Checking brackets and collector
components for firm seating
Check the pipe insulations for damage
Check the pipe insulations for damage.
If the pipe insulations are damaged:
▶ To avoid heat losses, replace any damaged pipe insulations. (→ Page 58)
Cleaning collectors
Danger!
Risk of burns and scalding!
In the event of solar radiation inside the
units, collectors can reach 200 °C.
▶ Avoid working in direct sunlight.
▶ You should preferably perform the work
▶
▶
in the morning.
Wear suitable safety gloves.
Wear suitable protective goggles.
Caution.
Material damage due to high-pressure
cleaner.
6.9
Replacing damaged pipe insulations
1.
Put the solar plant temporarily out of operation
(→ Page 61).
2. Replace the damaged pipe insulations.
3. Start the solar plant up again.
6.10
Disposing of damaged pipe insulations
The pipe insulations consist largely of recyclable materials.
The pipe insulations must not be disposed of with normal
household waste.
▶
▶
Observe the applicable regulations.
Dispose of the damaged pipe insulations properly.
High-pressure cleaners may damage the
collectors due to the extremely high pressure.
▶ Never clean the collectors with a highpressure cleaner.
Caution.
Material damage due to cleaning agent.
Cleaning agents may damage the surface
structure of the collector and decrease its
efficiency.
▶ Never clean the collector with cleaning
agents.
▶
Clean the collectors with a sponge and water.
58
Installation manual auroTHERM exclusive 0020077994_02
Troubleshooting 7
7
Troubleshooting
7.1
7.2.3 Sealing leaking connections
Spare parts for repair
Danger!
Risk of burns and scalding!
Procuring spare parts
If you require spare parts for servicing or repair work, use
only Vaillant genuine spare parts.
In the event of solar radiation inside the
units, collectors can reach 300 °C.
The original components of the unit were also certified as
part of the CE declaration of conformity. If you do not use
certified Vaillant genuine spare parts, this voids the CE conformity of the unit. We therefore strongly recommend that
you fit Vaillant genuine spare parts.
▶ Avoid working in direct sunlight.
▶ Cover the collectors before starting
▶
▶
Replacement parts
work.
You should preferably perform the work
in the morning.
Wear suitable safety gloves.
Applies to: Great Britain
1.
An overview of the available genuine Vaillant spare parts
can be obtained:
– From your parts wholesaler
– Alternatively contact Spares Technical
Enquiries on 01773 596615 or via email: [email protected]
7.2
Carrying out repairs
7.2.1
Replace leaking collectors
Danger!
Risk of burns and scalding!
In the event of solar radiation inside the
units, collectors can reach 300 °C.
Put the solar plant temporarily out of operation
(→ Page 61).
2. Seal the leaking connections.
3. Start up the solar plant again as described in the operating system instructions.
7.2.4 Replacing defective pipe insulations
1.
Put the solar plant temporarily out of operation
(→ Page 61).
2. To avoid heat losses, replace any defective pipe insulations.
3. Start up the solar plant again as described in the operating system instructions.
7.2.5 Disposing of defective pipe insulations
▶ Avoid working in direct sunlight.
▶ Cover the collectors before starting
The pipe insulations consist largely of recyclable materials.
▶
▶
▶
▶
work.
You should preferably perform the work
in the morning.
Wear suitable safety gloves.
1.
Put the solar plant temporarily out of operation
(→ Page 61).
2. Replace the leaking collectors.
3. Start up the solar plant again as described in the operating system instructions.
7.2.2 Disposing of defective collectors
Your Vaillant collector consists largely of recyclable materials.
The pipe insulations must not be disposed of with normal
household waste.
Observe the applicable regulations.
Dispose of the defective pipe insulations properly.
7.2.6 Replacing defective tubes
Danger!
Risk of injury caused by damaged vacuum tubes and sharp-edged components.
Shards and sharp-edged components may
lead to cuts.
▶ Wear suitable safety gloves.
The Vaillant collector must not be disposed of with normal
household waste.
▶
▶
Observe the applicable regulations.
Dispose of defective Vaillant collectors properly.
0020077994_02 auroTHERM exclusive Installation manual
59
7 Troubleshooting
Danger!
Risk of burns from hot components!
The U tube, heat conducting plate and the
interior of the vacuum tubes become warm
as a result of solar radiation and may cause
scalding.
▶ Wear suitable safety gloves.
▶ Wear suitable protective goggles.
1.
Only use genuine Vaillant replacement tubes (article
number 0020077347).
Note
If a tube has been damaged by a hailstorm,
for example, the individual tube can be replaced.
The solar plant can remain in operation
when replacing the tube.
2. Observe the relevant installation manual that is enclosed with the replacement tube.
7.2.7 Disposing of defective tubes
The Vaillant tubes consist largely of recyclable materials.
The Vaillant tubes must not be disposed of with normal
household waste.
▶
▶
Observe the applicable regulations.
Dispose of defective Vaillant tubes properly.
60
Installation manual auroTHERM exclusive 0020077994_02
Decommissioning 8
8
Decommissioning
8.1
Temporary decommissioning
Permanently decommissioning
8.2.1
Removing collectors
Caution.
Damage to the collectors.
Danger!
Risk of burns and scalding!
Collectors that are not in operation may
age more rapidly due to long periods of
high idle temperatures.
In the event of solar radiation inside the
units, collectors can reach 300 °C.
▶ Only put the solar plant out of operation
▶ Avoid working in direct sunlight.
▶ Cover the collectors before starting
▶ Do not decommission the collectors for
▶ You should preferably perform the work
▶ Cover any collectors that are not in use.
▶ Wear suitable safety gloves.
▶
Danger!
Risk of burns from hot components!
if you are a competent person.
more than four weeks.
Make sure that the cover is securely
fastened.
In the event of long periods of decommissioning of the solar plant, dismantle
the collectors.
Caution.
Oxidation of the solar fluid.
If the solar circuit is opened when out of
service for a prolonged period of time, the
solar fluid may age more rapidly due to the
penetrating oxygen in the air.
▶ Only decommission the solar plant if you
▶
▶
▶
are a competent person.
Do not decommission the collectors for
more than four weeks.
Before decommissioning the system for
a prolonged period of time, drain the
entire solar plant and dispose of the
solar fluid properly.
In the event of long periods of decommissioning of the solar plant, dismantle
the collectors.
For repair or maintenance work, you can temporarily decommission the solar plant. To do this, you must switch off
the solar pump.
▶
8.2
Temporarily decommission the solar plant, as described
in the operating system instructions.
work.
in the morning.
The U tube, heat conducting plate and the
interior of the vacuum tubes become warm
as a result of solar radiation and may cause
scalding.
▶ Wear suitable safety gloves.
▶ Wear suitable protective goggles.
Caution.
Damage to the collector and the solar
plant.
Improper removal may cause damage to
the collector and to the solar plant.
▶ Before removing the collectors, ensure
that a competent person or a Vaillant
customer service engineer decommissions the solar plant.
Caution.
Environmental hazard due to solar fluid.
After the solar plant is decommissioned,
the collector is still filled with solar fluid
which can leak out during removal.
▶ During transport from the roof, seal the
pipe connections of the collector with
the red plugs.
1. Undo the hydraulic connections.
2. Undo the clamping elements.
3. Remove the collectors from the roof.
0020077994_02 auroTHERM exclusive Installation manual
61
8 Decommissioning
Note
Do not use the carrying straps when removing the collectors as these may become
brittle due to prolonged exposure to outside weather.
4. Remove the sealing plugs.
5. Drain the collector fully into a canister through two
connections.
6. Fit the sealing plugs again.
7. Use adequate packing around the collectors.
8. Dispose of the collectors and the solar fluid.
8.2.2 Recycling and disposal
Your Vaillant collector consists largely of recyclable materials.
▶
Observe the applicable regulations.
Disposing of collectors
You must not dispose of your Vaillant collector or any of its
accessories in normal domestic waste.
▶
Dispose of the old unit and any accessories properly.
Disposing of solar fluid
The solar fluid must not be disposed of with normal household waste.
▶
▶
Dispose of the solar fluid in compliance with local regulations through an appropriate disposal company.
Dispose of packaging that cannot be cleaned in the same
way as solar fluid.
Uncontaminated packaging can be reused.
62
Installation manual auroTHERM exclusive 0020077994_02
Customer service 9
9
Customer service
Vaillant Service
Applies to: Great Britain
To ensure regular servicing, it is strongly recommended
that arrangements are made for a Maintenance Agreement.
Please contact Vaillant Service Solutions for further details:
+44 80 70 606 07 77
0020077994_02 auroTHERM exclusive Installation manual
63
10 Technical data
10
Technical data
10.1
Technical data table
Number of tubes
η0 (Aperture), DIN4757-4 or EN12975
Unit
VTK 570/2
VTK 1140/2
−
6
12
%
64.2
c1 with wind, or on aperture
W/(m²k)
0.885
c2 with wind, or on aperture
W/(m²k²)
0.001
K θ,trans (50°), or on aperture
−
1
K θ,long (50°), or on aperture
−
0.9
kWh/m²a
586
Yield forecast (location: Würzburg, 5 m² aperture,
300 litre cylinder, 4 people)
Peak output per collector module Wpeak
Area-related heat capacity c
W
642
1278
kJ/(m²k)
8.3
Volume flow (per m² of collector surface)
l/(m²h)
24
Minimum volume flow in the solar circuit
l/h
180
bar
10 mbar (= 10-8 bar)
Alpha absorber absorption
−
> 93.5% (see also ITW test report)
Epsilon absorber emission
−
< 6% (see also ITW test report)
Absolute pressure in the high vacuum
-5
Grid dimensions (length x height x depth)
m
0.7 x 1.65 x 0.11
1.39 x 1.65 x 0.11
Gross area
m²
1.16
2.30
Aperture surface area
m²
1.0
2.0
Absorber surface area
m²
1.0
2.0
l
0.9
1.8
Weight
kg
19
System overpressure, max. permissible
bar
10
Shutdown temperature, max.
°C
272
Connection width, flow/return
mm
15
Material for the tube collector
−
Al/1.4301/glass/silicone/PBT/EPDM/TE
Material for glass tubes
−
Borosilicate 3.3
Material for selective absorber layer
−
Aluminium nitride
Glass tubes (outer diameter/inner diameter/wall
thickness/tube length)
−
47 / 37 / 1.6 / 1500
Colour (plastic parts)
−
Black
Thermal shock test
ITW test
number
02COL282
Hail impact test in accordance with DIN EN 12975-2
TÜV test
number
435/142448
−
01-228-770
Collector capacity
Type approval number
2
37
Max. wind load
kg/Nm
1.2
Max. standard snow load
kg/Nm2
5
On-roof installation angle
°
15-75
Flat roof installation angle
°
30, 45, 60
64
Installation manual auroTHERM exclusive 0020077994_02
Technical data 10
10.2
Dimensions
1652
111
702
0020077994_02 auroTHERM exclusive Installation manual
65
10 Technical data
1652
111
1392
10.3
Efficiency and pressure loss
Efficiency of the VTK 570/2 and the VTK 1140/2 at a solar energy input EG of 300 W/m2
η
80%
70%
60%
50%
40%
30%
20%
10%
0%
ΔT
0
η
66
5
10
Efficiency [%]
15
20
25
30
35
40
45
ΔΤ
50
55
60
65
70
75
80
Τcollector −ambient air Τ [K]
Installation manual auroTHERM exclusive 0020077994_02
Technical data 10
Efficiency of the VTK 570/2 and the VTK1140/2 at a solar energy input EG of 800 W/m2
η
80%
70%
60%
50%
40%
30%
20%
10%
0%
ΔT
0
η
5
10
15
20
25
30
35
40
45
ΔΤ
Efficiency [%]
50
55
60
65
70
75
80
Τcollector −ambient air Τ [K]
Pressure loss
Δp [mbar]
160
140
120
VTK 570/2
VTK 1140/2
100
90
60
40
20
0
0
Q
50
100
150
200
250
Mass flow [l/h]
0020077994_02 auroTHERM exclusive Installation manual
300
Δp
350
400
450
Q [l/h]
500
Pressure loss [mbar]
67
Index
Index
H
A
Hydraulic connections
Installing............................................................................ 29, 54
Applicability
Manual .........................................................................................5
Article numbers ...............................................................................5
I
Identification plate ........................................................................ 10
B
Installation clearances
Complying with ................................................................. 14, 35
Ballast load (floating installation)
Determining............................................................................. 37
Installing
Checking............................................................................. 31, 55
Brackets
Checking................................................................................... 58
Intended use .................................................................................... 8
L
C
CE label ..............................................................................................9
Leaking connections
Sealing ...................................................................................... 59
Checklist
Installing............................................................................. 31, 55
M
Clearances
Complying with ................................................................. 14, 35
Maintenance
Preparing ................................................................................. 57
Collector components
Checking................................................................................... 58
Maintenance plan ......................................................................... 57
Collectors
Checking................................................................................... 58
Cleaning.................................................................................... 58
Disposal .................................................................................... 59
Installing............................................................................. 26, 51
Removing .................................................................................. 61
Replacing.................................................................................. 59
Storing ..................................................................................11, 33
Transporting...................................................................... 14, 35
Components
Putting together................................................................16, 37
Connection
Selecting............................................................................. 14, 35
Connection rules..................................................................... 14, 35
Connection schemas.............................................................. 14, 35
Connections
Checking................................................................................... 58
Sealing ...................................................................................... 59
Customer service.......................................................................... 63
D
Decommissioning........................................................................... 61
Disposal
Collectors ................................................................................. 62
Packaging.......................................................................... 32, 56
Solar fluid................................................................................. 62
P
Packaging
Disposal ............................................................................. 32, 56
Pipe insulations
Checking................................................................................... 58
Disposal .............................................................................58–59
Replacing...........................................................................58–59
Purpose
Unit ............................................................................................. 10
R
Rack
Defining clearances ............................................................... 45
Installing................................................................................... 47
Recycling
Collectors ................................................................................. 62
Packaging.......................................................................... 32, 56
Solar fluid................................................................................. 62
Roof bracket
Defining edge clearances...................................................... 19
Determining the number....................................................... 19
Roof duct
Preparing ........................................................................... 15, 36
S
Documents, other applicable ........................................................5
Scope of delivery
Checking............................................................................. 12, 34
F
Select installation variant, flat roof ......................................... 36
Service............................................................................................. 63
Final work
Installing............................................................................. 31, 55
68
Installation manual auroTHERM exclusive 0020077994_02
Index
Spare parts
Maintenance............................................................................ 57
Troubleshooting ..................................................................... 59
T
Technical data ............................................................................ 64
Dimensions .............................................................................. 65
Efficiency ................................................................................. 66
Pressure loss........................................................................... 66
Tubes
Disposal ....................................................................................60
Replacing.................................................................................. 59
Type overview ................................................................................ 10
U
Unit
Purpose ..................................................................................... 10
Use, intended................................................................................... 8
0020077994_02 auroTHERM exclusive Installation manual
69
0020077994_02