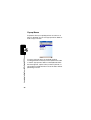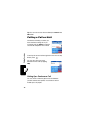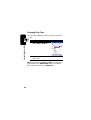
1
FCC ID: GKRMPX001
User’s Manual
A preliminary draft copy of the manual follows:
EXHIBIT 8
MPx
GSM
START HERE >
Welcome
Welcome to the world of Motorola MOTOPro devices. Your
selection, the Motorola MPx, delivers to you simplified
communications, increased productivity, and the control to
develop a superior mobile experience whether at work, at
home, on the road or at play.
1
Phone Mode
Ear Piece
Main Screen
Voice Dial
Button
Talk Button
Contacts Button
Game Pad
Keypad
2
Landscape Mode
Menu
Button
Inbox
Button
Start
Button
Fn
Button
Camera
Button
OK
Button
Power/End
Button
3
Front Panel
4
Back Panel
5
Motorola, Inc.
Consumer Advocacy Office
1307 East Algonquin Road
Schaumburg, IL 60196
1-800-331-6456 (United States)
1-888-390-6456 (TTY/TDD United States)
1-800-461-4575 (Canada)
www.motorola.com (United States)
www.motorola.ca (Canada)
MOTOROLA and the Stylized M Logo are registered in the US Patent &
Trademark Office. The Bluetooth trademarks are owned by their proprietor and
used by Motorola, Inc. under license. Java and all other Java-based marks are
trademarks or registered trademarks of Sun Microsystems, Inc. in the U.S. and
other countries. All other product or service names are the property of their
respective owners.
© Motorola, Inc. 2004
The information contained in Motorola's user's guides is believed to be correct
at the time of printing. Motorola reserves the right to change or modify any
information or specifications without notice. The contents of Motorolas user's
guides are provided as is. Except as required by applicable law, no warranties
of any kind, either express or implied, including, but not limited to, the implied
warranties of merchantability and fitness for a particular purpose, are made in
relation to the accuracy, reliability, or contents of this guide.
Caution: Changes or modifications made in the radio phone, not expressly
approved by Motorola, will void the user’s authority to operate the equipment.
Manual number:O
6
Contents
Welcome . . . . . . . . . . . . . . . . . . . . . . . . . . . . . . . . . . . . . . . 1
Phone Mode . . . . . . . . . . . . . . . . . . . . . . . . . . . . . . . . . . . 2
Landscape Mode . . . . . . . . . . . . . . . . . . . . . . . . . . . . . . . 3
Front Panel . . . . . . . . . . . . . . . . . . . . . . . . . . . . . . . . . . . . 4
Back Panel . . . . . . . . . . . . . . . . . . . . . . . . . . . . . . . . . . . . 5
Safety and General Information . . . . . . . . . . . . . . . . . . . 11
Getting Started . . . . . . . . . . . . . . . . . . . . . . . . . . . . . . . . . 18
Package Content . . . . . . . . . . . . . . . . . . . . . . . . . . . . . . 18
About This Guide . . . . . . . . . . . . . . . . . . . . . . . . . . . . . . 18
Installing and Removing the SIM Card . . . . . . . . . . . . . . 19
Installing and Removing the SD/MMC Card . . . . . . . . . . 21
Battery Use. . . . . . . . . . . . . . . . . . . . . . . . . . . . . . . . . . . 23
Installing the Battery . . . . . . . . . . . . . . . . . . . . . . . . . . . . 25
Charging the Battery. . . . . . . . . . . . . . . . . . . . . . . . . . . . 26
Removing the Stylus. . . . . . . . . . . . . . . . . . . . . . . . . . . . 28
Opening the Phone. . . . . . . . . . . . . . . . . . . . . . . . . . . . . 29
Turning the Phone On and Off . . . . . . . . . . . . . . . . . . . . 30
Calibrating the Screen . . . . . . . . . . . . . . . . . . . . . . . . . . 31
Making a Call . . . . . . . . . . . . . . . . . . . . . . . . . . . . . . . . . 33
Answering an Incoming Call . . . . . . . . . . . . . . . . . . . . . . 34
Ending a Call /!/!/!/!/!/!/!/!/!/!/!/!/!/!/!/!/!/!!45
Learning to Use Your MPx Pocket PC Phone . . . . . . . . 35
Using Your Phone’s Menus and Features. . . . . . . . . . . . 35
Entering Information . . . . . . . . . . . . . . . . . . . . . . . . . . . . 40
Adjusting Phone Volume. . . . . . . . . . . . . . . . . . . . . . . . . 48
Using the External Display . . . . . . . . . . . . . . . . . . . . . . . 50
Checking Your Phone Connection . . . . . . . . . . . . . . . . . 50
Setting Your Phone to Flight Mode . . . . . . . . . . . . . . . . . 51
7
Using a Headset . . . . . . . . . . . . . . . . . . . . . . . . . . . . . . 52
Using a Remote PTT Button . . . . . . . . . . . . . . . . . . . . . 52
Programs. . . . . . . . . . . . . . . . . . . . . . . . . . . . . . . . . . . . 53
Using the External Display . . . . . . . . . . . . . . . . . . . . . . 55
Setting Up Your Phone . . . . . . . . . . . . . . . . . . . . . . . . . . 61
Device Settings . . . . . . . . . . . . . . . . . . . . . . . . . . . . . . . 61
Calling Features . . . . . . . . . . . . . . . . . . . . . . . . . . . . . . . 64
The Dialer Screen . . . . . . . . . . . . . . . . . . . . . . . . . . . . . 64
Making a Call . . . . . . . . . . . . . . . . . . . . . . . . . . . . . . . . 65
Taking a Note during a Call . . . . . . . . . . . . . . . . . . . . . . 70
Putting a Call on Hold . . . . . . . . . . . . . . . . . . . . . . . . . . 72
Managing Your Contacts . . . . . . . . . . . . . . . . . . . . . . . . 73
Additional Dialing Information . . . . . . . . . . . . . . . . . . . . 79
Messaging Features . . . . . . . . . . . . . . . . . . . . . . . . . . . . 81
Email Messages . . . . . . . . . . . . . . . . . . . . . . . . . . . . . . 81
SMS Messages . . . . . . . . . . . . . . . . . . . . . . . . . . . . . . . 86
MMS Messages . . . . . . . . . . . . . . . . . . . . . . . . . . . . . . 87
Viewing Messages . . . . . . . . . . . . . . . . . . . . . . . . . . . . 93
Personalizing Your MPx . . . . . . . . . . . . . . . . . . . . . . . . . 97
Phone Settings . . . . . . . . . . . . . . . . . . . . . . . . . . . . . . 104
Getting More Out of Your Phone . . . . . . . . . . . . . . . . . 108
Dialing Options . . . . . . . . . . . . . . . . . . . . . . . . . . . . . . 108
Managing Your Calls . . . . . . . . . . . . . . . . . . . . . . . . . . 109
Monitoring Phone Use. . . . . . . . . . . . . . . . . . . . . . . . . 109
Network Features . . . . . . . . . . . . . . . . . . . . . . . . . . . . 110
Using ActiveSync . . . . . . . . . . . . . . . . . . . . . . . . . . . . 111
Synchronizing Information. . . . . . . . . . . . . . . . . . . . . . 112
Synchronizing Using an Infrared Connection . . . . . . . 115
ActiveSync Errors . . . . . . . . . . . . . . . . . . . . . . . . . . . . 116
Services . . . . . . . . . . . . . . . . . . . . . . . . . . . . . . . . . . . 117
8
Network. . . . . . . . . . . . . . . . . . . . . . . . . . . . . . . . . . . . . 118
Personal Organizer Features. . . . . . . . . . . . . . . . . . . . . 119
Alarm Clock . . . . . . . . . . . . . . . . . . . . . . . . . . . . . . . . . 119
Calculator . . . . . . . . . . . . . . . . . . . . . . . . . . . . . . . . . . . 120
Converting Currency. . . . . . . . . . . . . . . . . . . . . . . . . . . 120
Using the Stop Watch . . . . . . . . . . . . . . . . . . . . . . . . . . 120
Security . . . . . . . . . . . . . . . . . . . . . . . . . . . . . . . . . . . . . . 121
Setting PIN . . . . . . . . . . . . . . . . . . . . . . . . . . . . . . . . . . 121
Locking and Unlocking Your Phone . . . . . . . . . . . . . . . 121
Changing Your Unlock Code. . . . . . . . . . . . . . . . . . . . . 123
Protecting the SIM Card . . . . . . . . . . . . . . . . . . . . . . . . 124
Microsoft Pocket Outlook . . . . . . . . . . . . . . . . . . . . . . . 125
Calendar: Scheduling Appointments and Meetings . . . 126
Contacts: Tracking Friends and Colleagues . . . . . . . . . 128
Tasks: Keeping a To Do List . . . . . . . . . . . . . . . . . . . . . 131
Notes: Capturing Thoughts and Ideas . . . . . . . . . . . . . 133
Using Applications. . . . . . . . . . . . . . . . . . . . . . . . . . . . . 135
Communicating with MSN Messenger . . . . . . . . . . . . . 135
Pocket Word . . . . . . . . . . . . . . . . . . . . . . . . . . . . . . . . . 137
Pocket Excel . . . . . . . . . . . . . . . . . . . . . . . . . . . . . . . . . 141
Windows Media Player . . . . . . . . . . . . . . . . . . . . . . . . . 143
Pictures. . . . . . . . . . . . . . . . . . . . . . . . . . . . . . . . . . . . . 144
Using the Camera. . . . . . . . . . . . . . . . . . . . . . . . . . . . . . 151
Camera . . . . . . . . . . . . . . . . . . . . . . . . . . . . . . . . . . . . . 151
Photo Album . . . . . . . . . . . . . . . . . . . . . . . . . . . . . . . . . 155
Getting Connected . . . . . . . . . . . . . . . . . . . . . . . . . . . . . 161
Wi-Fi Wireless LAN (IEEE802.11b) . . . . . . . . . . . . . . . 161
Bluetooth Modes. . . . . . . . . . . . . . . . . . . . . . . . . . . . . . 165
Pocket Internet Explorer: Browsing Web and WAP
Pages . . . . . . . . . . . . . . . . . . . . . . . . . . . . . . . . . . . . . . 174
9
Games . . . . . . . . . . . . . . . . . . . . . . . . . . . . . . . . . . . . . . 181
Troubleshooting . . . . . . . . . . . . . . . . . . . . . . . . . . . . . . 182
Specific Absorption Rate Data . . . . . . . . . . . . . . . . . . 189
10
Safety and General
Information
IMPORTANT INFORMATION ON SAFE AND EFFICIENT OPERATION.
READ THIS INFORMATION BEFORE USING YOUR PHONE.
The information provided in this document supersedes the general safety
information in user’s guides published prior to December 1, 2002.
Exposure To Radio Frequency (RF) Energy
Your phone contains a transmitter and a receiver. When it is ON, it
receives and transmits RF energy. When you communicate with your
phone, the system handling your call controls the power level at which
your phone transmits.
Your Motorola phone is designed to comply with local regulatory
requirements in your country concerning exposure of human beings to RF
energy.
Operational Precautions
To assure optimal phone performance and make sure human exposure to
RF energy is within the guidelines set forth in the relevant standards,
always adhere to the following procedures.
External Antenna Care
Use only the supplied or Motorola-approved replacement antenna.
Unauthorized antennas, modifications, or attachments could damage the
phone.
DO NOT hold the external antenna when the phone is IN USE. Holding
the external antenna affects call quality and may cause the phone to
operate at a higher power level than needed. In addition, use of
11
unauthorized antennas may result in non-compliance with the local
regulatory requirements in your country.
Phone Operation
When placing or receiving a phone call, hold your phone as you would a
wireline telephone.
Body-Worn Operation
To maintain compliance with RF energy exposure guidelines, if you wear a
phone on your body when transmitting, always place the phone in a
Motorola-supplied or approved clip, holder, holster, case, or body harness
for this phone, if available. Use of accessories not approved by Motorola
may exceed RF energy exposure guidelines. If you do not use one of the
body-worn accessories approved or supplied by Motorola, and are not
using the phone held in the normal use position, ensure the phone and its
antenna are at least 1 inch (2.5 centimeters) from your body when
transmitting.
Data Operation
When using any data feature of the phone, with or without an accessory
cable, position the phone and its antenna at least 1 inch (2.5 centimeters)
from your body.
Approved Accessories
Use of accessories not approved by Motorola, including but not limited to
batteries and antennas, may cause your phone to exceed RF energy
exposure guidelines. For a list of approved Motorola accessories, visit our
website at www.Motorola.com.
RF Energy Interference/Compatibility
Nearly every electronic device is susceptible to RF energy interference
from external sources if inadequately shielded, designed, or otherwise
12
configured for RF energy compatibility. In some circumstances your
phone may cause interference.
Facilities
Turn off your phone in any facility where posted notices instruct you to do
so. These facilities may include hospitals or health care facilities that may
be using equipment that is sensitive to external RF energy.
Aircraft
When instructed to do so, turn off your phone when on board an aircraft.
Any use of a phone must be in accordance with applicable regulations per
airline crew instructions.
Medical Devices
Pacemakers
Pacemaker manufacturers recommend that a minimum separation of 6
inches (15 centimeters) be maintained between a handheld wireless
phone and a pacemaker.
Persons with pacemakers should:
• ALWAYS keep the phone more than 6 inches (15 centimeters) from
your pacemaker when the phone is turned ON.
• NOT carry the phone in the breast pocket.
• Use the ear opposite the pacemaker to minimize the potential for
interference.
• Turn OFF the phone immediately if you have any reason to suspect
that interference is taking place.
13
Hearing Aids
Some digital wireless phones may interfere with some hearing aids. In the
event of such interference, you may want to consult your hearing aid
manufacturer to discuss alternatives.
Other Medical Devices
If you use any other personal medical device, consult the manufacturer of
your device to determine if it is adequately shielded from RF energy. Your
physician may be able to assist you in obtaining this information.
Use While Driving
Check the laws and regulations on the use of phones in the area where
you drive. Always obey them.
When using your phone while driving, please:
• Give full attention to driving and to the road.
• Use handsfree operation, if available.
• Pull off the road and park before making or answering a call if driving
conditions so require.
Responsible driving best practices may be found in the “Wireless Phone
Safety Tips” at the end of this manual and at the Motorola website:
www.Motorola.com/callsmart.
Operational Warnings
For Vehicles With an Air Bag
Do not place a phone in the area over an air bag or in the air bag
deployment area. Air bags inflate with great force. If a phone is placed in
the air bag deployment area and the air bag inflates, the phone may be
propelled with great force and cause serious injury to occupants of the
vehicle.
14
Potentially Explosive Atmospheres
Turn off your phone prior to entering any area with a potentially explosive
atmosphere. Do not remove, install, or charge batteries in such areas.
Sparks in a potentially explosive atmosphere can cause an explosion or
fire resulting in bodily injury or even death.
Note: The areas with potentially explosive atmospheres referred to above
include fueling areas such as below decks on boats, fuel or chemical
transfer or storage facilities, areas where the air contains chemicals or
particles, such as grain, dust, or metal powders. Areas with potentially
explosive atmospheres are often but not always posted.
Blasting Caps and Areas
To avoid possible interference with blasting operations, turn OFF your
phone when you are near electrical blasting caps, in a blasting area, or in
areas posted “Turn off electronic devices.” Obey all signs and instructions.
Batteries
Batteries can cause property damage and/or bodily injury such as burns if
a conductive material such as jewelry, keys, or beaded chains touch
exposed terminals. The conductive material may complete an electrical
circuit (short circuit) and become quite hot. Exercise care in handling any
charged battery, particularly when placing it inside a pocket, purse, or
other container with metal objects. Use only Motorola original batteries
and chargers.
15
Your battery or phone may contain symbols, defined as follows:
Symbol
Definition
Important safety information will follow.
Your battery or phone should not be disposed of in
afire.
Your battery or phone may require recycling in
accordance with local laws. Contact your local
regulatory authorities for more information.
Your battery or phone should not be thrown in the
trash.
Your phone contains an internal lithium ion battery.
Seizures/Blackouts
Some people may be susceptible to epileptic seizures or blackouts when
exposed to flashing lights, such as when watching television or playing
video games. These seizures or blackouts may occur even if a person
never had a previous seizure or blackout.
If you have experienced seizures or blackouts, or if you have a family
history of such occurrences, please consult with your doctor before
playing video games on your phone or enabling a flashing-lights feature
on your phone. (The flashing-light feature is not available on all products.)
Parents should monitor their children's use of video game or other
features that incorporate flashing lights on the phones. All persons should
discontinue use and consult a doctor if any of the following symptoms
occur: convulsion, eye or muscle twitching, loss of awareness, involuntary
movements, or disorientation.
16
To limit the likelihood of such symptoms, please take the following safety
precautions:
• Do not play or use a flashing-lights feature if you are tired or need
sleep.
• Take a minimum of a 15-minute break hourly.
• Play in a room in which all lights are on.
• Play at the farthest distance possible from the screen.
Repetitive Motion Injuries
When you play games on your phone, you may experience occasional
discomfort in your hands, arms, shoulders, neck, or other parts of your
body. Follow these instructions to avoid problems such as tendonitis,
carpal tunnel syndrome, or other musculoskeletal disorders:
• Take a minimum 15-minute break every hour of game playing.
• If your hands, wrists, or arms become tired or sore while playing,
stop and rest for several hours before playing again.
• If you continue to have sore hands, wrists, or arms during or after
play, stop playing and see a doctor.
17
Getting Started
Getting Started
Welcome to the world of Motorola digital wireless
communications! We are pleased that you have chosen
the Motorola MPx Pocket PC phone.
Package Content
Your MPx Pocket PC phone comes with a replaceable
internal battery and is typically equipped with a charger.
Other accessories can enhance your phone’s performance
and portability.
About This Guide
This guide describes the basic features of your Motorola
MPx Pocket PC phone.
Optional Features
This label identifies an optional network, SIM
card, or subscription-dependent feature that may
not be offered by all service providers in all
geographical areas. Contact your service
provider for more information.
032380o
18
Optional Accessories
This label identifies a feature that requires an
optional Motorola OriginalTM accessory.
Your SIM (Subscriber Identity Module) card contains your
phone number, service details, and phonebook/ message
memory.
Caution: Do not bend or scratch your SIM card. Avoid
exposing your SIM card to static electricity, water, or dirt.
Getting Started
Installing and Removing the
SIM Card
Inserting the SIM Card
Action
1 Locate the SIM card slot on
the side of the device.
19
Getting Started
Action
2 Open the rubber door, and
insert the SIM card into the
slot.
Note: Position the SIM card
as shown, with the chip
facing the back of the device
and the notched corner to
the outside of the slot.
3 Close the rubber door.
Removing the SIM Card
Action
1 Open the battery door and
remove the battery.
20
Action
2 Insert the tip of the stylus
into the hole in the battery
compartment, as shown.
Getting Started
3 Use the stylus to push the
SIM card out, then remove
the card.
Installing and Removing the
SD/MMC Card
Your Pocket PC phone has a SD/MMC card slot for a SD
(Secure Digital) memory card. An SD/MMC card expands
the memory capacity of your Pocket PC phone. You can
purchase SD/MMC cards from a computer store.
Caution: Make sure that no foreign objects enter the SD/
MMC card slot of your Pocket PC phone.
Note: For more information, refer to the documentation for
the SD/MMC card.
21
Installing the Card
Getting Started
Action
1 Locate the SD/MMC card
slot and open the rubber
door.
2 Insert the SD/MMC card as
shown, with its label facing
the front and the connector
pointing to the slot.
3 Push the card into the slot
until it fits into place.
22
Removing the Card
Action
1 Close any application that uses the SD/MMC card.
2 Press the memory card
down. When you release it, it
pops up.
Getting Started
3 Remove the card and close
the cover.
Battery Use
Battery performance depends on many factors, including
your wireless carrier’s network configuration; signal
strength; the temperature at which you operate your
phone; the features and/or settings you select and use;
23
items attached to the phone’s accessory connector port;
and your voice, data, and other application usage patterns.
Caution: To prevent injuries or burns, do not allow
metal objects to contact or short-circuit the battery
terminals.
Getting Started
To maximize your battery’s performance:
• Always use Motorola Original batteries and battery
chargers. The phone warranty does not cover damage
caused from using non-Motorola batteries and/or
battery chargers.
• New batteries or batteries that have been stored for a
long time may require a longer charge time.
• Maintain the battery at or near room temperature
when charging.
• Do not expose batteries to temperatures below -10°C
(14°F) or above 45°C (113°F). Always take your
phone with you when you leave your vehicle.
• When you do not intend to use a battery for a while,
store it uncharged in a cool, dark, dry place, such as a
refrigerator.
• Batteries gradually wear down and require longer
charging times. This is normal. If you charge your
battery regularly and notice a decrease in talk time or
an increase in charging time, then it is probably time
to purchase a new battery.
The rechargeable batteries that power this phone
must be disposed of properly and may need to be
recycled. Refer to your battery’s label for battery
24
type. Contact your local recycling center for proper
disposal methods.
Warning: Never dispose of batteries in a fire because
they may explode.
Installing the Battery
Action
1 Press the battery clip, slide
the battery cover outward,
and lift the battery cover.
Getting Started
Your Pocket PC phone is designed to use only Motorola
Original batteries and accessories.
2 Insert the battery into the
battery compartment.
25
Getting Started
Action
3 Replace the cover.
Charging the Battery
New batteries are shipped partially charged. Before you
can use your phone, you need to install and charge the
battery as described below. Some batteries perform best
after several full charge/discharge cycles.
Action
1 Plug the travel charger into
the phone, with the release
tab facing up.
26
Action
2 Plug the other end of the
travel charger into the
appropriate electrical outlet.
Getting Started
3 When the Notification LED
on the phone lights green
(full-charged), press the
release tab and remove
the travel charger.
Tip: You can safely leave the travel charger connected to
the phone after charging is complete. This will not damage
the battery.
27
Removing the Stylus
Getting Started
The stylus for your MPx Pocket PC Phone fits into a
slot on the back of the phone. When you need to use
the stylus:
Action
1 Press the top of the stylus.
When you release it, it pops
up.
2 Pull the stylus from the slot.
28
Opening the Phone
Your MPx Pocket PC Phone allows you to operate in 2
modes: Portrait and Landscape (see pages 2 and 3).
Portrait mode is typically used for phone functions.
Landscape mode is typically used for Pocket PC
functions.
Getting Started
Action
To open the phone for Portrait
mode, push the cover from the
outside (near the speaker).
To open the phone for
Landscape mode, press the
release button on the hinge
and lift the cover from the
right side.
29
Turning the Phone On and Off
Getting Started
Action
1 Open the phone.
2 Press and hold the Power/
End key for 7 seconds to
turn on the device.
3 If necessary, enter your SIM card PIN code to
unlock the SIM card.
Caution: If you enter an incorrect PIN code 3 times in
a row, your SIM card is disabled and your phone
displays SIM Blocked .
4 If necessary, enter your 4-digit unlock code to
unlock the phone.
Notes:
• Pressing the Power/End key longer than 7 seconds
can suspend the device. The following events will
wake up a suspended device: receiving an MT call or
an SMS or MMS message; plugging in a USB cable or
AC adapter; pressing a phone or application key
30
(Power/End, Talk, Camera, or Inbox); pressing the
Reset button; inserting a SIM card (which resets the
phone).
• While an AC adapter is inserted, the phone cannot
be suspended.
• When the battery cover is removed, Flight Mode is
activated.
• If necessary, you can perform a Hardware reset.
To perform a software Hardware reset, simultaneously
press the Talk and Reset buttons.
Getting Started
• If the phone responds slowly or stops responding,
press the Reset button to reset the phone.
Calibrating the Screen
You must calibrate the screen response of our MPx Pocket
PC phone to ensure proper operation. This process
ensures that, when you tap an item on the screen, the item
is activated.
Note: With use, the tip of the stylus may become worn or
may pick up foreign particles that scratch the screen. A
damaged stylus may not move smoothly and can cause
unpredictable results when used. If your stylus exhibits
these problems, replace the stylus by contacting your
reseller.
31
Calibrating the Screen for the First Time
Getting Started
When you power on your MPx Pocket PC Phone for the
first time:
Action
Using your stylus, tap the
center of the cross as it
moves around the screen.
Recalibrating the Screen
Recalibrating the screen may be required in these
situations:
• You use the stylus differently (for example, with the
opposite hand) than whoever used the phone last.
• The screen has not been recalibrated for a long time.
If the phone fails to respond appropriately when you
tap an item, the phone has lost calibration.
To recalibrate the screen:
Action
1 Using your stylus, tap
2 Select the System tab.
3 Tap the Screen item.
32
Start > Settings .
Action
4 Tap the Align Screen button.
5 Using your stylus, tap the
center of the cross as it
moves around the screen.
Getting Started
Making a Call
Action
1 On the phone’s keypad, press the number keys to
enter the number you want to call.
Note: Make sure the
phone is set to
Symbolic input mode
. (Press [Fn] +
[Shift] to change between Symbolic
input mode .)
2 Press the
and Alpha
button.
33
Answering an Incoming Call
Getting Started
Press
Answer /
To
answer the call
Ignore /
reject the call
Tip: If you receive an incoming call when the flip is closed,
you can also press the right button to reject the call.
Ending a Call
Action
Press
or
Tap End .
34
.
Learning to Use Your
MPx Pocket PC Phone
Using Your Phone’s Menus and
Features
The Today Screen
This is the standard display you see when you are not on a
call or using the menu. The Today screen displays
important information about your phone, including today’s
appointments and status icons.
Learning to Use Your MPx Pocket PC Phone
When you turn on your MPx which is the standard
display. The Today screen contains important information
of your device, including today’s appointments and status
icons. Tap the information listed on the Today screen to
open the associated program, you see the Today screen.
35
The following status indicators can display:
Status
Icon
/
/
/
Learning to Use Your MPx Pocket PC Phone
/
36
Description
System sound is on/off. To switch the
sound mode, tap the icon and select
from the 3 options: On , Vibrate , and Off.
The main battery is low or very low.
Current input mode is Symbolic mode or
Alpha mode .
The connection to your mobile phone
service provider is on or off, and the
strength of the signal.
1 or more instant messages has been
received.
1 or more e-mail, SMS, or MMS
messages has been received.
Internet (GPRS) Connection is active.
Server synchronization is occurring.
The Command Bar
At the bottom of the screen is the Command bar with menus
and buttons you can use to perform tasks in programs.
Depending upon which program you are using, the buttons
may vary from those shown.
The Start Menu
The Start menu allows you to select programs for use,
access settings, or open Help topics. To display the
Start Menu, tap
Start from the top of any screen.
Learning to Use Your MPx Pocket PC Phone
37
Pop-up Menus
Learning to Use Your MPx Pocket PC Phone
Pop-menus allow you to quickly perform an action on an
item. For example, you can use a pop-up menu to delete or
make a copy of an item.
38
To access a pop-up menu, tap and hold (continue
touching) the item on which you want to perform the action
or use the “pop-up menu” button on the keyboard. When
the menu appears, tap the action you want to perform, or
tap anywhere outside the menu to close the menu without
performing an action.
The Keypad
Your phone contains a keypad with the full functionality of a
computer keyboard.
Easy
Access
Buttons
Typewriter
Keys
Easy
Access
Buttons
Game Pad
Easy
Access
Buttons
Use the typewriter keys to enter letters and numbers.
Game Pad
Use the Game Pad to:
• scroll up, down, left, or right through the menu system
• highlight menu items—press the Center button to
select a highlighted menu item
• change feature settings
• play games
• move the cursor during text entry
Learning to Use Your MPx Pocket PC Phone
Typewriter Keys
39
Easy Access Buttons
Learning to Use Your MPx Pocket PC Phone
Press
40
Start
To
open the Start menu
Inbox
launch the messaging function
Menu
Camera
display a shortcut menu with
control options for the selected item
activate the camera
OK
cancel the current option
Talk
Voice Dial
make and answer calls, view
recently dialed calls list
use voice dialing
Contacts
open the Contacts folder
Power/End
turn the phone on and off, suspend
the device, end calls, and exit menu
system
Entering Information
You can enter information into your MPx Pocket PC phone
in the following ways:
Entry Method
Typing
Description
Type with the keypad/Input
panel.
Entry Method
Writing
Description
Write directly on the screen
with the stylus.
Draw directly on the screen
with the stylus.
Use the microphone to record
a spoken message or note.
Use Microsoft ActiveSync to
exchange or copy information
between your PC and device.
Drawing
Recording
Synchronizing
Entering Text with the Typewriter Keys
Move the cursor
up for one line.
Move the cursor
right for one space.
Move the cursor left
for one space.
Move the cursor
down for one line.
Game Pad (Landscape Mode)
A 12-key numeric keypad is embedded in the keypad. To
enter a number, press and hold [Fn], then press the
desired digit(s).
Learning to Use Your MPx Pocket PC Phone
You can type letters and numbers on the keypad just as
you would on a typical computer keyboard. Use the 4-way
navigation keys on the Game Pad to move the cursor as
you type.
41
The following table lists all special keys and their functions:
Press
[Fn]
[shift]
[tab]
To
toggle between letters and numbers
toggle between uppercase and lowercase
insert a tab
Entering Text with the Input Panel
To show or hide the selected input method, tap
on
Learning to Use Your MPx Pocket PC Phone
the command bar. To select a different input panel, tap
the
arrow and then tap the input panel that you want.
42
When you use the input panel, your device anticipates the
word you are typing or writing and displays it above the
input panel. When you tap the displayed word, it is inserted
into your text at the insertion point. The more you use your
device, the more words it learns to anticipate.
To type with the soft keyboard:
To type a single uppercase letter or symbol, tap the
Shift key. To tap multiple uppercase letters or
symbols, tap the CAP key.
For uppercase, tap and hold the stylus on a key, then
drag up.
To add a space, tap and hold any key, then drag the
stylus to the right across at least 2 others.
To backspace 1 character, tap and hold any key, then
drag the stylus to the left across at least 2 others.
To insert a carriage return, tap and hold the stylus
anywhere on the keyboard and drag down.
Learning to Use Your MPx Pocket PC Phone
Action
1 Tap the arrow beside the Input Panel button, then tap
Keyboard .
2 Enter text by tapping the appropriate characters.
43
Writing on the Screen
In any program that accepts writing, such as Notes , the
Notes tab in Calendar, Contacts , and Tasks , you can use your
stylus to write directly on the screen, just as you write on
paper. You can edit and format what you have written and
convert the information to text at a later time.
Entering New Text
Action
Learning to Use Your MPx Pocket PC Phone
1 Tap the pen button
enter writing mode.
44
to
Your phone displays lines
to help you write.
2 Use the stylus to write directly on the screen.
Note: Some programs that accept writing may not have
the pen button. See the documentation for that program to
find out how to switch to writing mode.
Editing or Formatting Text
To edit or format writing.
Action
1 Tap and hold the stylus beside the text you want to
select until the insertion point appears.
2 Without lifting the stylus, drag it across the text you
want to select.
3 To cut, copy, or paste the text, tap and hold the
selected text, then tap the desired editing command
on the pop-up menu.
or
Tap the desired editing command on the Edit menu.
You can also select text by tapping
the pen button
to exit writing
mode, then dragging the stylus
across the screen.
Drawing on the Screen
When you enter writing mode, you can create a drawing
instead of writing text.
Learning to Use Your MPx Pocket PC Phone
If you accidentally write on the screen, tap Tools , then tap
Undo, and try again.
45
Creating a Drawing
Action
1 Tap the pen button
to enter writing mode.
Your phone displays several horizontal lines.
2 With 1st stroke of
your stylus, cross 3
ruled lines.
Learning to Use Your MPx Pocket PC Phone
A drawing box
appears.
46
Note: A stylus stroke
that does not cross 3
ruled lines is entered
as writing.
3 Use your stylus to create the drawing inside the
drawing box. (All subsequent strokes inside the
box or touching it become part of the drawing.)
Editing or Formatting a Drawing
Action
1 Tap and hold the stylus on the drawing until the
selection handle appears.
To select multiple drawings, deselect the pen button,
then drag to select the drawings you want.
2 To cut, copy, or paste the
drawing, tap and hold it, then
select the desired editing
command on the pop-up menu.
or
To resize the drawing, tap the
pen button
, then drag a selection handle.
Tip: To change the zoom level, tap Tools , then select a
zoom level.
Learning to Use Your MPx Pocket PC Phone
Tap the desired editing
command on the Edit menu.
47
Adjusting Phone Volume
Adjusting System Volume
You can adjust the volume of system notifications, such as
the sound you hear when you tap on program names and
menu options.
Action
Learning to Use Your MPx Pocket PC Phone
1 Tap the
icon.
2 Move the system volume slider
to the desired volume level.
48
Changing Ringer Volume
Action
1 Tap the
icon.
2 Move the ringer volume slider
to the desired volume level.
Muting the Sound
To mute system sounds or phone ringer, or to activate
vibrate mode:
Action
1 Tap the
icon.
2 To turn off the volume, select Off.
Tip: You can adjust phone earpiece volume only during a
call. Adjusting the volume at another time affects the ring
and notification levels.
Learning to Use Your MPx Pocket PC Phone
To activate vibrate mode, select
Vibration .
49
Using the External Display
When your phone is turned on and the flip is closed, the
external display shows the phone status, including battery
and network signal status. It also shows the time. When
you receive an incoming call, the external display shows
the caller's number or name. To answer the incoming call,
open the flip.
Learning to Use Your MPx Pocket PC Phone
Note: A caller's name appears on the external display
only if the caller's number matches an entry in your
phonebook.
50
Checking Your Phone
Connection
Your MPx Pocket PC Phone is set to establish an
automatic mobile phone connection to your service
provider’s network.
The icon
indicates that you are connected to the
network of your service provider's network. A full strength
signal is indicated by the
icon. As the strength of the
signal diminishes so will the number of vertical bars in the
icon, with no bars indicating no signal.
Setting Your Phone to Flight
Mode
IN MANY COUNTRIES YOU ARE
REQUIRED BY LAW TO TURN OFF
YOUR PHONE WHEN YOU FLY.
TURNING OFF YOUR POCKET PC
DOESN’T TURN OFF YOUR PHONE;
YOU MUST TURN THE FLIGHT MODE
ON IN ORDER TO DISCONNECT THE
WIRELESS CONNECTION TO YOUR
OPERATOR’S NETWORK.
Learning to Use Your MPx Pocket PC Phone
To turn off your wireless connection to your operator’s
network, you can set your phone connection to Flight mode.
You can turn on/off Flight mode without turning off your
51
phone. This feature enables you to continue using other
programs on your MPx Pocket PC Phone.
Action
Learning to Use Your MPx Pocket PC Phone
1 While using any program on your MPx Pocket
PC Phone, tap
in the title bar at the top of the
display.
2 In the pop-up menu, tap
Turn on flight mode or Turn
off flight mode .
52
To receive calls when your Pocket PC Phone is turned off,
leave the Turn on flight mode .
Using a Headset
If you use a headset or similar device with your phone,
your phone will send incoming sound to the headset only.
Using a Remote PTT Button
If you are using a headset or other accessory with a
remote push-to-talk (PTT) button, you can use the remote
PTT button to answer calls, switch between calls, and end
calls.
Programs
The following is a partial list of programs available on your
MPx Pocket PC Phone.
Icon
Program
ActiveSync
Calendar
Contacts
Pocket Internet
Explorer
Notes
Phone
Tasks
Windows Media
Player
Enable multimedia function.
Learning to Use Your MPx Pocket PC Phone
Messaging
Description
Synchronize information
between your device and
desktop computer.
Keeps track of
appointments, creates
meeting requests.
Keep track of your friends
and colleagues.
Send and receive e-mail/
SMS/MMS messages.
Browse Web and WAP
sites, download new
programs and files from the
Internet.
Create handwritten or typed
notes, drawings, and
recordings.
Make and receive calls,
switch between calls, set up
conference calling.
Keep track of your tasks.
53
Icon
Program
Pocket Excel
MSN Messenger
Pocket Word
Learning to Use Your MPx Pocket PC Phone
Camera
54
Calculator
SIM Manager
Description
Create new workbooks,
view and edit Excel
workbooks created on your
desktop computer.
Send and receive instant
messages with MSN
Messenger contacts.
Create new documents,
view and edit Word
documents created on your
desktop computer.
Take new photos, view
photos and send them via
MMS to friends.
Perform basic arithmetic.
Collect, organize, sort
Contacts list stored in your
SIM card.
Check the Pocket PC Companion CD for additional
programs that you can install onto your device.
You can switch 1 program to another by selecting it from
Start menu. To access more programs, tap
Start >
Programs , and then tap the desired program icon.
Using the External Display
When your phone is turned on and the flip is closed, the
external display shows the phone status, including battery
and network signal status. It also shows the time. When
you receive an incoming call, the external display shows
the caller's number or name. To answer the incoming call,
open the flip.
Note: To see a caller's name on the external display,
the caller's number must match an entry in your
phonebook External Display
Learning to Use Your MPx Pocket PC Phone
The external display allows you to open and control
some programs quickly by using the control buttons at the
bottom of the external display.
55
External Display Components
Main Screen
The following table lists the icons that may appear on the
main screen of the external display.
Icon
Meaning
No radio signal
Learning to Use Your MPx Pocket PC Phone
Flight mode
56
Searching radio signal
Radio signal strength
New message
Battery status
Roaming
Keylock enabled
Silent
Vibrate
Vibrate then ring
Ring loud (Ringer volume
Ring soft (Ringer volume < 3)
3
Control Buttons and Command Bar
There are three control buttons located below the main
screen of the external display. Each of the control buttons
performs the command displayed in the command bar at
the bottom of the main screen.
To display the command bar, press the Menu button located
in the middle of the control buttons. The following table
displays the common buttons and their meanings.
Icon
Meaning
Menu/Select
Previous
Apply
Easy Program Operations
Through the external display and the control buttons, you
can easily use the some programs, including Profiles, MP3
Player, Voice Notes, Wallpaper, Ring Tones and Exit.
Press the
button, then the
button to select a
program, and then press the
selected program.
button to open the
Learning to Use Your MPx Pocket PC Phone
Next
57
The following table displays the icons and meanings of
these programs.
Icon
Program
Profiles
MP3 Player
Voice Notes
Learning to Use Your MPx Pocket PC Phone
Wallpaper
58
Ring Tones
Profiles
You can change the profile of your MPx Pocket PC Phone
in the Profiles program.
Ring Tones
You can change the ring tone of your MPx Pocket PC
Phone in the Ring Tones program.
MP3 Player
The following table displays the available buttons for use in
the MP3 Player program.
Icon
Meaning
Play
Pause
Stop
Previous
Next
Volume
Volume Down
Exit
Learning to Use Your MPx Pocket PC Phone
Volume Up
59
Voice Notes
The following table displays the available buttons for use in
the Voice Notes program.
Icon
Meaning
Record
Exit
Stop
Delete
Pause
Learning to Use Your MPx Pocket PC Phone
Recording
60
Playback
Setting Up Your Phone
Device Settings
You can adjust device settings to suit the way you work.
Action
1 Tap
Start > Settings .
2 Tap Personal or System . You will see displayed icons
representing settings that can be adjusted.
Setting Up Your Phone
61
Personal Tab
Icon
Program
Buttons
Description
Input
Set up the input options.
Menus
Customize items in Start
menu, enable access to items
from New button.
Display personal information.
Setting Up Your Phone
Owner
Information
62
Assign an application to
hardware button.
Password
Limit access to device.
Phone
Configure phone functions.
Sounds and
notifications
Set up notification type,
event, and volume.
Today
Customize Today screen
appearance.
System Tab
Icon
Program
About
Description
Certificates
Display name of certificate
issuer and expiration date.
Display important device
information.
Icon
Program
CLI
Description
Memory
Display memory allocation
status and current running
programs.
Displays battery life.
Provides adjustments for
settings on the external
display.
Clock & Alarms Change time, set alarms.
Power
Profiles
Displays a selectin of audio
settings called profiles.
Regional
Settings
Customize region and
relative format for region you
use.
Create more memory by
removing programs.
Remove
Programs
Re-calibrate screen, enable/
disable Clear Type .
Screen light
Customize backlight and
brightness to save power.
System
Viewer
Find information about
version, hardware, and
system.
Setting Up Your Phone
Screen
63
Calling Features
The Dialer Screen
Start > Phone , or press
Calling Features
To access the Dialer screen, tap
the
button.
From this screen, you can access Call History, Speed Dial ,
and Phone Setting . This screen also includes signal
status information and important icons that tell you
about signal strength:
• last number details are displayed here.
• keypad for entering information
• task bar to access phone setting
• history iinformation. ncluding all received, dialed and
missed calls
• frequently-called numbers
64
Making a Call
Your MPx Pocket PC Phone provides you with several
ways to make a call:
• keypad (see x)
• Dialer screen
• Call History
• Contacts
• Speed Dial
• SIM Manager
Calling Features
• Voice Command
65
Calling from the Dialer
Action
Calling Features
1 Press
to display
the Dialer screen.
2 Tap the number on the Dialer keypad.
Tip: If you tap a wrong
number, tap the backspace
button
to erase
individual numbers 1 at a
time. You can also delete all
the numbers in the window
by tapping Edit , then Clear.
3 Tap
66
or press the
button.
Calling from Call History
You can quickly call someone you have recently called or
someone who has recently called you.
Action
1 From the Dialer keypad,
tap Call History.
For example, if th desired call is in All calls , select
All calls from the drop down menu.
3 Scroll to the number, then press the
or the icon to the left of the number.
Calling Features
2 View call details by selecting the category under
which it is filed.
button
67
Calling from Contacts
You can make a call from Contacts without having to look up
or manually enter the number.
Action
1 Press the Contacts button
on the phone’s keypad.
Calling Features
or
Tap
Start and select
Contacts .
2 From the Contacts list, tap and hold the contact.
3 On the popup window, tap
Call Work , Call Home , or Call
Mobile .
4 Tap the number you want to call.
Calling from Speed Dial
Speed dials function allows you to call frequently-used
numbers with a single tap.
68
Note: Before you can create a speed dial entry for a phone
number, that number must already exist in Contacts .
Action
1 From the Dialer keypad, tap Speed Dial .
2 From the Contacts list, tap and hold the contact.
3 On the popup window, tap
Call Work , Call Home , or Call
Mobile .
Calling Features
4 Select the speed dial location number of the
desired contact.
Tip: You can dial a contact with a 1digit speed dial number directly
from the keypad on the screen by
pressing and holding the 1-digit
number.
For example, to dial the number at
location number 3, tap and hold 3
on the dialer keypad.
Note: To dial a 2-digit speed dial
number from the keypad, tap the 1st digit, then tap and
hold the 2nd digit.
69
Calling from SIM Manager
Action
1 Tap
Start > Programs .
2 Select SIM Manager.
3 Tap and hold the name or phone number of the
person you wish to call.
4 Select Call from the pop-up menu.
Calling Features
Using Voice Command
70
Your MPx Pocket PC Phone provides an innovative and
intelligent method to enter your phone number: Voice
Command . For instructions on using Voice Command , see xx.
Taking a Note during a Call
You can take a note during an active call. When you finish
the note, your phone saves it as an attachment to your call
in the appropriate Call History folder.
To take a note:
Action
1 Tap the
icon at the bottom of the screen.
2 Enter the note.
Action
1 From the Dialer keypad, tap Call History.
2 Select the list where the call is filed.
3 Tap and hold the name or number of the call that
includes the note.
4 Tap View Note .
Calling Features
To access a note you created during a call:
71
Tip: You can also access the note directly from Notes in the
Calls folder.
Putting a Call on Hold
Calling Features
Your device will notify you when you
have another incoming call. If you
accept the call, tap Answer to take the
second call and put the first on hold.
To end up the second call and go back to the first call, tap
End or press
.
You can also choose to swap
between the two calls by tapping
Swap.
Setting Up a Conference Call.
You can create a three-way phone session between
yourself and two other parties. A conference call can
include up to six people.
72
1 From the Phone keypad, dial the
first number, tap Hold , dial the
second number, and then tap
Conference .
2 You can also set up a
conference call by accepting
2nd incoming call when you
already have one in progress.
3 To add additional people to your conference call, tap
Hold , key in the number, and then Resume to return and
continue.
You can either import the contacts from your SIM card or
the Call History.
SIM Manager
Calling Features
Managing Your Contacts
To open SIM manager, tap
Start > Programs > SIM
Manager. Wait for your SIM card contents to load.
73
Creating a SIM contact:
Action
Calling Features
1 After the SIM contacts complete loading, tap New.
2 Fill in the Name and
Phone information then
tap Add .
74
Saving contacts from SIM to Contacts:
On SIM Manager screen, tap Tools >
Select All > and then Save to Contacts .
or
Calling Features
Tap and hold a contact from the list,
and then select Save to Contacts from
the pop-up menu.
75
Saving personal numbers:
You can save your personal phone numbers in a separate
screen in SIM Manager.
Action
Calling Features
1 Tap
Start > Programs >
SIM Manager > Tools , and then
select List of Own Numbers .
76
2 Add a number to the screen
and then press OK .
Call History
From the Dialer's keypad, tap Call
History to open Call History. It details
all incoming, outgoing, and missed
calls.
Adding a record to Contacts from Call History:
Calling Features
Action
1 Find the call record you
want to add in the Contacts.
2 Using the stylus, tap and hold the item to bring
up the pop-up menu, and select Save to Contacts .
You can add additional contact details in the Save to
Contacts screen.
Tip: The call details in the Call History will then be
amended and displayed under the name of the contact, not
their telephone number.
77
Viewing duration of a Call:
Action
In Call History screen, find the call you are looking
in, and then tap it once.
Deleting individual calls from Call History:
Action
Calling Features
Using the stylus, tap and hold on the call you want to
delete, and then select Delete from the pop-up menu.
Deleting all calls from Call History:
Action
Tap Tools > Delete all Calls .
Setting limits on the size of your Call History:
Action
Tap Call History > Call Timers and then the box under
Delete call history items older than . In the drop down
menu select a time period then press OK .
78
Additional Dialing Information
Calling an Emergency Number
Your service provider programs one or more emergency
phone numbers, such as 911 , that you can call under any
circumstances, even when your phone is locked or the SIM
card is not inserted.
Action
Notes: Emergency numbers
vary by country. Your phone's
preprogrammed emergency
number(s) may not work in all locations, and
sometimes an emergency call cannot be placed due
to network, environmental, or interference issues.
Calling Features
1 Enter the international
emergency number, and
then tap
or press
button.
79
Dialing International Numbers:
Action
1 Tap and hold the
key until the + sign
appears. The + replaces the international prefix
of the country of where you are calling.
2 Enter the full phone number you want to dial. It
includes country code, area code (without the
leading zero) and phone number.
Calling Features
3 Tap
80
or press
button.
Messaging Features
You can receive Internet e-mail messages and SMS
messages in Inbox. Internet e-mail messages are sent by
using an address you receive from your Internet service
provider (ISP) or your employer. SMS messages are sent
and received through your wireless phone service provider
by using a phone number as the message address.
m
E ail Messages
You can use Inbox to send and receive e-mail messages in
either of these ways:
• Synchronize e-mail messages with Microsoft
Exchange or Microsoft Outlook on your PC.
Setting Up an Email Service
1 Open Inbox , tap Accounts , and then New Account .
2 Enter your email address and then tap Next .
3 Then Auto-configuration will attempt to connect to
the e-mail server and configure the necessary email settings automatically.
4 Enter an unique name for the account, User name
and Password , then tap Next .
Messaging Features
• Send and receive e-mail messages by connecting
directly to an e-mail server through an Internet
Service Provider (ISP) or a network.
81
5 In the Account type , tap POP3 or IMAP4. (POP3 is
the most common mail protocol for ISPs.)
6 Enter your ISP's e-mail server name of Incoming
mail and Outgoing mail , then tap Finish .
7 Connect to your email server by tapping Accounts
> Connect .
Note:
• If auto-configuration is not successful, you need to
manually enter the settings.
• For more explanation, tap
Start > Help.
Messaging Features
Synchronizing Email Messages
82
E-mail messages can be synchronized as part of the
general synchronization process. You will need to enable
Inbox synchronization in ActiveSync . For information on
enabling Inbox synchronization, see ActiveSync Help on the
PC.
During synchronization:
• Messages are copied from the Inbox folder on your
PC or Exchange server to the Inbox folder on your
device. When synchronizing Inbox with your PC,
ActiveSync synchronizes the first .5 KB of each new
message sent to you within the last three days each
time you synchronize. When synchronizing Inbox
with a server, ActiveSync synchronizes the first
500 bytes of each new message.
• Messages in the Outbox folder on your device are
transferred to Exchange or Outlook and then sent
from those programs.
• The messages on the two computers are linked.
When you delete a message on your device, it's
deleted from your PC the next time you synchronize.
• Messages in subfolders or other e-mail folders in
Outlook should be selected in ActiveSync for
synchronization.
Using the Message List
Messages you receive are
displayed in the message list. By
default, the most recently
received messages are displayed
first in the list.
Messaging Features
83
When you receive a message,
tap it to open it. Unread
messages are displayed in bold.
Messaging Features
You can mark the messages that you want to retrieve in full
during your next synchronization or e-mail server
connection. In the message list, tap and hold the message
you want to retrieve. On the pop-up menu, tap Mark for
Download . The icons in the Inbox message list give you
visual indications of message status.
You specify your downloading preferences when you set
up the account or select your synchronization options. You
can change them at any time:
• Change options for Inbox synchronization using
ActiveSync options. For more information, see
ActiveSync Help.
• Change options for direct e-mail server connections in
Inbox on your device. Tap Tools and then tap Options .
On the Account tab, tap the account you want to
change. Tap and hold the account and select Delete
to remove an account.
84
Composing an Email Messages
Action
1 In the message list, tap New.
Messaging Features
2 In the To field, enter the e-mail address of one or
more recipients, separating them with a
semicolon, or select a name from the contact list
by tapping the Address Book button. All e-mail
addresses entered in the e-mail fields in
Contacts appear in the Address Book.
3 Compose your message. To enter preset or
frequently used messages, tap My Text and
select a message.
4 Tap Send when you've finished the message. If
you are working offline, the message is moved to
the Outbox folder and will be sent the next time
you connect. If you are working online, it is sent
immediately.
85
Managing Messages and Folders
Each email, SMS and MMS account has its own folder
hierarchy with five default folders: Inbox , Outbox , Deleted
Items, Drafts, and Sent Items . The messages you receive
and send through the service account are stored in these
folders. You can also create additional folders within each
hierarchy.
SMS Messages
You can send an SMS Message from Inbox or from Phone
dialer screen. All the SMS messages received will be
stored in the Inbox.
Sending SMS
Messaging Features
Find the Feature
86
• In the Inbox , open a new email message and select
SMS account in the Account type options.
• In the Phone dialer screen, tap Tools > Send SMS .
In the To field, enter the SMS number of one or more
recipients, using “;” to separate them. Or select a contact
by tapping the Address Book button.
When you have finished the message, tap Send . If you are
working offline, the message will be stored in the Outbox
folder and will be sent when next time you connect.
MMS Messages
MMS Composer is incorporated into your device's “Inbox,”
which can be accessed either from the Start menu or the
Today screen. Once the Inbox is open, you can access
your MMS message boxes from the top-left pull-down:
Exiting MMS Composer
To quit, tap the “X ” in the topright corner of the screen while
viewing any message box.
Message Boxes
Use the pull-down to select the
MMS message box that you
wish to view:
Sent
Description
Contains messages you've discarded.
Stores work-in-progress messages.
Stores messages that you receive.
Stores messages that are currently
being sent, or those that were unable
to be sent.
Stores messages that have been
successfully sent.
Messaging Features
Entry Method
Deleted Items
Drafts
Inbox
Outbox
87
Creating a Message
Messages are created by combining various slides. Each
slide can consist of a photo or video, audio, and text.
Select “New” from the menu of any message box screen to
compose a new message*. Follow this procedure to create
a new message:
Action
Messaging Features
1 When you’re ready to
send your message,
tap here.
2 Here you can enter your recipients and subject.
Tap the double down arrow to view the Cc and
Bcc fields.
3 Tap here to insert a photo or video.
4 Tap here to input a text message.
5 Tap here to include an audio clip.
6 The menu lets you do a number of things, such
as preview and organize your message.
Note: You may not automatically be taken to a blank
message. If you are instead taken to a page that displays
88
pre-made templates, choose the template you want. If you
would prefer to create a blank message next time, check
the “Always choose custom” box.
Adding a Photo or Video
You can add either a still image or a video clip to each
individual slide. After you’ve tapped the area to add a
photo or video, you'll be allowed to select exactly what you
want to include.
Action
1 This pull-down lets you
select a specific
location that contains
photos/videos.
Messaging Features
2 Choose either “Photos” or “Videos” from this pulldown. You can only add either a single photo or
video clip to each individual slide.
3 Tap the specific photo or video clip that you want
to add.
Tap and hold on a file to see the “File Info” and “Delete”
options. “File Info” displays the file name, resolution,
date, and size of a photo. When viewing video file
information, the duration of the video is also listed.
89
“Delete” deletes the file.
Press
To
Adds the selected photo/video to
the slide.
Takes you to the previous screen.
Displays photos/videos as a file list.
Displays thumbnails (as shown
here).
Adding Text
Messaging Features
You can add text to any slide. You can either enter in new
text with the keyboard, or use “canned” text. Canned text
are previously saved words or phrases.
Action
Tap the Canned Text
icon to see a list of
pre-saved text
messages. Tap the
one you want, and
then choose “Select.”
Tap and hold on the
Canned Text screen to view additional options:
New: Lets you enter in a new canned text message.
Edit: Lets you modify an existing canned text
message.
Delete: Removes the selected canned text from the
list.
90
Adding Audio
Single audio clips can be added to each slide. You can
either include an existing sound file, or record a new one.
Action
1 From the pull-down,
select a location that
contains audio files.
2 Tap the file you’d like to use.
You can use the playback controls to preview the audio:
(Play/Pause and Stop controls are available.)
Messaging Features
You can view file information similarly to the way you can
with photos and videos. Tap and hold on a file, then
choose “File info” (you can also delete the file). The file
name, duration, date, and size are shown.
If you're happy with your choice, tap “Select.” Otherwise,
tap “Cancel.”
91
MMS Settings
To view and edit your MMS
settings, choose “MMS Settings”
from the “Tools” menu that appears
at the bottom of the screen while
viewing any message box:
Messaging Features
Entry Method
Connect Via
Retrieve Messages
Immediately
Save Sent Messages
Attempts Before Giving
Up
92
Description
Select your type of network
connection from the pulldown.
Typically, you receive a
notification whenever a new
message is available.
Checking this box downloads
new messages automatically.
You can also choose to
download messages while
roaming.
Check this option to save a
copy of messages that you
send.
This value sets the number of
times the program will
attempt to send your
message before stopping.
Entry Method
Photo Resolution
Description
Choose the resolution for
images that you send. You
may want to decrease below
the original resolution to help
the send/receive time.
The “Servers” tab lists your available servers.
The “About” tab lists various program information.
iVew
ing Messages
When viewing messages that you receive or send, or when
previewing a message you're working on, you have a
variety of options.
Messaging Features
Use the Play/Pause/Stop buttons
to view the message. Use the Left/
Right Arrow buttons to skip among
the various slides (if applicable).
You don't need to see the message
straight through; you can skip
among the various slides.
93
Messaging Features
Tapping “Objects” on the menu
displays a list of all the message
components. Tap any component
to open/view it. From the “Tools”
menu, you can choose to save an
object. You can also view the
component’s file properties.
94
Personalizing Your
MPx
Buttons
Find the Feature
Start > Settings > Personal > Buttons
Action
1 Select a button.
Personalizing Your MPx
To customize the functions of buttons, open the “Buttons”
control panel.
2 Select a program in Button Assignment .
3 Tap OK .
95
Input
Find the Feature
Start > Settings > Personal > Input
Personalizing Your MPx
Action
1 On the Input Method tab, you can select an input
method and changed preferred options.
2 On the Word Completion tab, you can select
desired options for word completion.
3 On the Options tab, you can select preferred
options for recording and writing. These options
apply to any program on the device where you
can record and write.
Note: You can also change the input options by tapping
the
arrow and then Options.
Menus
You can add the programs you use most often to Start
menu.
96
Find the Feature
Start > Settings > Personal >
Menus
Action
Owner Information
You can set your owner information using this control
panel.
Find the Feature
Personalizing Your MPx
1 On the Start Menu tab, select the programs you
want, and then tap OK.
2 On the New Menu tab, you can select Turn on New
button menu and then select the items to appear
on the menu. When you do this, you can create
certain programs such as Pocket Word, Pocket
Excel, Contacts, Calendar and Tasks by using
the New menu in the command bar.
Start > Settings > Personal >
Owner Information
Action
1 On the Identification tab, enter your personal
information. Select Show information when device is
turned on so that if you lose your device, it can be
returned to you.
2 On the Notes tab, enter any additional text you
want to display when the device is turned on,
such as: Reward if found.
97
Password
You can set a power-on password for your device with this
control panel.
Find the Feature
Start > Settings > Personal >
Password
Personalizing Your MPx
Action
1 To select how long your
mobile device must be
turned off before a
password must be
entered, check Prompt if
device unused for.
2 Select the type of password you would like to
use. A strong password must have at least seven
characters that are a combination of uppercase
and lowercase letters, numerals, and
punctuation.
3 Enter the password and, if necessary, confirm
the password.
Notes: If your device is configured to connect to a
network, use a strong password to help protect network
security.
98
Sounds and Notifications
To customize the way the device sounds during certain
events, open this control panel.
Find the Feature
Start > Settings > Personal >
Sounds and Notifications
Action
Tip: Turning off sounds and the notification light helps
conserve battery power.
Personalizing Your MPx
1 On the Sounds tab, you can select the actions for
which you want to hear sounds.
2 On the Notifications tab, you can customize how
you are notified about different events. Select the
event name and then select the type of reminder.
You can select a special sound, a message, or a
flashing light.
Today
This contorl panel allows you to customize the look of the
Today screen.
Find the Feature
Start > Settings > Personal > Today
99
Changing the background:
Personalizing Your MPx
Action
100
1 On the Appearance tab, select
the desired theme for the
background. To use your
own background, select Use
this picture as the
background then tap Browse
to locate the desired file.
2 Choose a folder and then tap the file you want.
3 Tap OK .
Tip: Recommend picture size for the background is
240x320 pixels in.jpg file.
Customizing the information you want displayed:
Action
1 Uncheck a box to remove its
information.
Personalizing Your MPx
2 To change an item's position select it then tap
Move Up or Move Down .
3 To choose how long the Today screen is
displayed, select/deselect Today timeout , then the
number of hours.
Tip: You can select Tasks or Calendar, and then Options to
further customize the information you want displayed.
101
Power
This control panel allows you to view the status of the
battery and adjust other power settings.
Find the Feature
Start > Settings > System >
Power
Personalizing Your MPx
Action
1 The Power option displays the amount of battery
power remaining. Battery power depends on the
battery type and how the device is being used.
2 You can tap screen light to enter the Screen light
option, allowing you to select options for turning
off your device to conserve battery power. To
conserve the most power, select the option that
turns off the device after 3 minutes or less.
Phone Settings
You can customize phone settings, such as the ring type
and ring tone to be used for incoming calls, and the keypad
tone to be used when entering phone numbers. You can
also protect your phone from unauthorized use.
102
Changing Ring Type
You can change the way that you are notified of incoming
calls. For example, you can choose to be notified by a
ring, a vibration, or a combination of both.
Action
2 Tap the Ring type list, and select the desired
option.
Personalizing Your MPx
1 From the Phone keypad, tap
Tools > Options > Phone tab.
103
Changing Ring Tone
You can select a different sound to notify you of incoming
calls.
Action
Personalizing Your MPx
1 From the Phone keypad, tap
Tools > Options > Phone tab.
2 Tap the Ring tone list, and select the sound you
want to use.
Note: You can also use .wav, .mid, or .wma files as ring tones.
Copy the files to the /Windows/Rings folder on your device.
Then, select the sound from the Ring tone list.
104
Changing Keypad Tone
You can change the tone you hear when entering a phone
number on the keypad. If set to Tones , the tone is heard
continuously for as long as the number on the keypad
is pressed. If set to Beep, the tone is heard only for one
or two seconds.
Personalizing Your MPx
Action
1 From the Phone keypad, tap
Tools > Options > Phone tab.
2 Tap the Keypad list, and select the option you
want.
105
Getting More Out of
Your Phone
Dialing Options
Fixed Dialing
Getting More Out of Your Phone
When you activate the fixed dial feature, users can only
call the number in the fixed dial list.
Note: Employers can use fixed dial to limit employees'
phones to a predefined list of numbers, country codes, or
other prefixes.
Activating Fixed Dial
Find the Feature
> Settings > Security > Fixed Dial
Creating and Calling Fixed Dial Entries
Fixed Dial list entries can be any length. You must enter
your SIM PIN2 code, from your network service provider,
to edit fixed dial entries. To open the fixed dial list:
Find the Feature
> More > Fixed Dial
In the fixed dial list, you can create, edit, delete, and sort
entries just like in the phonebook list. Fixed dial list entries
are stored on your SIM card.
Service Dialing
Dial preprogrammed numbers stored on your SIM card.
Your Service provider can program your SIM card with
106
phone numbers for services such as taxi companies,
restaurants, and hospitals.
Find the Feature
> More > Service Dial
Managing Your Calls
Calling a number in a Text Message
If you receive a text message with an embedded phone
number, you can dial the number directly.
Find he Feature
> Message > Inbox
Action
If the message contains more than 1 phone number, scroll
to the desired number and press SELECT to dial.
Monitoring Phone Use
Viewing and Resetting Call Timers
Getting More Out of Your Phone
1 Scroll to the message with the number.
2 Tap to open the message.
3 Tap the response icon and then Call to dial the
number in the message.
Your phone tracks and records call times. Use the recent
calls menu to view and reset a call timer.
Network connection time is the elapsed time from the
moment you connect to your service provider's network to
the moment you end the call by pressing the End key. This
time includes busy signals and ringing.
107
The amount of network connection time you track on your
resettable timer may not be equal the amount of time for
which you are billed by your service provider. For billing
information, please contact your service provider directly.
To view a call timer:
Find the Feature
> Phone > Call History > Tools > Call
Timers
To reset the call timer, tap Reset.
You can view the approximate network connection time
elapsed during the following calls:
Getting More Out of Your Phone
Timer
All Calls
Missed
Outgoing
Incoming
Description
shows all calls made to and
from the phone in chronological
order.
only shows calls that were not
answered.
only shows calls made from the
phone.
only shows call made to the
phone.
Network Features
Network Selection
Find the Feature
> Settings > Other Setting > Network
Your service provider registers your phone to a network.
You can view information about the current network,
change how your phone searches for a network, specify
108
your preferred networks, and activate alerts that indicate
when a call is dropped or network registration changes.
Using ActiveSync
With Microsoft ActiveSync on both your PC and mobile
device, you can exchange information between your PC
and your device.
Using ActiveSync, you can:
• Keep Pocket Outlook data up-to-date by
synchronizing your device with Microsoft Outlook
data on your PC.
• Copy files between your device and PC.
• Back up and restore device information.
• Add and remove programs on your device.
Note: You can directly synchronize information with a
Microsoft Exchange Server if your company is running
Microsoft Mobile Information Server 2002 or later.
Installing ActiveSync
To synchronize your device with your PC, you must install
ActiveSync on your PC from the Pocket PC Phone 2003
Companion CD.
Getting More Out of Your Phone
• Change synchronization settings and synchronization
schedule.
Creating a Partnership
Once ActiveSync is installed on your PC, you will be
prompted to connect and create a partnership with your
109
device by using a cable, cradle, or infrared connection.
During this partnership you can decide exactly which types
of information you want to synchronize with your PC and/or
a server.
Getting More Out of Your Phone
Your first synchronization will
automatically begin when you
finish using the wizard. After the
first synchronization, you will
notice that your Outlook
information now appears on
your device.
Synchronizing Information
You can synchronize the following types of Outlook
information:
• Inbox
• Calendar
• Contacts
• Tasks
• Notes
By default, ActiveSync doesn't automatically synchronize
all types of Outlook information. You can use ActiveSync
options to select what information types you want to
synchronize.
110
Synchronizing Inbox
When you select Inbox for synchronization in ActiveSync,
e-mail messages are synchronized as part of the general
synchronization process. During synchronization, the
following events occur:
• Messages are copied from the Outlook Inbox folder on
your desktop computer, or from a Microsoft Exchange
Server, to the Inbox folder on your device.
• The messages on your device and on your desktop
computer are linked. When you delete a message
your device, it is deleted from your desktop computer
the next time you synchronize, and vice versa.
• Messages in subfolders in other e-mail folders in
Outlook are synchronized only if the folders have been
selected for synchronization in the Inbox on your
device.
Synchronizing Calendar
Getting More Out of Your Phone
• By default, when synchronizing Inbox information
with your desktop computer, you will receive only
messages from the last three days and the first
500 bytes of each new message. You can also choose
to download file attachments.
• Calendar items stored on your device can be
synchronized with calendar items stored on your
desktop PC and/or on a Microsoft Exchange Server.
By default, calendar items from the last two weeks will
be synchronized.
111
• Calendar items created on your device are copied to
your desktop PC and/or server during
synchronization, and vice versa. Similarly, Calendar
items that are deleted from your device are deleted
from your desktop computer and/or server during
synchronization, and vice versa. This keeps your
information up-to-date in all locations.
Synchronizing Contacts
Getting More Out of Your Phone
• Contacts stored on your device can be
synchronized with contacts stored on your desktop
computer or on a Microsoft Exchange Server. By
default, all of your contacts will be synchronized.
• Contacts created on your device are copied to your
desktop computer and/or server during
synchronization, and vice versa. Similarly, contacts
that are deleted from your device are deleted from
your desktop computer and/or server during
synchronization, and vice versa. This keeps your
information up-to-date in all locations.
Synchronizing Tasks
• Tasks stored on your device can be synchronized with
tasks stored on your desktop computer. Task
synchronization is automatically selected in ActiveSync .
By default, all of your incomplete tasks will be
synchronized.
• Tasks created on your device are copied to your
desktop computer during synchronization, and vice
versa. Similarly, tasks that are deleted from your
112
device are deleted from your desktop computer during
synchronization, and vice versa. This keeps your
information up-to-date in all locations.
Synchronizing Using an
Infrared Connection
Using infrared (IR), you can also send and receive
information, such as contacts and appointments, between
two devices.
Sending information
1 Switch to the program where you created the
item you want to send and locate the item in the
list.
2 Align the IR ports so that they are unobstructed
and within close range.
3 Tap and hold the item, and tap Beam Item on the
pop up menu.
Getting More Out of Your Phone
You can use an infrared connection to create a direct
connection between your device and another mobile
device or desktop computer quickly. This method is
ideal for quickly switching between multiple devices
since there are no cables or adapters to change. When
creating a partnership, you must connect using infrared, a
cable, or a cradle connection.
113
Receiving information
1 Align the IR ports so that they are unobstructed
and within close range.
2 Have the owner of the other device send the
information to you. Your device will automatically
receive it.
ActiveSync Errors
Getting More Out of Your Phone
Whenever ActiveSync cannot successfully synchronize
your information, it displays an error on your device.
114
To view ActiveSync error information
Press the Action button when the error text is
displayed. ActiveSync will then display more
information about the error that occurred.
Notes: Some types of errors can interfere with automatic
synchronization. If you suspect that a scheduled automatic
synchronization has not occurred, you should attempt to
manually synchronize your information. Successfully
completing manual synchronization will reset automatic
synchronization.
Services
Service settings are used to set options for incoming/or
outgoing calls, such as Call Waiting , Call Forwarding , Call
Barring , and Caller ID.
From the Phone keypad, tap Tools > Options > Services tab.
Select a service and then tap Get Settings to access the
settings for a service.
Getting More Out of Your Phone
Description
Option
Call Waiting Notifies you of incoming calls when you
are already in a phone session. Keep
with reset of chart.
Call
Forwards all
Forwarding incoming calls to a
different number.
Call Barring Blocks certain types of incoming and/
or outgoing calls.
Caller ID
Shows or hides your identity when
calling other people
115
Network
You can view available networks, determine the order in
which your phone accesses another network if the current
one is unavailable, and specify whether you want to
change networks manually or automatically. The current
network will remain active until you change it, lose your
signal, or change your SIM card.
Find the Feature
From the Phone keypad,
tap Tools > Options > Network tab
Getting More Out of Your Phone
Action
116
1 The network your device is currently using will be
listed at the top of the screen.
2 When your current network is unavailable, tap
Select Network , and manually select a different
network to use.
Personal Organizer
Features
Alarm Clock
Find the Feature
Press
1
> select
[New Alarm]
> Alarm Set
To
create/edit alarm item
Alarm content list:
Name :
Time:
Alert:
> EDIT
3
> DELECT
delete 1 alarm item
4
> DELECT
delete all alarm items
ALL
Note: Your phone must be powered On in order for any
alarm that you may have set to be activated.
Personal Organizer Features
2
Volume:
same as above
117
Calculator
Find the Feature
Press
1 number keys
2
3 Select
> More > Calculator
To
enter a number in the calculator
highlight a calculator function
perform the highlighted function
Converting Currency
Find the Feature
Press
1 number keys
2 OK
> More > Calculator > Currency Rate
To
enter the exchange rate
store the exchange rate
Personal Organizer Features
Using the Stop Watch
118
Your phone provides you with a Stop Watch, allowing you
to count the time.
Find the Feature
Press
1 Start
2 Stop
3 Reset
> More > Stop Watch
To
start counting the time
stop counting the time
reset the Stop Watch
Security
Setting PIN
You can protect your phone from unauthorized use by
assigning a type of password called a PIN (Personal
Identification Number). Your first PIN will be given to you
by your mobile phone service provider.
Action
1 From the Phone keypad, tap Tools > Options >
Phone tab.
2 Select Require PIN when phone is used.
3 To change the PIN at any time, tap Change PIN .
Note: Emergency calls can be placed at any time, without
requiring a PIN.
Locking and Unlocking Your
Phone
You can look your phone manually or set your phone to
lock automatically whenever you turn it off.
Security
When you try to use a locked phone, it asks you to enter
the unlock code. A locked phone still rings or vibrates for
incoming calls or messages, but you must unlock it to
answer.
119
You can make emergency call on your phone even when it
is locked.
Lock your Phone Manually
Find the Feature
> Settings > Security > Phone Lock >
Lock Now
Press
1 keypad keys
2 OK
To
enter your 4-digit unlock code
lock the phone
Set Your Phone to Lock Automatically
Find the Feature
> Settings > Security > Phone Lock >
Auto Lock > On
Press
Security
1 keypad keys
2 OK
120
To
enter your 4-digit unlock code
set the phone to lock
automatically
Unlock Your Phone
1 keypad keys
To
enter your 4-digit unlock code
2 OK
The unlock code is originally set
to 1234.
unlock your phone
Press
Changing Your Unlock Code
Find the Feature
> Settings > Security > New
Passwords
To
scroll to the code or password
you want to change
3 Change
select the code or password
4 keypad keys enter your old code
5 OK
submit your old code
6 keypad Keys enter the new code
7 OK
assign the new code
8 keypad keys re-enter the new code
9 OK
confirm the new code
Press
Security
121
If you forget a code or password
Press
1
2 keypad keys
3 OK
To
go to the unlock code bypass
screen
enter your security code
submit your security code
Protecting the SIM Card
Find the Feature
> Settings > Security > SIM PIN
Unlock the SIM card PIN Code
Press
To
1
open the PIN unblocking editor
Security
2
3
4
5
6
7
122
keypad keys
OK
keypad keys
OK
keypad keys
OK
enter the PIN code
submit the PIN code
enter a new SIM card PIN code
assign the new SIM PIN code
re-enter your SIM card PIN code
confirm the new SIM PIN code
and unblock the SIM card
Microsoft Pocket
Outlook
Microsoft Pocket Outlook includes Calendar, Contacts , Tasks ,
Inbox , and Notes .You can use these programs individually or
together. For example, e-mail addresses stored in
Contacts can be used to address e-mail messages in
Inbox.
For information on using ActiveSync, see ActiveSync Help
on the PC.
Microsoft Pocket Outlook
Using ActiveSync®, you can synchronize information in
Microsoft Outlook or Microsoft Exchange on your desktop
computer with your device. You can also synchronize this
information directly with a Microsoft Exchange server.
Each time you synchronize, ActiveSync compares the
changes you made on your device and PC or server and
updates both computers with the latest information.
123
Calendar: Scheduling
Appointments and Meetings
Microsoft Pocket Outlook
Use Calendar to schedule
appointments, including meetings
and other events. You can check
your appointments in one of several
views (Agenda, Day, Week, Month,
and Year) and set Calendar to
remind you of appointments with a
sound or other method.
Note: You can customize the
Calendar display, such as changing
the first day of the week, by tapping Options on the Tools
menu.
To create an appointment:
Action
1 If you are in Day or Week
view, tap the desired date
and time for the
appointment.
2 Tap New.
3 Using the input panel, enter a description and a
location. Tap first to select the field.
124
4 If needed, tap the date and time to change them.
5 Enter other desired information. You will need to
hide the input panel to see all available fields.
6 To add notes, tap the Notes tab. You can enter
text, draw, or create a recording. For more
information on creating notes, see “Notes:
Capturing Thoughts and Ideas,” later in this
chapter.
7 When finished, tap OK to return to the calendar.
Tip: If you select Remind me in an appointment, your
device will remind you according to the options set in
Start > Settings > Personal tab > Sounds & Notifications .
When you tap an appointment in
Calendar, a summary screen is
displayed. To change the
appointment, tap Edit.
Microsoft Pocket Outlook
Using the Summary Screen
Creating Meeting Requests
You can use Calendar to set up meetings with users of
Outlook or Pocket Outlook. The meeting request will be
created automatically and sent either when you
synchronize Inbox or when you connect to your e-mail
server. Indicate how you want meeting requests sent by
125
tapping Tools and then Options. If you send and receive email messages through ActiveSync, select ActiveSync .
To schedule a meeting:
Action
Microsoft Pocket Outlook
1 Create an appointment by tapping New.
2 In the appointment details, hide the input panel,
and then tap Attendees.
3 From the list of e-mail addresses you've entered
in Contacts, select the meeting attendees.
4 The meeting notice is created automatically and
placed in the Outbox folder. For more information
on sending and receiving meeting requests, see
Calendar Help and Inbox Help on the device.
Contacts: Tracking Friends and
Colleagues
Contacts maintains a list of your
friends and colleagues so that you
can easily find the information you're
looking for, whether you're at home or
on the road. Using the device infrared
(IR) port, you can quickly share
Contacts information with other
device users.
Note: To change the way
information is displayed in the list, tap Tools and then
Options .
126
To create a contact
1 Tap New.
Microsoft Pocket Outlook
2 Using the input panel, enter a name and other
contact information. You will need to scroll down
to see all available fields.
3 To assign the contact to a category, scroll to and
tap Categories and select a category from the
list. In the contact list, you can display contact by
category.
4 To add notes, tap the Notes tab. You can enter
text, draw, or create a recording. For more
information on creating notes, see “Notes:
Capturing Thoughts and Ideas,” later in this
chapter.
5 When finished, tap OK to return to the contact
list.
127
Finding a contact
There are 4 ways to find a contact:
Microsoft Pocket Outlook
Action
128
1 Tap
Start , Contact , then Find , enter the contact
name (first, last, or middle), phone number, or
address, select Contacts for the type, and then tap
Go.
2 From Contacts, start typing a contact name until
you see it displayed on the screen. To show all
contacts again, tap the text box at the top of the
screen and clear the text, or tap the arrow icon to
the right of the text box.
3 In the contact list, tap the category list (labeled
All Contacts by default) and tap the category to
which you’ve assigned a contact. To show all
contacts again, select All Contacts .
4 To view the names of companies your contacts
work for, in the contact list, tap View > By Company.
The number of contacts that work for that
company will be displayed to the right of the
company name.
Using the Summary Screen
When you tap a contact in the
contact list, a summary screen is
displayed. To change the contact
information, tap Edit .
Tasks: Keeping a To Do List
Note: To change the way
information is displayed in the list,
tap Tools and then Options .
Microsoft Pocket Outlook
Use Tasks to keep track of things
you need to do.
129
To create a task:
Action
Microsoft Pocket Outlook
1 Tap New.
2 Using the input panel, enter a description.
3 You can enter a start date and due date or enter
other information by first tapping the field. If the
input panel is open, you will need to hide it to see
all available fields.
4 To assign the task to a category, tap Categories
and select a category from the list. In the task
list, you can display tasks by category.
5 To add notes, tap the Notes tab. You can enter
text, draw, or create a recording. For more
information on creating notes, see “Notes:
Capturing Thoughts and Ideas,” later in this
chapter.
6 When finished, tap OK to return to the task list.
Note: To quickly create a task with only a subject, tap
Entry Bar on the Tools menu. Then, tap Tap here to add a new
task and enter your task information.
130
Using the Summary Screen
When you tap a task in the task list,
a summary screen is displayed. To
change the task, tap Edit .
Notes: Capturing Thoughts and
Ideas
Microsoft Pocket Outlook
Quickly capture thoughts,
reminders, ideas, drawings, and
phone numbers with Notes. You
can create a written note or a
recording. You can also include a
recording in a note. If a note is
open when you create the
recording, it will be included in
the note as an icon. If the note
list is displayed, it will be created
as a stand-alone recording.
131
To create a note:
Action
1 Tap New.
Microsoft Pocket Outlook
2 Create your note by writing, drawing, typing, and
recording.
132
Using Applications
You can launch a companion program by tapping
programs on the
start menu, and then select the
program name.
Find the Feature
Start > Programs > MSN Messenger.
®
MSN Messenger on your device provides the same chat
environment as MSN Messenger on your desktop
computer. These features include:
Using Applications
Communicating with MSN
Messenger
• See who is online.
• Send and receive instant messages.
• Have an instant message conversation with a group of
contacts.
• Tell contacts that you are unavailable.
• Block contacts from seeing your status or sending you
messages.
Before you can use MSN Messenger, you must set up the
instant messaging account(s) to use. For MSN Messenger
Service, you must have a Microsoft Passport or Hotmail
account. For Exchange Instant Messaging, you must have
an Exchange account.
133
Setting Up
• In the Tools menu, tap Options and then Accounts tab.
• Select Enable MSN Messenger Service and/or Enable
Exchange Instant Messaging .
Using Applications
• Enter your sign-in name and password for the
selected account.
• To sign in, tap the sign-in screen and then Sign in
button.
Working with Contacts
The MSN Messenger window shows all of your messenger
contacts at a glance and are divided into Online and Not
Online categories. To change your status, select your
name from the Messenger contacts list, and press the
Action button. Select a status description, such as Away,
and press the Action button.
Tip:
1 To see others online without being seen, change your
status to Appear Offline.
2 If you block a contact, it appears offline but remains on
the blocked contact's list. To unblock a contact, select
the contact, press the Action button, select Unblock
from the list and press the Action button.
134
Chatting with Contacts
In MSN Messenger, select a contact name and press the
Send to open a chat window. Enter your message in the
text entry area at the bottom of the screen, or tap My
Text to choose a preset message, and then press the
Send . To invite another contact to a multi-user chat,
open the Tools menu and tap Invite to select a contact.
Pocket Word
Find the Feature
Start > Programs > Pocket Word .
Pocket Word works with Microsoft Word on your PC to give
you easy access to copies of your documents. You can
create new documents on your device, or you can copy
documents from your PC to your device. Synchronize
documents between your PC and your device so that you
have the most up-to-date content in both locations.
Using Applications
To know if the contact you are chatting with is responding,
look for the message under the text entry area.
135
To create a new file:
Action
Using Applications
1 Tap
Start > Programs >
Pocket Word , and then
New. A blank document
appears.
2 If you have selected a template for new
documents in the Tool > Options dialog box, that
template appears with appropriate text and
formatting already provided.
Note: You can open only one document at a time;
when you open a second document, you'll be asked
to save the first. You can save a document you
create or edit in a variety of formats, including Word
(.doc), Pocket Word (.psw), Rich Text Format (.rtf), and
Plain Text (.txt).
Tip: You can select a template for new documents in the
Options dialog box. The template appears comes with
appropriate text and formatting already provided.
Pocket Word contains a list of the files stored on your device.
Tap a file in the list to open it. To delete, make copies of,
136
and send files, tap and hold a file in the list. Then, select
the appropriate action on the pop up menu.
2
3
4
5
Using Applications
1
Action
Select the folder type you want displayed in the
list.
Tap to change the sort order of the list.
Tap to open a document.
Tap and hold an item to see a pop-up menu of
actions.
Tap to create a new document.
Tip: You can change the zoom magnification by tapping
View and then Zoom . Then select the percentage you want.
Select a higher percentage to enter text and a lower one to
see more of your document. If you're opening a Word
document created on a PC, select Wrap to Window on the
View menu so that you can see the entire document.
137
Entering Information in a New File
You can enter information in Pocket Word in one of four
modes (typing, writing, drawing, and recording), which
are displayed on the View menu. Each mode has its
own toolbar, which you can show and hide by tapping
the Show/Hide Toolbar button on the command bar.
Using Applications
1 Typing Mode
• Using the input panel, enter typed text into the
document.
• Toformat or edit existing text, first select it by using
your stylus to drag through the text. You can search a
docu-ment for text by tapping Edit and then Find/
Replace.
2 Writing Mode
In writing mode, use your stylus to write directly on the
screen. Ruled lines are displayed as a guide, and the
zoom magni-fication is greater than in typing mode to allow
you to write more easily.
3 Drawing Mode
In drawing mode, use your stylus to
draw on the screen. Gridlines
appear as a guide. When you lift
your stylus off the screen after the
first stroke, you'll see a drawing box
indicating the boundaries of the
drawing. Every subsequent stroke
within or touching the drawing box
becomes part of the drawing.
138
4 Recording Mode
In recording mode, you can embed a recording into your
document. Recordings are saved as .wav files.
Pocket Excel
Using Applications
Find the Feature
Start > Programs > Pocket Excel .
Pocket Excel works with Microsoft Excel on your PC to
provide easy access to copies of your workbooks. You can
create new workbooks on your device, or you can copy
workbooks from your PC to your device. Synchronize
workbooks between your PC and your device so that you
have the most up-to-date content in both locations.
139
To create a new file:
Action
Using Applications
Tap
Start > Programs >
Pocket Excel , and then New. A
blank workbook appears.
If you have selected a
template for new workbooks in
the Tool > Options dialog box,
that template appears with
appropriate text and
formatting already provided.
Pocket Excel provides
fundamental spreadsheet
tools, such as formulas,
functions, sorting, and filtering.
To display the toolbar, tap
View and then Toolbar.
Tips for Working in Pocket Excel
Note the following when working in large worksheets in
Pocket Excel:
• View in full screen mode to see as much of your
worksheet as possible. Tap View and then Full Screen .
To exit full screen mode, tap Restore .
• Show and hide window elements. Tap View and then
tap the elements you want to show or hide.
140
• Freeze panes on a worksheet. First select the cell
where you want to freeze panes. Tap View and then
Freeze Panes . You might want to freeze the top and
leftmost panes in a worksheet to keep row and
column labels visible as you scroll through a sheet.
• Show and hide rows and columns. To hide a hidden
row or column, select a cell in the row or column you
want to hide. Then tap Format , then Row or Column , and
then Hide . To show a hidden row or column, tap Tools ,
then Go To, and then type a reference that are in the
hidden row or column. Then tap Format , then Row or
Column , and then Unhide .
Using Applications
• Split panes to view different areas of a large
worksheet. Tap View and then Split . Then drag the split
bar to where you want it. To remove the split, tap View
and then Remove Split .
Windows Media Player
Find the Feature
Start > Programs > Windows Media .
Use Microsoft Windows Media Player for Pocket PC to play
digital audio and video files that are stored on your device
or on a network.
141
Using Windows Media Player:
Action
Using Applications
1 Tap
Start > Programs >
Windows Media .
2 Use Microsoft Windows Media Player on your PC
to copy digital audio and video files to your
Pocket PC. You can play Windows Media and
MP3 files on your Pocket PC.
Pictures
Find the Feature
Start > Programs > Pictures .
Pictures collects, organizes and sorts .jpg picture files on
your device. You can download images to your PC, and
then use ActiveSync to copy the files to your device. After
that, you can view the images as a slide show.
Tip: Pictures can also be stored and transferred to your
device from an MMC, SD or digital camera card. Insert a
card into the memory card slot and then copy or drag the
pictures from your PC to the My Documents directory on the
memory card (If the memory card does not have a My
Documents directory you must create one first).
142
Transferring Pictures
Action
Pictures stored on your PC can be synchronized
with Pictures on your device. Picture synchronization
is not automatically selected in ActiveSync, you
need to tap the sync option Files in ActiveSync on
your desktop PC to activate this function.
Action
1 Tap
Start > Programs > Pictures .
2 Tap My Pictures and select a folder from the dropdown menu.
Using Applications
Finding and listing pictures
Viewing Pictures
143
In the picture:
Action
Using Applications
Tap
to view pictures as a
slide show.
Tap
to view pictures stored in your My Picture
folder.
Tap
to view pictures
stored on a storage card.
Tip: Tap anywhere on the screen to display the Slide
show toolbar, which you can use to pause the slide
show, rotate the view, and more. Press the Left/Right
controls to move forward or backward through the
slides.
144
Sorting Pictures
Action
1 Tap
Start > Programs > Pictures .
2 Tap Name and select an
option from the dropdown menu.
Action
Hold the stylus firmly on the file name of the picture
you want to delete, and then select Delete from the
pop up menu.
Using Applications
Deleting a Picture
145
Editing Pictures
You can rotate, crop, zoom and adjust the brightness and
color contrast of your .jpg pictures.
Using Applications
Action
1 Tap
to rotate a
picture 90 degrees
counter-clockwise.
2 Tap
to crop a picture by dragging and
selecting the crop area. Tap outside of the box to
stop cropping.
3 Tap
to display the Zoom panel, from which
you can zoom in or out of a picture, or return a
picture to full-screen size.
4 Tap Edit > Brightness and Contrast to adjust the
brightness and contrast levels of a picture.
146
Setting Pictures as Background
You can use one of your own .jpg pictures as the
background on the Today screen, and specify how you
want it displayed on the screen, such as adjusting the
transparency level.
Using Applications
Action
1 In Pictures , tap the picture
you want to set as the
background.
2 Tap Tools > Set as Today Wallpaper.
Customizing Pictures
You can choose to launch the Pictures program
automatically when a digital camera storage card is
inserted and decide on a time delay length between slides
when showing a slide show.
147
To select launch automatically:
Action
Using Applications
1 Tap
Start > Programs >
Pictures .
2 Tap Tools > Options > General . Then, check the box
next to Detect digital camera storage cards .
To select the time delay between slides:
Action
1 Tap
Start > Programs > Pictures .
2 Tap Tools > Options > Slide Show. Then, select a
number of seconds then tap OK .
148
Using the Camera
Your Pocket PC Phone features a built-in camera for you to
take photos. After taking a photo, you can view it directly
on the Pocket PC Phone, or send it via MMS to your
friends.
Camera
To take photos:
Using the Camera
Action
1 If you want to save your
photos in a memory card,
insert it in the SD/MMC
card slot first.
2 There are two ways to open the Camera
program:
Tap
Start > Programs > Camera .
or
Press the Camera button on the keypad.
3 Use the camera to target your subject.
149
4 Hold the Pocket PC Phone steadily and position
the subject in the center of the screen.
5 To zoom in/out (100% ~ 400%), tap
the lower right of the screen.
/
on
6 Tap
on the bottom right corner of the screen,
or press the Center button of the Game Pad to
take the photo.
7 After taking the photo, you
can do one of the
following:
Using the Camera
• Tap
to save it in the
selected folder
150
• Tap
MMS
to send it via
• Tap
to set it as the
wallpaper of the Pocket
PC Phone
• Tap
to delete it
Setting Items on the Camera Screen
After opening the Camera program, there are several
setting items on the main screen of the Camera program
for you to view and change the settings of the photo:
Option
Mode
Resolution
Flash
Contrast
Settings
Using the Camera
Brightness
Description
You can select to use the Normal ,
Timer, or Burst mode .
The resolution options are
1280x960(SXVGA) , 640x480(VGA) ,
320X240(QVGA) , 176X144(QCIF) ,
160X120(QQVGA) and 128X96(SQCIF) .
Turn on or off the flash.
You can use the slider bar to
adjust the brightness value of
the photo.
You can use the slider bar to
adjust the contrast value of the
photo.
You can tap this icon to access
more Camera settings.
151
More Camera Settings
Cost Tracker
Mode option
Size restriction
Using the Camera
Name prefix
152
Description
You can set the time lag
between releasing the shutter
and shooting the photo (in the
Timer mode), or set the
maximum number of continuous
photos (in the Burst mode).
If the remaining space of the
Pocket PC Phone has reached
the size limit you set, you cannot
take new photos.
By default, the filename of each
new photo will be the prefix
following by a sequential
number. For example,
DSC_00001.jpg . You can change
the default prefix to your desired
characters.
White balance
Storage folder
Max idle time
The white balance options are
Automatic , Night , Fluorescent ,
Incandescent , Sunlight and Cloudy.
By default, the photos you take
will be saved to your \My
Documents\My Pictures folder in
ResidentFlash. You can change
the storage location.
You can set the idle period for
the Camera program to enter
the standby mode. The options
range from 20 seconds to 1
minute.
You can use the Photo Album program to view the photos.
Action
There are two ways to open
the Photo Album program:
Using the Camera
Photo Album
Start > Programs >
Tap
Photo Album .
or
Tap
on the upper right of
the Camera screen.
In Photo Album, four view modes are available: Thumbnail
view, Detailed view, Slide Show view, and Full Screen.
153
Thumbnail View Mode
By default, Photo Album will display the photos in the \My
Using the Camera
Documents\My Pictures folder in ResidentFlash.
You can change the display mode in this view mode:
To
Display the filenames of
the photos
Change the display
mode of the thumbnails
Display the photos in
the List mode
Change the folder of
photos
Do
Tap View > Show Name
Under Thumbnails .
Tap View > Thumbnails .
Tap View > List .
Tap View > Select a Folder.
Tap Tools to do the following functions:
• Check All Pictures
• Rename/Move Checked Pictures
• Delete Checked Pictures
154
Detailed View Mode
To enter the Detailed view mode, simply tap a photo in the
Thumbnail view mode.
Option
Rotate/Flip/
Crop
Edit Sound
Draw
Add Text
Add Clip Art
Description
allows you to rotate, flip or crop
the photo.
allows you to add an audio
recording to the photo.
allows you to draw on the photo.
allows you to add a text note to
the photo.
allows you to add a clip art
drawing on the photo.
Using the Camera
In this view mode, you can Tap Edit to edit the photo:
155
Funhouse
Photo Greeting
Warp
allows you to add a funny frame
for the photo.
allows you to select a card
background for the photo.
allows you to twist the photo.
Using the Camera
You can also do the following:
156
To
Move to the previous/
next photo in the
current folder
Change the Orientation
of the photo
Zoom the photo
View the photo in the
Full Screen mode
Send the photo via
MMS
Send the photo via email
Send the photo via IR
to another device
Set the photo as the
wallpaper of the Pocket
PC Phone
Do
Tap
or
.
Tap View > Show in Actual
Orientation /Show in Rotated
Orientation /Show in Best
Orientatio n.
Tap View > Zoom In (or
)
) /Zoom To.
/Zoom Out (or
Tap View > Full Screen .
Tap Tools > Send via MMS .
Tap Tools > Send via E-mail .
Tap Tools > Beam Picture .
Tap Tools > Set as
Wallpaper.
Tap Tools > Save Picture As .
Save the photo in
another location in the
Pocket PC Phone
Rename/Move the
photo
View the information of
the photo
Tap Tools > Rename/Move .
Delete the photo
Tap Tools > Delete , or
Tap Tools > Information , or
.
.
Slide Show View Mode
Using the Camera
To enter the Slide Show view mode, tap
in the
Thumbnail view mode. By default, you will enter the slide
show setting screen before the slide show starts. After the
slide show starts, tap anywhere on the screen to return to
the Thumbnail view mode.
157
Full Screen Mode
Using the Camera
To enter the Full Screen mode, tap View > Full Screen in the
Detailed view mode. Tap anywhere on the screen to return
to the Detailed view mode.
158
Getting Connected
Wi-Fi Wireless LAN
(IEEE802.11b)
Your Pocket PC Phone is equipped with a built-in wireless
network module to connect to an 802.11b wireless LAN
(WLAN) or connect directly to other WLAN-enabled
devices.
Turning the WLAN On or Off
Action
1 Tap
Start > WLAN Utility.
Getting Connected
2 Tap Turn ON to turn on the WLAN module. The
Pocket PC Phone will start to scan the wireless
networks available in your environment.
159
3 If one or more networks are available, the Pocket
PC Phone will ask you to select the network you
want to connect to and whether the network
connects to the Internet or Work.
4 If you are prompted for a Network Key (WEP),
enter it and then tap Connect. If you are not sure,
contact your network administrator.
5 To turn off the WLAN, tap the WLAN icon on the
bottom right corner of the display and tap Wireless
Off to turn it off.
Viewing the WLAN Status and Settings
To view the WLAN status and settings:
Action
Getting Connected
1 Tap
160
Start > WLAN Utility.
2 Tap the Status, Setting, Security or Information tab to
view the WLAN status and settings.
Bluetooth
Find the Feature
Start > Settings > Connections >
Bluetooth.
Bluetooth is a short-range wireless communications
technology. Devices with Bluetooth capabilities can
exchange information over a distance of about 10 meters
(30 feet) without requiring a physical connection.
Unlike infrared, you don’t need to line up the devices to
beam information with Bluetooth. The devices only need to
be within a range of about 10 meters. You can even beam
information to a device in a different room, as long as it's
within range. The software included with your Pocket PC
Phone allows you to use Bluetooth in the following ways:
• Create a dial-up modem connection between your
device and a Bluetooth phone. You can then use the
Bluetooth phone as a modem.
Getting Connected
• Beam information, such as files, appointments,
tasks, and contact cards, between devices that
have Bluetooth capabilities. For example, if you
and a co-worker each have a device with
Bluetooth, you can beam items between your devices,
such as files, contact cards, appointments, tasks, and
so forth.
161
To access to the Bluetooth settings screen:
Action
1 Tap
Start > Settings >
Connections tab > Bluetooth.
Getting Connected
2 Tap the small icon and
select the Bluetooth Setting
option
162
Bluetooth Modes
Bluetooth operates in three different modes:
Description
The Bluetooth radio
is turned on and
you can use
Bluetooth features.
Discoverable:
The Bluetooth radio is turned on, and
all of the other Bluetooth devices within
range (about 10 meters) can detect
your device and attempt to beam
information to it, establish a bond, or
use a Bluetooth service. In this mode,
other devices can detect your device
whether or not a bond has been
created; however, in order to receive a
beam from another device, you must
accept it on your device.
The Bluetooth radio is turned off. In
this mode, you can neither send nor
receive information by using Bluetooth.
You might want to turn the radio off at
times in order to conserve battery
power, or in situations where radio use
is prohibited, for example on airplanes
and in hospitals.
Off:
Getting Connected
Mode
ON:
163
To turn your Bluetooth radio on or off:
Action
1 Tap
Start > Settings > Connections tab > Bluetooth.
2 Select On or Off. The Bluetooth radio is turned on
or off according to your selection.
Tip: By default the Bluetooth radio is turned off. If
you turn it on, and then turn off your device, the
Bluetooth radio also turns off. When you turn on your
device again, the Bluetooth radio automatically turns
on.
To make your device discoverable:
Action
Getting Connected
1 Tap
Start > Settings > Connections tab > Bluetooth.
2 Select Discoverable. (Selecting Discoverable also
turns on your Bluetooth radio.)
164
Now, other Bluetooth devices can detect your device
and attempt to beam information to it, establish a
bond, or use a Bluetooth service. Note that to
receive beamed information, you must accept it on
your device.
Bonds
A bond is a relationship that you create between your
device and another Bluetooth device in order to exchange
information in a secure manner. Creating a bond involves
entering the same personal identification number (PIN) on
the two devices you want to bond. You need only create a
bond once between two devices. Once a bond is created,
the devices recognize the bond and are able to exchange
information without your entering a PIN again.
To create a bond:
You can create a bond between your device and another
device that has Bluetooth. Once you do this, Bluetooth
doesn't need to be in discoverable mode in order for you to
beam information between the two devices; the
Bluetooth radio only needs to be turned on.
2 Tap
Getting Connected
Action
1 Make sure that the two
devices are within 10
meters of one another
and that Bluetooth is in
discoverable mode on
both devices.
Start > Settings > Connections tab.
165
Getting Connected
3 Tap Bluetooth > Bonded Devices tab > New. Your device
searches for other Bluetooth devices and
displays them in the list.
4 Tap the name of the other device in the list, and
then Next.
5 In PIN, enter a PIN of
between 1 and 16
characters and tap Next.
166
6 Enter the same PIN on the other device.
7 If you want, in Name, edit the name of the other
device.
8 Tap Finish.
To accept a Bond:
Action
1 Make sure that Bluetooth
is turned on and in
discoverable mode.
Getting Connected
2 When prompted to bond with the other device,
tap OK.
3 In PIN, enter a PIN of between 1 and 16
characters, and tap Next. You must enter the
same PIN that was entered on the device
requesting the bond.
4 If you want, in Name, edit
the name of the device
requesting the bond.
5 Tap Finish.
Now, the bond is created. You can now exchange
information with the other device.
167
To rename a Bond:
Action
1
2
3
4
5
Tap
Start > Settings > Connections tab.
Tap Bluetooth > Bonded Devices tab.
Tap the bond to rename.
In Name, enter a new name for the bond.
Tap Finish.
To delete a Bond:
Action
Getting Connected
1
2
3
4
168
Tap
Start > Settings > Connections tab.
Tap Bluetooth > Bonded Devices tab.
Tap and hold the bond to delete.
Tap Delete.
Beaming Information with Bluetooth
Action
1 Tap and hold an item to
beam, such as an
appointment in Calendar,
a task in Tasks, a contact
card in Contacts, or a file
in File Manager.
2 Tap Beam [type of item].
3 Tap the device to which you want to send the
beam.
The item is beamed to the device you selected.
Getting Connected
Tip: If the device that you want to beam to does not
appear in the list, make sure that it is turned on, in
discoverable mode, and within 10 meters (10 meters) of
your device. Also, make sure you're your Bluetooth radio is
turned on.
169
Receiving a Bluetooth Beam
Action
1 Make sure that your
device is configured to
receive incoming beams
and that Bluetooth is in
discoverable mode.
2 Make sure that your device is within 10 meters of
the device beaming the information.
3 When prompted to receive an incoming beam,
tap Yes.
Getting Connected
The information is now stored on your device.
170
Using a Bluetooth Phone as a Modem
You can use a phone that has Bluetooth capabilities as a
modem for your device. To do this, you create a Bluetooth
modem connection on your device and then send
information to the phone by using Bluetooth. The phone
relays the information over the phone line and then sends
back to your device any information that you had
requested over the connection.
Once you create a modem connection to the Bluetooth
phone, you can reuse it whenever you want to use the
phone as a modem.
Action
1 Make sure that the
Bluetooth phone is turned
on, that your device's and
the phone's Bluetooth
radios are turned on, and
that your device and the
phone are within 10
meters (10 meters) of one
another.
2 If you have not already done so, create a
Bluetooth phone connection by following steps 3
through 16. Otherwise, skip to step 17.
Getting Connected
Tap
Start > Settings > Connections tab.
Tap Connections > Add a new modem connection.
Enter a name for the connection.
In the Select a modem list, tap Bluetooth > Next.
Make sure that the phone is discoverable. Some
phones may also need to be pairable in order to
accept a bonding request.
8 If the phone appears in the My Connections list, skip
to step 14. If not, tap New and follow the
remaining steps.
9 In the list, tap the phone and then Next.
3
4
5
6
7
171
Getting Connected
10 In PIN, enter a PIN of between 1 and 16
characters, and tap Next.
11 Enter the same PIN on the phone.
12 If you want, in Name, edit the name of the phone.
13 Tap Finish.
14 In the My Connections list, tap the phone, and then
Next.
15 Enter the phone number to dial for this
connection and tap Next.
16 In User name, Password, and Domain, enter the logon
information for this connection and tap Finish.
17 Start using the program that uses the Bluetooth
phone connection; for example Inbox to send
and receive e-mail, or Internet Explorer to
browse the Web.
172
Pocket Internet Explorer:
Browsing Web and WAP Pages
Find the Feature
Start > Internet Explorer.
You can use Microsoft Pocket Internet Explorer to view Web
HTML, cHTML, xHTML and WAP pages. You can browse
in either of these ways:
• During synchronization with your PC, download your
favorite links and mobile favorites that are stored in
the Mobile Favorites folder in Internet Explorer on the
PC.
• Connect to an Internet service provider (ISP) or
network and browse the Web.
Tip: To synchronize and download your favorite links from
your desktop computer, tap the sync option Favorites in
ActiveSync on your desktop PC.
When connected to an ISP or network, you can also
download files and programs from the Internet or intranet.
Using Pocket Internet Explorer
You can use Pocket Internet Explorer to browse mobile
favorites and channels that have been downloaded to your
device without connecting to the Internet. You can also
connect to the Internet through an ISP or a network
connection and browse the Web/ WAP page(s).
To browse the Internet:
2 Tap
Getting Connected
Action
1 In the address bar
that appears at the
top of the screen,
enter the Web
address you want to
visit.
to go to the web address you entered.
173
3 Tap
, the Favorites button, then tap the
favorite you want to view.
4 Tap
to go back to the Homepage you set.
5 Tap
to refresh the web page on the screen.
6 Tap the arrow
to choose from previously
entered addresses.
To view mobile favorites and channels :
Getting Connected
Action
1 To display your list of
favorites, tap
.
174
2 Tap the page you want to view.
3 You will see the page that was downloaded the
last time you synchronized with your PC. If the
page is not on your device, the favorite will be
dimmed. To download the page to your device,
you will need to synchronize with your PC again,
or connect to the Internet to view the page.
Tip: To add a favorite link while using the device, go to the
page you want to add, tap and hold on the page, and tap
Add to Favorites.
The Mobile Favorites Folder
Only items stored in the Mobile Favorites folder in the Favorites
folder in Internet Explorer on your PC will be synchronized
with your device. This folder was created automatically
when you installed ActiveSync.
Favorite Links
During synchronization, the list of favorite links in the Mobile
Favorites folder on your PC is synchronized with Pocket
Internet Explorer on your device. Both PC and your device are
Mobile Favorites
If you are using Microsoft Internet Explorer 5.0 or later
on your PC, you can download mobile favorites to your
device. Synchronizing mobile favorites downloads Web
content to your device so that you can view pages
while you are disconnected from your ISP and PC.
Getting Connected
updated with changes made to either list each time you
synchronize. Unless you mark the favorite link as a
mobile favorite, only the link will be downloaded to your
device, and you will need to connect to your ISP or
network to view the content. For more information on
synchronization, see ActiveSync Help on the PC.
Use the Internet Explorer plug in installed with
ActiveSync to create mobile favorites quickly.
175
Getting Connected
Creating a mobile favorite:
176
Action
1 In Internet Explorer on your desktop computer,
click Tools and then Create Mobile Favorite.
2 To change the link name, enter a new name in
the Name box.
3 Optionally, in Update, select a desired update
schedule.
4 Click OK. Internet Explorer downloads the latest
version of the page to your desktop computer.
5 To limit the number of download links, open
Internet Explorer on your desktop PC then
Favorites. Then, move your mouse through Mobile
Favorites to the mobile favorite you want to
change. Finally, right-click the mobile favorite and
then Properties; in the Download tab, specify 0 or 1
for the number of linked pages you want to
download.
6 Synchronize your device and desktop computer.
Mobile favorites that are stored in the Mobile
Favorites folder in Internet Explorer are
downloaded to your device.
If you did not specify an update schedule in step 3, you will
need to manually download content to keep the
information updated on your desktop computer and device.
Before synchronizing with your device, in Internet Explorer
on your desktop computer, click Tools and then Synchronize.
You will see the last time content was downloaded to the
desktop computer, and you can manually download
content if needed.
You can add a button to the Internet Explorer toolbar for
creating mobile favorites. In Internet Explorer on your
desktop computer, click View, Toolbars, and then Customize.
Saving Device Memory:
Mobile favorites take up storage memory on your device.
To minimize the amount of memory used:
• In ActiveSync on your desktop, click Options, select
Favorites/Internet Explorer, tap Settings and then Customize.
You can then deselect Synchronize Images, Synchronize Sound
and/or Synchronize offline content pages, to stop pictures
and sounds, or some mobile favorites from being
downloaded to the device.
Using AvantGo Channels
AvantGo is a free interactive service that gives you access
to personalized content and thousands of popular Web
sites. You subscribe to AvantGo channels directly from
your device. Then, you synchronize your device and PC, or
connect to the Internet to download the content. For more
information, visit the AvantGo Web site.
Getting Connected
• Limit the number of downloaded linked pages. In
Internet Explorer on the desktop computer, click
Favorites; then move your mouse through Mobile Favorites
to the mobile favorite you want to change. Finally,
right-click the mobile favorite and then Properties. In the
Download tab, specify 0 or 1 for the number of linked
pages you want to download.
177
To sign up for AvantGo:
Getting Connected
Action
1 In ActiveSync options on the desktop computer,
turn on synchronization for the AvantGo
information type.
2 In Pocket Internet Explorer on your device, tap the
Favorites button to display your list of favorites.
3 Tap the AvantGo Channels link.
4 Follow the directions on the screen. You will need
to synchronize your device with your desktop
computer and then tap the My Channels button to
complete the AvantGo setup.
5 When synchronization is complete, tap the
AvantGo Channels link in your list of favorites to see a
few of the most popular channels. To add or
remove channels, tap the Add or Remove link.
178
Games
Your phone comes with three games. If you get an
incoming call, message, alarm or alert, the game ends
automatically.
Find the Feature
Press
> Games
To
scroll to the game of your choice
1
2
SELECT
start the game
To end a game at any time:
Press
BACK/NO
To
end the game session or return
to the game menu
Games
179
Troubleshooting
Check these questions first if you have problems with your
phone:
Troubleshooting
Question
How do I know if
my battery is
charged?
180
Do you have a
valid SIM card
inserted in your
phone?
Does the
handset have a
signal? Do you
see a signal
showing in the
display?
Is the earpiece
volume too low?
Answer
The battery level indicator
should show at least one bar
(segment) of power. If it does
not, please recharge your
phone’s battery (see “Charging
Your Phone” on page 15). If the
battery level indicator has three
(3) bars showing, then your
phone’s battery is fully charged.
If necessary, turn off your phone
and make sure that you have
inserted a valid SIM card.
The signal strength indicator
should have at least one
segment showing. If it does not,
move to an area with a stronger
signal to use your phone.
While on a call, scroll up.
Question
Is the other party
unable to hear
you?
Has the phone
been damaged,
dropped or
gotten wet?
Also, you and/or the person you
are speaking with may be in a
weak network coverage area.
Make sure that your phone’s
microphone is not obstructed.
Dropping your phone, getting it
wet, or using a non-Motorola
battery charger can damage the
phone. The phone's limited
warranty does not cover liquid
damage or damage caused
from using non-Motorola
accessories.
Ensure that your phone is not
set to Silent or Vibrate. See
page 20 on how to modify your
phone’s Alert and Ring Tone
profiles: Ring, Vibrate, Vibrate &
Ring, Flashing, and Silent.
Troubleshooting
I can’t hear my
phone ring.
Answer
Your phone may be muted. You
may take the call off of mute by
making the appropriate soft key
selection.
181
The following referring to specific problems:
Troubleshooting
Question
My phone was
stolen. To whom
should I report
this?
I forgot my
password
I pressed the
End/Power key,
but nothing
happened.
182
Answer
Report a stolen phone to the
police and to your service
provider.
See “Changing Your Unlock
Code” on page 66.
To either turn your phone On or
Off, you must Press and Hold
the End/Power Key for a couple
of seconds. If your phone will
still not turn On when you do
this, then check to see if your
phone’s battery is charged.
The SIM card may be incorrectly
inserted. Check the SIM card to
make sure that it is inserted
properly.
The Display
says Insert SIM
card or Check
SIM Card even
though I have
inserted my
SIM card in the
phone.
The display
Call your service provider to
obtain the PIN unblocking code.
says SIM
Blocked. How
do I unblock my
SIM card?
Question
The display
says Enter
Unlock code.
How do I unlock
my phone?
If you changed the default
unlock code in your phone,
please enter the unlock code
that you defined to unlock it.
The application you want is
locked. If you own the phone but
do not know the unlock code,
see “Changing Your Unlock
Code” on page 66.
The ringer may be set to play a
tone even though your phone is
set to a silent alert profile.
Your call did not reach the
wireless system. You may have
dialed the number too soon
after turning the phone on. Wait
until the display shows the
name of your service provider
before making a call.
Troubleshooting
My phone asks
for an unlock
code when I try
to open a
feature.
My phone rings
even though I
selected the
silent or vibrate
alert profile.
I tried to place a
call and heard
an alternating
high/low tone.
Answer
Enter the factory-preset unlock
code, 1234, or the last 4 digits
of your phone number.
183
Question
I cannot make/
answer calls.
Answer
Make sure that you have a
phone signal. Avoid electrical or
radio interference, and
obstructions such as bridges,
parking garages, or tall
buildings.
Troubleshooting
Your phone may also have the
Call Barring feature turned on. If
you know the unlock code, you
can change this setting in the
security menu. > Settings >
Security.
184
My phone has
poor reception
and drops calls.
I cannot hear
others on my
phone.
Also, check and make sure your
SIM card is inserted and
working.
Make sure you have a phone
signal. Stay clear of any
obstructions such as bridges,
parking garages, or tall
buildings.
While on a call, adjust the
volume by scrolling with the
Navigation Key to either the
right (to increase) or to the left
(to decrease) the phone volume
in my earpiece. Also, make sure
that your phone's earpiece is
not blocked by its carrying case.
Question
Answer
I cannot open my Before you can use text or
inbox.
information services messages,
you must set up the appropriate
inbox.
How do I see the To see the most recent calls you
calls I sent or
dialed or received, open the list:
received?
> Recent calls > Received Calls
or Dialed calls.
Your phone sends commands
My phone will
not dial
and passwords as DTMF tones.
voicemail
You can set your phone's DTMF
commands,
tones to be Long, Short or Off. If
passwords, or
you have trouble sending
other codes.
numbers, check your DTMF
setting.
My phone's
display is too
light.
Press to scroll to Long DTMF or
Short DTMF and press Select to
confirm.
You can change the level of
contrast in your phone display.
Troubleshooting
From the idle display, press: >
Settings > Other Setting > Initial
Setup > DTMF.
185
Troubleshooting
Question
What can I do to
extend battery
life?
186
Answer
Your battery's performance is
affected by charge time, feature
use, temperature changes, and
other factors.
You may also select Battery
Save to help maximize the
amount of time that your battery
will last between charges (see
Setting Battery Save on page
22).
How do I remove Remove it by opening the back
the battery?
cover of the phone.
You may need to reset your
My phone is
stuck and none phone. To reset your phone
(without changing any of the
of the buttons I
defaults that you currently
push will do
have), remove your replaceable
anything. How
battery from your phone and
do I make my
then insert it back into your
phone work?
phone. This will reset your
phone and you should be able
to power your phone back on
and use it again.
Specific Absorption
Rate Data
This model phone meets the government's requirements for
exposure to radio waves.
Your mobile phone is a radio transmitter and receiver. It is
designed and manufactured not to exceed limits for exposure
to radio frequency (RF) energy. These limits are part of
comprehensive guidelines and establish permitted levels of
RF energy for the general population. The guidelines are
based on standards that were developed by independent
scientific organizations through periodic and thorough
evaluation of scientific studies. The guidelines include a
substantial safety margin designed to assure the safety of all
persons, regardless of age and health.
The exposure standard for mobile phones employs a unit of
measurement known as the Specific Abortion Rate, Or SAR.
Under the guideline for your phone model, the SAR limit is
2.0 W/kg. Tests for SAR are conducted in accordance with
CENELEC testing procedures using standard operating
positions with the phone transmitting at its highest certified
power level in all tested frequency bands. Although the SAR
is determined at the highest certified power level, the actual
SAR of the phone while operating can be well below the
maximum value. This is because the phone is designed to
operate at multiple power levels so as to use only the power
required to reach the network. In general, the closer you are
to a base station, the lower the power output of the phone.
187
Before a phone model is available for sale to the public. it is
tested to confirm compliance with the guidelines. The tests
are performed in positions and locations (e.g., at the ear and
work on the body) that conform to a uniform testing
methodology determined by an expert standards body. The
highest SAR value for this model phone when tested for use
at the ear is __ W/kg.
While there may be differences between the SAR levels of
various phones and at various positions, they all meet the
governmental requirements for safe exposure. Please note
that improvements to this product model could cause
differences in the SAR value for later products; in all cases,
products are designed to be within the guidelines.
188
motorola.com