1
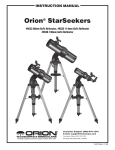
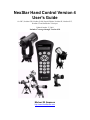
NexStar Hand Control Version 4
User's Guide
for CPC, NexStar GPS, NexStar 5i/8i/8i Special Edition, NexStar SE, NexStar SLT,
NexStar GT and StarSeeker Telescopes
Updated October 17, 2009
Includes Coverage through Version 4.18
Michael W. Swanson
http://www.NexStarSite.com
Contents
Introduction.................................................................................................................................... 1
Upgrading Firmware ..................................................................................................................... 2
Upgrading Firmware on the Hand Control.......................................................................................... 2
Upgrading the Motor Control Firmware in the Mount (not available on the GT or StarSeeker
models) ..................................................................................................................................................... 3
Understanding Alignment Stars, Sync and Precise GoTo............................................................ 6
Alignment ....................................................................................................................................... 7
SkyAlign................................................................................................................................................... 7
Auto Two Star Align ............................................................................................................................... 8
Solar System Align .................................................................................................................................. 9
One Star Align....................................................................................................................................... 10
Indoor Alignment.................................................................................................................................. 11
All-Star Polar Alignment - version 4.17 or later (not available on SLT, GT or StarSeeker models)
................................................................................................................................................................. 11
Display Polar Alignment Error - version 4.10 or later (not available on SLT, GT or StarSeeker
models) ................................................................................................................................................... 12
Alignment Stars (Re-Alignment) - version 4.10 or later (not available on GT or StarSeeker
models though they do still have the original Re-Alignment feature) .............................................. 12
Sync - version 4.10 or later (not available on GT or StarSeeker models) ........................................ 13
New or Updated Functions .......................................................................................................... 15
Precession - version 4.17 or later (not available on the GT or StarSeeker models) ........................ 15
Precise GoTo (not available on the SLT, GT or StarSeeker models)............................................... 15
Identify ................................................................................................................................................... 15
Constellation Tour ................................................................................................................................ 16
Sun Menu ............................................................................................................................................... 16
Save Database Object in User Objects ................................................................................................ 16
Scrolling Menu ...................................................................................................................................... 17
Calibrate Goto - version 4.10 or later (not available on GT or StarSeeker models)....................... 17
PEC Playback - version 4.10 or later (not available on SE, SLT, GT or StarSeeker models) ....... 17
Set Mount Position - version 4.10 or later (not available on GT or StarSeeker models)................ 18
Changes to Alt/Azm Menu Items - version 4.10 or later (not available on GT or StarSeeker
models) ................................................................................................................................................... 18
Changes to the Version Menu Item - version 4.12 or later (not available on GT or StarSeeker
models) ................................................................................................................................................... 18
Changes to the Lights Control Menu Item - version 4.12 or later (not available on GT or
StarSeeker models) ............................................................................................................................... 19
Changes to the Cordwrap Menu Item (not available on GT or StarSeeker models)..................... 19
Objects in the NexStar Hand Control ......................................................................................... 21
Introduction
In February 2005, Celestron introduced NexStar hand control version 4. First available to the public with
NexRemote, version 4 is also available on the new user-upgradeable NexStar hand control. The
upgradeable hand control ships as standard equipment on the CPC, NexStar SE and NexStar SLT. The
upgradeable hand control is also available for purchase separately for owners of existing GPS, GT and 'i'
Series scopes - contact Celestron for details. This version also shipped with the last of the GT scopes
(they have been replaced by the SLT) with these differences - while the GT-compatible version for the
upgradeable hand control is 4, the hand control that shipped with the last of the GTs is not user
upgradeable and the version number was 104. At least some of these NexStar GTs with the version 104
hand control have been re-branded as the Celestron StarSeeker - distinctive by its blue-green optical tube
- sold through Orion.
One additional note about the 104/4 version firmware for the GTs - this version greatly improves tracking
accuracy, keeping objects in the field of view for as long as you care to view them. The tracking is still
suited mainly for visual and perhaps web cam imaging as the necessary corrections made by the hand
control are significant and don't lend the scope to imaging.
1
Upgrading Firmware
Upgrading Firmware on the Hand Control
All hand controls with version 4 or higher can be upgraded by the owner. The only exceptions are GT
hand controls with version numbers in the 100s.
To update the hand control firmware, you will need the HCupdate program from Celestron's web site:
http://www.celestron.com/support/downloads/
Updating your scope also requires the standard Hand Control RS-232 Port Cable that plugs into the
bottom of the hand control. For details on the cable and sources to purchase one, visit the PC Control
section of my web site (http://www.NexStarSite.com). HCupdate requires a computer running Windows
98 or higher. Some have had success using Windows 95 but Celestron will not provide assistance for
Windows 95 users.
After downloading and installing HCupdate from the Celestron Support Downloads web site, start
HCupdate and read through the Help information. Here is a quick overview of the upgrade process:
• Connect the serial port of your PC to the RS-232 port on the bottom of the hand control. If your
PC does not have a serial port, you will need a USB-to-serial adapter available at most computer
stores.
• Hold down the hand control's UNDO and INFO buttons at the same time and turn on the power
to the scope. Release the buttons and the hand control should now display "Transmit Data...".
• Start the HCupdate from the Programs section of the Windows Start menu.
• Click the Next button on the welcome screen.
• Select the correct COM Port for your connection to the scope and click the Next button. Note
that if you do not have Internet connectivity at your scope, you can use None for the COM Port to
first download the correct firmware before disconnecting from the Internet and connecting your
PC to the scope.
• If you selected a COM Port and HCupdate cannot communicate with the scope, an error message
will appear. If you are certain your cable is good, try selecting all the other available COM Port
available in HCupdate. If that still doesn't work, you should check whether another program has
the serial port open - for example, the hot sync program for a palmtop computer. Either
temporarily disable the serial port selection in the hot sync program or uninstall it altogether (if
you no longer use it). If you are still having problems, ensure none of the pins in the connector
port on the bottom of the hand control are bent and reseat the cable. You may also try cleaning
the connector port on the bottom of the hand control using alcohol and a cotton swab. Additional
suggestions are found in the Serial Overview section of the help information in HCupdate.
• The next screen lists all the firmware you currently have downloaded to your PC. Click the
Download via the Web button to connect to Celestron's web site and see if newer firmware is
available. This does of course require that you are currently connected to the Internet, so as
mentioned before, if necessary, use COM Port "none" if you are not at your scope when
downloading new firmware. Once you have the firmware you wish to use, be sure it is
highlighted in the list and click the Next button. Note that it is not necessary to install each
version in succession until you reach the newest version - each version is a complete firmware
load and stands on its own.
• About the firmware available for download, following are the naming conventions for each type
of scope:
o NXS for GPS, CPC, SE and i Series
o SLT for SLT
2
•
•
GT for GT and StarSeeker
GEM for AS-GT and CGE
Click the Begin Programming button and wait until complete.
After the programming is finished, you will be prompted to power off and restart the telescope upon which the process is complete.
o
o
After updating the firmware, you should run the Calibrate Goto procedure on the Utilities menu of the
hand control as described later in this guide. Additionally, the following settings may need to be
configured:
• Location (city or long/lat)
• GPS On/Off
• Time Zone
• Direction Buttons
• Daylight Savings Time
• Slew Limits
• Sun Menu
• Filter Limits
• Scrolling Menu
• Alt Sensor Calibration (NexStar GPS only)
• Lights Control
• Model Select (NexStar GT and StarSeeker only)
Upgrading the Motor Control Firmware in the Mount
(not available on the GT or StarSeeker models)
Beginning with hand control version 4.13, it is now possible to upgrade the mount's motor control
firmware via the RS-232 port on the bottom of the hand control. It is no longer necessary to have a PC
Port on the mount and thus the same cable used to connect to the hand control is all that is needed to
upgrade the motor control firmware.
To update the MC firmware, download the MCupdate program from Celestron's web site:
http://www.celestron.com/support/downloads/
After downloading and installing the MCupdate program on a Windows 98 or higher PC (some have had
success using Windows 95 but Celestron will not provide assistance for Windows 95 users), you have
three options for connecting your PC to the scope:
1. For scopes with hand control version 4, insure the hand control firmware is version 4.13 or
higher. Next, connect the serial port on your PC to the RS-232 Port on the bottom of the hand
control using a Hand Control RS-232 Port Cable. For details on the cable and sources to
purchase one, visit the PC Control section of my web site (http://www.NexStarSite.com). During
the update process, MCupdate will place the hand control in a locked state.
2. For scopes with a PC Port on the mount (NexStar GPS, CPC and CGE) connect the serial port on
your PC to the PC Port on the mount using the PC Port Cable. For details on the cable and
sources to purchase one, visit the PC Control section of my web site
(http://www.NexStarSite.com). Note that use of the PC Port is a potential source of difficulty the PC port has generally been sitting exposed to the elements and may need cleaning. If you
have electronic contact cleaner, use a swab and clean the pins in the PC port jack. If you cannot
get contact cleaner, slide the plug in and out of the jack several times to wipe off any
contaminants.
3. For scopes with no PC Port on the mount, use Celestron's Auxiliary Port Accessory Kit (part
number 93965) which provides the required PC Port. Connect the serial port on your PC to the
PC Port on the Auxiliary Port Accessory. For more information on this accessory, visit the
Firmware Versions section of my web site (http://www.NexStarSite.com) and read the article on
how to upgrade the motor control firmware. If you do not already have one of these adapters, I
3
would recommend you purchase the new version 4 user upgradeable hand control and refer to
option 1 immediately above.
Start MCupdate and read through the Help information. Here is a quick overview of the upgrade process:
• First, insure you are using the latest version of MCupdate. If you are not using the latest version
of MCupdate then the following instructions may not work and the motor upgrade may
fail. Connect to the Internet and start MCupdate. Select None for the COM port and click the
Next button. Click Download via the Web button. If a newer version of MCupdate is available,
you will be prompted to install it and MCupdate will restart. You are now ready to update the
MC firmware in your scope.
• Connect your PC to the scope using one of the three methods discussed above. If you are
connecting to the mount via the PC Port, remove the hand control from the mount prior to
powering your telescope. If you are using hand control 4.13 or higher and connecting via the port
on the bottom of the hand control do not use the INFO/UNDO button sequence to put the hand
control in the programming state - this is only used when updating the hand control firmware,
not the motor control.
• Start MCupdate from the Programs section of the Windows Start menu.
• Insure Motor Control Board is selected as the device and click the Next button.
• Select the correct COM Port for your connection to the scope and click the Next button. Note
that if you do not have Internet connectivity at location of your scope, you can use None for the
COM Port to first download the correct firmware before disconnecting from the Internet,
traveling to your scope and connecting your PC to the scope.
• If you selected a COM Port and MCupdate cannot communicate with the scope, an error message
will appear. If you are certain your cable is good, try selecting all the other available COM Port
available in MCupdate. If that still doesn't work, you should check whether another program has
the serial port open - for example, the hot sync program for a palmtop computer. Either
temporarily disable the serial port selection in the hot sync program or uninstall it altogether (if
you no longer use it). If you are still having problems, clean the PC port as described above and
check to be sure that none of the pins in the port are bent. Additional suggestions are found in the
Serial Overview section of the help information in MCupdate.
• The next screen lists all the firmware you currently have downloaded to your PC. Click the
Download via the Web button to connect to Celestron's web site and see if newer firmware is
available. This does of course require that you are currently connected to the Internet, so as
mentioned before, if necessary, use COM Port "none" if you are not at your scope when
downloading new firmware. Once you have the downloaded the firmware you wish to use, be
sure it is highlighted in the list and click the Next button. Note that it is not necessary to install
each version in succession until you reach the newest version - each version is a complete
firmware load and stands on its own.
• Normally you should then click the Begin Programming button with All Devices selected in the
list. Some owners have experienced difficulty in completing the upgrade in this manner. In this
case they were able to successfully upgrade by programming the azimuth and altitude separately.
• The programmer will then proceed and should complete successfully. If it doesn't, don't panic,
just try again a few times - upgrading the azimuth and altitude separately. If it still doesn't
complete, now you can panic and call Celestron :-)
If the update is interrupted in the middle, (for example, the PC locks up or the mount is accidentally
powered off) you should power off and power on the mount. If you are updating via a PC Port on the
mount or Auxiliary Port Adapter, simply repeat the update process. If you are updating via the port on
the bottom of the hand control, when you switch the power back on the hand control may display a No
Response error. If so, simply press the UNDO button on the hand control several times until the No
Response message is cleared. The hand control should then display the locked message and you will be
able to continue with the update as described above. If you were updating via the hand control and now
4
the hand control displays Initializing and then goes blank, visit the Firmware Versions section of my web
site (http://www.NexStarSite.com) and read the article on how to upgrade the motor control firmware.
Updating MC firmware may reset the following to default values, so it is best to make a note of the
current settings prior to the upgrade:
• anti-backlash settings
• GoTo approach
• autoguide rates
• PEC recording (GPS, CPC, CGEM, CGE, CGE Pro mounts only) - use PECTool to save your
current recording before the upgrade and restore the recording after the upgrade
5
Understanding Alignment Stars, Sync and Precise GoTo
These three features (explained in detail in later sections) are all designed with one thing in mind improving GoTo accuracy. Here I will try to explain the differences and when each can be used most
effectively.
Alignment Stars (previously known as Re-Alignment) is used to make a permanent adjustment to the
current model of the sky. It replaces either of the current two alignment stars and affects GoTo accuracy
across the entire sky. Most typically this is used when you performed one of the single object alignments
- One Star, Solar System - or a "no object" alignment - Quick Align on the older versions of the hand
control. Alignment Stars is then used to more carefully center one additional, or two new alignment stars.
If you wish to improve the pointing accuracy across the entire sky, use Alignment Stars. Just as with any
initial alignment, be sure to use the correct final directions when centering the stars/objects and select
stars/objects with wide separation.
Sync is used to make a semi-permanent adjustment in one area of the sky only. For example, you might
Sync on Betelgeuse to improve GoTo accuracy in the area of the constellation Orion. This adjustment is
usually more accurate (for just that one area of the sky) than the use of the full-sky Alignment Stars
adjustment. However, Sync adjustment can cause poor accuracy in other areas of the sky, so use the
Undo Sync to completely cancel the effects prior to moving away from the Sync area.
Precise GoTo is a temporary Sync-like adjustment. Let's say you want to image a faint galaxy - so faint
that you can't see it in real-time using your CCD camera. Thus you won't know if the object is actually
showing on the CCD until after you run an exposure. Instead of using a regular GoTo, you might want to
use Precise GoTo. With Precise GoTo, the scope first moves to a bright star nearby your target galaxy,
which you then center using the arrow buttons. Then it moves to the target galaxy, offset by the amount
indicated by your adjustments in centering the nearby star. Thus the galaxy should now be centered on
the CCD. This is slightly more accurate than Sync, but the process must be repeated for each object you
GoTo.
So, use Alignment Stars for a permanent all-sky adjustment, Sync for a semi-permanent local adjustment
and Precise GoTo for a one-time, highly accurate adjustment.
6
Alignment
Celestron has provided several new innovative alignment methods in hand control version 4. Take a few
moments to read about each of them to see how you might use them.
SkyAlign
SkyAlign is an entirely new approach to aligning an alt-az mounted telescope. SkyAlign requires no
knowledge of the night sky and as such is designed for beginning backyard astronomers. In a nutshell,
you set up the telescope, provide your location and the date and time (GPS-equipped models will
automatically retrieve this information from the Global Positioning Satellite network) and center 3 bright
objects (you don't even need to know their names) in the eyepiece. The scope is now aligned and ready to
Go(To).
Procedure
• Setup the scope in alt-az mode - mounted right on top of the tripod. SkyAlign is not currently
available when mounted equatorially on a wedge.
• Power up the scope.
• Press ENTER to begin and then ENTER again when the display reads SkyAlign.
• The hand control will show either the current time or the time when you last used the scope. The top
line of the display will cycle through the messages, "Enter if OK", and "UNDO to edit". If your
scope has a GPS module, the GPS receiver will shortly lock onto 3 GPS satellites and update the date,
time, and location. If you become impatient waiting for a GPS link, or if you don't have a GPS
module in your scope, use the Up and Down buttons (6 and 9 on the keypad) to scroll through the
date, time, and location settings. If they are all correct, press Enter to accept and proceed with the
alignment. If they need adjusted, press Undo and make any necessary corrections.
• Next you will see a short message about what will happen next - press ENTER to continue.
• The display will now prompt to Center Object 1. Prior to beginning, you should scan across the sky
looking for three bright points. Two of them need to have wide separation, the third should not be
close to the line connecting the other two.
• Use the arrow buttons to slew (move) to the first of your bright objects. Center the object in the
finderscope and press ENTER. Then center the object in the eyepiece and press ALIGN. Repeat for
two additional objects and you are finished.
Additional Details
• As with all the new NexStar alignment methods, SkyAlign does not care where the optical tube is
pointed at the beginning of the alignment.
• Be sure to level the tripod before you start. Assumptions about the available bright stars and planets
rely on a level tripod. Once the alignment is complete, GoTo and tracking are not dependent upon the
accuracy with which you leveled the tripod, so do not spend time seeking perfect level - close is good
enough.
• If you do not have a GPS-equipped telescope, be accurate to within a couple of minutes when
entering the time. Also, either select a city within 50 miles or enter your longitude and latitude to
within a degree or two.
• Only stars of magnitude 2.5 or brighter are included in the SkyAlign procedure, so it is best to take a
look around and select three of the brightest stars in the sky.
• No need to worry about confusing planets for stars - SkyAlign works with the four brightest planets
as well (Venus, Jupiter, Saturn and Mars). Also, you can even use the Moon as one of your
alignment objects - though due to the speed with which it moves across the sky and the size (you
7
•
•
•
would need to switch to a low power eyepiece to center it), it is recommended you avoid it when
possible.
It is still important to select widely placed objects for alignment. When scanning the sky before you
begin, keep this in mind. Only two of the objects (the two with widest separation) will actually be
used for calculating the model of the sky. The third object is needed to provide a positive
identification of the other two. So, be sure at least two of the three are widely spaced.
Rarely, SkyAlign will not be able to determine what three objects were centered. To minimize this
further, if you see two bright objects near to each other (as will sometimes happen as a planet or the
Moon passes near one of the brighter stars) do not use either of these objects. Also, it is best to select
three objects that do not lie on a straight line.
Be sure to center the objects with the same final movements as the direction of the GoTo Approach.
For example, if the scope normally finishes a GoTo with the front of the scope moving right and up,
you will center all three objects in the eyepiece with the right and down arrow buttons (the up/down
arrows reverse at slew rates of 6 or lower). For more details on this, refer to my book The NexStar
User's Guide or the alignment guides found on my web site (http://www.NexStarSite.com).
Auto Two Star Align
Introduced with NexStar hand control version 2.3 (first shipped with the NexStar 8i SE) and available in
all newer versions, Auto Two Star Align is a cross between the original NexStar Auto Align and Two Star
Align. With Auto Two Star Align, after entering the date, time and location information, you select a star
from a list of the brightest stars currently above the horizon. You must then manually slew to that star.
After centering the first star the telescope will then automatically slew to a second alignment star. After
centering the second star the scope is aligned and ready to go.
Procedure
• Power up the scope.
• Press ENTER to begin, use the Up and Down buttons (6 and 9 on the keypad) to scroll to Auto Two
Star and then ENTER again.
• The hand control will show either the current time or the time when you last used the scope. The top
line of the display will cycle through the messages, "Enter if OK", and "UNDO to edit". If your
scope has a GPS module, the GPS receiver will shortly lock onto 3 GPS satellites and update the date,
time, and location. If you become impatient waiting for a GPS link, or if you don't have a GPS
module in your scope, use the Up and Down buttons (6 and 9 on the keypad) to scroll through the
date, time, and location settings. If they are all correct, press Enter to accept and proceed with the
alignment. If they need adjusted, press Undo and make any necessary corrections.
• The display will now prompt to Select Star 1. Decide which star you will use, Up and Down buttons
(6 and 9 on the keypad) to scroll to that star and then press ENTER. For Northern Hemisphere use,
Polaris (the North Star) is an excellent choice.
• Use the arrow buttons to slew (move) to the star you selected. Center the object in the finderscope
and press ENTER. Then center the object in the eyepiece and press ALIGN.
• The scope will now automatically slew to a second alignment star and prompt you to center and then
align, just as you did with the first star. If this second alignment star is obstructed from view or if you
would like to use a different star to get wider separation from the first (which improves GoTo
accuracy), press Undo to skip to the next available star.
• After pressing ALIGN for the second star, you are finished.
Additional Details
• Auto Two Star Align will only list objects that fall within the current Filter Limits and 15 - 70
degrees altitude (whichever is more restrictive) as available for alignment. For example, if your Filter
Limits are 20 and 90 degrees, only the objects between 20 and 70 degrees will be listed.
8
•
•
•
•
•
•
•
A sub-set of the full alignment star list is available during One Star Align - only the brightest stars are
available. Refer to the section Objects in the NexStar Hand Control for details.
Auto Two Star Align is only used in alt-az mode - mounted right on top of the tripod. When mounted
equatorially on a wedge, the original Auto and Two Star Align, as well as the new One Star and Solar
System Align (hand control version 4 or higher) are available.
As with all the new NexStar alignment methods, Auto Two Star Align does not care where the optical
tube is pointed at the beginning of the alignment.
To get closer pointing for the second star, be sure to level the tripod before you start. Once the
alignment is complete, GoTo and tracking are not dependent upon the accuracy with which you
leveled the tripod, so do not spend time seeking perfect level - close is good enough.
If you do not have a GPS-equipped telescope, be accurate to within a couple of minutes when
entering the time. Also, either select a city within 50 miles or enter your longitude and latitude to
within a degree or two.
It is still important to select widely placed stars for alignment. When selecting your first star, keep
this in mind. Selecting a first star high up in the sky will limit the possible separation of the
automatically selected second star.
Be sure to center the objects with the same final movements as the direction of the GoTo Approach.
For example, if the scope normally finishes a GoTo with the front of the scope moving right and up,
you will center both alignment stars in the eyepiece with the right and down arrow buttons (the
up/down arrows reverse at slew rates of 6 or lower). For more details on this, refer to my book The
NexStar User's Guide or the alignment guides found on my web site (http://www.NexStarSite.com).
Solar System Align
Solar System Align is available in alt-az mode (scope mounted directly on the tripod) and equatorial
mode (scope mounted on a wedge). Solar System Align is designed to provide excellent tracking and
GoTo performance during daytime use. Now you will be able to actually GoTo the Sun (with appropriate
filter), Moon, planets and bright stars for daytime viewing.
Procedure
• Power up the scope.
• Press ENTER to begin, use the Up and Down buttons (6 and 9 on the keypad) to scroll to Solar
Sys.Align and then ENTER again.
• The hand control will show either the current time or the time when you last used the scope. The top
line of the display will cycle through the messages, "Enter if OK", and "UNDO to edit". If your
scope has a GPS module, the GPS receiver will shortly lock onto 3 GPS satellites and update the date,
time, and location. If you become impatient waiting for a GPS link, or if you don't have a GPS
module in your scope, use the Up and Down buttons (6 and 9 on the keypad) to scroll through the
date, time, and location settings. If they are all correct, press Enter to accept and proceed with the
alignment. If they need adjusted, press Undo and make any necessary corrections.
• The display will now prompt to Select Object. By pressing the Up and Down buttons (6 and 9 on the
keypad) you can select from the Sun, Moon or planets that are currently between 15 and 70 degrees
above the horizon. Note that to include the Sun in the list, you must first access the Menu button
(UNDO back to the "Press ENTER to begin alignment" prompt), select Utilities and then Sun Menu.
This is a one-time setting and will be stored for future use. You must have a safe solar filter or cap
the scope and use a "sun finder" to safely use the Sun as an alignment object!
• After you press ENTER to select the solar system object you wish to use for alignment, use the arrow
buttons to slew (move) to that object. Center the object in the finderscope and press ENTER. Then
center the object in the eyepiece and press ALIGN.
9
•
•
If you are only interested in viewing the object you aligned on, you are finished. If you would like
accurate GoTo and tracking that to view other objects, continue with the next step - you may be
surprised how easily planets and bright stars are to see in the eyepiece during the day!
To provide accurate GoTo and tracking across the sky, use the hand control's normal GoTo for any
object that can be seen in the daylight and use the NexStar Re-Alignment feature to replace the
"Unassigned" star with that object.
Additional Details
• Solar System Align will only list objects that fall within the current Filter Limits as available for
alignment. For example, with Filter Limits set to 0 and 90 degrees, any of the bright solar system
objects currently above the horizon will be offered as an alignment object.
• As with all the new NexStar alignment methods, Solar System Align does not care where the optical
tube is pointed at the beginning of the alignment.
• To get better tracking and more accurate GoTo while still relying on a single alignment point, be sure
to level the tripod before you start.
• If you do not have a GPS-equipped telescope, be accurate to within a couple of minutes when
entering the time. Also, either select a city within 50 miles or enter your longitude and latitude to
within a degree or two.
• If you use Re-Alignment to replace the unassigned star, you may not use the same object you aligned
on originally. In other words, if you first alignment on Jupiter, you cannot replace the "Unassigned"
star with Jupiter.
• Be sure to center the objects with the same final movements as the direction of the GoTo Approach.
For example, if the scope normally finishes a GoTo with the front of the scope moving right and up,
you will center all three objects in the eyepiece with the right and down arrow buttons (the up/down
arrows reverse at slew rates of 6 or lower). For more details on this, refer to my book The NexStar
User's Guide or the alignment guides found on my web site (http://www.NexStarSite.com).
One Star Align
One Star Align is available in alt-az mode (scope mounted directly on the tripod) and equatorial mode
(scope mounted on a wedge). One Star Align is not designed to provide accurate GoTo or tracking, but
rather allows you to quickly setup the scope to start approximate tracking. This is most useful when you
don't care to have precise tracking and will manually find objects rather than using GoTo. That said, it
does quite good on a permanently wedge-mounted scope, and if you add a second star later with the ReAlignment feature, even an alt-az mounted scope will exhibit good GoTo and tracking.
Procedure
• Power up the scope.
• Press ENTER to begin, use the Up and Down buttons (6 and 9 on the keypad) to scroll to One Star
Align and then ENTER again.
• The hand control will show either the current time or the time when you last used the scope. The top
line of the display will cycle through the messages, "Enter if OK", and "UNDO to edit". If your
scope has a GPS module, the GPS receiver will shortly lock onto 3 GPS satellites and update the date,
time, and location. If you become impatient waiting for a GPS link, or if you don't have a GPS
module in your scope, use the Up and Down buttons (6 and 9 on the keypad) to scroll through the
date, time, and location settings. If they are all correct, press Enter to accept and proceed with the
alignment. If they need adjusted, press Undo and make any necessary corrections.
• The display will now prompt to Select Star 1. Decide which star you will use, use the Up and Down
buttons (6 and 9 on the keypad) to scroll to that star and then press ENTER.
• Use the arrow buttons to slew (move) to the star you selected. Center the object in the finderscope
and press ENTER. Then center the object in the eyepiece and press ALIGN.
10
•
To provide GoTo and tracking of nearly the same performance as one of the full alignment routines,
you may later use the NexStar Re-Alignment feature to replace the "Unassigned" star with a real star.
Additional Details
• One Star Align will only list objects that fall within the current Filter Limits and 15 - 70 degrees
altitude (whichever is more restrictive) as available for alignment. For example, if your Filter Limits
are 20 and 90 degrees, only the objects between 20 and 70 degrees will be listed.
• A sub-set of the full alignment star list is available during One Star Align - only the brightest stars are
available. Refer to the section Objects in the NexStar Hand Control for details.
• As with all the new NexStar alignment methods, One Star Align does not care where the optical tube
is pointed at the beginning of the alignment.
• To get better tracking be sure to level the tripod before you start.
• If you do not have a GPS-equipped telescope, be accurate to within a couple of minutes when
entering the time. Also, either select a city within 50 miles or enter your longitude and latitude to
within a degree or two.
Indoor Alignment
With hand control version 4, Quick Align, GPS Align and Auto Align are no longer available. Previously,
if a person wanted to align their NexStar indoors or during the daytime, one of these three alignment
methods was employed. With hand control version 4, a daytime alignment (outdoors) is best
accomplished with the new Solar System Align method. If you want to perform tests indoors, One Star
Align can be used as follows.
Northern Hemisphere
Point the telescope in the general direction of Polaris (the North Star). Remember that Polaris is straight
north and is the same number of degrees above the horizon as your latitude on Earth. In other words, if
you live at 45 degrees north latitude, you would point the scope north and up at a 45 degree angle. Start a
One Star Alignment and use Polaris as the alignment star, pressing ENTER and ALIGN to accept the
current position of the scope. The scope is now aligned and tracking.
Southern Hemisphere
In the Southern Hemisphere, you will need to use a planetarium program (such as Planetarium for Palm,
Cartes du Ciel, TheSky, etc.) to look up the current altitude and azimuth of one of the bright alignment
stars. To see which stars are available, power up the scope and start a One Star Align. Scroll through the
available stars and select one. Find that star in your planetarium program and note the location in the sky.
Then, point the telescope to your best estimation of that location in the sky. Press ENTER and ALIGN to
accept the current position of the scope. The scope is now aligned and tracking.
All-Star Polar Alignment - version 4.17 or later
(not available on SLT, GT or StarSeeker models)
All-Star Polar Alignment is similar to Wedge Align, which it replaces, though a couple of differences
exist. All-Star Polar Alignment allows the use of any star while Wedge Align was restricted to Polaris or
Sigma Octanis. Also, after using All-Star Polar Alignment, you are not required to power off and do
another EQ alignment as is required with Wedge Align.
Procedure
• Complete an EQ alignment.
• GoTo a star on the Named Star (LIST button).
• Press ALIGN, use the Up and Down buttons (6 and 9 on the keypad) to scroll to Polar Align and
press ENTER.
11
•
•
•
•
•
•
•
Use the Up and Down buttons (6 and 9 on the keypad) to scroll to Align Mount and press ENTER.
At this point, the mount will again GoTo the star you selected. Center the star in the finder and press
ENTER.
Using the same arrow buttons as used during alignment, center the star in the eyepiece and press
ALIGN. The star is now Synced.
Following the instructions on the display, press ENTER to begin the final steps of the procedure. The
mount will slew slightly to an orientation which corresponds to a correct polar alignment.
Using ONLY the wedge adjustments, NOT the arrow buttons on the hand control, center the star in a
reticle or high magnification eyepiece. Press ENTER when finished.
Press UNDO once, then use the Up and Down buttons (6 and 9 on the keypad) to scroll to Undo Sync
and press ENTER. If you escaped out of the menu system, you will find Undo Sync on the ALIGN
button menu.
Check GoTo accuracy by selecting a Named Star and pressing ENTER to GoTo that star. If
necessary, use the Alignment Stars feature described later in this document to improve accuracy.
Additional Details
• When selecting the star for All-Star Polar Alignment, select a star high in the sky and near the
meridian but NOT directly overhead and NOT near the celestial pole.
• You may wish to use Display Polar Alignment Error (next section) to see the results before and after
using All-Star Polar Alignment.
Display Polar Alignment Error - version 4.10 or later
(not available on SLT, GT or StarSeeker models)
This feature provides you a bit of confidence in the accuracy of your polar (wedge) alignment. The
values can't really be used to make any direct changes to the alignment, but after a bit of experience in
checking these values, you will be able to use it to know when to you can quit further efforts and still
achieve your desired imaging results.
Procedure for version 4.17 or higher
• Press ALIGN, use the Up and Down buttons (6 and 9 on the keypad) to scroll to Polar Align and then
ENTER again.
• Use the UP/DOWN buttons to scroll to Display Align and press ENTER.
• The hand control will display the polar alignment error for the altitude (Declination) and azimuth
(Right Ascension) axes.
Procedure for version 4.13 or lower
Press the MENU button and use the UP/DOWN buttons (6/9 on the number pad) to scroll to Utilities
and press ENTER.
• Use the UP/DOWN buttons to scroll to Wedge Align and press ENTER.
• Use the UP/DOWN buttons to scroll to Display Align and press ENTER.
• The hand control will display the polar alignment error for the altitude (Declination) and azimuth
(Right Ascension) axes.
•
Alignment Stars (Re-Alignment) - version 4.10 or later
(not available on GT or StarSeeker models though they do still have the original Re-Alignment feature)
Alignment Stars is the new name for the Re-Alignment feature of older versions. Alignment Stars is still
used to replace one of the two alignment stars with a new star or object. Access to this feature has
changed a bit in version 4.10 and when it used has changed as well. In the past, Re-Alignment was often
used to select an alignment object in an area of the sky where you were currently working. This
somewhat improved pointing in that area of the sky, but often resulted in poor accuracy in other areas of
12
the sky. This was generally due to the fact that the resulting two alignment objects may not have
provided good separation. In response to this, Celestron added Sync (described in the next section) to
provide very precise GoTo performance in any area of the sky.
So, where does that leave Alignment Stars? If your initial alignment stars were not well placed or lacked
much separation, pointing accuracy across the entire sky is likely to be poor. Use Alignment Stars to
replace one or both of the alignment stars to improve all-sky pointing. Also, this feature is used later in a
session to provide two actual alignment objects when using One Star Align and Solar System Align.
Procedure
• GoTo an object to use for alignment. Stars are preferred due to the fact they are easier to center than
extended objects and they have well-known positions.
• Press the ALIGN button.
• Use the Up and Down buttons (6 and 9 on the keypad) to select Alignment Stars and press ENTER note that this cannot be done if Sync is active (see next section).
• Use the Up and Down buttons (6 and 9 on the keypad) to select the existing alignment object you
wish to replace and then press ENTER.
• Center the object in the finderscope and press ENTER.
• Center the object in the eyepiece and press ALIGN.
• Be sure to center the object with the same final movements as the direction of the GoTo Approach.
For example, if the scope normally finishes a GoTo with the front of the scope moving right and up,
you will center all three objects in the eyepiece with the right and down arrow buttons (the up/down
arrows reverse at slew rates of 6 or lower). For more details on this, refer to my book The NexStar
User's Guide or the alignment guides found on my web site (http://www.NexStarSite.com).
Sync - version 4.10 or later
(not available on GT or StarSeeker models)
Sync is an exciting new feature for highly accurate GoTo pointing as is required for imaging. Sync
allows you to center an object in the area of the sky where you are currently working, resulting in very
accurate GoTo performance in that area of the sky. Sync can be activated via the hand control or via a PC
connected to the scope for enhanced control. Since this is a new feature, you should check with your
software provider to see if their products support Sync on Celestron scopes. Note that at the time version
4.10 was released, the ASCOM drivers (used by a wide array of software) already include support for this
new Sync feature.
Procedure to Activate Sync
• GoTo an object to use for sync. Stars are preferred due to the fact they are easier to center than
extended objects and they have well-known positions.
• Press the ALIGN button.
• Use the Up and Down buttons (6 and 9 on the keypad) to select Sync and then press ENTER.
• Center the object in the finderscope and press ENTER.
• Center the object in the eyepiece and press ALIGN.
• Be sure to center the object with the same final movements as the direction of the GoTo Approach.
For example, if the scope normally finishes a GoTo with the front of the scope moving right and up,
you will center all three objects in the eyepiece with the right and down arrow buttons (the up/down
arrows reverse at slew rates of 6 or lower). For more details on this, refer to my book The NexStar
User's Guide or the alignment guides found on my web site (http://www.NexStarSite.com).
Sync can negatively affect GoTo accuracy as you move away from the area of the Sync star. For that
reason, Celestron has provided the ability to deactivate Sync.
13
Procedure to Deactivate Sync
• Press the ALIGN button.
• Use the Up and Down buttons (6 and 9 on the keypad) to select Undo Sync and then press ENTER.
14
New or Updated Functions
Celestron has included several useful new functions and has updated some existing functions in hand
control version 4.
Precession - version 4.17 or later
(not available on the GT or StarSeeker models)
Due to the slow (26,000 years for a complete cycle) wobble of the Earth's axis in relation to a reference
frame of the Galaxy, the apparent coordinates of objects in the sky change slowly but continuously. This
phenomenon is known as precession. Previous versions of the NexStar hand control use only the
positions of these objects as they were in the year 2000; this is referred to as an epoch 2000 or J2000
coordinate system. Beginning with version 4.17 (4.15 on the GEM models), NexStar hand controls adjust
for precession, yielding "JNow" coordinates. This is most useful for those connecting a PC to the
telescope since almost all astronomy software uses JNow coordinates.
Precise GoTo
(not available on the SLT, GT or StarSeeker models)
Precise GoTo provides pinpoint accuracy to place an object right in the center of the field of view. This is
most useful when imaging objects that are visually undetectable and so you must rely on the scope to
place the target right in the center of your camera.
Procedure
• Press the Menu button then use the UP/DOWN buttons (6/9 on the number pad) to scroll to Precise
Goto and press ENTER. Generally it is quickest to scroll UP.
• Use the UP/DOWN buttons to select whether the object you are interested in is in the hand control's
database (catalogs) or if you will need to enter the RA and Dec of the object. Press ENTER to
proceed.
• If you selected RA/Dec, simply enter the coordinates. If you selected database, use the UP/DOWN
buttons to scroll to the correct catalog and press ENTER. Use the catalogs as you do for a regular
GoTo.
• After selecting your target object and pressing ENTER, the hand control will present a list of stars
near your target. Select any of these stars and press ENTER. You are presented with a list of
possible stars since one of them might be obscured by a tree, etc.
• After pressing ENTER, the scope will automatically slew to the star you selected. Center the star in
the eyepiece using the same arrow keys as used when you initially align the scope. Press ENTER
and the scope will now slew to your actual target object, placing it precisely in the center of the field
of view.
Identify
Identify searches the hand control's database for objects nearby the current location the telescope is
pointed towards. Several objects will be listed from the one closest to the current coordinates, to the one
furthest.
Procedure
• With the mystery object in the field of view, press the Menu button then use the UP/DOWN buttons
(6/9 on the number pad) to scroll to Identify and press ENTER. Generally it is quickest to scroll UP.
• Use the UP/DOWN buttons to select the catalog you wish to search. Refer to Appendix B in my
book, The NexStar User's Guide, if you are unfamiliar with the available catalogs. Press ENTER to
begin the search.
15
•
After a moment, you will be presented with the closest objects from the selected catalog. Note that
you can press the UP/DOWN buttons to scroll through the list. You may also press the INFO button
to see the full information on any of the objects. Note that when you are in the info mode, pressing
the UP/DOWN buttons scrolls through the available information (coordinates, magnitude, object type,
etc.) for that object.
Additional Details
Search time is dependent upon the number of objects in the catalog. The largest catalogs, the NGC,
IC and Abell catalogs, can take quite a while to search. It is best if you are looking for what appears
to be a deep sky object to first search the Messier, Caldwell and Named Objects catalogs.
•
Constellation Tour
Constellation Tour let's you explore the most spectacular objects in a given area of the sky. This is an
excellent way to learn the night sky or view new objects.
Procedure
• Press the LIST button and use the UP/DOWN buttons (6/9 on the number pad) to scroll to
Constellations and press ENTER. Note that only the constellations within your Filter Limit settings
will be available.
• Use the UP/DOWN buttons to scroll to the constellation of interest and press ENTER.
• Use the UP/DOWN buttons to scroll to the catalog containing the objects you would like to view and
press ENTER. Refer to Appendix B in my book, The NexStar User's Guide, if you are unfamiliar
with the available catalogs.
• Use the UP/DOWN buttons to scroll through the list of objects. You may also press the INFO
button to see the full information on any of the objects. Note that when you are in the info mode,
pressing the UP/DOWN buttons scrolls through the available information (coordinates, magnitude,
object type, etc.) for that object. Press ENTER and the telescope will GoTo the selected object.
• After viewing one object, use the UP/DOWN buttons to scroll and then press ENTER to GoTo the
next object.
Sun Menu
The Sun Menu simply adds the Sun to the Solar System list (the Solar System list is also presented when
you press the PLANET button.
Procedure
• Press the MENU button and use the UP/DOWN buttons (6/9 on the number pad) to scroll to Utilities
and press ENTER.
• Use the UP/DOWN buttons to scroll to Sun Menu and press ENTER.
• If the Sun is not currently allowed in the Solar System list, the display will prompt you to press
ENTER to allow it. If it is already allowed in the list, the display will prompt you to press ENTER
to remove it. To leave the setting as is, press the UNDO button.
Additional Details
The Sun is restricted in this way to protect the novice user. Viewing the Sun for even an instant
without the proper equipment (generally a full aperture solar filter) can cause PERMANENT eye
damage, even blindness. Use appropriate care!
•
Save Database Object in User Objects
Save Database Object is a new option to add items to the User Objects list. This allows you to create
custom tours prior to taking your scope out for an observing session.
16
Procedure
• Press the MENU button and use the UP/DOWN buttons (6/9 on the number pad) to scroll to User
Objects and press ENTER.
• Use the UP/DOWN buttons to scroll to Save Db Obj and press ENTER.
• Use the UP/DOWN buttons to scroll to the first object you wish to store a database object in and
press ENTER.
• Use the UP/DOWN buttons to scroll to the catalog containing the object you would like to save and
press ENTER. Refer to Appendix B in my book, The NexStar User's Guide, if you are unfamiliar
with the available catalogs.
• Select an object just as you would when performing a GoTo operation and press ENTER. The object
is now stored in the User Object list.
• Repeat for as many User Objects as you wish.
Scrolling Menu
The Scrolling Menu sets the default speed for text that scrolls across the display.
Procedure
• Press the MENU button and use the UP/DOWN buttons (6/9 on the number pad) to scroll to Utilities
and press ENTER.
• Use the UP/DOWN buttons to scroll to Scrolling Menu and press ENTER.
• Press the UP/DOWN buttons to adjust the scroll speed and press ENTER to save the setting.
Additional Details
The old method of using 1, 4 and 7 on the number pad to control the scroll speed dynamically has
been removed in hand control version 4. I find I prefer this new method since it is a permanent
setting that remains in place from one use of the scope to the next.
•
Calibrate Goto - version 4.10 or later
(not available on GT or StarSeeker models)
The hand control has a preset value used to time the final slow stage of the GoTo slew. Generally this is
accurate for most mounts, but slight variations in friction, motor responsiveness, balance and other
mechanical factors can have an affect on this final movement and GoTo accuracy. You should perform
Calibrate Goto on a new telescope, after upgrading hand control firmware or after performing a Factory
Settings.
Procedure
• Press the MENU button and use the UP/DOWN buttons (6/9 on the number pad) to scroll to Utilities
and press ENTER.
• Use the UP/DOWN buttons to scroll to Calibrate Goto and press ENTER.
• The scope will slew a bit in each direction and store the correct value.
PEC Playback - version 4.10 or later
(not available on SE, SLT, GT or StarSeeker models)
In previous versions, activating PEC playback required that the hand control stay in the PEC menu,
otherwise, PEC playback was deactivated. Thus, to GoTo another object (or use any other feature of the
hand control) it was necessary to deactivate PEC playback, GoTo the new object, then go back to the PEC
menu to reactivate PEC playback. With version 4.10 or later, PEC playback stays in effect even as you
use the other functions of the hand control.
17
Procedure
• Press the MENU button and use the UP/DOWN buttons (6/9 on the number pad) to scroll to Utilities
and press ENTER.
• Use the UP/DOWN buttons to scroll to PEC and press ENTER.
• If the hand control displays ON, PEC playback is currently active. If it displays OFF, PEC playback
in not active. To change, use the UP/DOWN buttons to scroll to the desired state and press ENTER.
Set Mount Position - version 4.10 or later
(not available on GT or StarSeeker models)
Set Mount Position is used to re-index the hand control to the sky, generally after releasing the clutches to
re-balance the mount. This is mainly used in EQ mode (on a wedge).
Procedure
• GoTo an object to use as a reference. Stars are preferred due to the fact they are easier to center than
extended objects and they have well-known positions.
• Press the MENU button and use the UP/DOWN buttons (6/9 on the number pad) to scroll to Utilities
and press ENTER.
• Use the UP/DOWN buttons to scroll to Set Mount Postn and press ENTER.
• Center the star or object in the finderscope and press ENTER.
• Center the star or object in the eyepiece and press ALIGN.
• Be sure to center the object with the same final movements as the direction of the GoTo Approach.
For example, if the scope normally finishes a GoTo with the front of the scope moving right and up,
you will center all three objects in the eyepiece with the right and down arrow buttons (the up/down
arrows reverse at slew rates of 6 or lower). For more details on this, refer to my book The NexStar
User's Guide or the alignment guides found on my web site (http://www.NexStarSite.com).
Changes to Alt/Azm Menu Items - version 4.10 or later
(not available on GT or StarSeeker models)
The Goto Alt-Az and Get Alt-Az menu items have been renamed Goto Axis Postn and Get Axis Postn
where Postn is an abbreviation for Position. Since this feature doesn't actually refer to altitude and
azimuth when mounted on a wedge, the new designation is more accurate.
The AutoGuide Rates command no longer refers to azimuth and altitude, but rather more correctly refers
to RA and Dec. Note that this feature is not available on the SLT models.
Changes to the Version Menu Item - version 4.12 or later
(not available on GT or StarSeeker models)
The Version menu item has been changed to display the mount model (NexStar GPS, CPC Series, etc.)
after displaying the hand control and motor control versions.
Procedure
• Press the MENU button and use the UP/DOWN buttons (6/9 on the number pad) to scroll to Utilities
and press ENTER.
• Use the UP/DOWN buttons to scroll to Version and press ENTER.
• The display will show the hand control (HC) and motor control (MC) versions. Press UNDO to
continue - the display will next show the mount the hand control is connected to. Press UNDO once
more to return to the menu.
18
Changes to the Lights Control Menu Item - version 4.12 or later
(not available on GT or StarSeeker models)
The Lights Control menu item has been changed to provide graduated control of the lighting for the
display and the buttons. You may now select a brightness best suited to the darkness of your observing
site.
Procedure
• Press the MENU button and use the UP/DOWN buttons (6/9 on the number pad) to scroll to Utilities
and press ENTER.
• Use the UP/DOWN buttons to scroll to Lights Control and press ENTER.
• Use the UP/DOWN buttons to select either Keypad Level or Display Level (they are set
individually) and press ENTER.
• Press one of the number buttons to select your desired brightness - 0 is off, 8 is full brightness. Press
ENTER to store your setting - adjust if necessary.
Changes to the Cordwrap Menu Item
(not available on GT or StarSeeker models)
Cordwrap prevention hasn't really changed much, but the manual doesn't document it well. Cordwrap
prevention establishes a "no-cross" line which the scope will not pass through during a GoTo. This may
cause the scope to take the long route to get to an object, but it prevents any cords on the moving section
of the scope from wrapping around the mount. For example, if the no-cross line is due North and you ask
the scope to move from an orientation pointing north-northwest to an object in the north-northeast, rather
than taking the direct route turning clockwise, the scope will go around counter-clockwise and pass
through the south.
Cordwrap prevention is on by default after performing an EQ alignment on any of the NexStar scopes
offering EQ alignment. The default "no-cross" line is opposite the meridian. Said another way, if you
point the scope to the zenith, the eyepiece is pointed at the "no-cross" line.
Cordwrap prevention is off by default after performing an Alt-Az alignment (any alignment method
where the scope is not mounted on a wedge) on NexStar GPS scopes. Cordwrap is on by default after
performing an Alt-Az alignment on any of the other NexStar scopes. The default "no-cross" line is due
North.
Procedure to Check Current Status of Cordwrap Prevention
• Press the MENU button and use the UP/DOWN buttons (6/9 on the number pad) to scroll to Scope
Setup and press ENTER.
• Use the UP/DOWN buttons to scroll to Cordwrap and press ENTER.
• The display will show the current state of cordwrap prevention - either On or Off.
• Press UNDO several times to exit out of the menu.
Procedure to Deactivate Cordwrap Prevention
Press the MENU button and use the UP/DOWN buttons (6/9 on the number pad) to scroll to Scope
Setup and press ENTER.
• Use the UP/DOWN buttons to scroll to Cordwrap and press ENTER.
• The display will show the current state of cordwrap prevention - either On or Off.
• If cordwrap is On, press the UP button (6 on the number pad) to change to Off, then press ENTER to
change the state.
• Press UNDO several times to exit out of the menu.
•
19
Procedure to Activate Cordwrap Prevention or Change the "No-Cross" Line
• Press the MENU button and use the UP/DOWN buttons (6/9 on the number pad) to scroll to Scope
Setup and press ENTER.
• Use the UP/DOWN buttons to scroll to Cordwrap and press ENTER.
• The display will show the current state of cordwrap prevention - either On or Off.
• If cordwrap is On, follow the directions above to turn it Off.
• If cordwrap is already Off, press the UP button (6 on the number pad) to change to On, then press
ENTER.
• The display will now prompt you to "Move opposite No-Cross line" - using the left/right arrow
buttons, move to the direction where most objects you will be viewing are located. Generally this is
due South for those in the Northern Hemisphere or due North for those in the Southern Hemisphere.
For example, if you point due South, the no-cross line will be due North - the scope will not cross that
line when performing a GoTo. Note that you may want to change the slew rate to 9 to move more
quickly.
• After pointing at the "opposite" direction, press ENTER to activate cordwrap prevention and set the
no-cross line.
• Press UNDO several times to exit out of the menu.
20
Objects in the NexStar Hand Control
The database of objects in the larger NexStar scopes is almost identical to the NexStar GPS hand control
version 1.6 or higher. Some corrections have been made (thus far the details of these corrections are
undocumented) and the number of alignment stars has been expanded to support SkyAlign. The total
number of database objects for the GPS, CPC and 5i/8i/8i SE models is 46,106.
The GT/StarSeeker database has been greatly expanded. The SLT shares the same database as the
GT/StarSeeker models. In addition to expanding the alignment star list, these models include the entire
NGC catalog and more than 29,000 SAO numbered stars. The total number of database objects for the
SLT, GT and StarSeeker models is 37,981, despite marketing material that states "4,000+".
Here are the details.
Named Stars (Alignment Stars) - 247 Objects
The named star list has been expanded to support SkyAlign, Precise GoTo, Sync and other related
functions. The entire list is presented here. The entire list is available during Two Star Alignment. Stars
marked with an asterisk ( * ) are those available during Auto Two Star and One Star Alignment. Stars
marked in bold are available to the SkyAlign routine.
*
*
*
*
*
*
*
Name
Acamar
Achernar
Achird
Acrux
Acubens
Adhafera
Adhara
Adhil
Ain
Alaraph
Albali
Albireo
Alchibah
Alcor
Alcyone
Aldebaran
Alderamin
Aldhanab
Alfecca Meridiana
Alfirk
Algenib
Algieba
Algol
Algorab
Alhaud
Alhena
Alioth
Alkaid
Mag
3.2
0.5
3.4
1.3
4.3
3.4
1.5
4.9
3.5
3.6
3.8
3.1
4
4
2.9
0.9
2.4
3
4.1
3.2
2.8
2.6
2.1
3
3.2
1.9
1.8
1.9
Const
Eri
Eri
Cas
Cru
Cnc
Leo
CMa
And
Tau
Vir
Aqr
Cyg
Crv
UMa
Tau
Tau
Cep
Gru
CrA
Cep
Peg
Leo
Per
Crv
UMa
Gem
UMa
UMa
*
*
*
*
*
*
*
*
21
Alkalurops
Alkes
Almach
Alnair
Alnilam
Alnitak
Alniyat
Alpha Centauri
Alphard
Alphecca
Alpheratz
Alrai
Alrescha
Alsaphi
Alsciaukat
Alshain
Altair
Altais
Alterf
Aludra
Alula Australis
Alula Borealis
Alwaid
Alya
Ancha
Angetenar
Ankaa
Anser
Antares
4.3
4.1
2.3
1.7
1.7
2.1
2.9
1.3
2
2.2
2.1
3.2
4.3
4.7
4.3
3.7
0.8
3.1
4.3
2.5
3.8
3.5
2.8
4.6
4.2
3.7
2.4
4.4
1
Boo
Crt
And
Gru
Ori
Ori
Sco
Cen
Hya
CrB
And
Cep
Psc
Dra
Lyn
Aql
Aql
Dra
Leo
CMa
UMa
UMa
Dra
Ser
Aqr
Eri
Phe
Vul
Sco
*
*
*
*
*
*
*
*
*
*
*
*
*
*
Arcturus
Arkab
Arneb
Arrakis
Ascella
Asellus Australis
Asellus Borealis
Asmidiske
Atik
Atria
Auva
Avior
Azha
Baham
Baten Kaitos
Beid
Bellatrix
Betelgeuse
Botein
Canopus
Capella
Caph
Castor
Celbalrai
Chara
Chort
Cor Caroli
Cujam
Cursa
Dabih
Deneb
Deneb Algiedi
Denebola
Diadem
Diphda
Dnoces
Dschubba
Dubhe
Dziban
Edasich
El Nath
Eltanin
Enif
Fomalhaut
Fornacis
Furud
Gacrux
Giauzar
Giedi
Gienah
0
4
2.6
5.8
2.6
3.9
4.7
3.3
2.9
1.9
3.4
1.9
3.9
3.5
3.7
4
1.6
0.5
4.4
-0.7
0.1
2.3
2
2.8
4.3
3.3
2.9
4.6
2.8
3.1
1.3
2.9
2.1
5.2
2
3.1
2.3
1.8
4.6
3.3
1.7
2.2
2.4
1.2
3.9
3
1.6
3.8
3.6
2.6
Boo
Sgr
Lep
Dra
Sgr
Cnc
Cnc
Pup
Per
TrA
Vir
Car
Eri
Peg
Cet
Eri
Ori
Ori
Ari
Car
Aur
Cas
Gem
Oph
CVn
Leo
CVn
Her
Eri
Cap
Cyg
Cap
Leo
Com
Cet
UMa
Sco
UMa
Dra
Dra
Tau
Dra
Peg
PsA
For
CMa
Cru
Dra
Cap
Crv
*
*
*
*
*
*
*
*
*
*
*
22
Gomeisa
Graffias
Grumium
Hadar
Hamal
Heze
Homam
Izar
Jabbah
Kaffaljidhm
Kaus Australis
Kaus Borealis
Kaus Media
Keid
Kekwan
Kitalpha
Kochab
Kornephoros
Kraz
Kurah
Lesuth
Maasym
Maaz
Marfik
Markab
Matar
Mebsuta
Megrez
Meissa
Mekbuda
Menkalinan
Menkar
Menkent
Menkib
Merak
Mesarthim
Miaplacidus
Mimosa
Minhar al Shuja
Minkar
Mintaka
Mira
Mirach
Mirfak
Mirzam
Mizar
Mothallah
Muhlifain
Muliphein
Mululizu
2.9
2.6
3.8
0.6
2
3.4
3.4
2.7
4
3.5
1.9
2.8
2.7
4.4
3.1
3.9
2.1
2.8
2.7
4.3
2.7
5
3
3.8
2.5
2.9
3
3.3
3.5
3.8
1.9
2.5
2.1
4
2.4
4.8
1.7
1.3
4.5
3
2.2
3
2.1
1.8
2
2.3
3.4
2.2
4.1
5
CMi
Sco
Dra
Cen
Ari
Vir
Peg
Boo
Sco
Cet
Sgr
Sgr
Sgr
Eri
Cen
Equ
UMi
Her
Crv
Cep
Sco
Her
Aur
Oph
Peg
Peg
Gem
UMa
Ori
Gem
Aur
Cet
Cen
Per
UMa
Ari
Car
Cru
Hya
Crv
Ori
Cet
And
Per
CMa
UMa
Tri
Cen
CMa
Lib
*
*
*
*
*
*
*
*
*
*
*
Muphrid
Muscida
Nair Saif
Naos
Nashira
Nasl
Navi
Nekkar
Nihal
Nunki
Nusakan
Peacock
Phact
Phad
Pherkad
Polaris
Polaris Australis
Pollux
Porrima
Praecipua
Prijipati
Procyon
Propus
Rana
Rasalas
Rasalgethi
Rasalhague
Rastaban
Regor
Regulus
Rigel
Rotanev
Rukbah
Rukbat
Sabik
Sadachbia
Sadalbari
Sadalmelik
Sadalsuud
Sadr
Saiph
Sargas
Sarin
Scheat
Schedar
2.7
3.4
2.8
2.3
3.7
3
3.4
3.5
2.8
2.1
3.7
1.9
2.6
2.4
3.1
2
5.4
1.1
3.7
3.8
3.7
0.4
3.3
3.5
3.9
3.5
2.1
2.8
1.8
1.4
0.1
3.6
2.7
4
2.4
3.8
3.5
3
2.9
2.2
2.1
1.9
3.1
2.4
2.2
Boo
UMa
Ori
Pup
Cap
Sgr
Cas
Boo
Lep
Sgr
CrB
Pav
Col
UMa
UMi
UMi
Oct
Gem
Vir
LMi
Aur
CMi
Gem
Eri
Leo
Her
Oph
Dra
Vel
Leo
Ori
Del
Cas
Sgr
Oph
Aqr
Peg
Aqr
Aqr
Cyg
Ori
Sco
Her
Peg
Cas
*
*
*
*
*
*
Schemali
Scutulum
Seginus
Sham
Shaula
Shelyak
Sheratan
Sirius
Situla
Skat
Spica
Sualocin
Suhail
Sulaphat
Syrma
Talitha Australis
Tania Australis
Tania Borealis
Tarazed
Tarf
Tchou
Tegmine
Tejat
Thabit
Thuban
Tsih
Tsze
Tyl
Ukdah
Unukalhai
Vega
Vindemiatrix
Wasat
Wazn
Wezen
Yed Posterior
Yed Prior
Yildun
Zaniah
Zaurac
Zibal
Zosma
Zubenelgenubi
Zubenelhakrabi
Zubeneshamali
3.6
2.3
3
4.4
1.6
3.5
2.6
-1.5
5
3.3
1
3.8
2.2
3.2
4.1
3.6
3.1
3.5
2.7
3.5
3
5.3
2.9
4.6
3.7
2.5
4.9
3.8
4.6
2.7
0
2.8
3.5
3.1
1.8
3.2
2.7
4.4
3.9
3
4.8
2.6
2.8
3.9
2.6
Cet
Car
Boo
Sge
Sco
Lyr
Ari
CMa
Aqr
Aqr
Vir
Del
Vel
Lyr
Vir
UMa
UMa
UMa
Aql
Cnc
Ara
Cnc
Gem
Ori
Dra
Cas
Col
Dra
Hya
Ser
Lyr
Vir
Gem
Col
CMa
Oph
Oph
UMi
Vir
Eri
Eri
Leo
Lib
Lib
Lib
Double Stars - 55 Objects
The same list of 55 double stars documented in my book and available in the Downloads section of my
web site is found in version 4 of the NexStar hand control.
23
Variable Stars - 20 Objects
The same list of 20 variable stars documented in my book and available in the Downloads section of my
web site is found in version 4 of the NexStar hand control.
Named Objects - 58 Objects
The same list of 58 named objects stars documented in my book and available in the Downloads section
of my web site is found in version 4 of the NexStar hand control.
Asterisms - 20 Objects
The same list of 20 asterisms documented in my book and available in the Downloads section of my web
site is found in version 4 of the NexStar hand control.
CCD Objects - 27 Objects
(not available on the SLT, GT or StarSeeker models)
The same list of CCD objects documented in my book and available in the Downloads section of my web
site is found in version 4 of the NexStar hand control (except for the models noted here), with one
addition - the recently discovered McNeil's Nebula in Orion.
Stars - 29522 Objects
The same list of 29522 stars from the SAO catalog as documented in my book and available in the
Downloads section of my web site is found in version 4 of the NexStar hand control.
Messier Objects - 110 Objects
The entire list of 110 Messier objects documented in my book and available in the Downloads section of
my web site is found in version 4 of the NexStar hand control.
Caldwell Objects - 109 Objects
The entire list of 109 Caldwell objects documented in my book and available in the Downloads section of
my web site is found in version 4 of the NexStar hand control.
NGC Objects - 7840 Objects
The entire list of 7840 NGC objects documented in my book and available in the Downloads section of
my web site is found in version 4 of the NexStar hand control.
IC Objects - 5386 Objects
(not available on the SLT, GT or StarSeeker models)
The entire list of IC objects documented in my book and available in the Downloads section of my web
site is found in version 4 of the NexStar hand control (except for the models noted here).
Abell Objects - 2712 Objects
(not available on the SLT, GT or StarSeeker models)
The same list of 2712 Abell galaxy clusters as documented in my book and available in the Downloads
section of my web site is found in version 4 of the NexStar hand control (except for the models noted
here).
24