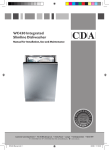
1
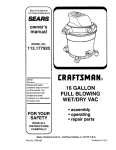
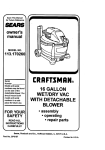
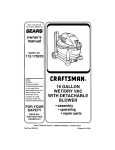
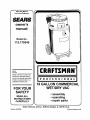
Save This Manual
For Future Reference
'_
SEARS
owner's
manual
Model No.
113.179345
CRAFTSMAN
°
Serial
Number
Model and serial number may
be found on the back side of
vac top. Youshouldrecord both
model and serial number in a
safe place for future use.
FOR YOUR
SAFETY
PROFESSIONAL
18 GALLON COMMERCIAL
WET/DRY VAC
• assembly
• operating
• repair parts
READ ALL
INSTRUCTIONS
CAREFULLY
Sears,
Part No, SP6225
Roebuck
and Co., Hoffman
Estates,
IL. 60179
U.S.A.
Printed in Mexico 2/00
FULL ONE YEAR WARRANTY
ON CRAFTSMAN WETIDRY MAC
If within one year from the date of purchase, this Craftsman Vac fails due to a defect in material or workmanship,
Sears will repair it, free of charge.
If this Craftsman Vac is used for commercial or rental purposes, this warranty coverage applies for only g0 days
from date of purchase.
Warranty service is available by simply contacting the nearest Sears Service CenterlDepartment throughout the
United States.
This warranty applies only while this product is used in the United States.
This warranty gives you specific legal dghts, and you may also have other rights which vary from state to state.
Sears, Roebuck and Co., D817 WA, Hoffman Estates, IL 60179
IMPORTANT SAFETY INSTRUCTIONS
Safety is a combination of common sense, staying aled and
knowing how your vac works. Read this manual to understand
the veo.
For dry pickup, do not use this vac with a torn filter or without
the filter installed.
Do not leave vac when plugged in, Unplug from outlet when not
in use and before servicing. Turn off vac before unplugging.
Safety Signal Words
DANGER: means if the safety informationis notfollowed someone will be seriously injured or killed.
WARNING: means if the safety information is notfollowed
someone could be seriously injured or killed.
CAUTION: means if the safety information is not followed
someone may be injured.
When usingyour vac, follow basic safety precautionsincluding
the following.
WAR N ING. Toreduce the risk
To reduce the risk of injury from accidental starting,unplug
power cord before changing or cleaning filter.
Connect to a properly grounded outlet only. See "Grounding
Instructions".
Do not unplug by pulling on cord. To unplug, grasp the plug, not
the cord.
Do not use with damaged cord, plug or other parts. If your vac is
not working as it should, has missing parts, has been dropped,
damaged, left outdoors, or dropped into water, return it to a
Sears Service Center.
of fire, elec-
tdc shock, or injury:
Read and understand this owner's manual and all labels on the
vac before operating. Use only as described in this manual. To
avoid personal injury or damage to vac, use only Sears Craftsman recommended accessories.
Do not pull or carry by cord, use cord as handle, close a door on
cord, or pull cord around sharp edges or corners.
Do not run Wet/Dry Vac over cord,
Keep cord away from heated surfaces.
Sparks inside the motor can ignite flammable vapors or dust. To
reduce the risk of fire or explosion:
• Do not vacuum, or use this vac near, flammable or cembustible liquids, gases, or explosive dusts such as gasoline or
other fuels, lighter fluid, cleaners, oil-based paints, natural
gas, hydrogen, coal dust, magnesium dust, grain dust, or gun
powder.
Do not handle plug or the vac with wet hands.
Do not put any object into ventilation openings. Do not vacuum
with any ventilation openings blocked; keep free of dust, lint,
hair or anything that may reduce air flow.
• Do not use vac as a sprayer.
Keep hair, loose clothing, fingers, and all parts of body away
from openings and moving parts.
To reduce the risk of falls, use extra care when cleaning on
stairs.
Do notvacuum anythingthat is burningor smoking, such as
cigarettes, matches, or hot ashes.
Observe the following warnings that appear on the motor housing of yourvac.
Do notvacuum fireplace soot or ash, this is a very fine dust
which will not be captured by the filterand may cause damage.
WARNING:
To reduce
risk of electric shock - do not
expose to rain
- store the
indoors.
To reduce the risk of health hazards from vapors or dusts, do
not vacuumtoxic materials.
Do not useor store near hazardousmaterials.
To reduce the dsk of electric shock, do not expose to rain. Store
indoors.
Do not allow to be used as a toy. Close attention is necessary
when used by or near children.
SAVE THESE INSTRUCTIONS
2
The operation of any utilityvac can result in foreign objects
being blown intothe eyes, which can result in severe eye damage. Alwayswear safety goggles complyingwith ANSI Z87.1
(shown on package) before commencing operation. Safety
Goggles are available at Sears retail stores.
For dustyoperations,wear dust mask.Use only extensioncords
that are ratedfor outdooruse. Extensioncords in poor condition
or that are too small in wire size can posefire and shock hazards. When usingan extensioncord, be sure it is in goodcondition. Using any extensioncordwill cause some loss of power.
To keep the loss to a minimum, use the following table to
choose the minimumwire size extensioncord.
Extension
Cord Length
0-50 Ft.
50-100 Ft.
To reduce the riskof hearing damage, wear ear protectors
when usingthe vac for extended hoursor when, usingit in a
noisy area.
Grounding
Gauge
(A.W.G.)
14
12
Instructions
This appliance must be grounded. If it shouldmalfunction or
breakdown, groundingprovidesa path of least resistancefor
electric current to reduce the riskof electric shock.This appliance is equipped with a cord having an equipment-grounding
conductor and groundingplug. The plug must be inserted into
an appropriate outlet that is properly installedand groundedin
accordance with all localcodes and ordinances.
Properly
Grounded
3-Prong Plug
Outlet
WARNING:
improper connection of the
equipment-grounding conductor can result in a risk of
electric shock. Check with a qualified electdctan or service person if you are in doubt as to whether the outlet is
properly grounded, Do not modify the plug provided
with the appliance - if it will not fit the outlet, have a
proper outlet installed by a qualified electrician.
This appliance is for use on a nominal 120 volt circuit,and
has a grounded plug that looks like the plug shown. A temporary adaptor that looks like the adaptor shown may be used to
connect this plug to a 2-pole receptacle as shown if a properly
grounded outlet is not available. The temporary adaptor
should be used only until a properly grounded outlet can be
installed by a qualified electrician. The green colored rigid
ear, lug or the like extending from the adaptor must be connected to a permanent ground such as a properly grounded
outlet box cover. Whenever the adaptor is used, it must be
held in place by a metal screw.
NOTE: In Canada, the use of a temporary adaptor is not permitted by the Canadian Electrical Code.
Grounding
Prong
Green
Grounding Lug
3-Prong
_7\
Plug
Make sure
this is
a metal
screw
_O -'_1 "_connected
(_1
to a known
i
ground
Adapter
troduc on
This vac is intendedfor householdor commercial use, It may be
used for vacuumingof wet or dry media. Familiarizeyourself
with the following productfeatures and read the entire owner's
manual for specific usage of your new wet/dry vac.
This vac may also be used with catalog no. 17905 Squeegee
Accessory, available throughSears Power & Hand Tool Catalog.
IMPORTANT
NOTE
Please Read Carefully
Static Shocks Are Common - In dry areas or when the relative
humidityof the air is low. To reduce the frequency of static
shocksin your home the best remedy is to add moistureto the
air with a console humidifier.
Table of Contents
Item
Page
Warranty .........................................................................
2
Safety Instructions ..........................................................
2
Safety Signal Words ....................................................
2
Grounding Instructions ............................................................. 3
Introduction .............................................................................. 3
Table of Contents ..................................................................... 4
Unpacking and Checking Carton Contents .............................. 4
Getting to Know YourVac ............................................. ;........... 5
Cord Storage ......................................................................... 5
Assembly .................................................................................. 5
Tools Required ...................................................................... 5
Rear Caster Assembly .......................................................... 5
FrontWheel Assembly .......................................................... 5
Cart Handle Spacer Assembly .............................................. 5
Handle Assembly .................................................................. 6
Unpacking
and Checking
Item
Page
FilterAssembly ...................................................................... 6
Foam Filter ............................................................................ 6
Cloth Filter Bag ..................................................................... 6
Vac Assembly ........................................................................ 7
Hose and Accessory Assembly ............................................. 7
Operation ................................................................................. 8
Vacuuming Dry Materials ...................................................... 8
Vacuuming Liquids ................................................................ 8
Emptying Dust Drum ............................................................. 8
Repair Parts ............................................................................. 9
Maintenance .......................................................................... 11
Cloth Bag Filter ................................................................... 11
Foam Filter .......................................................................... 11
Installation ........................................................................... 11
Carton Contents
Remove entire contents of carton. Check each item against the Carton Contents List. Notifyyour Sears Store if any parts are damaged or missing.
Carton Contents
List
Key
DescripUon
Qty
A 18 Gallon Commercial Wet/Dry Vac ................................ 1
B Handle ............................................................................. 1
C Hose ................................................................................ 1
D Wet Nozzle....................................................................... 1
E Floor nozzle ..................................................................... 1
F Carpet Nozzle .................................................................. 1
G ExtensionWands ............................................................. 2
H Foam Filter (may already be assembled) ......................... 1
J Cloth Filter Bag (may already be assembled) .................. 1
K Hose End ......................................................................... 2
L Rear Wheel ...................................................................... 2
M FrontCaster ..................................................................... 2
N Owners Manual................................................................ 1
O Squeegee Assembly (optional, provided with stock no.
179045 only),
Key
Description
Qty
P Bag Assembly (containing the following) ......................... 1
(taped to handle of powerhead)
Screw Pan Hd. 10-24 x 1-1/4 ........................................... 2
Screw Pan Hd. 10-24 x 1/2 .............................................. 2
RetainingRings ............................................................... 2
FlatWasher 3/16 .............................................................. 2
LockwasherExternal 1/4 ................................................. 2
Screws Hex Hal. 1/4-20 x 1/2 ........................................... 2
Acorn Nut......................................................................... 2
Flat Washer 3/8 ................................................................ 2
LockwasherInternal 3/8 ................................................... 2
Screws 10-24 x 3/4 (Stainless) ........................................ 2
Flat Washer 1/4................................................................ 2
Rubber Washer................................................................ 4
Cart Handle Spacer ......................................................... 2
G
A
O
E
4
Getting to Know Your Vac
Power Cord
Optional Accessory
I
This vac may also be used with Catalog I
No. 17905 Squeegee accessory available
in Sears Power & Hand Tool Cata og,
ExhaustCloth Bag
Filter
Handle
Foam Filter.
Outer Filte
Cage
Drain
Storage Clip
Drain Hose
Front Casters t"I
Cord Storage
When not in use, the powercord may be wrapped around the
handle and held in place by the clip on the plug end.
CAUTION: A partially unwrapped cord may fail in coils
I
near your feet. You could trip. To reduce the risk of this,
always fully unwrap the cord before plugging it in.
I
Assembly
RearWheel
Tools Required
Flat blade screwdriver, pliers,7/16 and 9/16 wrenches.
0
Rear Wheel Assembly
1. Turn drum upside down and lay on a clean, flat surface.
2. Using pliers, snap one retaining ring intogroove 1-1/8" from
the end of axle, repeat on other end.
3. Using a 7/16 wrench, attach rear wheel to drum caddy
with a 1/4 flat washer, 1/4 external Iockwasher and hex
head 1/4-20 x 1/2 screw as shown.
Retaining Ring
Front Caster Assembly
1. Insert the front casters into the drum caddy, separated by a
3/8 internal Iockwasher.
1/4 Lockwasher
2. Using a 9/16 wrench, fasten each caster with a 3/8 flat
washer and acorn nut as shown.
Cart
Handle
Spacer
Screw
Assembly
Drum
\
1. Return drum to uprightposition.
2. Using a fiat blade screwdriver,attach cart handle spacers to
drum with rubber washers, 3/16 flat washer and 10-24 x 3/4
screw as shown.
Screw
3/16 Washer
_,,jSpacer
Washer
Assembly
(continued)
Handle Assembly
1. Slide handle completely on to vac cart pegs at rear of the
unit. Align holes on handle with holes on vac cart pegs and
cart handle spacers.
2_Fasten the handle to the vac cart pegs with the 10-24 x 1/2
screws.
Screw
10-24 x 1-1/4
"_,._
_
3. Fastenthe handleto the carthandle spacersw_ththe 10-24x 1-1/4
SCreWS.
NOTE: Do not completelytighten screws until all screws are in
place.
7
10-24
Screw x 1/2
,
'
Vac Cart
Pegs
Filter Assembly
NOTE:Be surefiltersare properlyinstalledbeforeusingvac.
Filtersmay comepre-assembled.
Foam Filter
1. Place the lid assembly of the vac upside down into the drum
or on a clean, smooth surface.
2. Slide bottom of the foam filter into circular opening of outer
filtercage.
3. Gently push down on sides, then top of foam filteruntilfilter is
secured completelyunder the outer filter cage.
4. The filter must be in correct positionat all times to avoid leaks
and possibledamage to the vac. Be certain that the foam filter cempletely covers the inner filtercage and that the bottom
of the filter rests against the lid, making sure there are no
gaps between the filter and the lid.
Cloth
Filter
Bag
1. Once foam filter is in place, stretch cloth filter bag over the
outer filtercage.
2. Be sure the seams on the filter bag are facing the inside.
3. Pull down on the sides of the filter bag so that the elastic
rests under the bottom lip of the outer filter cage.
4. The filter bag should completely cover the outer filter cage
and the bottom of the filter bag should rest against the lid,
making sure there are no gaps between the filter and the lid.
I
i
VacAssembly
1. Locate the lid assemblyand the drum.
2. Positionthe lid assemblywith the on/off switch in the front, in
line with the vacuuming port and the drum label on the vac.
Allow the lid assemblyto rest securelyon the vac drum.
3. Rotate the three lid latches over the lid and fasten them by
pressing down on the latch grip untillatch is secure.
Hose and Accessory Assembly
1. Twista hose end ontoeach end of the hose.
2. Press one plastic hoseend into the vacuum port.
3. Press the other end of the hose into the upper extension
wand (the one withoutthe couplingring).
4. Join the two wands, aligning the buttonand holeso they snap
together.
5. To COnnectthe accessories, loosen the ring on the extension
wand (do not take if off), and insert the accessory of your
choice.Tighten the ring to secure the accessory in place.
6. All nozzles can also connect directlyto the hose.
Operation
WARNING
To reduce the risk of fire or explosion, do not operate this vac in areas with flammable gases or flammable vapors such
as lighter fluid, cleaners, oil-beae paints, gasoline, alcohol or explosive dust such as coal, magnesium, grain or gun powder in the air. Do not vacuum explosive dust, flammable or combustible liquids or hot ashes. Do not use this vac as a
sprayer. To reduce the risk of health hazards from vapors or dusts, do not vacuum toxic matedals. To reduce the risk of
electrical shock do not expose to rain. Store vac indoors. Unplug power cord before changing or cleaning filter or emptying the dust drum.
CAUTION: To reduce the risk of hearing damage wear ear
protectors when using the vac or blower for extended
hours or when using it in a noisy area. The operation of
any utility vac or blower can result in foreign objects
being blown into the eyes, which can result in severe eye
damage. Always wear safety goggles complying with
ANSI Z87.1 (shown on Package) before commencing
operation. Safety Goggles are available at Sears retail
stores,
Vacuuming
3. If your filter is wet butyou need to use the vac to pick up dry
material, you can quickly dry the filter by running the vac without hose attached for about 10 minutes. The clean air rushing
through the vac will help dry the filter.
Vacuuming
Liquids
1. Remove cloth bag filter, leave foam filter in place, and reattach lid assemblyto drum.
2. After using the vac to pick up liquids, the filter must be dried
to reduce the risk of possible mildew and damage to the filter.
3. When the liquid in the drum reaches a predetermined level,
the float mechanism will rise automatically to cut off airflow.
When this happens, turn off the vac, unplug the power cord,
and empty the drum. You will know that the float has risen
because vac airflow ceases and the motor noise will become
higher in pitch, due to increased motor speed.
Dry Materials
1. Boththe foam filterand the cloth bag filter must be in the correct positionat all times to reduce the riskof leaks and possible damage to the vec.
2. When using your vac to pick up very fine dust, it will be necessary for you to empty the drum and clean the filterat more
frequent intervalsto maintain peak vac performance.
NOTE: A dry filteris necessary to pick up dry material. If you
use yourvac to pick up dust when the filter is wet, the filterwill
clog quicklyand be very difficultto clean.
iMPORTANT: To reduce the risk of damage to the vac do not
run motor with float in raised position.
NOTE: Never vacuum liquids with the cloth bag filter in place.
Emptying Dust Drum
I
WARNING: To reduce the risk of injury from accidental
starting, unp ug power cord before emptying the drum.
J
1. To remove the lid to empty the contents of the dust drum,
simply lift up on the three latch grips and unhook the lid
latchesfrom the lid.
i
2. Pick up the lid assembly by the lid assembly handle and lay
the lid assembly down on a clean, dry area while emptying
the drum or changing the filter.
3. Dump the contentsof the dust drum into a proper waste disposaI container.
4. If the contents are liquid, you may dispose by usingthe drain
provided at the rear of the drum for easy emptying. Simply
pullout the drain plug at the end of the drain hose and allow
the liquidto drain out of the vac drum.
WARNING: To reduce the risk of back injury or falls, do
not lift a vac heavy with liquid or debris. Scoop or drain
enough contents out to make the vac light enough to lift
comfortably.
8
Repair Parts
Craftsman
Professional
Model
18 Gallon Commercial Wet/Dry Vac
Number
113.179345
I
Always order by Part Number Not by Key Number
Key
No,
1
2
3
4
5
6
7
8
9
10
11
12
13
14
15
16
17
18
19
20
Pad No.
Description
826896
i826893
826892
STD611007
826896
827401
STD510807
827412
827411
STD551208
STD541008
826894
826897
826898
STD610603
827410
826899
827414
827415
STD610805
Screw TyAB #10 x 1-3/4
Cover Handle
Motor-Cover
* Screw #10 x 3/4
Motor Cover Sound Foam
Motor Inlet Grommet
* Screw #8-32 x 3/4
Strain Relief
Cord w/Plug
* External Lockwasher#8
* Nut 8-32
Lead Asm - Ground
MotorEnclosure
Exhaust Grill
Screw Type AB #6 x 3/8
MotorSound Foam
Gasket Collector
Collector
Motor Gasket
* Screw Hex Hd.
Ty AB #8xl/2
21 827406
Motor Fan Cover
22 827416
Motor Assembly
23 827407
Brush & Brush HolderAsm
24 827418
Blower Sound Foam
25 827425
Blower Guard
26 827417
Lid Assembly
27 827404
Switch
28 827402
Switch Panel
29 827403
Speed Nut
30 STD510803 * Screw #8-32 x 3/8
31 827574
Inlet Gr:ill
32 827420
Float Gasket
33 827419
Lid Gasket
34 825738
Float
35 827421
Float Cage
36 STD551050 * FlatWasher 1/2x.203x1/16
37 STD611006 * Screw #10 x 3/8
38 827426
Foam Filter
39 827427
Filter Cage
40 827428
Fabric Filter
SP6225
Owners Manual
(Not Illustrated)
23
20
\
* Standard Hardware Item - May Be Purchased
Locally.
9
Repair Parts
Craftsman
Professional 18 Gallon Commercial
Model Number 113.179345
28
5
Wet/Dry Vac
4
27
25
4
22
32
33
12
11
10
8
\
7
15
10
Repair Parts
Craftsman
Professional 18 Gallon Commercial
Model Number 1 t3.179345
Wet/Dry Mac
Always order by Part Number - Not by Key Number
Key
No.
Part No.
1
2
3
4
5
6
7
8
9
10
11
12
13
14
15
16
17
826884
827448
805512-2
827441
827443-1
827440
827429
805512
805641-4
827431
STD551025
STD551250
STD512505
STD551037
STD827438
827437
827423
Key
No.
Description
Part No.
18 !826889
19 STD541837
20 826888
21 827424
22 827436
23
i27435
24 STD511107
25 STD551008
26 827408
27 827443
28 826877
29 826881
30 STD510805
31 73241
32 73249
33 828229
Hose Plug
Hose Drain
Screw 10-24 x 1-1/4
Spacer Cart Handle
Washer Rubber 5/32 x 7/16
Cart Handle
Drum & Chassis Assembly
Screw 10-24 x 1/2
Retaining Ring
Wheel 10"
* Washer Flat 1/4
* Lockwasher External 1/4
* Screw Hex Hd.1/4-20 x 1/2
* Washer Flat 3/8
* Lookwaaher Internal 3/8
Front Caster
Screw Type AB #4 x 1/2
Description
Bumper Front
* Acorn Nut 3/8-16
Molding-Chassis Trim
Vacuum Inlet
Inlet Elbow
Screw Hex Hd. 8-32 x 3/4 (Stainless)
* Screw Pan Hd 10-24 x 3/4 (Stainless)
* Washer Flat 3/16 x 1/2 x 1/16
Nut 8-32
Washer Rubber 3/16 x 1/2
Rubber LatchTip
Clamp Hose
* Screw He:<Hd. 8-32 x 1/2 (Stainless)
Hose End Soft
Hose 1-1/2 Dia. x 10Ft.
Bag Asm - Hardware
* Standard Hardware Item - May Be Purchased Locally.
I
WARNING:
not
attempt
service Center.
your wet/dry Mac beyond that described in the owner's manual. For all other servic- ]
ing
contact Do
your
local
SearstoService
Maintenance
I WARNING:
To cord
avoidbefore
injury changing
from accidental
starting,
unplug power
or cleaning
filters.
I
I
Yourfilters shouldbe cleaned often to maintain peak vac performance.
IMPORTANT: After cleaning, check the filters for tears or small
holes. Do nat use a filterwith holes or tears in it. Even a small
hole can cause a lot of dust to come oat of your vac. Replace it
immediately.
IMPORTANT: Toreduce the risk of damage to the blower wheel
and motor, always reinstall the proper filters before using the
4. Never wash cloth bag filter.
5. Make sure that the bottom of the cloth bag filter always fits
well around the outer filter cage.
Foam Filter
Mac,
CAUTION: Do not remove the filter cages or float. They
are there to shut off airflow when the drum is full of liqu ds.
3. After the filter is removed from the Mac,remove dry debris by
simply shaking the filter.
I
I
1. Remove foam filter by pulling up on the top of the foam filter,
so that the filter is pulled through the circular opening of the
outer filtercage.
2. After the foam filter is removed, run cold water through the filter from a hose or spigot. Take care that the water pressure
from the hose is not strong enough to damage the filter.
3. Let the foam filter dry completely before placing it on the Mac
again.
Cloth Bag Filter
1. For best results of cleaningaccumulated dust, clean the filter
in an open area. Cleaning should be done outdoorsand not
in livingor workingquarters.
2. Remove cloth filter from outer filter cage by gently pulling up
on the bottom of the filter.
Installation
Referto "FilterAssembly'.Allowthefilterto drybeforereinstallingand storingthevac,
11
SEARS
owner's
manual
18 GALLON COMMERCIAL
WET/DRY VAC
Model No.
For in-home major brand repair service:
113.179345
Call 24 hours a day, 7 days a week
1-800-4-MY-HOME
=ara pedir servicio de reparacibn
(1-800-469-4663)
a domicilio - 1-800-676-581'
For the repair or replacement
parts you need:
Call 6 am - 11 pm CST, 7 days a week
PartsDirect
Model and serial number may be
found on the back side of vac
top. You should record both
model and seriat number in a
safe place for future use.
1-800-366-PART
(1-800-366-7278)
Pars ordenar piezas con entrega a domicilio - 1-800-659-7084
For the location of a Sears Parts and Repair Center
in your area:
Call 24 hours a day, 7 days a week
1-800-488-1222
For information on purchasing a Sears Maintenance Agreement
or to inquire about an existing Agreement:
Call 9 am - 5 pro, Monday - Saturday
1-800-827-6655
When requesting service or
ordering parts, always provide
the following information:
SEARS
• Product Type
• Model Number
• Part Number
HomeCentral
• Part Description
Sears
© 1999 EmersonElectricCo.
Part No. SP6225
Roebuck
and Co., Hoffman
Estates,
Form No, SP6225-2
IL. 60179
U.S.A.
Printed in Mexico2/00